Desserts are sweet foods typically enjoyed after a meal, ranging from simple items like fruit to complex creations like cakes and pastries. Common dessert examples include ice cream, cookies, pies, and puddings, offering a satisfying conclusion to any dining experience.
Who doesn’t love a delicious dessert? As the perfect sweet ending to a meal or a comforting treat after a long day, dessert has a special way of bringing joy. But the thought of making something truly tempting can often feel intimidating. Complex recipes can be overwhelming, leaving home cooks unsure how to create satisfying sweet treats without the stress.
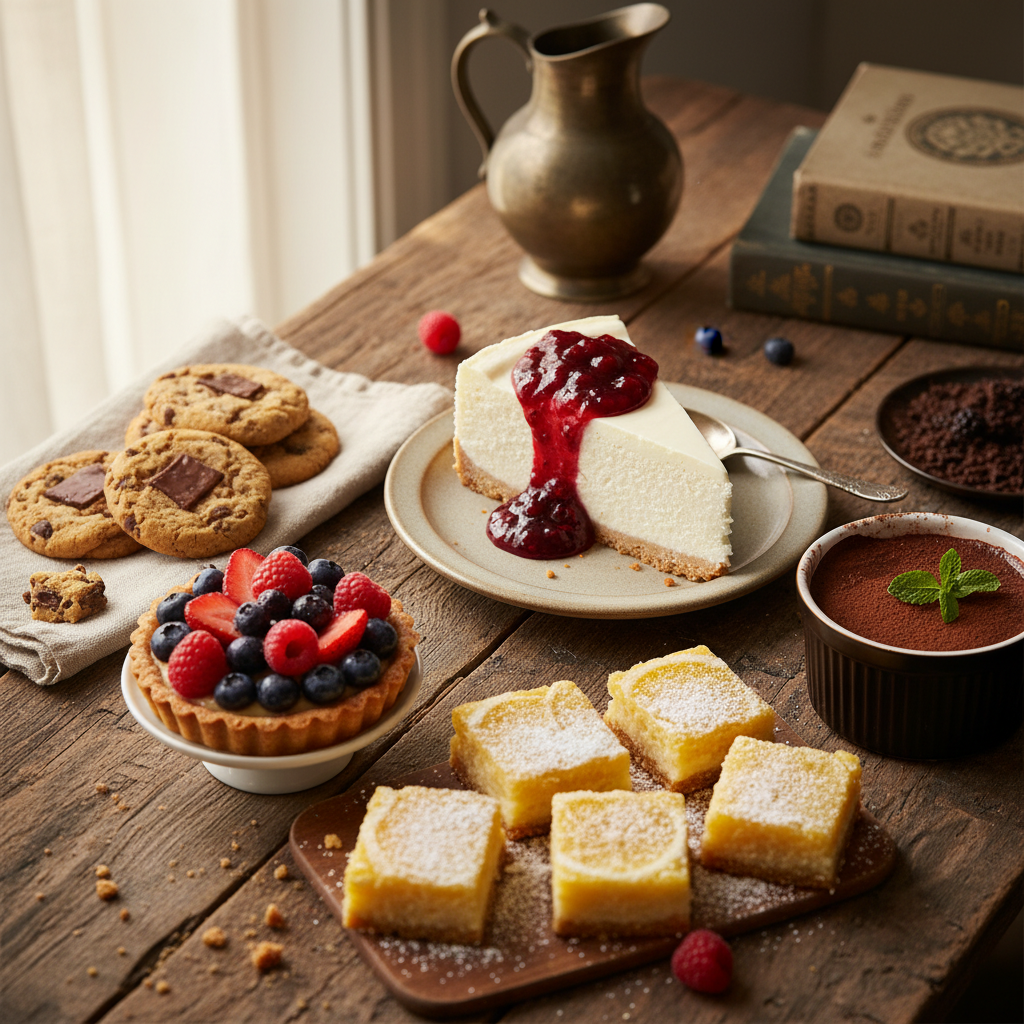
At Recipesmondial, we believe creating flavorful meals, including delightful desserts, should be enjoyable and straightforward. That’s why we’ve gathered 35 easy desserts designed to make your baking journey a breeze. This collection is perfect for everyone, featuring beginner-friendly recipes, quick sweet treats, and family-friendly meals. Get ready to discover approachable home cooking and learn to transform simple ingredients into memorable desserts that impress without the fuss.
Say goodbye to struggling with your next dessert or lacking confidence in the kitchen. Our step-by-step guidance ensures reliable results every time, making the cooking process enjoyable for everyone. Let’s explore what makes a dessert recipe truly easy and approachable, so you can start creating delicious sweet moments with confidence.
What Makes a Dessert Recipe Easy and Approachable?
Are you often overwhelmed by complex recipes? Do you wish you could whip up delicious desserts without stress? At Recipesmondial, we believe cooking should be enjoyable, especially when it comes to sweet treats.
An easy dessert recipe transforms baking from a chore into a delightful experience. It builds your confidence in the kitchen and makes creating flavorful treats simple. So, what exactly makes a dessert recipe truly easy and approachable?
Key Qualities of Easy Desserts
- Minimal, Everyday Ingredients: The best easy recipes use common pantry staples, so you won’t have to hunt for exotic items. Think everyday ingredients like flour, sugar, eggs, and chocolate. This approach simplifies the cooking process and is often more budget-friendly.
- Simple Techniques: Approachable desserts rely on basic techniques like stirring, mixing, and melting—no advanced culinary skills required. If a hand whisk works, you won’t need a stand mixer. This focus on simple methods helps you build cooking skills with confidence.
- Short Prep and Cook Time: For busy home cooks, time is key. That’s why easy desserts feature short prep and cook times, with many no-bake options available. The result? Less time in the kitchen and more time enjoying your creation. They’re the perfect sweet treat after a simple dinner recipe.
- Clear, Step-by-Step Guidance: A great easy recipe includes clear, step-by-step instructions. We avoid technical jargon, making each step simple and actionable. This straightforward guidance ensures you can follow along easily and get reliable results every time.
- Forgiving and Adaptable: Truly easy desserts are forgiving, meaning minor adjustments are unlikely to ruin the outcome. Many recipes also offer practical tips and substitutions, like swapping fruits or nuts. This flexibility allows you to customize dishes based on what you have on hand or specific dietary needs.
- Easy Clean-up: A huge mess after baking can ruin the fun. Easy dessert recipes are designed to use fewer dishes, which means less time cleaning up. This makes the entire experience more enjoyable from start to finish.
By choosing easy dessert recipes, you get to enjoy delicious sweet treats without the stress. At Recipesmondial, we specialize in approachable home cooking designed to be enjoyable for everyone. Explore our simple dishes, gain confidence, and discover just how easy flavorful meals can be.
What to have for dessert in 5 minutes?

Chocolate Avocado Mousse
Craving a decadent dessert that’s also incredibly simple? This chocolate avocado mousse is your new go-to sweet treat, perfect for unwinding after a busy day.
This beginner-friendly recipe transforms basic ingredients into a luxurious, creamy dessert in just minutes. It also offers a healthier twist on traditional mousse. Avocados provide healthy fats and a silky-smooth texture, making this a smart choice for a healthy snack or an indulgent dessert. With our busy lives, the demand for fast and easy dessert recipes has grown significantly [1]. This recipe helps you enjoy home cooking without the stress.
Ingredients:
- 1 ripe avocado, pitted and scooped
- 1/4 cup unsweetened cocoa powder
- 1/4 cup maple syrup or agave nectar (adjust to taste)
- 1/4 cup unsweetened almond milk (or milk of choice)
- 1/2 teaspoon vanilla extract
- Pinch of salt (optional, to enhance chocolate flavor)
Instructions:
- Add the avocado flesh, cocoa powder, maple syrup, almond milk, vanilla extract, and salt (if using) to a blender or food processor.
- Blend on high until the mixture is completely smooth and creamy. Scrape down the sides as needed to ensure all ingredients are incorporated.
- Taste the mousse and adjust sweetness if necessary.
- Spoon the mousse into serving dishes.
- Serve immediately for a soft, pudding-like texture, or chill in the refrigerator for 15–20 minutes to firm up.
Tips & Variations:
- For Extra Indulgence: Top with fresh berries, a dollop of whipped cream, or chocolate shavings.
- Sweetener Swap: You can use honey or any other liquid sweetener you prefer.
- Spice It Up: A tiny pinch of cayenne pepper adds a subtle, exciting kick to the chocolate.
Quick Berry & Yogurt Parfait
If you’re searching for an easy dessert that’s both refreshing and satisfying, this Quick Berry & Yogurt Parfait is the perfect solution. It’s incredibly fast to assemble, making it an ideal choice for busy families or anyone wanting a quick, healthy snack.
This delightful dessert layers creamy yogurt, vibrant berries, and crunchy granola. It’s a visually appealing dish that takes only moments to prepare. This approachable recipe is a great way to build confidence in the kitchen and prove that delicious, easy meals are truly achievable.
Ingredients:
- 1 cup plain or vanilla yogurt (use Greek yogurt for extra protein)
- 1/2 cup mixed fresh berries (like strawberries, blueberries, and raspberries)
- 1/4 cup granola
- 1 teaspoon honey or maple syrup (optional)
Instructions:
- Select a clear glass or bowl to show off the layers.
- Spoon about half of the yogurt into the bottom of the glass.
- Layer half of the mixed berries over the yogurt.
- Sprinkle half of the granola over the berries.
- Repeat the layers with the remaining yogurt, berries, and granola.
- Drizzle with honey or maple syrup, if desired.
- Serve immediately to enjoy the fresh flavors and crunchy texture.
Tips & Variations:
- Fruit Fun: Any fresh or frozen fruit works well. If using frozen fruit, let it thaw slightly first.
- Crunch Factor: Add nuts, seeds, or a sprinkle of shredded coconut for more texture.
- Sweetness Boost: Mix a little jam or fruit compote into the yogurt for extra flavor. This also makes a fantastic quick breakfast idea.
3-Ingredient Peanut Butter Cookies
Imagine warm, chewy cookies ready in under 15 minutes! These 3-Ingredient Peanut Butter Cookies are a true baking revelation. This is the perfect beginner-friendly recipe for anyone who wants a delicious dessert without the stress.
You no longer need to feel overwhelmed by complex instructions. This simple recipe proves that just a few ingredients can create something truly delicious. It’s a go-to dessert for a quick afternoon treat or a family-friendly sweet, and you’ll love how easy it is to whip up a batch.
Ingredients:
- 1 cup creamy peanut butter
- 1/2 cup granulated sugar
- 1 large egg
Instructions:
- Preheat your oven to 350°F (175°C) and line a baking sheet with parchment paper.
- In a medium bowl, combine the peanut butter, sugar, and egg. Mix with a spoon or spatula until a cohesive dough forms.
- Roll the dough into 1-inch balls and place them on the prepared baking sheet.
- Using a fork, gently press down on each ball to flatten it, creating a crisscross pattern on top.
- Bake for 8-10 minutes, or until the edges are lightly golden.
- Let the cookies cool on the baking sheet for a few minutes to firm up.
- Carefully transfer the cookies to a wire rack to cool completely.
Tips & Variations:
- Chocolate Lovers: Fold in 1/2 cup of chocolate chips for an extra-delicious twist.
- Texture Play: Use crunchy peanut butter for added texture and a nuttier flavor.
- Sugar Swap: Brown sugar can be used instead of white for a chewier cookie with a hint of caramel.
- Common Mistake to Avoid: Don’t overbake! The cookies will seem soft when they first come out of the oven, but they will set as they cool.
What is an easy but impressive dessert?
Ready to impress without the stress? At Recipesmondial, we believe easy recipes can still deliver a major wow factor. You don’t need to be a pastry chef to create stunning dessert recipes that leave a lasting impression. We focus on approachable home cooking by turning simple ingredients into delicious, visually appealing meals. Our goal is to boost your confidence in the kitchen and make cooking an enjoyable experience.
These sweet treats are perfect for special occasions, family dinners, or any time you want to feel like a culinary star. By combining straightforward steps with irresistible flavors, they prove that beginner-friendly recipes can be truly spectacular. Get ready to discover simple dishes that will delight everyone!
No-Bake Chocolate Lasagna
Imagine rich layers of chocolate and cream—all without turning on your oven. Our No-Bake Chocolate Lasagna is a showstopper, yet it’s incredibly simple to assemble. This easy chocolate dessert is a fantastic choice for family-friendly meals and gatherings because it offers a taste of indulgence with minimal effort.
The beauty of this dessert lies in its distinct layers, each contributing its own delightful texture and flavor. It’s a truly beginner-friendly recipe that looks far more complicated than it actually is.
Simple Steps for Layered Perfection:
- Crust: First, crush chocolate sandwich cookies until fine, then mix them with melted butter. Press the mixture firmly into the bottom of a 9×13 inch baking dish to create a sturdy, flavorful base.
- Cream Cheese Layer: Next, beat the softened cream cheese with powdered sugar. Mix in a little milk, then fold in the whipped topping until smooth. Spread this creamy mixture evenly over the cookie crust.
- Chocolate Pudding Layer: Prepare the instant chocolate pudding mix with cold milk according to package directions. Once it has set slightly, carefully spread the thickened pudding over the cream cheese layer.
- Top it Off: Finally, cover the pudding with a generous layer of whipped topping. For an extra touch of elegance, sprinkle with mini chocolate chips or chocolate shavings before serving.
Tips for Your No-Bake Lasagna:
- Make Ahead: This dessert is perfect for meal prep. It needs several hours to chill, so preparing it the day before is ideal.
- Variations: Try a different cookie crust, like graham cracker crumbs. You can also experiment with different pudding flavors, such as vanilla or white chocolate.
- Serving: Use a sharp knife for clean slices. This ensures each serving looks as good as it tastes.
Simplified Tiramisu Cups
Tiramisu is a classic Italian dessert food famous for its luxurious coffee and cream layers, but it can seem intimidating. Our Simplified Tiramisu Cups capture all that elegant flavor without the fuss. This version is perfect for anyone lacking confidence in cooking skills who wants to create an impressive sweet treat. We’ve made this global comfort food incredibly accessible for your home kitchen.
Serving tiramisu in individual cups makes it feel even more special. The presentation is perfect for dinner parties or simply for treating yourself. It’s a wonderful way to enjoy flavorful meals made easy.
Effortless Tiramisu Assembly:
- Coffee Dipping: First, quickly dip each ladyfinger into strong, cooled coffee. Be careful not to oversoak them, or they will become soggy.
- Mascarpone Cream: In a separate bowl, gently combine mascarpone cheese, a splash of vanilla extract, and powdered sugar. Then, fold in freshly whipped cream until the mixture is light and airy. This method replaces raw eggs, making it safer and easier.
- Layer in Cups: Place a dipped ladyfinger at the bottom of a small serving cup, then spoon a layer of the mascarpone cream over it. Repeat these layers until the cup is full, ending with a final layer of cream.
- Chill and Dust: Refrigerate the cups for at least two hours to allow the flavors to meld. Just before serving, dust the tops generously with cocoa powder.
Tips for Perfect Tiramisu Cups:
- Coffee Choice: Use good quality espresso or strong brewed coffee. You can add a tablespoon of coffee liqueur for adult versions.
- Cream Texture: Ensure your whipped cream is firm but not overbeaten before folding it in. This keeps the mascarpone mixture light.
- Presentation: Garnish with a coffee bean or a small chocolate curl for an elegant finish.
Molten Chocolate Lava Cakes
With their delicate outer crust and a warm, gooey chocolate center, Molten Chocolate Lava Cakes are the epitome of an impressive dessert. Despite their fancy appearance, these quick dessert ideas are surprisingly straightforward. They are ideal when you want to enjoy cooking without stress while still creating something extraordinary.
This easy chocolate lava cake recipe proves that a few simple ingredients can create something magical. Plus, the short baking time makes these cakes a fantastic last-minute option.
Quick Steps to a Melting Center:
- Melt Ingredients: First, melt the butter and good-quality chocolate together in a microwave or double boiler, stirring until smooth.
- Whisk Eggs: In a separate bowl, whisk the eggs and granulated sugar until the mixture is light and fluffy. This step creates the cake’s structure.
- Combine Mixtures: Gently fold the melted chocolate into the egg mixture. Next, add a small amount of all-purpose flour, mixing until just combined. Be careful not to overmix.
- Bake and Serve: Pour the batter into greased and floured ramekins. Bake for 12-15 minutes, until the edges are set but the center remains soft. Serve immediately with a dusting of powdered sugar, fresh berries, or a scoop of vanilla ice cream.
Tips for Lava Cake Success:
- Don’t Overbake: The key to a molten center is to pull the cakes from the oven at the right moment. The edges should look cooked, but the center should still be jiggly.
- Ramekin Prep: Thoroughly grease and flour your ramekins. This ensures the cakes will release easily after baking.
- Quality Chocolate: Use high-quality dark or semi-sweet chocolate, as it makes a significant difference in the final flavor. For example, using chocolate with at least 60% cocoa solids enhances richness [2].
Classic & Comforting Dessert Ideas

The Easiest Chocolate Chip Cookies
There’s nothing quite like a warm, gooey chocolate chip cookie. As the ultimate comforting sweet treat, these beloved cookies are wonderfully simple to create with our recipe. You’ll enjoy a delicious, homemade dessert without feeling overwhelmed.
Perfect for beginner cooks, this recipe uses common pantry ingredients and straightforward mixing steps. Best of all, you won’t need any special equipment to get started.
Tips for Perfect Cookies:
- Do Not Overmix: Mix ingredients just until combined. Overmixing can lead to tough cookies.
- Chill the Dough: If you have time, chill the dough for at least 30 minutes. This helps prevent spreading and deepens the flavor.
- Quality Matters: Use good quality chocolate chips. This simple step truly elevates the final cookie.
Variations: Add chopped nuts for crunch or a pinch of sea salt to balance the sweetness. Mastering this recipe builds confidence, proving that delicious baking can be enjoyable and stress-free. The first chocolate chip cookies were developed by Ruth Graves Wakefield at the Toll House Inn in Massachusetts in the 1930s [3].
Simple Apple Crumble
Apple crumble is a delightful, warm dessert and a true classic for any season. Our version is wonderfully simple to prepare, making it a fantastic introduction to home baking.
This dessert is easy to make because it combines a basic fruit filling with a simple crumbly topping. No complex pastry skills are needed, and it uses everyday ingredients you likely already have on hand.
Making Your Crumble Delicious:
- Apple Blend: Use a mix of sweet and tart apples for the best flavor. Granny Smith and Honeycrisp work well together.
- Spice It Up: Add cinnamon, nutmeg, or a dash of allspice. These spices enhance the fruit’s taste.
- Serve Warm: Apple crumble is best served warm. Pair it with vanilla ice cream or a dollop of custard for a truly delightful dessert.
Variations: Feel free to try other fruits like berries, peaches, or pears. It’s an easy way to adapt the recipe and discover new flavor combinations.
Beginner’s Chocolate Fudge Brownies
Who can resist a rich, fudgy brownie? This sweet treat is a definite crowd-pleaser, and our beginner-friendly recipe makes baking a batch easy and stress-free. You’ll be able to create a decadent dessert with confidence.
This recipe uses a simple one-bowl method with no fancy techniques involved—you just mix, pour, and bake. It’s a perfect choice for anyone new to baking.
Tips for Fudgy Perfection:
- Do Not Overbake: Overbaking is the enemy of fudgy brownies. Bake until a toothpick comes out with moist crumbs.
- Cool Completely: Let them cool completely before cutting. This ensures clean, perfect squares.
- Add-Ins: Stir in extra chocolate chips or chopped nuts. This adds wonderful texture.
Variations: For a nutty twist, swirl in some peanut butter before baking. You could also add a layer of cream cheese for a delicious marbled effect.
Classic Rice Pudding
Classic rice pudding is a creamy, warm, and comforting dessert that often brings back childhood memories. Best of all, this classic recipe is surprisingly simple to make.
This dessert involves slow-cooking basic pantry staples like rice, milk, and sugar, either on the stovetop or in the oven. No special skills are required, making it a wonderful and comforting treat for the whole family.
Achieving Creamy Rice Pudding:
- Rice Choice: Use short-grain rice for the creamiest texture. Arborio or sushi rice works perfectly.
- Stir Often: If cooking on the stovetop, stir frequently. This prevents sticking to the bottom and ensures even cooking.
- Toppings: Top with a sprinkle of cinnamon, fresh fruit, or a spoonful of jam. This makes your dessert extra special.
Variations: Add vanilla extract or lemon zest for extra flavor, or include raisins or dried cranberries for added sweetness. This pudding is delicious served either warm or cold.
No-Bake Sweet Treats for Effortless Indulgence

Craving a sweet treat without turning on the oven? You’ve come to the right place. Our “No-Bake Sweet Treats for Effortless Indulgence” section is filled with desserts that prove you don’t need complex techniques for incredible flavor. These recipes are perfect for beginners and busy home cooks alike, offering delicious results with minimal effort.
Here at Recipesmondial, we love quick and reliable meal solutions. That’s why we’ve gathered simple dessert ideas that let you enjoy homemade treats without the stress. Say goodbye to overwhelming recipes and hello to simple, enjoyable dessert-making!
Oreo Cheesecake Bites
These Oreo Cheesecake Bites are a true crowd-pleaser. Rich, creamy, and wonderfully easy to make, they’re the perfect addition to family dinners or any gathering. Get ready to impress everyone with these delightful no-bake sweet treats.
Ingredients:
- 15 Oreo cookies, finely crushed (about 1 ½ cups)
- 3 tablespoons unsalted butter, melted
- 8 ounces cream cheese, softened
- ½ cup granulated sugar
- 1 teaspoon vanilla extract
- 8 ounces whipped topping (like Cool Whip), thawed
- 6-8 whole Oreo cookies, for garnish (optional)
Instructions:
- Prepare the Crust: First, combine the crushed Oreo cookies and melted butter in a small bowl and stir well.
- Form the Bases: Next, line a mini muffin tin with paper liners. Press about one tablespoon of the cookie mixture firmly into the bottom of each liner.
- Chill Crusts: Place the muffin tin in the refrigerator to chill and set while you prepare the filling.
- Make the Filling: In a large bowl, beat the softened cream cheese, sugar, and vanilla extract with an electric mixer until smooth.
- Fold in Whipped Topping: Gently fold in the thawed whipped topping until just combined. Be careful not to overmix.
- Assemble Bites: Spoon or pipe the cream cheese mixture over the chilled crusts, filling each liner almost to the top.
- Garnish (Optional): If desired, place a small piece of an Oreo cookie on top of each bite.
- Chill Thoroughly: Finally, refrigerate the cheesecake bites for at least 4 hours, or overnight for best results.
- Serve: Remove from the muffin tin and serve cold.
Tips and Variations:
- Storage: Store these cheesecake bites in an airtight container in the refrigerator for up to 3 days.
- Different Cookies: Try using graham cracker crumbs or vanilla wafers for the crust instead.
- Flavor Boost: Add a pinch of lemon zest to the filling for a brighter taste.
- Make Ahead: These are perfect for making a day in advance. Prepare them the day before your event to save time.
Lemon Icebox Pie
This Lemon Icebox Pie is the ultimate refreshing dessert—wonderfully tangy and sweet. It’s an easy recipe that tastes impressive, making it the perfect cool treat for a warm day. Simple and delicious, this pie is a staple for no-fuss home cooking.
Ingredients:
- 1 pre-made graham cracker pie crust (9-inch)
- 1 (14-ounce) can sweetened condensed milk
- ½ cup fresh lemon juice (from about 2-3 lemons)
- 1 teaspoon lemon zest (from 1 lemon)
- 8 ounces whipped topping (like Cool Whip), thawed, plus extra for serving
Instructions:
- Combine Liquids: In a medium bowl, whisk together the sweetened condensed milk, fresh lemon juice, and lemon zest for 2-3 minutes, until the mixture thickens slightly.
- Fold in Whipped Topping: Gently fold in 8 ounces of thawed whipped topping until the mixture is smooth and just combined.
- Fill the Crust: Pour the lemon filling into the graham cracker pie crust and spread it evenly.
- Chill the Pie: Cover the pie with plastic wrap and refrigerate for at least 4 hours, or overnight for best results, to allow the pie to set fully.
- Serve: Before serving, top with additional whipped topping and a sprinkle of lemon zest, if desired.
Tips and Variations:
- Lime Variation: Substitute lime juice and zest for a Key Lime Pie twist.
- Berry Topping: Serve with fresh raspberries or blueberries for a lovely color and flavor contrast.
- Homemade Crust: For extra freshness, you can make your own graham cracker crust.
- Serving Tip: This pie slices beautifully when fully chilled. Use a warm knife for the cleanest cuts.
Energy Balls with Oats and Dates
Looking for a healthy sweet treat or a quick pick-me-up? These Energy Balls with Oats and Dates are your answer. They are packed with wholesome ingredients and offer a satisfying sweetness without any refined sugar, making them an excellent healthy snack. Plus, they are perfect for meal prep.
Ingredients:
- 1 cup rolled oats (gluten-free if needed)
- ½ cup pitted Medjool dates, packed
- ½ cup natural peanut butter (or almond butter)
- 2 tablespoons chia seeds (or ground flaxseed)
- 1 teaspoon vanilla extract
- Pinch of salt
- Optional additions: mini chocolate chips, shredded coconut, chopped nuts
Instructions:
- Process Dates: First, place the pitted dates in a food processor and process until they form a sticky ball or a finely chopped paste.
- Combine Ingredients: Add the oats, peanut butter, chia seeds, vanilla extract, and a pinch of salt to the food processor.
- Blend Until Combined: Process until the mixture comes together into a sticky, dough-like consistency. If it’s too dry, add a teaspoon of water; if too wet, add a tablespoon of oats.
- Add Optional Mix-ins: If using, stir in any optional additions like chocolate chips or coconut by hand.
- Form Balls: Roll the mixture into small balls, about 1-inch in diameter.
- Chill: Place the energy balls on a plate or in an airtight container and refrigerate for at least 30 minutes to firm up.
Tips and Variations:
- Nut Butter Swaps: Use any nut or seed butter you prefer, such as almond butter or sunflower seed butter.
- Boost Protein: Add a scoop of your favorite protein powder for an extra energy boost.
- Flavor Variations: Try adding a tablespoon of cocoa powder for a chocolatey twist or a bit of orange zest for a citrus note.
- Storage: Store these energy balls in an airtight container in the refrigerator for up to 1 week or freeze them for up to 1 month.
- Quick Breakfast Idea: Grab a couple of these on busy mornings for a quick and nutritious start to your day.
Frequently Asked Questions
What are the 9 common desserts?
Desserts are the sweet finale to any meal, bringing joy and comfort. Many classic treats are surprisingly easy to make at home. Here are nine of the most common and beloved desserts:
- Cookies: These individual baked treats range from classic chocolate chip to simple peanut butter cookies. They are perfect for sharing and are always a family-friendly favorite.
- Cakes: Cakes are baked sweet treats that come in many forms, including cupcakes, sheet cakes, and layered cakes. With simple recipes available, a quick, flavorful cake is always a great option.
- Pies: A pie consists of a pastry crust with a sweet filling. Common fillings include fruit, cream, or custard. Apple pie, for instance, is a popular and comforting classic.
- Brownies: Rich, fudgy, and intensely chocolatey, brownies are a beloved baked good. They are typically quick to prepare and are sure to please any crowd.
- Ice Cream: This frozen dairy treat is a universal favorite. Enjoyed plain or with toppings, it’s an easy and refreshing dessert for any occasion.
- Puddings: Puddings are creamy, soft desserts that can be served warm or cold. Classics like rice pudding or chocolate pudding are the ultimate comfort food.
- Cheesecakes: A cheesecake is a rich dessert made with a creamy cheese filling over a crust. No-bake varieties are especially popular because they are so easy to make.
- Mousses: Light and airy, mousses are typically made with chocolate or fruit. While they seem elegant, many recipes are surprisingly simple for beginners.
- Tarts: Similar to a pie, a tart has an open top that beautifully showcases its fruit or cream filling. They offer a sophisticated yet approachable dessert for home cooks.
What are dessert foods?
Dessert foods are sweet dishes typically served at the end of a meal to provide a pleasant and satisfying close to the dining experience. While they come in countless forms—from a simple piece of fruit to an elaborate cake—the goal is to satisfy a sweet tooth. The common thread across all cultures is sweetness, often coming from sugar, honey, or other sweeteners. Common ingredients also include chocolate, fruits, nuts, and various dairy products.
At Recipesmondial, we believe making dessert should be fun, not stressful. That’s why we provide easy-to-follow recipes for every skill level. Our step-by-step guidance helps you enjoy the process of creating delicious sweet dishes, making home-baked treats accessible to everyone.
Is it desert or dessert food?
This is a common question with an easy answer! The correct word for the sweet dish you eat after a meal is “dessert,” which has two ‘s’ letters in the middle.
- Dessert (pronounced dih-ZURT): This refers to sweet treats and is the final course of a meal. Think of cakes, cookies, ice cream, or pie. For example, “We had a delicious chocolate dessert after dinner.”
- Desert (pronounced DEZ-ert): This word has two main meanings. It can be a dry, often sandy, barren area of land, such as, “The Sahara Desert is very vast.” It can also mean to abandon someone or something, as in, “He chose to desert his post.”
To help you remember, think of it this way: you always want more of a delicious dessert, so it gets an extra ‘s’ for “seconds”! This simple trick makes it easy to distinguish between the two words. So, when you’re ready for something sweet, you are looking for “dessert recipes.” Recipesmondial has many delicious and easy options for you to explore!
Leave a Reply