A classic pizza dough recipe is a simple mixture of flour, water, active dry yeast, sugar (to feed the yeast), salt, and olive oil. The ingredients are combined and kneaded until a smooth, elastic dough forms, which is then left to rise in a warm place. This process develops the gluten and creates the light, airy texture characteristic of a perfect pizza crust.
Imagine the aroma of freshly baked pizza wafting through your kitchen, a golden crust bubbling with your favorite toppings. For many home cooks, creating pizza dough from scratch can seem like a daunting task. Complex recipes or the pressure to cook quickly can feel overwhelming, often leading to a reliance on store-bought options. But mastering a delicious homemade pizza dough recipe doesn’t have to be a struggle. At Recipesmondial, we believe simple, flavorful recipes are within everyone’s reach—and that includes making the perfect pizza crust.
Get ready to transform your kitchen into your favorite pizzeria with our ultimate, beginner-friendly guide. This step-by-step guide is designed to banish cooking anxiety and help you discover the satisfaction of preparing amazing pizza dough from scratch. We’ll walk you through each stage, giving you the confidence to create a consistently delicious and foolproof crust every time. Say goodbye to store-bought dough and hello to a rewarding, stress-free cooking experience that brings incredible flavor to your family-friendly meals.
We’re here to make your pizza-making journey enjoyable and approachable. We cover everything from understanding essential ingredients and expert tips to common recipe variations. With our clear instructions, you’ll be baking flavorful meals made easy in no time. Let’s dive in and see why this homemade pizza dough recipe is about to become your new kitchen staple.
Why You’ll Love This Easy Homemade Pizza Dough Recipe
Imagine biting into a warm slice of pizza. The crust is perfectly golden, crisp on the outside, and delightfully chewy inside. With this easy homemade pizza dough recipe, that dream becomes your delicious reality!
Here at Recipesmondial, we believe cooking should be fun and stress-free. That’s why we crafted the best pizza dough recipe for beginners. Say goodbye to store-bought dough and discover the joy of making your own!
Why You’ll Fall in Love with This Pizza Dough
This simple pizza dough recipe takes the guesswork out of baking, empowering you to create amazing meals. Soon, you’ll be making pizzeria-quality pies right in your own kitchen.
- Effortless and Beginner-Friendly: Are you overwhelmed by complex recipes? This guide simplifies the process with clear, step-by-step instructions so you can build your cooking skills with confidence.
- Unbeatable Flavor and Freshness: Nothing compares to a freshly made pizza base. Using simple, everyday ingredients, this recipe delivers a superior taste and texture that your family will truly notice.
- Perfect for Family Fun: Making homemade pizza dough is a fantastic activity for the whole family. Gather your loved ones for a fun cooking session and create delicious meals and lasting memories together.
- Customize Your Creations: This versatile pizza crust recipe is your blank canvas. Experiment with endless toppings and flavor combinations to create unique meals perfectly suited to your tastes.
- Save Money, Eat Better: Skip the takeout! Making pizza at home is more budget-friendly and healthier. Because you control the ingredients, you get to enjoy tastier, better-for-you meals. In fact, making meals at home can be significantly cheaper than eating out [source: https://www.usda.gov/media/blog/2023/10/26/making-healthy-meals-home-can-save-you-money].
- Boost Your Kitchen Confidence: Mastering this recipe is a great way to build your skills. This approachable project will boost your confidence in the kitchen, making it easier to tackle other simple dishes.
This easy pizza dough recipe is all about enjoying cooking without the stress. It shows you how to transform simple ingredients into a delicious, visually appealing meal. Get ready to cook with confidence and enjoy every single bite!
What Ingredients Do You Need for Pizza Dough?
Essential Ingredients for Your Pizza Dough
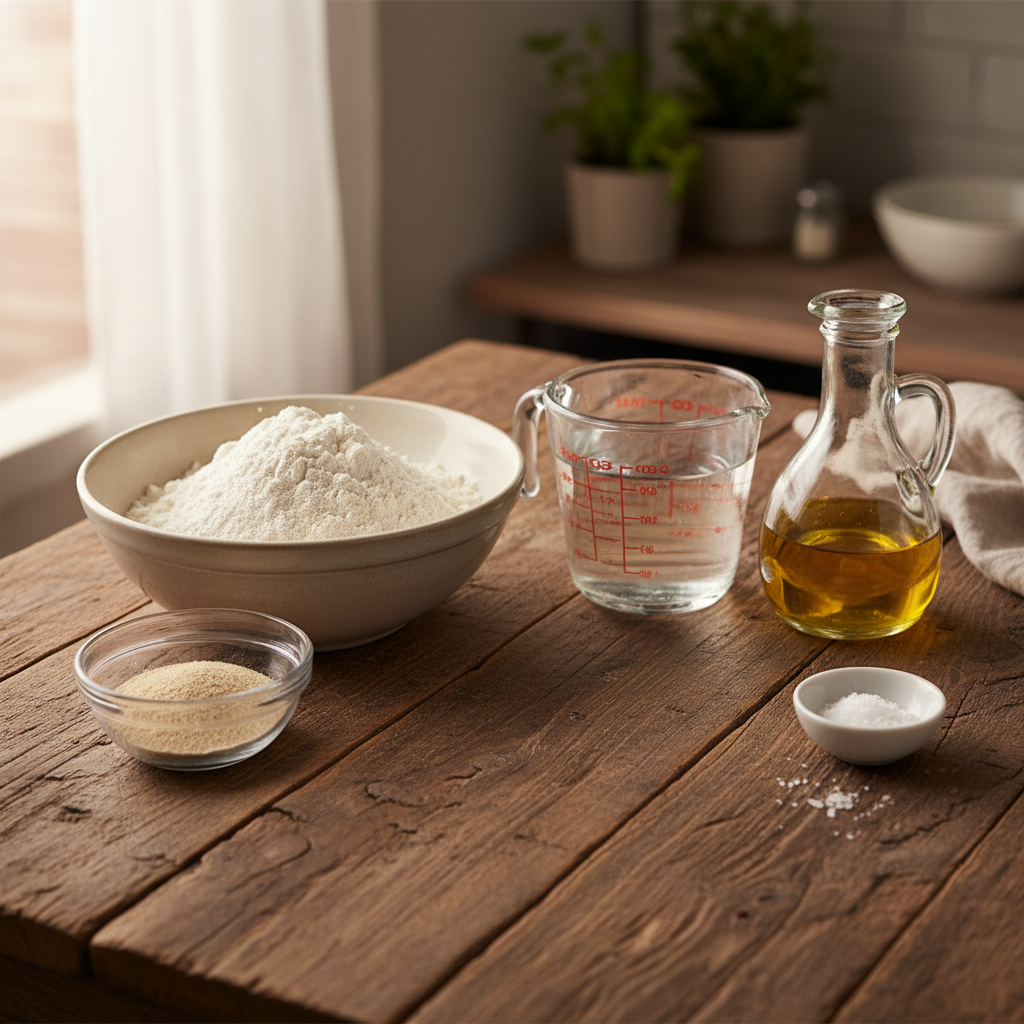
Crafting the perfect homemade pizza dough is surprisingly simple and starts with just a few basic ingredients. You likely have most of them in your pantry already! This easy recipe uses everyday items to deliver a delicious, stress-free result.
Here’s what you’ll need to make your flavorful pizza base:
- All-Purpose Flour: 3 cups (about 360g). As the foundation of your crust, all-purpose flour is a fantastic, beginner-friendly choice that creates a tender yet chewy texture. While bread flour yields a chewier result, all-purpose works beautifully for a classic homemade pizza.
- Instant Yeast: 1 packet (2 ¼ teaspoons or 7g). Instant yeast is a home cook’s best friend because it doesn’t require proofing, saving you time and getting your pizza in the oven faster.
- Warm Water: 1 cup (240ml). The water must be warm—between 105°F and 115°F (40°C-46°C)—to activate the yeast without killing it. Think of it as a perfect warm bath to help the yeast wake up.
- Olive Oil: 2 tablespoons. A good quality olive oil adds rich flavor, creates a tender texture, and helps the crust turn a lovely golden brown.
- Granulated Sugar: 1 teaspoon. Sugar does two things: it feeds the yeast to help it become active and bubbly, and it aids in browning for a beautifully finished crust.
- Salt: 1 teaspoon. Salt is vital for enhancing flavor and controlling the yeast’s activity, so don’t skip it!
Recommended Equipment for Making Pizza Dough
You don’t need a professional kitchen to make amazing homemade pizza dough. With just a few basic tools, you can simplify the process and set yourself up for success.
Here is the equipment that will set you up for success:
- Large Mixing Bowl: A spacious bowl provides plenty of room for mixing ingredients and kneading the dough without making a mess.
- Measuring Cups and Spoons: Accuracy is key in baking. Using proper measuring cups and spoons ensures your dough turns out perfectly every time.
- Liquid Measuring Cup: Use a liquid measuring cup for water to ensure the most accurate measurement.
- Kitchen Scale (Optional, but Recommended): For the most consistent results, we highly recommend a kitchen scale. Measuring flour by weight (not volume) is the best way to prevent a dense or dry crust.
- Plastic Wrap or a Clean Kitchen Towel: Used to cover the bowl, this traps heat and moisture, creating the perfect warm environment for the dough to rise.
- Dough Scraper (Optional): This handy tool makes it easier to handle sticky dough and scrape your work surface clean.
- Stand Mixer with Dough Hook (Optional): To save time and effort, a stand mixer with a dough hook attachment is fantastic for kneading the dough perfectly for you. It’s a great shortcut for busy families seeking quick meals.
- Baking Sheet, Pizza Stone, or Pizza Steel: You’ll need one of these to bake your pizza on. Because they retain heat so well, a pizza stone or steel is your best bet for achieving a wonderfully crispy crust.
How to Make the Perfect Pizza Dough: A Step-by-Step Guide
Step 1: Activate the Yeast
Creating the perfect homemade pizza dough starts with happy, active yeast. This first step is crucial for achieving a wonderful, airy texture.
Here’s how to bring your yeast to life:
- Warm the Water: Pour warm water into a large mixing bowl, aiming for a temperature between 105°F and 115°F (40°C-46°C). This range is ideal for activating yeast [1]. Be careful, as water that’s too hot can kill the yeast, while water that’s too cold won’t activate it properly.
- Add Sugar and Yeast: Sprinkle the sugar and then the active dry yeast over the warm water. The sugar provides food for the yeast, helping it to wake up and become active.
- Let it Bloom: Let the mixture sit undisturbed for 5 to 10 minutes. A foamy, bubbly layer will form on the surface, which means your yeast is active and ready to work!
Quick Tip: If your yeast doesn’t foam, it might be old, or the water temperature was incorrect. It’s best to start over with fresh yeast to ensure your easy pizza dough recipe rises beautifully.
Step 2: Combine the Dry and Wet Ingredients
Now it’s time to bring everything together. This stage builds the foundation for your delicious pizza crust recipe and gets you one step closer to a flavorful homemade meal!
- Mix Dry Ingredients: In a separate large bowl, whisk together the all-purpose flour and salt. This helps distribute the salt evenly, ensuring consistent flavor throughout the dough.
- Add Wet Ingredients: Pour the activated yeast mixture and the olive oil into the bowl with the dry ingredients. Olive oil adds wonderful tenderness and flavor to your best pizza dough recipe.
- Form a Shaggy Dough: Using a wooden spoon or a sturdy spatula, stir everything together until a shaggy, rough dough forms. Make sure all the flour is moistened, but don’t worry if the dough isn’t smooth yet.
Helpful Hint: The dough will be sticky at this point, which is completely normal. Resist the urge to add more flour; kneading is the next step and will develop the dough’s structure.
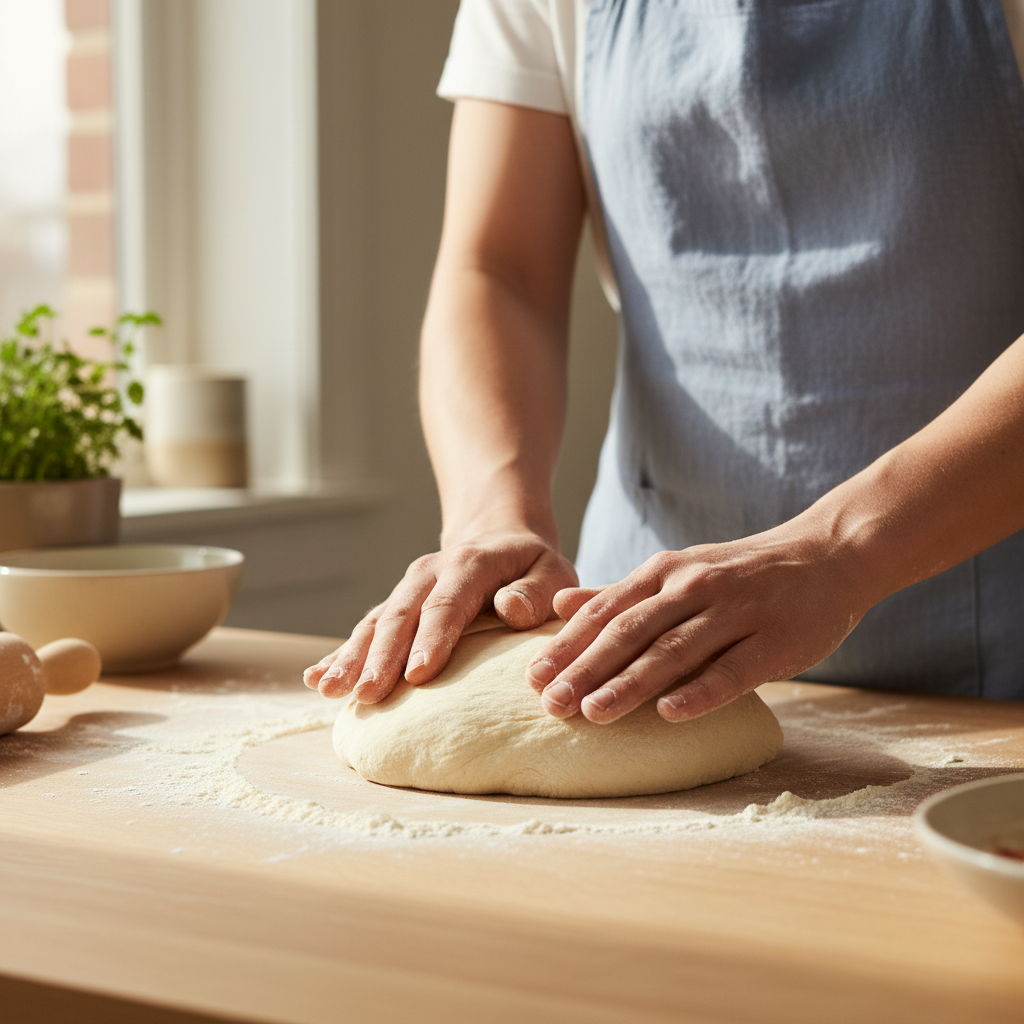
Step 3: Knead the Dough (By Hand or Mixer)
Kneading is where the magic happens for homemade pizza dough. This process develops gluten, giving the pizza base its signature elasticity and chew. Choose your preferred method below.
Kneading by Hand:
- Flour Your Surface: Lightly flour a clean work surface and turn the shaggy dough out onto it.
- Push, Fold, and Rotate: Use the heel of your hand to push the dough away from you, then fold it back over itself. Rotate the dough slightly after each push-and-fold motion.
- Continue Kneading: Repeat this process for 8-10 minutes. The dough will gradually become smoother, more elastic, and less sticky.
Kneading with a Stand Mixer:
- Attach Dough Hook: Place the shaggy dough into the bowl of your stand mixer and attach the dough hook.
- Knead on Low Speed: Turn the mixer to a low speed and let it knead the dough for 5-7 minutes.
- Check Consistency: The dough is ready when it pulls away from the sides of the bowl and looks smooth and elastic.
Pro Tip: To check if your dough is kneaded enough, use the “windowpane test.” Pinch off a small piece of dough and gently stretch it between your fingers. If you can stretch it thin enough to see light through it without tearing, it’s ready! This simple test helps ensure a fantastic pizza base recipe.
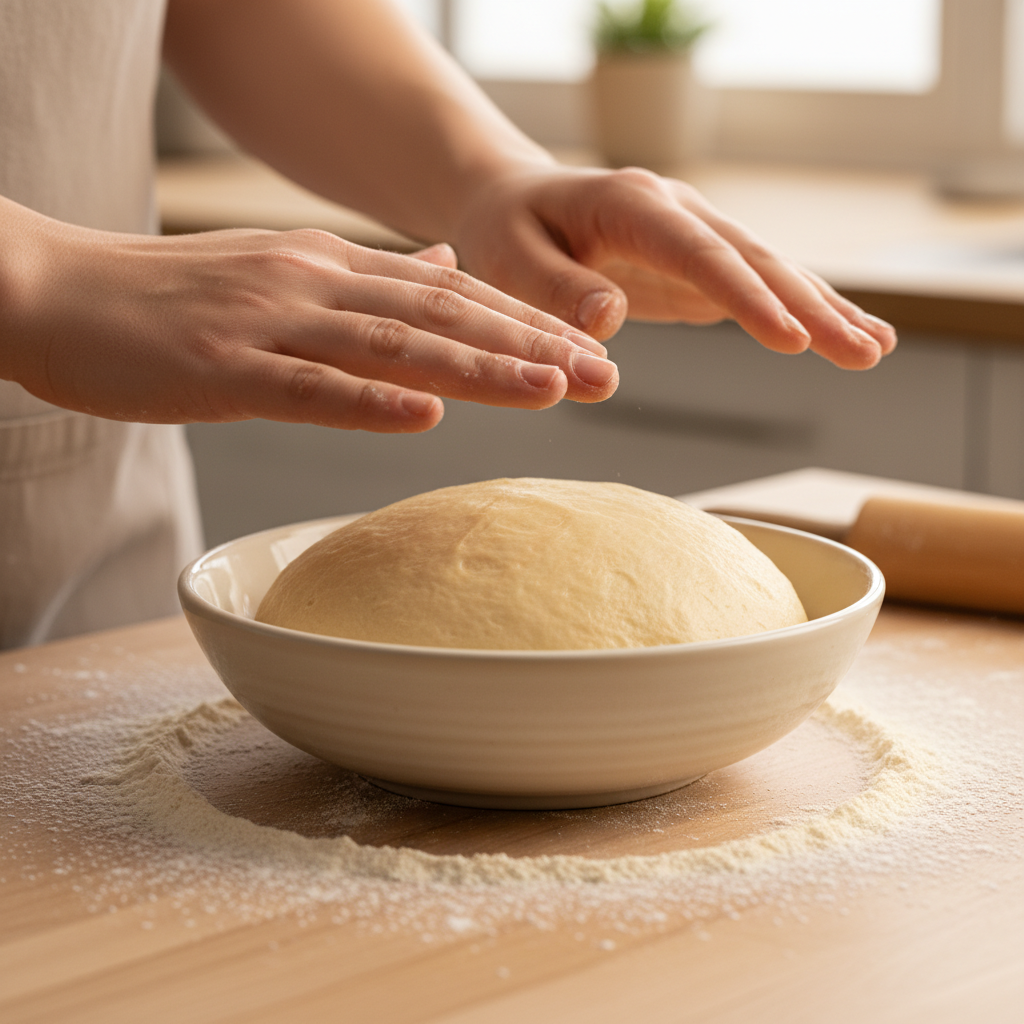
Step 4: Let the Dough Rise
Patience is key when making pizza dough. Giving it time to rise is essential for a light, airy crust and transforms the dough from dense to delightful.
- Prepare the Bowl: Lightly grease a large bowl with olive oil to prevent the dough from sticking.
- Place and Cover: Place the kneaded dough into the bowl and turn it once to coat all sides with oil. Cover the bowl tightly with plastic wrap or a clean kitchen towel.
- Find a Warm Spot: Set the covered bowl in a warm, draft-free location, such as a sunny spot or a slightly warm oven that has been turned off.
- Allow to Rise: Let the dough rise for 1 to 1.5 hours, or until it has doubled in size.
Chef’s Insight: For an even more flavorful crust, try a slower, colder rise. Cover the dough and refrigerate it overnight. This extended fermentation develops deeper flavors and is a great meal-prep tip for busy families.
Step 5: Shape Your Pizza Base
You’re at the final step before adding toppings! Shaping the dough correctly ensures a perfect, even pizza base, where your delicious pizza recipes truly come to life.
- Deflate Gently: After the dough has risen, gently punch it down to release the trapped air.
- Divide if Needed: If you’re making multiple pizzas, divide the dough into equal portions and form each one into a smooth ball.
- Prepare Your Surface: Lightly flour your work surface. For an extra crispy bottom crust, you can use semolina flour instead.
- Stretch, Don’t Roll: Using your fingertips, press the dough ball from the center outwards, gently stretching it into a circle. Avoid using a rolling pin, as hand-stretching creates a lighter, airier crust with a bubbly edge.
- Achieve Desired Thickness: Continue stretching until the pizza base reaches your desired size. If the dough springs back, let it rest for 5-10 minutes before you continue stretching.
Practical Tip: A well-shaped pizza base cooks evenly and holds your toppings beautifully. You’re now ready to create amazing, family-friendly meals that are both simple and full of flavor!
Expert Tips for the Best Pizza Crust Every Time
While creating the perfect pizza crust is an art, it’s one any home cook can master. Follow these expert tips to transform your simple ingredients into an exceptional homemade pizza dough every time. Get ready to easily bake the best pizza crust recipe!
Mastering Your Dough: Essential Steps
- Fresh Yeast is Your Friend: Always check the expiration date on your yeast. Fresh, active yeast is the key to a good rise and a light, airy pizza dough.
- Perfect Water Temperature: Use warm water—between 105-115°F (40-46°C)—to activate the yeast. Be careful: water that is too hot can kill the yeast, while water that is too cold won’t activate it properly [2].
- Measure Accurately: Baking is a science, so precision is key. Use a kitchen scale, especially for flour, to ensure you get consistent results with your easy pizza dough recipe.
- Don’t Skimp on Kneading: Kneading develops the gluten that gives your crust its signature chewy texture and structure. Whether you’re using your hands or a mixer, continue kneading until the dough is smooth and elastic.
- Give it Time to Rise: A slow, steady rise is crucial for developing flavor and creating a tender crumb. Place your dough in a warm, draft-free spot for 60-90 minutes, depending on your kitchen’s temperature.
- Handle Gently When Shaping: Once risen, handle the dough gently. Punching it down too hard or overworking it will deflate the delicate air bubbles, resulting in a dense crust. Remember to lightly flour your hands and work surface.
Baking for a Crispy Crust
- Preheat Your Oven Aggressively: A scorching hot oven is crucial for a crispy base. Preheat it to its highest setting, typically 475-550°F (245-290°C), for at least 30-60 minutes before you plan to bake.
- Use a Pizza Stone or Steel: These tools absorb and retain high temperatures, blasting the bottom of your pizza with intense, even heat. This creates a beautifully crisp pizza base that rivals one from a professional oven.
- Par-Bake for Extra Crispness: For a guaranteed crispy crust, especially when using wet toppings, consider par-baking your pizza base recipe for 5-7 minutes before adding toppings.
- Don’t Overload Your Toppings: Piling on too many toppings can make the crust soggy. Keep them light and evenly distributed to ensure your delicious best pizza dough recipe cooks through and can truly shine.
Following these simple pizza recipes tips will help you consistently achieve a fantastic crust. Say goodbye to soggy bases and hello to perfectly crisp, flavorful pizza right from your own kitchen!
Common Pizza Dough Recipe Variations
How to Make Pizza Dough Without Yeast
Craving pizza but out of yeast or short on time? You’re in luck. You can still make a delicious, easy pizza base without any rising required. This simple recipe is perfect for quick meals and first-time pizza makers.
This recipe uses baking powder instead of yeast for leavening. The result is a slightly denser, biscuit-like crust that comes together in minutes, making it a fantastic solution for family dinners when hunger strikes.
Quick Yeast-Free Pizza Dough
- Prep Time: 10 minutes
- Cook Time: 10-15 minutes (depending on toppings)
Ingredients:
- 1 ½ cups (180g) all-purpose flour
- 1 tablespoon baking powder
- ½ teaspoon salt
- ½ cup (120ml) milk (any kind works)
- 2 tablespoons olive oil, plus extra for brushing
Instructions:
- Combine Dry Ingredients: In a large bowl, whisk together the flour, baking powder, and salt.
- Add Wet Ingredients: Pour in the milk and olive oil. Mix with a spoon or your hands until a shaggy dough forms.
- Briefly Knead: Turn the dough out onto a lightly floured surface. Knead gently for 1-2 minutes until it comes together smoothly. Avoid overworking it.
- Shape and Bake: Roll the dough into your desired pizza shape and thickness. Transfer it to a greased baking sheet or pizza stone. Brush lightly with olive oil. Add your favorite toppings and bake at 425°F (220°C) for 10-15 minutes, or until the crust is golden and the cheese is bubbly.
This no-yeast dough is a true lifesaver for busy weeknights, making a homemade pizza dinner both easy and stress-free.
Using Bread Flour vs. All-Purpose Flour
The type of flour you choose will significantly change your pizza crust’s texture. While both bread flour and all-purpose flour make great pizza, they produce different results. Understanding this distinction is key to creating your perfect homemade pie.
Bread flour has a higher protein content than all-purpose flour. This extra protein helps develop more gluten, which creates a chewier and more elastic dough. In contrast, all-purpose flour is a versatile staple that yields a softer, more tender crust. The table below breaks down the key differences.
| Flour Type | Protein Content (Approx.) | Crust Texture | Best For |
|---|---|---|---|
| Bread Flour | 12-14% [3] | Chewy, airy, structured | Neapolitan-style, New York-style, crusts with good ‘chew’ |
| All-Purpose Flour | 10-12% [4] | Softer, tender, crispier edges | Thin crusts, general use, beginner-friendly recipes |
For beginners, all-purpose flour is an excellent, forgiving choice. If you want an authentic, restaurant-style chew, however, give bread flour a try. Ultimately, the best flour comes down to the pizza experience you prefer.
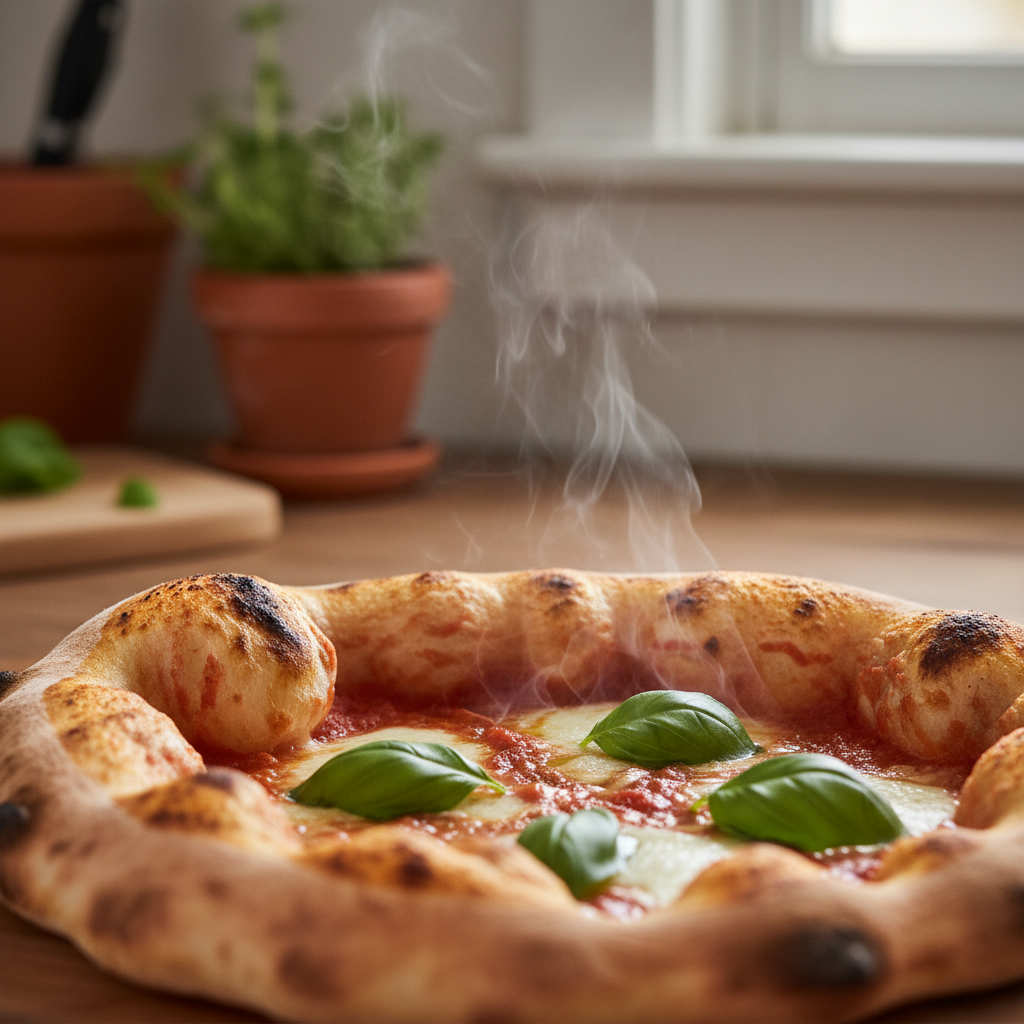
Making an Italian Pizza Dough Recipe
An authentic Italian pizza dough is known for its incredible flavor and texture. While still simple to make, this style often uses a specific flour and a longer fermentation time to develop its unique character. These small details can elevate your homemade pizza.
The secret to this style often lies in “00” flour, a finely milled flour traditional for Neapolitan pizza. It creates a light, airy crust with a delicate crispness. If you can’t find 00 flour, don’t worry—bread flour is an excellent substitute for achieving a similar chewy texture.
Italian-Style Pizza Dough
This Italian-style recipe uses specific ingredients to create a more authentic flavor while remaining perfectly approachable for home cooks.
Ingredients:
- 1 teaspoon active dry yeast
- 1 ½ cups (360ml) warm water (105-115°F / 40-46°C)
- 3 ¾ cups (450g) “00” flour, or high-quality bread flour
- 2 teaspoons fine sea salt
- 2 tablespoons extra virgin olive oil, plus more for the bowl
Instructions:
- Activate Yeast: In a large bowl, combine the warm water and yeast. Let it sit for 5-10 minutes until foamy.
- Combine Ingredients: Add the flour, salt, and olive oil to the yeast mixture. Mix with a spoon until a shaggy dough forms.
- Knead: Turn the dough onto a lightly floured surface. Knead for 8-10 minutes until it becomes smooth and elastic.
- First Rise: Lightly oil a clean bowl. Place the dough inside, turning to coat it with oil. Cover with plastic wrap and let it rise in a warm place for 1.5 to 2 hours, or until doubled in size.
- Second Rise (Optional, for deeper flavor): For an even more flavorful crust, punch down the dough after its first rise. Then, place it in the fridge for 12-24 hours. This slow fermentation develops complex flavors.
- Shape and Bake: When ready to bake, gently punch down the dough. Divide it into 2-3 balls for individual pizzas and let them rest on the counter for 15-20 minutes. Shape your pizza base, add your favorite toppings, and bake at a high temperature (450-500°F / 230-260°C) for 8-12 minutes, or until the crust is golden and the cheese is bubbly.
This Italian-inspired method yields a wonderfully chewy and flavorful pizza crust—a perfect way to explore authentic flavors in your own kitchen.
How Do You Store and Freeze Homemade Pizza Dough?
Storing Pizza Dough in the Refrigerator
If you plan to use your pizza dough within a few days, the refrigerator is the perfect place for it. Storing dough in the fridge actually develops more flavor, making your pizza crust even tastier.
Here’s how to store fresh pizza dough correctly:
- Lightly Oil: First, brush the dough ball with a little olive oil to prevent it from drying out.
- Airtight Container: Next, place the oiled dough into an airtight container or a large bowl covered tightly with plastic wrap. Make sure to leave enough room for the dough to expand, as it will continue to rise slowly.
- Refrigerate: Store the dough in the refrigerator for up to 3 days.
When you’re ready to bake, take the dough out of the fridge 30-60 minutes beforehand. This allows it to come to room temperature, which makes it much easier to work with.
Freezing Homemade Pizza Dough for Later
Freezing homemade pizza dough is a fantastic meal prep strategy, perfect for those times you need a quick and easy dinner. With pre-made dough in your freezer, you’re always just a step away from a delicious pizza.
Follow these simple steps to freeze pizza dough:
- Divide and Shape: First, divide the dough into individual portions for each pizza base. Gently shape each portion into a ball.
- Lightly Oil: Next, lightly brush each dough ball with olive oil. This step helps prevent freezer burn and makes the dough easier to handle later.
- Pre-Freeze: Place the oiled dough balls on a baking sheet lined with parchment paper, ensuring they don’t touch. Freeze them uncovered for 1-2 hours until solid. This important step prevents them from sticking together.
- Wrap Tightly: Once the dough is solid, remove the balls from the baking sheet. Wrap each one tightly in plastic wrap—double-wrapping offers even better protection.
- Store in Freezer Bag: Place the wrapped dough balls into a heavy-duty, freezer-safe bag or container. Squeeze out as much air as possible before you seal it.
- Label and Freeze: Finally, label the bag with the date. Frozen pizza dough can be stored for up to 3 months [5].
How to Thaw and Use Frozen Pizza Dough
Thawing frozen pizza dough is straightforward, but planning ahead will give you the best results.
- Overnight Thaw: The best method is to transfer the frozen dough to the refrigerator the night before you plan to use it. This allows it to thaw slowly and evenly overnight.
- Countertop Thaw: If you’re short on time, place the frozen dough on a lightly floured surface at room temperature. Cover it loosely with plastic wrap or a clean kitchen towel and let it thaw for 2-4 hours.
- Bring to Room Temperature: After the dough has thawed, let it rest at room temperature for an additional 30-60 minutes. This step allows the gluten to relax, making the dough pliable and much easier to roll out.
- Shape and Bake: Once thawed and rested, your dough is ready to be shaped and baked according to your recipe’s instructions.
By following these simple storage and freezing tips, you’ll always have delicious homemade pizza dough ready to go. With dough on hand, you can say goodbye to the stress of planning last-minute family meals. Recipesmondial helps you enjoy cooking without pressure, making quick, reliable, and flavorful food a reality every day
Frequently Asked Questions
What is the secret to a good pizza dough?
The secret to great homemade pizza dough is simple. It all comes down to a few key steps that balance quality ingredients with a little patience.
- Good Ingredients: Start with high-quality ingredients like fresh yeast and good flour. These are the building blocks for a flavorful crust.
- Proper Kneading: Kneading develops the gluten in the dough, which gives your pizza crust its wonderful chewiness and structure. Don’t rush this step!
- Sufficient Rise Time: Giving the dough enough time to rise is crucial. This process lets the yeast work its magic, creating air pockets and a deeper flavor. A slow rise often yields the best results [6].
- High Heat Baking: A very hot oven or pizza stone cooks the pizza quickly. This creates a desirable crispy crust with a soft, airy interior.
Following these key points will help you turn simple ingredients into a delicious pizza crust, even if you’re a beginner.
Can you make an easy pizza dough with just 3 ingredients?
Yes, you can make a simple pizza dough with just three core ingredients: self-rising flour, Greek yogurt, and a pinch of salt.
This method is fantastic for quick meals because it eliminates the need for yeast or lengthy rising times, making it a perfect solution when you want homemade pizza fast. While the texture is slightly different from a traditional yeast dough, it still creates a satisfying and sturdy pizza base. It’s a fantastic, stress-free option for busy families looking for a simple dinner.
What is the best flour for homemade pizza dough?
Choosing the right flour can significantly improve your pizza crust. For most home cooks, two types stand out:
- All-Purpose Flour: A wonderful choice for an easy pizza dough, all-purpose flour is readily available and forgiving. It yields a tender and crispy crust, making it perfect for beginners.
- Bread Flour: For a chewier crust with more structure, bread flour is ideal. Its higher protein content results in more gluten development, creating a more robust and airy pizza dough [7]. Many experienced bakers prefer it for its classic pizzeria-style texture.
Ultimately, both flours make excellent homemade pizza. We recommend starting with all-purpose flour and then experimenting with bread flour as your confidence grows.
How long should pizza dough rest before cooking?
Resting the dough is a key step for achieving the best possible pizza crust. Here is a breakdown of the two main resting periods:
- First Rise (Bulk Fermentation): After kneading, the dough needs its first rise. This step takes 60 to 90 minutes in a warm place, or until the dough has doubled in size. This is crucial for developing the dough’s flavor and texture.
- Second Rest (After Shaping): After you’ve shaped the pizza base, a brief second rest of 10 to 15 minutes is beneficial. This allows the gluten to relax, making the dough much easier to stretch without it snapping back [8].
Don’t skip these resting periods. They are vital for achieving a light, airy crust and ensuring your pizza turns out perfectly every time.
Sources
- https://redstaryeast.com/yeast-baking-lessons/yeast-activation-temperature/
- https://redstaryeast.com/yeast-baking-lessons/baking-tips-faqs/yeast-proof/
- https://www.kingarthurbaking.com/blog/2018/02/28/what-is-bread-flour
- https://www.kingarthurbaking.com/blog/2018/02/28/what-is-all-purpose-flour
- https://www.kingarthurbaking.com/blog/2016/06/07/freeze-bread-dough
- https://www.seriouseats.com/the-pizza-lab-secrets-to-great-pizza-dough
- https://www.kingarthurbaking.com/blog/2018/02/26/what-is-bread-flour
- https://www.cooksillustrated.com/how_tos/10204-why-let-dough-rest
Leave a Reply