Category: Appetizers, Sides, and Snacks

  • 15 Best Potato Recipes: Easy Ideas for Roasted, Scalloped & Cheesy Dishes

    The best potato recipes are versatile, simple, and comforting, making them a favorite for home cooks. Popular methods include oven-roasting for a crispy exterior, baking into a creamy scalloped or cheesy au gratin casserole, or mashing for a classic side dish. These recipes are perfect for family dinners, holidays, and easy weeknight meals.

    Are you searching for the perfect side dish that’s both comforting and versatile? Or maybe you’re struggling to plan family-friendly meals without overwhelming recipes? The humble potato is the answer. This kitchen MVP offers endless possibilities for delicious, satisfying dishes that are surprisingly easy to make.

    At Recipesmondial, we believe cooking should be enjoyable, not a chore. That’s why we’ve gathered our 15 best potato recipes to help you cook with confidence and make mealtime stress-free. In this collection, you’ll find everything from crispy oven-roasted potatoes to classic scalloped potatoes and hearty cheesy bakes. These simple dinner recipes deliver big flavor without the fuss and include easy-to-follow, step-by-step guidance.

    With options perfect for beginners and quick weeknight solutions, potatoes are incredibly versatile. Get ready to transform this simple ingredient into show-stopping sides and comforting main dishes. Let’s dive into our collection and discover why the potato is a true kitchen essential.

    What Makes Potatoes the Perfect Side Dish?

    More than just a simple vegetable, the potato is a true superstar in the kitchen. It’s the ultimate companion to almost any main course. Here at Recipesmondial, we know a great meal needs a fantastic side dish. Because potatoes consistently deliver on flavor and comfort, they are a top choice for home cooks like you.

    So, what makes these humble spuds the perfect side dish? Their incredible range is a great place to start. Whether you’re making crispy roasted potatoes, a creamy scalloped potatoes recipe, or decadent cheesy potatoes, they always perform beautifully.

    Incredible Versatility

    Potatoes are incredibly adaptable, easily transforming into countless delicious forms. From crispy oven roasted potatoes to tender mash, their ability to shine in any preparation makes them ideal for any meal, any day of the week.

    • Crispy Textures: Enjoy golden-brown roasted potatoes recipe with a satisfying crunch.
    • Creamy Delights: Indulge in rich, smooth mashed potatoes or a comforting scalloped potatoes dish.
    • Cheesy Indulgence: A bubbling cheesy potatoes recipe adds a layer of warmth and flavor that enhances any plate.
    • Hearty & Filling: Potatoes provide a substantial base that perfectly complements lighter proteins and vegetables.

    This versatility means you can use one simple ingredient to create endless easy recipes for your family. It’s like kitchen magic!

    Budget-Friendly & Accessible

    Cooking delicious meals doesn’t have to break the bank. Potatoes are an incredibly affordable ingredient, available year-round in any grocery store. Their accessibility and low cost make them a perfect pantry staple for budget cooking and family-friendly meals.

    You can always count on having potatoes on hand for quick, flavorful meals. They are a reliable choice that helps you avoid feeling overwhelmed by complex recipes, so you can enjoy cooking without stress.

    A Nutritional Powerhouse

    While often misunderstood, potatoes actually offer excellent nutritional benefits. They are a good source of vitamins and minerals; for instance, a medium potato with its skin provides significant Vitamin C and potassium [1]. Furthermore, their dietary fiber aids digestion, making them a smart choice for healthy and balanced meals.

    Including potatoes in your meal adds valuable nutrients and helps you feel full and satisfied. This satiety is key to creating simple, wholesome dinner recipes that are both tasty and good for you.

    Comfort & Flavor for Everyone

    There’s a unique comfort in a warm potato dish that brings a sense of familiarity to the table. This quality makes potatoes a universal crowd-pleaser for all ages—even picky eaters tend to love them!

    Potatoes also act as a flavor sponge, readily absorbing the spices and seasonings you add. This allows you to easily customize them to your taste, creating flavorful meals made easy every time. With guidance from Recipesmondial, you can cook confidently and enjoy every bite.

    In conclusion, the potato is the true hero of the side dish world. It’s versatile, affordable, nutritious, and undeniably delicious. So go ahead and explore our collection of potato recipes to discover your new favorite way to enjoy this amazing vegetable!

    Our Top Oven Roasted Potato Recipes

    A close-up of golden, crispy roasted potatoes with fresh rosemary on a rustic baking sheet.
    A photorealistic, high-quality food magazine photo of perfectly golden-brown oven-roasted potatoes, glistening with olive oil and sprinkled with fresh rosemary and sea salt. The potatoes are slightly crispy on the outside with a fluffy interior, artfully arranged on a rustic metal baking sheet. Shot from a slightly overhead angle with soft, inviting natural light, emphasizing texture and warmth. Professional food photography, sharp focus, inviting presentation.

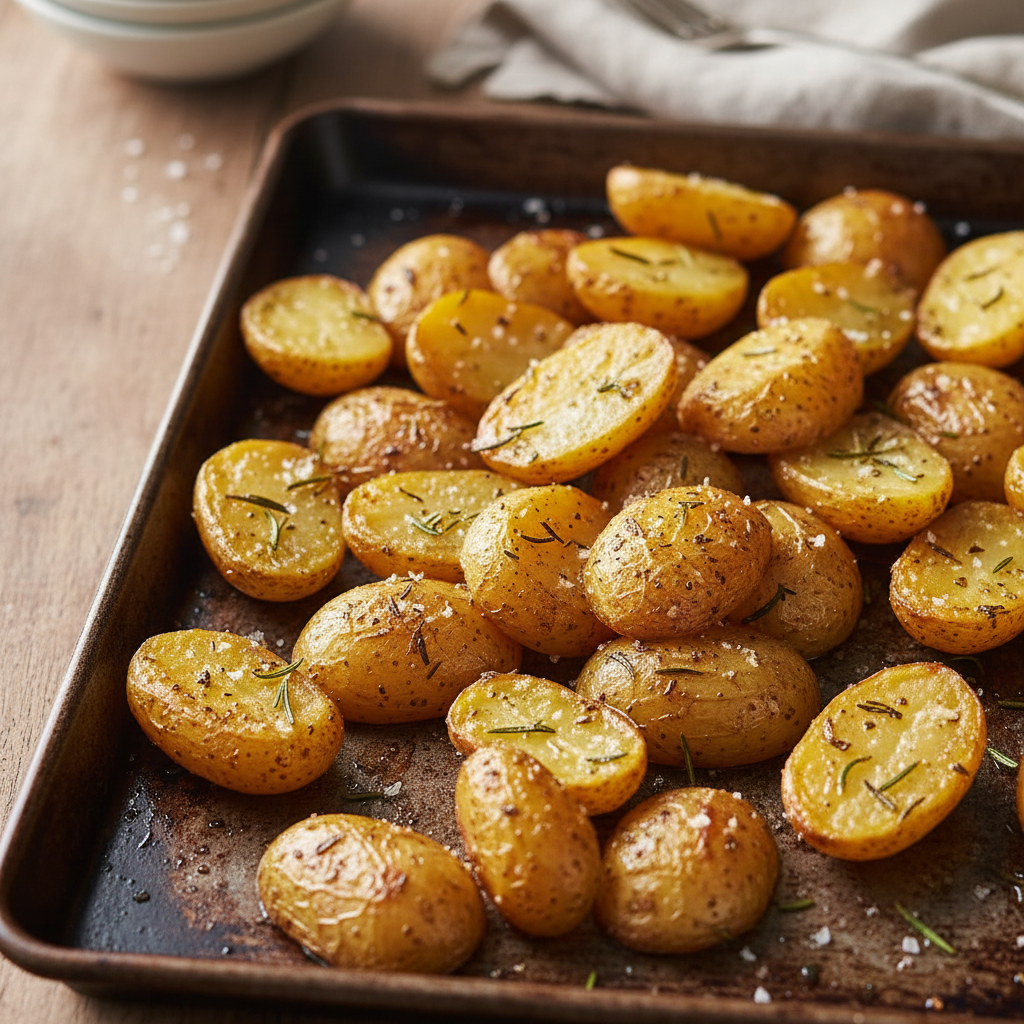
    Classic Crispy Oven Roasted Potatoes

    There is nothing quite like perfectly crispy oven roasted potatoes. These are the ultimate side dish! This recipe helps you achieve an amazing crunch on the outside while keeping them wonderfully fluffy on the inside. You will impress everyone with this simple, flavorful addition to any meal.

    While many recipes can seem complex, this classic method is surprisingly easy and delivers reliable results every time. It’s a fantastic way to boost your cooking confidence!

    Ingredients:

    • 2 lbs Yukon Gold or Russet potatoes, peeled and cut into 1-inch pieces
    • 2 tablespoons olive oil
    • 1 teaspoon salt
    • 1/2 teaspoon black pepper
    • 1/2 teaspoon garlic powder
    • Optional: fresh rosemary or thyme sprigs

    Step-by-Step Cooking Guidance:

    1. Prep the Potatoes: Preheat your oven to 400°F (200°C). Place the cut potatoes in a large pot, cover them with cold water, and add a generous pinch of salt. Bring to a boil over medium-high heat.
    2. Par-boil: Simmer the potatoes for 5-7 minutes until slightly tender but still firm. Do not overcook. This step is crucial for creating a perfectly crispy exterior.
    3. Drain and Dry: Carefully drain the potatoes and return them to the hot, empty pot. Put the lid on and shake gently for 15-30 seconds. This step roughs up the edges, which become extra crispy during roasting.
    4. Season: Drizzle the potatoes with olive oil and sprinkle with salt, pepper, and garlic powder. If using fresh herbs, add them now. Toss gently to coat everything well.
    5. Roast: Spread the seasoned potatoes in a single layer on a large baking sheet. Do not overcrowd the pan; use two if necessary. Giving the potatoes space ensures they roast instead of steam.
    6. Bake: Roast for 30-40 minutes, flipping them halfway through. Continue roasting until they are golden brown and wonderfully crispy. Serve immediately.

    Helpful Tips for Perfect Crispy Roasted Potatoes:

    • Potato Choice: Yukon Gold potatoes create a creamy interior, while Russets provide a very starchy, fluffy result. Both work beautifully for this recipe.
    • Don’t Crowd the Pan: Giving your potatoes space on the baking sheet is essential for crispiness. Overcrowding causes them to steam rather than roast.
    • High Heat is Key: Roasting at 400°F (200°C) is essential for developing that irresistible golden crust.
    • Variations: Experiment with different seasonings. Try paprika for a smoky flavor, or add onion powder or a pinch of cayenne pepper for a delicious twist.

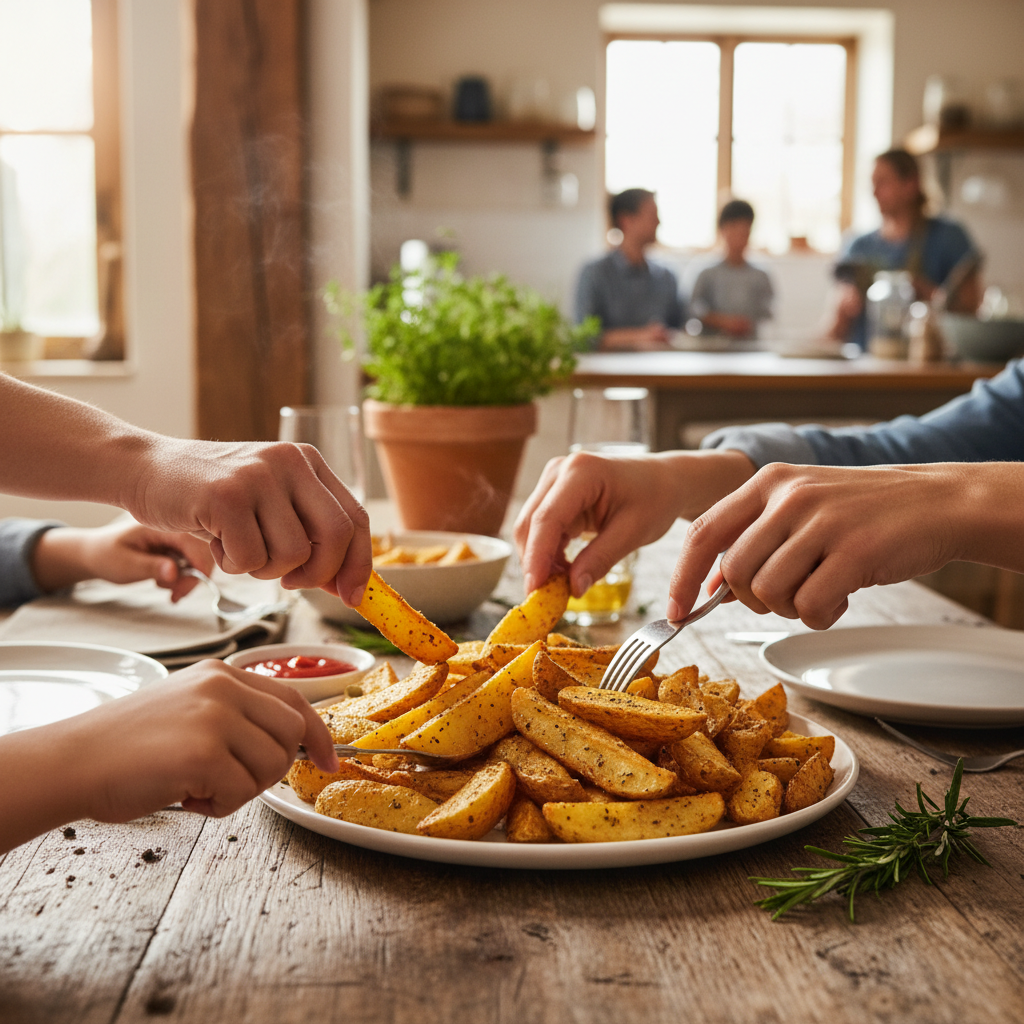
    Simple Roasted Potato Wedges

    Looking for family-friendly meal ideas? These simple roasted potato wedges are a fantastic solution. Quick to prepare and incredibly satisfying, they make a perfect side dish or a fun snack.

    This beginner-friendly recipe transforms basic potatoes into a flavorful, stress-free treat. It’s an ideal option for easy lunches or quick dinner recipes.

    Ingredients:

    • 2 lbs Russet or red potatoes, scrubbed clean
    • 1 tablespoon olive oil
    • 1/2 teaspoon salt
    • 1/4 teaspoon black pepper
    • 1/2 teaspoon paprika
    • Optional: 1/4 teaspoon chili powder for a kick

    Step-by-Step Cooking Guidance:

    1. Preheat Oven: Preheat your oven to 425°F (220°C).
    2. Cut Wedges: Wash the potatoes thoroughly, leaving the skin on for extra fiber and texture. Cut each potato lengthwise into quarters, then cut each quarter in half again to create even wedges.
    3. Season: Place the potato wedges in a large bowl. Drizzle with olive oil and sprinkle with salt, pepper, and paprika. Add chili powder if desired, and toss well until all wedges are evenly coated.
    4. Arrange: Spread the seasoned wedges in a single layer on a large baking sheet, ensuring they don’t overlap. This promotes even browning.
    5. Roast: Bake for 25-35 minutes, flipping the wedges halfway through. Continue roasting until they are tender on the inside and nicely browned and crisp on the outside.
    6. Serve: Serve hot with your favorite dipping sauce.

    Practical Tips and Variations:

    • Even Cutting: Try to cut your wedges into similar sizes to ensure they cook at the same rate.
    • Dipping Fun: These wedges are delicious with ketchup, a creamy ranch dip, or a spicy sriracha mayo.
    • Cheesy Option: For cheesy potatoes, sprinkle grated Parmesan cheese over the wedges during the last 5 minutes of roasting.
    • Meal Prep Idea: These wedges are great for meal prep. Cook a large batch and reheat them in the oven or an air fryer for the best results.

    Garlic Herb Roasted Potatoes and Carrots

    Transform simple ingredients into a delicious, visually appealing meal with this easy recipe. Garlic herb roasted potatoes and carrots make a vibrant and flavorful side dish, perfect for any weeknight dinner or special occasion.

    This combination offers great taste and added nutrition, making it a wonderful example of approachable home cooking. It helps you prepare healthy, delicious meals without complex steps.

    Ingredients:

    • 1.5 lbs Yukon Gold or red potatoes, scrubbed and cut into 1-inch pieces
    • 1 lb carrots, peeled and cut into 1/2-inch thick coins or sticks
    • 2 tablespoons olive oil
    • 3 cloves garlic, minced
    • 1 teaspoon dried mixed Italian herbs (or 1 tablespoon fresh, chopped)
    • 1/2 teaspoon salt
    • 1/4 teaspoon black pepper
    • Optional: fresh parsley for garnish

    Step-by-Step Cooking Guidance:

    1. Preheat Oven: Preheat your oven to 400°F (200°C).
    2. Prepare Vegetables: In a large bowl, combine the cut potatoes and carrots.
    3. Season: Add the olive oil, minced garlic, Italian herbs, salt, and pepper to the vegetables. Toss until everything is thoroughly coated.
    4. Arrange: Spread the seasoned vegetables in a single layer on a large baking sheet. Do not overcrowd the pan; use two sheets if necessary to ensure even roasting and caramelization.
    5. Roast: Bake for 30-40 minutes, stirring the vegetables halfway through. Continue roasting until the potatoes are tender and golden, and the carrots are slightly caramelized.
    6. Serve: Garnish with fresh parsley if desired, and serve these flavorful vegetables alongside your favorite protein.

    Helpful Tips and Flavorful Variations:

    • Even Cooking: Cutting the vegetables to a uniform size is key. Since carrots cook more quickly than potatoes, make sure your potato pieces are not cut significantly larger than your carrot pieces to ensure both are perfectly cooked at the same time.
    • Fresh Herbs: If using fresh herbs like rosemary or thyme, add them during the last 10-15 minutes of roasting to preserve their delicate flavor.
    • Add Other Veggies: This recipe is very versatile. Feel free to add other root vegetables like parsnips or sweet potatoes. Brussels sprouts can also be added during the last 15-20 minutes of cooking.
    • Spice It Up: A pinch of red pepper flakes can add a subtle warmth and an extra layer of flavor to this dish.

    The Best Creamy and Cheesy Potato Recipes

    A warm, bubbling dish of creamy, cheesy potato gratin, with a serving spoon lifting a portion.
    A photorealistic, high-quality food magazine photo of a bubbling, creamy, and cheesy potato gratin, freshly baked in a ceramic casserole dish. The top is a perfect golden-brown with melted, gooey cheese peeking through, and the rich, creamy sauce is visible between layers of thinly sliced potatoes. A serving spoon is gently lifting a portion, showing the delicious texture inside. Warm, soft lighting from the side, with a slight hint of steam, creating an appetizing and comforting look. Professional food photography, inviting and mouth-watering.

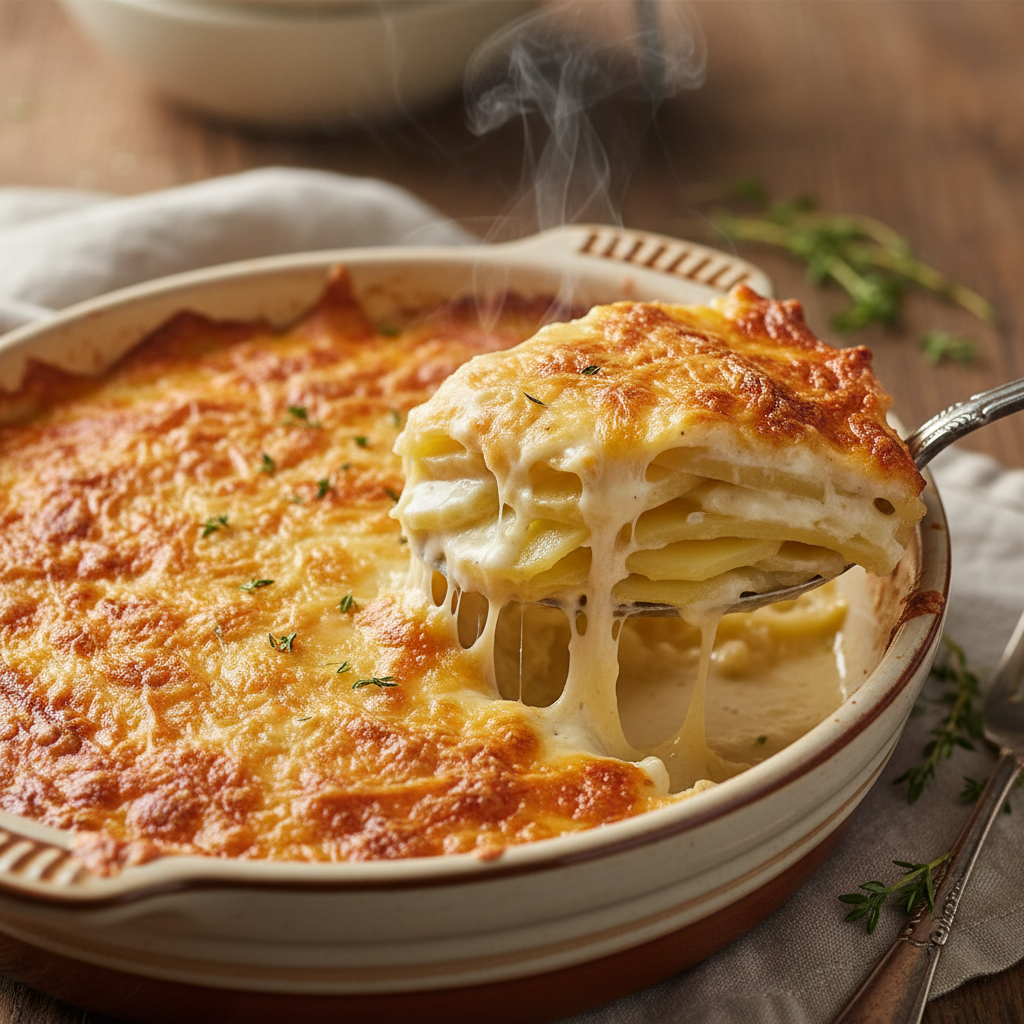
    Traditional Scalloped Potatoes Recipe

    Nothing brings comfort to the table like a classic dish, and our traditional scalloped potatoes are a perfect example. This recipe features thinly sliced potatoes baked in a rich, creamy sauce, creating a satisfying side dish for any meal. It’s also a wonderful choice for family gatherings and holiday dinners, making it a go-to for home cooks everywhere.

    Why You’ll Love This Easy Recipe

    • It uses simple, everyday ingredients.
    • The step-by-step cooking guidance makes it beginner-friendly.
    • It creates a wonderfully rich and comforting flavor.
    • This dish is a fantastic family-friendly meal option.

    Simple Ingredients

    • 6 medium Russet potatoes, peeled and thinly sliced (about 1/8-inch thick)
    • 4 tablespoons unsalted butter
    • 4 tablespoons all-purpose flour
    • 3 cups whole milk, warmed
    • 1 teaspoon salt
    • 1/2 teaspoon black pepper
    • Pinch of nutmeg (optional, but adds depth)

    Step-by-Step Cooking Guidance

    1. Prepare your oven and dish: First, preheat your oven to 375°F (190°C). Then, lightly butter a 9×13 inch baking dish to prevent sticking and add flavor.
    2. Make the creamy sauce: Next, melt the butter in a medium saucepan over medium heat. Whisk in the flour and cook for one minute to create a roux. Slowly pour in the warm milk, whisking continuously until the sauce thickens, about 5-7 minutes. Stir in the salt, pepper, and nutmeg (if using).
    3. Layer the potatoes: Arrange one-third of the potato slices in an even layer in the prepared baking dish. Pour one-third of the creamy sauce over the potatoes. Repeat these layers two more times, ending with a layer of sauce.
    4. Bake to perfection: Cover the baking dish loosely with aluminum foil and bake for 45 minutes. Remove the foil and continue baking for another 20-30 minutes, until the potatoes are tender and the top is golden brown and bubbly.
    5. Rest and serve: Allow the scalloped potatoes to rest for 10-15 minutes before serving. This step helps the sauce set beautifully.

    Helpful Tips and Variations

    • Potato Choice: Russet potatoes are ideal because their high starch content helps them absorb the sauce well.
    • Slicing: For perfectly even, thin slices that cook uniformly, use a mandoline.
    • Add Cheese: For a cheesy twist, sprinkle 1 cup of shredded Gruyère or sharp cheddar cheese between the layers to create a richer, gratin-style dish.
    • Make Ahead: You can assemble this dish a day in advance. Store it covered in the refrigerator and add an extra 15-20 minutes to the baking time.

    Ultimate Cheesy Potato Casserole (Funeral Potatoes)

    The Ultimate Cheesy Potato Casserole, often called “Funeral Potatoes,” is a beloved potluck staple known for its incredible creaminess and rich cheesy flavor. This dish features tender shredded potatoes in a savory cheese sauce, all finished with a crispy, buttery topping. As a quick and reliable choice for any gathering, it takes the stress out of planning family-friendly meals.

    A Crowd-Pleasing Cheesy Potatoes Recipe

    This casserole is the definition of comfort food, combining simple ingredients for a huge flavor impact. Its ease and versatility make it a favorite for everyone, from busy families to seasoned cooks.

    What You’ll Need

    • 2 lbs frozen shredded hash brown potatoes, thawed
    • 1/2 cup melted butter, plus 2 tablespoons for topping
    • 1 can (10.5 oz) cream of chicken soup
    • 1 container (16 oz) sour cream
    • 2 cups shredded sharp cheddar cheese
    • 1/2 cup chopped yellow onion (optional, for extra flavor)
    • Salt and black pepper to taste
    • 2 cups crushed cornflakes or Ritz crackers for topping

    How to Make This Simple Dinner Recipe

    1. Prepare your oven and dish: Preheat your oven to 350°F (175°C). Lightly grease a 9×13 inch baking dish.
    2. Combine ingredients: In a large bowl, stir together the thawed hash browns, 1/2 cup melted butter, cream of chicken soup, sour cream, shredded cheddar cheese, and onion (if using). Season with salt and pepper to taste.
    3. Transfer to dish: Pour the potato mixture into your prepared baking dish and spread it into an even layer.
    4. Add the topping: In a small bowl, combine the crushed cornflakes or crackers with the remaining 2 tablespoons of melted butter. Sprinkle this mixture evenly over the potatoes for a delightful crunchy crust.
    5. Bake until bubbly: Bake for 45-60 minutes, until the casserole is hot and bubbly and the topping is golden brown.
    6. Serve warm: Let it cool for a few minutes before serving to allow the cheesy sauce to set.

    Tips for Success and Dietary Needs

    • Thaw Hash Browns: To prevent a watery casserole, ensure your hash browns are fully thawed before mixing.
    • Cheese Swap: Feel free to experiment with different cheeses. Monterey Jack or Colby are great options for a new flavor profile.
    • Vegetarian Version: For a delicious meat-free alternative, simply use cream of mushroom soup instead of cream of chicken.
    • Meal Prep Tip: Assemble the casserole (without the topping) ahead of time. Cover and refrigerate for up to 24 hours. When ready to bake, add the topping and increase the baking time by about 15 minutes.

    Easy Potatoes au Gratin

    Potatoes au Gratin are a sophisticated cousin to scalloped potatoes, known for a luxurious cheese sauce and tender, thinly sliced potatoes. Our easy recipe is straightforward and incredibly rewarding, delivering a rich, flavorful dish without complex steps. It’s the perfect way to enjoy elevated home cooking without the stress.

    Experience Cheesy Perfection

    This dish elevates simple potatoes into something truly special, celebrating creamy textures and savory cheese. Surprisingly easy to make, it’s an approachable recipe that’s still impressive enough for guests.

    Gather Your Ingredients

    • 2 lbs Yukon Gold potatoes, peeled and thinly sliced (about 1/8-inch thick)
    • 2 tablespoons unsalted butter
    • 2 tablespoons all-purpose flour
    • 2 cups half-and-half (or whole milk)
    • 1 clove garlic, minced
    • 1/2 teaspoon salt
    • 1/4 teaspoon black pepper
    • 1 cup shredded Gruyère cheese, divided
    • 1/2 cup grated Parmesan cheese, divided

    Your Step-by-Step Guide

    1. Prepare oven and dish: First, preheat your oven to 400°F (200°C). Then, butter a 9×13 inch baking dish.
    2. Make the cheese sauce: Melt butter in a medium saucepan over medium heat. Add the garlic and cook until fragrant, about 30 seconds. Whisk in the flour and cook for 1 minute. Gradually whisk in the half-and-half until the sauce is smooth and starts to thicken, about 3-5 minutes. Remove from the heat and stir in the salt, pepper, half of the Gruyère, and half of the Parmesan until the cheese is fully melted.
    3. Layer the potatoes and sauce: Arrange half of the potato slices in the prepared dish and pour half of the cheese sauce over them. Top with the remaining potatoes, followed by the rest of the sauce.
    4. Top with cheese: Sprinkle the remaining Gruyère and Parmesan cheese evenly over the top layer.
    5. Bake until golden: Cover with foil and bake for 30 minutes. Remove the foil and bake for another 20-30 minutes, or until the potatoes are tender and the top is bubbly and golden brown.
    6. Rest before serving: Let the dish rest for 10 minutes before serving. This step allows the sauce to settle and makes slicing easier.

    Expert Tips for the Best Results

    • Potato Type: Yukon Gold potatoes are perfect for this dish. They hold their shape while becoming wonderfully creamy. [2]
    • Even Slices: Thin, uniform slices are key to ensuring the potatoes cook evenly. A mandoline is the easiest tool for this task.
    • Freshly Grated Cheese: For the smoothest sauce, always use freshly grated cheese. Pre-shredded varieties contain anti-caking agents that can affect how well they melt.
    • Flavor Boost: Add a pinch of cayenne pepper to the cheese sauce. This provides a subtle warmth that enhances the cheese flavor without making the dish spicy.

    Quick and Easy Potato Recipes for Busy Families

    A plate of golden potato wedges on a wooden table, with family hands reaching to serve themselves.
    A photorealistic, high-quality food magazine photo depicting a vibrant, delicious plate of quick potato wedges or crispy home fries served on a casual wooden dining table. The scene includes the blur of diverse family members’ hands (adult and child) reaching for the potatoes, suggesting a relaxed and happy mealtime. The potatoes are perfectly seasoned and golden. The background shows a warm, inviting, and slightly rustic kitchen or dining area with soft, natural light, emphasizing a friendly and approachable family meal atmosphere. Professional food photography, candid yet polished.

    Life can get pretty hectic, and when you need quick dinner solutions, potatoes are your best friend. Because they’re so versatile and delicious, potatoes can transform into amazing family-friendly meals in no time.

    At Recipesmondial, we understand you want to enjoy stress-free cooking and need reliable, flavorful meals fast. Perfect for busy families, these beginner-friendly potato recipes help solve your mealtime dilemmas effortlessly. Get ready to cook with confidence and discover just how simple potatoes can be!

    Crispy Air Fryer Roasted Potatoes

    The air fryer is a game-changer for busy home cooks, making it easy to get crispy roasted potatoes with very little oil. Not only is this method incredibly fast, but cleanup is also a breeze. You’ll love how simple and satisfying this recipe is. Air fryers have become increasingly popular for their efficiency and health benefits [3].

    Ingredients:

    • 1.5 pounds (about 3 large) Yukon Gold or red potatoes
    • 1 tablespoon olive oil
    • 1 teaspoon garlic powder
    • 1/2 teaspoon onion powder
    • 1/2 teaspoon paprika
    • 1/4 teaspoon black pepper
    • 1/2 teaspoon salt, or to taste
    • Optional: 1 tablespoon fresh chopped parsley for garnish

    Step-by-Step Cooking Guidance:

    1. Prepare Potatoes: Wash the potatoes thoroughly. You can peel them or leave the skin on for extra fiber and crispiness. Cut the potatoes into uniform 1-inch cubes to ensure they cook evenly.
    2. Season: In a large bowl, place the cubed potatoes. Drizzle with olive oil and sprinkle with garlic powder, onion powder, paprika, salt, and pepper. Toss well to make sure all the potatoes are evenly coated.
    3. Air Fry: Preheat your air fryer to 400°F (200°C). Place the seasoned potatoes in the air fryer basket in a single layer. To ensure they get crispy, do not overcrowd the basket; cook in batches if necessary.
    4. Cook to Perfection: Air fry for 15-20 minutes until golden brown and tender, shaking the basket halfway through cooking to help them crisp up on all sides.
    5. Serve: Transfer the crispy roasted potatoes to a serving dish. Garnish with fresh parsley if desired and serve immediately as a delicious side dish.

    Tips & Variations for Family-Friendly Meals:

    • Extra Crispy Tip: For even crispier results, soak the cut potatoes in cold water for 15 minutes. Drain them thoroughly and pat them completely dry before oiling and seasoning.
    • Flavor Boost: Add a pinch of dried rosemary or thyme with the other seasonings.
    • Spicy Kick: Include a dash of cayenne pepper for a little heat.
    • Cheesy Twist: Toss with a sprinkle of grated Parmesan cheese during the last 5 minutes of cooking.

    Simple Potato Recipes with Few Ingredients

    You don’t need fancy ingredients to create delicious potato dishes. Perfect for beginners, these simple recipes rely on basic pantry staples to make flavorful meals with minimal effort. You’ll be amazed at what you can create!

    1. Classic Boiled Potatoes with Butter & Herbs

    Incredibly comforting, this foundational recipe is one of the easiest ways to enjoy potatoes.

    Ingredients:
    • 1.5 pounds (about 3 large) new potatoes or small red potatoes
    • 4 cups water
    • 1 teaspoon salt, plus more to taste
    • 2 tablespoons unsalted butter
    • 2 tablespoons fresh chopped chives or parsley
    • Pinch of black pepper
    Instructions:
    1. Boil Potatoes: Wash the potatoes well, leaving the skin on. Place the whole potatoes in a large pot and add enough cold water to cover them by an inch. Stir in 1 teaspoon of salt.
    2. Cook: Bring the water to a boil over high heat, then reduce the heat to medium-low. Simmer for 15-25 minutes, or until the potatoes are fork-tender. The exact time will depend on their size.
    3. Drain & Finish: Drain the potatoes thoroughly and return them to the warm pot. Add the butter, chopped herbs, and a pinch of pepper, then toss gently until the butter is melted. Serve warm.
    Quick Meal Prep Tip:

    Boil a larger batch of potatoes. Store leftovers in the fridge. Use them for quick potato salad or breakfast hash later.

    2. Quick Pan-Fried Garlic Potatoes

    This method gives you tender potatoes with golden, crispy edges and is a fantastic accompaniment to almost any meal.

    Ingredients:
    • 1.5 pounds (about 3 large) Russet or Yukon Gold potatoes
    • 2 tablespoons olive oil or butter
    • 2 cloves garlic, minced
    • Salt and black pepper to taste
    • Optional: Fresh rosemary or thyme sprigs
    Instructions:
    1. Prepare Potatoes: Wash and peel the potatoes (or leave the skin on) and cut them into 1/2-inch cubes.
    2. Heat Pan: Heat the olive oil or butter in a large non-stick skillet over medium-high heat.
    3. Fry Potatoes: Add the potato cubes to the hot skillet in a single layer, being careful not to overcrowd it (cook in batches if needed). Fry for 5-7 minutes without stirring to allow them to brown on one side.
    4. Continue Cooking: Stir the potatoes, add the minced garlic, and continue cooking for 10-15 minutes. Stir occasionally until the potatoes are tender and golden brown.
    5. Season: Season generously with salt and pepper, add fresh herbs if using, and serve hot.

    Easy Potato Breakfast Hash

    Start your day with a satisfying and hearty meal. This easy potato breakfast hash is a fantastic way to use up leftover cooked potatoes and is perfect for a quick breakfast. As a super-flexible recipe, it welcomes all sorts of additions, making it a truly approachable home cooking delight.

    Ingredients:

    • 2 tablespoons olive oil or butter
    • 1 medium onion, chopped
    • 1 bell pepper (any color), chopped
    • 3 cups cooked potatoes, diced (roasted, boiled, or leftover work great!)
    • 1/2 teaspoon paprika
    • 1/4 teaspoon garlic powder
    • Salt and black pepper to taste
    • Optional: 4 large eggs, cooked to your liking
    • Optional: 1/4 cup fresh chopped parsley or chives for garnish

    Step-by-Step Cooking Guidance:

    1. Sauté Veggies: Heat the olive oil or butter in a large skillet over medium heat. Add the chopped onion and bell pepper and sauté for 5-7 minutes, until softened.
    2. Add Potatoes: Stir in the diced cooked potatoes and sprinkle with paprika, garlic powder, salt, and pepper.
    3. Crisp It Up: Increase the heat to medium-high and cook for 8-12 minutes, stirring occasionally, until the potatoes are browned and crispy.
    4. Optional Eggs: With a spoon, create four wells in the hash and crack an egg into each one. Cover the skillet and cook for 3-5 minutes, or until the egg whites are set and the yolks are cooked to your liking.
    5. Serve: Garnish with fresh parsley or chives and serve your easy potato breakfast hash immediately.

    Customization & Meal Prep Ideas:

    • Protein Boost: Add cooked chopped bacon, sausage, or ham along with the potatoes. This makes it a complete family-friendly meal.
    • Cheese Please: Sprinkle some shredded cheddar cheese over the hash during the last few minutes of cooking.
    • Spice It Up: A pinch of red pepper flakes adds a nice kick.
    • Make Ahead: Cook the hash (without eggs) ahead of time. Store it in the fridge. Reheat in a skillet or microwave. Add fresh eggs when ready to serve.

    Tips for Perfect Potatoes Every Time

    Choosing the Right Potato

    The first step to a truly delicious dish is choosing the right potato variety. Different potatoes have unique textures and flavors, and understanding these differences is key to achieving perfect results, whether you’re making crispy oven roasted potatoes or creamy scalloped potatoes.

    Here’s a simple guide to help you choose the best spuds:

    • Russet Potatoes (Baking Potatoes): High in starch with a floury texture, Russets become incredibly fluffy when cooked. Use them for super crispy roasted potatoes, mashed potatoes, or French fries, as they absorb flavors beautifully.
    • Yukon Gold Potatoes (All-Purpose): With their medium starch content, Yukon Golds are wonderfully versatile. They have a creamy, buttery flavor and a slightly waxy texture that holds its shape well after cooking. This makes them perfect for scalloped potatoes, cheesy potatoes, and all types of roasting.
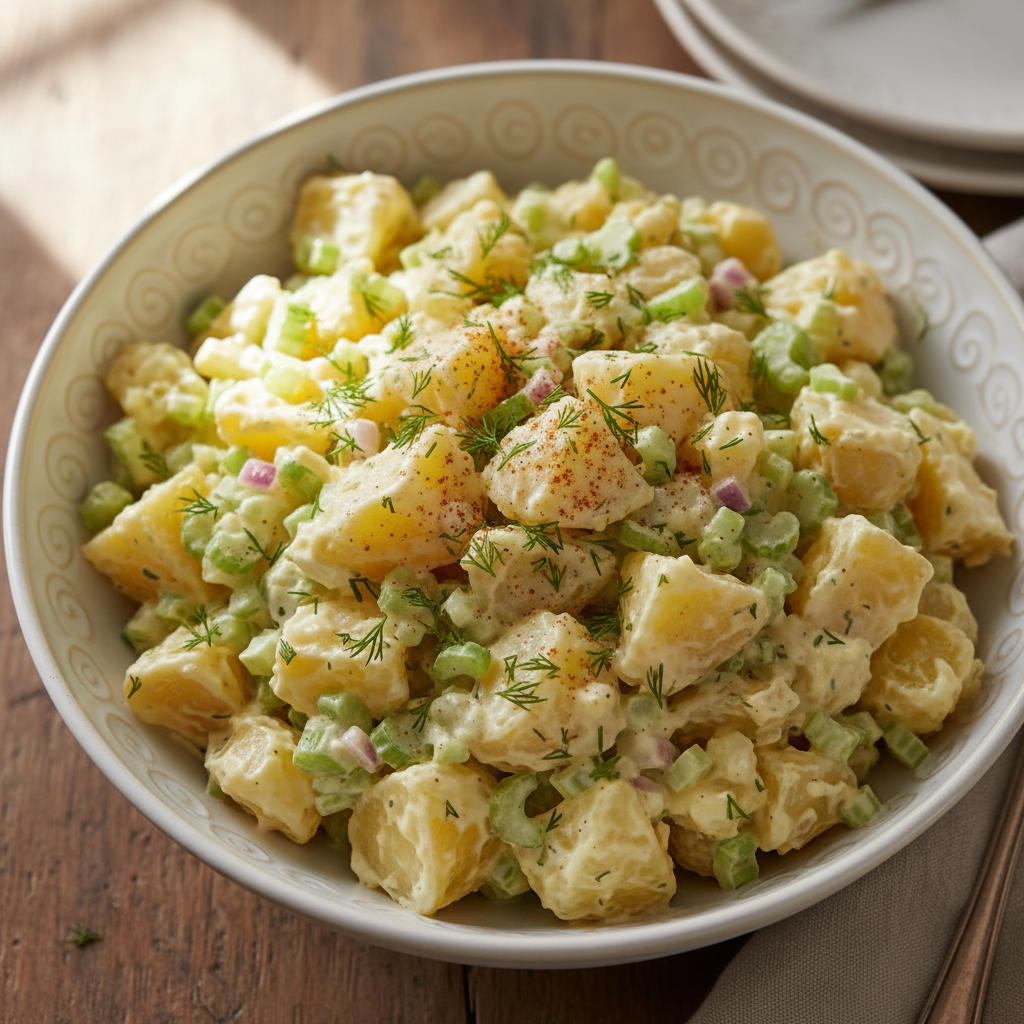
    • Red Bliss, New Potatoes, or Fingerling Potatoes (Waxy Potatoes): Low in starch and high in moisture, these varieties keep their shape very well, even after boiling. They are fantastic for potato salads or any recipe where you want distinct, firm pieces.

    For most of the potato recipes you’ll find here, Yukon Golds or Russets will be your go-to choices. However, feel free to experiment with other varieties to discover what you prefer!

    Secrets to Crispy Skin

    Achieving perfectly crispy roasted potatoes is a game-changer—no one enjoys a soggy potato! Follow these simple tips for an irresistible golden crunch every time.

    • Chop Evenly: Cut potatoes into uniform pieces to ensure they cook at the same rate. If pieces are uneven, some will overcook while others remain undercooked.
    • Soak and Dry Thoroughly: For extra crispness, soak chopped potatoes in cold water for 30 minutes. This step removes excess starch that can cause stickiness [4]. Afterward, it is critical to dry them completely with a clean kitchen towel. Remember, moisture is the enemy of crispiness!
    • Parboil for Perfection: For the ultimate crispy texture, parboil the potatoes first. Boil the pieces in salted water for 5–7 minutes until they are just tender but not falling apart, then drain well.
    • Rough Them Up: After draining, return the potatoes to the hot, empty pot. Place the lid on and shake vigorously for about 30 seconds. This step roughens the edges, creating more surface area to crisp up in the oven.
    • Preheat Oil and Pan: Place your baking sheet with a generous amount of oil in the oven as it preheats. The potatoes should sizzle the moment they hit the hot oil, creating an instant sear that helps build a crispy crust.
    • Don’t Overcrowd: Arrange the potatoes in a single layer with space between each piece. Overcrowding traps steam and leads to soggy results. Use two baking sheets if necessary.
    • Roast at High Heat: A hot oven, around 400–425°F (200–220°C), is ideal for roasted potatoes. High heat is essential for rapid browning and crisping.
    • Flip for Evenness: To get all sides evenly golden brown and crisp, be sure to flip the potatoes halfway through the cooking time.

    By following these steps, you will master the art of crispy roasted potatoes and turn a simple side dish into a showstopper.

    How to Store Leftovers

    Leftover potatoes are wonderful for quick meals and easy meal prep. Proper storage keeps your dishes fresh and safe to eat, whether it’s cheesy potatoes or your favorite scalloped potatoes.

    • Cool Down Quickly: For food safety, never leave cooked potatoes at room temperature for more than two hours. Allow them to cool slightly, then transfer them to an airtight container.
    • Refrigerate Promptly: Store all cooked potato dishes, including oven roasted potatoes and casseroles, in airtight containers in the refrigerator. They will typically last for 3 to 5 days [5].
    • Freezing Options:

      • Roasted Potatoes: To freeze roasted potatoes, spread them on a baking sheet until solid, then transfer them to a freezer-safe bag. They will last for up to 3 months.
      • Scalloped or Cheesy Potatoes: These dishes can also be frozen, but be aware that dairy can sometimes separate or become grainy upon thawing. For the best texture, freeze them in a tightly covered, oven-safe dish.
    • Reheating Tips:

      • Crispy Potatoes: To restore their crunch, reheat roasted potatoes on a baking sheet in a preheated oven at 375°F (190°C). An air fryer also works wonderfully for this.
      • Creamy Dishes: Gently reheat scalloped potatoes or cheesy potatoes in the oven or microwave. If they seem dry, add a splash of milk or broth to restore their creaminess.

    Proper storage allows you to enjoy your delicious potato recipes without waste, making meal planning easier for busy families.

    Frequently Asked Questions About Potato Recipes

    How do you make roast potatoes crispy?

    Achieving perfectly crispy roast potatoes is simple when you follow a few key steps. These expert tips will help you transform humble potatoes into golden, crunchy delights every time.

    • Choose the Right Potato: Start with floury potato varieties like Russets, Maris Piper, or King Edward. Their high starch content helps create a fluffy inside and a crispy exterior.
    • Parboil Them: This step is a game-changer for crispiness. Cut your potatoes into even pieces and boil them in salted water for 8-10 minutes, until tender but not falling apart. This process gelatinizes the starches on the surface, which is essential for maximum crunch [6].
    • Drain and Rough Up: After boiling, drain the potatoes thoroughly in a colander. Return them to the empty pot and shake gently to rough up the edges. This creates more surface area for crisping in the oven.
    • Dry Them Well: Moisture is the enemy of a crispy finish. Let the roughed-up potatoes air dry for several minutes, or pat them dry with a clean kitchen towel to remove any excess water.
    • Preheat the Fat: Pour your chosen fat—such as duck fat, beef dripping, or olive oil—onto a roasting tray. Place the tray in a hot oven for 5-10 minutes to heat the fat. This ensures the potatoes begin sizzling immediately.
    • Don’t Overcrowd the Pan: Arrange the potatoes in a single layer with space between each piece. An overcrowded pan will steam the potatoes instead of roasting them. Use two trays if necessary.
    • Roast at High Heat: A hot oven is crucial for a crispy exterior. Roast your potatoes at 200°C (400°F), or even up to 220°C (425°F). Turn them occasionally to ensure they brown evenly on all sides.

    By following these steps, you’ll consistently create incredibly crispy roasted potatoes that everyone will love.

    What seasoning is good on roasted potatoes?

    The right seasoning can elevate your oven roasted potatoes from good to unforgettable. You can choose from many delicious options to match any meal. Here are some of our favorite combinations:

    • Classic & Simple: A generous amount of salt, freshly ground black pepper, and a touch of garlic or onion powder makes a fantastic starting point.
    • Herby Goodness: Fresh rosemary and thyme are natural partners for potatoes. Roughly chop the herbs and toss them with the potatoes before roasting. Dried herbs like oregano or Italian seasoning also work well.
    • Spicy Kick: For a warming heat, add a pinch of paprika, cayenne pepper, or red pepper flakes. Smoked paprika will also contribute a lovely, smoky flavor.
    • Garlic Lover’s Dream: In addition to garlic powder, try roasting whole, unpeeled garlic cloves alongside your potatoes. The roasted cloves become soft, sweet, and spreadable.
    • Cheesy Delight: For a delicious, savory crust, sprinkle grated Parmesan cheese over the potatoes during the last 10-15 minutes of roasting.
    • Lemon Zest Brightness: To add a fresh, vibrant twist, toss the potatoes with lemon zest about halfway through the cooking time.

    Feel free to mix and match these ideas. Experimenting is the best way to discover your own perfect seasoning combination.

    How long does it take to roast potatoes at 200 C (400 F)?

    Roasting potatoes at 200°C (400°F) typically takes between 30 and 45 minutes. However, the exact time can vary depending on several factors:

    • Potato Size and Cut: Smaller pieces or thinner wedges will cook faster than larger chunks or whole small potatoes.
    • Potato Variety: Some types of potatoes cook slightly quicker than others due to their density and starch content.
    • Desired Crispiness: If you prefer extra-crispy potatoes, you may want to extend the roasting time by an additional 5-10 minutes.
    • Parboiling: If you parboil your potatoes first, they will need less time in the oven. The roasting stage is often closer to the 30-minute mark.
    • Oven Calibration: Keep in mind that the actual temperature of your oven may vary slightly from its setting.

    To ensure they’re ready, test a potato with a fork—it should be tender in the center and perfectly golden and crispy on the outside. Remember to give the pan a gentle shake or flip the potatoes halfway through for even roasting.


    Sources

    1. https://www.usda.gov/
    2. https://www.idahopotato.com/recipes/how-to-choose-the-right-potato
    3. https://www.grandviewresearch.com/industry-analysis/air-fryer-market
    4. https://www.potatogoodness.com/potato-faqs/
    5. https://www.fda.gov/media/74542/download
    6. https://www.seriouseats.com/the-best-crispy-roast-potatoes-recipe
  • The Perfect Creamy Polenta Recipe (Beginner-Friendly Guide)

    The Perfect Creamy Polenta Recipe (Beginner-Friendly Guide)

    Polenta is a classic Italian dish made from boiled cornmeal. It can be served as a creamy, porridge-like side dish, or cooled until firm and then fried, baked, or grilled. This versatile and budget-friendly recipe is a comforting base for sauces, meats, and vegetables.

    Ever crave a comforting, delicious side dish that feels gourmet but is surprisingly simple? It’s easy to feel overwhelmed by complex recipes. That’s where creamy polenta comes in. This wonderfully versatile and naturally gluten-free option can transform your weeknight dinners into something special, without any stress. Humble yet flavorful, this dish is about to become your new favorite. Here at Recipesmondial, we believe cooking should be an enjoyable, confidence-building experience, and this easy polenta recipe is the perfect example.

    If you’re looking for a beginner-friendly recipe with reliably delicious results, you’ve come to the right place. This step-by-step guide takes the guesswork out of making polenta. We’ll show you how to get a beautifully smooth, rich, and creamy texture without any technical jargon or complicated techniques. We cover everything from basic ingredients to essential tips, so you can confidently whip up this Italian staple. Ready to discover what makes polenta such a beloved classic?

    Ready to Make the Creamiest Polenta Ever?

    A steaming bowl of perfectly creamy, golden yellow polenta with a slight swirl.
    Professional food photography, photorealistic, high-quality food magazine photo: A close-up shot of a steaming bowl of perfectly creamy, golden yellow polenta, with a slight swirl from a spoon. The polenta should have a smooth, velvety texture, glistening slightly under warm, natural light. The background is softly blurred with subtle kitchen elements, creating a warm and inviting atmosphere. Focus on the rich texture and comforting appeal of the polenta. No people.

    Are you ready to create a dish that’s incredibly comforting and deeply satisfying? Perhaps you’ve heard of polenta, that golden, creamy Italian staple. It’s a wonderful base for so many delicious meals.

    However, many home cooks find polenta intimidating. You might worry about getting lumps, ending up with a bland taste, or simply not knowing how to achieve that perfect texture. But we’re here to show you that making flawless, creamy polenta is surprisingly simple. At Recipesmondial, we believe cooking should be a joy, not a chore.

    This beginner-friendly guide will change the way you think about this versatile dish. We’ll provide clear, step-by-step cooking guidance to help you master a creamy polenta recipe. Using just a few everyday ingredients, you’ll create a truly flavorful meal made easy. Get ready to cook with confidence and enjoy every single bite. Let’s turn simple cornmeal into a delicious, warm masterpiece!

    What exactly is polenta?

    Polenta is more than just a dish; it’s a comforting, versatile, and easy-to-make staple that has graced tables for centuries. This simple porridge, made from ground cornmeal, is beloved for its creamy texture and ability to pair with countless flavors. Whether you’re looking for simple dinner recipes or delicious family-friendly meals, understanding polenta is a great place to start.

    A Brief History of This Italian Staple

    Polenta has a rich history that predates the corn we associate with it today. Originally, the term “polenta” referred to any porridge made from ground grains. For instance, ancient Romans enjoyed a similar dish made from barley, farro, or chickpeas, and it was a common, hearty meal across various cultures [1].

    The corn-based polenta we know today only emerged after corn, or maize, was brought to Europe from the Americas in the 16th century. It thrived in the fertile plains of Northern Italy—especially in regions like Veneto, Lombardy, and Emilia-Romagna—where farmers found it to be a robust and economical crop.

    As a result, cornmeal quickly became the primary ingredient for polenta, transforming it into a crucial, inexpensive, and satisfying food for many Italian families. This traditional staple provided warmth and sustenance, particularly during colder months. It was often served with simple sauces, hearty stews, or just a drizzle of olive oil. Today, polenta remains a beloved component of Italian cuisine, a testament to its simple and enduring appeal.

    Polenta vs. Grits: What’s the Difference?

    It’s easy to confuse polenta with grits, as both are popular dishes made from ground corn. However, several key distinctions in their origin, corn type, and preparation set them apart. Understanding these differences can help you appreciate each one more. Here’s a simple breakdown:

    Feature Polenta Grits
    Origin Northern Italy Southern United States
    Type of Corn Typically made from yellow flint corn. This variety is drier and starchier, which gives polenta a firmer texture as it cooks and cools. Usually made from white dent corn. This softer corn has a higher moisture content, which results in a creamier, more tender texture.
    Grind Size The grind is often coarse, contributing to its slightly toothier texture. Can range from fine to coarse. Stone-ground grits are typically coarser, while instant grits are very fine.
    Processing Usually dried and then stone-ground. Often undergoes nixtamalization, a process where the corn is soaked and cooked in an alkaline solution. This step enhances both nutritional value and flavor [2].
    Typical Flavor Profile Subtly sweet, nutty, and earthy. It is often served with savory sauces, cheeses, or meats. Mild corn flavor that can be slightly tangy from nixtamalization. Grits can be served savory or sweet but are often paired with butter, cheese, or shrimp.

    In essence, while both polenta and grits offer a comforting meal, their distinct origins and preparation methods give them unique identities. Appreciating these differences helps home cooks choose the right ingredients for their desired dish, making the experience of preparing a perfect creamy polenta all the more satisfying.

    How to Make Our Easy Polenta Recipe

    Hands stirring creamy polenta in a stainless steel pot on a stove.
    Professional food photography, photorealistic, high-quality food magazine photo: A home cook’s hands, with clean, manicured nails, gently stirring creamy polenta in a heavy-bottomed stainless steel pot on a stove. The polenta is a beautiful light yellow, bubbling softly, and has a smooth, rich consistency. The kitchen setting is clean and well-lit, with a warm, inviting ambiance. Focus on the action and the texture of the polenta. No face visible, only hands and the cooking process.

    Ingredients You’ll Need

    Gathering your ingredients first makes cooking much smoother. This simple polenta recipe uses just a few staples to create a comforting and delicious dish.

    • 4 cups (960 ml) cold water or vegetable broth: Using broth adds extra flavor.
    • 1 cup (150 g) fine or medium-ground cornmeal (polenta): Choose good quality polenta for the best texture.
    • 1 teaspoon salt: Adjust to your taste.
    • 2 tablespoons unsalted butter: This creates a creamy, rich texture.
    • ½ cup (50 g) grated Parmesan cheese (optional): Freshly grated is always best for flavor.

    Step-by-Step Cooking Instructions

    Follow these simple steps for perfect, creamy polenta every time. This beginner-friendly method is incredibly easy to follow.

    1. Prepare your pot: Choose a heavy-bottomed saucepan to distribute heat evenly and prevent sticking.
    2. Heat the liquid: Pour the cold water or broth into the pot and add the salt. Bring to a gentle boil over medium-high heat.
    3. Whisk in polenta: Once boiling, slowly drizzle in the cornmeal while whisking continuously. This prevents lumps and ensures a smooth texture.
    4. Reduce heat and stir: Immediately reduce the heat to low so the mixture is at a bare simmer. Stir almost constantly for the first 5-10 minutes.
    5. Continue to cook: Cook for 25-30 minutes, stirring every few minutes to prevent sticking. The polenta will thicken and become creamy.
    6. Check for doneness: The polenta is ready when it’s soft, creamy, and pulls away from the sides of the pot. Taste it to ensure the grains are tender and not gritty.
    7. Stir in finishing touches: Remove the pot from the heat. Stir in the butter and Parmesan cheese (if using) for richness and savory flavor.
    8. Serve immediately: Spoon the polenta into bowls and enjoy while it’s warm and creamy.

    Tips for Perfect, Lump-Free Polenta

    Want to guarantee your polenta is perfectly smooth? Follow these tips to avoid lumps and achieve a delicious, creamy texture.

    • Start with cold liquid: Adding cornmeal to cold or lukewarm liquid allows the grains to hydrate gradually, which helps prevent lumps from forming.
    • Drizzle and whisk: Pour the cornmeal in a slow, steady stream while whisking vigorously. This is key to a smooth, lump-free mixture.
    • Use a heavy-bottomed pot: A thick-bottomed pot distributes heat more evenly, which minimizes scorching and sticking.
    • Stir frequently: Regular stirring, especially at the beginning, keeps the polenta from clumping. It also helps release starches for a creamier texture.
    • Cook slowly: Low and slow cooking allows the polenta grains to soften fully, ensuring a tender, non-gritty final product.
    • Adjust consistency: If your polenta becomes too thick, whisk in a splash of warm water or broth until you reach your desired consistency.
    • Consider nutritional benefits: Cornmeal, the base of polenta, is a whole grain that provides dietary fiber and essential nutrients, contributing to a healthy and balanced meal [source: https://www.nal.usda.gov/fnic/food-composition-databases].

    What do you do with polenta?

    Delicious Serving Suggestions

    Once you’ve mastered our easy polenta recipe, a world of delicious possibilities opens up. This creamy, comforting dish is incredibly versatile, able to serve as the star of your meal or as a wonderful side. Here are some fantastic ways to enjoy your freshly made polenta:

    • Classic Comfort: Serve warm, creamy polenta with a rich ragu or slow-cooked Bolognese for a satisfying, family-friendly meal that always impresses.
    • Savory & Simple: For a quick and delightful meal, swirl in extra butter, a generous sprinkle of Parmesan cheese, and fresh herbs like chives or parsley. Finish with a dash of black pepper.
    • Roasted Vegetable Delight: For a healthy and balanced meal, top your polenta with a medley of roasted seasonal vegetables like cherry tomatoes, bell peppers, and zucchini. A drizzle of balsamic glaze adds the perfect finishing touch.
    • Hearty Meat Pairings: Polenta is a beautiful partner for braised short ribs, Italian sausages, or rustic chicken cacciatore. Its creamy texture is perfect for soaking up every drop of flavorful sauce.
    • Mushroom Magic: Create a gourmet-style topping with sautéed wild mushrooms, garlic, and thyme. Adding a splash of white wine gives the sauce extra depth. This recipe is surprisingly simple and beginner-friendly.
    • As a Side Dish: Substitute polenta for mashed potatoes or rice to elevate any meal. It’s a perfect complement to grilled meats, fish, and stews.
    • Breakfast Treat: For a surprisingly delightful breakfast, warm up leftover creamy polenta and serve it with fresh berries, a drizzle of honey, or a sprinkle of cinnamon.

    Polenta is all about approachable home cooking. Enjoy the process without stress as you discover delicious new ways to prepare this simple ingredient.

    Recipe Variations: Firm Polenta, Fried Polenta, and More

    The beauty of polenta is its versatility. Beyond its creamy form, you can transform it into entirely new textures and dishes. These variations are perfect for meal prep and will help you add creativity to your weekly menu with confidence.

    Making Firm Polenta

    Firm polenta is the secret to many exciting dishes, as it can be sliced, grilled, or fried. To make it, simply follow the creamy polenta recipe but reduce the liquid slightly or cook it a bit longer. You’ll know it’s ready when it’s very thick and pulls away from the sides of the pot. This technique echoes traditional methods where Italian chefs cooked polenta for extended periods to achieve a sliceable consistency [3].

    1. Prepare & Spread: Once cooked, immediately pour the hot, thick polenta into a lightly oiled baking dish (an 8×8 inch dish works well).
    2. Chill & Set: Smooth the top with a spatula, cover, and refrigerate for at least 2 hours, or until completely firm. This can be prepared the day before.

    Fun Ways to Use Firm Polenta

    Once your polenta is firm, the fun can begin! Here are a few simple ideas for quick and delicious meals.

    • Grilled or Pan-Fried Slices:
      1. Slice It: Once firm, invert the polenta onto a cutting board. Slice it into squares, triangles, or rectangles about ½-inch thick.
      2. Oil & Season: Lightly brush each slice with olive oil and season with salt, pepper, and your favorite herbs.
      3. Cook: Grill or pan-fry the slices in a hot skillet over medium-high heat for 3-5 minutes per side, until golden brown and slightly crispy.
      4. Serve: Top the grilled slices with bruschetta, roasted vegetables, or a dollop of pesto for a great appetizer or unique side dish.
    • Crispy Polenta Fries:
      1. Cut into Sticks: Cut the block of firm polenta into fry-shaped sticks.
      2. Bake or Air Fry: Toss the sticks with a little olive oil, salt, and pepper. Bake at 400°F (200°C) for 20-25 minutes, flipping halfway. Or, air fry at 375°F (190°C) for 15-20 minutes until golden and crisp.
      3. Dip Away: Serve with marinara sauce, spicy aioli, or ketchup for a family-friendly side that everyone will love.
    • Baked Polenta Casseroles:
      1. Layer It: Use slices of firm polenta as the base layers in a casserole dish.
      2. Add Fillings: Alternate with layers of tomato sauce, cheese, cooked vegetables, or ground meat.
      3. Bake: Bake until bubbly and golden for a comforting dinner. This dish is similar to a lasagna but offers a unique, gluten-free twist.

    Exploring these variations will boost your cooking confidence, helping you create delicious, visually appealing meals from simple ingredients. Recipesmondial is here to help you enjoy cooking without stress, one recipe at a time!

    What are some common mistakes when making polenta?

    Making creamy, delicious polenta is easier than you might think. However, a few common pitfalls can trip up even experienced home cooks. Don’t worry—with these simple tips from Recipesmondial, you’ll learn how to avoid them and make perfect, lump-free polenta every time.

    Avoiding Common Polenta Problems

    Here are the top mistakes to watch out for and how to ensure your polenta turns out wonderfully:

    • Adding Polenta Too Quickly or All at Once: This is the most common culprit for lumpy polenta. When dry polenta hits hot liquid all at once, it clumps together instantly.
      • The Fix: Pour the polenta into your simmering liquid in a thin, steady stream while whisking continuously. This prevents the grains from clumping and helps them absorb moisture evenly. Think of it as a gentle rain, not a sudden downpour.
    • Not Stirring Enough: Polenta needs attention. If you don’t stir frequently, especially in the initial stages, it can stick to the bottom of the pot, burn, and develop an inconsistent texture.
      • The Fix: Whisk vigorously as you add the polenta and until it begins to thicken. Afterward, switch to a wooden spoon and stir frequently to ensure even cooking and prevent sticking. Constant stirring isn’t necessary once it reaches a gentle simmer.
    • Using Cold Liquid: Starting with cold liquid means the polenta will take much longer to cook and can lead to an uneven, lumpy consistency.
      • The Fix: Always bring your liquid (water, broth, or milk) to a simmer before you start adding the polenta. A hot start ensures the grains begin cooking immediately and evenly for the smoothest possible texture.
    • Not Cooking Long Enough: Rushing the process is a sure way to get gritty, undercooked polenta. The cornmeal needs time to fully soften and swell.
      • The Fix: Be patient, as proper cooking takes time. Most recipes require at least 30-45 minutes for the cornmeal to fully soften. Always taste it before serving—the texture should be creamy and tender, with no grittiness. For truly authentic results, some Italian chefs cook polenta for an hour or more [4].
    • Incorrect Liquid-to-Polenta Ratio: Too much liquid will make your polenta soupy, while too little will make it thick, dry, and dense.
      • The Fix: Start by following your recipe’s recommended ratio. Remember, it’s easy to stir in a splash of extra hot liquid if your polenta gets too thick, but it’s difficult to fix if it’s too thin.
    • Forgetting to Season Properly: On its own, polenta is quite bland. A common mistake is not seasoning it enough or at the right time.
      • The Fix: Season the cooking liquid with salt before adding the polenta. Since ingredients like cheese and butter will change the flavor, always taste and adjust the seasoning again just before serving. This is a crucial step for a flavorful result.
    • Using the Wrong Type of Cornmeal: Not all cornmeal is the same. Instant, fine, and medium-grind cornmeal all cook very differently and yield different results.
      • The Fix: Pay close attention to the type of cornmeal your recipe calls for. For a classic creamy texture, medium-grind polenta is often the best choice. While instant polenta is faster, be aware that its flavor and texture will not be the same.

    By keeping these simple tips in mind, you will avoid common mistakes and feel more confident making impressive, flavorful polenta. Master this comforting dish, and you’ll have a wonderful meal for any occasion.

    Frequently Asked Questions About Polenta

    Is polenta the same as grits?

    While polenta and grits aren’t the same, they are very similar. Both are comforting porridges made from ground corn.

    The main differences are the type of corn used and the size of the grind. Here’s a quick comparison:

    Feature Polenta Grits
    Corn Type Typically made from yellow flint or dent corn, which gives it a slightly sweet, earthy flavor. Often made from hominy—corn that has been treated with an alkali [5]. This process changes its flavor and texture.
    Grind Usually a coarser grind, which leads to a more textured and hearty finished dish. Can be fine, medium, or coarse, but it is often finer than polenta for a smoother consistency.
    Origin A staple in Northern Italian cuisine. A traditional dish from the Southern United States.

    In short, while they are both corn-based porridges, their distinct origins and processing methods give them unique characteristics. You can enjoy both as a comforting, quick meal!

    Is polenta healthy or fattening?

    On its own, polenta is a very healthy food. As a whole grain made from ground corn, it offers several nutritional benefits.

    Here’s why polenta can be a great addition to your diet:

    • Good Source of Energy: Polenta provides complex carbohydrates for sustained energy.
    • Rich in Fiber: It contains dietary fiber, which is important for digestive health and helps you feel full, aiding in weight management [6].
    • Vitamins and Minerals: Polenta can be a good source of vitamins and minerals, including B vitamins, iron, and magnesium.
    • Naturally Gluten-Free: It is a great option for those with celiac disease or gluten sensitivities.

    Whether polenta becomes “fattening” depends on its preparation. Cooked simply with water or broth, polenta is low in fat and calories. However, adding butter, cream, or large amounts of cheese will significantly increase its calorie and fat content, turning it into a richer dish.

    For a healthy and flavorful meal, serve polenta with plenty of fresh vegetables and lean proteins to create a balanced and satisfying dish.

    How do Italians eat polenta?

    In Italy, especially in the northern regions, polenta is a cherished comfort food, not just a simple side dish. It is incredibly versatile and served in many delicious ways.

    Here are some popular ways Italians serve polenta:

    • Creamy Polenta (Polenta Morbida): This soft, smooth version is served much like mashed potatoes. It often accompanies rich, slow-cooked meat stews, braised mushrooms, or a sprinkle of Parmesan or Gorgonzola cheese [7].
    • Firm Polenta (Polenta Solida): Once cooled, polenta becomes firm enough to be sliced. These slices can then be:
      • Grilled or Pan-Fried: This method creates a crisp outside and a tender inside. Slices are fantastic with roasted vegetables, sausages, or seafood.
      • Baked: Slices are used in layered dishes, similar to a savory lasagna, with cheese and tomato sauce.
    • Breakfast Polenta: In some regions, a sweeter polenta is enjoyed for breakfast, served with milk, sugar, or honey.
    • As a Base for Soups and Stews: A scoop of thick polenta is often served in a bowl and topped with hearty soups or stews, soaking up all the rich flavors.

    Essentially, Italians use polenta as a wonderful canvas for many different flavors, making it a truly adaptable ingredient for home cooking.

    What’s the difference between cornmeal and polenta?

    This is a common question! The key distinction is that “polenta” refers to both a specific dish and the type of cornmeal used to make it. While all polenta is a form of cornmeal, not all cornmeal is ideal for making the classic polenta dish.

    Here’s what sets polenta apart from general cornmeal:

    • Grind Size: Polenta is typically made from coarsely ground yellow corn. This texture gives the finished dish its characteristic hearty bite. General cornmeal can range from very fine to coarse.
    • Corn Type: Authentic polenta is often made from specific Italian varieties of corn, like flint or dent, which are known for their distinct flavor and texture. Regular cornmeal can be made from any type of corn.
    • Labeling: A package labeled “polenta” contains cornmeal that is the correct grind for making the classic creamy dish. You may also see “instant” or “quick-cooking” polenta, which is pre-cooked or more finely ground for faster preparation.

    So, can you use any cornmeal to make polenta? Yes, but the texture will vary. Fine cornmeal will result in a much smoother, creamier dish. For the traditional, heartier texture, it’s best to use a cornmeal specifically labeled “polenta” or one that is coarsely ground.


    Sources

    1. https://www.britannica.com/topic/polenta
    2. https://www.nccorn.com/nixtamalization-what-is-it/
    3. https://www.academiabarilla.com/italian-recipes/polenta-traditional-dish-italian-cuisine
    4. https://www.academiabarilla.com/the-italian-food-academy/polenta-a-staple-of-northern-italian-cuisine/
    5. https://nchfp.uga.edu/how/can_06/hominy.html
    6. https://www.hsph.harvard.edu/nutritionsource/carbohydrates/fiber/
    7. https://www.lacucinaitaliana.com/glossary/polenta

  • 7 Best Potato Salad Recipes (From Classic American to No-Mayo!)

    7 Best Potato Salad Recipes (From Classic American to No-Mayo!)

    A potato salad recipe is a classic side dish made by combining boiled, cubed potatoes with a creamy or vinaigrette-based dressing and various mix-ins. The most common American version uses a mayonnaise dressing with hard-boiled eggs, celery, and onions. Variations are popular worldwide, including German potato salad which uses a vinegar-based dressing and is often served warm.

    Is there anything quite as comforting and versatile as a good potato salad? It’s the perfect crowd-pleaser for a summer picnic, a backyard barbecue, or as a delicious side dish to elevate your weeknight dinner. However, finding the best potato salad recipe—one that matches your taste and is also simple to prepare—can be a challenge.

    We believe cooking should be enjoyable, not stressful. That’s why we’ve gathered our best potato salad variations, each with clear, step-by-step guidance to take the guesswork out of mealtime. These approachable recipes are designed to help you build confidence in the kitchen and create flavorful meals with ease.

    In this guide, you’ll find 7 incredible potato salad recipes. We cover everything from the classic American style with egg to tangy, no-mayo German options and other light, fresh alternatives. Each beginner-friendly recipe is crafted to deliver reliable and delicious results. Get ready to transform humble potatoes into an unforgettable dish!

    What Makes the Perfect Potato Salad?

    A close-up shot of a beautifully prepared classic creamy potato salad, garnished with fresh dill and paprika in a white ceramic bowl.
    Professional food photography, photorealistic, high-quality food magazine photo of a perfect, classic American potato salad in an elegant ceramic bowl. The potato salad should be creamy with visible tender potato chunks, finely chopped celery, and a sprinkle of fresh dill and paprika on top. The dressing should look rich and well-integrated. Natural, soft daylight from a window illuminates the scene, creating inviting highlights. The background is softly blurred, suggesting a warm kitchen environment.

    Crafting the “perfect” potato salad is a delightful journey for any home cook. It’s more than just a side dish—it’s a celebration of simple ingredients. At Recipesmondial, we believe the best potato salad recipe is easy to follow and incredibly flavorful, making your cooking experience both stress-free and enjoyable.

    While there’s no single definition of “perfect,” certain elements consistently elevate a potato salad from good to truly unforgettable. Let’s explore the key components needed to create that ideal, mouth-watering dish.

    The Star: Perfectly Cooked Potatoes

    The foundation of any great potato salad is the potatoes themselves. Choosing the right type and cooking them correctly is crucial. You want pieces that are tender yet firm, hold their shape, and readily absorb the dressing.

    • Choose Wisely: Waxy or all-purpose potatoes like Yukon Gold, red potatoes, or fingerlings work best. These varieties have less starch, so they hold their shape instead of falling apart. For example, Yukon Golds are a fantastic choice for their creamy texture and subtle sweetness [1].
    • Cook Them Right: Boil or steam your potatoes until they are fork-tender but not mushy. Overcooked potatoes turn to mash, while undercooked ones are too firm. Adding a little salt to the cooking water seasons them from the start.
    • Cool Properly: After cooking, drain the potatoes well. For the best flavor absorption, let them cool slightly before dressing them while they are still warm.

    The Heart: A Flavorful Dressing

    The dressing ties all the ingredients together, infusing them with incredible flavor. Whether you prefer a creamy classic or a tangy vinaigrette, the key is balance.

    • Creamy Classic: Many easy potato salad recipes use a mayonnaise-based dressing. This typically includes mayonnaise, mustard (Dijon or yellow), a touch of vinegar or lemon juice for brightness, and seasonings.
    • Tangy & Light: For a lighter take, a vinaigrette-style dressing is a wonderful choice. A mix of olive oil, vinegar (like apple cider or white wine), fresh herbs, and spices creates a vibrant flavor. This is a fantastic option if you’re looking for a fresh-tasting side dish.
    • Balance the Flavors: A great dressing should have a balanced mix of savory, tangy, and sweet notes. Always taste your dressing before adding it to the potatoes and adjust the seasonings as needed.

    The Personality: Fresh Mix-Ins

    Mix-ins add texture, color, and extra layers of flavor. This is where you can truly personalize your potato salad and make it your own.

    • Classic Choices: Finely diced celery adds a satisfying crunch, while red or green onions bring a mild bite. Hard-boiled eggs are also a beloved addition in traditional American potato salads, contributing a rich, creamy texture.
    • Creative Additions: Don’t be afraid to experiment! Consider chopped pickles for tang, bell peppers for sweetness, fresh dill for herbaceous notes, or crispy bacon for a savory crunch. These simple additions can elevate many simple dinner recipes, and potato salad is a perfect example.
    • Texture Matters: Using a variety of textures makes each bite more interesting. Aim for a balanced combination of soft potatoes, crunchy vegetables, and the creamy texture of hard-boiled eggs.

    The Secret Touch: Seasoning and Resting

    Even with perfect ingredients, proper seasoning and a little patience can make all the difference in your final dish.

    • Season Generously: Don’t be shy with salt and pepper, as potatoes absorb a lot of seasoning. Taste as you go and adjust. A pinch of sugar can also help balance the acidity in the dressing.
    • Let it Mingle: For the best flavor, allow the finished potato salad to chill in the refrigerator for at least one hour, or ideally several hours. This resting time allows all the flavors to meld together, creating a more harmonious and delicious result. This simple step is key to taking your potato salad from good to great.

    At Recipesmondial, we provide step-by-step guidance to help you master this classic dish. We aim to make cooking enjoyable for everyone, ensuring your journey from simple ingredients to a delicious, rewarding meal is a seamless one.

    Our 7 Best Potato Salad Recipes for Any Occasion

    An overhead view of three distinct potato salads, showcasing various styles like a classic creamy one, a vibrant herby one, and a hearty deli-style version, arranged on a rustic wooden table.
    Professional food photography, photorealistic, high-quality food magazine photo of a vibrant flat lay featuring three distinct potato salads on a rustic wooden table. One is a classic creamy American style, garnished with paprika and chives. Another is a colorful no-mayo version with roasted potatoes, fresh herbs like parsley and dill, cherry tomatoes, and a light vinaigrette. The third is a hearty, deli-style potato salad with visible bacon bits and hard-boiled eggs. Each salad is in a unique, aesthetically pleasing bowl, showcasing variety in texture and color. The lighting is bright and natural, creating an inviting, abundant feel.

    Ready to discover your next favorite side dish? At Recipesmondial, we believe every meal should be delicious and easy. That’s why we’ve gathered our best potato salad recipes for every taste and occasion. Whether you’re looking for classic comfort food or a fresh new twist, we’ve got you covered. Get ready to turn simple ingredients into an unforgettable side dish!

    1. The Classic American Potato Salad Recipe (With Egg)

    There’s nothing quite like a traditional American potato salad. This crowd-pleasing recipe is a staple for any gathering, from family meals to summer barbecues. You’ll find creamy potatoes, crisp celery, a hint of onion, and perfectly cooked hard-boiled eggs. Everything is tossed in a rich, tangy mayonnaise dressing for a side dish that is simple, satisfying, and always a hit.

    • Flavor Profile: Creamy, tangy, savory, and comforting.
    • Why You’ll Love It: It evokes nostalgia with a familiar, delicious taste. This classic side dish pairs well with almost anything.
    • Best For: Potlucks, picnics, holiday gatherings, and Sunday dinners.

    2. Simple Potato Salad Recipe for Beginners

    New to cooking or overwhelmed by complex instructions? This beginner-friendly recipe is for you. With straightforward steps and minimal ingredients, it’s designed to help you build confidence in the kitchen. This recipe skips the fancy additions, highlighting the natural flavor of potatoes with a simple yet delicious creamy dressing. It’s a fantastic way to enjoy cooking without stress.

    • Flavor Profile: Mild, creamy, and wonderfully balanced.
    • Why You’ll Love It: It’s incredibly easy to follow and quick to prepare, guaranteeing reliable results every time.
    • Best For: First-time cooks, quick lunch ideas, or a fuss-free side dish.

    3. Tangy German Potato Salad (A No-Mayo Favorite)

    Step outside the box with this vibrant German potato salad. As a delightful no-mayo option, it’s perfect for those seeking something new. Served warm or at room temperature, it features tender potatoes tossed in a zesty, vinegar-based dressing. Crispy bacon, sautéed onions, and fresh parsley add incredible depth, making its tangy flavor a refreshing alternative to traditional creamy versions.

    • Flavor Profile: Tangy, savory, smoky, and bright.
    • Why You’ll Love It: It’s naturally lighter than mayo-based salads and packed with bold flavors, making it excellent for outdoor events where refrigeration might be an issue.
    • Best For: Barbecues, Oktoberfest celebrations, or a unique weeknight side.

    4. Creamy Potato Salad Recipe with Sour Cream

    If you love extra creaminess and a touch of tang, this recipe is a must-try. It uses sour cream to add a rich, luxurious texture and a delightful zest that complements the potatoes beautifully. We combine it with classic ingredients to create a truly indulgent side dish, offering a lovely variation on the traditional mayo-based recipe. It’s a simple, comforting, and approachable dish.

    • Flavor Profile: Rich, creamy, slightly tart, and comforting.
    • Why You’ll Love It: The sour cream creates a wonderfully smooth consistency and a unique flavor that feels both familiar and special.
    • Best For: Sunday lunches, potlucks, or when you want an extra-creamy side.

    5. Easy No-Egg Potato Salad Recipe

    Not a fan of hard-boiled eggs in your potato salad? This recipe is designed for you. It delivers all the classic, comforting flavor you expect, just without the eggs. Instead, we focus on perfectly cooked potatoes, crisp veggies, and a delicious creamy dressing. This version ensures everyone at the table can enjoy this classic side. It’s a straightforward alternative that doesn’t compromise on taste.

    • Flavor Profile: Classic creamy, savory, and fresh.
    • Why You’ll Love It: It caters to dietary preferences or simple dislikes, offering a reliably delicious potato salad every time.
    • Best For: Egg-free diets, picnics, or when you want a simpler preparation.

    6. A Crowd-Pleasing Potato Salad with No Pickles

    Pickles not your thing? You’re not alone! This crowd-pleasing recipe skips the pickles entirely. Instead, we use other crisp vegetables and seasonings to achieve a perfect balance of flavor and texture. Bell peppers, celery, and a touch of mustard or white wine vinegar provide the ideal tang and crunch. This version is a guaranteed hit with everyone.

    • Flavor Profile: Savory, creamy, and fresh without the pickle brine.
    • Why You’ll Love It: It’s ideal for those who dislike pickles but still want a flavorful potato salad, making this version universally appealing.
    • Best For: Large gatherings, fussy eaters, or anytime you want a guaranteed crowd-pleaser.

    7. Light & Fresh Potato Salad Without Mayo

    Looking for a healthier twist or a lighter side dish? This fresh potato salad without mayo is the perfect answer. It features a bright, zesty vinaigrette made with olive oil, lemon juice, and fresh herbs. We also add crisp vegetables like cucumbers and cherry tomatoes for a vibrant, flavorful finish. It’s a refreshing option that’s full of taste but feels much lighter.

    • Flavor Profile: Bright, zesty, herbaceous, and incredibly fresh.
    • Why You’ll Love It: It’s a fantastic lighter option packed with fresh flavors, making it great for warm weather.
    • Best For: Summer barbecues, healthy meal plans, or a refreshing side to grilled fish.

    What not to put in potato salad?

    Hey there, fellow home cooks! While making a delicious potato salad is an art, it’s also about knowing what to avoid. Simple mistakes can easily turn a potential crowd-pleaser into a less-than-stellar dish. Don’t worry, we’re here to help! At Recipesmondial, we want your cooking journey to be enjoyable and stress-free. Let’s dive into the common pitfalls to ensure your homemade potato salad is always a hit.

    By avoiding these missteps, you can create a potato salad that is flavorful, perfectly textured, and truly irresistible. These practical tips will help you build confidence in the kitchen and master this classic dish.

    • Overcooked or Undercooked Potatoes:

      The texture of your potatoes is crucial. Overcooked potatoes become mushy and lose their structure, while undercooked ones are hard and have an unpleasant, gritty texture. For the best potato salad, you want potato pieces that are tender yet firm. The goal is fork-tender, not falling apart.

    • Too Much Mayonnaise or Dressing:

      It’s easy to drown potato salad in dressing, but this common mistake can make it greasy, soupy, and overpower the other fresh flavors. Start with a smaller amount of dressing and mix gently. You can always add more if needed. The goal is to lightly coat the potatoes, not have them swimming in dressing, to achieve the perfect balance.

    • Raw, Overpowering Onions or Garlic:

      The sharp bite of raw onions or garlic can easily overpower the other flavors in your potato salad, leaving a pungent aftertaste. To mellow the flavor of raw onions, chop them finely and soak them in cold water for 10-15 minutes before adding them. For a sweeter, less assertive garlic flavor, try roasting it lightly first.

    • Adding Dressing to Hot Potatoes (for Creamy Salads):

      For creamy, mayonnaise-based salads, avoid adding the dressing while the potatoes are still hot. Hot potatoes absorb the dressing too quickly, which can cause the mayonnaise to separate and turn the salad oily or watery. Let them cool until they are just warm before mixing. This ensures the perfect creamy texture. Note that this rule doesn’t apply to all recipes; warm German potato salad, for instance, often requires adding a vinaigrette to hot potatoes.

    • Watery Ingredients:

      Excess water from any ingredient will dilute the dressing, wash away flavors, and make your potato salad soggy. To prevent this, ensure your cooked potatoes are drained thoroughly. Additionally, pat watery vegetables like celery or cucumbers dry with a paper towel before adding them to the salad. This simple step is key to a crisp, flavorful result.

    • Ignoring Chill Time:

      Potato salad tastes best when the flavors have had time to meld together. Serving it immediately after mixing often results in a bland dish. For a much richer taste, allow the salad to chill in the refrigerator for at least one hour before serving—two to four hours is even better. This resting period is essential for developing flavor. For food safety, always keep potato salad refrigerated [2].

    • Old or Poor-Quality Ingredients:

      The quality of your final dish depends entirely on the quality of your ingredients. Stale herbs, old mayonnaise, or potatoes past their prime will compromise the flavor of your salad. For the best results, always use the freshest, highest-quality ingredients you can find. Be sure to check expiration dates and choose crisp produce for a truly delicious potato salad.

    By avoiding these common pitfalls, you’re well on your way to creating a potato salad that’s perfect every time. Recipesmondial is here to guide you toward more confident and joyful cooking!

    Pro Tips for the Best Homemade Potato Salad

    Choosing the Right Type of Potato

    Choosing the right potato is the first step to making the best potato salad recipe. Because different potatoes behave differently when cooked, selecting the correct variety is key to preventing a mushy or crumbly salad. This simple choice makes a big difference in the final texture and taste.

    • Waxy Potatoes are Best: These potatoes have less starch and thinner skins, which helps them hold their shape well after cooking. This quality makes them perfect for absorbing dressing without falling apart.
    • Top Choices:
      • Yukon Gold: A fantastic all-purpose choice, these have a slightly buttery flavor and creamy texture. They hold their shape beautifully.
      • Red Bliss (New Potatoes): These small, firm, and waxy potatoes don’t need peeling if you prefer a rustic look. They also have an excellent delicate flavor.
      • Fingerlings: Another great waxy option, these potatoes are often thin and elongated. They offer a unique presentation, especially when cut into rounds.
    • Avoid Starchy Potatoes: Varieties like Russet or Idaho are high in starch, which causes them to become fluffy and break apart easily when boiled. This can lead to a pasty, unappetizing potato salad.

    For a consistently good texture, always choose waxy potatoes. This ensures your homemade potato salad is both firm and flavorful.

    How to Cook Potatoes Perfectly Every Time

    Properly cooked potatoes are the foundation of an amazing potato salad. Overcooked potatoes turn mushy, while undercooked ones are unpleasantly hard. Follow these simple steps for perfect results every time.

    1. Clean and Cut: First, wash your potatoes thoroughly. You can peel them or leave the skin on for extra flavor and nutrients. Next, cut them into uniform 1-inch pieces to ensure they cook evenly.
    2. Start with Cold Water: Place the cut potatoes in a large pot and cover them with about an inch of cold water. Salting the water is an important step because it seasons the potatoes from the inside out, boosting their flavor [3]. A good rule of thumb is 1 tablespoon of salt per gallon of water.
    3. Bring to a Boil, Then Simmer: Bring the water to a boil over medium-high heat. Once it’s boiling, reduce the heat to maintain a gentle simmer. Cook until the potatoes are tender but not falling apart.
    4. Check for Doneness: Test a potato piece with a fork or small knife. It should slide in easily with only slight resistance. This typically takes 10 to 15 minutes, depending on the potato size, so be careful not to overcook them.
    5. Drain and Cool: Immediately drain the potatoes in a colander and let them sit for a few minutes to steam dry. This removes excess moisture. You can also spread them on a baking sheet to cool slightly before dressing.

    This method provides the ideal base for any potato salad recipe. It prevents mushiness and ensures a delightful texture, helping even beginners achieve perfect results.

    Assembling Your Salad for Maximum Flavor

    Assembling your homemade potato salad is where the magic happens. A few key techniques will ensure every bite is bursting with flavor and transform your dish into a crowd-pleaser.

    • Dress While Warm: For the most flavorful result, toss the warm, cooked potatoes with about half of your dressing. Warm potatoes absorb flavors more readily, which creates a much deeper taste profile. This is a pro tip for the best potato salad recipe.
    • Layer Your Flavors: Instead of dumping everything in at once, add ingredients in stages.
      • Start with chopped onions, celery, or pickles to add a textural crunch.
      • Next, add fresh herbs like dill or parsley for brightness.
      • Finally, gently fold in eggs or other additions.
    • Taste and Adjust: Always taste your salad as you go. Add more salt, pepper, or a splash of vinegar if needed. A squeeze of lemon juice can also brighten the flavors. This step ensures the salad is seasoned perfectly to your liking.
    • Don’t Overmix: Be gentle when stirring, as overmixing can break down the potatoes. Use a rubber spatula to fold ingredients together, which helps keep the potato chunks intact.

    Following these steps will help you create a truly flavorful and balanced potato salad, taking your dish from good to absolutely amazing.

    Make-Ahead and Storage Tips

    Making your potato salad ahead of time is a smart move, as it allows the flavors to meld beautifully. Proper storage will keep your delicious creation fresh and safe to eat, making it perfect for meal prep and family gatherings.

    • Chill for Flavor Development: After assembling, cover your potato salad tightly and refrigerate it for at least 2 hours. For the best results, chill it for 4 hours or overnight. This resting time allows the ingredients to mingle and deepens the flavor.
    • Proper Storage: Always keep your homemade potato salad in an airtight container in the refrigerator. This prevents it from drying out or absorbing other food odors.
    • Shelf Life: Potato salad, especially if it contains mayonnaise or other perishable ingredients, should be eaten within 3 to 4 days when stored properly [4]. To ensure food safety, discard any leftovers after this time.
    • Revitalizing Leftovers: If your salad seems a bit dry after chilling, you can easily refresh it. Add a spoonful of mayonnaise, a dollop of sour cream, or a splash of vinegar and stir gently to restore its texture and flavor.

    These simple make-ahead and storage tips help you enjoy your best potato salad recipe whenever you’re ready. They also minimize kitchen stress, making your cooking experience more organized and enjoyable.

    Frequently Asked Questions

    How to Make Potato Salad with Mayonnaise?

    A classic, creamy potato salad with mayonnaise is a fantastic and comforting side dish. This simple recipe delivers big flavor without the stress. Here’s a step-by-step guide to a delicious, beginner-friendly version:

    1. Cook Your Potatoes: Start with about 2 pounds of waxy potatoes, like Yukon Gold or red potatoes. Wash them well, peel if you prefer, and cut them into bite-sized cubes. Boil them in salted water until tender but still firm, which usually takes 10-15 minutes. Drain the potatoes thoroughly and let them cool slightly.
    2. Prep Your Veggies: While the potatoes cool, finely chop about 1 cup of celery and half a small red onion or a few scallions. These ingredients add a wonderful crunch and a hint of sharpness.
    3. Whisk the Dressing: In a large bowl, combine 1 cup of quality mayonnaise, 2 tablespoons of yellow mustard (or Dijon for a tangier kick), 1 tablespoon of apple cider vinegar, salt, and black pepper to taste. You can also add a teaspoon of sugar for a sweeter dressing or a tablespoon of pickle relish for extra zest.
    4. Combine and Chill: Gently add the cooled potatoes and chopped vegetables to the dressing. Fold everything together carefully to coat the potatoes without mashing them. Taste and adjust the seasonings as needed.
    5. Let it Mingle: Cover the bowl and refrigerate your potato salad for at least 1 hour. This step allows all the delicious flavors to blend together.

    This simple method results in a flavorful side dish, perfect for family meals or gatherings.

    What Are the Main Ingredients in a Simple Potato Salad?

    A simple potato salad combines a few key components into a harmonious and satisfying dish. It’s an approachable home cooking staple that every cook should have in their repertoire. Below are the main ingredients you’ll typically find:

    • Cooked Potatoes: The star of the show. Waxy varieties like red potatoes, Yukon Gold, or new potatoes work best because they hold their shape well after cooking.
    • Creamy Dressing: This is most often mayonnaise-based. However, some variations use sour cream, Greek yogurt, or a mix of these for a lighter touch.
    • Flavor Enhancers: Mustard (yellow or Dijon) and vinegar (apple cider, white, or red wine) are crucial for adding tang and depth to the dressing.
    • Crunchy Additions: Celery is a classic choice for a refreshing bite. Finely diced onion, scallions, or bell peppers also offer great texture and flavor.
    • Seasonings: Salt and black pepper are essential. Many recipes also include a touch of sugar, paprika, or fresh herbs like dill or parsley for extra brightness.

    With these basic ingredients, you can whip up a delicious side dish that’s sure to be a crowd-pleaser.

    What Is in a German Potato Salad?

    German potato salad is a delightful departure from the creamy, mayonnaise-based versions many are familiar with. Instead, this style features a tangy, vibrant dressing and is often served warm or at room temperature. Here’s what makes it unique:

    • Waxy Potatoes: Similar to American versions, waxy potatoes are preferred for their ability to maintain their texture.
    • Bacon: This is a signature ingredient. Crispy bacon bits add smoky flavor and a satisfying crunch, while the rendered bacon fat is crucial for the dressing.
    • Onion: Finely diced yellow or red onion is often sautéed in the bacon fat, which makes it tender and sweet.
    • Vinegar-Based Dressing: Instead of mayo, German potato salad uses a warm dressing made from vinegar (white or apple cider), water or broth, sugar, and flavorful bacon fat. This creates its distinctive tangy and slightly sweet profile.
    • Fresh Herbs: Chopped fresh parsley is a common addition that adds a fresh, green finish.
    • Optional Additions: Some variations include a touch of mustard, caraway seeds, or a sprinkle of paprika for extra flavor.

    The absence of mayonnaise makes German potato salad a lighter, yet incredibly flavorful, option perfect for outdoor gatherings and meal prep.

    How Long Does Homemade Potato Salad Last in the Fridge?

    Proper storage is key to enjoying your homemade potato salad safely. When stored correctly, a mayonnaise-based potato salad lasts for 3 to 4 days in the refrigerator [5]. Following proper storage guidelines helps with meal prep and reduces food waste.

    Here are some important tips for safe storage:

    • Refrigerate Promptly: Chill your potato salad as soon as possible after making it. Do not leave it at room temperature for more than 2 hours (or 1 hour if the temperature is above 90°F / 32°C).
    • Airtight Container: Store your potato salad in a clean, airtight container to prevent it from absorbing odors and to keep it fresh.
    • Keep it Cold: Ensure your refrigerator is set at or below 40°F (4°C).
    • Check for Spoilage: Before serving, always check for off odors, discoloration, or mold. If you notice any of these signs, discard the salad.

    Following these simple guidelines will help keep your potato salad safe and delicious for days.


    Sources

    1. https://www.potatogoodness.com/potato-types/
    2. https://www.fsis.usda.gov/food-safety/safe-food-handling-and-preparation/food-safety-basics/refrigeration-and-food-safety
    3. https://www.seriouseats.com/salt-water-for-cooking-potatoes-theory-and-practice
    4. https://www.foodsafety.gov/keep-food-safe/food-safety-by-the-numbers
    5. https://www.foodsafety.gov/food-safety-charts/cold-food-storage-chart
  • The Easiest Creamy Coleslaw Recipe (A Simple Step-by-Step Guide)

    The Easiest Creamy Coleslaw Recipe (A Simple Step-by-Step Guide)

    A classic coleslaw recipe combines finely shredded green cabbage and carrots with a creamy dressing. The dressing is typically made from a base of mayonnaise, a splash of vinegar for tang, and a small amount of sugar for sweetness, resulting in a perfectly balanced, crunchy, and refreshing side dish.

    Are you looking for a perfect side dish that complements any meal, adds a delightful crunch, and has everyone asking for the recipe? If you’re tired of complex instructions and want to make healthy, tasty food for your family, you’ve come to the right place. We specialize in simple, flavorful meals, and our Easiest Creamy Coleslaw is here to transform your dinner table. This classic recipe is incredibly easy to follow and guarantees a delicious result that will quickly become a family favorite.

    Our goal is to make Approachable home cooking a reality for everyone. We offer clear, step-by-step guidance without intimidating jargon. Whether you’re a beginner building confidence or a busy home cook who needs quick, family-friendly meals, this easy slaw is the perfect solution. We’ll show you how to make the perfect creamy dressing using everyday ingredients, complete with practical tips, substitutions, and even a KFC-style variation. Get ready to enjoy stress-free cooking and discover how simple homemade coleslaw can be!

    Why You’ll Love This Easy Coleslaw Recipe

    A close-up of a large serving bowl filled with creamy coleslaw, featuring shredded green and purple cabbage and carrots, garnished with fresh parsley.
    Professional food photography, photorealistic, high-quality food magazine photo. A vibrant and enticing close-up shot of a large serving bowl filled with freshly made creamy coleslaw. The coleslaw should feature finely shredded green cabbage, purple cabbage, and bright orange carrots, all generously coated in a rich, smooth, creamy white dressing. Garnish with a sprinkle of fresh chopped parsley. The bowl is placed on a light wooden surface or a rustic linen tablecloth. Soft, natural light illuminates the dish from the side, highlighting the glossy texture of the dressing and the crispness of the vegetables. Shallow depth of field, warm and inviting atmosphere.

    Searching for a side dish that’s both delicious and simple? This easy coleslaw recipe is your new go-to, delivering a creamy, refreshing crunch with minimal effort.

    We know that complex recipes and long ingredient lists can be overwhelming. That’s why this creamy coleslaw is so beginner-friendly. It’s designed to help you build confidence in the kitchen, one simple step at a time.

    • Super Simple & Quick: Ready in minutes, this recipe is perfect for busy weeknights or last-minute gatherings. It’s a delicious solution that’s even faster than ordering takeout.
    • Flavorful & Satisfying: Our homemade dressing strikes the perfect balance of sweet and tangy, while the crisp cabbage adds a delightful texture for a satisfying crunch in every bite.
    • Family-Friendly Favorite: As a classic side dish loved by all ages, coleslaw is an ideal addition to any family meal. Even picky eaters often enjoy its mild, refreshing taste.
    • Approachable Home Cooking: No fancy culinary skills required! Our step-by-step guidance makes this recipe foolproof, helping you master a classic dish with confidence.
    • Versatile for Any Occasion: From picnics and potlucks to weeknight dinners, this slaw complements countless dishes. Serve it alongside barbecue, fried chicken, or even fish tacos.
    • Enjoy Cooking Without Stress: Forget complicated steps and long prep times. This simple recipe lets you relax and create something delicious with ease.

    At Recipesmondial, we believe cooking should be enjoyable, not daunting. This easy coleslaw recipe perfectly embodies our mission by offering reliable results and incredible flavor. Get ready to discover your new favorite side dish!

    What Ingredients Do You Need for Coleslaw?

    A top-down view of fresh ingredients for creamy coleslaw, including whole green and purple cabbage, carrots, mayonnaise, apple cider vinegar, sugar, salt, and pepper.
    Professional food photography, photorealistic, high-quality food magazine photo. A beautifully arranged flat lay or overhead shot displaying all the fresh ingredients needed for creamy coleslaw. Include a head of green cabbage, a smaller portion of purple cabbage, whole carrots, a jar of mayonnaise, a bottle of apple cider vinegar, a small bowl of granulated sugar, and pinches of salt and black pepper. Each ingredient should look fresh, vibrant, and perfectly prepared (e.g., washed carrots, whole cabbage). They are neatly organized on a clean, light-colored kitchen counter or a light wooden board. The lighting is bright and even, emphasizing the natural colors and textures of the ingredients. No hands or cooking utensils present, just the raw ingredients.

    For the Cabbage Slaw

    The secret to a perfect creamy coleslaw is using fresh, vibrant vegetables. You don’t need fancy ingredients—just everyday staples that combine to create that classic crunch and fresh taste. It makes an amazing component for any simple dinner recipe.

    Here’s what you’ll need for the slaw base:

    • 1 medium head green cabbage (about 2 pounds): This is the heart of your coleslaw. Look for a firm head that feels heavy for its size. You’ll want to finely shred it.
    • 2 medium carrots: Carrots add a lovely sweetness and a pop of color. Shred them finely too.

    Quick Tip for the Slaw: To save time, buy a pre-shredded coleslaw mix—it’s perfect for quick meals. For extra visual appeal and texture, add a bit of shredded red cabbage to the mix.

    For the Creamy Coleslaw Dressing

    The magic of great coleslaw is in the dressing. This simple recipe creates a perfectly balanced sweet and tangy creaminess that coats the vegetables beautifully. Best of all, the ingredients are likely already in your pantry, making it incredibly easy to whip up.

    Here are the simple ingredients for our delicious dressing:

    • 1 cup mayonnaise: This forms the rich, creamy base of your coleslaw dressing. Use your favorite brand for the best results.
    • 2 tablespoons white vinegar: Vinegar adds that essential tang that brightens up the flavors. You can also use apple cider vinegar for a slightly different note.
    • 2 tablespoons granulated sugar: A touch of sugar balances the tanginess of the vinegar and enhances the natural sweetness of the carrots.
    • 1 teaspoon Dijon mustard: Dijon mustard adds a subtle depth and a hint of zest, and it also helps to emulsify the dressing.
    • ½ teaspoon celery salt: This is the secret to a classic, deli-style coleslaw flavor. If you don’t have any, substitute with ¼ teaspoon regular salt and ¼ teaspoon celery seed.
    • ¼ teaspoon black pepper: A pinch of fresh black pepper helps round out all the flavors.

    Substitution Ideas for Your Dressing: This recipe is very flexible. For a lighter dressing, replace half of the mayonnaise with Greek yogurt. To reduce the sweetness, simply use less sugar or your favorite sugar substitute.

    How to Make Coleslaw: A Step-by-Step Guide

    A person's hands gently mixing shredded cabbage and carrots with a creamy dressing in a large glass bowl using a wooden spoon.
    Professional food photography, photorealistic, high-quality food magazine photo. A dynamic, candid shot focusing on the hands of a home cook gently mixing creamy coleslaw in a large glass mixing bowl. The bowl contains a generous amount of shredded green and purple cabbage and bright orange carrots, with the creamy dressing visibly coating the vegetables. The cook’s hands are holding a wooden spoon, actively tossing and combining the ingredients. The background is a slightly blurred, warm, and inviting kitchen setting, perhaps with a subtle hint of a clean countertop or a window. Natural, soft lighting highlights the movement and the texture of the coleslaw. The scene evokes a sense of ease and satisfaction in home cooking.

    Ready to whip up the perfect creamy coleslaw? This step-by-step guide makes it a breeze. You don’t need to be a chef to create this delightful side dish, as our easy-to-follow recipe is designed for home cooks building confidence. Get ready to enjoy a stress-free cooking experience.

    Making delicious slaw is incredibly simple. With this guide, you will quickly master the classic recipe and achieve reliable, flavorful results every time. Follow these clear steps to create a vibrant dish that is sure to become a family favorite.

    1. Prepare Your Veggies: Begin with fresh cabbage and carrots. If using a whole head of cabbage, shred it finely with a sharp knife or a food processor. Next, grate the carrots. For a convenient shortcut, a pre-shredded coleslaw mix is a fantastic option that saves time without sacrificing flavor. This is a great tip for quick meals.
    2. Whisk the Creamy Dressing: In a large mixing bowl, combine the mayonnaise, apple cider vinegar, sugar, and seasonings. Whisk everything together until the mixture is smooth and well-combined. Be sure there are no lumps. Taste the dressing and adjust the sweetness or tanginess to your liking, as a little extra sugar or vinegar can make a big difference.
    3. Combine and Toss: Add the shredded cabbage and carrots to the bowl with the dressing. Gently toss until the vegetables are fully and evenly coated. Be careful not to overmix, which can make the cabbage watery. Simply mix until everything looks uniformly dressed.
    4. Chill for Flavor Development: This step is crucial for the best taste. Cover the bowl with plastic wrap and refrigerate the coleslaw for at least 30 minutes, though an hour is even better. Chilling allows the flavors to meld beautifully and the dressing to slightly soften the cabbage, creating that perfect coleslaw texture. This dish tastes even better if made a few hours ahead, making it great for meal prep.
    5. Serve and Enjoy: Before serving, give the coleslaw another gentle stir to ensure the dressing is evenly distributed. Serve this fresh, creamy side dish alongside your favorite meals. It’s a versatile accompaniment that pairs well with almost anything.

    Tips for the Best Traditional Coleslaw

    Crafting the perfect coleslaw is simple with a few helpful pointers. These tips will ensure your dish is always a hit, helping you cook with confidence.

    • Freshness Matters: Always use the freshest cabbage and carrots you can find. Crisp ingredients make a huge difference in the final taste and crunch.
    • Don’t Overdress: It’s easier to add more dressing than it is to remove it. Start with a little less than you think you need to avoid a soggy result.
    • Season to Taste: Taste your dressing before you combine it with the vegetables. Adjust the salt, pepper, and sugar levels to suit your personal preference.
    • Chilling is Key: Don’t skip the chilling step. This essential time allows the flavors to deepen and ensures the cabbage softens to the ideal texture.
    • Shredding Size: For a consistent texture, aim to shred your vegetables uniformly. This ensures every bite is perfect.
    • Make Ahead: Coleslaw is a fantastic make-ahead dish. Preparing it a few hours in advance makes mealtime stress-free and can even enhance the flavor, making it a great family-friendly meal component.
    • Spice it Up (Optional): For a little kick, try adding a pinch of cayenne pepper to the dressing.

    Tips for Making the Best Traditional Coleslaw

    Making the best traditional coleslaw is simpler than you think. With a few key tips, you can transform simple ingredients into a creamy, crunchy side dish that everyone will love. These pointers will help you avoid common pitfalls and master this classic recipe.

    Choose Your Cabbage Wisely

    The foundation of any great coleslaw is fresh cabbage. The quality of your cabbage directly impacts the final taste and texture of the slaw.

    • Freshness First: Pick a head of cabbage that feels heavy for its size. The leaves should be crisp and vibrant, with no signs of wilting or discoloration.
    • Green or Red Cabbage: While green cabbage is traditional, red cabbage adds a pop of color and a slightly earthier flavor. For the best visual appeal and depth, try using a mix of both.
    • Shredding Methods: You can shred cabbage by hand with a sharp knife, but a food processor with a shredding disc makes the job much faster. A mandoline also works well for creating uniform pieces.

    Perfecting the Dressing Balance

    The dressing is where the magic happens. A well-balanced creamy dressing is the key to a memorable coleslaw.

    • Sweetness is Essential: Don’t skip the sugar, as it balances the tang from the vinegar. Granulated sugar, honey, or a touch of maple syrup all work well.
    • Tang for Brightness: Apple cider vinegar is a classic choice. For an extra zesty note, add a squeeze of fresh lemon juice.
    • Creaminess Counts: Mayonnaise provides the creamy base. Use full-fat mayo for maximum richness or a lighter version if you prefer. For added depth, try mixing in a spoonful of buttermilk.
    • Season Generously: Always taste the dressing and adjust the seasonings. Salt and pepper are essential for enhancing the flavors, and a pinch of celery seed is a classic secret ingredient in many a coleslaw recipe.

    Preventing Watery Coleslaw

    Nobody enjoys a soggy slaw. Follow these steps to keep your coleslaw crisp and delicious.

    • Salt the Cabbage: After shredding, place the cabbage in a colander and toss it with about 1 teaspoon of salt. Let it sit for 15-30 minutes. This simple step draws out excess moisture.
    • Squeeze and Drain: Next, rinse the cabbage thoroughly under cold water to remove the salt. Squeeze out as much water as possible using your hands or a clean kitchen towel. This step is crucial for a crunchy texture.

    The Magic of Chilling Time

    Patience is key when making coleslaw. Allowing the slaw to rest before serving makes a significant difference.

    • Mellow Flavors: For the best taste, let your coleslaw chill in the refrigerator for at least 30 minutes, or ideally for 2-4 hours. This resting period allows the flavors of the dressing to meld with the cabbage [1].
    • Softer Texture: Chilling also helps the cabbage soften just enough to absorb the dressing, resulting in a more cohesive and enjoyable texture.

    Adding Extra Flair to Your Slaw

    While classic coleslaw is fantastic on its own, you can easily add extra crunch and flavor with a few simple ingredients.

    • Carrot and Onion: Shredded carrots provide natural sweetness and vibrant color, while finely minced red or green onion offers a mild, zesty bite.
    • Crispy Add-ins: For a welcome textural contrast, try adding toasted sunflower seeds, chopped nuts, or bacon bits just before serving.
    • Fresh Herbs: A sprinkle of fresh parsley or dill brightens the flavor of your coleslaw and adds an aromatic finish.

    By following these tips, you’ll be able to create a consistently delicious traditional coleslaw. It’s the perfect side dish for cookouts, potlucks, and family-friendly meals.

    What Are Some Different Coleslaw Recipes and Variations?

    KFC Style Coleslaw Recipe

    Craving that iconic, creamy, and slightly sweet coleslaw from KFC? You’re in luck! Recreating this family favorite at home is much simpler than you might think.

    The secret to its signature taste is an extra-fine chop of the vegetables and a perfectly balanced sweet and tangy dressing.

    How to Achieve That Signature Taste and Texture:

    • Finely Chop Your Veggies: For the creamiest texture, use a food processor to get a quick and consistent chop. You want the cabbage and carrots to be almost minced, not thickly shredded.
    • Sweet and Tangy Dressing: The dressing is a smooth blend of mayonnaise, milk, a touch of buttermilk (or lemon juice for tang), sugar, white vinegar, and a pinch of onion powder.
    • Let it Chill: Like the original, this slaw tastes best after chilling for at least an hour or two. This gives the flavors time to meld together.

    This beginner-friendly recipe is a quick and reliable way to bring a classic comfort food to any gathering.

    Coleslaw Recipe Without Mayo (Vinegar Slaw)

    For a lighter, brighter take on coleslaw, a vinegar-based slaw is the perfect answer. This version is naturally dairy-free and offers a refreshing tang instead of creamy richness.

    This slaw is perfect for warmer weather, for cutting through rich main dishes, or simply for when you’re out of mayonnaise.

    Simple Vinegar Dressing Ingredients:

    • Oil: A neutral oil like canola or sunflower oil works well. Olive oil can also be used for a robust flavor.
    • Vinegar: Apple cider vinegar is a popular choice for its mild, fruity tang. White wine vinegar or even rice vinegar can also be used.
    • Sweetener: A little sugar, honey, or maple syrup balances the tartness.
    • Seasonings: Salt, black pepper, and perhaps a touch of celery seed or dried dill add depth.
    • Optional Flavor Boosters: A finely minced shallot or a spoonful of Dijon mustard can elevate the taste.

    Simply whisk these ingredients together and toss with your shredded cabbage and carrots for a delicious result every time.

    Fun Add-ins for Extra Flavor and Crunch

    One of the best parts of making coleslaw from scratch is how easily you can customize it. Simple additions can transform a basic recipe into something uniquely yours.

    Here are some of our favorite additions to boost flavor, texture, and visual appeal:

    • For Extra Crunch:
      • Toasted Nuts: Pecans, walnuts, or slivered almonds add a lovely nutty depth.
      • Seeds: Sunflower seeds, pumpkin seeds, or sesame seeds provide a delicate crunch.
      • Crispy Noodles: Fried wonton strips or ramen noodles (untoasted) can be a fun addition.
      • Bell Peppers: Finely diced red, yellow, or orange bell peppers add a fresh snap.
    • For Sweetness and Fruitiness:
      • Dried Cranberries or Raisins: These add a chewy sweetness.
      • Apple: Diced Granny Smith or Fuji apples offer a crisp, juicy bite.
      • Pineapple: Crushed or tidbit pineapple can bring a tropical flair (drain well!).
    • For Bold Flavors:
      • Fresh Herbs: Chopped parsley, cilantro, dill, or chives brighten the flavor.
      • Jalapeño: A finely minced jalapeño (seeds removed for less heat) adds a gentle kick.
      • Red Onion: Thinly sliced red onion provides a sharper, more pungent flavor.
      • Blue Cheese Crumbles: For a gourmet touch, especially with a creamy dressing.

    Experiment with these ideas to find your favorite combinations and create a signature slaw.

    What Can You Serve With Coleslaw?

    With its cool crunch and tangy flavor, creamy homemade coleslaw is an incredibly versatile side dish. This easy coleslaw recipe is the perfect companion for countless family-friendly meals.

    Classic BBQ and Comfort Food Pairings

    As a staple at any barbecue or picnic, coleslaw is also the go-to side for many beloved comfort foods.

    • Pulled Pork Sandwiches: The crisp, cool slaw perfectly balances the rich, smoky flavor of pulled pork, creating an easy and delicious meal.
    • BBQ Ribs: A tangy dressing adds a refreshing contrast that beautifully complements both sweet and savory BBQ ribs.
    • Grilled Chicken: A generous scoop alongside grilled chicken breasts or thighs creates a fresh and satisfying plate.
    • Fried Chicken: Our creamy recipe tastes just like the classic KFC coleslaw, making it the ideal companion for a crispy fried chicken dinner.
    • Fish and Chips: Coleslaw offers a zesty, crisp counterpoint to rich, battered fish and hot fries.

    Elevating Everyday Meals

    This simple coleslaw isn’t just for special occasions. It’s a fantastic way to elevate everyday meals, from quick lunches to simple dinners, making your cooking more enjoyable and stress-free.

    • Tacos and Wraps:
      • Fish Tacos: Use coleslaw as a crunchy, flavorful topping to add amazing texture and zest.
      • Chicken or Pork Wraps: For a fast and delicious lunch, fill wraps with leftover cooked meat and a spoonful of slaw. This is also a great meal prep idea.
    • Sandwiches and Burgers:
      • Hamburgers and Hot Dogs: Add a dollop to your burger or hot dog for an extra burst of crunch and flavor.
      • Veggie Burgers: Transform a basic veggie burger into a special meal by adding a scoop of fresh coleslaw.
    • Baked and Roasted Mains:
      • Roasted Chicken or Pork: A side of fresh slaw brightens up any comforting roasted meat dinner.
      • Baked Salmon: The creamy texture and tang of the slaw pair wonderfully with flaky baked salmon.

    Creative Ways to Enjoy Your Slaw

    Don’t limit this delicious recipe to a traditional side dish. Get creative with your flavorful coleslaw!

    • Salad Topper: Add a spoonful to a green salad for extra crunch and a creamy, zesty element.
    • Picnic Staple: As a refreshing addition to any outdoor gathering, coleslaw is a lighter alternative to heavier pasta or potato salads.

    As you can see, homemade coleslaw is remarkably versatile, pairing well with everything from quick weeknight lunches to impressive weekend dinners. Enjoy discovering all the delightful ways to serve this simple, flavorful side! You are now equipped to make cooking enjoyable and stress-free with Recipesmondial’s easy recipes.

    How to Store Leftover Coleslaw

    You’ve whipped up a fantastic batch of our easy creamy coleslaw recipe! It’s so fresh and flavorful, you might not have leftovers. However, if you do, storing them correctly is key. Proper storage helps you enjoy every last bite, minimize food waste, and simplify future meal prep.

    How to Keep Your Coleslaw Fresh

    To ensure your leftover coleslaw stays delicious and safe to eat, follow these simple steps for the best results:

    • Use an Airtight Container: Transfer any remaining coleslaw into a clean, airtight container. This prevents air from drying out the cabbage and degrading the dressing. It also seals out other refrigerator odors.
    • Refrigerate Promptly: Always store coleslaw in the refrigerator, as the cool temperature slows bacterial growth. This step is especially important for dressings that contain mayonnaise.
    • Check the Shelf Life: When stored properly in the fridge, homemade creamy coleslaw usually stays fresh for 3 to 4 days [2]. After this period, the texture and flavor may start to decline.

    Dealing with Watery Coleslaw

    One common issue with leftover coleslaw is that it can become watery over time. This happens because salt in the dressing draws moisture out of the cabbage. Don’t worry—this is simple to manage.

    • Drain Excess Liquid: Before serving your leftovers, give the coleslaw a gentle stir. If you see a pool of liquid at the bottom of the container, carefully drain it off to improve the texture.
    • Consider Separate Storage (Pro Tip): If you’re making a large batch for meal prep, store the shredded cabbage mix and the creamy dressing separately. Combine them just before serving to keep the slaw extra crunchy for longer.
    • Stir Before Serving: Always give your stored coleslaw a good stir right before you eat it. This will help reincorporate the dressing and distribute any separated liquid evenly.

    Even if it’s a little softer the next day, leftover coleslaw is still wonderful as a quick side dish or a topping for sandwiches. Learning how to store food correctly builds confidence in the kitchen and makes approachable home cooking even more rewarding. Enjoy your delicious recipes to the last bite!

    Frequently Asked Questions

    What are the ingredients in a traditional coleslaw?

    A traditional coleslaw recipe is simple, focusing on fresh, crisp vegetables and a creamy dressing. The main ingredient is cabbage, often a mix of green and red varieties for color.

    Here are the key components:

    • Shredded Cabbage: Typically green cabbage, often mixed with a bit of red cabbage.
    • Shredded Carrots: These add a touch of sweetness and vibrant color.
    • Creamy Dressing: This usually features mayonnaise as its base.

    This classic combination creates a refreshing side dish and is a fantastic, beginner-friendly recipe for any home cook.

    How do you make a simple coleslaw dressing?

    Making a simple, creamy coleslaw dressing is quick and easy. This recipe comes together in just a few minutes and adds fantastic flavor to shredded vegetables.

    Here’s what you need for a basic yet flavorful dressing:

    • Mayonnaise
    • White vinegar or apple cider vinegar
    • Sugar or a natural sweetener
    • A touch of Dijon mustard
    • Salt and black pepper to taste

    To make the dressing:

    1. In a medium bowl, combine the mayonnaise, vinegar, sugar, and Dijon mustard.
    2. Whisk everything together until the mixture is smooth and well combined.
    3. Season with salt and pepper. Taste the dressing and adjust as needed.
    4. Pour the dressing over your shredded cabbage and carrots, then toss gently to coat.

    This dressing transforms simple ingredients into a flavorful side dish, perfect for a quick family meal.

    Can you make coleslaw dressing without mayo?

    Yes, you can easily make a delicious coleslaw dressing without mayonnaise. For a lighter option or if you prefer to avoid mayo, this variation—often called a vinegar slaw—is a great alternative.

    A vinegar-based dressing provides a tangy, bright flavor and holds up well in the refrigerator, making it a great option for meal prep.

    Common ingredients for a mayo-free dressing include:

    • Olive oil or another neutral oil
    • Vinegar (apple cider vinegar, white vinegar, or rice vinegar work well)
    • Sugar or honey, to balance the tang
    • Dijon mustard for a little kick
    • Salt and pepper
    • Optional additions: celery seeds, poppy seeds, or a pinch of red pepper flakes

    To prepare it, simply whisk all the ingredients together and pour the dressing over your shredded vegetables. This fresh take on slaw is a wonderful way to enjoy a classic side dish with a different twist, creating a healthy option for family meals.

    Get the Easiest Creamy Coleslaw Recipe

    Ready for a perfect, creamy, and undeniably delicious coleslaw recipe? Forget complicated instructions and bland, watery results. This simple guide guarantees a crowd-pleasing side dish every single time.

    At Recipesmondial, we believe cooking should be an enjoyable experience, not a chore. This easy coleslaw recipe was designed with that in mind. It’s perfect for home cooks, busy families, and anyone who wants a great meal without the stress.

    Here’s why this is the easiest and best creamy coleslaw you’ll ever make:

    • Beginner-Friendly: Our step-by-step guidance makes it nearly impossible to go wrong. You’ll build kitchen confidence with every simple chop and stir.
    • Quick to Make: This coleslaw comes together in minutes, making it the ideal side for busy weeknights or last-minute potlucks.
    • Family-Friendly: The classic, creamy flavor is a hit with everyone, even picky eaters. It’s a versatile side that complements almost any meal.
    • Simply Flavorful: We use fresh, everyday ingredients to deliver maximum taste without any fuss. The homemade coleslaw dressing recipe is the true star.
    • Approachable Cooking: Say goodbye to overwhelming instructions. We keep our recipes clear, practical, and focused on incredible flavor.

    This classic, homemade slaw is more than just a side dish—it’s proof that simple ingredients can create something truly special. Whether you’re craving the iconic taste of a KFC coleslaw recipe or just want a fresh, crunchy addition to your dinner, this recipe delivers.

    So, go ahead and give it a try! You’re moments away from serving the freshest, most delicious homemade creamy coleslaw. Let Recipesmondial help you discover new flavors and make mealtime stress-free. Happy cooking!


    Sources

    1. https://www.thekitchn.com/why-you-should-let-your-salads-rest-229606
    2. https://www.foodsafety.gov/food-safety-by-events/cookouts-and-picnics
  • Easy Sweet Potato Casserole Recipe (A Step-by-Step Guide)

    Easy Sweet Potato Casserole Recipe (A Step-by-Step Guide)

    Sweet potato casserole is a classic American side dish, popular during the holidays. It features a base of mashed sweet potatoes mixed with butter, sugar, eggs, and warm spices like cinnamon and nutmeg. The casserole is typically finished with a sweet and crunchy pecan streusel or a soft, toasted marshmallow topping before being baked until golden brown.

    Few dishes evoke warmth and comfort like a classic sweet potato casserole. With its creamy texture and sweet, nutty topping, it’s always a crowd-pleaser, whether as a holiday centerpiece or a comforting side for a weeknight family dinner. However, achieving that perfect balance of flavors can feel overwhelming. You’re not alone if you’ve ever struggled with complex recipes or found it challenging to plan family-friendly meals that are both delicious and easy to prepare.

    That’s where Recipesmondial comes in. We believe cooking should be an enjoyable, stress-free experience for every home cook, regardless of skill level. This easy sweet potato casserole recipe was designed with clear, step-by-step guidance to help you create a flavorful dish without any fuss. It’s perfect for those seeking simple dinner recipes, and its reliable, beginner-friendly results will build your confidence in the kitchen.

    Get ready to transform simple ingredients into a show-stopping sweet potato casserole that everyone will adore. We’re here to show you why this isn’t just another recipe—it’s the best approach for beginners to master this beloved dish with ease and enjoy cooking without stress.

    Why Is This the Best Sweet Potato Casserole Recipe for Beginners?

    Welcome to your new favorite sweet potato casserole recipe! We know that diving into a new recipe can feel daunting, but our goal at Recipesmondial is to make home cooking simple and stress-free. This particular casserole is the perfect beginner-friendly option, and here’s why.

    We designed this easy sweet potato casserole recipe to build your confidence in the kitchen. It delivers fantastic results without complex steps, so you can create a delightful dish effortlessly.

    Key Features for Beginner Cooks

    This recipe’s straightforward approach ensures success, even for those new to baking. We’ve focused on clarity and simplicity at every turn.

    • Simple, Everyday Ingredients: You won’t need to hunt for exotic items. All the ingredients are easy to find at your local grocery store, making shopping a breeze.
    • Clear, Step-by-Step Guidance: We break down the process into simple, manageable steps. Our instructions are easy to follow, so you’ll never feel overwhelmed by technical terms.
    • Foolproof Method: Our recipe is designed to minimize common mistakes, helping you achieve a perfect result every time. You can cook with confidence and joy.
    • Delicious and Reliable Results: Create a rich, creamy sweet potato filling with a crunchy, sweet pecan streusel topping that your family and friends will love.
    • Time-Saving Techniques: We include practical tips to streamline the cooking process, helping you get this delicious meal on the table faster.
    • Flexible and Adaptable: Learn how to customize your casserole with our simple variations, whether you prefer a savory version or a healthier one.

    Solving Common Cooking Challenges

    Many home cooks find complex recipes intimidating or feel unsure how to make healthy, tasty meals quickly. This sweet potato casserole recipe is designed to solve those exact challenges.

    • No More Overwhelm: Our clear, step-by-step instructions banish confusion, allowing you to cook with confidence.
    • Boost Your Confidence: A successful cooking experience is the best way to build skill. This recipe is designed for success, so you’ll be proud of your creation.
    • Stress-Free Meal Prep: Enjoy cooking again with a simple, family-friendly recipe that takes the stress out of mealtime.
    • Practical Tips Included: Throughout the guide, we provide expert advice, including simple substitutions and make-ahead instructions.

    At Recipesmondial, we want you to discover the joy of cooking. This beginner-friendly sweet potato casserole recipe is the perfect starting point. It’s designed to transform uncertainty into confidence and simple ingredients into a truly delicious dish. Get ready to cook with confidence and enjoy every bite!

    What Ingredients Do You Need for This Casserole?

    A professional flat lay photo of all ingredients for sweet potato casserole, including sweet potatoes, butter, sugar, milk, spices, vanilla, marshmallows, and pecans, arranged on a wooden counter.
    Professional food photography, photorealistic, high-quality food magazine photo of all ingredients for a sweet potato casserole laid out neatly on a warm, rustic wooden kitchen counter. Ingredients include: several vibrant orange sweet potatoes (some peeled, some whole), a stick of butter, bowls of brown sugar and granulated sugar, a bottle of milk or heavy cream, a small bowl of ground cinnamon and nutmeg, vanilla extract, a bag of mini marshmallows, and chopped pecans. The items are arranged artfully and invitingly, bathed in soft, natural light, emphasizing freshness and readiness for cooking. The scene evokes a friendly, approachable home cooking environment.

    For the Sweet Potato Filling

    Crafting the perfect sweet potato casserole begins with simple ingredients for the creamy filling, many of which you may already have on hand. This combination creates a rich, flavorful base, making this a truly beginner-friendly recipe. With this step-by-step cooking guidance, you’ll create a delicious filling with confidence.

    • 3 pounds Sweet Potatoes: Look for medium-sized sweet potatoes, which you will bake or boil until tender. They are the star of this family-friendly meal.
    • ½ cup (1 stick) Unsalted Butter: Melted butter adds incredible richness. Use good quality butter for the best flavor.
    • ½ cup Granulated Sugar: This provides the classic, clean sweetness.
    • ¼ cup Brown Sugar (packed): Adds a lovely depth and a hint of caramel flavor.
    • ½ cup Milk: Whole milk creates the creamiest texture, but 2% milk also works well if that’s what you have.
    • 2 Large Eggs: Help bind the filling and give it a light, custardy texture.
    • 1 teaspoon Vanilla Extract: Pure vanilla extract enhances all the sweet flavors. It’s a must-have!
    • ½ teaspoon Ground Cinnamon: Cinnamon’s warm spice perfectly complements the sweet potatoes.
    • ¼ teaspoon Ground Nutmeg: A pinch of nutmeg adds warmth and a classic holiday aroma.
    • ¼ teaspoon Salt: Just a touch of salt is essential to balance all the sweetness.

    These ingredients come together easily, making this a flavorful meal made easy and stress-free. You’re now on your way to a comforting and delicious sweet potato casserole!

    For the Classic Pecan Streusel Topping

    No sweet potato casserole is complete without a crunchy, buttery finish. This pecan streusel adds a delightful texture and nutty sweetness, making it a special but easy recipe addition.

    • ½ cup All-Purpose Flour: This forms the base of the crumbly topping.
    • ½ cup Brown Sugar (packed): Provides a rich, molasses sweetness and a slightly chewy texture.
    • ½ cup Chopped Pecans: Add a wonderful crunch and nutty flavor. You can lightly toast them beforehand for even more depth.
    • ½ teaspoon Ground Cinnamon: This ties the topping’s flavor to the filling below.
    • ¼ cup (½ stick) Unsalted Butter: It’s essential that the butter is very cold and cut into small pieces. This is the key to an irresistible crumbly texture.

    Mixing these simple ingredients quickly creates a crisp, golden-brown topping. This final layer ensures every spoonful of your sweet potato casserole recipe is delicious, making it a perfect addition to your family-friendly meals.

    How to Make Sweet Potato Casserole Step-by-Step

    A professional photo of a freshly baked sweet potato casserole in a ceramic dish, topped with golden-brown marshmallows, on a kitchen table.
    Professional food photography, photorealistic, high-quality food magazine photo of a perfectly baked sweet potato casserole, presented warm and inviting on a clean, light kitchen table. The casserole is in a beautiful ceramic baking dish, with its golden-brown, lightly toasted marshmallow topping glistening. A serving spoon is gently nestled beside the dish, suggesting readiness to be enjoyed. Steam subtly rises from the dish, highlighting its warmth. The background is softly blurred, focusing entirely on the delicious, comforting casserole, evoking a sense of accomplishment and flavor for a home cook.

    Step 1: Cook the Sweet Potatoes

    First, let’s cook the sweet potatoes. This simple step is key to achieving the perfectly smooth and creamy texture everyone loves in a classic casserole. It’s a foundational skill for many easy, family-friendly meals.

    1. Wash and Prep: Thoroughly wash 3 pounds of sweet potatoes. There’s no need to peel them yet.
    2. Boil Until Tender: Place the whole sweet potatoes in a large pot and cover them with cold water by about an inch. Bring to a boil, then reduce the heat to a gentle simmer. Cook for 20-30 minutes, or until a fork easily pierces the potatoes. This ensures they will be easy to mash.
    3. Drain and Cool: Carefully drain the hot water. Let the sweet potatoes cool for 10-15 minutes, or until they are cool enough to handle.
    4. Peel with Ease: Once cooled, the skins will slip off easily. Use your hands or a small paring knife to peel them, then discard the skins.

    Recipesmondial Tip: Boiling is a quick, beginner-friendly method. For a deeper, more caramelized flavor, you can bake the sweet potatoes instead. Prick them with a fork, then bake at 400°F (200°C) for 45-60 minutes until very soft.

    Step 2: Prepare the Creamy Filling

    Now, let’s transform the cooked potatoes into the casserole’s rich and creamy base. This step creates the comforting flavor perfect for family dinners.

    1. Mash the Sweet Potatoes: In a large mixing bowl, mash the peeled sweet potatoes with a potato masher, a fork, or an electric mixer until smooth. A few small lumps are fine and add homemade charm.
    2. Add Wet Ingredients: To the bowl, add ½ cup (1 stick) of melted unsalted butter and ½ cup of milk. For the richest texture, use whole milk or half-and-half. Stir until well combined.
    3. Sweeten and Spice: Mix in ½ cup granulated sugar (adjust to taste), 2 lightly beaten large eggs, 1 teaspoon of vanilla extract, and ½ teaspoon of ground cinnamon for classic warmth and flavor.
    4. Season to Perfection: Stir in ¼ teaspoon of salt to balance the sweetness. Continue mixing until the filling is completely smooth and creamy.
    5. Taste and Adjust: This is the perfect time to taste the filling. Feel free to add another pinch of sugar or cinnamon if you think it needs it.

    Chef’s Tip: For an exceptionally smooth filling, use a hand mixer or a food processor. Be careful not to overmix, which can make the texture gummy. For most home cooks, however, a simple potato masher works perfectly.

    Step 3: Make the Topping

    The streusel topping is what elevates this casserole, adding a wonderful crunch and buttery flavor to complement the creamy filling. This step is quick and simple.

    1. Combine Dry Ingredients: In a medium bowl, whisk together ½ cup all-purpose flour, ½ cup packed light brown sugar, and ½ teaspoon ground cinnamon until evenly mixed.
    2. Cut in the Butter: Add ¼ cup (½ stick) of cold unsalted butter, cut into small pieces. Using a pastry blender, two forks, or your fingertips, cut the butter into the dry mixture until it resembles coarse, pea-sized crumbs.
    3. Stir in Pecans: Gently fold in 1 cup of chopped pecans. They provide a wonderful texture and rich, nutty flavor.

    Recipesmondial Variation: Not a fan of pecans? You can substitute them with chopped walnuts. For a nut-free version, replace the pecans with an equal amount of rolled oats to create a delicious crumble topping.

    Step 4: Assemble and Bake the Casserole

    You’re almost there! This final step brings everything together into one beautiful, comforting casserole. Mastering simple assembly and baking builds confidence in the kitchen.

    1. Preheat Oven and Prep Dish: Preheat your oven to 375°F (190°C). Lightly grease a 9×13-inch baking dish.
    2. Spread the Filling: Spoon the sweet potato filling into the prepared dish and use a spatula to smooth the top.
    3. Add the Topping: Sprinkle the pecan streusel topping evenly over the filling. An even layer ensures a perfect crunch in every bite.
    4. Bake to Perfection: Place the casserole in the preheated oven and bake for 25-30 minutes. It’s done when the topping is golden brown and the filling is bubbly around the edges.
    5. Cool and Serve: Remove the casserole from the oven and let it cool for at least 10-15 minutes before serving. This allows the filling to set, making it easier to scoop.

    Your easy sweet potato casserole is now ready to enjoy! This flavorful, simple dish is sure to impress everyone. With Recipesmondial, you can create delicious, family-friendly meals without the stress.

    What Are Some Popular Recipe Variations?

    Sweet Potato Casserole with Marshmallows

    Adding marshmallows to sweet potato casserole is a classic way to create an irresistible, dessert-like treat. This holiday favorite adds extra sweetness and a wonderfully gooey, toasted top that the whole family will love.

    Here’s how to add them:

    • Mini Marshmallows: The easiest option. Sprinkle 3 to 4 cups of mini marshmallows evenly over the filling during the last 10 to 15 minutes of baking.
    • Large Marshmallows: For a different look, cut large marshmallows in half or quarters and arrange them in a single layer over the casserole.
    • Baking Tip: Watch the casserole carefully as it bakes. The marshmallows should turn golden brown and puffy. Avoid letting them burn.

    This simple addition is ideal for beginner cooks and offers a quick, reliable way to put a popular twist on a classic dish.

    How to Make a Savory Sweet potato Casserole

    For a delicious alternative, try a savory sweet potato casserole. This versatile side dish pairs wonderfully with roasted meats or can be served as a standalone vegetarian meal.

    Creating a savory casserole involves adjusting the filling and topping. Here are some easy modifications:

    • Reduce Sugar: Omit or significantly reduce the brown sugar in the sweet potato filling.
    • Add Aromatics: Sauté finely diced onion, garlic, or shallots in olive oil and mix them into the sweet potato mash for a fragrant base.
    • Spice It Up: Incorporate savory spices like smoked paprika, garlic powder, and onion powder. Fresh or dried herbs like rosemary, thyme, or sage also add depth.
    • Add Cheese: Stir in shredded cheese for richness. Sharp cheddar or Gruyère melt beautifully, while Parmesan adds a salty, umami kick.
    • Savory Topping Ideas: Instead of a sweet topping, try one of these savory options:
      • Crispy Onions: Sprinkle store-bought crispy fried onions over the top before baking.
      • Breadcrumbs and Herbs: Mix panko breadcrumbs with melted butter, Parmesan, and fresh herbs.
      • Bacon Crumbles: Add crispy, cooked bacon for a smoky flavor.
      • Nutty Crunch: Toss chopped pecans or walnuts with savory spices like cumin or chili powder.

    This approach transforms a sweet classic into a flavorful, hearty side dish that’s perfect for any meal.

    Making a Healthier Sweet Potato Casserole

    To make a lighter sweet potato casserole, a few simple adjustments can reduce sugar and fat without sacrificing flavor. These small changes make a big difference to the nutritional profile of this comforting dish.

    Here are practical tips for a healthier version:

    For the Sweet Potato Filling:

    • Reduce Sugar: Cut the brown sugar in half, or replace it with a natural sweetener like maple syrup or honey. You can also rely on the natural sweetness of the potatoes themselves.
    • Dairy Swaps: Instead of heavy cream, use unsweetened almond milk, oat milk, or low-fat milk. Plain Greek yogurt can replace some butter or cream, adding tang and protein.
    • Reduce Butter: Use a smaller amount of butter, or substitute some of it with applesauce or mashed banana to maintain moisture.
    • Boost Flavor Naturally: Add more cinnamon, nutmeg, and ginger. These spices enhance the sweet taste without adding extra sugar.

    For the Topping:

    • Oat and Nut Streusel: Create a crunchy, nutrient-dense topping by combining rolled oats, chopped pecans or walnuts, a small amount of maple syrup, and a touch of coconut oil.
    • Seed Mix: Add texture and healthy fats with a blend of pumpkin seeds, sunflower seeds, and chia seeds.
    • Use Marshmallows Sparingly: If you love marshmallows, simply use fewer of them. You can also look for natural, lower-sugar brands if they are available.

    With these adjustments, you can serve a nutritious and flavorful dish that your family will love, all while making smart, healthy choices. [source: https://www.heart.org/en/healthy-living/healthy-eating/eat-smart/nutrition-basics/added-sugars-infographic]

    Tips for Perfect Results Every Time

    A close-up photo of a serving spoon scooping a perfect portion of creamy sweet potato casserole from a baking dish onto a plate, highlighting its texture.
    Professional food photography, photorealistic, high-quality food magazine photo, close-up shot of a perfectly scooped serving of sweet potato casserole being lifted from a baking dish onto a white plate. A real human hand, belonging to a home cook, is holding a silver serving spoon, revealing the creamy, smooth interior of the casserole beneath a delicate, golden marshmallow or pecan streusel topping. The texture is clearly visible, rich and inviting, emphasizing a successful, delicious result. Soft, warm lighting illuminates the dish, creating a sense of comfort and culinary satisfaction.

    A delicious sweet potato casserole is easier to make than you think. With a few simple tricks, you can ensure your sweet potato casserole recipe is perfectly golden and tasty every single time. These beginner-friendly tips will help you turn simple ingredients into a flavorful, crowd-pleasing dish.

    Selecting and Preparing Your Sweet Potatoes

    • Pick the Right Potatoes: Look for firm, blemish-free sweet potatoes. Jewel or Garnet varieties are wonderful choices for their creamy texture and vibrant color, making them ideal for a classic sweet potato casserole.
    • Cook Them Just Right: For the best flavor and texture, roast or bake your sweet potatoes instead of boiling them. This method enhances their natural sweetness and prevents them from becoming waterlogged. Cook them until they are just tender enough to mash easily, as overcooked potatoes can result in a loose filling.
    • Mash Them Smooth: For a silky-smooth casserole, mash your cooked sweet potatoes thoroughly. A potato masher works well, but for extra creaminess, use an electric mixer or food processor to eliminate any lumps.

    Crafting the Perfect Filling and Topping

    • Balance the Sweetness: Always taste the filling before you bake it. Since the topping also adds sweetness, adjust the sugar in the filling to achieve a perfectly balanced flavor.
    • Room Temperature Ingredients: For the creamiest possible filling, use room-temperature ingredients. Butter, eggs, and milk will combine more smoothly into the sweet potato mixture, ensuring a consistent texture.
    • Even Topping Distribution: Spread the pecan streusel topping in an even layer across the filling. This not only ensures every bite has a delightful crunch but also helps it bake to a perfect golden-brown finish.
    • Prevent Burning the Topping: Keep an eye on your topping as it bakes. If it starts to brown too quickly, loosely cover the casserole with aluminum foil to protect it while the filling finishes cooking.

    Baking and Serving for Success

    • Preheat Your Oven: Always preheat your oven completely before baking to ensure even cooking from the start. A consistent temperature is key for a perfectly baked casserole.
    • Bake Until Bubbly: Your casserole is ready when the filling is set and bubbly around the edges and the topping is golden brown and fragrant. This usually takes about 25-30 minutes.
    • Let It Rest: After baking, let the casserole rest for 10-15 minutes before serving. This important step allows the filling to set, making it much easier to scoop.

    By following these simple tips, you can confidently create a fantastic sweet potato casserole every time. Recipesmondial is here to help you enjoy stress-free cooking and turn everyday ingredients into delicious, visually appealing meals.

    How Do You Store and Reheat Leftovers?

    Having leftover sweet potato casserole is a wonderful thing because it means you get to enjoy this delicious, family-friendly dish all over again. To ensure it tastes just as good the second time, it’s important to store and reheat it correctly. Additionally, mastering a few make-ahead steps can simplify meal prep, which is especially helpful for busy families or special occasions.

    Storing Sweet Potato Casserole

    To keep your sweet potato casserole fresh and safe, follow these simple storage steps:

    • Cool Completely: Before storing, allow the casserole to cool to room temperature, which usually takes 30 to 60 minutes. For safety, do not leave it out for more than two hours.
    • Airtight Container: Transfer the cooled casserole into an airtight container. This prevents it from drying out and absorbing other odors from your fridge.
    • Refrigerate: Your sweet potato casserole will stay fresh in the refrigerator for 3 to 4 days [1].
    • Freeze (Optional): For longer storage, freeze individual portions or the whole casserole. Wrap it tightly in plastic wrap and then foil, or place it in a freezer-safe, airtight container. It will keep for 2-3 months for the best quality [2]. Always label the container with the date.

    Reheating Sweet Potato Casserole

    When you’re ready to enjoy your leftovers, choose the reheating method that best fits your schedule and desired texture:

    • Oven Method (Best for Texture):
      • Preheat your oven to 300°F (150°C).
      • Place the casserole in an oven-safe dish. If it’s frozen, allow it to thaw in the refrigerator overnight first.
      • Cover the dish loosely with foil to prevent the topping from over-browning.
      • Bake for 20-30 minutes, or until heated through. For a crispier topping, uncover it for the last few minutes of baking.
    • Microwave Method (Quickest Option):
      • Scoop a single serving onto a microwave-safe plate.
      • Cover the plate with a microwave-safe lid or a damp paper towel to retain moisture.
      • Heat on medium power for 1-2 minutes, stirring halfway through if possible.
      • Continue heating in 30-second intervals until it’s warmed to your liking. Be careful not to overheat it, which can cause the casserole to dry out.

    Make-Ahead Instructions

    Save time on busy holidays or weeknights by preparing your sweet potato casserole in advance. Following these steps helps you get ahead without the stress.

    • Prepare the Filling: You can cook, mash, and mix the sweet potato filling ingredients ahead of time. Store the mixture in an airtight container in the refrigerator for up to 2-3 days.
    • Make the Topping: The pecan streusel topping can also be prepared in advance. Store it in a separate airtight container in the refrigerator for up to 2-3 days.
    • Assemble Unbaked: For ultimate convenience, assemble the entire casserole up to 2 days before you plan to bake it. Simply spread the filling in your baking dish, sprinkle the topping over it, and cover tightly with plastic wrap before refrigerating.
    • Bake from Chilled: When ready to bake, remove the casserole from the fridge about 30 minutes beforehand to let it come closer to room temperature. You will need to add about 10-15 minutes to the original baking time since the dish is starting cold.
    • Freeze Unbaked: You can also assemble the entire casserole, wrap it tightly, and freeze it for up to 1-2 months. Before baking, thaw it completely in the refrigerator and add extra baking time as needed to ensure it’s heated through.

    Frequently Asked Questions

    Can you make sweet potato casserole from canned sweet potatoes?

    Yes, you absolutely can! Using canned sweet potatoes is a fantastic time-saver for busy home cooks, making this a truly *quick meal* option and a perfect *beginner-friendly recipe*.

    While fresh sweet potatoes often offer a richer flavor and texture, canned ones work beautifully. If you opt for canned, here are a couple of tips for the best results:

    • Drain them well: Be sure to drain all the liquid from the cans. Excess moisture can make your casserole watery.
    • Adjust sweetness: Canned sweet potatoes are sometimes packed in syrup. Taste them before adding other ingredients, as you may need to reduce the amount of sugar in your filling.

    It’s an easy way to enjoy a *flavorful meal made easy*, even when you’re short on time!

    How do you make a sweet potato casserole without marshmallows?

    Our recipe already skips the marshmallows in favor of a delicious pecan streusel topping. It provides a lovely crunch and nutty sweetness without being overly sugary, creating a more sophisticated, less-sweet profile that many people prefer.

    If you’re looking for other alternatives to marshmallows for your *sweet potato casserole recipe*, here are some excellent ideas:

    • Pecan Streusel: Our classic choice, made with brown sugar, flour, butter, and pecans, is both crunchy and flavorful.
    • Oatmeal Crumble: For a hearty, comforting crumble, combine rolled oats, brown sugar, a touch of cinnamon, and melted butter.
    • Toasted Coconut: Sprinkle shredded coconut over the casserole during the last 10-15 minutes of baking for a tropical twist and a golden crunch.
    • Savory Herbs: For a less traditional, savory approach, try a topping of breadcrumbs, Parmesan cheese, and fresh herbs like thyme or rosemary. This is perfect for those seeking *healthy and balanced meals* with less sugar.

    These variations help you customize this *family-friendly meal* exactly how you like it!

    What makes an old fashioned sweet potato casserole?

    An old-fashioned sweet potato casserole is all about its rich, creamy base and comforting, classic flavor. The sweet potatoes are typically sweetened and spiced, making it a beloved *simple dinner recipe* or holiday side dish.

    Key characteristics include:

    • Creamy Sweet Potato Base: Mashed sweet potatoes are mixed with butter, sugar (often brown sugar), milk or cream, eggs, and warming spices like cinnamon and nutmeg to create a smooth, indulgent texture.
    • Classic Topping: The most common old-fashioned toppings are either a sugary marshmallow layer or a buttery, crunchy pecan streusel. Both provide a delightful contrast to the soft filling.
    • Sweet & Savory Balance: While sweet, the casserole has an underlying earthy depth from the sweet potatoes that makes it a versatile side dish.

    This traditional approach has made sweet potato casserole a staple in *family-friendly meals* for generations, especially during holidays.

    Can this recipe be made ahead of time for Thanksgiving?

    Absolutely! Making this *easy sweet potato casserole* ahead of time is a brilliant *meal prep tip* for big holidays like Thanksgiving. Prepping in advance reduces stress and helps you enjoy more time with your loved ones.

    Here’s how to prepare it in advance:

    • Assemble the Day Before: Prepare the sweet potato filling and the pecan streusel topping as directed in the recipe.
    • Layer and Store: Spread the sweet potato mixture into your baking dish, then sprinkle the streusel topping evenly over the top.
    • Cover and Refrigerate: Cover the dish tightly with plastic wrap or aluminum foil and store it in the refrigerator for up to 24 hours.
    • Bake on the Day: When you’re ready, remove the casserole from the fridge about 30 minutes before baking to let it come to room temperature. Since it will be chilled, you will need to add an extra 10-15 minutes to the baking time.

    This simple strategy allows you to serve a delicious, *flavorful meal* without feeling overwhelmed on the big day. It’s perfect for *planning weekly meals efficiently* too, not just holidays!


    Sources

    1. https://www.fsis.usda.gov/food-safety/safe-food-handling-and-preparation/food-safety-basics/how-chill-foods-safely
    2. https://www.fsis.usda.gov/food-safety/safe-food-handling-and-preparation/food-safety-basics/freezing-and-food-safety

  • The Perfect Quesadilla Recipe: Easy, Cheesy, and Ready in 10 Minutes

    The Perfect Quesadilla Recipe: Easy, Cheesy, and Ready in 10 Minutes

    A quesadilla is a traditional Mexican dish consisting of a tortilla, usually a corn or flour tortilla, filled primarily with cheese. It is often folded in half and cooked on a griddle or skillet until the cheese is melted and the tortilla becomes crispy. Optional ingredients like meats, beans, and vegetables can also be added.

    Searching for a speedy, delicious meal the whole family will love? It can be challenging to whip up something satisfying when you’re short on time, especially with overwhelming, complex recipes. That’s why we’re excited to share one of our favorite easy recipes: the humble yet mighty quesadilla. Forget stressing about dinner tonight—this simple dish delivers big flavor with minimal effort.

    At Recipesmondial, our mission is to make cooking enjoyable and accessible for everyone. This quesadilla recipe embodies that mission perfectly. It’s quick to prepare, packed with cheesy goodness, and easily adaptable to whatever ingredients you have on hand. It’s the perfect solution for a speedy lunch, a fun family meal, or a satisfying healthy snack. Our step-by-step guidance helps you create a fantastic dish without any fuss, boosting your kitchen confidence with simple, beginner-friendly recipes.

    Get ready to learn how to make the best quesadillas—consistently crispy on the outside and perfectly gooey on the inside. We’ll walk you through everything you need to know, from essential ingredients and simple techniques to creative filling ideas and practical tips. Let’s turn everyday ingredients into an extraordinary meal and prove that cooking can be easy and stress-free!

    Why You’ll Love This Easy Quesadilla Recipe

    Sliced quesadilla on a wooden board, revealing gooey melted cheese, garnished with cilantro and served with salsa.
    A professional food photography, photorealistic, high-quality food magazine photo of a perfectly golden-brown quesadilla, sliced into wedges, revealing abundant, gooey, melted cheese stretching slightly between the pieces. The quesadilla is artfully arranged on a rustic wooden cutting board, garnished with a sprinkle of fresh chopped cilantro and a small side of vibrant salsa in a ceramic bowl. The lighting is warm and inviting, showcasing the delicious texture and appealing simplicity of the dish. Shot from a slightly overhead angle.

    Discover your new favorite go-to meal with this easy quesadilla recipe. It’s more than just cheese in a tortilla; it’s the perfect solution for busy days and hungry appetites, designed specifically for home cooks like you.

    Whether you need quick breakfast ideas, easy lunches, or simple dinner recipes, this versatile recipe delivers. It helps you enjoy cooking without stress and builds your confidence in the kitchen.

    Here’s why you’ll absolutely adore making these flavorful meals made easy:

    • Ready in Minutes: This easy quesadilla recipe comes together in just 10 minutes, making it perfect for quick meals and impromptu cravings.
    • Incredibly Simple: Forget being overwhelmed by complex recipes. Our step-by-step cooking guidance makes this one of our most beginner-friendly recipes, ensuring anyone can make a perfect quesadilla.
    • Family-Friendly Favorite: Kids and adults alike love these cheesy delights, making it a perfect solution if you’re struggling to plan family-friendly meals. Everyone will be asking for seconds!
    • Customizable for Everyone: This basic recipe is the perfect canvas. Add your favorite proteins or veggies to create endless variations that suit any taste or dietary need.
    • Budget-Friendly: Made with everyday ingredients, this is an excellent choice for budget cooking, letting you create a delicious meal without breaking the bank.
    • Reliably Delicious: Get a golden, crispy tortilla filled with gooey, melted cheese every single time. Say goodbye to dry, bland meals—this recipe guarantees flavorful meals made easy.
    • Build Your Confidence: If you’re lacking confidence in cooking skills, this is the perfect recipe for you. It offers a clear path to success, so you’ll feel like a pro in no time!

    This quesadilla recipe is designed to take you from uncertainty to confidence, turning stressful meal prep into an enjoyable experience. At Recipesmondial, we’re here to help you discover new flavors through approachable home cooking.

    What Ingredients Do You Need for Perfect Quesadillas?

    Flat lay of fresh quesadilla ingredients: tortillas, shredded cheese, diced peppers, onions, and spices.
    A professional food photography, photorealistic, high-quality food magazine photo showcasing a neatly arranged flat lay of fresh, essential quesadilla ingredients on a clean, light-colored kitchen counter. The arrangement includes a stack of soft flour tortillas, a generous pile of shredded Monterey Jack and cheddar cheese, a bowl of diced bell peppers (red and green), a small bowl of diced onions, and a sprinkle of a simple spice blend. The lighting is bright and natural, emphasizing the freshness and simplicity of the ingredients, ready for an easy cooking process.

    For the Basic Cheese Quesadilla

    Perfect quesadillas start with just a few simple ingredients. You don’t need anything fancy to create a delicious, cheesy meal built on classic flavors.

    Here’s what you’ll need to make a basic yet incredibly satisfying cheese quesadilla. This simple recipe is quick to assemble and always a family favorite.

    • Flour Tortillas (8-inch or 10-inch): Soft, fresh flour tortillas are ideal because they fold easily and crisp up beautifully in the pan.
    • Shredded Cheese (1/2 cup per quesadilla): A good melting cheese is key. Monterey Jack, cheddar, or a Mexican blend are all excellent choices. For the best results, grate a block of cheese yourself—it melts better and tastes fresher.
    • Butter or Oil (1 teaspoon per quesadilla): A little fat is essential for achieving a golden-brown, crispy tortilla. Butter adds rich flavor, while a neutral oil like canola or vegetable also works well.
    • Optional: Salt & Pepper (to taste): A pinch can enhance the flavor of the cheese.

    Quick Tip for Success: Using freshly shredded cheese makes a big difference. Pre-shredded varieties often contain anti-caking agents that can prevent the cheese from melting smoothly. For the ultimate gooey quesadilla, opt for a block of cheese and grate it yourself—this extra step is worth it!

    Essential Equipment

    You don’t need a gourmet kitchen to make great quesadillas, just a few basic tools. Having the right items on hand will help you cook confidently and keep the process stress-free.

    Gather these essentials before you start cooking:

    • Non-Stick Skillet or Frying Pan (10-12 inch): A good non-stick pan is crucial for preventing sticking and ensuring your tortillas brown evenly.
    • Spatula: A wide spatula is essential for flipping quesadillas, as it supports the entire tortilla to prevent it from breaking.
    • Cheese Grater (if using block cheese): If you’re following our tip to grate your own cheese, a simple box grater or microplane is all you need.
    • Cutting Board & Knife (optional, for other fillings): You won’t need these for a basic cheese quesadilla, but they are essential if you plan to add other fillings like chicken or vegetables.

    Cook’s Note: Using the right pan size is important. A 10-inch skillet, for example, is perfect for an 8-inch tortilla because it leaves enough space to easily fold the quesadilla without crowding the pan.

    How to Make Quesadillas: A Simple Step-by-Step Guide

    Hands of a home cook pressing down on a golden-brown quesadilla in a skillet on the stovetop.
    A professional food photography, photorealistic, high-quality food magazine photo capturing a close-up of a home cook’s hands gently pressing down on a quesadilla in a hot, non-stick skillet on a gas stovetop. The quesadilla is golden-brown and slightly crispy on one side. The background is a softly blurred, warm-toned home kitchen, suggesting a cozy and inviting cooking environment. The focus is on the action of cooking, emphasizing ease and approachability. Subtle steam might be visible. Real human cook, not a model.

    Ready to create the perfect, cheesy quesadilla? This simple recipe is designed for everyone, from kitchen newcomers to anyone looking for a stress-free meal. Follow our step-by-step guide, and you’ll be cooking with confidence in no time.

    As one of our favorite beginner-friendly recipes, it’s a fantastic solution for easy dinners, quick lunches, or a fun family meal. Let’s get started and turn a few simple ingredients into a delicious, satisfying dish.

    1. Warm Your Pan: Place a non-stick skillet or griddle over medium heat and allow it to warm up for 1-2 minutes. This important first step ensures the tortilla cooks evenly and develops a golden-brown crust.

    2. Add Fat: Drizzle about a half teaspoon of oil or add a small pat of butter (about 1/2 tablespoon) to the hot pan. Swirl the pan to lightly coat the bottom. This adds flavor and helps the tortilla get crispy.

    3. Place Tortilla: Carefully lay one tortilla flat in the pan. Let it warm for about 30 seconds.

    4. Add Cheese: Generously sprinkle 1/4 to 1/3 cup of your favorite shredded cheese over one half of the tortilla. For the best results, remember that freshly grated cheese melts beautifully!

    5. Add Fillings (Optional): If using extra fillings like cooked chicken, beans, or veggies, spread them evenly over the cheese. Avoid overstuffing, as less is more for a perfectly melted quesadilla.

    6. Fold and Cook: When the cheese begins to melt, use a spatula to gently fold the empty half of the tortilla over the filled side. Press down lightly to seal it.

    7. Brown Both Sides: Cook the quesadilla for 2-3 minutes on each side, or until the exterior is golden brown and the cheese inside is completely melted. Keep a close eye on the heat to prevent the tortilla from burning.

    8. Slice and Serve: Carefully remove the quesadilla from the pan and transfer it to a cutting board. Slice it into wedges with a pizza cutter or sharp knife and serve immediately with your favorite dips. Enjoy your delicious, homemade meal!

    Pro Tips for Perfect Quesadillas Every Time

    While making a quesadilla is simple, a few key tricks can make it truly amazing. Keep these tips in mind for delicious, consistent results every time you cook.

    • Don’t Overstuff: It’s tempting to add lots of fillings, but this can prevent the quesadilla from cooking evenly. A thin, even layer ensures everything heats through and the cheese melts perfectly.

    • Medium Heat is Your Friend: Always cook quesadillas over medium heat. High heat will burn the tortilla before the cheese has a chance to melt. Medium heat gives you a crispy, golden tortilla and perfectly gooey cheese.

    • Grate Your Own Cheese: Pre-shredded cheese is often coated in anti-caking agents that prevent smooth melting. For the ultimate cheesy texture, take a moment to grate cheese from a block. It makes a noticeable difference!

    • Pre-Cook Fillings: Make sure any meat or vegetable fillings are already cooked and warm before you add them. This helps them heat through quickly without overcooking the tortilla or making it soggy.

    • Press and Flip: Gently press down on the quesadilla with your spatula as it cooks. This increases contact with the pan, which helps it brown evenly and ensures all the cheese melts. Be sure to flip it carefully.

    • Serve Immediately: Quesadillas are best enjoyed right out of the pan while the cheese is hot and melty. Have your plates and toppings ready to go before you start cooking.

    What should you put in a quesadilla?

    Classic & Popular Cheese Blends

    The heart of any delicious quesadilla is the cheese. Choosing the right blend makes all the difference, creating a perfect melt and amazing flavor. Fortunately, there are many excellent options available.

    Here are some classic and popular cheese blends for your perfect quesadilla:

    • Monterey Jack: A top choice for its mild flavor and excellent melting qualities, this cheese becomes incredibly creamy when hot.
    • Cheddar Cheese: Mild or medium cheddar works wonderfully, adding a familiar, savory taste. For a bolder flavor, try sharp cheddar.
    • Mexican Blend: Many stores offer pre-shredded “Mexican Blend” cheese, which typically combines Monterey Jack, Cheddar, Asadero, and Queso Blanco. It&#x2019s a convenient shortcut for busy families.
    • Asadero or Oaxaca: These authentic Mexican cheeses are fantastic for quesadillas. They have a mild, buttery flavor and melt with a lovely stretch.
    • Provolone: For something a little different, provolone offers a smooth melt and a slightly sharper, more distinctive taste.

    Recipesmondial Tip: For the best results, grate your own cheese. Pre-shredded varieties often contain anti-caking agents that can prevent a smooth melt. Freshly grated cheese ensures the creamiest, gooiest filling and makes a noticeable difference in your final dish.

    Easy Chicken Quesadilla Filling

    Adding chicken is a simple way to turn a basic cheese quesadilla into a hearty meal. This filling is perfect for a quick lunch or an easy weeknight dinner because it comes together in minutes.

    Here’s how to prepare a delicious chicken filling:

    • Pre-Cooked Chicken: The easiest method is to use leftover cooked chicken. Shredded rotisserie chicken is a huge time-saver, but cooked chicken breast or thighs also work well.
    • Quick Sauté Method:
      1. Heat 1 tablespoon of olive oil in a skillet over medium heat.
      2. Add 1 cup of shredded cooked chicken.
      3. Stir in 1/2 teaspoon of chili powder, 1/4 teaspoon of cumin, and a pinch of salt and pepper.
      4. Cook for 2-3 minutes, just until the chicken is warmed through and fragrant.
    • Flavor Boosters: For extra taste, add a tablespoon of your favorite salsa or a squeeze of lime juice to the chicken mixture. This creates a more vibrant filling.

    This simple preparation keeps cooking enjoyable and stress-free, giving you a healthy and tasty meal without a lot of effort.

    Flavorful Beef Quesadilla Filling

    For a rich and savory option, try a ground beef filling. This beginner-friendly recipe is a fantastic choice for a simple and satisfying dinner that delivers reliable results.

    Follow these easy steps for a delicious beef filling:

    • Prepare Your Beef:
      1. In a skillet over medium heat, brown 1/2 pound of ground beef (80/20 lean works well).
      2. Use a spoon to break up the meat as it cooks.
      3. Once the beef is fully cooked, drain any excess fat.
    • Season It Well:
      1. Return the skillet to the heat and stir in 1/2 teaspoon of chili powder, 1/4 teaspoon of cumin, 1/4 teaspoon of garlic powder, and a pinch of salt and pepper.
      2. Alternatively, use 1 teaspoon of your favorite taco seasoning mix.
      3. Cook for another 1-2 minutes to allow the spices to toast and become fragrant.
    • Optional Add-ins: For extra texture and flavor, add a tablespoon of diced onions or bell peppers to the skillet while browning the beef.

    This straightforward recipe is a great solution for busy weeknights, offering clear, step-by-step guidance for a delicious family meal.

    Simple Vegetarian & Vegan Options

    Quesadillas are also incredibly versatile, making them perfect for vegetarian and vegan meals. With a few simple ingredients, you can create a healthy snack or a satisfying main course.

    Here are some simple and flavorful ideas:

    • Black Bean & Corn:
    • Sautéed Veggies:
      • Thinly slice bell peppers, onions, mushrooms, or zucchini.
      • Sauté them in a little olive oil until tender-crisp.
      • Season with salt, pepper, and a dash of garlic powder.
    • Spinach & Mushroom:
      • Sauté fresh spinach and sliced mushrooms in a pan until the spinach wilts and the mushrooms soften.
      • Season simply with salt, pepper, and a touch of nutmeg.
    • Spicy Potato:
      • Dice cooked potatoes (boiled or roasted work well).
      • Toss them with smoked paprika and a pinch of cayenne for a spicy kick.

    To make these quesadillas vegan, use your favorite dairy-free cheese alternative. Many plant-based shreds melt surprisingly well and can be combined with any vegetarian filling for a flavorful, satisfying meal. This flexibility allows you to get creative and adapt the recipe to your dietary needs.

    How do I make my quesadillas better?

    Tip 1: Grate Your Own Cheese

    For the best results, skip the bag of pre-shredded cheese. Store-bought shredded cheese contains anti-caking agents that prevent it from melting smoothly. Freshly grated cheese, on the other hand, melts much more evenly and creates that perfect, gooey texture inside your quesadilla [1].

    Grating your own cheese is easy and adds only a minute or two to your prep time. This simple step elevates the flavor and texture of your quesadilla, making it a quick win for any home cook.

    Tip 2: Don’t Overstuff the Tortilla

    While it’s tempting to load your quesadilla with fillings, overstuffing is a common mistake. Too much filling can tear the tortilla, spill out during cooking, and prevent the quesadilla from heating evenly. This often results in a cold center with unmelted cheese.

    Instead, aim for a thin, even layer of cheese and other ingredients. This ensures the tortilla crisps up perfectly while everything inside gets hot and melted. When it comes to building a great quesadilla, less is often more.

    Tip 3: Cook on Medium Heat for a Crispy Finish

    The right cooking temperature is essential. High heat often burns the tortilla before the cheese has a chance to melt. For a better result, use medium heat. This allows the tortilla to toast slowly to a beautiful, golden-brown and crispy finish. Meanwhile, the cheese inside has enough time to become completely melted and gooey.

    Patience is key. Cooking slowly ensures even heating, creating that irresistible crispy exterior without any burnt spots. This simple technique will help you make delicious and reliable quesadillas every time.

    Tip 4: Use a Little Butter or Oil

    For an extra layer of flavor and crispiness, cook your quesadilla in a small amount of fat. Butter adds a rich, savory flavor, but olive or avocado oil also works well. The fat helps the tortilla turn golden brown and prevents it from sticking to the pan, which makes flipping much easier.

    You only need a teaspoon or two per quesadilla. Spread it evenly across your skillet before cooking to achieve a restaurant-quality crispness. This simple trick makes your homemade quesadillas truly shine.

    What is the spice mix for quesadillas?

    Simple Homemade Quesadilla Seasoning

    The secret to a great quesadilla isn’t just cheese and tortillas—it’s the perfect blend of spices. While you can buy seasoning, making your own is surprisingly easy and adds incredible flavor to any quesadilla. Best of all, you can customize the mix to suit your family’s tastes.

    This go-to recipe transforms simple ingredients into a delicious meal. It’s an approachable home cooking tip that will make you feel more confident in the kitchen.

    What You’ll Need for Your Flavorful Blend

    Gather these common spices from your pantry:

    • 1 tablespoon chili powder: Provides a foundational warmth.
    • 1 teaspoon ground cumin: Adds an earthy, savory depth.
    • 1 teaspoon dried oregano: A classic herb for Mexican-inspired dishes.
    • 1/2 teaspoon garlic powder: For a mellow, aromatic touch.
    • 1/2 teaspoon onion powder: Enhances the savory profile.
    • 1/4 teaspoon smoked paprika (optional): Adds a lovely smoky note.
    • 1/4 teaspoon cayenne pepper (optional): If you enjoy a little heat.
    • 1/2 teaspoon salt: Essential for bringing out all the flavors.
    • 1/4 teaspoon black pepper: A simple, yet effective flavor enhancer.

    How to Mix Your Seasoning

    Creating this blend couldn’t be simpler. Just follow these steps:

    1. Combine all spices: In a small bowl, add the chili powder, cumin, oregano, garlic powder, onion powder, salt, and black pepper. Include the smoked paprika and cayenne if you’re using them.
    2. Mix well: Stir everything together with a spoon or small whisk until the blend is uniform and free of clumps.
    3. Store it: Transfer your homemade seasoning to an airtight container, like a small jar.

    Your seasoning will stay fresh in the pantry for several months, so it’s always ready for family-friendly meals or even quick breakfast quesadillas.

    How to Use Your Quesadilla Seasoning

    It’s easy to add this seasoning to your favorite recipes. Here are a few ideas:

    • For meat fillings: Sprinkle 1-2 teaspoons of seasoning directly onto cooked chicken, beef, or pork. Mix well before assembling the quesadillas to ensure every bite is flavorful.
    • For vegetarian options: Add the seasoning to sautéed vegetables like bell peppers and onions. It also works wonderfully with black beans or corn.
    • Adjust to taste: Start with a small amount of seasoning. You can always add more, but you can’t take it away.
    • Make it a paste: For a deeper flavor, mix 1 tablespoon of seasoning with 1 tablespoon of olive oil. Toss your cooked filling in this paste before adding it to the tortilla.

    This beginner-friendly recipe guarantees your quesadillas will never be bland again. It’s a simple way to make cooking more enjoyable and less overwhelming.

    Is it better to bake or pan fry quesadillas?

    Deciding whether to bake or pan-fry your quesadillas is a common dilemma for home cooks. While both methods yield delicious results, they offer distinct advantages. Your choice often depends on your priorities, like how much time you have and how many servings you’re preparing. Let’s explore each option to help you find the best fit for your needs.

    Pan-Frying for Classic Crispness and Speed

    Pan-frying is the traditional and most popular method, ideal for making just one or two servings. This technique delivers that signature crispy tortilla with a beautifully golden-brown finish. Meanwhile, the cheese melts quickly inside, creating a satisfyingly gooey center.

    • Speed: Pan-frying is incredibly fast, with each quesadilla ready in just a few minutes per side. This makes it perfect for a quick lunch or an easy dinner.
    • Crisp Texture: Direct contact with the hot pan creates an unmatched crispy exterior, delivering a satisfying crunch with every bite.
    • Control: You can easily monitor the browning and adjust the heat as you go. This level of control helps prevent burning and makes the method very beginner-friendly.

    For the best results, use medium heat and add a little butter or oil to your pan to ensure even browning and add flavor. Remember to keep a close eye on your quesadilla and flip it when it’s golden brown and crispy.

    Baking for Convenience and Large Batches

    Baking quesadillas is a fantastic alternative, especially when you need to prepare several servings at once. For busy families or anyone feeding a crowd, this method simplifies the process significantly.

    • Hands-Off Cooking: This method requires less active cooking time. Once the quesadillas are in the oven, you are free to prepare toppings or side dishes.
    • Even Cooking: The oven’s ambient heat cooks everything uniformly, so the cheese melts beautifully and consistently from edge to edge.
    • Great for Batches: You can easily arrange multiple quesadillas on a single baking sheet, making this approach perfect for meal prep or entertaining guests.

    When baking, preheat your oven to a moderate temperature, such as 375°F (190°C), for consistent heat that melts the cheese effectively [2]. A light spray of oil on the tortillas will also help them crisp up.

    Which Method Should You Choose?

    Ultimately, the “better” method depends on your specific needs. If you want a single, super-crispy quesadilla in a hurry, reach for the frying pan. However, if you’re making quesadillas for your whole family, baking is a fantastic time-saver that lets you cook a large batch at once. Both methods yield delicious results and bring warm, cheesy goodness to your table. Just pick the one that fits your cooking style and enjoy a simple, satisfying meal!

    What to Serve with Your Quesadillas

    With your quesadillas hot and ready, the next step is transforming them into a truly memorable meal. Because quesadillas are so versatile, they work equally well as a quick lunch or a satisfying dinner, especially when paired with simple sides. This approach also makes meal planning much easier. At Recipesmondial, we love easy recipes for family-friendly meals, so let’s explore some delicious, beginner-friendly recipes to serve alongside your perfect quesadillas.

    There’s no need to feel overwhelmed by complex recipes. To help you cook healthy and tasty meals quickly and confidently, these suggestions focus on fresh ingredients and simple techniques. You’ll be enjoying stress-free cooking in no time.

    Essential Toppings and Dips

    Start with these classic additions to elevate your quesadilla experience. They introduce fresh flavors and textures and are incredibly simple to prepare.

    • Salsa: A vibrant salsa is a must-have. Try a fresh pico de gallo with diced tomatoes, onions, cilantro, and a squeeze of lime. Alternatively, a zesty salsa verde offers a tangy kick.
    • Guacamole or Sliced Avocado: Creamy, rich avocado adds a wonderful balance. Make a simple guacamole with mashed avocado, lime juice, salt, and a pinch of chili powder. Or, simply serve fresh avocado slices.
    • Sour Cream or Greek Yogurt: A dollop of cool sour cream provides a delightful contrast. For a healthier twist, use plain Greek yogurt, which adds creaminess and a touch of tang.
    • Fresh Cilantro and Lime Wedges: A sprinkle of fresh cilantro brightens every bite, while lime wedges offer a burst of citrus. This simple addition makes a big difference in flavor.

    Fresh and Light Sides

    To create healthy and balanced meals, round out your plate with these vibrant, light options. They add essential nutrients and satisfying textures without feeling heavy.

    • Simple Green Salad: A crisp mixed green salad tossed with a light vinaigrette is a fantastic choice. It offers a refreshing break from the richness of the quesadilla and is a simple way to boost your nutrient intake [3].
    • Black Bean and Corn Salad: This colorful salad is full of flavor. Combine canned black beans (rinsed), corn, diced bell peppers, red onion, and a lime-cilantro dressing for a quick and satisfying option.
    • Fruit Salad: For a sweet and refreshing contrast, serve a simple fruit salad with watermelon, cantaloupe, berries, and mango. It cleanses the palate beautifully.

    Heartier Accompaniments

    For a more substantial dinner, or when quesadillas are part of a larger spread, consider these comforting sides. They are key to creating truly flavorful meals made easy.

    • Cilantro Lime Rice: Fluffy white or brown rice infused with lime juice and fresh cilantro is delicious and an excellent companion for soaking up any extra flavors.
    • Refried Beans: A classic pairing, refried beans add a comforting, savory element. You can find ready-made options or make your own for a fresher taste.
    • Mexican Street Corn (Esquites): For a truly special side, try this warm salad that mixes corn with mayonnaise, cotija cheese, chili powder, and lime juice. It’s a wonderful burst of flavor.

    Cooking at home should be enjoyable, not stressful. We hope these ideas inspire you to create a complete and delicious meal with confidence. Enjoy discovering new flavors with Recipesmondial!

    The Easiest Quesadilla Recipe (Printable Card)

    Looking for the ultimate easy quesadilla recipe? This is it. Our simple guide will help you confidently create delicious, cheesy quesadillas in minutes, perfect for busy weeknights or a quick lunch. Get ready for stress-free mealtimes with this family-friendly favorite.

    Classic Cheese Quesadilla Recipe

    Enjoy a flavorful meal that’s perfect for cooks of all skill levels. This beginner-friendly recipe is a true staple for approachable home cooking.

    Prep Time: 5 minutes

    Cook Time: 5-7 minutes

    Yield: 2 quesadillas (serves 4)

    Ingredients:

    • 4 small (6-inch) or 2 large (8-10 inch) flour tortillas
    • 1 cup shredded cheese (Monterey Jack, cheddar, or a Mexican blend)
    • 1 tablespoon unsalted butter or olive oil
    • Optional: Pinch of salt, black pepper, or a dash of chili powder

    Essential Equipment:

    • Large non-stick skillet or cast-iron pan
    • Spatula
    • Cutting board
    • Pizza cutter or knife

    Step-by-Step Instructions:

    1. Prepare Your Pan: Heat the butter or oil in a large skillet over medium heat until shimmering or fully melted.
    2. Lay Down Tortilla: Place one tortilla flat in the hot pan.
    3. Add Cheese: Sprinkle half of the cheese evenly over one half of the tortilla, leaving a small border to prevent it from spilling out.
    4. Fold or Top: After about 1-2 minutes, once the cheese begins to melt, fold the empty half of the tortilla over the cheese. Press down gently with a spatula. If using two large tortillas, sprinkle the cheese over the entire surface of the bottom tortilla and place the second one on top.
    5. Cook Until Golden: Cook for 2-3 minutes per side, until the tortilla is golden brown and crispy and the cheese is completely melted. Flip carefully to cook the second side.
    6. Remove and Slice: Transfer the quesadilla to a cutting board and let it rest for a moment, which makes it easier to slice.
    7. Slice and Serve: Cut into wedges using a pizza cutter or a sharp knife. Serve immediately with your favorite toppings.

    Tips for Success & Variations:

    Use these tips to guarantee delicious results every time and discover new flavor combinations.

    • Don’t Overstuff: Avoid adding too much filling, as it makes the quesadilla difficult to flip and can prevent it from cooking evenly. Keep it simple for the best results.
    • Low to Medium Heat: Cooking over low to medium heat is essential. This allows the tortilla to get crispy and golden while the cheese melts perfectly without the risk of burning.
    • Cheese Choices: Experiment with different cheeses. Mozzarella offers a great stretch, while a blend provides a more complex flavor. Find your favorite combination!
    • Add Protein: For a heartier meal, include cooked protein like leftover shredded chicken or seasoned ground beef.
    • Vegetarian Boost: Add sautéed onions, bell peppers, or spinach. Black beans or corn are also delicious additions for a more substantial meal.
    • Spice It Up: Elevate the flavor by sprinkling a pinch of cumin, chili powder, or garlic powder over the cheese before cooking.
    • Serving Suggestions: Serve with salsa, guacamole, sour cream, or a squeeze of fresh lime juice to complement these quick meals.
    • Meal Prep Idea: Store cooked quesadillas in the fridge for a quick meal. Reheat gently in a dry pan until warm and crisp for a perfect grab-and-go lunch or breakfast.

    Designed for busy families, this step-by-step quesadilla recipe makes it simple to get a delicious and satisfying meal on the table. Enjoy this easy approach to flavorful home cooking!

    Frequently Asked Questions About Quesadillas

    What should you put in a quesadilla?

    Quesadillas are wonderfully versatile, making them perfect for using up leftovers or whipping up a quick, flavorful meal. While cheese is the essential ingredient, the filling possibilities are nearly endless. Simply consider what you love and what you already have in your fridge.

    Here are some popular and easy filling ideas:

    • Cheese: This is a must! Use a good melting cheese like Monterey Jack, cheddar, or a Mexican blend.
    • Cooked Chicken: Shredded rotisserie chicken makes for a super quick and easy chicken quesadilla. Leftover grilled chicken works beautifully too.
    • Seasoned Ground Beef: Taco-seasoned ground beef adds bold flavor and is great for family-friendly meals.
    • Black Beans & Corn: For a fantastic vegetarian option, combine black beans and corn. Add a sprinkle of chili powder for extra zing.
    • Sautéed Veggies: Bell peppers, onions, mushrooms, or spinach are all delicious additions. Be sure to cook them until tender before adding them to your tortilla.
    • Pork Carnitas: If you have leftover pulled pork, it makes an incredibly tasty and simple dinner.
    • Scrambled Eggs: For a delightful breakfast quesadilla, add some scrambled eggs and a little cooked sausage.

    Remember, don’t overstuff your quesadilla. A thin, even layer of fillings ensures everything cooks through and stays neatly inside the tortilla.

    How do I make my quesadillas better?

    Turning a good quesadilla into a great one is all about technique. These simple tips will elevate your results.

    • Grate Your Own Cheese: Pre-shredded cheese contains anti-caking agents like cellulose, which prevent it from melting smoothly [4]. For that gooey, irresistible texture, freshly grated cheese melts much more evenly.
    • Don’t Overstuff: While it’s tempting to load up on fillings, too much makes the quesadilla difficult to fold and causes it to cook unevenly. A thin, even layer is best to ensure everything heats through and the cheese melts perfectly.
    • Use Medium Heat: Patience is key. Cooking on medium heat allows the tortilla to become golden and crispy while giving the cheese enough time to melt completely. High heat will burn the tortilla before the filling is ready.
    • Add a Little Fat: A small amount of butter or oil in the pan is essential. It adds flavor and helps create a beautifully golden, crispy crust on the tortilla.
    • Pre-cook Fillings: Always cook any raw meat or hard vegetables beforehand. This ensures every component of your filling is tender and hot when the quesadilla is done.

    Following these steps will help you achieve wonderfully crispy, cheesy, and flavorful quesadillas every time.

    Is it better to bake or pan fry quesadillas?

    Both methods have their advantages, so the best choice depends on your priorities. Consider whether you need to make a large batch or want the crispiest possible tortilla.

    Method Pros Cons Best For
    Pan Frying
    • Achieves the crispiest tortillas.
    • Quickest for one or two quesadillas.
    • Excellent cheese melt and golden-brown exterior.
    • Easy to monitor for perfect browning.
    • Requires more hands-on attention.
    • Can be time-consuming for large batches.
    • Only cooks one or two at a time.
    • Single servings.
    • Extra crispy results.
    • Quick lunch or dinner ideas.
    Baking
    • Great for making large batches at once.
    • More hands-off once in the oven.
    • Still results in a warm, melted quesadilla.
    • Good for family meals or gatherings.
    • Less crispy than pan-fried.
    • Can sometimes dry out the tortilla if overcooked.
    • Takes longer overall due to oven preheating.
    • Feeding a crowd.
    • Meal prep for busy families.
    • When you need a more hands-off approach.

    For the ultimate crispy texture, pan-frying is the clear winner. However, baking is a fantastic and convenient option when making several quesadillas for a family dinner. You can even combine methods: lightly pan-fry each quesadilla, then transfer them to a baking sheet in the oven to keep warm and finish melting.

    What kind of cheese is best for quesadillas?

    The best cheese for quesadillas is one that melts beautifully and offers great flavor, giving you that gooey, stringy pull in every bite. Here are some top choices:

    • Monterey Jack: A classic for a reason, this cheese melts incredibly well and has a mild, buttery flavor.
    • Cheddar: Medium or sharp cheddar adds a lovely tangy flavor and melts reliably, especially when freshly grated.
    • Mexican Blend: Found in most grocery stores, these blends typically combine Monterey Jack, cheddar, asadero, and Oaxaca cheeses for convenient, great-tasting results.
    • Oaxaca Cheese: This traditional Mexican cheese is fantastic. It has a mild, milky flavor and a superb stringy melt similar to mozzarella.
    • Asadero Cheese: Similar to Oaxaca, Asadero is another excellent Mexican melting cheese with a mild, smooth taste.
    • Colby Jack: A marbled blend of Colby and Monterey Jack, it melts wonderfully and provides a balanced, mild flavor.

    For the best results, always choose a block of cheese and grate it yourself. This simple step ensures the smoothest, most delicious melt. It’s also wise to avoid overly watery or crumbly cheeses, as they won’t provide that classic, gooey texture.


    Sources

    1. https://www.seriouseats.com/shredded-cheese-vs-block-cheese-best-for-cooking
    2. https://www.bhg.com/recipes/how-to-bake-everything-3022513
    3. https://www.choosemyplate.gov/eat-healthy/vegetables
    4. https://www.seriouseats.com/how-to-choose-the-best-cheese-for-mac-and-cheese

  • The Best Easy Buffalo Chicken Dip Recipe (A Step-by-Step Guide)

    The Best Easy Buffalo Chicken Dip Recipe (A Step-by-Step Guide)

    The best buffalo chicken dip is a creamy, cheesy, and spicy appetizer made from shredded chicken, cream cheese, ranch or blue cheese dressing, and a cayenne pepper hot sauce like Frank’s RedHot. The ingredients are combined and then baked in the oven or heated in a slow cooker until hot and bubbly, perfect for serving with chips, crackers, or vegetables.

    Need a show-stopping appetizer that’s guaranteed to disappear the moment it hits the table? Look no further. While classic buffalo chicken dip is a universal crowd-pleaser, the thought of making party snacks can feel daunting. We know it’s easy to feel overwhelmed by complex recipes when all you want is a reliable, tasty dish. That’s why we at Recipesmondial are thrilled to share our ultimate easy buffalo chicken dip. It’s designed to take the stress out of entertaining and deliver maximum flavor with minimal effort.

    This isn’t just any buffalo chicken dip—it’s your new go-to for creamy, cheesy, and perfectly spicy flavor. We crafted this recipe with beginner-friendly steps and everyday ingredients, ensuring anyone can achieve perfect results. Whether you’re a seasoned cook or just building confidence, our step-by-step guidance makes preparation a breeze. You’ll spend less time in the kitchen and more time enjoying your gathering. Get ready to impress everyone with this irresistible, stress-free dish.

    Ready to transform simple ingredients into an epic party favorite? In this guide, we’ll walk you through everything you need to know. We cover choosing the best chicken and hot sauce, different cooking methods, creative serving suggestions, and clever make-ahead tips. You’ll soon discover why this approachable home cooking staple is a dish you’ll absolutely love.

    Why You’ll Love This Easy Buffalo Chicken Dip Recipe

    This isn’t just another buffalo chicken dip recipe; it’s a game-changer for your gatherings and a comforting treat for your family! At Recipesmondial, we believe cooking should be enjoyable and stress-free. This easy buffalo chicken dip perfectly embodies that philosophy. It’s a crowd-pleaser that delivers big on flavor without requiring hours in the kitchen.

    If complex recipes overwhelm you, this dish is for you. Struggling to find family-friendly meals everyone enjoys? Look no further! We’ve designed it to be incredibly straightforward, using simple ingredients you likely already have. It’s a fantastic way to build confidence in your cooking skills while creating something truly delicious.

    Here’s why this buffalo chicken dip recipe will quickly become a favorite:

    • Super Simple to Make: Forget complicated steps. Our step-by-step guidance makes this recipe a breeze, even for beginners. You’ll be amazed at how quickly it comes together.
    • Unforgettable Flavor: Get ready for a perfect balance of creamy, cheesy, and spicy goodness. This addictive dip is guaranteed to be a hit with everyone.
    • Perfect for Any Occasion: From game day and potlucks to casual family dinners, this versatile dip is a perfect fit. Serve it as a crowd-pleasing snack or a simple dinner recipe alongside fresh veggies.
    • Uses Everyday Ingredients: You won’t need any fancy items for this recipe. It uses common pantry staples, making it both practical and budget-friendly.
    • Reliable Results Every Time: Say goodbye to cooking uncertainty! Our tried-and-true recipe ensures you’ll get a perfectly gooey and delicious dip every single time.
    • Boost Your Confidence: Enjoy a rewarding, pressure-free cooking experience. Successfully making this simple dish is a fantastic way to build your culinary confidence.

    This buffalo chicken dip recipe also offers great flexibility. You can easily adjust the spice level to suit your family’s tastes, making it an ideal solution for a busy weeknight or a quick, impressive appetizer. Get ready to impress your friends and family with minimal effort!

    What Ingredients Do You Need for Buffalo Chicken Dip?

    Overhead view of fresh ingredients for buffalo chicken dip, including shredded chicken, cream cheese, buffalo sauce, dressing, cheddar cheese, and green onions, arranged on a wooden counter.
    A professional food photography shot, photorealistic, of all the key ingredients for Buffalo Chicken Dip laid out invitingly on a clean, rustic wooden kitchen counter. The arrangement is a flat lay, brightly lit with warm, natural light. Ingredients include shredded cooked chicken, blocks of cream cheese, a bottle of vibrant buffalo sauce, a bowl of ranch or blue cheese dressing, a mound of shredded cheddar cheese, and a small bunch of fresh green onions or parsley. Each item is clear, fresh, and perfectly lit, emulating a high-quality food magazine photo.

    The Best Chicken to Use (Rotisserie, Canned, or Fresh)

    Choosing the right chicken is the first step to a delicious dip. To keep this recipe quick and easy, you have a few great options that minimize fuss.

    Here are your best chicken choices for buffalo chicken dip:

    • Rotisserie Chicken: A true time-saver, store-bought rotisserie chicken is already seasoned, tender, and ready to shred. It’s the perfect shortcut for busy families or quick weeknight meals.
    • Canned Chicken: Another fantastic shortcut, canned chicken is a budget-friendly option that’s pre-cooked and ready to use. Just drain it well and shred with a fork to ensure your dip comes together quickly.
    • Fresh Chicken Breast: If you prefer to cook from scratch, boneless, skinless chicken breasts are a wonderful choice. Simply boil or bake them until fully cooked, then shred them into bite-sized pieces. This option gives you complete control over the seasoning.

    Pro Tip for Shredding Chicken: Shredding any cooked chicken is simple. While you can use two forks to pull the meat apart, an even quicker method is to use a stand mixer with the paddle attachment [1]. It will shred warm, cooked chicken in seconds!

    The Creamy and Cheesy Base

    The heart of any great buffalo chicken dip is its creamy, cheesy base. This combination of ingredients is what makes the dip so rich, indulgent, and irresistible.

    You will need these key ingredients for the base:

    • Cream Cheese: For the richest flavor, use full-fat cream cheese. Be sure to soften it to room temperature first, as this helps it blend smoothly and prevents lumps. It’s the essential foundation for a creamy dip.
    • Cheddar Cheese: Freshly shredded cheddar cheese adds a sharp, tangy flavor and melts beautifully. While pre-shredded cheese works for convenience, shredding your own block of cheese will result in a smoother, creamier texture.
    • Ranch or Blue Cheese Dressing: Either ranch or blue cheese dressing will add vital moisture and flavor, helping to bind all the ingredients together. We will discuss which one to choose in a moment.

    Substitution Idea: Want to try different cheeses? Swap some of the cheddar for Monterey Jack, or use mozzarella for a milder, stretchier texture. Feel free to get creative to find your perfect cheese combination.

    Which Hot Sauce is Best? (Frank’s RedHot Guide)

    For the most authentic buffalo chicken dip, one hot sauce stands above the rest: Frank’s RedHot Original [2]. Its distinct flavor profile is the gold standard for that classic buffalo taste.

    Here’s why Frank’s RedHot is often recommended:

    • Classic Flavor: It offers the perfect balance of heat and tang that you’d expect from classic buffalo wings.
    • Vinegar Base: Its vinegar base brightens the rich, creamy dip, cutting through the fats and adding a delicious zing.
    • Consistent Heat: It provides a moderate, approachable level of spice that’s enjoyable for most palates without being overwhelmingly hot.

    Can I use other hot sauces? Absolutely! While Frank’s is traditional, feel free to experiment with other hot sauces. Just be aware that flavor profiles and heat levels can vary significantly. It’s always a good idea to start with less and add more to taste.

    Ranch vs. Blue Cheese Dressing

    The choice between ranch and blue cheese dressing is a classic debate. Both options add creamy flavor and essential moisture, so the decision really comes down to personal preference.

    Let’s compare these two popular options:

    Dressing Type Flavor Profile Texture Best For
    Ranch Dressing Creamy, savory, with hints of herbs like dill and chives. Generally milder. Smooth and thick. Those who prefer a milder, widely appealing taste. Excellent for family-friendly meals.
    Blue Cheese Dressing Tangy, pungent, with a distinct, sharp blue cheese flavor. More intense. Often thicker, with visible specks of blue cheese. Fans of a bold, traditional buffalo wing experience. Adds a gourmet touch.

    Both options create a fantastic dip. If you’re unsure which to choose, ranch is a safe bet for crowds, as its milder flavor is universally loved. For a more authentic and robust buffalo experience, however, blue cheese dressing adds a bold, tangy flavor that truly elevates the dish.

    How to Make Buffalo Chicken Dip in the Oven (Step-by-Step)

    A bubbling hot, golden-brown buffalo chicken dip in a ceramic baking dish, garnished with fresh green onions.
    A close-up, professional food photography shot, photorealistic, of a perfectly baked, bubbling hot Buffalo Chicken Dip in a rustic cast iron skillet or an attractive ceramic baking dish, just pulled from the oven. The dip’s surface is golden brown and visibly cheesy, with subtle steam rising. It’s garnished generously with freshly chopped green onions. The background is a softly blurred, warm and inviting home kitchen setting, suggesting comfort and deliciousness. This is a high-quality food magazine photo, mouth-watering and ready to serve.

    Get ready to make a delicious and easy baked buffalo chicken dip! Perfect for parties, game nights, or a cozy family meal, this simple recipe delivers incredible flavor with minimal effort. We’ll guide you through each step to ensure your dip is a crowd-pleasing success, even if you’re new to cooking. This guide makes it simple to turn basic ingredients into an impressive dish everyone will love.

    What You’ll Need

    Before you start, gather these essential items and ingredients:

    • A 9×13 inch (or similar) baking dish.
    • A large mixing bowl.
    • An electric mixer (optional, but helpful for cream cheese).
    • 2 cups cooked chicken, shredded or finely diced (about 1 pound raw).
    • 8 ounces cream cheese, softened.
    • ½ cup ranch dressing (or blue cheese dressing).
    • ½ cup buffalo hot sauce (like Frank’s RedHot).
    • 1 cup shredded cheddar cheese (or a cheddar-jack blend), divided.
    • Optional: Chopped green onions or fresh parsley for garnish.

    Step-by-Step Instructions

    Making buffalo chicken dip in the oven is one of the easiest recipes you’ll find. Just follow these simple steps for a crowd-pleasing dish:

    1. Preheat Your Oven: Start by preheating your oven to 375°F (190°C) to ensure the dip bakes evenly.
    2. Soften the Cream Cheese: In a large mixing bowl, beat the softened cream cheese until it’s smooth and creamy. A hand mixer makes this quick. If your cream cheese isn’t soft, microwave it for 15-20 seconds.
    3. Mix the Creamy Base: Add the ranch dressing and buffalo hot sauce to the cream cheese. Mix thoroughly until the base is smooth and well combined. This creamy, spicy mixture is the heart of your dip’s flavor.
    4. Fold in the Chicken: Gently fold the shredded chicken into the creamy base until it’s evenly coated.
    5. Prepare for Baking: Spread half of the chicken mixture into your baking dish. Sprinkle with half of the shredded cheddar cheese to create a cheesy middle layer.
    6. Layer and Top: Spread the remaining chicken mixture on top, then sprinkle the rest of the cheddar cheese over the entire dip. This top layer will bake into an irresistible golden crust.
    7. Bake to Perfection: Place the baking dish in your preheated oven and bake for 20-25 minutes. The dip is ready when it’s bubbly around the edges and the cheese on top is melted and lightly golden brown.
    8. Serve Warm: Carefully remove the dip from the oven and let it cool for a few minutes. This allows it to set slightly. Garnish with chopped green onions or parsley, if desired, before serving.

    Tips for Success with Your Buffalo Chicken Dip

    Achieving a perfect buffalo chicken dip is easy with a few extra pointers. These simple tips will help elevate your beginner-friendly recipe:

    • Room Temperature Cream Cheese: Always use softened cream cheese. It mixes much more easily, preventing lumps in your dip. Take it out of the fridge about 30 minutes before you start.
    • Shredding Chicken: For the best texture, shred your chicken evenly. This ensures every bite has chicken. Using two forks or a stand mixer with a paddle attachment works wonders for shredding.
    • Don’t Overbake: Keep an eye on your dip. Overbaking can dry it out. The goal is bubbly edges and melted, slightly golden cheese on top.
    • Make Ahead: You can assemble the dip completely up to 24 hours in advance. Just cover it and refrigerate. When ready to bake, add a few extra minutes to the cooking time [3].
    • Customizing Spice: If you like it spicier, add a little extra hot sauce. For a milder dip, reduce the hot sauce slightly or add a touch more ranch dressing. This flexibility makes it a great family-friendly meal.

    With this simple method, you can consistently create a creamy, cheesy, and perfectly spicy dip. It’s an easy and stress-free way to build confidence in the kitchen. Serve it warm and get ready to impress your friends and family with this incredible homemade buffalo chicken dip!

    How to Make Buffalo Chicken Dip in a Slow Cooker

    Your slow cooker is perfect for making a delicious and easy buffalo chicken dip recipe. Ideal for parties, game days, or a stress-free family dinner, this method simplifies the cooking process and frees up your oven. The slow cooker also keeps your dip warm and ready to serve for hours.

    Here’s how to create this flavorful dip with minimal effort.

    Ingredients for Slow Cooker Buffalo Chicken Dip

    This recipe uses simple, everyday ingredients like cooked chicken, cream cheese, hot sauce, and your favorite dressing to create a fantastic result.

    • Cooked Chicken: About 2 cups, shredded. Rotisserie chicken is a great shortcut!
    • Cream Cheese: 2 blocks (16 oz total), softened.
    • Buffalo Hot Sauce: 1/2 to 3/4 cup (like Frank’s RedHot).
    • Ranch or Blue Cheese Dressing: 1/2 cup.
    • Shredded Cheddar Cheese: 1 to 1 1/2 cups.
    • Shredded Mozzarella (optional): 1/2 cup for extra gooeyness.

    Step-by-Step Slow Cooker Instructions

    Follow these simple steps to make a warm, creamy, and irresistible buffalo chicken dip.

    1. Prepare Your Chicken: Ensure your chicken is cooked and shredded. If using fresh chicken breasts, boil or bake them first, then shred with two forks.
    2. Add Cream Cheese: Place the softened cream cheese blocks into your slow cooker. Using room temperature cream cheese makes this easier.
    3. Combine Liquids: Pour the buffalo hot sauce and ranch or blue cheese dressing into the slow cooker.
    4. Stir in Chicken: Gently add the shredded chicken.
    5. Add Cheese: Sprinkle in about half of the shredded cheddar cheese. If using mozzarella, add it now as well.
    6. Mix Well: Stir everything together until well combined. The cream cheese should begin to break down and mix with the other ingredients.
    7. Cook: Cover and cook on LOW for 1.5 to 2 hours or on HIGH for 45 minutes to 1 hour.
    8. Stir and Add Remaining Cheese: About halfway through the cooking time, stir the dip well to ensure everything is melting evenly. Mix in the remaining shredded cheddar cheese.
    9. Continue Cooking: Let the dip cook until it is hot, bubbly, and all the cheese has melted.
    10. Serve Warm: Switch your slow cooker to the “Keep Warm” setting to keep the dip at the perfect temperature for serving.

    Helpful Tips for Slow Cooker Buffalo Chicken Dip Success

    These practical tips will help you make the best possible easy buffalo chicken dip.

    • Soften Cream Cheese: Always use softened cream cheese to help it melt smoothly and blend easily. Take it out of the fridge about 30 minutes before you start.
    • Stirring is Key: Stir the dip periodically as it cooks. This prevents sticking at the bottom and ensures a consistent, creamy texture.
    • Consistency Check: If your dip seems too thick, add a splash of ranch dressing or a tablespoon of chicken broth. If it’s too thin, a little extra cream cheese or cheddar will help it thicken.
    • The “Keep Warm” Setting: Use the “Keep Warm” function to hold the dip at the perfect temperature for parties. This prevents overcooking and is ideal for events where guests eat at different times.
    • Prep Ahead: You can cook and shred your chicken a day in advance. Store it in an airtight container in the fridge to save time when you’re ready to cook.
    • Customize Your Heat: Adjust the amount of buffalo hot sauce to your liking. Add more for extra spice or use less for a milder flavor.

    Using your slow cooker makes creating delicious, flavorful dips like this one a breeze. Enjoy this simple and satisfying buffalo chicken dip!

    What Should You Serve with Buffalo Chicken Dip?

    Once you’ve mastered our easy buffalo chicken dip recipe, the next fun part is choosing the perfect pairings! This warm, creamy, and spicy dip is incredibly versatile, making it a star at game days, potlucks, or as a fun simple dinner recipe.

    The key to a great spread is balancing textures and flavors with a mix of crunchy, fresh, and hearty options. As part of our mission to help you enjoy flavorful meals made easy, we’ve gathered the best ideas for what to serve with your buffalo chicken dip. These beginner-friendly recipes are guaranteed to be a hit!

    Classic & Crunchy Dippers

    When you need a reliable, satisfying crunch, these go-to dippers are the perfect choice. They are sturdy enough to handle a generous scoop of buffalo chicken dip, making them a crowd-pleaser for any gathering.

    • Tortilla Chips: Sturdy and savory, perfect for scooping. Look for restaurant-style chips.
    • Pita Chips: These offer a slightly softer crunch and have a wonderful toasted flavor.
    • Crackers: Choose hearty options like Ritz or butter crackers to add a salty, buttery note.
    • Pretzel Crisps or Mini Pretzels: Their salty crunch provides a fantastic contrast to the creamy dip.

    Fresh & Healthy Bites

    To balance the dip’s rich flavor, add some fresh and healthy options. Crisp, cool vegetables offer a refreshing counterpoint and make your appetizer spread more colorful and well-rounded.

    • Celery Sticks: The classic pairing. Their crisp texture and mild flavor complement the dip perfectly.
    • Carrot Sticks: Sweet and crunchy, they add a vibrant touch of color.
    • Cucumber Slices: Refreshing and cool, these slices help cut through the richness of the dip.
    • Bell Pepper Strips: Red, yellow, or orange bell peppers provide a sweet, crunchy bite.
    • Broccoli Florets: A great way to add more green, they offer a uniquely satisfying bite.
    • Cherry Tomatoes: These add a juicy pop of freshness with every scoop.

    Warm & Hearty Breads

    For a more substantial pairing, serve the dip with warm breads. These options help turn your appetizer into a mini-meal, making them perfect for a cozy night in or as part of your family-friendly meals.

    • Sliced Baguette: Toast it lightly for the perfect amount of crunch.
    • Toasted Garlic Bread: Adds a delicious, savory layer of flavor.
    • Hawaiian Rolls or Slider Buns: Soft and slightly sweet, these are ideal for making mini sandwiches.
    • Pita Bread (warm): Cut into triangles for an easy and soft scooping option.
    • Potato Wedges or Tater Tots: Bake until crispy and use them as an indulgent dipper.

    Turn it into a Meal!

    Don’t limit this dip to just an appetizer! With a little creativity, you can transform buffalo chicken dip into a satisfying simple dinner recipe. These ideas are excellent quick meal solutions for busy families.

    • Buffalo Chicken Dip Wraps or Sandwiches: Spoon the dip into a tortilla or onto a bun with lettuce and tomato for a quick lunch.
    • Stuffed Bell Peppers: Halve bell peppers, fill them with the dip, and bake until tender for a healthy and balanced meal.
    • Quesadillas: Spread the dip between two tortillas with extra cheese and grill until golden brown.
    • Loaded Baked Potatoes: Top a baked potato with a generous scoop of dip for a comforting and approachable home cooking option.
    • Lettuce Wraps: For a lighter, low-carb meal, spoon the dip into large, crisp lettuce cups.

    With so many delicious options, you can serve your homemade buffalo chicken dip recipe a new way every time. Enjoy experimenting with these pairings to find your favorites! Recipesmondial is here to help you make every meal delicious and stress-free.

    Tips, Variations, and Storage

    How to Make it Spicier (or Milder)

    One of the best things about making homemade buffalo chicken dip is customizing the heat. Whether you love a fiery kick or prefer a milder, creamy flavor, it’s easy to adjust this recipe to your taste.

    Here’s how to tailor the heat:

    • For More Heat:
      • Add More Hot Sauce: Increase the amount of Frank’s RedHot (or your chosen brand) by 1-2 tablespoons.
      • Cayenne Pepper: Stir in a pinch of cayenne pepper with the cheese mixture. A little goes a long way!
      • Red Pepper Flakes: For a visible pop of spice, mix in 1/2 to 1 teaspoon of red pepper flakes.
      • Hotter Sauce: If you’re feeling adventurous, use a spicier variety of hot sauce.
    • For Milder Flavor:
      • Reduce Hot Sauce: Start with less hot sauce than the recipe calls for, such as 1/4 to 1/2 cup, and taste as you go.
      • More Cream Cheese: Add an extra 2-4 ounces of cream cheese to boost creaminess and mellow the heat.
      • More Dressing: Stir in an extra 1/4 cup of ranch or blue cheese dressing to balance the spice.
      • Use Milder Sauce: Some brands offer milder buffalo sauces, which are a great starting point for those who prefer less heat.

    Can You Make Buffalo Chicken Dip Ahead of Time?

    Absolutely! This dip is perfect for making ahead. You can assemble it in advance and bake it just before serving, making it a great option for parties or busy weeknights.

    • Assemble and Refrigerate:

      Mix all the ingredients as directed in the recipe, but do not bake. Transfer the mixture to your baking dish and cover it tightly with plastic wrap or foil.

    • Store in the Fridge:

      Refrigerate the unbaked dip for up to 2-3 days.

    • Bake When Ready:

      When you’re ready to serve, remove the dip from the fridge. Let it sit on the counter for about 15-20 minutes to take the chill off. Bake according to the recipe instructions, adding an extra 5-10 minutes to the baking time to account for the cold temperature.

    How to Store and Reheat Leftovers

    Proper storage will keep your buffalo chicken dip fresh and delicious. Here’s how to store and reheat any leftovers.

    • Storing Leftovers:
      • Cool Completely: Allow the dip to cool to room temperature before storing. This prevents condensation and keeps it fresh.
      • Airtight Container: Transfer the leftover dip to an airtight container.
      • Refrigerate Promptly: Store the dip in the refrigerator for up to 3-4 days [4].
      • Freezing (Optional): While you can freeze this dip, the creamy texture may change slightly upon thawing. To freeze, place it in a freezer-safe, airtight container for up to 2-3 months. Thaw overnight in the refrigerator before reheating.
    • Reheating Leftovers:
      • In the Oven:
        1. Preheat your oven to 350°F (175°C).
        2. Transfer the dip to an oven-safe dish. If it seems dry, stir in a splash of milk or chicken broth.
        3. Cover with foil to prevent it from drying out.
        4. Bake for 15-25 minutes, or until heated through and bubbly.
      • In the Microwave:
        1. Place an individual portion into a microwave-safe dish.
        2. Cover lightly with a paper towel to prevent splatters.
        3. Heat on medium power for 1-2 minutes, stirring halfway through. Continue heating in 30-second intervals until warmed to your liking.

    Frequently Asked Questions About Buffalo Chicken Dip

    What is the best chicken for buffalo chicken dip?

    Choosing the right chicken for buffalo chicken dip is simple, as you have several excellent, low-effort options. Each one helps you create a delicious dip.

    Here are the best types of chicken to use:

    • Cooked Rotisserie Chicken: A fantastic, time-saving choice for easy recipes, rotisserie chicken is already tender and flavorful. Simply shred the meat and add it to your dip for a quick meal solution.
    • Canned Chicken: This convenient pantry staple is another great option. Just be sure to drain it well before shredding it with a fork. It works wonderfully for a fuss-free beginner-friendly recipe.
    • Cooked Chicken Breast or Thighs: For those who prefer cooking from scratch, fresh chicken is ideal. You can poach, bake, or boil chicken breasts or thighs before shredding them. This option gives you full control over the seasoning and is also a great way to use up leftovers.

    Regardless of which chicken you choose, make sure it’s fully cooked and shredded finely. This texture helps it incorporate perfectly into the creamy dip base, making your flavorful meals made easy.

    Can you eat buffalo chicken dip cold?

    While technically safe to eat cold, buffalo chicken dip is almost always served warm. Warming the dip brings out its best flavors, as the cheeses become melty and creamy to create an irresistible, gooey texture. The hot sauce also tastes more vibrant when heated.

    However, eating cold leftovers is perfectly fine. Just know the texture will be different, as it will be much firmer and less spreadable. For the best experience, we always recommend reheating your dip to restore its fresh, delicious flavor. Our goal is to help you enjoy cooking without stress.

    How do you make buffalo chicken dip without ranch?

    Instead of ranch, many classic recipes call for blue cheese dressing. Its tangy, pungent flavor pairs wonderfully with spicy buffalo sauce, providing a deeper, more traditional flavor profile for a truly flavorful meal.

    If you dislike both ranch and blue cheese, you can still make a delicious dip. Consider this simple substitution:

    • Cream Cheese and Sour Cream: For a creamy base without a specific dressing flavor, combine extra cream cheese with a dollop of sour cream. Thin the mixture with a splash of milk or chicken broth. From there, you can customize the dip by adding seasonings like garlic powder or onion powder. This approach is part of our step-by-step cooking guidance.

    Experiment to find your perfect balance. You’ll quickly build confidence in the kitchen.

    What is the best hot sauce for buffalo dip?

    For an authentic buffalo chicken dip, Frank’s RedHot Original is the undisputed classic. This hot sauce offers the perfect balance of heat and vinegary tang, an iconic flavor that many consider essential for the true buffalo experience [5].

    However, you can certainly experiment with other hot sauces, as different brands offer varying heat levels and flavor notes. For example:

    • Louisiana-style Hot Sauces: These offer a similar vinegary kick but may be milder or feature a different chili pepper profile.
    • Spicier Options: If you love extra heat, choose a hotter cayenne pepper sauce or add a touch of habanero or ghost pepper hot sauce. Start small and taste as you go!

    Ultimately, the “best” hot sauce is the one you enjoy most, a principle at the heart of our approachable home cooking philosophy. Choosing a sauce you genuinely like ensures your easy recipes are always a hit.


    Sources

    1. https://www.thekitchn.com/the-easiest-way-to-shred-chicken-237190
    2. https://www.franksredhot.com/en-us/products/franks-redhot-original-cayenne-pepper-sauce
    3. https://www.foodsafety.gov/keep-food-safe/food-safety-by-events-and-seasons/parties-and-buffets
    4. https://www.foodsafety.gov/food-safety-charts/cold-food-storage-chart
    5. https://www.franksredhot.com/en-us/about-us

  • How to Make Perfect Baked Potatoes in the Oven (A Simple Guide)

    How to Make Perfect Baked Potatoes in the Oven (A Simple Guide)

    To make perfect baked potatoes in the oven, first wash and dry russet potatoes, then pierce them several times with a fork. Rub the skins with olive oil and a generous amount of salt. Bake them directly on the oven rack at 425°F (220°C) for 45-60 minutes, until the skin is crispy and the inside is fluffy and tender.

    Is there anything more comforting than a perfectly cooked baked potato? Its golden, crispy skin gives way to a wonderfully fluffy, steaming interior—a simple pleasure that forms the base of countless delicious meals. While it seems straightforward, achieving that ideal texture can be a culinary mystery. Many home cooks are left wondering how to get it right without being overwhelmed by complex techniques.

    At Recipesmondial, we believe simple dinner recipes should always deliver maximum flavor and enjoyment. Our goal is to transform basic ingredients into something extraordinary. That’s why we’re sharing our foolproof method for the best baked potatoes. This guide to approachable home cooking is designed for beginners and busy families, walking you through every step. Forget the guesswork; we guarantee you’ll get that crave-worthy crispy skin and a perfectly fluffy potato every single time. Cook confidently and enjoy the process without stress.

    Whether you need an easy side dish, a hearty lunch, or a creative base for family-friendly meals, this simple baked potato recipe is your new go-to. Elevate your everyday cooking with a classic dish that’s simple, satisfying, and incredibly versatile. Let’s explore why this method stands out and how it can help you make flavorful meals easy in your own kitchen.

    Why This is the Best Baked Potato Recipe

    Welcome to your new favorite way to make incredible baked potatoes! At Recipesmondial, we believe cooking should be simple, enjoyable, and delicious. Our oven-baked potato recipe is designed to deliver just that: a perfectly crispy skin and a wonderfully fluffy interior, every single time.

    Have you ever felt overwhelmed by complex recipes? We’ve stripped away the confusion. This guide takes the guesswork out of making the perfect oven-baked potato, with easy-to-follow steps for both beginners and experienced home cooks.

    So, what makes this the best baked potato recipe you’ll find?

    • Foolproof Results: Our clear, step-by-step guidance ensures you get it right every time. You’ll achieve that perfect combination of a fluffy interior and crisp, delicious skin, so you can say goodbye to dense or burnt potatoes for good.
    • Simple Ingredients, Maximum Flavor: This recipe uses just a few pantry staples to bring out the potato’s natural, delicious flavor. It’s proof that you don’t need complicated ingredients to create an incredible dish.
    • Confidence Building: Perfect for beginners, this easy recipe will boost your confidence in the kitchen. By mastering this simple technique, you’ll have a versatile base for countless family-friendly meals.
    • Stress-Free Cooking: Because this method is so straightforward, you can relax and enjoy the process. It eliminates the pressure of complicated steps so you can focus on creating a delicious meal.
    • Versatile Meal Starter: A great baked potato isn’t just a side dish—it’s the foundation for a complete meal. Use it for quick breakfasts, simple lunches, or satisfying dinners. With endless topping possibilities, it makes meal planning easy.
    • Practical Tips & Tricks: We share our essential secrets for success, helping you avoid common mistakes. These insights ensure your baked potatoes turn out perfectly, so you can cook with confidence.

    Our goal is to help you move from uncertainty to confidence in the kitchen. With this recipe, you’ll learn to transform simple ingredients into a delicious, satisfying meal. Get ready to make mealtime more enjoyable and stress-free with Recipesmondial!

    What You’ll Need: Ingredients & Equipment

    A flat lay of fresh Russet potatoes, olive oil, sea salt, a fork, and a baking sheet on a wooden surface, ready for preparing baked potatoes.
    A professional food photography shot, photorealistic, high-quality food magazine style. The image features a visually appealing flat lay of fresh, clean Russet potatoes, a bottle of olive oil, a small bowl of coarse sea salt, a fork, and a baking sheet. All items are arranged neatly on a rustic wooden cutting board or a light, textured kitchen counter. The lighting is warm and natural, emphasizing the quality and readiness of the ingredients. No artistic filters or effects.

    What is the best type of potato for baking?

    Choosing the right potato is the first step to a perfect baked potato. For a truly fluffy interior and wonderfully crispy skin, we strongly recommend Russet potatoes [1]. These are also commonly known as Idaho potatoes.

    Russets have a high starch content, which makes them light and airy when cooked. Their thick skins also crisp up beautifully in the oven, creating that satisfying contrast between a fluffy interior and a crunchy exterior.

    However, if Russets aren’t available, don’t worry! Yukon Gold potatoes are a fantastic alternative that offer a slightly creamier, richer texture. Red potatoes also work in a pinch, though they will result in a denser, waxier interior. Feel free to experiment to discover your personal favorite!

    Simple Ingredients for Flavorful Spuds

    To create an incredibly flavorful baked potato, you only need a few simple ingredients that you likely already have. This recipe is a quick, reliable, and budget-friendly meal solution.

    • Russet Potatoes: Medium to large size (about 8-10 ounces each). Always choose firm potatoes and avoid any with green spots or sprouts for the best flavor.
    • Olive Oil or Avocado Oil: A light coating helps the skin get super crispy and allows the salt to adhere well.
    • Kosher Salt: Coarse kosher salt is essential for boosting flavor and achieving a perfectly crunchy skin.
    • Freshly Ground Black Pepper (Optional): Adds a nice touch of warmth and subtle spice.

    These simple ingredients are the foundation for a perfect baked potato, proving that delicious, family-friendly meals don’t need to be complicated or require a lot of fuss.

    Essential Kitchen Tools

    You don’t need any special equipment to make perfect baked potatoes. The basic tools required are likely already in your kitchen, making the process smooth and enjoyable.

    • Baking Sheet: A sturdy sheet pan provides even heat distribution. Ensure it’s large enough to hold your potatoes without crowding them.
    • Fork or Paring Knife: Use this to pierce the potato skins before baking. This simple step is crucial to prevent them from bursting in your oven.
    • Pastry Brush (Optional): Great for evenly coating potatoes with oil. Alternatively, you can simply use your clean hands.
    • Oven Mitts: Absolutely essential for safety. Always use them when handling the hot baking sheet and potatoes.

    With these kitchen essentials, you’re all set to begin. Our step-by-step guidance will have you cooking confidently and enjoying the process without any stress.

    How to oven bake the perfect baked potato?

    A perfectly baked Russet potato, split open with steam rising, a pat of butter melting into its fluffy interior, on a white plate.
    A professional food photography shot, photorealistic, high-quality food magazine style. The image captures a single, perfectly baked Russet potato, split lengthwise down the middle. Steam gently rises from its fluffy, white interior. A small pat of butter is melting perfectly into the soft potato flesh. The skin is crispy and golden brown. The potato is presented on a simple, elegant white plate, with a slightly blurred warm kitchen background. The focus is sharp on the potato. No artistic interpretations or filters.

    Step 1: Preheat and Prep

    Preheating your oven is a crucial first step. It ensures consistent heat from the moment the potatoes go in, helping them cook evenly and develop a wonderfully crispy skin. For the best results, set your oven to 400°F (200°C).

    • Preheat your oven: Adjust an oven rack to the middle position and preheat to 400°F (200°C).
    • Prepare your baking sheet: Line a baking sheet with parchment paper or aluminum foil for easy cleanup.

    Step 2: Wash and Pierce the Potatoes

    Properly washing and piercing your potatoes is essential. Washing removes any dirt from the skin, while piercing prevents them from bursting in the oven.

    • Wash the potatoes: Scrub each potato thoroughly under cool running water, using a vegetable brush to remove any stubborn dirt. Pat them completely dry with a kitchen towel.
    • Pierce the potatoes: Using a fork, pierce each potato 6 to 8 times on all sides. This allows steam to escape during baking, which prevents them from bursting [2] and ensures a fluffy interior.

    Step 3: Oil and Season for Crispy Skin

    This step is the secret to an irresistible, crispy skin. A little oil and salt will transform the potato’s exterior into a flavorful, crunchy shell that encases the fluffy interior.

    • Oil the potatoes: Drizzle each potato with about 1 teaspoon of olive or avocado oil. Use your hands to rub the oil evenly over the entire skin.
    • Season generously: Sprinkle coarse salt (like sea salt or kosher salt) and freshly ground black pepper over each potato. The salt not only adds flavor but also helps draw out moisture, making the skin even crispier.

    Step 4: Bake to Fluffy Perfection

    It’s time to bake. Cooking at the right temperature for the correct amount of time is the key to a perfectly tender and fluffy interior. Soon, you’ll have delicious baked potatoes ready for your favorite toppings.

    • Place in the oven: Arrange the potatoes on the prepared baking sheet, making sure to leave some space between them for even air circulation.
    • Bake until tender: Bake for 50 to 70 minutes. The exact time will depend on the size of your potatoes; larger ones will require more time.
    • Check for doneness: The potatoes are ready when a fork slides easily into the center with no resistance, or when they yield to a gentle squeeze (use an oven mitt!).
    • Finish and serve: Carefully remove the potatoes from the oven. To serve, slice them lengthwise, gently squeeze the ends to open them up, and fluff the inside with a fork. Serve immediately with your desired toppings.

    Should you roast potatoes at 400 or 425?

    The question of whether to bake potatoes at 400°F (200°C) or 425°F (220°C) is a common one for home cooks. While both temperatures yield a delicious result, they produce slightly different textures. Understanding this difference is the key to creating your perfect baked potato every time.

    Let’s break down what to expect at each temperature so you can decide which is best for your next easy meal.

    Baking at 400°F (200°C)

    Baking at 400°F is a fantastic and forgiving choice. This temperature allows potatoes to bake evenly, developing a wonderfully fluffy inside while the skin gets nicely crisp. The lower heat also prevents the potato from drying out and reduces the chance of burning. As a result, it’s an excellent temperature for larger potatoes, giving them ample time to cook through. This reliable method guarantees a great baked potato every time, making it perfect for beginner cooks seeking simple dinner recipes.

    Baking at 425°F (220°C)

    If you love an extra-crispy potato skin, then 425°F might be your go-to temperature. The intense heat cooks potatoes faster and creates that desirable deep golden-brown, crunchy exterior. However, you’ll need to watch them more carefully, as the higher heat can sometimes dry out the interior, especially if they overcook. This temperature is perfect when you’re short on time or when that super-crispy texture is your top priority for your family-friendly meals.

    Which Temperature is Best for Your Baked Potato?

    Ultimately, the best temperature depends on your desired outcome and how much time you have. While both settings produce a delicious baked potato, your choice simply refines the final texture and taste.

    • For beginners or larger potatoes: Choose 400°F (200°C). This temperature is more forgiving and reliably produces a fluffy baked potato with great skin, making it a perfect approach for approachable home cooking. [3]
    • For speed and super-crispy skin: Go for 425°F (220°C), but remember to monitor the potatoes closely. To ensure a perfectly cooked interior despite the faster cooking time, check for doneness with a fork or an internal thermometer.

    No matter which temperature you choose, a few simple steps will ensure success. Always prick your potatoes several times with a fork to release steam and prevent them from bursting in the oven. Next, rub them with a little oil and season generously with salt to make the skin extra delicious. With these tips, you’re on your way to making the best baked potato!

    Pro Tips for Foolproof Baked Potatoes

    Unlock the secret to the ultimate baked potato with these expert tips. We’ll show you how to achieve a perfectly fluffy interior and a deliciously crispy skin every single time. Say goodbye to guesswork and hello to your new favorite side dish!

    • Pick the Right Potato: For the best results, always choose starchy potatoes like Russets (also known as Idaho potatoes). Their high starch content is the key to a fluffy, airy texture once baked.
    • Wash and Dry Thoroughly: Scrub your potatoes well under running water, then dry them completely with a clean towel. Removing all moisture is essential for a crispy skin.
    • Don’t Forget to Pierce: Pierce the skin 4-5 times all over with a fork. This crucial step allows steam to escape, which prevents the potato from bursting and helps it cook more evenly.
    • Oil and Salt for Super Crispy Skin: For a wonderfully crisp and savory crust, rub the potato skin with a little olive or vegetable oil. Then, sprinkle generously with coarse sea salt.
    • Bake Directly on the Rack: For the crispiest skin, place potatoes directly on the oven rack. This allows hot air to circulate evenly. Avoid wrapping them in foil, which steams the potato and results in a soft skin.
    • Test for Doneness: To check if your potato is done, a fork should slide easily into the center. It should also feel tender when gently squeezed. For perfect results, the internal temperature should be between 205–210°F (96–99°C) [3].
    • Slit and Fluff Immediately: As soon as the potato is out of the oven, cut a slit down the middle to release steam. This step is essential for a light, fluffy interior. Gently squeeze the ends to open it up, then use a fork to fluff the flesh.
    • Avoid Overbaking: An overbaked potato will be dry and mealy. To ensure a moist, delicious interior, monitor the cooking time and begin testing for doneness as it gets close.
    • Get Creative with Toppings: A baked potato is the perfect canvas for flavor, so think beyond butter and sour cream. To make this simple side dish truly shine, explore our Delicious Topping Ideas section for inspiration.

    Delicious Topping Ideas for Your Baked Potato

    Three baked potatoes, each with different delicious toppings: one with sour cream and chives, one with cheese and bacon, and one with chili.
    A professional food photography shot, photorealistic, high-quality food magazine style. The image showcases a vibrant and appealing spread of three baked potatoes, each generously topped with different, colorful ingredients. One potato is topped with sour cream and freshly chopped green chives, another with melted cheddar cheese and crispy bacon bits, and the third with a spoonful of hearty chili. The toppings are artfully arranged, creating a visually rich and appetizing display. The background is a clean, inviting kitchen counter with soft, natural lighting. No artistic effects or illustrations.

    Classic & Comforting Toppings

    Once your potato is perfectly baked, it’s time for the fun part: the toppings. With a few simple additions, you can transform a simple spud into a delicious, comforting meal. Here are some classic choices to get you started.

    • Fluffy Butter: A pat of real butter melting into the hot, fluffy potato adds a rich, creamy taste. It’s the essential first step for a classic baked potato.
    • Cool Sour Cream: For a tangy, refreshing contrast, add a generous dollop of sour cream. Its perfect balance makes it a staple topping for a reason.
    • Shredded Cheddar Cheese: Sprinkle sharp or mild cheddar over the hot potato and watch it melt into a gooey, savory layer.
    • Crispy Bacon Bits: Crumbled cooked bacon adds a salty, smoky crunch. You can use store-bought bits or cook and chop your own for extra flavor.
    • Fresh Chives: Finely chopped chives provide a mild oniony zest, a hint of freshness, and a lovely pop of green color.
    • Salt and Freshly Ground Black Pepper: Don’t forget the basics. A good pinch of salt and pepper enhances all the other flavors.

    Healthy & Fresh Toppings

    A baked potato can be the foundation of a healthy, balanced meal. By opting for lighter, fresher ingredients, you can add flavor and nutrition without feeling weighed down. These options make creating a quick, healthy dish easy.

    • Greek Yogurt: A fantastic substitute for sour cream, Greek yogurt offers a similar tang with more protein and fewer calories.
    • Salsa: A fresh tomato salsa makes for a vibrant, zesty topping that’s full of vegetables and adds a nice kick.
    • Diced Avocado: Creamy avocado adds healthy fats and a smooth texture. Brighten it up even more with a squeeze of lime juice.
    • Steamed Vegetables: Top with lightly steamed vegetables like broccoli florets, corn, or peas, finished with a dash of salt and pepper.
    • Lean Protein: Turn your baked potato into a protein-packed dish with shredded chicken, black beans, or chickpeas.
    • Herbs and Spices: Add flavor without extra calories by using fresh herbs like parsley and dill or a sprinkle of paprika.

    Loaded Dinner-Style Toppings

    With these hearty, dinner-style ideas, you can turn a baked potato into a satisfying, family-friendly meal. It’s an easy way to elevate a weeknight dinner and find approachable home cooking inspiration.

    • Chili con Carne: Ladle a scoop of your favorite chili over the potato. Top it with cheese and sour cream for a comforting, complete meal.
    • Pulled Pork or Chicken: Use leftover pulled pork or shredded chicken tossed in BBQ sauce for a flavorful and easy supper.
    • Taco Filling: Spoon on seasoned ground beef, turkey, or lentils. Then, add your favorite taco toppings like lettuce, tomatoes, and cheese.
    • Shepherd’s Pie Topping: Try a savory mix of ground meat and vegetables for a deconstructed shepherd’s pie that’s both quick and delicious.
    • Broccoli and Cheese Sauce: Steam fresh broccoli florets and smother them with a simple cheese sauce. This classic combination is always a hit.
    • Mediterranean Style: For fresh, bold flavors, top your potato with olives, feta cheese, sun-dried tomatoes, and a drizzle of olive oil.

    How to Store and Reheat Leftovers

    Don’t let your delicious baked potatoes go to waste! Knowing how to store and reheat them properly is a fantastic meal prep tip that ensures you can enjoy them again. This simple skill helps you create easy recipes from leftovers and keeps your family-friendly meals both safe and flavorful.

    How to Safely Store Baked Potatoes

    Proper storage is key to preventing foodborne illness while keeping your baked potato tasting its best. Follow these simple steps for beginner-friendly recipes and safe food handling.

    • Cool Quickly and Unwrapped: This is a crucial food safety step. Never wrap hot baked potatoes in foil, as this creates an anaerobic environment that can promote the growth of dangerous bacteria like Clostridium botulinum. Let potatoes cool at room temperature for no more than one hour before refrigerating. [4]
    • Refrigerate Promptly: Once cooled, place your baked potato in an airtight container or a resealable bag. Store it in the refrigerator and eat within 3 to 4 days for the best quality.

    Best Ways to Reheat Your Baked Potato

    Reheating a baked potato is quick and simple, but the method you choose affects its final texture. Here are a few reliable options for creating flavorful meals made easy.

    Reheating in the Oven (For Crispy Skin)

    This method is ideal for restoring the potato’s original crispy skin, giving you that best baked potato experience all over again. It’s a great option for quick meal solutions when you have a bit more time.

    1. Preheat your oven to 400°F (200°C).
    2. Place the cold baked potatoes directly on the oven rack.
    3. Heat for 15-20 minutes, or until the internal temperature reaches 165°F (74°C). Note that larger potatoes may need more time.

    Reheating in the Microwave (For Speed)

    The microwave is your fastest option, making it perfect when you need easy recipes fast. Just be aware that this method will result in a softer skin.

    1. Place the baked potato on a microwave-safe plate.
    2. Heat on high for 1-2 minutes to start.
    3. Flip the potato and continue heating in 30-second intervals until it is warmed all the way through.

    Reheating in the Air Fryer (For a Quick Crisp)

    The air fryer offers a great balance of speed and texture. It’s faster than the oven but still delivers a nicely crisped skin, making it a brilliant meal prep tip for quick re-crisping.

    1. Preheat your air fryer to 350°F (175°C).
    2. Place the baked potato in the basket, ensuring not to overcrowd it.
    3. Cook for 5-8 minutes, flipping halfway through, until the skin is crisp and the potato is heated through.

    Tips for Reheating Success

    To make your reheated baked potato taste as good as it did the first time, follow these tips for the best baked potato outcome.

    • Avoid Overheating: An overheated potato will become dry. Check it often and use shorter heating intervals to prevent this.
    • Add Moisture: If the potato seems dry, add a small pat of butter or a sprinkle of water before heating. To get a softer skin in the oven, you can wrap the potato loosely in foil.
    • Keep Toppings Separate: Always reheat potatoes plain. Add fresh toppings like sour cream, cheese, or chives afterward to prevent them from becoming overcooked.

    By following these guidelines, you can confidently store and reheat your baked potatoes. This makes it a breeze to enjoy your simple dinner recipes and leftover baked potatoes in oven, even on busy days. Recipesmondial is here to make your cooking journey stress-free and full of flavor!

    Frequently Asked Questions

    How long does it take a potato to bake at 400 in the oven?

    Baking a potato at 400°F (200°C) typically takes 45 to 60 minutes. However, the exact cooking time depends on the potato’s size. Larger potatoes will naturally require more time to become tender.

    For example, small to medium potatoes might be ready in as little as 40 minutes, while very large ones could take up to 75 minutes. To ensure a fluffy interior every time, always check for doneness before serving.

    To test if your potato is done, pierce it with a fork. It should feel tender all the way through. For guaranteed results, you can use a thermometer; the internal temperature should be between 205-212°F (96-100°C) for a perfectly fluffy texture [5].

    For consistent results, choose potatoes that are similar in size. This simple step helps them cook evenly and makes your meal preparation more reliable.

    Do baked potatoes have to be wrapped in foil in the oven?

    No, you do not need to wrap potatoes in foil to bake them. In fact, for the crispiest skin, it’s best to bake them directly on the oven rack. Wrapping a potato in foil traps moisture and steams it, resulting in a soft, soggy skin rather than a crispy one.

    If you prefer that satisfying crunch, skip the foil. Our cooking guidance focuses on achieving a perfectly crisp skin, which is the hallmark of a great baked potato.

    However, foil can be useful for keeping potatoes warm after they’re cooked. Once they’re out of the oven, you can wrap them loosely to hold in the heat. Just remember not to bake them in foil from the start if a crispy skin is your goal.

    For a truly delicious baked potato, let the skin get golden and crisp in the oven. This simple technique delivers maximum flavor and the best possible texture.

    How to make a baked potato in the oven fast?

    While oven baking takes time, you can speed up the process with a few smart tricks. These shortcuts are perfect for busy families who need quick and enjoyable meal solutions.

    Here are a few tips for faster baked potatoes:

    • Microwave First: Pierce the potatoes several times with a fork and microwave them for 5-10 minutes, depending on their size. Afterward, transfer them to a preheated oven for 20-30 minutes to finish cooking and achieve a crispy skin.
    • Preheat Thoroughly: Always make sure your oven is fully preheated before putting the potatoes in. Starting with a hot oven significantly reduces the overall cooking time.
    • Use a Higher Temperature: You can bake potatoes at 425°F (218°C) or 450°F (232°C) for faster results. Just be sure to monitor them closely to prevent burning.
    • Choose Smaller Potatoes: Unsurprisingly, smaller potatoes cook faster than larger ones. Selecting smaller, uniformly sized potatoes is a simple way to ensure quicker, more even cooking.

    Using these methods will help you get delicious, fluffy baked potatoes on the table much sooner, making weeknight dinners easy and stress-free.

    What’s the difference between a baked potato and a jacket potato?

    A “baked potato” and a “jacket potato” are essentially the same dish. The primary difference is the regional terminology used to describe them. In the United States, the dish is commonly called a “baked potato.”

    In the United Kingdom and Ireland, however, it is known as a “jacket potato.” This name refers to the potato’s crispy skin, which forms a “jacket” around the soft, fluffy interior. Both names describe a potato that has been cooked whole in its skin until tender.

    Regardless of what you call it, the goal is always a tender, fluffy interior with a crisp skin. It’s a classic, comforting, and versatile meal that is perfect for an easy lunch or a simple dinner.

    This simple dish is a perfect example of approachable home cooking that delivers maximum flavor with minimal fuss.


    Sources

    1. https://potatoes.com/potato-varieties/
    2. https://www.seriouseats.com/how-to-make-the-best-baked-potatoes-recipe
    3. https://www.idahopotato.com/recipes/how-to-bake-a-potato
    4. https://www.fda.gov/media/74548/download
    5. https://www.potatogoodness.com/potato-basics/how-to-cook-potatoes/
  • How to Make the Best Mashed Potatoes: An Easy Step-by-Step Recipe

    How to Make the Best Mashed Potatoes: An Easy Step-by-Step Recipe

    To make the best mashed potatoes, start by boiling peeled, evenly-cut potatoes like Russets or Yukon Golds in salted water until fork-tender. Drain them thoroughly, then mash with warmed butter, milk, or cream. Season generously with salt and pepper until you reach a smooth, creamy, and flavorful consistency.

    Few dishes bring comfort to the table quite like a steaming bowl of perfectly creamy mashed potatoes. It’s a classic star side dish for a holiday feast and a simple addition to any weeknight meal. But have you ever felt overwhelmed by complicated recipes? At Recipesmondial, we believe finding reliable and easy recipes for family-friendly meals is key to making cooking enjoyable, not stressful. That’s why we are sharing our ultimate mashed potatoes recipe, designed to take the guesswork out of this beloved side.

    You can forget about dry, lumpy, or gummy results for good. Our best mashed potatoes recipe offers clear, step-by-step cooking guidance that even beginners can follow with confidence. We’ll show you everything, from selecting the right potatoes to the simple techniques for achieving that incredible, melt-in-your-mouth creaminess. With our approachable home cooking tips, you’ll master the best mashed potatoes and serve delicious homemade mashed potatoes everyone will love. Get ready to transform everyday ingredients into truly flavorful meals made easy and build your confidence in the kitchen.

    Why You’ll Love This Easy Homemade Mashed Potatoes Recipe

    Simple, Everyday Ingredients

    You don’t need a pantry full of specialty items to make these incredible homemade mashed potatoes. Our recipe prioritizes common ingredients you likely already have, like humble potatoes, fresh milk, rich butter, and simple seasonings. This budget-friendly approach makes cooking accessible and stress-free, allowing you to create a flavorful meal without extra trips to the store.

    Foolproof for Beginners

    If you’re often overwhelmed by complex recipes or lack confidence in the kitchen, this mashed potato recipe is for you. It’s truly foolproof and designed for beginners. We provide clear, step-by-step guidance to support you through each stage, ensuring you get perfect results every time. This recipe will help you build confidence and make preparing delicious, family-friendly meals an enjoyable experience.

    The Perfect Creamy Texture

    Our recipe delivers wonderfully light, fluffy, and incredibly smooth mashed potatoes—never gummy or lumpy. Each bite offers a rich, comforting experience. The secret lies in a few simple techniques and the perfect ratio of ingredients, allowing you to achieve a restaurant-quality texture right at home. It’s a classic, flavorful dish your family will adore.

    What ingredients to put in mashed potatoes?

    An inviting flat lay of fresh ingredients for mashed potatoes: whole potatoes, butter, milk, salt, pepper, and chives.
    A professional food photography shot, 100 percent photorealistic, high-quality food magazine photo. A clean, organized flat lay composition of fresh, high-quality mashed potato ingredients on a light-colored wooden cutting board or marble countertop. The arrangement includes whole, unpeeled golden Yukon Gold potatoes, a stick of unsalted butter, a small glass pitcher of whole milk or heavy cream, a small ceramic bowl containing a pinch of coarse sea salt and freshly ground black pepper, and a small bunch of fresh green chives. Each ingredient is perfectly lit with soft, natural light, emphasizing freshness and quality, set against a clean, uncluttered background that evokes a bright home kitchen.

    Creating delicious homemade mashed potatoes is simpler than you think—it all starts with choosing the right ingredients. We’ll focus on everyday staples that combine to make a side dish that is both comforting and full of flavor. Selecting the best components will help you build kitchen confidence and achieve perfect results every time.

    The Best Potatoes for Mashing

    The type of potato you choose is crucial for the final texture of your dish. To achieve a light, fluffy, and creamy mash, select a variety that is high in starch. Starchy potatoes break down easily during cooking and absorb dairy without becoming gummy.

    • Russet Potatoes (Idaho Potatoes): Often considered the champions of mashed potatoes, Russets have a high starch content and a fluffy texture. This makes them ideal for absorbing butter and milk, resulting in a wonderfully airy mash. They are excellent for family-friendly meals.
    • Yukon Gold Potatoes: If you prefer a denser, creamier mash with a naturally buttery flavor, Yukon Golds are a fantastic choice. With their medium starch content and lovely golden hue, many home cooks love them for their rich taste, making them perfect for flavorful meals made easy.

    Quick Tip: Avoid waxy potatoes like red bliss or new potatoes. They have less starch and more moisture, which will make them gluey and dense—not light and fluffy—when mashed [1].

    Essential Dairy: Butter, Milk, or Cream

    Dairy is what transforms cooked potatoes into a rich, decadent side dish. For best results, warm your dairy before adding it. This key step keeps the potatoes from cooling down and helps them absorb the liquid more effectively.

    • Unsalted Butter: Using unsalted butter gives you complete control over the saltiness of your dish. It also adds incredible richness and flavor, so don’t be shy.
    • Whole Milk: For a smooth consistency that isn’t overly heavy, whole milk is a reliable choice. It provides a perfect balance of creaminess for your beginner-friendly mashed potatoes.
    • Heavy Cream or Half-and-Half: To create an extra luxurious and ultra-creamy texture, use heavy cream or half-and-half. These additions make your mashed potatoes incredibly indulgent and are wonderful for elevating simple dinner recipes.

    Substitution Idea: For a dairy-free version, you can use a dairy-free milk alternative (like unsweetened almond or oat milk) and plant-based butter. This makes it an adaptable easy recipe for various dietary needs.

    Simple Seasonings for Maximum Flavor

    Proper seasoning is crucial for bringing out the full flavor of your best mashed potatoes recipe. Don’t be afraid to taste as you go and adjust accordingly.

    • Salt: Kosher salt is ideal. Add it to the potato boiling water and again while mashing to layer the flavor beautifully.
    • Black Pepper: Freshly ground black pepper adds a subtle kick and aroma that perfectly complements the creamy potatoes.
    • Optional Flavor Boosters:
      • Garlic Powder or Roasted Garlic: A pinch of garlic powder or a few cloves of mashed roasted garlic offers a wonderful savory depth.
      • Fresh Herbs: Add a bright, fresh note with finely chopped chives, parsley, or thyme. Stir them in just before serving.
      • Onion Powder: Similar to garlic powder, a little onion powder can add another layer of savory taste without being overpowering.

    Start with these basic yet high-quality ingredients, and you’ll be on your way to mastering homemade mashed potatoes. Recipesmondial is here to help you turn simple components into something truly special, making your time in the kitchen enjoyable and stress-free.

    How to Make the Best Mashed Potatoes: Step-by-Step

    A home cook's hands mashing steaming potatoes in a large pot with a potato masher.
    A professional food photography shot, 100 percent photorealistic, high-quality food magazine photo. A close-up, action shot in a real, brightly lit home kitchen. A home cook’s hands are actively using a sturdy, silver potato masher to mash freshly boiled, steaming potatoes in a large, stainless steel heavy-bottomed pot. The potatoes are visibly soft, fluffy, and perfectly cooked, with subtle steam rising from the pot. The cook’s hands are natural and confident, conveying ease and approachability. The background is softly blurred, showing hints of a clean, warm kitchen counter and possibly a window, maintaining a focus on the mashing process.

    Step 1: Peel and Boil the Potatoes

    Properly preparing your potatoes is the cornerstone of creamy mashed potatoes. This first step ensures they cook evenly, setting the stage for a perfectly smooth final texture.

    • Peel your potatoes: Use a vegetable peeler to remove all the skin. A sturdy Y-peeler works best for quick peeling.
    • Cut into equal pieces: Slice the peeled potatoes into uniform 1.5 to 2-inch chunks. This ensures every piece cooks at the same rate, preventing hard spots or overcooked edges.
    • Rinse them well: Place the cut potatoes in a colander and rinse them under cold water. This washes away excess starch, which helps prevent a gummy texture.
    • Place in a pot: Transfer the rinsed potatoes to a large pot and cover them with cold water by about one inch.
    • Add salt: Generously salt the water with about 1 tablespoon of salt per gallon, similar to how you would for pasta. Salting the water seasons the potatoes from the inside out, making a huge difference in the final flavor [2].
    • Boil until tender: Bring the water to a boil, then reduce the heat to a simmer. Cook for 15-20 minutes, or until a fork slides easily into a potato chunk.

    Step 2: Drain and Steam Dry

    Do not overlook this crucial step. Draining and steam-drying the potatoes is the secret to a light, fluffy texture, preventing them from becoming watery or dense.

    • Drain thoroughly: Carefully pour the potatoes into a colander and shake gently to let all the hot water drain away.
    • Return to the hot pot: Return the drained potatoes directly to the still-warm pot. The residual heat will help steam them dry.
    • Steam for a few minutes: Let the potatoes sit for 3-5 minutes, allowing the steam to evaporate any excess moisture. This creates a drier potato, which is essential for a fluffy result.

    Step 3: Warm Your Butter and Milk

    Warming your butter and milk is essential for a smooth, lump-free texture. Cold dairy can cool the potatoes, preventing them from absorbing the fat evenly and resulting in a less silky finish. This quick step ensures creamy results.

    • Combine dairy: Combine the butter and milk (or cream) in a small saucepan or a microwave-safe bowl.
    • Gently heat: Warm the mixture over low heat, stirring occasionally, until the butter is melted and the milk is warm to the touch. Be careful not to let it boil.
    • Keep it ready: Set the warm dairy mixture aside so it’s ready to add to the potatoes.

    Step 4: Mash to Creamy Perfection

    Now it’s time to mash. The key to a perfect creamy texture is to work gently and avoid overmixing, which can make the potatoes gummy.

    • Return potatoes to pot: Ensure the steam-dried potatoes are in the pot you used for boiling.
    • Mash them well: Use a potato ricer or a hand masher to break down the potatoes until they are mostly smooth. A ricer will create the lightest, fluffiest texture.
    • Add warm dairy: Gradually pour in about two-thirds of the warm butter and milk mixture. It’s best to start with less, as you can always add more.
    • Mix gently: Using a sturdy spoon or spatula, fold the dairy into the potatoes until just combined and creamy. Do not overmix! Overmixing develops the starch and leads to gluey potatoes.
    • Season to taste: Season with salt and freshly ground black pepper. Taste and adjust as needed, adding more warm milk for a creamier consistency if desired.
    • Serve immediately: For the best taste and texture, serve your mashed potatoes immediately while they are warm.

    What is the secret to really good mashed potatoes?

    Tip 1: Use the Right Kind of Potato

    Excellent mashed potatoes start with the right type of potato. Starchy potatoes are your best friend here because they break down easily and absorb butter and milk beautifully. This creates the light, fluffy texture everyone loves.

    Waxy potatoes, on the other hand, have less starch and hold their shape well, which is great for salads. However, when mashed, they can become gluey and dense, resulting in a less enjoyable texture.

    For the ultimate creamy, fluffy mashed potatoes, reach for these varieties:

    • Russet Potatoes: Also known as Idaho potatoes, these are high in starch and low in moisture. They cook up light and fluffy, perfect for absorbing all the delicious dairy you add.
    • Yukon Gold Potatoes: These have a naturally buttery flavor and creamy texture. While slightly less starchy than Russets, they still mash wonderfully and give your dish a lovely yellow hue.

    Choosing the right potato from the start makes the entire process easier and helps you avoid common mistakes. [3]

    Tip 2: Always Use Warm Milk and Butter

    This tip is a game-changer for homemade mashed potatoes. Adding cold ingredients to hot potatoes cools them down, which prevents them from fully absorbing the dairy. This can lead to a lumpy or uneven consistency.

    Instead, gently warm your milk (or cream) and butter together in a small saucepan over low heat until the butter is melted. The mixture should be warm, not boiling. Warm ingredients incorporate more smoothly into hot potatoes, creating a silky and perfectly consistent texture. This simple step elevates your mashed potatoes, making them reliably smooth and flavorful.

    Tip 3: Don’t Overwork or Over-mix

    Overworking potatoes is the most common cause of a gummy, gluey texture. When potatoes are mashed too aggressively, their starch cells break down and release excess starch, which creates that unappetizing stickiness.

    To achieve the best results, be gentle. Mash your cooked potatoes until they are mostly broken down. Then, add your warm milk and butter mixture and mix just until everything is combined and creamy. A potato ricer or a hand masher works best for this. Avoid using a food processor or an electric mixer, as these tools are too aggressive and will quickly overwork the potatoes. Remember, stopping at the right moment is the key to a perfectly fluffy result.

    Tip 4: Salt Your Cooking Water

    Building flavor should start early in the cooking process. Salting the cooking water is essential because as the potatoes boil, they absorb the salt, seasoning them from the inside out. Since potatoes are bland on their own, they need this foundation of seasoning.

    Think of it like cooking pasta—you want the water to be well-seasoned. A good guideline is to add 1-2 tablespoons of salt per gallon of water before adding your potatoes. This initial salting makes a huge difference, ensuring every bite of your mashed potatoes is flavorful and well-balanced. It’s a small step that guarantees a delicious result.

    What is a common mistake when making mashed potatoes?

    Mistake 1: Using the Wrong Tool to Mash

    The secret to perfectly creamy mashed potatoes is using the right tool. Many beginners reach for a food processor or an electric mixer, but these high-speed gadgets can actually ruin the texture.

    Here’s why:

    • Overworks the Starch: High-speed blades and beaters break down the potato cells too aggressively. This process releases an excessive amount of starch.
    • Creates a Gummy Texture: All that extra starch is what turns fluffy potatoes into a sticky, glue-like mess.

    For the best results, use a hand-held potato masher or a potato ricer. These tools gently break down the potatoes without overworking the starches, giving you the light and fluffy texture you want.

    Mistake 2: Adding Cold Ingredients

    Adding cold ingredients to hot potatoes can ruin their texture and flavor. This common oversight prevents the potatoes from becoming perfectly smooth and creamy.

    Here’s the impact:

    • Cools the Potatoes Down: Cold dairy instantly lowers the temperature of your potatoes, which makes them more difficult to mash into a smooth consistency.
    • Prevents Proper Absorption: Warm potatoes absorb liquids much more effectively. Adding cold ingredients prevents them from blending seamlessly, resulting in a lumpy, less creamy texture.

    The fix is simple: gently warm your butter, milk, or cream before adding them. This small step ensures all the ingredients combine smoothly for the richest, creamiest result.

    Mistake 3: Not Draining the Potatoes Properly

    Watery mashed potatoes are a common disappointment, usually caused by one simple mistake: not draining them properly. Getting rid of excess moisture is a crucial step for great results.

    Here’s how it affects your dish:

    • Dilutes the Flavor: Excess water dilutes the taste of the potatoes and any seasonings you add, making your final dish bland.
    • Creates a Soupy Texture: Instead of being thick and fluffy, potatoes with too much water will turn thin and runny.
    • Inhibits Creaminess: The presence of water makes it difficult for potatoes to absorb the butter and cream, preventing a rich, creamy result.

    After boiling, drain the potatoes thoroughly in a colander. For an extra step, return them to the hot, empty pot and place it over low heat for a minute. This allows any remaining moisture to steam off, leaving your potatoes perfectly dry and ready to absorb the butter and cream.

    Easy Variations for Your Mashed Potatoes

    Creamy Garlic Mashed Potatoes

    Ready for a simple twist on classic mashed potatoes? Adding garlic creates a wonderful depth of flavor that will impress everyone. This easy variation is perfect for simple dinner recipes and a fantastic way to elevate family-friendly meals.

    Here’s how to make your mashed potatoes deliciously garlicky:

    • Prepare the Garlic: You have two easy options.
      • Sautéed Garlic: Mince 3-4 cloves of garlic, then sauté them gently in a tablespoon of butter or olive oil for 1-2 minutes until fragrant. Be careful not to let the garlic brown, as it can become bitter.
      • Roasted Garlic: For a milder, sweeter flavor, slice the top off a head of garlic. Drizzle it with olive oil, wrap it in foil, and roast at 400°F (200°C) for 30-40 minutes until soft. Simply squeeze the soft cloves out of the peel.
    • Mix It In: After mashing your potatoes, it’s time to add the garlic. For sautéed garlic, stir it in with the warm milk and butter. For roasted garlic, mash the soft cloves directly into the potatoes until well combined.
    • Taste and Adjust: Finally, taste your homemade mashed potatoes and add more salt or pepper if needed. Enjoy this flavorful meal made easy!

    Cheesy Mashed Potatoes

    Who doesn’t love cheese? Turning your best mashed potatoes recipe into a cheesy delight is incredibly simple. This variation adds a comforting flavor and is a guaranteed hit for all your family-friendly meals.

    Follow these quick steps to create a cheesy masterpiece:

    • Choose Your Cheese: Medium or sharp cheddar is a popular choice, but Monterey Jack, Gruyere, or a blend of cheeses also work wonderfully. For a standard batch (about 2 pounds of potatoes), you’ll need about 1 cup of shredded cheese.
    • Add the Cheese: The key is to add the shredded cheese right after you’ve mashed the potatoes and mixed in the warm milk and butter. The residual heat will melt it beautifully.
    • Stir and Serve: Gently stir until the cheese is fully melted and incorporated, creating lovely, gooey strings. For the best texture, serve immediately. This easy recipe adds big flavor!

    Mashed Potatoes Recipe Without Milk (Dairy-Free)

    Need a dairy-free option? You can still enjoy creamy, delicious mashed potatoes without milk or butter. This fantastic beginner-friendly recipe proves that approachable home cooking can cater to everyone’s dietary needs.

    Here are some simple substitutions to make your mashed potatoes dairy-free:

    • Plant-Based Milk: Swap regular milk or cream for an unsweetened, plain variety like almond, oat, or soy milk. Start with a smaller amount and add more as needed, since some plant-based milks are thinner than dairy milk.
    • Dairy-Free Fat: To get that silky texture, replace butter with a high-quality olive oil or your favorite vegan butter alternative. This will add the necessary richness.
    • Flavor Boosters: For a deeper, savory flavor, consider using vegetable broth instead of plant-based milk. You can also add nutritional yeast for a cheesy, umami note.
    • Preparation: Simply follow the main recipe steps, but substitute the dairy ingredients with their plant-based counterparts. Be sure to warm your chosen plant-based milk and dairy-free fat together before adding them to the mashed potatoes.

    Your mashed potatoes recipe without milk will be just as comforting and delicious!

    Herbed Mashed Potatoes

    Adding fresh herbs is an easy way to bring a vibrant, earthy flavor to your homemade mashed potatoes. This simple variation makes a big impact and is a wonderful way to boost your confidence in the kitchen.

    Here’s how to infuse your potatoes with wonderful herbal notes:

    • Choose Your Herbs: Fresh chives, parsley, rosemary, and thyme are all excellent choices. Feel free to use a single herb or create a combination. For a standard batch, aim for 2-3 tablespoons of finely chopped fresh herbs.
    • Prep the Herbs: Thoroughly wash your chosen herbs, pat them completely dry, and then finely chop them.
    • Add at the End: For the best flavor and color, stir the fresh herbs into your mashed potatoes just before serving. Adding them too early can dull both their taste and appearance.
    • Seasoning Tip: Before adding extra salt, taste your herbed mashed potatoes. Some herbs, like chives, have a natural savory note that may be enough.

    Enjoy this delightful and flavorful meal made easy with the simple addition of fresh herbs!

    How to Store and Reheat Leftovers

    Making a big batch of your favorite homemade mashed potatoes is a smart move, as they’re perfect for holiday meals or as a comforting side dish any night of the week. Knowing how to store and reheat them properly turns them into delicious, stress-free leftovers. This also makes them a fantastic option for meal prep ideas that can save you time later.

    Storing Mashed Potatoes Safely

    Proper storage is key to keeping your mashed potatoes fresh, delicious, and safe to eat. Following food safety guidelines is especially important when preparing family-friendly meals.

    • Cool Down Quickly: Let your mashed potatoes cool to room temperature within two hours of cooking. This crucial step prevents harmful bacteria growth [4].
    • Airtight Container: Once cooled, transfer the mashed potatoes to an airtight container. This will prevent them from drying out or absorbing other odors from the fridge.
    • Refrigerate Promptly: Stored in the refrigerator, mashed potatoes will last for 3-4 days, making them perfect for planning quick meals to enjoy throughout the week.

    Can You Freeze Mashed Potatoes?

    Absolutely! Freezing homemade mashed potatoes is a brilliant way to extend their shelf life. This meal-prep hack ensures you always have a delicious side dish ready for future easy recipes.

    Here’s how to freeze your best mashed potatoes:

    1. Cool Completely: Ensure your mashed potatoes are completely cool before freezing to prevent ice crystals from forming.
    2. Portion Out: Divide the mashed potatoes into single-serving or family-sized portions to make thawing and reheating much easier later.
    3. Wrap Well: Place portions in freezer-safe bags or airtight containers. If using bags, press out all excess air to help prevent freezer burn. For extra protection, you can cover the surface of the potatoes with a thin layer of melted butter.
    4. Label and Freeze: Label each container or bag with the date. Your mashed potatoes will keep well in the freezer for up to two months, ensuring they taste great when you’re ready to enjoy them.

    Reheating Mashed Potatoes for the Best Flavor

    Reheating can sometimes dry out mashed potatoes, but a few simple tricks can bring them back to their original creamy glory. This ensures your leftovers contribute to flavorful meals made easy.

    The key to perfect reheating is restoring moisture. No matter which method you choose, plan to stir in a splash of warm milk, cream, or broth and a pat of butter. This will bring back their signature creamy texture.

    Reheating in the Oven (Recommended for Large Batches)

    The oven is the best method for reheating large quantities, especially if you want to create a slightly crisp top. It evenly warms the potatoes, restoring their delicious texture.

    1. Preheat Oven: Set your oven to 350°F (175°C).
    2. Prepare Dish: Spread the mashed potatoes in an oven-safe dish and add a tablespoon or two of milk or broth over the top.
    3. Cover and Heat: Cover the dish tightly with foil to prevent the potatoes from drying out.
    4. Bake: Bake for 20-30 minutes, or until heated through. For the most even heating, give them a stir halfway through the cooking time.

    Reheating on the Stovetop (Quick and Easy)

    The stovetop method is fast, efficient, and perfect for reheating smaller or individual portions of homemade mashed potatoes.

    1. Use a Pot: Transfer the mashed potatoes to a saucepan or pot.
    2. Add Liquid: Add a splash of milk, cream, or broth, using about 1-2 tablespoons per cup of potatoes.
    3. Heat Gently: Heat over medium-low, stirring constantly to prevent sticking and ensure the potatoes warm up evenly.
    4. Serve When Ready: Continue stirring until the potatoes are hot, smooth, and ready to serve.

    Reheating in the Microwave (Fastest Method)

    When speed is your top priority, the microwave is the fastest reheating method. It’s ideal for a quick meal on a busy day.

    1. Microwave-Safe Dish: Place the mashed potatoes in a microwave-safe bowl.
    2. Add Liquid: Stir in a small amount of milk or broth to add moisture.
    3. Cover and Heat: Cover the bowl with a microwave-safe lid or plastic wrap, leaving a corner vented to allow steam to escape.
    4. Heat in Intervals: Heat on medium power for 1-2 minutes, then stir well. Continue heating in 30-second intervals, stirring each time, until the potatoes are hot throughout. This frequent stirring is key to preventing hot spots.

    With these simple tips, your leftover mashed potatoes will be just as comforting and delicious as when they were freshly made. Enjoy confident, approachable home cooking with Recipesmondial!

    Frequently Asked Questions About Mashed Potatoes

    How do you make mashed potatoes creamy and not gummy?

    Gummy mashed potatoes are a common problem caused by overworking the starch. To achieve a perfectly creamy and smooth consistency instead, follow a few key techniques.

    • Choose the Right Potatoes: Select starchy varieties like Russets or Yukon Golds. These are perfect for a fluffy mash because they break down easily and absorb butter and milk beautifully. [5]
    • Cook Evenly: Cut potatoes into uniform pieces to ensure they cook at the same rate. Unevenly cooked potatoes can result in a lumpy or inconsistent mash.
    • Drain and Steam Dry: After cooking, drain the potatoes thoroughly. Return them to the hot pot for a minute or two to steam dry. Removing this excess water is a crucial step to prevent a watery, gummy mash.
    • Warm Your Dairy: Gently warm your milk, cream, and butter before adding them. Cold ingredients cool the potatoes down, making them difficult to mash and preventing the butter from emulsifying properly.
    • Use the Right Tool: For the best texture, use a potato ricer or a handheld masher. Avoid a food processor or blender, as these tools overwork the starch quickly and will make your potatoes gluey.
    • Mash Gently: Be careful not to over-mix. Mash the potatoes gently and stop as soon as they are smooth and combined. Overworking them develops too much starch, which creates a gummy consistency.

    Can I make mashed potatoes ahead of time?

    Yes, you can absolutely make mashed potatoes ahead of time. This is a fantastic time-saver for holiday meal prep or busy weeknights, helping you get a delicious side dish on the table with less stress.

    1. Prepare your homemade mashed potatoes as directed in your recipe, making sure they are perfectly seasoned.
    2. After mashing, allow them to cool completely. This step is important for safe storage.
    3. Transfer the cooled mashed potatoes to an airtight container. Store them in the refrigerator for up to 3-4 days or freeze them for up to one month.

    When you’re ready to serve, reheating is simple. Adding a splash of warm milk or cream while reheating will help restore the potatoes’ original creamy texture and flavor.

    • Oven: Place mashed potatoes in an oven-safe dish with a splash of warm milk or cream. Cover with foil and bake at 350°F (175°C) for 20-30 minutes, stirring occasionally until heated through.
    • Stovetop: Transfer potatoes to a saucepan over low heat. Add a little warm milk or butter and stir frequently until warmed through and creamy.
    • Slow Cooker: For a large batch, place the potatoes in a slow cooker on low. Add a bit of liquid and stir often. This keeps them warm for hours, which is perfect for gatherings.
    • Microwave: For a single serving, place potatoes in a microwave-safe bowl with a tablespoon of milk. Heat in 1-minute increments, stirring between each, until hot.

    Should you peel potatoes for mashed potatoes?

    Traditionally, potatoes are peeled to create the smoothest, most refined texture. Removing the skin ensures your mash is consistently creamy and gives it a classic, elegant look.

    However, for a more rustic and flavorful result, you can leave the skins on. This method works especially well with thin-skinned varieties like Yukon Golds or red potatoes. Just be sure to scrub them thoroughly before boiling.

    Leaving the skins on adds extra fiber and nutrients [6]. It also provides a rustic visual appeal, saves on prep time, and adds more character to the dish.

    The choice really depends on your personal preference. Do you prefer a silky smooth texture or a slightly more wholesome, textured mash? Both are delicious, and Recipesmondial supports your culinary adventure!


    Sources

    1. https://www.idahopotato.com/recipes/mashed-potatoes-faq
    2. https://www.seriouseats.com/the-best-mashed-potatoes-recipe
    3. https://www.potatogoodness.com/potato-fun-facts/potato-types-and-varieties/
    4. https://www.foodsafety.gov/food-safety-charts/cold-food-storage-charts
    5. https://www.idahopotato.com/recipes/how-to-make-mashed-potatoes
    6. https://www.potatogoodness.com/potato-nutrition-facts/
  • The Only Deviled Eggs Recipe You’ll Ever Need (Classic & Easy)

    The Only Deviled Eggs Recipe You’ll Ever Need (Classic & Easy)

    A classic deviled eggs recipe involves boiling eggs until hard, peeling them, and slicing them in half. The yolks are then removed and mashed with mayonnaise, Dijon mustard, vinegar, and seasonings to create a smooth, creamy filling. This mixture is then piped or spooned back into the hollowed egg whites and garnished with paprika.

    Picture the perfect party spread: vibrant, delicious, and utterly irresistible. A platter of creamy, dreamy deviled eggs is likely front and center. This timeless appetizer is a crowd-pleaser for a reason, but achieving the perfect balance of flavor and texture can be tricky. If you’ve ever felt unsure in the kitchen, whether making appetizers or planning family-friendly meals, you’re in the right place.

    At Recipesmondial, we want you to enjoy cooking without stress. Our focus is on new simple dishes that deliver reliable results, and our ultimate classic deviled eggs recipe is a perfect example. With our step-by-step guidance, you’ll go from feeling unsure to cooking with confidence, creating flavorful meals made easy.

    This isn’t just any deviled eggs recipe; it’s a comprehensive guide perfect for busy home cooks and anyone looking for beginner-friendly recipes. We’ll share all our secrets for perfectly cooked eggs, a velvety smooth filling, and even creative variations to inspire your next gathering. Get ready to add this amazing deviled eggs recipe to your repertoire and delight everyone with your newfound confidence!

    Why You’ll Love This Classic Deviled Eggs Recipe

    A beautiful platter of classic deviled eggs, garnished with paprika and chives, ready for serving.
    100 percent photorealistic, professional food photography style, high-quality food magazine photo. A visually stunning platter of perfectly prepared classic deviled eggs, garnished with a sprinkle of vibrant paprika and fresh, finely chopped chives. The eggs are arranged artfully on a light-colored, rustic serving platter, set against a softly blurred, warm home kitchen background that suggests comfort and approachability. Natural, inviting daylight illuminates the scene, highlighting the creamy texture of the filling and the pristine whites. The overall impression is one of deliciousness, ease, and culinary satisfaction. NO artistic interpretations, NO illustrations, NO vector graphics, NO abstract art.

    Welcome to your new favorite deviled eggs recipe! At Recipesmondial, we believe cooking should be enjoyable, not stressful. We crafted this classic, easy-to-follow guide with that philosophy in mind. Get ready to see why this recipe will become a go-to in your kitchen.

    This recipe transforms a simple ingredient into a delightful bite perfect for any occasion. Best of all, it promises consistent, delicious results every single time.

    Why Our Deviled Eggs Recipe Stands Out

    We know home cooks want reliable guidance and easy recipes without complex steps. To solve common kitchen frustrations, we designed this deviled eggs recipe to be as straightforward as possible.

    • Effortlessly Simple: Tired of overwhelming recipes? We keep things straightforward with simple ingredients and clear instructions, so you can create this classic dish without any fuss.
    • Beginner-Friendly Approach: Lacking confidence in the kitchen? This recipe is for you. With step-by-step guidance that breaks down each part, you’ll build basic cooking skills as you go.
    • Irresistibly Delicious Flavor: Our recipe delivers the perfect creamy, tangy, and savory taste that makes deviled eggs a crowd-pleaser. They are an ideal family-friendly meal addition or party appetizer. In fact, deviled eggs are consistently a top favorite appetizer for holidays and gatherings [1].
    • Quick to Prepare: Need a fast snack or appetizer? This recipe comes together quickly, making it a fantastic solution for busy schedules.
    • Reliable Results: Say goodbye to cooking uncertainty. Our method ensures perfectly boiled eggs and a smooth, creamy filling, so you can cook confidently and achieve delicious results every time.
    • Versatile for Any Occasion: Whether it’s a potluck, a picnic, or a simple family dinner, these deviled eggs fit right in. They’re a classic for a reason!
    • Inspiring Creativity: Go beyond the classic with our fun variations. We encourage you to customize your deviled eggs and explore your culinary creativity.

    At Recipesmondial, our goal is to make mealtime stress-free so you can truly enjoy cooking. This deviled eggs recipe is a perfect example of that philosophy, turning simple ingredients into something special. Move from uncertainty to confidence in the kitchen and get ready to impress everyone with your delicious creations!

    What Ingredients Do You Need for Perfect Deviled Eggs?

    A flat lay photo showing all the fresh ingredients for deviled eggs, including whole eggs, halved egg whites, mayonnaise, mustard, and seasonings.
    100 percent photorealistic, professional food photography style, high-quality food magazine photo. A bright, clean flat lay composition showcasing all the fresh, simple ingredients required for classic deviled eggs. Featured items include several whole, perfectly hard-boiled eggs, some halved hard-boiled eggs with the yolks removed, a small bowl of creamy mayonnaise, a dollop of Dijon mustard, a splash of white vinegar, a pinch of salt and pepper, and a small, vibrant bunch of fresh dill or chives. The ingredients are neatly arranged on a pristine white marble or light wooden kitchen counter, bathed in soft, natural window light. The scene is uncluttered, inviting, and easy for a home cook to follow. NO artistic interpretations, NO illustrations, NO vector graphics, NO abstract art.

    You don’t need a long list of fancy ingredients to make perfect deviled eggs. In fact, the most delicious recipes use simple components you probably already have at home.

    At Recipesmondial, we’ll show you how to turn those everyday items into a flavorful, crowd-pleasing snack. Our guide makes crafting this classic deviled eggs recipe surprisingly easy.

    Essential Ingredients for Classic Deviled Eggs

    To create a batch of classic, creamy devilled eggs, you only need a few basic items. Here’s how these simple components come together for the perfect flavor.

    • Large Eggs (6-8): These are the star of your deviled eggs. Using slightly older eggs, about 7-10 days old, often makes them much easier to peel after boiling [2].
    • Mayonnaise (1/4 cup): This provides the creamy base for your yolk filling. Use your favorite brand for the best taste.
    • Dijon Mustard (1 teaspoon): Dijon adds a lovely tang and a hint of sophisticated flavor. If you prefer, classic yellow mustard also works wonderfully for a more traditional taste.
    • White Vinegar or Pickle Juice (1 teaspoon): A touch of acid brightens the filling. Pickle juice adds a unique, zesty twist.
    • Salt (1/4 teaspoon, or to taste): Seasoning is key to bringing out all the other flavors. Start with a little and add more if needed.
    • Black Pepper (1/8 teaspoon, or to taste): Freshly ground black pepper provides a subtle kick.
    • Smoked Paprika (for garnish): This vibrant spice adds color and a delicate smoky note, making it the perfect finishing touch for your deviled eggs.

    Tips for Ingredient Selection

    While the classic ingredients work well, a few smart choices can elevate your easy deviled eggs recipe. Use these tips to maximize flavor.

    • Egg Quality Matters: Start with high-quality eggs, as they form the foundation of your dish.
    • Mayonnaise Choice: Experiment with different mayonnaise brands—some are tangier, while others are sweeter. Finding your favorite is a simple way to customize beginner-friendly recipes.
    • Mustard Variety: Don’t be afraid to try other mustards, like spicy brown or honey mustard, for a fun variation. This simple swap shows how versatile flavorful meals made easy can be.
    • Fresh Herbs (Optional): For extra flair and freshness, add a sprinkle of fresh chives or dill as a garnish.

    With these basic ingredients, you’re ready to create delightful deviled eggs perfect for any occasion. This recipe shows how simple dinner recipes can also be adapted into amazing appetizers or healthy snacks!

    How to Make Deviled Eggs: A Step-by-Step Guide

    A close-up of hands piping creamy deviled egg yolk mixture into halved hard-boiled egg whites on a cutting board.
    100 percent photorealistic, professional food photography style, high-quality food magazine photo. A close-up, dynamic shot of a friendly, encouraging home cook’s hands (a real human cook) expertly piping the creamy, golden deviled egg filling back into the hollowed-out halves of the hard-boiled egg whites. The piping bag is held with a steady hand, creating a perfect swirl. The eggs are neatly arranged on a light-colored cutting board or serving tray, set within a bright, clean, and inviting home kitchen environment. Soft, overhead lighting emphasizes the texture and precision of the action, making the process look simple and achievable. NO artistic interpretations, NO illustrations, NO vector graphics, NO abstract art.

    Step 1: Boil the Eggs Perfectly

    The secret to delicious deviled eggs starts with a perfectly boiled egg. This crucial first step ensures they peel smoothly every time. Follow our simple, stress-free method and say goodbye to struggling with eggshells.

    Here’s how to get it right:

    1. Place Eggs in a Pot: Gently place your eggs in a single layer in a large pot.
    2. Cover with Water: Add enough cold water to cover the eggs by at least one inch.
    3. Bring to a Rolling Boil: Over high heat, bring the water to a full, rolling boil.
    4. Turn Off Heat & Cover: As soon as it boils, remove the pot from the heat and cover it tightly with a lid.
    5. Let Them Sit: Allow the eggs to sit in the hot water for 12-14 minutes. Do not skip this resting time.
    6. Prepare an Ice Bath: While the eggs rest, fill a large bowl with ice and cold water.
    7. Chill Immediately: Using a slotted spoon, carefully transfer the cooked eggs to the ice bath. Let them chill for at least 5 minutes to stop the cooking process and make them easier to peel [3].
    8. Peel with Ease: Once completely cool, gently crack and peel the eggs under cool running water.

    Pro Tip: Older eggs tend to peel more easily than very fresh ones. If you have very fresh eggs, steaming them can also help with peeling!

    Step 2: Prepare the Creamy Yolk Filling

    Next, it’s time to create the irresistible, creamy filling. You’ll be surprised how simple it is to achieve a perfectly smooth and flavorful mixture.

    1. Separate Yolks: Carefully slice each peeled egg in half lengthwise. Gently scoop the yolks into a medium-sized bowl and arrange the egg white halves on a serving platter.
    2. Mash the Yolks: Use a fork to mash the yolks until they are completely smooth and free of lumps.
    3. Add Creamy Ingredients: Add the mayonnaise, Dijon mustard, and a splash of white vinegar to the mashed yolks for a rich and tangy base.
    4. Season Well: Sprinkle in salt and black pepper to taste.
    5. Mix Until Smooth: Stir all the ingredients together with a fork or small whisk until the filling is perfectly smooth and creamy.

    Chef’s Secret for Creaminess: Don’t be shy with the mashing! The smoother your yolks are before adding other ingredients, the creamier your final filling will be. A touch of vinegar also brightens the flavor beautifully.

    Step 3: Fill the Egg Whites

    You’re almost done! Now for the fun part: filling the egg whites. With a few simple techniques, you can make your deviled eggs look professional and inviting.

    1. Choose Your Method: You have two main options for filling the egg whites:
      • Spoon Method (Easy & Quick): Use a small spoon to carefully scoop the yolk filling into each egg white half, creating a small mound.
      • Piping Bag Method (Elegant): For a more polished look, transfer the filling to a piping bag fitted with a star tip. Pipe an attractive swirl into each egg white half.
    2. Garnish (Optional but Recommended!): Lightly sprinkle the tops with a pinch of paprika. For an extra pop of color and flavor, add a tiny sprig of fresh parsley or dill.
    3. Arrange and Serve: Arrange your beautifully filled deviled eggs on your serving platter, and they are ready to be enjoyed!

    Quick Tip: If you don’t have a piping bag, you can snip off a corner of a sturdy Ziploc bag. This works wonderfully as a makeshift piping bag.

    Tips and Tricks for the Best Deviled Eggs Ever

    Want to take your deviled eggs from good to absolutely unforgettable? We’re sharing our favorite tips and tricks to help you master this classic appetizer. These simple techniques ensure every bite is creamy, flavorful, and perfect. Get ready to cook with confidence and impress everyone with your easy deviled eggs recipe!

    Achieving Perfectly Boiled Eggs

    The foundation of amazing deviled eggs starts with perfectly cooked, easy-to-peel eggs. Avoid dreaded green yolks and tricky shells with these simple steps.

    • Start Cold: Place your eggs in a saucepan and cover them with cold water by about an inch. This gradual heating helps prevent the shells from cracking.
    • Gentle Boil, Then Rest: Bring the water to a rolling boil over medium-high heat. Once it boils, immediately turn off the heat, cover the pot, and let the eggs sit for 12-14 minutes. This method cooks the eggs gently, resulting in creamy, evenly cooked yolks.
    • Ice Bath is Key: As soon as the eggs are done, transfer them to a bowl of ice water for at least 5 minutes. This step is crucial because it stops the cooking process and makes the shells much easier to peel.
    • Prevent Green Yolks: The green ring around the yolk is caused by a reaction between sulfur and iron, which happens when eggs are overcooked. Following the precise cooking time and using an ice bath will prevent this [4].

    Creamy, Dreamy Filling Every Time

    The secret to irresistible deviled eggs is a smooth, luscious filling. Follow these pointers for a filling that melts in your mouth.

    • Mash Thoroughly: Use a fork or a potato masher to break down the cooked yolks until they are completely smooth. For the creamiest possible texture, make sure there are no lumps.
    • Room Temperature Ingredients: Mayonnaise and mustard blend more easily when they aren’t cold. Using room temperature ingredients helps create a smoother, more cohesive filling.
    • Balance Flavors: Taste the filling as you mix it. Don’t be afraid to adjust the mustard, vinegar, and salt to your preference. A small splash of vinegar can significantly brighten the flavor.
    • Sieve for Silkiness (Optional): For a truly restaurant-quality filling, push the yolk mixture through a fine-mesh sieve with a spoon. This extra step removes any remaining small lumps, resulting in an exceptionally smooth and silky texture.

    Elevate Your Flavor

    While the classic recipe is wonderful, a few simple additions can take your deviled eggs to the next level. Get creative with these flavor boosters!

    • A Pinch of Heat: Add a dash of cayenne pepper, a tiny bit of hot sauce, or a sprinkle of smoked paprika for a subtle kick.
    • Herby Freshness: Finely chopped fresh chives, dill, or parsley can add a vibrant, fresh note and beautiful color.
    • Umami Boost: A tiny splash of Worcestershire sauce or a pinch of garlic powder can add a deeper, savory dimension.
    • Tangy Twist: A squeeze of fresh lemon juice brightens the overall flavor profile.

    Picture-Perfect Presentation

    Deviled eggs are as much about presentation as they are about taste. Make your deviled eggs visually appealing with these simple finishing touches.

    • Use a Piping Bag: For an elegant look, spoon the filling into a piping bag fitted with a star tip. This creates beautiful, uniform swirls. If you don’t have a piping bag, a ziptop bag with one corner snipped off works just as well.
    • Garnish Generously: A sprinkle of paprika is traditional and adds a pop of color. Also consider fresh herbs, a single caper, a small piece of cooked bacon, or even a tiny shrimp for a gourmet touch.
    • Clean Whites: Before filling, ensure the egg white halves are clean and dry. Gently wipe away any stray yolk to create a neat appearance.

    Prep Ahead for Stress-Free Serving

    Deviled eggs are a fantastic party appetizer because much of the work can be done in advance. Prepping the components separately helps you avoid stress on the day of your event.

    • Separate Components: You can boil and peel the eggs up to two days ahead of time. To maintain freshness, store the egg whites and the mashed yolk filling in separate airtight containers in the refrigerator.
    • Fill Just Before Serving: For the best texture and appearance, fill the egg whites no more than 2-4 hours before you plan to serve them. This prevents the whites from drying out and keeps the filling fresh.
    • Transport Safely: If you’re bringing deviled eggs to a gathering, use a deviled egg platter with indentations to keep them from sliding. Alternatively, place them in a single layer in a container lined with a paper towel.

    Fun Variations on the Classic Recipe

    Once you’ve mastered our classic deviled eggs recipe, it’s time for a kitchen adventure! These fun variations are simple to make and let you explore new flavors with minimal effort. You can easily adapt your trusted recipe to suit any craving or occasion. Get ready to impress your family and friends with these creative twists!

    Southern-Style Deviled Eggs

    Embrace the comfort and flavor of the South with this beloved twist. Often featuring a hint of sweetness and a tangy crunch, Southern-style deviled eggs are a staple at potlucks and family gatherings. These simple additions are an easy way to elevate your appetizer game.

    • Sweet Pickle Relish: Add 1-2 tablespoons of sweet pickle relish to your yolk mixture for a lovely sweetness and texture.
    • Dijon Mustard: Swap some of the classic yellow mustard for 1 teaspoon of Dijon, which offers a sharper, more complex flavor.
    • Apple Cider Vinegar: A tiny splash (about 1/2 teaspoon) can brighten up the entire filling.
    • Garnish: Sprinkle with a generous amount of smoked paprika. For an authentic touch, add a tiny sliver of candied jalapeño.

    With just a few simple changes, you’ll have a deviled egg that tastes wonderfully homemade and is a true crowd-pleaser at any gathering.

    Spicy Deviled Eggs

    If you love a little kick, these spicy deviled eggs are for you. Adding heat is simple and completely customizable, allowing you to make them as fiery or as mild as you like. This variation is a perfect, beginner-friendly way for spice lovers to add a punch to a classic appetizer.

    • Hot Sauce: Mix 1-2 teaspoons of your favorite hot sauce into the yolk filling. Start with a small amount and taste as you go.
    • Jalapeño: Finely mince 1-2 teaspoons of fresh or pickled jalapeño and fold it into the yolk mixture. Remember to remove the seeds for less heat.
    • Cayenne Pepper: Add 1/4 to 1/2 teaspoon of cayenne pepper for an even distribution of heat.
    • Garnish: Top with a sprinkle of red pepper flakes or a thin slice of fresh jalapeño.

    This spicy twist is a quick and reliable way to add excitement to your deviled eggs, helping you serve a memorable appetizer with confidence.

    Million Dollar Deviled Eggs

    Feeling a bit fancy? “Million Dollar” deviled eggs use luxurious ingredients to turn a simple snack into a gourmet treat. This variation is all about rich flavors and textures, and it’s surprisingly easy to make this impressive appetizer.

    • Crispy Bacon: Cook 2-3 slices of bacon until crispy. Crumble it finely, mixing most of it into the yolk filling while saving some for garnish.
    • Cream Cheese or Sour Cream: Add 1-2 tablespoons of softened cream cheese or sour cream to the yolk mixture. This makes the filling extra creamy and rich.
    • Fresh Chives: Finely chop 1 tablespoon of fresh chives and stir them into the filling for a mild oniony flavor.
    • Garnish: Top each deviled egg with a sprinkle of the reserved bacon crumbles and a few extra chives for an elegant look.

    Truly indulgent, these deviled eggs prove that simple ingredients can create a delicious and visually appealing appetizer. You’ll feel like a pro chef without the stress!

    How to Store Leftover Deviled Eggs Safely

    So, you’ve mastered our classic deviled eggs recipe. What’s the best way to keep those delicious leftovers safe and fresh? Storing deviled eggs correctly is crucial for both taste and food safety.

    At Recipesmondial, we want your cooking to be enjoyable and stress-free, from prep to storage. Follow these simple steps to store your deviled eggs with confidence.

    The Golden Rule: Keep Them Cold

    Because they contain mayonnaise and eggs, deviled eggs are highly perishable and require constant refrigeration. If left at room temperature for too long, harmful bacteria can grow quickly. Always follow the two-hour rule: never leave deviled eggs out for more than two hours [source: USDA FSIS], especially on a warm day.

    Best Way to Store Assembled Deviled Eggs

    Once your deviled eggs are assembled, follow these guidelines:

    • Use an Airtight Container: This is your best defense against spoilage and dryness. A shallow, airtight container prevents air from drying out the filling and egg whites.
    • Arrange in a Single Layer: Place the deviled eggs neatly in one layer. Stacking them can crush the delicate filling and toppings.
    • Seal Out Strong Odors: Eggs easily absorb smells from other foods in the refrigerator. Make sure your container is sealed tightly to prevent this.
    • Refrigerate Promptly: Don’t wait. Transfer the deviled eggs to the fridge as soon as you’re done serving. The sooner they are chilled, the safer they’ll be.

    Storing Unassembled Components (Meal Prep Tip!)

    Want to get a head start? Preparing the components of your deviled eggs separately is a fantastic meal prep trick that also extends their freshness.

    • Store Egg Whites: Place the hollowed-out egg white halves in an airtight container lined with a damp paper towel to keep them from drying out.
    • Store Yolk Filling: Keep the yolk mixture in a separate airtight container or a sealed piping bag. Using a piping bag makes assembly quick and clean later on.
    • Keep Separated and Chilled: Store both containers in the refrigerator. For the freshest taste and best texture, assemble the deviled eggs just before you plan to serve them.

    How Long Do Deviled Eggs Last?

    Even when stored properly, deviled eggs don’t last long. For the best quality, enjoy them within 1 to 2 days [source: FoodSafety.gov]. After that, the egg whites may become rubbery and the filling can lose its flavor.

    • Assembled Deviled Eggs: 1 to 2 days in the refrigerator.
    • Separated Components: The boiled egg whites and yolk filling can last up to 2-3 days when stored separately.

    Signs Your Deviled Eggs Have Gone Bad

    When it comes to food safety, trust your senses. You should discard your deviled eggs immediately if you notice any of these signs:

    • Off Smell: A sour, sulfurous, or otherwise unpleasant odor is a clear sign of spoilage.
    • Slimy Texture: The egg whites should be firm, not slimy or sticky.
    • Discoloration: Look for any changes in color on the whites or the filling that weren’t there before.
    • Mold: Any visible mold means the eggs are unsafe to eat and must be thrown away.

    With these tips, you can enjoy your homemade deviled eggs with confidence. At Recipesmondial, we provide easy recipes and practical advice to help you create delicious and safe family-friendly meals every day.

    Frequently Asked Questions About Deviled Eggs

    What is the secret to making good deviled eggs?

    The secret to truly delicious deviled eggs isn’t complicated; it’s all about focusing on a few key elements. These simple steps will help you create the perfect appetizer.

    • Perfectly Cooked Eggs: Start with perfectly boiled eggs that are easy to peel. This foundational step ensures smooth whites and vibrant, creamy yolks.
    • Quality Ingredients: Use fresh, high-quality mayonnaise and fresh herbs like chives or dill. These simple ingredients make a big difference in flavor.
    • Balanced Seasoning: Aim for a balance of tangy, savory, and a hint of spice. Mustard, vinegar or pickle juice, salt, and pepper are essential, while a dash of paprika adds color and mild flavor.
    • Creamy Texture: For a lump-free filling, mash the yolks until they are very fine. We cover this technique in more detail below.
    • Gentle Handling: Be careful when peeling the eggs and mixing the filling to keep the egg whites intact and looking their best.

    By focusing on these fundamentals, you’ll make delicious deviled eggs every time and enjoy the process!

    How do you make the filling so creamy?

    Achieving an irresistibly smooth deviled egg filling is simpler than you might think. Here’s how to get it perfectly creamy:

    • Finely Mash Yolks: First, mash the cooked egg yolks with a fork until they are completely smooth. For an extra-velvety texture, press the yolks through a fine-mesh sieve.
    • Choose Your Mayo Wisely: Full-fat mayonnaise yields the richest, creamiest result. While plain Greek yogurt can be a lighter substitute, it may alter the taste slightly.
    • Add a Touch of Tang: A splash of pickle juice, white vinegar, or apple cider vinegar not only brightens the flavor but also helps create a smoother consistency.
    • Include Mustard: Dijon or classic yellow mustard adds a tangy flavor and contributes to the filling’s silky texture.
    • Mix Thoroughly: Combine all your ingredients and mix well until no lumps remain. This ensures every component is fully incorporated for the best flavor and texture.

    Follow these tips, and you’ll love how easy it is to achieve a luxuriously smooth filling!

    Can you make deviled eggs the day before a party?

    Absolutely! Deviled eggs are a fantastic make-ahead appetizer. To ensure they stay fresh and look their best, it’s best to prepare the components separately.

    Here’s the best method for stress-free prep:

    1. Separate Components: Prepare the egg white halves and the yolk filling, but keep them separate for now.
    2. Store Properly: Place the egg whites in an airtight container. Keep the filling in a separate airtight container or a zip-top bag. Refrigerate both immediately.
    3. Cover the Filling: To prevent a dry crust from forming on the filling, press a piece of plastic wrap directly onto its surface before sealing the container.
    4. Assemble Just Before Serving: When you’re ready to serve, or up to an hour beforehand, pipe or spoon the filling into the egg whites. Garnish right before they go on the table to keep them looking fresh.

    This make-ahead method removes the last-minute rush, making your party planning much more enjoyable.

    What does ‘deviled’ mean in deviled eggs?

    The term ‘deviled’ is a culinary one that refers to food prepared with spicy or zesty seasonings. Despite the name, it has no religious connotation.

    The term first appeared in print in the late 18th century [5] to describe dishes with bold, piquant flavors. Common “deviling” ingredients include:

    • Mustard
    • Cayenne pepper
    • Red pepper flakes
    • Hot sauce
    • Paprika

    In deviled eggs, these ingredients add a delightful kick that elevates the classic recipe. So, when you see ‘deviled’ on a menu, simply think ‘spicy and flavorful.’


    Sources

    1. https://www.instacart.com/company/grocery-trends/thanksgiving-trends-2023/
    2. https://food.unl.edu/article/how-peel-hard-boiled-eggs
    3. https://www.nal.usda.gov/blogs/ask-experts/how-cook-hard-boiled-eggs
    4. https://food.unl.edu/food-safety-qa-eggs
    5. https://www.merriam-webster.com/word/deviled