Category: Baking, Breads, and Desserts

  • The Easiest Sourdough Bread Recipe for Beginners (Step-by-Step Guide)

    The Easiest Sourdough Bread Recipe for Beginners (Step-by-Step Guide)

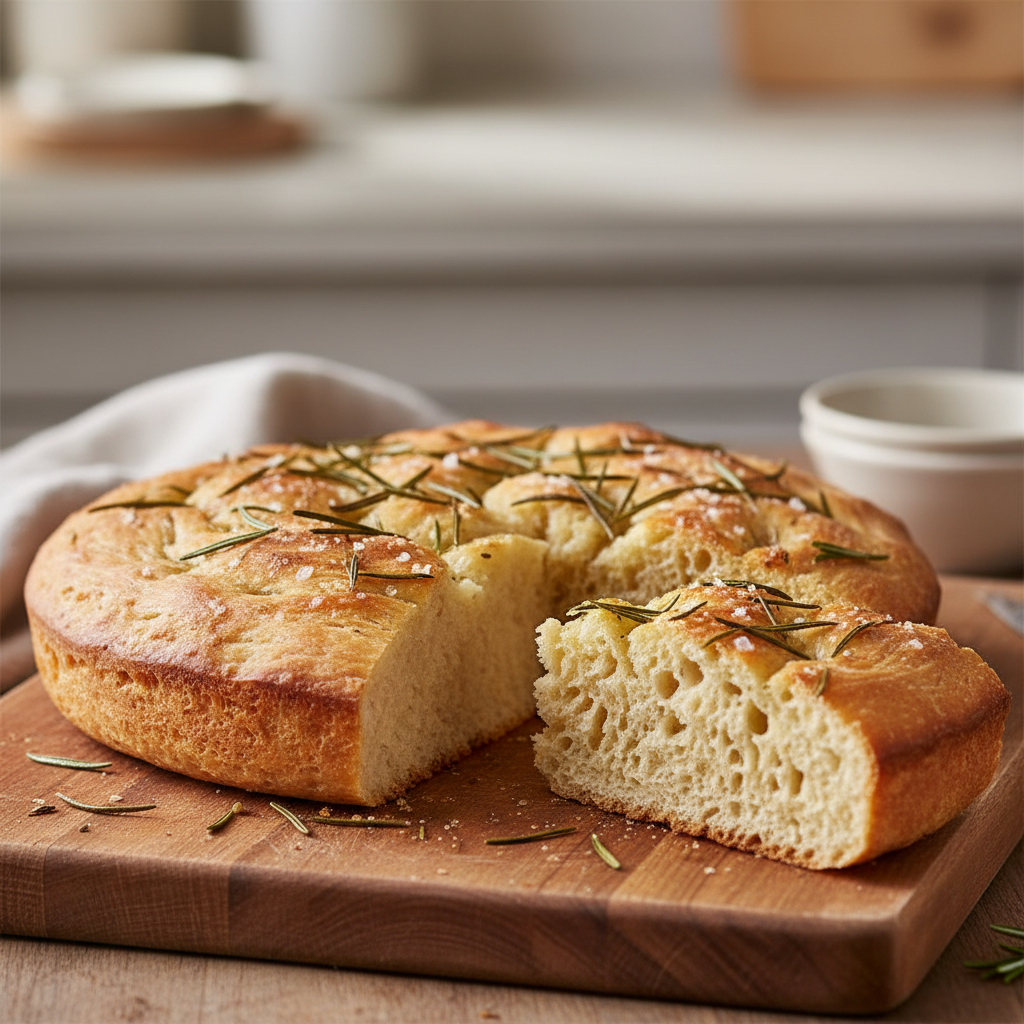
    A sourdough bread recipe is a method for making bread using a fermented culture of flour and water called a sourdough starter, which acts as a natural leavening agent. The process involves activating the starter, mixing it with flour, water, and salt, then developing gluten through a series of folds. After a long fermentation and proofing period, the dough is baked in a hot oven to create a loaf with a distinctive tangy flavor, chewy crumb, and crisp crust.

    There’s something uniquely satisfying about baking a warm, crusty loaf of sourdough at home. The aroma, the golden crust, and the chewy interior make it a culinary dream for many home cooks. However, the journey to a perfect loaf can seem daunting. If you’ve ever felt overwhelmed by complex recipes, technical terms, or lengthy processes, you’re not alone.

    But what if it didn’t have to be so complicated? At Recipesmondial, we believe making delicious, restaurant-quality bread at home should be a stress-free experience. That’s why we’ve crafted the ultimate easy sourdough recipe specifically for beginners. This step-by-step guide will help you build confidence and bake an amazing, flavorful loaf that will impress your family and friends. Get ready to discover the joy of approachable home cooking!

    Forget the intimidating jargon and endless proofing times. Our simplified approach focuses on practical tips, clear instructions, and reliable results, making it the perfect starting point for your sourdough adventure. We’ll show you exactly how to achieve that coveted tangy flavor and irresistible texture. This recipe will transform you from a hesitant baker into a confident bread master. So, what makes this sourdough recipe stand out as the best for beginners? Let’s dive in!

    Why Is This the Best Sourdough Recipe for Beginners?

    Learning to bake sourdough bread can feel like a challenge, especially with recipes full of complex jargon and confusing steps. We understand that frustration. That’s why we created this easy sourdough bread recipe, designed to be the perfect starting point for any home baker.

    Our method focuses on simplicity. By removing unnecessary complications, we provide a clear, step-by-step guide. This approach ensures your first sourdough experience is both enjoyable and successful, helping you build confidence from the start.

    Here’s why this is the ideal sourdough recipe for beginners:

    • Simple, Actionable Steps: We break down the entire process into easy-to-understand instructions. We use plain language instead of confusing culinary terms to make home cooking more approachable.
    • Focus on Key Techniques: You will learn the essential skills for making sourdough without getting lost in overly technical details. Our step-by-step guidance helps you master the basics.
    • Forgiving Method: Sourdough can be intimidating, but this recipe is designed to be forgiving. Minor variations won’t ruin your loaf, which helps build your confidence in the kitchen.
    • Reliable Results: Following our instructions leads to a beautiful and flavorful loaf. This repeatable success helps turn uncertainty into confidence.
    • Minimal Equipment: You don’t need expensive or specialized tools. This recipe uses common kitchen items, keeping it simple and budget-friendly.
    • Delicious Flavor Profile: Despite its simplicity, this recipe delivers incredible taste. You’ll bake a crusty, airy, and tangy sourdough bread—a truly flavorful meal made easy.
    • Confidence Builder: Mastering sourdough may seem difficult, but our beginner-friendly recipe makes it achievable. You’ll be amazed at what you can create, allowing you to enjoy baking without stress.

    This recipe is designed to demystify the sourdough process so you can focus on the joy of baking. Soon, you’ll be sharing delicious, homemade bread that will impress both you and your family!

    What Equipment Do You Need to Make Sourdough?

    Ready to dive into the world of homemade sourdough? Great news: you don’t need a kitchen full of specialized gadgets to get started. In fact, most home cooks already own the necessary tools. Our easy sourdough bread recipe focuses on simple techniques and minimal equipment, so you can start baking delicious loaves without feeling overwhelmed.

    Essential Tools

    These tools are key to making your sourdough journey smooth and successful. Using them will help you achieve consistent results with our sourdough bread recipe.

    • Large Mixing Bowl: You’ll need a bowl spacious enough to comfortably mix your ingredients and hold the dough as it rises during bulk fermentation. A large glass or plastic bowl works well.
    • Kitchen Scale: A kitchen scale is essential for baking sourdough. Measuring ingredients by weight, rather than volume, is far more accurate and helps prevent common baking mistakes. This precision ensures your sourdough recipe turns out perfectly every time. source: https://www.kingarthurbaking.com/blog/2018/03/29/baking-by-weight
    • Dutch Oven or Baking Vessel: A Dutch oven creates a steamy environment that helps the crust develop beautifully and allows the bread to expand fully. Don’t have one? Don’t worry! Our guide also covers baking sourdough without a Dutch oven, using alternatives like a lidded pot or a baking stone with a pan of water.
    • Bench Scraper: This flat, rectangular tool is incredibly versatile. Use it to scrape dough from your work surface, divide and shape your loaf, and make handling sticky dough much easier.
    • Proofing Basket (Banneton) or Bowl with a Floured Cloth: A proofing basket (or banneton) holds the dough’s shape during its final rise, giving the loaf a lovely texture and preventing it from spreading. If you don’t have one, a regular bowl lined with a generously floured kitchen towel is a perfect beginner-friendly substitution.

    Helpful-but-Not-Required Tools

    While not strictly necessary for our basic sourdough recipe, these tools can make the process easier and more enjoyable. Think of them as useful upgrades for when you feel more comfortable.

    • Dough Whisk (Danish Dough Whisk): This special whisk is designed to mix dough quickly and efficiently, combining flour and water without overdeveloping the gluten too early. While helpful, your hands or a sturdy spoon also work just fine.
    • Lame (Scoring Tool): A lame is a small blade used for scoring the top of your dough. This scoring guides the bread’s expansion in the oven, creating beautiful patterns and a better rise. In a pinch, a very sharp razor blade or knife can be used instead.
    • Digital Thermometer: A digital thermometer is the best way to ensure your bread is fully baked and prevent a gummy interior. Alternatively, you can test for doneness by tapping the bottom of the loaf—a hollow sound usually means it’s ready.
    • Stand Mixer: A stand mixer with a dough hook can handle the initial mixing, but most sourdough recipes rely on hand mixing and stretching. Kneading by hand is not only satisfying but also the best way to feel the dough’s development, which is why our recipe focuses on this method.

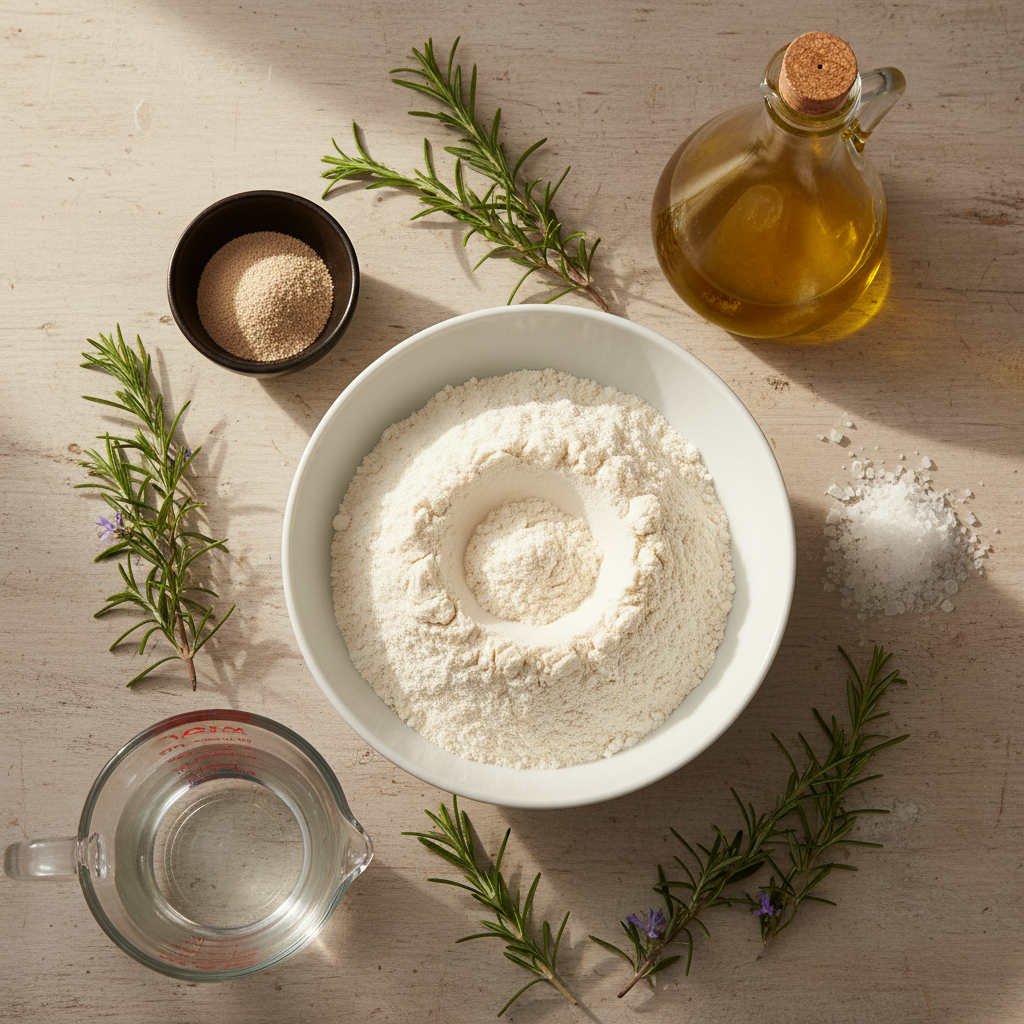
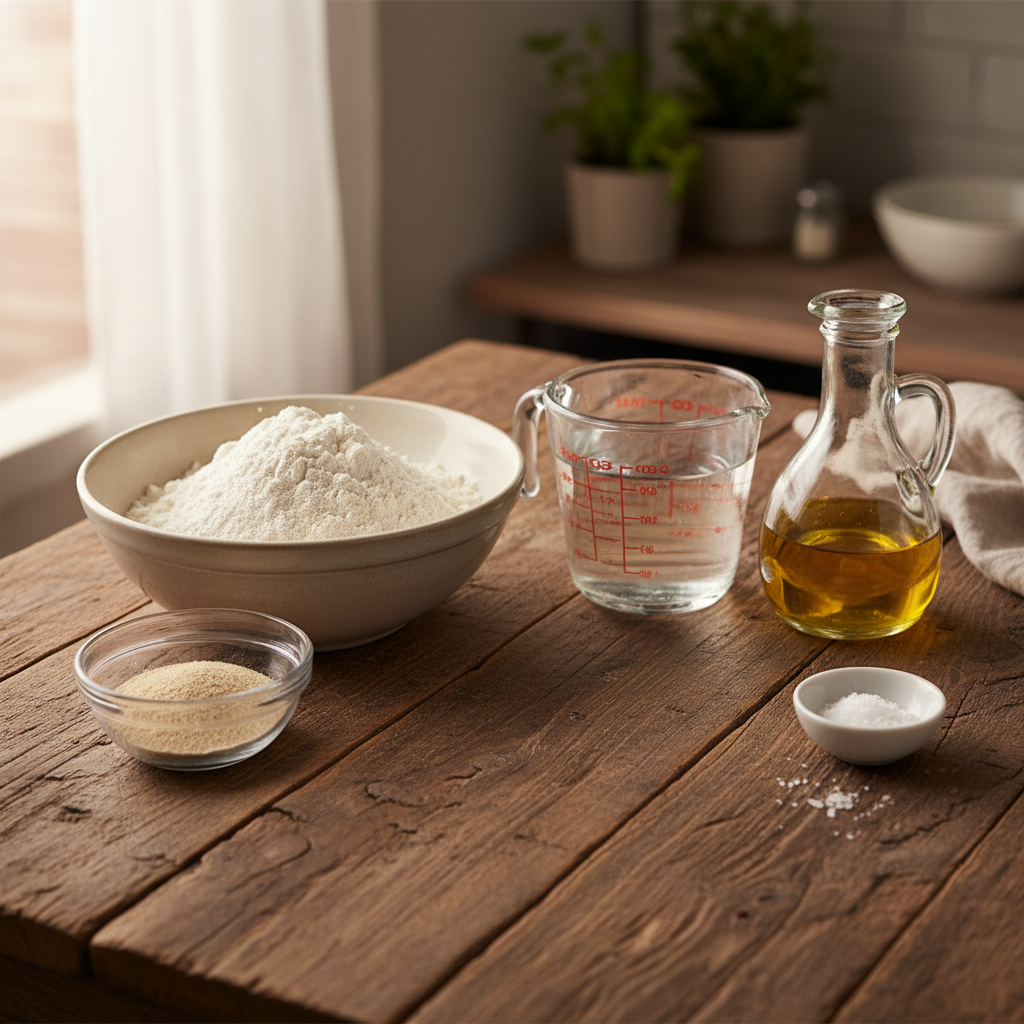
    What Simple Ingredients Are in Sourdough Bread?

    An overhead view of simple sourdough ingredients: flour in a bowl, an active sourdough starter in a jar, sea salt, and water, arranged on a rustic wooden counter.
    Professional food photography, photorealistic, high-quality food magazine photo. A bright and warm overhead flat lay of the essential, simple ingredients for sourdough bread. Focus on quality and freshness. Include a rustic ceramic bowl filled with unbleached bread flour, a clear glass jar with a bubbly, active sourdough starter, a small wooden bowl of fine sea salt, and a glass of pure water. Arrange these elements artfully on a light-colored, rustic wooden kitchen counter, with soft, natural daylight illuminating the scene. The composition should feel approachable, clean, and inviting, emphasizing the ease of the recipe.

    You might be surprised to learn that a beautiful loaf of sourdough requires very few ingredients. It’s a testament to how simple components can create something extraordinary. You don’t need a pantry full of specialty items for this easy sourdough recipe; in fact, you only need four. Let’s explore the basic building blocks behind this flavorful bread.

    Sourdough Starter

    The sourdough starter is the heart of your bread. It’s a living mixture of flour and water, full of wild yeast and beneficial bacteria. These natural microorganisms are what make the dough rise and give sourdough its distinctive tangy flavor. Because the starter is a natural leavening agent, you won’t need any commercial yeast. A healthy, active starter is the key to a successful loaf, transforming simple ingredients into something magical.

    Flour

    Flour provides the main structure for sourdough bread. However, not all flours are created equal for baking this particular bread, as your choice will impact both the texture and flavor. For a reliable loaf, bread flour is often recommended due to its higher protein content, which helps develop a strong gluten network. This gluten is what gives the bread its signature chewiness and allows it to hold its shape. While you can use high-quality all-purpose flour for a beginner-friendly option, some bakers enjoy experimenting with whole wheat or rye for added depth. For best results when starting out, stick with bread flour or a strong all-purpose flour.

    Water

    Water is more than just a liquid in your sourdough; it plays a crucial role in activating the starter and hydrating the flour to develop gluten. For best results, use filtered water. Tap water often contains chlorine, which can inhibit the activity of your starter’s delicate wild yeasts and bacteria. If you must use tap water, let it sit out for a few hours to allow the chlorine to evaporate. It’s also best to use warm water when mixing your dough, as this encourages starter activity and helps the flour absorb the liquid more effectively.

    Salt

    Salt is a vital ingredient that contributes more than just flavor to your sourdough. It strengthens the gluten structure, leading to a better rise and crumb, and also controls the fermentation rate to prevent your dough from over-proofing. Of course, it also adds a crucial depth of flavor. Fine sea salt or kosher salt are excellent choices, but avoid iodized table salt, which can impart an off-flavor. Never skip the salt; it’s essential for both taste and texture in this easy sourdough recipe. Studies show that salt significantly influences dough rheology and bread quality [1].

    How to Make Sourdough Bread: A Step-by-Step Guide

    A home cook's hands gently shaping a soft sourdough dough on a lightly floured wooden counter.
    Professional food photography, photorealistic, high-quality food magazine photo. A close-up, warm, and inviting shot of real human hands (a home cook, not overly manicured, reflecting an approachable vibe) gently shaping a large, soft, slightly sticky mass of sourdough dough on a lightly floured, warm wooden kitchen counter. The dough should show good elasticity and a gentle texture. The background should be a softly blurred, clean home kitchen environment, with warm, natural window light. The focus is on the encouraging, hands-on aspect of bread making, making it look achievable for beginners.

    Making delicious sourdough bread at home is a rewarding journey. This easy-to-follow, step-by-step guide will lead you through each stage, helping you move from uncertainty to baking with confidence. Our goal is to make your cooking experience enjoyable and stress-free.

    Let’s turn simple ingredients into a beautiful, flavorful loaf.

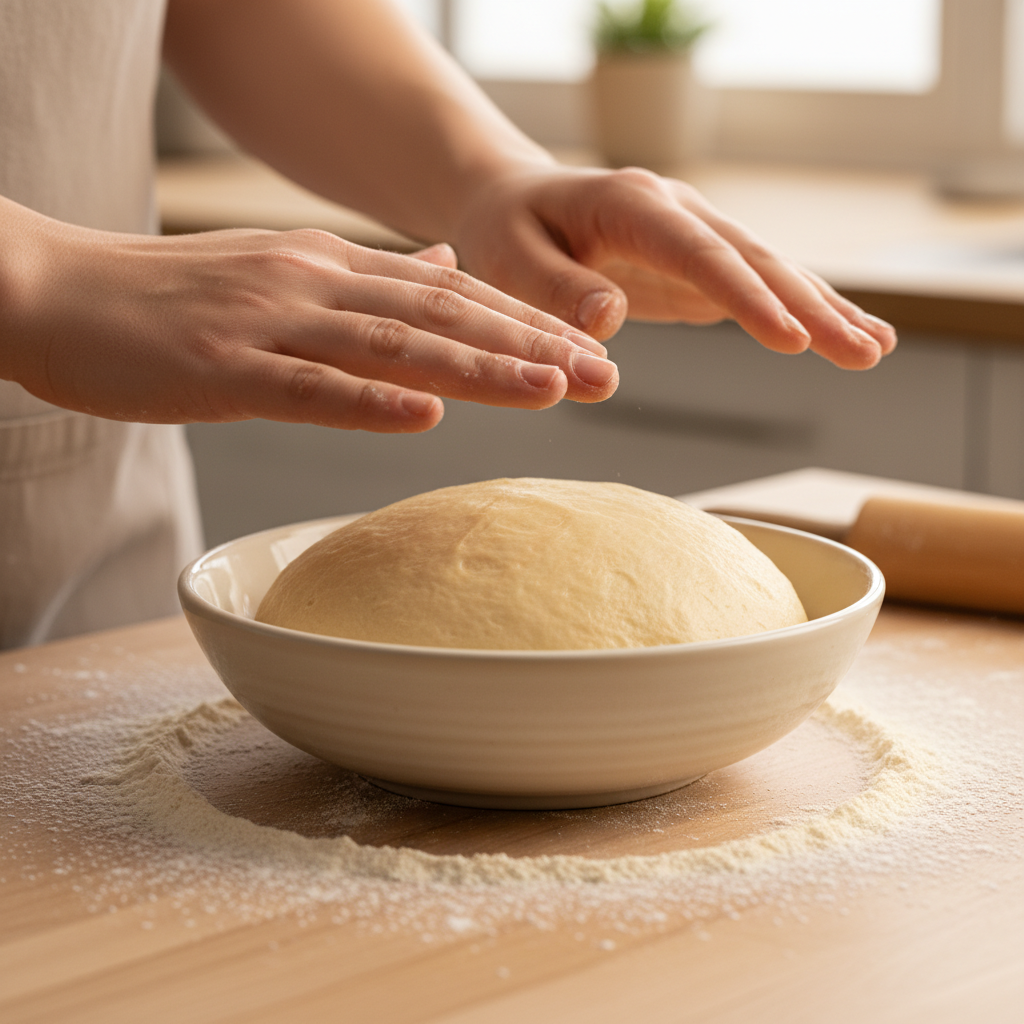
    Step 1: Feed Your Sourdough Starter

    A happy, active starter is the key to a great loaf of bread. Before you begin mixing your dough, your starter needs to be bubbly and lively. This crucial first step ensures your bread will rise beautifully.

    How to Feed Your Starter:

    1. Discard: First, remove most of your starter from its jar, leaving just 1-2 tablespoons behind. This step is essential for keeping it active and preventing it from becoming too acidic.
    2. Feed: To the remaining starter, add 50 grams of unbleached all-purpose or bread flour and 50 grams of warm water.
    3. Mix: Stir everything together until there are no dry spots. Scrape down the sides of the jar for a clean start.
    4. Rest: Cover the jar loosely and let it sit at room temperature for 4-8 hours. It should become bubbly and visibly active, which means it’s ready for baking.

    Tip: Your starter is ready when it has doubled in size and passes the “float test.” To check, drop a small spoonful into a glass of water. If it floats, it’s ready to use.

    Step 2: Mix the Dough

    Now it’s time to mix the dough. This is a straightforward process that doesn’t require any complex techniques.

    Ingredients:

    • 100 grams active sourdough starter
    • 350 grams warm water (around 95-100°F / 35-38°C)
    • 500 grams bread flour (or unbleached all-purpose flour)
    • 10 grams fine sea salt

    Mixing Instructions:

    1. Combine Water and Starter: In a large mixing bowl, pour in the warm water. Add your active sourdough starter and stir gently until it is mostly dissolved.
    2. Add Flour: Add the flour to the bowl. Use a spoon or your hands to mix until no dry flour remains. The dough will be shaggy and sticky.
    3. Rest (Autolyse): Cover the bowl with a clean kitchen towel and let the dough rest for 30 minutes. This process, called autolyse, allows the flour to fully hydrate. It also starts gluten development naturally, making the dough easier to work with later [2].
    4. Incorporate Salt: After the rest, sprinkle the salt evenly over the dough. Use your fingers to gently pinch and fold the salt into the dough until it is fully incorporated.
    5. Initial Stretch and Fold: Perform one quick set of stretch and folds to begin building strength. Grab a portion of the dough, stretch it upwards, and fold it over the center. Rotate the bowl and repeat this 4-6 times.
    6. Cover and Rest: Cover the bowl again and let the dough rest for another 30 minutes.

    Tip: The dough will feel very sticky at first, but don’t worry. It will become smoother and more manageable as you continue.

    Step 3: Bulk Fermentation (Stretches and Folds)

    During this stage, often called “bulk ferment” or the “first rise,” your dough develops its flavor and strength. We’ll use a gentle technique called “stretch and fold” to build structure without kneading.

    The Bulk Fermentation Process:

    1. Duration: Bulk fermentation typically takes 4-6 hours at room temperature (around 72-76°F / 22-24°C). The process will be slower in a cooler environment and faster in a warmer one.
    2. Stretch and Fold Technique:
      • For the first 2-3 hours, perform a set of stretch and folds every 30-45 minutes.
      • Lightly wet your hands to prevent the dough from sticking.
      • Grab a portion of the dough from the edge of the bowl.
      • Gently stretch it upward and then fold it over the center.
      • Rotate the bowl a quarter turn and repeat this action 3-4 more times to complete one “set.”
    3. Rest: After each set, cover the bowl and let the dough rest until the next scheduled stretch and fold.
    4. Visual Cues: The dough is ready when it has increased in volume by about 30-50%. It will look smoother, feel more elastic, and you’ll see small bubbles on the surface.

    Common Mistake to Avoid: Do not over-ferment your dough, as it will become sticky and lose its structure. Conversely, under-fermented dough won’t rise well. Pay close attention to these visual cues to know when it’s ready.

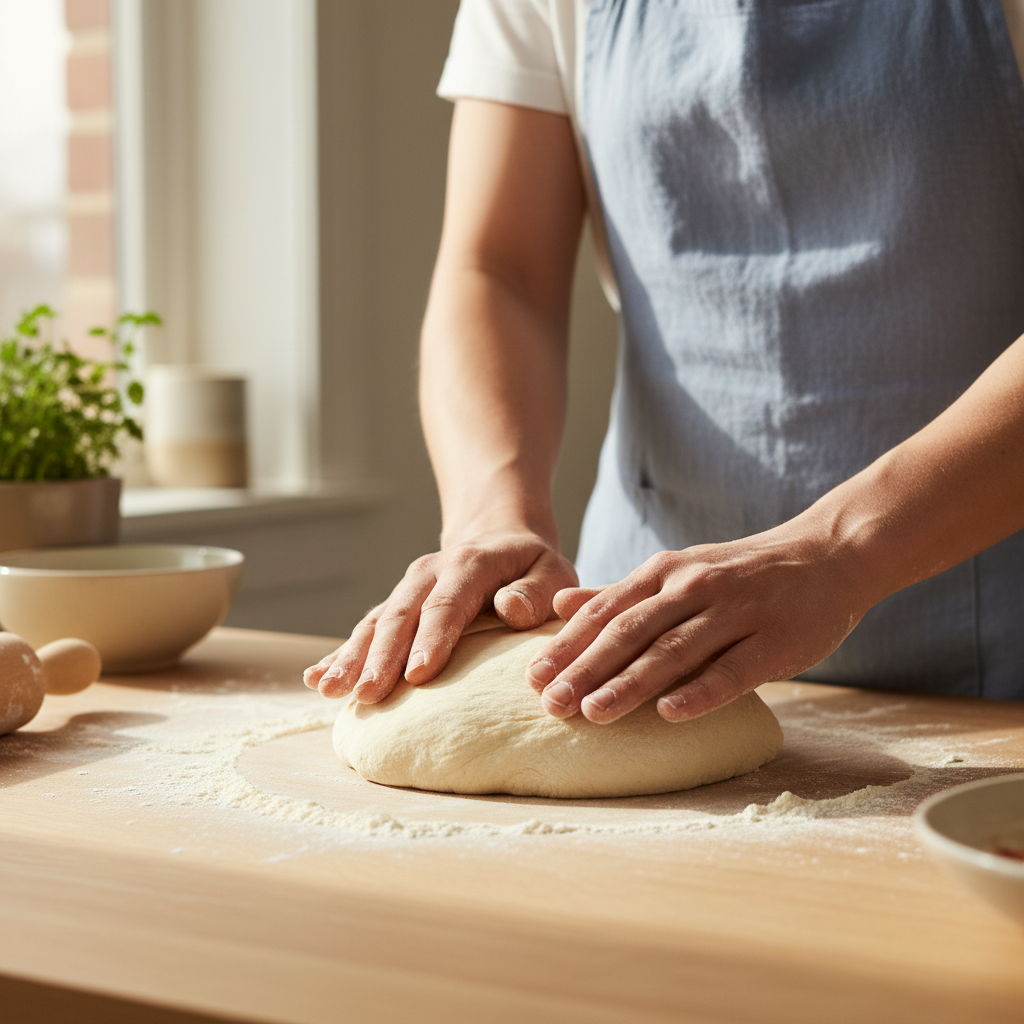
    Step 4: Shape the Loaf

    Shaping is a crucial step for achieving a good rise and an attractive loaf. The goal is to build tension in the dough, which helps it hold its form during baking.

    How to Shape Your Sourdough Loaf:

    1. Prepare Your Surface: Lightly flour your work surface and gently turn the dough out onto it.
    2. Pre-shape (Round):
      • Gently pat the dough into a loose rectangle.
      • Fold the top edge down to the middle, then fold the bottom edge up to meet it.
      • Fold the left side over, followed by the right side.
      • Flip the dough over so the seams are on the bottom. Use your cupped hands to pull it towards you, creating a round shape with a taut surface.
      • Let the dough rest on the counter, uncovered, for 20-30 minutes. This relaxes the gluten.
    3. Prepare Banneton: While the dough rests, lightly flour your banneton (proofing basket). If you don’t have one, use a bowl lined with a floured kitchen towel. Rice flour works best as it prevents sticking.
    4. Final Shape (Loaf):
      • Gently flip the pre-shaped dough over so the smooth side is down.
      • Starting from the edge farthest from you, fold the top third of the dough down.
      • Fold the left and right sides in towards the center, like a letter.
      • Tightly roll the dough from the top down towards you, creating a taut log or ball.
      • Pinch the final seam together firmly to seal the dough.
    5. Place in Banneton: Carefully place the shaped dough into your prepared banneton with the seam-side facing up.

    Tip: Shaping takes practice, so don’t be discouraged if your first few attempts aren’t perfect. The goal is to create tension across the surface of the dough without tearing it.

    Step 5: The Final Rise (Cold Proof)

    The final rise, also known as a “cold proof,” takes place in the refrigerator. This step is a game-changer for developing a deeper flavor and managing your baking schedule.

    Cold Proofing Instructions:

    1. Cover: Once the dough is in the banneton, place it inside a plastic bag or cover it with plastic wrap to make it airtight.
    2. Refrigerate: Place the covered banneton in the refrigerator.
    3. Proofing Time: Let the dough proof for at least 8 hours, and up to 24 hours. The cold temperature slows down fermentation, which deepens the sourdough’s flavor and makes the cold dough much easier to score and handle.

    Benefit: A long cold proof develops the characteristic tangy flavor of sourdough and helps you achieve a superior crust and crumb. This flexibility also allows you to bake fresh bread whenever you’re ready.

    Step 6: Score and Bake Your Bread

    This is the final step: baking your loaf to perfection. Scoring the dough before baking creates a weak spot, allowing it to expand predictably for a beautiful “ear.” A hot Dutch oven is key to achieving a crisp crust and a soft, airy interior.

    Baking Your Sourdough:

    1. Preheat Oven & Dutch Oven: Place your Dutch oven, with the lid on, into your oven. Preheat the oven to 475°F (245°C) for at least 45-60 minutes to ensure the Dutch oven is extremely hot.
    2. Prepare Dough: Once the oven is preheated, carefully remove your dough from the refrigerator.
    3. Score the Dough:
      • Gently flip the cold dough from the banneton onto a piece of parchment paper.
      • Using a bread lame or a very sharp razor blade, make a single, confident slash about 1/2 inch deep across the top of the loaf. This score allows the bread to expand without tearing randomly.
    4. Bake with Lid On:
      • Using the parchment paper as a sling, carefully lower the dough into the hot Dutch oven. Be cautious—it’s very hot!
      • Place the lid back on and bake for 30 minutes. The trapped steam mimics a professional steam-injected oven, creating a fantastic crust.
    5. Bake with Lid Off:
      • Carefully remove the lid from the Dutch oven.
      • Reduce the oven temperature to 450°F (230°C).
      • Continue baking for another 20-25 minutes, or until the crust is a deep golden brown and the loaf sounds hollow when tapped on the bottom.
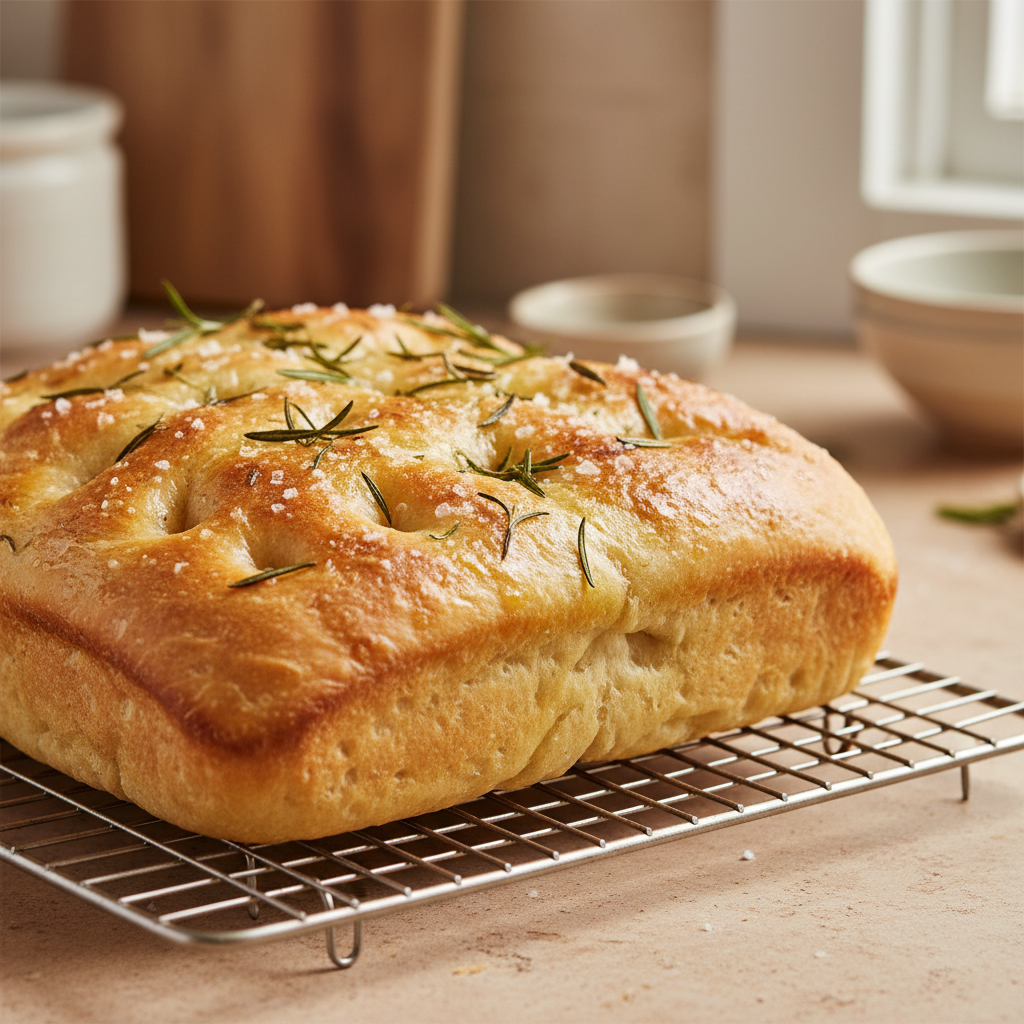
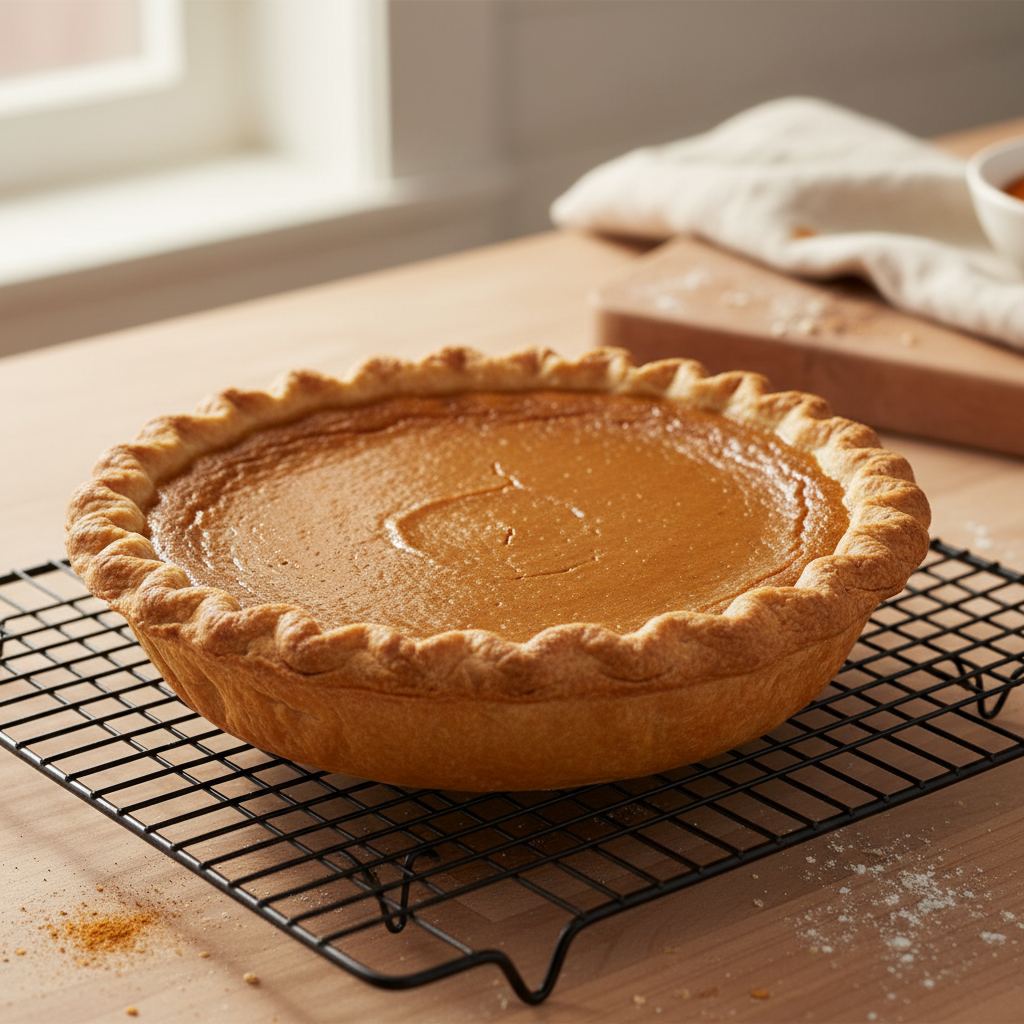
    6. Cool: Immediately remove the bread from the Dutch oven and place it on a wire rack to cool completely. Wait at least 1-2 hours before slicing, as this allows the interior crumb to set.

    Congratulations! You’ve just baked your own beautiful sourdough bread. Enjoy every delicious, well-earned slice!

    How to Bake Sourdough Bread Without a Dutch Oven

    Don’t worry if you don’t have a Dutch oven! It’s entirely possible to bake delicious, rustic sourdough bread using everyday kitchen items. The key is to create a steamy environment in your oven, which helps the loaf develop a beautiful, crisp crust and rise fully during baking. You can achieve fantastic results without any specialized equipment.

    The Importance of Steam for Your Sourdough Recipe

    A Dutch oven is effective because it traps steam around the loaf. This moisture keeps the crust soft during the initial baking phase, allowing the sourdough to expand as much as possible—a process known as “oven spring” [3]. Once the bread has risen, the crust can then bake to a beautiful, crisp finish. The goal is to replicate this steamy effect using tools you already own, making it easy to create bakery-quality bread at home.

    Method 1: Baking Sheet with a Pan for Steam

    This popular and effective method uses a simple pan to generate steam. For the steam pan, you can use a roasting pan, a cast iron skillet, or any other heavy, oven-safe pan.

    1. Preheat the Oven and Pans: Preheat your oven to 475°F (245°C). Place a heavy baking sheet or pizza stone on the middle rack and your empty steam pan (roasting pan, skillet, etc.) on the bottom rack. Allow everything to get very hot.
    2. Transfer the Loaf: Using parchment paper, carefully slide your shaped sourdough loaf onto the preheated baking sheet.
    3. Create Steam: Working quickly and carefully, pour about 1 cup of boiling water into the hot pan on the bottom rack. Be mindful of the burst of steam. Immediately close the oven door to trap it.
    4. Initial Bake: Bake for 20 minutes with steam. Do not open the oven during this time.
    5. Remove Steam and Lower Heat: After 20 minutes, carefully remove the pan of water from the oven. Lower the oven temperature to 425°F (220°C).
    6. Final Bake: Continue baking for another 25-35 minutes, or until the sourdough is deeply golden brown and sounds hollow when tapped on the bottom.

    Method 2: Covered Oven-Safe Pot or Casserole Dish

    Any oven-safe pot with a tight-fitting lid can serve as a substitute for a Dutch oven. A heavy ceramic casserole dish or a sturdy stockpot works perfectly because it traps the steam released by the dough itself.

    1. Preheat the Pot: Place your pot and its lid in the oven and preheat to 475°F (245°C). Getting the pot piping hot is crucial for a good oven spring.
    2. Transfer the Loaf: Carefully remove the hot pot from the oven. Using parchment paper as handles, gently lower your sourdough loaf into the pot.
    3. Bake Covered: Secure the lid on the pot and return it to the oven. Bake for 20 minutes.
    4. Remove Lid and Lower Heat: After 20 minutes, carefully remove the lid to allow the crust to brown. Lower the oven temperature to 425°F (220°C).
    5. Final Bake: Continue baking uncovered for another 25-35 minutes. The crust should be beautifully golden and crisp.

    General Tips for Success

    Follow these practical tips to bake your best loaf, even without fancy equipment.

    • Always Preheat Thoroughly: Your oven and baking vessel (pot, baking sheet, etc.) must be fully preheated. This initial blast of intense heat is vital for a good oven spring.
    • Use Parchment Paper: A sheet of parchment paper acts as a sling, making it much safer and easier to transfer your delicate loaf into a hot pot or onto a hot baking sheet.
    • Score Your Loaf: Use a sharp knife or razor blade to score the top of your dough just before baking. This creates a weak spot that guides the bread’s expansion for a more beautiful result.
    • Don’t Peek: Resist the urge to open the oven door for the first 20 minutes. Opening it releases the steam needed for the initial rise.
    • Handle Steam with Care: Boiling water creates a large volume of steam instantly. Always use protective oven mitts and be extremely cautious when pouring water into a hot pan.
    • Know When It’s Done: Every oven is different, so baking times are a guide. The bread is done when it has a deep golden-brown color and sounds hollow when you tap the bottom.
    • Experiment: Don’t be afraid to try different methods and find what works best in your kitchen. Baking delicious sourdough at home is a rewarding learning process.

    Tips for Perfect, Flavorful Sourdough Every Time

    Crafting perfect, flavorful sourdough bread is a truly rewarding experience. While it takes practice, these simple tips will help you bake a delicious loaf every time. Say goodbye to feeling overwhelmed by complex recipes!

    Our goal is to help you build confidence in the kitchen. With these practical insights, you’ll find that making sourdough can be an enjoyable and stress-free process.

    Nurturing Your Sourdough Starter

    • Use an Active Starter: Your starter is the heart of your bread, so it needs to be bubbly and lively before you mix the dough. An active starter should double in size within 4-8 hours after feeding [4]. This peak activity ensures a good rise.
    • Consistency is Key: Feed your starter regularly and aim for a thick, pancake-batter-like consistency. This provides the ideal environment for yeast and bacteria to thrive.
    • Smell Test: A healthy starter should smell slightly sweet and yeasty with a pleasant tang. If it smells like nail polish remover, it’s a sign that it’s hungry and needs a thorough feeding.

    Accurate Measuring and Mixing

    • Weigh Your Ingredients: For consistent results, a kitchen scale is your best friend. Measuring ingredients by weight is far more accurate than using cups.
    • Hydration Matters: The amount of water affects how the dough handles. Since different flours absorb water differently, don’t be afraid to adjust the amount slightly to suit your flour.
    • Gentle Mixing: Avoid the temptation to overmix. Simply combine your ingredients until no dry flour remains. The gluten will develop naturally during the bulk fermentation process.

    The Art of Bulk Fermentation and Shaping

    • Temperature Control: Dough temperature directly affects fermentation time. A warmer kitchen (around 75-80°F or 24-27°C) will speed up the process [5], while cooler temperatures will slow it down.
    • Listen to Your Dough: Instead of following a strict timer, learn to observe your dough. It should look visibly puffy and feel jiggly, often with small bubbles appearing on the surface.
    • Gentle Shaping: Handle the dough gently during shaping. The goal is to create surface tension for a strong loaf while being careful not to deflate the air bubbles.

    Baking for a Beautiful Loaf

    • Preheat Thoroughly: Always preheat your Dutch oven or baking vessel for at least 30-60 minutes. Starting with a hot surface helps the bread spring up quickly, creating a fantastic crust.
    • Score Confidently: Use a sharp razor blade (lame) to score your dough. A deep, single slash allows the loaf to expand predictably as it bakes, often resulting in the best “oven spring.”
    • Steam is Your Friend: Baking in a covered Dutch oven traps steam. This keeps the crust soft at first, allowing for maximum expansion before the crust begins to form and crisp up.

    Patience: The Secret Ingredient

    Sourdough is a journey, not a race. The long fermentation process, in particular, requires patience. This is what develops the deep, complex flavors that make sourdough so special. Don’t rush the steps—enjoy the process, and you’ll be rewarded with delicious homemade bread that your family will love.

    How to Store Homemade Sourdough Bread

    You’ve baked a beautiful, rustic loaf of homemade sourdough bread. Now, how do you keep it fresh and delicious for as long as possible? Proper storage is key to enjoying that perfect crust and tangy crumb you worked so hard to create. Don’t let your fantastic sourdough bread recipe go to waste!

    Here are the best ways to store your sourdough, ensuring every slice is as delightful as the first:

    Short-Term Storage (1-2 Days)

    For the first day or two, your goal is to protect the sourdough from drying out while maintaining its crispy crust. The best place to do this is right on your kitchen counter.

    • Cut-Side Down: If you’ve already sliced into your loaf, place the cut side down on a clean cutting board. This simple trick helps prevent moisture loss from the exposed crumb.
    • Paper Bag or Tea Towel: Wrap the entire loaf loosely in a clean paper bag or a breathable linen/cotton tea towel. This allows enough air to circulate to keep the crust from becoming soggy while still protecting the bread.
    • Bread Box: A bread box creates an ideal, slightly humid environment. It keeps your bread away from direct air currents that can dry it out and helps maintain a more consistent texture.

    For short-term storage, avoid plastic bags if you want to preserve a crisp crust. Plastic traps moisture, which will soften the exterior.

    Medium-Term Storage (Up to 5-7 Days)

    If you plan to enjoy your sourdough over several days, you’ll need to shift your focus from crust preservation to overall freshness. The crust will naturally soften a bit over time.

    • Plastic Bag or Airtight Container: After the first day, transfer your sourdough to an airtight container or a plastic bag. This significantly slows the staling process, keeping the interior soft and moist.
    • Combination Method: Many bakers use a combination approach. They start with a paper bag or tea towel for the first day, then move the loaf into a plastic bag. This gives you the best of both worlds: initial crust integrity followed by prolonged softness.

    A word of caution: Avoid the refrigerator for storing sourdough. The cool temperatures actually speed up the staling process, making your bread dry and tough much faster than if you left it on the counter [6].

    Long-Term Storage (Up to 3 Months)

    To keep your delicious sourdough recipe fresh for much longer, freezing is your best friend. This is a fantastic meal prep tip for busy families or anyone who loves having homemade bread ready to go.

    • Freezing Whole Loaves:
      1. Let your freshly baked loaf cool completely to room temperature.
      2. Wrap the loaf tightly in plastic wrap, ensuring there are no air gaps.
      3. Add a second layer of aluminum foil or place the wrapped loaf in a large freezer-safe bag. This double layer prevents freezer burn.
      4. Store in the freezer for up to 3 months.
      5. To thaw, unwrap the frozen loaf and let it sit on the counter for several hours. To revive the crust, spritz it lightly with water and bake in a preheated oven at 350°F (175°C) for 10-15 minutes.
    • Freezing Sliced Bread:
      1. Slice the cooled sourdough to your desired thickness.
      2. Arrange the slices in a single layer on a baking sheet and freeze for about 30 minutes until firm. This step prevents them from sticking together.
      3. Transfer the frozen slices to a freezer-safe bag or an airtight container.
      4. You can toast slices directly from the freezer or let them thaw on the counter for a few minutes.

    Tips for Extending Freshness and Enjoyment

    • Don’t Slice All at Once: Only slice what you plan to eat right away. Leaving the loaf whole is the best way to maintain moisture in the crumb.
    • Revive Stale Sourdough: If your sourdough feels a bit dry, a quick refresh can work wonders. Spritz the loaf lightly with water and bake in a preheated oven at 300°F (150°C) for 5-10 minutes. This brings back a wonderful crust and warms the interior.
    • Embrace Stale Bread: If your bread becomes truly stale, don’t throw it away! Turn it into delicious bread crumbs, croutons, or use it for recipes like French toast.

    By following these simple storage guidelines, you can ensure your homemade sourdough bread stays fresh, flavorful, and ready to enjoy, making your approachable home cooking even more rewarding!

    Frequently Asked Questions

    What is the easiest sourdough bread recipe for a beginner?

    You’ve found it. This guide provides the easiest sourdough bread recipe for beginners, designed for home cooks seeking flavorful meals made simple.

    Our approach simplifies the entire process by breaking down each step clearly. This method helps you build confidence in the kitchen without feeling overwhelmed by complex instructions.

    Here’s what makes this sourdough recipe beginner-friendly:

    • Clear, Step-by-Step Instructions: We guide you through every stage, from mixing to baking.
    • Minimal Kneading: Our recipe relies on simple stretch-and-fold techniques instead of intensive kneading.
    • Everyday Ingredients: You won’t need any specialty flours or equipment to get started.
    • Focus on Success: We provide practical tips to help you avoid common baking mistakes.

    At Recipesmondial, we focus on approachable home cooking to ensure you get reliable results every time.

    How do you make a sourdough starter from scratch?

    Making a sourdough starter is simpler than you might think—it just requires a little patience. A starter is a living culture of wild yeast and bacteria, which gives sourdough its signature tangy flavor and airy rise.

    Here’s a basic overview:

    1. Combine Flour and Water: In a clean jar, mix equal parts whole wheat flour and filtered water until no dry spots remain.
    2. Cover Loosely: Place a lid or plastic wrap on the jar, ensuring it’s loose enough to allow for air circulation.
    3. Daily Feedings: Each day, discard most of the starter and feed the remainder with fresh flour and water. You’ll soon see bubbles and growth.
    4. Watch for Activity: After about 7–14 days, your starter will become active and bubbly, consistently doubling in size a few hours after each feeding.
    5. ol>

      For more in-depth instructions, many detailed guides are available online [7]. This simple process can transform your baking journey.

      Can you make a sourdough bread recipe with commercial yeast?

      You can certainly make a delicious loaf of bread using commercial yeast, but it won’t be true sourdough.

      Here’s why:

      • Flavor Profile: While commercial yeast provides a quick rise, it doesn’t create the complex, tangy flavor unique to sourdough. That distinct taste comes from the wild yeasts and lactic acid bacteria in a natural starter.
      • Digestion: Sourdough’s long fermentation process helps break down gluten and phytic acid, which can make the bread easier to digest. Breads made with commercial yeast do not undergo this extended fermentation.
      • Texture: Traditional sourdough is known for its distinct open crumb and chewy texture. Commercial yeast typically produces a softer, more uniform crumb.

      If you’re looking for quick breakfast ideas or a simple dinner recipe, bread made with commercial yeast is a great choice. For an authentic sourdough experience, however, a healthy starter is essential.

      Can I use all-purpose flour for this sourdough recipe?

      Yes, you can use all-purpose (AP) flour for this sourdough bread recipe. However, bread flour is often preferred, and there are a few differences to keep in mind.

      Here’s what to expect:

      • Protein Content: Bread flour has a higher protein content, which helps develop a stronger gluten network. This is what gives sourdough its classic chewy texture and a better rise.
      • Dough Handling: Dough made with AP flour may be stickier and less elastic, making it slightly more challenging to handle during shaping.
      • Final Texture: Bread made with all-purpose flour might be slightly less chewy and have a denser crumb compared to a loaf made with bread flour.

      If you choose to use AP flour, consider these tips:

      • Reduce Water Slightly: AP flour absorbs less liquid than bread flour, so you may need to use a little less water to prevent the dough from becoming too sticky.
      • Handle Gently: Be extra gentle with the dough to carefully develop its gluten structure during the stretch-and-fold steps.

      Don’t be afraid to experiment! This recipe is about approachable home cooking, so use what you have and enjoy the learning process.


    Sources

    1. https://www.sciencedirect.com/science/article/pii/S073497501730075X
    2. https://www.kingarthurbaking.com/blog/2021/04/15/what-is-autolyse
    3. https://www.kingarthurbaking.com/blog/2017/02/09/baking-bread-with-steam
    4. https://artisanbreadandstarter.com/blogs/blog/how-to-tell-if-your-sourdough-starter-is-ready
    5. https://blog.kingarthurbaking.com/2021/04/09/how-to-proof-sourdough/
    6. https://www.sciencefocus.com/science/why-does-bread-go-stale-faster-in-the-fridge/
    7. https://www.kingarthurbaking.com/recipes/sourdough-starter-recipe

  • Easy Focaccia Bread Recipe (A Step-by-Step Guide for Beginners)

    Easy Focaccia Bread Recipe (A Step-by-Step Guide for Beginners)

    Focaccia is a classic Italian flatbread known for its signature dimples, soft and airy texture, and rich olive oil flavor. This beginner-friendly bread is incredibly versatile and can be enjoyed plain with sea salt or customized with various toppings like herbs, vegetables, and cheeses.

    Imagine the aroma of freshly baked bread filling your kitchen. Picture a golden crust that gives way to a soft, airy interior. For many home cooks, baking bread can feel daunting, with technical terms and complex steps that lead to overwhelming recipes. But creating this culinary magic can be surprisingly simple. That’s where homemade focaccia comes in. This beautiful, versatile Italian flatbread is not only delicious but also one of the most forgiving and beginner-friendly breads you can tackle.

    At Recipesmondial, we believe cooking should be a delightful adventure, not a source of stress. That’s why we’re excited to share our ultimate easy focaccia recipe. Our step-by-step guidance will walk you through every stage, helping you build confidence and create an impressive, flavorful bread with ease. Whether you’re looking for a delightful side dish for family-friendly meals or a delicious base for sandwiches, this focaccia recipe will quickly become a favorite in your kitchen. Say goodbye to baking anxiety and hello to delicious success!

    We’ve broken down the art of making focaccia into simple instructions using everyday ingredients and basic techniques. You’ll learn how to achieve its signature dimpled top, a crisp bottom, and a perfectly fluffy crumb—all without intimidating culinary jargon. Enjoy a stress-free experience as we guide you from mixing to baking. Let’s dive in and discover why this is the easiest focaccia recipe you’ll ever make, transforming simple ingredients into a show-stopping dish!

    Why Is This The Easiest Focaccia Recipe You’ll Ever Make?

    Welcome to the world of homemade bread, where you can bake with confidence! We know that baking bread can feel like a big challenge. That’s why we’ve designed this recipe to be the easiest focaccia you’ll ever make, especially for home cooks and beginners.

    Focaccia is a beloved Italian flatbread with ancient origins, evolving from simple hearth-baked doughs [source: https://www.britannica.com/topic/focaccia]. We’ve taken that rich tradition and made it incredibly approachable. You won’t find complex steps or technical jargon here. Instead, our clear, step-by-step instructions are designed to build your confidence in the kitchen.

    This recipe turns what seems like a difficult task into an enjoyable, stress-free experience. We focus on simple techniques and common ingredients so you can create a flavorful, impressive bread, even if you’re new to baking.

    Here’s why this particular focaccia recipe is so beginner-friendly:

    • No-Knead Method: Forget strenuous kneading! Our simple, no-knead method requires minimal effort. It’s perfect for anyone intimidated by traditional bread-making techniques.
    • Everyday Ingredients: You won’t need any special flour or hard-to-find items. This recipe uses basic pantry staples, which simplifies your shopping list.
    • Long, Slow Rise: Most of the work is passive. The dough develops its amazing flavor and texture while it rests, making this a relaxing, hands-off process.
    • Forgiving Dough: Focaccia is incredibly resilient. It’s hard to truly mess up! This allows you to experiment and learn without fear of failure.
    • Visual Cues: Our step-by-step instructions guide you with clear visual indicators. You’ll know exactly what to look for at each stage, making the process intuitive.
    • Versatile Toppings: From classic herbs to fresh vegetables, focaccia welcomes creativity. You can easily adapt it to your taste or whatever ingredients you have on hand.

    We’re passionate about making home cooking easy and enjoyable. This focaccia recipe is a fantastic way to learn basic baking skills and add a delightful homemade bread to your repertoire. Get ready to bake with confidence and impress your family and friends with minimal fuss!

    What Exactly is Focaccia Bread?

    Are you ready to explore the wonderful world of focaccia bread? Far more than a simple side dish, this delightful Italian flatbread is a fantastic project for home cooks seeking easy recipes. At Recipesmondial, we love showing you how simple it is to create flavorful meals made easy.

    Think of focaccia as Italy’s beloved, savory flatbread. It boasts a unique texture, with a wonderfully golden, crisp crust and a soft, airy crumb full of delightful pockets. This signature texture is created by a generous amount of olive oil, which also contributes to its distinct and memorable appearance.

    What makes focaccia bread instantly recognizable? It has several key characteristics:

    • Golden Crust: Baking in olive oil gives the crust its signature deep golden brown color.
    • Irregular Dimples: Gently pressed into the dough to hold pools of olive oil and toppings.
    • Airy Interior: An open, chewy crumb that feels both light and satisfying.
    • Savory Toppings: Classic toppings include coarse sea salt and fresh herbs like rosemary, though many creative variations exist.

    The history of focaccia is truly ancient, with roots dating back to the Etruscans and ancient Romans who baked a similar flatbread over hot coals. The name itself comes from the Latin “panis focacius,” meaning “hearth bread” or “baked on the hearth” [1], highlighting its deep historical origins.

    As a beginner-friendly recipe, focaccia bread is incredibly forgiving and doesn’t require complex techniques. It’s the ideal easy recipe for making fresh bread at home, and you’ll be amazed at how quickly you can achieve professional-tasting results. Say goodbye to feeling overwhelmed by complex recipes; this focaccia recipe will help you start cooking confidently so you can share a truly special homemade bread.

    Ready to discover what simple ingredients bring this classic to life? Let’s dive in!

    What Ingredients Do You Need for Focaccia?

    A flat lay photo of focaccia ingredients, including flour, olive oil, yeast, water, and fresh rosemary sprigs, neatly arranged on a light wooden surface.
    Professional food photography, photorealistic, high-quality food magazine photo: A beautifully arranged, bright flat lay of all the basic ingredients needed for focaccia bread. This includes a bowl of all-purpose flour, a small bowl of active dry yeast, a glass bottle of high-quality extra virgin olive oil, a small pile of flaky sea salt, a measuring cup with water, and fresh sprigs of rosemary. The ingredients are neatly and artfully arranged on a rustic, light-colored wooden kitchen counter, bathed in soft, warm natural light. The focus is sharp on all ingredients, showcasing their texture and freshness.

    Making delicious focaccia bread is simpler than you might think, and you don’t need fancy ingredients. In fact, you probably have most of what you need in your pantry already. At Recipesmondial, we believe in using everyday ingredients for our easy recipes to make your cooking journey stress-free and enjoyable. Let’s gather the ingredients for this beginner-friendly recipe.

    For the Focaccia Dough

    A simple yet robust dough is the foundation of any great focaccia. These basic ingredients create a wonderfully chewy texture and are surprisingly easy to work with, even if you’re new to baking bread.

    • Warm Water: This helps wake up the yeast. Aim for lukewarm, about 105-115°F (40-46°C). It should feel warm to the touch, not hot.
    • Active Dry Yeast: This is the magic ingredient that makes the bread rise. If you’re using instant yeast instead, you can skip the activation step and mix it directly with the flour.
    • Granulated Sugar: Just a pinch is needed to feed the yeast, helping it activate quickly and develop flavor.
    • All-Purpose Flour: A pantry staple, all-purpose flour works perfectly for a soft, airy focaccia. For a slightly chewier result, you can use bread flour.
    • Salt: Essential for flavor. We recommend kosher or fine sea salt to balance the dough and enhance the overall taste.
    • Extra Virgin Olive Oil: The heart of Italian cooking! A good quality extra virgin olive oil adds incredible flavor and richness to the dough and is also used for drizzling on top.

    With just these simple components, you’re on your way to a flavorful meal made easy. You’ll be amazed at the delicious bread you can create from scratch.

    For the Topping

    Toppings are where your focaccia truly shines, adding delightful texture and aroma. These classic choices are simple but create a huge impact on flavor.

    • Extra Virgin Olive Oil: Drizzled generously before baking, it creates a crispy, golden crust and infuses the bread with its signature rich taste.
    • Flaky Sea Salt: A must-have! Sprinkling flaky sea salt on top provides bursts of briny flavor and adds a wonderful crunchy texture.
    • Fresh Rosemary: The quintessential focaccia herb. Its fragrant, piney notes are simply irresistible. Feel free to use other fresh herbs like thyme or oregano too.

    These toppings transform the simple dough into an amazing focaccia, adding a fresh and aromatic finish. Best of all, these ingredients are easy to find, making this a perfect approachable home cooking project.

    How to Make Focaccia Bread Step-by-Step

    A close-up of a warm, golden-brown focaccia bread, fresh from the oven, with characteristic dimples, olive oil sheen, and rosemary on a cooling rack.
    Professional food photography, photorealistic, high-quality food magazine photo: A close-up shot of a perfectly baked, golden-brown focaccia bread, fresh out of the oven. The bread exhibits characteristic deep dimples, a glistening surface from olive oil, and is generously topped with fresh rosemary sprigs and coarse sea salt. It is placed on a simple metal cooling rack on a warm, inviting light-colored kitchen counter. The background is slightly blurred to keep the focus on the bread, suggesting a cozy home kitchen. The lighting is soft and natural, highlighting the bread’s airy, fluffy texture and inviting crust.

    Step 1: Activate the Yeast and Mix the Dough

    This first step brings together simple ingredients to create a soft, pliable dough. You’ll be amazed at how easy it is to start this delicious bread.

    1. Warm the Water: In a large mixing bowl, pour 1 ½ cups (360ml) of lukewarm water. The ideal temperature is between 105–115°F (40–46°C), which should feel warm but not hot to the touch. This temperature is crucial for activating the yeast [2].
    2. Add Sweetness and Yeast: Stir in 1 teaspoon of granulated sugar. Then, sprinkle 2 ¼ teaspoons (one packet) of active dry yeast over the water.
    3. Let it Bloom: Let the mixture sit for 5–10 minutes until it becomes foamy and bubbly. This “bloom” indicates the yeast is active. If it doesn’t foam, your yeast may be inactive, or the water was too hot or cold.
    4. Combine Dry Ingredients: In a separate bowl, whisk together 3 ½ cups (420g) of all-purpose flour and 2 teaspoons of fine sea salt.
    5. Mix the Dough: Pour the yeast mixture and ¼ cup (60ml) of olive oil into the flour mixture. Use a wooden spoon or spatula to mix until just combined. The dough will be shaggy and sticky—this is normal for focaccia.
    6. Gentle Knead: Briefly knead the dough in the bowl for 1–2 minutes to develop the gluten. The goal is to form a cohesive, sticky ball.

    Chef’s Tip: Don’t worry about perfect kneading. Focaccia is a forgiving bread; the goal is simply to bring the ingredients together for minimal effort and maximum flavor.

    Step 2: Let the Dough Rise (First Proof)

    Now it’s time for the first rise, or “proof.” During this step, the yeast will transform the dough into a light, airy base, which is crucial for achieving that signature fluffy focaccia texture.

    1. Oil the Bowl: Lightly coat a clean, large bowl with about a tablespoon of olive oil.
    2. Transfer the Dough: Place the dough ball into the oiled bowl and turn it once to coat all sides. This prevents a dry crust from forming.
    3. Cover and Rise: Cover the bowl tightly with plastic wrap or a clean kitchen towel.
    4. Find a Warm Spot: Place the bowl in a warm, draft-free location. A sunny spot on your counter or inside a slightly warm (but turned off) oven works well.
    5. Watch it Grow: Let the dough rise for 1 to 1 ½ hours, or until it has doubled in size. It should look puffy and be full of air bubbles.

    Chef’s Tip: If your kitchen is on the cooler side, the dough may need more time to rise. Patience is key for this simple recipe.

    Step 3: Shape and Dimple the Focaccia

    In this step, you’ll shape and dimple the dough, creating the classic focaccia look. These signature pockets are perfect for holding olive oil and toppings.

    1. Prepare Your Pan: Generously coat a 9×13-inch baking pan or a large cast-iron skillet with 2–3 tablespoons of olive oil. A well-coated pan prevents sticking and creates a crispy bottom crust.
    2. Transfer the Dough: Gently scrape the risen dough into the prepared pan, trying not to deflate it too much.
    3. Spread Gently: Using oiled fingertips, gently press and stretch the dough toward the edges of the pan. If it springs back, let it rest for 5–10 minutes before continuing.
    4. The Dimpling: Press your fingertips deep into the dough to create indentations all over the surface, being careful not to press all the way through. These iconic dimples are what make focaccia so recognizable.
    5. Second Rise: Loosely cover the pan and let the dough rise again in a warm spot for another 30–45 minutes, until it becomes visibly puffy.

    Chef’s Tip: Don’t be shy when dimpling the dough. Deeper indentations are better for catching olive oil and creating that classic focaccia texture.

    Step 4: Add Toppings and Bake to Perfection

    You’re at the final, most rewarding stage: topping and baking. Your kitchen will soon be filled with the irresistible aroma of fresh focaccia.

    1. Preheat Your Oven: While the dough is on its second rise, preheat your oven to 425°F (220°C).
    2. A Final Drizzle: After the second rise, uncover the dough and drizzle it with another 2–3 tablespoons of good-quality olive oil. Allow the oil to pool in the dimples.
    3. Add Your Toppings: Sprinkle generously with flaky sea salt, followed by any other toppings. Fresh rosemary is a classic choice, and you can find more ideas in our “Best Focaccia Toppings” section.
    4. Bake Until Golden: Bake in the preheated oven for 20–30 minutes, until the top is golden brown and springy to the touch. The bottom should also be golden and crisp.
    5. Cool and Serve: Carefully remove the pan from the oven. Immediately transfer the focaccia to a wire rack to cool slightly before slicing and serving.

    Chef’s Tip: A generous drizzle of olive oil before baking is essential. It creates a wonderfully crispy crust and adds incredible flavor, making this bread a perfect appetizer or side dish.

    What Are The Best Focaccia Toppings?

    Three slices of focaccia bread with different savory toppings: cherry tomatoes and basil, black olives, and caramelized onions with thyme.
    Professional food photography, photorealistic, high-quality food magazine photo: An inviting spread showcasing three distinct and delicious focaccia topping variations. Three individual squares or slices of focaccia are arranged artfully on a rustic light-colored ceramic platter or wooden board. One piece is topped with vibrant halved cherry tomatoes and fresh basil leaves. Another features thin slices of black olives and a sprinkle of flaky sea salt. The third piece is adorned with beautifully caramelized onions and fresh thyme sprigs. Each piece of focaccia has a golden-brown crust and a visible airy interior, glistening with olive oil under soft, warm natural light, emphasizing their irresistible appeal.

    Classic Herb and Salt

    Sometimes, the simplest things are the most delicious. The classic combination of fresh herbs and flaky sea salt is a timeless topping for homemade focaccia. It’s a fantastic starting point for beginners and an easy way to create a flavorful, fuss-free bread. This simple topping highlights the natural goodness of the focaccia itself.

    Here are some popular choices for a classic herb and salt focaccia:

    • Fresh Rosemary: This is the iconic herb for focaccia. Its piney, fragrant notes complement the rich olive oil beautifully.
    • Fresh Thyme: A wonderful alternative or addition to rosemary, offering a slightly more delicate, earthy flavor.
    • Dried Oregano: If fresh herbs aren’t available, dried oregano works well. Sprinkle it generously over the dough before baking.
    • Flaky Sea Salt: This is crucial! The large, irregular flakes provide a satisfying, salty crunch. The texture is a significant upgrade from regular table salt.
    • High-Quality Olive Oil: Drizzle generously over the dough before adding herbs and salt. It infuses flavor and helps create a lovely crisp crust.

    Pro Tip: Gently press the herbs into the dough’s dimples. This helps them adhere and release their aromatic oils during baking.

    Vegetable and Cheese Variations

    Focaccia is wonderfully versatile and acts as a blank canvas for your favorite flavors. By exploring vegetable and cheese variations, you can create family-friendly meals or creative snacks. These toppings add color, texture, and a burst of savory goodness to your bread.

    Consider these fantastic toppings:

    • Cherry Tomatoes: Halve or quarter colorful cherry tomatoes. They become sweet and juicy when baked.
    • Olives: Sliced black or green olives, especially Kalamata, add a briny, savory punch that is a staple in Mediterranean cooking.
    • Caramelized Onions: Sweet, tender onions bring incredible depth of flavor. This takes a little extra time but is well worth the effort.
    • Bell Peppers: Thinly sliced red, yellow, or orange bell peppers add vibrant color and a sweet crunch.
    • Thinly Sliced Zucchini or Asparagus: These vegetables become tender and slightly caramelized on top of the focaccia.
    • Parmesan Cheese: Sprinkle grated Parmesan for a salty, nutty, and cheesy crust. It’s always a crowd-pleaser.
    • Mozzarella: Cubed or shredded fresh mozzarella melts beautifully, creating gooey pockets of cheese.
    • Feta Cheese: Crumbled feta adds a tangy, salty kick that pairs wonderfully with tomatoes or olives.
    • Goat Cheese: Creamy goat cheese adds a delicate tang, especially when combined with fresh herbs or roasted red peppers.

    Get Creative: Try combinations like cherry tomatoes and basil with mozzarella, or Kalamata olives with feta. For a heartier meal, add thinly sliced pepperoni or cooked sausage. These variations can be easily adapted to suit any taste.

    Sweet Focaccia Ideas

    Focaccia doesn’t have to be savory. A sweet version makes a delightful surprise for breakfast, brunch, or a unique dessert. This creative twist transforms your basic focaccia recipe into a delicious sweet treat.

    Here are some inspiring sweet focaccia toppings:

    • Grapes and Rosemary: This Italian classic features juicy red or green grapes that caramelize slightly in the oven. A hint of fresh rosemary provides an unexpected, elegant aroma.
    • Fig and Honey: Sliced fresh figs paired with a drizzle of honey before baking create a wonderfully sweet and sophisticated focaccia.
    • Apple and Cinnamon: Use thinly sliced apples (like Granny Smith or Honeycrisp) with a sprinkle of cinnamon and sugar. It tastes like apple pie in bread form!
    • Mixed Berries: Fresh raspberries, blueberries, or sliced strawberries dotted over the dough, perhaps with a dusting of sugar, make a colorful and fruity treat.
    • Citrus Zest and Sugar: Orange or lemon zest mixed with a little sugar creates a bright, fragrant topping.

    Serving Suggestion: Sweet focaccia is wonderful on its own, but you can also serve it with a dollop of whipped cream, a scoop of vanilla ice cream, or a drizzle of balsamic glaze for an extra special touch. It works well as a quick breakfast or a unique dessert.

    What Are Some Tips for Perfect, Fluffy Focaccia?

    Making delicious, fluffy focaccia is surprisingly simple, and you don’t need to be a seasoned baker to create a masterpiece. With a few practical tips and a little patience, you’ll achieve that perfect airy texture and golden crust every time. These beginner-friendly techniques will boost your confidence and make this recipe an absolute joy to bake, freeing you from complicated instructions.

    • Give Your Yeast a Good Start: Active yeast is the secret to a light, airy focaccia. To activate it properly, always use warm water—around 105–115°F (40–46°C). Water that’s too hot will kill the yeast, while water that’s too cold will prevent it from activating. After 5–10 minutes, you should see a foamy layer on the surface, which signals your yeast is ready to work. This critical step ensures a reliable rise.
    • Embrace the Sticky Dough: Focaccia dough has high hydration, which means it will be wet and sticky. Resist the temptation to add too much extra flour, as this sticky texture is essential for creating a wonderfully open and airy crumb. To make handling easier, simply coat your hands with a little olive oil. Remember, a sticky dough means you’re on the right track for perfect focaccia.
    • Patience with Proofing Pays Off: Proper proofing, or rising, is crucial for developing flavor and texture. For the first rise, let the dough rest for at least 1–2 hours in a warm spot; this slow process builds a deeper, more complex taste. For even better results, try an overnight cold proof in the refrigerator. This longer fermentation significantly enhances both the flavor and chewiness [3]. Don’t rush this step—it’s the key to irresistible focaccia.
    • Don’t Skimp on Olive Oil: Extra virgin olive oil is fundamental to focaccia, adding rich flavor and contributing to its tender texture. Start by generously oiling your baking pan to prevent sticking and create a crispy bottom crust. Before baking, drizzle plenty of oil over the dough as well. This not only ensures a moist interior but also infuses every bite with classic focaccia flavor.
    • Master the Dimple: Focaccia’s iconic dimples aren’t just for looks; they are key to its unique texture. To create them, gently press your fingertips all over the proofed dough. This action prevents large air pockets from forming and creates signature wells that catch olive oil, salt, and other toppings. As a result, every bite is bursting with concentrated flavor.
    • Preheat Your Oven Thoroughly: A fully preheated oven is essential. The initial burst of high heat creates “oven spring,” causing the dough to rise quickly. This vital step leads to a lighter, fluffier interior and helps form a desirable golden-brown, crispy crust. Giving your oven enough time to reach the target temperature ensures consistent, professional results.
    • Bake Until Golden, Not Dry: Keep a close eye on your focaccia as it bakes, aiming for a beautifully golden-brown top and crisp, inviting edges. Overbaking can easily lead to a dry loaf. The goal is a perfect balance: soft and airy on the inside with a satisfying crunch on the outside. Since every oven is different, trust your senses more than the timer for the best results.

    How Should You Store and Serve Focaccia?

    Serving Suggestions

    Focaccia is incredibly versatile, perfect as a simple side dish or a satisfying meal on its own. Think of it as your new favorite bread for any occasion. Here are some easy serving ideas for your homemade focaccia:

    • Alongside Soups and Salads: Focaccia is the perfect companion to soups and salads. Serve it alongside a hearty minestrone to dip into the broth, or use it to scoop up a fresh garden salad.
    • With Dips and Spreads: For a simple appetizer, offer warm focaccia slices with dips like olive oil and balsamic vinegar, pesto, or hummus.
    • As a Sandwich Base: Slice focaccia horizontally to create a delicious sandwich base, great for quick lunches or picnics. Fill it with your favorite ingredients, such as deli meats, cheeses, roasted vegetables, or grilled chicken.
    • Breakfast or Brunch Treat: Enjoy a plain or sweet slice of focaccia with your morning coffee for a delightful start to the day. It’s wonderful with a light spread of cream cheese or jam.
    • Part of a Charcuterie Board: Elevate any gathering by adding slices of focaccia to a charcuterie board alongside cheeses, cured meats, olives, and fresh fruit.
    • To Mop Up Sauces: Its soft, porous texture is ideal for mopping up flavorful sauces from pasta dishes or stews.

    Storage and Reheating Instructions

    While focaccia is best enjoyed the day it’s baked, proper storage will keep it fresh and delicious for longer. Here’s how to effectively store and reheat your homemade focaccia:

    Storing Your Focaccia

    • Room Temperature:

      To keep focaccia soft and ready to eat, wrap it tightly in plastic wrap or aluminum foil and store it at room temperature. It will stay fresh for up to 2 days.

    • Refrigeration:

      For longer storage, wrap the focaccia securely and refrigerate it for up to 4-5 days. Note that refrigeration can slightly alter the texture, making it drier.

    • Freezing for Longer Storage:

      Focaccia freezes beautifully, making it a great option for meal prep. Once it has cooled completely, wrap individual slices or the whole loaf tightly in plastic wrap, then place it in a freezer-safe bag. It will keep for up to 3 months.

    Reheating Your Focaccia

    Reheating restores focaccia’s wonderful warmth and soft texture. Follow these simple steps for the best results:

    • From Room Temperature or Refrigerator:
      • Preheat your oven to 350°F (175°C).
      • Place the focaccia on a baking sheet or directly on the oven rack.
      • Heat for 5-10 minutes, or until warmed through.
      • For a crispier crust, lightly mist the top with water before reheating.
    • From Frozen:
      • You can reheat focaccia directly from the freezer; no thawing is necessary.
      • Preheat your oven to 375°F (190°C).
      • Place the frozen focaccia on a baking sheet.
      • Bake for 15-20 minutes, or until thawed and heated through.
      • Check that the center is warm before serving.
    • Quick Reheating (Single Slices):

      For a single slice, use a toaster oven or a dry skillet over medium heat. Warm until heated through and slightly crispy, being careful not to dry it out.

    Frequently Asked Questions About Focaccia

    Is focaccia bread healthy?

    Focaccia is a delicious treat! However, like most breads, its healthfulness depends on two main factors: the ingredients you use and your portion size.

    A typical focaccia recipe includes white flour, olive oil, water, yeast, and salt. The extra virgin olive oil provides healthy monounsaturated fats, making it a great addition to your diet when enjoyed in moderation [4].

    Here are a few tips for making focaccia a healthy part of your diet:

    • Moderation is Key: Enjoy focaccia in reasonable portion sizes, as you would with any delicious food.
    • Choose Whole Grains: Try using a portion of whole wheat flour in your recipe. This adds more fiber to your focaccia.
    • Go Easy on the Oil: While olive oil is a healthy fat, too much of it increases the overall calorie count. Be mindful of the amount you drizzle.
    • Load Up on Veggies: Top your focaccia with colorful vegetables like roasted bell peppers, cherry tomatoes, or spinach to boost nutrients and flavor.
    • Pair Wisely: Serve focaccia with a fresh salad or a lean protein to create a well-rounded, family-friendly meal.

    Ultimately, focaccia can be a wonderful part of a balanced diet. The key is to prepare and enjoy it thoughtfully!

    What flour is best for focaccia?

    Choosing the right flour is key to achieving the perfect focaccia texture: a fluffy inside with a crispy crust. Fortunately, the best options are simple and easy to find.

    Here are the best flour options for your focaccia:

    • All-Purpose Flour: This is a fantastic choice for home cooks. It’s readily available, easy to work with, and creates a soft, tender crumb that’s perfect for beginner recipes.
    • Bread Flour: Preferred by many bakers, bread flour has a higher protein content than all-purpose. This extra protein develops more gluten, resulting in a chewier, more structured focaccia with great elasticity.
    • “00” Flour: This finely milled Italian flour, often used for pasta and pizza, can give focaccia a very delicate and airy texture. However, it can be difficult to find in regular grocery stores and isn’t necessary for a delicious result.

    For your first focaccia, stick with all-purpose or bread flour. You will get amazing results either way!

    How do you pronounce focaccia?

    Learning to pronounce “focaccia” is fun and easy! Say it like this: “foh-KAH-chuh.”

    In this Italian word, the “cc” is pronounced like a “k” sound. Now you can confidently order or talk about your delicious homemade focaccia!

    Can you make a quick focaccia recipe?

    Yes, you absolutely can make a quicker version of focaccia! While traditional recipes involve long proofing times to develop flavor, several methods can speed up the process when you’re short on time.

    Here are a few tips for making focaccia more quickly:

    • Warm Environment: Place your dough in a warm spot to rise. A slightly warm oven (turned off!) or a sunny windowsill helps yeast activate faster.
    • Active Dry or Instant Yeast: Both work well for speeding up the process. Instant yeast is particularly useful as it often doesn’t require prior activation, shaving off a few minutes.
    • Single Rise: Some quick recipes skip the second proofing. Instead, you can shape the dough, add toppings, and bake after just one rise. This method is perfect for a simpler, beginner-friendly focaccia.

    Keep in mind that while these shortcuts work, a longer, slower rise typically develops more complex flavors. The goal is to find a recipe that balances speed with fantastic results, saving you time without sacrificing taste.


    Sources

    1. https://www.britannica.com/topic/focaccia
    2. https://redstaryeast.com/yeast-baking-lessons/yeast-proofing-tips/
    3. https://www.seriouseats.com/bread-making-fundamentals-how-to-proof-dough
    4. https://www.heart.org/en/healthy-living/healthy-eating/eat-smart/fats/monounsaturated-fats

  • The Ultimate Pizza Dough Recipe: A Step-by-Step Guide for Beginners

    The Ultimate Pizza Dough Recipe: A Step-by-Step Guide for Beginners

    A classic pizza dough recipe is a simple mixture of flour, water, active dry yeast, sugar (to feed the yeast), salt, and olive oil. The ingredients are combined and kneaded until a smooth, elastic dough forms, which is then left to rise in a warm place. This process develops the gluten and creates the light, airy texture characteristic of a perfect pizza crust.

    Imagine the aroma of freshly baked pizza wafting through your kitchen, a golden crust bubbling with your favorite toppings. For many home cooks, creating pizza dough from scratch can seem like a daunting task. Complex recipes or the pressure to cook quickly can feel overwhelming, often leading to a reliance on store-bought options. But mastering a delicious homemade pizza dough recipe doesn’t have to be a struggle. At Recipesmondial, we believe simple, flavorful recipes are within everyone’s reach—and that includes making the perfect pizza crust.

    Get ready to transform your kitchen into your favorite pizzeria with our ultimate, beginner-friendly guide. This step-by-step guide is designed to banish cooking anxiety and help you discover the satisfaction of preparing amazing pizza dough from scratch. We’ll walk you through each stage, giving you the confidence to create a consistently delicious and foolproof crust every time. Say goodbye to store-bought dough and hello to a rewarding, stress-free cooking experience that brings incredible flavor to your family-friendly meals.

    We’re here to make your pizza-making journey enjoyable and approachable. We cover everything from understanding essential ingredients and expert tips to common recipe variations. With our clear instructions, you’ll be baking flavorful meals made easy in no time. Let’s dive in and see why this homemade pizza dough recipe is about to become your new kitchen staple.

    Why You’ll Love This Easy Homemade Pizza Dough Recipe

    Imagine biting into a warm slice of pizza. The crust is perfectly golden, crisp on the outside, and delightfully chewy inside. With this easy homemade pizza dough recipe, that dream becomes your delicious reality!

    Here at Recipesmondial, we believe cooking should be fun and stress-free. That’s why we crafted the best pizza dough recipe for beginners. Say goodbye to store-bought dough and discover the joy of making your own!

    Why You’ll Fall in Love with This Pizza Dough

    This simple pizza dough recipe takes the guesswork out of baking, empowering you to create amazing meals. Soon, you’ll be making pizzeria-quality pies right in your own kitchen.

    • Effortless and Beginner-Friendly: Are you overwhelmed by complex recipes? This guide simplifies the process with clear, step-by-step instructions so you can build your cooking skills with confidence.
    • Unbeatable Flavor and Freshness: Nothing compares to a freshly made pizza base. Using simple, everyday ingredients, this recipe delivers a superior taste and texture that your family will truly notice.
    • Perfect for Family Fun: Making homemade pizza dough is a fantastic activity for the whole family. Gather your loved ones for a fun cooking session and create delicious meals and lasting memories together.
    • Customize Your Creations: This versatile pizza crust recipe is your blank canvas. Experiment with endless toppings and flavor combinations to create unique meals perfectly suited to your tastes.
    • Save Money, Eat Better: Skip the takeout! Making pizza at home is more budget-friendly and healthier. Because you control the ingredients, you get to enjoy tastier, better-for-you meals. In fact, making meals at home can be significantly cheaper than eating out [source: https://www.usda.gov/media/blog/2023/10/26/making-healthy-meals-home-can-save-you-money].
    • Boost Your Kitchen Confidence: Mastering this recipe is a great way to build your skills. This approachable project will boost your confidence in the kitchen, making it easier to tackle other simple dishes.

    This easy pizza dough recipe is all about enjoying cooking without the stress. It shows you how to transform simple ingredients into a delicious, visually appealing meal. Get ready to cook with confidence and enjoy every single bite!

    What Ingredients Do You Need for Pizza Dough?

    A flat lay photo of pizza dough ingredients including flour, yeast, olive oil, water, and salt on a wooden surface.
    A 100 percent photorealistic, professional food photography style, high-quality food magazine photo showing a beautifully arranged flat lay of all the essential ingredients for pizza dough. On a rustic wooden kitchen counter, display a bowl of all-purpose flour, a small bowl of active dry yeast, a bottle of olive oil, a measuring cup with warm water, and a pinch of salt. The lighting is soft and warm, highlighting the textures. The composition is clean, inviting, and approachable, with a shallow depth of field. No people are visible.

    Essential Ingredients for Your Pizza Dough

    Crafting the perfect homemade pizza dough is surprisingly simple and starts with just a few basic ingredients. You likely have most of them in your pantry already! This easy recipe uses everyday items to deliver a delicious, stress-free result.

    Here’s what you’ll need to make your flavorful pizza base:

    • All-Purpose Flour: 3 cups (about 360g). As the foundation of your crust, all-purpose flour is a fantastic, beginner-friendly choice that creates a tender yet chewy texture. While bread flour yields a chewier result, all-purpose works beautifully for a classic homemade pizza.
    • Instant Yeast: 1 packet (2 ¼ teaspoons or 7g). Instant yeast is a home cook’s best friend because it doesn’t require proofing, saving you time and getting your pizza in the oven faster.
    • Warm Water: 1 cup (240ml). The water must be warm—between 105°F and 115°F (40°C-46°C)—to activate the yeast without killing it. Think of it as a perfect warm bath to help the yeast wake up.
    • Olive Oil: 2 tablespoons. A good quality olive oil adds rich flavor, creates a tender texture, and helps the crust turn a lovely golden brown.
    • Granulated Sugar: 1 teaspoon. Sugar does two things: it feeds the yeast to help it become active and bubbly, and it aids in browning for a beautifully finished crust.
    • Salt: 1 teaspoon. Salt is vital for enhancing flavor and controlling the yeast’s activity, so don’t skip it!

    Recommended Equipment for Making Pizza Dough

    You don’t need a professional kitchen to make amazing homemade pizza dough. With just a few basic tools, you can simplify the process and set yourself up for success.

    Here is the equipment that will set you up for success:

    • Large Mixing Bowl: A spacious bowl provides plenty of room for mixing ingredients and kneading the dough without making a mess.
    • Measuring Cups and Spoons: Accuracy is key in baking. Using proper measuring cups and spoons ensures your dough turns out perfectly every time.
    • Liquid Measuring Cup: Use a liquid measuring cup for water to ensure the most accurate measurement.
    • Kitchen Scale (Optional, but Recommended): For the most consistent results, we highly recommend a kitchen scale. Measuring flour by weight (not volume) is the best way to prevent a dense or dry crust.
    • Plastic Wrap or a Clean Kitchen Towel: Used to cover the bowl, this traps heat and moisture, creating the perfect warm environment for the dough to rise.
    • Dough Scraper (Optional): This handy tool makes it easier to handle sticky dough and scrape your work surface clean.
    • Stand Mixer with Dough Hook (Optional): To save time and effort, a stand mixer with a dough hook attachment is fantastic for kneading the dough perfectly for you. It’s a great shortcut for busy families seeking quick meals.
    • Baking Sheet, Pizza Stone, or Pizza Steel: You’ll need one of these to bake your pizza on. Because they retain heat so well, a pizza stone or steel is your best bet for achieving a wonderfully crispy crust.

    How to Make the Perfect Pizza Dough: A Step-by-Step Guide

    A home cook's hands kneading a smooth, elastic pizza dough on a floured wooden kitchen counter.
    A 100 percent photorealistic, professional food photography style, high-quality food magazine photo capturing a close-up of a home cook’s hands gently kneading a smooth, elastic pizza dough on a lightly floured wooden countertop. The lighting is bright and natural, creating a warm and encouraging atmosphere. The dough looks soft and pliable. The focus is on the hands and the dough, with a subtly blurred background showing a clean, home kitchen environment. The cook is a real human, dressed casually in a clean apron. The scene exudes a sense of simple satisfaction and confidence-building in the kitchen.

    Step 1: Activate the Yeast

    Creating the perfect homemade pizza dough starts with happy, active yeast. This first step is crucial for achieving a wonderful, airy texture.

    Here’s how to bring your yeast to life:

    1. Warm the Water: Pour warm water into a large mixing bowl, aiming for a temperature between 105°F and 115°F (40°C-46°C). This range is ideal for activating yeast [1]. Be careful, as water that’s too hot can kill the yeast, while water that’s too cold won’t activate it properly.
    2. Add Sugar and Yeast: Sprinkle the sugar and then the active dry yeast over the warm water. The sugar provides food for the yeast, helping it to wake up and become active.
    3. Let it Bloom: Let the mixture sit undisturbed for 5 to 10 minutes. A foamy, bubbly layer will form on the surface, which means your yeast is active and ready to work!

    Quick Tip: If your yeast doesn’t foam, it might be old, or the water temperature was incorrect. It’s best to start over with fresh yeast to ensure your easy pizza dough recipe rises beautifully.

    Step 2: Combine the Dry and Wet Ingredients

    Now it’s time to bring everything together. This stage builds the foundation for your delicious pizza crust recipe and gets you one step closer to a flavorful homemade meal!

    1. Mix Dry Ingredients: In a separate large bowl, whisk together the all-purpose flour and salt. This helps distribute the salt evenly, ensuring consistent flavor throughout the dough.
    2. Add Wet Ingredients: Pour the activated yeast mixture and the olive oil into the bowl with the dry ingredients. Olive oil adds wonderful tenderness and flavor to your best pizza dough recipe.
    3. Form a Shaggy Dough: Using a wooden spoon or a sturdy spatula, stir everything together until a shaggy, rough dough forms. Make sure all the flour is moistened, but don’t worry if the dough isn’t smooth yet.

    Helpful Hint: The dough will be sticky at this point, which is completely normal. Resist the urge to add more flour; kneading is the next step and will develop the dough’s structure.

    Step 3: Knead the Dough (By Hand or Mixer)

    Kneading is where the magic happens for homemade pizza dough. This process develops gluten, giving the pizza base its signature elasticity and chew. Choose your preferred method below.

    Kneading by Hand:

    1. Flour Your Surface: Lightly flour a clean work surface and turn the shaggy dough out onto it.
    2. Push, Fold, and Rotate: Use the heel of your hand to push the dough away from you, then fold it back over itself. Rotate the dough slightly after each push-and-fold motion.
    3. Continue Kneading: Repeat this process for 8-10 minutes. The dough will gradually become smoother, more elastic, and less sticky.

    Kneading with a Stand Mixer:

    1. Attach Dough Hook: Place the shaggy dough into the bowl of your stand mixer and attach the dough hook.
    2. Knead on Low Speed: Turn the mixer to a low speed and let it knead the dough for 5-7 minutes.
    3. Check Consistency: The dough is ready when it pulls away from the sides of the bowl and looks smooth and elastic.

    Pro Tip: To check if your dough is kneaded enough, use the “windowpane test.” Pinch off a small piece of dough and gently stretch it between your fingers. If you can stretch it thin enough to see light through it without tearing, it’s ready! This simple test helps ensure a fantastic pizza base recipe.

    Step 4: Let the Dough Rise

    Patience is key when making pizza dough. Giving it time to rise is essential for a light, airy crust and transforms the dough from dense to delightful.

    1. Prepare the Bowl: Lightly grease a large bowl with olive oil to prevent the dough from sticking.
    2. Place and Cover: Place the kneaded dough into the bowl and turn it once to coat all sides with oil. Cover the bowl tightly with plastic wrap or a clean kitchen towel.
    3. Find a Warm Spot: Set the covered bowl in a warm, draft-free location, such as a sunny spot or a slightly warm oven that has been turned off.
    4. Allow to Rise: Let the dough rise for 1 to 1.5 hours, or until it has doubled in size.

    Chef’s Insight: For an even more flavorful crust, try a slower, colder rise. Cover the dough and refrigerate it overnight. This extended fermentation develops deeper flavors and is a great meal-prep tip for busy families.

    Step 5: Shape Your Pizza Base

    You’re at the final step before adding toppings! Shaping the dough correctly ensures a perfect, even pizza base, where your delicious pizza recipes truly come to life.

    1. Deflate Gently: After the dough has risen, gently punch it down to release the trapped air.
    2. Divide if Needed: If you’re making multiple pizzas, divide the dough into equal portions and form each one into a smooth ball.
    3. Prepare Your Surface: Lightly flour your work surface. For an extra crispy bottom crust, you can use semolina flour instead.
    4. Stretch, Don’t Roll: Using your fingertips, press the dough ball from the center outwards, gently stretching it into a circle. Avoid using a rolling pin, as hand-stretching creates a lighter, airier crust with a bubbly edge.
    5. Achieve Desired Thickness: Continue stretching until the pizza base reaches your desired size. If the dough springs back, let it rest for 5-10 minutes before you continue stretching.

    Practical Tip: A well-shaped pizza base cooks evenly and holds your toppings beautifully. You’re now ready to create amazing, family-friendly meals that are both simple and full of flavor!

    Expert Tips for the Best Pizza Crust Every Time

    A close-up shot of a perfectly baked pizza crust, golden-brown and bubbly, with a few fresh basil leaves.
    A 100 percent photorealistic, professional food photography style, high-quality food magazine photo of a perfectly baked pizza, featuring a close-up on its golden-brown, airy, and slightly charred crust. The pizza is hot, with steam gently rising, showcasing its delicious texture and inviting appearance. A few fresh basil leaves are scattered on top for a pop of color. The background is a softly blurred, warm kitchen setting, hinting at a cozy home cooking environment. The focus is sharply on the crust, emphasizing its crispness and chewiness.

    While creating the perfect pizza crust is an art, it’s one any home cook can master. Follow these expert tips to transform your simple ingredients into an exceptional homemade pizza dough every time. Get ready to easily bake the best pizza crust recipe!

    Mastering Your Dough: Essential Steps

    • Fresh Yeast is Your Friend: Always check the expiration date on your yeast. Fresh, active yeast is the key to a good rise and a light, airy pizza dough.
    • Perfect Water Temperature: Use warm water—between 105-115°F (40-46°C)—to activate the yeast. Be careful: water that is too hot can kill the yeast, while water that is too cold won’t activate it properly [2].
    • Measure Accurately: Baking is a science, so precision is key. Use a kitchen scale, especially for flour, to ensure you get consistent results with your easy pizza dough recipe.
    • Don’t Skimp on Kneading: Kneading develops the gluten that gives your crust its signature chewy texture and structure. Whether you’re using your hands or a mixer, continue kneading until the dough is smooth and elastic.
    • Give it Time to Rise: A slow, steady rise is crucial for developing flavor and creating a tender crumb. Place your dough in a warm, draft-free spot for 60-90 minutes, depending on your kitchen’s temperature.
    • Handle Gently When Shaping: Once risen, handle the dough gently. Punching it down too hard or overworking it will deflate the delicate air bubbles, resulting in a dense crust. Remember to lightly flour your hands and work surface.

    Baking for a Crispy Crust

    • Preheat Your Oven Aggressively: A scorching hot oven is crucial for a crispy base. Preheat it to its highest setting, typically 475-550°F (245-290°C), for at least 30-60 minutes before you plan to bake.
    • Use a Pizza Stone or Steel: These tools absorb and retain high temperatures, blasting the bottom of your pizza with intense, even heat. This creates a beautifully crisp pizza base that rivals one from a professional oven.
    • Par-Bake for Extra Crispness: For a guaranteed crispy crust, especially when using wet toppings, consider par-baking your pizza base recipe for 5-7 minutes before adding toppings.
    • Don’t Overload Your Toppings: Piling on too many toppings can make the crust soggy. Keep them light and evenly distributed to ensure your delicious best pizza dough recipe cooks through and can truly shine.

    Following these simple pizza recipes tips will help you consistently achieve a fantastic crust. Say goodbye to soggy bases and hello to perfectly crisp, flavorful pizza right from your own kitchen!

    Common Pizza Dough Recipe Variations

    How to Make Pizza Dough Without Yeast

    Craving pizza but out of yeast or short on time? You’re in luck. You can still make a delicious, easy pizza base without any rising required. This simple recipe is perfect for quick meals and first-time pizza makers.

    This recipe uses baking powder instead of yeast for leavening. The result is a slightly denser, biscuit-like crust that comes together in minutes, making it a fantastic solution for family dinners when hunger strikes.

    Quick Yeast-Free Pizza Dough

    • Prep Time: 10 minutes
    • Cook Time: 10-15 minutes (depending on toppings)

    Ingredients:

    • 1 ½ cups (180g) all-purpose flour
    • 1 tablespoon baking powder
    • ½ teaspoon salt
    • ½ cup (120ml) milk (any kind works)
    • 2 tablespoons olive oil, plus extra for brushing

    Instructions:

    1. Combine Dry Ingredients: In a large bowl, whisk together the flour, baking powder, and salt.
    2. Add Wet Ingredients: Pour in the milk and olive oil. Mix with a spoon or your hands until a shaggy dough forms.
    3. Briefly Knead: Turn the dough out onto a lightly floured surface. Knead gently for 1-2 minutes until it comes together smoothly. Avoid overworking it.
    4. Shape and Bake: Roll the dough into your desired pizza shape and thickness. Transfer it to a greased baking sheet or pizza stone. Brush lightly with olive oil. Add your favorite toppings and bake at 425°F (220°C) for 10-15 minutes, or until the crust is golden and the cheese is bubbly.

    This no-yeast dough is a true lifesaver for busy weeknights, making a homemade pizza dinner both easy and stress-free.

    Using Bread Flour vs. All-Purpose Flour

    The type of flour you choose will significantly change your pizza crust’s texture. While both bread flour and all-purpose flour make great pizza, they produce different results. Understanding this distinction is key to creating your perfect homemade pie.

    Bread flour has a higher protein content than all-purpose flour. This extra protein helps develop more gluten, which creates a chewier and more elastic dough. In contrast, all-purpose flour is a versatile staple that yields a softer, more tender crust. The table below breaks down the key differences.

    Flour Type Protein Content (Approx.) Crust Texture Best For
    Bread Flour 12-14% [3] Chewy, airy, structured Neapolitan-style, New York-style, crusts with good ‘chew’
    All-Purpose Flour 10-12% [4] Softer, tender, crispier edges Thin crusts, general use, beginner-friendly recipes

    For beginners, all-purpose flour is an excellent, forgiving choice. If you want an authentic, restaurant-style chew, however, give bread flour a try. Ultimately, the best flour comes down to the pizza experience you prefer.

    Making an Italian Pizza Dough Recipe

    An authentic Italian pizza dough is known for its incredible flavor and texture. While still simple to make, this style often uses a specific flour and a longer fermentation time to develop its unique character. These small details can elevate your homemade pizza.

    The secret to this style often lies in “00” flour, a finely milled flour traditional for Neapolitan pizza. It creates a light, airy crust with a delicate crispness. If you can’t find 00 flour, don’t worry—bread flour is an excellent substitute for achieving a similar chewy texture.

    Italian-Style Pizza Dough

    This Italian-style recipe uses specific ingredients to create a more authentic flavor while remaining perfectly approachable for home cooks.

    Ingredients:

    • 1 teaspoon active dry yeast
    • 1 ½ cups (360ml) warm water (105-115°F / 40-46°C)
    • 3 ¾ cups (450g) “00” flour, or high-quality bread flour
    • 2 teaspoons fine sea salt
    • 2 tablespoons extra virgin olive oil, plus more for the bowl

    Instructions:

    1. Activate Yeast: In a large bowl, combine the warm water and yeast. Let it sit for 5-10 minutes until foamy.
    2. Combine Ingredients: Add the flour, salt, and olive oil to the yeast mixture. Mix with a spoon until a shaggy dough forms.
    3. Knead: Turn the dough onto a lightly floured surface. Knead for 8-10 minutes until it becomes smooth and elastic.
    4. First Rise: Lightly oil a clean bowl. Place the dough inside, turning to coat it with oil. Cover with plastic wrap and let it rise in a warm place for 1.5 to 2 hours, or until doubled in size.
    5. Second Rise (Optional, for deeper flavor): For an even more flavorful crust, punch down the dough after its first rise. Then, place it in the fridge for 12-24 hours. This slow fermentation develops complex flavors.
    6. Shape and Bake: When ready to bake, gently punch down the dough. Divide it into 2-3 balls for individual pizzas and let them rest on the counter for 15-20 minutes. Shape your pizza base, add your favorite toppings, and bake at a high temperature (450-500°F / 230-260°C) for 8-12 minutes, or until the crust is golden and the cheese is bubbly.

    This Italian-inspired method yields a wonderfully chewy and flavorful pizza crust—a perfect way to explore authentic flavors in your own kitchen.

    How Do You Store and Freeze Homemade Pizza Dough?

    Storing Pizza Dough in the Refrigerator

    If you plan to use your pizza dough within a few days, the refrigerator is the perfect place for it. Storing dough in the fridge actually develops more flavor, making your pizza crust even tastier.

    Here’s how to store fresh pizza dough correctly:

    • Lightly Oil: First, brush the dough ball with a little olive oil to prevent it from drying out.
    • Airtight Container: Next, place the oiled dough into an airtight container or a large bowl covered tightly with plastic wrap. Make sure to leave enough room for the dough to expand, as it will continue to rise slowly.
    • Refrigerate: Store the dough in the refrigerator for up to 3 days.

    When you’re ready to bake, take the dough out of the fridge 30-60 minutes beforehand. This allows it to come to room temperature, which makes it much easier to work with.

    Freezing Homemade Pizza Dough for Later

    Freezing homemade pizza dough is a fantastic meal prep strategy, perfect for those times you need a quick and easy dinner. With pre-made dough in your freezer, you’re always just a step away from a delicious pizza.

    Follow these simple steps to freeze pizza dough:

    1. Divide and Shape: First, divide the dough into individual portions for each pizza base. Gently shape each portion into a ball.
    2. Lightly Oil: Next, lightly brush each dough ball with olive oil. This step helps prevent freezer burn and makes the dough easier to handle later.
    3. Pre-Freeze: Place the oiled dough balls on a baking sheet lined with parchment paper, ensuring they don’t touch. Freeze them uncovered for 1-2 hours until solid. This important step prevents them from sticking together.
    4. Wrap Tightly: Once the dough is solid, remove the balls from the baking sheet. Wrap each one tightly in plastic wrap—double-wrapping offers even better protection.
    5. Store in Freezer Bag: Place the wrapped dough balls into a heavy-duty, freezer-safe bag or container. Squeeze out as much air as possible before you seal it.
    6. Label and Freeze: Finally, label the bag with the date. Frozen pizza dough can be stored for up to 3 months [5].

    How to Thaw and Use Frozen Pizza Dough

    Thawing frozen pizza dough is straightforward, but planning ahead will give you the best results.

    • Overnight Thaw: The best method is to transfer the frozen dough to the refrigerator the night before you plan to use it. This allows it to thaw slowly and evenly overnight.
    • Countertop Thaw: If you’re short on time, place the frozen dough on a lightly floured surface at room temperature. Cover it loosely with plastic wrap or a clean kitchen towel and let it thaw for 2-4 hours.
    • Bring to Room Temperature: After the dough has thawed, let it rest at room temperature for an additional 30-60 minutes. This step allows the gluten to relax, making the dough pliable and much easier to roll out.
    • Shape and Bake: Once thawed and rested, your dough is ready to be shaped and baked according to your recipe’s instructions.

    By following these simple storage and freezing tips, you’ll always have delicious homemade pizza dough ready to go. With dough on hand, you can say goodbye to the stress of planning last-minute family meals. Recipesmondial helps you enjoy cooking without pressure, making quick, reliable, and flavorful food a reality every day

    Frequently Asked Questions

    What is the secret to a good pizza dough?

    The secret to great homemade pizza dough is simple. It all comes down to a few key steps that balance quality ingredients with a little patience.

    • Good Ingredients: Start with high-quality ingredients like fresh yeast and good flour. These are the building blocks for a flavorful crust.
    • Proper Kneading: Kneading develops the gluten in the dough, which gives your pizza crust its wonderful chewiness and structure. Don’t rush this step!
    • Sufficient Rise Time: Giving the dough enough time to rise is crucial. This process lets the yeast work its magic, creating air pockets and a deeper flavor. A slow rise often yields the best results [6].
    • High Heat Baking: A very hot oven or pizza stone cooks the pizza quickly. This creates a desirable crispy crust with a soft, airy interior.

    Following these key points will help you turn simple ingredients into a delicious pizza crust, even if you’re a beginner.

    Can you make an easy pizza dough with just 3 ingredients?

    Yes, you can make a simple pizza dough with just three core ingredients: self-rising flour, Greek yogurt, and a pinch of salt.

    This method is fantastic for quick meals because it eliminates the need for yeast or lengthy rising times, making it a perfect solution when you want homemade pizza fast. While the texture is slightly different from a traditional yeast dough, it still creates a satisfying and sturdy pizza base. It’s a fantastic, stress-free option for busy families looking for a simple dinner.

    What is the best flour for homemade pizza dough?

    Choosing the right flour can significantly improve your pizza crust. For most home cooks, two types stand out:

    • All-Purpose Flour: A wonderful choice for an easy pizza dough, all-purpose flour is readily available and forgiving. It yields a tender and crispy crust, making it perfect for beginners.
    • Bread Flour: For a chewier crust with more structure, bread flour is ideal. Its higher protein content results in more gluten development, creating a more robust and airy pizza dough [7]. Many experienced bakers prefer it for its classic pizzeria-style texture.

    Ultimately, both flours make excellent homemade pizza. We recommend starting with all-purpose flour and then experimenting with bread flour as your confidence grows.

    How long should pizza dough rest before cooking?

    Resting the dough is a key step for achieving the best possible pizza crust. Here is a breakdown of the two main resting periods:

    • First Rise (Bulk Fermentation): After kneading, the dough needs its first rise. This step takes 60 to 90 minutes in a warm place, or until the dough has doubled in size. This is crucial for developing the dough’s flavor and texture.
    • Second Rest (After Shaping): After you’ve shaped the pizza base, a brief second rest of 10 to 15 minutes is beneficial. This allows the gluten to relax, making the dough much easier to stretch without it snapping back [8].

    Don’t skip these resting periods. They are vital for achieving a light, airy crust and ensuring your pizza turns out perfectly every time.


    Sources

    1. https://redstaryeast.com/yeast-baking-lessons/yeast-activation-temperature/
    2. https://redstaryeast.com/yeast-baking-lessons/baking-tips-faqs/yeast-proof/
    3. https://www.kingarthurbaking.com/blog/2018/02/28/what-is-bread-flour
    4. https://www.kingarthurbaking.com/blog/2018/02/28/what-is-all-purpose-flour
    5. https://www.kingarthurbaking.com/blog/2016/06/07/freeze-bread-dough
    6. https://www.seriouseats.com/the-pizza-lab-secrets-to-great-pizza-dough
    7. https://www.kingarthurbaking.com/blog/2018/02/26/what-is-bread-flour
    8. https://www.cooksillustrated.com/how_tos/10204-why-let-dough-rest
  • The Easiest Rice Krispie Treats Recipe (Perfectly Gooey!)

    The Easiest Rice Krispie Treats Recipe (Perfectly Gooey!)

    Rice Krispie treats are a classic no-bake dessert made from three simple ingredients: puffed rice cereal, marshmallows, and butter. The butter and marshmallows are melted together, then combined with the cereal and pressed into a pan to cool before being cut into squares.

    Who can resist the comforting crunch and chew of a perfect Rice Krispie Treat? These delightful squares bring back sweet childhood memories and are a go-to for a quick snack, a lunchbox surprise, or a simple dessert. If you’ve ever wanted that ultimate gooey texture without a complicated recipe, you’re in the right place. At Recipesmondial, we believe cooking should be stress-free, so we’re sharing our favorite no-fail rice krispie treats recipe for perfectly gooey results every time.

    Forget feeling overwhelmed or unsure how to get the ideal chewiness. This rice krispie treat recipe is designed with home cooks in mind, offering step-by-step cooking guidance that makes the process incredibly simple. It’s perfect for kitchen beginners, busy parents looking for easy snacks to serve with family-friendly meals, or anyone who wants a delicious treat in minutes. With just three basic ingredients, you’ll see how easy it is to make flavorful meals made easy, turning pantry staples into a treat that builds your confidence in the kitchen.

    Why You’ll Love This Classic Rice Krispie Treat Recipe

    Get ready to discover your new favorite treat! This classic Rice Krispie Treat recipe is incredibly simple and delivers delicious results without any fuss. It’s a guaranteed path to kitchen success and pure joy.

    Here’s why you’ll love making these perfectly gooey Rice Krispie treats:

    • Effortlessly Simple: Forget overwhelming recipes. This is a fantastic beginner-friendly recipe with clear, step-by-step guidance. It’s genuinely one of the easiest treats you’ll ever make.
    • Lightning Fast: Whip up a batch in under 15 minutes. It’s the perfect solution for quick snacks, unexpected guests, or any time you want tasty treats fast.
    • Gooey Perfection: Say goodbye to hard, brittle treats. Our secret technique ensures a wonderfully soft, chewy, and perfectly gooey texture in every single bite.
    • Everyday Ingredients: No special shopping trip needed. This recipe uses simple, common ingredients you likely already have, making it a great choice for budget-friendly cooking.
    • Family Favorite: This is a guaranteed crowd-pleaser for all ages, making it a perfect solution for a family-friendly snack everyone will love.
    • Boost Your Confidence: Build your kitchen confidence with this foolproof recipe. It delivers reliable, stress-free results every time, making you feel like a pro after just one batch.
    • Endless Customization: The classic version is amazing, but this recipe is also a fantastic base for creativity. Add your own spin with extras like chocolate chips, sprinkles, or a hint of vanilla.

    At Recipesmondial, we believe cooking should be stress-free and fun. This classic Rice Krispie Treat recipe embodies that spirit, proving how simple items can create something truly delicious. You’ll love turning basic ingredients into a delightful treat that you can proudly share with everyone!

    What Ingredients Do You Need for Rice Krispie Treats?

    Making the perfect batch of gooey, delicious Rice Krispie treats requires just a few basic ingredients you likely have in your pantry already. This makes them a fantastic choice for a quick, family-friendly dessert. You won’t need any fancy equipment or hard-to-find items for this classic recipe.

    This is beginner-friendly cooking at its best. Let’s gather what you need to create these iconic treats!

    • Rice Krispies Cereal: You’ll need 6 cups of this classic puffed rice cereal. It provides the crunchy base that makes these treats so satisfying. For the best texture, make sure your cereal is fresh.
    • Mini Marshmallows: A 10-ounce bag is perfect. Mini marshmallows melt more quickly and evenly than larger ones. Freshness is crucial for a perfectly gooey texture, as stale marshmallows can make your treats stiff.
    • Unsalted Butter: You’ll need 3 tablespoons. Butter adds rich flavor, helps the marshmallows melt smoothly, and prevents sticking. We recommend unsalted butter to control the saltiness, but if you only have salted, simply omit the added salt.
    • Vanilla Extract (Optional but Recommended): Just 1 teaspoon makes a big difference by adding a wonderful depth of flavor. A good quality vanilla extract elevates these treats from good to unforgettable.
    • Pinch of Salt (Optional but Recommended): A small ¼ teaspoon of salt balances the sweetness and enhances all the other flavors without making the treats taste salty. Trust us, this small addition is a game-changer.

    Tips for Ingredient Success

    Using high-quality ingredients and knowing a few simple tricks will ensure your Rice Krispie treats turn out perfectly every time. These tips will help you avoid common pitfalls and achieve the best results.

    • Fresh Marshmallows are Key: Always use a fresh bag of marshmallows. Stale ones don’t melt as smoothly and can result in hard, brittle treats. If your marshmallows feel stiff in the bag, they’re past their prime for this recipe.
    • Good Quality Butter: The flavor of good quality butter will shine through, adding richness and a delightful aroma.
    • Don’t Skimp on Cereal: Measure your Rice Krispies accurately. Too little cereal will make the treats overly sticky, while too much will make them dry and crumbly.
    • Control the Heat: Melt the butter and marshmallows over low heat. Using high heat can scorch them and cause the finished treats to become hard once they cool.

    Ingredient Substitutions and Dietary Considerations

    This recipe can be easily adapted to fit different dietary needs. Here are a few simple swaps you can make.

    • Dairy-Free: Swap regular butter for a plant-based butter alternative. Most brands work wonderfully in this recipe.
    • Vegan: For a fully vegan version, use a plant-based butter alternative along with vegan marshmallows. Dandies is a popular brand that melts well.
    • Gluten-Free: While rice is naturally gluten-free, some brands of puffed rice cereal contain malt flavoring, which has gluten. Always check the label and choose a certified gluten-free brand to be safe. [1]
    • Brown Butter Variation: For a richer, nuttier flavor, brown your butter in the pan before adding the marshmallows. This easy step adds incredible depth. We’ll cover this in more detail later!

    How to Make Rice Krispie Treats Step-by-Step

    A home cook's hands gently stirring warm, gooey melted marshmallows into Rice Krispies cereal in a large mixing bowl.
    Professional food photography, photorealistic, high-quality food magazine photo depicting a real human home cook’s hands, specifically a friendly woman’s hands, gently stirring a large quantity of melted, warm, gooey marshmallow mixture into a bowl full of Rice Krispies cereal. The scene is set in a bright, inviting home kitchen, with a focus on the action and the developing sticky, sweet texture. The lighting is warm and natural, highlighting the golden-white mixture.

    Step 1: Melt the Butter and Marshmallows

    To create the perfect marshmallow base, start by grabbing a large pot to prevent spills and give you plenty of room to stir. Place it over low heat and add the butter, allowing it to melt completely.

    Once the butter has melted, add all the marshmallows to the pot. Continue to stir the mixture constantly over low heat. This is important because it helps the marshmallows melt evenly and prevents them from sticking to the bottom of the pot. Keep stirring until the mixture is smooth and completely melted—a crucial step for achieving gooey treats.

    • Expert Tip: Melting marshmallows too quickly or over high heat can make your Rice Krispie treats hard later on. So, be patient and keep that heat low!

    Step 2: Stir in the Cereal

    Once the marshmallow mixture is perfectly smooth, remove the pot from the heat. This important step prevents the cereal from getting too soft. Immediately add the entire box of Rice Krispies to the pot.

    Using a large spoon or a heat-safe spatula, gently stir until every piece of cereal is evenly coated. Work quickly but carefully to avoid overmixing, which can crush the cereal and make the treats dense instead of light and airy.

    • Quick Tip: Ensure all the cereal is coated. This guarantees a consistent texture and flavor in every bite.

    Step 3: Gently Press into the Pan

    After the cereal is well-coated, transfer the mixture to a prepared 9×13 inch baking pan. For easy removal and cleanup, we recommend lining the pan with parchment paper or lightly greasing it with butter or non-stick spray.

    Next, scoop the warm mixture into the pan. The key to perfectly gooey treats is to press them down gently. Compacting the mixture too firmly will make them tough. To prevent sticking, use a buttered spatula, a piece of parchment paper, or lightly buttered hands to press the mixture into an even layer.

    • Pro Hack: A light touch makes all the difference here. Gentle pressing equals delightfully chewy treats.

    Step 4: Let Cool and Cut

    Now for the hardest part: waiting! Allow the Rice Krispie treats to cool completely in the pan, which usually takes about 1 to 2 hours at room temperature. For a quicker set, you can also refrigerate them for about 30 minutes.

    Once fully cooled and firm, use a sharp knife to cut the treats into squares or rectangles. While 2×2 inches is a standard size, feel free to make them as big or small as you like. Your homemade, easy Rice Krispie treats are now ready to enjoy as a fantastic snack or quick dessert.

    • Serving Suggestion: For extra fun, try using cookie cutters to make festive shapes once they’re cool!

    Expert Tips for the Best, Gooiest Treats Every Time

    A close-up of several perfectly gooey Rice Krispie Treats, stacked on a plate, with one treat slightly pulled to show its soft, stretchy texture.
    Professional food photography, photorealistic, high-quality food magazine photo featuring a close-up, hero shot of several perfectly cut, square Rice Krispie Treats stacked slightly on a simple white plate or a light-colored wooden cutting board. One treat is slightly pulled apart to emphasize its incredibly gooey, stretchy, and soft texture. The treats are golden brown and perfectly set, glistening slightly under soft, appealing light, inviting viewers to take a bite. The background is softly blurred to keep the focus on the delicious treats.

    Crafting gooey, irresistible rice krispie treats is easier than you think. Follow these expert tips from Recipesmondial to ensure they’re perfectly soft and chewy every time. Soon, you’ll be confidently making this easy, family-friendly treat for any occasion.

    • Low and Slow for Marshmallows: When melting your butter and marshmallows, keep the heat on low. This prevents them from hardening or caramelizing, a common mistake that leads to tough treats.
    • Fresh Marshmallows are Key: Always use fresh, soft marshmallows. Older, stale ones won’t melt as smoothly and can make your treats less pliable. When it comes to texture, freshness truly makes a difference.
    • A Touch of Vanilla (Optional but Recommended): Once the marshmallows are melted and off the heat, stir in a teaspoon of vanilla extract. This simple addition elevates the flavor profile, adding a wonderful depth to your recipe.
    • Don’t Overmix the Cereal: Once you add the Rice Krispies cereal, fold it in gently. Overmixing can crush the cereal and lead to an uneven coating, so stir just enough to combine everything.
    • Lightly Press into the Pan: Use a buttered spatula or wax paper to gently press the mixture into your prepared pan. Avoid pressing too firmly, as compacting the mixture results in dense, hard treats instead of soft and airy ones.
    • A Pinch of Salt: Adding a tiny pinch of salt (about 1/4 teaspoon) with the butter can truly enhance the sweetness and balance the flavors. This simple secret ingredient is a game-changer.
    • Let Them Cool Naturally: Resist the urge to cut your treats too soon. Allow them to cool completely at room temperature. This lets them set properly, ensuring that perfect gooey-yet-firm texture you love.
    • Grease Everything: Lightly grease your mixing bowl, spatula, and even your hands. This prevents the sticky marshmallow mixture from clinging to everything, which keeps your treats intact and makes cleanup a breeze.

    What are some fun Rice Krispie Treats variations?

    Chocolate Rice Krispie Treats

    Transform classic Rice Krispie Treats into a chocolate lover’s dream with this easy, rich twist. Perfect for family-friendly meals or a fun baking project, there are a few simple ways to add a delicious chocolate flavor.

    • Add Cocoa Powder: Stir 2-3 tablespoons of unsweetened cocoa powder into the melted butter and marshmallow mixture to create a deep chocolate base.
    • Mix in Chocolate Chips: After stirring in the cereal, fold in 1 cup of chocolate chips. Milk chocolate, semi-sweet, or white chocolate chips all work well. The residual heat will slightly melt them, creating lovely pockets of gooey chocolate.
    • Drizzle with Melted Chocolate: Once your rice krispie treat recipe has cooled, melt chocolate chips and drizzle them over the top for a beautiful finish and extra goodness.

    Brown Butter Rice Krispie Treats

    To elevate your Rice Crispy Treats recipe with a gourmet touch, use brown butter. This secret ingredient adds a nutty, toasted flavor that makes a huge difference. A favorite technique among approachable home cooking enthusiasts, this simple step creates an incredible depth of flavor.

    • How to Brown Butter: Melt butter in a saucepan over medium heat. Continue cooking, stirring occasionally, as it foams and then turns golden. Once you see small brown bits at the bottom and smell a nutty aroma, remove it from the heat immediately.
    • Why It’s Special: The browning process creates fragrant, caramel-like milk solids, giving your rice krispie treats an incredibly rich and complex flavor.
    • Proceed as Usual: Once the butter is browned, add the marshmallows to the warm, nutty butter and stir until melted. From there, follow the rest of the beginner-friendly recipes steps.

    Rice Krispie Treats with Sprinkles

    Adding sprinkles is a fantastic and easy way to make your rice krispie treats more festive and fun. This simple enhancement makes them perfect for birthdays, parties, or just a colorful snack.

    • When to Add: For even distribution, stir sprinkles into the marshmallow and cereal mixture right before pressing it into the pan. You can also add more on top after pressing.
    • Choose Your Style: Use classic rainbow sprinkles for a vibrant look, or pick specific colors to match a holiday or party theme.
    • Tip for Success: To prevent the sprinkles from melting, make sure the marshmallow mixture isn’t too hot before stirring them in.

    Halloween Rice Krispie Treats

    Get into the spooky spirit with fun Halloween-themed Rice Krispie Treats. A huge hit for family-friendly meals and parties, this variation lets you get creative with minimal effort using a few simple additions.

    • Color Them Spooky: Add a few drops of orange or green food coloring to your melted marshmallow mixture to instantly transform them into festive treats.
    • Shape Them Up: Instead of a square pan, press the mixture into a cookie sheet. Once set, use lightly greased Halloween cookie cutters (like ghosts, pumpkins, or bats) to create fun shapes.
    • Decorate with Candy: Press candy corn, gummy worms, or other Halloween candies onto the treats while they are still warm. To create monster treats, attach edible candy eyes with a bit of frosting once they have cooled.
    • Drizzle and Design: For a haunted look, drizzle melted colored candy melts over your treats. You can draw spider webs, zigzags, or other spooky patterns.

    How to Store Your Treats to Keep Them Fresh

    So, you’ve made a delicious batch of perfectly gooey rice krispie treats. How do you keep them tasting their best? The secret to preserving their wonderful texture and flavor is proper storage. Follow these simple tips to ensure your homemade rice crispy treats stay fresh for as long as possible.

    Best Way to Store Rice Krispie Treats

    The ideal way to keep your rice krispie treat recipe creations soft and chewy is at room temperature. Refrigeration makes them hard and less enjoyable, so always choose a cool, dry spot away from direct sunlight.

    • Use an Airtight Container: This is the most crucial step. A well-sealed container prevents air from drying out your rice crispy treats, which is essential for keeping them soft.
    • Layer with Parchment Paper: If you need to stack the treats, place a sheet of parchment or wax paper between each layer. This simple trick prevents them from sticking together.
    • Store at Room Temperature: Keep the container in a pantry or on a countertop, away from any heat sources.
    • Enjoy Within Days: For the best possible texture, enjoy your treats within 2 to 3 days. While they may last longer, they are most delightfully chewy during this time.

    Tips for Extra Freshness

    Want to go the extra mile? These small steps can make a big difference in keeping your treats perfectly fresh.

    • Wrap Individually: For maximum freshness, especially if you’re packing them for lunches or parties, wrap each square in plastic wrap before placing them in an airtight container.
    • Avoid the Fridge: It’s worth repeating: storing rice krispie treats in the refrigerator will make them hard. The cold temperature causes the marshmallows to seize up, ruining their signature chewiness.
    • Don’t Freeze: While freezing works for some desserts, it is not recommended for classic rice crispy treats. Thawing can negatively alter their texture, so stick with room temperature storage for the best results.

    By following these easy storage tips, you’ll ensure every bite of your homemade rice krispie treats is as perfectly gooey and delicious as the first!

    Frequently Asked Questions

    Can I make Rice Krispie treats in the microwave?

    Yes, absolutely! Making rice krispie treats in the microwave is a fantastic shortcut. It’s perfect for when you need a quick snack or a speedy dessert. This beginner-friendly method is also a great option for new cooks.

    Here’s how to do it:

    • First, melt the butter in a large, microwave-safe bowl in 30-second intervals.
    • Next, add the marshmallows to the melted butter.
    • Microwave them for 1 to 2 minutes, stopping to stir every 30 seconds until the marshmallows are puffy and fully melted. Be careful not to overcook them.
    • Then, stir in the Rice Krispies cereal until it is well coated.
    • Finally, gently press the mixture into a prepared pan.

    This quick method is a great way to enjoy delicious, gooey treats without much fuss!

    Why are my Rice Krispie treats hard?

    Hard rice krispie treats are a common frustration, but the problem is usually easy to fix. The cause is often one of a few key issues. Understanding them will help you make perfectly gooey treats every time.

    • Overcooking the marshmallows: This is the most common reason for hard treats. When marshmallows are cooked too long or at too high a heat, their sugar caramelizes. This makes them brittle once they cool. To avoid this, always melt marshmallows slowly over low heat or in the microwave with careful timing.
    • Pressing too firmly: When you press the mixture into the pan, do it gently. Packing the rice crispy treats too tightly squeezes out the air, resulting in dense, hard squares instead of light, chewy ones. Use a buttered spatula or wax paper and press just enough to create an even layer.
    • Not enough butter or marshmallows: The butter and marshmallows are the gooey binder. If the ratio is off, your treats can turn out dry and hard. Always use the correct measurements from your recipe.
    • Stale marshmallows: For the best texture, use fresh marshmallows. They melt more easily and stay softer than older marshmallows, which can lead to a tougher final product.

    For the best results, remember to melt your marshmallows gently and press the mixture lightly into the pan. These simple tips will guarantee perfectly soft and chewy rice crispy treats every single time.

    Can you use big marshmallows for Rice Krispie treats?

    Yes, you can certainly use large marshmallows for rice krispie treats. The recipe is forgiving enough to work with different marshmallow sizes. However, keep a couple of things in mind for the best results.

    • Melting time: Large marshmallows take longer to melt than mini ones. Be patient and stir them frequently to ensure they are fully melted and smooth before you add the cereal. This step prevents an uneven distribution of the gooey binder.
    • Cutting them down: For a faster, more even melt, you can cut larger marshmallows in half or quarters. This increases their surface area, helping them melt more quickly and blend smoothly with the butter.

    Regardless of the size, the key is to melt them slowly and gently. Avoid high heat to prevent the marshmallows from becoming hard. This tip helps ensure your treats turn out perfectly gooey every time.

    Are Rice Krispie treats gluten-free?

    This is an excellent question for anyone with dietary needs. While core ingredients like butter and marshmallows are often gluten-free, the answer for rice krispie treats isn’t a simple “yes.”

    Here’s what you need to know:

    • Marshmallows: Most standard marshmallow brands, like Jet-Puffed, are gluten-free [2]. However, it’s always smart to double-check the ingredient list for any hidden gluten-containing additives.
    • Butter: Plain butter is naturally gluten-free.
    • Rice Krispies Cereal: This is the key ingredient to watch. In the United States, traditional Kellogg’s Rice Krispies cereal contains malt flavoring, which is derived from barley, a gluten-containing grain [3]. For this reason, original Kellogg’s Rice Krispies are NOT gluten-free.
    • Gluten-Free Alternatives: The good news is that many brands now offer certified gluten-free crisp rice cereal. These products are made without malt flavoring. To be safe, look for packaging that is clearly labeled “gluten-free,” especially if you are preparing them for someone with celiac disease or a gluten sensitivity.

    In summary, to make truly gluten-free rice crispy treats, you must use a certified gluten-free brand of crisp rice cereal. This simple substitution makes these delicious snacks accessible to everyone, allowing those with dietary restrictions to enjoy them safely.


    Sources

    1. https://www.celiac.org/gluten-free-living/what-is-gluten/
    2. https://www.kraftheinzcompany.com/brands/jetpuffed/faq
    3. https://www.kelloggs.com/en_US/products/kelloggs-rice-krispies-cereal.html
  • The Best Simple Apple Pie Recipe (Perfect for Beginners)

    The Best Simple Apple Pie Recipe (Perfect for Beginners)

    A classic apple pie recipe combines sliced fresh apples with sugar, cinnamon, and nutmeg, all baked inside a flaky, buttery pastry crust. The key to a great pie is balancing the sweetness and tartness of the apples and baking until the filling is bubbly and the crust is perfectly golden brown. This recipe is designed to be simple and approachable for home cooks.

    Is there anything more comforting than a warm slice of homemade apple pie? The combination of a golden, flaky crust and a sweet, spiced apple filling is a timeless delight. Yet, the thought of baking from scratch can feel overwhelming. If complex recipes leave you unsure where to start, you are not alone. Many home cooks dream of perfecting this classic dessert without the stress.

    Here at Recipesmondial, we believe making delicious, family-friendly meals and desserts should be an enjoyable experience, especially for beginners. That’s why we’re thrilled to share our best apple pie recipe, designed for simplicity. It offers clear, step-by-step guidance so you can create a memorable pie with confidence. Get ready to transform everyday ingredients into an amazing dessert.

    Forget overly technical jargon and daunting instructions. Our Approachable Home Cooking philosophy will help you bake an amazing apple pie that tastes like it came straight from grandma’s kitchen. You’ll build confidence with every step while discovering just how simple and rewarding baking can be. Ready to try the perfect beginner-friendly recipe for your next baking adventure?

    Why Is This the Best Apple Pie Recipe for Beginners?

    Welcome to your new favorite baking adventure! Diving into homemade pie can feel daunting, especially for beginners. If you’ve ever felt overwhelmed by complex instructions or lacked confidence in the kitchen, this recipe is for you. It isn’t just another apple pie recipe—it’s the best one for beginners, designed to make you a confident baker.

    Our goal at Recipesmondial is to make cooking enjoyable and stress-free. This apple pie recipe combines simple ingredients with clear, step-by-step guidance, empowering you to create a delicious dessert without the struggle. You’ll go from feeling uncertain to proudly presenting a homemade masterpiece.

    Here’s why this recipe is your go-to for a perfect, flavorful apple pie every single time:

    • Approachable Home Cooking: We break down every step into plain, simple language. You won’t find any intimidating culinary terms, just clear guidance from start to finish.
    • Simple, Everyday Ingredients: No need for a special trip to a gourmet store. This recipe calls for common ingredients you probably already have in your pantry.
    • Foolproof Flaky Crust: Our forgiving crust recipe is easy to handle and delivers a classic flaky texture without the fuss. We also include tips for using store-bought pastry to make it even simpler.
    • Delicious, Balanced Filling: Create a perfectly sweet and spiced apple filling with our simple instructions. We help you achieve a wonderful balance of flavors so your pie is never too tart or too sweet.
    • Confidence Building: Successfully baking a classic dessert is a huge accomplishment. This recipe is designed to be a rewarding experience that boosts your skills and inspires you to try more ambitious dishes.
    • Practical Tips and Substitutions: We include helpful tips to prevent common mistakes, along with simple substitutions to suit your pantry or dietary needs. This flexibility ensures you can adapt the recipe with ease.

    Discover how enjoyable making a delicious apple pie from scratch can be. This recipe transforms simple ingredients into a beautiful, comforting dessert. Get ready to impress family and friends with your new baking skills!

    What Ingredients Do You Need for a Classic Apple Pie?

    A flat lay photo showing fresh apples, flour, sugar, butter, and spices neatly arranged on a kitchen counter, ready for making apple pie.
    A professional food photography shot, photorealistic, high-quality food magazine photo. A beautifully arranged flat lay of fresh, raw ingredients for apple pie. Vibrant green Granny Smith apples and red Honeycrisp apples are artfully piled alongside bowls of all-purpose flour, granulated sugar, light brown sugar, ground cinnamon, nutmeg, and chunks of cold unsalted butter. A whole lemon and a small bottle of vanilla extract are also visible. The ingredients are laid out on a light, rustic wooden countertop or a clean marble surface, illuminated by soft, natural daylight. The composition is clean, inviting, and highlights the freshness and quality of each ingredient, ready for baking.

    For the Flaky Pie Crust

    Every great apple pie starts with a perfect, flaky crust. While making your own might sound daunting, our easy recipes approach simplifies the process. Using just a few basic ingredients, you’ll create a wonderfully tender and golden base for your pie. This beginner-friendly recipe focuses on clear steps to help you build confidence in the kitchen.

    Here’s what you’ll need for two 9-inch pie crusts (one for the bottom and one for the top):

    • 2 ½ cups (300g) all-purpose flour: Serves as the foundation of your crust.
    • 1 teaspoon salt: Brings out the butter’s flavor and balances the sweetness of the filling.
    • 1 cup (226g) unsalted butter, very cold and cut into ½-inch cubes: Using very cold butter is the key to flakiness. As it bakes, it creates steam pockets that result in an irresistible texture.
    • ½ cup (120ml) ice water, plus more if needed: Ice water helps keep the butter cold and brings the dough together without overworking it.

    For the Sweet and Spiced Apple Filling

    The heart of any great apple pie is the filling. Our recipe creates one that is sweet, warmly spiced, and perfectly balanced. The filling thickens beautifully, so it won’t be runny—making this one of the best apple pie recipes for beginners. You’ll love how these simple ingredients transform into a comforting classic.

    Gather these ingredients for a vibrant, flavorful filling:

    • 6-7 medium-sized baking apples (about 2 ½ – 3 pounds), peeled, cored, and sliced ¼-inch thick: For the best flavor and texture, we recommend using a mix of sweet and tart apples like Granny Smith, Honeycrisp, or Fuji.
    • ¾ cup (150g) granulated sugar: Provides sweetness. Feel free to adjust the amount based on the natural sweetness of your apples.
    • ¼ cup (50g) packed light brown sugar: Adds a lovely caramel note and depth of flavor.
    • ¼ cup (30g) all-purpose flour: Acts as a thickener to prevent a watery pie. You can use cornstarch for a gluten-free option.
    • 1 ½ teaspoons ground cinnamon: The essential warming spice in any classic apple pie.
    • ¼ teaspoon ground nutmeg: Complements the cinnamon beautifully.
    • Pinch of ground cloves or allspice (optional): Adds an extra layer of complexity to the flavor.
    • 1 tablespoon fresh lemon juice: Brightens the apple flavor and prevents the slices from browning.
    • 2 tablespoons unsalted butter, cut into small pieces: Dotted over the filling before baking, this adds richness and a golden shine.

    How to Make a Simple Apple Pie From Scratch

    A golden-brown, freshly baked apple pie with a beautiful lattice crust sits on a cooling rack, with one slice cut out revealing the warm apple filling.
    A professional food photography shot, photorealistic, high-quality food magazine photo. A warm, inviting image of a perfectly baked, golden-brown classic apple pie, fresh out of the oven. The pie is centered on a light-colored, slightly worn wooden table, resting on a wire cooling rack. It features a beautiful, intricate lattice top crust that’s evenly golden and slightly crisp, with the bubbly, caramelized apple filling peeking through. A single slice has been carefully cut and removed from the pie, revealing the tender, spiced apple filling and flaky bottom crust. Beside the pie, a scoop of melting vanilla bean ice cream or a dollop of fresh whipped cream sits on a small white plate, ready to be served. The lighting is soft, warm, and natural, evoking a cozy, homemade feel. There are subtle hints of steam rising from the cut pie.

    Ready to create a delicious, homemade apple pie that will impress everyone? This guide breaks down the process into simple steps, helping you turn basic ingredients into a warm, comforting dessert with confidence. Our goal is to make your baking journey enjoyable and stress-free.

    Step 1: Prepare the Pie Crust

    Crafting your own flaky pie crust is truly rewarding. Our beginner-friendly method ensures a tender, buttery base for your apple pie. You’ll find this easy recipe a game-changer for all your baking needs.

    1. Combine Dry Ingredients: In a large mixing bowl, whisk together 2 ½ cups (300g) all-purpose flour, 1 teaspoon granulated sugar, and ½ teaspoon salt to create an even base.
    2. Cut in Cold Butter: Add 1 cup (226g) of very cold unsalted butter, cut into ½-inch cubes. Using a pastry blender or your fingertips, cut the butter into the flour until the pieces are about the size of small peas. A mix of smaller and some larger, flatter pieces is ideal.
    3. Add Ice Water Gradually: Slowly drizzle in 6-8 tablespoons of ice water, one tablespoon at a time, mixing gently with a fork after each addition. Stop when the dough just begins to come together when squeezed. Avoid adding too much water, as it can make the crust tough.
    4. Form and Chill: Divide the dough into two equal portions and gently flatten each into a disk. Wrap each disk tightly in plastic wrap and refrigerate for at least 30 minutes, or up to 2 days. Chilling is crucial for a flaky texture.

    Expert Tip for Beginners: Do not overwork the dough! Over-mixing develops too much gluten, which results in a tough crust instead of a tender one. Handle the dough as little as possible.

    Step 2: Make the Apple Pie Filling

    Now for the heart of your pie: the sweet and spiced apple filling. This is where simple ingredients transform into irresistible flavor. Our approachable method makes it easy.

    1. Prepare Your Apples: Peel, core, and slice 6-8 medium baking apples (about 6 cups). Aim for uniform ¼-inch thick slices to ensure they cook evenly.
    2. Combine Filling Ingredients: In a large bowl, gently toss the apple slices with ¾ cup (150g) granulated sugar, 2 tablespoons all-purpose flour, 1 teaspoon ground cinnamon, ¼ teaspoon ground nutmeg, and a pinch of salt. The flour helps thicken the juices as the pie bakes.
    3. Add a Citrus Boost (Optional): For extra brightness, add 1 tablespoon of fresh lemon juice. This also helps prevent the apples from browning.
    4. Let It Mingle: Allow the apple mixture to sit for 15-20 minutes. This step draws out some of the juices, which helps create a more flavorful and less watery filling.

    Quick Tip for Flavor: Many baking experts recommend using a mix of sweet and tart apples, such as Honeycrisp and Granny Smith [1]. This balance creates a more complex and delicious taste.

    Step 3: Assemble Your Pie

    It’s time to bring all the elements together. Follow these steps to build your picture-perfect homemade apple pie.

    1. Preheat Oven and Prep Pan: Preheat your oven to 425°F (220°C) and have a 9-inch pie dish ready.
    2. Roll Out Bottom Crust: On a lightly floured surface, roll one disk of chilled dough into a 12-inch circle. Carefully transfer the dough to your pie dish, leaving about a ½-inch overhang.
    3. Fill with Apples: Pour the apple filling into the prepared crust and mound it slightly in the center. Dot the top of the filling with 1 tablespoon of unsalted butter cut into small pieces.
    4. Add Top Crust: Roll out the second disk of dough into another 12-inch circle. You can either place this over the filling as a solid top or cut it into strips for a lattice design.
    5. Seal and Crimp: Trim the edges of the top crust to match the bottom. Press the top and bottom crusts together along the rim to seal. Crimp the edges decoratively using your fingers or a fork.
    6. Vent the Pie: If you used a solid top crust, cut several slits in it to allow steam to escape during baking.
    7. Egg Wash (Optional): For a beautiful golden-brown finish, beat 1 egg with 1 tablespoon of milk or water and brush it over the top crust. Sprinkle with a little extra sugar, if desired.

    Step 4: Bake to Golden Perfection

    The aroma of a baking apple pie is incredible. This final stage is all about baking your pie until the crust is golden and the filling is bubbly.

    1. Initial High Heat Bake: Place the pie on a baking sheet to catch any drips and bake for 15 minutes at 425°F (220°C). This initial high heat helps set a flaky bottom crust.
    2. Reduce Heat and Continue Baking: Lower the oven temperature to 375°F (190°C) and continue baking for another 40-50 minutes.
    3. Check for Doneness: The pie is done when the crust is a deep golden brown and the filling is bubbling through the vents. You can also insert a thin knife into a vent; the apples should feel tender.
    4. Prevent Over-Browning: If the edges of the crust are browning too quickly, cover them loosely with a ring of aluminum foil.
    5. Cool Completely: This step is critical! Remove the pie from the oven and let it cool on a wire rack for at least 3-4 hours before slicing. This allows the filling to set, preventing a runny slice.

    Congratulations! You’ve just made a wonderful apple pie from scratch. This beginner-friendly recipe proves that delicious, homemade results are achievable for any home baker. Enjoy every bite!

    Expert Tips for a Perfect Homemade Apple Pie

    Mastering Your Pie Crust

    A truly perfect homemade apple pie starts with an amazing crust. While it might seem daunting, these expert tips will help you achieve flaky perfection every time.

    • Keep it Cold: For a wonderfully flaky texture, your butter must be ice-cold. In the oven, cold butter creates pockets of steam—the secret to a flaky crust. Remember to use ice water when mixing the dough as well.
    • Don’t Overwork the Dough: Mix your pie crust just until it comes together. Overworking develops too much gluten, which makes the crust tough instead of tender. A light touch is all you need.
    • Chill Out: After mixing, always chill your dough for at least 30 minutes. This step relaxes the gluten, keeps the butter cold, and makes the dough much easier to roll out.
    • Roll Evenly: When rolling out your dough, aim for an even thickness to ensure the crust bakes evenly. Uneven spots can burn or remain undercooked.

    Perfecting Your Apple Filling

    The filling is the heart of the apple pie. Follow these tips to ensure yours is rich, comforting, and delicious every time.

    • Mix Your Apples: Using a mix of apples creates the best flavor and texture. Some varieties hold their shape, while others break down into a saucy base. Granny Smith, Honeycrisp, and Fuji are popular choices for their balance of tartness and sweetness [2].
    • Slice Consistently: Cut your apple slices to a similar thickness so they cook evenly. Otherwise, some slices may turn mushy while others remain too firm.
    • Prevent a Watery Filling: Apples release a lot of liquid during cooking. To create a thick, luscious filling, add a thickening agent like flour, cornstarch, or tapioca.
    • Spice it Right: While cinnamon is a classic, don’t be afraid to add a pinch of nutmeg, allspice, or cardamom to elevate the flavor. Adjust the spices to create a pie that’s uniquely yours.
    • Sweetness to Taste: Taste your apples before adding sugar, and adjust the amount based on their natural sweetness. Tart apples will require more sugar than sweeter varieties.

    Baking for Golden Perfection

    The final step is baking, where all your hard work comes together. Follow these simple tips for a perfectly golden, bubbly pie.

    • Vent Your Top Crust: Always cut slits or another design in your top crust. This allows steam to escape during baking, which prevents the crust from puffing up or cracking.
    • Egg Wash for Shine: For a beautiful, golden-brown shine, brush the top crust with an egg wash (one egg whisked with a tablespoon of water). This also helps sprinkled sugar adhere to the crust.
    • Protect the Edges: If the edges of your crust are browning too quickly, cover them with aluminum foil. This will prevent them from burning while the rest of the pie finishes baking.
    • Bake Until Bubbly: A key sign of a fully baked pie is a filling that’s visibly bubbling in the center. This indicates the apples are tender and the thickener has activated. Baking typically takes 50-60 minutes, often starting at a high temperature (like 400°F/200°C) that is reduced partway through.
    • Cool Completely: This might be the hardest tip to follow, but it’s crucial to let your pie cool completely. This allows the filling to set properly, preventing a runny slice. Patience is key!

    Enjoying Your Homemade Masterpiece

    Making a homemade apple pie should be a wonderful experience, not an overwhelming one. Recipesmondial is here to make your cooking journey enjoyable. Celebrate your accomplishment with a slice of this delicious, family-friendly dessert. With every step, you’re building confidence in the kitchen!

    Recipe Variations and Substitutions

    Using a Ready-Made Pie Crust

    Feeling overwhelmed by complex recipes? Our goal at Recipesmondial is to make cooking enjoyable and stress-free. That’s why using a ready-made pie crust is a fantastic shortcut that saves you significant time and effort.

    Many home cooks, from beginners to seasoned pros, rely on these crusts as a perfectly acceptable option. Best of all, your delicious apple pie will still taste wonderfully homemade.

    Tips for success with ready-made crusts:

    • Choose wisely: Look for refrigerated pie crusts in the dairy aisle. Frozen ones also work well, but be sure to follow the package instructions for thawing.
    • Handle with care: Ready-made crusts can be delicate. Unroll them gently onto your pie plate.
    • Pinch for perfection: Crimp the edges just as you would with a homemade crust. This adds a beautiful, finished look.
    • Pre-baking (sometimes): Some recipes suggest pre-baking (or blind baking) the bottom crust. Always check the package for recommendations, but know that for most fruit pies, this step isn’t necessary.

    This simple swap lets you enjoy a flavorful apple pie without the added stress of making dough from scratch. It’s an excellent choice for quick and reliable meal solutions [3].

    Making an Egg-Free Version

    If dietary needs or preferences require you to skip the egg, don’t worry. While many traditional apple pie recipes use an egg wash for a golden shine, it’s easy to make an egg-free version. There are simple alternatives that work just as well, making our family-friendly meals even more inclusive.

    Egg-free wash alternatives:

    • Milk or cream: Brush the top crust lightly with milk or heavy cream for a nice golden color and a soft finish.
    • Melted butter: A brush of melted unsalted butter provides a rich sheen and adds a lovely buttery flavor.
    • Plant-based milk: For a completely dairy-free and egg-free option, use almond, soy, or oat milk. This works similarly to regular milk.
    • Sugar sprinkle: After brushing with milk or butter, a sprinkle of coarse sugar adds sparkle and a delightful crunchy texture.

    With these simple substitutions, everyone can enjoy a slice of your delicious apple pie without compromising on flavor or appearance.

    Adjusting the Spices

    The beauty of homemade apple pie is making it your own. Adjusting the spices is a simple way to tailor the flavor and get creative in the kitchen. Our classic recipe provides a wonderful base, but feel free to experiment with different combinations to find what you love most.

    Spice variations to try:

    • More warmth: Increase the cinnamon to 1 teaspoon or even 1.5 teaspoons.
    • Ginger kick: Add 1/4 to 1/2 teaspoon of ground ginger for a lovely, warm undertone.
    • Nutmeg nuance: Use a bit more nutmeg, up to 1/2 teaspoon. Freshly grated nutmeg offers the best flavor.
    • Cardamom complexity: For a unique twist, try 1/4 teaspoon of ground cardamom. It pairs beautifully with apples.
    • Allspice addition: A dash of allspice (about 1/4 teaspoon) can deepen the overall spice profile.
    • Pie spice blend: If you have an apple pie spice blend, you can use 1.5 to 2 teaspoons of it instead. It usually contains a mix of cinnamon, nutmeg, and allspice.

    Start with small adjustments and taste the apple filling before baking to achieve your perfect spice level. This is an easy way to elevate your flavorful meals made easy.

    How to Store and Freeze Apple Pie

    Storing a Baked Apple Pie

    After baking a beautiful apple pie, you’ll want to store it properly to keep it fresh and flavorful. Following a few simple steps will ensure your pie is ready for quick desserts or family meals later.

    At Room Temperature

    • Cool completely: First, let the pie cool completely on a wire rack for several hours. This crucial step prevents condensation from forming and making the crust soggy.
    • Cover loosely: Once the pie is fully cooled, cover it loosely with a pie dome, an inverted bowl, or aluminum foil.
    • Storage duration: An apple pie can be stored at room temperature in a cool, dry place for up to two days.

    In the Refrigerator

    • Cover tightly: For longer storage, wrap the completely cooled pie tightly, first in plastic wrap and then in aluminum foil. This protects it from absorbing refrigerator odors and drying out.
    • Storage duration: A refrigerated apple pie stays fresh for 3 to 5 days.
    • Reheating tip: To bring back the crust’s crisp texture, reheat individual slices in an oven or toaster oven until warm.

    Freezing an Apple Pie for Later

    Freezing is a fantastic way to enjoy homemade apple pie anytime. You can freeze the pie either baked or unbaked, and both methods are simple. Here’s how.

    Freezing a Baked Apple Pie

    Freezing a baked pie is perfect for busy days when you need a quick, ready-to-serve dessert. You will love having a homemade treat on hand.

    • Cool completely: Allow the pie to cool entirely after baking. This step is essential to prevent ice crystals from forming.
    • Wrap securely: Tightly wrap the whole pie in several layers of plastic wrap, followed by a layer of heavy-duty aluminum foil. This double layer is the best defense against freezer burn.
    • Label and date: Don’t forget to label the wrapped pie with the date so you know how long it has been stored.
    • Freezer duration: A baked apple pie can be frozen for up to 4 months.
    • Thawing and reheating:
      • To serve, thaw the pie in the refrigerator overnight.
      • Reheat it in an oven preheated to 350°F (175°C) for 20-30 minutes, or until warmed through.
      • If the crust begins to over-brown, cover it loosely with foil.

    Freezing an Unbaked Apple Pie

    Freezing an unbaked pie is a great time-saver that makes baking day less stressful. It’s an excellent way to prepare ahead of time.

    • Assemble the pie: Follow your recipe to assemble the apple pie completely, but do not bake it.
    • Firm up in freezer: Place the unbaked pie in the freezer, uncovered, for about 30 minutes. This helps it firm up, making it easier to wrap without damaging the crust.
    • Wrap securely: Tightly wrap the firm pie, first in multiple layers of plastic wrap and then in heavy-duty aluminum foil to protect it from freezer burn.
    • Label and date: Clearly label the pie with the date so you can track its freshness.
    • Freezer duration: An unbaked apple pie can be frozen for up to 3 months.
    • Baking from frozen:
      • When you are ready to bake, do not thaw the pie.
      • Preheat your oven to 425°F (220°C).
      • Place the frozen pie on a baking sheet and bake for 15-20 minutes.
      • Next, reduce the oven temperature to 375°F (190°C).
      • Continue to bake for another 60-80 minutes, or until the crust is golden brown and the filling is bubbly.
      • To prevent over-browning, you can cover the edges of the crust with foil during the last part of baking.

    These simple tips will help you keep your homemade apple pie delicious and ready to enjoy at a moment’s notice. Enjoy cooking confidently with Recipesmondial!

    Frequently Asked Questions

    What’s in a classic old-fashioned apple pie?

    A classic old-fashioned apple pie is all about simple, wholesome ingredients and a touch of love. Its comforting and straightforward nature makes it the perfect recipe for beginners.

    Typically, you will find:

    • Fresh Apples: Often a mix of sweet and tart varieties for the best flavor and texture.
    • Sugar: Granulated sugar, sometimes with a touch of brown sugar, to sweeten the filling.
    • Spices: Cinnamon is essential. Nutmeg, allspice, or a pinch of cloves might also be added for warmth.
    • Flour or Cornstarch: This acts as a thickener to prevent a watery filling.
    • Butter: A few pats of butter are often dotted over the filling for richness and flavor.
    • A Flaky Pie Crust: Made from flour, butter (or shortening), salt, and ice water. This creates that wonderful, tender, golden-brown shell.

    This approach emphasizes quality, everyday ingredients to create a delicious dessert that feels like a hug from your kitchen. It’s a wonderful example of a flavorful meal made easy.

    How do you make the best apple pie filling?

    Crafting the best apple pie filling is simpler than you might think and ensures a delicious, non-soggy pie every time. Here’s how to achieve it:

    • Choose the Right Apples: Use a blend of firm, crisp apples. Think Granny Smith for tartness, combined with Honeycrisp or Fuji for sweetness.
    • Balance Sweetness and Spice: Adjust the sugar based on your apples’ tartness. Also, don’t skimp on the cinnamon and a hint of nutmeg or allspice—these warming spices make the flavor sing.
    • Thicken it Well: Always use a thickener like all-purpose flour or cornstarch to prevent a watery filling and ensure your slices hold their shape. A few tablespoons are usually enough for a standard pie.
    • Pre-cook or Macerate (Optional but Recommended): To prevent a gap from forming under the top crust, you can pre-cook or macerate your apples. Pre-cooking involves simmering them briefly, while macerating means tossing them with sugar and letting them rest for 30 minutes. Both methods draw out excess moisture before baking.
    • Add a Touch of Fat: Dotting the filling with small pieces of butter before adding the top crust adds richness and helps create a beautiful, glossy result.

    Following these tips provides great step-by-step cooking guidance, helping you to cook confidently and master a flavorful meal made easy in no time!

    Can I make this apple pie recipe with ready-made pastry?

    Absolutely! Using ready-made pastry is a fantastic time-saver that makes this beginner-friendly recipe even easier. This shortcut helps you enjoy cooking without stress and is perfect when you need a quick meal or simply want to simplify the baking process.

    Here are some tips when using pre-made pastry:

    • Thaw Properly: Ensure your frozen pastry is thawed according to package directions. It should be pliable but still cool.
    • Handle Gently: Store-bought crusts can be more delicate than homemade, so handle them carefully to prevent tearing.
    • Flute with Care: When crimping the edges, work gently. You can use a fork for a simple pattern or your fingers for a more traditional look.
    • Adjust Baking Time (if needed): Some ready-made crusts may bake slightly faster. Watch your pie closely for golden-brown perfection.

    Embracing ready-made pastry is a smart choice for approachable home cooking. It allows you to focus on the delicious apple filling while still achieving a wonderful, homemade-tasting pie. It’s a perfect example of a simple dinner recipe solution!

    What are the best types of apples to use for pie?

    Choosing the right apples is key to a successful and flavorful apple pie recipe. The best pies use a blend of apples to create a balanced flavor and maintain a great texture after baking. Here are some top picks:

    • Granny Smith: A pie favorite! They are tart, firm, and hold their shape beautifully when baked, balancing the sweetness of the filling.
    • Honeycrisp: Known for their crisp texture and sweet-tart flavor. They stay firm during baking and add a lovely juiciness.
    • Braeburn: These apples offer a spicy-sweet flavor and a firm texture that holds its shape well.
    • Fuji: Sweet and crisp, Fujis contribute a pleasant sweetness and retain some texture after baking.
    • Golden Delicious: A sweeter apple that softens nicely without turning to mush. They provide a milder flavor and good moisture.

    For the ideal pie, we recommend using at least two different varieties. For instance, combining a tart apple like Granny Smith with a sweeter one like Honeycrisp or Braeburn creates a complex flavor and prevents the filling from becoming mushy. This is a great tip for elevating any beginner-friendly recipes!


    Sources

    1. https://www.seriouseats.com/best-apples-for-apple-pie
    2. https://foodprint.org/eating-sustainably/which-apple-to-use/
    3. https://www.kingarthurbaking.com/blog/2021/04/09/how-to-blind-bake-pie-crust

  • The Easiest Creme Brulee Recipe (Foolproof & Beginner-Friendly)

    The Easiest Creme Brulee Recipe (Foolproof & Beginner-Friendly)

    Creme brulee is a classic French dessert featuring a rich, creamy custard base topped with a contrasting layer of hard, caramelized sugar. The custard is traditionally made with heavy cream, egg yolks, sugar, and vanilla. The name, which means “burnt cream,” refers to the signature brittle topping created by torching or broiling sugar just before serving.

    Imagine cracking through a perfectly caramelized sugar crust to reveal a silky, rich custard beneath. While that sounds like a dream reserved for fancy restaurants, it doesn’t have to be. Many home cooks feel intimidated by crème brûlée, assuming it requires expert skills and complicated techniques. But what if we told you that creating this elegant dessert at home is surprisingly straightforward?

    At Recipesmondial, our mission is to make delicious cooking accessible to everyone. We know you want simple recipes that deliver big flavor, without overwhelming instructions or unfamiliar ingredients. That’s why we’ve designed our easiest crème brûlée recipe with beginner-friendly steps to ensure success. Our goal is to build your confidence and help you master this classic dessert, complete with a rich, creamy texture and a flawless, crunchy topping every single time.

    It’s time to forget the stress and embrace the joy of creating something spectacular. This guide will walk you through each step, making the process enjoyable and the results guaranteed. You’ll soon discover that this isn’t just an easy crème brûlée recipe; it’s the foolproof method you’ve been searching for. It promises to elevate your dessert game without the fuss. Let’s dive in and see why this is the best crème brûlée recipe for beginners!

    Why Is This the Best Creme Brulee Recipe for Beginners?

    Welcome to the world of delicious desserts! Have you always dreamed of making a beautiful creme brulee but felt intimidated by complex recipes? You’re in the right place. We designed this simple creme brulee recipe specifically for home cooks, making it the perfect choice for beginners.

    At Recipesmondial, we believe cooking should be enjoyable, not stressful. That’s why we’ve transformed this seemingly fancy dessert into an approachable home cooking project. This recipe is your first step toward creating flavorful, impressive meals with ease, starting with this classic treat.

    Why This Recipe Stands Out for New Cooks

    Many creme brulee recipes are intimidating, filled with technical jargon and complicated steps. Our version cuts through that confusion by focusing on clarity, simplicity, and reliable results. Here’s how this beginner-friendly recipe will boost your confidence in the kitchen:

    • Simple, Everyday Ingredients: No need to search for obscure items. This recipe uses common pantry staples like heavy cream, egg yolks, sugar, and a hint of vanilla, so finding what you need is easy.
    • Clear, Step-by-Step Guidance: We break down every action into easy-to-understand instructions. You’ll move confidently from one step to the next without any guesswork.
    • Foolproof Techniques Explained: We guide you through key techniques without stress. For instance, while tempering egg yolks sounds complex, we show you exactly how to do it. We also simplify the water bath method to ensure a perfectly creamy custard every time.
    • Common Pitfalls Addressed: We highlight potential challenges and provide practical tips to avoid them. This proactive advice helps prevent mistakes before they happen, so you can cook with confidence.
    • No Fancy Equipment Required (Mostly!): While a kitchen torch is fun, it’s not necessary. We offer simple alternatives so you can achieve the signature crackly sugar crust using equipment you already own.
    • Guaranteed Delicious Results: Just like our simple dinner recipes and quick breakfast ideas, this dessert delivers great flavor. You will create a rich, creamy, and impressive creme brulee that your family will love.

    This recipe is more than just a set of instructions; it’s an encouraging companion designed to help you enjoy the cooking process. Say goodbye to feeling overwhelmed and hello to making delightful desserts with ease. Get ready to build your confidence and enjoy every moment in the kitchen!

    What Ingredients Do You Need for Classic Creme Brulee?

    A flat lay of classic crème brûlée ingredients including cream, egg yolks, sugar, and a vanilla bean on a wooden table.
    A professional food photography style, photorealistic, high-quality food magazine photo of a beautifully arranged flat lay on a warm, rustic wooden surface. The classic crème brûlée ingredients are neatly organized: a small jug of heavy cream, a bowl of bright yellow egg yolks, granulated sugar, a whole vanilla bean, and a small pinch of salt. The ingredients are fresh, vibrant, and inviting, showcased with soft, natural lighting that emphasizes their textures. The overall impression is clean, simple, and encouraging for a beginner home cook.

    Making a classic creme brulee might sound fancy, but it’s a surprisingly simple dessert made with just a few ingredients. Since you likely have these staples in your kitchen already, this recipe is perfect for beginners. You can create a rich, creamy dessert without feeling overwhelmed.

    Here are the core ingredients you will need:

    • Heavy Cream (35-36% milk fat): This is the star of the show. Its high fat content is what gives the custard its incredibly rich, smooth, and luxurious texture. For a truly classic result, do not substitute it with lighter creams or milk. [1]
    • Large Egg Yolks: These provide structure and richness, giving your custard its beautiful pale yellow color. Egg yolks are key to achieving a firm yet silky set.
    • Granulated Sugar: You will use this in two ways: first, to sweeten the custard, and second, to create that iconic crunchy, caramelized crust on top.
    • Vanilla Extract or Vanilla Bean: This adds the warm, comforting flavor that defines a classic creme brulee. While a good quality vanilla extract works wonderfully, a vanilla bean will offer a more intense, aromatic experience.
    • Pinch of Salt: A tiny bit of salt balances the sweetness and enhances all the other flavors, making your creme brulee taste even better.

    A Note on Cream vs. Milk

    For a truly classic creme brulee, heavy cream is non-negotiable. Its high-fat content is crucial for creating the custard’s characteristic rich, silky texture—the secret to that melt-in-your-mouth experience.

    If you use milk or half-and-half, the result will be a much lighter custard that may not set as firmly and will have a less luxurious mouthfeel. While you can certainly experiment for a lighter dessert, it won’t be the traditional creme brulee you expect. To ensure a foolproof first attempt, we recommend sticking to heavy cream.

    Because Recipesmondial focuses on reliable results, this beginner-friendly recipe calls for full-fat heavy cream. Using it guarantees that perfect creamy consistency every time, so you can cook confidently, knowing you’re set up for success.

    What Equipment Will You Need?

    Making a delicious creme brulee might seem intimidating, but this easy recipe is designed for success. We’ll show you how to get reliable, delicious results using common kitchen tools you likely already own. Our goal is to help you feel confident and excited in the kitchen, not stressed.

    • Medium Saucepan: Use this for gently heating the cream and vanilla. A saucepan with a heavy bottom works best because it distributes heat evenly.
    • Whisk: An essential tool for smoothly combining the egg yolks and sugar. A whisk also helps you properly temper the hot cream into the egg mixture.
    • Mixing Bowls (2-3): You will need at least one bowl for separating your egg yolks and another for mixing the custard base ingredients.
    • Fine-Mesh Sieve: This is the secret to a perfectly silky custard. Straining the mixture catches any small bits of cooked egg or vanilla bean, ensuring a flawless texture.
    • Ramekins: These individual oven-safe ceramic dishes are essential for baking. Standard 4- to 6-ounce ramekins work perfectly, and you will need 4 to 6 of them for this recipe.
    • Large Roasting Pan or Baking Dish: This will hold your ramekins during their crucial water bath (bain-marie). Choose a pan large enough to fit all the ramekins without them touching.
    • Kettle or Pot: You’ll need this to heat the water for your water bath. Starting with hot water is key to ensuring the custard bakes evenly and sets properly.
    • Measuring Cups and Spoons: Precise measurements are key to a perfect custard. Use these to ensure a consistent balance of ingredients every time.
    • Oven Mitts: Safety first! Always use oven mitts when handling hot dishes and pans from the oven.

    Do You Really Need a Kitchen Torch?

    The iconic crackly sugar top is a hallmark of creme brulee, leading many to wonder if a kitchen torch is necessary. While it’s the most effective and traditional tool for the job, you can still make this dessert without one.

    A kitchen torch, also known as a culinary torch, provides quick, high-impact heat. This creates the beautiful golden-brown crust without warming the cool custard underneath, keeping it perfectly chilled and creamy. Using a torch also adds a professional touch to the final step.

    If you don’t have a torch, don’t worry—you can use your oven’s broiler instead. Simply place the chilled ramekins under a preheated broiler for a minute or two. Be sure to watch them constantly, as the sugar can go from caramelized to burnt in seconds. This alternative makes the recipe accessible to everyone, using equipment you already have.

    For beginners, starting with the broiler is a great way to build confidence without buying special equipment. If you find yourself making this dessert often, a kitchen torch can be a fun and useful tool to add to your collection. It speeds up the final step and guarantees a perfect crust every time.

    How to Make Creme Brulee: A Step-by-Step Guide

    A home cook's hands carefully pouring creamy custard into a white ramekin set in a roasting pan.
    A professional food photography style, photorealistic, high-quality food magazine photo capturing a close-up of a home cook’s hands in a brightly lit, clean home kitchen. The hands are gently pouring creamy, pale yellow crème brûlée custard from a clear glass measuring cup into a white ceramic ramekin. The ramekin is already placed inside a larger, shallow roasting pan, implying it’s ready for a water bath (bain-marie). The focus is on the smooth, pourable texture of the custard and the careful, precise movement. The background is softly blurred to keep attention on the pouring action, suggesting an easy and approachable cooking process.

    Step 1: Infuse the Cream

    To create a truly flavorful creme brulee, the magic starts here. By gently warming the cream and vanilla together, you’ll infuse a beautiful, deep aroma into the custard base. This simple step is key to a remarkable dessert.

    • Gather your ingredients: Pour the heavy cream into a medium saucepan. If using a vanilla bean, add it now. If using vanilla extract, you will add it later.
    • Heat gently: Place the saucepan over medium-low heat and warm the cream until it becomes steamy with small bubbles forming around the edges. Be careful not to let it boil, as this can scorch the cream.
    • Infuse the flavor: Remove the saucepan from the heat. If you used a vanilla bean, cover the pan and let it steep for 15-20 minutes to allow the flavor to deepen.
    • Strain (if needed): After steeping, remove the vanilla bean. For extra visual appeal, you can scrape the seeds out and stir them back into the cream. To guarantee a silky custard, strain the cream through a fine-mesh sieve.

    Step 2: Temper the Egg Yolks

    Tempering might sound intimidating, but it’s a simple technique to prevent the eggs from scrambling when they meet the warm cream. Mastering this step is essential for a perfectly smooth custard and will build your confidence in the kitchen.

    1. Whisk yolks and sugar: In a large mixing bowl, whisk the egg yolks and granulated sugar together vigorously. Continue until the mixture is pale yellow and slightly thickened, which incorporates air and helps dissolve the sugar.
    2. Slowly add warm cream: While whisking constantly, gradually pour about a quarter of the warm cream into the egg mixture. This slowly raises the temperature of the eggs, preventing them from cooking too quickly.
    3. Combine everything: Once tempered, pour the egg yolk mixture back into the saucepan with the remaining cream. Whisk gently until well combined. If using vanilla extract, stir it in now.
    4. Strain for smoothness: For the ultimate silky texture, pour the finished custard base through a fine-mesh sieve into a clean bowl or large measuring cup. This final straining removes any small bits of cooked egg and ensures a foolproof, wonderfully smooth result.

    Step 3: Bake in a Water Bath (Bain-Marie)

    A water bath, also known as a bain-marie, is the secret weapon for a perfectly cooked creme brulee. It provides gentle, even heat, which prevents the delicate custard from overcooking or cracking at the edges.

    • Preheat oven and prepare bath: Preheat your oven to 325°F (160°C). Arrange 4-6 ramekins (4- to 6-ounce size) inside a large roasting pan or baking dish with high sides.
    • Fill ramekins: Carefully pour the strained custard mixture into each ramekin, filling them almost to the top. Using a measuring cup with a spout makes this easier.
    • Add hot water: Place the baking dish on the oven rack. Carefully pour hot water into the dish until it comes halfway up the sides of the ramekins. This creates the essential bain-marie.
    • Bake until set: Bake for 30-40 minutes, depending on ramekin size. The custards are done when the edges are set but the centers still have a slight jiggle, similar to firm Jell-O.
    • Cool carefully: Gently remove the baking dish from the oven. Using tongs, carefully lift the ramekins out of the water bath and place them on a wire rack to cool completely to room temperature.

    Step 4: Chill to Perfection

    Patience is key during this next step. Chilling is crucial because it allows the custard to fully set and develop the delightful, firm texture that creme brulee is known for. Do not skip this step.

    • Cover and refrigerate: Once the ramekins are completely cool, cover each one with plastic wrap and place them in the refrigerator.
    • Chill thoroughly: Chill for at least 4 hours, but overnight is ideal. This ensures the custard is perfectly set, which is essential for creating the signature crisp sugar crust later.
    • Plan ahead: The custards can be prepared up to three days in advance, making this a fantastic make-ahead dessert for entertaining or busy weeknights.

    Step 5: Create the Signature Sugar Crust

    Now for the grand finale: creating the iconic, caramelized sugar crust. This final step provides that satisfying crunch against the creamy custard, making your homemade creme brulee truly special.

    1. Prepare for torching: Just before serving, uncover the chilled ramekins. Gently blot any condensation from the custard’s surface with a paper towel to ensure the sugar stays dry.
    2. Sprinkle sugar evenly: Sprinkle a fine, even layer of about 1-2 teaspoons of granulated sugar over the top of each custard. Too much sugar can create a crust that is overly thick and hard.
    3. Caramelize with a torch: Using a kitchen torch, move the flame steadily and continuously across the sugar’s surface to melt and caramelize it. Keeping the torch moving prevents any single spot from burning.
    4. Achieve the perfect crust: Continue torching until all the sugar has melted into a beautiful, even, golden-brown crust.
    5. Let it harden: Allow the caramelized sugar to cool for a minute or two. It will harden into a brittle, glass-like layer that creates the satisfying “crack” when tapped with a spoon.
    6. Serve immediately: Present your beautiful creme brulee right away to be enjoyed while the contrast between the warm, crisp topping and the cool, creamy custard is at its best.

    Top Tips for Foolproof Creme Brulee Success

    Three perfect crème brûlées in white ramekins, each with a golden cracked sugar topping, on a wooden table.
    A professional food photography style, photorealistic, high-quality food magazine photo featuring three exquisite, perfectly finished crème brûlée desserts. Each dessert is presented in an elegant white ceramic ramekin, arranged appealingly on a simple, inviting rustic wooden table. The top of each crème brûlée boasts a glistening, golden-brown, caramelized sugar crust with a distinct, satisfying crack, inviting the viewer. Soft, warm, natural lighting highlights the rich texture and appealing color. A single antique silver spoon rests beside one of the ramekins, ready for enjoyment, emphasizing the indulgent and achievable perfection of the dessert.

    Making delicious crème brûlée is easier than you think. Even beginner cooks can achieve a restaurant-quality dessert with a few simple tricks. These foolproof tips will guide you to a perfect crème brûlée every time, helping you cook with confidence.

    Mastering the Custard Base

    • Heat the Cream Gently: Never boil the cream. Instead, bring the mixture to a gentle simmer. Boiling can scald the cream and give it an unpleasant flavor, making your custard more likely to curdle.
    • Temper Your Egg Yolks Slowly: This crucial step ensures a creamy custard. To prevent the eggs from scrambling, slowly whisk a small amount of warm cream into the yolks. This gently raises their temperature before you add the warmed yolk mixture back into the rest of the cream.
    • Strain for Silkiness: For the smoothest possible texture, pour your custard mixture through a fine-mesh sieve before filling the ramekins. This removes any small bits of cooked egg or vanilla bean, resulting in a wonderfully silky finish.

    Baking for Perfection

    • The Water Bath (Bain-Marie) is Essential: A water bath creates a gentle, humid environment that cooks the custard evenly, preventing it from cracking or becoming rubbery. Use hot tap water, not boiling, filling the pan until it reaches halfway up the sides of your ramekins.
    • Do Not Overbake: Avoid overbaking, a common mistake that leads to a rubbery custard. Your crème brûlée is ready when the edges are set but the center still has a slight jiggle. It will continue to firm up as it cools.
    • Chill Thoroughly: Patience is a must! After baking, allow the crème brûlée to cool completely at room temperature before transferring it to the refrigerator. Chill for at least four hours, or ideally overnight, to allow the custard to set properly for that perfect, creamy consistency.

    Achieving the Signature Crust

    • Even Sugar Layer for the Crust: Right before serving, sprinkle a thin, even layer of granulated sugar over the chilled custard. Too much sugar creates an overly thick, hard crust, while too little may burn before it can caramelize.
    • Torch with Confidence: A kitchen torch provides the best results. Hold it a few inches from the sugar and move it in a constant motion until it melts and caramelizes into a deep amber color. If you don’t have a torch, you can use your oven’s broiler—just watch it closely, as it can burn in seconds.

    With these tips, you’ll be creating beautiful, flavorful crème brûlée like a pro. This beginner-friendly recipe will quickly become a family favorite. Enjoy cooking without stress, and discover new simple dishes with Recipesmondial!

    How Do You Store Leftover Creme Brulee?

    Properly storing your creamy, dreamy creme brulee is key to savoring every bite, even days later. Good storage not only prevents waste but also makes enjoying your homemade treats simple and stress-free.

    Storing Un-Caramelized Creme Brulee

    The best way to store creme brulee is before torching the sugar topping. This method keeps the custard perfectly creamy and allows you to create a fresh, crispy crust just before serving. As a fantastic meal prep strategy, this approach lets you make the dessert ahead of time, ensuring a stress-free serving day.

    • Chill Completely: First, let your baked creme brulee ramekins cool completely to room temperature before placing them in the refrigerator.
    • Cover Tightly: Cover each ramekin individually with plastic wrap or an airtight lid. This step is crucial to prevent the custard from absorbing fridge odors or drying out.
    • Refrigerate Promptly: Store the covered ramekins in the refrigerator, where they will stay fresh for up to 3-4 days [source: https://www.foodsafety.gov/keep-food-safe/food-safety-by-food-type/eggs].
    • Torch Before Serving: When you’re ready to serve, simply remove the ramekins from the fridge, sprinkle with sugar, and torch the top to create that signature crisp crust.

    Storing Caramelized Creme Brulee

    If you’ve already torched your creme brulee, you can still store it. However, be aware that the crisp sugar crust will soften as it absorbs moisture from the custard and the air, so it won’t be as crunchy. While a caramelized creme brulee recipe stored this way will have a softer top, it will still be delicious—a compromise many home cooks find worthwhile.

    • Cool Down: Allow the torched creme brulee to cool completely to room temperature.
    • Gentle Covering: Cover the ramekins carefully with plastic wrap or place them in an airtight container. To minimize stickiness, try to avoid letting the plastic touch the caramelized top.
    • Refrigerate: Store in the refrigerator for up to 2-3 days. Keep in mind the texture of the crust will change during this time.

    Tips for the Freshest Creme Brulee

    To get the best results from your easy creme brulee recipe, keep these tips in mind:

    • Seal It Well: Always use airtight covers to protect the delicate custard from outside odors and air.
    • Keep It Cold: Refrigeration is crucial for both safety and freshness. Never leave creme brulee at room temperature for an extended period.
    • Avoid Condensation: To prevent condensation from making the custard’s surface watery, create a slight dome with the plastic wrap when covering. This keeps water droplets from dripping down.
    • Plan Ahead: Making the custard base ahead of time is an excellent strategy that saves you effort on the day of your gathering, making it an ideal make-ahead dessert.

    Following these simple storage steps will ensure your creme brulee stays delicious, allowing you to confidently serve this delightful dessert anytime. Recipesmondial aims to make your kitchen experiences enjoyable and stress-free as you discover new flavors.

    Frequently Asked Questions

    What makes a creme brulee recipe easy?

    An easy creme brulee recipe simplifies the process with clear, step-by-step instructions, helping home cooks feel confident rather than overwhelmed.

    Our beginner-friendly recipes prioritize practical tips and reliable results, so you can build confidence in your cooking skills.

    Key elements that make a creme brulee recipe easy include:

    • Minimal Ingredients: Our recipes use everyday items found in most kitchens.
    • Clear Steps: Each instruction is broken down into simple, detailed steps without technical jargon.
    • Foolproof Techniques: Methods like slow tempering and using a water bath prevent common mistakes, ensuring a creamy custard every time.
    • Common Equipment: You won’t need specialized gadgets, aside from a kitchen torch for the crust—and we even offer an alternative for that!
    • Focus on Flavor: The recipe highlights how simple ingredients can create a delicious dessert with incredible flavor.

    Ultimately, an easy recipe means you can enjoy the cooking process without stress and achieve delicious, reliable results.

    Can you make creme brulee with milk instead of heavy cream?

    While you can technically use milk, we strongly recommend heavy cream for the best results. Heavy cream is essential for creating the classic, rich, and velvety texture that makes creme brulee so special.

    Here’s a breakdown of why heavy cream is preferred:

    • Fat Content: Heavy cream has a much higher fat content, which creates a luxurious, smooth custard that holds its shape beautifully.
    • Texture: Using milk or half-and-half will result in a lighter, thinner custard that may be more prone to curdling.
    • Stability: The fat in cream adds stability, which helps prevent a watery or grainy texture in the final dessert.

    If you must substitute, you can try a blend of whole milk and half-and-half, but expect a noticeable difference in richness and consistency. For a truly authentic experience, heavy cream is the star ingredient.

    What is an authentic French creme brulee recipe like?

    An authentic French creme brulee recipe celebrates simplicity and quality ingredients, highlighting classic dessert traditions. [2]

    The core components are straightforward and typically include:

    • Rich Dairy: High-fat heavy cream (or a mix of cream and whole milk) creates a luscious base.
    • Egg Yolks: These provide the custard’s structure and signature richness.
    • Sugar: Granulated sugar sweetens the custard, while an additional sprinkle on top is caramelized to create the famous crisp crust.
    • Vanilla: A real vanilla bean or pure vanilla extract is used to infuse the cream, adding an elegant, aromatic flavor.

    The method is just as simple and elegant. It involves gently heating the cream, tempering the egg yolks, baking the custards in a water bath, and chilling them completely. The signature crunchy sugar crust is then created just before serving.

    Authentic recipes emphasize quality ingredients and precise, gentle cooking, allowing the natural flavors to shine. Our recipes bring this traditional elegance to your kitchen with simple, easy-to-follow steps.


    Sources

    1. https://www.foodnetwork.com/how-to/packages/food-network-essentials/what-is-heavy-cream
    2. https://www.larousse.fr/dictionnaires/francais/cr%C3%A8me_br%C3%BBl%C3%A9e/20268

  • The Easiest Pumpkin Pie Recipe (A Simple, Foolproof Guide)

    The Easiest Pumpkin Pie Recipe (A Simple, Foolproof Guide)

    A classic pumpkin pie recipe involves making a smooth filling by combining pumpkin puree, eggs, sugar, heavy cream or evaporated milk, and warm spices like cinnamon, nutmeg, ginger, and cloves. This mixture is poured into an unbaked pie crust and baked until the center is just set. The result is a creamy, flavorful dessert perfect for holidays.

    The aroma of warm, spiced pumpkin pie instantly transports us to cozy gatherings and cherished traditions. But if the thought of baking one from scratch feels daunting—or you worry about achieving a perfect, creamy filling without cracks—you’re not alone. Many home cooks feel overwhelmed by complex recipes, especially during holiday baking. At Recipesmondial, we believe dessert should be a joy to make and even more delightful to eat. That’s why we’re sharing our ultimate, beginner-friendly pumpkin pie recipe.

    This isn’t just any pumpkin pie recipe; it’s your guide to a simple, foolproof dessert with rich flavor and a perfectly smooth texture. Designed with approachable home cooking in mind, our step-by-step guidance ensures you’ll create a stunning pie with confidence. Forget stressing over cracked tops or soggy crusts. We’ll walk you through each easy step, making the baking process enjoyable and rewarding. Get ready to bake a delicious, family-friendly pumpkin pie with ease!

    Why Is This The Only Pumpkin Pie Recipe You’ll Need?

    Perfect for Beginners (And Experts!)

    Tackling a new dessert can feel daunting, but this pumpkin pie recipe is designed for everyone. With clear, step-by-step guidance, the process is enjoyable and stress-free. It’s the perfect way for beginners to build confidence in the kitchen and achieve reliable, delicious results.

    Even seasoned bakers will appreciate this recipe’s simplicity and fantastic outcome. It’s a quick and reliable dessert for any occasion that is sure to leave a memorable impression. Get ready to bake with confidence!

    Simple Ingredients, Incredible Flavor

    You don’t need a pantry full of exotic items to create incredible flavor. This recipe calls for simple, everyday ingredients you likely already have, making it both approachable and budget-friendly. You won’t have to hunt for any special components.

    We focus on combining these simple elements for maximum taste. Each one plays a vital role in creating a rich, creamy, and wonderfully spiced pumpkin pie. You’ll be amazed by the depth of flavor you can achieve with such basic ingredients. It’s a family-friendly dessert perfect for any gathering.

    Our Foolproof, No-Crack Filling Secret

    A cracked pumpkin pie can be disheartening after all your hard work. Our simple method, however, guarantees a smooth, beautiful top every time. This secret tip ensures a flawless presentation and a pie you’ll be proud to share.

    Our foolproof approach focuses on two key steps: precise baking and gentle cooling. First, we show you how to avoid overbaking, the most common cause of cracks. Next, we guide you through a slow cooling process that allows the filling to set perfectly. The result is a stunning, picture-perfect pumpkin pie that will boost your confidence and make baking stress-free.

    What Ingredients Do You Need for Pumpkin Pie?

    A flat lay photo showing all the fresh ingredients for pumpkin pie, including pumpkin puree, eggs, spices, condensed milk, and a pie crust, neatly arranged on a kitchen surface.
    Professional food photography of a beautiful flat lay of all the fresh ingredients for pumpkin pie. Cans of pumpkin puree, eggs, condensed milk, an assortment of aromatic spices (cinnamon sticks, whole nutmeg, ground ginger), and a prepared pie crust (or flour, butter, and water for a homemade crust) are artfully arranged on a light-colored, slightly textured kitchen countertop or rustic wooden table. Ingredients are vibrant, clean, and appear fresh and ready for use. Soft, inviting natural light illuminates the scene from a window, creating subtle highlights and shadows. Photorealistic, high-quality food magazine photo, top-down view.

    For the Perfect Pie Crust (Store-Bought vs. Homemade)

    A delicious pumpkin pie starts with a fantastic crust—it’s the base that holds all that creamy, spiced goodness. We know life gets busy, so you have two great options to choose from.

    For the quickest option, choose a store-bought pie crust. This is a brilliant shortcut for quick meals and beginner-friendly recipes. It saves significant time and makes the baking process more enjoyable. For the best results, look for an unbaked, deep-dish version.

    If you prefer to bake from scratch, a homemade crust offers incredible flavor and a true sense of accomplishment. It’s a wonderful way to elevate your pumpkin pie. Whichever path you choose, our guide will help you achieve a perfect result.

    Ingredients for the Crust:

    • 1 unbaked 9-inch pie crust: Choose a store-bought crust for convenience or use your favorite homemade recipe.

    For the Rich & Creamy Pumpkin Filling

    Next, let’s gather the ingredients for our rich and creamy pumpkin filling. You’ll find these are common pantry staples that are easy to find at any grocery store. This simple list is the key to making flavorful meals made easy.

    • 1 (15-ounce) can pumpkin puree: Be sure to use 100% pure pumpkin, not pumpkin pie filling, as it forms the heart of your pie.
    • ¾ cup granulated sugar: Adds the perfect amount of sweetness.
    • ½ teaspoon salt: Balances the sweetness and enhances the spices.
    • 1 teaspoon ground cinnamon: The classic warm spice for any pumpkin pie.
    • ½ teaspoon ground ginger: Provides a subtle, zesty kick.
    • ¼ teaspoon ground cloves: Adds a deep, aromatic note.
    • ¼ teaspoon ground nutmeg: For that traditional autumn flavor. (For simplicity, you can substitute the cinnamon, ginger, cloves, and nutmeg with 2 teaspoons of pumpkin pie spice.)
    • 2 large eggs: They bind the filling together for a smooth, custard-like texture.
    • 1 ½ cups evaporated milk: This is the secret to an incredibly rich and creamy texture. It’s much thicker than regular milk.
    • 1 teaspoon vanilla extract: Rounds out all the other flavors in the filling.

    That’s it! With these simple ingredients, you’re ready to create a truly special pumpkin pie without any fancy tools or obscure items.

    How Do You Make Pumpkin Pie Step-by-Step?

    A perfectly baked, golden-brown pumpkin pie with a flaky crust, cooling on a wire rack on a kitchen counter.
    Professional food photography of a perfectly baked, golden-brown pumpkin pie, just removed from the oven and cooling on a wire rack. The pie has a beautifully crimped, slightly flaky crust and a smooth, set filling with a subtle sheen. The pie is the central focus, shot from a slightly elevated angle. The background is a clean, warm, and slightly blurred kitchen counter, perhaps with a glimpse of a wooden cutting board or a simple kitchen towel. Warm, inviting natural light. Photorealistic, high-quality food magazine photo.

    Step 1: Prepare Your Pie Crust

    The first step is preparing the pie crust. For the easiest option, we recommend using a store-bought crust to save time and ensure a consistent result—a fantastic shortcut for busy families and beginner cooks.

    However, whether your crust is store-bought or homemade, pre-baking is the key to preventing a soggy bottom. This simple step creates a crisp foundation for the creamy filling and is essential for a perfect pie.

    Here’s how to prepare your crust:

    1. Thaw or Prepare: If using a frozen store-bought crust, let it thaw according to package directions. If making your own, prepare it and fit it into your pie plate.
    2. Prick the Crust: Use a fork to gently prick holes all over the bottom and sides of the pie crust. This allows steam to escape, preventing the crust from puffing up too much during baking.
    3. Blind Bake (Optional, but Recommended): For an extra-crispy crust, line it with parchment paper and fill with pie weights, dried beans, or rice.
    4. Bake Briefly: Bake the crust in a preheated 375°F (190°C) oven for 10-15 minutes, until the edges look slightly golden. If blind baking, remove the weights and parchment, then bake for another 5 minutes until the base is lightly golden.
    5. Cool: Let the crust cool completely on a wire rack before adding the filling. A cool crust prevents the filling from baking unevenly and helps keep the bottom crisp.

    Step 2: Mix the Pumpkin Filling

    Now for the heart of the pie: the filling. This straightforward method ensures a smooth, rich, and creamy result every time without any overwhelming or complex steps.

    Gather your ingredients and follow these simple steps:

    1. Combine Wet Ingredients: In a large mixing bowl, whisk together the pumpkin puree, granulated sugar, brown sugar, and large eggs until the mixture is smooth and uniform.
    2. Add Spices and Salt: Stir in the ground cinnamon, ground ginger, ground nutmeg, and a pinch of salt until these classic, comforting spices are just incorporated.
    3. Introduce Cream or Evaporated Milk: Gradually whisk in the heavy cream or evaporated milk until the filling is perfectly smooth. Be careful not to overmix, as this can incorporate too much air and cause the pie to crack later.
    4. Taste (Optional): Carefully taste a tiny bit of the raw filling to adjust spices if desired. Remember to cook it fully afterward.

    With that, you’ve created a delicious, classic pumpkin pie filling ready for the crust.

    Step 3: Bake to Perfection

    Baking is where your pumpkin pie comes to life. Following these steps carefully will help prevent common issues like cracks and ensure a perfectly set, creamy texture.

    Let’s get baking:

    1. Preheat Oven: First, preheat your oven to 425°F (220°C). This initial high heat helps set the crust quickly.
    2. Pour Filling: Carefully pour the prepared pumpkin filling into your cooled, pre-baked pie crust, filling it almost to the top.
    3. Initial High Heat Bake: Place the pie on a baking sheet to catch any potential drips and make it easier to transfer. Bake at 425°F (220°C) for 15 minutes.
    4. Reduce Heat & Continue Baking: After 15 minutes, reduce the oven temperature to 350°F (175°C). Do NOT open the oven door. Continue baking for another 35-50 minutes.
    5. Check for Doneness: The pie is done when the edges are set but the center still has a slight jiggle. Alternatively, a knife inserted about one inch from the edge should come out clean. An internal temperature of 175°F (79°C) is ideal for custards [1].
    6. Prevent Over-Browning: If the crust edges start to brown too quickly, gently cover them with strips of aluminum foil or a pie crust shield.

    Step 4: Cool, Chill, and Serve

    The final steps—cooling and chilling—are just as crucial as baking. They ensure your pumpkin pie sets properly and develops its full flavor, so don’t be tempted to skip them!

    Here’s how to finish your perfect pie:

    1. Cool Completely: Remove the pie from the oven and place it on a wire rack to cool completely at room temperature for at least 2-3 hours. The filling will continue to set as it cools.
    2. Chill Thoroughly: Once cool, transfer the pie to the refrigerator to chill for at least 4 hours, or preferably overnight. Chilling not only firms up the filling for a perfect slice but also allows the flavors to meld beautifully.
    3. Slice and Serve: Once chilled, your pie is ready! For clean cuts, use a sharp knife and run it under hot water between slices.
    4. Serving Suggestions: Serve chilled, topped with a dollop of fresh whipped cream. A sprinkle of cinnamon or a drizzle of caramel sauce also adds a lovely finishing touch.

    Congratulations! You’ve made a delicious and beautiful pumpkin pie that’s sure to impress.

    What Are Our Top Tips for the Best Pumpkin Pie?

    Crafting the perfect pumpkin pie doesn’t have to be daunting. With a few smart techniques, you can avoid common baking woes and achieve a stunning dessert every time. These tips will help you bake with confidence, making the journey easy, enjoyable, and reliably delicious.

    How to Avoid a Cracked Top

    A perfectly smooth pumpkin pie top is a satisfying goal for any baker. Cracks typically form when the pie bakes too quickly or cools too fast. Fortunately, this common issue is easy to prevent. Follow these simple steps to achieve a beautiful, unblemished surface:

    • Do Not Overbake: Overbaking is the main culprit for cracks. A pie that bakes too long will dry out and split. We discuss how to tell when your pie is done in the next section.
    • Cool Slowly: After baking, let your pie cool gradually on a wire rack at room temperature. A sudden temperature change can shock the custard, leading to cracks.
    • Avoid Over-mixing: Mix your filling just until the ingredients are combined. Over-mixing incorporates excess air, which can cause the filling to expand and then crack as it cools.
    • Gentle Heat: Baking at a slightly lower temperature for a bit longer allows the custard to set more evenly, which also helps prevent cracks.

    How to Know When Your Pie Is Perfectly Done

    Knowing exactly when to pull your pumpkin pie from the oven is crucial for a creamy, perfectly set filling. An underbaked pie will be runny, while an overbaked one may crack. Use these easy methods to check for doneness:

    • The Jiggle Test: Gently shake the pie dish. The edges of the filling should be set and firm, but the very center (about a 1-inch circle) should still have a slight jiggle, similar to gelatin. The center will continue to set as the pie cools. This is the most reliable method.
    • Visual Cues: Look for a golden-brown crust and a filling that appears opaque and slightly puffed around the edges.
    • Clean Knife Test (Optional): For extra reassurance, insert a thin knife into the filling about halfway between the center and the edge. If it comes out mostly clean, the pie is ready. Avoid testing the very center to prevent leaving a visible mark.

    Once your pie passes the jiggle test, remove it from the oven immediately to prevent overbaking. This final step is key to ensuring a perfectly smooth and creamy texture.

    Using Canned vs. Fresh Pumpkin Puree

    Both canned and fresh pumpkin puree can yield a delicious pie, but each has distinct advantages. Your choice will likely depend on your available time, personal preference, and the flavor profile you want to achieve. Let’s explore the key differences:

    Feature Canned Pumpkin Puree Fresh Pumpkin Puree
    Convenience Extremely convenient. It’s ready to use straight from the can, making it ideal for busy schedules. More time-consuming, as it requires roasting, peeling, and pureeing a fresh pumpkin.
    Consistency Very consistent in texture and moisture, which leads to reliable results. Canned pumpkin puree is processed to have a smooth, uniform texture [2]. Consistency and moisture content can vary depending on the pumpkin variety and how thoroughly it’s drained.
    Flavor Profile Offers the mild, classic pumpkin flavor that most people associate with traditional pumpkin pie. Provides a deeper, richer, and more earthy pumpkin flavor that can be slightly sweeter and more vibrant.
    Texture Smooth and uniform, resulting in a very creamy pie filling. Can be slightly more fibrous if not pureed thoroughly, which can add a pleasant rustic quality.
    Best For Anyone seeking reliable, consistent results, especially when short on time. It’s a beginner-friendly staple. Bakers who want a gourmet touch, have extra time, or enjoy the process of making everything from scratch.

    If you opt for fresh puree, be sure to use a sugar or pie pumpkin, as carving pumpkins are too watery. Roasting the pumpkin until tender makes it easy to puree. Crucially, remember to drain any excess liquid from your fresh puree to prevent a watery filling. Whichever option you choose, you’re on your way to a delicious homemade pumpkin pie.

    What Are Some Popular Recipe Variations?

    Easy Pumpkin Pie with Condensed Milk

    Craving classic pumpkin pie with less fuss? A version made with sweetened condensed milk is the perfect solution. This method simplifies the filling, making it a fantastic choice for beginner-friendly recipes and busy home cooks.

    Sweetened condensed milk adds rich creaminess and sugar in one step. As a result, you’ll need fewer ingredients overall. This makes it a quick and reliable way to get a delicious dessert on the table.

    Here’s why it’s a great variation:

    • Simplified Sweetness: Condensed milk is already sweetened, which cuts down on the amount of added sugar you need.
    • Extra Creaminess: It delivers an incredibly smooth and rich texture, creating a luxurious mouthfeel.
    • Foolproof Method: It’s hard to go wrong with this approach, ensuring a consistently good result.

    To adapt your recipe, simply swap out some of the sugar and regular milk for the condensed milk. This variation offers a great way to make desserts for simple dinner recipes even simpler.

    Classic Old-Fashioned Pumpkin Pie with Milk

    For a more traditional approach, the classic old-fashioned pumpkin pie uses regular or evaporated milk. This method creates a slightly less sweet filling that allows the warm spices to shine, making it a staple among family-friendly meals.

    Using milk—whether whole, 2%, or evaporated—gives the pie a delicate, custardy texture. While different from the condensed milk version, it’s just as satisfying and a perfect example of truly flavorful meals made easy.

    Why choose this classic approach?

    • Balanced Sweetness: You have full control over the sugar levels, letting you adjust the pie to your preference.
    • Spice Forward: The subtle sweetness allows the cinnamon, nutmeg, and ginger to truly pop.
    • Traditional Texture: It creates the beloved, tender custard that many remember from childhood.

    Since this variation uses standard pantry ingredients and follows traditional steps, it’s a wonderful way to enjoy a pie that feels both homemade and familiar.

    Using a Pre-Made (Libby’s) Filling

    When life gets busy, a pre-made pumpkin pie filling like Libby’s Famous Pumpkin Pie Mix is the fastest route to a delicious dessert. This convenient option is perfect for quick meals and last-minute baking, helping to solve mealtime decisions effortlessly.

    Because the mix comes pre-spiced and pre-sweetened, it significantly simplifies the baking process. You can enjoy a homemade-tasting pie with minimal effort, making it an ideal solution for anyone new to baking.

    Consider these benefits for your next baking adventure:

    • Ultimate Time-Saver: With the spices and sugar already measured and mixed, this option drastically cuts down on prep time.
    • Guaranteed Flavor: The mix provides a consistent and delicious flavor profile every single time.
    • Minimal Ingredients: You often only need to add eggs and milk to the mix to complete the filling.

    Simply pour the filling into your prepared pie crust and bake as directed. This variation offers an incredibly approachable home cooking experience, ensuring delicious results even on your busiest days.

    How Should You Store and Serve Pumpkin Pie?

    A delectable slice of pumpkin pie topped with whipped cream, presented on a white plate with a blurred whole pie in the background.
    Professional food photography of a generous slice of classic pumpkin pie, perfectly plated on a simple white ceramic dish, with a dollop of freshly whipped cream on top and a light sprinkle of cinnamon. The slice reveals a creamy, smooth texture. In the soft-focused background, a whole pumpkin pie sits on a wooden serving platter, hinting at more to come. The lighting is warm and inviting, suggesting a cozy dessert moment. Photorealistic, high-quality food magazine photo.

    Make-Ahead and Storage Instructions

    Making your pumpkin pie ahead of time is a smart move that saves time, especially on busy meal prep days. You can bake it up to two days before serving, and it will stay perfectly fresh.

    After baking, always let your pie cool completely on a wire rack. This crucial step helps the filling set properly and prevents condensation from forming during storage.

    Because pumpkin pie is a dairy-based dessert, it must be refrigerated once it’s completely cool. Store it in the fridge by covering it loosely with plastic wrap, aluminum foil, or a pie dome to keep it from drying out.

    Pumpkin pie will stay delicious in the refrigerator for 3-4 days [3], so be sure to enjoy it within this timeframe.

    If you want to plan even further ahead, freezing is an excellent solution.

    • Bake your easy pumpkin pie as directed.
    • Let it cool completely on a wire rack (about 2-3 hours).
    • Wrap the cooled pie very tightly with a layer of plastic wrap.
    • Add a second layer of heavy-duty aluminum foil for extra protection.
    • Label and freeze the pie for up to 1 month.

    To serve your frozen pie, thaw it safely overnight in the refrigerator. After it has thawed, let it stand at room temperature for 30-60 minutes before serving to bring out its best flavor and texture.

    Our Favorite Serving Suggestions

    Serving your homemade pumpkin pie is the best part! Here are a few simple ideas to make each slice extra special.

    The classic choice is a dollop of fresh whipped cream, which adds both richness and lightness. For the best taste, make it yourself and sprinkle a little cinnamon or nutmeg on top to boost the pie’s spice flavor.

    For a wonderful contrast, consider a scoop of vanilla ice cream, which pairs beautifully with the spiced pie. A drizzle of warm caramel sauce is also fantastic, and chocolate sauce works surprisingly well too.

    Feeling a bit fancy?

    • Candied Pecans: Sprinkle some crunchy candied pecans over each slice.
    • Toasted Coconut: A light sprinkle of toasted coconut flakes adds a unique twist.
    • Maple Syrup: A tiny drizzle of pure maple syrup enhances the fall flavors.
    • Coffee or Tea: Serve your pie with a fresh cup of coffee or a warm herbal tea.
    • Fruit: A side of fresh berries or sliced apples offers a refreshing counterpoint.

    Remember, pumpkin pie can be served chilled or slightly warm. To serve it warm, simply let it sit at room temperature for about 30 minutes, which brings out its full aromatic profile. Enjoy every flavorful bite

    Frequently Asked Questions

    How do you make an easy pumpkin pie?

    Making a delicious pumpkin pie is simpler than you might think. At Recipesmondial, we focus on clear, step-by-step guidance to help you create desserts with confidence. We designed our foolproof pumpkin pie recipe for home cooks who want to enjoy the process without the stress.

    Here’s how we make it extra easy:

    • Simple Ingredients: Our recipe uses readily available ingredients, so you won’t need to visit a specialty store.
    • Store-Bought Crust Option: Using a pre-made pie crust saves significant time and effort, making it a fantastic shortcut for busy families.
    • Foolproof Filling: Our recipe helps prevent common issues like a cracked filling. We guide you through each step to ensure it turns out creamy and rich.
    • Clear Baking Instructions: We provide exact temperatures and times, plus tips on how to tell when your pie is perfectly done. This helps build confidence for beginner cooks.
    • Minimal Steps: We break the process down into simple, manageable actions so you can move from preparation to baking smoothly.

    This approach ensures you get a flavorful, impressive pumpkin pie every time. It’s one of our favorite beginner-friendly recipes.

    Can you make pumpkin pie from a fresh pumpkin?

    Absolutely! Making pumpkin pie from a fresh pumpkin offers a wonderful, subtle earthiness. However, be prepared for more prep work compared to using canned pumpkin puree.

    Here’s a quick overview of the process:

    • Choose the Right Pumpkin: Select small “sugar” or “pie” pumpkins, which have sweeter, less stringy flesh. Avoid using large carving pumpkins.
    • Roast the Pumpkin: Cut the pumpkin in half and scoop out the seeds. Place the halves cut-side down on a baking sheet and roast at 375°F (190°C) for 45-60 minutes, or until very tender.
    • Scoop and Puree: Once the pumpkin is cool enough to handle, scoop out the soft flesh. Puree it in a food processor until completely smooth, adding a splash of water if it seems too thick.
    • Drain Excess Water: Fresh pumpkin puree contains more water than canned. To prevent a watery pie, place the puree in a fine-mesh sieve lined with cheesecloth and let it drain for a few hours.

    While using fresh pumpkin is a rewarding culinary experience, we generally recommend canned pumpkin puree for its convenience and consistent texture.

    What does condensed milk do for pumpkin pie?

    Sweetened condensed milk is a fantastic ingredient for pumpkin pie. It plays several key roles in creating a delicious, creamy filling with a velvety texture.

    Here’s what it brings to your pie:

    • Sweetness: Condensed milk is already sweetened, so you often need less added sugar. It provides a balanced, rich sweetness.
    • Creaminess: Its incredibly thick consistency gives the pie filling a luxurious, smooth texture for a truly indulgent dessert.
    • Richness: It adds a distinct depth of flavor that perfectly complements the warm spices in pumpkin pie.
    • Simplicity: Using condensed milk can simplify your ingredient list, as it often replaces both evaporated milk and a large portion of the sugar.

    Historically, condensed milk became a popular dessert ingredient for its long shelf life and consistent quality [4]. Because of this, many easy pumpkin pie recipes feature it as a shortcut to a velvety smooth and incredibly tasty pie.


    Sources

    1. https://food.unl.edu/food-safety-temperatures-dairy-and-eggs
    2. https://www.libbyspumpkin.com/faq
    3. https://food.unl.edu/food-safety-pumpkins
    4. https://www.healthline.com/nutrition/what-is-condensed-milk

  • 50+ Best Birthday Cakes: Easy & Unique Ideas for Any Celebration

    50+ Best Birthday Cakes: Easy & Unique Ideas for Any Celebration

    Birthday cakes are celebratory cakes served at birthday parties to honor the person celebrating. They come in countless flavors, shapes, and sizes, from simple sheet cakes to elaborate multi-tiered creations, and are often personalized with frosting, candles, and decorations to reflect the individual’s tastes and personality.

    There’s something magical about birthdays, and at the heart of every celebration is the cake. But if the thought of baking a show-stopping dessert feels overwhelming, you’re not alone. Complex recipes and the pressure to create something special can be stressful. Here at Recipesmondial, we believe preparing a delicious and memorable cake should be a joyous experience. We’re your friendly cooking companion, ready to help you turn simple ingredients into a delightful masterpiece for any special day.

    Our comprehensive guide to “50+ Best Birthday Cakes” is packed with easy and unique ideas designed for every home cook, from beginners building confidence to those seeking fresh inspiration. Whether you’re planning a fun celebration for kids, an elegant gathering for adults, or a heartfelt treat for a loved one, you’ll find an approachable recipe here. We provide step-by-step guidance for classic favorites, creative twists, and even no-bake wonders, helping you create a flavorful cake without the stress. Get ready to bake a truly special birthday treat that will bring smiles all around.

    What Makes a Birthday Cake Special?

    A beautifully decorated birthday cake with lit candles, serving as a centerpiece on a warm, inviting table, ready for celebration.
    A professional food photography shot of a perfectly presented, festive birthday cake, glowing with lit candles, positioned as the centerpiece on a beautifully set table in a warm, inviting home. The background is softly blurred, hinting at a joyful celebration with family or friends. The cake itself is elegantly decorated but still looks homemade and approachable, perhaps a classic white cake with colorful sprinkles or simple elegant piping. The lighting is soft and warm, emphasizing the cozy, celebratory atmosphere and the cake’s appeal. photorealistic, high-quality food magazine photo.

    A birthday cake is more than just a sweet treat; it’s the centerpiece of the celebration. This special dessert brings joy, excitement, and delicious flavors to any birthday party, holding a unique place in our hearts and traditions.

    While baking a birthday cake may seem like a big task, the right guidance can turn it into an enjoyable process. Recipesmondial is here to help you create memorable birthday cakes with ease. We believe everyone can bake something wonderful, especially with our beginner-friendly recipes.

    So, what truly makes a birthday cake special? Let’s explore the magic behind this beloved tradition:

    • A Symbol of Love and Celebration: A birthday cake is a visible sign of affection, representing good wishes as it marks another year of life and joy.
    • Personal Touch: Customizing a cake with the person’s favorite flavors or hobbies adds a personal touch that makes it truly meaningful.
    • The Centerpiece of Memories: From birthday photos to the tradition of blowing out candles, the cake is at the center of lasting memories that are cherished for years.
    • A Shared Experience: The simple act of cutting and sharing the cake brings everyone together, fostering a sense of community and shared happiness.
    • Delicious Flavors and Textures: Beyond its appearance, a great cake delights the senses with a delicious blend of flavors and textures, from rich chocolate to light vanilla.
    • Visual Appeal and Creativity: Creative decorations, bright colors, and beautiful frosting add to the cake’s magic, showcasing the care and creativity behind it.

    Ultimately, a birthday cake is special because it combines tradition with personal expression, helping us celebrate life’s milestones in a sweet and memorable way. If you feel overwhelmed by complex recipes, Recipesmondial offers the step-by-step cooking guidance you need. We make it simple to bake delightful cakes and other flavorful meals made easy. Get ready to cook with confidence and create delicious moments!

    Our Favorite Easy Birthday Cake Recipes for Beginners

    A spread of three colorful, easy-to-make birthday cakes, including vanilla, chocolate, and funfetti, styled on a bright kitchen counter.
    A beautifully styled flat lay or overhead shot displaying 3-4 different, vibrantly decorated, yet easy-to-make birthday cakes for beginners. Each cake should have a distinct, appealing look without being overly complicated. For example, one could be a classic vanilla cake with simple sprinkles, another a chocolate cake with a rustic swirl frosting, and a third a vibrant funfetti cake. The setting is a clean, bright home kitchen countertop, with soft, natural lighting. Focus on texture, color, and inviting presentation that highlights their simplicity and deliciousness. professional food photography, photorealistic, high-quality food magazine photo.

    Planning a birthday celebration is exciting, and making a homemade cake adds an extra special touch. However, if you’re new to baking, you might feel unsure where to start. Many home cooks struggle with complex recipes, but baking a delicious birthday cake doesn’t have to be stressful. At Recipesmondial, we’re here to help you cook confidently. We believe everyone can create a stunning and tasty cake with our easy, step-by-step guidance, letting you enjoy the process.

    Our favorite easy birthday cake recipes for beginners focus on simplicity and use everyday ingredients. These approachable ideas promise delicious results with minimal fuss. You will discover how simple items can transform into a memorable treat. Get ready to bake an unforgettable cake!

    Classic Chocolate Birthday Cake

    A classic chocolate birthday cake is always a winner and a comforting choice for any celebration. This recipe is perfect for beginners because the steps are straightforward, so you won’t be overwhelmed by complex instructions. Plus, chocolate cakes are very forgiving, which means they’re hard to mess up.

    Here’s why it’s a fantastic choice:

    • Simple Ingredients: You likely have most items in your pantry, like flour, sugar, cocoa powder, eggs, and milk.
    • Reliable Results: This cake consistently turns out moist and rich, delivering a dependably delicious dessert.
    • Versatile Frosting: Pair it with a simple buttercream or try a quick chocolate ganache. Both are beginner-friendly options.

    Tips for Success: For the best flavor, use good quality cocoa powder. Measure your ingredients precisely to ensure a perfect texture. Be careful not to overmix the batter, as this can lead to a dry cake. This family-friendly dessert is one everyone will love.

    Simple Vanilla Funfetti Cake

    Who doesn’t love sprinkles? A simple vanilla funfetti cake brings instant joy and is incredibly visually appealing, yet it only requires basic baking skills. It’s one of our favorite beginner recipes because the bright colors make it a festive treat for kids and adults alike.

    What makes it so easy?

    • Basic Vanilla Base: The foundation is a straightforward vanilla cake recipe, an essential skill for any home cook.
    • Instant Celebration: Sprinkles do all the decorating work for you. Just fold them into the batter and add more on top!
    • Quick Assembly: This cake comes together fast with a standard and uncomplicated baking process.

    Tips for Success: Using a good quality vanilla extract makes a big difference in flavor. When adding the sprinkles, fold them in gently to prevent their colors from bleeding into the batter. A simple vanilla buttercream is ideal for this cake, as it highlights the funfetti magic. This approachable recipe is a fantastic way to build your confidence in the kitchen.

    No-Bake Cheesecake Birthday Cake

    Imagine a delicious birthday cake that doesn’t require an oven—our no-bake cheesecake makes it possible! This recipe is ideal if you’re new to baking or simply want a perfect dessert for a hot day. It’s a fantastic, stress-free solution when you’re short on time or oven space.

    Why this is a go-to easy recipe:

    • No Baking Needed: You simply mix, pour, and chill, which eliminates any oven-related worries.
    • Minimal Equipment: You mainly need a mixing bowl and a springform pan to create this impressive dessert.
    • Make Ahead: This cake needs time to set in the fridge, so you can easily prepare it a day in advance.

    Tips for Success: For a perfectly smooth filling, ensure your cream cheese is at room temperature before you begin. The cheesecake needs ample time to chill, so allow at least 4-6 hours in the fridge, though overnight is even better. This versatile dessert can be topped with fresh berries, chocolate sauce, or your favorite topping.

    Colorful Rainbow Layer Cake

    A rainbow layer cake looks incredibly impressive, but it’s surprisingly simple to make. This recipe starts with one basic cake batter, which you divide and color to create the vibrant layers. Stacking them is easy, and the final result is guaranteed to bring huge smiles.

    Here’s why it’s a showstopper that’s also easy:

    • Basic Batter: It all starts with one simple vanilla cake batter, a foundational recipe perfect for beginners.
    • Food Coloring Does the Work: Gel food coloring creates bright, distinct layers without needing any special techniques.
    • Easy Stacking: Because each layer bakes thin, they are easy to handle and stack. A quick crumb coat of frosting helps hold everything together perfectly.

    Tips for Success: For the most vibrant results, use gel food coloring, as liquid versions can thin the batter. Chilling your cake layers briefly before frosting will make them firmer and much easier to stack. A simple cream cheese frosting complements the rainbow colors perfectly. This recipe truly transforms simple ingredients into a visually appealing and delicious dessert.

    How Can I Find Birthday Cake Inspiration?

    Unique Birthday Cakes for Adults

    Finding birthday cake inspiration for an adult is a fun challenge. You want a cake that feels special but is still easy to make at home. To get started, think about the person’s favorite flavors or hobbies.

    • Coffee or Tea Lovers: A rich coffee-flavored cake with espresso buttercream is always a hit. Or try a delicate Earl Grey tea-infused sponge for a sophisticated touch.
    • Favorite Spirits: Incorporate a splash of their favorite liquor. Think a whiskey caramel cake or a rum-soaked pineapple upside-down cake. Just be mindful of the amount!
    • Hobby-Themed: Is the person a gardener? Decorate their cake with edible flowers. For a bookworm, create a simple cake that looks like a stack of books. Personal touches like these are easy to add, even with beginner-friendly recipes.
    • Unexpected Flavor Pairings: Step outside the box. Consider a chocolate chili cake for a kick, or a lemon rosemary cake for a fresh, herbal note.
    • Miniature Cakes: Instead of one large cake, bake individual mini cakes or cupcakes. They are perfect for portion control and easy to decorate with different designs.

    Fun Birthday Cakes for Boys & Girls

    A child’s birthday cake should be exciting and fun! The secret is to start with a simple cake base and add magical decorations. With a little creativity, even a basic recipe can become something unforgettable.

    • Character Cakes: Use their favorite character as inspiration. You don’t need fancy molds—a simple round or sheet cake can be decorated with colored frosting to create beloved figures.
    • Rainbow Funfetti: Layers of brightly colored cake, topped with sprinkles, are always a winner. It’s a joyful, easy recipe that looks impressive without complex steps.
    • Animal Kingdom: A simple round cake can become a friendly lion, a cute bear, or a funny monster with strategically placed frosting, candies, and cookies for features.
    • Sports Theme: For the sports enthusiast, decorate a sheet cake to look like a football field, basketball court, or soccer ball using green, white, and brown frostings.
    • Treasure Chest Cake: Bake a rectangular cake, cut it in half, and stack it to form a chest. Decorate with chocolate coins and edible “jewels” for a pirate adventure.

    Elegant Birthday Cakes for Ladies

    An elegant cake doesn’t have to be complicated. The key is to focus on delicate details, beautiful colors, and a polished finish. These simple techniques can help you create a stunning dessert without feeling overwhelmed.

    • Floral Finishes: Use fresh, edible flowers or simple piped buttercream flowers to add a touch of grace. Lavender sprigs or small roses can instantly elevate any cake.
    • Ombre Delights: Create a stunning visual effect by frosting the cake in varying shades of one color, from light to dark. This simple technique gives any cake a sophisticated look.
    • Metallic Accents: A touch of edible gold or silver dust can make a plain cake look luxurious. Use it sparingly on edges, drips, or simple geometric patterns.
    • Drip Cakes: A controlled ganache or glaze drip down the sides of a neatly frosted cake adds a professional and chic touch. Pair it with fresh berries or macarons on top.
    • Naked or Semi-Naked Cakes: These cakes have thin layers of frosting, allowing the cake layers to peek through. They offer a rustic yet refined elegance, perfect for showcasing your baking.

    Beautiful Birthday Cake Images to Spark Ideas

    Sometimes, a picture is the best inspiration for your next baking adventure. Visuals can spark creative ideas for flavors and decorations. Here are a few great places to look:

    • Recipesmondial’s Gallery: Explore our collection of cake recipes. We provide step-by-step guidance with clear photos to help you bake with confidence.
    • Pinterest: This visual search engine is a treasure trove of birthday cake images. Create a board to save your favorite ideas, from simple designs to more elaborate ones. Look for “easy birthday cake ideas” or “beginner-friendly cake decorating.”
    • Instagram: Follow bakers and food bloggers (like Recipesmondial!) for daily doses of inspiration. Search hashtags like #birthdaycakeideas, #simplecakes, or #homebaking.
    • Cookbooks and Magazines: Don’t forget classic sources! Cookbooks and magazines provide stunning photography and often feature approachable home baking techniques.
    • Local Bakeries: Peek inside a local bakery for inspiration. Seeing professional cakes can spark ideas for colors, textures, and themes you can adapt for your own baking [1].

    How Do You Decorate a Birthday Cake at Home?

    A woman in a home kitchen happily decorating a birthday cake with frosting and sprinkles, demonstrating an easy technique.
    A professional food photography shot capturing a friendly, smiling home cook (a woman in her 30s-40s) confidently decorating a birthday cake in a warm, well-lit home kitchen. She is piping simple frosting swirls or adding colorful sprinkles to a partially frosted cake. Her hands are in action, demonstrating an easy technique. The kitchen is clean and inviting, with natural light emphasizing the freshness and homemade aspect. The focus is on the accessibility and enjoyment of home cake decorating. professional food photography, photorealistic, high-quality food magazine photo.

    Simple Frosting Techniques for a Professional Look

    Decorating a birthday cake at home can feel intimidating, but you don’t need fancy tools or years of experience to create a beautiful dessert. With a few simple tricks, you can frost a cake that looks polished and professional, all while building your confidence in the kitchen.

    Mastering the Crumb Coat

    The crumb coat is your secret weapon for a perfectly smooth finish. This initial thin layer of frosting traps any loose crumbs, creating a clean canvas for your final, decorative layer.

    1. Apply a Thin Layer: Using an offset spatula or butter knife, spread a very thin layer of frosting over the entire cake, covering the top and sides.
    2. Chill Time: Place the cake in the refrigerator for at least 15-20 minutes. This allows the crumb coat to set firmly.
    3. Second Layer: Now, apply a thicker, more generous layer of frosting. Because the crumbs are sealed, this final coat will be smooth and pristine.

    Achieving a Smooth Finish

    A perfectly smooth surface gives any cake a polished look, and it’s easier to achieve than you might think.

    • Warm Your Spatula: Dip your offset spatula in hot water for a few seconds, then wipe it dry. The gentle heat from the warm metal will help you glide over the frosting for a flawless finish.
    • Use a Bench Scraper: For perfectly straight sides, hold a clean bench scraper against the side of the cake at a 45-degree angle. As you slowly turn the cake, the scraper will smooth the frosting.
    • Top Smoothness: To smooth the top, pull your spatula from the edge toward the center in one clean motion. Lift the spatula and repeat around the entire edge.

    Easy Textured Finishes

    If you prefer a more rustic look, textured finishes are charming and incredibly easy to create.

    • Swirls with a Spoon: Use the back of a spoon to create beautiful, gentle swirls across the top and sides of the cake.
    • Ridge Design: Gently drag the tines of a fork horizontally around the sides of the cake to create a pretty, ridged pattern.
    • Stippling Effect: Press the tip of a small spatula or the back of a spoon into the frosting and pull it away quickly. Repeat this all over to create a soft, textured look.

    Easy Topping Ideas (No Special Skills Needed!)

    Once your cake is frosted, it’s time for the fun part—toppings! These ideas require no special skills and will instantly elevate your homemade birthday cake.

    • Sprinkles Galore: A timeless choice for a reason. Colorful jimmies, nonpareils, or sparkling sugar add instant festivity.
    • Fresh Fruit: Berries, sliced kiwi, or mandarin orange segments add a vibrant look and a fresh taste. Arrange them artfully on top for a beautiful finish.
    • Chocolate Shavings or Chips: Simply grate a chocolate bar over your cake with a vegetable peeler or sprinkle on mini chocolate chips for a simple, delicious touch.
    • Candies and Cookies: Get creative with crushed Oreos, mini chocolate bars, M&M’s, or gumdrops. These are always a hit, especially with kids.
    • Coconut Flakes: Whether toasted or plain, coconut flakes add great texture and a hint of tropical flavor.
    • Chopped Nuts: Toasted almonds, pecans, or walnuts provide a satisfying crunch and a sophisticated look.
    • Edible Flowers: For an elegant touch, use pansies, violets, or rose petals. Just be sure they are food-safe and grown without pesticides.

    These simple additions can transform your cake from homemade to showstopper, helping you create a delicious, visually appealing dessert without the stress.

    Tips for Writing a Birthday Message

    Writing on a cake can be nerve-wracking, but a little practice is all it takes to add a clear, heartfelt note to your creation.

    • Practice First: Before piping on the cake, practice your message on a piece of parchment paper using the same frosting and tip. This will help you build confidence and steady your hand.
    • Keep it Short and Sweet: Phrases like “Happy Birthday” or “Happy B-Day [Name]” are classics for a reason. Longer messages are more difficult to space correctly and can be hard to read.
    • Use the Right Frosting Consistency: Your frosting should be firm enough to hold its shape but soft enough to pipe smoothly. If it’s too thin, the letters will spread; if it’s too thick, the lines will break.
    • Choose a Small Round Tip: A piping bag fitted with a small, round tip (like a Wilton #3 or #4) offers the best control for lettering.
    • Steady Your Hand: To prevent shaky lines, rest your piping hand on your other hand for support. Guide the motion with your whole arm, not just your wrist.
    • Dot for Placement: Lightly mark dots on the frosting with a toothpick to plan the start and end of each letter. This is a great trick for improving spacing and alignment.
    • Consider Alternatives: If you’re not comfortable piping, try one of these easy ideas:
      • Chocolate Letters: Melt chocolate, pipe letters onto parchment paper, and chill them until firm. Then, you can easily lift and place them on the cake.
      • Cookie Cutters: Lightly press letter-shaped cookie cutters into the frosting to create an impression, then fill the outline with sprinkles.
      • Store-Bought Decorations: Many grocery and craft stores sell pre-made edible letters and sugar plaques.

    Remember, it’s the effort and thought that count most. A homemade cake decorated with care is a wonderful gift, no matter how the writing turns out.

    Frequently Asked Questions

    What are some unique birthday cakes for adults?

    Adult birthdays are the perfect excuse to explore sophisticated flavors. Best of all, you can easily create a memorable cake at home. Think beyond simple chocolate or vanilla with these approachable ideas for any home cook.

    • Coffee & Caramel Cake: A rich, coffee-flavored sponge pairs wonderfully with luscious caramel frosting for a delightful treat coffee lovers will adore.
    • Lemon Raspberry Delight: Bright lemon zest in the cake, balanced by a fresh raspberry filling, offers a light and vibrant taste.
    • Spiced Apple Crumble Cake: Imagine a warm, spiced cake with a buttery apple crumble topping. Cozy and incredible, it’s a fantastic choice for fall birthdays.
    • Dark Chocolate Stout Cake: Stout beer adds a surprising depth and moisture to a rich chocolate cake, creating a truly indulgent flavor. (Don’t worry, the alcohol bakes out!)
    • Pistachio Rosewater Cake: For something truly unique, this cake offers a delicate, elegant flavor profile with ground pistachios and a hint of rosewater.

    Remember, presentation matters, too. Simple decorations like fresh berries, a sprinkle of cocoa powder, or a light glaze can easily elevate your cake. To help you build confidence in your baking skills, Recipesmondial offers many beginner-friendly recipes.

    What are good birthday cakes for boys?

    When baking for boys, the keys are fun and flavor! Classic, bold flavors are often big hits, and the decorating can be simple yet impactful. Here are a few family-friendly ideas.

    • Classic Chocolate Fudge Cake: You can’t go wrong with a classic. A rich, moist chocolate cake with creamy fudge frosting is a timeless choice.
    • Vanilla Funfetti Extravaganza: A bright vanilla cake loaded with colorful sprinkles is festive, easy to make, and brings instant joy.
    • Cookies and Cream Cake: Crushed chocolate cookies mixed into vanilla cake and frosting create a guaranteed crowd-pleaser.
    • Red Velvet with Cream Cheese Frosting: With its vibrant color and tangy cream cheese frosting, this fun and delicious cake always feels special.
    • S’mores Cake: Bring campfire fun indoors with layers of graham cracker crust, chocolate cake, and toasted marshmallow frosting.

    Customize these cakes with simple decorations like favorite candies, toy figures, or a piped message. For step-by-step guidance, Recipesmondial offers recipes for all skill levels, helping you create delicious desserts without stress.

    How can I find beautiful birthday cake images for inspiration?

    Finding inspiration for your next birthday cake is an exciting part of the process. There are many fantastic places to look, but visual platforms are especially helpful for discovering new decorating ideas.

    • Pinterest: This visual platform is a treasure trove of ideas. Search terms like “birthday cake ideas” or “easy cake decorating,” then create boards to save your favorite looks [2].
    • Instagram: Follow popular baking accounts and search hashtags like #birthdaycakeinspiration or #cakedecorating to find endless creative designs.
    • Food Blogs and Websites: Many food blogs and recipe websites, like Recipesmondial, feature galleries of stunning cakes that include approachable home cooking tips.
    • Google Images: A simple search for “beautiful birthday cake designs” will yield thousands of results you can filter by color or style.
    • Cookbooks and Magazines: Don’t forget cookbooks and magazines, which often showcase professionally styled cakes that can spark your own creative ideas.

    When you find an image you love, focus on the elements you can replicate. You don’t need professional skills to make a beautiful cake! To make baking enjoyable and boost your confidence, Recipesmondial offers plenty of beginner-friendly recipes.

    What makes an elegant birthday cake for ladies?

    An elegant birthday cake combines refined flavors with sophisticated presentation for a tasteful, graceful dessert. Fortunately, you can achieve this look with approachable techniques.

    • Subtle Color Palettes: Think soft pastels, muted tones, or classic whites and creams. Gold or silver accents can add a touch of luxury.
    • Delicate Flavors: Opt for flavors like vanilla bean, lavender, Earl Grey tea, or light fruit essences. These are often more sophisticated than bold, intense flavors.
    • Minimalist Decoration: Less is often more. A smooth, flawless frosting, simple piping, or clean lines can look more elegant than excessive embellishments.
    • Fresh Floral Adornments: Edible flowers or food-safe fresh blooms instantly elevate a cake. Ensure flowers are organic and non-toxic.
    • Fresh Fruit or Berries: Artfully arranged fresh berries or thinly sliced fruit add natural beauty and a burst of fresh flavor.
    • Simple Glazes or Drips: A perfectly executed ganache drip or a glossy glaze adds a chic touch and is often easier than intricate frosting work.

    Ultimately, an elegant cake focuses on quality ingredients and a polished finish. With clear, step-by-step cooking guidance from Recipesmondial, you can bake confidently and enjoy beautiful, delicious results.


    Sources

    1. https://www.bakemag.com/articles/18797-five-best-places-to-find-cake-inspiration
    2. https://newsroom.pinterest.com/
  • The Ultimate Fudgy Brownie Recipe (Easy & From Scratch)

    The Ultimate Fudgy Brownie Recipe (Easy & From Scratch)

    The best brownie recipe creates rich, fudgy chocolate squares with a signature crackly top. It involves melting butter and chocolate together, whisking in sugar and eggs until glossy, and gently folding in flour and cocoa powder. The key is to avoid over-mixing the batter to ensure a dense, chewy texture rather than a cake-like one.

    We all dream of sinking our teeth into perfectly fudgy, deeply chocolatey homemade brownies with an irresistible crackly top. However, finding an easy recipe that consistently delivers can be a challenge, often leading to complex instructions or disappointing, cakey results. Whether you’re looking for a simple dinner recipe or a perfect dessert, you want pure joy without the fuss.

    At Recipesmondial, we believe making classic treats should always be enjoyable. That’s why we perfected this brownie recipe for home cooks, ensuring a joyful, stress-free experience. Our comprehensive, step-by-step guidance walks you through every detail. With simple ingredients and clear instructions, you are guaranteed to achieve incredible, fudgy brownies every time.

    You don’t need professional skills to create a show-stopping dessert. Our approachable home cooking philosophy shines through in this easy brownie recipe, which promises rich, decadent results that will impress everyone. We’re here to help you enjoy stress-free baking by transforming basic pantry staples into a stunning dessert. Ready to discover your new go-to recipe for foolproof, homemade brownies?

    Why Is This the Best Brownie Recipe for Beginners?

    Welcome to the world of baking! If you’re ready for the perfect start, this is the best brownie recipe for beginners. We designed this easy brownie recipe to make your first time baking simple, successful, and incredibly delicious.

    At Recipesmondial, our goal is to help you enjoy cooking without stress. This fudgy brownie recipe removes the guesswork, so you won’t feel overwhelmed. Instead, you’ll find clear, step-by-step guidance that builds your confidence in the kitchen.

    Here’s why this homemade brownies recipe stands out as the ideal choice for new bakers:

    • Simple Ingredients: You’ll only need everyday kitchen staples. No obscure items are required to make these rich chocolate brownies.
    • Straightforward Steps: Each instruction is broken down into clear, simple actions. We avoid technical jargon, making this one of our top beginner-friendly recipes.
    • Minimal Equipment: You don’t need fancy gadgets. Basic bowls and a whisk are enough to create amazing brownies from scratch.
    • Guaranteed Fudgy Results: Our method ensures consistently moist, intensely chocolatey fudgy brownies every single time.
    • Confidence Boosting: Successfully baking this perfect chocolate brownie recipe brings a real sense of achievement and is an ideal first step into approachable home cooking.
    • Quick & Reliable: This recipe is designed to be fast. You can whip up these delicious brownies quickly, making it a reliable solution for any sweet craving.

    This recipe delivers on our promise of stress-free baking. Get ready to make incredible brownies and impress everyone—including yourself!

    What Ingredients Do You Need for Homemade Brownies?

    You don’t need a trip to a specialty store to craft delicious, homemade brownies. In fact, this easy brownie recipe uses simple pantry staples you likely already have. Follow along as we turn those everyday items into the most fudgy brownies you’ve ever tasted.

    Here’s what you’ll need for these incredible chocolate brownies from scratch:

    • Unsalted Butter (1 cup / 226g): Essential for richness and a fudgy texture. Using unsalted butter lets you control the salt level perfectly. If you only have salted butter, just reduce the added salt by half.
    • Good Quality Chocolate (4 ounces / 113g): A bar of unsweetened or bittersweet chocolate provides a deep, complex flavor. Avoid using chocolate chips, as their added stabilizers prevent them from melting smoothly.
    • Granulated Sugar (1½ cups / 300g): This provides sweetness and helps create the wonderful shiny, crackly top on your homemade brownies.
    • Light Brown Sugar, packed (½ cup / 100g): Adds essential moisture and chewiness, making this the ultimate fudgy brownie recipe.
    • Large Eggs (4): Eggs act as a binder and give the brownies structure. They are also crucial for achieving a rich, fudgy consistency.
    • Vanilla Extract (1 tablespoon): Don’t skip this ingredient! Vanilla enhances the chocolate flavor, making your brownies taste even more indulgent.
    • All-Purpose Flour (1 cup / 120g): Provides just enough structure to hold the brownies together without making them cakey. Remember, we want fudgy, not cakey!
    • Unsweetened Cocoa Powder (¼ cup / 25g): This deepens the overall chocolate flavor. See our note below on why we use both cocoa and melted chocolate.
    • Salt (½ teaspoon): A little salt is a key flavor enhancer, balancing the sweetness and bringing out the rich chocolate notes.

    A Note on Cocoa Powder vs. Chocolate

    You might wonder why this best brownie recipe uses both melted chocolate and cocoa powder. While both add deep chocolate flavor, they play different roles.

    • Melted Chocolate: This provides the richness, fat, and smooth, luxurious texture that gives brownies their signature fudginess. Higher quality chocolate will always yield better results.
    • Cocoa Powder: This provides an intense, concentrated chocolate flavor without adding fat. It also absorbs a little moisture, which helps create a denser, more fudgy brownie texture and a beautiful dark color.

    By combining both, you get the ideal result: intense chocolate flavor from the cocoa and incredible fudginess from the melted chocolate. This powerful pairing creates truly spectacular chocolate brownies that are both rich and deeply flavorful. Achieving this balance is a key secret in many easy recipes for baked goods.

    For more insights into different types of cocoa powder and their uses in baking, you can explore resources like King Arthur Baking Company [1].

    How to make brownies step by step

    A home cook's hands stirring rich, glossy chocolate brownie batter in a ceramic mixing bowl with a rubber spatula.
    Professional food photography, photorealistic, high-quality food magazine photo. A close-up shot capturing a home cook’s hands, specifically a woman with a friendly demeanor, gently stirring a rich, dark, and glossy chocolate brownie batter in a large, pristine ceramic mixing bowl using a rubber spatula. The batter should look thick, smooth, and genuinely fudgy. The background features a softly blurred, warm kitchen setting, with a clean counter and a hint of natural light filtering in. The focus is on the inviting texture of the batter and the hands-on process, conveying ease and enjoyment in baking. Emphasize the deep chocolate color and luxurious consistency of the batter.

    Ready to bake the most amazing, fudgy brownies from scratch? This simple, step-by-step recipe is incredibly rewarding and perfect for home cooks of all skill levels. Follow along to go from mixing ingredients to enjoying a delicious homemade treat in no time. Get ready to build your confidence in the kitchen!

    Step 1: Prep Your Pan and Ingredients

    First things first, let’s get organized. This quick prep work ensures a smooth baking process and guarantees your fudgy brownies come out perfectly.

    • Preheat your oven: Set your oven to 350°F (175°C) so it’s fully heated when your batter is ready.
    • Prepare your baking pan: Lightly grease an 8×8 inch (20×20 cm) pan and line it with parchment paper, leaving an overhang on two sides. These “handles” make it easy to lift the brownies out for cutting.
    • Gather your ingredients: Lay out all your measured ingredients. This practice, known as “mise en place,” prevents last-minute searching and makes the baking process stress-free.

    Step 2: Melt the Butter and Chocolate

    This step is key for a signature fudgy texture, creating a rich chocolate base for the batter.

    1. Combine butter and chocolate: In a medium, heatproof bowl, combine the unsalted butter and unsweetened chocolate.
    2. Melt gently: You have two easy options for melting:
      • Microwave method: Heat the mixture in 30-second intervals, stirring well after each one to prevent scorching. Continue until it is smooth and fully melted.
      • Double boiler method: Place the bowl over a saucepan of simmering water, ensuring the bowl does not touch the water. Stir occasionally until the mixture is smooth.
    3. Cool slightly: Once melted, remove the mixture from the heat and let it cool for about 5 minutes. This important pause prevents the eggs from scrambling in the next step.

    Step 3: Whisk in Sugars and Eggs

    Now it’s time to add sweetness and structure. This step builds flavor and helps create the signature shiny, crackly top on your brownies.

    1. Add sugars: Whisk the granulated and brown sugars into the slightly cooled chocolate mixture until they are well combined.
    2. Incorporate eggs and vanilla: Add the eggs one at a time, whisking thoroughly after each addition until the batter becomes lighter in color and slightly thick. Then, stir in the vanilla extract.

    Step 4: Fold in Dry Ingredients

    This is where the brownie batter comes together. The key is to mix gently, as overmixing will result in cakey brownies instead of fudgy ones.

    1. Combine dry ingredients: In a separate small bowl, whisk together the all-purpose flour, unsweetened cocoa powder, and salt to ensure they are evenly distributed.
    2. Gently fold: Add the dry ingredients to the wet mixture and use a spatula to gently fold them together. Stop mixing as soon as no streaks of flour remain. Overmixing develops gluten, which creates a tougher, more cake-like texture.
    3. Optional additions: If using chocolate chips or nuts, gently fold them in now.

    Step 5: Bake to Perfection

    You’re almost there! Baking with precision is the final step to achieving a perfectly fudgy texture.

    1. Pour and smooth: Pour the batter into your prepared pan and use a spatula to spread it into an even layer.
    2. Bake: Place the pan in your preheated oven and bake for 25-30 minutes. Note that baking times can vary slightly between ovens.
    3. Check for doneness: Insert a toothpick into the center of the pan.
      • For fudgy brownies, the toothpick should come out with moist crumbs attached, not clean.
      • A clean toothpick means the brownies are likely overbaked.
      • The edges should look set while the center has a very slight wobble. This is perfect!
    4. Cool completely: This is a crucial step for the best texture. Let the brownies cool completely in the pan on a wire rack for at least 2 hours. Cooling allows them to set fully, which concentrates their rich flavor and makes them much easier to cut into clean squares.

    And there you have it—perfectly fudgy homemade brownies! Enjoy this delicious dessert or snack. This step-by-step guide makes the baking process stress-free and fun.

    Expert Tips for Perfect Fudgy Brownies

    A perfect square of fudgy brownie with a crinkly top on a white plate, with more brownies cooling in the background.
    Professional food photography, photorealistic, high-quality food magazine photo. A perfectly cut, square fudgy brownie, boasting a beautiful crinkly top, sitting on a simple, elegant white ceramic plate. The brownie is rich, dark brown, dense, and moist, clearly showcasing its irresistible fudgy texture. In the softly blurred background, a few more brownies rest on a wire cooling rack, hinting at a freshly baked batch. Soft, warm natural light illuminates the scene, highlighting the brownie’s appealing texture and inviting sheen. The setting is minimalist and clean, emphasizing the deliciousness and homemade quality of the treat. A few delicate chocolate crumbs are scattered around the brownie on the plate, adding to its authentic charm.

    Welcome to the ultimate guide for making truly fudgy brownies. We’ll share simple yet powerful tricks to help you bake a batch that’s rich, dense, and perfectly moist every time. You don’t need to be a professional baker—just follow these beginner-friendly steps for the best results!

    Mastering Fudgy Brownies From Scratch

    Creating the perfect fudgy brownie is easier than you think. With these practical insights, you can avoid common pitfalls and boost your confidence in the kitchen. If you’ve struggled to achieve that ideal chewy texture, our tips will help transform your baking experience from uncertain to successful.

    • Choose High-Quality Ingredients: Great brownies start with great components. Use good-quality butter, a rich cocoa powder, and high-grade bittersweet or semi-sweet chocolate. Using premium ingredients makes a noticeable difference in the final flavor and texture.
    • Do Not Overmix the Batter: This is a golden rule for fudginess. Once you add the dry ingredients, mix just until no streaks of flour remain. Overmixing develops gluten, which can make your brownies cakey instead of dense. Gentle folding is the key to that perfect, fudgy texture.
    • Slightly Undercook Your Brownies: This is the secret to maximum fudginess. When testing for doneness, a toothpick inserted into the center should come out with moist crumbs attached, not wet batter. A completely clean toothpick means they are likely overbaked. This simple trick ensures a moist and gooey interior—the hallmark of a perfect brownie.
    • Patience in Cooling is Key: It’s tempting to slice into them right away, but letting brownies cool completely is crucial. Warm brownies are too delicate and will crumble. Cooling allows them to set properly, which results in cleaner cuts and a firmer, fudgier texture. Resist the urge to slice them too soon!
    • Use Room Temperature Eggs: Take your eggs out of the fridge about 30 minutes before you begin. Room-temperature eggs blend more evenly into the batter, creating a smoother emulsion with the butter and sugar. This leads to a more uniform and fudgy texture, elevating your final result.
    • Consider Your Baking Pan: A light-colored metal pan is often best because it conducts heat more evenly, while darker pans can cause the edges to overbake. For easy removal and perfect slicing, line your pan with parchment paper, leaving an overhang on the sides to use as handles.
    • Add a Pinch of Salt: Don’t skip the salt! A small amount enhances the chocolate flavor and balances the sweetness, making your brownies taste richer and more complex. It’s a simple addition with a big impact.

    Common Brownie Recipe Variations

    Eggless Brownie Recipe

    Don’t let dietary restrictions stop you from enjoying a batch of fudgy, homemade brownies! Creating an eggless brownie recipe is simpler than you might think. This variation is perfect for beginner bakers or anyone looking for family-friendly treats that cater to different needs.

    In a typical recipe, eggs provide structure and moisture. However, several simple substitutions work wonderfully to achieve the same delightful chewiness and rich flavor using everyday ingredients.

    To make your fudgy brownie recipe eggless:

    • Flax Eggs: For each egg, combine 1 tablespoon of ground flaxseed meal with 3 tablespoons of water. Let the mixture sit for 5-10 minutes until it thickens into a gel. This creates a binder similar to an egg.
    • Applesauce: Use ¼ cup of unsweetened applesauce per egg. This adds moisture and a slight sweetness, helping to keep your brownies tender.
    • Mashed Banana: Substitute ¼ cup of very ripe mashed banana for each egg. Be aware that this will add a subtle banana flavor to your brownies.

    Simply swap the eggs in your recipe for one of these alternatives and follow all other steps as written. You’ll be amazed at the delicious results!

    Brownie Recipe with Nuts

    Adding nuts to homemade brownies is a classic choice for a reason. They provide a satisfying crunch and a layer of nutty flavor that perfectly complements the rich chocolate. This simple variation adds wonderful texture without complicating the recipe.

    To create a delicious brownie recipe with nuts:

    • Choose Your Nuts: Walnuts and pecans are popular choices, but feel free to experiment with almonds or a mix of your favorite nuts.
    • Toast for Flavor: For the best results, lightly toast the nuts before adding them to the batter. Spread them on a baking sheet and bake at 350°F (175°C) for 5-7 minutes to enhance their aroma and taste. Let them cool completely before chopping.
    • Chop the Nuts: Roughly chop the cooled nuts into medium-sized pieces. You want them to be noticeable but not too large.
    • Fold Them In: Gently fold ¾ to 1 cup of chopped nuts into the brownie batter right before pouring it into the pan. You can also sprinkle a few extra on top for a beautiful finish.

    This simple addition transforms your fudgy brownies into an even more satisfying treat, perfect for any occasion.

    Double Chocolate Chunk Brownies

    For the ultimate chocolate lover, this variation is a dream come true. Double chocolate chunk brownies take your favorite fudgy recipe to the next level. They create an intense burst of flavor and delightful pockets of melted chocolate in every bite, making for an easy yet impressive dessert.

    To make decadent double chocolate chunk brownies:

    • Select Your Chocolate: You will need 1 to 1 ½ cups of chocolate chunks or chips.
    • Mix and Match: For a more complex flavor, feel free to use a variety.
      • Semi-sweet chocolate chunks provide a classic, balanced flavor.
      • Dark chocolate chunks offer a deeper, more intense cocoa experience.
      • Milk chocolate chunks create a sweeter, creamier contrast.
      • A combination of any two or three types adds wonderful depth.
    • Fold Them In: Gently fold the chocolate chunks into the batter after mixing your dry ingredients. Do not overmix; you just want them evenly distributed.
    • Optional Topping: Sprinkle a few extra chocolate chunks over the top of the batter before baking for a beautiful, melty finish.

    Perfect for satisfying any chocolate craving, these brownies are a simple yet decadent dessert. This approachable recipe is a home-cooking delight that everyone will love.

    How to Store Your Homemade Brownies

    Keep Your Homemade Brownies Fresh and Fudgy

    You’ve just baked a batch of irresistible homemade brownies using our easy fudgy brownie recipe. To ensure they stay wonderfully moist and delicious, proper storage is key.

    Storing your brownies from scratch correctly will preserve their perfect texture, ensuring every bite is as good as the first. This simple guide will help.

    Room Temperature Storage for Short-Term Freshness

    If you plan to enjoy your brownies within a few days, storing them at room temperature is the best way to keep them soft and chewy.

    • Cool Completely: Always wait until your chocolate brownies are fully cooled before storing. Warm brownies create condensation, which can make them soggy.
    • Slice and Store: Once cooled, cut the brownies into individual squares.
    • Use an Airtight Container: Place the brownies in an airtight container to prevent them from drying out.
    • Layer with Parchment: If stacking brownies, place a sheet of parchment paper between the layers to prevent them from sticking.
    • Location: Keep the container on your kitchen counter, away from direct sunlight and heat sources.
    • Enjoy By: Stored this way, your delicious homemade brownies will stay fresh for 3 to 4 days.

    Refrigerator Storage for Extended Enjoyment

    The refrigerator is a great option if your kitchen is warm or if you want your brownies to last longer. This method is also ideal for brownies with frosting or other delicate toppings.

    • Prepare for Storage: First, let the brownies cool completely before cutting them into squares.
    • Airtight is Essential: Place them in an airtight container or wrap them tightly in plastic wrap to seal out air.
    • Refrigerate: Store the sealed container in your fridge.
    • Enjoy By: Brownies can last for up to one week in the refrigerator.
    • Serving Tip: For the best texture, let refrigerated brownies sit at room temperature for 15-30 minutes before serving. A quick 10-15 seconds in the microwave can also bring back that warm, gooey feel.

    Freezer Storage for Long-Term Deliciousness

    Baking a big batch? Freezing your fudgy brownies is an excellent way to enjoy them weeks or even months later. This method is perfect for meal prepping or having quick desserts on hand.

    • Cool and Cut: Let your homemade brownies cool completely, then cut them into individual portions.
    • Wrap Individually: To ensure freshness and prevent freezer burn, wrap each brownie square tightly in plastic wrap.
    • Add an Outer Layer: For extra protection, place the individually wrapped brownies into a freezer-safe zip-top bag or an airtight container.
    • Freeze: Store in the freezer for up to 3 months.
    • Thawing: When you’re ready for a treat, take out a brownie and let it thaw at room temperature for about an hour. You can also warm it gently in the microwave or oven.

    Pro Tips for Perfect Brownie Preservation

    Here are a few extra tips to keep your brownies at their delicious peak:

    • Always Cool Completely: This is the most crucial step, no matter which storage method you choose.
    • Airtight is Non-Negotiable: Exposure to air is the enemy of freshness. Always use a truly airtight container or wrap the brownies tightly.
    • Add a Moisture Boost: For extra-moist brownies, place a slice of plain bread in the airtight container. The brownies will absorb moisture from the bread. Remember to replace the bread slice every couple of days.
    • Avoid Open Air: Never leave brownies uncovered on the counter, as they will quickly become dry and hard.

    With these simple storage tips, your homemade brownies will remain a delightful treat long after they come out of the oven. For more helpful kitchen information, check out our other step-by-step cooking guidance.

    Frequently Asked Questions

    What makes brownies fudgy vs cakey?

    The delicious debate between fudgy and cakey brownies comes down to key differences in ingredients and technique. Understanding them is the secret to baking your perfect batch every time.

    • Fudgy Brownies: These have a dense, moist, and gooey texture similar to fudge. The recipe uses a higher ratio of fat (butter and chocolate) to flour and very little leavening agent, like baking powder. This creates a rich, chewy, and intensely chocolatey result.
    • Cakey Brownies: These are lighter and airier, with a texture closer to a chocolate cake. Their recipes call for more flour, more leavening agents, and often more eggs. The butter and sugar are sometimes creamed together, which incorporates air and results in a softer, fluffier crumb.

    While both styles are delicious, our easy brownie recipe focuses on achieving that irresistible, wonderfully dense fudgy texture. It’s a beginner-friendly guide to making incredible chocolate brownies from scratch.

    How do you get a crackly top on brownies?

    That beautiful, shiny, crackly top is the signature of a perfect brownie. It adds visual appeal and a satisfying textural contrast. Here are our top tips for getting that coveted finish:

    • Whisk Eggs and Sugar Well: This is the most important secret! Energetically whisking the eggs and sugar until they are light, frothy, and slightly thickened helps dissolve the sugar. This dissolved sugar rises and crystallizes on the surface during baking, creating the crackle [2].
    • Use Enough Sugar: Sugar is essential for this effect. Our fudgy brownie recipe uses just the right amount to encourage that crispy crust.
    • Melted Butter and Chocolate: Using melted butter and chocolate as a base for the batter creates a sugar-rich liquid that contributes to the crackly layer.
    • Bake at the Right Temperature: A slightly higher initial baking temperature helps set the top of the brownies quickly, leading to those gorgeous cracks.
    • Don’t Overbake: Overbaking will dry out your brownies and can prevent the crackle from forming properly. Keep a close eye on them!

    Follow our step-by-step guidance for this easy brownie recipe, and you’ll achieve that delightful crackly top every time!

    Can I make brownies with just cocoa powder and no chocolate?

    Yes, you can absolutely make delicious chocolate brownies using only cocoa powder. This is a great option if you’re out of baking chocolate or prefer a different flavor profile. Here’s what to keep in mind:

    • Adjust Fat and Sugar: Baking chocolate contains cocoa solids, cocoa butter, and sugar. When using only cocoa powder, you must increase the fat (like butter or oil) to replace the missing cocoa butter. You may also need more sugar to balance the bitterness of the cocoa.
    • Flavor Difference: Brownies made with only cocoa powder often have a more intense, sometimes slightly drier, chocolate flavor. They can be less complex than brownies made with both cocoa and melted chocolate.
    • Type of Cocoa Powder: For the best results, use a good-quality unsweetened cocoa powder. Dutch-processed cocoa creates a darker, milder chocolate flavor, while natural cocoa powder offers a fruitier, more acidic note.

    While our best brownie recipe calls for both, experimenting with cocoa-only versions is part of what makes home cooking fun. It’s a great way to discover new favorites and personalize your treats.

    What’s the best way to cut brownies cleanly?

    Cutting your homemade brownies into neat squares can be tricky, but these practical tips will ensure beautiful, clean cuts every time. Say goodbye to crumbly edges!

    1. Cool Completely: This is the most crucial step! Warm brownies are too soft and will crumble. Let them cool entirely in the pan at room temperature for several hours. For extra-firm brownies, you can also chill them in the refrigerator for 30 to 60 minutes before cutting.
    2. Use a Hot Knife: Run a sharp, long knife under hot water, then wipe it dry with a paper towel. The heat helps the blade glide through the rich brownie without dragging or sticking.
    3. Clean After Each Cut: Wipe your knife clean with a damp paper towel between each slice. This prevents crumbs and chocolate from one cut from smearing onto the next.
    4. Score Before Cutting: For perfectly even squares, lightly score the top of the brownies with your knife to mark your cuts first. Then, follow your guides for a firm, straight cut.
    5. Straight Down, Not Sawing: Press the knife straight down through the brownie in one confident motion. Avoid using a back-and-forth sawing action, which creates crumbs.

    With this beginner-friendly recipe and tips, you can enjoy baking without stress and present your delicious fudgy brownies beautifully!


    Sources

    1. https://www.kingarthurbaking.com/blog/2016/06/23/dutch-process-vs-natural-cocoa
    2. https://www.seriouseats.com/how-to-make-brownies-crackly-top

  • How to Make Perfect Croissants: An Easy Step-by-Step Guide

    How to Make Perfect Croissants: An Easy Step-by-Step Guide

    A croissant is a buttery, flaky French pastry known for its distinct crescent shape and layered texture. It is made from a yeast-leavened dough that is laminated with butter, a process which involves repeatedly folding and rolling the dough to create hundreds of delicate, airy layers.

    Imagine waking up to the aroma of freshly baked, golden croissants with flaky layers waiting to be pulled apart. For many, the idea of creating these delicate French pastries from scratch can feel daunting. You might feel overwhelmed by complex recipes or lack the confidence for such an intricate bake, leading you to believe they’re best left to the professionals.

    At Recipesmondial, we believe every home cook deserves the satisfaction of mastering classic recipes, even challenging ones. That’s why we developed a step-by-step guide to demystify the art of making perfect croissants. Our beginner-friendly recipe removes the stress by focusing on clear, approachable techniques. It’s designed to deliver reliable results and boost your confidence in the kitchen.

    Get ready to transform simple ingredients into a delightful pastry experience. We’ll walk you through each stage, from preparing the dough to achieving the signature flaky texture and rich, buttery flavor. Ready to learn what sets a perfect homemade croissant apart? Let’s uncover the secrets to baking this iconic treat.

    What Makes a Perfect Homemade Croissant?

    A perfectly baked, golden-brown croissant, split open to show its airy, layered interior.
    Professional food photography, photorealistic, high-quality food magazine photo of a perfectly baked, golden-brown croissant, split in half to reveal its airy, open honeycomb interior and distinct, delicate layers. A subtle wisp of steam rises from the warm pastry. The croissant sits on a clean, light-colored rustic wooden board next to a simple white linen napkin, with soft, natural morning light. Emphasize crispness, flakiness, and depth of color. No people, no abstract art, no illustrations.

    Imagine biting into a warm, crisp pastry that shatters delicately in your mouth to reveal a tender, airy interior. This is the magic of a perfect homemade croissant. Achieving this bakery-quality delight at home is incredibly rewarding, transforming a simple breakfast into a special occasion. At Recipesmondial, we believe everyone can master this treat because our approach makes even complex-sounding recipes simple and enjoyable.

    So, what makes a croissant truly perfect? It comes down to a few key elements that create an unforgettable experience. Understanding these characteristics will not only help you bake with confidence but will also ensure delicious results every time.

    The Hallmarks of Croissant Perfection

    A truly perfect homemade croissant delights all your senses. It’s more than just a pastry—it’s a testament to careful technique and quality ingredients. Here are the qualities to aim for:

    • A Golden, Crisp Exterior: The outside should be a beautiful golden brown and crackle audibly when you break it. This signature crispness is a hallmark of proper lamination and baking.
    • An Airy, Honeycomb Interior: When sliced in half, a perfect croissant reveals a magnificent, open crumb structure resembling a delicate honeycomb. This indicates light, airy layers that are never dense or bready. These air pockets are formed by steam created during baking within the butter layers [1].
    • Rich, Buttery Flavor: Quality butter is essential, providing the irresistible, rich aroma and pure, luxurious taste that is the heart of any great croissant.
    • Feathery Lightness: Despite its richness, a perfect croissant feels incredibly light and practically melts in your mouth. This lightness comes from the many thin layers of dough and butter.
    • Delicate Flakiness: Each bite should offer a satisfying flakiness as the layers separate beautifully, creating a delightful texture. This is achieved through careful folding and chilling during lamination.
    • Beautiful Shape: A classic, visually appealing crescent shape signifies a properly rolled pastry and adds to the overall homemade charm.

    Achieving these results might seem daunting, but it’s entirely possible with our step-by-step guidance. Our beginner-friendly recipes are designed to make cooking flavorful meals easy and stress-free. Get ready to impress your family and friends with this classic treat!

    What Ingredients Do You Need for Croissants?

    A neatly arranged selection of croissant ingredients including flour, butter, milk, yeast, sugar, and salt on a marble counter.
    Professional food photography, photorealistic, high-quality food magazine photo of all essential raw ingredients for croissants neatly and aesthetically arranged on a clean, light marble countertop. Ingredients include a mound of unbleached all-purpose flour in a ceramic bowl, cold sticks of unsalted butter, a small pitcher of warm milk, a packet of active dry yeast, a small bowl of granulated sugar, and a pinch of salt. The setup is bright, well-organized, and inviting, with a shallow depth of field focusing on the ingredients. No hands, no people, no abstract art, no illustrations.

    For the Dough (Détrempe)

    The foundation of a perfect croissant is the dough, known in French baking as the “détrempe.” This is a simple mixture of pantry staples that creates the croissant’s signature structure and flavor. Don’t be intimidated by the name—this recipe is very beginner-friendly!

    Here’s what you’ll need:

    • All-Purpose Flour: Unbleached all-purpose flour provides the ideal gluten balance for a chewy yet tender crumb, forming the backbone of your dough.
    • Granulated Sugar: A small amount of sugar feeds the yeast to help the dough rise and adds a subtle sweetness to the finished pastry.
    • Fine Sea Salt: Salt is essential for flavor, but it also controls the yeast’s activity and strengthens the gluten structure.
    • Active Dry Yeast: This is the key to a light, airy croissant. As yeast produces carbon dioxide, it creates the delicate air pockets that define the pastry’s texture. Be sure your yeast is fresh for the best results.
    • Cold Water: Using cold water keeps the dough cool. This is crucial for controlling the yeast and preventing the butter from melting prematurely during lamination.
    • Whole Milk: Milk adds richness and tenderness to the dough and helps the croissants develop a beautiful golden-brown crust during baking.

    With these straightforward components, you’re on your way to creating a delicious pastry. Simple ingredients are often the starting point for the best baked goods, from croissants to other quick breakfast ideas.

    For the Butter Block (Beurrage)

    The “beurrage” is the block of butter that gets folded into the dough to create iconic, flaky layers. This step is where the magic happens, turning a simple dough into a spectacular pastry. It sounds technical, but it’s all about preparing one key ingredient correctly.

    You will need:

    • High-Quality Unsalted Butter: The quality of your butter is the single most important factor for great croissants. Choose a high-fat, European-style butter (ideally 82% fat or more) [2]. Its low water content creates supremely flaky layers and a richer flavor. Using unsalted butter also gives you full control over the final saltiness.

    Chef’s Tip: Your butter must be cold but pliable—it should bend without cracking. Achieving this texture is the key to successful lamination, as it allows the butter to spread evenly without melting into the dough.

    For the Egg Wash

    A simple egg wash is the final touch that gives your homemade croissants a professional, bakery-quality finish. While it’s a small step, it makes a huge difference in the appearance of the final pastry.

    For a perfect golden shine, you will need:

    • Large Egg: A whole egg provides richness and promotes a deep, even browning.
    • Splash of Water or Milk: Thinning the egg with a little water or milk helps it brush on smoothly, creating a consistent, glossy sheen after baking.

    This easy step ensures your croissants look as incredible as they taste, giving them a beautiful, golden-brown crust that’s impossible to resist.

    How to Make Croissants: A Step-by-Step Guide

    How to Make Croissants: A Step-by-Step Guide

    Ready to create flaky, buttery croissants in your own kitchen? This guide will walk you through each step, making the process simple and enjoyable. We’ll cover everything from preparing the dough to baking these golden delights. You’ll soon discover that making these delicious pastries is an incredibly rewarding experience, transforming simple ingredients into an extraordinary treat.

    Forget feeling overwhelmed by complex recipes. We’re here to guide you with approachable home cooking techniques. Let’s get baking!

    Step 1: Preparing the Dough (Détrempe)

    The journey to perfect croissants begins with a simple but crucial dough, known as the détrempe. This initial mixture sets the foundation for all the wonderful layers to come.

    • Warm the Milk: Gently heat 1 cup (240ml) of whole milk until it’s lukewarm, about 100-110°F (38-43°C). It should feel warm to the touch, but not hot.
    • Activate the Yeast: In a large mixing bowl, combine the warm milk, 2 ¼ teaspoons (7g) of active dry yeast, and 2 tablespoons (25g) of granulated sugar. Stir gently and let it sit for 5-10 minutes until it becomes foamy. This foam is a sign that your yeast is active and ready to work.
    • Mix Dry Ingredients: In a separate bowl, whisk together 3 ½ cups (420g) of all-purpose flour and 1 teaspoon (6g) of fine sea salt.
    • Combine and Knead: Add the dry ingredients to the activated yeast mixture. Mix with a spoon or your hands until a shaggy dough forms.
    • Knead the Dough: Turn the dough out onto a lightly floured surface and knead for 5-7 minutes. The dough should become smooth and elastic, and it should spring back when you lightly poke it.
    • Chill the Dough: Shape the dough into a flat 6×8 inch rectangle and wrap it tightly in plastic wrap. Refrigerate for at least 2 hours, or preferably overnight. This chilling step is essential for easier handling and creating a better texture.

    Step 2: Creating the Butter Block (Beurrage)

    The butter block, or beurrage, is the heart of a croissant’s flakiness. The key is to create a pliable block of butter that has the same consistency as your chilled dough.

    • Prepare the Butter: Start with 1 cup (226g) of cold, unsalted butter. European-style butter is ideal for its higher fat content and superior flavor.
    • Shape the Butter: Place the cold butter between two sheets of parchment paper. Using a rolling pin, pound and roll the butter into an 8×8 inch square, aiming for an even thickness throughout.
    • Chill the Butter: Place the parchment-enclosed butter block back into the refrigerator to chill. It needs to be firm but still pliable, which will prevent it from breaking apart during the lamination stage.

    Expert Tip: For perfect layers, the butter and dough must be roughly the same temperature. If the butter is too cold, it will shatter within the dough. If it’s too warm, it will melt and absorb into the dough, ruining the layers.

    Step 3: The Lamination Process (Making the Layers)

    This is where the magic happens. Lamination is the process of folding butter into dough to create hundreds of thin, alternating layers. Don’t be intimidated; we’ll break it down into a series of simple “turns.”

    The First Turn

    1. Roll out the Dough: On a lightly floured surface, roll your chilled dough into a 9×18 inch rectangle. Try to keep the edges as straight as possible.
    2. Place the Butter: Position the chilled butter block on one half of the dough, leaving a ½-inch border around the edges.
    3. Fold the Dough: Fold the empty half of the dough over the butter block, carefully lining up the edges. You have now encased the butter.
    4. Seal the Edges: Gently press the edges together to fully enclose the butter. This crucial step prevents the butter from leaking out while you roll.
    5. First Roll: Rotate the dough 90 degrees. Lightly flour the surface and your rolling pin. Carefully roll the dough into a 10×20 inch rectangle. Be firm but gentle to maintain an even thickness.
    6. First Fold (Letter Fold): Imagine the dough is a letter. Fold the bottom third of the dough up to the center, then fold the top third down over it.
    7. Chill: Wrap the folded dough tightly in plastic wrap and refrigerate for at least 30-45 minutes. This rest allows the gluten to relax and the butter to firm up again.

    The Second Turn

    1. Repeat Rolling: Remove the chilled dough from the fridge. On a lightly floured surface, place the dough so the seam is on your side. Roll it out again into a 10×20 inch rectangle.
    2. Second Fold: Perform another letter fold, just as you did before.
    3. Chill Again: Wrap the dough and refrigerate for another 30-45 minutes.

    The Third and Final Turn

    1. Last Roll: Remove the dough from the fridge. With the seam to your side, roll it one last time into a 10×20 inch rectangle.
    2. Final Fold: Complete a third and final letter fold.
    3. Final Chill: Wrap the dough tightly and refrigerate for at least 1-2 hours, or up to overnight. This extensive chill is vital for making the dough firm and easy to shape.

    Congratulations! You’ve successfully laminated your dough, creating the foundation for truly flaky, delicious croissants.

    Step 4: Shaping the Croissants

    Now for the fun part: transforming your laminated dough into its iconic crescent shape. This step is easier than you might think!

    • Prepare Your Workspace: Lightly flour a clean surface and remove your chilled dough from the refrigerator.
    • Roll the Dough: Carefully roll the dough into a large 12×24 inch rectangle that is approximately ¼ inch thick.
    • Trim and Cut: Using a sharp knife or a pizza cutter, trim the edges to create clean, straight lines. Cut the rectangle in half lengthwise to create two 6×24 inch strips.
    • Cut Triangles: On each strip, make alternating diagonal cuts to create long triangles with a base of about 4-5 inches.
    • Make a Slit: At the center of the wide base of each triangle, make a small ½-inch slit. This helps the croissant roll more evenly.
    • Roll the Croissant: Gently stretch the two points of the base outwards. Starting from the wide end, roll the dough towards the point. Roll snugly, but not so tightly that you compress the layers. Your goal is to create a visible spiral.
    • Shape the Crescent: Once rolled, gently curve the ends inward to form the classic crescent shape.
    • Place on Baking Sheet: Transfer the shaped croissants to a baking sheet lined with parchment paper, leaving plenty of space between them to allow for expansion.

    Creative Variation: For a delicious twist, make pain au chocolat by placing two small chocolate batons at the base of the triangle before rolling.

    Step 5: Proofing the Pastries

    Proofing is the final rise before baking. This critical step creates a light, airy texture and helps develop the beautiful honeycomb interior that makes croissants so special.

    • Create a Warm Environment: Place the baking sheets in a warm, humid, and draft-free spot to proof. A great option is to place them in an oven (turned off!) with a bowl of hot water inside to create the perfect environment.
    • Proofing Time: Let the croissants proof for 2-3 hours. The exact time will depend on the warmth and humidity of your kitchen.
    • Check for Proofing: They are ready when they have visibly puffed up, feel light, and jiggle when you gently shake the pan. If you gently press one, the indentation should spring back slowly. If it springs back immediately, they need more time. If it collapses, they are over-proofed.
    • Important Note: Avoid proofing in a place that is too hot. If the butter melts out of the dough, the layers will be ruined. The ideal temperature for yeast activity is typically between 75-95°F (24-35°C) [3].

    Troubleshooting Tip: Under-proofed croissants will be dense and bready. Over-proofed croissants may collapse in the oven or have a coarse texture. Patience is key here!

    Step 6: Baking to Golden Perfection

    This is the moment of truth! Baking will transform your proofed pastries into golden, crispy, and utterly delicious croissants. You’re just minutes away from enjoying the results of your hard work.

    • Preheat Oven: Preheat your oven to 400°F (200°C) for at least 20 minutes before baking.
    • Prepare Egg Wash: In a small bowl, whisk together 1 large egg with 1 tablespoon of milk or water.
    • Apply Egg Wash: Just before baking, gently brush the tops of the proofed croissants with the egg wash. This will give them a beautiful golden color and shine.
    • Bake the Croissants: Place the baking sheets in the preheated oven and bake for 10 minutes at 400°F (200°C).
    • Reduce Heat and Continue Baking: Without opening the oven, reduce the temperature to 375°F (190°C). Continue baking for another 10-15 minutes, or until the croissants are a deep golden brown and sound hollow when tapped on the bottom.
    • Cooling: Immediately transfer the baked croissants to a wire rack. Let them cool for at least 15-20 minutes before serving. This allows the butter to set and the interior to finish cooking.

    There you have it! Your homemade, perfect croissants are ready to be devoured. Enjoy this classic pastry for breakfast or as a delightful snack anytime. You have successfully transformed simple ingredients into an extraordinary treat!

    What Are the Most Common Mistakes to Avoid?

    Making perfect croissants can feel like a daunting culinary challenge, but many common errors are surprisingly easy to fix. We’re here to guide you through them. Learning from these mistakes will not only boost your baking confidence but also help you create delicious, flaky pastries every time. Let’s make your croissant journey stress-free and enjoyable!

    Ignoring Temperature Control

    When making croissants, temperature is one of your most critical factors. The entire process relies on keeping both the butter and the dough cold. If either gets too warm, you’ll run into problems.

    • Melting Butter During Lamination: If the butter gets too warm, it will mix into the dough instead of forming distinct layers, which prevents that beautiful, flaky texture. To avoid this, keep your kitchen cool, work quickly when rolling, and chill the dough often.
    • Dough Too Warm: Warm dough becomes sticky and difficult to handle, which also causes the butter to melt faster.
    • Dough Too Cold: On the other hand, dough that is too cold will be stiff and can tear during rolling, causing the butter block to break into pieces.

    Tip: To keep everything perfectly chilled, always return the dough to the fridge between each fold. A dough thermometer can also be a helpful tool; the ideal dough temperature is usually between 60-65°F (15-18°C) before lamination [4].

    Rushing the Lamination Process

    Lamination—the process of rolling and folding the dough to create many thin layers of butter—is what gives croissants their signature flaky texture. While it can be tempting to rush this step, patience is key.

    • Not Enough Turns: Insufficient folds result in fewer layers and, consequently, a dense, less flaky croissant. Be sure to follow your recipe’s instructions on the correct number of turns for optimal results.
    • Uneven Rolling: Aim to roll the dough evenly, avoiding thin spots or thick patches. Uneven thickness creates inconsistent layers and can cause pockets of raw dough or burnt sections in the final product.
    • Overworking the Dough: Too much handling develops excess gluten, which makes the dough tough and difficult to roll. This can lead to a chewy, rather than tender, croissant.

    Tip: Take your time, flour your work surface lightly, and use a gentle, even pressure when rolling. Think of it as stretching the dough, not forcing it.

    Incorrect Proofing

    Proofing, the final rise before baking, is a critical stage where your shaped croissants develop the air pockets that create their light, airy texture. Getting this step right is essential for success.

    • Under-Proofing: Croissants that haven’t proofed long enough will be dense and won’t rise much in the oven. Their texture will be more bready than airy, and they may also appear pale after baking.
    • Over-Proofing: Allowing croissants to proof for too long can cause their delicate structure to collapse and the butter to melt out during baking. This leads to greasy, flat pastries that don’t hold their shape.

    Tip: Always proof your croissants in a warm, humid, and draft-free place. To test for readiness, gently press a finger into the dough: it should spring back slowly. If it springs back quickly, it needs more time. If the indentation remains, it’s likely over-proofed. The ideal proofing temperature is around 75-78°F (24-26°C).

    Improper Baking Temperature

    The oven temperature directly impacts both the final texture and color of your croissants, so getting it right is crucial for a perfect bake.

    • Oven Too Hot: If the oven is too hot, the exterior can brown too quickly while the inside remains raw or undercooked. This intense heat can also cause the butter to escape too rapidly.
    • Oven Too Cold: Conversely, an oven that’s too cool will dry out the croissants, preventing them from achieving a beautiful golden color and a full, airy puff.
    • Forgetting Egg Wash: Don’t skip this simple step! A good egg wash is essential for creating a beautiful shine and encouraging a deep, golden-brown crust.

    Tip: Preheat your oven thoroughly and use an oven thermometer to ensure accuracy. To promote even baking, rotate your baking sheet halfway through. Your goal is a rich, golden-brown color for perfectly baked croissants.

    How Do You Pronounce Croissant Correctly?

    Want to pronounce croissants like a pro? When you’re exploring new global comfort foods, getting the name right is part of the fun. You’re not alone in wondering, and it’s simpler than it looks!

    Because the word “croissant” is French, it has a distinct sound. Don’t worry, we’re here to help you say it with confidence.

    Breaking Down the Pronunciation

    Here’s an easy way to remember how to say “croissant” correctly:

    • First part: “Kwah”

      This sounds like the beginning of the word “quality,” but quicker. Think “Kwah.”

    • Second part: “Sahn”

      This part has a soft, nasal sound. Imagine saying “song” but dropping the hard “g” at the end. The “n” is very light, not like the “ant” in “want.” Think “Sahn.”

    • Putting it together: “Kwah-Sahn”

      Say it smoothly as one word: “Kwah-Sahn.” Remember, the final ‘t’ is completely silent.

    Now you can confidently say you’ve made delicious “Kwah-Sahns”! Practicing is a fun part of your beginner-friendly recipes journey. Enjoy every flaky bite and every perfectly pronounced word!

    Frequently Asked Questions About Croissants

    What are the main ingredients in a croissant?

    Delicious croissants start with a few simple, everyday ingredients. The magic is in the technique, which combines these basic components through careful preparation and patience.

    Here are the core ingredients you’ll need for a classic croissant:

    • All-Purpose Flour: This forms the structure of your dough.
    • Active Dry Yeast: Yeast helps the dough rise, creating a light and airy texture.
    • Granulated Sugar: A touch of sugar feeds the yeast and adds a subtle sweetness.
    • Salt: Essential for flavor balance and strengthening the dough.
    • Whole Milk: Adds richness and moisture to the dough, contributing to a tender crumb.
    • Unsalted Butter: This is the star ingredient for lamination, creating those incredible, flaky layers.

    When combined with our step-by-step cooking guidance, these humble ingredients transform into an amazing pastry right in your own kitchen.

    How many calories are in a typical croissant?

    A classic, plain butter croissant is a wonderful treat. On average, a standard-sized one contains approximately 220-250 calories [5].

    However, this number can vary. For instance, larger croissants or those filled with chocolate, almond paste, or cheese will naturally have a higher calorie count. At Recipesmondial, our goal is to help you enjoy delicious food, whether it’s an occasional treat or a healthy and balanced meal. We believe in making informed choices while still savoring every bite!

    Is there an easy croissant recipe for beginners?

    Absolutely! We know many home cooks feel overwhelmed by complex recipes, especially when it comes to laminated pastries like croissants. Traditional recipes involve many specific steps and chilling times, which can feel like a major project. That’s why we focus on helping you find easy recipes fast and without stress.

    Here at Recipesmondial, we focus on beginner-friendly recipes and approachable home cooking. Our guide, “How to Make Perfect Croissants: An Easy Step-by-Step Guide,” breaks the process down into clear, manageable steps. We’ve simplified the techniques and provided the practical tips you need to build confidence in the kitchen.

    With our clear instructions, you’ll find that making croissants at home is a fun and rewarding experience. It’s all about making cooking enjoyable, even for those new to baking!

    What’s the difference between homemade and store-bought croissants?

    There’s a world of difference between homemade and store-bought croissants. Once you taste the homemade version, you’ll understand why!

    • Homemade Croissants:
      • Flavor: Unmatched freshness and depth of flavor. You control the quality of ingredients, like using premium butter, which makes a huge difference.
      • Texture: Incredibly flaky, tender, and airy. The layers are distinct and shatter delicately with each bite.
      • Ingredients: You know exactly what goes into them—no artificial flavors, preservatives, or unnecessary additives. This is great for those who prioritize healthy and balanced meals.
      • Effort & Reward: A labor of love that results in immense satisfaction and a superior pastry. It’s a fantastic way to develop your cooking skills and enjoy creating flavorful meals made easy at home.
    • Store-Bought Croissants:
      • Convenience: Ready to eat immediately, making them a perfect quick breakfast idea when you’re short on time.
      • Consistency: They generally have a consistent look and taste due to being mass-produced.
      • Ingredients: May contain dough conditioners, emulsifiers, and preservatives to extend shelf life. Sometimes, cheaper fats are used instead of pure butter.
      • Texture: Can be denser, less flaky, or have a more “bready” texture compared to homemade.

    While store-bought croissants offer convenience, nothing compares to the freshness, flavor, and pride of making your own. It’s a wonderful journey that transforms simple ingredients into a delightful pastry.


    Sources

    1. https://www.scientificamerican.com/article/the-science-of-baking-bread/
    2. https://www.seriouseats.com/what-is-european-style-butter-versus-american-style-butter
    3. https://bakerpedia.com/ingredients/yeast/
    4. https://www.kingarthurbaking.com/blog/2021/04/09/how-to-make-croissants-at-home
    5. https://fdc.nal.usda.gov/fdc-app.html#/food-details/780829/nutrients