Category: Dinner and Main Courses

  • Easy BBQ Chicken Recipe: A Simple Guide for Juicy, Flavorful Results

    Easy BBQ Chicken Recipe: A Simple Guide for Juicy, Flavorful Results

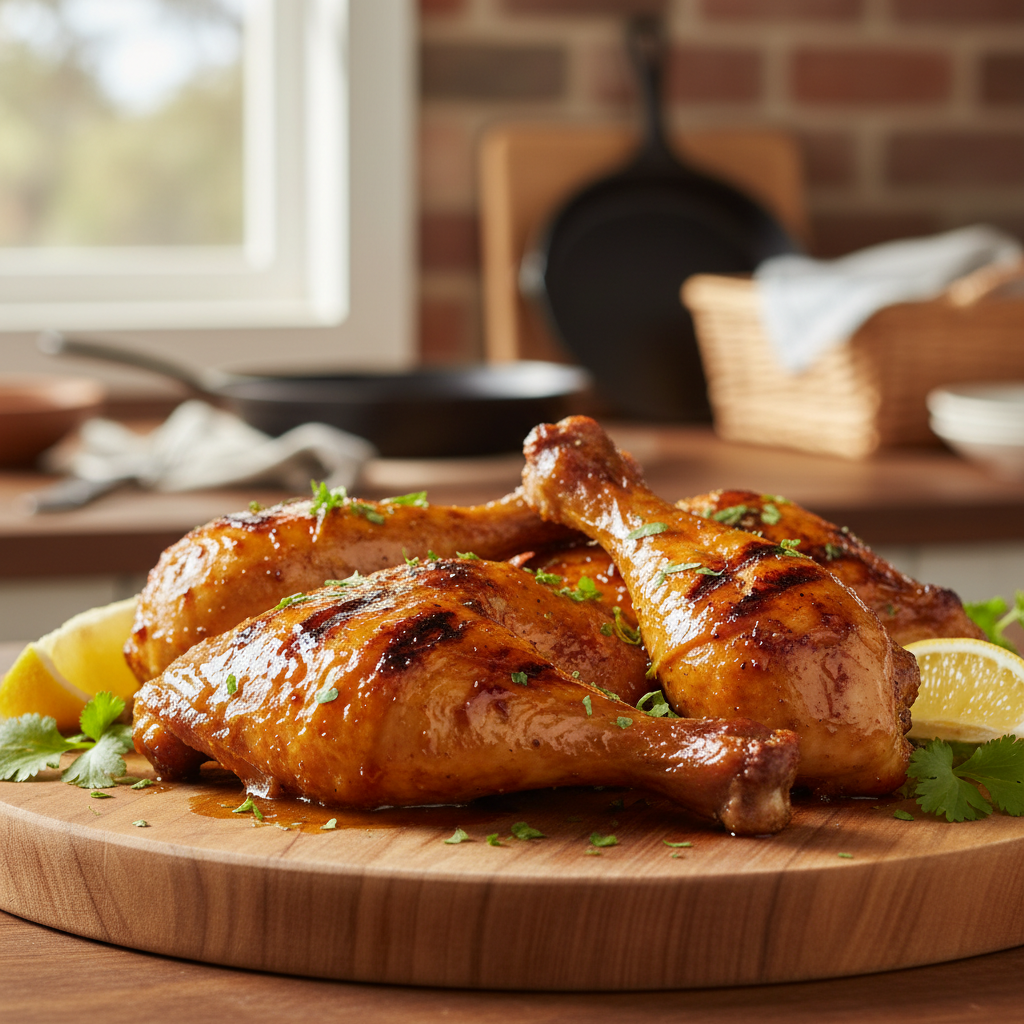
    BBQ chicken is a classic dish featuring chicken cooked with barbecue sauce, serving as either a marinade, basting sauce, or finishing glaze. It is most commonly prepared by grilling, baking, or smoking, which results in tender, juicy meat with a sweet, smoky, and tangy caramelized exterior. This popular meal is a staple for cookouts, family dinners, and casual gatherings.

    Few dishes capture the essence of a relaxed, delicious meal quite like classic BBQ chicken. With its smoky aroma, sticky-sweet glaze, and perfectly tender bite, it’s pure comfort food. But making it at home can feel intimidating. Have you ever worried about dry chicken or struggled to find a reliable bbq chicken recipe that delivers amazing results? You’re not alone. Many home cooks feel overwhelmed by complex instructions or find it challenging to plan quick, healthy, and family-friendly meals everyone will love.

    At Recipesmondial, we believe cooking should be a stress-free, enjoyable experience. That’s why we’ve crafted the ultimate easy bbq chicken recipe, designed for home cooks of all skill levels—whether you’re a beginner or looking to perfect your weeknight dinner repertoire. Our guide offers simple, step-by-step cooking guidance to ensure your chicken turns out succulent and packed with flavor every single time. We focus on approachable home cooking, transforming simple ingredients into a truly memorable dish.

    Forget the guesswork and get ready to create a dish that will become a go-to in your kitchen. We’ll walk you through everything, from selecting the right chicken and mastering seasoning techniques to choosing your preferred cooking method—be it on the grill, in the oven, or even in the air fryer. Plus, we’ll share our best tips for the juiciest results and clever serving ideas. Let’s build your confidence to cook delicious, flavorful meals with ease!

    Why Is This the Best Beginner-Friendly BBQ Chicken Recipe?

    Ready to enjoy incredible BBQ chicken without the fuss? You’ve come to the right place. At Recipesmondial, we believe cooking should be a joy, not a chore. This isn’t just another recipe; it’s a guide designed for home cooks who want delicious results with minimal stress.

    We’ll guide you every step of the way, helping you build confidence in the kitchen. Our goal is to ensure you can create a flavorful, family-friendly meal that everyone will love.

    Why Our Recipe Stands Out for Beginners

    If you feel overwhelmed by complex instructions or worry about getting a tasty meal on the table quickly, this recipe is for you. We focus on making cooking enjoyable and stress-free. Here’s why our approach is perfect for beginners:

    • Simple Ingredients: This recipe uses common ingredients found at any grocery store. No need to hunt for specialty items.
    • Clear, Step-by-Step Guidance: We break down the entire process into simple, easy-to-follow steps. You’ll never be left wondering what to do next.
    • Multiple Cooking Methods: Whether you prefer grilling, baking, or using an air fryer, our guide covers it all. Choose the method that suits your equipment and comfort level for reliable results every time.
    • No Fancy Techniques: Forget about complicated marinades or precise knife skills. This recipe focuses on simple techniques that yield juicy, tender chicken every time.
    • Quick and Convenient: This recipe won’t keep you in the kitchen for hours. It’s a perfect solution for busy nights and anyone seeking quick meals, getting a delicious dinner on the table fast.
    • Guaranteed Flavor: Simplicity doesn’t mean sacrificing taste. We show you how to get that classic tangy and sweet BBQ flavor without any guesswork.
    • A Real Confidence Booster: Successfully making a delicious meal is incredibly rewarding. This recipe is designed to help you build skills and feel more confident in the kitchen.
    • Family-Friendly Favorite: BBQ chicken is a universal crowd-pleaser, and this recipe is sure to become a staple in your meal rotation. It’s one of those easy recipes that makes mealtime stress-free.

    Our goal at Recipesmondial is to help you enjoy cooking, discover new flavors, and make mealtime easier. This BBQ chicken recipe is a perfect example of what we stand for: simple, flavorful, and inspiring recipes for everyday life.

    What Ingredients Do You Need for Perfect BBQ Chicken?

    An overhead shot of fresh chicken pieces, BBQ sauce, garlic, olive oil, rosemary, salt, and pepper laid out on a wooden board.
    A professional food photography, photorealistic, high-quality food magazine photo of a flat lay composition showing all fresh, high-quality ingredients for an easy BBQ chicken recipe. The ingredients are neatly arranged on a rustic wooden cutting board or a clean, light-colored kitchen counter. Include raw chicken pieces (a mix of thighs and drumsticks), a small bowl of vibrant, homemade-looking BBQ sauce, a clear glass bottle of olive oil, fresh garlic cloves, a sprig of fresh rosemary, a pinch of coarse sea salt, and black peppercorns. The lighting is warm and natural, creating an inviting and approachable atmosphere, highlighting the freshness of the ingredients. No people visible.

    Creating perfect BBQ chicken starts with the right ingredients. Don’t worry if you’re new to cooking—this ingredient list is simple and approachable. By focusing on everyday items that deliver big flavor, you can make a delicious, stress-free family meal. Let’s get cooking!

    For the Chicken

    The foundation of our easy BBQ chicken recipe is the chicken itself. For juicy, flavorful results, we suggest using chicken thighs because they are incredibly forgiving and ideal for beginners. But you have other options, too!

    • 2-3 pounds Boneless, Skinless Chicken Thighs: These are our top pick. They cook quickly and stay moist, ensuring a delightful bite every time.
    • Alternatively, Bone-In, Skin-On Chicken Thighs: These offer more flavor and yield wonderfully crispy skin. Just be sure to adjust your cooking time if using this cut.
    • Substitution Tip: You can also use chicken breasts. To ensure they cook evenly, cut them into similar-sized pieces. Since breasts are leaner, cook them carefully to prevent dryness. They’re still a great option for healthy and balanced meals.

    Before you begin, make sure your chicken is thawed, then pat it completely dry with paper towels. This simple step helps seasonings stick better and promotes a crisp crust during cooking.

    For a Simple Homemade BBQ Sauce (or Your Favorite Store-Bought)

    A great BBQ sauce elevates your chicken from good to amazing. You have two fantastic choices: whip up a quick homemade version or grab your favorite from the store. Either option will give you delicious results and help you get dinner on the table fast!

    Homemade BBQ Sauce Ingredients

    Making your own BBQ sauce is easier than you think, and it uses common pantry staples. It’s a fantastic option for budget-friendly cooking, plus you get to control the flavor! Here’s what you’ll need:

    • 1 ½ cups Ketchup: This forms the base of our sauce.
    • ½ cup Brown Sugar (packed): For that classic sweet and smoky flavor. Adjust to your taste.
    • ¼ cup Apple Cider Vinegar: Adds a crucial tangy balance.
    • 2 tablespoons Worcestershire Sauce: Deepens the savory notes.
    • 1 tablespoon Dijon Mustard: Provides a pleasant zesty kick.
    • 1 teaspoon Garlic Powder: A fundamental flavor enhancer.
    • 1 teaspoon Onion Powder: Another essential aromatic.
    • ½ teaspoon Smoked Paprika: For a lovely, subtle smokiness. You can use regular paprika too.
    • ¼ teaspoon Black Pepper: Freshly ground is always best.
    • Optional: Pinch of Cayenne Pepper: If you like a little heat, add a dash!

    Simply combine these ingredients, and you’ll have a rich, flavorful sauce in minutes.

    Choosing Your Favorite Store-Bought BBQ Sauce

    When life calls for simplicity, a quality store-bought BBQ sauce is the perfect shortcut for busy families. With so many excellent options available—from smoky and sweet to tangy—you can easily find one you love. Just read the label to find a flavor profile that fits your preferences and get a delicious, family-friendly meal on the table with minimal effort.

    How Do You Make BBQ Chicken Step-by-Step?

    Close-up of glossy BBQ chicken sizzling on a hot grill with visible char marks and gentle smoke.
    A professional food photography, photorealistic, high-quality food magazine photo capturing a close-up, mouth-watering scene of juicy BBQ chicken pieces sizzling and charring slightly on a hot outdoor grill. The chicken has visible, enticing grill marks and is generously coated in a glistening, caramelized BBQ sauce. Wisps of smoke are gently rising from the grill grates. The background is softly blurred, hinting at a warm, inviting backyard or patio setting. The focus is entirely on the delicious texture and color of the chicken, emphasizing its juiciness and flavor. No people visible.

    Step 1: Prepare the Chicken

    Properly preparing your chicken is the key to a juicy, flavorful BBQ experience. This simple step sets the stage for success.

    • Pat Your Chicken Dry: Gently pat the chicken pieces dry with paper towels. This step removes excess moisture, which helps the seasoning stick better and creates a crispier skin.
    • Trim Excess Fat: Next, trim away any large pieces of excess fat from the chicken. Trimming prevents grill flare-ups and results in a leaner, more enjoyable bite.

    This quick prep is an essential part of our easy recipes, guaranteeing fantastic results for all beginner-friendly recipes.

    Step 2: Season Generously

    Now it’s time to build flavor. Generously seasoning the chicken creates a delicious base for your bbq chicken recipe, so don’t be shy with the spices!

    • A Little Oil Goes a Long Way: Lightly brush the chicken with a bit of olive oil. This simple coating helps the seasoning adhere and promotes even browning.
    • Season All Over: Sprinkle your chosen seasoning blend over every surface. For a classic barbecue flavor, use a generous pinch of salt and pepper, along with garlic powder, onion powder, and smoked paprika.
    • Consider a BBQ Rub: Alternatively, use your favorite store-bought BBQ rub. These blends are perfect for flavorful meals made easy. Just be sure to coat the chicken evenly.

    Proper seasoning is a vital step in our step-by-step cooking guidance, ensuring every bite is packed with taste.

    Step 3: Choose Your Cooking Method

    With your chicken prepped and seasoned, you’re ready to cook. You can achieve fantastic results with several different methods, giving you the flexibility to cook your bbq chicken perfectly.

    Consider the equipment you have and your personal preferences, as your choice will determine the next steps. This flexibility is what makes approachable home cooking so enjoyable.

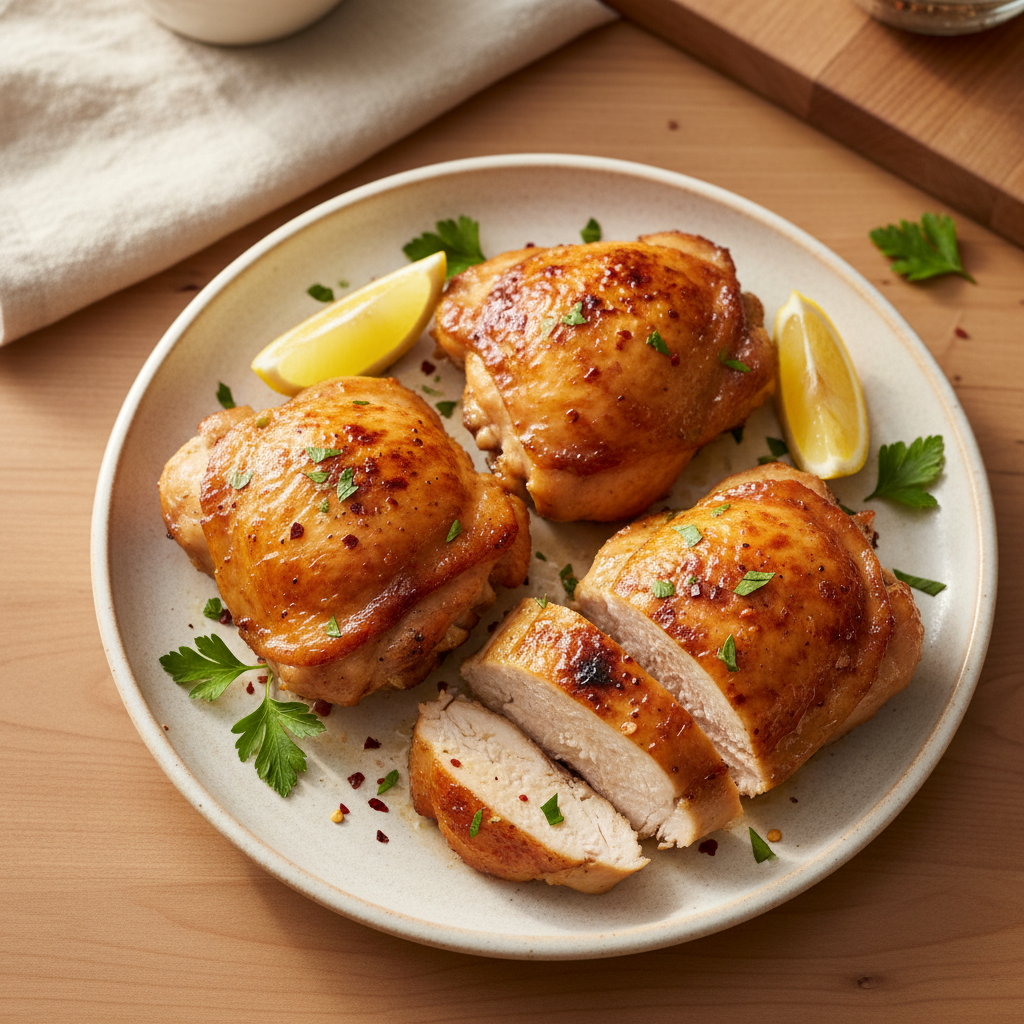
    Step 4: Sauce and Finish to Perfection

    The final step is all about creating that signature sticky, sweet, and tangy glaze for your bbq chicken. Here, timing is crucial.

    • When to Add the Sauce: Wait to apply BBQ sauce until the final 10-15 minutes of cooking. The sugars in the sauce can burn easily, so adding it too early will result in a charred exterior.
    • Brush and Glaze: Use a pastry brush to generously coat the chicken with your favorite BBQ sauce. Flip the pieces once or twice during this process, brushing again after each turn to build an even, beautiful glaze.
    • Check for Doneness: To guarantee your chicken is both juicy and safe to eat, always use a meat thermometer. Insert it into the thickest part of the chicken without touching the bone. It’s fully cooked when the internal temperature reaches 165°F (74°C) [source: https://www.foodsafety.gov/food-safety-charts/safe-minimum-cooking-temperatures].
    • Rest Before Serving: After cooking, remove the chicken from the heat and let it rest for 5-10 minutes before serving. This important step allows the juices to redistribute, ensuring your chicken is wonderfully moist and tender.

    These simple techniques are the foundation of a great beginner-friendly recipe and will help you serve up perfectly finished, family-friendly bbq chicken every time.

    What Is the Best Way to Cook BBQ Chicken?

    How to Make BBQ Chicken on the Grill

    Grilling gives bbq chicken an irresistible smoky flavor that brings out the best in the meat. Plus, cooking outside is always a fun experience!

    Here’s how to get delicious, tender chicken on your grill:

    1. Preheat Your Grill: Preheat your grill to a medium-high heat, around 375-400°F (190-205°C), to ensure even cooking.
    2. Clean and Oil Grates: Clean your grill grates thoroughly, then lightly oil them to prevent the chicken from sticking.
    3. Arrange the Chicken: Place your seasoned chicken on the grill. For bone-in cuts, start skin-side down to achieve a nice sear.
    4. Cook and Flip: Cook for 6-8 minutes per side, flipping every few minutes to prevent burning and promote even cooking.
    5. Add BBQ Sauce: During the last 10-15 minutes of cooking, brush your favorite bbq chicken recipe sauce generously onto the chicken. Turn it frequently to build up a lovely caramelized layer.
    6. Check Doneness: Use a meat thermometer to check for doneness. The chicken is ready when it reaches an internal temperature of 165°F (74°C) in the thickest part of the meat [1].
    7. Rest and Serve: Remove the chicken from the grill and let it rest for 5-10 minutes before serving. This step is crucial for keeping the chicken juicy.

    Grilling Tips for Success:

    • Do not overcrowd the grill; leave enough space for heat to circulate evenly around each piece.
    • Keep a spray bottle of water handy to tame any sudden flare-ups from dripping fat.
    • For bone-in cuts, start with indirect heat to cook the chicken through, then finish over direct heat for crispy skin and sauce caramelization.

    How to Make BBQ Chicken in the Oven

    Cooking bbq chicken in the oven is a reliable method that gives you consistent results every time. It’s a perfect option for any weather, making it a truly family-friendly meal.

    Follow these easy steps for tender, flavorful oven-baked BBQ chicken:

    1. Preheat Oven: Preheat your oven to 400°F (200°C).
    2. Prepare Baking Sheet: Line a large baking sheet with foil and place a wire rack on top. The rack allows air to circulate, helping the chicken cook more evenly.
    3. Arrange Chicken: Place the seasoned chicken pieces in a single layer on the wire rack.
    4. Initial Bake: Bake the chicken for 20-25 minutes.
    5. First Sauce Application: Remove the chicken from the oven and brush it generously with your chosen BBQ sauce.
    6. Continue Baking: Return the chicken to the oven and bake for another 15-20 minutes, flipping and basting again halfway through.
    7. Final Sauce and Broil (Optional): For a thicker, caramelized sauce, brush with more sauce and broil for 2-3 minutes at the end. Watch carefully to prevent burning.
    8. Check Doneness: Confirm the chicken has reached an internal temperature of 165°F (74°C).
    9. Rest: Allow the chicken to rest for a few minutes before serving to keep the meat moist.

    Oven Baking Tips:

    • Using a wire rack is key to lifting the chicken off the pan, helping it crisp up on all sides.
    • Do not add the BBQ sauce too early in the cooking process, as its sugars can burn easily.
    • Line your baking sheet with foil for an easy cleanup.

    How to Make BBQ Chicken in the Air Fryer

    The air fryer is a fantastic tool for making quick and crispy bbq chicken, especially for smaller portions or when you need quick dinner ideas.

    Here’s how to create perfectly cooked air fryer BBQ chicken:

    1. Preheat Air Fryer: Preheat your air fryer to 375°F (190°C) for about 5 minutes.
    2. Lightly Oil Chicken: Lightly coat your seasoned chicken pieces with a little oil to help them get crispy.
    3. Place in Basket: Arrange the chicken in a single layer in the air fryer basket. Do not overcrowd it; work in batches if necessary.
    4. Initial Cook: Cook for 10-12 minutes, flipping the chicken halfway through.
    5. Add BBQ Sauce: Pull out the basket and brush a generous amount of BBQ sauce onto the chicken.
    6. Continue Cooking: Return the chicken to the air fryer and cook for another 5-7 minutes, or until the sauce is caramelized and bubbly.
    7. Check Doneness: Confirm the chicken’s internal temperature is 165°F (74°C) with a meat thermometer.
    8. Rest: Let the chicken rest for a couple of minutes before serving to lock in the juices.

    Air Fryer Tips:

    • Always cook in a single layer, as overcrowding prevents the hot air from circulating properly.
    • Shake the basket or flip the chicken a few times during cooking to ensure all sides cook evenly and get crispy.
    • Keep a close watch on your chicken, since air fryers cook quickly and food can burn easily.

    What Are Some Tips for the Juiciest BBQ Chicken?

    Creating juicy BBQ chicken is easier than you think. You can avoid dry, tough results with a few smart choices and simple techniques that ensure every bite is tender and full of flavor.

    Choosing the Right Cut: Thighs vs. Breasts

    The cut of chicken you choose plays a big role in the final juiciness. While both breasts and thighs work well for BBQ, they have different textures and cooking requirements.

    • Chicken Thighs: Because dark meat has a higher fat content, thighs are naturally more forgiving. They stay moist and tender even if slightly overcooked, which makes them a fantastic choice for beginner cooks.
    • Chicken Breasts: Leaner white meat means breasts can dry out quickly. If you prefer their milder flavor, be extra careful with cooking times. To help lock in moisture, consider using bone-in, skin-on breasts.

    For the juiciest result every time, we recommend bone-in, skin-on chicken thighs. They deliver rich flavor, incredible tenderness, and are forgiving enough to help you build confidence at the grill.

    The Secret to Preventing Dry Chicken

    No one likes dry chicken, but luckily, avoiding it is simple. Follow these key steps for perfectly moist results:

    • Don’t Overcook: This is the most common mistake. Since chicken continues to cook from residual heat after being removed from the grill, a meat thermometer is your most important tool.
    • Target Temperature: Cook chicken to an internal temperature of 165°F (74°C) in the thickest part [2]. This ensures it’s both safe to eat and perfectly juicy.
    • Rest Your Chicken: Always let the chicken rest for 5-10 minutes after cooking. This step allows the juices to redistribute throughout the meat, keeping it tender. Tenting it loosely with foil can help keep it warm.
    • Consider a Brine: For an extra layer of insurance against dryness, try a simple brine. A quick soak in a salt-water solution before cooking adds moisture and enhances the overall flavor.

    By following these tips, you can confidently create flavorful meals without the stress of serving dry chicken.

    When Is the Right Time to Add BBQ Sauce?

    Timing your BBQ sauce application is crucial. Since most sauces contain sugar, adding them too early is a common mistake that causes them to burn, leaving you with a bitter, charred exterior.

    Instead, follow this simple rule:

    • Add Sauce Towards the End: Brush BBQ sauce onto the chicken only during the last 10-15 minutes of cooking. This allows the sauce to caramelize and become sticky and delicious without burning.
    • Multiple Coats: For a thicker, more even layer of sauce, apply it in two or three thin coats. Brush on a coat, let it set for a few minutes, then repeat. This method builds a beautiful, glossy finish.

    This simple technique guarantees a sticky, flavorful crust and is the key to perfect BBQ chicken every time.

    What Can You Serve With BBQ Chicken?

    A serving of perfectly glazed BBQ chicken on a rustic plate, accompanied by a fresh green salad and grilled corn.
    A professional food photography, photorealistic, high-quality food magazine photo showcasing a perfectly plated serving of tender, glazed BBQ chicken. A beautifully browned and juicy chicken thigh, glistening with a rich BBQ sauce, is artfully arranged on a rustic, inviting ceramic plate. It is accompanied by vibrant, fresh side dishes: a small portion of a crisp green salad with cherry tomatoes and a light vinaigrette, and a piece of perfectly grilled corn on the cob. The setting is a warm, inviting dinner table, possibly outdoors or by a window with soft, natural light illuminating the dish, enhancing its appeal and highlighting the textures and colors of the food. No people visible.

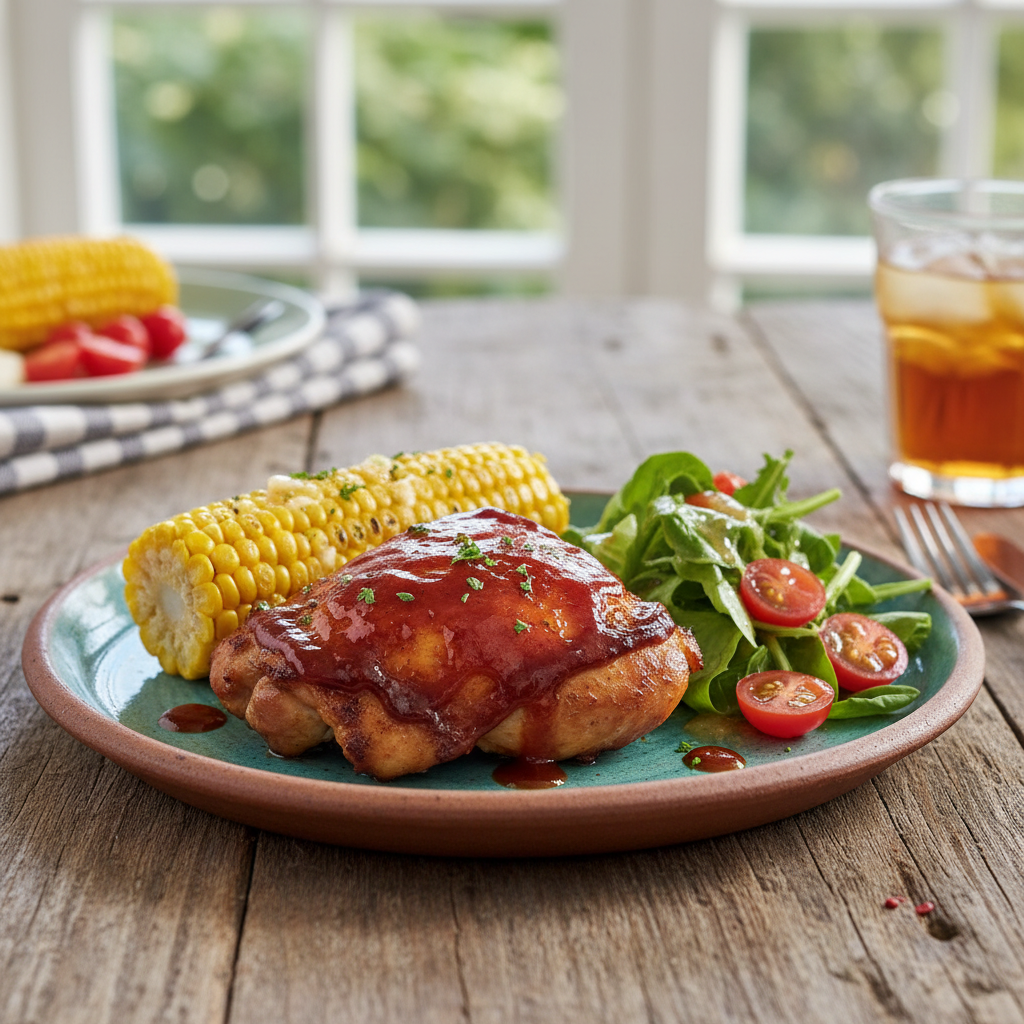
    Your juicy, flavorful BBQ chicken is the star of the show, but a great main course deserves equally delicious companions. Choosing the right side dish transforms a good meal into a fantastic one. That’s why we’ve compiled this list of perfect pairings for your easy BBQ chicken recipe, designed for busy families and beginner cooks.

    You’ll find simple dinner ideas that are big on flavor, whether you’re looking for something quick, healthy, or comforting. Get ready to build a complete and satisfying family-friendly meal!

    Classic BBQ Sides That Always Delight

    Some dishes are simply meant to be served with BBQ chicken. These timeless classics complement its sweet and tangy flavors beautifully, bringing a comforting and familiar touch to your plate.

    • Creamy Coleslaw: A cool, crisp coleslaw provides a wonderful contrast. Its tanginess cuts through the richness of the BBQ sauce, making it a refreshing and easy side to whip up.
    • Homestyle Potato Salad: A true crowd-pleaser, creamy potato salad adds a hearty and satisfying element to your meal. It’s a classic comfort food that pairs wonderfully with chicken.
    • Baked Beans (Homemade or Canned): Sweet and savory baked beans are a quintessential BBQ side. They offer a rich flavor and a comforting texture. You can easily elevate canned beans with a few extra ingredients.
    • Corn on the Cob: Whether grilled, boiled, or roasted, sweet corn is always a hit. A little butter and salt are all it needs to become a simple, healthy side that tastes amazing.

    Fresh and Healthy Companions

    To balance the richness of BBQ chicken, try one of these fresh and healthy companions. They add vibrant flavor and nutrients to your bbq chicken meal, creating a balanced dinner without feeling heavy.

    • Simple Green Salad: A mixed green salad with a light vinaigrette is always a good choice. It adds a refreshing crunch and a vibrant taste, making it one of the easiest sides to prepare.
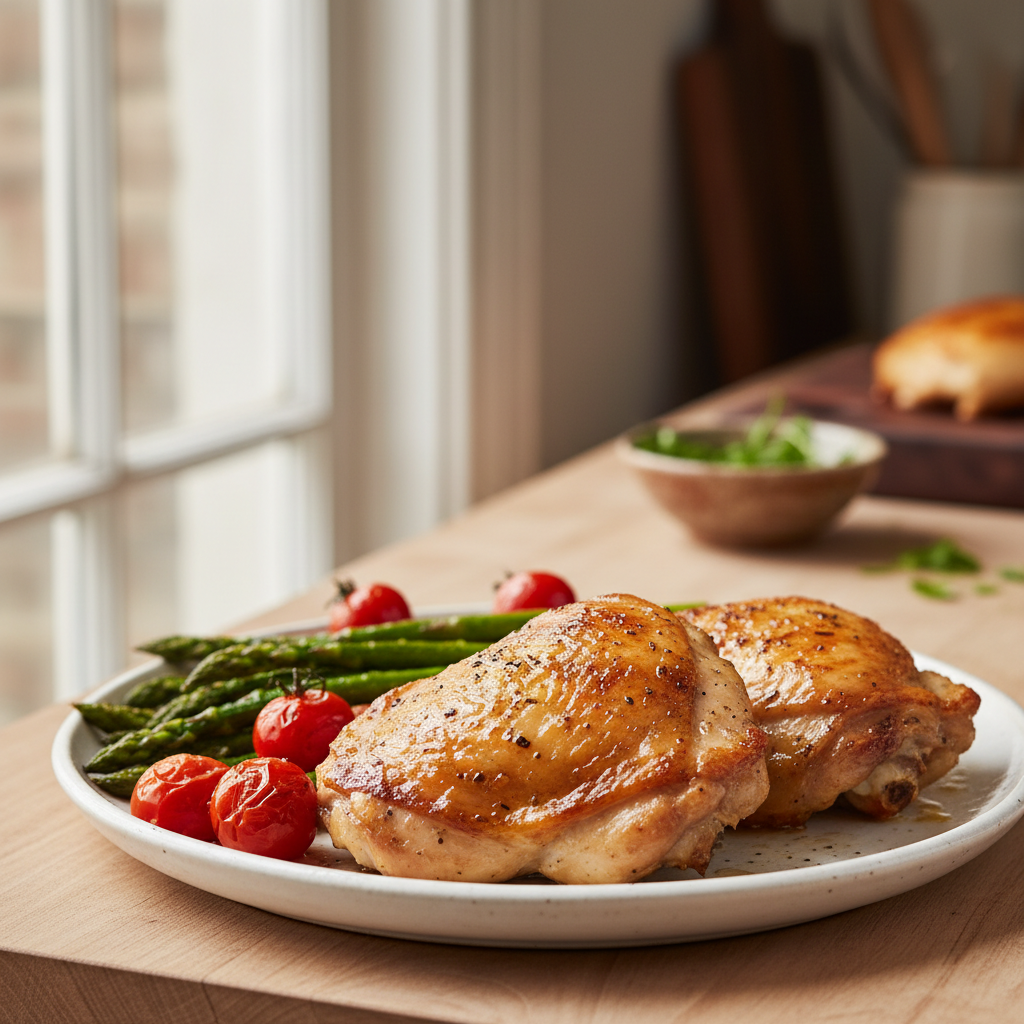
    • Grilled Vegetables: Zucchini, bell peppers, asparagus, or onions can be grilled right alongside your chicken. Grilling enhances their natural sweetness and smokiness—all you need is a drizzle of olive oil and some seasoning.
    • Roasted Sweet Potatoes: Cubed sweet potatoes roasted with a touch of olive oil and spices are delicious and offer a wonderful sweet-and-savory balance. Plus, they are packed with vitamins.
    • Quinoa Salad: A light quinoa salad with chopped cucumbers, tomatoes, and a lemon dressing is a filling yet healthy option. It’s packed with protein and fiber, making it a great choice for a balanced meal.

    Quick and Easy Additions for Busy Days

    When time is tight, you need sides that come together fast. These simple options will help you get a delicious, family-friendly dinner on the table without the stress.

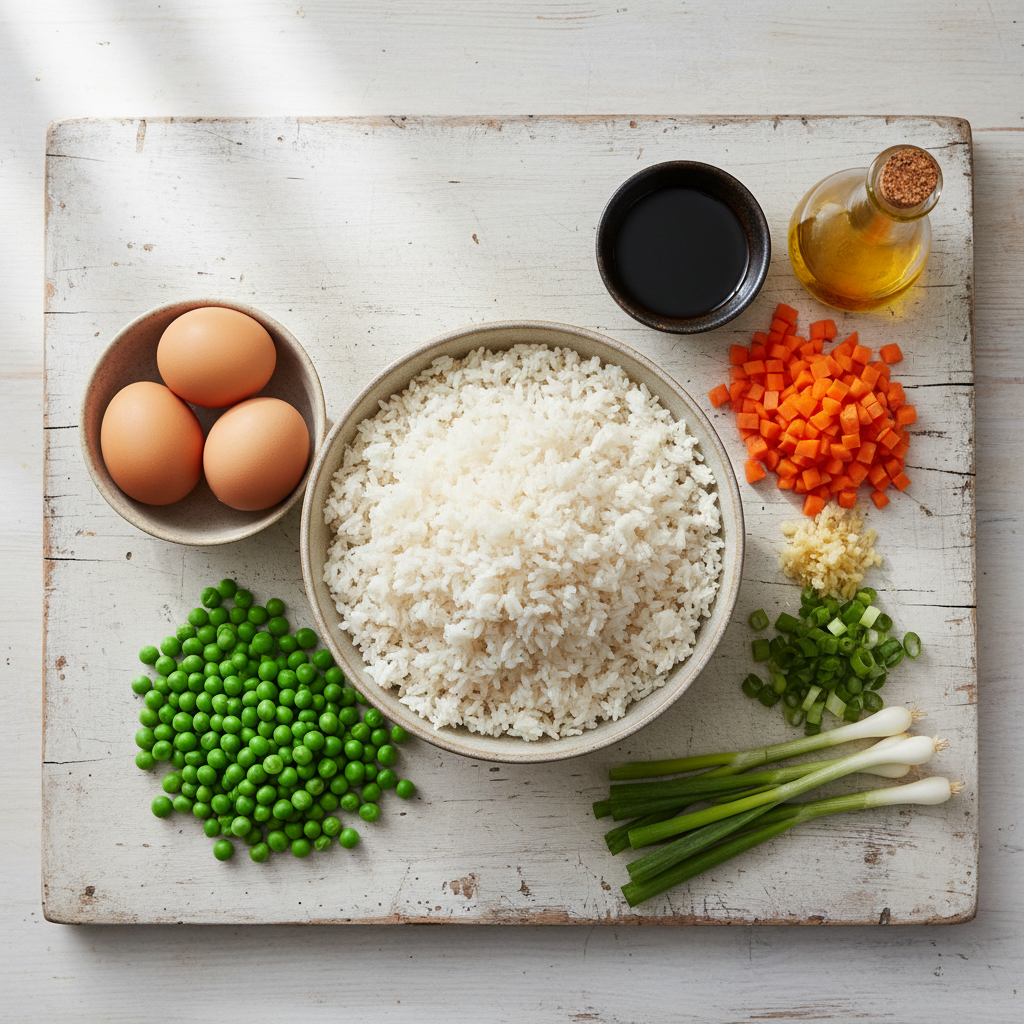
    • White or Brown Rice: A simple bowl of rice is a versatile companion that soaks up all that wonderful BBQ sauce. For a healthier option, choose brown rice for its higher fiber content.
    • Garlic Bread or Dinner Rolls: Warm, crusty bread is perfect for dipping and a comforting addition that everyone enjoys. You can find ready-to-bake options for ultimate convenience.
    • Steamed Green Beans: For a healthy side that takes very little effort, quickly steam some fresh green beans. A simple pat of butter and a pinch of salt is all they need.
    • Boxed Macaroni and Cheese: Sometimes, comfort food is exactly what you need. A quick box of mac and cheese is a nostalgic favorite and a simple dinner recipe that kids always love.

    Tips for Perfect Pairings and Meal Planning

    Choosing the right sides goes beyond just taste. Consider balance, ease of preparation, and your family’s preferences. These practical tips will help you create a stress-free, flavorful meal.

    • Balance Flavors and Textures: Pair your rich BBQ chicken with something fresh or tangy, like a creamy coleslaw. This contrast creates a more interesting and balanced eating experience.
    • Consider Prep Time: If your chicken takes a while to cook, choose quick-prep sides. Using pre-chopped veggies or ready-made salads is a key strategy for efficient meal planning.
    • Use Seasonal Ingredients: Fresh, in-season produce always tastes best and often requires less work to make it shine. Buying seasonal is also a great way to cook on a budget.
    • Don’t Be Afraid to Mix and Match: You don’t need to stick to just one side. Offering two or three different options gives everyone at the table a choice and adds more variety to the meal.

    With these simple side dish suggestions, you can confidently serve a complete, delicious meal with your easy BBQ chicken. Enjoy cooking and eating well with Recipesmondial!

    How Should You Store and Reheat Leftovers?

    One of the best parts of a delicious BBQ chicken dinner is enjoying the leftovers! Proper storage and reheating are key to making sure your chicken stays safe and tastes just as amazing the second time around. Here at Recipesmondial, we want your home cooking experience to be stress-free from start to finish.

    Storing Your BBQ Chicken Safely

    To keep leftover BBQ chicken flavorful and safe to eat, follow these simple storage steps:

    • Cool Quickly: Let the chicken cool to room temperature, but for no more than two hours. This step is crucial for preventing bacteria growth.
    • Use Airtight Containers: Once cool, place the chicken in an airtight container. This locks in moisture and prevents the chicken from absorbing other fridge odors.
    • Refrigerate Promptly: Store the airtight container in the refrigerator for up to 3 to 4 days [3]. This makes leftovers perfect for quick lunches or easy weeknight meals.
    • Freeze for Longer Storage: To store chicken for up to 3 months, wrap individual portions tightly and place them in freezer-safe bags or containers [3]. Thaw it overnight in the refrigerator before you plan to reheat it.

    Following these guidelines will help you enjoy your easy recipes for days, making meal prep a breeze.

    Reheating Your BBQ Chicken for Best Flavor

    Proper reheating is the secret to enjoying your leftovers. The goal is to warm the chicken thoroughly without drying it out. For safety, always use a meat thermometer to ensure the internal temperature reaches 165°F (74°C).

    Reheating in the Oven (Recommended for Best Results)

    The oven is our top recommendation because it gently warms the chicken, keeping it moist while helping the skin crisp up again.

    1. Preheat your oven to 300°F (150°C).
    2. Place the chicken in an oven-safe dish.
    3. Add a splash of chicken broth or water to the dish. This creates steam and prevents the chicken from drying out.
    4. Cover the dish tightly with aluminum foil.
    5. Bake for 15–25 minutes. The exact time will depend on the size and thickness of the chicken pieces.
    6. For crispier skin, remove the foil for the last 5 minutes of heating.

    Reheating in the Air Fryer (Great for Small Portions)

    The air fryer is a fantastic option for reviving the chicken’s crispy texture, especially for smaller portions like wings or drumettes.

    1. Preheat the air fryer to 350°F (175°C).
    2. Lightly spray the chicken pieces with cooking oil to help them crisp up.
    3. Place the chicken in the basket in a single layer, making sure not to overcrowd it.
    4. Air fry for 5–8 minutes, flipping the pieces halfway through cooking.
    5. Check the internal temperature to ensure it’s fully heated.

    Reheating in the Microwave (Quickest Option)

    While it’s the fastest method, be careful not to overcook, as the microwave can make chicken rubbery. This method is best when you’re short on time.

    1. Place the chicken in a microwave-safe dish.
    2. Add a small splash of water or broth to the dish.
    3. Cover the dish with a microwave-safe lid or a damp paper towel to trap steam and keep the chicken moist.
    4. Heat on medium power (50%) in 60-second intervals. Check and flip the chicken after each interval to ensure even heating.
    5. Continue until the chicken is hot throughout.

    Tips for Juicy Reheated Chicken

    • Don’t Overheat: This is the most common mistake. Overheating is the fastest way to make chicken dry and tough.
    • Add Moisture: A splash of liquid—like broth, water, or even a fresh bit of BBQ sauce—makes a huge difference in keeping the chicken from drying out.
    • Slice Thick Pieces: For large pieces like chicken breasts, slice them before reheating. This helps them warm up quickly and evenly.
    • Check Temperature: Always use a meat thermometer to ensure your chicken reaches 165°F (74°C). This guarantees it’s safe to eat.

    With these simple tips, your leftover BBQ chicken will be just as delicious as when it was freshly cooked. At Recipesmondial, we’re here to make home cooking easy and enjoyable for everyone!

    Frequently Asked Questions About BBQ Chicken

    What is the best internal temperature for BBQ chicken?

    For juicy and safe BBQ chicken, cook it to an internal temperature of 165°F (74°C). This is the USDA-recommended temperature to ensure all poultry is cooked safely. [4]

    To check for doneness, use a meat thermometer. Insert it into the thickest part of the chicken, making sure it doesn’t touch any bones.

    Reaching 165°F not only guarantees the chicken is fully cooked, but it also helps keep the meat tender and flavorful. This simple check is the key to cooking with confidence every time.

    How do you get BBQ sauce to stick to chicken?

    Getting that perfect sticky, caramelized BBQ sauce on your chicken is easier than you think. The secret lies in timing and technique. Here’s how:

    • Pat the chicken dry: Before seasoning, gently pat your chicken pieces dry with paper towels. Excess moisture creates steam and prevents the sauce from adhering properly.
    • Apply in layers: Don’t smother the chicken in sauce too early. Instead, brush on thin layers during the final 10-15 minutes of cooking to allow each layer to set and caramelize.
    • Use moderate heat: If you’re grilling, move the chicken to a cooler, indirect heat zone before saucing. In an oven, keep the temperature moderate. This prevents the sugars in the sauce from burning.
    • Baste often: Apply a new layer of sauce every few minutes. This builds up a beautiful, glossy coating as the sugars thicken and create that delicious, sticky glaze.

    This method prevents the sauce from dripping off, giving you a wonderfully flavorful meal that’s perfect for any family dinner.

    Should you marinate chicken before making BBQ chicken?

    While marinating your chicken before grilling is optional, it’s an excellent way to elevate your dish. A marinade can significantly improve your BBQ chicken in three key ways:

    • Boosts flavor: A good marinade infuses the chicken with flavor, going much deeper than a surface-level dry rub.
    • Adds moisture: Marinades help the chicken retain its natural juices, preventing it from drying out during cooking.
    • Tenderizes the meat: Acidic ingredients like vinegar or buttermilk gently break down tough fibers, resulting in incredibly tender chicken.

    If you’re short on time, don’t worry. A good dry rub is a fantastic alternative, or you can simply let the rich flavor of your BBQ sauce shine. Both options offer great flexibility for a quick meal.

    Can I use chicken breasts instead of thighs for this recipe?

    Absolutely! Chicken breasts are a great substitute for thighs in this recipe. Because they are leaner, you’ll need to make a few small adjustments.

    Here are a few tips for using chicken breasts:

    • Watch the cooking time: Chicken breasts are leaner and cook much faster than thighs, so keep a close eye on them to prevent overcooking.
    • Monitor the temperature: Use a meat thermometer and pull the chicken from the heat the moment it reaches 165°F. This is crucial for preventing dry results.
    • Consider brining: For extra juicy breasts, a quick brine before seasoning can make a big difference by helping the meat retain moisture.
    • Pound them flat: Pounding chicken breasts to an even thickness helps them cook uniformly, ensuring no part becomes dry while another is still undercooked.

    While thighs are more forgiving, chicken breasts can be just as delicious when cooked carefully. Simply adjust your cooking time and monitor the temperature closely!


    Sources

    1. https://www.foodsafety.gov/food-safety-charts/safe-minimum-internal-temperature-chart
    2. https://www.foodsafety.gov/food-safety-charts/safe-minimum-cooking-temperatures
    3. https://www.foodsafety.gov/food-safety-charts/cold-food-storage-chart
    4. https://www.fsis.usda.gov/food-safety/safe-food-handling-and-preparation/food-safety-basics/safe-internal-temperature-chart

  • How to Make Perfect Risotto: A Simple Step-by-Step Recipe for Beginners

    How to Make Perfect Risotto: A Simple Step-by-Step Recipe for Beginners

    Risotto is a classic Northern Italian rice dish cooked slowly with broth until it becomes creamy and velvety. Its signature creamy texture comes not from cream, but from the starch released by short-grain, high-starch rice varieties like Arborio or Carnaroli as they are stirred during cooking.

    Imagine a rich, creamy bowl of risotto, with each spoonful melting in your mouth. That’s the magic of this classic Italian dish. For many home cooks, however, risotto can feel intimidating. It has a reputation for requiring constant stirring and precise timing. Perhaps you’ve been overwhelmed by complex recipes or unsure how to create healthy, tasty meals that impress. But what if we told you that making a delicious risotto is far simpler than you think, even for beginners?

    At Recipesmondial, we believe amazing food shouldn’t require culinary school. Our mission is to make approachable home cooking a joyful experience, turning simple dinner recipes into triumphs. This guide will empower you with step-by-step guidance to build your confidence and skills. You will discover how easy it is to create flavorful, family-friendly meals, transforming meal prep from a chore into a fun kitchen adventure.

    We’ll skip the complicated jargon and get straight to what works. This guide covers everything you need to know, from selecting the right risotto rice to mastering the techniques for that signature creamy texture. Soon, you’ll be impressing yourself and your loved ones with flavorful meals made easy. Let’s dive in and start with the heart of the dish.

    What Makes a Perfect Risotto?

    Imagine a dish that’s wonderfully creamy, incredibly flavorful, and deeply comforting. That’s the magic of a perfect risotto! This classic Italian rice dish feels both elegant and incredibly homey.

    Achieving this perfection isn’t complicated, even for beginners. The secret lies in two things: patient cooking and the right ingredients. The process involves gently stirring a special, starchy rice with warm broth. This slow stirring releases the rice’s natural starches, which is what creates that signature luxurious texture.

    So, what truly sets a perfect risotto apart? Here are the key elements you’ll want to achieve with our easy recipes:

    • Creamy Texture: The hallmark of great risotto is its unbelievably creamy texture. It should flow softly, almost like a thick soup, yet still hold its shape on a plate. This creaminess comes from the rice’s starch, which naturally thickens the broth and other liquids.
    • Al Dente Rice: While incredibly creamy, the individual rice grains should remain distinct. Each one needs a slight, pleasant chew at its very center. This texture is called ‘al dente,’ which means ‘to the tooth’ in Italian, offering a satisfying bite without being hard.
    • Rich, Balanced Flavor: A perfect risotto bursts with deep, savory flavors. These come from high-quality broth, a splash of white wine, and fresh aromatics like onion and garlic. Each ingredient should blend together to create one harmonious taste.
    • Just the Right Consistency (All’onda): It should never be too soupy or too stiff. Instead, it should flow like a gentle wave when you tilt the plate. This ideal consistency is known as *all’onda*, which means ‘on the wave’ in Italian—the true sign of a perfectly cooked risotto.
    • Freshness: Risotto is best enjoyed the moment it’s made. Its delicate texture and comforting warmth are at their absolute peak when served immediately.

    Once you master these key elements, you can create delicious risotto for your family with confidence. This approachable dish is a fantastic way to build your skills and feel more at home in the kitchen!

    What kind of rice is used in risotto?

    Three bowls displaying different types of uncooked risotto rice: Arborio, Carnaroli, and Vialone Nano.
    Professional food photography, photorealistic, high-quality food magazine photo. A clear and precise close-up shot showcasing three distinct types of risotto rice: Arborio, Carnaroli, and Vialone Nano. Each type of uncooked rice is neatly presented in a small, simple, and elegant white ceramic or glass bowl. The bowls are arranged in a row or slight triangle on a clean, neutral-toned surface, allowing the viewer to clearly discern the shape, size, and texture of each rice grain. The lighting is bright and even, highlighting the unique characteristics of each rice variety.

    Arborio: The Go-To Risotto Rice

    When you first make risotto, you’ll most likely encounter Arborio rice. It’s the go-to choice for many home cooks for a few key reasons.

    • Easy to find: Arborio is available in most grocery stores, making it a perfect starting point for beginner-friendly recipes.
    • Creamy texture: This plump, oval-shaped short-grain rice is packed with a starch called amylopectin. As you stir the risotto, this starch is released, creating the classic creamy consistency.
    • Absorbs flavor well: Arborio soaks up broth and seasonings effectively, delivering a rich and flavorful meal.

    Because of these qualities, Arborio is a reliable choice for successful, flavorful risotto and other simple dinner recipes.

    Carnaroli: The ‘King’ of Risotto Rice

    If you’re ready to elevate your risotto, consider Carnaroli. Many professional chefs refer to it as the “King of Risotto Rice.”

    • Superior texture: As a medium-grain rice, Carnaroli has a higher amylose content than Arborio. This structure helps the grains hold their shape well during cooking, resulting in a distinct al dente bite.
    • Extra creamy: Despite its firmness, Carnaroli releases plenty of starch, which creates a very creamy risotto without becoming mushy.
    • Rich flavor absorption: This rice excels at absorbing liquids and flavors, making every bite exceptionally rich.

    While it can be pricier and harder to find, Carnaroli is worth the effort for a restaurant-quality dish at home [1].

    Vialone Nano: For a Softer Texture

    Vialone Nano is another excellent but lesser-known option for risotto. It offers a different texture that is just as appealing.

    • Smaller grain: A short-grain variety, Vialone Nano is noticeably smaller and rounder than Arborio or Carnaroli.
    • Quick absorption: Its grains absorb liquid more quickly than other varieties, which can shorten the overall cooking time.
    • Softer, creamier result: The final dish is very creamy with a softer, almost soupy consistency. This texture makes it a preferred choice for delicate seafood risottos and vegetable dishes.

    Choose Vialone Nano if you want a risotto with a lighter, looser texture, which is ideal for exploring different flavors and cooking styles.

    Can I Make Risotto with Normal Rice?

    A common question, especially for those budget cooking, is whether regular rice can be used for risotto. The short answer is no—at least not if you want an authentic, creamy result.

    • Lack of starch: Standard long-grain rice, such as jasmine or basmati, has much less surface starch, which is essential for creating risotto’s signature creamy sauce.
    • Mushy texture: Instead of absorbing liquid gradually, these grains tend to become mushy and lose their individual shape.
    • Different cooking properties: The unique starch in risotto rice allows it to release creaminess while the grain itself remains firm in the center (al dente). Regular rice cannot do this.

    For the best risotto experience, it is essential to use a specialized Italian rice variety. Using the correct type ensures a creamy texture and reliable results, helping you avoid the frustration of a dish that doesn’t turn out as expected, which can feel like an overly complex recipe.

    Essential Ingredients for a Basic Risotto Recipe

    An organized display of fresh risotto ingredients including Arborio rice, Parmesan, onion, garlic, broth, white wine, butter, and parsley.
    Professional food photography, photorealistic, high-quality food magazine photo. A warm, inviting flat lay arrangement of fresh, high-quality essential ingredients for a basic risotto recipe. Include a small bowl of uncooked Arborio rice, a wedge of Parmesan cheese with a grater nearby, a fresh shallot or small onion, a few cloves of garlic, a clear glass pitcher filled with golden chicken or vegetable broth, a small bottle of dry white wine, a stick of butter, and a bunch of vibrant fresh parsley. All items are artfully arranged on a clean, light-colored wooden or marble kitchen counter, highlighting their freshness and readiness for cooking. The lighting is soft and natural.

    The Rice

    The star of any amazing risotto is the rice. Choosing the right grain is crucial for achieving that signature creamy texture, making it a key step in creating truly flavorful meals made easy.

    • Arborio Rice: As the most common choice, this is perfect for beginner-friendly recipes. Arborio grains are plump, absorb liquid beautifully, and release starch as they cook to create a lovely creamy sauce.
    • Carnaroli Rice: Often called the “king of risotto rice,” Carnaroli offers an even creamier result while holding its shape wonderfully.
    • Vialone Nano Rice: This smaller grain cooks a bit faster and yields a slightly softer, very creamy risotto.

    Avoid using long-grain white rice for risotto, as it won’t release enough starch for the desired creaminess. For the best outcome, stick to these specific risotto rice varieties.

    The Broth

    Broth is more than just liquid in risotto; it’s a primary source of flavor. For the best taste, always use a good-quality broth. It’s what transforms your simple dinner recipes into something special.

    • Chicken Broth: A classic choice, chicken broth adds a rich, savory depth that pairs well with many ingredients.
    • Vegetable Broth: For a vegetarian or vegan risotto, vegetable broth is essential. Choose a low-sodium option to better control the saltiness.

    Pro Tip: Always keep your broth warm in a separate pot on the stove. Adding cold broth to the hot rice can shock it, which slows the cooking process and prevents the grains from absorbing liquid evenly. This simple trick ensures a consistently creamy finish.

    The Aromatics (Onion & Garlic)

    These humble ingredients form the aromatic foundation of your risotto, providing the initial burst of flavor. They are vital for adding depth to any easy recipe. A classic risotto starts with finely diced onion and sometimes garlic.

    • Onion: Finely chop half a medium onion. You want it to almost disappear into the rice as it cooks, adding a subtle sweetness and depth.
    • Garlic: One or two cloves of minced garlic can enhance the flavor. Be sure to add it after the onion softens to prevent it from burning.

    Sautéing these ingredients gently until translucent releases their wonderful aromas and creates a welcoming base for the rice. This step-by-step cooking guidance ensures you build flavor from the very beginning.

    The Fat (Butter & Olive Oil)

    Fat plays a dual role in risotto: it’s used for both sautéing and for richness. Butter and olive oil each bring unique qualities to the dish.

    • Olive Oil: Start with a good-quality extra virgin olive oil. It’s perfect for sautéing the aromatics and toasting the rice, providing a light, fruity base.
    • Unsalted Butter: Butter is added later for richness and creaminess, contributing to the dish’s luxurious final texture. Using unsalted butter also lets you control the seasoning.

    Together, they create a silky, smooth mouthfeel that makes your risotto feel truly indulgent. This small detail makes a big difference in approachable home cooking.

    The Wine (Optional but Recommended)

    Adding wine is a traditional step that enhances the risotto’s complexity and elevates family-friendly meals. However, this step is optional. If you prefer not to use wine, simply use a little more broth instead.

    • Dry White Wine: A dry white wine, like Pinot Grigio or Sauvignon Blanc, is ideal. It adds a bright acidity that helps deglaze the pan and balances the richness of the butter and cheese.

    The alcohol cooks off completely, leaving behind a wonderful, nuanced flavor that makes the dish more sophisticated. It’s a great way to discover new simple dishes and build confidence in the kitchen.

    The Finishers (Parmesan & Butter)

    The final touches, stirred in right at the end, make all the difference in achieving a perfectly creamy risotto. This process, called “mantecatura,” is essential for a truly flavorful meal made easy.

    • Freshly Grated Parmesan Cheese: Use high-quality Parmesan or Pecorino Romano. The cheese melts into the rice, adding a salty, umami depth and incredible creaminess. Avoid pre-grated cheese, which often contains anti-caking agents that can ruin the texture.
    • Cold Unsalted Butter: Stirring in a final knob of cold butter off the heat allows it to emulsify with the rice’s starches and the broth. This is the key to a glossy, velvety-smooth finish.

    These finishers are the secret to a dreamy, restaurant-quality risotto, helping to transform simple ingredients into delicious, visually appealing meals at home.

    How to Make Simple & Creamy Risotto: A Step-by-Step Guide

    A creamy bowl of perfectly cooked risotto topped with freshly grated Parmesan cheese and chopped parsley, with steam gently rising.
    Professional food photography, photorealistic, high-quality food magazine photo. A close-up, top-down shot of a perfectly cooked, golden-hued, and visibly creamy risotto served in an elegant, rustic ceramic bowl. The risotto is generously garnished with a sprinkle of freshly grated Parmesan cheese and a few bright green chopped parsley leaves. Soft steam is gently rising from the dish, emphasizing its warmth and freshness. The background is softly blurred, suggesting a cozy, inviting kitchen environment. The texture of the risotto should look rich, comforting, and perfectly al dente.

    Step 1: Prepare Your Ingredients (Mise en Place)

    Preparing all your ingredients before you start is a game-changer. This practice, known by the French term “Mise en Place” (everything in its place), helps you cook with confidence and makes the process more enjoyable.

    Gathering and prepping everything beforehand prevents any last-minute scrambling. This is a fantastic habit for beginner-friendly recipes and a key part of our meal prep tips.

    • Warm the broth: Pour the chicken or vegetable broth into a saucepan and gently heat it over low heat. It should be hot but not boiling. Keeping the broth warm helps the risotto cook evenly.
    • Dice the onion: Finely chop one small to medium onion.
    • Mince the garlic: Peel and finely mince 2-3 cloves of garlic.
    • Measure the rice: You’ll need 1 cup (180-200g) of Arborio or Carnaroli rice.
    • Grate the cheese: Grate ½ cup of fresh Parmesan and set it aside.
    • Prepare the butter: Cut 2 tablespoons of unsalted butter into small cubes.
    • Measure the wine (optional): Pour ½ cup of dry white wine, such as Pinot Grigio or Sauvignon Blanc.

    Step 2: Sauté the Aromatics

    This step builds the first layer of flavor for your risotto. Your kitchen is about to start smelling amazing!

    1. Place a large, heavy-bottomed pot or a Dutch oven over medium heat.
    2. Add 1 tablespoon of olive oil and 1 tablespoon of butter.
    3. Once the butter has melted and the oil shimmers, add the finely diced onion.
    4. Sauté the onion for 5-7 minutes, stirring occasionally, until it becomes soft and translucent. Be careful not to let it brown.
    5. Stir in the minced garlic and cook for one more minute until fragrant. Watch it closely, as burnt garlic tastes bitter.

    Step 3: Toast the Rice (Tostatura)

    Next is “Tostatura,” the Italian term for toasting the rice. This is a crucial step for achieving the perfect risotto texture. Toasting helps each grain absorb liquid more slowly, which prevents it from becoming mushy and ensures a wonderful ‘al dente’ bite.

    1. Add the risotto rice to the pot with the onions and garlic.
    2. Stir constantly for 2-3 minutes to coat each grain.
    3. You’ll know it’s ready when the edges of the rice grains look translucent, but the centers remain white and opaque.
    4. Toasting also brings out a pleasant, nutty flavor. It’s a simple technique that makes a big difference.

    Step 4: Deglaze with Wine

    Deglazing with wine adds a rich depth of flavor and helps lift any tasty bits of food stuck to the bottom of the pot. This little trick is a secret to flavorful meals made easy.

    1. Pour the white wine into the pot.
    2. Stir continuously as the wine bubbles and evaporates, which should happen quickly.
    3. Continue stirring until the wine is fully absorbed and no liquid pools at the bottom of the pot.
    4. Quick Tip: If you prefer not to use wine, you can skip this step. Just add an extra ½ cup of warm broth in the next step instead.

    Step 5: Gradually Add Warm Broth

    This step is the heart of making risotto, and patience is key. By adding broth slowly, you are coaxing the starches out of the rice, which creates its signature creamy texture. This is a fundamental technique in basic cooking skills.

    1. Add one ladleful (about ½ cup) of the warm broth to the rice.
    2. Stir gently but constantly until the broth is almost completely absorbed by the rice.
    3. Once the liquid is absorbed, add another ladleful of broth.
    4. Repeat this process—adding one ladleful of broth at a time and stirring until it’s absorbed—for about 18-25 minutes.
    5. Taste the rice periodically. It’s ready when it’s creamy but still has a slight bite in the center (known as “al dente”).
    6. You may not use all the broth, or you might need a bit more. The goal is a creamy consistency, not a soupy one.

    Step 6: The Final Stir (Mantecatura)

    The final step, “Mantecatura,” is how you achieve an incredibly rich and creamy finish. This technique brings all the flavors together and gives the risotto its classic velvety texture.

    1. Once the risotto is al dente, remove the pot from the heat.
    2. Add the remaining 1 tablespoon of cubed butter.
    3. Stir in the grated Parmesan cheese.
    4. Stir vigorously for about 30 seconds. This action emulsifies the butter and cheese with the starch from the rice, creating a beautiful, velvety sauce.
    5. Cover the pot and let it rest for 2-3 minutes. This allows the flavors to meld and makes the risotto even creamier.
    6. Serve the risotto immediately. Garnish with extra Parmesan and fresh parsley, if desired.

    Top Tips for Foolproof Risotto

    Always Use Warm Broth

    One of the most important secrets to a truly creamy risotto is using warm broth. This simple step makes a huge difference. Adding cold broth to hot rice instantly drops the pan’s temperature, which shocks the rice kernels. As a result, the cooking process slows down and becomes uneven.

    In contrast, warm broth helps the rice cook consistently and encourages a smooth release of starches. This process is what creates that lovely, velvety texture. Keep your broth at a gentle simmer in a separate pot, and ladle it in gradually as needed. This technique ensures your risotto cooks beautifully every time.

    Stir Constantly, but Gently

    Consistent, gentle stirring is essential for a great risotto. The constant movement causes the rice grains to rub against each other, which releases their natural starches. These starches create the creamy, luscious texture of an authentic risotto. Without enough stirring, your dish might end up sticky or less creamy.

    However, avoid stirring too aggressively. Too much force can break down the delicate rice grains, resulting in a mushy texture instead of a perfectly al dente bite. Think of it as a gentle, continuous motion. Mastering this simple technique will help you achieve perfect results and boost your confidence in the kitchen.

    Don’t Rush the Process

    Patience is essential when making risotto. While it isn’t a quick meal, the results are incredibly satisfying. Rushing can lead to an undercooked or unevenly textured dish. The gradual addition of warm broth is key, as it allows the rice to slowly absorb the liquid, building flavor and creaminess layer by layer.

    Plan on about 20-30 minutes for the cooking stage, and try to enjoy the process. By taking your time to stir and add the broth ladle by ladle, you ensure each grain is cooked perfectly to the ideal al dente texture. Remember, good things come to those who wait—especially a delicious risotto.

    Taste As You Go

    Tasting your risotto throughout the cooking process is crucial for achieving the best results. This simple tip allows you to adjust flavors and monitor the texture for perfect doneness. Start tasting the rice about 15 minutes after you begin adding broth. You’re looking for a tender bite with a slight firmness in the center, also known as ‘al dente’.

    This is also your chance to check the seasoning. Since your broth likely contains salt, add any extra salt and pepper carefully. You can also add more cheese at the end if you like. Adjust as you go to create a balanced, flavorful dish. This final step is key to making a perfect risotto every time.

    Easy Risotto Recipe Variations to Try Next

    Mushroom Risotto

    Once you master the basic risotto, an easy mushroom risotto recipe is a popular next step. It’s a classic for a reason, offering an incredible depth of flavor and an earthy aroma that elevates any simple dinner.

    Here’s how to create this delightful variation:

    • Key Ingredients: Use fresh mushrooms like cremini, shiitake, or a mix of wild varieties. A little garlic and fresh thyme will also enhance the flavor.
    • Preparation: Start by sautéing sliced mushrooms in a separate pan until golden brown. This crucial step concentrates their flavor. Remove them from the pan and set aside.
    • Cooking Adjustments: Follow the basic risotto steps: sauté your aromatics, toast the rice, deglaze with white wine, and then gradually add warm broth.
    • Adding the Mushrooms: Stir the sautéed mushrooms back into the risotto during the last 5 minutes of cooking to prevent them from becoming rubbery.
    • Flavor Boost: For extra richness, use mushroom broth instead of chicken or vegetable broth. A sprinkle of fresh parsley at the end adds a bright finish.

    Chicken Risotto

    For a hearty, protein-packed meal, chicken risotto is a fantastic choice. This family-friendly dish is both comforting and satisfying. It’s also perfect for using leftover chicken, making it a quick weeknight meal.

    Here’s how to make a delicious chicken risotto:

    • Key Ingredients: You’ll need cooked chicken—shredded rotisserie chicken is a great shortcut. Fresh or frozen peas and a touch of lemon zest are also excellent additions.
    • Preparation: If using raw chicken, cut it into small, bite-sized pieces. Sauté the pieces in olive oil until cooked through, then set the chicken aside.
    • Cooking Adjustments: Follow the standard risotto cooking method. Make sure your broth is warm before you begin.
    • Incorporating Chicken and Peas: Stir in the cooked chicken and peas during the last 5-7 minutes of cooking. This gives them enough time to warm through completely.
    • Serving Tip: A squeeze of fresh lemon juice at the end brightens all the flavors and cuts through the richness of the dish beautifully.

    Vegetarian Risotto with Spring Vegetables

    A vibrant vegetarian risotto is the perfect way to enjoy the freshness of the season. This healthy and balanced dish is ideal for lighter dining, offering a beautiful mix of colors and textures.

    Here’s how to bring spring to your plate:

    • Key Ingredients: Choose tender spring vegetables like asparagus, peas, and fresh spinach. Lemon zest and fresh mint or basil add a wonderful aroma.
    • Preparation: To prepare the vegetables, blanch the asparagus and peas in boiling water, then plunge them into an ice bath. This preserves their vibrant color and crisp texture. Chop the asparagus into small pieces.
    • Cooking Adjustments: Use vegetable broth for this recipe and follow the standard risotto method.
    • Adding Vegetables: Stir in the blanched asparagus and peas during the final 3-5 minutes of cooking. Add fresh spinach at the very end, as the residual heat will wilt it perfectly.
    • Finishing Touch: A generous amount of lemon zest and a handful of chopped fresh herbs elevate this dish, making it truly taste like spring.

    Seafood Risotto

    For a touch of elegance, try a seafood risotto. This impressive dish might seem fancy, but it’s surprisingly simple to prepare. It’s a wonderful option for a special occasion or any time you want an extraordinary meal.

    Here’s how to create a stunning seafood risotto:

    • Key Ingredients: Select your favorite seafood, such as shrimp, scallops, calamari, or mussels. A good dry white wine and fresh parsley are also essential.
    • Preparation: Gently sauté the seafood in a separate pan with a little olive oil. Cook just until opaque (or until mussels open) to avoid overcooking. Remove the seafood and set it aside.
    • Cooking Adjustments: Use fish stock or a light vegetable broth if possible. Follow the basic risotto steps, including deglazing the pan with white wine.
    • Integrating Seafood: Stir the cooked seafood into the risotto during the last 2-3 minutes of cooking. This gently warms it through without overcooking, ensuring it remains tender.
    • Pro Tip: Garnish with plenty of fresh, chopped parsley. This adds a burst of fresh flavor and creates a beautiful presentation.

    Frequently Asked Questions About Risotto

    Is risotto more healthy than rice?

    Risotto generally contains more calories and fat than plain steamed rice. This is because it’s enriched with ingredients like butter, broth, and cheese, while plain rice is typically just cooked with water.

    Here’s a simple comparison:

    • Plain Rice: Consists of rice and water, offering simple carbohydrates for energy.
    • Risotto: Starts with rice but adds butter, wine, broth, and Parmesan cheese. These ingredients are what create its famously rich flavor and creamy texture.

    However, you can easily make a healthier risotto. Try reducing the amount of butter and cheese, and boost its nutritional value by adding plenty of vegetables like mushrooms, spinach, or asparagus. This can turn it into a well-rounded and flavorful meal.

    At Recipesmondial, we believe enjoyment is key to home cooking. So while plain rice is lower in calories, a homemade risotto packed with vegetables can be a wonderful part of a balanced diet. It’s all about preparation and balance.

    Can I make risotto with normal rice?

    While you can technically use regular long-grain rice, it won’t produce the classic creamy texture of a true risotto. The type of rice you use is critical for getting the right result.

    Here’s why:

    • High Starch Content: Risotto rice like Arborio and Carnaroli has a high content of a starch called amylopectin. As you stir the rice and add liquid, this starch releases and creates the signature creamy, velvety sauce.
    • Slow Absorption: The grains are also great at absorbing liquid slowly without becoming mushy. This allows them to cook to a perfect al dente texture.

    Regular long-grain rice, like basmati or jasmine, has much less of this starch. It will absorb the broth but won’t create that creamy consistency. Instead, you’ll end up with a dish that’s more like a pilaf. For authentic results, using proper risotto rice makes all the difference.

    What is traditional risotto rice?

    To make an authentic, creamy risotto, you need to use a specific type of short- to medium-grain rice. These varieties have the high starch content required for a creamy texture and the ability to absorb liquids while remaining firm, or “al dente.”

    Here are the top traditional risotto rice types:

    • Arborio: The most widely available risotto rice, making it a popular choice for beginner-friendly recipes. Its large, plump grains release a lot of starch, producing a very creamy risotto. It’s a great starting point for anyone new to making the dish.
    • Carnaroli: Often called the “king of risotto rice,” Carnaroli has longer grains and an even higher starch content than Arborio. It creates an exceptionally creamy texture while the grains hold their shape beautifully. Many chefs prefer it for its reliable results.
    • Vialone Nano: With shorter, plumper grains, Vialone Nano cooks a bit faster than the others. It produces a very creamy risotto with a slightly softer finish and is a favorite for seafood dishes.

    Choosing the right rice is the most important step for achieving that signature creamy texture. It ensures your risotto will turn out perfectly every time.

    What wine is best to use in risotto?

    A dry white wine is a classic ingredient in risotto for a reason. It adds a fantastic depth of flavor and a touch of acidity that cuts through the richness of the dish.

    Here’s what you should look for:

    • Dry White Wine: Opt for a crisp, unoaked wine. Good choices include Pinot Grigio, Sauvignon Blanc, or a dry Vermouth. The alcohol cooks off during cooking, leaving behind a subtle flavor that enhances the dish.
    • Pro Tip: Follow the golden rule of cooking with wine: if you wouldn’t drink it, don’t cook with it. A low-quality wine will not improve with cooking.

    And here’s what to avoid:

    • Sweet Wines: Avoid sweet wines like Moscato or a sweet Riesling, as they will make your risotto taste sugary.
    • Red Wines: Unless a specific recipe calls for it (like a Barolo risotto), it’s best to avoid red wine. It will dramatically change the dish’s color and intended flavor.

    If you prefer to cook without alcohol, you can easily skip the wine. Simply substitute it with an equal amount of warm broth. Your risotto will still be delicious and full of flavor.


    Sources

    1. https://www.finedininglovers.com/article/risotto-rice-varieties-carnaroli-arborio-vialone-nano

  • The Best Beef Stroganoff: A Step-by-Step Guide for Beginners

    The Best Beef Stroganoff: A Step-by-Step Guide for Beginners

    Beef Stroganoff is a classic comfort food dish featuring tender strips of sautéed beef and mushrooms, all coated in a rich, creamy sauce made with sour cream. It is traditionally served over egg noodles, rice, or potatoes. This simple, one-pan recipe is perfect for a quick and flavorful weeknight dinner.

    Are you searching for a hearty, comforting meal that feels special but isn’t complicated to prepare? It can be overwhelming to find family-friendly dishes that satisfy everyone, especially when you want incredible flavor without the stress. That’s where this beef stroganoff comes in. It’s a timeless classic that brings warmth and deliciousness to any dinner table, made simple and enjoyable for cooks of all levels.

    Our goal is to help you build confidence and make cooking an enjoyable experience, not a chore. This beef stroganoff recipe is designed with clear, step-by-step guidance perfect for beginners and busy home cooks. We’ll walk you through every stage, ensuring you achieve perfectly tender beef and a rich, creamy mushroom sauce. You’ll see how simple ingredients transform into a truly impressive, stress-free meal.

    Forget guesswork and confusing technical terms. Our approachable home cooking method focuses on practical steps for delicious results. This isn’t just another stroganoff recipe—it’s proof that cooking can be both easy and incredibly rewarding. Ready to see why this will become your new go-to for a quick family dinner? Let’s get started.

    Why Is This The Best Beef Stroganoff Recipe?

    Welcome to your new favorite beef stroganoff! We believe cooking should be enjoyable, not overwhelming, which is why we designed this recipe to be the absolute best for home cooks. It transforms a classic dish into a delicious and comforting meal you can create without any stress.

    This recipe was crafted with you in mind. Our clear, step-by-step guidance makes the entire process approachable from start to finish, ensuring you achieve a perfect result every single time.

    So, why is this beef stroganoff recipe truly exceptional?

    • Simple, Everyday Ingredients: We focus on ingredients you can easily find at any grocery store. No exotic or hard-to-source items are needed for this flavorful meal.
    • Unbeatable Flavor, Made Easy: Our simple method ensures tender beef and a rich, creamy mushroom sauce, so you can achieve restaurant-quality taste in your own kitchen.
    • Beginner-Friendly Steps: Each instruction is broken down into simple, actionable steps. You won’t be overwhelmed by complex techniques or jargon, making this recipe perfect for building your confidence in the kitchen.
    • Reliable Results: Say goodbye to guesswork! This recipe is designed for consistent success. You will create a comforting, family-friendly meal that everyone will love.
    • Quick & Convenient: Perfect for busy weeknights, this beef stroganoff comes together surprisingly fast, helping you solve mealtime decisions quickly and deliciously.
    • Customizable for Your Family: We include practical tips for substitutions and variations. You can easily adapt this stroganoff recipe to fit different tastes or dietary needs.

    Many home cooks feel intimidated by complex recipes or lack confidence in the kitchen. This beef stroganoff recipe is the perfect solution. It’s designed to make cooking a stress-free joy, providing a reliable and delicious meal every time. Get ready to transform simple ingredients into a truly memorable dish!

    What are the ingredients for beef stroganoff?

    A beautiful flat lay of fresh ingredients for beef stroganoff, including raw beef strips, sliced mushrooms, sour cream, and various spices.
    Professional food photography, photorealistic, high-quality food magazine photo. An overhead shot of all fresh, raw ingredients for homemade beef stroganoff, beautifully arranged on a rustic light wood cutting board or kitchen counter. Key ingredients include: tender cuts of beef sirloin or tenderloin, thinly sliced cremini mushrooms, finely chopped yellow onion, minced garlic cloves, a tub of creamy sour cream, rich beef broth, a dollop of Dijon mustard, a splash of Worcestershire sauce, olive oil, and a small bunch of fresh parsley. Each ingredient is distinct and vibrant, showcased in its best light with warm, natural kitchen lighting. The scene evokes a sense of freshness and inviting preparation.

    The Best Cut of Beef for Stroganoff

    Choosing the right cut of beef is key to a tender, delicious stroganoff. The best options are those that cook quickly while staying juicy, guaranteeing a successful and family-friendly meal.

    Here are our top recommendations for approachable home cooking:

    • Sirloin Steak: A fantastic and lean choice that becomes wonderfully tender when sliced correctly. Sirloin is ideal for a quick-cooking, flavorful meal.
    • Beef Tenderloin (Filet Mignon): For ultimate tenderness, beef tenderloin is unmatched. It cooks incredibly fast, ensuring a supremely tender result that makes any simple dinner feel indulgent.
    • Ribeye Steak: While a slightly pricier option, ribeye offers exceptional flavor and tenderness due to its rich marbling, which guarantees a delicious result.

    Pro Tip for Tender Beef: For the most tender beef, always slice the meat against the grain. This crucial technique shortens the muscle fibers, resulting in a better chew and preventing toughness. [1] For this recipe, you will need about 1.5 pounds (approximately 680g) of beef.

    For the Creamy Mushroom Sauce

    The delicious, creamy sauce is the heart of this comforting dish. Fortunately, creating it is simpler than you might think, using everyday ingredients to build incredible flavor.

    Here’s what you’ll need to make our signature creamy mushroom sauce:

    • Mushrooms: About 8 ounces (225g) of thinly sliced cremini (baby bella) or white button mushrooms, which add an earthy depth.
    • Onion: One small yellow onion, finely chopped to provide a sweet base when sautéed.
    • Garlic: Two cloves of minced garlic, a key flavor booster in any savory dish.
    • Beef Broth: 2 cups (480ml) of low-sodium beef broth to create the foundation of the rich sauce.
    • Worcestershire Sauce: 1 tablespoon, which adds a deep, savory umami complexity.
    • Dijon Mustard: 1 tablespoon for a subtle tang that balances the sauce’s richness and enhances the overall taste.
    • All-Purpose Flour: 2 tablespoons to thicken the sauce, creating a lovely, luscious texture.
    • Sour Cream: 1 cup (240g) of full-fat sour cream, the key to the signature creaminess and tang. Bring it to room temperature before adding to the hot sauce to prevent curdling.
    • Unsalted Butter or Olive Oil: 2 tablespoons for sautéing.

    Substitution Tip: If you don’t have sour cream, full-fat plain Greek yogurt is a good substitute. For the best texture and to prevent curdling, ensure it also comes to room temperature before using.

    Essential Herbs and Spices

    The right herbs and spices are vital for transforming simple ingredients into a rich, well-rounded beef stroganoff. These seasonings bring out the best in the dish and ensure a flavorful meal.

    Here are the essential spices you’ll need:

    • Salt: About 1 teaspoon of kosher or sea salt to season the beef and sauce. Adjust to your taste.
    • Black Pepper: Half a teaspoon of freshly ground black pepper for a subtle warmth and spice.
    • Paprika: 1 teaspoon of sweet or smoked paprika, which adds beautiful color and a mild, earthy flavor.
    • Fresh Parsley: For garnish. A sprinkle of freshly chopped parsley at the end brightens the dish with a pop of color and freshness.

    These common seasonings are easy to find and make a significant difference in the final flavor of the dish.

    How to Make Easy Beef Stroganoff (Step-by-Step)

    A close-up, mouth-watering image of creamy beef stroganoff served over egg noodles, garnished with fresh parsley.
    Professional food photography, photorealistic, high-quality food magazine photo. A stunning hero shot of a generous serving of perfectly cooked Beef Stroganoff, plated elegantly in a warm, rustic ceramic bowl. The creamy, rich mushroom and beef sauce coats tender slices of beef, served over a bed of al dente wide egg noodles. A sprinkle of freshly chopped green parsley garnishes the top, adding a pop of color. Wisps of steam gently rise from the hot dish, indicating its warmth and freshness. The background is a softly blurred, inviting home kitchen setting with warm, ambient lighting, emphasizing comfort and deliciousness. Shot from a slightly elevated angle, capturing depth and texture.

    Step 1: Prepare the Beef and Vegetables

    A delicious Beef Stroganoff starts with good prep work. This step ensures everything cooks evenly and infuses your dish with maximum flavor.

    • Slice the Beef: Cut your chosen beef into thin strips, about 1/4-inch thick and 2-3 inches long. For the most tender results, always slice across the grain. [2] This is a key technique for tender, flavorful meals made easy.
    • Chop the Onion: Peel and finely dice the onion. Small, even pieces will melt beautifully into the sauce.
    • Slice the Mushrooms: Wipe the mushrooms clean with a damp cloth and slice them evenly. You can leave smaller mushrooms whole if you prefer.

    Step 2: Sauté the Mushrooms and Onions

    Building layers of flavor is crucial for an amazing beef stroganoff recipe. Sautéing the vegetables first brings out their natural sweetness and deepens the overall taste of the dish.

    1. Heat Your Skillet: Place a large skillet or Dutch oven over medium-high heat and add 1 tablespoon of olive oil or butter.
    2. Cook the Mushrooms: Add the sliced mushrooms to the hot pan. Cook for 5-7 minutes, stirring occasionally, until they have released their liquid and started to brown nicely. This adds a rich, earthy note.
    3. Add the Onions: Push the mushrooms to one side of the skillet and add the diced onion to the empty side. Cook for 3-5 minutes, until the onions soften and become translucent.
    4. Combine and Season: Stir the mushrooms and onions together. Season with a pinch of salt and black pepper, then remove the mixture from the skillet and set it aside.

    Pro Tip: Avoid overcrowding the pan when cooking mushrooms. If needed, cook them in two batches to ensure they brown properly instead of steaming. This gives you a much better flavor and texture.

    Step 3: Sear the Beef Strips

    Searing the beef locks in its juices and creates a flavorful browned crust. This step adds incredible depth to this simple dinner recipe and makes your beef stroganoff truly special.

    1. Increase the Heat: Return the same skillet to medium-high heat and add another tablespoon of olive oil or butter.
    2. Sear in Batches: Place about one-third of the beef strips in the hot pan in a single layer. Do not overcrowd the pan. Cook for 1-2 minutes per side, until the beef is nicely browned.
    3. Remove the Beef: Transfer the seared beef to a plate. Repeat the process with the remaining beef in two more batches.
    4. Keep the Flavor: After searing all the beef, you’ll see delicious browned bits stuck to the bottom of the pan. Don’t wash them away! These are packed with flavor for your sauce.

    Why this step matters: Searing meat develops a rich, savory crust through the Maillard reaction. [3] This chemical reaction is essential for a truly flavorful meal made easy.

    Step 4: Create the Creamy Stroganoff Sauce

    Now it’s time to build the heart of this family-friendly meal: the rich and creamy sauce. This step is surprisingly simple, making this one of many great beginner-friendly recipes.

    1. Deglaze the Pan: Reduce the heat to medium-low. Pour 1/2 cup of beef broth into the skillet and use a wooden spoon to scrape up all those flavorful browned bits from the bottom.
    2. Make a Roux: Add 2 tablespoons of butter to the pan. Once it melts, sprinkle in 2 tablespoons of all-purpose flour. Whisk continuously for 1-2 minutes to create a roux, which will thicken the sauce.
    3. Whisk in the Broth: Gradually pour in the remaining 1 1/2 cups of beef broth, whisking constantly to prevent lumps as the sauce begins to thicken.
    4. Add Seasoning: Stir in 1 tablespoon of Worcestershire sauce and 1 teaspoon of Dijon mustard. These ingredients add a wonderful, tangy depth.
    5. Stir in the Sour Cream: Remove the pan from the heat and let it cool for a minute. This crucial step prevents the sour cream from curdling. Stir in 1 cup of sour cream, whisking until the sauce is smooth and creamy.

    Quick Tip: If your sauce seems too thick, add a splash more beef broth or water until it reaches your desired consistency. This step-by-step cooking guidance helps you adjust as you go.

    Step 5: Combine and Simmer to Perfection

    You’re almost there! This final step brings all the elements together into a comforting, delicious easy recipe that is sure to become a new family favorite.

    1. Return Ingredients to the Pan: Add the seared beef and the sautéed mushrooms and onions back into the skillet with the creamy sauce.
    2. Simmer Gently: Stir everything together and place the skillet back over low heat. Allow the stroganoff to simmer gently for 5-10 minutes. This will finish cooking the beef and meld all the flavors. Avoid boiling, which can cause the sour cream to separate.
    3. Taste and Adjust: Give the stroganoff a final taste. Add more salt and pepper if needed. You can also add a pinch of paprika for extra color and flavor.
    4. Garnish and Serve: Remove from the heat and garnish generously with fresh chopped parsley. Serve your homemade easy beef stroganoff immediately over egg noodles, rice, or mashed potatoes for a satisfying, approachable home cooking experience.

    From simple ingredients to a delicious, beautiful meal – that’s the Recipesmondial way! You’ve just created an amazing dish that proves great cooking can be both enjoyable and stress-free.

    What Should I Serve With Beef Stroganoff?

    A complete, comforting dinner setting featuring a bowl of beef stroganoff with egg noodles, a side of green asparagus, and a slice of crusty bread.
    Professional food photography, photorealistic, high-quality food magazine photo. A warm and inviting dinner scene featuring a complete meal. The main focus is a beautifully plated bowl of Beef Stroganoff with egg noodles, positioned centrally. Alongside it, there is a small, rustic side dish of perfectly steamed and bright green asparagus spears, lightly seasoned, and a thick slice of crusty, artisanal bread with a golden-brown crust. The setting is a cozy, wooden dining table, possibly with a simple, warm-toned linen napkin or placemat. Natural, soft lighting highlights the textures and colors of the food, creating an appealing and wholesome meal presentation.

    Classic Egg Noodles

    You’ve crafted a fantastic beef stroganoff recipe, and now it’s time to find its perfect partner. Classic egg noodles are the quintessential choice because their wide, flat shape is ideal for soaking up the rich, creamy sauce, making every bite wonderfully flavorful.

    Best of all, preparing egg noodles is incredibly simple, making them a quick and easy option for any busy home cook.

    • Boil Water: Bring a large pot of salted water to a rolling boil.
    • Add Noodles: Carefully add the egg noodles to the water.
    • Cook to Al Dente: Cook according to package directions, typically 6-8 minutes. Aim for an al dente texture, which is slightly firm to the bite.
    • Drain and Serve: Drain the noodles well. You can either toss them directly with the stroganoff or serve them alongside.

    Serving egg noodles with stroganoff guarantees a comforting, family-friendly meal that’s both easy and delicious.

    Fluffy White Rice

    Fluffy white rice is a superb choice for beef stroganoff, whether you need a gluten-free option or simply prefer a different texture. Its mild flavor allows the rich sauce to shine, while the individual grains provide a lovely textural contrast to the creamy beef.

    Here’s how to get perfectly fluffy rice every time:

    • Rinse Rice (Optional but Recommended): For fluffier results, rinse the rice under cold water until the water runs clear. This step removes excess starch.
    • Combine Rice and Water: Use a 1:2 ratio for most white rice. Combine 1 cup of rice with 2 cups of water in a saucepan.
    • Bring to a Boil: Heat over medium-high heat until the water begins to boil.
    • Simmer: Reduce the heat to low, cover the pot tightly, and simmer for about 18 minutes. Do not lift the lid during this time.
    • Rest: Remove the pot from the heat and let it stand, still covered, for 5-10 minutes.
    • Fluff and Serve: Uncover the rice and fluff it with a fork. Serve warm with your delicious stroganoff.

    This method can be adapted for brown rice by adjusting the cooking time based on package instructions. Mastering fluffy rice is a foundational skill for any home cook.

    Creamy Mashed Potatoes

    For the ultimate comfort food pairing, serve your beef stroganoff over a bed of creamy mashed potatoes. Their smooth, buttery texture perfectly cradles the rich, savory sauce, creating a deeply satisfying meal that the whole family will love.

    Making delicious mashed potatoes is simpler than you think:

    • Prepare Potatoes: Peel and cube about 2 pounds of starchy potatoes, such as Russets or Yukon Golds.
    • Boil Until Tender: Place the potatoes in a pot and cover with cold, salted water. Bring to a boil, then reduce the heat and cook until fork-tender, about 15-20 minutes.
    • Drain Thoroughly: To prevent watery mashed potatoes, drain them well and return them to the hot, empty pot over low heat for a minute to dry them out.
    • Mash: Use a potato masher or ricer for the smoothest texture.
    • Add Dairy: Stir in about 1/2 cup of warm milk or cream and 1/4 cup of melted butter. Season with salt and pepper. For extra creaminess, add a dollop of sour cream.
    • Serve Warm: Spoon a generous amount onto each plate and top with your amazing stroganoff.

    This classic side dish elevates a simple dinner into a memorably warm and hearty meal.

    Low-Carb Alternatives

    If you’re following a low-carb diet, you can still enjoy your favorite beef stroganoff. The following alternatives are simple to prepare and allow you to savor all the rich flavors without the extra carbs.

    Here are some excellent low-carb pairings:

    • Cauliflower Rice: A popular and versatile choice. Sauté riced cauliflower in butter or olive oil until tender. It’s an excellent substitute for rice.
    • Zucchini Noodles (Zoodles): Spiralize fresh zucchini into noodles. You can briefly sauté them or toss them raw with the warm stroganoff for a fresh, crisp texture.
    • Spaghetti Squash: Bake or microwave a spaghetti squash until tender, then use a fork to scrape out the spaghetti-like strands. This makes a fantastic pasta substitute.
    • Steamed Green Beans or Asparagus: For a simple, vibrant side, quickly steam some green beans or asparagus. Their crispness provides a refreshing contrast to the creamy sauce.
    • Mashed Cauliflower: Boil or steam cauliflower florets until tender, then mash them just like potatoes. Blend with butter, cream cheese, or heavy cream for a creamy, low-carb alternative to mashed potatoes.

    These versatile options prove that a satisfying meal doesn’t have to be high in carbs, making it easy to adapt this classic dish to a healthier lifestyle.

    What Are Some Popular Recipe Variations?

    Easy Ground Beef Stroganoff

    For a quicker twist on classic beef stroganoff, ground beef is a fantastic, budget-friendly option. Using ground beef significantly cuts down on cooking time, making this variation perfect for busy weeknights and a favorite for family-friendly meals.

    How to Make It:

    • Brown the Beef: Instead of beef strips, use 1 pound of lean ground beef. Brown it in a large skillet over medium-high heat, breaking it apart with a spoon as it cooks.
    • Drain Fat: Once the beef is browned, carefully drain any excess fat from the pan. This step ensures your sauce won’t be greasy.
    • Add Aromatics: Add diced onions and minced garlic to the skillet. Cook for 3-5 minutes, or until softened and fragrant.
    • Build the Sauce: Stir in flour or cornstarch, then slowly add beef broth, Worcestershire sauce, and Dijon mustard. Bring the mixture to a simmer, stirring until the sauce thickens.
    • Finish with Dairy: Remove the skillet from the heat before stirring in sour cream or Greek yogurt. Season to taste with salt and pepper.
    • Serve: Serve immediately over your favorite noodles or rice.

    This easy ground beef stroganoff delivers all the comforting flavors you love with less fuss. It’s a great home-cooked meal for beginners and a reliable weeknight dinner.

    Slow Cooker Beef Stroganoff

    Imagine coming home to a delicious, warm meal that’s ready to serve. A slow cooker makes it possible. This hands-off method is fantastic for tenderizing beef and building deep flavors with minimal effort, making it a perfect choice for easy family dinners.

    Steps for Your Slow Cooker:

    1. Sear the Beef (Optional, but Recommended): For the best flavor, quickly sear your beef strips in a hot skillet before adding them to the slow cooker. This step creates a rich crust.
    2. Combine Ingredients: In your slow cooker, combine the seared beef, sliced mushrooms, chopped onion, beef broth, Worcestershire sauce, and any herbs you’d like, such as thyme.
    3. Cook Low and Slow: Cook on low for 6-8 hours or on high for 3-4 hours. The beef should be incredibly tender when done.
    4. Thicken the Sauce: About 30 minutes before serving, whisk a small amount of cornstarch with cold water to create a slurry. Stir the mixture into the slow cooker to thicken the sauce.
    5. Add Dairy: Turn off the heat. Stir in the sour cream or Greek yogurt. Adding the dairy at the end prevents it from curdling.
    6. Season and Serve: Taste the stroganoff and adjust seasonings as needed. Serve hot.

    This slow cooker method simplifies making a flavorful meal. It’s perfect for busy schedules, as it delivers a comforting dinner without requiring constant attention.

    Healthy Beef Stroganoff Swaps

    You can still enjoy a hearty beef stroganoff while making it a healthier, more balanced meal. With a few small changes, you can customize the dish to fit your dietary goals without sacrificing the classic flavor.

    Smart Swaps for a Lighter Dish:

    • Leaner Beef: Opt for leaner cuts of beef, such as sirloin or flank steak. Be sure to trim any visible fat before cooking.
    • More Vegetables: Boost nutrition by adding extra vegetables like sliced bell peppers, spinach, or even grated carrots. Mushrooms are already a healthy addition, rich in B vitamins and antioxidants [4].
    • Dairy Alternatives: Swap full-fat sour cream for light sour cream or plain Greek yogurt. Greek yogurt offers a similar tang and creaminess but has fewer calories and more protein.
    • Whole Grains: Serve your stroganoff over whole wheat egg noodles, brown rice, or quinoa instead of white pasta to increase the fiber content.
    • Low-Carb Options: For a low-carb version, serve the stroganoff over cauliflower rice, zucchini noodles, or steamed green beans.
    • Reduced Sodium Broth: Choose low-sodium beef broth to better control your salt intake.

    With these simple variations, you can create a delicious, customized stroganoff that everyone can enjoy. At Recipesmondial, our goal is to make cooking accessible and fun, helping you prepare flavorful meals with or without healthy modifications.

    How to Store and Reheat Leftovers

    Enjoyed your delicious Beef Stroganoff? Great news! This flavorful meal is perfect for meal prep because it tastes just as wonderful the next day. Learning how to store and reheat it properly ensures your leftovers are always safe, delicious, and ready for a quick meal. Follow these simple steps and you’ll be cooking confidently!

    Storing Your Beef Stroganoff

    To keep your leftovers safe and delicious, proper storage is key. After cooking, allow the stroganoff to cool slightly, but for no more than two hours at room temperature. This is a critical food safety rule to prevent bacterial growth [5].

    • For the Refrigerator: Transfer the cooled stroganoff into an airtight container and seal it tightly. It will keep for up to 3-4 days in the refrigerator, making it a simple solution for planning family-friendly meals.
    • For the Freezer: To store your stroganoff for longer, spoon it into freezer-safe containers or heavy-duty freezer bags. Press out as much air as possible before sealing. It will last in the freezer for up to 2-3 months. When you’re ready to eat, thaw it overnight in the refrigerator.

    Reheating Beef Stroganoff Like a Pro

    Reheating creamy sauces and pasta can be challenging, but our step-by-step cooking guidance from Recipesmondial makes it easy. Follow these methods to keep your stroganoff perfectly creamy and delicious.

    • Stovetop (Recommended for Best Results):
      1. Transfer the stroganoff to a saucepan or skillet over medium-low heat.
      2. Add a splash of beef broth, milk, or water (about 1-2 tablespoons per serving) to help rehydrate the sauce and prevent it from drying out.
      3. Stir gently and frequently until warmed through, which typically takes 5-8 minutes.
      4. For safety, ensure the internal temperature reaches 165°F (74°C) [5].

      This method helps the sauce stay creamy and smooth.

    • Microwave (Quick Option):
      1. Place a single serving of stroganoff in a microwave-safe dish.
      2. Stir in a teaspoon or two of broth or milk to add moisture.
      3. Cover the dish loosely with a microwave-safe lid or wrap.
      4. Heat on medium power for 1-2 minutes, then stir. Continue heating in 30-second intervals, stirring after each one, until the stroganoff is heated through.

      Microwaving is quick, but the sauce can sometimes separate. Stirring frequently helps prevent this.

    Helpful Tips for Reheating:

    • Noodles stored in the sauce can become too soft upon reheating. For the best texture, we recommend cooking a fresh batch of noodles when you’re ready to serve your leftovers.
    • Taste the stroganoff after reheating and adjust the seasoning if needed, as flavors can mellow in the refrigerator.
    • For best quality and safety, never reheat leftovers more than once.

    With these practical tips, this beginner-friendly recipe allows you to enjoy flavorful meals made easy for days. You’ll be cooking confidently knowing your leftovers are just as good as the first night!

    Frequently Asked Questions

    What is the origin of Beef Stroganoff?

    Beef Stroganoff is a classic comfort dish with a rich history that began in Russia in the mid-19th century. It is believed to have been created by French chefs working for the wealthy Stroganov family [6]. The dish quickly gained popularity, especially among the Russian aristocracy.

    From its Russian roots, this meal traveled around the world, adapting over time to local ingredients and tastes. Today, many countries have their own spin on the recipe. Our version offers a simple yet incredibly flavorful take on this beloved dish.

    What is in a traditional beef stroganoff recipe?

    A traditional beef stroganoff recipe relies on high-quality ingredients to create its signature rich, creamy sauce without shortcuts. An authentic version typically includes the following key components:

    • Beef: Thinly sliced tender cuts like beef tenderloin or sirloin.
    • Mushrooms: Cremini or white button mushrooms are most common.
    • Onions: Finely diced yellow or white onions form the flavor base.
    • Mustard: Dijon or a similar tangy mustard adds depth.
    • Sour Cream: This is the hallmark ingredient for the creamy sauce.
    • Broth: Beef broth or stock provides a savory foundation.
    • Flour or Cornstarch: Used as a thickening agent for the sauce.
    • Fresh Herbs: Parsley or dill adds a touch of freshness for garnish.

    When combined, these simple ingredients create a deeply flavorful meal. Our beginner-friendly recipe will show you how to bring them all together step by step.

    Can I make this recipe with cream of mushroom soup?

    While many cooks use cream of mushroom soup as a shortcut, we highly recommend making the sauce from scratch. This approach delivers a much richer, more authentic flavor and is worth the extra few minutes.

    However, if you’re short on time, you can use condensed cream of mushroom soup as a substitute. To do so, simply swap the broth, flour, and some of the sour cream for one can of soup. Remember to season it well, and add a splash of milk or water to reach your desired consistency. Keep in mind that this shortcut will result in a different flavor and texture than our from-scratch recipe.

    What’s the best way to get tender beef in stroganoff?

    Tender beef is the key to a perfect beef stroganoff. To avoid tough or chewy results, follow these essential tips for preparation and cooking:

    • Choose the Right Cut: Start with a tender cut of beef. Sirloin, beef tenderloin, or thinly sliced ribeye are excellent choices. While skirt or flank steak can also work, be sure to slice them very thinly against the grain.
    • Cut Against the Grain: No matter the cut, always slice the beef against the muscle fibers. This simple step shortens the tough strands, making each bite significantly more tender.
    • Sear Quickly and Hot: Use a very hot pan and sear the beef in small batches for just 1-2 minutes per side. Overcrowding the pan lowers its temperature, causing the beef to steam instead of sear, which makes it tough.
    • Don’t Overcook: The beef only needs a brief sear, as it will finish cooking gently in the sauce later. Overcooking at this stage can make the meat rubbery.
    • Avoid Boiling the Sauce: Once you return the beef to the pan, keep the sauce at a gentle simmer. Boiling the sauce can toughen the meat, even if it was seared perfectly.

    By following these techniques, you can ensure your beef is perfectly tender every time you make this classic dish.


    Sources

    1. https://www.fsis.usda.gov/food-safety/safe-handling-instructions/meat-poultry-and-egg-products/beef-from-farm-table
    2. https://www.bhg.com/recipes/how-to/cooking-basics/cut-meat-against-grain/
    3. https://www.seriouseats.com/what-is-the-maillard-reaction-foods-science-explainer
    4. https://www.hsph.harvard.edu/nutritionsource/food-features/mushrooms/
    5. https://www.fsis.usda.gov/food-safety/safe-food-handling-and-preparation/food-safety-basics/danger-zone
    6. https://www.britannica.com/topic/beef-Stroganoff

  • How to Make Authentic Carbonara: A Simple Step-by-Step Recipe

    How to Make Authentic Carbonara: A Simple Step-by-Step Recipe

    Carbonara is a classic Italian pasta dish from Rome made with eggs, hard cheese (typically Pecorino Romano), cured pork (guanciale), and black pepper. The creamy sauce is created without any cream by combining the hot pasta with a mixture of raw eggs, cheese, and the rendered pork fat, which emulsifies into a rich coating.

    Imagine a bowl of silky pasta coated in a rich, luscious sauce of egg, cheese, and crispy pork. This is authentic carbonara, a timeless Italian classic that many home cooks find intimidating. The biggest fears? Scrambling the eggs and failing to create that perfectly creamy sauce. But what if you could master a truly delicious pasta carbonara with confidence? Our recipe makes it much simpler than you think—no professional chef skills required.

    Our simple, step-by-step guide is designed to make the process joyful and foolproof. We’ll walk you through every detail to ensure you get a perfectly creamy, intensely flavorful spaghetti carbonara. Best of all, it takes only 20 minutes from start to finish. This makes it an ideal family-friendly meal for a quick weeknight dinner, yet it’s special enough for any occasion.

    We’ll break down the secrets to a flawless carbonara, showing you how to achieve its iconic creamy texture using just a few simple ingredients—no cream needed. You’ll gain confidence in the kitchen and experience the satisfaction of serving a restaurant-quality meal at home. So, what makes this the ultimate carbonara recipe for home cooks? Let’s dive in and find out.

    Why Is This The Best Carbonara Recipe for Home Cooks?

    Welcome to the ultimate guide for making authentic, delicious, and surprisingly simple carbonara at home. If you’ve ever felt intimidated by classic Italian pasta, you’re not alone. Many home cooks struggle to create that perfect, creamy sauce, often ending up with scrambled eggs or a dry dish.

    At Recipesmondial, we believe cooking should be enjoyable, not stressful. That’s why we’ve crafted this carbonara recipe specifically for the home cook. We simplified the process without sacrificing an ounce of authentic flavor, so you can cook confidently and enjoy one of Italy’s most beloved dishes.

    This spaghetti carbonara recipe unlocks a stress-free kitchen experience by offering:

    • Simplified Step-by-Step Cooking Guidance: We break down every stage into clear, manageable steps. From prep to plating, you’ll move with ease—even if you’re a beginner.
    • Reliable, Creamy Results: Our instructions deliver a luscious, silky carbonara sauce every single time. Say goodbye to scrambled eggs and dry pasta—this recipe guarantees success.
    • Focus on Essential, Flavorful Ingredients: You won’t find a long, confusing list here. We highlight the five key ingredients that make an authentic carbonara sing, and we’ll guide you on choosing and using them for maximum flavor.
    • Practical Tips for Success: We share all the secrets, from perfectly emulsifying the sauce to rendering the pork just right. These practical tips make great home cooking approachable.
    • Confidence-Building Techniques: This isn’t just a recipe; it’s a cooking lesson. You’ll learn fundamental techniques you can apply to many other easy recipes. As you build your skills, you’ll transform from an unsure cook into one who truly enjoys the process.
    • Quick and Easy Preparation: We know you need delicious meals fast. This pasta carbonara recipe is designed for efficiency, delivering flavorful meals made easy right to your weeknight table.

    Enjoy gourmet flavor without being overwhelmed by complex instructions. Our beginner-friendly recipes are designed to inspire creativity and make mealtime exciting. This carbonara recipe is a perfect example of how Recipesmondial helps you cook confidently and eat well, every day.

    What Are the 5 Ingredients for Authentic Carbonara?

    The five essential ingredients for authentic carbonara: guanciale, Pecorino Romano cheese, eggs, black pepper, and spaghetti, neatly arranged on a wooden surface.
    Professional food photography, photorealistic, high-quality food magazine photo of the five essential ingredients for authentic spaghetti carbonara laid out on a rustic wooden countertop. The ingredients include fresh eggs (some whole, some with yolks separated), a block of Pecorino Romano cheese with a grater nearby, a generous slab of guanciale, a bowl of whole dried spaghetti, and a small pile of freshly cracked black pepper. The lighting is warm and inviting, showcasing the textures and freshness of each item. The composition is clean and appealing, ready for a home cook to begin.

    Authentic Carbonara is all about a few key ingredients working together to create its irresistible creamy sauce. The focus is on simplicity and flavor, ensuring your recipe turns out perfectly every time. Forget complex instructions—let’s break down the five essential components for an easy-to-make, classic Carbonara.

    Here are the five essential ingredients for an authentic, easy-to-make Carbonara:

    Guanciale vs. Pancetta vs. Bacon

    The heart of any classic Carbonara is cured pork, and guanciale is the most traditional choice. This cured pork jowl is prized for its rich flavor and the unique texture it develops when rendered. Its fat melts into a silky base for the sauce [source: https://www.eataly.com/us_en/what-is-guanciale].

    Since guanciale can be hard to find, **pancetta** (cured pork belly) is a fantastic substitute that offers a similar depth of flavor and is more widely available. While not traditional, **bacon** is another accessible option. Its smoky flavor delivers savory notes and crispy bits, creating a comforting, family-friendly meal. Each choice brings something unique to your pasta carbonara.

    Here is a quick comparison to help you choose:

    Ingredient Description Flavor Profile Availability Authenticity
    Guanciale Cured pork jowl Rich, fatty, intense pork flavor Specialty stores Most authentic
    Pancetta Cured pork belly Salty, savory, milder than guanciale Most grocery stores Excellent alternative
    Bacon Smoked pork belly Smoky, salty, crispy Widely available Common substitution (less authentic)

    The Best Cheese for Carbonara: Pecorino Romano or Parmesan?

    For the signature creamy, tangy sauce, cheese is crucial. **Pecorino Romano** is the authentic choice. Made from sheep’s milk, this hard, salty cheese has a sharp, pungent flavor that cuts through the richness of the pork and eggs [source: https://www.cheese.com/pecorino-romano/].

    If Pecorino Romano isn’t available, **Parmigiano Reggiano** (Parmesan) is a delicious alternative. This cow’s milk cheese offers a nuttier, more savory taste and is widely available. For a more balanced profile, you can even use a blend of both. No matter which you choose, always use freshly grated cheese. Pre-grated varieties contain anti-caking agents that can make your sauce gritty.

    The Role of Eggs in the Creamy Sauce

    Eggs are what give Carbonara its luxurious, silky sauce—no cream required. The secret is a combination of whole eggs and egg yolks. Yolks provide richness and help emulsify the sauce, while whole eggs add body. Many traditional recipes call for one whole egg and two additional yolks for the ideal consistency. This mixture is combined with the hot pasta and a splash of starchy pasta water to create the sauce.

    To avoid scrambling the eggs, it’s crucial to temper them gently. This beginner-friendly recipe will help you master the technique. Using fresh, high-quality eggs also makes a significant difference in the final flavor and texture of your spaghetti carbonara. This simple dinner recipe is all about technique.

    What is the best pasta for carbonara?

    Choosing the right pasta shape is essential. **Spaghetti** is the traditional and most popular choice, as its long, thin strands coat evenly with the creamy sauce [source: https://www.barilla.com/en-us/products/pasta/classic-blue-box/spaghetti-no-5]. This ensures you get a consistent flavor in every bite.

    While spaghetti is classic, other shapes also work well:

    • Bucatini: This pasta resembles thick spaghetti with a hole through the center, which captures the sauce beautifully.
    • Rigatoni: A shorter, ridged tube pasta. The ridges and hollow center hold onto the sauce effectively.
    • Fettuccine: Wider, flat strands offer a different mouthfeel and are still great for rich sauces.

    The key is to select a pasta that holds the sauce effectively. No matter which shape you choose, be sure to cook it al dente (firm to the bite). This texture is crucial for a perfect finish to your easy carbonara recipe.

    Freshly Ground Black Pepper

    Don’t overlook the **freshly ground black pepper**—it’s a non-negotiable ingredient in authentic Carbonara. More than just a garnish, pepper provides a warm, pungent counterpoint to the dish’s rich, savory flavors. It adds a subtle kick and complexity that elevates the final result. For the best aroma and taste, always use freshly ground whole peppercorns instead of pre-ground pepper; this small detail makes a huge difference.

    A generous amount ground directly over the pasta creates a classic “cacio e pepe” (cheese and pepper) effect, transforming simple ingredients into a flavorful meal. Remember, fresh is always best for this crucial seasoning.

    How to Make Perfect Spaghetti Carbonara Step-by-Step

    A home cook's hands gently toss spaghetti with creamy carbonara sauce and crispy guanciale in a large pan.
    Professional food photography, photorealistic, high-quality food magazine photo depicting a close-up of a home cook’s hands, in a warm, friendly kitchen, expertly tossing freshly cooked spaghetti with the creamy, emulsified egg and Pecorino Romano sauce in a large stainless steel pan. Steam gently rises from the pasta, highlighting the perfect coating of the rich, golden sauce on each strand. The guanciale pieces are visible, crispy and well-integrated. The focus is on the action and the appealing texture of the developing carbonara. The scene conveys a sense of ease and mastery for a beginner cook.

    Making authentic spaghetti carbonara can seem intimidating, but this recipe makes it wonderfully simple. At Recipesmondial, our goal is to make cooking enjoyable and stress-free. Follow these steps to create a truly flavorful meal without feeling overwhelmed.

    This beginner-friendly recipe focuses on core techniques, so you can forget the stress of elaborate cooking. You’ll quickly learn how to transform a few simple ingredients into a creamy, delicious dish. Let’s get started on your authentic spaghetti carbonara.

    Step 1: Prepare the Egg and Cheese Mixture

    This crucial step creates the creamy base for your carbonara sauce, so it’s important to get it ready before your pasta finishes cooking.

    • Crack 2 whole large eggs and 2 extra large egg yolks into a medium-sized bowl. The extra yolks add richness and creaminess.
    • Add 1 cup (about 80g) of finely grated Pecorino Romano cheese. This traditional cheese provides a sharp, salty flavor, but finely grated Parmesan is a great substitute if you prefer a milder taste.
    • Grind in a generous amount of freshly ground black pepper. We recommend about 1 teaspoon, but feel free to adjust to your preference. Freshly ground pepper adds a wonderful aroma and spice.
    • Whisk the mixture vigorously with a fork until it is thoroughly combined and smooth. It should look like a thick, pale yellow paste. Set this bowl aside.

    Step 2: Cook the Pasta

    Perfectly cooked pasta is key to a great carbonara. You want it to be al dente, which means it should be slightly firm to the bite.

    • Bring a large pot of water to a rolling boil.
    • Add a generous amount of salt to the boiling water. It should taste like the sea [1].
    • Add 12 ounces (about 340g) of spaghetti or your preferred pasta to the boiling water.
    • Cook the pasta according to the package directions, but aim for 1-2 minutes less than the recommended time for al dente. This prevents the pasta from getting mushy when it finishes cooking in the sauce.
    • Before draining, reserve about 1½ cups of the starchy pasta cooking water. This cloudy water is the secret to a luscious sauce.
    • Drain the pasta well, but do not rinse it.

    Step 3: Render the Pork

    The pork provides incredible flavor and the essential fat for the carbonara sauce. While guanciale is traditional, pancetta or bacon are also delicious alternatives.

    • Dice 4 ounces (about 115g) of guanciale (or pancetta/bacon) into small, uniform ¼-inch pieces. Cutting them to an even size helps them cook more evenly.
    • Place the diced pork in a large, cold skillet. Make sure the skillet is large enough to hold all of the pasta later.
    • Turn the heat to medium-low. Cook slowly, stirring occasionally, until the pork is crispy and its fat has rendered. This process usually takes 8-10 minutes.
    • Use a slotted spoon to remove the crispy pork pieces from the skillet. Set them on a paper towel-lined plate to drain excess fat.
    • Leave the flavorful rendered fat in the skillet—it is a crucial part of the sauce. Keep the skillet over very low heat to ensure the fat stays warm.

    Step 4: Combine Everything to Create the Sauce

    This is where the magic happens! To get a creamy, emulsified sauce instead of scrambled eggs, you need to work quickly and confidently. This final step transforms your ingredients into an irresistible pasta carbonara.

    • Immediately add the hot, drained pasta to the skillet with the warm pork fat. Toss well to coat every strand of spaghetti.
    • Pour about ¼ cup of the hot, reserved pasta water into the skillet and stir to combine.
    • Now, remove the skillet from the heat completely. This is the most important step to prevent the eggs from scrambling.
    • Quickly pour the egg and cheese mixture over the hot pasta.
    • Using tongs, toss and stir everything continuously and very quickly. The residual heat from the pasta and the skillet gently cooks the eggs, while the starchy water helps create a rich, creamy sauce. It is essential that you do not stop stirring.
    • The sauce will thicken as you stir. If it seems too thick, add more of the reserved pasta water, one tablespoon at a time, until it reaches a silky, creamy consistency.
    • Stir in most of the crispy pork, saving a small amount for garnish.
    • Serve immediately in warm bowls. Garnish with the remaining pork, an extra sprinkle of Pecorino Romano, and another grind of black pepper.

    And there you have it: a perfect spaghetti carbonara, made easy and approachable. Enjoy this delicious, restaurant-quality meal, cooked with confidence in your own kitchen.

    Top Tips for a Flawless, Creamy Carbonara (Without Cream)

    A close-up of a beautifully plated bowl of creamy, authentic spaghetti carbonara, garnished with fresh black pepper and grated Pecorino Romano cheese.
    Professional food photography, photorealistic, high-quality food magazine photo of a perfectly plated, steaming bowl of authentic spaghetti carbonara, presented on a simple, elegant white plate. The spaghetti is glistening, coated generously with a luscious, creamy, emulsified sauce that has no visible liquid or cream, demonstrating the flawless technique. It is garnished with abundant freshly cracked black pepper and finely grated Pecorino Romano cheese. The lighting is soft and inviting, emphasizing the rich texture and delicious appeal of the dish, making it look incredibly appetizing and achievable for a home cook.

    Making a perfectly rich and creamy carbonara is simpler than you might think—and it doesn’t require any cream. The magic lies in a few key techniques. Follow our pro tips to achieve a restaurant-quality spaghetti carbonara recipe at home. You’ll master this classic pasta carbonara in no time.

    Avoid Scrambled Eggs

    A common fear when making a classic carbonara recipe is accidentally scrambling the eggs. To avoid this, the key is temperature control.

    • Remove from Heat: Always take your hot pasta off the stove before adding the egg and cheese mixture.
    • Temper the Eggs: Whisk constantly while slowly drizzling a spoonful or two of hot pasta water into the egg and cheese mixture. This gentle warming process helps prevent the eggs from curdling when they meet the hot pasta [2].
    • Constant Motion: As you add the egg mixture to the pasta, stir continuously. This constant movement is what creates a smooth, velvety sauce instead of unwanted chunky bits.

    Follow these steps, and your pasta carbonara sauce will be perfectly smooth and creamy.

    Use Pasta Water

    The starchy water from cooking your pasta is liquid gold. This secret ingredient binds the sauce together, creating a luscious, creamy texture without any cream.

    • Save It: Before draining your pasta, reserve at least one cup of the cooking water.
    • Add Gradually: Slowly drizzle the starchy water into your pasta and egg mixture, just a tablespoon or two at a time, until the sauce reaches your desired consistency.
    • Emulsify: The starch in the water is essential for emulsifying the sauce. It helps blend the fat from the pork with the cheese and eggs, creating a silky, cohesive coating for your spaghetti carbonara.

    This simple trick makes all the difference for an authentic carbonara recipe.

    Work Quickly

    Timing is crucial for a creamy carbonara. Once the pasta is cooked and the pork is rendered, the final steps must be done quickly.

    • Be Prepared: Have all your ingredients measured and ready before you begin. This includes the egg mixture, rendered pork, and reserved pasta water.
    • Combine Fast: Immediately after taking the pasta off the heat, toss it with the pork, and then pour in the egg mixture.
    • Stir Vigorously: Stir quickly and constantly to coat every strand of pasta. This rapid movement helps the sauce emulsify while preventing the eggs from overcooking.

    Working swiftly is key to a fluid sauce that clings perfectly to the pasta.

    Serve Immediately

    Carbonara is best enjoyed the moment it’s made. The delicate sauce changes consistency as it cools, so timing is everything.

    • Enjoy Fresh: Have everyone at the table and ready to eat as soon as the pasta carbonara is finished.
    • Best Texture: The sauce is at its peak creamy consistency right after it’s made—warm, velvety, and coating the pasta perfectly.
    • Avoid Thickening: If it sits for too long, the sauce will thicken, and the pasta may clump together.

    Plate it immediately, garnish with extra cheese and pepper, and enjoy your delicious carbonara recipe!

    Easy Carbonara Recipe Variations

    While authentic carbonara is a masterpiece, sometimes a recipe needs to adapt. Whether it’s to fit your pantry, suit dietary needs, or simply try something new, we’re here to help! At Recipesmondial, we love showing you how versatile cooking can be. These easy carbonara variations are perfect for beginner cooks and busy families. They provide simple, flavorful dinner recipes so you can enjoy cooking without stress.

    Vegetarian Carbonara

    Going vegetarian doesn’t mean sacrificing flavor, and creating a delicious veggie carbonara is simple. Just replace the guanciale or pancetta with a savory, plant-based alternative. This variation is a wonderful way to enjoy a comforting pasta dish and makes a great family-friendly meal.

    Here are some fantastic substitutes for the cured pork:

    • Mushrooms: Sauté sliced cremini, shiitake, or portobello mushrooms until deeply browned and slightly crispy. They offer a rich, umami flavor and a satisfying chew.
    • Smoked Tofu or Tempeh: Dice smoked tofu or tempeh into small cubes and pan-fry them until golden and crisp. This adds a lovely smoky depth that mimics bacon.
    • Sun-dried Tomatoes: Finely chop oil-packed sun-dried tomatoes. Sauté them briefly to warm them through and release their concentrated flavor for a sweet and tangy contrast.
    • Zucchini or Asparagus: For a lighter touch, roast or sauté diced zucchini or asparagus until tender-crisp. These vegetables add freshness and a pop of color.

    Pro Tip: Whichever option you choose, cook it until it has a good sear or crispiness. This step is key to mimicking the texture and savory flavor of the pork, ensuring your vegetarian carbonara is just as satisfying. Remember to use a vegetarian-friendly hard cheese, as some Pecorino Romano varieties contain animal rennet.

    Carbonara with Bacon

    While guanciale is traditional, bacon is a more common ingredient in many home kitchens. This simple swap makes the classic Italian dish more approachable for everyday cooking, and you can still achieve a wonderfully rich and creamy result.

    Here’s how to adapt the recipe:

    • Choose Good Quality Bacon: Opt for thick-cut, smoked bacon if possible. It will provide the best flavor and texture.
    • Render Slowly: Cut the bacon into small pieces. Cook it slowly in a cold pan over medium-low heat to gradually render the fat and perfectly crisp the bacon.
    • Save the Fat: Keep a tablespoon or two of the rendered bacon fat in the pan. This flavorful fat is crucial for tossing with the pasta and emulsifying the sauce. Drain any excess.
    • Adjust Seasoning: Bacon is generally saltier than guanciale. Taste the crispy bacon before adding extra salt to your pasta water or cheese mixture, as you might need less overall.

    This simple swap creates an easy weeknight meal with all the comforting flavor you expect—no specialty ingredients required. Bacon carbonara is a fantastic family-friendly dish that everyone will love.

    Using Different Pasta Shapes

    Spaghetti is the classic choice for carbonara because the creamy sauce coats each strand so well. However, you can absolutely use other pasta shapes. Experimenting with different pastas is a fun way to add variety to this simple dinner and keep mealtime exciting.

    Here are some excellent alternatives:

    • Bucatini: This thick, spaghetti-like pasta has a hole through the center, making it fantastic for trapping sauce inside and out for a satisfying bite.
    • Rigatoni: These large, ridged tubes are perfect for catching the rich carbonara sauce. Their ridges and hollow centers ensure every mouthful is packed with flavor.
    • Penne: Similar to rigatoni but smaller, penne also has ridges and a hollow interior that holds sauce well. It’s a widely available choice that offers a slightly different texture.
    • Fettuccine or Tagliatelle: These wider, flat ribbons provide a different mouthfeel and pair wonderfully with rich sauces, creating a substantial base for the carbonara.
    • Mezzi Rigatoni or Maccheroni: Shorter, smaller pasta shapes also work well. They are ideal if you prefer a more bite-sized pasta in your carbonara.

    The key is to choose a pasta shape that the egg and cheese sauce can cling to well. These variations ensure that even if you’re out of spaghetti, you can still enjoy a delicious carbonara with minimal fuss. Learning these simple cooking tips will boost your confidence in the kitchen!

    Frequently Asked Questions about Carbonara

    What makes a carbonara recipe authentic?

    An authentic spaghetti carbonara recipe is simpler than you might think. The secret lies in using a few high-quality ingredients and the right technique to create a rich, creamy sauce without any cream.

    Here are the key elements for an authentic pasta carbonara:

    • Guanciale: This cured pork jowl is essential for its rich fat and distinct flavor. If you can’t find it, good-quality pancetta is the next best thing.
    • Pecorino Romano Cheese: A hard, salty sheep’s milk cheese, Pecorino Romano adds a sharp, tangy taste that is non-negotiable for true authenticity.
    • Eggs: The sauce uses a mix of whole eggs and extra yolks. This mixture creates the silky, emulsified coating for the pasta.
    • Black Pepper: Freshly ground black pepper is crucial, adding a delightful warmth and spice.
    • Pasta: While spaghetti is the traditional choice, other pasta shapes like rigatoni or bucatini also work well.
    • Pasta Water: Starchy pasta water is vital. It helps emulsify the sauce and makes it incredibly creamy.

    A truly authentic carbonara never includes cream, garlic, onions, or mushrooms. Instead, its incredible flavor comes from the simple combination of these core ingredients [3].

    Can you make carbonara with cream?

    For an authentic Italian carbonara recipe, the answer is a firm “no.” Traditional pasta carbonara achieves its creaminess through a clever emulsion of rendered pork fat, egg yolks, Pecorino Romano cheese, and starchy pasta water. This process creates a rich, velvety sauce without any dairy cream.

    Many recipes, especially those outside of Italy, add cream to make the sauce-making process easier and reduce the risk of scrambling the eggs. However, adding cream significantly changes the dish’s texture and flavor, moving it away from what makes a classic spaghetti carbonara so special. We focus on authentic flavor, showing you how to achieve that perfect creaminess the traditional way. Mastering this technique is a rewarding experience.

    What’s the difference between Italian and Filipino Carbonara?

    While both are beloved pasta dishes, Italian and Filipino carbonara recipes are quite different, reflecting local ingredients and culinary preferences. Here’s a quick comparison:

    Feature Italian Carbonara Filipino Carbonara
    Main Pork Product Guanciale (cured pork jowl) Bacon, ham, or hotdogs
    Dairy Base No cream; uses eggs, Pecorino Romano, and pasta water for creaminess Cream, evaporated milk, or condensed milk for a sweeter, richer sauce
    Cheese Pecorino Romano (salty sheep’s milk cheese) Parmesan cheese, often grated, for a milder flavor
    Additional Ingredients Freshly ground black pepper, minimal other additions Often includes mushrooms, onions, garlic, and sometimes a touch of sugar for a sweeter profile [4]
    Flavor Profile Savory, peppery, cheesy, rich umami Creamier, often sweeter, milder cheese flavor, sometimes smoky from bacon

    Both versions are delicious and showcase how a classic dish can evolve across different cultures. Recipesmondial celebrates these diverse, flavorful meals made easy!

    Can I use bacon instead of guanciale in carbonara?

    Yes, absolutely! While guanciale is traditional for an authentic carbonara recipe, bacon is a common and perfectly acceptable substitute. Since guanciale can be hard to find, using bacon makes this delicious dish more accessible to home cooks.

    Here’s what to keep in mind when using bacon for your spaghetti carbonara:

    • Choose Wisely: Opt for good-quality, thick-cut bacon. Avoid heavily smoked or maple-cured varieties, as their strong flavors can overpower the dish.
    • Render Slowly: Cook the bacon gently over low heat until it’s crispy. This process renders out the fat, which is a crucial component of the sauce.
    • Flavor Difference: Bacon gives the carbonara a smokier flavor, while guanciale offers a deeper, porkier richness. Even so, bacon still creates a fantastic and flavorful meal.

    Our easy recipes are all about helping you create delicious family-friendly meals with what you have on hand. Don’t let the lack of guanciale stop you from enjoying a wonderful plate of pasta carbonara!


    Sources

    1. https://www.seriouseats.com/how-to-salt-pasta-water
    2. https://www.seriouseats.com/what-is-tempering-eggs-guide
    3. https://www.accademiaitalianachef.com/en/blog/carbonara-history-and-original-recipe/
    4. https://www.foxyfolksy.com/filipino-style-carbonara-recipe/

  • The Perfect Prime Rib Recipe: A Simple Guide for Beginners

    The Perfect Prime Rib Recipe: A Simple Guide for Beginners

    Prime rib, also known as a standing rib roast, is a premium cut of beef celebrated for its rich flavor and tender texture. The best way to cook it is using a ‘reverse sear’ method: roast it low and slow in the oven until it’s about 15 degrees from your target temperature, let it rest, then sear it in a hot oven or pan for a perfect crust.

    Imagine serving a show-stopping meal that impresses everyone at the table: a perfectly cooked prime rib roast, golden-brown on the outside and wonderfully juicy within. For many home cooks, however, the idea of preparing a magnificent prime rib can feel daunting. You might worry about complex steps or lack confidence in your skills. But what if we told you that mastering this impressive dish is far simpler than you think? Here at Recipesmondial, we believe flavorful meals made easy are within everyone’s reach, and we’re here to guide you every step of the way.

    This prime rib recipe is designed to replace that intimidation with confidence. Whether you’re a novice cook or just need reliable step-by-step guidance, our beginner-friendly recipe delivers a stunning prime rib roast without the stress. We will walk you through the process of creating a tender, mouthwatering prime rib that will be the star of any holiday gathering or special family meal. Say goodbye to guesswork and hello to delicious results.

    Ready to unlock the secrets to a truly unforgettable roast? We’ll show you why this is more than just another recipe—it’s the definitive guide for approachable home cooking that guarantees success. Let’s dive in and discover why this is the best prime rib recipe for your kitchen.

    Why Is This the Best Prime Rib Recipe for Home Cooks?

    If you’re looking for an exceptional holiday meal, you’ve come to the right place. This isn’t just another prime rib recipe—it’s a guide designed specifically for home cooks. We’ll help you transform a daunting task into an enjoyable experience.

    Simplicity and Confidence in Every Step

    Cooking a majestic prime rib roast can feel overwhelming. Many recipes are filled with complex jargon and too many steps, leaving you unsure of where to start. At Recipesmondial, we believe in approachable home cooking and want you to feel confident in your kitchen.

    • No Overwhelm: Our step-by-step guidance breaks down the process into clear, manageable instructions, so you’ll never feel lost or intimidated.
    • Beginner-Friendly Focus: We avoid confusing culinary terms and use plain language, making it easy to master the basics.
    • Guaranteed Success: Follow our guide to achieve a perfectly cooked, flavorful standing rib roast. We set you up for success, just like with all our simple dinner recipes.

    Flavorful Results, Stress-Free Experience

    A delicious meal shouldn’t require hours of complex work. That’s why this prime rib recipe delivers maximum flavor with minimal fuss. We focus on simple techniques that work in a real home kitchen, allowing you to enjoy the cooking process from start to finish.

    • Everyday Ingredients: Our recipe relies on common ingredients you can find at any grocery store, so there’s no need for a special trip.
    • The Perfect Reverse Sear: We’ll guide you through the reverse sear, a chef-approved method that creates an incredible crust and ensures tender, evenly cooked meat.
    • Perfect Doneness Every Time: With our clear timing chart and meat thermometer tips, you can achieve your desired doneness without guesswork, resulting in a juicy, tender prime rib roast recipe.

    Designed for Your Recipesmondial Journey

    This prime rib guide is a perfect example of the Recipesmondial spirit. We’re dedicated to making mealtime stress-free with easy, family-friendly meals that help you build confidence and discover new flavors.

    • Clear Guidance: We present our recipes in a clear, easy-to-follow format, so you always know what to do next.
    • Practical Tips: We include smart substitutions and meal prep advice to help you save time and cook more efficiently.
    • Inspiring Creativity: This recipe provides a great foundation, inspiring you to explore other flavorful and simple meals.

    From simple breakfast ideas to comforting dinners, Recipesmondial supports your entire culinary journey. This prime rib roast is just one example of our commitment to helping you create memorable, delicious meals with ease.

    What’s the Difference Between Prime Rib and Standing Rib Roast?

    Navigating the world of beef roasts can feel like learning a new language. You might see recipes for “prime rib” and others for “standing rib roast,” leaving you to wonder what the difference is. The good news is, they’re just two names for the same fantastic cut of beef.

    It’s like how some people say “soda” while others say “pop” to describe the same fizzy drink. In the same way, prime rib and standing rib roast refer to the exact same delicious, impressive cut of meat.

    Understanding the Names

    While the names are interchangeable, each one tells a small part of the cut’s story:

    • Prime Rib: This name comes from the fact that the cut is from the “primal” rib section of the cow. While this cut was historically graded USDA “Prime” for its high quality, the name is now used more broadly. That means a roast labeled “prime rib” today might be of a different grade, like Choice or Select.
    • Standing Rib Roast: This name is more literal, describing how the roast is cooked. It “stands” on its rack of rib bones in the pan. This technique helps protect the meat from the direct heat of the pan and adds incredible flavor as the bones render.

    So, the next time you’re at the butcher shop, don’t let the terminology confuse you. A standing rib roast recipe is the same as a prime rib recipe. No matter what it’s called, you’re getting a tender, juicy, and incredibly flavorful centerpiece for your table.

    At Recipesmondial, our goal is to make cooking simple. Now that you know this secret, you’re one step closer to mastering a delicious prime rib, no matter what your recipe calls it!

    Choosing Your Cut: A Quick Shopping Guide

    Understanding Grades: Prime, Choice, and Select

    Choosing the perfect prime rib roast starts at the butcher’s counter, where you’ll often see different grades of beef. The United States Department of Agriculture (USDA) assigns these grades to indicate the meat’s quality, helping you know what to expect from your purchase.

    Understanding these grades makes shopping easier and helps you pick the right prime rib for your meal. Here’s a quick guide to the most common grades:

    • USDA Prime: This is the highest quality grade, characterized by abundant marbling—the small flecks of fat within the muscle. As the meat cooks, this fat melts, making Prime cuts incredibly tender, juicy, and flavorful. Often found in high-end restaurants, it’s an excellent choice for a truly special occasion.
    • USDA Choice: Choice is also a high-quality grade with less marbling than Prime, but still plenty to ensure a rich, tender, and flavorful cut. Widely available in supermarkets, Choice beef offers a fantastic balance of quality and value, making it an ideal option for most home cooks.
    • USDA Select: This grade is leaner, with the least amount of marbling. As a result, Select cuts are less juicy and tender than Prime or Choice. While they can be improved with marinades or slow cooking, this grade is not typically recommended for a show-stopping prime rib roast.

    For your perfect prime rib roast, we highly recommend a USDA Choice cut. It delivers amazing flavor and tenderness and is usually more budget-friendly than Prime.

    Bone-In vs. Boneless Prime Rib

    Next, you’ll need to decide between a bone-in and a boneless prime rib. While both options can make a wonderful meal, they offer slightly different benefits.

    • Bone-In Prime Rib (Standing Rib Roast): Often called a “standing rib roast” because it can stand on its own rib bones, many chefs prefer this cut. The bones are believed to add flavor and insulate the meat, which promotes even cooking. While a bone-in roast makes for an impressive presentation, it can be trickier to carve.
    • Boneless Prime Rib: A boneless prime rib is easier to season, carves more easily, and typically cooks a little faster than its bone-in counterpart. Butchers often tie it with string to help it hold a uniform shape. The main drawback is that some people find it slightly less flavorful without the bones.

    Ultimately, either option works well. If you prioritize ease of carving, go boneless. If you want maximum flavor and an impressive presentation, choose bone-in. Both will result in a delicious roast.

    How Much Prime Rib Per Person?

    Planning the right amount of prime rib ensures everyone gets a satisfying portion without creating food waste. Since prime rib is a rich cut, a little goes a long way. Your calculations should also factor in your guests’ appetites and how many side dishes you plan to serve. With many hearty sides, for example, you’ll likely need less meat.

    Here is a simple guide to help you plan your family-friendly meal:

    Roast Type Serving Size Per Person
    Bone-In Prime Rib About 1 pound (450g)
    Boneless Prime Rib About 1/2 pound to 3/4 pound (225g to 340g)

    For example, if you are serving six people, you would need a 6-pound bone-in roast or a 3- to 4.5-pound boneless roast. It’s always a good idea to buy a little extra to ensure enough for seconds—plus, leftover prime rib makes amazing sandwiches!

    Essential Ingredients & Tools for Your Roast

    A flat lay photo showing a raw prime rib roast, fresh herbs, garlic, salt, pepper, olive oil, a roasting pan, kitchen twine, and a meat thermometer on a wooden kitchen counter.
    A professional food photography, photorealistic, high-quality food magazine photo of a meticulously arranged flat lay on a clean, rustic wooden countertop. The main subject is a raw, beautiful prime rib roast, surrounded by essential ingredients: fresh rosemary and thyme sprigs, whole garlic cloves, coarse sea salt, black peppercorns, and a small bottle of olive oil. Adjacent to the ingredients are the key tools: a sturdy roasting pan, kitchen twine, and a digital meat thermometer. The lighting is warm and inviting, highlighting the textures and freshness of the ingredients, creating a sense of simplicity and readiness for cooking in a home kitchen setting. No human hands visible.

    For the Prime Rib Roast

    A truly memorable prime rib starts with a great cut of meat—it’s the foundation of your masterpiece. Let’s make sure your cooking experience is stress-free and yields delicious results.

    • A Quality Prime Rib Roast: Look for a standing rib roast (often called prime rib). You can choose bone-in or boneless, but bone-in roasts tend to add more flavor and promote even cooking.
    • Size Matters: Plan on 1 to 1.5 pounds per person for a bone-in roast or 0.75 to 1 pound for boneless. This calculation ensures everyone gets a generous serving.
    • USDA Choice or Prime: While “prime rib” is the name of the cut, the USDA grade is also important. Aim for “Choice” for excellent quality and value, or choose “Prime” for superior marbling and tenderness if your budget allows. [source: https://www.ams.usda.gov/grades-standards/beef-grades] If you’re unsure, your butcher can help you select the perfect roast.
    • Bringing it Home: Purchase your roast a day or two before you plan to cook it and store it in the refrigerator until you’re ready.

    Remember, starting with a quality roast is the first step to a successful, family-friendly meal that everyone will rave about.

    Simple Herb & Garlic Seasoning

    You don’t need fancy ingredients for incredible flavor. This simple herb and garlic rub will elevate your prime rib from good to absolutely amazing.

    • Fresh Garlic: 6-8 cloves, minced. Using fresh garlic provides the most aromatic flavor.
    • Fresh Rosemary: 2 tablespoons, finely chopped. Its piney notes are a beautiful complement to beef.
    • Fresh Thyme: 1 tablespoon, finely chopped, to add a subtle, earthy depth.
    • Coarse Kosher Salt: 2-3 tablespoons. Salt is crucial for seasoning the meat and creating a delicious crust.
    • Freshly Ground Black Pepper: 1-2 tablespoons. Grinding it fresh provides the best flavor.
    • Olive Oil: 2-3 tablespoons. The oil helps the seasoning adhere to the meat and promotes a beautiful sear.

    Simply combine these ingredients to create a robust, flavorful coating. You’ll be amazed at the flavor this easy blend produces!

    Kitchen Tools You’ll Need

    Having the right tools makes cooking a prime rib roast easier and more enjoyable. You don’t need a gourmet kitchen—these simple items are all it takes to achieve perfect results.

    • Large Roasting Pan with a Rack: This is an essential tool. The rack lifts the roast off the pan, allowing heat to circulate for even cooking and preventing a soggy bottom.
    • Instant-Read Meat Thermometer: This is your secret weapon for perfectly cooked meat, as it takes away all the guesswork. A reliable thermometer is especially invaluable for a beginner-friendly recipe.
    • Sharp Chef’s Knife: A sharp knife is necessary for preparing the herbs and garlic, and it also makes carving the finished roast much safer and easier.
    • Cutting Board: A sturdy board is crucial for both prep and carving your magnificent roast.
    • Small Bowl: For mixing your herb and garlic rub.
    • Butcher’s Twine (Optional, but Recommended): If your roast is irregularly shaped, tying it with twine helps it hold its shape and cook more evenly for consistent results.
    • Heavy-Bottomed Skillet or Cast Iron Pan (Optional, for Searing): If you choose to sear your roast before roasting, a good skillet creates an amazing crust.

    With these tools, you’ll be well-equipped to create a delicious prime rib with confidence. Making flavorful meals at home should be an easy and enjoyable process for everyone.

    How to Cook a Prime Rib Roast: Step-by-Step

    Slices of perfectly cooked medium-rare prime rib roast on a wooden cutting board, garnished with fresh rosemary and thyme.
    A professional food photography, photorealistic, high-quality food magazine photo of a perfectly cooked, golden-brown prime rib roast, beautifully carved into thick, succulent slices, arranged on a rustic wooden cutting board. The interior of the meat should clearly display a tender, juicy medium-rare pink center with a flavorful, seared crust. A few sprigs of fresh rosemary and thyme are artfully placed on the board for garnish. Subtle steam rises from the warm meat. The background is softly blurred, suggesting a cozy, well-lit kitchen environment. The focus is entirely on the deliciousness and perfection of the finished roast, emphasizing its restaurant-quality appearance for home cooks.

    Step 1: Bring the Roast to Room Temperature

    This first step is crucial for an evenly cooked prime rib. Allowing the roast to come to room temperature before cooking prevents it from having a cold center and overcooked edges.

    • Plan ahead: Remove your prime rib from the refrigerator 3-4 hours before you plan to cook it. Larger roasts may need up to 5 hours.
    • Unwrap it: Let the roast sit unwrapped on a wire rack set over a baking sheet to allow for air circulation.
    • Even cooking: A room-temperature roast cooks more predictably, making it easier to reach your desired doneness.

    Step 2: Prepare the Herb and Garlic Rub

    This simple herb and garlic rub infuses the prime rib with flavor, creating a delicious crust and a fragrant aroma. It’s a key part of the recipe.

    In a small bowl, combine all the rub ingredients, which typically include:

    • Minced garlic
    • Fresh or dried rosemary
    • Fresh or dried thyme
    • Coarse salt
    • Freshly ground black pepper
    • Olive oil (to make a paste)

    Mix everything until it forms a thick paste. The olive oil helps the rub adhere to the meat and melds the flavors together.

    Step 3: Season the Prime Rib Generously

    Now it’s time to season the roast. Generous seasoning is the secret to a restaurant-quality prime rib, so don’t be shy with the rub.

    • Apply the rub: Use your hands to thoroughly coat the entire surface of the prime rib with the herb and garlic paste.
    • Massage it in: Gently massage the rub into every crevice to ensure maximum flavor penetration.
    • All sides: Make sure to cover the top, bottom, and all sides of the roast, including the bones.
    • Prep for success: This step is vital for developing a flavorful crust that locks in the juices.

    Step 4: Sear for a Perfect Crust

    To create an incredible, golden-brown crust, we’ll start with an initial high-heat sear in the oven. This technique adds immense flavor and texture to your prime rib.

    • Preheat your oven: Set your oven to a high temperature, around 450-500°F (232-260°C).
    • Place on a rack: Put the seasoned prime rib, fat-cap up, on a wire rack in a roasting pan.
    • Initial sear: Roast at this high temperature for 15-20 minutes. This creates a beautiful sear on your standing rib roast.
    • Lower the temperature: After the initial sear, reduce the oven temperature for the slow-roasting phase, as detailed in the next step.

    Expert Tip: A good sear adds depth of flavor and creates a satisfying texture contrast, making your prime rib truly special.

    Step 5: Roast to Your Desired Doneness

    After the initial sear, the next stage is slow roasting. This gentle cooking method ensures a tender, juicy interior. For this step, a meat thermometer is essential.

    • Reduce heat: Lower your oven temperature to 250-300°F (120-150°C) for the slow roast.
    • Insert thermometer: Place an oven-safe meat thermometer into the thickest part of the roast, being careful to avoid touching any bones.
    • Cook slowly: Continue roasting until the internal temperature is about 5-10°F (3-6°C) below your desired final doneness. For medium-rare, aim for 120-125°F (49-52°C) before removing it from the oven.
    • Check regularly: Monitor the temperature closely. While our prime rib cooking time chart offers estimates, always trust your thermometer, as cooking times can vary based on the roast’s size and your oven [1].

    Using a thermometer is the most reliable way to achieve your preferred doneness and transform simple ingredients into a delicious meal.

    Step 6: The Most Important Step – Let it Rest!

    This final step is non-negotiable for a succulent prime rib. Do not skip the resting period, as it is critical for a juicy result.

    • Remove from oven: Once your prime rib reaches its target temperature, take it out of the oven.
    • Tent loosely: Transfer the roast to a clean cutting board and tent it loosely with aluminum foil.
    • Resting time: Let the prime rib rest for at least 20-30 minutes. Larger roasts benefit from resting up to 45 minutes.
    • Why it matters: Resting allows the juices to redistribute throughout the meat, resulting in a tender and moist roast. Skipping this step will cause the juices to run out onto the cutting board when you slice it.
    • Carryover cooking: During the rest, the internal temperature will continue to rise by a few degrees. This is known as “carryover cooking.”

    This crucial resting period ensures every slice of your prime rib is perfectly juicy and flavorful. It’s the final key to a perfect result.

    How long to cook prime rib roast?

    Prime Rib Cooking Time Chart

    Cooking a show-stopping prime rib roast might seem daunting, but it’s simpler than you think. The key is to understand that cooking time depends on two main factors: the size of the roast and your desired doneness.

    The table below offers approximate cooking times, but remember, these are only guidelines. Factors like your specific oven and the roast’s starting temperature can cause variations. For the most accurate results, you should always use a reliable meat thermometer.

    The times in this chart are for the reverse sear method, an excellent beginner-friendly recipe approach. This technique uses a low oven temperature for roasting followed by a high-heat sear, which creates an even cook and a delicious, crispy crust.

    Roast Size (Weight) Rare (120-125°F) Medium-Rare (130-135°F) Medium (135-140°F)
    3-4 lbs (2 Ribs) 1.5 – 2 hours 2 – 2.5 hours 2.5 – 3 hours
    5-7 lbs (3-4 Ribs) 2 – 2.5 hours 2.5 – 3 hours 3 – 3.5 hours
    8-10 lbs (4-5 Ribs) 2.5 – 3 hours 3 – 3.5 hours 3.5 – 4 hours
    11-13 lbs (6-7 Ribs) 3 – 3.5 hours 3.5 – 4 hours 4 – 4.5 hours

    Don’t forget the resting period after roasting—it’s crucial. Your prime rib continues to cook even after it’s out of the oven, a process known as carry-over cooking. The internal temperature can rise by an additional 5-10°F. For this reason, you should always remove the roast from the oven slightly before it reaches your final target temperature.

    Using a Meat Thermometer for Perfect Results

    When cooking prime rib, a meat thermometer is your most essential tool. It eliminates guesswork and is the only reliable way to guarantee your desired doneness every time. Using one will give you confidence in the kitchen, which is why so many easy recipes recommend this technique for success.

    To achieve a *flavorful meal made easy*, here’s how to use your thermometer correctly:

    • Insert It Correctly: Push the thermometer into the thickest part of the roast. Make sure it doesn’t touch any bones, which conduct heat differently and can give an inaccurate reading.
    • Monitor Regularly: Begin checking the temperature about 30 minutes before the estimated cook time ends. This allows you to remove the roast at the perfect moment.
    • Know Your Temperatures: To get the exact result you want, you need to know the target internal temperature for your preferred level of doneness.

    Here are the target temperatures to guide you:

    • Rare: 120-125°F (pull from oven at 115-120°F)
    • Medium-Rare: 130-135°F (pull from oven at 125-130°F)
    • Medium: 135-140°F (pull from oven at 130-135°F)
    • Medium-Well: 145-150°F (pull from oven at 140°F)
    • Well-Done: 150-155°F (pull from oven at 145°F)

    For food safety, the USDA recommends cooking whole cuts of beef like prime rib to a minimum internal temperature of 145°F (63°C) [2]. However, many people prefer a lower temperature for optimal tenderness and flavor. If you choose a doneness below 145°F, be aware of the official guidelines and ensure everyone eating the roast is comfortable with this choice.

    Ultimately, using a thermometer is the key to achieving restaurant-quality results at home. It makes *approachable home cooking* a joy and helps build confidence, even if you feel you are *lacking confidence in cooking skills* right now. This simple step is what makes any *beginner-friendly recipe* for roasts a success.

    Tips for a Flawless, Restaurant-Style Prime Rib

    Transforming a beautiful cut of beef into a show-stopping, restaurant-style prime rib roast might seem challenging, but you can achieve incredible results right in your own kitchen. At Recipesmondial, we want to help you create memorable meals. These practical strategies will elevate your prime rib recipe and guide you toward a truly flawless feast.

    Achieving Restaurant-Quality Results at Home

    You can easily prepare a magnificent standing rib roast that rivals your favorite steakhouse, taking the stress out of cooking an impressive dish. To help you build confidence, we’ve made these tips straightforward and beginner-friendly, ensuring a delicious outcome every time.

    • Start at Room Temperature: For even cooking, this step is crucial. Remove your prime rib from the refrigerator 2-3 hours before roasting. Cold meat cooks unevenly, which means the outer layers can overcook before the center reaches your desired doneness.
    • Season Generously and Early: Don’t be shy with your seasoning—apply a liberal coating of salt, pepper, and herbs all over the roast. For the best flavor, season the meat at least 45 minutes to an hour before cooking. Many chefs even season it a day ahead, storing it uncovered in the fridge [3]. This technique helps draw out moisture to create a better crust.
    • Master the Sear: A high-heat sear is what creates an irresistible, flavorful crust. Whether you sear at the beginning (traditional method) or the end (reverse sear), high heat is key. Use a heavy-bottomed pan or cast-iron skillet to caramelize the exterior and add a deep, rich flavor.
    • Use a Reliable Meat Thermometer: A meat thermometer is your secret weapon for perfect results, as guessing often leads to an over or undercooked roast. Insert the probe into the thickest part of the meat, avoiding any bones. Remember to pull the roast from the oven when it’s 5-10°F below your target temperature to account for carryover cooking.
    • The Golden Rule: Let It Rest: This might be the most important step for a juicy prime rib roast. After removing it from the oven, tent the roast loosely with foil and let it rest for at least 20-30 minutes (or up to 45 for a large roast). This resting period allows the juices to redistribute throughout the meat, ensuring every slice is tender and succulent. Skipping this step will result in dry meat.
    • Carve Against the Grain: For maximum tenderness, always slice your prime rib against the grain. Look for the direction of the muscle fibers and slice perpendicularly across them. This shortens the fibers, making each bite tender and much easier to chew.
    • Make a Simple Jus or Sauce: Don’t discard the flavorful pan drippings. Deglaze the pan with a little wine or broth to create a simple jus or pan sauce. This adds another layer of restaurant-quality taste that truly elevates your prime rib recipe.

    Following these straightforward tips will help you create a memorable and delicious prime rib roast. Say goodbye to uncertainty and hello to confident cooking!

    What Should You Serve with Prime Rib?

    A plated meal featuring sliced prime rib, creamy mashed potatoes, roasted asparagus, and a side of au jus on a rustic dining table.
    A professional food photography, photorealistic, high-quality food magazine photo of a single, elegantly plated serving of prime rib, showcasing several thick, juicy slices with a perfect medium-rare interior. The prime rib is accompanied by classic, comforting side dishes: a generous scoop of creamy, fluffy mashed potatoes, and a vibrant portion of perfectly roasted green asparagus spears. A small, elegant ramekin of rich au jus is placed beside the plate. The setting is a warm, inviting rustic dining table, with soft, natural lighting, creating an appetizing and approachable feel. Shallow depth of field to keep the food in sharp focus.

    You’ve mastered the main course. Now, let’s complete your perfect prime rib meal! Pairing your magnificent roast with the right sides and sauces elevates the entire dining experience. Don’t feel overwhelmed by the choices; we have simple, flavorful ideas that will complement your roast beautifully and ensure a balanced, satisfying feast.

    Classic Side Dishes

    The right side dishes are key to complementing the rich flavors of your prime rib roast. To make your meal memorable, here are some easy recipes that pair perfectly.

    • Creamy Mashed Potatoes: These fluffy, rich potatoes are a timeless choice that soaks up all the delicious prime rib juices. You can easily make them with butter, milk, and a pinch of salt.
    • Roasted Asparagus: For a simple yet elegant green vegetable, toss fresh asparagus with olive oil, salt, and pepper, then roast until tender-crisp. This side adds a lovely, fresh contrast to the rich meat.
    • Yorkshire Pudding: This traditional English popover is a must-have for many prime rib enthusiasts. It’s made from a simple batter and cooked in hot beef drippings, resulting in a light, airy, and savory accompaniment.
    • Garlic Herb Roasted Potatoes: For an approachable side dish everyone loves, cut potatoes into bite-sized pieces and toss them with olive oil, rosemary, thyme, garlic, salt, and pepper. Roast until golden and crispy.
    • Creamed Spinach: Rich and savory, creamed spinach offers a wonderful texture and flavor contrast. It is surprisingly easy to prepare using fresh spinach, cream, and a touch of nutmeg.
    • Simple Green Salad with Vinaigrette: A light and tangy salad is sometimes all you need to cut through the richness of the meat. For a fresh option, use mixed greens, cherry tomatoes, and a homemade lemon vinaigrette.

    Easy Sauce and Gravy Ideas

    No prime rib is complete without a fantastic sauce to add extra moisture and bring out the best in your roast. With these easy ideas, you can confidently serve restaurant-quality gravy and sauces at home.

    • Homemade Gravy (Au Jus): Arguably the most essential accompaniment, this savory sauce is made directly from the rich pan drippings. After the prime rib rests, skim excess fat from the pan, then deglaze it with beef broth or red wine. Simmer until slightly reduced for a sauce packed with flavor.
    • Creamy Horseradish Sauce: This classic pairing adds a delightful zing and provides a fantastic counterpoint to the meat’s richness. Simply mix prepared horseradish with sour cream or Greek yogurt, then add a squeeze of lemon juice, a dash of Worcestershire sauce, and a pinch of salt and pepper.
    • Red Wine Reduction: For a touch of elegance, try a simple red wine reduction. Sauté shallots, add a red wine like Cabernet Sauvignon and beef broth, then simmer until the liquid reduces by half and thickens slightly. This easy yet flavorful sauce adds a deep, sophisticated note to your prime rib.

    Frequently Asked Questions About Prime Rib

    How to cook a small prime rib roast?

    Cooking a small prime rib roast is just like cooking a large one—you simply need to adjust the roasting time. The goal remains the same: a beautiful crust and a juicy, perfectly cooked interior. This makes it a great option for an easy family dinner or a smaller gathering.

    Here are the key things to keep in mind:

    • Follow the same prep: Always bring your roast to room temperature before cooking to ensure it cooks evenly. Then, season it generously with your favorite rub.
    • Sear it well: A good sear is essential for creating a delicious, flavorful crust. Don’t skip this step.
    • Adjust roasting time: A smaller roast will cook faster, so a meat thermometer is your most reliable guide for perfect results.
    • Rest is crucial: Like any large roast, a small one needs to rest after cooking. This allows the juices to redistribute, keeping your prime rib tender and moist.

    For specific temperature guidelines, refer to our Prime Rib Cooking Time Chart. Remember, using a meat thermometer takes the guesswork out of cooking and helps build confidence in the kitchen.

    What is the prime rib 500 rule?

    The “500-degree rule,” also known as the “high-heat method,” is a popular technique for cooking prime rib. The goal is to create a perfect crust while keeping the inside tender and juicy. While its simplicity appeals to many home cooks, this method requires a well-calibrated oven and careful monitoring.

    Here’s how it generally works:

    1. Preheat your oven: Preheat the oven to a very high temperature, usually between 450°F and 500°F (232-260°C).
    2. Sear the roast: Place the seasoned prime rib in the hot oven for a short time, typically 15-30 minutes, depending on its size.
    3. Turn off the heat: After the initial searing time, turn the oven off completely. It is critical that you do not open the oven door.
    4. Cook with residual heat: The roast continues to cook gently in the oven’s residual heat, which helps keep it incredibly juicy.
    5. Rest: Once the internal temperature reaches your target, remove the roast from the oven and let it rest before carving.

    While this method can produce excellent results, keep in mind that oven temperatures can vary significantly [4]. A well-insulated oven will work best. Above all, use a reliable meat thermometer to track the internal temperature. This is the only way to ensure your prime rib is cooked to your desired doneness safely.

    What is the difference between prime rib vs ribeye?

    Prime rib and ribeye both come from the same cut of beef—the primal rib section. The key difference lies in how they are prepared and sold. Understanding this distinction will help you choose the right cut for your meal.

    Here’s a simple breakdown:

    Feature Prime Rib (Standing Rib Roast) Ribeye Steak
    Cut A large roast containing several ribs, often sold with the bones attached. An individual steak cut from the prime rib roast before cooking. Usually boneless, but bone-in options are available.
    Cooking Method Slow-roasted whole in an oven, resulting in a tender and succulent roast. Cooked quickly over high heat, such as grilling, pan-searing, or broiling.
    Size & Presentation A grand centerpiece dish that serves multiple people and is often carved at the table. An individual portion perfect for a single serving or a weeknight steak dinner.
    Fat Content Known for its generous marbling, which provides incredible flavor and tenderness. Also highly marbled, giving the steak its signature rich taste and juicy texture.

    Essentially, prime rib is the entire roast, while a ribeye is an individual steak sliced from it. Both offer a luxurious and flavorful beef experience.

    Can I use a boneless prime rib recipe with a bone-in roast?

    Yes, you can absolutely adapt a boneless prime rib recipe for a bone-in roast. The core principles—seasoning, searing, and resting—remain the same. However, you’ll need to consider a few key adjustments to get the best results.

    Here’s what you should keep in mind:

    • Cooking Time: Bone-in roasts take longer to cook than boneless ones of the same weight [5]. The bones act as insulators, slowing down heat penetration. Always rely on a meat thermometer for accuracy.
    • Flavor: Many cooks believe the bones add significant flavor and help keep the meat moist during cooking.
    • Carving: Carving a bone-in roast requires you to slice along the bones to separate the meat. For easier carving, some butchers will cut the bones off and tie them back on, giving you flavor without the hassle.
    • Heat Distribution: The bones can sometimes lead to slightly uneven cooking in the meat directly surrounding them.

    The main takeaway is to allow for more cooking time. Always use a meat thermometer to check the internal temperature in several spots (avoiding the bone), and you’ll have a delicious and impressive prime rib roast.


    Sources

    1. https://www.fsis.usda.gov/food-safety/safe-food-handling-and-preparation/food-safety-basics/safe-minimum-internal-temperature-chart
    2. https://www.fsis.usda.gov/food-safety/safe-handling-instructions/meat-poultry-and-egg-products/beef-safety-qa
    3. https://www.seriouseats.com/how-to-dry-brine-meat-turkey-chicken-pork-ribs-steaks
    4. https://www.seriouseats.com/2014/11/what-does-the-temperature-knob-on-my-oven-actually-do.html
    5. https://www.foodnetwork.com/recipes/articles/food-network-kitchens-prime-rib-cooking-guide

  • The Easiest Fried Rice Recipe: A Step-by-Step Guide for Beginners

    The Easiest Fried Rice Recipe: A Step-by-Step Guide for Beginners

    The best fried rice recipe uses cold, leftover rice stir-fried in a hot wok or large skillet with scrambled eggs, vegetables, and a protein like chicken, shrimp, or pork. The key is using day-old rice to ensure it’s dry enough not to clump, combined with a simple sauce made from soy sauce and sesame oil for that authentic, restaurant-quality flavor.

    There’s a special comfort that comes with a steaming plate of perfectly seasoned fried rice. It’s a takeout favorite, but making it at home can feel overwhelming—especially for new cooks. Many people struggle with complex recipes or feel unsure how to create healthy, tasty meals quickly for their families. If you’re looking for simple dinner recipes that deliver on flavor without the stress, you’ve come to the right place.

    At Recipesmondial, we believe cooking should be an enjoyable, confidence-building experience. That’s why we developed the easiest fried rice recipe, designed with beginner-friendly steps and approachable home cooking in mind. This step-by-step guide simplifies the process, helping you achieve restaurant-quality results in your own kitchen. Prepare to master a dish that’s as flavorful as it is versatile, whether you’re making a classic chicken fried rice or a zesty shrimp version.

    Why You’ll Love This Easy Fried Rice Recipe

    A close-up of a steaming bowl of perfectly cooked fried rice, garnished with green onions and sesame seeds.
    Professional food photography, photorealistic, high-quality food magazine photo: A beautifully plated, steaming bowl of golden-brown fried rice, garnished generously with vibrant chopped green onions and a sprinkle of toasted sesame seeds. The rice is fluffy with visible peas, carrots, and scrambled egg pieces, suggesting a perfect texture. Shot from a slightly overhead angle on a warm wooden table in a brightly lit, inviting home kitchen, emphasizing comfort and deliciousness. Soft natural lighting highlights the texture and steam. No hands or people visible.

    Ready to transform simple ingredients into a dazzling dish? Our easy fried rice recipe is more than a meal—it’s your gateway to stress-free, flavorful cooking. You’ll love making it, and your family will love eating it!

    Effortless Cooking, Incredible Flavor

    • Super Simple Steps: We break down every step, so no complex techniques are needed. This recipe is truly beginner-friendly and builds your kitchen confidence.
    • Quick & Convenient: Perfect for busy weeknights, this dish comes together fast, so you can have a delicious, hot meal on the table in minutes.
    • Uses Everyday Ingredients: No special trips to the store are required. This budget-friendly option uses items you likely already have on hand.
    • Beyond Delicious: Satisfy your cravings with authentic, savory flavor that’s often even better than takeout.

    Versatility for Every Taste

    One of the best things about this fried rice is its incredible adaptability. It’s a fantastic solution for family-friendly meals, as you can easily adjust it to suit everyone’s preferences.

    • Protein Power: Easily swap in your favorite protein. Create a classic chicken fried rice recipe, a delightful shrimp fried rice recipe, or a robust pork fried rice recipe. You can even stick with simple egg fried rice.
    • Veggie Heaven: Clean out your fridge! This recipe welcomes nearly any vegetable, making it an excellent way to use up produce and boost your veggie intake.
    • Leftover Lifesaver: This dish shines with day-old rice, transforming simple leftovers into a culinary triumph. It’s smart cooking at its best.

    Say Goodbye to Cooking Stress

    We know cooking can feel overwhelming, especially when you’re looking for quick dinner ideas. This fried rice recipe from Recipesmondial is designed to banish those mealtime worries.

    • No More Guesswork: Our clear, step-by-step guidance eliminates guesswork, ensuring reliable and delicious results every time.
    • Enjoy the Process: Cooking should be fun, not a chore. This simple recipe helps you enjoy your time in the kitchen and brings the joy back to meal preparation.
    • Impress Your Loved Ones: Serve a dish that everyone will rave about. Your family and friends will ask for this recipe again and again.

    Join us in making delicious meals accessible to all. This easy fried rice recipe is just the beginning of your journey toward new flavors and kitchen confidence!

    What Ingredients Do You Need for Fried Rice?

    Fresh ingredients for fried rice, including rice, vegetables, eggs, and sauces, neatly arranged on a kitchen counter.
    Professional food photography, photorealistic, high-quality food magazine photo: A meticulously organized flat lay of all fresh ingredients for fried rice on a clean, light-colored kitchen counter or rustic wooden board. Ingredients include a bowl of day-old cooked white rice, fresh eggs in a bowl, shelled green peas, diced carrots, chopped garlic, soy sauce in a small dish, sesame oil in a small bottle, and sliced green onions. All ingredients are vibrant, fresh, and perfectly prepped, bathed in soft, natural overhead lighting, evoking a sense of ease and readiness to cook.

    The Best Rice for Fried Rice (Hint: It’s Leftover!)

    The secret to truly amazing fried rice starts with the right rice. But it’s not just about the type—it’s about its age!

    For the best texture, always use day-old, cooked rice. Freshly cooked rice has too much moisture, which makes your fried rice soggy and clumpy. Nobody wants that!

    Using leftover rice helps achieve that perfect, slightly chewy, separate grain texture. It’s a game-changer for any beginner-friendly recipe.

    What kind of rice should you use?

    • Medium or long-grain white rice: Varieties like jasmine rice or basmati rice work wonderfully. Their grains hold up well to stir-frying.
    • Avoid short-grain or sticky rice: These types tend to clump together too much. They won’t give you the individual grain texture you want for fried rice.

    Don’t have leftover rice? No problem!

    You can still make delicious fried rice. Just cook your rice as usual, but use about 10-20% less water. Afterward, spread it out on a baking sheet and let it cool completely for at least an hour. You can even pop it into the fridge for 30 minutes to help it dry out. Planning ahead makes meal prep for family-friendly meals like this even easier!

    Essential Vegetables and Aromatics

    Fresh vegetables and pungent aromatics add incredible flavor, color, and texture to homemade fried rice. This is where your dish really comes alive!

    Here are the core ingredients you’ll need:

    • Eggs: Lightly scrambled eggs add a wonderful richness and protein. They cook quickly and easily.
    • Garlic: Freshly minced garlic is a must. It builds a foundational layer of flavor.
    • Ginger: A small amount of grated or minced fresh ginger adds a bright, zesty kick.
    • Onion or Scallions (Green Onions): Finely diced yellow onion or chopped scallions provide a savory base. Scallions also offer a fresh, mild onion flavor at the end.
    • Peas and Carrots: These classic additions bring sweetness and vibrant color. Frozen peas and carrots work perfectly and save time.
    • Optional additions: Feel free to get creative! Bell peppers, corn, broccoli florets, or mushrooms are all great choices. This is an easy recipe to customize.

    Pro Tip for Beginners: Dice all your vegetables uniformly to ensure they cook evenly. It’s also best to prep everything before you start cooking. This strategy, called “mise en place,” makes the process stress-free—perfect for busy families looking for simple dinner recipes.

    The Perfect Fried Rice Sauce

    The sauce is the soul of your fried rice. It brings all the ingredients together with a savory, umami-rich coating. This simple blend is key to flavorful meals made easy.

    You’ll whisk together just a few pantry staples:

    • Soy Sauce: Use a good quality light (or “all-purpose”) soy sauce. It provides salty depth without being overpowering. If you prefer a darker color, you can add a touch of dark soy sauce.
    • Sesame Oil: A drizzle of toasted sesame oil adds a distinctive nutty aroma and flavor. Be sure to add it towards the end of cooking to preserve its delicate notes.
    • Sugar: Just a pinch of granulated sugar balances the salty soy sauce and enhances the overall flavor profile beautifully.
    • White Pepper: This subtle spice adds an authentic, mild heat. It’s a traditional ingredient in many Chinese fried rice recipes.

    Combine these ingredients in a small bowl before you begin. This makes adding the sauce at the right moment a breeze. Having the sauce pre-mixed is a crucial step for achieving that authentic, perfectly balanced fried rice taste.

    How to Make the Best Fried Rice (Step-by-Step)

    A home cook actively stirring colorful fried rice in a large wok on a stovetop, with steam rising.
    Professional food photography, photorealistic, high-quality food magazine photo: A dynamic shot of a home cook’s hands, in a clean and inviting home kitchen, actively stirring colorful fried rice in a large, well-seasoned wok or skillet over a gas burner. Steam is visibly rising from the wok, and the rice grains, mixed with peas, carrots, and egg pieces, appear perfectly separated and slightly golden. The scene captures the motion and energy of cooking, with focus on the food’s appealing texture and vibrant colors. Natural light illuminates the cooking process.

    Step 1: Prepare Your Ingredients (Mise en Place)

    Cooking is a joy when you’re organized. This is the idea behind “mise en place,” which simply means having “everything in its place” before you begin. Think of this step as your secret weapon for making the cooking process smooth and stress-free. Say goodbye to feeling overwhelmed by complex recipes!

    Here’s how to prep for your best fried rice recipe:

    • Chop Vegetables: Dice your onion, carrots, and any other veggies. Aim for small, uniform pieces to ensure they cook evenly.
    • Mince Aromatics: Finely mince your garlic and ginger. These give your fried rice its amazing flavor.
    • Dice Protein: Cut your chosen protein into bite-sized pieces. Whether it’s chicken for a flavorful chicken fried rice, shrimp for a quick shrimp fried rice, or pork for a hearty pork fried rice recipe, get it ready.
    • Whisk Eggs: Beat your eggs in a small bowl.
    • Mix Sauce: Combine all the sauce ingredients in a separate small bowl. This prevents any last-minute scrambling.

    These few minutes of prep will save you so much time later. It’s the key to approachable home cooking success and a fantastic meal prep tip for any beginner-friendly recipes.

    Step 2: Scramble the Eggs

    Next, let’s get those fluffy eggs ready. They add a wonderful texture and richness to your fried rice.

    1. Heat a large pan or wok over medium-high heat and add 1 tablespoon of cooking oil.
    2. Once the oil shimmers, pour in your whisked eggs.
    3. Let them set for a moment, then gently scramble them with your spatula, breaking them into small pieces.
    4. Cook until they are just set but still soft. Do not overcook them, as they will cook a little more later.
    5. Remove the scrambled eggs from the pan and set them aside on a plate.

    This quick step ensures tender eggs in every bite of your chinese fried rice.

    Step 3: Sauté Aromatics and Protein

    Now, let’s build those delicious layers of flavor. This is where your kitchen will start to smell incredible!

    1. Add another tablespoon of oil to the same pan or wok over medium-high heat.
    2. Add your minced garlic, ginger, and diced onion. Sauté for about 1 minute until fragrant, but not browned.
    3. Add your protein of choice.
      • For chicken fried rice: Add the diced chicken and cook until it’s no longer pink, about 3-5 minutes.
      • For shrimp fried rice: Add the shrimp and cook until it turns pink and opaque, about 2-3 minutes.
      • For pork fried rice: Add the diced pork and cook until browned and cooked through, about 5-7 minutes.
    4. Stir in any hardier vegetables, like diced carrots, and cook for another 2-3 minutes until slightly tender-crisp.

    Pro Tip: Do not overcrowd your pan. If you have a large amount of protein or vegetables, cook them in batches. This allows them to sear nicely instead of steam and is key for a truly flavorful meal made easy.

    Step 4: Add Rice and Sauce

    This step brings everything together. The rice is the heart of your fried rice recipe!

    1. Push the cooked aromatics, protein, and vegetables to one side of the pan.
    2. Add your cold, day-old rice to the empty side. It’s crucial that your rice is cold and day-old to prevent your fried rice from becoming soggy [1].
    3. Use your spatula to break up the rice. Spread it out as much as possible and let it sizzle for 1-2 minutes. This helps dry it out and can create delicious crispy bits.
    4. Pour your pre-mixed fried rice sauce evenly over the rice.
    5. Stir everything together vigorously, making sure every grain of rice is coated with the amazing sauce.
    6. Add softer vegetables, such as peas and corn, if using, and stir for another minute.

    You’re almost there! Your kitchen should smell absolutely incredible. This is how to make fried rice not soggy and bursting with flavor.

    Step 5: Combine Everything and Serve

    Time for the final step! Let’s bring all the delicious components together for a fantastic simple dinner recipe.

    1. Add the scrambled eggs you set aside back into the pan.
    2. Gently toss and stir to combine all the ingredients, ensuring the eggs, protein, vegetables, and rice are evenly distributed.
    3. Continue to stir-fry for another 1-2 minutes to ensure everything is heated through.
    4. Taste your fried rice and adjust seasonings if needed. A little more soy sauce or a dash of white pepper can make all the difference.
    5. Remove from the heat and garnish generously with sliced green onions.

    Serve your homemade fried rice immediately. You’ve just created a delicious, family-friendly meal that everyone will love. Enjoy cooking without the stress, knowing you’ve mastered this quick meal. This approach is what makes approachable home cooking so rewarding.

    What is the secret ingredient in Chinese fried rice?

    Ever wonder about the magic behind truly amazing Chinese fried rice? While you might think there’s a single secret ingredient, the truth is even better. It’s actually a combination of simple techniques and flavorful additions that makes all the difference. Master these, and you can create delicious fried rice right at home.

    At Recipesmondial, we break down complex ideas to empower you to cook with confidence. When it comes to fried rice, there isn’t one “secret ingredient.” Instead, it’s a few key elements working in harmony. Mastering them will elevate your easy fried rice recipe from good to great.

    The Real “Secrets” to Amazing Fried Rice

    Here are the crucial components that create that irresistible flavor and texture:

    • Cold, Day-Old Rice: This is the non-negotiable foundation. Using rice that’s at least a day old and fully chilled prevents it from getting soggy. This ensures the individual grains stay firm and separate, allowing them to absorb all the delicious flavors.
    • High Heat Cooking: This is where the magic happens. Quickly cooking over very high heat creates a smoky, slightly charred flavor known as “wok hei,” or the “breath of the wok” [2]. A super-hot pan or large skillet is essential to achieve this effect. This quick sear not only locks in flavor but also gives your chicken fried rice or shrimp fried rice an incredible texture.
    • Umami-Rich Sauce: A well-balanced sauce is key for depth and savory flavor. A typical blend includes light soy sauce for saltiness, dark soy sauce for color and richness, and often oyster sauce for complexity. A final touch of sesame oil adds a lovely aroma. Together, these ingredients deliver the essential umami taste that makes fried rice so satisfying.
    • Fresh Aromatics: Don’t skip these! Fresh garlic, ginger, and green onions are essential for building a vibrant base of flavor. Sautéing them briefly at the start releases their fragrant oils, which permeate the entire dish.
    • Quick Stir-Frying: Speed is crucial. The goal is to cook ingredients just until tender-crisp, not a moment longer. This technique maintains their fresh texture and crunch while preventing vegetables from becoming watery.

    By focusing on these core elements, you can confidently transform simple ingredients into a restaurant-quality meal. Forget being overwhelmed by complex recipes. Instead, enjoy the process of cooking flavorful meals, made easy with Recipesmondial!

    What are common mistakes in making fried rice?

    Making delicious fried rice is easier than you might think! However, like any dish, there are a few common pitfalls that can turn your perfectly planned meal into something less than ideal. Don’t worry, we’re here to guide you. Learning from these easy-to-avoid mistakes will help you create flavorful fried rice every time.

    Many home cooks feel overwhelmed by complex recipes and often struggle with getting the texture right. But with these simple tips, you’ll gain confidence in the kitchen and enjoy cooking without stress.

    Mistake 1: Using Freshly Cooked, Warm Rice

    • Why it’s a mistake: Freshly cooked rice is moist and sticky. It clumps together in the pan, which makes your fried rice soggy and mushy. This prevents you from getting that desired dry, separate grain texture.
    • The easy fix: Always use cold, day-old cooked rice. Long-grain rice like Jasmine works best. Cook your rice the day before, spread it on a tray to cool completely, and store it in the fridge overnight. This process dries out the grains, so they will fry up perfectly light and fluffy. This is a game-changer for any fried rice recipe!

    Mistake 2: Overcrowding Your Pan or Wok

    • Why it’s a mistake: Filling your pan too much reduces the heat. This causes ingredients to steam instead of fry, leading to mushy vegetables and rice. You won’t achieve that lovely browned, slightly crispy texture.
    • The easy fix: Cook your fried rice in batches if needed. Use a large pan or wok over high heat and give your ingredients plenty of space. This ensures everything fries properly. As a result, each grain of rice and every piece of vegetable gets beautifully caramelized.

    Mistake 3: Not Prepping All Ingredients First (No Mise en Place!)

    • Why it’s a mistake: Fried rice cooks very quickly, so you need to add ingredients in rapid succession. If you’re chopping while cooking, ingredients in the pan can easily burn. This can turn your simple dinner recipes into a stressful experience.
    • The easy fix: Prepare everything before you even turn on the stove. Chop all your vegetables, measure out your sauce, and have your eggs scrambled and protein cooked. This organized approach, often called “mise en place,” makes the cooking process smooth. It’s key for quick breakfast ideas and family-friendly meals.

    Mistake 4: Using Too Much Sauce or Oil

    • Why it’s a mistake: Excess liquid or oil can weigh down your rice. This makes the dish greasy and soggy, ruining the light, fluffy texture.
    • The easy fix: Be mindful of your measurements. Use just enough oil to coat the pan and add the sauce sparingly—you can always add more if needed. Start with the recommended amount in your easy recipes. This ensures flavorful meals made easy without the extra grease.

    Mistake 5: Not Using High Enough Heat

    • Why it’s a mistake: Fried rice needs high heat to create its characteristic wok hei (smoky flavor) and crisp texture. Low heat causes ingredients to stew in their own juices, resulting in soft, unappealing fried rice.
    • The easy fix: Always cook your fried rice over high heat. Let your pan or wok get smoking hot before adding oil, and keep the ingredients moving constantly. This helps achieve the perfect balance of tenderness and slight crispness. It’s essential for classic chicken fried rice or savory shrimp fried rice recipes.

    By avoiding these common mistakes, you’ll be well on your way to making delicious, restaurant-quality fried rice at home. You’ll go from feeling uncertain in the kitchen to cooking with confidence. Enjoy the journey of discovering new simple dishes with Recipesmondial!

    Easy Fried Rice Variations to Try

    You’ve mastered the basic, super-easy fried rice recipe—fantastic! Now, let’s unlock a world of flavor. Building on your skills, these simple variations will help you create diverse, family-friendly meals. Get ready to explore new tastes, as each twist makes for a quick and satisfying dinner.

    Classic Chicken Fried Rice Recipe

    A beloved classic, chicken fried rice adds lean protein and a satisfying texture to your meal. This variation is perfect for busy weeknights and is a great way to use up leftover chicken.

    • Preparation: Dice 1 cup of cooked chicken. For extra speed, use rotisserie chicken. You can also quickly sauté small, bite-sized pieces of raw chicken breast or thigh until no longer pink.
    • When to Add: Add the cooked chicken to the pan along with the rice, mixing it thoroughly with the vegetables and sauce.
    • Tip: Season the chicken lightly with salt and pepper before cooking to enhance its flavor.

    Flavorful Shrimp Fried Rice Recipe

    For a delicate and delicious flavor, try shrimp fried rice. Shrimp cooks very quickly, making this a fantastic way to elevate your fried rice on a tight schedule. Both fresh and frozen shrimp work well.

    • Preparation: Peel and devein 1 cup of raw, small-to-medium shrimp. Pat them dry with a paper towel to ensure they sear nicely in the pan.
    • When to Add: Cook the shrimp right after the aromatics. Sauté for just 2-3 minutes per side until pink and opaque. Be careful not to overcook them, as they can become rubbery.
    • Tip: A squeeze of fresh lemon juice at the end will brighten the shrimp’s flavor.

    Hearty Pork Fried Rice Recipe

    Wonderfully savory and filling, pork fried rice is true comfort food. This version is excellent for using up leftover roasted pork, but you can also easily prepare it with fresh pork.

    • Preparation: Dice 1 cup of cooked pork, such as leftover loin or shoulder. If using raw pork, choose lean cuts like tenderloin or boneless chops and cut them into small pieces.
    • When to Add: Sauté raw pork until fully cooked and browned before adding aromatics. If you’re using cooked pork, add it with the rice and heat it through gently.
    • Tip: Briefly marinating raw pork in a little soy sauce and sesame oil is a simple step that adds incredible depth of flavor.

    Simple Egg Fried Rice

    Sometimes, simplicity is key. Egg fried rice is the ultimate quick and budget-friendly meal, perfect for a light lunch or dinner. Since you already know how to scramble eggs, you’re halfway there!

    • Preparation: Follow the main recipe’s steps for scrambling eggs. Feel free to add an extra egg or two to boost the protein content.
    • When to Add: Stir the scrambled eggs back into the fried rice at the very end, ensuring they are well integrated.
    • Why it’s great: As one of the easiest and most versatile variations, this classic beginner-friendly recipe proves that a delicious meal doesn’t require many ingredients.

    How to Store and Reheat Leftover Fried Rice

    One of the best things about making your own delicious fried rice recipe is enjoying the leftovers! Our easy fried rice is often even tastier the next day. But it’s crucial to store and reheat it safely. Let’s make sure you can enjoy every last bite without any worries.

    Storing Leftover Fried Rice Safely

    Proper storage is key to keeping your fried rice fresh and safe. Always act quickly after cooking.

    • Cool Quickly: Transfer leftover fried rice into shallow containers within one hour of cooking. This promotes rapid, even cooling.
    • Airtight Containers: Use airtight containers. This protects your rice from drying out and absorbing other food odors.
    • Refrigerate Promptly: Place the sealed containers in the refrigerator. Your chicken fried rice or shrimp fried rice will stay fresh for up to 3-4 days when stored correctly.
    • Freezing (Optional): For longer storage, you can freeze fried rice for up to one month, though the texture may change slightly. Make sure it’s completely cool first, and thaw it in the refrigerator overnight before reheating.

    Important Food Safety Note: Cooked rice can contain spores of a bacteria called Bacillus cereus. If cooked rice is left at room temperature for too long, these spores can multiply and produce toxins that cause food poisoning. Therefore, it is crucial to cool and refrigerate your fried rice quickly [3].

    How to Reheat Fried Rice for Best Results

    Reheating fried rice properly ensures it tastes great and is safe to eat. For safety, aim for an internal temperature of 165°F (74°C).

    Method 1: Microwave (Quickest Option)

    This is a super-fast way to warm up your pork fried rice or chinese fried rice.

    1. Portion Control: Place a single serving of fried rice in a microwave-safe dish.
    2. Add Moisture: Sprinkle a tablespoon of water or broth over the rice to prevent it from drying out.
    3. Cover: Loosely cover the dish with a microwave-safe lid or a damp paper towel.
    4. Heat: Microwave on high for 1-2 minutes, stirring halfway through. Continue heating in 30-second intervals until it is piping hot throughout.

    Method 2: Stovetop (Best for Texture)

    If you have a little more time, the stovetop method helps restore that delicious, freshly made texture. This works wonderfully for chicken fried rice recipe leftovers.

    1. Heat Pan: Add 1-2 teaspoons of oil to a non-stick skillet or wok over medium-high heat.
    2. Add Rice: Once the oil is shimmering, add your leftover fried rice. Use a spoon to break up any large clumps.
    3. Stir-Fry: Stir-fry constantly for 3-5 minutes, ensuring all ingredients are heated through. You should hear some sizzling.
    4. Add Moisture (Optional): If the rice seems dry, add a splash of water, broth, or a little more soy sauce.
    5. Serve Hot: Once it’s steaming hot, remove it from the heat and enjoy immediately.

    No matter which method you choose, always make sure your fried rice is steaming hot throughout before serving. Following these simple steps will ensure your leftovers are just as delicious and safe as when they were first made!

    Frequently Asked Questions

    What meat goes best with fried rice?

    Fried rice is wonderfully versatile! You can easily customize it with your favorite protein. This flexibility makes it a fantastic choice for family-friendly meals and easy recipes.

    Here are some popular and delicious options:

    • Chicken: Diced chicken breast or thighs are a classic choice. They cook quickly, absorb flavors beautifully, and make for a hearty chicken fried rice recipe that everyone loves.
    • Shrimp: For a lighter, flavorful option, shrimp is an excellent choice. It cooks very fast, so add it near the end to keep it tender. This makes a shrimp fried rice recipe a great solution for a quick meal.
    • Pork: Diced pork loin or tenderloin adds a lovely savory depth. Char siu (Chinese BBQ pork) is also a fantastic, authentic choice for pork fried rice.
    • Beef: Thinly sliced steak, like sirloin or flank steak, is also delicious. Marinate it briefly for extra tenderness and flavor.
    • Tofu or Tempeh: For a vegetarian or vegan version, firm tofu or tempeh works perfectly. Simply press out the excess water and fry it until golden before adding it to your fried rice.

    Ultimately, the best meat for your fried rice is the one you enjoy most! Feel free to experiment and discover your personal favorite for flavorful meals made easy.

    How do I make my fried rice not soggy?

    Achieving perfectly dry, fluffy fried rice is key for flavorful meals made easy! Soggy fried rice is a common frustration, but it’s easily avoided with a few tips perfect for beginner-friendly recipes.

    Follow these practical steps for a great result every time:

    • Use Cold, Day-Old Rice: This is the golden rule! Freshly cooked rice is warm and moist, which makes it steam and turn mushy in the pan. Chilling leftover rice in the fridge dries it out, so the grains stay separate and firm. This step is essential for the best texture. [4]
    • High Heat is Your Friend: Cook your fried rice in a very hot wok or large skillet. High heat evaporates moisture quickly and gives the rice those lovely crispy bits.
    • Don’t Overcrowd the Pan: Cook in batches if necessary. Too much food in the pan lowers the temperature, causing ingredients to steam instead of fry. This releases moisture and leads to sogginess.
    • Use Enough Oil (But Not Too Much): A sufficient amount of oil helps toast the rice and prevents sticking. However, too much oil can make it greasy.
    • Add Sauce Towards the End: Add your sauces just before the rice is finished cooking. Toss them quickly to coat the rice without making the dish wet.
    • Dry Your Ingredients: Make sure any vegetables or protein are dry before you add them to the pan. Excess water will create steam.

    By following this step-by-step cooking guidance, you’ll create delightful, non-soggy fried rice. You will be cooking confidently in no time!

    What kind of soy sauce is best for fried rice?

    Choosing the right soy sauce significantly impacts your fried rice‘s flavor and appearance. It’s a key ingredient for flavorful meals made easy, and understanding the types is a great step for approachable home cooking.

    For the best results, you’ll typically use a combination:

    • Light Soy Sauce (or Regular Soy Sauce): This is your primary seasoning, providing the main salty, umami flavor. Using a good quality brand will give you the best taste. It’s a staple in many simple dinner recipes.
    • Dark Soy Sauce: This type is thicker, slightly sweeter, and less salty than light soy sauce. Its main purpose is to add a rich, beautiful caramel color to your fried rice while also imparting a deeper, more complex flavor.
    • Low-Sodium Soy Sauce: If you’re watching your salt intake, low-sodium varieties are a great option. They allow you to control the saltiness more easily, and you can always adjust with a pinch of salt if needed.

    For an authentic Chinese fried rice, we recommend using both light and dark soy sauce. The light soy sauce brings the salt and umami, while the dark soy sauce provides that signature deep color and a hint of sweetness. This combination creates a perfect balance that elevates your fried rice recipe to restaurant quality!


    Sources

    1. https://www.foodandwine.com/essential-kitchen-tips/day-old-rice-fried-rice-myth-busted-7965922
    2. https://www.seriouseats.com/what-is-wok-hei-how-to-get-it-at-home
    3. https://www.nhs.uk/common-health-questions/food-and-diet/can-you-reheat-rice/
    4. https://www.seriouseats.com/the-best-fried-rice-recipe-how-to-make-fried-rice
  • Easy Chicken Pot Pie Recipe: A Simple Step-by-Step Guide

    Easy Chicken Pot Pie Recipe: A Simple Step-by-Step Guide

    This classic chicken pot pie recipe features tender chunks of chicken and vegetables like carrots, peas, and potatoes in a rich, creamy sauce. The savory mixture is baked inside a flaky, golden-brown pie crust, creating the ultimate comfort food meal perfect for families and beginner cooks.

    A warm, comforting meal brings everyone to the table, especially when life gets busy. For many home cooks, the classic chicken pot pie is the ultimate cozy dish. Still, the thought of making it from scratch can feel daunting. If you want to cook healthy, tasty meals the whole family will love without complex steps, you’re in the right place. We believe delicious, flavorful meals made easy should be a cornerstone of every home kitchen.

    At Recipesmondial, we want to make family-friendly cooking an enjoyable, stress-free experience. That’s why we’re sharing our incredibly simple chicken pot pie recipe, designed to guide you step-by-step. You’ll learn how to create a golden, flaky-crusted pot pie with a rich, savory filling that tastes like it took hours but comes together easily. This simple dinner recipe is about to become a reliable favorite.

    Our beginner-friendly recipe provides practical guidance to ensure great results, whether you’re a seasoned cook or just starting. We’ll show you how to achieve the perfect chicken pot pie every time, complete with helpful tips, substitutions, and variations to make it your own. Get ready to cook with confidence and serve a meal that is sure to gather rave reviews.

    Why You’ll Love This Homemade Chicken Pot Pie Recipe

    A golden-brown chicken pot pie with a slice removed, revealing the creamy chicken and vegetable filling inside, on a wooden table.
    A perfectly baked chicken pot pie, golden-brown and flaky crust with a lovely lattice top, steam gently rising from a slice that’s been cut out, revealing the creamy, rich filling with chunks of chicken and vibrant mixed vegetables. The pie is served on a rustic wooden surface, with a cozy, warm kitchen in the softly blurred background. Professional food photography, photorealistic, high-quality food magazine photo style.

    There’s nothing quite like the comforting embrace of a warm, savory homemade chicken pot pie. While it’s a true classic for any occasion, this isn’t just any pot pie recipe. We’ve designed it specifically for home cooks like you.

    At Recipesmondial, we believe cooking should be enjoyable, not stressful. That’s why our easy chicken pot pie recipe delivers reliable results and incredible flavor without the fuss. Instead of being overwhelmed by complex recipes, you’ll find simple steps and practical guidance.

    Here’s why you’ll absolutely love making this homemade chicken pot pie:

    • Effortless Comfort Food: This pot pie recipe brings cozy warmth to your table using everyday ingredients you likely already have. It’s the perfect choice for a satisfying dinner any night of the week.
    • Beginner-Friendly Approach: We break down every step clearly, providing step-by-step cooking guidance from start to finish. This approachable home cooking experience helps even new cooks feel confident in the kitchen.
    • Incredible Flavor, Made Easy: Get ready to enjoy a rich, creamy filling and a perfectly flaky crust. Our straightforward method ensures maximum taste with minimal fuss, making this a truly flavorful meal made easy.
    • Perfect for Busy Families: As a family-friendly meal, this chicken pot pie is a guaranteed crowd-pleaser. Plus, our meal prep tips show you how to prepare it ahead of time.
    • Customizable to Your Liking: Feel free to adapt this recipe by swapping vegetables or using leftover chicken. We also include variations, like a chicken pot pie casserole, to suit your taste and what you have on hand.
    • Say Goodbye to Mealtime Stress: Stop struggling to plan family-friendly meals. With clear directions and delicious results, this recipe lets you enjoy cooking without stress.

    Get ready to create a memorable dish that will quickly become a staple in your kitchen. This chicken pie recipe proves how simple ingredients can transform into a spectacular meal. Recipesmondial is here to guide you toward culinary success!

    What Ingredients Do You Need for This Pot Pie Recipe?

    An overhead view of all the fresh ingredients for chicken pot pie, including raw chicken, mixed vegetables, and pie crusts, neatly arranged on a counter.
    An overhead flat lay, professional food photography shot of all fresh, raw ingredients for an easy chicken pot pie neatly arranged on a clean, light-colored kitchen counter or rustic wooden board. Ingredients include raw chicken breast, frozen mixed vegetables (peas, carrots, corn), chicken broth, cream of chicken soup, milk, butter, all-purpose flour, salt, black pepper, and two store-bought pie crusts (one in its package, one unrolled). The ingredients are vibrant, fresh, and perfectly lit. Photorealistic, high-quality food magazine photo.

    For the Creamy Chicken Filling

    A rich and creamy filling is the heart of a delicious homemade chicken pot pie. Using everyday ingredients, it comes together quickly to create a comforting, flavorful meal your family will adore. This recipe makes approachable home cooking both simple and enjoyable.

    Here’s what you’ll need for this savory core:

    • Cooked Chicken: 2 cups, shredded or diced. Leftover roast chicken or a store-bought rotisserie chicken works perfectly and saves so much time!
    • Unsalted Butter: 1/4 cup (4 tablespoons). This forms the base for our flavorful sauce.
    • Yellow Onion: 1/2 medium, chopped. It adds a sweet and savory depth.
    • Carrots: 1 cup, peeled and diced. They bring natural sweetness and color.
    • Celery: 1 cup, diced. This adds a subtle crunch and classic flavor.
    • All-Purpose Flour: 1/4 cup. It helps to thicken the creamy sauce beautifully.
    • Chicken Broth: 1 1/2 cups. Choose low-sodium to control the saltiness.
    • Milk: 1/2 cup (whole milk or 2%). This makes the filling wonderfully creamy.
    • Frozen Peas: 1 cup. No need to thaw them; they add a pop of green and sweetness.
    • Dried Thyme: 1/2 teaspoon. It provides that classic, aromatic pot pie taste.
    • Salt and Black Pepper: To taste. Start with 1/2 teaspoon salt and 1/4 teaspoon pepper, then adjust as needed.

    Substitution Tip: Feel free to customize the filling! You can easily swap in other vegetables like diced potatoes, green beans, or corn. This flexibility makes it a truly family-friendly meal. For an even richer sauce, replace half the milk with heavy cream. This beginner-friendly recipe encourages creativity in your kitchen!

    For the Flaky Pie Crust (Store-Bought or Homemade)

    The golden, flaky crust is what makes a chicken pot pie irresistible. To create an easy chicken pot pie, we recommend a store-bought crust. It’s a great shortcut for getting this simple dinner recipe on the table fast. However, if you love to bake, a homemade crust is a wonderful and rewarding option.

    Here are your crust choices:

    • Refrigerated Pie Crusts: 2 (one 14.1-ounce package). This is our top pick for a quick and stress-free pie. They are readily available in most grocery stores—simply unroll and use!

    For the Homemade Crust (Optional, but rewarding!):

    • All-Purpose Flour: 2 1/2 cups.
    • Unsalted Butter: 1 cup (2 sticks), very cold and cut into small cubes. Cold butter is the key to a flaky crust!
    • Ice Water: 1/2 cup to 3/4 cup. Add it slowly until the dough just comes together.
    • Salt: 1 teaspoon. This enhances the flavor of the crust.

    Pro Tip for Beginners: Don’t hesitate to use a store-bought crust! It’s a fantastic shortcut for a flavorful meal made easy without the extra work. Our step-by-step cooking guidance is designed to provide simple paths to delicious results. You can always tackle the homemade version when you’re feeling more adventurous. You’ll build kitchen confidence with every recipe you try!

    How to Make Chicken Pot Pie Step-by-Step

    A home cook's hands gently placing and crimping a top pie crust onto a dish filled with chicken pot pie mixture.
    A close-up, photorealistic professional food photography shot of a home cook’s hands, with clean, unadorned nails, gently placing a golden-brown, pre-made pie crust over a glass pie dish filled with a creamy chicken and mixed vegetable mixture. The hands are carefully crimping the edges to seal the pie. The background is a soft, warm, and inviting kitchen setting, slightly blurred to keep focus on the hands and the pie assembly. High-quality food magazine photo.

    Step 1: Prepare and Sauté the Vegetables

    Let’s begin your delicious easy chicken pot pie recipe by preparing the vegetables. Proper prep work makes the cooking process much smoother and is a great habit for meal prep.

    1. Dice the aromatics. Finely dice one medium onion and two cloves of garlic. Smaller pieces will ensure they cook evenly.
    2. Melt the butter. In a large pot or Dutch oven, melt two tablespoons of unsalted butter over medium heat.
    3. Sauté the onion. Add the diced onion to the pot and sauté for about 5 minutes, stirring occasionally until it has softened.
    4. Add remaining vegetables. Add one cup of sliced carrots and one cup of frozen peas to the pot. You can also add corn for extra sweetness.
    5. Stir in the garlic. Add the minced garlic and cook for one more minute until you can smell its aroma.
    6. Set the vegetables aside. Remove the cooked vegetables from the pot and transfer them to a bowl. This step prevents them from overcooking while you prepare the sauce.

    Step 2: Cook the Chicken and Create the Creamy Sauce

    Now it’s time to build the heart of your homemade chicken pot pie: the creamy, flavorful filling. This rich sauce is what makes a pot pie so comforting.

    1. Cook the chicken. If using raw chicken, dice two boneless, skinless chicken breasts and cook them in the same pot with a tablespoon of olive oil until no longer pink, about 6-8 minutes. If you are using pre-cooked rotisserie chicken, you will add two cups of shredded meat later.
    2. Make the roux. In the same pot, melt another two tablespoons of butter. Whisk in 1/4 cup of all-purpose flour and cook for 1-2 minutes, stirring constantly, to create a thickening paste.
    3. Create the sauce. Gradually pour in 1 3/4 cups of chicken broth while whisking constantly to prevent lumps. Then, whisk in 1 cup of whole milk. Continue until the sauce begins to thicken and can coat the back of a spoon.
    4. Season the sauce. Stir in 1/2 teaspoon of dried thyme, 1/2 teaspoon of salt, and 1/4 teaspoon of black pepper. Taste and adjust the seasonings if needed.
    5. Combine all ingredients. Return the cooked vegetables to the pot. Add the cooked chicken (either the freshly cooked pieces or the shredded rotisserie chicken) and stir everything together. Simmer for 2-3 minutes to allow the flavors to meld.

    Step 3: Assemble the Chicken Pot Pie

    The assembly step is where your chicken pot pie comes to life. This process is simple, satisfying, and a great example of beginner-friendly recipes.

    1. Preheat the oven. Set your oven to 400°F (200°C).
    2. Prepare the pie plate. Lightly grease a standard 9-inch pie plate.
    3. Line the pie plate. Gently unroll one refrigerated pie crust and press it into the bottom and up the sides of the prepared plate. Trim any excess dough from the edge.
    4. Add the filling. Pour the warm chicken and vegetable filling into the bottom crust and spread it out evenly.
    5. Cover with the top crust. Place the second pie crust over the filling. Trim the edges, leaving a 1/2-inch overhang.
    6. Seal the edges. Fold the top crust’s overhang under the bottom crust’s edge and crimp them together with your fingers or a fork to create a seal.
    7. Vent the crust. Cut a few small slits in the top crust to allow steam to escape during baking. This helps prevent a soggy pie.
    8. Add an optional egg wash. For a rich, golden-brown finish, brush the top crust with an egg wash (one egg beaten with a tablespoon of water).

    Step 4: Bake to Golden Brown Perfection

    The final step is baking. This is where the magic happens, turning simple ingredients into a classic, flavorful meal made easy. Prepare for a truly comforting chicken pot pie experience!

    1. Bake the pie. Place the assembled pot pie in the preheated oven. Bake for 30-40 minutes, or until the crust is golden brown and the filling is bubbly.
    2. Prevent over-browning. If you notice the edges of the crust browning too quickly, you can cover them with a strip of aluminum foil.
    3. Check for doneness. For food safety, the internal temperature of the filling should reach 165°F (74°C) [1].
    4. Rest the pie before serving. Once baked, remove the pot pie from the oven and let it cool for at least 10-15 minutes. This crucial step allows the creamy filling to set, so it doesn’t run out when you slice it.
    5. Serve and enjoy! Slice the warm, homemade chicken pot pie and serve immediately. It’s a satisfying dish perfect for any night of the week.

    What Are Some Tips and Variations for the Best Chicken Pie?

    Time-Saving Tip: Using Rotisserie Chicken

    When life gets busy, smart shortcuts in the kitchen are a lifesaver.

    Using a pre-cooked rotisserie chicken is a fantastic way to make this easy chicken pot pie even quicker. This simple swap saves you valuable time, especially when you’re preparing dinner on a tight schedule.

    Here’s how to do it:

    • Shred the Chicken: Once the rotisserie chicken has cooled, remove the skin and bones. Shred or dice the meat into bite-sized pieces. You’ll need about 2-3 cups for this recipe.
    • Skip a Step: Add the cooked chicken directly to your sautéed vegetables and creamy sauce. This allows you to skip the step of cooking raw chicken from scratch.
    • Flavor Boost: Rotisserie chicken often comes pre-seasoned, which adds an extra layer of savory flavor to your homemade chicken pot pie.

    This simple trick makes preparing family-friendly, beginner-friendly meals a breeze.

    Crust Alternatives: Can I use biscuits or puff pastry?

    Absolutely! The beauty of a pot pie recipe is its versatility, and you can easily switch up the crust.

    If you’re looking for a different texture or an even simpler approach, these alternatives are perfect for stress-free cooking.

    Many home cooks enjoy these popular variations:

    • Flaky Puff Pastry: For an elegant, super-flaky top, use a sheet of store-bought puff pastry. Thaw it according to package directions, lay it over your filling, crimp the edges, and bake until golden brown for a beautiful, light crust.
    • Comforting Biscuits: Biscuit dough makes a wonderful, soft topping. You can use canned biscuit dough or your favorite homemade recipe. Simply arrange the biscuits over the filling for a more rustic, casserole-style pot pie.
    • No Bottom Crust: For a lighter option, you can skip the bottom crust entirely. This is a great approach when making a chicken pot pie in a bowl or in a “pot pie soup” style.

    These crust alternatives open up new possibilities for creating easy and flavorful meals.

    Making a Chicken Pot Pie Casserole

    Transforming your chicken pot pie into a casserole is an excellent idea that’s often even easier to assemble.

    This variation is perfect for feeding a crowd because it simplifies serving, making it a fantastic solution for busy family dinners.

    Follow these simple adjustments:

    • Choose Your Dish: Prepare your creamy chicken filling as directed, then pour it into a large baking dish (like a 9×13 inch casserole dish) instead of a pie plate.
    • Crust on Top Only: A casserole typically has a top crust only. You can use a single pie crust, puff pastry, or biscuits. If using pie crust, you might need two sheets to cover a larger casserole dish.
    • Crumb Topping (Optional): For a lighter, crunchier topping, consider a savory crumb. Mix breadcrumbs with melted butter, herbs, and Parmesan cheese, then sprinkle the mixture over the filling before baking.
    • Bake and Serve: Bake at 375°F (190°C) for 25-35 minutes, or until the filling is bubbly and the top is golden brown. Adjust the baking time based on your dish size and topping.

    This adaptation creates an approachable home cooking experience, and you’ll love how simple and delicious it is!

    Meal Prep: Making the Filling Ahead of Time

    Meal prep is a game-changer for stress-free cooking, and preparing your chicken pot pie filling in advance is a smart move.

    This approach saves significant time, helping you get delicious, family-friendly meals on the table fast, even on the most hectic days.

    Here’s how to do it efficiently:

    • Cook the Filling: Follow the recipe steps to prepare the creamy chicken filling, ensuring the chicken is fully cooked and the sauce is thickened.
    • Cool Completely: It is crucial to let the filling cool down completely before storing it. Storing it while hot can create condensation and affect freshness.
    • Store Properly: Transfer the cooled filling to an airtight container. It will keep in the refrigerator for up to 3-4 days or in the freezer for up to 3 months [2].
    • Assemble and Bake Later: When you’re ready to bake, thaw the filling if frozen and warm it gently on the stovetop. Pour it into your pie crust, add the top crust, and bake as usual.

    This meal prep tip ensures you can enjoy flavorful, home-cooked meals with less last-minute effort.

    How to Store and Reheat Leftover Pot Pie

    Making a delicious homemade chicken pot pie is incredibly satisfying. By learning how to properly store and reheat your leftovers, you can enjoy that comforting flavor for days! Here at Recipesmondial, we want to help you make the most of every meal.

    How to Store Leftover Chicken Pot Pie

    To keep your leftover pot pie fresh and delicious, follow these simple storage steps:

    • Cool Completely: Let your chicken pot pie cool to room temperature before storing. For safety, do not leave it out for more than two hours [3].
    • Use Airtight Containers: Transfer the cooled leftovers into an airtight container. This keeps the pie from drying out and locks in freshness.
    • Refrigerate Promptly: Place the sealed container in the refrigerator, where it will stay fresh for 3-4 days. This is perfect for quick lunches or easy dinners later in the week.
    • Freeze for Longer Storage: For longer-term storage, freezing is an excellent option.
      • To Freeze a Whole Pie: Wrap the entire pot pie tightly, first in plastic wrap and then in aluminum foil.
      • To Freeze Individual Portions: For convenient meal prep, divide the pie into single servings before freezing. Be sure to label each container with the date.
      • Frozen pot pie is best if used within 2-3 months. Remember to thaw it in the refrigerator overnight before you plan to reheat it.

    How to Reheat Leftover Chicken Pot Pie

    Reheating your pot pie the right way is key to restoring its delicious flavor and flaky crust. Here are the best methods:

    • In the Oven (Recommended for Best Results): Using the oven is the best way to revive the pot pie’s crispy, flaky crust.
      1. Preheat your oven to 300°F (150°C). A lower temperature gently reheats the filling without burning the crust.
      2. Place the pot pie on a baking sheet. If the crust is already golden brown, cover it loosely with aluminum foil to prevent over-browning.
      3. Bake a single slice for 20-30 minutes or a whole pie for 45-60 minutes.
      4. The pie is ready when the filling is bubbly. For food safety, ensure it reaches an internal temperature of 165°F (74°C) [4].
      5. To make the crust extra crispy, remove the foil for the last 5-10 minutes of baking.
    • In the Microwave (Quickest Option): While the oven delivers the best texture, the microwave is a great alternative when you’re short on time.
      1. Place a slice of pot pie on a microwave-safe dish.
      2. Cover the slice loosely with a damp paper towel to prevent it from drying out.
      3. Heat on medium power for 2-3 minutes, checking for doneness.
      4. If it’s not hot enough, continue heating in 30-second intervals.
      5. Use caution when removing, as the filling can become extremely hot.

      Pro Tip: To get a crispier crust after microwaving, place the slice in a toaster oven or air fryer for a few minutes. It’s the perfect trick for a quick and satisfying lunch!

    Frequently Asked Questions

    What makes a good old-fashioned chicken pot pie recipe?

    A good old-fashioned chicken pot pie is the ultimate comfort food. It combines simple, delicious elements to create a heartwarming meal for the whole family.

    Here’s what goes into a great homemade chicken pot pie:

    • A Rich, Creamy Filling: The heart of the pie is its luscious, savory sauce, which should coat every ingredient beautifully.
    • Tender Chicken: Cooked chicken, whether shredded or diced, provides the main protein. For the best result, it should be juicy and flavorful.
    • Classic Vegetables: A colorful mix of peas, carrots, and corn adds texture and nutrition, making the dish vibrant. Potatoes or green beans are also great additions.
    • A Flaky Crust: A golden, buttery crust is non-negotiable. Whether it’s a simple store-bought option or homemade, the crust seals in all the delicious flavors.

    Together, these elements create a satisfying, flavorful meal that feels just like home—an easy recipe perfect for any weeknight.

    Can I make this an easy chicken pot pie recipe with cream of chicken soup?

    Yes, absolutely! Using canned cream of chicken soup is a great shortcut for an even easier chicken pot pie. This simple swap streamlines the filling process, making dinner quick and stress-free.

    Here’s how to make it work for a simple dinner recipe:

    • Combine Ingredients: In a bowl, mix your cooked chicken and vegetables with a can of cream of chicken soup.
    • Adjust Consistency: If the filling seems too thick, add a splash of milk or chicken broth to reach your desired creamy texture.
    • Boost Flavor: To enhance the taste, stir in a pinch of dried thyme, a dash of garlic powder, or some freshly ground black pepper. These simple additions will elevate the flavor.

    This method makes a family-friendly meal accessible for busy cooks. It’s a fantastic, beginner-friendly recipe that delivers a delicious outcome with minimal effort.

    Can I make just the chicken pot pie filling?

    Yes, you certainly can! Making the chicken pot pie filling ahead of time is a smart meal prep strategy. It saves valuable time on busy weeknights and makes getting dinner on the table much less of a rush.

    Here are a few ways to prepare and use your chicken pot pie filling:

    • Make Ahead for Pot Pie: Prepare the filling as directed, then let it cool completely. Store it in an airtight container in the refrigerator for up to 3-4 days [5]. When you’re ready to eat, just assemble the pot pie and bake.
    • Versatile Serving Ideas: The filling is delicious on its own and can be enjoyed in several ways. Serve it over warm biscuits for a deconstructed pot pie, or thin it with a little extra broth to create a comforting chicken pot pie soup.
    • Freezing for Later: For longer storage, freeze the cooled filling in freezer-safe bags or containers. It will last for up to 2-3 months. Thaw it overnight in the fridge before using.

    This flexibility makes meal planning much simpler, helping you enjoy a stress-free cooking experience.

    What is the difference between a chicken pie and a chicken pot pie?

    While the terms “chicken pie” and “chicken pot pie” are often used interchangeably, there’s a subtle difference that usually comes down to the crust and presentation.

    Here’s a simple breakdown:

    • Chicken Pot Pie: This version features a creamy filling baked in a deep dish—or “pot.” It typically has only a top crust, which can be made from pastry, biscuits, or puff pastry. The name highlights the deep dish vessel it’s baked in, signifying a hearty, all-in-one meal.
    • Chicken Pie: This term often refers to a savory pie with both a top and bottom crust, similar in structure to a traditional fruit pie. In some regions, a chicken pie might also be a smaller, hand-held pastry.

    Ultimately, both are comforting and delicious options for a family-friendly meal. At Recipesmondial, we focus on approachable home cooking, so we embrace both delicious styles!


    Sources

    1. https://www.fsis.usda.gov/food-safety/safe-food-handling-and-preparation/food-safety-basics/safe-minimum-internal-temperature-chart
    2. https://www.fsis.usda.gov/food-safety/safe-food-handling-and-preparation/food-safety-basics/freezing-and-food-safety
    3. https://www.fsis.usda.gov/food-safety/safe-food-handling-and-preparation/food-safety-basics/danger-zone
    4. https://www.foodsafety.gov/keep-food-safe/food-safety-by-topic/cooking-temperature-chart
    5. https://www.foodsafety.gov/food-safety-charts/cold-storage-chart
  • 21 Best Chicken Thigh Recipes (Easy, Quick & Delicious Ideas)

    21 Best Chicken Thigh Recipes (Easy, Quick & Delicious Ideas)

    Chicken thigh recipes are incredibly popular because chicken thighs are a flavorful, juicy, and budget-friendly cut of meat. They are highly versatile and can be baked, pan-seared, grilled, or cooked in an air fryer, making them perfect for quick weeknight dinners, family-friendly meals, and meal prep.

    Do you dream of serving delicious, restaurant-quality meals without spending hours in the kitchen? Are you overwhelmed by complex recipes or struggling to plan family-friendly meals that everyone will love? We understand. Balancing a busy life with flavorful, satisfying food is a challenge. At Recipesmondial, we believe cooking should be an enjoyable, stress-free experience. That’s why we’re here to celebrate one of the most versatile, budget-friendly, and delicious ingredients around: chicken thighs!

    This guide unlocks the potential of chicken thighs with 21 of our best recipes, each one quick, easy, and bursting with flavor. Whether you’re a beginner seeking reliable results or a seasoned pro looking for fresh inspiration, these simple dinner recipes offer practical, step-by-step guidance. It’s time to say goodbye to kitchen uncertainty and hello to a world of approachable home cooking.

    From crispy oven-baked favorites to speedy air fryer options and versatile boneless recipes, we’ll show you how to transform this humble cut into a culinary masterpiece. Get ready to discover new flavors, boost your confidence in the kitchen, and make mealtime an exciting, delicious journey. Let’s dive in and explore why chicken thighs are perfect for easy meals!

    Why Are Chicken Thighs Perfect for Easy Meals?

    Chicken thighs are a true kitchen hero, perfect for anyone seeking easy, flavorful meals. Here at Recipesmondial, we know you need simple yet delicious options, and chicken thighs deliver with fantastic value and versatility. Naturally juicy and forgiving, these succulent cuts make weeknight cooking a joy and are ideal for both beginner cooks and creative chefs. Say goodbye to dry, boring chicken. Let’s explore why chicken thighs are a staple for stress-free, flavorful cooking.

    Boneless vs. Bone-In Thighs: What’s the Difference?

    Understanding the difference between boneless and bone-in thighs will help you choose the best option for your recipe. You will typically find both boneless, skinless and bone-in, skin-on varieties, each offering unique benefits.

    Boneless, Skinless Chicken Thighs: Incredibly convenient, these thighs cook quickly, making them excellent for fast weeknight dinners. They readily absorb marinades and sauces, which is perfect for quick stir-fries or speedy pan-sears. They are also simple to cut into uniform pieces.

    Bone-In, Skin-On Chicken Thighs: For deeper flavor and extra juiciness, choose bone-in thighs. The bone helps distribute heat evenly to keep the meat moist, while the skin crisps up beautifully for a wonderful texture. Bone-in thighs are also often a great budget-friendly option, though they do require a bit more cooking time.

    Here’s a quick comparison to help you decide:

    Feature Boneless, Skinless Chicken Thighs Bone-In, Skin-On Chicken Thighs
    Cook Time Faster, great for quick meals Slower, allows for deeper flavor
    Flavor Profile Mild, readily absorbs marinades Richer, more robust chicken flavor
    Texture Uniform, easy to shred or slice Very tender, often falls off the bone
    Prep Effort Minimal, ready to cook May require trimming some excess skin/fat
    Best For Stir-fries, quick pan-sears, curries Roasting, braising, slow cooking, grilling
    Cost Slightly higher per pound Generally more budget-friendly

    Tips for Perfectly Juicy Chicken Every Time

    Achieving perfectly juicy chicken thighs is easier than you think. With these simple tips, you can forget about dry chicken, boost your cooking confidence, and consistently create flavorful meals.

    • Use a Meat Thermometer: A meat thermometer is your best friend for juicy chicken. Thighs are fully cooked and safe at 175°F (80°C) [1]. Unlike breasts, they benefit from cooking past the typical 165°F, as this allows connective tissues to break down for extra tenderness.
    • Do Not Overcook: While thighs are forgiving, overcooking is still the primary cause of dryness. Check the internal temperature often and remove the chicken from the heat just as it reaches its target to keep it moist.
    • Consider a Simple Brine: A quick brine can work wonders. Soaking chicken thighs in salted water for 30 minutes to an hour helps the meat retain moisture while adding flavor [2].
    • Let it Rest: After cooking, always let your chicken rest for 5-10 minutes under a loose covering of foil. This crucial step allows the juices to redistribute throughout the meat, resulting in a much juicier bite.
    • Pat Dry Before Cooking: For crispy skin, this tip is crucial. Use paper towels to pat the chicken thighs completely dry, especially bone-in, skin-on varieties. Excess moisture creates steam and prevents the skin from browning properly.
    • High Heat for Crispy Skin: When cooking bone-in, skin-on thighs, start them skin-side down in the pan over medium-high heat. This technique renders the fat and creates a beautifully crispy skin.
    • Don’t Crowd the Pan: To get a good sear, cook chicken in a single layer without overcrowding the pan. If necessary, cook in batches. A crowded pan lowers the temperature, causing the chicken to steam instead of sear.

    With these straightforward techniques, you can cook with confidence and enjoy perfectly juicy, flavorful chicken thighs every time. Recipesmondial is here to guide you to delicious, easy recipes.

    Simple Oven-Baked Chicken Thigh Recipes

    A plate of golden-brown, crispy-skinned oven-baked chicken thighs served with roasted asparagus and cherry tomatoes.
    Professional food photography, photorealistic, high-quality food magazine photo: A beautifully plated dish of golden-brown, crispy-skinned oven-baked chicken thighs. The chicken is perfectly seared with visible juices, resting on a rustic white plate. Alongside, there’s a vibrant side of roasted asparagus spears and cherry tomatoes, lightly charred, suggesting fresh, simple ingredients. Soft, warm natural lighting from a window illuminates the dish, highlighting the textures and rich colors. The background is slightly blurred, showing a warm, inviting kitchen counter with a hint of a wooden cutting board. The overall feel is comforting, easy, and incredibly delicious.

    Classic Crispy Skin Baked Chicken Thighs

    Ready to master a truly satisfying dish? Our classic crispy skin baked chicken thighs recipe is the perfect place to start. This easy method promises juicy chicken with delightfully crispy skin, making it a go-to for family-friendly dinners. You’ll love how simple it is to prepare.

    Why This Recipe Works for You

    • Beginner-Friendly: With step-by-step guidance, anyone can achieve fantastic results.
    • Maximum Flavor: The skin gets wonderfully crisp, sealing in all the delicious juices.
    • Everyday Ingredients: You likely have most of these items in your pantry already.
    • Versatile: It pairs well with almost any side dish.

    Ingredients You Will Need

    • 4 bone-in, skin-on chicken thighs
    • 1 tablespoon olive oil
    • 1 teaspoon salt
    • ½ teaspoon black pepper
    • ½ teaspoon garlic powder (optional)
    • ½ teaspoon paprika (optional, for color and mild flavor)

    Simple Step-by-Step Instructions

    1. Preheat Oven: Set your oven to 400°F (200°C).
    2. Prepare Chicken: Pat the chicken thighs thoroughly dry with paper towels. This is a crucial step for achieving crispy skin.
    3. Season: Drizzle the chicken with olive oil and rub it evenly over all sides.
    4. Sprinkle Seasonings: In a small bowl, combine the salt, pepper, garlic powder, and paprika (if using). Sprinkle this mixture generously over both sides of the chicken.
    5. Arrange: Place the seasoned chicken thighs skin-side up in a single layer on a baking sheet.
    6. Bake: Bake for 35-45 minutes. Cooking time will depend on the size of the chicken thighs.
    7. Check Doneness: The chicken is done when its internal temperature reaches 165°F (74°C) [3]. Use a meat thermometer for an accurate reading.
    8. Rest and Serve: Let the chicken rest for 5 minutes before serving. This step keeps it extra juicy.

    Tips for Success and Variations

    • Extra Crispy Skin: For even crispier skin, bake the chicken on a wire rack placed over a baking sheet. This allows hot air to circulate completely.
    • Flavor Boost: Add a sprig of fresh rosemary or thyme to the baking sheet as the chicken cooks.
    • Meal Prep Idea: Cook extra thighs and shred the meat for salads or sandwiches later in the week. This makes weekly meal planning easy.
    • Spice It Up: A pinch of cayenne pepper in the seasoning mix will add a gentle kick.

    One-Pan Lemon Herb Chicken and Veggies

    Overwhelmed by complex recipes and too many dishes? This one-pan lemon herb chicken and veggies recipe is your new best friend. It delivers a full, flavorful meal on a single baking sheet, making it perfect for busy families who value simple dinners and easy cleanup.

    Why This Recipe Works for You

    • Minimal Cleanup: Only one pan to wash—a huge win on a busy night!
    • Complete Meal: Your protein and vegetables cook together for a balanced dish.
    • Nutrient-Rich: This meal is packed with fresh vegetables and lean protein.
    • Approachable Home Cooking: Simple steps that deliver delicious results every time.

    Ingredients You Will Need

    • 4 boneless, skinless chicken thighs (or bone-in, skin-on for extra flavor)
    • 1 pound small potatoes, quartered
    • 2 cups broccoli florets
    • 1 bell pepper (any color), chopped into 1-inch pieces
    • 2 tablespoons olive oil
    • Juice of 1 lemon
    • 1 tablespoon dried Italian herbs (or a mix of dried rosemary, thyme, and oregano)
    • ½ teaspoon salt
    • ¼ teaspoon black pepper
    • Fresh parsley, chopped, for garnish (optional)

    Simple Step-by-Step Instructions

    1. Preheat Oven: Heat your oven to 400°F (200°C). For even easier cleanup, line a large baking sheet with parchment paper.
    2. Prepare Veggies: In a large bowl, toss the potatoes, broccoli, and bell pepper with 1 tablespoon of olive oil, half the lemon juice, ½ tablespoon of Italian herbs, salt, and pepper.
    3. Season Chicken: Pat the chicken thighs dry. In the same bowl (or a separate one), toss the chicken with the remaining 1 tablespoon of olive oil, lemon juice, and Italian herbs.
    4. Arrange on Pan: Spread the seasoned vegetables in an even layer on the prepared baking sheet. Place the chicken thighs among the vegetables.
    5. Bake: Bake for 25-35 minutes. Cooking time varies based on the thickness of the chicken.
    6. Check Doneness: The chicken is cooked through when its internal temperature reaches 165°F (74°C), and the vegetables should be tender and lightly browned.
    7. Serve: Garnish with fresh parsley, if desired, and serve immediately.

    Tips for Success and Variations

    • Veggie Swaps: Feel free to use carrots, zucchini, asparagus, or cherry tomatoes. Just be sure to adjust cooking times as needed.
    • Spice Variation: For some heat, add a pinch of red pepper flakes with the other seasonings.
    • Marinade Ahead: For extra flavor, marinate the chicken and veggies together for at least 30 minutes before baking.
    • Meal Prep Friendly: This recipe makes fantastic leftovers and is ideal for healthy lunch prep during the week.

    Savory Garlic and Paprika Chicken Thighs

    Unlock robust flavors with our savory garlic and paprika chicken thighs. This straightforward yet incredibly satisfying recipe is perfect for beginners and makes a tasty addition to any meal plan. It’s a simple way to create a delicious dish that will impress your family without any stress.

    Why This Recipe Works for You

    • Flavorful Punch: Garlic and paprika combine to create a deep, savory taste.
    • Quick & Easy: Get maximum flavor with minimal prep time.
    • Versatile Pairing: This chicken is great with rice, pasta, or a simple green salad.
    • Budget-Friendly: Chicken thighs are an economical and delicious choice for family meals.

    Ingredients You Will Need

    • 4 boneless, skinless chicken thighs
    • 1 tablespoon olive oil
    • 1 tablespoon garlic powder
    • 1 teaspoon smoked paprika
    • ½ teaspoon onion powder
    • ½ teaspoon salt
    • ¼ teaspoon black pepper
    • Optional: Pinch of cayenne pepper for heat

    Simple Step-by-Step Instructions

    1. Preheat Oven: Preheat your oven to 400°F (200°C).
    2. Prepare Chicken: Pat the chicken thighs dry with paper towels.
    3. Create Spice Rub: In a small bowl, combine the garlic powder, smoked paprika, onion powder, salt, pepper, and cayenne (if using).
    4. Season Chicken: Drizzle the chicken with olive oil. Sprinkle the spice rub evenly over all sides, patting it gently to help it adhere.
    5. Arrange on Pan: Place the seasoned chicken thighs in a single layer on a baking sheet.
    6. Bake: Bake for 20-30 minutes, depending on the thickness of your chicken.
    7. Check Doneness: Use a meat thermometer to ensure the internal temperature has reached 165°F (74°C).
    8. Rest and Serve: Let the chicken rest for a few minutes before slicing and serving. This keeps the meat tender and juicy.

    Tips for Success and Variations

    • Marinade Option: For a deeper flavor, coat the chicken with the oil and spice rub, then refrigerate for at least 30 minutes (or up to 4 hours) before baking.
    • Smoked Paprika Power: Using smoked paprika provides a richer, more complex taste, but regular paprika works well too.
    • Make it a Sheet Pan Meal: Toss sliced onions, bell peppers, or zucchini with a little oil and salt and add them to the pan to cook alongside the chicken.
    • Serving Suggestion: A squeeze of fresh lemon juice just before serving brightens all the savory flavors.

    Easy Boneless Skinless Chicken Thigh Recipes

    15-Minute Pan-Seared Chicken Thighs with Sauce

    Craving a delicious dinner in a flash? This pan-seared chicken is the perfect solution for busy evenings. Pan-searing is a quick cooking method that locks in flavor and moisture, and since boneless thighs cook so fast, you can have a restaurant-quality meal on the table in just 15 minutes.

    This recipe is a game-changer for anyone short on time, and it’s also ideal for beginner cooks looking to build confidence in the kitchen. With this simple approach, you can say goodbye to overwhelming, complex recipes and see just how easy a flavorful meal can be.

    Why You’ll Love This Quick Meal:

    • Lightning Fast: Ready from start to finish in about 15 minutes.
    • Big Flavor: A simple pan sauce elevates the chicken.
    • Easy to Master: Perfect for learning basic cooking skills.
    • Versatile: Pairs well with almost any side dish.

    Key Ingredients (You’ll need):

    • Boneless, skinless chicken thighs
    • Olive oil or butter
    • Garlic
    • Chicken broth or white wine
    • Fresh herbs (like thyme or parsley)
    • Lemon juice

    Simple Steps:

    1. Pat your chicken thighs dry and season them well.
    2. Heat oil in a skillet over medium-high heat.
    3. Sear the chicken for 4-5 minutes per side until golden brown and cooked through, reaching an internal temperature of 165°F (74°C) for safety [4].
    4. Remove the chicken from the pan and quickly make your pan sauce. Add garlic, then deglaze with broth. Stir in herbs and lemon juice.
    5. Return the chicken to the pan to coat it in the sauce.

    Tips for Success:

    • Don’t Overcrowd: To ensure a good sear, cook the chicken in batches if needed.
    • Get Creative with Sauce: Try adding a touch of cream for richness or a spoonful of Dijon mustard for tang.
    • Serve It Up: This dish is delicious with mashed potatoes, rice, or a fresh green salad.

    Quick Honey-Garlic Chicken Stir-Fry

    If you need a healthy and tasty meal on the table fast, a stir-fry is the perfect answer. This quick honey-garlic chicken stir-fry combines tender boneless chicken with vibrant vegetables in a single pan, which makes cleanup a breeze. It’s a simple, flavorful, and family-friendly meal that tastes incredible.

    This dish is an excellent option for meal prep, as you can chop the veggies ahead of time to save precious minutes during the week. It’s also an easy recipe for beginners and can be adjusted to suit any dietary needs or preferences.

    Why This Stir-Fry is a Winner:

    • One-Pan Wonder: Less washing up means more time to relax.
    • Customizable: Use any vegetables you have on hand.
    • Healthy & Balanced: Packed with lean protein and fresh produce.
    • Sweet & Savory: The honey-garlic sauce is a universal favorite.

    Key Ingredients (You’ll need):

    • Boneless, skinless chicken thighs
    • Assorted stir-fry vegetables (broccoli, bell peppers, carrots, snap peas)
    • Soy sauce (or tamari for gluten-free)
    • Honey
    • Garlic and ginger
    • Rice vinegar

    Simple Steps:

    1. Cut the chicken and vegetables into bite-sized pieces.
    2. In a small bowl, whisk together the honey-garlic sauce ingredients.
    3. Heat oil in a large skillet or wok over high heat.
    4. Cook the chicken until it is browned and nearly cooked through.
    5. Add hardier vegetables first, then softer ones, and stir-fry until tender-crisp.
    6. Pour in the sauce and cook until it thickens and coats everything completely.

    Tips for Success:

    • Prep Ahead: For any stir-fry, it’s crucial to chop all your ingredients before you start cooking.
    • High Heat: Use high heat for searing to create that authentic stir-fry texture.
    • Serve with Grains: Enjoy over steamed rice, quinoa, or noodles.

    Simple Chicken Thigh Casserole

    For those times you need a comforting meal that practically cooks itself, this simple chicken thigh casserole is the ideal solution. It’s a fantastic, beginner-friendly recipe for busy families—just assemble the ingredients and let the oven do the work. This dish transforms simple pantry staples into a delicious and hearty dinner, making it the definition of easy home cooking.

    As a stress-free meal prep solution, this casserole is a winner. You can assemble it the night before and pop it into the oven when you’re ready to eat. It’s a reliable recipe that delivers consistent, flavorful results every time.

    Why This Casserole is a Family Favorite:

    • Minimal Effort: Enjoy hands-off cooking once it’s in the oven.
    • Comfort Food: Warm, hearty, and deeply satisfying.
    • Feeds a Crowd: Easily doubles for larger families or planned leftovers.
    • Budget-Friendly: Uses economical boneless chicken thighs and staple vegetables.

    Key Ingredients (You’ll need):

    • Boneless, skinless chicken thighs
    • Potatoes (cut into chunks)
    • Carrots and celery
    • Onion
    • Cream of mushroom/chicken soup (or a homemade creamy sauce)
    • Chicken broth
    • Seasonings (salt, pepper, herbs)

    Simple Steps:

    1. Preheat your oven to the temperature specified in the recipe.
    2. Combine the chicken, potatoes, carrots, celery, and onion in a large baking dish.
    3. In a separate bowl, mix together the soup, broth, and seasonings.
    4. Pour the sauce mixture evenly over the chicken and vegetables.
    5. Bake until the chicken is cooked through and the vegetables are tender.

    Tips for Success:

    • Add More Veggies: Bell peppers, peas, or green beans are also great additions.
    • Cheesy Goodness: Sprinkle shredded cheese on top during the last 15 minutes of baking.
    • Make Ahead: Assemble the casserole up to 24 hours in advance. Cover and refrigerate until ready to bake.

    Flavorful Bone-In Chicken Thigh Recipes

    Slow-Cooker BBQ Pulled Chicken

    Imagine a delicious meal that practically cooks itself. Our Slow-Cooker BBQ Pulled Chicken is one of the easiest recipes you’ll ever make, making it a fantastic solution for busy weeknights or feeding a crowd.

    This recipe uses bone-in chicken thighs, which become incredibly tender and flavorful as they slow cook—perfect for shredding. Loved for its ease and taste, this simple dinner recipe is a true family-friendly meal that will keep everyone at the table happy.

    Ingredients:

    • 2 pounds bone-in, skin-on chicken thighs
    • 1 medium onion, chopped
    • 1 bottle (18 ounces) your favorite BBQ sauce
    • ½ cup chicken broth or water
    • 1 tablespoon apple cider vinegar (optional, for tang)
    • Salt and black pepper to taste

    Step-by-Step Cooking Guidance:

    1. Season the Chicken: First, pat the chicken thighs dry with paper towels. Then, season them generously with salt and pepper on all sides.
    2. Combine in Slow Cooker: Place the chopped onion in the bottom of your slow cooker and arrange the seasoned chicken thighs on top.
    3. Add Liquids: In a separate bowl, whisk together the BBQ sauce, chicken broth (or water), and apple cider vinegar (if using). Pour this mixture evenly over the chicken.
    4. Cook Low and Slow: Cover the slow cooker and cook on low for 6-8 hours or on high for 3-4 hours. The chicken is done when it’s very tender and the internal temperature reaches 165°F (74°C) [5].
    5. Shred and Serve: Carefully remove the chicken from the slow cooker. Once it’s cool enough to handle, discard the bones and skin, then shred the meat using two forks. Return the shredded chicken to the slow cooker and stir to combine with the delicious BBQ sauce.

    Tips and Variations:

    • Serving Suggestions: Serve on hamburger buns for classic pulled chicken sandwiches. You can also use it in tacos, wraps, or over a bed of rice. A side of simple coleslaw completes the meal.
    • Spice It Up: For a little kick, add a pinch of cayenne pepper or a dash of your favorite hot sauce to the BBQ mixture.
    • Meal Prep Idea: This recipe is perfect for meal prep. Cook a large batch on Sunday to enjoy in different meals throughout the week—a fantastic time-saver for busy families.

    Hearty Roasted Chicken with Root Vegetables

    Looking for an easy, flavorful meal with minimal cleanup? This Hearty Roasted Chicken with Root Vegetables is your answer. Because it’s a complete meal cooked on a single pan, it’s a great choice for beginner cooks or anyone seeking approachable home cooking.

    Roasting bone-in chicken thighs alongside vegetables creates an amazing depth of flavor as the veggies absorb the savory chicken drippings. The result is a simple dinner recipe that is nourishing, satisfying, and truly comforting.

    Ingredients:

    • 4 bone-in, skin-on chicken thighs
    • 1 pound small red potatoes, quartered
    • 1 pound carrots, peeled and chopped into 1-inch pieces
    • 1 medium sweet potato, peeled and cubed
    • 1 tablespoon olive oil
    • 1 teaspoon dried rosemary
    • ½ teaspoon dried thyme
    • ½ teaspoon garlic powder
    • Salt and black pepper to taste

    Step-by-Step Cooking Guidance:

    1. Preheat Oven: Preheat your oven to 400°F (200°C) and line a large baking sheet with parchment paper for easy cleanup.
    2. Prepare Vegetables: In a large bowl, combine the potatoes, carrots, and sweet potato. Drizzle with olive oil and sprinkle with rosemary, thyme, garlic powder, salt, and pepper. Toss until everything is evenly coated, then spread the vegetables in a single layer on the prepared baking sheet.
    3. Season Chicken: Pat the chicken thighs dry and season them generously with salt, pepper, and a little extra rosemary and thyme, if desired.
    4. Roast Together: Place the seasoned chicken thighs directly on top of the vegetables.
    5. Bake to Perfection: Roast for 35-45 minutes, or until the chicken skin is golden and crispy, the vegetables are tender, and the chicken reaches an internal temperature of 165°F (74°C).

    Tips and Variations:

    • Vegetable Swaps: Feel free to use other root vegetables. Parsnips, butternut squash, or Brussels sprouts also work wonderfully.
    • Fresh Herbs: For extra aroma, use 1 tablespoon of chopped fresh rosemary or thyme instead of dried.
    • Add Citrus: A squeeze of fresh lemon juice over the finished dish adds a bright, fresh flavor.
    • Batch Cooking: As a beginner-friendly recipe, this is excellent for batch cooking. Prepare it once and have healthy meals ready for days.

    Simple Italian-Style Braised Chicken

    Unlock incredible flavor and tenderness with our Simple Italian-Style Braised Chicken. While “braising” might sound complex, the technique is incredibly easy and a fantastic way to transform simple ingredients into a rich, comforting meal.

    Bone-in chicken thighs are ideal for this method, as they stay moist while absorbing all the delicious Italian flavors. This dish is perfect for building confidence in the kitchen, delivering an impressive meal with minimal fuss.

    Ingredients:

    • 4 bone-in, skin-on chicken thighs
    • 1 tablespoon olive oil
    • 1 medium onion, chopped
    • 2 cloves garlic, minced
    • 1 (14.5 ounce) can diced tomatoes, undrained
    • ½ cup chicken broth or dry white wine
    • 1 teaspoon dried oregano
    • ½ teaspoon dried basil
    • Salt and black pepper to taste
    • Fresh parsley, chopped, for garnish (optional)

    Step-by-Step Cooking Guidance:

    1. Brown the Chicken: Pat the chicken thighs dry and season generously with salt and pepper. Heat the olive oil in a large, oven-safe pot or Dutch oven over medium-high heat. Place the chicken skin-side down and sear for 5-7 minutes, until golden and crispy. Flip and sear for another 2-3 minutes. Remove the chicken from the pot and set it aside.
    2. Sauté Aromatics: Reduce the heat to medium. Add the chopped onion to the pot and cook for 3-5 minutes, until softened. Add the minced garlic and cook for 1 more minute, until fragrant.
    3. Deglaze and Add Liquids: Pour in the chicken broth or white wine, using a spoon to scrape up any browned bits from the bottom of the pot. Stir in the undrained diced tomatoes, dried oregano, and dried basil. Bring the mixture to a gentle simmer.
    4. Braise the Chicken: Return the seared chicken to the pot, nestling the pieces into the sauce. The sauce should come about halfway up the sides of the chicken. Cover the pot with a tight-fitting lid.
    5. Cook to Perfection: Finish cooking using one of two methods: either simmer gently on the stovetop for 30-40 minutes or bake in a preheated 350°F (175°C) oven for 45-60 minutes. The chicken is ready when it’s very tender and easily pulls away from the bone.
    6. Serve: Garnish with fresh chopped parsley before serving, if desired.

    Tips and Variations:

    • Serving Suggestions: This dish is perfect over pasta, creamy polenta, or mashed potatoes. Don’t forget the crusty bread to soak up the delicious sauce.
    • Add Vegetables: To boost flavor and nutrition, add sliced bell peppers or mushrooms to the pot along with the onions.
    • Cheese Please: A sprinkle of freshly grated Parmesan cheese before serving adds a lovely, savory finish.
    • Make Ahead: The flavors in this dish deepen overnight, making it a perfect make-ahead meal. It’s great for meal prep to make your week easier.

    Quick Air Fryer Chicken Thigh Recipes

    The air fryer is a game-changer for busy home cooks, transforming simple ingredients into delicious meals with incredible speed and minimal mess. If you’re looking for family-friendly meals that are both quick and tasty, your air fryer is here to help. Plus, it’s a fantastic tool for achieving a crispy texture without excessive oil, offering a healthier cooking option [6].

    Chicken thighs are perfect for the air fryer because they cook quickly and stay wonderfully juicy. Get ready to cook confidently and enjoy stress-free dinners with these beginner-friendly recipes.

    Crispy Air Fryer Chicken Thighs

    This simple go-to recipe delivers perfectly crispy chicken thighs every time. Using just a few pantry staples, it’s one of our favorite quick meals for a busy weeknight.

    Ingredients:
    • 4 bone-in, skin-on chicken thighs (about 6-8 oz each)
    • 1 tablespoon olive oil
    • 1 teaspoon garlic powder
    • 1 teaspoon paprika
    • 1/2 teaspoon salt
    • 1/4 teaspoon black pepper
    Step-by-Step Instructions:
    1. Prepare the Chicken: Pat the chicken thighs completely dry with paper towels. This step is crucial for getting crispy skin.
    2. Season the Chicken: In a small bowl, mix the garlic powder, paprika, salt, and pepper. Drizzle the chicken with olive oil, then rub the seasoning mixture evenly over both sides of each thigh.
    3. Preheat the Air Fryer: Preheat your air fryer to 375°F (190°C).
    4. Air Fry: Place the seasoned chicken thighs in a single layer in the air fryer basket, skin-side up. Cook for 18-22 minutes, flipping the thighs halfway through.
    5. Check for Doneness: The chicken is ready when the skin is golden brown and the internal temperature reaches 165°F (74°C) on a meat thermometer.
    6. Rest and Serve: Let the chicken rest for 5 minutes before serving. This step helps keep the meat juicy.
    Tips for Success:
    • Don’t Overcrowd: Cook in batches if necessary to ensure hot air can circulate around each piece for maximum crispiness.
    • Use a Thermometer: An instant-read thermometer is the best way to ensure your chicken is cooked perfectly.
    • Ensure Skin is Dry: For the crispiest results, make sure all moisture is removed from the skin before seasoning.

    Spicy Cajun-Style Air Fryer Chicken

    Bring a burst of flavor to your dinner table with these easy Cajun-style chicken thighs. This recipe is a fantastic way to spice up your usual routine and deliver a flavorful meal without the fuss.

    Ingredients:
    • 4 bone-in, skin-on chicken thighs
    • 2 tablespoons olive oil
    • 2 tablespoons Cajun seasoning (store-bought or homemade)
    • 1/2 teaspoon onion powder
    • 1/4 teaspoon cayenne pepper (optional, for extra heat)
    Step-by-Step Instructions:
    1. Prepare the Chicken: Pat the chicken thighs dry with paper towels.
    2. Season the Chicken: Drizzle the chicken with olive oil. In a small bowl, combine the Cajun seasoning, onion powder, and cayenne pepper (if using), then rub the mixture all over the thighs.
    3. Preheat the Air Fryer: Preheat your air fryer to 375°F (190°C).
    4. Air Fry: Arrange the chicken in a single layer in the air fryer basket. Cook for 20-25 minutes, flipping halfway through.
    5. Check for Doneness: Verify the chicken’s internal temperature has reached 165°F (74°C) before removing it from the air fryer.
    6. Rest and Serve: Let the chicken rest for a few minutes before enjoying.
    Flavor Boost:
    • Homemade Cajun Seasoning: For a custom blend, mix paprika, garlic powder, onion powder, dried oregano, dried thyme, black pepper, cayenne pepper, and salt.
    • Adjust Heat: Easily increase or decrease the amount of cayenne pepper to suit your taste.

    Easy Teriyaki Chicken Thighs

    This recipe features tender, juicy boneless chicken thighs coated in a sticky, sweet, and savory teriyaki glaze. It’s a perfect quick dinner that doesn’t compromise on flavor.

    Ingredients:
    • 1.5 pounds boneless, skinless chicken thighs
    • 1/2 cup teriyaki sauce (store-bought or homemade)
    • 1 tablespoon cornstarch (optional, to thicken the sauce)
    • 1 tablespoon water (if using cornstarch)
    • Sesame seeds and sliced green onions for garnish (optional)
    Step-by-Step Instructions:
    1. Prepare the Chicken: Cut the boneless, skinless chicken thighs into 1-inch pieces to ensure they cook quickly and evenly.
    2. Marinate: In a bowl, toss the chicken pieces with the teriyaki sauce. For best results, marinate for at least 15-30 minutes in the fridge.
    3. Preheat the Air Fryer: Preheat your air fryer to 380°F (195°C).
    4. Air Fry: Place the chicken pieces in a single layer in the air fryer basket. Cook for 10-14 minutes, shaking the basket halfway through for even cooking.
    5. Check for Doneness: The chicken is cooked through when it reaches an internal temperature of 165°F (74°C).
    6. Finish and Serve: For a thicker glaze, simmer the leftover marinade in a saucepan with a cornstarch slurry (1 tbsp cornstarch mixed with 1 tbsp water) until it thickens. Toss the cooked chicken in the sauce, garnish with sesame seeds and green onions, and serve immediately.
    Meal Prep Tips:
    • Marinate Ahead: To save time, marinate the chicken the night before you plan to cook it.
    • Build a Meal: Serve the teriyaki chicken over steamed rice with a side of air-fried or steamed broccoli for a complete meal.

    Global-Inspired Chicken Thigh Recipes

    A vibrant bowl of Mediterranean-inspired chicken thighs with olives, cherry tomatoes, feta, and fresh herbs.
    Professional food photography, photorealistic, high-quality food magazine photo: A vibrant and colorful bowl of Mediterranean-inspired chicken thighs. The chicken pieces are tender, browned, and glistening with a lemon-herb sauce, mixed with Kalamata olives, halved cherry tomatoes, and crumbled feta cheese. Fresh parsley and oregano are generously sprinkled over the top. The dish is presented in an earthy ceramic bowl on a light blue linen tablecloth, with a fork gently resting beside it. The lighting is bright and airy, emphasizing the freshness and diversity of ingredients, evoking a sense of healthy and exotic indulgence.

    Easy Chicken Thigh Curry (Indian Style)

    Craving a rich, aromatic dinner without a complex recipe? Our Easy Chicken Thigh Curry is the perfect solution. This simple recipe transforms chicken thighs into a heartwarming, Indian-inspired dish full of vibrant flavors. It’s a fantastic, stress-free way to add global comfort food to your weeknight rotation.

    Using readily available ingredients, you’ll create a deeply flavorful sauce that tastes like it simmered all day. This beginner-friendly dish is ideal for busy families who want a delicious, easy meal.

    • Key Flavors: Expect warm spices like turmeric, cumin, and coriander, with a touch of ginger and garlic for depth. Coconut milk provides a creamy finish.
    • Simple Steps: We guide you through each stage, from browning the chicken to building the sauce, so you can cook with confidence from start to finish.
    • Serving Suggestions: Pair this delicious curry with fluffy basmati rice or warm naan bread to scoop up every last bit of sauce.
    • Quick Tip: Use boneless chicken thighs for faster cooking, or choose bone-in thighs for even more flavor.

    Sweet & Savory Asian Glazed Chicken Thighs

    Looking for a quick meal that bursts with flavor? These Sweet & Savory Asian Glazed Chicken Thighs are a popular weeknight winner. This recipe is fast, tasty, and uses everyday ingredients, making it a fantastic option for family dinners. Get ready for a perfect balance of sweet, savory, and tangy notes.

    The star of this recipe is the irresistible sticky glaze that perfectly coats the juicy chicken thighs. It comes together quickly, making it a go-to staple for busy evenings. This approachable dish makes home cooking easy and stress-free.

    • The Perfect Glaze: Our glaze combines soy sauce, honey or brown sugar, ginger, and garlic. A splash of rice vinegar balances the sweetness.
    • Cooking Versatility: Pan-sear these flavorful chicken thighs for a quick finish, or bake them in the oven until caramelized.
    • Meal Pairings: Serve over steamed rice with a side of stir-fried vegetables like broccoli or snap peas.
    • Beginner-Friendly Hint: For the best results, marinate the chicken for at least 30 minutes to infuse it with flavor before cooking.

    Flavorful Mexican-Inspired Chicken Marinade

    Want to cook healthy, tasty meals quickly? A great marinade is your secret weapon. Our Flavorful Mexican-Inspired Chicken Marinade is perfect for chicken thighs, tenderizing the meat while infusing it with bold, zesty flavors. This simple addition transforms your chicken into an exciting meal and is incredibly effective for meal prep.

    Marinating chicken ahead of time saves precious minutes during a busy week, making it a perfect strategy for planning family-friendly meals. It’s a simple step that guarantees a flavorful result every time.

    • Marinade Must-Haves: Combine lime juice for brightness with chili powder, cumin, and paprika for authentic warmth. A touch of olive oil and minced garlic completes the blend.
    • How to Marinate: Combine all ingredients in a resealable bag or bowl with boneless or bone-in chicken thighs. Marinate for at least 30 minutes, or up to 4 hours for maximum flavor.
    • Meal Applications: Use this marinated chicken for incredible tacos, fajitas, burritos, or atop a fresh salad bowl.
    • Practical Tip: Marinate a larger batch of chicken at the beginning of the week. This provides a versatile protein for several quick meals [7].

    How Do You Make a Good Chicken Thigh Marinade?

    Raw chicken thighs marinating in a glass bowl with fresh garlic, rosemary, lemon slices, and olive oil.
    Professional food photography, photorealistic, high-quality food magazine photo: A close-up shot of raw, boneless, skinless chicken thighs marinating in a clear glass bowl. The marinade is rich with visible fresh ingredients like chopped garlic, rosemary sprigs, lemon slices, red pepper flakes, and a vibrant olive oil-based mixture. A hand, belonging to a home cook, is gently tossing the chicken to ensure even coating. The scene is set on a clean, light-colored kitchen counter with natural overhead light, emphasizing freshness, preparation, and the promise of flavor. The focus is sharp on the chicken and marinade ingredients.

    A great marinade can transform a simple weeknight meal into something special. For chicken thighs, a marinade is a secret weapon that infuses deep flavor and tenderizes the meat, guaranteeing juicy, delicious results every time. Whether you’re cooking boneless chicken thigh recipes or bone-in varieties, a marinade effortlessly elevates your dish. Let’s dive into some easy and flavorful ideas to make your chicken thighs irresistible.

    Simple All-Purpose Marinade

    This versatile, all-purpose marinade works wonderfully for baking, grilling, or pan-searing. It’s the perfect choice for any home cook seeking reliable, flavorful results with chicken thighs.

    Ingredients:

    • 2 tablespoons olive oil
    • 1 tablespoon apple cider vinegar (or lemon juice)
    • 1 teaspoon salt
    • ½ teaspoon black pepper
    • 1 teaspoon garlic powder
    • ½ teaspoon onion powder
    • ½ teaspoon paprika (smoked or sweet)
    • 1 teaspoon dried Italian herbs (oregano, basil, thyme blend)

    Instructions:

    1. In a medium bowl, whisk together all the marinade ingredients until well blended.
    2. Place the chicken thighs in a large zip-top bag or shallow dish.
    3. Pour the marinade over the chicken, ensuring each piece is fully coated.
    4. Seal the bag (pressing out excess air) or cover the dish tightly.
    5. Refrigerate for at least 30 minutes. For the best flavor, marinate for 2 to 4 hours, but no longer than 12 hours.

    Tips for Success:

    • Quick Meals: In a hurry? Even 15-20 minutes of marinating will add a great flavor boost.
    • Spice it Up: For a little heat, add a pinch of cayenne pepper.
    • Herbs: If you have fresh herbs, feel free to use them. Just double the amount listed for dried herbs.

    Yogurt-Based Marinade for Tender Chicken

    Yogurt-based marinades create exceptionally tender and juicy chicken. The natural lactic acid in yogurt gently breaks down muscle fibers, resulting in moist and flavorful chicken thighs. It’s an excellent choice for family-friendly meals.

    Ingredients:

    • ½ cup plain yogurt (full-fat or low-fat)
    • 1 tablespoon fresh lemon juice
    • 2 cloves garlic, minced
    • 1 teaspoon grated fresh ginger
    • 1 teaspoon ground cumin
    • ½ teaspoon turmeric powder
    • 1 teaspoon paprika
    • ½ teaspoon salt
    • ¼ teaspoon black pepper

    Instructions:

    1. In a bowl, mix all the ingredients until well combined.
    2. Add the chicken thighs to a zip-top bag or bowl.
    3. Pour the yogurt marinade over the chicken, making sure all pieces are evenly coated.
    4. Seal the bag or cover the bowl tightly.
    5. Refrigerate for at least 1 hour. For optimal tenderness, marinate for 4 to 6 hours (up to 24 hours is safe).

    Tips for Success:

    • Avoid Burning: Gently scrape off excess yogurt marinade before cooking to prevent it from burning on the pan or grill.
    • Spice Variations: Try adding garam masala for an Indian-inspired flavor or a dash of chili powder for extra kick.
    • Storage: According to the USDA, it is safe to marinate chicken in the refrigerator for up to 2 days [8].

    Lemon and Herb Marinade

    This vibrant marinade adds a fresh, zesty flavor to chicken thighs. It’s a perfect option for lighter, healthy and balanced meals and works especially well with boneless chicken thigh recipes.

    Ingredients:

    • ¼ cup olive oil
    • 3 tablespoons fresh lemon juice
    • 1 tablespoon lemon zest
    • 2 cloves garlic, minced
    • 1 tablespoon chopped fresh rosemary
    • 1 tablespoon chopped fresh thyme
    • 1 teaspoon salt
    • ½ teaspoon black pepper

    Instructions:

    1. In a bowl, whisk together all the ingredients.
    2. Place the chicken thighs in a zip-top bag or shallow dish.
    3. Pour the marinade over the chicken, coating each piece well.
    4. Seal the bag or cover the dish.
    5. Refrigerate for at least 30 minutes and up to 4 hours to allow the flavors to develop.

    Tips for Success:

    • Dried Herbs: If you don’t have fresh herbs, you can substitute 1 teaspoon each of dried rosemary and thyme.
    • Sweet Touch: A teaspoon of honey or maple syrup beautifully balances the lemon’s tang.
    • Meal Prep: This marinade freezes well. Make a double batch and save half for future meal prep ideas.

    Frequently Asked Questions

    How long does it take for chicken thighs to cook in the oven?

    Cooking chicken thighs in the oven is an easy way to prepare a delicious meal, but the exact cooking time depends on your oven temperature and whether the thighs are bone-in or boneless.

    For the best results, cook chicken thighs to a safe internal temperature of 175-180°F (79-82°C). This ensures they are juicy and fully cooked [5].

    Here’s a simple guide for an oven set to 400°F (200°C):

    • Boneless, Skinless Chicken Thighs: These typically take 20-25 minutes.
    • Bone-In, Skin-On Chicken Thighs: Expect these to take 35-45 minutes, as the bone requires a longer cooking time.
    • Lower Temperatures (e.g., 375°F / 190°C): If you bake at a slightly lower temperature, add about 5-10 minutes to the times above.

    Always use a meat thermometer for the most accurate results. Insert it into the thickest part of the thigh without touching the bone. This is the best way to achieve perfectly cooked chicken thighs every time.

    What is the nutritional value of chicken thighs?

    Chicken thighs are a flavorful and nutritious choice for a balanced diet. While they are richer in fat than chicken breasts—which is what makes them so juicy—they are still considered a good source of lean protein.

    Here’s a snapshot of their key nutritional benefits:

    • High-Quality Protein: Chicken thighs are packed with protein, which helps build and repair muscles and keeps you feeling full.
    • Vitamins and Minerals: They are a good source of essential nutrients like iron, zinc, and B vitamins (such as B6 and B12), which are vital for energy and overall health.
    • Healthy Fats: Much of the fat in chicken thighs is monounsaturated, which can support heart health when eaten in moderation.

    For a specific example, a 3.5-ounce (100g) serving of cooked, boneless, skinless chicken thigh contains roughly 209 calories, 26 grams of protein, and 10 grams of fat [9]. Keep in mind that bone-in, skin-on versions will have more fat and calories.

    What is a good sauce for boneless skinless chicken thighs?

    Boneless, skinless chicken thighs are incredibly versatile. Their mild flavor makes them a perfect canvas for delicious sauces, which can turn a simple protein into a quick, family-friendly meal. Here are a few popular and easy sauce ideas:

    • Honey Garlic Sauce: Whisk together soy sauce, honey, minced garlic, and a touch of ginger. Simmer and thicken with a cornstarch slurry for a sweet and savory winner.
    • Lemon Herb Sauce: For a bright, fresh flavor, combine lemon juice, olive oil, and chopped fresh herbs like parsley, thyme, or oregano with a pinch of salt and pepper.
    • Creamy Mushroom Sauce: Create a comforting sauce by sautéing sliced mushrooms with garlic, then stirring in chicken broth and a splash of cream. Let it simmer until it thickens.
    • Teriyaki Glaze: Use a store-bought teriyaki sauce or make your own with soy sauce, mirin, sugar, and ginger. This is perfect for quick stir-fries or as a glaze.
    • BBQ Sauce: A classic choice for a reason. Simply brush your favorite barbecue sauce over the thighs during the last few minutes of cooking.

    These simple sauces can transform basic chicken into a delicious meal, and they’re easy enough for any home cook to master.

    How many calories are in chicken thighs?

    The number of calories in chicken thighs depends on two main factors: the cut (bone-in or boneless) and whether you eat the skin. Chicken thighs are slightly higher in calories than chicken breasts because of their higher fat content, which is also what gives them so much flavor and juiciness.

    Here’s a general breakdown for a 3.5-ounce (100g) serving of cooked chicken thigh:

    • Boneless, Skinless Chicken Thighs: Approximately 180-210 calories [9].
    • Bone-In, Skin-On Chicken Thighs: Roughly 220-250 calories [10].

    Removing the skin before eating is an easy way to reduce the calorie and fat content, though the skin does add wonderful flavor and crispiness. Remember that these are estimates. To manage calories, be mindful of your portion sizes and choose lighter cooking methods like baking or grilling over frying.


    Sources

    1. https://www.fsis.usda.gov/food-safety/safe-food-handling-and-preparation/food-safety-basics/safe-minimum-internal-temperature
    2. https://www.extension.iastate.edu/food/making-meat-more-tender
    3. https://www.fsis.usda.gov/food-safety/safe-food-handling-and-preparation/food-safety-basics/safe-internal-temperature-chart
    4. https://www.fsis.usda.gov/food-safety/safe-food-handling-and-preparation/food-safety-basics/safe-temperature-chart
    5. https://www.foodsafety.gov/food-safety-charts/safe-minimum-cooking-temperatures
    6. https://www.heart.org/en/news/2023/10/25/do-air-fryers-make-food-healthier-what-to-know-about-the-popular-appliance
    7. https://www.foodsafety.gov/food-safety-charts/marinade-safety
    8. https://www.fsis.usda.gov/food-safety/safe-food-handling-and-preparation/food-safety-basics/marinades-and-food-safety
    9. https://fdc.nal.usda.gov/fdc-app.html#/food-details/171077/nutrients
    10. https://fdc.nal.usda.gov/fdc-app.html#/food-details/171075/nutrients

  • How to Make Authentic Pad Thai at Home: An Easy Recipe

    How to Make Authentic Pad Thai at Home: An Easy Recipe

    Pad Thai is a popular Thai stir-fried noodle dish made with rice noodles, a protein such as shrimp or chicken, tofu, scrambled eggs, and vegetables like bean sprouts and garlic chives. The dish is known for its sweet, sour, and savory sauce, typically made from tamarind paste, fish sauce, palm sugar, and chili.

    Craving a perfect plate of Pad Thai, with its vibrant mix of savory, sweet, and tangy flavors? If the thought of making it from scratch feels overwhelming, you’re not alone. Many home cooks assume this beloved Thai noodle dish requires complex ingredients and tricky techniques best left to restaurant chefs. But at Recipesmondial, we believe enjoying authentic, flavorful meals at home should be simple. We’re here to show you that making a delicious, genuine Pad Thai in your own kitchen is not only achievable but also incredibly rewarding.

    This article is your friendly guide to mastering homemade Pad Thai with confidence. We’ve developed an easy recipe that breaks down every part of the process. You’ll learn how to prepare the ideal rice noodles, whip up a rich and authentic sauce, and perfectly stir-fry your ingredients—including a popular chicken Pad Thai variation. Forget getting lost in technical jargon. Our step-by-step instructions focus on clarity and simplicity, ensuring great results even if you’re new to Asian cuisine. Get ready to fill your kitchen with incredible aromas and enjoy a satisfying meal that proves approachable home cooking can be both authentic and stress-free.

    Why Is This the Best Beginner-Friendly Pad Thai Recipe?

    Feeling intimidated by the idea of making authentic Pad Thai? We get it—many home cooks feel overwhelmed by complex recipes. At Recipesmondial, we believe cooking delicious, authentic food should be stress-free and enjoyable. That’s why we’ve created the perfect beginner-friendly Pad Thai recipe.

    Our goal is to remove the guesswork so you can cook with confidence. This simplified recipe makes traditional Pad Thai approachable, delivering incredible flavor without requiring advanced skills or hard-to-find ingredients. It’s all about bringing gourmet taste to your family table.

    Here’s what makes this your go-to recipe for mastering Pad Thai:

    • Clear, Step-by-Step Guidance: We break down the entire process into easy-to-follow instructions. Our clear guidance helps you build confidence from start to finish.
    • Everyday, Accessible Ingredients: Forget searching for obscure items. This recipe uses common ingredients you can find at your local grocery store, making preparation simple and fast.
    • Authentic Yet Achievable Flavor: Enjoy the classic sweet, sour, salty, and umami balance of real Pad Thai. We’ve designed this recipe to deliver a rich, flavorful experience without any complex techniques.
    • Perfect for Busy Schedules: As a quick meal solution, this recipe is ideal for anyone seeking simple dinner recipes that are both satisfying and fast.
    • Boost Your Cooking Confidence: Master a famous international dish with ease. Our approachable method will transform your kitchen experience, turning uncertainty into culinary success.
    • Customizable for Everyone: Whether you prefer classic chicken Pad Thai or a vegetarian version, this recipe is easily adaptable. You can make simple variations to suit different tastes and dietary needs.

    This Pad Thai recipe is more than just a meal—it’s an opportunity to enjoy cooking without stress. Get ready to discover how easy it is to create authentic, flavorful dishes right in your own kitchen!

    What Ingredients Do You Need for Pad Thai?

    An overhead shot of fresh Pad Thai ingredients, including noodles, shrimp, tofu, and sauce components, neatly arranged on a wooden table.
    Professional food photography, photorealistic, high-quality food magazine photo of a vibrant, meticulously arranged flat lay of all fresh Pad Thai ingredients. Displayed on a rustic wooden table with a warm, inviting kitchen background, capturing natural light. Ingredients include uncooked rice noodles (rehydrated), fresh raw shrimp, firm tofu cubes, bean sprouts, garlic chives, crushed peanuts, quartered lime, and small bowls containing ingredients for the sauce: tamarind paste, fish sauce, palm sugar, and dried chili flakes. Emphasize crisp freshness, bright colors, and clean presentation. No artistic interpretations, no illustrations.

    For the Authentic Pad Thai Sauce

    The secret to perfect Pad Thai is an incredible sauce. This blend masterfully balances sweet, sour, and salty flavors with a hint of spice, transforming simple ingredients into a rich, aromatic experience. Here’s what you’ll need to create a genuinely delicious sauce:

    • Tamarind Paste (2 tablespoons): As the heart of Pad Thai, this paste provides the dish’s signature tangy, sweet-and-sour flavor. Look for a seedless, concentrated variety for the best results.
    • Fish Sauce (2 tablespoons): Essential for authentic flavor, fish sauce adds a crucial savory, umami depth. It’s a staple in Thai cuisine.
    • Palm Sugar (2 tablespoons): With its rich, caramel-like sweetness, palm sugar is softer than white sugar. If you can’t find it, brown sugar is an excellent substitute.
    • Rice Vinegar (1 tablespoon, optional): A splash of rice vinegar brightens the sauce, helping to balance the sweet and salty notes for a perfect finish.
    • Sriracha or Red Chili Flakes (1 teaspoon or to taste, optional): For a touch of heat, add sriracha or red chili flakes. Adjust the amount to suit your family’s preference.

    Simply whisk these ingredients together to create your balanced sauce. This key step makes it easy for any home cook to master this classic comfort food and achieve an authentic taste right at home.

    For the Noodles and Stir-Fry

    With the sauce ready, it’s time for the noodles and fresh stir-fry ingredients that bring this dish to life. These components provide texture and flavor, forming the foundation of a wonderful, family-friendly meal. Having them prepped and ready will make the cooking process much smoother.

    Noodles and Protein:

    • Flat Rice Noodles (8 ounces, dried): The classic choice for Pad Thai, these are typically medium-width. Soak them according to package directions before cooking to ensure they become tender while retaining a pleasant chew.
    • Shrimp, Chicken, or Tofu (8 ounces): Choose your favorite protein. For a classic chicken Pad Thai, cut chicken breast or thigh into bite-sized pieces. If using shrimp, remember they cook very quickly. For a simple vegetarian variation, firm or extra-firm tofu works wonderfully.
    • Eggs (2 large): A traditional addition, scrambled eggs add richness and a lovely texture to the dish.
    • Firm Tofu (4 ounces, pressed and cubed, optional): Even when using another protein, small cubes of fried tofu add a wonderful texture and soak up the sauce beautifully.

    Aromatics and Vegetables:

    Fresh aromatics create the fragrant foundation of the stir-fry, while crisp vegetables add essential flavor and freshness. Together, they help make this a healthy and balanced meal.

    • Garlic (2 cloves, minced): Forms the essential fragrant base for the stir-fry.
    • Shallots (1 small, minced): These offer a milder, sweeter flavor than regular onions. A red onion is an easy substitution if needed.
    • Bean Sprouts (1 cup): Add a fantastic crunch by stirring these in at the very end of cooking to keep them crisp.
    • Garlic Chives (½ cup, chopped into 1-inch pieces): These lend a delicate onion-garlic flavor. If you can’t find them, regular chives work well too.

    Finishing Touches and Oil:

    • Vegetable Oil (2 tablespoons): Use a neutral oil with a high smoke point for stir-frying. Canola or peanut oil are good choices.
    • Roasted Peanuts (¼ cup, crushed): A sprinkle of crushed peanuts provides a delightful nutty crunch and is a signature garnish for authentic Pad Thai.
    • Fresh Lime Wedges (1-2 limes): A squeeze of fresh lime juice just before serving is a must-have, as it brightens all the flavors in the dish.

    With these ingredients prepped and ready, you’re well on your way to creating a delicious Pad Thai at home. This simple, approachable recipe ensures a flavorful meal and success for any home cook.

    How to Make Pad Thai: A Step-by-Step Guide

    A smiling home cook stir-frying vibrant Pad Thai noodles, shrimp, and vegetables in a large wok on a stovetop.
    Photorealistic, professional food photography, high-quality food magazine photo of a smiling, engaged real human home cook (female, mid-30s, warm expression) actively stir-frying vibrant Pad Thai in a large wok on a gas stovetop in a clean, inviting home kitchen. Steam is gently rising from the wok, highlighting the freshness. The wok is filled with rice noodles, cooked shrimp, scrambled egg, bean sprouts, and chives, all coated in a rich, glossy Pad Thai sauce. Focus on the dynamic action, the enticing colors, and the joyful expression of the cook. The background shows a warm, well-lit kitchen counter. No artistic interpretations, no illustrations.

    Prepare the Noodles

    Perfectly cooked rice noodles are the foundation of great Pad Thai, as mushy noodles can ruin the dish. Follow these simple steps to get a tender, chewy texture, even if you’re a beginner.

    1. Soak the Noodles: Place the dried flat rice noodles (usually about ¼-inch wide) in a large heatproof bowl.
    2. Cover with Warm Water: Pour warm tap water over the noodles, ensuring they are fully submerged.
    3. Let Them Soften: Allow the noodles to soak for 20-30 minutes. Thicker noodles may need a bit longer.
    4. Check for Doneness: The noodles should be pliable and bend easily but still feel firm to the touch. You want them “al dente,” ready for their final cook in the wok.
    5. Drain and Rinse: Once ready, drain the noodles thoroughly in a colander and rinse them briefly with cool water to stop the cooking and prevent sticking.
    6. Set Aside: Keep the noodles in the colander until needed.

    Quick Tip: Soaking time varies by noodle thickness and brand, so always check the package directions first. Getting this step right ensures your noodles cook evenly in the wok.

    Mix the Sauce

    The secret to incredible Pad Thai is a balanced sauce that hits all the key flavors: sweet, sour, salty, and umami. Mixing it ahead of time is a simple trick that saves you from scrambling while the wok is hot.

    1. Gather Your Ingredients: You will need fish sauce, tamarind paste, brown sugar, and rice vinegar.
    2. Combine in a Bowl: In a small bowl, whisk together 3 tablespoons fish sauce, 2 tablespoons tamarind paste, 3 tablespoons brown sugar, and 1 tablespoon rice vinegar.
    3. Stir Until Smooth: Continue mixing until the brown sugar has completely dissolved.
    4. Taste and Adjust: Take a tiny taste. Does it need more sweetness or more tang? Adjust the seasonings to your preference to perfect the flavor profile.
    5. Set Aside: Your Pad Thai sauce is now ready.

    Why Pre-Mix? Having the sauce ready makes the final stir-fry process much quicker and more enjoyable. You won’t be scrambling for ingredients while your wok is hot!

    Cook the Protein and Aromatics

    In this step, we’ll build the first layer of flavor by cooking your protein and aromatics. The technique is similar whether you’re using chicken, shrimp, or tofu.

    1. Heat Your Wok: Add 2 tablespoons of vegetable oil to a large wok or a wide, non-stick skillet over medium-high heat. Heat until the oil is shimmering.
    2. Cook the Protein:
      • For Chicken: Add 8 ounces of thinly sliced chicken breast or thigh. Stir-fry for 3-5 minutes until cooked through and lightly browned. Remove the chicken from the wok and set aside.
      • For Shrimp: Add 8 ounces of peeled and deveined shrimp. Cook for 2-3 minutes per side until pink and opaque. Remove and set aside.
      • For Tofu: Add 8 ounces of firm or extra-firm tofu (pressed and cubed). Cook until golden brown and crispy on all sides, about 5-7 minutes. Remove and set aside.
    3. Add Aromatics: If needed, add another teaspoon of oil to the wok. Add 2 minced garlic cloves and 1 finely chopped shallot. Stir-fry for about 1 minute until fragrant. Do not let them burn.
    4. Scramble the Egg: Push the aromatics to one side of the wok. Crack 2 large eggs into the empty space and scramble them gently for 1-2 minutes until just set. Break the cooked egg into smaller pieces.

    Helpful Tip: Avoid overcrowding the pan, which causes food to steam instead of brown. If you’re making a larger batch, cook the protein in two separate batches to ensure it gets a delicious, seared texture.

    Combine Everything in the Wok

    Now it’s time to bring all the components together. This final stage happens quickly, so have all your ingredients ready and close to the stove.

    1. Return Protein to Wok: Add the cooked chicken, shrimp, or tofu back into the wok with the scrambled egg and aromatics.
    2. Add Noodles: Gently add the soaked and drained rice noodles to the wok.
    3. Pour in Sauce: Drizzle the pre-mixed Pad Thai sauce evenly over the noodles and other ingredients.
    4. Toss and Cook: Using tongs or two spatulas, toss everything together quickly. Stir-fry for 2-3 minutes, ensuring the noodles are evenly coated and heated through.
    5. Add Vegetables (Optional): If adding fresh bean sprouts or chives, stir them in during the last 30 seconds of cooking to keep them crisp.
    6. Final Touches: Remove the wok from the heat.

    Serving Suggestion: Serve Pad Thai immediately, garnished with chopped peanuts, a wedge of lime, and extra bean sprouts, if desired.

    Tips for Perfecting Your Pad Thai

    A beautifully plated bowl of homemade Pad Thai, garnished with lime, chopped peanuts, and fresh cilantro, on a wooden table.
    Photorealistic, professional food photography, high-quality food magazine photo of a beautifully plated, mouth-watering bowl of authentic homemade Pad Thai, presented from a slightly elevated angle. The noodles are glossy, coated in a rich, savory-sweet sauce, perfectly mixed with tender shrimp, scrambled egg, and bean sprouts. It’s garnished generously with fresh lime wedges, finely chopped roasted peanuts, a sprig of fresh cilantro, and a sprinkle of fresh bean sprouts. Subtly visible steam hints at its warmth. The dish is on a rustic, warm-toned ceramic bowl placed on a textured wooden table, with soft, natural light creating inviting shadows. Focus on texture, color, and visual appeal. No artistic interpretations, no illustrations.

    Ready to transform your Pad Thai recipe from good to absolutely amazing? Even if you’re a beginner, these simple tips will help you master this delicious dish and build your confidence in the kitchen.

    • Prep Everything First (Mise en Place): This is the golden rule for any stir-fry, especially Pad Thai. Chop your vegetables, slice your protein, mix your sauce, and have your soaked noodles ready before turning on the stove. With everything prepared, the cooking process will be smooth, quick, and stress-free.
    • Master Your Noodles: To avoid mushy noodles, do not over-soak them. They should be pliable but still feel firm to the touch, as they will finish cooking in the wok. Soaking them correctly is the key to achieving the perfect texture.
    • High Heat is Your Friend: Always use a very hot wok or large skillet. High heat is essential for creating the signature “wok hei” (breath of the wok) flavor and ensures your ingredients sear quickly instead of stewing. This is the secret to achieving a restaurant-quality texture and taste.
    • Don’t Overcrowd the Wok: It’s essential to cook in batches. Adding too many ingredients at once causes the temperature to drop, which steams your food instead of stir-frying it. For best results, cook your protein first and set it aside, then continue with the remaining ingredients before combining everything at the end.
    • Taste and Adjust Your Sauce: The sauce is the heart of the dish, so taste it before you start cooking. Does it need more tang from lime, sweetness from sugar, or savory depth from fish sauce? Adjust the flavors until they are perfect for your preference. This is your chance to customize the dish completely.
    • The Egg Technique: For perfect ribbons of egg, push the noodles and other ingredients to one side of the wok. Pour the beaten egg into the empty space, let it set for a moment, and then gently scramble. Once cooked, mix it all together. This method distributes the egg beautifully throughout your chicken Pad Thai.
    • Fresh Garnishes Make a Difference: Don’t skip the final garnishes—they truly elevate the dish. Crushed peanuts add crunch, fresh lime wedges provide a burst of zest, bean sprouts give a refreshing crispness, and cilantro adds aroma. These finishing touches are essential for a truly incredible Pad Thai.
    • Cook with Confidence: Don’t be afraid to experiment with your Pad Thai. Try adjusting the spice level or adding different vegetables. Every time you cook, you’ll learn something new. The most important part is to have fun and enjoy the creative process of making a delicious meal.

    How Can You Customize Your Pad Thai?

    Easy Chicken Pad Thai Variation

    Adding chicken to classic Pad Thai is a simple way to create a hearty, protein-packed meal the whole family will love. This variation takes the stress out of meal planning and is an easy recipe to master.

    Here’s how to incorporate chicken into your Pad Thai:

    • Choose Your Cut: Opt for boneless, skinless chicken breast or thighs. Thighs tend to be juicier.
    • Prep the Chicken: Slice the chicken into thin, bite-sized pieces. Aim for a uniform size to ensure even cooking.
    • Marinate (Optional but Recommended): For extra flavor, marinate the chicken for 15-30 minutes in a mix of soy sauce, a pinch of sugar, and a dash of white pepper.
    • Cook the Chicken: Heat a tablespoon of oil in a wok or large skillet over medium-high heat. Add the chicken and stir-fry for 3-5 minutes until cooked through and lightly golden. Remove it from the wok and set it aside to add back in later.

    Follow these simple steps for a flavorful chicken Pad Thai that’s perfect for any weeknight dinner.

    Simple Vegetarian Pad Thai Variation

    Making a delicious and flavorful vegetarian Pad Thai is surprisingly simple. This customizable, plant-based version is a great way to enjoy a healthy meal and practice basic cooking skills.

    Here are a few ways to make your Pad Thai vegetarian or vegan-friendly:

    • Choose Your Protein:
      • Tofu: Use extra-firm tofu. Press it well to remove excess water, then cut it into cubes. Pan-fry or air-fry until golden and crispy before adding to the dish.
      • Eggs: Whisk 1-2 eggs and scramble them directly in the wok, then break them into smaller pieces.
      • Edamame or Tempeh: These are excellent protein choices. Cook tempeh like tofu, or add shelled edamame during the final stir-fry stage.
    • Load Up on Veggies: For more nutrition and crunch, add fresh vegetables like:
      • Broccoli florets
      • Sliced carrots
      • Bell peppers
      • Mushrooms
      • Snow peas
    • Make it Vegan: To make the sauce vegan, simply replace the fish sauce. Use a vegan fish sauce alternative or a mix of soy sauce and a squeeze of lime juice for umami flavor.
    • Cooking Order: Cook your protein (like tofu) first and set it aside. Next, sauté aromatics like garlic and shallots with any harder vegetables. Finally, add your noodles and sauce, returning the cooked protein and softer vegetables to the wok for the final toss.

    This simple recipe is a great starting point for anyone, ensuring a vibrant and flavorful meal without the fuss.

    Frequently Asked Questions About Pad Thai

    What is in an authentic Pad Thai recipe?

    An authentic Pad Thai recipe features a delicious balance of sweet, sour, salty, and savory flavors. It’s a classic Thai stir-fried noodle dish, famous worldwide [1], that is surprisingly simple to make at home.

    Here are the core ingredients of a traditional Pad Thai:

    • Rice Stick Noodles: These flat, thin noodles form the hearty base of the dish.
    • Protein: Typically shrimp, chicken, or tofu, providing a satisfying bite.
    • Eggs: Scrambled into the dish to add richness and texture.
    • Aromatics: Fresh garlic and shallots create a fragrant foundation.
    • Pad Thai Sauce: This is the heart of the dish, made from a balanced mix of tamarind paste, fish sauce, and palm sugar.
    • Vegetables: Crisp bean sprouts and fresh garlic chives are stirred in at the end for freshness and crunch.
    • Garnishes: A sprinkle of crushed peanuts, a wedge of lime, and a dash of chili flakes complete the experience.

    Together, these ingredients create the dish’s signature delicious and balanced taste.

    How do you make Pad Thai sauce from scratch?

    Making Pad Thai sauce from scratch is simple and the best way to elevate the flavor of your dish.

    Here’s what you’ll need for your homemade sauce:

    • 3 tablespoons tamarind paste (the unsweetened kind)
    • 3 tablespoons fish sauce
    • 2-3 tablespoons palm sugar (or brown sugar for an easy substitute)
    • 1-2 tablespoons water (to help dissolve the sugar)
    • A squeeze of fresh lime juice (optional, for extra brightness)

    Follow these simple steps:

    1. Combine the tamarind paste, fish sauce, palm sugar, and water in a small bowl.
    2. Whisk until the palm sugar dissolves completely. If needed, you can gently warm the mixture in a small saucepan over low heat. Stir constantly and do not let it boil.
    3. Taste the sauce and adjust it to your preference. Add more palm sugar for sweetness, or a bit more tamarind paste for a tangier flavor.

    This homemade sauce is the key to an authentic-tasting Pad Thai.

    What are the main ingredients in chicken Pad Thai?

    Chicken Pad Thai is a popular variation that builds on the classic recipe, using tender chicken as the main protein.

    The main ingredients for chicken Pad Thai include:

    • Thin Rice Stick Noodles: The essential base.
    • Boneless, Skinless Chicken Breast or Thigh: Cut into small, bite-sized pieces for quick cooking.
    • Homemade Pad Thai Sauce: The sweet, sour, and savory blend discussed earlier.
    • Eggs: Scrambled right in the wok.
    • Garlic and Shallots: For aromatic depth.
    • Fresh Bean Sprouts and Garlic Chives: Added at the end for crunch and fresh flavor.
    • Oil: For stir-frying everything to perfection.
    • Garnishes: Crushed peanuts, fresh lime wedges, and chili flakes for serving.

    These components come together to create a quick, satisfying, and flavorful meal.

    What kind of noodles are best for Pad Thai?

    For truly authentic Pad Thai, you should use flat rice stick noodles. They are designed for stir-frying and are perfect for soaking up the rich sauce.

    Here’s why they are the best choice:

    • Texture: When properly prepared, they become tender with a pleasant chew.
    • Absorbency: They readily absorb the sauce, ensuring every bite is full of flavor.
    • Authenticity: They are the traditional noodle used in Thailand for this dish.

    You can find them in most Asian grocery stores or the international aisle of larger supermarkets. They come in various widths; a medium width (about 3-5mm) is ideal for Pad Thai.

    Preparing the noodles:

    Always follow package directions, but the general method is to soak them in warm water for 20-30 minutes until they are pliable but still firm. Avoid boiling the noodles, as they will finish cooking in the wok. This crucial step ensures they don’t become mushy.


    Sources

    1. https://thaifoodmaster.com/history-of-pad-thai-noodles-the-recipe-of-phibunsongkhram/

  • How to Make The Best Homemade Meatballs (An Easy Recipe)

    How to Make The Best Homemade Meatballs (An Easy Recipe)

    A classic homemade meatball recipe involves combining ground meat, such as beef and pork, with binders like breadcrumbs and egg. Key flavorings include grated Parmesan cheese, minced garlic, parsley, and seasoning. The mixture is gently formed into balls and then baked or pan-fried until golden brown before being simmered in tomato sauce.

    Imagine serving a plate of perfectly tender, flavorful homemade meatballs—so juicy they practically melt in your mouth. While this might sound like a dish only an experienced chef can master, we’re here to prove otherwise. We know that complex recipes can feel overwhelming, but creating the perfect meatball from scratch is simpler and more satisfying than you think.

    Here at Recipesmondial, we believe every home cook deserves to feel confident in the kitchen. That’s why we’re sharing our ultimate easy meatball recipe. This guide will walk you through every step, whether you’re a beginner or just seeking simple dinner recipes. You’ll learn how to transform basic ingredients into succulent Italian meatballs perfect for any family-friendly meals—all without intimidating jargon.

    It’s time to say goodbye to bland, dry meatballs and hello to a culinary triumph. This recipe does more than just teach you to cook; it builds confidence and makes mealtime stress-free. You’ll discover all the tips for making perfect meatballs every time, whether you’re pairing them with spaghetti, stuffing them into a sub, or serving them as a delicious appetizer. Let’s start cooking some amazing homemade meatballs together!

    Why Is This the Best Homemade Meatball Recipe for Beginners?

    This isn’t just another meatball recipe—it’s designed with you in mind. We created it for anyone new to making homemade meals or searching for truly easy recipes. We know cooking can feel overwhelming, which is why we focus on beginner-friendly recipes. Our goal is to deliver incredible flavor without the stress.

    Here’s why this homemade meatball recipe stands out as the best for beginners:

    • Simple, Everyday Ingredients: Forget hunting for special items. This recipe uses common, affordable ingredients from any grocery store, making it perfect for budget cooking and family-friendly meals.
    • Clear, Step-by-Step Instructions: Our directions provide clear step-by-step cooking guidance in plain language. We break down each action into a manageable task to eliminate guesswork and build your confidence.
    • No Special Equipment Needed: You don’t need a stand mixer or any fancy gadgets. Your hands and a simple mixing bowl are all it takes to make perfect meatballs, which makes approachable home cooking a reality.
    • Foolproof Method for Juicy Results: Our recipe includes specific tips to prevent common mistakes, like overmixing. This method ensures your homemade meatballs are tender and juicy every single time.
    • Quick to Prepare: We designed this recipe to be fast, so you can get flavorful meals made easy. It’s the perfect solution for busy weeknights when you need quick meals that still taste incredible.
    • Confidence Booster: Making these meatballs from scratch is a fantastic way to feel more empowered in the kitchen. It’s the perfect recipe for building your skills for future culinary adventures.

    We believe everyone deserves to enjoy sharing delicious food. This best meatball recipe is part of our commitment to making cooking stress-free, enjoyable, and rewarding. Say goodbye to being overwhelmed by complex recipes and hello to confident cooking!

    What Ingredients Do You Need for Italian Meatballs?

    Making delicious Italian meatballs starts with the right ingredients—and don’t worry, you won’t need anything fancy. Recipesmondial focuses on easy recipes that use everyday items you likely already have. Our goal is to help you create flavorful meals made easy without the stress of complex instructions.

    Here’s a breakdown of what you’ll need for this simple dinner recipe. Each ingredient works to create juicy, tender, and incredibly tasty homemade meatballs that your family will love.

    The Heart of Your Meatballs: The Meat Blend

    The foundation of any great meatball is the meat itself. We suggest a classic blend for the best possible texture and flavor, ensuring rich and tender results.

    • 1 pound (450g) Ground Beef: Choose an 80/20 lean-to-fat ratio for the juiciest meatballs.
    • ½ pound (225g) Ground Pork: Pork adds extra moisture and a wonderful savory flavor.
    • Optional: ½ pound (225g) Ground Veal: For an even more authentic and tender Italian meatball, add veal to create the classic “meatball trifecta.”

    Essential Binders and Moisture

    These next ingredients are crucial for holding your meatballs together and keeping them incredibly moist. Don’t skip this step—it’s the secret to truly tender results.

    • ¾ cup Panko Breadcrumbs: Panko creates a lighter, airier texture than traditional breadcrumbs. You can also use fresh breadcrumbs.
    • ½ cup Whole Milk (or water): Soaking the breadcrumbs in milk makes the meatballs super tender and prevents them from drying out [1].
    • 1 Large Egg: The egg acts as a binder, helping all your ingredients stick together beautifully.

    Flavor Powerhouses: Herbs, Cheese, and Aromatics

    This is where the classic, aromatic flavors come from. These key additions are what truly elevate your Italian meatballs, making this a standout beginner-friendly recipe.

    • ½ cup Grated Parmesan Cheese: Use freshly grated for the best flavor. It adds a salty, umami depth.
    • ¼ cup Fresh Parsley: Finely chopped, flat-leaf parsley adds freshness and a hint of peppery flavor.
    • 2 cloves Garlic: Minced finely, garlic provides that authentic Italian taste.
    • ¼ cup Finely Chopped Onion (or shallot): A little onion adds a touch of sweetness and aromatic depth.

    Seasoning and Cooking Essentials

    Finally, a few simple seasonings will bring all the flavors together, enhancing the natural taste of the meat and other ingredients. You’ll also need oil for cooking.

    • 1 teaspoon Salt: Adjust to your personal taste.
    • ½ teaspoon Black Pepper: Freshly ground pepper is always best.
    • 2 tablespoons Olive Oil: For browning your meatballs if you choose to pan-fry them.

    Ingredient Tips and Swaps for Your Perfect Meatballs

    Cooking should be accessible, so feel free to adapt these ingredients to your preferences or what you have on hand. Use these tips to customize your recipe and build confidence in the kitchen.

    • Meat Variations: You can use all ground beef if you prefer. For a leaner option, try ground turkey or chicken, but be aware they may be less juicy.
    • Breadcrumb Choices: If you don’t have panko, regular dried breadcrumbs work well. Simply reduce the amount slightly, as they absorb less liquid. You can also use fresh breadcrumbs from stale bread.
    • Cheese Alternatives: Pecorino Romano cheese makes a great substitute for Parmesan, offering a sharper, saltier flavor.
    • Herb Swaps: While parsley is traditional, feel free to add a pinch of dried oregano or basil for extra herbal notes. Use fresh herbs whenever possible for the best taste.
    • Dairy-Free Option: To avoid dairy, simply use water instead of milk for soaking the breadcrumbs. The meatballs will still be tender.

    With these simple ingredients in hand, you’re ready to make delicious, family-friendly meals. This straightforward approach ensures your Italian meatball recipe is not only easy to make but also incredibly satisfying.

    How to Make Meatballs from Scratch: A Step-by-Step Guide

    A close-up of a home cook's hands gently mixing ground meat and other ingredients for meatballs in a large ceramic bowl.
    Professional food photography, photorealistic, high-quality food magazine photo. A close-up, dynamic shot focusing on a home cook’s hands (natural, not overly manicured) gently but confidently mixing the meatball ingredients in a large, rustic ceramic mixing bowl. The mixture, containing ground meats, breadcrumbs, cheese, and herbs, is perfectly combined but not overmixed, showing a pleasant texture. The lighting is soft and warm, highlighting the texture of the mixture and the hands. The background is a softly blurred, inviting home kitchen setting with natural light, reinforcing a friendly and approachable cooking environment.

    Step 1: Combine the Binders and Seasonings

    A powerful seasoning base is the secret to flavorful, juicy meatballs. This first step not only infuses every bite with taste but also helps bind the ingredients, so your meatballs won’t fall apart while cooking.

    To prepare your flavor foundation:

    • In a large mixing bowl, combine the fresh breadcrumbs and milk.
    • Add a large egg, which acts as a natural binder to hold the mixture together.
    • Next, add the seasonings: grated Parmesan cheese, finely chopped fresh parsley, minced garlic, red pepper flakes (for a little kick), and salt and black pepper to taste.
    • Mix everything thoroughly until it forms a moist, paste-like consistency.
    • Let the mixture sit for about five minutes. This allows the breadcrumbs to absorb the liquid, which is key for tender meatballs.

    Tip for Success: Don’t be afraid to taste a tiny bit of this binder mixture (before adding meat!) to adjust seasonings. This ensures your Italian meatballs will be perfectly seasoned.

    Step 2: Gently Mix in the Ground Meat

    Now it’s time to add the ground meat. The secret to tender, melt-in-your-mouth meatballs is to mix gently. Overworking the meat will make it tough and dense, so a light touch is essential.

    Follow these simple steps for perfectly mixed meat:

    • Add your ground meat to the seasoning mixture in the bowl. For the richest flavor, use a combination of ground beef, pork, and veal.
    • Using your hands, gently fold the meat into the other ingredients until just combined. The goal is to incorporate, not to knead.
    • Stop mixing as soon as you no longer see streaks of plain ground meat.
    • Avoid compacting the mixture. A light touch ensures a light meatball texture.

    Beginner-Friendly Tip: If you’re unsure, it’s always better to under-mix slightly than to over-mix. This simple technique is crucial for making delicious, juicy homemade meatballs every time.

    Step 3: Roll the Meatballs

    With the mixture ready, it’s time to roll the meatballs. Making them a uniform size is important because it ensures they cook evenly for consistent, reliable results.

    Here’s how to roll perfect meatballs:

    • Line a baking sheet or large plate with parchment paper to prevent sticking.
    • Lightly moisten your hands with water to keep the meat from sticking to them.
    • Scoop the mixture using a standard ice cream scoop to create uniform 1.5- to 2-inch meatballs (about the size of a golf ball).
    • Gently roll each portion between your palms to form a smooth, round ball without pressing too hard.
    • Place the finished meatballs on the prepared baking sheet.
    • Repeat until all the meat mixture has been rolled.

    Pro-Home Cook Hint: If you’re short on time, you can roll these meatballs ahead and chill them. This is a great meal prep tip for busy families!

    Step 4: Choose Your Cooking Method (Bake or Pan-Fry)

    It’s time to cook your meatballs. You have two excellent, beginner-friendly options: baking in the oven or pan-frying on the stovetop. Both methods produce delicious results.

    Baking Your Meatballs (Oven Method)

    Baking is a great hands-off option that creates less mess, making it ideal for cooking large batches.

    • Preheat your oven to 400°F (200°C).
    • Arrange your rolled meatballs in a single layer on a baking sheet lined with parchment paper. Make sure they aren’t touching each other.
    • Bake for 18-22 minutes, or until the meatballs are golden brown and cooked through.
    • To ensure they are fully cooked and safe, the internal temperature should reach 160°F (71°C) [2].

    Outcome: Baked meatballs are exceptionally juicy and are a lighter option. They are perfect for simmering directly in your favorite tomato sauce.

    Pan-Frying Your Meatballs (Stovetop Method)

    Pan-frying creates a delicious, crispy exterior and is a quick cooking method, especially if you plan to serve the meatballs right away.

    • Heat a large skillet over medium-high heat. Add a tablespoon or two of olive oil.
    • Once the oil is shimmering, carefully add the meatballs to the hot skillet. Do not overcrowd the pan; cook in batches if necessary.
    • Sear the meatballs for 2-3 minutes per side, turning occasionally, until all sides are nicely browned.
    • Reduce the heat to medium-low. Cover the skillet and let the meatballs cook for another 8-10 minutes, or until they are cooked through.
    • Again, verify the internal temperature reaches 160°F (71°C) for food safety.

    Outcome: Pan-fried meatballs have a rich, seared crust. They are excellent on their own, with a dipping sauce, or tossed into a pasta dish.

    No matter which method you choose, you’re on your way to enjoying perfect homemade meatballs!

    What Are Some Tips for Making Perfect, Juicy Meatballs?

    Crafting perfect, juicy meatballs is an art, but it’s one that’s easy to master. With these simple, beginner-friendly tips, you’ll make delicious homemade meatballs every time. Impress your family and friends with flavorful, easy-to-make meals.

    • Do Not Overmix the Meat: This is the most crucial tip for tender meatballs. Overmixing compresses the meat proteins, which can make your meatballs tough and dense. Gently combine the ingredients until they are just incorporated to prevent a rubbery texture.
    • Choose the Right Meat Blend: For the best flavor and texture, use a mix of ground beef and ground pork. Beef provides a rich taste, while pork adds essential fat for moisture. This balance is key to a juicy result. An 80/20 lean-to-fat ratio is ideal for tenderness [3].
    • Embrace the Panade: A panade—a mixture of bread or breadcrumbs soaked in milk—is the secret to moist meatballs. The bread absorbs the liquid and slowly releases it during cooking, keeping the meatballs tender. It also acts as a binder for the ingredients.
    • Roll Evenly Sized Meatballs: For even cooking, consistency is key. Use a small ice cream scoop or your hands to form meatballs of a similar size. This ensures they all cook at the same rate, preventing some from being overcooked while others are undercooked.
    • Do Not Overcrowd the Pan: When browning your meatballs, work in batches to avoid overcrowding the pan. A crowded pan lowers the temperature, causing the meatballs to steam instead of brown. Giving them enough space is essential for developing a flavorful crust that adds depth to the dish.
    • Cook Gently and Do Not Overcook: Whether you’re baking or pan-frying, be careful not to cook your meatballs for too long, as overcooked meat dries out quickly. Cook them until they are just done. You can finish them with a gentle simmer in your favorite sauce, which will keep them extra moist and flavorful.

    By following these simple tips, you can confidently create perfect, juicy meatballs every time. At Recipesmondial, we’re here to help you enjoy cooking and make mealtime stress-free. Get ready to serve delicious, family-friendly meals!

    What Are the Best Ways to Serve Homemade Meatballs?

    Delicious homemade Italian meatballs simmering in a rich red marinara sauce, garnished with fresh basil, in a rustic pot.
    Professional food photography, photorealistic, high-quality food magazine photo. A mouth-watering, close-up, high-angle hero shot of perfectly cooked, glistening homemade Italian meatballs simmering in a rich, vibrant red marinara sauce in a rustic cast-iron pot or an elegant, shallow serving dish. Several fresh basil leaves are artfully scattered on top, adding a pop of green. A hint of steam is gently rising from the hot sauce. The background is softly blurred, suggesting a cozy, inviting dining table setting with warm lighting, emphasizing the deliciousness and comfort of the meal.

    Once you’ve mastered our easy meatball recipe, the fun truly begins. Because they are so versatile, homemade meatballs can transform simple ingredients into flavorful meals for any occasion, from a quick family dinner to an impressive appetizer. To help you get started, here are some of our favorite serving ideas that make mealtime decisions delicious and stress-free.

    Classic & Comforting Combinations

    There’s a reason some pairings are timeless. Perfect for family-friendly meals, these classic options highlight the rich flavors of your Italian meatballs.

    • Spaghetti and Meatballs: Arguably the most famous way to enjoy them, simply toss your juicy meatballs with your favorite marinara sauce. Serve over al dente spaghetti for a satisfying and simple dinner that everyone loves.
    • Meatball Subs: Pile warm homemade meatballs onto a crusty hoagie roll. Add plenty of melted provolone or mozzarella cheese and a generous spoonful of marinara, then bake until golden and bubbly for a hearty lunch or casual dinner.
    • Meatball Parmesan: Similar to a sub but served as a main dish, place meatballs in an oven-safe dish and cover them with marinara, mozzarella, and a sprinkle of Parmesan. Bake until the cheese is melted and serve with a side salad or crusty bread.

    Creative & Quick Meal Ideas

    Looking to switch things up? Your homemade meatballs are perfect for exploring new dishes that are both delicious and easy to prepare.

    • Meatball Pizza Topping: Cut or crumble your meatballs and sprinkle them over a homemade or store-bought pizza crust with sauce and cheese. This adds incredible flavor to any pizza night.
    • Meatball Skewers: For a fun appetizer or light meal, thread cooked meatballs onto skewers with cherry tomatoes, bell pepper pieces, and onion. Grill or broil until the veggies are tender and serve with a dipping sauce.
    • Stir-Fry with Meatballs: Add sliced homemade meatballs to your favorite vegetable stir-fry with a savory sauce like teriyaki or peanut. This transforms a classic stir-fry into a heartier, protein-packed dish and is a great way to use leftovers.

    Appetizers & Party Pleasers

    Homemade meatballs are excellent, crowd-pleasing appetizers that are incredibly easy to prepare for gatherings. Try these simple ideas for your next event.

    • Cocktail Meatballs: To create a sweet and tangy glaze, simmer your meatballs in a slow cooker with a simple sauce like grape jelly and BBQ sauce or chili sauce and cranberry sauce. They are perfect for parties and potlucks.
    • Mini Meatball Sliders: Place smaller meatballs on slider buns with a dollop of marinara and a slice of cheese. Serve them as bite-sized appetizers or a fun party food.
    • Meatball & Dip Platter: Arrange cooked meatballs on a platter with various dips, such as marinara, pesto, or a creamy ranch. Add some toothpicks for easy serving.

    Low-Carb & Healthy Alternatives

    If you’re looking for healthier options, your homemade meatballs can easily fit into a low-carb or balanced meal plan, making it simple to enjoy flavorful meals while sticking to your dietary goals.

    • Zucchini Noodles (Zoodles): Instead of pasta, serve your Italian meatballs over a bed of fresh zucchini noodles topped with your favorite marinara. This significantly reduces carbs while still providing a satisfying meal.
    • Cauliflower Rice Bowl: Create a delicious and healthy bowl with cauliflower rice, homemade meatballs, and a vibrant vegetable medley. Add a light sauce to complete the dish.
    • Lettuce Wraps: Crumble or slice meatballs and serve them in crisp lettuce cups with a flavorful sauce and fresh herbs for a refreshing and light meal option.

    No matter how you serve them, your homemade meatballs are sure to be a hit. Our recipe is designed for versatility, allowing you to easily adapt it to your family’s tastes and mealtime needs. Enjoy creating delicious, stress-free meals with Recipesmondial!

    How to Store and Freeze Leftover Meatballs

    How to Store and Freeze Leftover Meatballs

    Making a big batch of homemade meatballs is a great way to prepare for future meals. When you know how to store and freeze them properly, you’ll always have a delicious, easy dinner option on hand.

    Storing in the Refrigerator

    Proper refrigeration is key to keeping your meatballs fresh for a few days. Follow these simple steps to ensure they stay delicious and safe to eat.

    • Cool Them Completely: First, let your cooked meatballs cool to room temperature, which usually takes 30-60 minutes. Storing hot food can create condensation and encourage bacterial growth.
    • Use an Airtight Container: Transfer the cooled meatballs to a clean, airtight container. If they are in a sauce, make sure the lid seals tightly to prevent spills.
    • Refrigerate Promptly: Place the container in the refrigerator within two hours of cooking to keep them safe.
    • Shelf Life: Your homemade meatballs will stay fresh in the refrigerator for 3 to 4 days, making them perfect for lunches or quick weeknight dinners.
    • Reheating Tips: To reheat, gently warm the meatballs in their sauce on the stovetop over low heat. For a quicker option, you can also use the microwave.

    This simple method helps you enjoy your leftovers for days, making mealtime less stressful.

    Freezing for Later

    Freezing meatballs is a game-changer for meal prep. Whether you freeze them cooked or uncooked, you’ll always have a quick, comforting meal ready to go.

    Freezing Cooked Meatballs:

    This method is ideal if you like to cook in bulk and want meals that are ready to heat and serve.

    • Cool Thoroughly: As with refrigerating, ensure your cooked meatballs are completely cool before freezing. This simple step helps prevent ice crystals and maintains their texture.
    • Flash Freeze (Recommended for Best Results): To stop the meatballs from clumping together, arrange them in a single layer on a parchment-lined baking sheet. Freeze for 1 to 2 hours, or until they are firm.
    • Package Them Well: Transfer the flash-frozen meatballs into heavy-duty freezer bags or airtight, freezer-safe containers. Squeeze out as much air as possible to prevent freezer burn.
    • Label and Date: Always label your bags or containers with the contents and date. This helps you keep your freezer organized and use food at its best.
    • Freezer Life: For the best quality, use cooked meatballs within 3 to 4 months. While they are safe to eat beyond this, their flavor and texture may decline.

    Freezing Uncooked Meatballs:

    Choose this option if you prefer to cook your meatballs fresh or want to prepare a large batch of the mixture ahead of time.

    • Form and Flash Freeze: Shape your meatball mixture and arrange the raw meatballs in a single layer on a parchment-lined baking sheet. Freeze for 1 to 2 hours until solid.
    • Store Securely: Once solid, transfer the uncooked meatballs to freezer bags or airtight containers, removing any excess air before sealing.
    • Cook from Frozen: There’s no need to thaw before cooking. Simply bake them or simmer them in sauce straight from the freezer. Just add a few extra minutes to the cooking time.

    Thawing and Reheating Frozen Meatballs:

    When you’re ready to enjoy your frozen meatballs, follow these simple steps for thawing and reheating.

    • Thawing Options: For the best results, thaw cooked meatballs overnight in the refrigerator before reheating. If you’re short on time, you can also reheat them directly from frozen.
    • Reheating Cooked Meatballs: To reheat thawed meatballs, warm them gently in sauce on the stovetop or bake at 350°F (175°C) for 15-20 minutes. To reheat from frozen, simmer them in sauce or bake at a lower temperature, like 300°F (150°C), until they reach an internal temperature of 165°F (74°C).
    • Cooking Uncooked Meatballs: Cook uncooked meatballs directly from frozen by simmering them in sauce or baking them in the oven. Ensure they are browned and fully cooked to an internal temperature of 160°F (71°C).

    With these simple storage tips, you can master meal prep and always have homemade meatballs on hand for quick, family-friendly dinners. It’s all about making home cooking more enjoyable and stress-free!

    Frequently Asked Questions

    How to make meatballs from mince?

    Turning simple mince (ground meat) into delicious homemade meatballs is a breeze! Our easy recipes help you create tender, flavorful meatballs every time.

    Here’s a quick step-by-step guide to help you create fantastic meatballs:

    • Choose Your Mince: You can use ground beef, pork, chicken, turkey, or a mix. For the best flavor and juiciness, a combination of beef and pork is often recommended.
    • Add Binders: Mix in ingredients like breadcrumbs (or stale bread soaked in milk) and an egg. These ingredients hold the meatballs together and keep them moist.
    • Season Well: This is where the flavor comes from. Include grated Parmesan cheese, minced garlic, finely chopped fresh parsley, salt, black pepper, and perhaps a pinch of red pepper flakes for a little kick.
    • Mix Gently: Use your hands to combine all the ingredients. Be careful not to overmix, as this can make your meatballs tough. Mix just until everything is evenly distributed.
    • Roll Evenly: Roll the mixture into meatballs of a consistent size, about as big as a golf ball. This helps them cook evenly.
    • Cook Them Up: You can bake your meatballs in the oven for a hands-off approach or pan-fry them until beautifully browned. After that, simply simmer them in your favorite sauce!

    This beginner-friendly process ensures a fantastic outcome every time. You’ll build confidence in the kitchen and enjoy cooking without stress!

    What is the best meatball recipe for spaghetti?

    For spaghetti, the best meatballs are incredibly tender, packed with savory flavor, and perfect for soaking up a rich tomato sauce. A great recipe focuses on achieving classic flavor and ultimate juiciness.

    Here’s what makes for truly great spaghetti meatballs:

    • Meat Blend is Key: A mix of ground beef and ground pork provides the best texture and depth of flavor. Some recipes also include ground veal for extra tenderness.
    • Rich Flavorings: Be generous with fresh garlic, finely chopped parsley, and grated Parmesan cheese. A touch of onion powder or finely minced onion also adds a savory, aromatic flavor.
    • Moisture & Tenderness: A combination of milk-soaked breadcrumbs and an egg is crucial. This technique keeps the meatballs moist and prevents them from becoming dense.
    • Gentle Hand: Overmixing is the enemy of tender meatballs. Mix just until the ingredients are combined. This simple tip makes a huge difference.
    • Cooking Method: Pan-fry the meatballs first to get a nice crust, then simmer them directly in your marinara sauce. This allows them to absorb the rich flavor of the sauce as they finish cooking.

    This simple and satisfying recipe is perfect for dinner and is sure to become a family favorite!

    What are authentic Italian meatballs made of?

    When we talk about “authentic Italian meatballs” (known as polpette in Italy), it’s important to know that traditions vary widely by region. However, there are several common themes that set them apart from the Italian-American versions many are familiar with.

    Traditionally, authentic Italian meatballs often feature:

    • Mixed Meats: You’ll frequently find a blend of ground beef, pork, and sometimes veal. In some regions, lamb or sausage meat may be included.
    • Stale Bread, Not Dry Crumbs: Instead of dry breadcrumbs, many traditional recipes use stale bread soaked in milk or water, which is then squeezed dry. This creates a much lighter and softer texture.
    • Cheese: Grated Parmesan or Pecorino Romano cheese is a staple, adding a salty, savory depth.
    • Eggs: An egg acts as a binder, helping to hold the mixture together.
    • Fresh Herbs: Finely chopped fresh parsley is almost always included. While other herbs like basil or oregano might be used, parsley is the most common choice.
    • Aromatics: Minced garlic is common, and sometimes finely grated or sautéed onion is added.
    • Simple Seasoning: Salt and freshly ground black pepper are often all that’s needed, allowing the quality of the ingredients to shine.
    • Smaller Size: Authentic Italian polpette are often smaller than their Italian-American counterparts, sometimes just bite-sized.
    • Cooking Method: They are frequently cooked in a simple tomato sauce or fried briefly before being added to a stew or soup. They are rarely served with spaghetti; instead, they are enjoyed as a small appetizer or part of a larger meal. [4]

    Understanding these elements helps home cooks appreciate the nuances of different meatball traditions. At Recipesmondial, we celebrate global comfort foods by making their diverse flavors accessible for every home cook.


    Sources

    1. https://www.seriouseats.com/the-food-lab-best-meatball-recipe-italian-american-new-york-cooking-tips
    2. https://www.fsis.usda.gov/food-safety/safe-food-handling-and-preparation/meat/ground-beef-and-food-safety
    3. https://www.usda.gov/media/blog/2019/04/24/ground-meat-whats-lean-and-whats-fatty
    4. https://www.academiabarilla.com/italian-recipes/meatballs-polpette