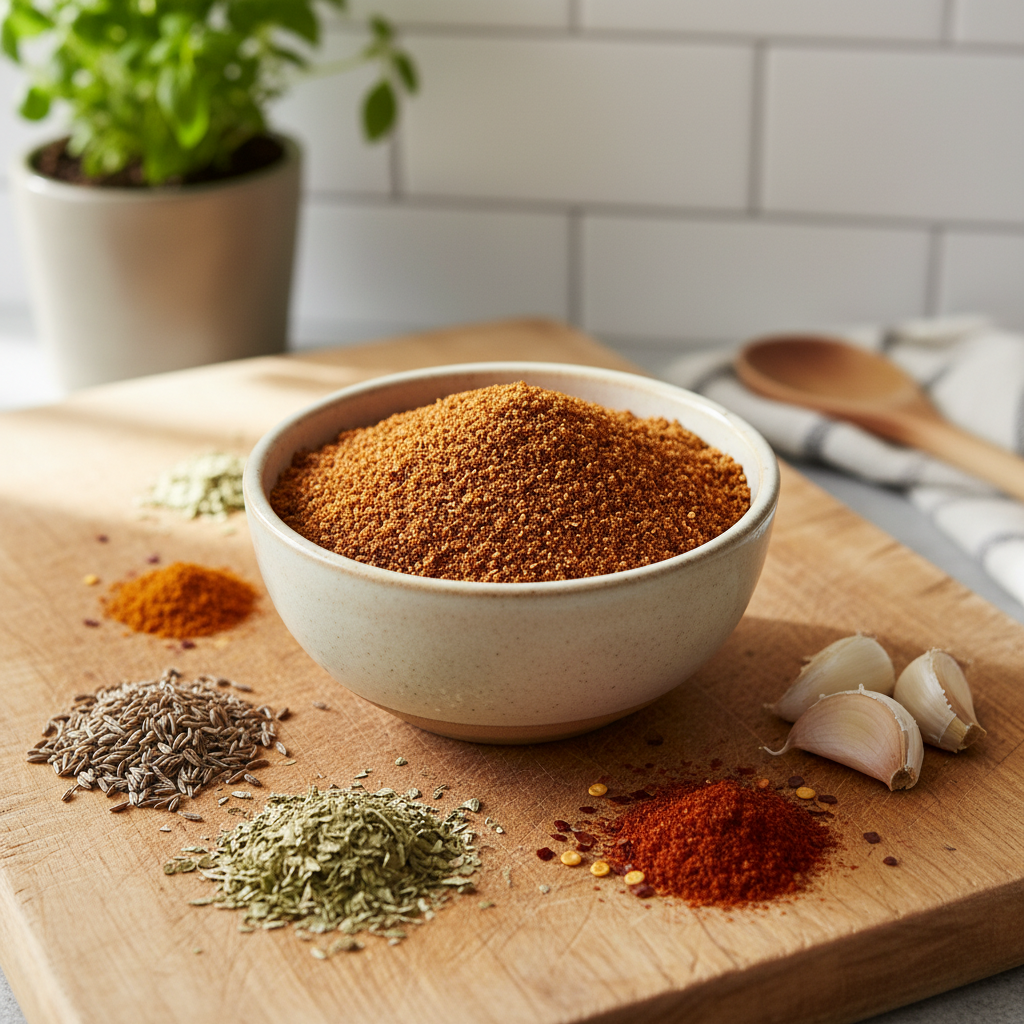
A homemade taco seasoning recipe combines common pantry spices like chili powder, ground cumin, paprika, garlic powder, onion powder, and dried oregano. Making your own allows you to control the ingredients, adjust the salt and spice levels to your liking, and avoid the additives found in store-bought packets.
Store-bought taco seasoning is convenient, but a homemade blend offers a fresher, more vibrant flavor. If you ever feel overwhelmed by complex recipes or unsure how to cook healthy, tasty meals quickly, you’re not alone. The good news is, creating an amazing taco experience doesn’t have to be complicated. It’s time to ditch those one-note packets and elevate your culinary game with a simple, yet incredibly flavorful homemade taco seasoning recipe.
At Recipesmondial, we believe cooking should be enjoyable, not stressful. That’s why we’re sharing our easy homemade taco seasoning recipe, designed with beginner-friendly recipes in mind. This blend does more than make your weeknight simple dinner recipes more delicious—it puts you in control. You can customize the ingredients, adjust the spice level for your family, and build confidence in your skills. With our step-by-step guidance, you’ll see how easy it is to transform everyday pantry staples into something extraordinary.
This article will show you how to create the best homemade taco seasoning, far superior to anything from a store. We’ll cover the essential ingredients, offer practical tips for making it mild, spicy, or low-sodium, and explain how to store it for maximum freshness. Get ready to cook confidently, savor incredible flavors, and make every taco night a delicious success. Let’s dive in!
Why Bother Making Homemade Taco Seasoning?
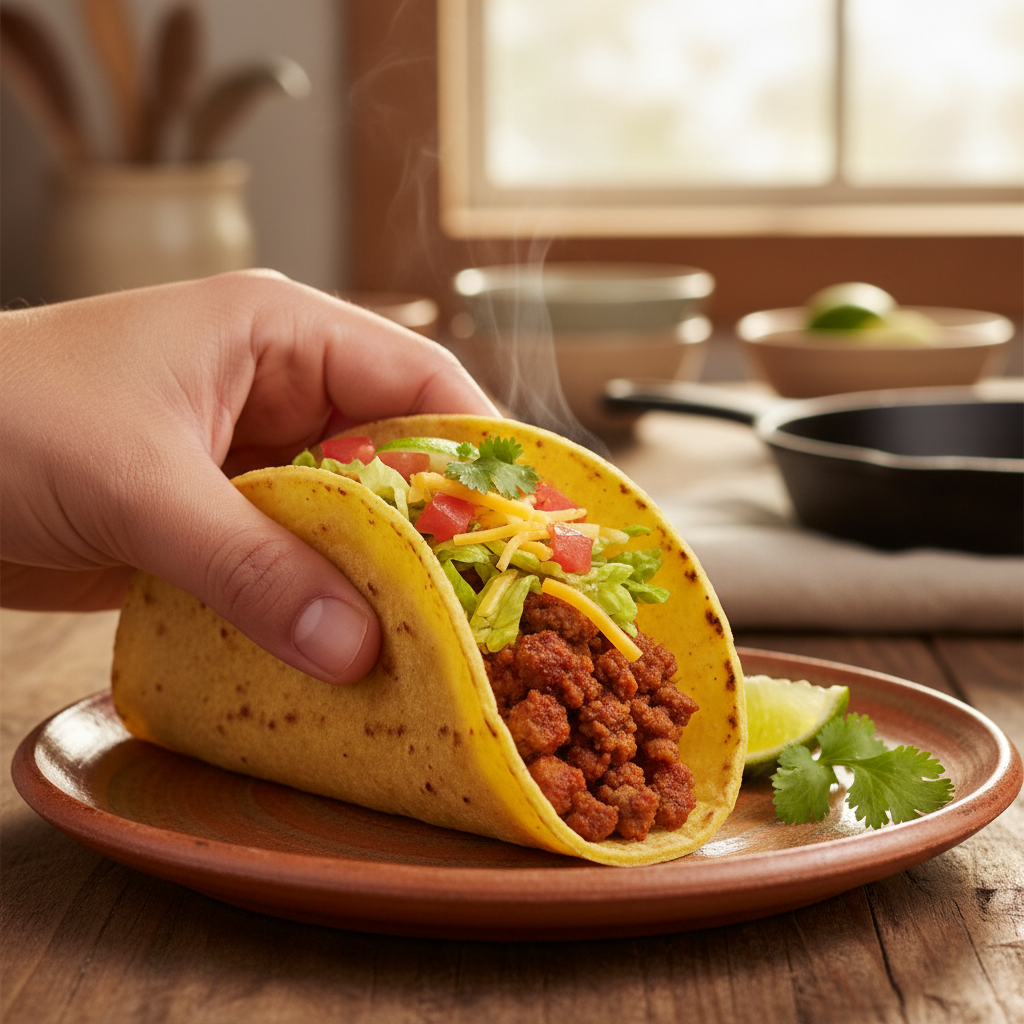
Professional food photography, photorealistic, high-quality food magazine photo: A mouth-watering, close-up shot of a perfectly assembled, vibrant beef taco. The taco is generously filled with freshly seasoned ground beef, crisp shredded lettuce, diced ripe tomatoes, and a sprinkle of melted cheddar cheese, all nestled in a warm, soft corn tortilla. The taco is held by a real human hand (warm and inviting) or resting on a simple, rustic ceramic plate. The background is a subtly blurred, warm-toned home kitchen setting, suggesting a cozy mealtime. Emphasize freshness, abundant flavor, and homemade appeal. Natural, inviting lighting. No artistic interpretations, no illustrations, no vector graphics, no abstract art.
If you’ve ever grabbed a packet of taco seasoning and wondered if there’s a better way, we get it. While those packets are convenient, making your own is a kitchen superpower. It’s surprisingly easy, tastes incredible, and gives you complete control over the flavor.
Taking this one simple step can change your taco night forever and boost your kitchen confidence. Here’s why making a homemade taco seasoning recipe is absolutely worth it:
Unbeatable Flavor and Freshness
Taste the Difference: Store-bought packets often contain fillers and can sit on shelves for ages. In contrast, freshly mixed spices burst with a vibrant flavor that will make your tacos taste incredible.
Customization is Key: Love an extra kick of spice? Prefer less salt? Making your own blend means you control every ingredient, tailoring the taste perfectly to your preference.
No More Bland Meals: Say goodbye to generic flavors. Your homemade blend will elevate not just tacos, but countless other dishes too.
Know What You’re Eating
Control Your Ingredients: Many commercial taco seasonings hide unwanted additives like anti-caking agents, excess sugar, and artificial flavors.
Dietary Needs Made Easy: Whether you’re watching your sodium or managing allergies, crafting your own blend ensures it perfectly fits your family’s needs. This makes it easier to create healthy and balanced meals for everyone. [1]
Simple, Wholesome Goodness: Your homemade blend uses everyday spices from your pantry, so you know exactly what’s in it—no mysterious ingredients.
Save Money and Time
Budget-Friendly: While individual spices have a small upfront cost, they are far more economical in the long run. You can make many batches for the price of just a few packets.
Always Ready: Mix up a big batch once and store it in your pantry. It will always be ready for quick weeknight meals, eliminating last-minute grocery runs and making meal prep a breeze.
Stress-Free Cooking: Having your go-to seasoning ready simplifies mealtime, helping you whip up delicious, family-friendly meals without the stress.
Boost Your Cooking Confidence
Empowering Experience: Creating your own spice blend is a simple yet powerful accomplishment. It’s an easy first step toward building fundamental cooking skills.
Demystify Spices: You’ll become more familiar with individual spices, which empowers you to experiment in the kitchen and start cooking with confidence.
From Uncertainty to Flavor Pro: This simple recipe is a fantastic confidence-builder. You’ll learn how to create amazing flavor from scratch and enjoy cooking without stress. Recipesmondial is here to help you every step of the way.
What are the ingredients in taco seasoning?
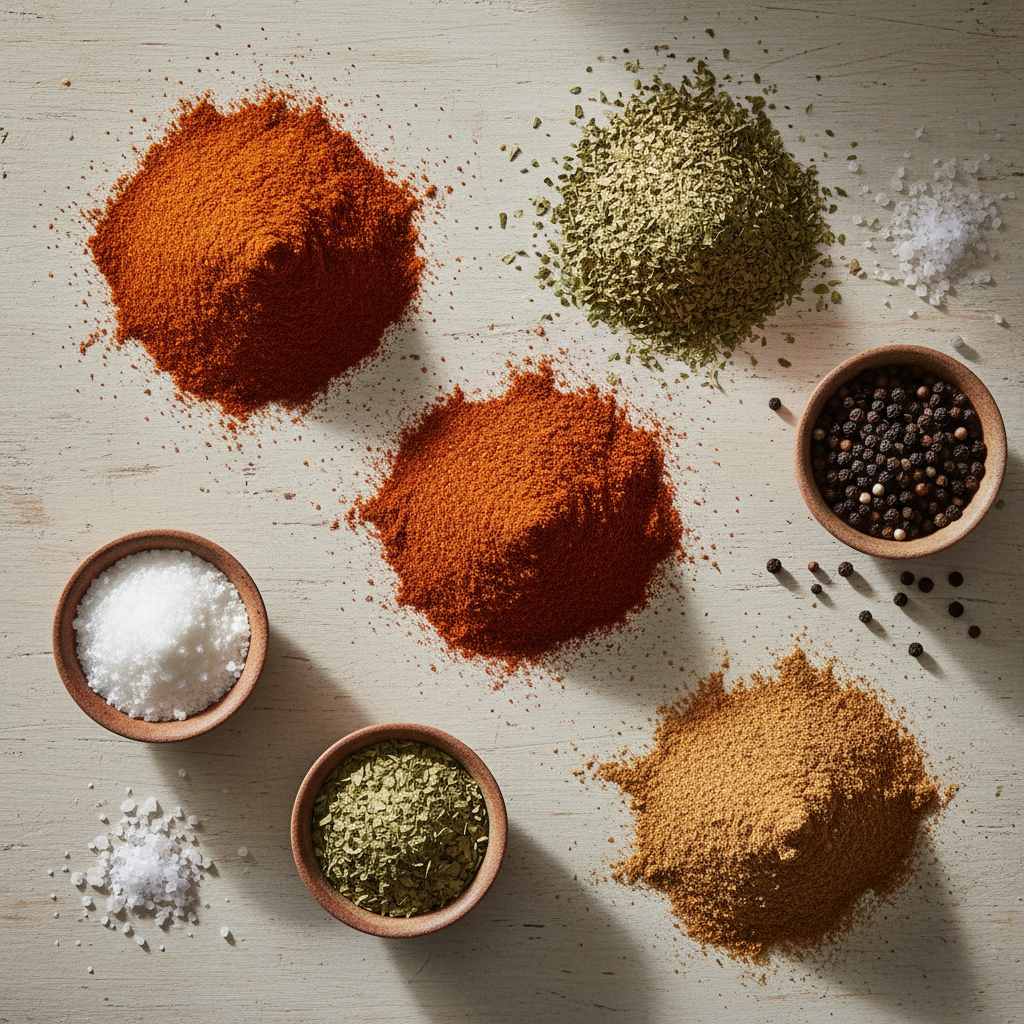
Professional food photography, photorealistic, high-quality food magazine photo: An overhead flat lay composition showcasing the individual vibrant ingredients for homemade taco seasoning. Small, distinct piles or elegant ceramic bowls of ground chili powder, ground cumin, smoked paprika, dried oregano, garlic powder, onion powder, sea salt, and black pepper are arranged neatly on a light, rustic wooden surface. The spices should be rich in color and texture. Natural, bright, diffused lighting, creating subtle shadows. No artistic interpretations, no illustrations, no vector graphics, no abstract art.
Crafting your own homemade taco seasoning is incredibly rewarding because it puts you in control of the flavors and ingredients. You can skip the hidden additives and excess sodium common in store-bought packets and instead use simple spices you already have in your pantry. Let’s break down the core ingredients that make up the best taco seasoning blend.
Chili Powder: The Base of Your Blend
Chili powder is the heart of any good taco seasoning, providing a warm and earthy foundation. While pre-made chili powder is a blend of ground dried chiles and other spices, we add ingredients like cumin and oregano separately for more control over the final taste. You can find different varieties, from mild ancho to vibrant New Mexico chili powder, each offering a unique depth of flavor.
Cumin and Paprika: For Warmth and Color
These two spices are essential for achieving that classic taco flavor.
Cumin: This spice brings a distinctive smoky and earthy warmth. An irreplaceable ingredient in many Mexican-inspired dishes, a little goes a long way to build depth.
Paprika: Paprika adds beautiful color and a mild, sweet, or smoky flavor. Sweet paprika is common, offering a rich red hue. Smoked paprika, on the other hand, provides a deeper, campfire-like aroma and is a fantastic addition for an extra smoky kick.
Garlic Powder and Onion Powder: The Savory Duo
Garlic and onion powder are the secret weapons for savory richness, delivering concentrated flavor in a way fresh versions can’t in a dry mix. Using powdered aromatics is key because they disperse evenly throughout the seasoning and keep it shelf-stable, ensuring a consistent and flavorful base in every bite.
Dried Oregano: For an Herbal Touch
Oregano adds a subtle, herbaceous note with a slightly bitter, peppery, and aromatic quality. While any dried oregano you have will work beautifully, Mexican oregano is often used in authentic blends for its brighter, citrusy notes compared to Mediterranean oregano [2]. It provides an essential herbal balance to the seasoning.
Salt, Pepper, and Optional Spices
Finally, salt and pepper are crucial for bringing the blend together. Salt enhances all the other flavors, while black pepper adds a gentle, sharp heat.
You can also customize your seasoning with optional spices:
Cayenne Pepper: For a spicy kick, add a pinch of cayenne. It’s perfect for making your meals a bit more adventurous.
Coriander: Ground coriander offers a subtle citrusy, floral note that brightens the overall flavor profile.
Smoked Paprika (if not already using): If your main paprika is sweet, adding a small amount of smoked paprika can deepen the smoky undertones.
Sugar: A tiny pinch of granulated sugar can balance the savory and spicy notes while helping the meat caramelize as it cooks.
These simple ingredients come together to create a robust and flavorful homemade taco seasoning. It’s truly better than any store-bought packet and makes weeknight dinners incredibly easy and delicious!
How to Make Taco Seasoning: A Simple Step-by-Step Guide
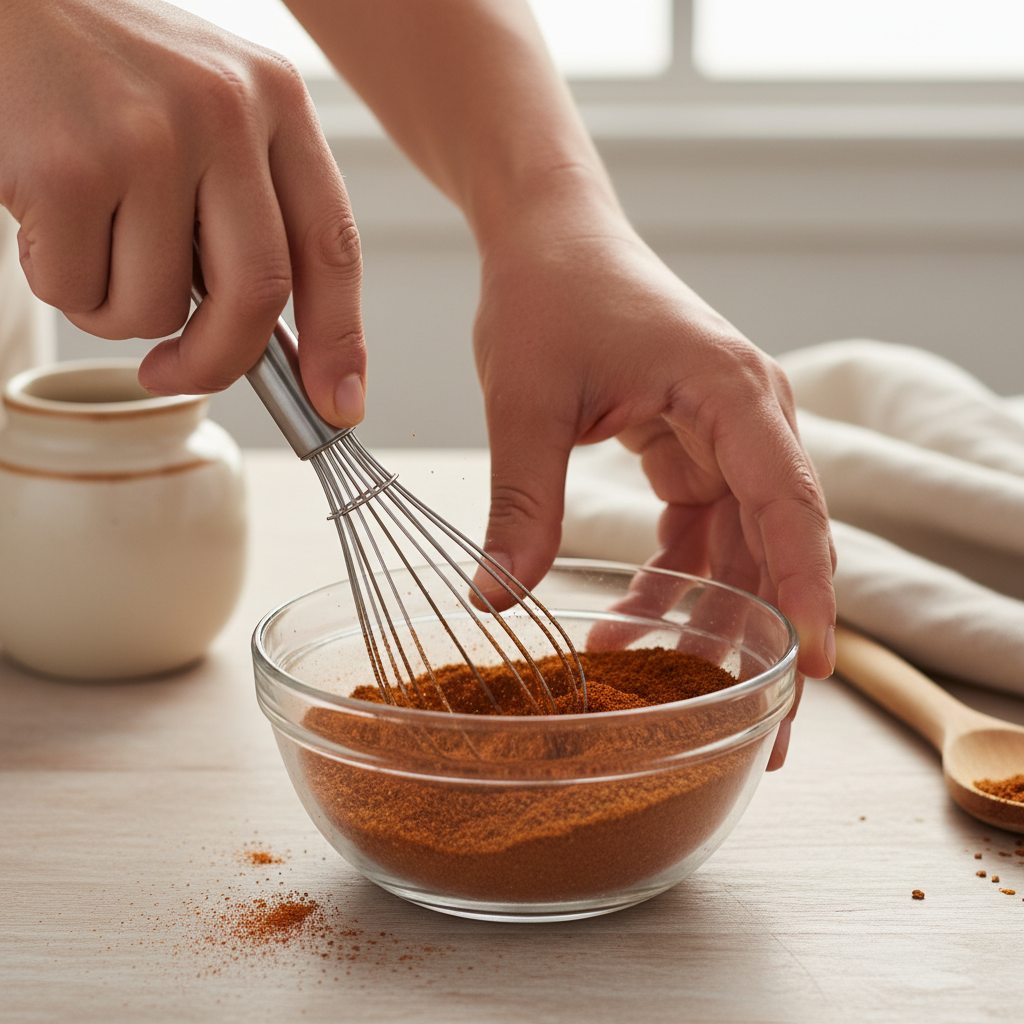
Professional food photography, photorealistic, high-quality food magazine photo: A close-up shot of a real human home cook’s hands (warm skin tone) gently whisking a blend of reddish-brown dry spices in a small, clear glass mixing bowl. A small metal whisk is actively mixing the powders. The background is a softly blurred, warm-toned kitchen counter or a light-colored wooden table, suggesting a clean, approachable home kitchen environment. Soft, natural light illuminates the scene, highlighting the texture of the spices. No artistic interpretations, no illustrations, no vector graphics, no abstract art.
Step 1: Measure Your Spices
Creating your own flavorful homemade taco seasoning begins with measuring your ingredients. Precise measurements ensure a balanced and delicious blend every time, making this recipe perfect for beginners.
First, gather all your spices and use measuring spoons for accuracy. This simple preparation helps you cook confidently and avoids any last-minute searching. For the best taste, always use the freshest spices possible.
2 tablespoons chili powder: This forms the delicious base of your blend.
1 tablespoon ground cumin: Adds a warm, earthy flavor.
1 tablespoon paprika (sweet or smoked): For vibrant color and a hint of sweetness or smokiness.
1 teaspoon garlic powder: A savory essential for depth.
1 teaspoon onion powder: Enhances the deep savory notes.
1/2 teaspoon dried oregano: Brings an aromatic, herbaceous touch.
1 teaspoon salt: Balances all the wonderful flavors.
1/2 teaspoon black pepper: Adds a gentle, subtle kick.
Optional: 1/4 teaspoon cayenne pepper (for heat): Skip this if you prefer a mild blend.
Having everything measured out beforehand makes the next step quick and stress-free, leading to simple and reliable meal solutions.
Step 2: Mix Them Together
Now it’s time to combine your spices. This simple step is where your homemade taco seasoning truly comes to life, creating a quick win for flavorful meals.
To guarantee every bite of your tacos will be bursting with flavor, you must ensure all the spices are evenly distributed. No one wants a mouthful of just chili powder!
In a small bowl: Add all your measured spices, then use a fork or a small whisk to gently mix them until they are well combined.
Alternatively, in a small jar: Place all the spices inside, close the lid tightly, and shake vigorously for 30-60 seconds. This is often the easiest method and helps break up any clumps.
Keep mixing until there are no visible streaks of individual spices. Your final blend should have a consistent color and texture.
Step 3: Store for Maximum Freshness
Proper storage is key to keeping your homemade taco seasoning fresh and potent. Storing it correctly ensures the flavor will last for many family-friendly meals and deliver reliable results every time you cook.
Air, light, and moisture are the enemies of spice freshness. Protecting your blend from these elements will make it taste great for longer and help you maximize your ingredients.
Choose an airtight container: A small glass jar with a tight-fitting lid is ideal, as it prevents air from degrading the spices. You can also use a reusable spice jar.
Find a cool, dark place: Store your seasoning away from direct sunlight and heat. A pantry or cupboard, away from the stove, is the perfect spot.
Your homemade blend will stay fresh for about 6 months to 1 year [3]. Since spices lose their potency over time, always give the seasoning a sniff before using it. If the aroma is faint, it might be time to make a fresh batch.
With these steps, you’re ready to enjoy delicious and flavorful meals, building your kitchen confidence with Recipesmondial!
How much taco seasoning and water for 1 pound of meat?
One of the best things about a homemade taco seasoning recipe is having it ready for quick meals. For family-friendly dinners like tacos, using the right proportions is key to perfect flavor. For 1 pound of ground meat (such as beef, turkey, or chicken), we recommend this specific ratio for delicious results every time.
Recommended Proportions for 1 Pound of Meat
To ensure your tacos are bursting with flavor, here’s how much of your homemade taco seasoning and water you will need:
Homemade Taco Seasoning: Use about 2 tablespoons. This amount provides a robust flavor that rivals store-bought packets. You can always add more to taste if you prefer a stronger spice level.
Water: Add 1/2 cup (120 ml). The water helps the spices bloom and creates a rich sauce that coats the meat, preventing it from drying out.
Step-by-Step Cooking Instructions
Follow these simple steps to turn plain ground meat into a flavorful taco filling:
Brown the Meat: In a large skillet, cook 1 pound of ground meat over medium-high heat, breaking it apart with a spoon as it cooks.
Drain Excess Fat: Once the meat is fully browned, carefully drain the excess grease from the pan. This keeps your tacos from being too oily.
Add Seasoning: Stir in 2 tablespoons of your homemade taco seasoning. Cook for one minute, stirring constantly to toast the spices and deepen their flavor.
Pour in Water: Add 1/2 cup of water to the skillet and bring the mixture to a simmer.
Simmer and Thicken: Reduce the heat to low and let it simmer for 5-7 minutes. The sauce will thicken and cling to the meat as most of the water evaporates.
Tips for Perfect Taco Meat
Adjust to Taste: If you like things spicier, add a pinch of chili powder or cayenne pepper. For a milder flavor, start with 1.5 tablespoons of seasoning and add more if needed.
Consistency Check: If the mixture seems too dry, add another tablespoon or two of water. If it’s too watery, continue to simmer for a few more minutes until it reaches your desired thickness.
Meat Options: This ratio works wonderfully for ground beef, turkey, or chicken, making it a versatile base for many easy recipes and family-friendly meals.
With these straightforward steps and clear measurements, you can cook with confidence. Say goodbye to guesswork and hello to delicious, flavorful tacos in no time.
How Can You Customize This Recipe?
Making it Mild
When you make your own homemade taco seasoning, you control the flavor. To create a milder blend for kids or anyone sensitive to spice, simply adjust the heat. This ensures everyone can enjoy your family-friendly meals.
Reduce Chili Powder: Chili powder provides the primary heat, so start by using half the recommended amount.
Skip the Cayenne Pepper: Our original recipe includes an optional pinch of cayenne. Omit this completely for a much milder flavor profile.
Add Sweet Paprika: Increase the amount of sweet paprika slightly. This adds beautiful color and a mild, warm flavor without any heat.
These simple tweaks create a delicious seasoning that everyone at the table will love, allowing you to customize the recipe with confidence.
Making it Spicy
If you’re ready to turn up the heat, customizing your taco seasoning recipe is a fun way to explore new flavors. It’s the perfect choice for anyone who loves a fiery punch in their meals.
Increase Cayenne Pepper: Double or even triple the amount of cayenne. Add it in small increments, tasting as you go, until you reach your desired heat level.
Add Crushed Red Pepper Flakes: A teaspoon or two of crushed red pepper flakes will deliver a noticeable warmth and add a nice textural element.
Include Chipotle Powder: For a smoky heat, stir in 1/2 to 1 teaspoon of chipotle powder. This provides a deep, robust spiciness.
Use a Spicier Chili Powder: Some chili powders are inherently hotter than others. Look for varieties labeled “hot chili powder” or “Ancho chili powder” for a more intense base.
Remember to taste the seasoning as you add more heat. This simple adjustment gives you full control over your culinary adventure and helps you build confidence as you cook.
Making it Smoky
Adding a smoky depth to your homemade taco seasoning is a simple way to elevate its flavor. This easy technique introduces a rich, complex taste to your meals, making even quick dishes feel more special.
Use Smoked Paprika: Swap out regular paprika for smoked paprika. This single ingredient is a game-changer for adding a natural, savory smoky flavor.
Incorporate Chipotle Powder: As mentioned for spiciness, chipotle powder also brings a wonderful smoky note. Start with 1/2 teaspoon and adjust to your preference.
A Pinch of Cumin Seed: While not directly smoky, lightly toasting whole cumin seeds before grinding them adds a deeper, earthier aroma that complements smoky flavors.
These simple additions will transform your basic seasoning into something memorable. This easy tweak is a great way to inspire creativity in the kitchen.
Making a Low-Sodium Version
If you’re monitoring your sodium intake, creating a low-sodium taco seasoning recipe is a practical way to enjoy healthy meals without sacrificing flavor. This modification is easy to do and perfect for fitting specific dietary needs.
Omit or Reduce Salt: The easiest method is to leave the salt out completely or significantly reduce the amount in the blend.
Add Salt at the Table: Instead of seasoning the entire batch, allow individuals to add salt to their finished dish. This gives everyone control over their personal intake.
Boost Other Flavors: Compensate for less salt by increasing other aromatic spices. Try adding an extra 1/2 teaspoon each of garlic powder, onion powder, and cumin.
Fresh Brightness: When cooking, a squeeze of fresh lime juice at the end can brighten all the flavors, reducing the perceived need for salt.
Creating a low-sodium version is a beginner-friendly modification that supports your wellness goals and allows you to cook delicious, stress-free meals.
What can I use if I don’t have taco seasoning?
Running out of taco seasoning can feel like a setback, especially when you’re planning a delicious meal. But don’t worry! At Recipesmondial, we believe in simple, flavorful solutions for home cooks. You can easily create a fantastic flavor profile for your tacos using individual spices you likely already have in your pantry. This means your family-friendly meals are always within reach!
Here are a few quick and reliable ways to season your meat without a store-bought packet or a pre-mixed homemade blend. These options are perfect for simple, beginner-friendly recipes.
Mix Your Own Quick Taco Flavor
The beauty of making your own blend is controlling the taste and tailoring it to your family’s preferences. This beginner-friendly approach guarantees a flavorful result every time.
To make about two tablespoons of seasoning (roughly equivalent to one store-bought packet), try this simple combination. This amount is perfect for seasoning one pound of meat.
1 tablespoon chili powder: This forms the delicious base of your blend.
1 teaspoon ground cumin: Cumin adds a warm, earthy depth.
1 teaspoon dried oregano: This gives an aromatic, herbaceous note.
½ teaspoon garlic powder: For that essential savory kick.
½ teaspoon onion powder: This enhances the savory profile.
¼ teaspoon paprika (smoked or sweet): Paprika offers color and a mild, pleasant flavor.
¼ teaspoon salt: Salt is crucial for bringing out all the other flavors.
⅛ teaspoon black pepper: This adds a touch of subtle heat and spice.
How to use it: Simply combine these spices in a small bowl and stir them into your cooked ground meat. Add 1/4 to 1/2 cup of water and simmer until the liquid reduces, allowing the flavors to meld beautifully. This quick method ensures a delicious dinner every time!
What If I Only Have Chili Powder?
If your spice rack is sparse, plain chili powder is an excellent starting point. Because it’s often a blend of spices like chili pepper, cumin, and oregano, it provides a solid base. However, you can easily boost its flavor to make it taste more like taco seasoning.
To turn basic chili powder into a more taco-like seasoning for 1 pound of meat:
Start with 1 to 1 ½ tablespoons of chili powder.
Add ½ to 1 teaspoon of ground cumin: This is the most important addition for that classic taco flavor.
Stir in ½ teaspoon of garlic powder: For an essential savory taste.
Include ¼ teaspoon of salt: This is always needed to season your dish properly.
A pinch of black pepper: Adds a little extra warmth.
This approachable technique is fantastic for quick meals and helps solve last-minute dinner decisions, making it perfect for busy families.
Other Pantry Staples That Can Help
Even if you lack some of the main spices, you can still infuse your dish with great taste. Sometimes, simplicity is the key to a flavorful meal.
Salt and Pepper: These are non-negotiables for any savory dish, as they enhance all other flavors.
Garlic Powder and Onion Powder: These two work wonders together to provide a foundational savory base.
Cumin: If you only have one “taco-specific” spice, make it cumin. Its distinctive flavor is unmistakable in Mexican-inspired dishes.
A Dash of Cayenne Pepper or Red Pepper Flakes: For those who love a bit of heat, add a small amount and taste as you go.
Don’t be overwhelmed by complex recipes. At Recipesmondial, we help you enjoy cooking without stress. By experimenting with these simple substitutions, you’ll gain confidence and learn to create delicious, family-friendly meals with ease!
Frequently Asked Questions
What’s the secret ingredient in the best taco seasoning?
The secret to the best taco seasoning isn’t one single ingredient—it’s a combination of two key elements: fresh spices and a balanced blend. Spices lose their potency over time, so starting with a fresh, high-quality supply makes a huge difference. This recipe is designed to create that perfect balance for maximum flavor.
Here are the real “secrets” to a truly flavorful homemade taco seasoning:
Fresh Spices: Use vibrant, fragrant spices. Older spices lose their potency and won’t deliver the same rich flavor.
Proper Ratios: The right balance of chili powder, cumin, and paprika creates incredible depth. These three form the heart of the blend.
Savory Enhancers: Garlic powder and onion powder add a fundamental savory base that is crucial for an authentic taco taste.
A Touch of Oregano: A small amount of dried oregano provides a subtle herbal note that rounds out the entire flavor profile.
Customization: The ability to adjust the heat and salt to your preference is what makes a homemade blend perfect for you.
Ultimately, the “secret” is combining fresh, quality ingredients in thoughtful proportions to create a seasoning that is far superior to any store-bought packet.
How much homemade seasoning is equal to one store-bought packet?
A typical store-bought taco seasoning packet contains about 1 ounce, which is equal to 2 tablespoons. To replace one packet in a recipe, simply use 2 tablespoons of this homemade blend. This is the perfect amount for seasoning 1 pound of ground meat or beans.
However, the best part about making your own is having complete control. Feel free to add a little more or less to match your personal taste. This flexibility ensures you get the perfect flavor for your meals every time.
How should I store my homemade taco seasoning?
To keep your homemade taco seasoning fresh and flavorful, proper storage is essential. If not stored correctly, spices will lose their potency over time. Follow these simple tips for the best results:
Use an Airtight Container: Transfer the seasoning to a small glass jar or another airtight container to keep out air and moisture.
Choose a Cool, Dark Place: Store the container in a pantry or cupboard, away from direct sunlight and heat. Avoid storing it above the stove.
Avoid Moisture: Ensure the container and any spoons you use are completely dry, as moisture can cause spices to clump and spoil.
Label Clearly: Don’t forget to label the container with the name of the seasoning and the date it was made. This helps you track its freshness.
When stored correctly, your homemade taco seasoning will stay potent for up to 6 months. After that, it may start to lose flavor. A quick sniff test will tell you if it’s still good to use.
Is it cheaper to make your own taco seasoning?
Yes, making your own taco seasoning is much more cost-effective in the long run. Although there’s an initial cost for buying individual spices, they will last for many batches. Here’s why it’s a smart choice:
Long-Term Savings: While buying several spices at once seems more expensive upfront, you’ll have enough to make numerous batches. This quickly becomes cheaper than buying single-use packets [4].
Bulk Buying Benefits: Purchasing spices in larger quantities often reduces the per-unit cost, leading to even greater savings over time.
Better Ingredients: You have complete control over what goes into your blend. This means you can avoid the anti-caking agents, extra sodium, and other additives often found in store-bought packets.
Versatility: The individual spices in this recipe are staples for many other dishes, including global comfort foods and other beginner-friendly recipes.
In short, while the initial shopping trip may cost more, making your own taco seasoning saves money, delivers better flavor, and gives you full control over the ingredients. It’s a simple kitchen hack that really pays off!
This homemade alfredo sauce recipe is a rich and creamy sauce perfect for pasta, made from a few simple ingredients. The classic version combines butter, heavy cream, and freshly grated Parmesan cheese, which are gently heated until smooth and emulsified. Garlic, salt, and pepper are often added for extra flavor.
A rich, creamy alfredo sauce coating every strand of pasta is truly irresistible. This classic comfort food often brings back memories of favorite restaurant meals. But what if you could create that same velvety, flavorful experience at home? It’s not only possible—it’s surprisingly simple. Many home cooks are put off by complex recipes or have been disappointed by sauces that just didn’t turn out right. That’s where we come in.
At Recipesmondial, we believe delicious cooking should be approachable and stress-free. Forget bland store-bought options and overly technical instructions. This guide provides easy, step-by-step instructions on how to make the best homemade alfredo sauce you’ve ever tasted. Perfect for beginners and seasoned cooks alike, our recipe ensures a consistently rich and creamy result every single time. It will transform your simple dinner recipes into something extraordinary. Get ready to build your kitchen confidence and discover how easy flavorful meals can be.
Why Will You Love This Homemade Alfredo Sauce Recipe?
A professional food photography, photorealistic, high-quality food magazine photo of a generous serving of perfectly cooked fettuccine pasta coated in a rich, creamy, homemade Alfredo sauce, garnished with freshly chopped parsley and a sprinkle of grated Parmesan cheese. The dish is presented in a warm, inviting ceramic bowl on a rustic wooden table, with soft, natural lighting creating a comforting and appetizing scene. Emphasize the silky texture of the sauce and the fresh ingredients, typical of high-end cookbook visuals. No artistic interpretations or illustrations.
Are you ready to transform your dinner table? This homemade alfredo sauce recipe is a true game-changer, delivering a world of creamy, rich flavor that’s so much better than anything from a jar. It’s guaranteed to become a new family favorite.
We understand that home cooks can feel overwhelmed by complex recipes or struggle to plan quick family-friendly meals. This simple recipe is designed to solve those problems. With our clear, step-by-step guidance, you’ll gain confidence in the kitchen.
Here’s why you’ll love making this alfredo sauce at home:
Unbeatable Taste and Freshness: Made with fresh ingredients, this homemade alfredo sauce delivers an incredible, rich flavor that tastes like a gourmet meal, proving it’s far superior to store-bought options.
Effortlessly Easy: You don’t need to be an expert chef. This alfredo recipe features simple, step-by-step instructions perfect for beginners, so you can create a delicious sauce with ease.
Quick Meal Solution: Facing a busy weeknight? No problem. This easy recipe comes together quickly, making it the ideal solution for fast lunches or family dinners.
Perfectly Creamy Texture: Achieve a perfectly velvety and smooth consistency every time. Our method ensures the sauce will coat your pasta beautifully for a restaurant-quality result.
Versatile and Family-Friendly: This sauce pairs wonderfully with many dishes beyond pasta, like chicken, shrimp, or steamed vegetables. It’s a fantastic base for countless family-friendly meals, so get creative with your additions!
Build Your Confidence: Successfully making this delicious sauce from scratch is a huge confidence booster. You’ll feel proud of what you create, and Recipesmondial helps you enjoy a stress-free cooking experience.
Save Money and Enjoy Quality: Dining out for alfredo can be costly. Making it at home is not only budget-friendly but also gives you complete control over the quality of the ingredients.
This recipe will transform your kitchen experience. You’ll move from uncertainty to confidence, creating delicious and visually appealing meals. Discover new flavors and find the joy in approachable home cooking with Recipesmondial.
What Ingredients Do You Need for Classic Alfredo Sauce?
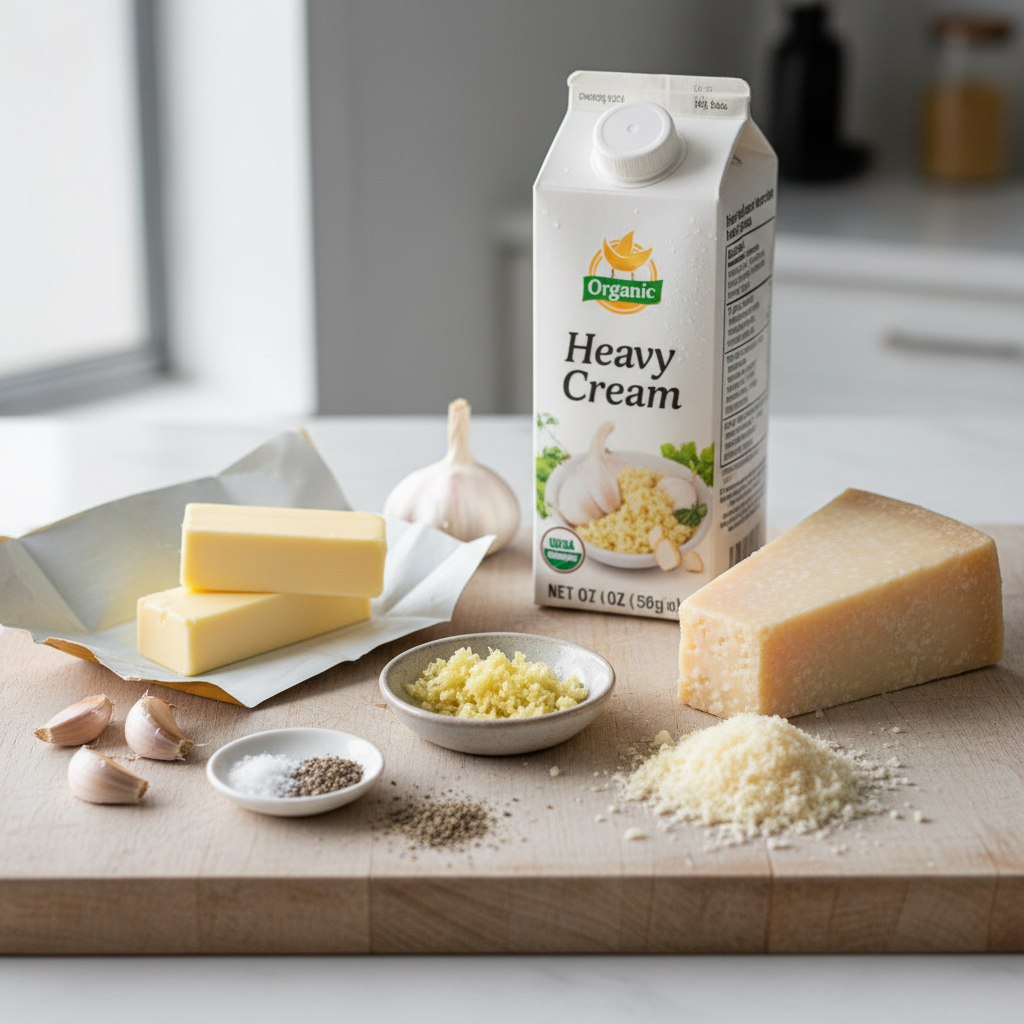
A professional food photography, photorealistic, high-quality food magazine photo of the essential ingredients for classic Alfredo sauce, meticulously arranged on a clean, light-colored kitchen countertop or a rustic wooden board. The composition should be an inviting flat lay, featuring sticks of unsalted butter, a carton of fresh heavy cream, whole garlic cloves alongside some minced garlic, a block of high-quality Parmesan cheese (with a small pile of freshly grated Parmesan next to it), and a small dish of salt and black pepper. The lighting is soft and even, highlighting the freshness and simplicity of the ingredients, resembling high-end cookbook photos. No artistic interpretations or illustrations.
Core Ingredients
The best homemade alfredo sauce starts with a few simple, high-quality ingredients—no fancy tools or a long shopping list required. Our goal is to make delicious, stress-free meals accessible to everyone. Let’s gather the essentials for that rich, creamy classic you’ll love.
Here’s what you’ll need for a truly classic, flavorful alfredo sauce:
Unsalted Butter (1/2 cup or 1 stick): This forms the rich base of your sauce. Using unsalted butter allows you to control the saltiness while helping to develop a luxurious texture.
Heavy Cream (2 cups): As the star of the show, heavy cream provides the signature creamy texture that makes this sauce so incredibly indulgent.
Freshly Grated Parmesan Cheese (1 ½ cups, packed): For an authentic, nutty flavor, freshly grated Parmesan is non-negotiable. We recommend Parmigiano-Reggiano. Pre-grated varieties contain anti-caking agents that can create a gritty texture, but fresh cheese melts beautifully into a silky-smooth sauce.
Garlic (2-3 cloves, minced): Freshly minced garlic adds an aromatic depth, infusing the sauce with a warm, savory note that isn’t overpowering.
Salt (to taste): Seasoning is key. Start with a small amount and adjust to your preference, keeping in mind that Parmesan cheese is naturally salty.
Freshly Ground Black Pepper (to taste): A dash of freshly ground black pepper adds a subtle warmth and helps brighten the sauce’s rich flavors.
Optional Add-ins for Extra Flavor
While the classic recipe is amazing on its own, you can easily customize it. These optional add-ins introduce new dimensions of flavor, allowing you to create your perfect version of this family-friendly meal.
Nutmeg (a pinch): A secret ingredient for many chefs, a tiny dash of freshly grated nutmeg enhances the nutty notes of the Parmesan and adds a sophisticated warmth to the sauce.
White Pepper (a pinch): For a milder pepper flavor that won’t add black specks to your sauce, use white pepper. It provides a more subtle heat.
Cream Cheese (2 tablespoons): For an even thicker and tangier sauce, stir in a bit of cream cheese. This makes the sauce extra decadent and is a great trick for achieving maximum creaminess.
Lemon Juice (1 teaspoon, fresh): A small squeeze of fresh lemon juice at the end brightens the entire sauce, cutting through the richness with a touch of zing. Be sure to use it sparingly to avoid a sour taste.
Pasta Water (1/4 – 1/2 cup): This starchy water is the secret to a perfect sauce consistency. Before draining your pasta, reserve about a half-cup. Adding it to the alfredo helps emulsify the fats and creates a silky texture that clings beautifully to the pasta.
Cooked Chicken or Shrimp: To turn your alfredo sauce into a complete meal, add a protein like cooked, sliced chicken breast or sautéed shrimp. It’s a simple way to create a quick and flavorful dinner.
How to Make Alfredo Sauce: A Step-by-Step Guide
A professional food photography, photorealistic, high-quality food magazine photo capturing a pivotal moment in making homemade Alfredo sauce. A real human home cook’s hands (visible, clean, and warm) are gently stirring a wooden spoon or whisk into a simmering, rich, creamy Alfredo sauce in a gleaming stainless steel saucepan on a stovetop. Freshly grated Parmesan cheese is being incorporated, creating visible swirls of melting cheese into the smooth, bubbling sauce. Steam is subtly rising, and the kitchen background is softly blurred to keep focus on the action. The scene evokes a friendly, helpful, and approachable cooking atmosphere, typical of high-end cookbook visuals. No artistic interpretations or illustrations.
Making a delicious, creamy Alfredo sauce at home is easier than you think. Our step-by-step guide will help you create a rich, flavorful sauce that rivals any restaurant’s version. Perfect for beginner cooks, this recipe is a fantastic addition to any family meal. Get ready for enjoyable, approachable home cooking.
Before you begin, gather the core ingredients for this classic sauce:
1/2 cup (113g) unsalted butter
2 cloves garlic, minced
2 cups (480ml) heavy cream
1 1/2 cups (150g) freshly grated Parmesan cheese
1/2 teaspoon salt
1/4 teaspoon black pepper
Optional: Pinch of freshly grated nutmeg
Now, let’s get cooking! Follow these simple steps for a perfect Alfredo sauce:
Melt the Butter and Sauté Garlic: In a medium saucepan over medium heat, melt the unsalted butter. Once melted, add the minced garlic and sauté for about 1 minute until fragrant. Be careful not to let the garlic brown.
Add Heavy Cream and Simmer: Pour in the heavy cream and stir to combine. Bring the mixture to a gentle simmer, then reduce the heat to low. Keeping the sauce at a low simmer, without boiling, is key to creating a smooth base.
Gradually Incorporate Parmesan Cheese: Remove the saucepan from the heat to prevent the sauce from breaking. Slowly whisk in the freshly grated Parmesan cheese, a little at a time, until the sauce is smooth and thick. The residual heat will melt the cheese perfectly.
Season to Taste: Stir in the salt and black pepper. Taste the sauce and adjust the seasonings if needed. For an extra layer of flavor, add the optional pinch of freshly grated nutmeg, which enhances creamy dishes [1].
Serve Immediately: Your homemade Alfredo sauce is ready! For the best texture, toss it immediately with your favorite cooked pasta, such as fettuccine. It also pairs wonderfully with chicken, shrimp, or roasted vegetables.
Tips for Perfect, Creamy Alfredo Every Time
To achieve a perfect, restaurant-quality Alfredo sauce, keep these simple tricks in mind. They will help you get the ideal flavor and texture with every batch.
Use Freshly Grated Parmesan: This cannot be stressed enough! Pre-grated cheese contains anti-caking agents that can make your sauce gritty or prevent it from melting smoothly. For the best flavor and texture, always grate your own Parmesan.
Don’t Overheat the Sauce: High heat can cause the cream to separate and the cheese to become stringy. Always remove the sauce from direct heat before adding the cheese. The warmth of the cream is enough to melt it perfectly.
Whisk Constantly: Continuous whisking helps emulsify the fat and dairy, creating a uniformly smooth and luscious texture. This step is crucial for preventing clumps.
Adjust Consistency: If your sauce is too thick, stir in a splash of warm pasta water until you reach your desired consistency. If it’s too thin, simmer it gently on low heat for another minute or two, stirring constantly. Remember, the sauce will thicken as it cools.
Serve Promptly: Alfredo sauce is best enjoyed fresh, as its texture can change upon cooling. For the best experience, have your pasta cooked and ready to go as soon as the sauce is finished.
How Do You Make Alfredo Sauce Without Heavy Cream?
Alfredo Sauce Recipe with Milk
Craving rich, creamy Alfredo sauce but don’t have heavy cream? You can make a delicious, lighter version right at home. This recipe shows you how to achieve the classic flavor and texture you love using simple, everyday ingredients.
Using milk as the base creates a sauce that’s satisfying without being overly rich. It’s a simple, beginner-friendly recipe that comes together quickly, making it a perfect choice for a family-friendly meal.
Ingredients for Alfredo with Milk:
2 tablespoons unsalted butter
2 tablespoons all-purpose flour
2 cups whole milk (or 2% milk for a slightly lighter sauce)
Melt the Butter: In a medium saucepan, gently melt the butter over medium heat.
Make a Roux: Whisk in the flour and cook for 1 minute, stirring constantly. This creates a roux, which will thicken your sauce.
Add Milk Gradually: To prevent lumps, slowly pour in the milk while whisking continuously until the mixture is completely smooth.
Simmer and Thicken: Bring the sauce to a gentle simmer, whisking often, until it thickens. This should take about 5-7 minutes.
Stir in Cheese: Remove the pan from the heat and stir in the freshly grated Parmesan cheese. Whisk until the cheese has melted completely.
Season: Add the garlic powder, salt, pepper, and nutmeg (if using). Taste the sauce and adjust the seasoning as needed.
Tips for Success:
Use Whole Milk: For the creamiest result, whole milk is best. However, 2% milk also works well.
Whisk Constantly: Whisking is key to a smooth, lump-free sauce and helps prevent scorching on the bottom of the pan.
Fresh Parmesan is Best: Pre-grated cheese often contains anti-caking agents that can make your sauce gritty. Grate your own for the smoothest texture.
Adjust Thickness: If your sauce is too thick, whisk in a splash of warm milk. If it’s too thin, allow it to simmer for a few more minutes.
Alfredo Sauce Recipe with Cream Cheese
For an incredibly rich and tangy Alfredo sauce without heavy cream, try using cream cheese. This method is quick, simple, and guarantees a velvety smooth texture every time.
Cream cheese also adds stability, creating a sauce that holds up well. It’s the perfect solution for a delicious and easy weeknight meal.
Ingredients for Alfredo with Cream Cheese:
2 tablespoons unsalted butter
2 cloves garlic, minced
8 ounces cream cheese, softened and cut into cubes
1 cup milk (whole or 2%) or chicken broth
1/2 cup freshly grated Parmesan cheese
1/4 teaspoon salt
Pinch of black pepper
Optional: Fresh parsley for garnish
Step-by-Step Instructions:
Sauté Garlic: Melt the butter in a medium saucepan over medium-low heat. Add the minced garlic and sauté for about 1 minute until fragrant, being careful not to let it brown.
Melt the Cream Cheese: Add the cubed cream cheese and about a quarter cup of the milk or broth to the pan. Whisk constantly until the cream cheese melts completely into a smooth, lump-free sauce.
Gradually Add Liquid: Slowly whisk in the remaining milk or broth until the sauce is creamy and well combined.
Stir in Parmesan: Remove the pan from the heat and stir in the freshly grated Parmesan cheese. Whisk until it fully melts into the sauce.
Season: Season with salt and pepper, then taste and adjust. Stir in fresh parsley just before serving, if desired.
Tips for Success:
Soften Cream Cheese: Using room-temperature cream cheese is essential for helping it melt easily and smoothly into the sauce.
Low Heat is Key: Cook over medium-low heat to prevent the cream cheese from separating or scorching.
Whisk Thoroughly: Continuous whisking is the key to preventing lumps and achieving a silky-smooth texture.
Storage: This sauce will thicken as it cools. When reheating, you can loosen it with a splash of milk or broth.
What Are The Top Tips for Perfect, Creamy Alfredo Every Time?
Use Freshly Grated Parmesan
For the best homemade alfredo sauce, skip the pre-grated cheese. Freshly grated Parmesan is a game-changer because it melts beautifully into a silky, smooth sauce. Pre-grated options often contain anti-caking agents, which can make your sauce gritty and prevent it from becoming truly creamy.
For the best results, choose a good quality block of Parmesan and grate it yourself just before adding it to the sauce. This simple step elevates your alfredo to restaurant quality [2]. You will immediately notice the difference in both texture and flavor, a key tip for a truly rich and authentic alfredo recipe.
Don’t Overheat the Sauce
A common mistake is overheating the alfredo sauce. High heat can cause dairy to separate, resulting in a broken, oily sauce instead of a smooth, creamy one.
To avoid this, cook the sauce gently over low to medium-low heat, stirring constantly as it thickens. Once the sauce reaches your desired creaminess, remove it from the heat. This careful approach ensures a perfect emulsification, keeping your alfredo sauce silky and smooth every time [3].
How to Thicken Your Sauce Naturally
A classic alfredo sauce doesn’t need flour or cornstarch for thickening. Instead, it gets its rich body from the careful combination of butter, cream, and cheese. Here’s how to achieve that perfect thickness:
Reduce Gently: Let the cream simmer slowly over low heat. As some of the liquid evaporates, the sauce will naturally thicken. This process also concentrates the flavors, creating a richer base for your homemade alfredo sauce.
Emulsify with Pasta Water: This is a secret weapon for many Italian sauces. Reserve some of the starchy water from cooking your pasta. Adding a splash or two to your sauce at the end helps bind everything together, as the starches in the water help create a smooth, glossy emulsion [4].
Add More Cheese: As you stir in your freshly grated Parmesan, it will naturally thicken the sauce even more. The melting cheese helps create that signature creamy texture. Continue adding it gradually until you reach your preferred consistency.
By using these natural methods, you’ll create a beautifully thick and luxurious alfredo sauce. It will be full of flavor and perfectly creamy, making delicious, family-friendly meals easier than ever.
What Can You Serve with Alfredo Sauce?
Pasta Pairings
To help your Alfredo sauce truly shine, choose a pasta that can hold onto its creamy richness. Shapes with ample surface area or plenty of nooks and crannies are ideal because they prevent the sauce from slipping off, ensuring every bite is wonderfully flavorful.
Here are some classic, beginner-friendly pasta choices that pair beautifully with homemade Alfredo sauce, perfect for your next family-friendly meal:
Fettuccine: The traditional choice for a reason, these flat, wide strands are perfect for generously coating with a creamy homemade alfredo sauce. It’s a classic pairing for a hearty, satisfying dish.
Linguine: Similar to fettuccine but slightly narrower, linguine also holds the rich sauce well. It offers a slightly lighter feel without sacrificing any flavor.
Penne: For those who prefer a shorter pasta, penne is a fantastic option. Its tubular shape and ridges capture the sauce both inside and out, making it a delicious choice and great for kids.
Rigatoni: Similar to penne but larger, this ridged tube pasta is excellent for absorbing even more sauce, delivering an extra creamy experience in every bite.
Spaghetti or Bucatini: Though less traditional, these long, round pastas are convenient options that work well. Bucatini is especially effective, as its hollow center delivers extra sauce with each bite, making it great for a quick and simple dinner recipe.
Pro Tip: Always cook your pasta al dente, meaning it’s still firm to the bite. It will finish cooking in the warm Alfredo sauce, which prevents it from becoming mushy. This simple step for beginner-friendly recipes makes a huge difference!
Protein Additions
Adding a protein like chicken or shrimp transforms pasta Alfredo into a complete and satisfying flavorful meal made easy. It’s an excellent way to make your alfredo sauce recipe a balanced and family-friendly meal.
Here’s how to prepare these classic additions to mix into your homemade alfredo sauce:
Chicken for Alfredo
A beloved comfort food, Chicken Alfredo features juicy, tender chicken breast that pairs perfectly with the creamy sauce. This easy recipe addition truly completes the meal.
Step-by-Step Cooking Guidance:
Prepare the Chicken: Take 1-2 boneless, skinless chicken breasts (about 1 pound total) and pat them dry with paper towels.
Season Well: Season both sides generously with salt, black pepper, garlic powder, and a touch of paprika for extra flavor.
Heat Your Pan: Heat 1 tablespoon of olive oil or butter in a large skillet over medium-high heat.
Cook the Chicken: Place the seasoned chicken breasts in the hot pan and cook for 5-7 minutes per side, until golden brown and cooked through. The internal temperature should reach 165°F (74°C).
Rest and Slice: Transfer the cooked chicken to a cutting board and let it rest for 5 minutes before slicing it into thin strips or dicing it. This keeps the chicken juicy.
Combine: Gently fold the cooked chicken into your prepared Alfredo sauce and pasta just before serving.
Substitution Idea: You can also use cooked rotisserie chicken. This makes for an even quicker simple dinner recipe. Just shred or dice it and warm it through with the sauce.
Shrimp for Alfredo
For a lighter yet luxurious option, try Shrimp Alfredo. Because shrimp cooks in minutes, it’s ideal for quick meals when you’re short on time.
Step-by-Step Cooking Guidance:
Prepare the Shrimp: Use 1 pound of large raw shrimp, peeled and deveined. Pat them very dry with paper towels.
Season: Toss the shrimp with a pinch of salt, black pepper, and garlic powder.
Heat Your Pan: Heat 1 tablespoon of olive oil or butter in a large skillet over medium-high heat.
Cook the Shrimp: Add the seasoned shrimp to the hot pan in a single layer. Cook for 1-2 minutes per side, just until they turn pink and opaque. Be careful not to overcook the shrimp, or they will become rubbery.
Combine: Stir the perfectly cooked shrimp directly into your alfredo sauce and pasta. Serve immediately to enjoy their tender texture.
Tips for Success: Fresh or frozen shrimp both work great. If using frozen, thaw them completely first and be sure to pat them very dry before cooking to ensure the best sear and texture. This is part of approachable home cooking that delivers great results.
Vegetable Mix-ins
Adding vegetables is a fantastic way to introduce color, texture, and nutrients to your Alfredo, turning it into a more balanced and vibrant meal. This simple trick helps create healthy and balanced meals and makes any easy recipes even more impressive.
Here are some of our favorite vegetables to mix into your homemade alfredo sauce, along with quick prep tips:
Broccoli Florets: A classic pairing for good reason, steamed or lightly blanched broccoli adds a lovely pop of green and a satisfying crunch. Simply steam the florets until they are tender-crisp.
Spinach: Fresh spinach wilts beautifully into hot Alfredo sauce, adding a healthy boost with minimal effort. Simply stir in fresh spinach leaves at the very end; they will wilt in seconds.
Mushrooms: Sliced sautéed mushrooms (like cremini or button) bring an earthy depth of flavor. Sauté them in a separate pan with a little butter and garlic until golden brown.
Peas: Frozen peas are a super convenient addition. Add them to the boiling pasta water during the last minute of cooking, or stir them into the hot sauce to warm through.
Asparagus: Blanched or roasted asparagus spears add an elegant, fresh note that complements the rich sauce. Cut them into bite-sized pieces after cooking.
Bell Peppers: Sautéed strips of red or yellow bell peppers add sweetness and vibrant color, making them perfect for family-friendly meals.
Meal Prep Tip: You can often prepare your vegetables ahead of time. Steam broccoli or blanch asparagus, then store them in the fridge. This makes assembling your simple dinner recipe even quicker on a busy weeknight.
How to Store and Reheat Leftover Alfredo Sauce
Properly Storing Your Homemade Alfredo Sauce
Made too much delicious homemade alfredo sauce? No problem. Proper storage is the key to enjoying those leftovers later, ensuring your sauce stays fresh and safe to eat. Follow these simple steps for stress-free meal prep.
Cool It Quickly: Let your alfredo sauce cool down before storing, but don’t leave it at room temperature for more than two hours. Cooling the sauce quickly helps prevent bacterial growth [5].
Choose an Airtight Container: Once cool, transfer the sauce into a clean, airtight container. This will protect it from air and prevent it from absorbing other odors in your fridge.
Refrigerate Promptly: Place the airtight container in the refrigerator right away. Stored this way, homemade alfredo sauce will last for 3 to 4 days, making it perfect for quick meals throughout the week.
Freezing Considerations (Use with Caution): Freezing alfredo sauce is not recommended because the dairy tends to separate upon thawing, resulting in a grainy texture. However, if you must freeze it, store the sauce in an airtight container for up to two months. Thaw it overnight in the refrigerator and be prepared to whisk it vigorously during reheating to improve the texture.
Reheating Leftover Alfredo Sauce Like a Pro
Reheating alfredo sauce requires a gentle touch to prevent it from separating. The goal is to bring it back to its original creamy consistency. Follow these methods for perfect results every time.
Stovetop Reheating Method (Recommended)
The stovetop is the best way to reheat alfredo sauce because it gives you maximum control over the temperature. This gentle heating method helps maintain the sauce’s rich, smooth texture.
Use Low Heat: Pour the sauce into a saucepan and warm it over low heat. Rushing this process with high heat can cause the cream and butter to separate, making the sauce oily.
Add a Splash of Liquid: The sauce will likely thicken in the fridge. As it warms, add a tablespoon or two of milk, half-and-half, or pasta water to help restore its original creamy texture.
Whisk Constantly: Whisk the sauce gently and continuously as it heats. This will prevent it from sticking to the pan and help the ingredients re-emulsify into a smooth sauce.
Optional: Extra Parmesan: For an even richer taste, stir in a small amount of freshly grated Parmesan cheese at the very end. This adds extra flavor and helps thicken it slightly if needed.
Microwave Reheating Method (Quick and Easy)
If you’re short on time, the microwave is a good option. However, you’ll need to pay close attention to prevent the sauce from separating.
Use a Microwave-Safe Bowl: Place your alfredo sauce in a microwave-safe bowl.
Heat in Short Bursts: Microwave the sauce on medium power (50%) in 30-second intervals. It’s crucial to stop and whisk the sauce thoroughly after each interval.
Add Liquid as Needed: If the sauce is too thick, stir in a splash of milk or half-and-half. Continue heating in short bursts, whisking each time, until it is warm and smooth.
Troubleshooting Separated Alfredo Sauce
If your sauce looks oily or grainy after reheating, don’t worry—it can usually be fixed. Separation is common with dairy-based sauces. Here’s how to bring your sauce back together.
Whisk Vigorously: Remove the pan from the heat and start by whisking the sauce vigorously. Often, this is enough to re-emulsify it.
Add a Touch of Warm Liquid: If whisking alone doesn’t work, slowly drizzle in a tablespoon of warm milk or half-and-half while whisking constantly. This can help the fats and liquids recombine.
Stir in More Cheese: As a last resort, add a small amount of freshly grated Parmesan. The cheese acts as an emulsifier and can help bind the sauce back together. Be sure to add it off the heat or on very low heat while whisking.
With these practical tips, you can confidently store and reheat your homemade alfredo sauce. Now you can enjoy delicious, creamy pasta anytime, reducing food waste and making future meals even easier.
Frequently Asked Questions
What is in a traditional Italian Alfredo sauce recipe?
You might be surprised to learn that a truly traditional Italian Alfredo sauce, often called “Fettuccine Alfredo,” is incredibly simple and relies on just a few high-quality ingredients.
Butter: Rich, unsalted butter is key.
Parmigiano-Reggiano Cheese: This must be freshly grated. It provides the essential nutty, salty flavor.
Pasta Water: The starchy water from cooking your pasta helps create a creamy emulsion.
Freshly Cooked Fettuccine: The hot pasta mixes directly with the butter and cheese.
The original recipe, invented in Rome by Alfredo di Lelio, does not include heavy cream. Instead, the creaminess comes from a perfect emulsion of melted butter, cheese, and starchy pasta water [6]. This method creates a lighter, yet incredibly rich, coating for the pasta, proving how simple ingredients can deliver huge flavor.
How do you make a 3 ingredient Alfredo sauce?
For a quick, easy, and family-friendly Alfredo sauce, many home cooks turn to a popular three-ingredient version that greatly simplifies the process.
Here’s how to whip up this beginner-friendly recipe:
Melt Butter: In a saucepan over medium-low heat, melt 1/2 cup (1 stick) of unsalted butter. Keep the heat gentle to prevent burning.
Add Heavy Cream: Pour in 1 1/2 cups of heavy cream. Stir gently and let it warm through for about 2-3 minutes. Do not boil.
Whisk in Parmesan: Gradually whisk in 1 1/2 cups of freshly grated Parmigiano-Reggiano cheese until smooth and melted. Continue to whisk until the sauce thickens slightly.
This method results in a rich, creamy sauce that’s perfect for a quick meal. Just remember to use freshly grated cheese for the best taste and texture. This simple approach makes it enjoyable and stress-free to create a restaurant-quality sauce at home.
Can you use mozzarella in Alfredo sauce?
While you *can* add mozzarella to a white sauce, it is not a typical ingredient in a classic Alfredo recipe. Traditional Alfredo relies on the unique sharp flavor and melting properties of Parmigiano-Reggiano, and mozzarella behaves very differently when heated.
Here’s what to consider about using mozzarella:
Texture: Mozzarella tends to be stringy when melted. This can give your sauce a different, less smooth texture than traditional Alfredo.
Flavor: It has a much milder, less complex flavor compared to Parmesan. Your sauce might lack the signature rich, nutty taste.
Melt: While it melts well, it doesn’t emulsify with butter and cream in the same way Parmesan does.
If you’re looking for a super cheesy, gooey white sauce with a stretchy cheese pull, mozzarella can be a great addition. As a beginner-friendly option, try using a blend of half Parmesan and half low-moisture mozzarella. This gives you some of that cheesy stretch without completely losing the classic Alfredo flavor. Experimenting with blends is a great way to discover the taste your family enjoys most.
What’s the best way to make shrimp Alfredo sauce?
Making shrimp Alfredo is a fantastic way to add protein to this rich and flavorful meal, and it comes together quickly. The key is to cook the shrimp perfectly so they remain tender and juicy.
Here are two easy, step-by-step methods for delicious shrimp Alfredo:
Method 1: Cook Shrimp Separately
Prepare Shrimp: Pat your peeled and deveined shrimp dry. Season them with salt, pepper, and a pinch of garlic powder.
Cook Shrimp: In a separate skillet, melt 1 tablespoon of butter or olive oil over medium-high heat. Add the shrimp and cook for 1-2 minutes per side, until pink and opaque. Don’t overcook them!
Combine: Gently fold the cooked shrimp into your finished homemade Alfredo sauce right before serving.
Method 2: Cook Shrimp in the Saucepan
Sauté Aromatics: In your Alfredo sauce pan, melt 1 tablespoon of butter over medium heat. Add 1-2 cloves of minced garlic and cook for about 30 seconds until fragrant.
Cook Shrimp: Add your seasoned shrimp to the pan. Cook for 1-2 minutes per side until they turn pink. Remove the shrimp from the pan and set aside.
Make Sauce: Proceed with making your Alfredo sauce in the same pan. The delicious flavors from the shrimp and garlic will enhance your sauce.
Add Back: Once the sauce is ready, gently stir the cooked shrimp back in.
Both methods yield delicious results, so choose the one that best fits your cooking style. Either approach will help you create a quick and satisfying meal that makes dinner enjoyable and stress-free.
Sauces, dips, and dressings are liquid or semi-liquid preparations used to add flavor, moisture, and texture to food. Sauces are typically served with a main dish, dips are used for scooping with items like chips or vegetables, and dressings are poured over salads. Making them at home is a simple way to control ingredients and enhance your everyday meals.
Ever feel like your delicious homemade meal is just missing that special something, a secret ingredient that takes it from good to absolutely unforgettable? Or perhaps you’re looking to add a burst of flavor without resorting to store-bought options that can often be packed with unfamiliar ingredients? We’ve all been there, staring at a plate that could use a little extra spark, sometimes feeling overwhelmed by complex recipes or unsure of how to cook healthy, tasty meals quickly. It’s a common challenge for home cooks and busy families alike who want to enjoy cooking without stress, but often find themselves lacking confidence in their cooking skills.
The good news is, elevating your everyday cooking to restaurant-quality status is far simpler than you might imagine, and it starts with incredible homemade sauces, dips, and dressings. At Recipesmondial, we believe that making delicious, flavorful meals should be enjoyable and stress-free for everyone, regardless of your cooking experience. Imagine whipping up a creamy bechamel sauce, a classic white sauce recipe that forms the base of so many dishes, or a vibrant, tangy yum yum sauce recipe for your grilled favorites, all with easy-to-follow, step-by-step cooking guidance. This simple approach to creating flavorful meals made easy will transform your kitchen confidence.
This ultimate guide is designed to empower you, offering a treasure trove of simple dinner recipes, quick breakfast ideas, and healthy snacks that are perfectly complemented by our collection of approachable home cooking staples. We’ll walk you through everything from mastering a foundational béchamel sauce recipe to exploring global flavors, practical meal prep tips, and even delightful sweet toppings. You’ll learn basic cooking skills and discover new simple dishes, proving that cooking confidently and eating well every day is absolutely within your reach. But before we dive into the delicious details, let’s explore why making your own sauces, dips, and dressings is a game-changer for any home cook.
Why Should You Make Your Own Sauces, Dips, and Dressings?
Are you ready to transform your everyday meals? Making your own sauces, dips, and dressings at home is a game-changer. It’s an easy way to elevate any dish. Many home cooks feel overwhelmed by complex recipes. However, homemade condiments are often simple to prepare. You don’t need to be a gourmet chef. Recipesmondial helps you with step-by-step cooking guidance. We make cooking enjoyable for everyone.
You might be unsure how to cook healthy, tasty meals quickly. Homemade sauces offer a fantastic solution. They bring vibrant flavors to quick breakfasts, easy lunches, and simple dinner recipes. Forget struggling to plan family-friendly meals. With a few basic ingredients, you can create magic. Discover why making your own is such a rewarding experience:
Unbeatable Flavor and Freshness: Store-bought options often lack depth. They sometimes contain artificial flavors. When you make a basil pesto recipe, the fresh basil truly shines. A homemade salsa recipe bursts with garden-fresh taste. You control every ingredient. This results in incredibly flavorful meals made easy.
Healthier Choices and Dietary Control: Ever checked the label on a bottle of dressing? Many contain hidden sugars, excessive sodium, and preservatives. Making your own puts you in charge. You can reduce salt, choose healthier oils, and avoid allergens. This is ideal for family-friendly meals and those seeking healthy and balanced meals. For example, a simple white sauce recipe or homemade alfredo sauce lets you pick your ingredients. You can make adjustments for dietary needs.
Cost-Effectiveness and Budget Cooking: Buying specialty sauces can get expensive. Crafting them from scratch is often much cheaper. Basic ingredients like vinegar, oil, herbs, and spices are budget-friendly. This helps you save money while enjoying delicious food. It’s a smart approach to budget cooking.
Unleash Creativity and Boost Confidence: Cooking should be fun, not stressful. Creating your own sauces allows for endless experimentation. Start with a foundational bechamel sauce. Then add cheese for an easy cheese sauce. Or try a yum yum sauce recipe and adjust the spice. This helps you discover new simple dishes. You will build confidence in cooking skills along the way.
Convenience and Smart Meal Prep: Many sauces, like homemade taco seasoning or a simple vinaigrette, come together in minutes. You can also make bigger batches. Store them for quick additions to meals throughout the week. This is an excellent meal prep tip. It ensures you always have flavor enhancers on hand.
Avoidance of Unwanted Additives: Processed foods often include emulsifiers, thickeners, and colorings. Making your own means you know exactly what you’re eating. You can skip artificial ingredients entirely [1]. This ensures pure, wholesome goodness in every bite.
At Recipesmondial, we believe cooking should be stress-free and enjoyable. Our approachable home cooking guides help you master these essential building blocks. From a classic pesto recipe for pesto pasta to a versatile alfredo sauce recipe, we provide clear instructions. Say goodbye to bland meals and hello to a world of flavor. We offer the easy recipes you need to cook confidently and eat well every day.
Essential Kitchen Tools for Sauce Making
Blenders and Food Processors
Creating silky smooth sauces, vibrant pestos, or chunky salsas is simple with the right tools. Blenders and food processors are your best friends for achieving the perfect texture. They help you make delicious results without being overwhelmed by complex recipes.
Choosing Your Blending Tool
Different tools suit different sauce needs. Consider these options for your kitchen:
Immersion Blender: Also known as a stick blender. It’s fantastic for blending hot liquids right in the pot. This means less cleanup! You can use it to smooth out a white sauce or a creamy tomato sauce.
Countertop Blender: This is a classic for a reason. A powerful countertop blender makes light work of tough ingredients. It’s perfect for creating a super smooth pesto sauce recipe or a creamy dressing.
Food Processor: More than just blending, a food processor can chop, mince, and puree. It’s ideal for making a chunky salsa recipe or a fresh basil pesto recipe. It handles thicker mixtures with ease.
Tips for Blending Success
These tools make flavorful meals made easy. Follow these simple steps for great results:
Start Slow: Begin blending on a low speed. Gradually increase the power. This prevents splashes and helps ingredients combine evenly.
Add Liquids Gradually: For thicker sauces like a homemade alfredo sauce, add liquids a little at a time. This helps you control the consistency.
Scrape Down Sides: Pause your machine and scrape down any ingredients clinging to the sides. This ensures everything gets blended smoothly.
Safety First: Never overfill your blender or food processor. Always secure the lid tightly before starting.
Whisks and Spatulas
These humble tools are absolute heroes for sauce making. They ensure everything is perfectly combined and prevent lumps. With a good whisk and spatula, you will build confidence in the kitchen and achieve wonderful textures.
Essential Whisks for Smooth Sauces
A whisk is key for emulsifying and preventing lumps. Different whisks serve different purposes:
Balloon Whisk: This is your all-around performer. Its many wires are perfect for aerating and combining ingredients. Use it for a light béchamel sauce or to mix up an egg-based dressing.
Flat Whisk (or Roux Whisk): The flat shape makes it ideal for reaching into the corners of your saucepan. It’s excellent for stirring a roux for gravy or a classic white sauce. It ensures no sticky bits are left behind.
French Whisk: Similar to a balloon whisk but narrower. It’s great for thicker sauces or when you need more control in smaller bowls.
The Versatility of Spatulas
Spatulas are more than just scrapers. They are invaluable for stirring, folding, and ensuring you get every last drop of your delicious creation.
Silicone Spatula: These are heat-resistant and non-scratch. They are perfect for stirring sauces in non-stick pans. They also excel at scraping down bowls. This ensures no tasty bits go to waste!
Rubber Spatula: Similar to silicone but often less heat-resistant. It’s great for folding delicate mixtures or for general scraping tasks.
Tips for Using Whisks and Spatulas
Mastering these basic tools is a foundational cooking skill:
Prevent Lumps: When making a white sauce recipe or a béchamel sauce recipe, whisk constantly as you add liquid. This stops lumps from forming.
Scrape Thoroughly: Use your spatula to scrape the bottom and sides of your pot. This prevents scorching and ensures even cooking.
Fold Gently: For delicate sauces, use a spatula to fold ingredients together. This maintains airiness and texture.
Saucepans and Skillets
Every great sauce starts in a reliable pot. Choosing the right saucepan or skillet is crucial for successful sauce making. These tools are essential for quick, reliable meal solutions and flavorful results.
Your Saucepan Collection
Saucepans come in various sizes and materials. Each is suited for different tasks:
2-Quart Saucepan: This is a versatile, everyday size. It’s perfect for small batches of alfredo sauce or heating up a homemade taco seasoning mixture.
4-Quart Saucepan: Ideal for larger family-friendly meals. Use it for simmering a rich marinara sauce or cooking a bigger batch of gravy.
Stainless Steel: Excellent for even heat distribution and browning. It’s durable and easy to clean. Many chefs prefer stainless steel for precise temperature control.
Non-Stick: Great for delicate sauces that tend to stick. Think creamy sauces or reheating. However, avoid metal utensils which can damage the coating.
Skillets for Sautéing and Reducing
Skillets offer a wider surface area, which is great for certain sauce preparations:
10-Inch Skillet: A workhorse in any kitchen. Use it for sautéing aromatics before adding them to a sauce. It’s also great for reducing sauces quickly.
Cast Iron Skillet: Known for its superior heat retention. It’s fantastic for developing rich flavors. You can deglaze a cast iron skillet to capture all those delicious browned bits for a sauce base.
Non-Stick Skillet: Ideal for sauces where you want minimal sticking. It’s perfect for making a quick yum yum sauce or frying ingredients for a salsa recipe.
Saucepan and Skillet Tips
Selecting the right cookware makes cooking enjoyable for everyone:
Match Size to Task: A too-large pot can cause sauces to reduce too quickly. A too-small pot can boil over.
Heavy Bottom: Look for pans with a thick, heavy bottom. This prevents scorching. It also distributes heat evenly.
Lids are Key: A tight-fitting lid helps simmer sauces and prevents evaporation. It also speeds up heating.
Measuring Tools and Storage Jars
Precision is key to consistent and delicious sauces. Measuring tools ensure your recipes turn out perfectly every time. Storage jars help with meal prep and keep your homemade creations fresh. This gives you reliable results and less food waste.
Accurate Measuring Tools
Having the right measuring equipment ensures your sauces are balanced in flavor and consistency:
Liquid Measuring Cups: These are usually clear with a spout. They let you read the liquid level at eye level. This prevents over or under-measuring.
Dry Measuring Cups: Designed for scooping and leveling dry ingredients. This includes flour for a white sauce or spices for homemade taco seasoning.
Measuring Spoons: Essential for small quantities of spices, extracts, or thickeners. Accurate spoons prevent an overpowering flavor.
Kitchen Scale: For ultimate precision, especially in baking or when scaling recipes. Many professional chefs prefer weighing ingredients.
Storing Your Homemade Sauces
Once you’ve made your delicious sauces, proper storage keeps them fresh and ready for your next meal:
Airtight Glass Jars: These are excellent for storing sauces, dressings, and dips. Glass doesn’t retain odors or stains. They are also easy to clean.
Food-Grade Plastic Containers: A lighter, shatterproof option. Look for BPA-free containers. Ensure they have tight-fitting lids.
Smart Storage and Measuring Practices
These simple tips help you plan weekly meals efficiently and enjoy stress-free cooking:
Label Everything: Always label your stored sauces with the name and date. This helps you keep track of freshness.
Cool Before Storing: Allow hot sauces to cool completely before transferring them to storage containers. This prevents condensation and keeps them safe.
Portion Control: Store sauces in meal-sized portions. This makes it easy to grab exactly what you need. It also minimizes waste.
Clean and Dry: Ensure all measuring tools and storage containers are clean and completely dry before use.
Foundational Creamy Sauces (The Mother Sauces)
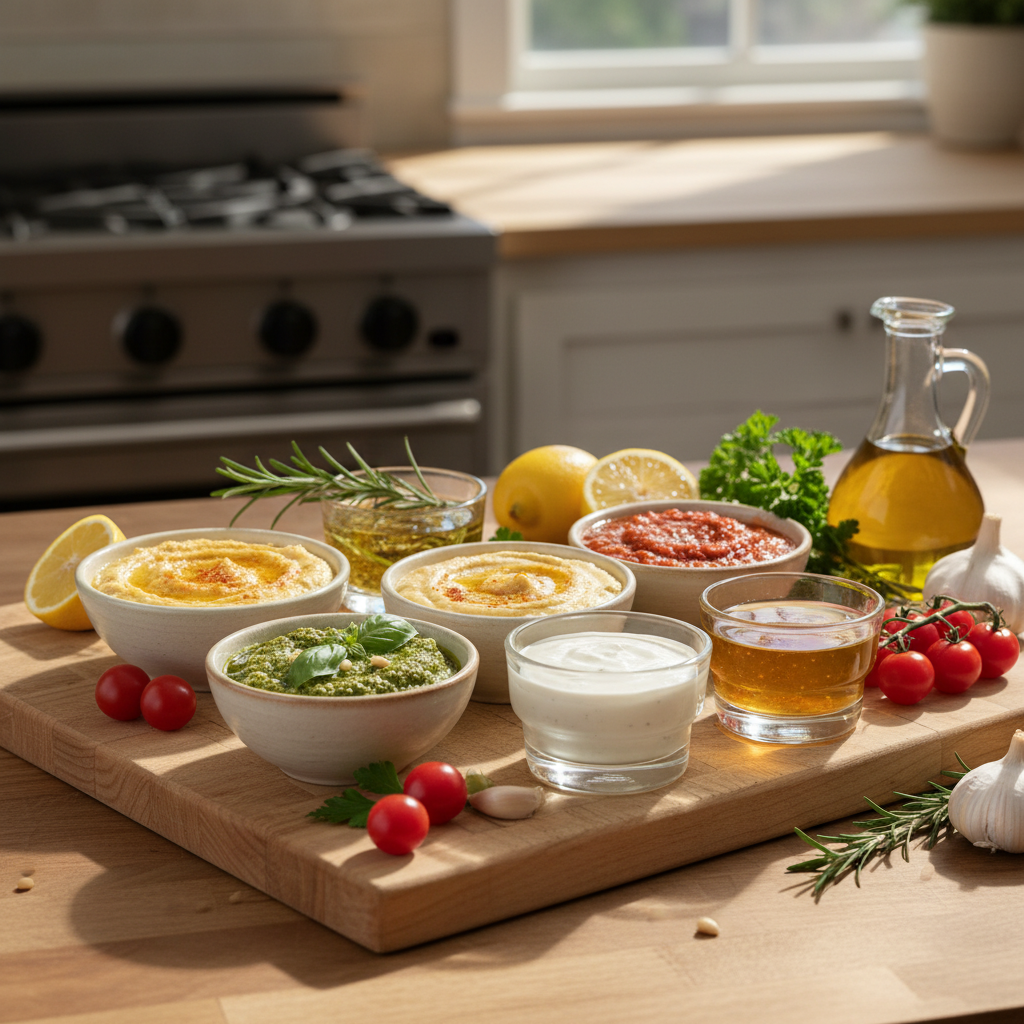
Professional food photography, photorealistic, high-quality food magazine photo of five classic ‘mother sauces’ (Béchamel, Velouté, Espagnole, Hollandaise, Tomato) displayed in small, elegant white ceramic bowls on a warm, rustic wooden surface. Each sauce has a distinct, appealing color and texture. Béchamel is creamy white with a sprinkle of nutmeg, Velouté is a golden blonde, Espagnole is a rich dark brown, Hollandaise is a glossy, vibrant yellow, and Tomato sauce is a bright, deep red with a fresh basil leaf. The lighting is soft, natural, and inviting, highlighting the textures and colors. The background is subtly blurred, maintaining focus on the sauces.
Welcome to the heart of creamy goodness! Understanding these foundational sauces is a game-changer for any home cook. They unlock countless delicious possibilities. Think of them as the building blocks for countless family-friendly meals. Learning these beginner-friendly recipes will boost your kitchen confidence. You will soon be cooking confidently and creating flavorful meals made easy.
These “Mother Sauces” are versatile. They transform simple ingredients into something special. They are a must-know for anyone wanting to enjoy cooking without stress. Let’s dive into these essential, approachable home cooking techniques.
How to make a simple béchamel sauce?
Béchamel sauce is a true classic. It is one of the five original “Mother Sauces” of French cuisine [2]. This means many other sauces stem from it. Also known as white sauce, it is incredibly easy to master. It uses just three main ingredients. You likely already have them in your pantry. This sauce is perfect for enriching dishes. It provides a creamy, comforting base. It’s a great example of simple dinner recipes that shine.
What you’ll need:
2 tablespoons unsalted butter
2 tablespoons all-purpose flour
2 cups whole milk (or 2% milk)
1/4 teaspoon salt
Pinch of white pepper or black pepper
Optional: Pinch of nutmeg
Step-by-step cooking guidance:
Melt the Butter: Place a medium saucepan over medium heat. Add the butter. Let it melt completely. Swirl it around the pan.
Add the Flour (Make a Roux): Sprinkle the flour into the melted butter. Whisk constantly. Cook for 1-2 minutes. This mixture is called a “roux.” It should look like a pale paste. It will smell slightly nutty.
Gradually Add Milk: Slowly pour about 1/2 cup of milk into the roux. Whisk continuously. This prevents lumps. Once smooth, add another 1/2 cup. Repeat until all the milk is incorporated.
Simmer and Thicken: Continue whisking over medium heat. Bring the sauce to a gentle simmer. Do not boil vigorously. It will thicken as it heats. This usually takes 5-7 minutes.
Season: Remove the pan from the heat. Stir in the salt, pepper, and nutmeg (if using). Taste and adjust seasonings as needed.
Helpful Tips for a Perfect Béchamel:
Prevent Lumps: Always add cold milk to a warm roux, or warm milk to a cold roux. This temperature difference helps prevent lumps. Whisk vigorously throughout the process.
Consistency: For a thicker sauce, cook a little longer. For a thinner sauce, whisk in a splash more milk.
Make Ahead: You can make béchamel a day ahead. Store it covered in the fridge. Reheat gently over low heat. Add a splash of milk if it’s too thick.
Once you master béchamel, a delicious cheese sauce is just moments away! This recipe is incredibly versatile. It is perfect for turning simple meals into indulgent, family-friendly meals. Say goodbye to store-bought packets. This homemade version is tastier and fresher. It’s a true staple for approachable home cooking.
What you’ll need:
2 cups prepared Béchamel Sauce (from the recipe above)
1 1/2 cups shredded cheddar cheese (sharp or mild)
1/2 cup shredded Monterey Jack or Gruyère cheese (for extra creaminess and flavor)
Pinch of cayenne pepper (optional, for a little kick)
Step-by-step cooking guidance:
Reheat Béchamel: If your béchamel is cold, gently reheat it in a saucepan over low heat. Whisk until smooth and warm.
Add Cheese: Reduce heat to very low. Add the shredded cheeses in batches. Stir constantly with a whisk or spatula. Do not let the sauce boil.
Melt Smooth: Continue stirring until all the cheese is melted. The sauce should be smooth and creamy.
Season: Stir in the dry mustard and cayenne pepper, if using. Taste and adjust seasonings. Add more salt or pepper if needed.
Serve Immediately: Cheese sauce is best served fresh.
Variations for your cheese sauce:
Spicy Cheese Sauce: Add a diced jalapeño while melting the butter for the béchamel. Or, stir in 1/4 teaspoon of chili powder.
Different Cheeses: Experiment with different cheese blends. Provolone, fontina, or even a smoked gouda work well.
Herby Cheese Sauce: Stir in 1 tablespoon of fresh chopped chives or parsley at the end.
How to enjoy your cheese sauce:
Pour over nachos for a quick, delicious snack.
Drizzle on steamed broccoli or cauliflower.
Serve with French fries or baked potatoes.
Create a gourmet grilled cheese sandwich.
Classic Homemade Gravy (Brown & Chicken)
Gravy is the ultimate comfort food accompaniment. It adds richness to any roast. Knowing how to make a classic gravy is a valuable skill. It transforms pan drippings into liquid gold. This easy recipe will guide you through both brown (beef-based) and chicken gravies. You will be serving up flavorful meals made easy in no time.
What you’ll need:
For Brown Gravy:
2 tablespoons pan drippings (from roast beef or other red meat)
2 tablespoons all-purpose flour
2 cups beef broth (low sodium preferred)
Salt and freshly ground black pepper to taste
Optional: 1 teaspoon Worcestershire sauce for depth
For Chicken Gravy:
2 tablespoons pan drippings (from roasted chicken or turkey)
2 tablespoons all-purpose flour
2 cups chicken broth (low sodium preferred)
Salt and freshly ground black pepper to taste
Optional: Pinch of dried thyme or sage
Step-by-step cooking guidance:
Prepare Drippings: After roasting meat, remove the meat from the pan. Pour the pan drippings into a heatproof bowl. Let it sit for a few minutes. The fat will separate and rise to the top. Skim off excess fat, leaving about 2 tablespoons in the roasting pan or pour 2 tablespoons of drippings (including fat and juices) back into the pan.
Make the Roux: Place the roasting pan (or a separate saucepan) over medium heat. Sprinkle the flour over the drippings. Whisk constantly for 1-2 minutes. This creates a flavorful roux. It should be light brown for chicken, or a deeper brown for beef.
Add Broth: Slowly pour in about 1/2 cup of broth. Whisk well to combine. Continue adding broth in small amounts. Whisk until all broth is incorporated and the mixture is smooth.
Simmer and Thicken: Bring the gravy to a gentle simmer. Cook for 5-7 minutes. Stir occasionally. The gravy will thicken as it simmers.
Season: Remove from heat. Stir in salt, pepper, and optional additions (Worcestershire for beef, herbs for chicken). Taste and adjust seasoning.
Common Mistakes to Avoid:
Lumpy Gravy: Always add liquid slowly to the roux. Whisk continuously. Use a whisk for best results.
Too Thin/Thick: If too thin, simmer longer. If too thick, whisk in a little more broth until desired consistency.
Lack of Flavor: Don’t skip the pan drippings! They are key. Using good quality broth also makes a difference.
Serving Suggestions for your homemade gravy:
Drizzle generously over roasted chicken, turkey, or beef.
Mastering these foundational creamy sauces is a fantastic step. You are building confidence in the kitchen. These easy recipes help you prepare quick, reliable, and flavorful meals. Enjoy your cooking journey!
Classic Italian Pasta Sauces Everyone Should Know
Rich & Simple Marinara Sauce Recipe
Nothing says Italian comfort food quite like a rich, vibrant marinara sauce. This classic is a true kitchen hero! It’s incredibly versatile and surprisingly simple to make from scratch.
At Recipesmondial, we believe everyone can master foundational sauces. Learning how to whip up a delicious marinara from basic ingredients will boost your cooking confidence instantly. It’s perfect for a quick weeknight dinner or a relaxed family meal.
Making Your Own Marinara
Creating your own marinara is a straightforward process. You only need a few pantry staples.
Start with quality tomatoes: Canned crushed or diced tomatoes are your best friend here. Look for San Marzano tomatoes for an authentic flavor, but any good quality brand works beautifully [3].
Sauté your aromatics: A little olive oil, garlic, and onion form the flavorful base.
Simmer to perfection: Combine your tomatoes with the aromatics. Add a touch of dried oregano and fresh basil. Let it simmer gently. This allows all the flavors to deepen and meld together.
Tips for a Stellar Marinara
Make it ahead: Marinara tastes even better the next day! It’s a fantastic meal prep idea.
Freeze for later: This sauce freezes beautifully. Store it in portions for quick dinner recipes anytime.
Add some veggies: Stir in finely diced carrots or bell peppers while sautéing the onion. This adds extra nutrients and makes it even more family-friendly.
Spice it up: A pinch of red pepper flakes can add a lovely warmth.
This beginner-friendly recipe is a cornerstone for countless flavorful meals. You’ll never be overwhelmed by complex recipes again!
Authentic Homemade Pesto Recipe
Imagine a sauce that is bright, fresh, and bursting with herbaceous flavor. That’s pesto! This vibrant green sauce originated in Genoa, Italy, and brings sunshine to any dish [4]. Learning to make an authentic homemade pesto recipe is a game-changer for quick meals and adds a gourmet touch without the fuss.
Many home cooks might grab a jar from the store. However, making pesto from scratch is incredibly easy and the flavor is unmatched. It’s a wonderful way to enjoy fresh ingredients and create truly inspiring recipes.
Crafting Your Own Basil Pesto
The beauty of pesto lies in its simplicity. A food processor does most of the work for you!
Fresh basil is key: Use plenty of fresh basil leaves for that signature aroma and taste.
Nuts for texture: Pine nuts are traditional, offering a delicate texture. Walnuts or almonds are great budget-friendly substitutions.
Garlic for zing: Just a clove or two provides a wonderful punch of flavor.
Olive oil magic: A good quality extra virgin olive oil binds everything together into a luscious sauce.
Simply combine all ingredients (except most of the olive oil) in your food processor. Then, drizzle in the olive oil as it blends until you reach a smooth, vibrant consistency. This step-by-step cooking guidance ensures perfect results every time.
Elevate Your Meals with Pesto Sauce
Pesto pasta: Toss with your favorite pasta for a classic and quick dinner.
Spread it on: Use as a delicious spread for sandwiches or wraps.
Boost roasted veggies: Drizzle over roasted vegetables for extra flavor.
Marinade magic: It makes an excellent marinade for chicken or fish.
Storage tip: Cover the surface of stored pesto with a thin layer of olive oil to prevent browning.
This beginner-friendly recipe solves mealtime decisions by offering endless possibilities. You’ll discover new simple dishes and enjoy cooking without stress!
Creamy Homemade Alfredo Sauce Recipe
Rich, velvety, and utterly comforting, Alfredo sauce is a beloved classic that transforms simple pasta into a luxurious meal. While many people turn to jarred versions, mastering a creamy homemade Alfredo sauce recipe is surprisingly straightforward. It’s far superior in taste and texture, offering a truly flavorful meal made easy.
We know you want to enjoy cooking without stress, and this alfredo recipe delivers. It’s a fantastic beginner-friendly recipe that yields impressive results, perfect for a family-friendly dinner.
The Secrets to a Velvety Alfredo
True Alfredo sauce, as created by Alfredo di Lelio in Rome, originally contained just butter and Parmesan cheese [5]. Today, many versions include cream for extra richness and stability. Here’s how to make a luscious version:
Melt butter: Start with good quality unsalted butter in a saucepan.
Warm the cream: Slowly whisk in heavy cream, allowing it to gently warm. Avoid boiling to prevent separation.
Parmesan perfection: Gradually whisk in freshly grated Parmesan cheese. Freshly grated is crucial for a smooth sauce; pre-shredded often contains additives that prevent it from melting properly.
Season simply: A pinch of salt and black pepper is usually all you need. Some people like a hint of garlic powder, too!
Keep the heat low and whisk consistently. This approachable home cooking method ensures your sauce is perfectly smooth and creamy every time.
Tips for Your Alfredo Creations
Adjust consistency: If it’s too thick, add a splash of warm pasta water. If too thin, continue to gently simmer until it thickens slightly.
Add protein: Toss with grilled chicken or sautéed shrimp for a complete meal. This is a great way to plan family-friendly meals.
Serve immediately: Alfredo sauce is best enjoyed right after it’s made. It can thicken significantly as it cools.
Use quality ingredients: Since there are so few ingredients, the quality truly shines through.
This easy recipe will help you cook confidently and make mealtime stress-free. Say goodbye to struggling with complex cooking techniques!
Flavorful Bolognese Sauce
Bolognese is more than just a meat sauce; it’s a rich, slow-simmered masterpiece that embodies the heart of Italian cooking. Hailing from Bologna, this hearty ragù is perfect for cooler evenings and makes for truly satisfying family-friendly meals [6]. While it takes time, the actual cooking steps are straightforward, making it an achievable goal for any home cook looking to discover new simple dishes.
Don’t be overwhelmed by the longer cooking time. Most of it is hands-off simmering. This flavorful bolognese sauce is an excellent meal prep idea, as it tastes even better the next day and freezes wonderfully.
Building a Classic Bolognese
The depth of flavor in Bolognese comes from carefully layered ingredients and slow cooking.
Soffritto base: Start by gently sautéing finely diced onion, celery, and carrots (the “soffritto”). This aromatic trio is fundamental to Italian cuisine.
Brown the meat: Use a mix of ground beef and pork for the best flavor. Brown it thoroughly, breaking it up as it cooks.
Add liquids: A splash of dry red wine (or milk, traditionally) adds complexity. Crushed tomatoes provide the body, along with a touch of broth.
Low and slow: The magic happens during the long simmer. Let it bubble gently for at least 2-3 hours, or even longer. This tenderizes the meat and deepens all the flavors.
This approachable home cooking method focuses on patience and simple techniques, guaranteeing a delicious outcome.
Tips for Your Hearty Bolognese
Choose your pasta wisely: Bolognese pairs best with wide, flat pasta shapes like tagliatelle or pappardelle, which can scoop up the rich sauce.
Make a big batch: This is a perfect recipe for batch cooking. Divide into containers for easy lunches or simple dinner recipes throughout the week.
Freezer-friendly: Bolognese freezes exceptionally well for up to 3 months. It’s a lifesaver for busy families.
Garnish with cheese: A generous sprinkle of freshly grated Parmesan cheese is a must before serving.
This recipe helps you learn basic cooking skills and provides inspiration for creative, flavorful meals. You’ll love turning simple ingredients into a delicious, visually appealing dish!
Luxe Vodka Sauce Recipe
Creamy, tangy, and with just a hint of a kick, vodka sauce is a sophisticated yet incredibly easy Italian pasta sauce. It’s often found in restaurants, but making a luxe vodka sauce recipe at home is completely doable for beginner cooks. This flavorful meal made easy is perfect when you want something special without being overwhelmed by complex recipes.
The vodka in the sauce serves a purpose beyond flavor; it helps to emulsify the tomatoes and cream, creating a smoother, richer texture. Don’t worry, the alcohol cooks out, leaving only its unique contribution to the sauce’s body [7].
Creating Your Own Vodka Sauce
This sauce comes together quicker than you might think, making it ideal for simple dinner recipes.
Aromatics first: Sauté finely diced onion or shallots and garlic in olive oil until soft.
Tomato base: Add crushed tomatoes (or tomato paste for a deeper flavor) and let them cook down slightly.
The vodka splash: Pour in a small amount of vodka. Let it simmer and reduce for a few minutes. This allows the alcohol to evaporate, leaving behind the flavor and emulsifying properties.
Creamy finish: Stir in heavy cream and let the sauce gently simmer until it thickens slightly.
Parmesan punch: Finish with freshly grated Parmesan cheese and a generous pinch of red pepper flakes for a subtle heat.
This step-by-step cooking guidance ensures you’ll achieve a restaurant-quality sauce right in your own kitchen.
Tips for a Perfect Vodka Sauce
Penna perfection: Vodka sauce is famously paired with penne pasta, as the ridged tubes capture the creamy sauce beautifully.
Adjust the spice: Increase or decrease the red pepper flakes to suit your taste preference.
Add protein: Cooked pancetta, prosciutto, or chicken make excellent additions to this sauce.
Fresh herbs: A sprinkle of fresh parsley or basil at the end adds a lovely finish.
This easy recipe helps you plan weekly meals efficiently and confidently. You’ll discover how enjoyable cooking can be!
Global Flavors: Sauces and Seasonings from Around the World
Japanese Steakhouse Yum Yum Sauce Recipe
Ever wondered how to get that delicious, creamy sauce from your favorite Japanese steakhouse at home? It’s easier than you think! Our yum yum sauce recipe lets you recreate this amazing flavor. This simple sauce transforms any meal into something special. It’s perfect for chicken, shrimp, steak, or even as a dip for veggies.
Making your own yum yum sauce gives you fresh flavor and control over ingredients. Say goodbye to store-bought versions that might have unwanted additives. This recipe is a fantastic way to elevate your everyday cooking with a global touch. It’s truly a beginner-friendly recipe!
Simple Ingredients for Homemade Yum Yum Sauce:
1 cup mayonnaise (full-fat works best)
2 tablespoons water
1 tablespoon tomato paste
1 teaspoon granulated sugar
1 teaspoon paprika
1/2 teaspoon garlic powder
1/4 teaspoon onion powder
Pinch of cayenne pepper (optional, for a little kick)
Step-by-Step Yum Yum Sauce Instructions:
Combine Ingredients: In a medium bowl, add the mayonnaise, water, tomato paste, sugar, paprika, garlic powder, onion powder, and cayenne pepper (if using).
Whisk Until Smooth: Whisk all ingredients together until the sauce is completely smooth and well combined.
Chill and Serve: Cover the bowl and refrigerate for at least 30 minutes. This allows the flavors to meld beautifully.
Enjoy: Serve with grilled meats, seafood, stir-fries, or even as a dip for French fries.
Chef’s Tip: For a thinner sauce, add a tiny bit more water, one teaspoon at a time. The sauce tastes even better the next day. You can store it in an airtight container in the refrigerator for up to one week.
Homemade Taco, Fajita, and Chili Seasoning
Ready to make your family meals sing with flavor? Skip the store-bought packets! Crafting your own homemade taco seasoning or chili mix is a game-changer. It’s incredibly simple, budget-friendly, and lets you control the spice level. You also avoid extra sodium and preservatives often found in commercial blends [8]. This is ideal for healthy, tasty meals quickly.
These versatile blends are perfect for quick dinner ideas. Use them for ground beef, chicken, fish, or even plant-based options. You’ll never be overwhelmed by complex recipes again with these easy mixes.
Basic Homemade Taco Seasoning Recipe:
2 tablespoons chili powder
1 tablespoon ground cumin
1 tablespoon dried oregano
1 teaspoon garlic powder
1 teaspoon onion powder
1/2 teaspoon smoked paprika (optional, for depth)
1/2 teaspoon salt (adjust to taste)
1/4 teaspoon black pepper
Pinch of cayenne pepper (optional, for heat)
How to Make Your Own Seasoning Mix:
Measure Spices: Gather all your spices in a small bowl.
Combine Thoroughly: Whisk them well until fully blended.
Store Safely: Transfer the mixture to an airtight jar. Keep it in a cool, dark place.
Use Generously: Use about 2 tablespoons per pound of meat or veggies.
Adapt and Enjoy: This base recipe is easily adjustable. For a fajita seasoning, add a bit more cumin and a dash of sugar. For chili, increase the chili powder and add a pinch of cocoa powder for richness. These simple dinner recipes are so much better with fresh spice blends.
Fresh Salsa and Salsa Verde Recipes
Nothing beats the vibrant taste of fresh, homemade salsa. It instantly brightens any dish! Our salsa recipe and salsa verde guide will show you how. These fresh creations are packed with incredible flavor. They add a zesty kick to your weeknight dinners and snacks alike.
Making salsa at home is a fantastic way to enjoy healthy, flavorful meals made easy. Plus, you get all the nutritional benefits of fresh vegetables [9]. These are perfect for beginner-friendly recipes.
Classic Fresh Tomato Salsa Recipe:
This salsa is chunky and full of garden-fresh taste.
3 ripe Roma tomatoes, diced
1/2 red onion, finely diced
1-2 jalapeños, seeds removed and minced (adjust to heat preference)
1/4 cup fresh cilantro, chopped
Juice of 1 lime
1/2 teaspoon salt, or to taste
Quick Steps for Fresh Tomato Salsa:
Prep Ingredients: Dice tomatoes, onion, and mince jalapeños. Chop cilantro.
Combine: Gently mix all ingredients in a bowl.
Season: Add lime juice and salt. Stir well.
Chill: For best flavor, refrigerate for 30 minutes before serving.
Zesty Salsa Verde Recipe:
Salsa verde offers a tangy, slightly spicier alternative. It’s made with tomatillos.
1 pound tomatillos, husked and rinsed
1-2 serrano peppers, stems removed (adjust heat)
1/2 white onion, roughly chopped
2 cloves garlic, peeled
1/4 cup fresh cilantro
Juice of 1/2 lime
1/2 teaspoon salt, or to taste
Easy Steps for Salsa Verde:
Roast (Optional): For deeper flavor, roast tomatillos, serranos, onion, and garlic on a baking sheet until slightly charred. About 15-20 minutes at 400°F (200°C).
Blend: Transfer roasted ingredients (or raw, if not roasting) to a food processor or blender. Add cilantro, lime juice, and salt.
Process: Pulse until you reach your desired consistency. Some like it chunky, others smooth.
Taste and Adjust: Add more salt or lime if needed. Serve immediately or chill.
Serving Suggestion: Both salsas are wonderful with tortilla chips. They also shine as toppings for tacos, grilled chicken, or scrambled eggs. These are wonderful family-friendly meals.
Versatile Asian Sauces: Hoisin, Stir Fry, and Peanut Sauce
Explore the incredible world of Asian flavors right in your own kitchen! These three sauces are true culinary superheroes. They are perfect for creating delicious, international recipes made accessible. You’ll quickly discover how easy it is to make flavorful meals.
Making these sauces from scratch means fresh taste and no hidden ingredients. They transform simple ingredients into something extraordinary. This section offers step-by-step cooking guidance for delicious Asian dishes.
Homemade Hoisin Sauce: Sweet and Savory
Hoisin sauce is a thick, fragrant sauce often used in Cantonese cuisine. It’s a staple for marinades, glazes, and dipping. Its sweet and salty profile is simply irresistible.
1/4 cup soy sauce (low sodium is good)
2 tablespoons peanut butter (creamy)
1 tablespoon brown sugar
1 tablespoon rice vinegar
2 teaspoons sesame oil
1 clove garlic, minced
1/2 teaspoon ginger, grated
Pinch of black pepper
Instructions: Whisk all ingredients together in a small bowl until smooth. Adjust sweetness or saltiness to your liking. Use for barbecue, stir-fries, or as a dipping sauce for spring rolls.
Quick Stir Fry Sauce: Your Weeknight Warrior
A good stir fry sauce makes dinner a breeze. It’s perfect for quick meals. This sauce coats your noodles, rice, and veggies beautifully. It’s a lifesaver for busy families.
1 tablespoon cornstarch mixed with 2 tablespoons water (slurry)
Instructions: Combine all ingredients except the cornstarch slurry in a bowl. Whisk until sugar dissolves. When ready to cook, add the sauce to your stir fry. Then, stir in the cornstarch slurry to thicken. This is perfect for quick breakfast ideas that need a savory side too!
Creamy Peanut Sauce: Irresistibly Nutty
Peanut sauce offers a rich, creamy, and slightly spicy flavor. It’s fantastic with grilled skewers, salads, or as a dressing. It adds a lovely depth to many dishes, highlighting a popular legume found in diverse cuisines [10].
1/2 cup creamy peanut butter
2 tablespoons soy sauce
1 tablespoon rice vinegar
1 tablespoon honey or maple syrup
1 tablespoon sesame oil
1 clove garlic, minced
1/2-1 teaspoon sriracha (or chili garlic sauce, to taste)
2-4 tablespoons warm water (to thin)
Instructions: In a bowl, whisk together peanut butter, soy sauce, vinegar, honey, sesame oil, garlic, and sriracha. Gradually add warm water, one tablespoon at a time. Whisk until you reach your desired consistency. Enjoy this flavorful dip or dressing!
Meal Prep Tip: Make these sauces ahead of time. Store them in airtight containers in the fridge for up to a week. They are fantastic for meal prep guidance.
Spicy Delights: Buffalo Sauce, Cajun Sauce, and Adobo
Do you love a little heat in your meals? This section is for you! Discover how easy it is to make three fantastic spicy sauces. They will ignite your taste buds and add excitement to your cooking. These sauces are perfect for those seeking inspiration for creative, flavorful meals.
These spicy options are simple dinner recipes that truly pack a punch. They show how easy cooking can be, even with bold international flavors. Get ready to add some fire to your kitchen!
Classic Homemade Buffalo Sauce: Hot and Tangy
Buffalo sauce is famous for its perfect balance of spice and tang. It’s a must-have for chicken wings, but also great on sandwiches or even pizza.
1/2 cup hot sauce (like Frank’s RedHot)
1/2 cup unsalted butter, melted
1 tablespoon white vinegar
1/2 teaspoon garlic powder
Instructions: In a small saucepan, combine hot sauce, melted butter, vinegar, and garlic powder. Heat over medium-low heat, whisking until fully combined and warm. Do not boil. Use immediately or store in the fridge. Capsaicin, the compound giving chili peppers their heat, is also known for potential health benefits [11].
Bold Cajun Sauce: Smoky and Zesty
Cajun sauce brings the vibrant flavors of Louisiana right to your table. It’s smoky, spicy, and incredibly aromatic. This sauce is fantastic for seafood, chicken, or rice dishes.
1/4 cup olive oil
1/2 small onion, finely diced
1 bell pepper (any color), finely diced
2 cloves garlic, minced
1/4 cup chicken or vegetable broth
1 tablespoon tomato paste
1 tablespoon Cajun seasoning blend (homemade or store-bought)
1/2 teaspoon dried thyme
Pinch of cayenne pepper (optional)
Instructions: Heat olive oil in a skillet over medium heat. Sauté onion and bell pepper until softened, about 5-7 minutes. Add garlic and cook for 1 minute more. Stir in broth, tomato paste, Cajun seasoning, thyme, and cayenne. Simmer for 5-7 minutes, allowing flavors to meld. Serve warm.
Savory Adobo Sauce: Filipino Comfort
Adobo sauce is the heart of Filipino cuisine. It’s a tangy, salty, and savory sauce. It is often made with soy sauce, vinegar, garlic, and peppercorns. This simple yet profound sauce infuses meat or vegetables with incredible depth.
1/2 cup soy sauce
1/2 cup white vinegar
6-8 cloves garlic, crushed
1 teaspoon whole black peppercorns
2-3 bay leaves
1 tablespoon brown sugar (optional, for balance)
Instructions: Combine all ingredients in a saucepan. Bring to a simmer over medium heat. Let it gently bubble for 10-15 minutes. This allows the flavors to deepen. Use it as a marinade, a braising liquid for chicken or pork, or a flavorful finishing sauce.
Cooking Confidence: Don’t be afraid to adjust the heat level. Add more cayenne or sriracha for extra spice. Reduce them for a milder flavor. Cooking should always be enjoyable!
Essential European Flavors: Aioli, Sofrito, and Remoulade
Journey through Europe with these fundamental sauces and flavor bases! They are cornerstones of European cuisine. Learning these will greatly expand your cooking repertoire. These recipes offer approachable home cooking for everyone.
From the creamy garlic notes of aioli to the aromatic sofrito, these are simple to master. You’ll quickly see how they elevate everyday ingredients. Get ready to cook confidently and enjoy delicious meals.
Garlic-Infused Aioli: The Mediterranean Mayonnaise
Aioli is essentially a garlic mayonnaise. It originated in the Mediterranean regions [12]. It is rich, creamy, and wonderfully pungent. It’s a fantastic dipping sauce or spread.
1 cup good quality mayonnaise
2-3 cloves garlic, minced or grated very fine
1 tablespoon fresh lemon juice
1/2 teaspoon Dijon mustard (optional, for extra tang)
Salt and freshly ground black pepper to taste
Instructions: In a small bowl, combine mayonnaise, minced garlic, lemon juice, and Dijon mustard (if using). Whisk well until all ingredients are fully incorporated. Season with salt and pepper. Refrigerate for at least 30 minutes to let the flavors marry. Serve with fries, roasted vegetables, or grilled fish.
Aromatic Sofrito: The Heart of Spanish and Latin American Cooking
Sofrito is a flavorful aromatic base. It is made by sautéing diced vegetables in olive oil. This mixture is foundational for countless stews, rice dishes, and sauces. It creates a deep flavor base. It’s a key to flavorful meals made easy.
1/4 cup olive oil
1 large onion, finely diced
1 green bell pepper, finely diced
4 cloves garlic, minced
1 ripe tomato, grated or finely diced (optional)
Pinch of salt and pepper
Instructions: Heat olive oil in a pan over medium-low heat. Add onion and bell pepper. Sauté gently until very soft and translucent, about 10-15 minutes. This slow cooking develops sweetness. Add garlic and optional grated tomato. Cook for another 5 minutes. Season with salt and pepper. Use as a base for soups, rice, or bean dishes. It’s excellent for family-friendly meals.
Tangy Remoulade: The French-Inspired Classic
Remoulade is a classic French cold sauce. It’s similar to aioli but with added herbs, capers, and pickles. It’s wonderfully tangy and flavorful. It pairs perfectly with seafood and fried dishes.
1 cup good quality mayonnaise
1 tablespoon Dijon mustard
1 tablespoon capers, finely chopped
1 tablespoon cornichons or dill pickles, finely chopped
1 tablespoon fresh parsley, chopped
1 tablespoon fresh chives, chopped
1 teaspoon lemon juice
Pinch of cayenne pepper (optional)
Salt and black pepper to taste
Instructions: In a medium bowl, combine mayonnaise, Dijon mustard, chopped capers, pickles, parsley, chives, and lemon juice. Mix well. Add a pinch of cayenne pepper if you like. Season with salt and pepper. Cover and chill for at least 30 minutes before serving. This sauce makes quick lunches or easy dinners feel gourmet.
Kitchen Confidence Builder: Mastering these European flavor bases will open up so many new cooking possibilities. You’ll find yourself reaching for these versatile sauces often. They are perfect for transforming simple ingredients into delicious, visually appealing meals.
The Best Dips and Spreads for Any Occasion
Professional food photography, photorealistic, high-quality food magazine photo of a vibrant, inviting platter of assorted dips and spreads. The centerpiece is a bright green, chunky guacamole with a scattering of cilantro and tortilla chips arranged around it. Alongside, there’s a smooth, creamy hummus drizzled with olive oil and sprinkled with paprika, served with warm pita bread wedges. Also present is a fresh, colorful salsa with finely diced tomatoes, onions, and cilantro. The platter is artfully arranged on a light-colored, slightly textured surface, with soft, natural lighting emphasizing the fresh ingredients and appetizing textures. Some fresh vegetables like carrot sticks or cucumber slices are also visible as dippers.
Creamy Tahini Sauce and Dressing
Tahini is a fantastic ingredient. It is a paste made from ground sesame seeds. This simple sauce transforms many dishes. It adds a wonderful nutty, creamy depth.
Making your own tahini sauce is incredibly easy. It takes just minutes. This makes it perfect for quick meals. It is also a healthy and flavorful addition to almost any meal. You can use it as a dip, a dressing, or a rich spread.
Ingredients for Creamy Tahini Sauce
1/2 cup tahini paste
1/4 cup fresh lemon juice
1-2 cloves garlic, minced (adjust to your taste)
1/4 cup cold water (or more, as needed)
1/4 teaspoon salt
Pinch of black pepper (optional)
How to Make Easy Tahini Sauce
In a medium bowl, combine the tahini, lemon juice, minced garlic, and salt.
Whisk these ingredients together well. The mixture will likely thicken and seize up. Do not worry; this is normal.
Gradually add the cold water, one tablespoon at a time. Whisk continuously. The sauce will loosen and become creamy and smooth.
Keep adding water until you reach your desired consistency. It should be thick enough to coat a spoon, but thin enough to drizzle.
Taste and adjust seasonings. You might want more lemon, salt, or garlic.
Tips and Uses
Consistency Control: For a thicker dip, use less water. For a thinner dressing, add more.
Make Ahead: This sauce keeps well in the fridge for up to a week. Store it in an airtight container.
Serving Ideas: Drizzle over roasted vegetables, grilled chicken, or falafel. It is excellent with salads as a healthy dressing. You can also serve it as a dip for pita bread or fresh veggies, offering healthy snacks.
Health Benefits: Tahini is rich in healthy fats, vitamins, and minerals. It’s a great source of calcium and iron [13].
Classic Cocktail Sauce for Seafood
Enjoying fresh seafood is a real treat. A great cocktail sauce makes it even better. This simple homemade version is much fresher than store-bought. It also allows you to customize the spice level. It’s a beginner-friendly recipe that delivers big on flavor.
Ingredients for Classic Cocktail Sauce
1 cup ketchup
2-4 tablespoons prepared horseradish (start with 2, add more for extra kick)
1 tablespoon fresh lemon juice
1 teaspoon Worcestershire sauce
1/2 teaspoon hot sauce (like Tabasco, optional)
Pinch of salt and black pepper
How to Make Quick Cocktail Sauce
In a small bowl, combine the ketchup, prepared horseradish, lemon juice, Worcestershire sauce, and hot sauce (if using).
Stir all the ingredients until they are thoroughly mixed.
Taste the sauce. Adjust the horseradish or hot sauce to achieve your preferred level of spiciness. Add a pinch of salt and pepper if needed.
Cover the bowl and refrigerate the sauce for at least 30 minutes. This allows the flavors to blend beautifully.
Serving Suggestions
This sauce is perfect for shrimp cocktail, oysters, or fried calamari.
It also works well with other simple dinner recipes like baked fish.
Store any leftover sauce in an airtight container in the refrigerator for up to 1 week.
Easy Burger Sauce Recipe (Big Mac Inspired)
Transform your homemade burgers with this incredible sauce. It tastes just like your favorite fast-food classic. This easy recipe brings a burst of tangy, creamy flavor. It’s perfect for family-friendly meals. Your burger nights will never be the same!
Ingredients for Big Mac Inspired Burger Sauce
1/2 cup mayonnaise
2 tablespoons ketchup
1 tablespoon yellow mustard
1 tablespoon sweet pickle relish
1/2 teaspoon garlic powder
1/2 teaspoon onion powder
1/4 teaspoon paprika
Pinch of salt and black pepper
How to Make Simple Burger Sauce
In a small bowl, combine the mayonnaise, ketchup, yellow mustard, and sweet pickle relish.
Add the garlic powder, onion powder, paprika, salt, and pepper to the bowl.
Stir all the ingredients together until they are completely smooth and well combined.
Cover the bowl and refrigerate the sauce for at least 30 minutes. This chilling time helps the flavors meld.
Perfect Pairings
This flavorful sauce is a must for burgers.
It also makes an excellent dipping sauce for french fries.
Try it on chicken sandwiches or as a spread for wraps.
This sauce is a fantastic way to elevate quick meals.
Spicy Mayo and Garlic Parmesan Sauce
These two sauces are incredibly versatile. They are both packed with flavor. You can whip them up in minutes. They are perfect for adding excitement to everyday dishes. These beginner-friendly recipes make cooking enjoyable and stress-free.
Spicy Mayo: A Kick of Flavor
Spicy mayo is a creamy, zesty condiment. It adds a delicious kick to many foods. It’s one of the easiest recipes you can make.
Ingredients for Spicy Mayo
1/2 cup mayonnaise
1-2 tablespoons sriracha (or your favorite hot sauce)
1 teaspoon lime juice (optional, for extra brightness)
How to Make Quick Spicy Mayo
In a small bowl, combine the mayonnaise, sriracha, and lime juice (if using).
Stir well until all ingredients are fully blended.
Taste and adjust the amount of sriracha for your desired spice level.
Uses for Spicy Mayo
Drizzle over sushi rolls or poke bowls.
Serve with tacos, burritos, or quesadillas.
It is a fantastic dipping sauce for french fries, onion rings, or sweet potato fries.
Use as a spread on sandwiches or wraps for quick meals.
Garlic Parmesan Sauce: Rich and Savory
This rich sauce is packed with savory garlic and sharp Parmesan cheese. It’s wonderfully creamy and flavorful. It’s perfect for elevating simple ingredients.
1 tablespoon milk or water (to adjust consistency)
Pinch of salt and black pepper
How to Make Easy Garlic Parmesan Sauce
In a small bowl, combine the mayonnaise (or sour cream), grated Parmesan cheese, and minced garlic.
Add the chopped parsley, salt, and pepper. Stir everything together thoroughly.
If the sauce is too thick, add milk or water one teaspoon at a time. Mix until it reaches your desired consistency.
Taste and adjust seasonings as needed.
Serving Ideas for Garlic Parmesan Sauce
Toss with hot chicken wings for a delicious coating.
Use as a dipping sauce for pizza crust or garlic bread.
Serve with roasted vegetables or as a dressing for pasta salad.
It adds a gourmet touch to simple dinner recipes.
Simple Salad Dressings to Brighten Your Greens
Professional food photography, photorealistic, high-quality food magazine photo of a pristine, vibrant green salad in a stylish clear glass bowl. Mixed greens, cherry tomatoes, and thinly sliced cucumber are visible. A hand, belonging to a real human cook, is gracefully pouring a stream of homemade golden vinaigrette from an elegant glass cruet over the fresh salad. Nearby, on a clean, light countertop, are small ingredient bowls holding golden olive oil, clear white vinegar, a dollop of Dijon mustard, and fresh sprigs of thyme and rosemary, suggesting the simple components of the dressing. The scene is brightly lit with natural light, emphasizing freshness, health, and a homemade feel.
Homemade Ranch Dressing Recipe
Ditch the bottled stuff and whip up your own creamy, dreamy ranch dressing! This easy recipe is a game-changer for salads, a dip for fresh veggies, or even a topping for your favorite family-friendly meals. It’s incredibly simple to make, even for beginner cooks, and tastes so much better than anything you buy at the store. You’ll be amazed at how quickly you can create this flavorful dressing!
Ingredients for Classic Ranch:
1/2 cup mayonnaise
1/2 cup sour cream (or plain Greek yogurt for a healthier twist)
1/4 cup buttermilk (or regular milk with 1 teaspoon lemon juice or white vinegar, let sit for 5 minutes)
1 tablespoon fresh chives, finely chopped
1 tablespoon fresh parsley, finely chopped
1 teaspoon dried dill
1/2 teaspoon garlic powder
1/2 teaspoon onion powder
1/4 teaspoon salt (or to taste)
1/8 teaspoon black pepper (or to taste)
Step-by-Step Instructions:
Combine Wet Ingredients: In a medium bowl, whisk together the mayonnaise, sour cream (or Greek yogurt), and buttermilk until smooth.
Add Dry Seasonings: Stir in the fresh chives, fresh parsley, dried dill, garlic powder, onion powder, salt, and black pepper.
Mix Well: Continue to whisk until all ingredients are fully combined and the dressing is creamy.
Chill and Serve: Cover the bowl and refrigerate for at least 30 minutes. This allows the flavors to meld beautifully. Serve chilled.
Tips and Variations:
For a Thicker Dressing: Use less buttermilk or add an extra tablespoon of mayonnaise or Greek yogurt.
Make it Healthier: Swap mayonnaise for light mayo and use plain Greek yogurt instead of sour cream.
Spice It Up: Add a pinch of cayenne pepper or a dash of hot sauce for a zesty kick.
Meal Prep Idea: This dressing keeps well in an airtight container in the refrigerator for up to 5-7 days, making it perfect for your weekly meal prep.
Classic Caesar Dressing Recipe
Transform a simple bowl of romaine into a restaurant-quality Caesar salad right in your own kitchen! Our classic Caesar dressing recipe is surprisingly easy to master. It delivers that signature tangy, savory flavor that makes Caesar salads so irresistible. This flavorful meal made easy is a fantastic way to elevate your cooking skills without being overwhelmed.
Ingredients for Classic Caesar:
1 large egg yolk (see note below for egg-free option)
1 tablespoon fresh lemon juice
1 teaspoon Dijon mustard
1 clove garlic, minced
1/2 teaspoon Worcestershire sauce
1/4 cup extra virgin olive oil
1/4 cup grated Parmesan cheese
2 anchovy fillets, mashed (optional, but highly recommended for authentic flavor)
Salt and freshly ground black pepper to taste
Step-by-Step Instructions:
Whisk Base: In a medium bowl, whisk together the egg yolk, lemon juice, Dijon mustard, minced garlic, and Worcestershire sauce. If using anchovies, add them here and mash them into the mixture until nearly smooth.
Slowly Emulsify: While whisking continuously, slowly drizzle in the olive oil. Start with just a few drops at a time, then increase to a thin stream. This creates a thick, creamy emulsion.
Add Cheese and Season: Stir in the grated Parmesan cheese. Season with salt and pepper to your liking.
Taste and Adjust: Taste the dressing and adjust seasonings as needed. You might want more lemon juice or pepper.
Serve Immediately: Toss with crisp romaine lettuce and homemade croutons for the ultimate Caesar salad.
Tips and Variations:
Egg-Free Option: For those concerned about raw eggs, use 1 tablespoon of mayonnaise in place of the egg yolk. The texture will be slightly different but still delicious.
Anchovy-Free: If you prefer to omit anchovies, consider adding a pinch of capers or a dash of soy sauce for a similar savory depth.
Storage: Homemade Caesar dressing is best enjoyed fresh. Store any leftovers in an airtight container in the refrigerator for up to 2-3 days.
Food Safety Note: Raw eggs carry a small risk of salmonella. Consider using pasteurized eggs for this recipe [14].
Simple Balsamic Vinaigrette
A simple balsamic vinaigrette is a staple for any home cook. It’s one of the easiest recipes you can make and elevates any salad or roasted vegetable dish. This beginner-friendly recipe uses everyday ingredients and takes just minutes to prepare. It’s perfect for those seeking healthy and balanced meals without fuss or stress.
Ingredients for Simple Balsamic Vinaigrette:
3 tablespoons balsamic vinegar
1 tablespoon Dijon mustard
1 clove garlic, minced (optional)
1/2 teaspoon salt
1/4 teaspoon black pepper
1/2 cup extra virgin olive oil
Step-by-Step Instructions:
Combine Base: In a small bowl, whisk together the balsamic vinegar, Dijon mustard, minced garlic (if using), salt, and black pepper.
Slowly Add Oil: While continuously whisking, slowly drizzle in the olive oil until the dressing is emulsified and smooth.
Taste and Adjust: Taste the vinaigrette and adjust seasonings as needed. You might want more salt or a little more vinegar for tang.
Serve or Store: Use immediately or transfer to an airtight container.
Tips and Variations:
Add Sweetness: A teaspoon of honey or maple syrup can balance the tang of the vinegar beautifully.
Herbaceous Touch: Incorporate fresh or dried herbs like oregano, basil, or thyme for added flavor.
Shake It Up: If you don’t want to whisk, simply combine all ingredients in a jar with a tight-fitting lid and shake vigorously until combined.
Storage: Store homemade balsamic vinaigrette in an airtight container in the refrigerator for up to 1 week. Bring to room temperature and shake well before using.
Zesty Italian and Greek Salad Dressings
Bring the vibrant flavors of the Mediterranean to your table with these zesty Italian and Greek salad dressings! Both are easy recipes and perfect for beginner cooks looking to discover new simple dishes. They add a fresh, bright touch to your salads and can even double as flavorful marinades for your family-friendly meals.
Homemade Italian Dressing:
This classic brightens any green salad with its herbs and tang.
Ingredients:
1/2 cup extra virgin olive oil
1/4 cup red wine vinegar
1 tablespoon water
1 clove garlic, minced
1 teaspoon dried oregano
1/2 teaspoon dried basil
1/4 teaspoon dried thyme
1/2 teaspoon salt
1/4 teaspoon black pepper
1/2 teaspoon sugar (optional, to balance flavors)
Instructions:
Combine: In a jar with a tight-fitting lid, combine all ingredients.
Shake: Secure the lid and shake vigorously until the dressing is well combined and emulsified.
Serve or Store: Use immediately or store in the refrigerator.
Tips:
Marinade Magic: This dressing makes an excellent marinade for chicken or vegetables before grilling or roasting.
Cheese Boost: Add a tablespoon of grated Parmesan cheese for an extra savory note.
Authentic Greek Salad Dressing:
Embrace the simple, fresh flavors of the Greek islands with this vibrant dressing.
Ingredients:
1/2 cup extra virgin olive oil
1/4 cup red wine vinegar
1 tablespoon fresh lemon juice
1 clove garlic, minced
1 teaspoon dried oregano
1/2 teaspoon salt
1/4 teaspoon black pepper
Instructions:
Combine: In a small bowl or jar, whisk together the olive oil, red wine vinegar, lemon juice, minced garlic, oregano, salt, and pepper.
Mix Well: Whisk or shake until all ingredients are fully combined.
Serve Fresh: Drizzle over a traditional Greek salad with cucumber, tomatoes, red onion, Kalamata olives, and feta cheese.
Tips:
Fresh Herbs: A tablespoon of fresh chopped parsley can enhance the flavor.
Mustard Kick: A teaspoon of Dijon mustard can help emulsify the dressing and add a little zing.
General Storage for Italian & Greek Dressings:
Store both dressings in an airtight container in the refrigerator for up to 1 week. The olive oil may solidify, so bring to room temperature and shake well before each use.
Creamy Green Goddess Dressing
Discover the magic of fresh herbs with our creamy Green Goddess dressing! This vibrant, flavorful dressing is an approachable home cooking delight, perfect for those who want to enjoy cooking without stress. It’s a healthy and balanced meal component that adds a burst of freshness to salads, wraps, or as a dip for your favorite vegetables.
Ingredients for Creamy Green Goddess Dressing:
1/2 cup mayonnaise (or Greek yogurt for a lighter version)
1 anchovy fillet, mashed (optional, for depth of flavor)
1/4 teaspoon salt
1/8 teaspoon black pepper
Step-by-Step Instructions:
Prepare Herbs: Ensure all your fresh herbs are washed and finely chopped.
Combine All Ingredients: In a food processor or blender, combine the mayonnaise, sour cream, chopped parsley, chives, tarragon, lemon juice, minced garlic, mashed anchovy (if using), salt, and pepper.
Blend Until Smooth: Process until the dressing is completely smooth and vibrant green. Scrape down the sides as needed.
Taste and Adjust: Taste the dressing and add more salt, pepper, or lemon juice if desired.
Chill and Serve: Transfer to an airtight container and refrigerate for at least 30 minutes for flavors to meld. Serve chilled.
Tips and Variations:
Make it Vegan: Use vegan mayonnaise and vegan sour cream or cashew cream.
Herb Swap: Feel free to experiment with other fresh herbs like dill, mint, or basil, adjusting quantities to your taste.
Thinner Consistency: Add a tablespoon or two of milk or water if you prefer a thinner dressing.
Meal Prep Power: This dressing keeps well in the refrigerator for 3-5 days, making it a wonderful addition to your meal prep routine for quick lunches.
Flavor-Boosting Marinades, Glazes, and Rubs
Ready to unlock incredible flavor in your everyday cooking? Marinades, glazes, and rubs are your secret weapons! They transform simple ingredients into mouth-watering meals with minimal effort. Think of them as easy flavor shortcuts for busy home cooks.
At Recipesmondial, we believe cooking should be enjoyable, not stressful. These beginner-friendly recipes are designed to boost your confidence in the kitchen. They promise delicious results every time.
The Best Steak Marinade Recipe
A fantastic steak doesn’t need to be complicated. Our easy steak marinade recipe guarantees a tender, flavorful result. It turns any cut of beef into a star of your simple dinner recipes.
Why Marinate Steak?
Adds Flavor: Infuses the meat with herbs, spices, and savory notes.
Tenderizes: Acids in the marinade help break down tough fibers. This makes your steak incredibly juicy [15].
Moisture: Helps prevent the steak from drying out during cooking.
Ingredients for Steak Marinade
You likely have most of these in your pantry already!
1/2 cup olive oil
1/4 cup soy sauce (or tamari for gluten-free)
2 tablespoons Worcestershire sauce
2 tablespoons apple cider vinegar (or red wine vinegar)
1 tablespoon Dijon mustard
2 cloves garlic, minced
1 teaspoon dried oregano
1/2 teaspoon black pepper
Optional: 1 teaspoon dried rosemary, 1/2 teaspoon red pepper flakes for a kick
Step-by-Step Instructions
Making this marinade is quick and simple.
In a medium bowl, whisk together the olive oil, soy sauce, Worcestershire sauce, apple cider vinegar, and Dijon mustard.
Stir in the minced garlic, oregano, and black pepper. Add any optional herbs or spices.
Place your steak (about 1.5-2 lbs) into a large zip-top bag or a shallow dish.
Pour the marinade over the steak, ensuring it’s fully coated.
Seal the bag or cover the dish. Refrigerate for at least 30 minutes, or up to 4 hours for maximum flavor. For thinner cuts, 30 minutes is often enough.
Remove steak from the marinade before cooking. Discard any remaining marinade.
Tips for Success
Marinating Time: Don’t marinate for too long (over 8 hours) with acidic marinades, as it can make the meat mushy.
Steak Cuts: This marinade works wonderfully with flank steak, sirloin, skirt steak, or even thicker cuts like ribeye.
Cooking: Grill, pan-sear, or broil your marinated steak for a delicious family-friendly meal.
Sweet & Sticky Ham Glaze Recipe
Transform a simple baked ham into a showstopper with this irresistible sweet and sticky glaze. It’s perfect for holidays or an impressive weekend dinner. This approachable home cooking recipe will make your ham shine.
Why Glaze Your Ham?
Adds Flavor: A sweet and savory crust forms during baking.
Moisture: The glaze helps keep the ham moist and tender.
Appearance: Creates a beautiful, glossy finish that looks professional.
Ingredients for Ham Glaze
These ingredients combine for a perfect balance of sweet and tangy.
1/2 cup brown sugar, packed
1/4 cup honey (or maple syrup)
2 tablespoons Dijon mustard
1 tablespoon apple cider vinegar (or orange juice)
1/2 teaspoon ground cinnamon (optional)
Pinch of ground cloves (optional)
Step-by-Step Instructions
Applying this glaze is incredibly easy.
In a small saucepan, combine the brown sugar, honey, Dijon mustard, and apple cider vinegar. Add cinnamon and cloves if using.
Heat over medium-low heat. Stir constantly until the sugar dissolves and the mixture is smooth. This takes about 2-3 minutes.
Remove from heat and let cool slightly.
Preheat your oven according to your ham packaging instructions (usually around 300-325°F or 150-160°C).
Score the surface of your pre-cooked ham in a diamond pattern using a sharp knife.
Place the ham in a roasting pan. Brush about one-third of the glaze over the ham.
Bake the ham, brushing with more glaze every 15-20 minutes, until heated through and beautifully caramelized.
Tips for the Perfect Glaze
Scoring: Scoring allows the glaze to penetrate better and creates an attractive finish.
Don’t Rush: Apply the glaze gradually throughout the baking process for layers of flavor and a rich color.
Storage: Store any leftover glaze in an airtight container in the refrigerator for up to a week.
Bold Jerk and Blackened Seasonings
Ready to explore some vibrant flavors? Jerk and blackened seasonings are incredible ways to add a punch to your cooking. These global comfort foods are surprisingly simple to make at home. They’re perfect for flavorful meals made easy.
Homemade Jerk Seasoning
Jerk seasoning brings the taste of the Caribbean to your kitchen. It’s warm, spicy, and incredibly aromatic. This blend is fantastic for chicken, pork, or even vegetables.
Ingredients for Jerk Seasoning
1 tablespoon onion powder
1 tablespoon garlic powder
2 teaspoons dried thyme
2 teaspoons smoked paprika
1 teaspoon allspice, ground
1 teaspoon cayenne pepper (adjust to your spice preference)
1 teaspoon sugar (brown or white)
1 teaspoon salt
1/2 teaspoon black pepper
1/2 teaspoon ground ginger
1/4 teaspoon ground nutmeg
1/4 teaspoon ground cloves
How to Use Jerk Seasoning
In a small bowl, combine all the ingredients. Mix well to ensure everything is evenly distributed.
Store in an airtight container for up to 6 months.
Dry Rub: Sprinkle generously on chicken, pork, or fish before grilling, baking, or pan-frying.
Wet Rub/Marinade: Mix 2-3 tablespoons of seasoning with 1/4 cup olive oil and 1 tablespoon lime juice to create a paste. Rub onto meat and marinate for 1-4 hours before cooking.
Homemade Blackened Seasoning
Blackened seasoning creates a delicious, spicy crust on food. It’s a hallmark of Cajun cooking. This quick meal seasoning is especially famous for fish, but it’s great on chicken and shrimp too.
Ingredients for Blackened Seasoning
1 tablespoon smoked paprika
1 tablespoon onion powder
1 tablespoon garlic powder
1 teaspoon dried oregano
1 teaspoon dried thyme
1 teaspoon cayenne pepper (adjust to your spice preference)
1 teaspoon salt
1/2 teaspoon black pepper
How to Use Blackened Seasoning
Combine all spices in a small bowl. Mix thoroughly.
Store in an airtight container for up to 6 months.
Blackening Method: Pat your protein (fish fillets, chicken breasts, shrimp) very dry. Melt butter or oil in a heavy-bottomed skillet (cast iron works best) over high heat until it’s smoking.
Dredge the protein generously in the seasoning blend.
Carefully place the seasoned protein into the hot skillet. Cook for a few minutes per side until a dark, flavorful crust forms.
Tips for Seasoning Blends
Adjust Spice: Feel free to increase or decrease cayenne pepper to suit your heat preference.
Freshness: Using freshly ground whole spices (like allspice berries or nutmeg) will give the best flavor.
Batch Prep: Make a larger batch of these seasonings. It’s a great meal prep tip for future quick meals.
Garlic Butter Sauce for Everything
Meet your new favorite flavor enhancer: garlic butter sauce! This simple, versatile sauce truly goes with everything. It’s a beginner-friendly recipe that will quickly become a staple in your kitchen. It elevates any dish into a flavorful meal made easy.
Why You Need This Sauce
Super Versatile: Drizzle it on vegetables, seafood, pasta, bread, or steak.
Easy to Make: Only a few ingredients and minutes needed.
Irresistible Flavor: The rich taste of butter combined with fragrant garlic is a winning combination.
1 tablespoon fresh parsley, chopped (optional, for color and freshness)
Pinch of salt and black pepper to taste
Step-by-Step Instructions
You won’t believe how fast this comes together!
In a small saucepan or microwave-safe bowl, melt the butter over medium-low heat or in the microwave.
Once melted, add the minced garlic.
Sauté the garlic for 1-2 minutes until fragrant. Be careful not to burn it, as burnt garlic tastes bitter.
Remove from heat. Stir in the fresh parsley, salt, and black pepper.
Serve warm.
Ways to Enjoy Your Garlic Butter Sauce
Seafood: Drizzle over cooked shrimp, scallops, or baked fish.
Vegetables: Toss with steamed broccoli, roasted asparagus, or corn on the cob.
Bread: Brush onto warm garlic bread, dinner rolls, or baguettes.
Pasta: Toss with hot pasta for a simple, flavorful sauce.
Steak/Chicken: Spoon over grilled steak, chicken breasts, or pork chops for extra richness.
Tips & Variations
Herb Boost: Add other fresh herbs like thyme, rosemary, or chives for different flavor profiles.
Lemon Zest: A squeeze of fresh lemon juice or a sprinkle of lemon zest brightens the flavor beautifully.
Storage: Store leftover garlic butter in an airtight container in the refrigerator for up to 5 days. Reheat gently.
Sweet Sauces, Frostings, and Toppings
Sweet sauces, creamy frostings, and delightful toppings are the secret to turning simple desserts into extraordinary treats. At Recipesmondial, we believe everyone can master these delicious additions. You don’t need to be a pastry chef!
In fact, making your own sweet enhancements is easier than you think. This builds confidence in the kitchen. It also ensures fresh, vibrant flavors for all your favorite sweet dishes. Say goodbye to store-bought, often expensive versions. Say hello to homemade magic!
Learning these easy recipes will elevate your baking. Furthermore, it gives you full control over ingredients. This is perfect for those seeking healthy or customized options. Get ready to discover flavorful meals made easy, one sweet dollop at a time.
Foolproof Homemade Caramel Sauce Recipe
A velvety, golden caramel sauce adds a touch of luxury to almost any dessert. Many people feel overwhelmed by making caramel. However, our beginner-friendly recipe makes it a breeze. This is a truly quick meal solution for enhancing cakes, ice cream, or even coffee.
Ingredients:
1 cup granulated sugar
1/4 cup water
1/2 cup heavy cream, warmed
4 tablespoons unsalted butter, cubed and at room temperature
1 teaspoon vanilla extract (optional)
Pinch of sea salt (optional)
Step-by-Step Cooking Guidance:
Prepare Your Cream: Gently warm the heavy cream in a small saucepan or microwave. Set it aside.
Combine Sugar and Water: In a medium, heavy-bottomed saucepan, combine the granulated sugar and water. Stir briefly to moisten all the sugar.
Boil Without Stirring: Place the saucepan over medium-high heat. Bring the mixture to a boil. Do not stir it once it starts boiling.
Watch for Color: Allow the sugar mixture to boil undisturbed. It will begin to turn amber. This usually takes about 5-8 minutes. Keep a close eye on it. The color can change quickly from golden to burnt.
Remove from Heat: Once the caramel reaches a deep amber color, immediately remove the saucepan from the heat.
Add Butter: Carefully add the cubed butter to the hot caramel. It will bubble vigorously. Whisk continuously until the butter is fully melted and incorporated.
Pour in Cream: Slowly and carefully pour the warm heavy cream into the caramel. Whisk constantly. Be very careful, as the mixture will bubble and steam intensely.
Smooth and Finish: Continue whisking until the sauce is smooth. If there are any sugar lumps, return the pan to low heat. Stir until they dissolve.
Add Vanilla and Salt: Stir in the vanilla extract and sea salt, if using.
Cool and Store: Pour the caramel into a heatproof jar. Let it cool completely before covering and storing in the refrigerator. It will thicken as it cools.
Tips for Success:
Safety First: Hot caramel is extremely hot. Be cautious when adding butter and cream.
Don’t Stir Sugar: Avoid stirring the sugar and water once it boils. This prevents crystallization.
Clean Sides: If sugar crystals form on the sides of the pan, use a wet pastry brush to wash them down.
Storage: Homemade caramel sauce keeps well in the refrigerator for up to 3 weeks. Warm gently before serving.
Rich Chocolate Syrup and Lemon Curd
This section brings together two beloved sweet additions. One offers comforting richness. The other provides bright, zesty tang. Both are simple to make and incredibly versatile for family-friendly dishes and beyond.
Rich Homemade Chocolate Syrup
Skip the store-bought bottles. Making your own chocolate syrup ensures a truly deep, rich chocolate flavor. This approachable home cooking recipe is perfect for milkshakes, sundaes, or as a decadent topping.
Ingredients:
1 cup granulated sugar
1/2 cup unsweetened cocoa powder
Pinch of salt
1 cup water
1 teaspoon vanilla extract
Step-by-Step Cooking Guidance:
Combine Dry Ingredients: In a medium saucepan, whisk together the sugar, cocoa powder, and salt. This removes any lumps.
Add Water: Gradually whisk in the water until the mixture is smooth.
Simmer: Place the saucepan over medium heat. Bring the mixture to a gentle boil, whisking constantly.
Thicken: Reduce the heat to low. Let it simmer for 1-2 minutes, stirring occasionally, until it thickens slightly.
Remove from Heat: Take the saucepan off the heat. Stir in the vanilla extract.
Cool and Store: Pour the syrup into a clean jar or bottle. Allow it to cool completely before covering and refrigerating. It will thicken further as it chills.
Tips and Uses:
For a Darker Flavor: Use dark cocoa powder.
Adjust Sweetness: Feel free to reduce the sugar for a less sweet syrup.
Storage: Store in the refrigerator for up to 2-3 weeks.
Versatile: Enjoy it over ice cream, in milk, with pancakes, or mixed into coffee.
Bright Homemade Lemon Curd
Lemon curd is a vibrant, tangy, and creamy spread. It’s surprisingly easy to make and tastes infinitely better homemade. This recipe is a fantastic addition for those looking for meal prep tips for breakfasts or desserts.
Ingredients:
3 large eggs
1/2 cup granulated sugar
1/2 cup fresh lemon juice (from about 2-3 lemons)
1 tablespoon lemon zest
1/4 cup unsalted butter, cubed
Pinch of salt
Step-by-Step Cooking Guidance:
Whisk Ingredients: In a heatproof bowl (or the top of a double boiler), whisk together the eggs, sugar, lemon juice, lemon zest, and salt until well combined.
Cook over Heat: Place the bowl over a saucepan of simmering water. Ensure the bottom of the bowl does not touch the water.
Stir Continuously: Cook the mixture, stirring constantly with a whisk or rubber spatula. This prevents the eggs from scrambling.
Thicken: Continue cooking for 8-10 minutes. The curd will gradually thicken to the consistency of mayonnaise. It should coat the back of a spoon. When you run your finger across the spoon, it should leave a clear path. The ideal temperature is around 170°F (77°C) [16].
Remove from Heat: Immediately remove the bowl from the heat.
Add Butter: Stir in the cubed butter until it is completely melted and incorporated.
Strain (Optional but Recommended): For an extra smooth curd, push the mixture through a fine-mesh sieve into a clean jar or bowl.
Chill: Cover the surface of the curd directly with plastic wrap to prevent a skin from forming. Chill in the refrigerator for at least 2 hours, or until fully set.
Tips and Uses:
Don’t Boil: Do not let the curd boil, or the eggs may curdle.
Fresh Lemons: Always use fresh lemon juice and zest for the best flavor.
Storage: Lemon curd can be stored in an airtight container in the refrigerator for up to 1-2 weeks.
Serving Ideas: Serve with scones, toast, yogurt, tarts, crepes, or as a filling for cakes.
Simple Syrup for Drinks and Desserts
Simple syrup is a foundational ingredient for any home cook. It’s a key component in countless cocktails and desserts. This easy recipe makes it effortless to sweeten and flavor beverages. It also moistens cakes. It truly represents simple dinner recipes logic applied to sweets.
Ingredients:
1 cup granulated sugar
1 cup water
Step-by-Step Cooking Guidance:
Combine Ingredients: In a small saucepan, combine the granulated sugar and water.
Heat and Dissolve: Place the saucepan over medium heat. Stir occasionally until the sugar completely dissolves. Do not bring it to a boil unless you want a thicker syrup (see note below).
Cool: Remove the saucepan from the heat. Let the syrup cool completely to room temperature.
Store: Pour the cooled simple syrup into a clean, airtight bottle or jar.
Tips and Variations:
Basic Ratio: The classic ratio is 1:1 sugar to water. For a thicker, richer “rich simple syrup,” use a 2:1 sugar to water ratio.
Flavor Infusions:
Herbal: Add sprigs of fresh mint, basil, or rosemary while the syrup cools.
Spiced: Infuse with cinnamon sticks, star anise, or a few cardamom pods.
Fruity: Add fruit peels (like orange or lemon) or muddled berries to the hot syrup.
Storage: Simple syrup lasts for about 2-3 weeks in the refrigerator. Flavored syrups may have a slightly shorter shelf life.
Uses: Sweeten iced tea, lemonade, cocktails, coffee. Use to moisten cake layers before frosting. Drizzle over fresh fruit.
Fluffy Whipped Cream Frosting
Light, airy, and wonderfully creamy, homemade whipped cream frosting is a classic for a reason. It’s far superior to canned versions and incredibly simple to make. This easy recipe is perfect for quick breakfast ideas like fruit parfaits or topping a simple dessert.
Ingredients:
1 cup very cold heavy cream (or whipping cream)
2-4 tablespoons powdered sugar (confectioners’ sugar), to taste
1 teaspoon vanilla extract
Step-by-Step Cooking Guidance:
Chill Equipment: For best results, chill your mixing bowl (preferably metal) and whisk attachment in the freezer for 10-15 minutes before starting. This helps the cream whip faster and hold its shape better.
Combine Ingredients: Pour the cold heavy cream into the chilled bowl. Add the powdered sugar and vanilla extract. Start with 2 tablespoons of sugar and adjust to your preference.
Whip: Using an electric mixer (stand mixer or hand mixer) on medium-high speed, begin to whip the cream.
Watch for Peaks: Continue whipping until the cream forms soft peaks. Then increase speed to high. Keep whipping until it forms firm, stiff peaks. This usually takes 2-5 minutes, depending on your mixer. Be careful not to over-whip, as it can turn grainy or even into butter.
Serve Immediately: Use your fluffy whipped cream frosting right away for the best texture.
Tips for Success:
Cold is Key: Ensure your cream and equipment are very cold. This is the most important tip!
Don’t Over-Whip: Stop whipping as soon as stiff peaks form. Over-whipped cream becomes lumpy and separates.
Stabilize for Longer Hold: For whipped cream that holds its shape longer, especially in warmer conditions, you can add 1-2 tablespoons of powdered milk or a pinch of cream of tartar to the cream before whipping [17].
Flavor Variations:
Chocolate: Add 1-2 tablespoons of cocoa powder with the sugar.
Citrus: Include a teaspoon of lemon or orange zest.
Nutty: Mix in a few drops of almond extract instead of vanilla.
Spiced: A pinch of cinnamon or nutmeg works wonders.
Storage: Freshly whipped cream is best enjoyed immediately. It can be stored in the refrigerator for a few hours. However, it will lose some of its fluffiness over time.
Frequently Asked Questions
What are the ingredients of béchamel sauce?
Béchamel sauce, often called white sauce, is one of the foundational “mother sauces” in classic French cuisine. It’s incredibly simple to make from scratch, even for beginner cooks! This creamy, versatile sauce starts with just a few basic ingredients you likely have on hand.
Here are the essential ingredients for a traditional béchamel sauce:
Unsalted Butter: This forms the base of your roux.
All-Purpose Flour: It thickens the sauce beautifully.
Milk: Whole milk is ideal for richness. However, you can use 2% milk too.
Salt: Essential for flavor balance.
White Pepper: Adds a subtle warmth without visible black specks.
Nutmeg (Optional): A pinch elevates the flavor profile. It’s a classic addition to many béchamel recipes.
Making homemade béchamel sauce is a fantastic step toward more confident, approachable home cooking. It’s a simple dinner recipe that truly transforms meals!
Is alfredo sauce the same as béchamel sauce?
This is a great question we hear often! While both béchamel and alfredo sauce are creamy white sauces, they are definitely not the same. They come from different culinary traditions and use distinct ingredients.
Let’s look at the key differences:
Origin: Béchamel is a French “mother sauce.” Alfredo sauce, in contrast, is an Italian creation.
Thickening Method: Béchamel relies on a roux. This is a cooked mixture of butter and flour. It gives béchamel its smooth, thick texture. Alfredo sauce has no flour. It thickens naturally. This happens as the cheese emulsifies with butter and cream.
Core Ingredients:
Béchamel: Butter, flour, and milk. It’s a neutral base.
Alfredo: Butter, heavy cream, and Parmesan cheese. Often, a little garlic is added.
Flavor Profile: Béchamel has a mild, milky, and very adaptable flavor. It’s a fantastic starting point for other sauces, like cheese sauce. Alfredo sauce is rich, savory, and distinctly cheesy. Its flavor comes directly from Parmesan.
So, while both sauces deliver creamy goodness, their flavors and preparations are unique. Understanding these differences helps you choose the best sauce for your easy recipes and family-friendly meals!
What is the closest thing to yum yum sauce?
Yum Yum Sauce is that beloved, creamy, slightly sweet, and tangy sauce often served at Japanese steakhouses. If you’re looking to replicate that deliciousness at home, you have a few easy options!
The closest things to Yum Yum Sauce are often homemade sauces designed to mimic its unique flavor. Our Homemade Japanese Steakhouse Yum Yum Sauce Recipe is a perfect example. However, if you need a quick alternative, consider these options:
Spicy Mayo: This is a very close relative. You’ll need mayonnaise and a touch of sriracha or other hot sauce. A dash of sugar helps balance the flavor.
Fry Sauce: Popular in many parts of the US, fry sauce often blends mayonnaise and ketchup. To get closer to Yum Yum, you might add a little paprika and garlic powder.
Homemade Creamy Dressings: Many creamy dressings share a mayonnaise base. You can experiment by adding a tiny bit of tomato paste, paprika, garlic powder, and sugar to mayonnaise. A splash of rice vinegar helps with tanginess.
The key to Yum Yum Sauce is its balance of creamy, savory, sweet, and a little spicy. With a few common pantry ingredients, you can whip up a great approximation. It makes an excellent addition to quick breakfast ideas or simple dinner recipes, especially with grilled meats or seafood!
Do you just add a jar of pesto to pasta?
You certainly can add a jar of pesto directly to pasta! It’s one of the easiest ways to enjoy a flavorful meal quickly. However, with a few simple tricks, you can elevate that jarred pesto to taste even fresher and more homemade. This is perfect for busy families or anyone seeking flavorful meals made easy.
Here’s how to get the best out of your jarred pesto:
Warm Gently: Do not cook pesto vigorously. Instead, add it to your cooked pasta while it’s still warm. This gentle heat helps the flavors bloom.
Add Pasta Water: This is a chef’s secret! Before draining your pasta, reserve about half a cup of the starchy cooking water. Add a tablespoon or two to your pesto and pasta. It helps create a silky, emulsified sauce that coats every strand.
Freshness Boost:
Squeeze a little fresh lemon juice into the pesto. It brightens the flavor.
Stir in some freshly grated Parmesan cheese. This adds a lovely salty, nutty depth.
If you have fresh basil on hand, chop some and sprinkle it over the finished dish.
Customize It: Feel free to add cherry tomatoes, toasted pine nuts, or grilled chicken to your pesto pasta. This makes it a complete, simple dinner recipe.
Using jarred pesto is a fantastic shortcut for approachable home cooking. With these simple tips, your pesto pasta recipe will taste incredibly fresh and delicious every time!