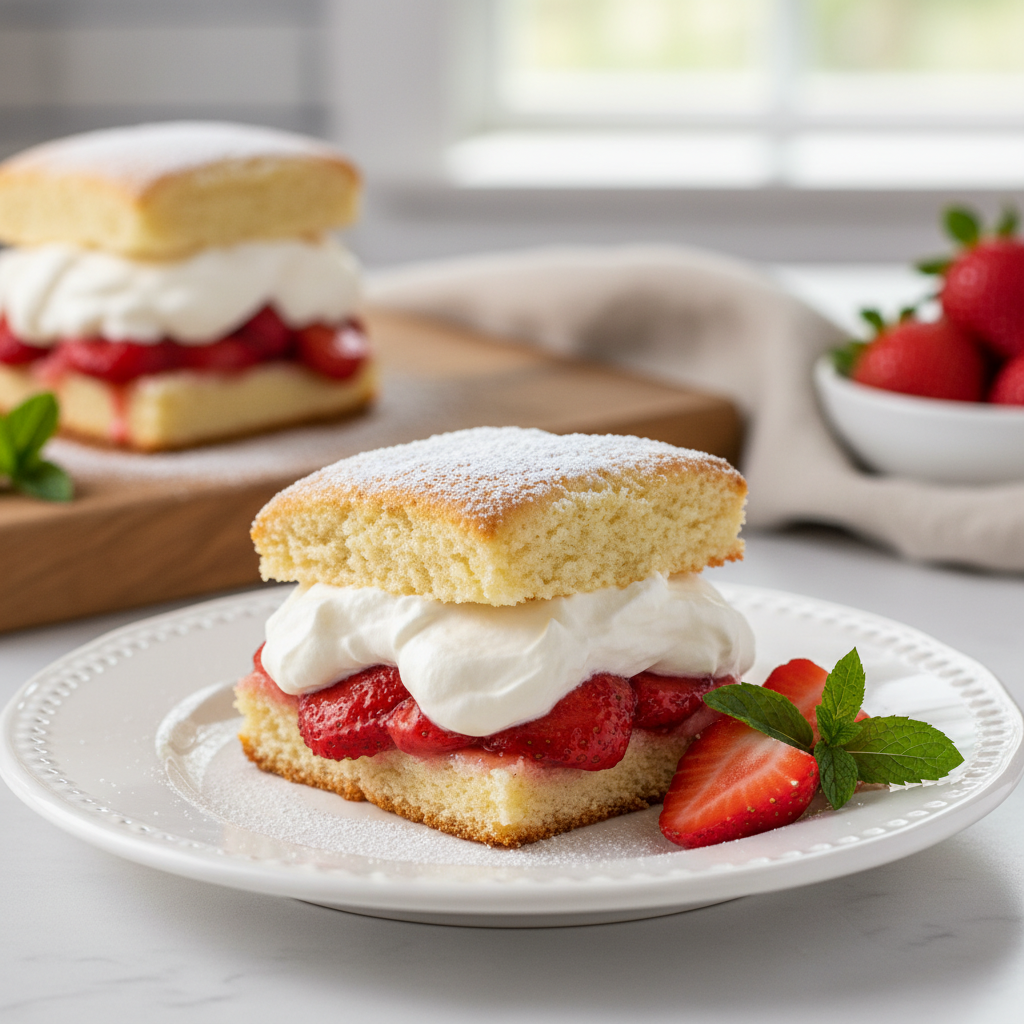
A classic apple pie recipe combines sliced fresh apples with sugar, cinnamon, and nutmeg, all baked inside a flaky, buttery pastry crust. The key to a great pie is balancing the sweetness and tartness of the apples and baking until the filling is bubbly and the crust is perfectly golden brown. This recipe is designed to be simple and approachable for home cooks.
Is there anything more comforting than a warm slice of homemade apple pie? The combination of a golden, flaky crust and a sweet, spiced apple filling is a timeless delight. Yet, the thought of baking from scratch can feel overwhelming. If complex recipes leave you unsure where to start, you are not alone. Many home cooks dream of perfecting this classic dessert without the stress.
Here at Recipesmondial, we believe making delicious, family-friendly meals and desserts should be an enjoyable experience, especially for beginners. That’s why we’re thrilled to share our best apple pie recipe, designed for simplicity. It offers clear, step-by-step guidance so you can create a memorable pie with confidence. Get ready to transform everyday ingredients into an amazing dessert.
Forget overly technical jargon and daunting instructions. Our Approachable Home Cooking philosophy will help you bake an amazing apple pie that tastes like it came straight from grandma’s kitchen. You’ll build confidence with every step while discovering just how simple and rewarding baking can be. Ready to try the perfect beginner-friendly recipe for your next baking adventure?
Why Is This the Best Apple Pie Recipe for Beginners?
Welcome to your new favorite baking adventure! Diving into homemade pie can feel daunting, especially for beginners. If you’ve ever felt overwhelmed by complex instructions or lacked confidence in the kitchen, this recipe is for you. It isn’t just another apple pie recipe—it’s the best one for beginners, designed to make you a confident baker.
Our goal at Recipesmondial is to make cooking enjoyable and stress-free. This apple pie recipe combines simple ingredients with clear, step-by-step guidance, empowering you to create a delicious dessert without the struggle. You’ll go from feeling uncertain to proudly presenting a homemade masterpiece.
Here’s why this recipe is your go-to for a perfect, flavorful apple pie every single time:
- Approachable Home Cooking: We break down every step into plain, simple language. You won’t find any intimidating culinary terms, just clear guidance from start to finish.
- Simple, Everyday Ingredients: No need for a special trip to a gourmet store. This recipe calls for common ingredients you probably already have in your pantry.
- Foolproof Flaky Crust: Our forgiving crust recipe is easy to handle and delivers a classic flaky texture without the fuss. We also include tips for using store-bought pastry to make it even simpler.
- Delicious, Balanced Filling: Create a perfectly sweet and spiced apple filling with our simple instructions. We help you achieve a wonderful balance of flavors so your pie is never too tart or too sweet.
- Confidence Building: Successfully baking a classic dessert is a huge accomplishment. This recipe is designed to be a rewarding experience that boosts your skills and inspires you to try more ambitious dishes.
- Practical Tips and Substitutions: We include helpful tips to prevent common mistakes, along with simple substitutions to suit your pantry or dietary needs. This flexibility ensures you can adapt the recipe with ease.
Discover how enjoyable making a delicious apple pie from scratch can be. This recipe transforms simple ingredients into a beautiful, comforting dessert. Get ready to impress family and friends with your new baking skills!
What Ingredients Do You Need for a Classic Apple Pie?
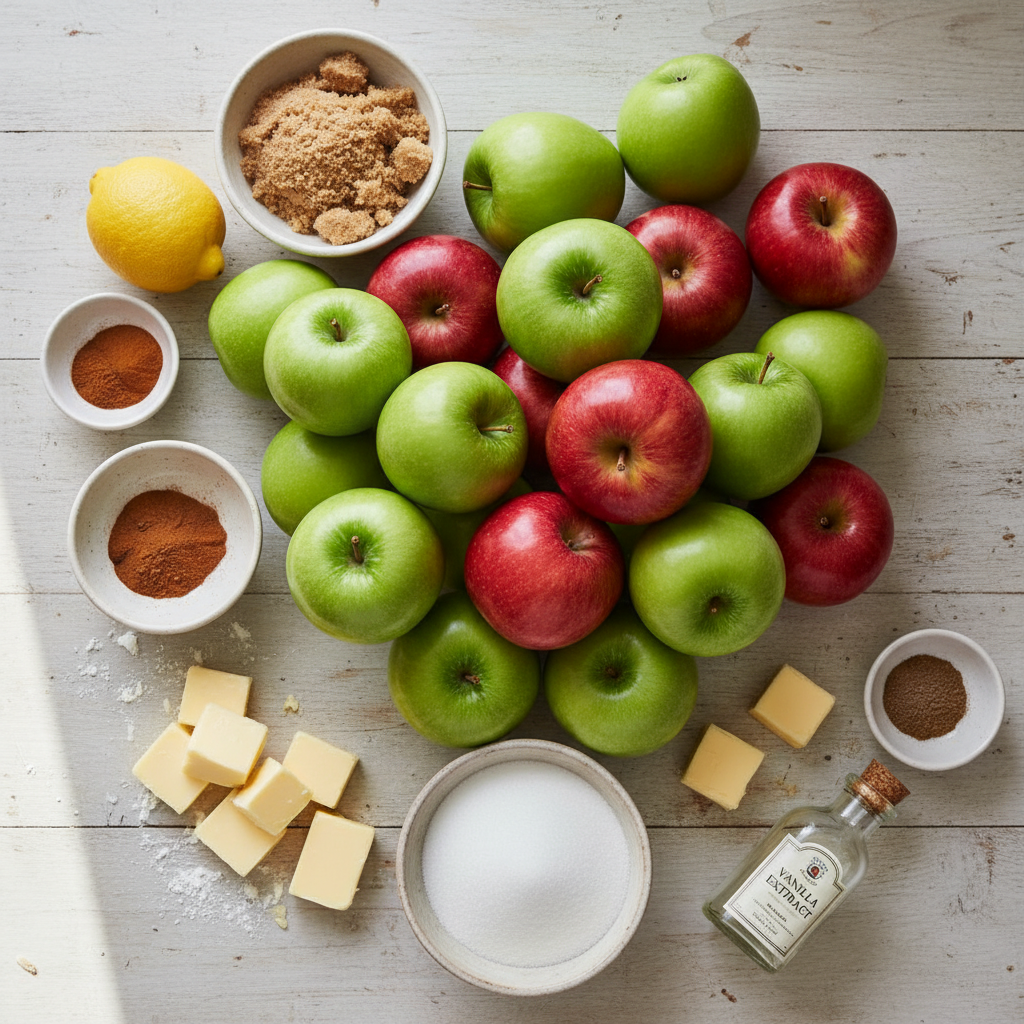
For the Flaky Pie Crust
Every great apple pie starts with a perfect, flaky crust. While making your own might sound daunting, our easy recipes approach simplifies the process. Using just a few basic ingredients, you’ll create a wonderfully tender and golden base for your pie. This beginner-friendly recipe focuses on clear steps to help you build confidence in the kitchen.
Here’s what you’ll need for two 9-inch pie crusts (one for the bottom and one for the top):
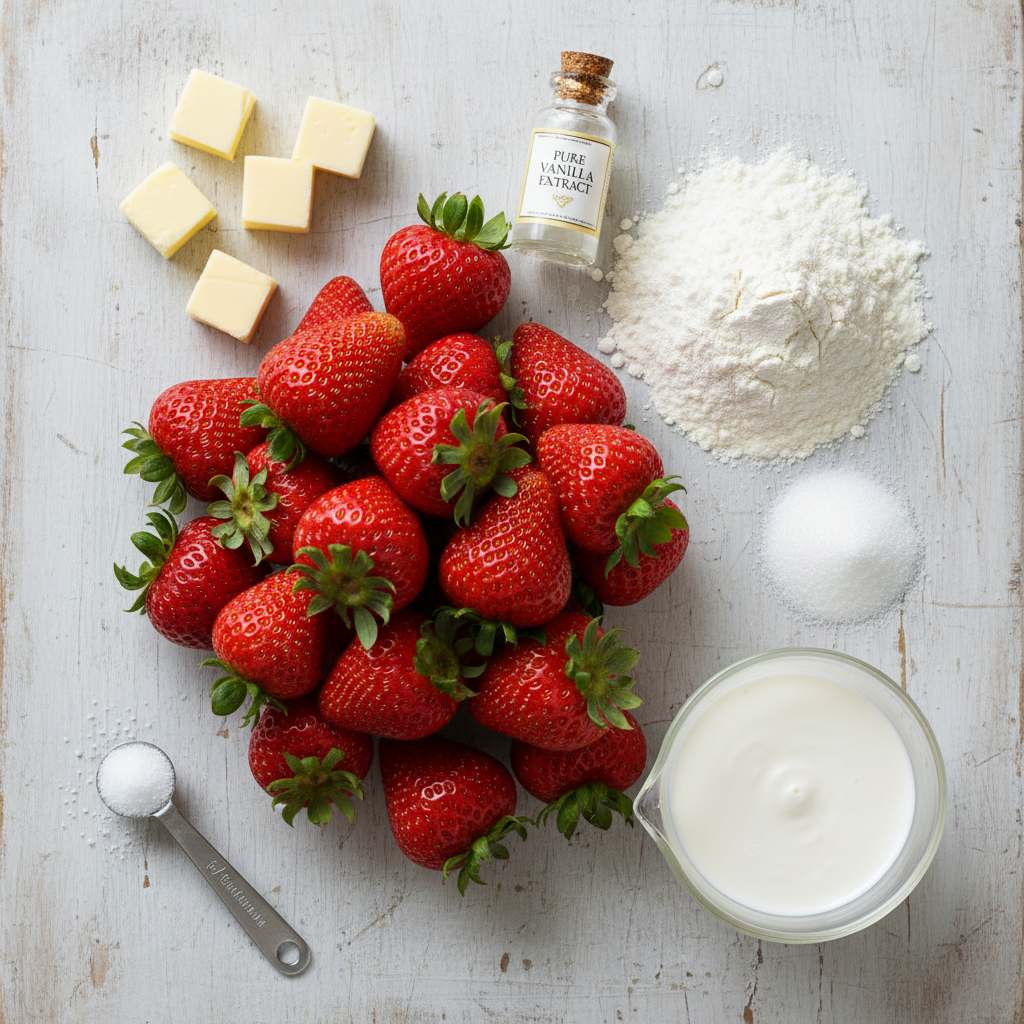
- 2 ½ cups (300g) all-purpose flour: Serves as the foundation of your crust.
- 1 teaspoon salt: Brings out the butter’s flavor and balances the sweetness of the filling.
- 1 cup (226g) unsalted butter, very cold and cut into ½-inch cubes: Using very cold butter is the key to flakiness. As it bakes, it creates steam pockets that result in an irresistible texture.
- ½ cup (120ml) ice water, plus more if needed: Ice water helps keep the butter cold and brings the dough together without overworking it.
For the Sweet and Spiced Apple Filling
The heart of any great apple pie is the filling. Our recipe creates one that is sweet, warmly spiced, and perfectly balanced. The filling thickens beautifully, so it won’t be runny—making this one of the best apple pie recipes for beginners. You’ll love how these simple ingredients transform into a comforting classic.
Gather these ingredients for a vibrant, flavorful filling:
- 6-7 medium-sized baking apples (about 2 ½ – 3 pounds), peeled, cored, and sliced ¼-inch thick: For the best flavor and texture, we recommend using a mix of sweet and tart apples like Granny Smith, Honeycrisp, or Fuji.
- ¾ cup (150g) granulated sugar: Provides sweetness. Feel free to adjust the amount based on the natural sweetness of your apples.
- ¼ cup (50g) packed light brown sugar: Adds a lovely caramel note and depth of flavor.
- ¼ cup (30g) all-purpose flour: Acts as a thickener to prevent a watery pie. You can use cornstarch for a gluten-free option.
- 1 ½ teaspoons ground cinnamon: The essential warming spice in any classic apple pie.
- ¼ teaspoon ground nutmeg: Complements the cinnamon beautifully.
- Pinch of ground cloves or allspice (optional): Adds an extra layer of complexity to the flavor.
- 1 tablespoon fresh lemon juice: Brightens the apple flavor and prevents the slices from browning.
- 2 tablespoons unsalted butter, cut into small pieces: Dotted over the filling before baking, this adds richness and a golden shine.
How to Make a Simple Apple Pie From Scratch
Ready to create a delicious, homemade apple pie that will impress everyone? This guide breaks down the process into simple steps, helping you turn basic ingredients into a warm, comforting dessert with confidence. Our goal is to make your baking journey enjoyable and stress-free.
Step 1: Prepare the Pie Crust
Crafting your own flaky pie crust is truly rewarding. Our beginner-friendly method ensures a tender, buttery base for your apple pie. You’ll find this easy recipe a game-changer for all your baking needs.
- Combine Dry Ingredients: In a large mixing bowl, whisk together 2 ½ cups (300g) all-purpose flour, 1 teaspoon granulated sugar, and ½ teaspoon salt to create an even base.
- Cut in Cold Butter: Add 1 cup (226g) of very cold unsalted butter, cut into ½-inch cubes. Using a pastry blender or your fingertips, cut the butter into the flour until the pieces are about the size of small peas. A mix of smaller and some larger, flatter pieces is ideal.
- Add Ice Water Gradually: Slowly drizzle in 6-8 tablespoons of ice water, one tablespoon at a time, mixing gently with a fork after each addition. Stop when the dough just begins to come together when squeezed. Avoid adding too much water, as it can make the crust tough.
- Form and Chill: Divide the dough into two equal portions and gently flatten each into a disk. Wrap each disk tightly in plastic wrap and refrigerate for at least 30 minutes, or up to 2 days. Chilling is crucial for a flaky texture.
Expert Tip for Beginners: Do not overwork the dough! Over-mixing develops too much gluten, which results in a tough crust instead of a tender one. Handle the dough as little as possible.
Step 2: Make the Apple Pie Filling
Now for the heart of your pie: the sweet and spiced apple filling. This is where simple ingredients transform into irresistible flavor. Our approachable method makes it easy.
- Prepare Your Apples: Peel, core, and slice 6-8 medium baking apples (about 6 cups). Aim for uniform ¼-inch thick slices to ensure they cook evenly.
- Combine Filling Ingredients: In a large bowl, gently toss the apple slices with ¾ cup (150g) granulated sugar, 2 tablespoons all-purpose flour, 1 teaspoon ground cinnamon, ¼ teaspoon ground nutmeg, and a pinch of salt. The flour helps thicken the juices as the pie bakes.
- Add a Citrus Boost (Optional): For extra brightness, add 1 tablespoon of fresh lemon juice. This also helps prevent the apples from browning.
- Let It Mingle: Allow the apple mixture to sit for 15-20 minutes. This step draws out some of the juices, which helps create a more flavorful and less watery filling.
Quick Tip for Flavor: Many baking experts recommend using a mix of sweet and tart apples, such as Honeycrisp and Granny Smith [1]. This balance creates a more complex and delicious taste.
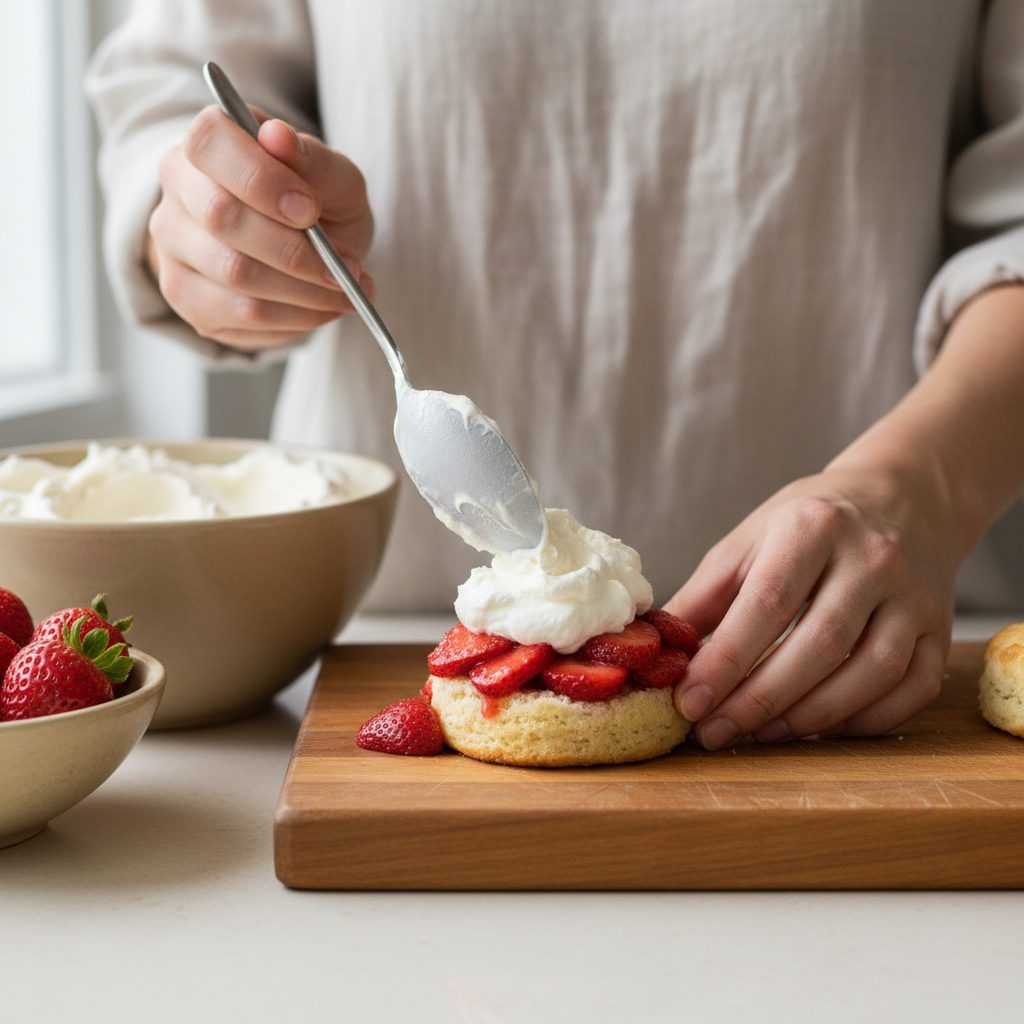
Step 3: Assemble Your Pie
It’s time to bring all the elements together. Follow these steps to build your picture-perfect homemade apple pie.
- Preheat Oven and Prep Pan: Preheat your oven to 425°F (220°C) and have a 9-inch pie dish ready.
- Roll Out Bottom Crust: On a lightly floured surface, roll one disk of chilled dough into a 12-inch circle. Carefully transfer the dough to your pie dish, leaving about a ½-inch overhang.
- Fill with Apples: Pour the apple filling into the prepared crust and mound it slightly in the center. Dot the top of the filling with 1 tablespoon of unsalted butter cut into small pieces.
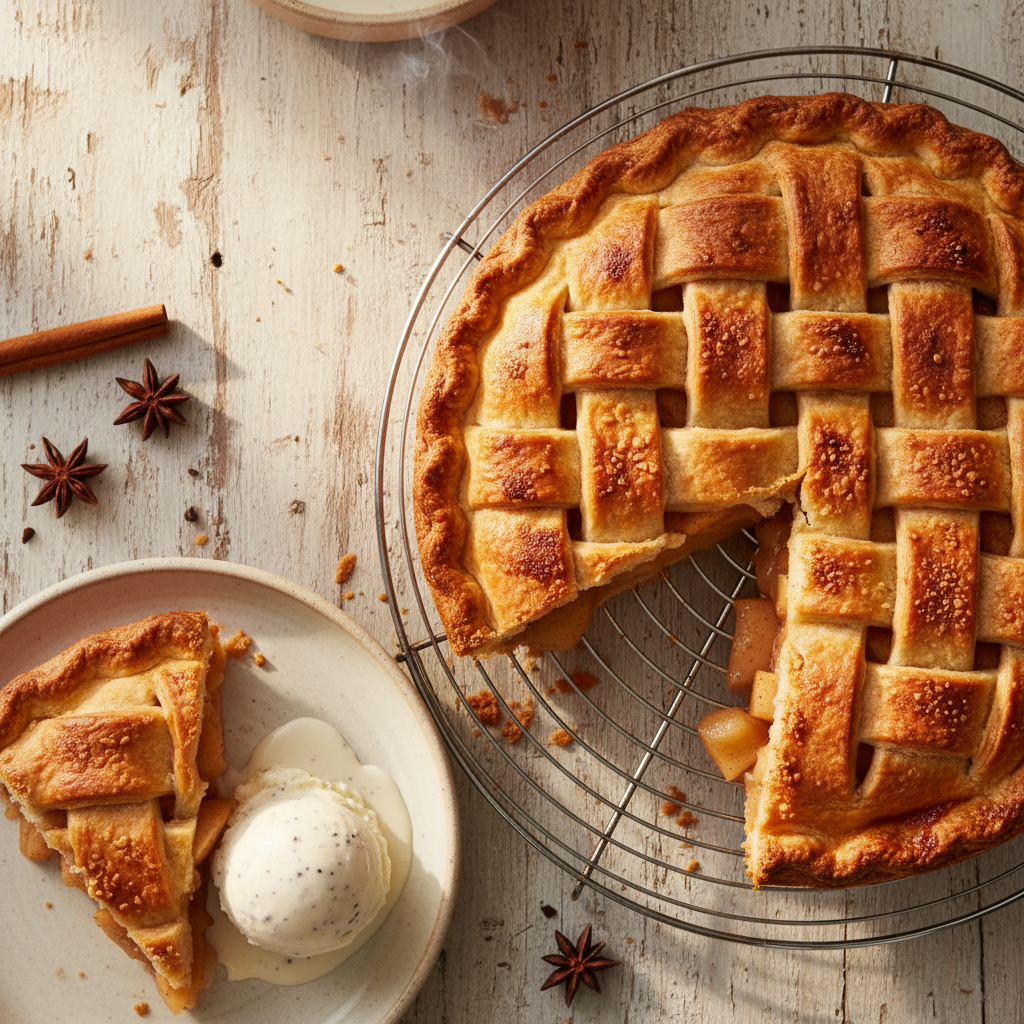
- Add Top Crust: Roll out the second disk of dough into another 12-inch circle. You can either place this over the filling as a solid top or cut it into strips for a lattice design.
- Seal and Crimp: Trim the edges of the top crust to match the bottom. Press the top and bottom crusts together along the rim to seal. Crimp the edges decoratively using your fingers or a fork.
- Vent the Pie: If you used a solid top crust, cut several slits in it to allow steam to escape during baking.
- Egg Wash (Optional): For a beautiful golden-brown finish, beat 1 egg with 1 tablespoon of milk or water and brush it over the top crust. Sprinkle with a little extra sugar, if desired.
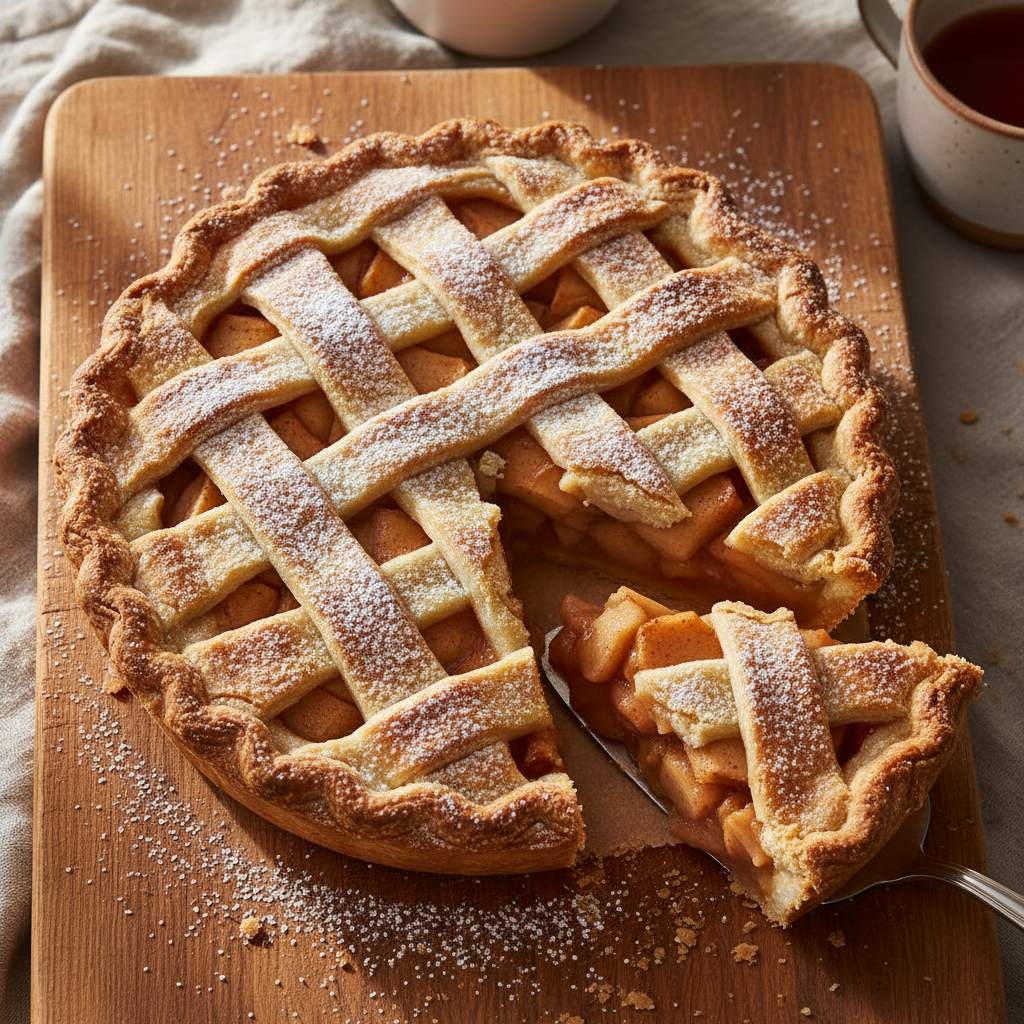
Step 4: Bake to Golden Perfection
The aroma of a baking apple pie is incredible. This final stage is all about baking your pie until the crust is golden and the filling is bubbly.
- Initial High Heat Bake: Place the pie on a baking sheet to catch any drips and bake for 15 minutes at 425°F (220°C). This initial high heat helps set a flaky bottom crust.
- Reduce Heat and Continue Baking: Lower the oven temperature to 375°F (190°C) and continue baking for another 40-50 minutes.
- Check for Doneness: The pie is done when the crust is a deep golden brown and the filling is bubbling through the vents. You can also insert a thin knife into a vent; the apples should feel tender.
- Prevent Over-Browning: If the edges of the crust are browning too quickly, cover them loosely with a ring of aluminum foil.
- Cool Completely: This step is critical! Remove the pie from the oven and let it cool on a wire rack for at least 3-4 hours before slicing. This allows the filling to set, preventing a runny slice.
Congratulations! You’ve just made a wonderful apple pie from scratch. This beginner-friendly recipe proves that delicious, homemade results are achievable for any home baker. Enjoy every bite!
Expert Tips for a Perfect Homemade Apple Pie
Mastering Your Pie Crust
A truly perfect homemade apple pie starts with an amazing crust. While it might seem daunting, these expert tips will help you achieve flaky perfection every time.
- Keep it Cold: For a wonderfully flaky texture, your butter must be ice-cold. In the oven, cold butter creates pockets of steam—the secret to a flaky crust. Remember to use ice water when mixing the dough as well.
- Don’t Overwork the Dough: Mix your pie crust just until it comes together. Overworking develops too much gluten, which makes the crust tough instead of tender. A light touch is all you need.
- Chill Out: After mixing, always chill your dough for at least 30 minutes. This step relaxes the gluten, keeps the butter cold, and makes the dough much easier to roll out.
- Roll Evenly: When rolling out your dough, aim for an even thickness to ensure the crust bakes evenly. Uneven spots can burn or remain undercooked.
Perfecting Your Apple Filling
The filling is the heart of the apple pie. Follow these tips to ensure yours is rich, comforting, and delicious every time.
- Mix Your Apples: Using a mix of apples creates the best flavor and texture. Some varieties hold their shape, while others break down into a saucy base. Granny Smith, Honeycrisp, and Fuji are popular choices for their balance of tartness and sweetness [2].
- Slice Consistently: Cut your apple slices to a similar thickness so they cook evenly. Otherwise, some slices may turn mushy while others remain too firm.
- Prevent a Watery Filling: Apples release a lot of liquid during cooking. To create a thick, luscious filling, add a thickening agent like flour, cornstarch, or tapioca.
- Spice it Right: While cinnamon is a classic, don’t be afraid to add a pinch of nutmeg, allspice, or cardamom to elevate the flavor. Adjust the spices to create a pie that’s uniquely yours.
- Sweetness to Taste: Taste your apples before adding sugar, and adjust the amount based on their natural sweetness. Tart apples will require more sugar than sweeter varieties.
Baking for Golden Perfection
The final step is baking, where all your hard work comes together. Follow these simple tips for a perfectly golden, bubbly pie.
- Vent Your Top Crust: Always cut slits or another design in your top crust. This allows steam to escape during baking, which prevents the crust from puffing up or cracking.
- Egg Wash for Shine: For a beautiful, golden-brown shine, brush the top crust with an egg wash (one egg whisked with a tablespoon of water). This also helps sprinkled sugar adhere to the crust.
- Protect the Edges: If the edges of your crust are browning too quickly, cover them with aluminum foil. This will prevent them from burning while the rest of the pie finishes baking.
- Bake Until Bubbly: A key sign of a fully baked pie is a filling that’s visibly bubbling in the center. This indicates the apples are tender and the thickener has activated. Baking typically takes 50-60 minutes, often starting at a high temperature (like 400°F/200°C) that is reduced partway through.
- Cool Completely: This might be the hardest tip to follow, but it’s crucial to let your pie cool completely. This allows the filling to set properly, preventing a runny slice. Patience is key!
Enjoying Your Homemade Masterpiece
Making a homemade apple pie should be a wonderful experience, not an overwhelming one. Recipesmondial is here to make your cooking journey enjoyable. Celebrate your accomplishment with a slice of this delicious, family-friendly dessert. With every step, you’re building confidence in the kitchen!
Recipe Variations and Substitutions
Using a Ready-Made Pie Crust
Feeling overwhelmed by complex recipes? Our goal at Recipesmondial is to make cooking enjoyable and stress-free. That’s why using a ready-made pie crust is a fantastic shortcut that saves you significant time and effort.
Many home cooks, from beginners to seasoned pros, rely on these crusts as a perfectly acceptable option. Best of all, your delicious apple pie will still taste wonderfully homemade.
Tips for success with ready-made crusts:
- Choose wisely: Look for refrigerated pie crusts in the dairy aisle. Frozen ones also work well, but be sure to follow the package instructions for thawing.
- Handle with care: Ready-made crusts can be delicate. Unroll them gently onto your pie plate.
- Pinch for perfection: Crimp the edges just as you would with a homemade crust. This adds a beautiful, finished look.
- Pre-baking (sometimes): Some recipes suggest pre-baking (or blind baking) the bottom crust. Always check the package for recommendations, but know that for most fruit pies, this step isn’t necessary.
This simple swap lets you enjoy a flavorful apple pie without the added stress of making dough from scratch. It’s an excellent choice for quick and reliable meal solutions [3].
Making an Egg-Free Version
If dietary needs or preferences require you to skip the egg, don’t worry. While many traditional apple pie recipes use an egg wash for a golden shine, it’s easy to make an egg-free version. There are simple alternatives that work just as well, making our family-friendly meals even more inclusive.
Egg-free wash alternatives:
- Milk or cream: Brush the top crust lightly with milk or heavy cream for a nice golden color and a soft finish.
- Melted butter: A brush of melted unsalted butter provides a rich sheen and adds a lovely buttery flavor.
- Plant-based milk: For a completely dairy-free and egg-free option, use almond, soy, or oat milk. This works similarly to regular milk.
- Sugar sprinkle: After brushing with milk or butter, a sprinkle of coarse sugar adds sparkle and a delightful crunchy texture.
With these simple substitutions, everyone can enjoy a slice of your delicious apple pie without compromising on flavor or appearance.
Adjusting the Spices
The beauty of homemade apple pie is making it your own. Adjusting the spices is a simple way to tailor the flavor and get creative in the kitchen. Our classic recipe provides a wonderful base, but feel free to experiment with different combinations to find what you love most.
Spice variations to try:
- More warmth: Increase the cinnamon to 1 teaspoon or even 1.5 teaspoons.
- Ginger kick: Add 1/4 to 1/2 teaspoon of ground ginger for a lovely, warm undertone.
- Nutmeg nuance: Use a bit more nutmeg, up to 1/2 teaspoon. Freshly grated nutmeg offers the best flavor.
- Cardamom complexity: For a unique twist, try 1/4 teaspoon of ground cardamom. It pairs beautifully with apples.
- Allspice addition: A dash of allspice (about 1/4 teaspoon) can deepen the overall spice profile.
- Pie spice blend: If you have an apple pie spice blend, you can use 1.5 to 2 teaspoons of it instead. It usually contains a mix of cinnamon, nutmeg, and allspice.
Start with small adjustments and taste the apple filling before baking to achieve your perfect spice level. This is an easy way to elevate your flavorful meals made easy.
How to Store and Freeze Apple Pie
Storing a Baked Apple Pie
After baking a beautiful apple pie, you’ll want to store it properly to keep it fresh and flavorful. Following a few simple steps will ensure your pie is ready for quick desserts or family meals later.
At Room Temperature
- Cool completely: First, let the pie cool completely on a wire rack for several hours. This crucial step prevents condensation from forming and making the crust soggy.
- Cover loosely: Once the pie is fully cooled, cover it loosely with a pie dome, an inverted bowl, or aluminum foil.
- Storage duration: An apple pie can be stored at room temperature in a cool, dry place for up to two days.
In the Refrigerator
- Cover tightly: For longer storage, wrap the completely cooled pie tightly, first in plastic wrap and then in aluminum foil. This protects it from absorbing refrigerator odors and drying out.
- Storage duration: A refrigerated apple pie stays fresh for 3 to 5 days.
- Reheating tip: To bring back the crust’s crisp texture, reheat individual slices in an oven or toaster oven until warm.
–
Freezing an Apple Pie for Later
Freezing is a fantastic way to enjoy homemade apple pie anytime. You can freeze the pie either baked or unbaked, and both methods are simple. Here’s how.
Freezing a Baked Apple Pie
Freezing a baked pie is perfect for busy days when you need a quick, ready-to-serve dessert. You will love having a homemade treat on hand.
- Cool completely: Allow the pie to cool entirely after baking. This step is essential to prevent ice crystals from forming.
- Wrap securely: Tightly wrap the whole pie in several layers of plastic wrap, followed by a layer of heavy-duty aluminum foil. This double layer is the best defense against freezer burn.
- Label and date: Don’t forget to label the wrapped pie with the date so you know how long it has been stored.
- Freezer duration: A baked apple pie can be frozen for up to 4 months.
- Thawing and reheating:
- To serve, thaw the pie in the refrigerator overnight.
- Reheat it in an oven preheated to 350°F (175°C) for 20-30 minutes, or until warmed through.
- If the crust begins to over-brown, cover it loosely with foil.
Freezing an Unbaked Apple Pie
Freezing an unbaked pie is a great time-saver that makes baking day less stressful. It’s an excellent way to prepare ahead of time.
- Assemble the pie: Follow your recipe to assemble the apple pie completely, but do not bake it.
- Firm up in freezer: Place the unbaked pie in the freezer, uncovered, for about 30 minutes. This helps it firm up, making it easier to wrap without damaging the crust.
- Wrap securely: Tightly wrap the firm pie, first in multiple layers of plastic wrap and then in heavy-duty aluminum foil to protect it from freezer burn.
- Label and date: Clearly label the pie with the date so you can track its freshness.
- Freezer duration: An unbaked apple pie can be frozen for up to 3 months.
- Baking from frozen:
- When you are ready to bake, do not thaw the pie.
- Preheat your oven to 425°F (220°C).
- Place the frozen pie on a baking sheet and bake for 15-20 minutes.
- Next, reduce the oven temperature to 375°F (190°C).
- Continue to bake for another 60-80 minutes, or until the crust is golden brown and the filling is bubbly.
- To prevent over-browning, you can cover the edges of the crust with foil during the last part of baking.
These simple tips will help you keep your homemade apple pie delicious and ready to enjoy at a moment’s notice. Enjoy cooking confidently with Recipesmondial!
Frequently Asked Questions
What’s in a classic old-fashioned apple pie?
A classic old-fashioned apple pie is all about simple, wholesome ingredients and a touch of love. Its comforting and straightforward nature makes it the perfect recipe for beginners.
Typically, you will find:
- Fresh Apples: Often a mix of sweet and tart varieties for the best flavor and texture.
- Sugar: Granulated sugar, sometimes with a touch of brown sugar, to sweeten the filling.
- Spices: Cinnamon is essential. Nutmeg, allspice, or a pinch of cloves might also be added for warmth.
- Flour or Cornstarch: This acts as a thickener to prevent a watery filling.
- Butter: A few pats of butter are often dotted over the filling for richness and flavor.
- A Flaky Pie Crust: Made from flour, butter (or shortening), salt, and ice water. This creates that wonderful, tender, golden-brown shell.
This approach emphasizes quality, everyday ingredients to create a delicious dessert that feels like a hug from your kitchen. It’s a wonderful example of a flavorful meal made easy.
How do you make the best apple pie filling?
Crafting the best apple pie filling is simpler than you might think and ensures a delicious, non-soggy pie every time. Here’s how to achieve it:
- Choose the Right Apples: Use a blend of firm, crisp apples. Think Granny Smith for tartness, combined with Honeycrisp or Fuji for sweetness.
- Balance Sweetness and Spice: Adjust the sugar based on your apples’ tartness. Also, don’t skimp on the cinnamon and a hint of nutmeg or allspice—these warming spices make the flavor sing.
- Thicken it Well: Always use a thickener like all-purpose flour or cornstarch to prevent a watery filling and ensure your slices hold their shape. A few tablespoons are usually enough for a standard pie.
- Pre-cook or Macerate (Optional but Recommended): To prevent a gap from forming under the top crust, you can pre-cook or macerate your apples. Pre-cooking involves simmering them briefly, while macerating means tossing them with sugar and letting them rest for 30 minutes. Both methods draw out excess moisture before baking.
- Add a Touch of Fat: Dotting the filling with small pieces of butter before adding the top crust adds richness and helps create a beautiful, glossy result.
Following these tips provides great step-by-step cooking guidance, helping you to cook confidently and master a flavorful meal made easy in no time!
Can I make this apple pie recipe with ready-made pastry?
Absolutely! Using ready-made pastry is a fantastic time-saver that makes this beginner-friendly recipe even easier. This shortcut helps you enjoy cooking without stress and is perfect when you need a quick meal or simply want to simplify the baking process.
Here are some tips when using pre-made pastry:
- Thaw Properly: Ensure your frozen pastry is thawed according to package directions. It should be pliable but still cool.
- Handle Gently: Store-bought crusts can be more delicate than homemade, so handle them carefully to prevent tearing.
- Flute with Care: When crimping the edges, work gently. You can use a fork for a simple pattern or your fingers for a more traditional look.
- Adjust Baking Time (if needed): Some ready-made crusts may bake slightly faster. Watch your pie closely for golden-brown perfection.
Embracing ready-made pastry is a smart choice for approachable home cooking. It allows you to focus on the delicious apple filling while still achieving a wonderful, homemade-tasting pie. It’s a perfect example of a simple dinner recipe solution!
What are the best types of apples to use for pie?
Choosing the right apples is key to a successful and flavorful apple pie recipe. The best pies use a blend of apples to create a balanced flavor and maintain a great texture after baking. Here are some top picks:
- Granny Smith: A pie favorite! They are tart, firm, and hold their shape beautifully when baked, balancing the sweetness of the filling.
- Honeycrisp: Known for their crisp texture and sweet-tart flavor. They stay firm during baking and add a lovely juiciness.
- Braeburn: These apples offer a spicy-sweet flavor and a firm texture that holds its shape well.
- Fuji: Sweet and crisp, Fujis contribute a pleasant sweetness and retain some texture after baking.
- Golden Delicious: A sweeter apple that softens nicely without turning to mush. They provide a milder flavor and good moisture.
For the ideal pie, we recommend using at least two different varieties. For instance, combining a tart apple like Granny Smith with a sweeter one like Honeycrisp or Braeburn creates a complex flavor and prevents the filling from becoming mushy. This is a great tip for elevating any beginner-friendly recipes!