Tag: beef

  • The Perfect Prime Rib Recipe: A Simple Guide for Beginners

    The Perfect Prime Rib Recipe: A Simple Guide for Beginners

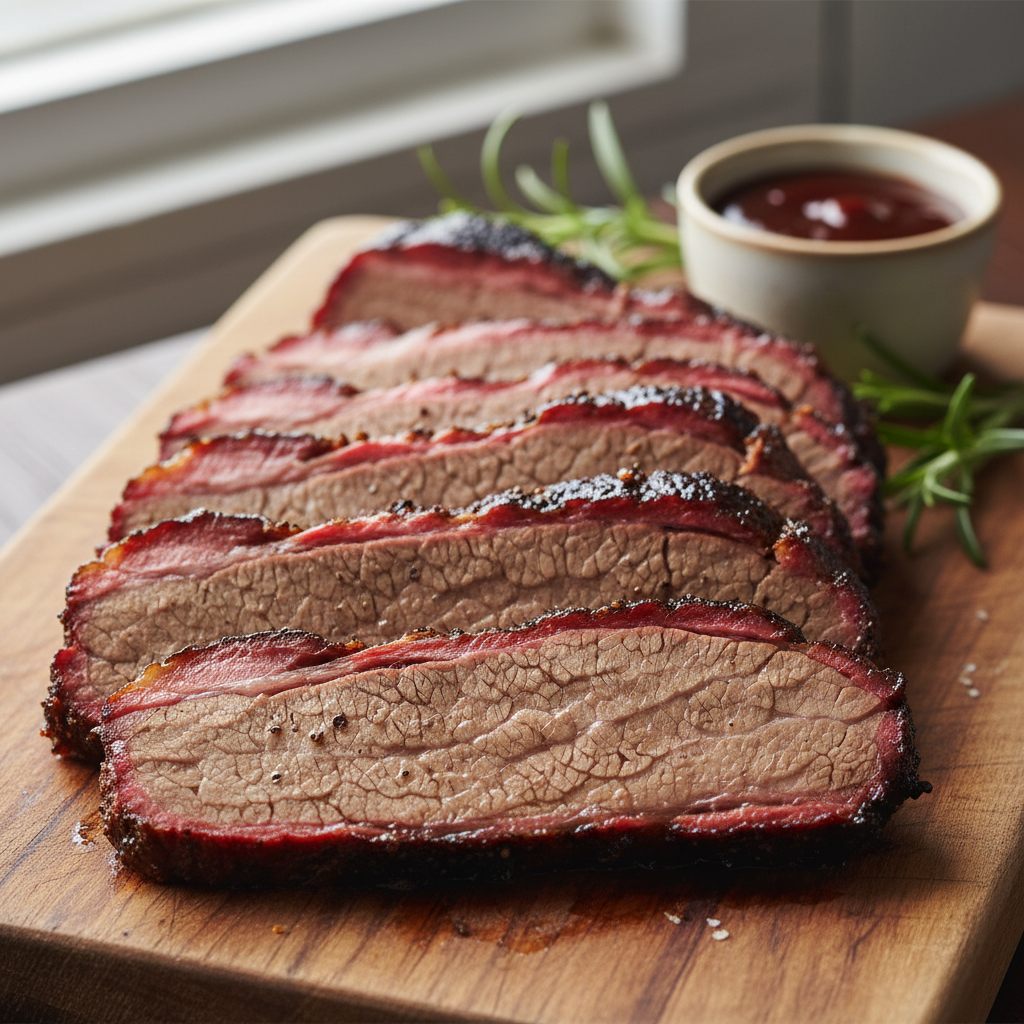
    Prime rib, also known as a standing rib roast, is a premium cut of beef celebrated for its rich flavor and tender texture. The best way to cook it is using a ‘reverse sear’ method: roast it low and slow in the oven until it’s about 15 degrees from your target temperature, let it rest, then sear it in a hot oven or pan for a perfect crust.

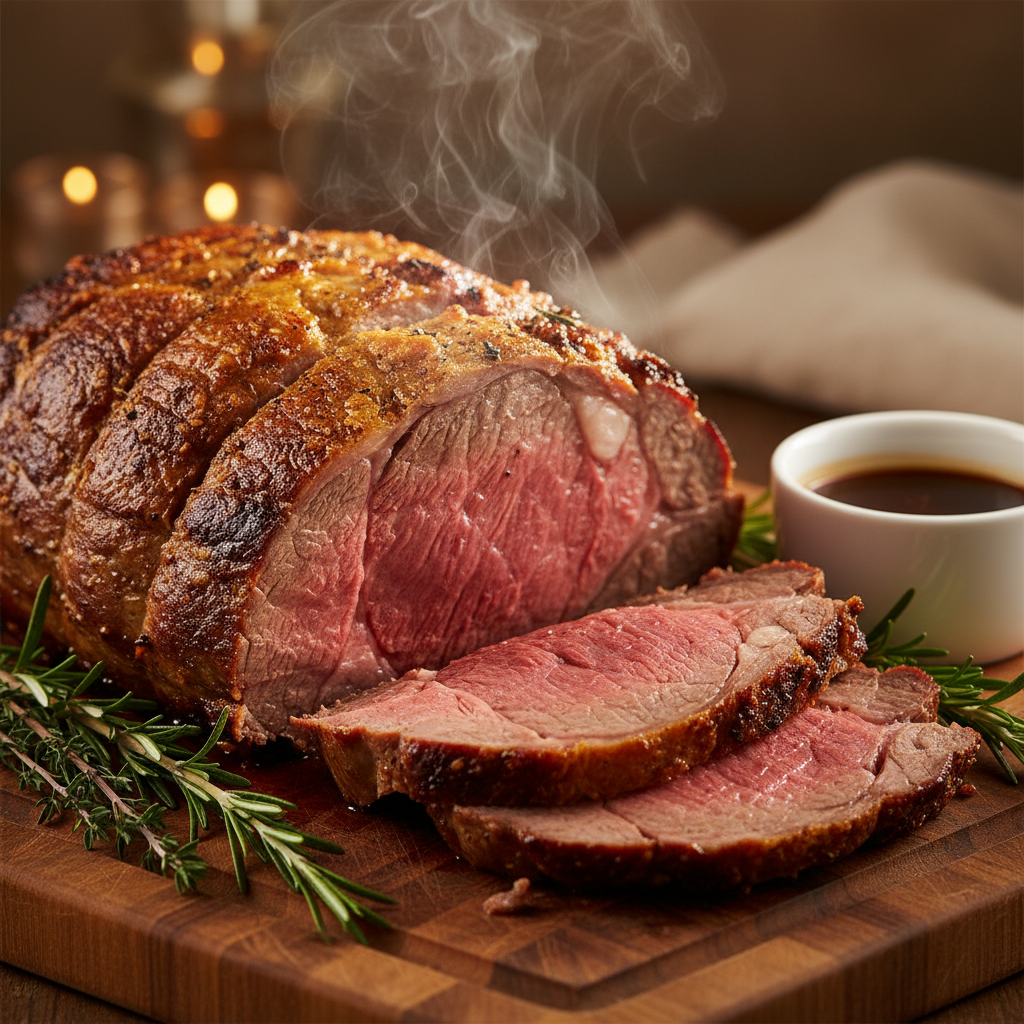
    Imagine serving a show-stopping meal that impresses everyone at the table: a perfectly cooked prime rib roast, golden-brown on the outside and wonderfully juicy within. For many home cooks, however, the idea of preparing a magnificent prime rib can feel daunting. You might worry about complex steps or lack confidence in your skills. But what if we told you that mastering this impressive dish is far simpler than you think? Here at Recipesmondial, we believe flavorful meals made easy are within everyone’s reach, and we’re here to guide you every step of the way.

    This prime rib recipe is designed to replace that intimidation with confidence. Whether you’re a novice cook or just need reliable step-by-step guidance, our beginner-friendly recipe delivers a stunning prime rib roast without the stress. We will walk you through the process of creating a tender, mouthwatering prime rib that will be the star of any holiday gathering or special family meal. Say goodbye to guesswork and hello to delicious results.

    Ready to unlock the secrets to a truly unforgettable roast? We’ll show you why this is more than just another recipe—it’s the definitive guide for approachable home cooking that guarantees success. Let’s dive in and discover why this is the best prime rib recipe for your kitchen.

    Why Is This the Best Prime Rib Recipe for Home Cooks?

    If you’re looking for an exceptional holiday meal, you’ve come to the right place. This isn’t just another prime rib recipe—it’s a guide designed specifically for home cooks. We’ll help you transform a daunting task into an enjoyable experience.

    Simplicity and Confidence in Every Step

    Cooking a majestic prime rib roast can feel overwhelming. Many recipes are filled with complex jargon and too many steps, leaving you unsure of where to start. At Recipesmondial, we believe in approachable home cooking and want you to feel confident in your kitchen.

    • No Overwhelm: Our step-by-step guidance breaks down the process into clear, manageable instructions, so you’ll never feel lost or intimidated.
    • Beginner-Friendly Focus: We avoid confusing culinary terms and use plain language, making it easy to master the basics.
    • Guaranteed Success: Follow our guide to achieve a perfectly cooked, flavorful standing rib roast. We set you up for success, just like with all our simple dinner recipes.

    Flavorful Results, Stress-Free Experience

    A delicious meal shouldn’t require hours of complex work. That’s why this prime rib recipe delivers maximum flavor with minimal fuss. We focus on simple techniques that work in a real home kitchen, allowing you to enjoy the cooking process from start to finish.

    • Everyday Ingredients: Our recipe relies on common ingredients you can find at any grocery store, so there’s no need for a special trip.
    • The Perfect Reverse Sear: We’ll guide you through the reverse sear, a chef-approved method that creates an incredible crust and ensures tender, evenly cooked meat.
    • Perfect Doneness Every Time: With our clear timing chart and meat thermometer tips, you can achieve your desired doneness without guesswork, resulting in a juicy, tender prime rib roast recipe.

    Designed for Your Recipesmondial Journey

    This prime rib guide is a perfect example of the Recipesmondial spirit. We’re dedicated to making mealtime stress-free with easy, family-friendly meals that help you build confidence and discover new flavors.

    • Clear Guidance: We present our recipes in a clear, easy-to-follow format, so you always know what to do next.
    • Practical Tips: We include smart substitutions and meal prep advice to help you save time and cook more efficiently.
    • Inspiring Creativity: This recipe provides a great foundation, inspiring you to explore other flavorful and simple meals.

    From simple breakfast ideas to comforting dinners, Recipesmondial supports your entire culinary journey. This prime rib roast is just one example of our commitment to helping you create memorable, delicious meals with ease.

    What’s the Difference Between Prime Rib and Standing Rib Roast?

    Navigating the world of beef roasts can feel like learning a new language. You might see recipes for “prime rib” and others for “standing rib roast,” leaving you to wonder what the difference is. The good news is, they’re just two names for the same fantastic cut of beef.

    It’s like how some people say “soda” while others say “pop” to describe the same fizzy drink. In the same way, prime rib and standing rib roast refer to the exact same delicious, impressive cut of meat.

    Understanding the Names

    While the names are interchangeable, each one tells a small part of the cut’s story:

    • Prime Rib: This name comes from the fact that the cut is from the “primal” rib section of the cow. While this cut was historically graded USDA “Prime” for its high quality, the name is now used more broadly. That means a roast labeled “prime rib” today might be of a different grade, like Choice or Select.
    • Standing Rib Roast: This name is more literal, describing how the roast is cooked. It “stands” on its rack of rib bones in the pan. This technique helps protect the meat from the direct heat of the pan and adds incredible flavor as the bones render.

    So, the next time you’re at the butcher shop, don’t let the terminology confuse you. A standing rib roast recipe is the same as a prime rib recipe. No matter what it’s called, you’re getting a tender, juicy, and incredibly flavorful centerpiece for your table.

    At Recipesmondial, our goal is to make cooking simple. Now that you know this secret, you’re one step closer to mastering a delicious prime rib, no matter what your recipe calls it!

    Choosing Your Cut: A Quick Shopping Guide

    Understanding Grades: Prime, Choice, and Select

    Choosing the perfect prime rib roast starts at the butcher’s counter, where you’ll often see different grades of beef. The United States Department of Agriculture (USDA) assigns these grades to indicate the meat’s quality, helping you know what to expect from your purchase.

    Understanding these grades makes shopping easier and helps you pick the right prime rib for your meal. Here’s a quick guide to the most common grades:

    • USDA Prime: This is the highest quality grade, characterized by abundant marbling—the small flecks of fat within the muscle. As the meat cooks, this fat melts, making Prime cuts incredibly tender, juicy, and flavorful. Often found in high-end restaurants, it’s an excellent choice for a truly special occasion.
    • USDA Choice: Choice is also a high-quality grade with less marbling than Prime, but still plenty to ensure a rich, tender, and flavorful cut. Widely available in supermarkets, Choice beef offers a fantastic balance of quality and value, making it an ideal option for most home cooks.
    • USDA Select: This grade is leaner, with the least amount of marbling. As a result, Select cuts are less juicy and tender than Prime or Choice. While they can be improved with marinades or slow cooking, this grade is not typically recommended for a show-stopping prime rib roast.

    For your perfect prime rib roast, we highly recommend a USDA Choice cut. It delivers amazing flavor and tenderness and is usually more budget-friendly than Prime.

    Bone-In vs. Boneless Prime Rib

    Next, you’ll need to decide between a bone-in and a boneless prime rib. While both options can make a wonderful meal, they offer slightly different benefits.

    • Bone-In Prime Rib (Standing Rib Roast): Often called a “standing rib roast” because it can stand on its own rib bones, many chefs prefer this cut. The bones are believed to add flavor and insulate the meat, which promotes even cooking. While a bone-in roast makes for an impressive presentation, it can be trickier to carve.
    • Boneless Prime Rib: A boneless prime rib is easier to season, carves more easily, and typically cooks a little faster than its bone-in counterpart. Butchers often tie it with string to help it hold a uniform shape. The main drawback is that some people find it slightly less flavorful without the bones.

    Ultimately, either option works well. If you prioritize ease of carving, go boneless. If you want maximum flavor and an impressive presentation, choose bone-in. Both will result in a delicious roast.

    How Much Prime Rib Per Person?

    Planning the right amount of prime rib ensures everyone gets a satisfying portion without creating food waste. Since prime rib is a rich cut, a little goes a long way. Your calculations should also factor in your guests’ appetites and how many side dishes you plan to serve. With many hearty sides, for example, you’ll likely need less meat.

    Here is a simple guide to help you plan your family-friendly meal:

    Roast Type Serving Size Per Person
    Bone-In Prime Rib About 1 pound (450g)
    Boneless Prime Rib About 1/2 pound to 3/4 pound (225g to 340g)

    For example, if you are serving six people, you would need a 6-pound bone-in roast or a 3- to 4.5-pound boneless roast. It’s always a good idea to buy a little extra to ensure enough for seconds—plus, leftover prime rib makes amazing sandwiches!

    Essential Ingredients & Tools for Your Roast

    A flat lay photo showing a raw prime rib roast, fresh herbs, garlic, salt, pepper, olive oil, a roasting pan, kitchen twine, and a meat thermometer on a wooden kitchen counter.
    A professional food photography, photorealistic, high-quality food magazine photo of a meticulously arranged flat lay on a clean, rustic wooden countertop. The main subject is a raw, beautiful prime rib roast, surrounded by essential ingredients: fresh rosemary and thyme sprigs, whole garlic cloves, coarse sea salt, black peppercorns, and a small bottle of olive oil. Adjacent to the ingredients are the key tools: a sturdy roasting pan, kitchen twine, and a digital meat thermometer. The lighting is warm and inviting, highlighting the textures and freshness of the ingredients, creating a sense of simplicity and readiness for cooking in a home kitchen setting. No human hands visible.

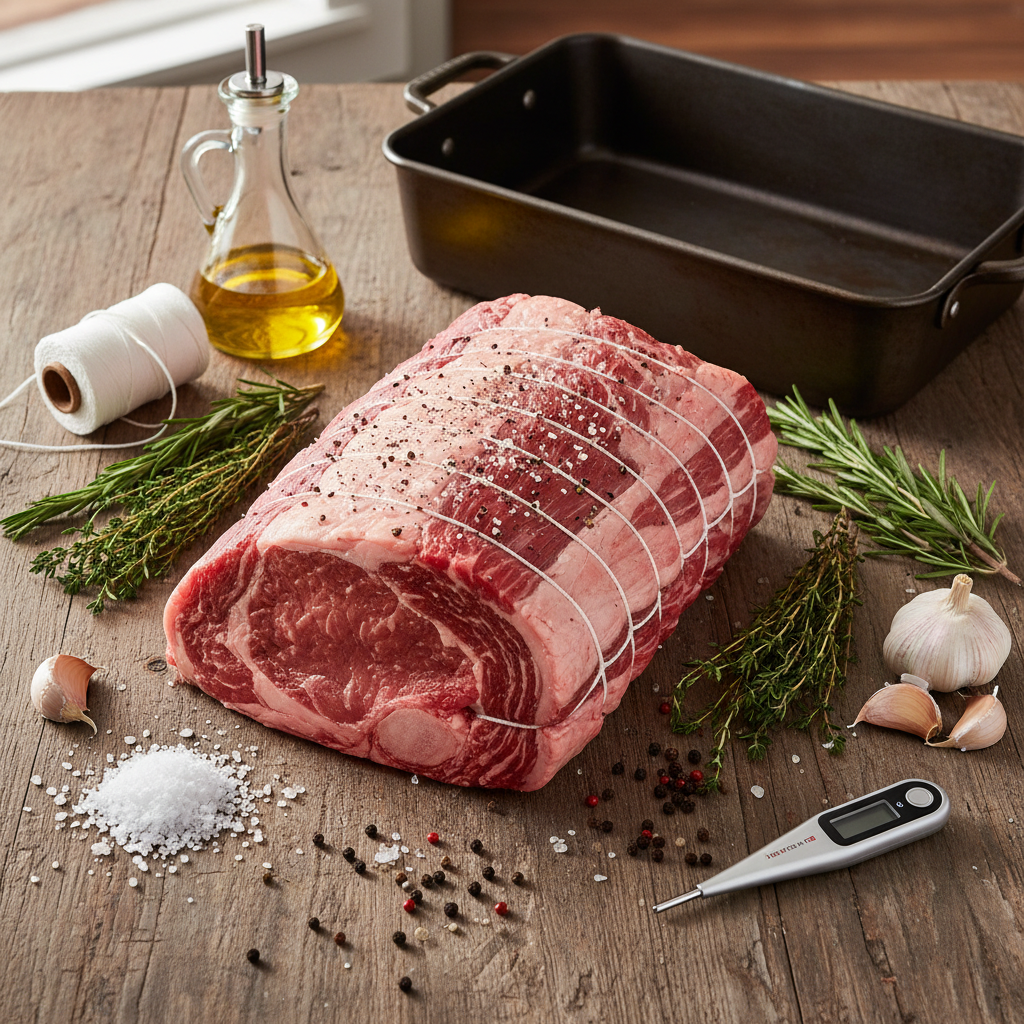
    For the Prime Rib Roast

    A truly memorable prime rib starts with a great cut of meat—it’s the foundation of your masterpiece. Let’s make sure your cooking experience is stress-free and yields delicious results.

    • A Quality Prime Rib Roast: Look for a standing rib roast (often called prime rib). You can choose bone-in or boneless, but bone-in roasts tend to add more flavor and promote even cooking.
    • Size Matters: Plan on 1 to 1.5 pounds per person for a bone-in roast or 0.75 to 1 pound for boneless. This calculation ensures everyone gets a generous serving.
    • USDA Choice or Prime: While “prime rib” is the name of the cut, the USDA grade is also important. Aim for “Choice” for excellent quality and value, or choose “Prime” for superior marbling and tenderness if your budget allows. [source: https://www.ams.usda.gov/grades-standards/beef-grades] If you’re unsure, your butcher can help you select the perfect roast.
    • Bringing it Home: Purchase your roast a day or two before you plan to cook it and store it in the refrigerator until you’re ready.

    Remember, starting with a quality roast is the first step to a successful, family-friendly meal that everyone will rave about.

    Simple Herb & Garlic Seasoning

    You don’t need fancy ingredients for incredible flavor. This simple herb and garlic rub will elevate your prime rib from good to absolutely amazing.

    • Fresh Garlic: 6-8 cloves, minced. Using fresh garlic provides the most aromatic flavor.
    • Fresh Rosemary: 2 tablespoons, finely chopped. Its piney notes are a beautiful complement to beef.
    • Fresh Thyme: 1 tablespoon, finely chopped, to add a subtle, earthy depth.
    • Coarse Kosher Salt: 2-3 tablespoons. Salt is crucial for seasoning the meat and creating a delicious crust.
    • Freshly Ground Black Pepper: 1-2 tablespoons. Grinding it fresh provides the best flavor.
    • Olive Oil: 2-3 tablespoons. The oil helps the seasoning adhere to the meat and promotes a beautiful sear.

    Simply combine these ingredients to create a robust, flavorful coating. You’ll be amazed at the flavor this easy blend produces!

    Kitchen Tools You’ll Need

    Having the right tools makes cooking a prime rib roast easier and more enjoyable. You don’t need a gourmet kitchen—these simple items are all it takes to achieve perfect results.

    • Large Roasting Pan with a Rack: This is an essential tool. The rack lifts the roast off the pan, allowing heat to circulate for even cooking and preventing a soggy bottom.
    • Instant-Read Meat Thermometer: This is your secret weapon for perfectly cooked meat, as it takes away all the guesswork. A reliable thermometer is especially invaluable for a beginner-friendly recipe.
    • Sharp Chef’s Knife: A sharp knife is necessary for preparing the herbs and garlic, and it also makes carving the finished roast much safer and easier.
    • Cutting Board: A sturdy board is crucial for both prep and carving your magnificent roast.
    • Small Bowl: For mixing your herb and garlic rub.
    • Butcher’s Twine (Optional, but Recommended): If your roast is irregularly shaped, tying it with twine helps it hold its shape and cook more evenly for consistent results.
    • Heavy-Bottomed Skillet or Cast Iron Pan (Optional, for Searing): If you choose to sear your roast before roasting, a good skillet creates an amazing crust.

    With these tools, you’ll be well-equipped to create a delicious prime rib with confidence. Making flavorful meals at home should be an easy and enjoyable process for everyone.

    How to Cook a Prime Rib Roast: Step-by-Step

    Slices of perfectly cooked medium-rare prime rib roast on a wooden cutting board, garnished with fresh rosemary and thyme.
    A professional food photography, photorealistic, high-quality food magazine photo of a perfectly cooked, golden-brown prime rib roast, beautifully carved into thick, succulent slices, arranged on a rustic wooden cutting board. The interior of the meat should clearly display a tender, juicy medium-rare pink center with a flavorful, seared crust. A few sprigs of fresh rosemary and thyme are artfully placed on the board for garnish. Subtle steam rises from the warm meat. The background is softly blurred, suggesting a cozy, well-lit kitchen environment. The focus is entirely on the deliciousness and perfection of the finished roast, emphasizing its restaurant-quality appearance for home cooks.

    Step 1: Bring the Roast to Room Temperature

    This first step is crucial for an evenly cooked prime rib. Allowing the roast to come to room temperature before cooking prevents it from having a cold center and overcooked edges.

    • Plan ahead: Remove your prime rib from the refrigerator 3-4 hours before you plan to cook it. Larger roasts may need up to 5 hours.
    • Unwrap it: Let the roast sit unwrapped on a wire rack set over a baking sheet to allow for air circulation.
    • Even cooking: A room-temperature roast cooks more predictably, making it easier to reach your desired doneness.

    Step 2: Prepare the Herb and Garlic Rub

    This simple herb and garlic rub infuses the prime rib with flavor, creating a delicious crust and a fragrant aroma. It’s a key part of the recipe.

    In a small bowl, combine all the rub ingredients, which typically include:

    • Minced garlic
    • Fresh or dried rosemary
    • Fresh or dried thyme
    • Coarse salt
    • Freshly ground black pepper
    • Olive oil (to make a paste)

    Mix everything until it forms a thick paste. The olive oil helps the rub adhere to the meat and melds the flavors together.

    Step 3: Season the Prime Rib Generously

    Now it’s time to season the roast. Generous seasoning is the secret to a restaurant-quality prime rib, so don’t be shy with the rub.

    • Apply the rub: Use your hands to thoroughly coat the entire surface of the prime rib with the herb and garlic paste.
    • Massage it in: Gently massage the rub into every crevice to ensure maximum flavor penetration.
    • All sides: Make sure to cover the top, bottom, and all sides of the roast, including the bones.
    • Prep for success: This step is vital for developing a flavorful crust that locks in the juices.

    Step 4: Sear for a Perfect Crust

    To create an incredible, golden-brown crust, we’ll start with an initial high-heat sear in the oven. This technique adds immense flavor and texture to your prime rib.

    • Preheat your oven: Set your oven to a high temperature, around 450-500°F (232-260°C).
    • Place on a rack: Put the seasoned prime rib, fat-cap up, on a wire rack in a roasting pan.
    • Initial sear: Roast at this high temperature for 15-20 minutes. This creates a beautiful sear on your standing rib roast.
    • Lower the temperature: After the initial sear, reduce the oven temperature for the slow-roasting phase, as detailed in the next step.

    Expert Tip: A good sear adds depth of flavor and creates a satisfying texture contrast, making your prime rib truly special.

    Step 5: Roast to Your Desired Doneness

    After the initial sear, the next stage is slow roasting. This gentle cooking method ensures a tender, juicy interior. For this step, a meat thermometer is essential.

    • Reduce heat: Lower your oven temperature to 250-300°F (120-150°C) for the slow roast.
    • Insert thermometer: Place an oven-safe meat thermometer into the thickest part of the roast, being careful to avoid touching any bones.
    • Cook slowly: Continue roasting until the internal temperature is about 5-10°F (3-6°C) below your desired final doneness. For medium-rare, aim for 120-125°F (49-52°C) before removing it from the oven.
    • Check regularly: Monitor the temperature closely. While our prime rib cooking time chart offers estimates, always trust your thermometer, as cooking times can vary based on the roast’s size and your oven [1].

    Using a thermometer is the most reliable way to achieve your preferred doneness and transform simple ingredients into a delicious meal.

    Step 6: The Most Important Step – Let it Rest!

    This final step is non-negotiable for a succulent prime rib. Do not skip the resting period, as it is critical for a juicy result.

    • Remove from oven: Once your prime rib reaches its target temperature, take it out of the oven.
    • Tent loosely: Transfer the roast to a clean cutting board and tent it loosely with aluminum foil.
    • Resting time: Let the prime rib rest for at least 20-30 minutes. Larger roasts benefit from resting up to 45 minutes.
    • Why it matters: Resting allows the juices to redistribute throughout the meat, resulting in a tender and moist roast. Skipping this step will cause the juices to run out onto the cutting board when you slice it.
    • Carryover cooking: During the rest, the internal temperature will continue to rise by a few degrees. This is known as “carryover cooking.”

    This crucial resting period ensures every slice of your prime rib is perfectly juicy and flavorful. It’s the final key to a perfect result.

    How long to cook prime rib roast?

    Prime Rib Cooking Time Chart

    Cooking a show-stopping prime rib roast might seem daunting, but it’s simpler than you think. The key is to understand that cooking time depends on two main factors: the size of the roast and your desired doneness.

    The table below offers approximate cooking times, but remember, these are only guidelines. Factors like your specific oven and the roast’s starting temperature can cause variations. For the most accurate results, you should always use a reliable meat thermometer.

    The times in this chart are for the reverse sear method, an excellent beginner-friendly recipe approach. This technique uses a low oven temperature for roasting followed by a high-heat sear, which creates an even cook and a delicious, crispy crust.

    Roast Size (Weight) Rare (120-125°F) Medium-Rare (130-135°F) Medium (135-140°F)
    3-4 lbs (2 Ribs) 1.5 – 2 hours 2 – 2.5 hours 2.5 – 3 hours
    5-7 lbs (3-4 Ribs) 2 – 2.5 hours 2.5 – 3 hours 3 – 3.5 hours
    8-10 lbs (4-5 Ribs) 2.5 – 3 hours 3 – 3.5 hours 3.5 – 4 hours
    11-13 lbs (6-7 Ribs) 3 – 3.5 hours 3.5 – 4 hours 4 – 4.5 hours

    Don’t forget the resting period after roasting—it’s crucial. Your prime rib continues to cook even after it’s out of the oven, a process known as carry-over cooking. The internal temperature can rise by an additional 5-10°F. For this reason, you should always remove the roast from the oven slightly before it reaches your final target temperature.

    Using a Meat Thermometer for Perfect Results

    When cooking prime rib, a meat thermometer is your most essential tool. It eliminates guesswork and is the only reliable way to guarantee your desired doneness every time. Using one will give you confidence in the kitchen, which is why so many easy recipes recommend this technique for success.

    To achieve a *flavorful meal made easy*, here’s how to use your thermometer correctly:

    • Insert It Correctly: Push the thermometer into the thickest part of the roast. Make sure it doesn’t touch any bones, which conduct heat differently and can give an inaccurate reading.
    • Monitor Regularly: Begin checking the temperature about 30 minutes before the estimated cook time ends. This allows you to remove the roast at the perfect moment.
    • Know Your Temperatures: To get the exact result you want, you need to know the target internal temperature for your preferred level of doneness.

    Here are the target temperatures to guide you:

    • Rare: 120-125°F (pull from oven at 115-120°F)
    • Medium-Rare: 130-135°F (pull from oven at 125-130°F)
    • Medium: 135-140°F (pull from oven at 130-135°F)
    • Medium-Well: 145-150°F (pull from oven at 140°F)
    • Well-Done: 150-155°F (pull from oven at 145°F)

    For food safety, the USDA recommends cooking whole cuts of beef like prime rib to a minimum internal temperature of 145°F (63°C) [2]. However, many people prefer a lower temperature for optimal tenderness and flavor. If you choose a doneness below 145°F, be aware of the official guidelines and ensure everyone eating the roast is comfortable with this choice.

    Ultimately, using a thermometer is the key to achieving restaurant-quality results at home. It makes *approachable home cooking* a joy and helps build confidence, even if you feel you are *lacking confidence in cooking skills* right now. This simple step is what makes any *beginner-friendly recipe* for roasts a success.

    Tips for a Flawless, Restaurant-Style Prime Rib

    Transforming a beautiful cut of beef into a show-stopping, restaurant-style prime rib roast might seem challenging, but you can achieve incredible results right in your own kitchen. At Recipesmondial, we want to help you create memorable meals. These practical strategies will elevate your prime rib recipe and guide you toward a truly flawless feast.

    Achieving Restaurant-Quality Results at Home

    You can easily prepare a magnificent standing rib roast that rivals your favorite steakhouse, taking the stress out of cooking an impressive dish. To help you build confidence, we’ve made these tips straightforward and beginner-friendly, ensuring a delicious outcome every time.

    • Start at Room Temperature: For even cooking, this step is crucial. Remove your prime rib from the refrigerator 2-3 hours before roasting. Cold meat cooks unevenly, which means the outer layers can overcook before the center reaches your desired doneness.
    • Season Generously and Early: Don’t be shy with your seasoning—apply a liberal coating of salt, pepper, and herbs all over the roast. For the best flavor, season the meat at least 45 minutes to an hour before cooking. Many chefs even season it a day ahead, storing it uncovered in the fridge [3]. This technique helps draw out moisture to create a better crust.
    • Master the Sear: A high-heat sear is what creates an irresistible, flavorful crust. Whether you sear at the beginning (traditional method) or the end (reverse sear), high heat is key. Use a heavy-bottomed pan or cast-iron skillet to caramelize the exterior and add a deep, rich flavor.
    • Use a Reliable Meat Thermometer: A meat thermometer is your secret weapon for perfect results, as guessing often leads to an over or undercooked roast. Insert the probe into the thickest part of the meat, avoiding any bones. Remember to pull the roast from the oven when it’s 5-10°F below your target temperature to account for carryover cooking.
    • The Golden Rule: Let It Rest: This might be the most important step for a juicy prime rib roast. After removing it from the oven, tent the roast loosely with foil and let it rest for at least 20-30 minutes (or up to 45 for a large roast). This resting period allows the juices to redistribute throughout the meat, ensuring every slice is tender and succulent. Skipping this step will result in dry meat.
    • Carve Against the Grain: For maximum tenderness, always slice your prime rib against the grain. Look for the direction of the muscle fibers and slice perpendicularly across them. This shortens the fibers, making each bite tender and much easier to chew.
    • Make a Simple Jus or Sauce: Don’t discard the flavorful pan drippings. Deglaze the pan with a little wine or broth to create a simple jus or pan sauce. This adds another layer of restaurant-quality taste that truly elevates your prime rib recipe.

    Following these straightforward tips will help you create a memorable and delicious prime rib roast. Say goodbye to uncertainty and hello to confident cooking!

    What Should You Serve with Prime Rib?

    A plated meal featuring sliced prime rib, creamy mashed potatoes, roasted asparagus, and a side of au jus on a rustic dining table.
    A professional food photography, photorealistic, high-quality food magazine photo of a single, elegantly plated serving of prime rib, showcasing several thick, juicy slices with a perfect medium-rare interior. The prime rib is accompanied by classic, comforting side dishes: a generous scoop of creamy, fluffy mashed potatoes, and a vibrant portion of perfectly roasted green asparagus spears. A small, elegant ramekin of rich au jus is placed beside the plate. The setting is a warm, inviting rustic dining table, with soft, natural lighting, creating an appetizing and approachable feel. Shallow depth of field to keep the food in sharp focus.

    You’ve mastered the main course. Now, let’s complete your perfect prime rib meal! Pairing your magnificent roast with the right sides and sauces elevates the entire dining experience. Don’t feel overwhelmed by the choices; we have simple, flavorful ideas that will complement your roast beautifully and ensure a balanced, satisfying feast.

    Classic Side Dishes

    The right side dishes are key to complementing the rich flavors of your prime rib roast. To make your meal memorable, here are some easy recipes that pair perfectly.

    • Creamy Mashed Potatoes: These fluffy, rich potatoes are a timeless choice that soaks up all the delicious prime rib juices. You can easily make them with butter, milk, and a pinch of salt.
    • Roasted Asparagus: For a simple yet elegant green vegetable, toss fresh asparagus with olive oil, salt, and pepper, then roast until tender-crisp. This side adds a lovely, fresh contrast to the rich meat.
    • Yorkshire Pudding: This traditional English popover is a must-have for many prime rib enthusiasts. It’s made from a simple batter and cooked in hot beef drippings, resulting in a light, airy, and savory accompaniment.
    • Garlic Herb Roasted Potatoes: For an approachable side dish everyone loves, cut potatoes into bite-sized pieces and toss them with olive oil, rosemary, thyme, garlic, salt, and pepper. Roast until golden and crispy.
    • Creamed Spinach: Rich and savory, creamed spinach offers a wonderful texture and flavor contrast. It is surprisingly easy to prepare using fresh spinach, cream, and a touch of nutmeg.
    • Simple Green Salad with Vinaigrette: A light and tangy salad is sometimes all you need to cut through the richness of the meat. For a fresh option, use mixed greens, cherry tomatoes, and a homemade lemon vinaigrette.

    Easy Sauce and Gravy Ideas

    No prime rib is complete without a fantastic sauce to add extra moisture and bring out the best in your roast. With these easy ideas, you can confidently serve restaurant-quality gravy and sauces at home.

    • Homemade Gravy (Au Jus): Arguably the most essential accompaniment, this savory sauce is made directly from the rich pan drippings. After the prime rib rests, skim excess fat from the pan, then deglaze it with beef broth or red wine. Simmer until slightly reduced for a sauce packed with flavor.
    • Creamy Horseradish Sauce: This classic pairing adds a delightful zing and provides a fantastic counterpoint to the meat’s richness. Simply mix prepared horseradish with sour cream or Greek yogurt, then add a squeeze of lemon juice, a dash of Worcestershire sauce, and a pinch of salt and pepper.
    • Red Wine Reduction: For a touch of elegance, try a simple red wine reduction. Sauté shallots, add a red wine like Cabernet Sauvignon and beef broth, then simmer until the liquid reduces by half and thickens slightly. This easy yet flavorful sauce adds a deep, sophisticated note to your prime rib.

    Frequently Asked Questions About Prime Rib

    How to cook a small prime rib roast?

    Cooking a small prime rib roast is just like cooking a large one—you simply need to adjust the roasting time. The goal remains the same: a beautiful crust and a juicy, perfectly cooked interior. This makes it a great option for an easy family dinner or a smaller gathering.

    Here are the key things to keep in mind:

    • Follow the same prep: Always bring your roast to room temperature before cooking to ensure it cooks evenly. Then, season it generously with your favorite rub.
    • Sear it well: A good sear is essential for creating a delicious, flavorful crust. Don’t skip this step.
    • Adjust roasting time: A smaller roast will cook faster, so a meat thermometer is your most reliable guide for perfect results.
    • Rest is crucial: Like any large roast, a small one needs to rest after cooking. This allows the juices to redistribute, keeping your prime rib tender and moist.

    For specific temperature guidelines, refer to our Prime Rib Cooking Time Chart. Remember, using a meat thermometer takes the guesswork out of cooking and helps build confidence in the kitchen.

    What is the prime rib 500 rule?

    The “500-degree rule,” also known as the “high-heat method,” is a popular technique for cooking prime rib. The goal is to create a perfect crust while keeping the inside tender and juicy. While its simplicity appeals to many home cooks, this method requires a well-calibrated oven and careful monitoring.

    Here’s how it generally works:

    1. Preheat your oven: Preheat the oven to a very high temperature, usually between 450°F and 500°F (232-260°C).
    2. Sear the roast: Place the seasoned prime rib in the hot oven for a short time, typically 15-30 minutes, depending on its size.
    3. Turn off the heat: After the initial searing time, turn the oven off completely. It is critical that you do not open the oven door.
    4. Cook with residual heat: The roast continues to cook gently in the oven’s residual heat, which helps keep it incredibly juicy.
    5. Rest: Once the internal temperature reaches your target, remove the roast from the oven and let it rest before carving.

    While this method can produce excellent results, keep in mind that oven temperatures can vary significantly [4]. A well-insulated oven will work best. Above all, use a reliable meat thermometer to track the internal temperature. This is the only way to ensure your prime rib is cooked to your desired doneness safely.

    What is the difference between prime rib vs ribeye?

    Prime rib and ribeye both come from the same cut of beef—the primal rib section. The key difference lies in how they are prepared and sold. Understanding this distinction will help you choose the right cut for your meal.

    Here’s a simple breakdown:

    Feature Prime Rib (Standing Rib Roast) Ribeye Steak
    Cut A large roast containing several ribs, often sold with the bones attached. An individual steak cut from the prime rib roast before cooking. Usually boneless, but bone-in options are available.
    Cooking Method Slow-roasted whole in an oven, resulting in a tender and succulent roast. Cooked quickly over high heat, such as grilling, pan-searing, or broiling.
    Size & Presentation A grand centerpiece dish that serves multiple people and is often carved at the table. An individual portion perfect for a single serving or a weeknight steak dinner.
    Fat Content Known for its generous marbling, which provides incredible flavor and tenderness. Also highly marbled, giving the steak its signature rich taste and juicy texture.

    Essentially, prime rib is the entire roast, while a ribeye is an individual steak sliced from it. Both offer a luxurious and flavorful beef experience.

    Can I use a boneless prime rib recipe with a bone-in roast?

    Yes, you can absolutely adapt a boneless prime rib recipe for a bone-in roast. The core principles—seasoning, searing, and resting—remain the same. However, you’ll need to consider a few key adjustments to get the best results.

    Here’s what you should keep in mind:

    • Cooking Time: Bone-in roasts take longer to cook than boneless ones of the same weight [5]. The bones act as insulators, slowing down heat penetration. Always rely on a meat thermometer for accuracy.
    • Flavor: Many cooks believe the bones add significant flavor and help keep the meat moist during cooking.
    • Carving: Carving a bone-in roast requires you to slice along the bones to separate the meat. For easier carving, some butchers will cut the bones off and tie them back on, giving you flavor without the hassle.
    • Heat Distribution: The bones can sometimes lead to slightly uneven cooking in the meat directly surrounding them.

    The main takeaway is to allow for more cooking time. Always use a meat thermometer to check the internal temperature in several spots (avoiding the bone), and you’ll have a delicious and impressive prime rib roast.


    Sources

    1. https://www.fsis.usda.gov/food-safety/safe-food-handling-and-preparation/food-safety-basics/safe-minimum-internal-temperature-chart
    2. https://www.fsis.usda.gov/food-safety/safe-handling-instructions/meat-poultry-and-egg-products/beef-safety-qa
    3. https://www.seriouseats.com/how-to-dry-brine-meat-turkey-chicken-pork-ribs-steaks
    4. https://www.seriouseats.com/2014/11/what-does-the-temperature-knob-on-my-oven-actually-do.html
    5. https://www.foodnetwork.com/recipes/articles/food-network-kitchens-prime-rib-cooking-guide

  • How to Cook Perfect Brisket: A Step-by-Step Beginner’s Guide

    How to Cook Perfect Brisket: A Step-by-Step Beginner’s Guide

    The best way to cook brisket is using a ‘low and slow’ method, typically in an oven, smoker, or slow cooker at a temperature between 225-275°F (107-135°C). This process gently breaks down the tough connective tissues over several hours, resulting in tender, juicy meat. For optimal flavor and moisture, season the brisket generously and let it rest properly before slicing against the grain.

    Few dishes are as impressive as a perfectly cooked brisket. For many home cooks, however, tackling this magnificent cut of beef can feel overwhelming. If you’ve ever dreamed of serving tender, melt-in-your-mouth beef brisket without the stress, you’ve come to the right place. Here at Recipesmondial, we believe simple, flavorful, and inspiring recipes should be accessible to everyone. That’s why we’re here to show you that mastering a delicious brisket recipe doesn’t have to be a daunting task.

    This comprehensive step-by-step beginner’s guide will demystify the art of preparing a fantastic beef brisket recipe. This guide is for anyone who wants to cook without stress, plan better family-friendly meals, or simply gain more confidence in the kitchen. We’ll cover everything: choosing the right cut, perfecting the seasoning, using the “low and slow” cooking method, and slicing for ultimate tenderness. Our practical tips will give you the clear guidance needed to achieve amazing results every time.

    Get ready to transform simple ingredients into an unforgettable feast. Our approachable home cooking philosophy will help you move from uncertainty to confidence in the kitchen, so you can serve a show-stopping meal that tastes incredible. Let’s dive into making your own perfect brisket. It’s a rewarding culinary adventure that will build your confidence and delight your taste buds. We’ll start by understanding why brisket is such a beloved choice for home cooks.

    Why is Brisket a Favorite for Home Cooks?

    For home cooks, brisket is more than just a cut of beef; it’s a rewarding culinary journey. There’s immense satisfaction in transforming this humble piece of meat into something incredibly delicious.

    A large brisket might seem intimidating at first, but its magic lies in a simple cooking method. By going “low and slow,” the tough cut becomes wonderfully tender. This amazing transformation is not only satisfying but also a fantastic way to build confidence in your kitchen skills as you learn to trust the process.

    The deep, rich flavor of a perfectly cooked brisket is unmatched, delivering a taste that embodies pure comfort. Its incredible versatility also makes any brisket recipe perfect for family-friendly meals.

    • Slice it thick and serve with your favorite side dishes.
    • Shred the meat for hearty, satisfying sandwiches.
    • Add it to tacos for a flavorful and exciting twist.
    • Transform leftovers into delicious stews or chili.

    While cooking brisket is a long process, it’s mostly hands-off, freeing you up for other tasks. This makes it an ideal choice for meal prep ideas. By cooking one large batch, you’ll have delicious, ready-to-eat meals for days, which helps solve mealtime decisions and reduces stress during busy weeks. It’s no wonder more people are cooking at home to save money and enjoy healthier meals [1].

    Ultimately, making a delicious beef brisket recipe is immensely rewarding. You get to take simple, everyday ingredients and transform them into a truly show-stopping meal that will impress family and friends. More importantly, you will enjoy the entire cooking journey. Recipesmondial is here to help you navigate that journey with clear, step-by-step guidance, so you can cook confidently and enjoy flavorful meals every day.

    How to Choose the Right Brisket Cut

    A home cook points to distinct raw brisket cuts, flat and point, on a butcher block.
    Professional food photography, photorealistic, high-quality food magazine photo. A friendly, smiling home cook in a clean, well-lit home kitchen, gently gesturing towards two distinct raw beef brisket cuts displayed on a rustic wooden butcher block. One cut is a lean flat, the other a fattier point, clearly showcasing their differences. The lighting is warm and natural, highlighting the marbling and texture of the meat, inviting and educational. The focus is on clarity and helpfulness for a beginner.

    Understanding Brisket: Flat vs. Point

    Ready to make a delicious brisket recipe? Your first step is choosing the right cut of meat. Brisket comes from the lower chest of a cow and is a tough cut of meat. However, with slow cooking, it becomes wonderfully tender and flavorful.

    You will often find brisket sold in two main parts: the “flat” and the “point.” Sometimes, they are sold together as a “full packer” brisket. Understanding the difference between these cuts will help you pick the best one for your beef brisket recipe.

    Here’s a quick look at each part:

    • The Flat (or “First Cut”): This leaner, flatter section has an even shape and a layer of fat on one side. Because it holds its shape well, the flat is excellent for slicing. It’s a popular choice for home cooks as it’s generally easier to manage.
    • The Point (or “Second Cut”): The point is thicker, more irregular in shape, and has significantly more marbled fat. This extra fat makes it incredibly juicy and flavorful, perfect for shredded brisket or burnt ends, as it becomes exceptionally tender when cooked slowly.

    So, which one should you choose for a beginner-friendly recipe? For most easy recipes, we recommend starting with the flat cut. It cooks more evenly and is simpler to slice, which helps build your confidence in the kitchen.

    What to Look For at the Butcher Counter

    Once you know which cut you want, use these simple tips to find the perfect brisket at the butcher counter. You’ll soon feel confident selecting the right meat for a flavorful meal.

    Here’s what to keep in mind:

    • Marbling is Key: Look for good marbling—the small streaks of fat running through the meat. This fat melts during cooking, keeping your brisket moist and flavorful. In short, more marbling means a juicier result.
    • Even Thickness: Try to find a piece with consistent thickness, especially for the flat cut. An even thickness helps the brisket cook more uniformly, preventing some parts from drying out while others are still cooking.
    • Color and Texture: A quality brisket should have a vibrant, healthy red color and feel firm to the touch. Avoid any cuts that look pale, discolored, or have a slimy texture.
    • The Fat Cap: Brisket comes with a layer of fat on one side called the fat cap. This fat is essential, as it protects the meat and adds flavor during cooking. Look for a fat cap that is about ¼ to ½ inch thick; you can always trim any excess later.
    • Meat Grade: In the US, beef is often graded as USDA Prime, Choice, or Select. Prime has the most marbling, while Select is the leanest. Choice offers a good balance of quality and value. For a truly amazing brisket, aim for Prime or Choice if your budget allows [2]. A Choice cut will still give you fantastic results for simple dinner recipes.

    Don’t be afraid to ask your butcher questions. They are a wonderful resource and can help you select the best brisket for your needs. Picking the right cut is the first step toward ensuring your step-by-step cooking guidance leads to a delicious meal!

    The Simple Brisket Recipe for Beginners

    Essential Ingredients

    Ready to make a show-stopping brisket? This recipe uses simple ingredients you likely already have in your pantry for a truly flavorful meal.

    • 1 (5-7 pound) beef brisket flat: This is the leaner, more uniform part of the brisket, making it perfect for this recipe.
    • 2 tablespoons coarse salt: Kosher salt is a great choice.
    • 2 tablespoons black pepper: Use freshly ground for the best flavor.
    • 1 tablespoon garlic powder: A pantry staple for a rich, savory taste.
    • 1 tablespoon onion powder: Enhances the overall savory flavor.
    • 1 teaspoon paprika: Adds a touch of color and mild sweetness.
    • 1 cup beef broth or water: Keeps the brisket moist during the long cook.
    • Optional: 1/2 cup your favorite BBQ sauce: For brushing on near the end to create a sweet and tangy glaze.

    Simple Tools You’ll Need

    You don’t need fancy equipment for this recipe. These common kitchen tools are all it takes to cook a perfect brisket at home.

    • Large roasting pan with a lid or heavy-duty aluminum foil: To trap moisture during cooking.
    • Sharp knife: For trimming the fat cap and slicing the finished brisket.
    • Cutting board: For a stable trimming and carving surface.
    • Large mixing bowl or plate: To mix your rub and season the meat.
    • Meat thermometer (instant-read is best): This is the most reliable way to check for doneness, ensuring a perfect result.
    • Wire rack (optional, but helpful): Elevates the brisket for more even cooking.

    Step 1: Trimming the Fat Cap

    Trimming the fat cap might seem intimidating, but it’s simple and ensures the brisket cooks evenly. Leaving a little fat adds flavor, but too much can make it greasy. Aim to leave a layer about 1/4-inch thick.

    1. Place the brisket on a large cutting board, fat-side up.
    2. Using a sharp knife, carefully slice away the excess fat, leaving an even 1/4-inch layer.
    3. Trim off any hard areas of fat or tough silver skin, as these will not render down during cooking.
    4. Flip the brisket over and trim any large, loose pieces of meat or fat from the other side.

    Tip for Beginners: Don’t worry about getting it perfect. Just focus on removing the thickest areas of hard fat. A good trim also helps the seasoning penetrate the meat.

    Step 2: Seasoning Your Brisket

    A flavorful rub is key to creating an amazing crust. This simple seasoning blend delivers a classic, delicious brisket flavor.

    1. In a small bowl, mix the salt, black pepper, garlic powder, onion powder, and paprika to create your rub.
    2. Pat the brisket completely dry with paper towels. A dry surface helps the rub adhere and form a delicious crust.
    3. Sprinkle the rub generously over the entire brisket, covering all sides, top, and bottom.
    4. Use your hands to gently press the seasoning into the meat so it adheres well.
    5. For the best flavor, let the brisket rest at room temperature for 30-60 minutes after seasoning.

    Flavor Boost Tip: For an extra kick, add a teaspoon of chili powder or a pinch of cayenne pepper to your rub.

    Step 3: The Low and Slow Cook

    The secret to incredibly tender brisket is cooking it “low and slow.” Cooking at a low temperature for a long time breaks down the tough connective tissues in the meat, resulting in a juicy, fall-apart texture.

    1. Preheat your oven: Set your oven to a low temperature, around 275°F (135°C). This is ideal for a gentle cook.
    2. Prepare the pan: Place the brisket, fat-side up, in your roasting pan. Pour the beef broth or water into the bottom of the pan to create a moist cooking environment.
    3. Cover and seal: Cover the pan tightly with a lid or a double layer of heavy-duty aluminum foil. A tight seal is crucial for trapping steam and keeping the brisket moist.
    4. Begin the long wait: Place the covered pan in the preheated oven. Plan for a cook time of approximately 1 to 1.5 hours per pound. For example, a 5-pound brisket will take about 5 to 7.5 hours. Cooking times can vary, so use time as a guideline and temperature/tenderness as your goal [3].
    5. Check for tenderness: Begin checking for doneness at the lower end of your estimated cook time. The internal temperature should be around 200-205°F (93-96°C). More importantly, the thermometer probe should slide into the thickest part of the meat with very little resistance, like probing warm butter.
    6. Optional BBQ Glaze: During the last 30-60 minutes of cooking, remove the lid or foil. Brush your favorite BBQ sauce over the brisket and return it to the oven, uncovered, to let the sauce set and caramelize.

    Patience is Key: Do not rush this process. Low and slow is essential for tender results. Resist the urge to open the oven frequently, as this releases heat and moisture.

    What is the best way to cook brisket?

    Method 1: Easy Oven-Roasted Brisket

    Cooking brisket in the oven is a fantastic, reliable starting point for any home cook. This method delivers consistent results, helping beginners create a tender, flavorful meal without stress.

    Oven roasting mimics the “low and slow” cooking process essential for brisket, ensuring every bite is juicy and delicious. Because you can easily manage other tasks while it cooks, this method is perfect for busy families.

    Here’s why oven roasting is a top choice:

    • Consistent Heat: Your oven maintains a steady temperature, which is crucial for breaking down tough brisket fibers.
    • Minimal Monitoring: Once the brisket is in the oven, you don’t need to babysit it, making dinner prep much easier.
    • Family-Friendly: This simple recipe yields a large, comforting meal that’s perfect for the whole family.
    • Approachability: You don’t need special equipment—just a good roasting pan will do.

    Quick Tip: Always wrap your brisket tightly in foil or butcher paper. This locks in moisture and helps achieve that melt-in-your-mouth texture.

    Method 2: Flavorful Slow Cooker Brisket

    For ultimate convenience, the slow cooker is your best friend. This “set-it-and-forget-it” method delivers incredibly tender beef brisket with minimal effort, making the cooking process enjoyable and stress-free.

    The slow cooker excels at long, gentle cooking, which infuses the brisket with deep flavors. It’s a lifesaver for planning family-friendly meals because you can prepare it in the morning and come home to a delicious dinner ready to serve.

    Why choose the slow cooker for brisket?

    • Effortless Cooking: Simply add your ingredients, turn it on, and let the slow cooker handle the rest.
    • Unmatched Tenderness: The long, moist cooking environment breaks down connective tissue perfectly, resulting in a brisket that will simply fall apart.
    • Deep Flavor Development: Liquids and seasonings meld together for hours, creating exceptionally rich and savory results.
    • Great for Meal Prep: Cook a large brisket to have leftovers for easy lunches or quick dinners throughout the week.

    Helpful Hint: Don’t forget to add a little liquid, like broth, apple cider vinegar, or your favorite barbecue sauce. This adds moisture and flavor while preventing the brisket from drying out during the long cook time.

    Method 3: Classic Smoked Brisket

    For an authentic, rich, and unmistakable flavor, smoked brisket is king. While it requires more attention than other methods, this true culinary experience is the go-to for many barbecue enthusiasts, and the results are incredibly rewarding.

    Smoking gives brisket its distinct smoky crust (known as the “bark”) and a deep, complex flavor profile. This method transforms simple ingredients into a show-stopping dish, helping you build confidence in the kitchen as you discover fantastic new flavors.

    What makes smoked brisket so special?

    • Unique Smoky Flavor: Wood smoke penetrates the meat, creating a taste you can’t replicate with other methods.
    • Incredible “Bark”: The seasoned exterior forms a deliciously crisp, flavorful crust.
    • Tender Perfection: When smoked correctly, the brisket becomes unbelievably tender—it holds its shape yet melts in your mouth.
    • Rewarding Experience: Mastering smoked brisket is a fulfilling cooking journey and a true badge of honor for any home cook.

    Pro Tip: Patience is key when smoking brisket. Use a good meat thermometer to carefully monitor the internal temperature, and aim for a consistent low smoking temperature, typically between 225°F and 275°F [4]. This ensures the best smoke penetration and the most tender results.

    How to cook beef brisket so it falls apart?

    Close-up of tender, perfectly cooked beef brisket being pulled apart by two forks, with steam rising.
    Professional food photography, photorealistic, high-quality food magazine photo. An extreme close-up shot of perfectly cooked, unbelievably tender beef brisket. Two forks are gently pulling a piece of brisket apart, showcasing its moist, succulent, and perfectly shredded texture. Wisps of steam are delicately rising, emphasizing its warmth and freshness. The brisket has a beautiful bark and a visible smoke ring (if applicable, or just rich, deep brown color). Served on a rustic wooden cutting board, with soft, inviting natural light creating a warm glow. The image exudes comfort, success, and deliciousness.

    The Importance of Low Temperature

    Achieving a melt-in-your-mouth, fall-apart beef brisket all comes down to one thing: cooking it low and slow. This is more than just a catchy phrase; it’s a scientific principle that transforms a tough cut of meat into something incredibly tender and delicious. Think of it as a magic trick that just takes time.

    Brisket is a hard-working muscle, which means it contains a lot of tough connective tissue, specifically collagen. If cooked quickly at a high temperature, this collagen tightens and makes the meat chewy. However, when you cook brisket at a consistently low temperature for many hours, something wonderful happens.

    The collagen slowly breaks down and melts into gelatin [5]. This gelatin lubricates the muscle fibers, making the brisket incredibly juicy and tender enough to fall apart with a gentle pull. This slow process also allows the fat to render beautifully, which adds richness and flavor to your beef brisket recipe. It’s a foundational step for any beginner-friendly recipe aiming for perfect results.

    When and Why to Wrap Your Brisket

    Wrapping your brisket is a popular technique that many home cooks swear by. It’s typically done after the initial cooking phase, when the brisket’s internal temperature reaches between 150°F and 170°F. Around this time, you might notice the temperature has stopped rising, a phenomenon known as “the stall.”

    During the stall, your brisket’s temperature can plateau or even drop for several hours. This happens because moisture evaporating from the meat’s surface creates a cooling effect, much like how sweat cools your skin [6]. Rest assured, this is a completely normal part of the cooking process.

    Wrapping your brisket helps push it through the stall while also locking in moisture, resulting in an even juicier final product. You can use either heavy-duty aluminum foil or unbleached butcher paper. Butcher paper is more breathable, which helps preserve the bark’s crispy texture. In contrast, aluminum foil creates a tighter seal that traps more steam and speeds up the cook. This step makes any brisket recipe more reliable and ensures a flavorful meal your family will love.

    Here are the key reasons to wrap your brisket:

    • Breaks the Stall: Wrapping helps the internal temperature rise more quickly, significantly shortening the overall cooking time.
    • Retains Moisture: The wrap prevents excessive moisture loss, keeping your beef brisket incredibly juicy and tender.
    • Develops Tenderness: The moist, steamy environment inside the wrap helps break down tough connective tissues even further.
    • Evens Out Cooking: Wrapping protects the exterior from drying out or burning, which ensures a more uniform cook throughout.

    Checking for Tenderness (Not Just Temperature)

    While an internal temperature guide is helpful, brisket is truly done when it’s tender, not when it hits a specific number. Temperature charts provide a good benchmark, but every cut of meat is unique. Relying solely on temperature can sometimes lead to dry or tough results. For a true fall-apart brisket, tenderness is key.

    The best way to check for doneness is the “probe test,” a simple and practical tip for any beginner-friendly recipe. To do this, use a thin, sharp object, like a meat thermometer probe or a wooden skewer. Gently insert it into the thickest part of the brisket.

    A truly tender brisket will feel like “butter.” The probe should slide in and out with very little resistance, similar to poking a warm stick of butter. If you feel any significant resistance, the brisket isn’t ready and needs more time to cook. Don’t rush this final stage, as patience leads to amazing results. This method helps you cook confidently and achieve a delicious outcome every time.

    Remember, the goal isn’t just to hit a certain temperature; it’s to transform that tough muscle into a succulent, flavorful meal. Trust the feel of the meat over the thermometer. Your senses are your best guide for perfect, approachable home cooking.

    What not to do when cooking a brisket?

    Mistake #1: Rushing the Cook Time

    Cooking a perfect brisket is a journey, not a race. While it’s tempting to crank up the heat to speed things along, this is a crucial mistake. Brisket has tough connective tissue that needs hours at a low temperature to break down. This slow process transforms those tough fibers into delicious, melt-in-your-mouth gelatin, so patience truly pays off.

    Rushing the cook time will only result in dry, chewy meat, robbing you of that fall-apart texture you’re after. In contrast, cooking brisket slowly not only makes it tender but also allows the flavors to deepen, creating a truly memorable meal.

    Here’s what to remember:

    • Go Low and Slow: This is the golden rule for brisket. A temperature between 225°F and 275°F (107°C to 135°C) is ideal.
    • Plan Ahead: Brisket takes many hours. A larger brisket can easily cook for 10-14 hours or even longer [7]. Start early to avoid any stress.
    • Trust the Process: Don’t constantly open the oven or smoker. This lets heat escape and slows down the cooking process.

    By embracing the “low and slow” method, you’ll be rewarded with incredible results. This approach transforms a tough cut of meat into a tender masterpiece and is the key to cooking with confidence.

    Mistake #2: Skipping the Resting Period

    After hours of waiting, your brisket smells amazing and the temptation to slice into it is strong. But resist! Skipping the rest is a common mistake that can ruin all your hard work. This simple step is absolutely crucial for ensuring a juicy result.

    As meat cooks, its muscle fibers tighten and push moisture to the surface. If you cut into the brisket right away, all those precious juices will spill onto your cutting board, leaving you with dry meat. Resting allows the muscle fibers to relax and reabsorb that moisture. As a result, the juices redistribute throughout the brisket, making every slice incredibly moist and tender.

    To rest your brisket properly:

    • Wrap it Up: After cooking, remove the brisket from the heat and wrap it tightly in butcher paper or foil.
    • Insulate it: Place the wrapped brisket in a dry, empty cooler to keep it warm.
    • Give it Time: A good rule of thumb is to rest brisket for at least 1-2 hours. Some experts even recommend up to 4 hours for larger cuts [8].

    This resting period is an easy yet powerful technique. It’s the final step that guarantees your patience pays off with a delicious, juicy brisket.

    Mistake #3: Slicing It the Wrong Way

    You’ve cooked your brisket perfectly and let it rest. But the final step—slicing—is just as important. Slicing incorrectly can make even the most tender meat seem tough. The key is to always slice against the grain.

    “The grain” refers to the direction the long muscle fibers run within the meat. If you slice parallel to these fibers (with the grain), you’re left with long, chewy strands. However, slicing perpendicular to them (against the grain) cuts those long fibers into short, tender pieces. This simple technique makes the meat significantly easier to chew and much more enjoyable.

    Here’s how to slice against the grain:

    • Identify the Grain: Look closely at the cooked brisket to see the lines of the muscle fibers. This is the grain.
    • Find the Change: A full brisket has two muscles, the flat and the point, and their grains run in different directions. You may need to separate these sections before slicing.
    • Slice Perpendicular: Position your knife to cut directly across those lines. Aim for slices that are about the thickness of a pencil (1/4 inch).

    Mastering this simple slicing technique is essential. It guarantees that every bite of brisket you serve is as tender and delicious as it should be, truly elevating your final result.

    Tips for Serving and Storing Leftover Brisket

    A plated brisket meal with sides on one side, and an airtight container of leftover brisket in a fridge on the other.
    Professional food photography, photorealistic, high-quality food magazine photo. A split-scene image in a home kitchen. On one side, a beautifully plated serving of thinly sliced, juicy brisket with a vibrant side of homemade coleslaw and crisp dill pickles. On the other side, a clear, airtight container filled with neatly arranged, shredded leftover brisket, placed inside a clean, well-organized home refrigerator. The overall scene is warm, practical, and inspiring, showing both the joy of eating and the ease of meal prep. Natural light, inviting atmosphere.

    Reheating Your Brisket for Best Flavor

    You’ve mastered a delicious brisket recipe, and now it’s time to make sure those leftovers taste just as good. The secret is proper reheating, which is key to avoiding a dry, tough experience. Our goal is to enjoy a tender, flavorful meal, even days later.

    Slow and Gentle Reheating Methods

    Using gentle heat is the best way to preserve moisture and make your leftover beef brisket recipe shine. High heat will only dry out the meat, so instead, try one of these simple and effective methods:

    • Oven Method: Preheat your oven to a low 275°F (135°C). Slice the brisket against the grain and place the slices in a baking dish. Add a splash of beef broth or water, then cover the dish tightly with foil to trap moisture. Heat for 20-30 minutes, or until warmed through.
    • Stovetop Method: For a quicker option, especially with smaller portions, slice the brisket and place it in a pan with a little broth. Cover the pan and heat over low to medium-low heat, stirring occasionally until warm.
    • Sous Vide (for advanced users): If you have a sous vide circulator, this is a fantastic option for achieving incredibly even heating. Vacuum-seal your sliced brisket and heat it in a water bath at 150°F (65°C) for about an hour.

    No matter which method you choose, always slice your brisket before reheating. This allows heat to penetrate more evenly and helps prevent the meat from drying out. Remember, a little added liquid is your secret weapon for retaining moisture.

    Creative Ways to Enjoy Leftover Brisket

    Leftover brisket is a gift and a versatile base for many quick and flavorful dishes. Instead of just eating it plain, get creative with these family-friendly meal ideas:

    • Brisket Sandwiches: Pile sliced brisket on a toasted bun. Add BBQ sauce, pickles, and coleslaw. This is a classic for a reason.
    • Brisket Tacos or Nachos: Shred the brisket and warm it with taco seasoning. Serve it in tortillas with your favorite toppings, or layer it over tortilla chips for a simple nacho dinner.
    • Brisket Chili: Add chopped brisket to your favorite chili recipe. It deepens the flavor wonderfully. This is a hearty, comforting meal.
    • Brisket Hash: Dice the brisket and sauté it with potatoes, onions, and bell peppers. Top with a fried egg for a delicious breakfast or brunch.
    • Brisket Mac and Cheese: Stir shredded brisket into creamy mac and cheese to elevate a comfort food favorite.
    • Brisket Pizza Topping: Use thinly sliced or shredded brisket as a unique pizza topping. Combine with BBQ sauce for a smoky twist.

    These ideas transform simple ingredients and turn your leftovers into exciting new dishes, ensuring you’re never stuck wondering what to do with extra brisket.

    Storing Leftover Brisket Safely

    Proper storage is crucial for maintaining both the safety and flavor of your delicious brisket. To make it last, follow these clear steps for storing the cooked meat.

    Refrigeration Tips

    • Cool Quickly: Let the brisket cool at room temperature for no more than two hours. Cooling it quickly is essential for preventing bacterial growth.
    • Airtight Containers: Once cooled, slice or chop the brisket and place it in shallow, airtight containers. This protects the meat from air exposure, which causes dryness and spoilage.
    • Add Pan Juices: To keep the meat moist and add flavor, pour any reserved pan juices or broth over the brisket before sealing the container.
    • Storage Time: Stored this way, cooked brisket will last for 3 to 4 days in the refrigerator, making it a great option for meal prep [9].

    Freezing Tips for Longer Storage

    For longer storage, freezing is the perfect way to extend your brisket’s life. This method is ideal for busy families and meal planners, ensuring you can enjoy your beef brisket recipe for weeks to come.

    • Portioning: Divide the brisket into meal-sized portions before freezing to make thawing much easier later.
    • Wrap Tightly: To prevent freezer burn, wrap each portion tightly first in plastic wrap and then in aluminum foil. A vacuum sealer is also an excellent option.
    • Airtight Bags: Place the wrapped portions into freezer-safe bags, squeezing out as much air as possible before sealing. Don’t forget to label each bag with the date.
    • Freezer Life: For the best quality, brisket can be frozen for 2 to 3 months. While it remains safe to eat beyond that, the texture and flavor may decline [9].
    • Thawing: When you’re ready to eat it, thaw frozen brisket slowly in the refrigerator overnight. Avoid thawing it at room temperature to ensure food safety.

    By following these storage tips, you’ll ensure every bit of your hard work pays off. You’ll always have delicious, safely-stored brisket ready to go, making mealtime stress-free.

    Frequently Asked Questions About Cooking Brisket

    Is brisket best in the oven or slow cooker?

    Both the oven and a slow cooker are fantastic choices for making delicious, tender brisket in your kitchen. The “best” method depends on your goals for your beef brisket recipe.

    • Oven-Roasted Brisket: This method gives you excellent control over browning the exterior of the meat. You can achieve a lovely, flavorful crust that is difficult to get otherwise. This method is great for larger cuts of brisket and makes it easy to use the pan drippings for basting. For many home cooks, oven roasting is a reliable way to get a juicy, flavorful result.
    • Slow Cooker Brisket: If you want hands-off convenience and guaranteed tenderness, the slow cooker is your friend. It excels at cooking meat slowly over many hours, which effortlessly breaks down tough muscle fibers. The result is incredibly moist, fall-apart meat. This method is perfect for busy families or any time you want to “set it and forget it.” A slow cooker is also ideal for smaller brisket cuts.

    Ultimately, both methods deliver a wonderful meal. Recipesmondial encourages you to try both to see which one best suits your cooking style and desired texture for your next family dinner.

    What is brisket’s preferred cooking method?

    When it comes to brisket, many culinary enthusiasts will tell you that smoking is the traditional “preferred” method. Smoking imparts a deep, smoky flavor and creates a distinctive “bark” (a flavorful crust) that is hard to replicate with other techniques [10].

    However, for most home cooks, “preferred” simply means “easiest for amazing results.”

    • Smoking: This method involves cooking the brisket low and slow over wood smoke for many hours. It requires specialized equipment, like a smoker, and a good understanding of temperature control. The outcome is often a culinary masterpiece celebrated for its complex flavors and melt-in-your-mouth texture.
    • Oven Roasting & Slow Cooking: For most home kitchens, the oven and slow cooker are excellent, more accessible alternatives. These methods make cooking a tender, flavorful beef brisket recipe achievable for everyone. They are perfect for creating simple, family-friendly meals without needing a dedicated smoker.

    At Recipesmondial, we believe the best method is the one that fits your lifestyle, helps you cook confidently, and allows you to enjoy the process. Whether it’s smoked, oven-roasted, or slow-cooked, a well-prepared brisket is always a delight.

    What is the 3/2:1 rule for brisket?

    The 3/2:1 rule is a popular guideline for smoking brisket. It breaks down the cooking process for a larger beef brisket recipe into three timed stages. This approach is designed to achieve the perfect balance of bark, tenderness, and moisture.

    Here’s a simple breakdown of the method:

    • “3” – Initial Smoke (3-5 hours): First, smoke the unwrapped brisket for 3 to 5 hours. During this phase, the brisket absorbs smoke flavor and begins to develop its “bark,” or crust. This step is crucial for achieving a classic smoky taste and texture.
    • “2” – The Stall & Wrap (2-3 hours): After the initial smoke, wrap the brisket tightly in butcher paper or foil. This helps push the meat through the “stall”—a point where the internal temperature temporarily stops rising. Wrapping retains moisture and helps the temperature climb again [11]. Continue cooking the wrapped brisket for another 2 to 3 hours. The goal is to reach an internal temperature of around 200-205°F (93-96°C).
    • “1” – The Rest (1 hour or more): The final “1” represents the resting period. After cooking, let the wrapped brisket rest for at least one hour, or even longer. This crucial step allows the meat fibers to relax and reabsorb their juices. Skipping the rest can result in a dry, less tender brisket.

    Remember, these numbers are just guidelines. The actual cooking time for any brisket recipe will vary based on the brisket’s size, your cooking temperature, and your equipment. Always cook to your desired tenderness and internal temperature, not just by the clock.


    Sources

    1. https://www.fmi.org/newsroom/news-archive/view/2023/11/08/new-report-shows-consumers-cooking-more-at-home-even-as-food-spending-shifts
    2. https://www.ams.usda.gov/grades-standards/beef-grades
    3. https://amazingribs.com/more-technique-and-science/more-science/meat-and-heat/
    4. https://www.seriouseats.com/how-to-smoke-brisket-recipes-texas-style-barbecue
    5. https://www.seriouseats.com/what-is-collagen-in-meat-and-how-to-cook-it
    6. https://amazingribs.com/more-technique-and-science/more-science/stall-and-how-power-through-it/
    7. https://www.beefitswhatsfordinner.com/cooking/beef-basics/brisket
    8. https://amazingribs.com/more-technique-and-science/more-cooking-science/science-meat-resting/
    9. https://www.foodsafety.gov/food-safety-charts/cold-storage-chart
    10. https://amazingribs.com/more-technique-and-science/what-is-barbecue/what-is-barbecue-brisket/
    11. https://barbecuelab.com/what-is-the-brisket-stall-and-how-to-power-through/