Tag: Beginner-friendly

  • The Perfect Creamy Polenta Recipe (Beginner-Friendly Guide)

    The Perfect Creamy Polenta Recipe (Beginner-Friendly Guide)

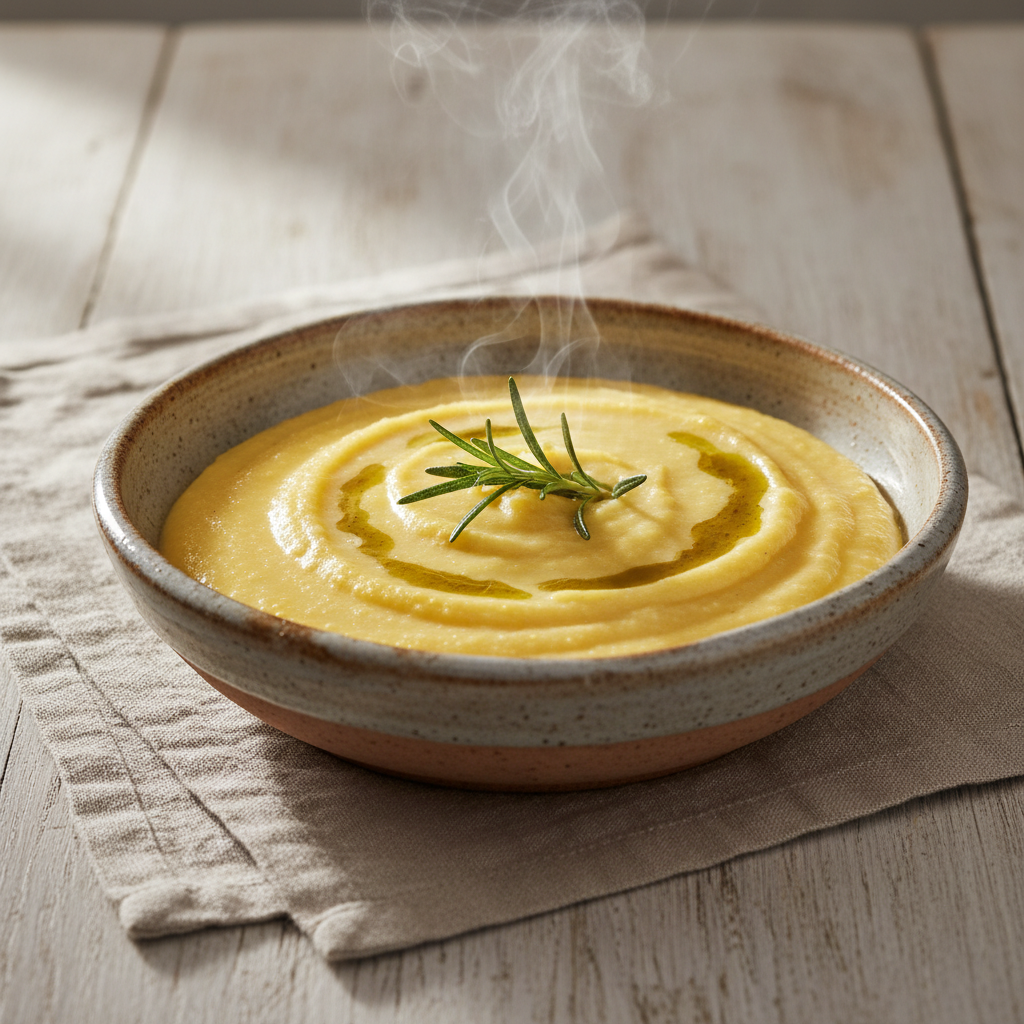
    Polenta is a classic Italian dish made from boiled cornmeal. It can be served as a creamy, porridge-like side dish, or cooled until firm and then fried, baked, or grilled. This versatile and budget-friendly recipe is a comforting base for sauces, meats, and vegetables.

    Ever crave a comforting, delicious side dish that feels gourmet but is surprisingly simple? It’s easy to feel overwhelmed by complex recipes. That’s where creamy polenta comes in. This wonderfully versatile and naturally gluten-free option can transform your weeknight dinners into something special, without any stress. Humble yet flavorful, this dish is about to become your new favorite. Here at Recipesmondial, we believe cooking should be an enjoyable, confidence-building experience, and this easy polenta recipe is the perfect example.

    If you’re looking for a beginner-friendly recipe with reliably delicious results, you’ve come to the right place. This step-by-step guide takes the guesswork out of making polenta. We’ll show you how to get a beautifully smooth, rich, and creamy texture without any technical jargon or complicated techniques. We cover everything from basic ingredients to essential tips, so you can confidently whip up this Italian staple. Ready to discover what makes polenta such a beloved classic?

    Ready to Make the Creamiest Polenta Ever?

    A steaming bowl of perfectly creamy, golden yellow polenta with a slight swirl.
    Professional food photography, photorealistic, high-quality food magazine photo: A close-up shot of a steaming bowl of perfectly creamy, golden yellow polenta, with a slight swirl from a spoon. The polenta should have a smooth, velvety texture, glistening slightly under warm, natural light. The background is softly blurred with subtle kitchen elements, creating a warm and inviting atmosphere. Focus on the rich texture and comforting appeal of the polenta. No people.

    Are you ready to create a dish that’s incredibly comforting and deeply satisfying? Perhaps you’ve heard of polenta, that golden, creamy Italian staple. It’s a wonderful base for so many delicious meals.

    However, many home cooks find polenta intimidating. You might worry about getting lumps, ending up with a bland taste, or simply not knowing how to achieve that perfect texture. But we’re here to show you that making flawless, creamy polenta is surprisingly simple. At Recipesmondial, we believe cooking should be a joy, not a chore.

    This beginner-friendly guide will change the way you think about this versatile dish. We’ll provide clear, step-by-step cooking guidance to help you master a creamy polenta recipe. Using just a few everyday ingredients, you’ll create a truly flavorful meal made easy. Get ready to cook with confidence and enjoy every single bite. Let’s turn simple cornmeal into a delicious, warm masterpiece!

    What exactly is polenta?

    Polenta is more than just a dish; it’s a comforting, versatile, and easy-to-make staple that has graced tables for centuries. This simple porridge, made from ground cornmeal, is beloved for its creamy texture and ability to pair with countless flavors. Whether you’re looking for simple dinner recipes or delicious family-friendly meals, understanding polenta is a great place to start.

    A Brief History of This Italian Staple

    Polenta has a rich history that predates the corn we associate with it today. Originally, the term “polenta” referred to any porridge made from ground grains. For instance, ancient Romans enjoyed a similar dish made from barley, farro, or chickpeas, and it was a common, hearty meal across various cultures [1].

    The corn-based polenta we know today only emerged after corn, or maize, was brought to Europe from the Americas in the 16th century. It thrived in the fertile plains of Northern Italy—especially in regions like Veneto, Lombardy, and Emilia-Romagna—where farmers found it to be a robust and economical crop.

    As a result, cornmeal quickly became the primary ingredient for polenta, transforming it into a crucial, inexpensive, and satisfying food for many Italian families. This traditional staple provided warmth and sustenance, particularly during colder months. It was often served with simple sauces, hearty stews, or just a drizzle of olive oil. Today, polenta remains a beloved component of Italian cuisine, a testament to its simple and enduring appeal.

    Polenta vs. Grits: What’s the Difference?

    It’s easy to confuse polenta with grits, as both are popular dishes made from ground corn. However, several key distinctions in their origin, corn type, and preparation set them apart. Understanding these differences can help you appreciate each one more. Here’s a simple breakdown:

    Feature Polenta Grits
    Origin Northern Italy Southern United States
    Type of Corn Typically made from yellow flint corn. This variety is drier and starchier, which gives polenta a firmer texture as it cooks and cools. Usually made from white dent corn. This softer corn has a higher moisture content, which results in a creamier, more tender texture.
    Grind Size The grind is often coarse, contributing to its slightly toothier texture. Can range from fine to coarse. Stone-ground grits are typically coarser, while instant grits are very fine.
    Processing Usually dried and then stone-ground. Often undergoes nixtamalization, a process where the corn is soaked and cooked in an alkaline solution. This step enhances both nutritional value and flavor [2].
    Typical Flavor Profile Subtly sweet, nutty, and earthy. It is often served with savory sauces, cheeses, or meats. Mild corn flavor that can be slightly tangy from nixtamalization. Grits can be served savory or sweet but are often paired with butter, cheese, or shrimp.

    In essence, while both polenta and grits offer a comforting meal, their distinct origins and preparation methods give them unique identities. Appreciating these differences helps home cooks choose the right ingredients for their desired dish, making the experience of preparing a perfect creamy polenta all the more satisfying.

    How to Make Our Easy Polenta Recipe

    Hands stirring creamy polenta in a stainless steel pot on a stove.
    Professional food photography, photorealistic, high-quality food magazine photo: A home cook’s hands, with clean, manicured nails, gently stirring creamy polenta in a heavy-bottomed stainless steel pot on a stove. The polenta is a beautiful light yellow, bubbling softly, and has a smooth, rich consistency. The kitchen setting is clean and well-lit, with a warm, inviting ambiance. Focus on the action and the texture of the polenta. No face visible, only hands and the cooking process.

    Ingredients You’ll Need

    Gathering your ingredients first makes cooking much smoother. This simple polenta recipe uses just a few staples to create a comforting and delicious dish.

    • 4 cups (960 ml) cold water or vegetable broth: Using broth adds extra flavor.
    • 1 cup (150 g) fine or medium-ground cornmeal (polenta): Choose good quality polenta for the best texture.
    • 1 teaspoon salt: Adjust to your taste.
    • 2 tablespoons unsalted butter: This creates a creamy, rich texture.
    • ½ cup (50 g) grated Parmesan cheese (optional): Freshly grated is always best for flavor.

    Step-by-Step Cooking Instructions

    Follow these simple steps for perfect, creamy polenta every time. This beginner-friendly method is incredibly easy to follow.

    1. Prepare your pot: Choose a heavy-bottomed saucepan to distribute heat evenly and prevent sticking.
    2. Heat the liquid: Pour the cold water or broth into the pot and add the salt. Bring to a gentle boil over medium-high heat.
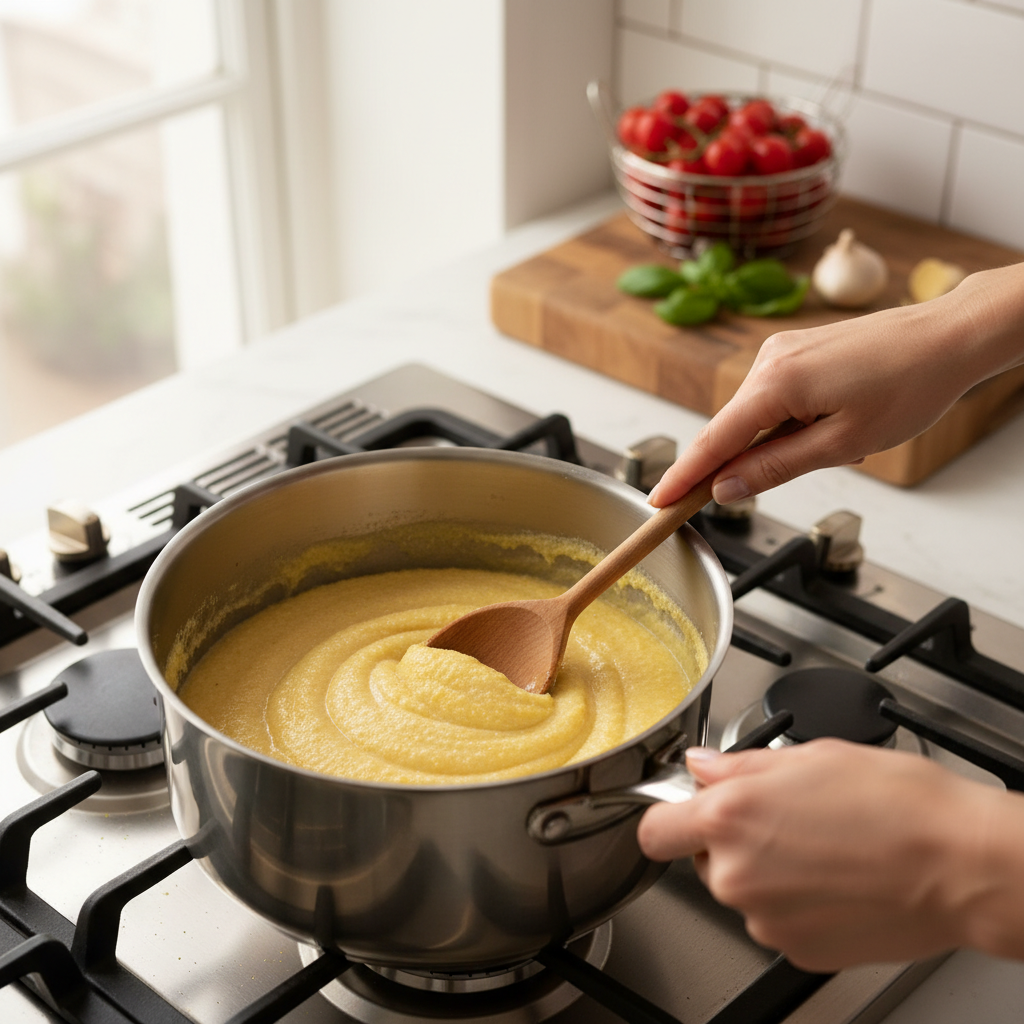
    3. Whisk in polenta: Once boiling, slowly drizzle in the cornmeal while whisking continuously. This prevents lumps and ensures a smooth texture.
    4. Reduce heat and stir: Immediately reduce the heat to low so the mixture is at a bare simmer. Stir almost constantly for the first 5-10 minutes.
    5. Continue to cook: Cook for 25-30 minutes, stirring every few minutes to prevent sticking. The polenta will thicken and become creamy.
    6. Check for doneness: The polenta is ready when it’s soft, creamy, and pulls away from the sides of the pot. Taste it to ensure the grains are tender and not gritty.
    7. Stir in finishing touches: Remove the pot from the heat. Stir in the butter and Parmesan cheese (if using) for richness and savory flavor.
    8. Serve immediately: Spoon the polenta into bowls and enjoy while it’s warm and creamy.

    Tips for Perfect, Lump-Free Polenta

    Want to guarantee your polenta is perfectly smooth? Follow these tips to avoid lumps and achieve a delicious, creamy texture.

    • Start with cold liquid: Adding cornmeal to cold or lukewarm liquid allows the grains to hydrate gradually, which helps prevent lumps from forming.
    • Drizzle and whisk: Pour the cornmeal in a slow, steady stream while whisking vigorously. This is key to a smooth, lump-free mixture.
    • Use a heavy-bottomed pot: A thick-bottomed pot distributes heat more evenly, which minimizes scorching and sticking.
    • Stir frequently: Regular stirring, especially at the beginning, keeps the polenta from clumping. It also helps release starches for a creamier texture.
    • Cook slowly: Low and slow cooking allows the polenta grains to soften fully, ensuring a tender, non-gritty final product.
    • Adjust consistency: If your polenta becomes too thick, whisk in a splash of warm water or broth until you reach your desired consistency.
    • Consider nutritional benefits: Cornmeal, the base of polenta, is a whole grain that provides dietary fiber and essential nutrients, contributing to a healthy and balanced meal [source: https://www.nal.usda.gov/fnic/food-composition-databases].

    What do you do with polenta?

    Delicious Serving Suggestions

    Once you’ve mastered our easy polenta recipe, a world of delicious possibilities opens up. This creamy, comforting dish is incredibly versatile, able to serve as the star of your meal or as a wonderful side. Here are some fantastic ways to enjoy your freshly made polenta:

    • Classic Comfort: Serve warm, creamy polenta with a rich ragu or slow-cooked Bolognese for a satisfying, family-friendly meal that always impresses.
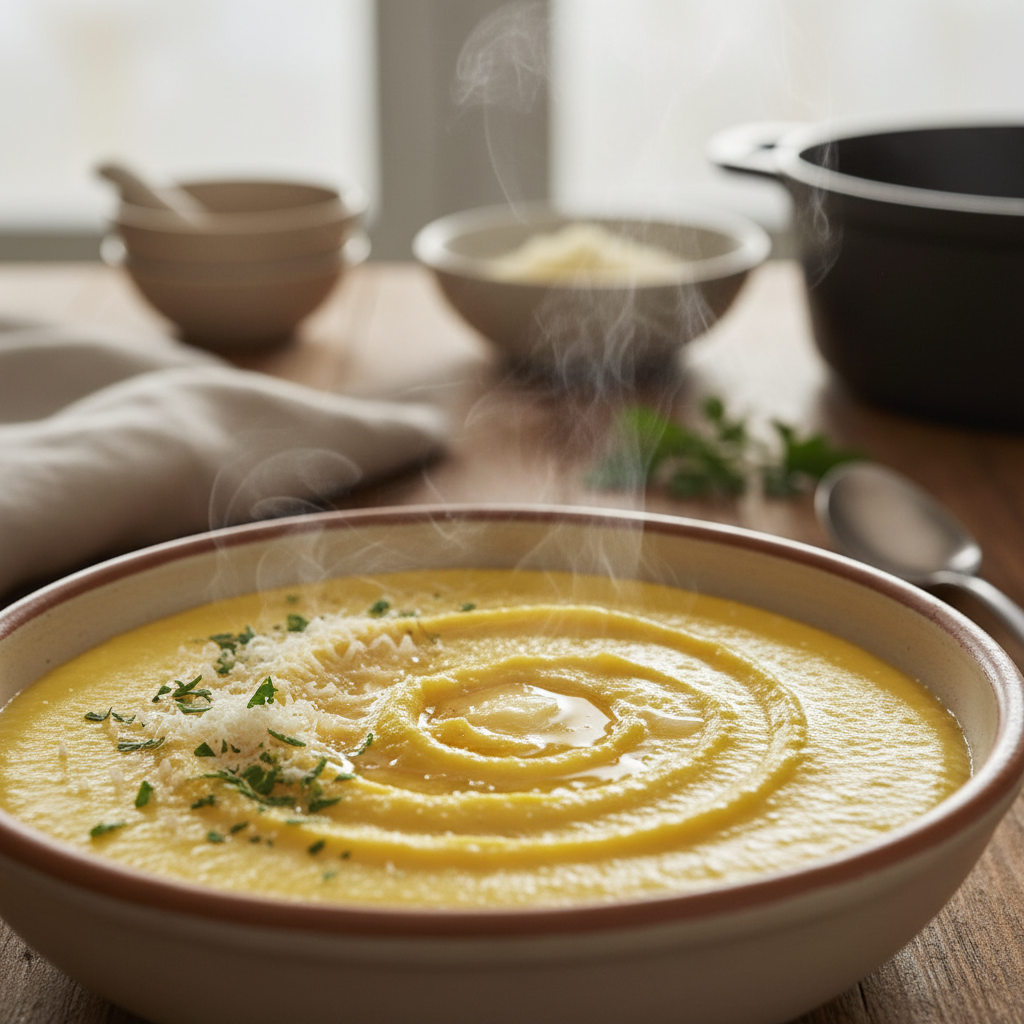
    • Savory & Simple: For a quick and delightful meal, swirl in extra butter, a generous sprinkle of Parmesan cheese, and fresh herbs like chives or parsley. Finish with a dash of black pepper.
    • Roasted Vegetable Delight: For a healthy and balanced meal, top your polenta with a medley of roasted seasonal vegetables like cherry tomatoes, bell peppers, and zucchini. A drizzle of balsamic glaze adds the perfect finishing touch.
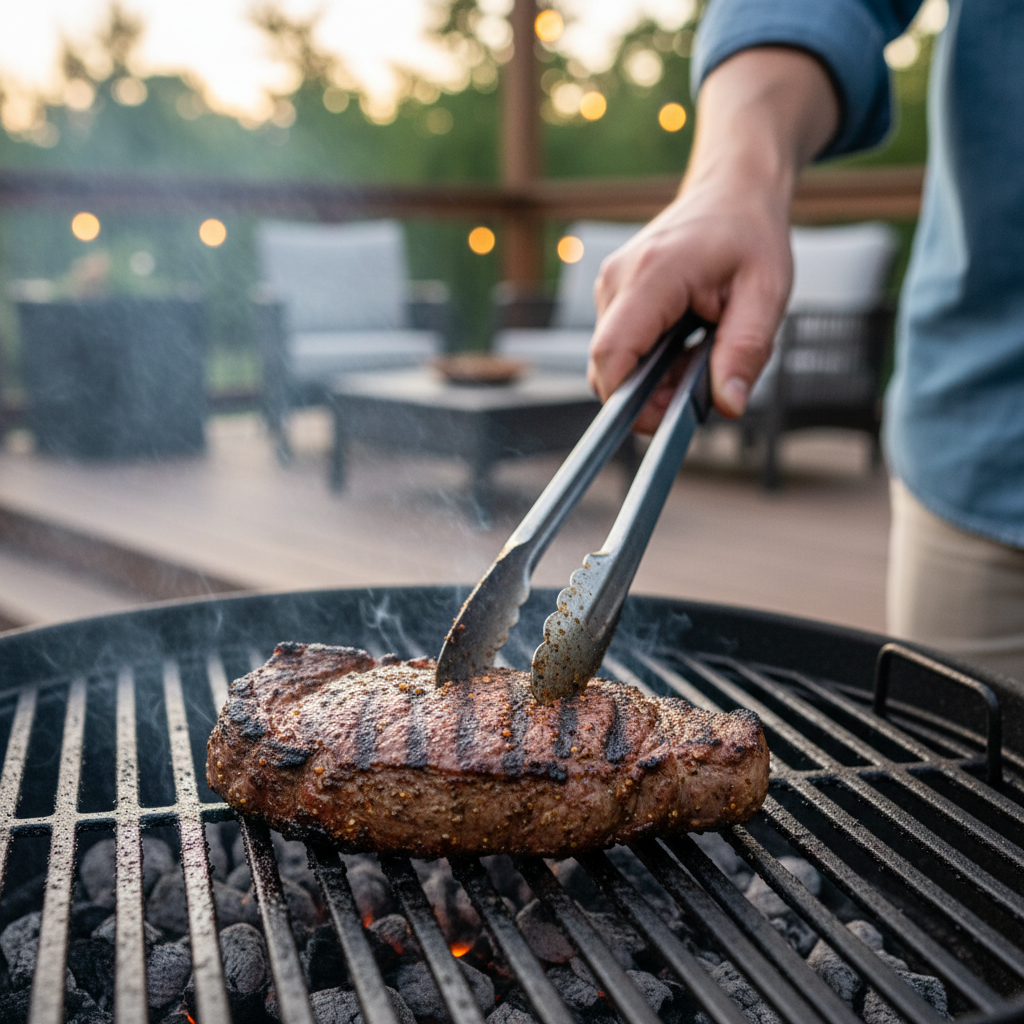
    • Hearty Meat Pairings: Polenta is a beautiful partner for braised short ribs, Italian sausages, or rustic chicken cacciatore. Its creamy texture is perfect for soaking up every drop of flavorful sauce.
    • Mushroom Magic: Create a gourmet-style topping with sautéed wild mushrooms, garlic, and thyme. Adding a splash of white wine gives the sauce extra depth. This recipe is surprisingly simple and beginner-friendly.
    • As a Side Dish: Substitute polenta for mashed potatoes or rice to elevate any meal. It’s a perfect complement to grilled meats, fish, and stews.
    • Breakfast Treat: For a surprisingly delightful breakfast, warm up leftover creamy polenta and serve it with fresh berries, a drizzle of honey, or a sprinkle of cinnamon.

    Polenta is all about approachable home cooking. Enjoy the process without stress as you discover delicious new ways to prepare this simple ingredient.

    Recipe Variations: Firm Polenta, Fried Polenta, and More

    The beauty of polenta is its versatility. Beyond its creamy form, you can transform it into entirely new textures and dishes. These variations are perfect for meal prep and will help you add creativity to your weekly menu with confidence.

    Making Firm Polenta

    Firm polenta is the secret to many exciting dishes, as it can be sliced, grilled, or fried. To make it, simply follow the creamy polenta recipe but reduce the liquid slightly or cook it a bit longer. You’ll know it’s ready when it’s very thick and pulls away from the sides of the pot. This technique echoes traditional methods where Italian chefs cooked polenta for extended periods to achieve a sliceable consistency [3].

    1. Prepare & Spread: Once cooked, immediately pour the hot, thick polenta into a lightly oiled baking dish (an 8×8 inch dish works well).
    2. Chill & Set: Smooth the top with a spatula, cover, and refrigerate for at least 2 hours, or until completely firm. This can be prepared the day before.

    Fun Ways to Use Firm Polenta

    Once your polenta is firm, the fun can begin! Here are a few simple ideas for quick and delicious meals.

    • Grilled or Pan-Fried Slices:
      1. Slice It: Once firm, invert the polenta onto a cutting board. Slice it into squares, triangles, or rectangles about ½-inch thick.
      2. Oil & Season: Lightly brush each slice with olive oil and season with salt, pepper, and your favorite herbs.
      3. Cook: Grill or pan-fry the slices in a hot skillet over medium-high heat for 3-5 minutes per side, until golden brown and slightly crispy.
      4. Serve: Top the grilled slices with bruschetta, roasted vegetables, or a dollop of pesto for a great appetizer or unique side dish.
    • Crispy Polenta Fries:
      1. Cut into Sticks: Cut the block of firm polenta into fry-shaped sticks.
      2. Bake or Air Fry: Toss the sticks with a little olive oil, salt, and pepper. Bake at 400°F (200°C) for 20-25 minutes, flipping halfway. Or, air fry at 375°F (190°C) for 15-20 minutes until golden and crisp.
      3. Dip Away: Serve with marinara sauce, spicy aioli, or ketchup for a family-friendly side that everyone will love.
    • Baked Polenta Casseroles:
      1. Layer It: Use slices of firm polenta as the base layers in a casserole dish.
      2. Add Fillings: Alternate with layers of tomato sauce, cheese, cooked vegetables, or ground meat.
      3. Bake: Bake until bubbly and golden for a comforting dinner. This dish is similar to a lasagna but offers a unique, gluten-free twist.

    Exploring these variations will boost your cooking confidence, helping you create delicious, visually appealing meals from simple ingredients. Recipesmondial is here to help you enjoy cooking without stress, one recipe at a time!

    What are some common mistakes when making polenta?

    Making creamy, delicious polenta is easier than you might think. However, a few common pitfalls can trip up even experienced home cooks. Don’t worry—with these simple tips from Recipesmondial, you’ll learn how to avoid them and make perfect, lump-free polenta every time.

    Avoiding Common Polenta Problems

    Here are the top mistakes to watch out for and how to ensure your polenta turns out wonderfully:

    • Adding Polenta Too Quickly or All at Once: This is the most common culprit for lumpy polenta. When dry polenta hits hot liquid all at once, it clumps together instantly.
      • The Fix: Pour the polenta into your simmering liquid in a thin, steady stream while whisking continuously. This prevents the grains from clumping and helps them absorb moisture evenly. Think of it as a gentle rain, not a sudden downpour.
    • Not Stirring Enough: Polenta needs attention. If you don’t stir frequently, especially in the initial stages, it can stick to the bottom of the pot, burn, and develop an inconsistent texture.
      • The Fix: Whisk vigorously as you add the polenta and until it begins to thicken. Afterward, switch to a wooden spoon and stir frequently to ensure even cooking and prevent sticking. Constant stirring isn’t necessary once it reaches a gentle simmer.
    • Using Cold Liquid: Starting with cold liquid means the polenta will take much longer to cook and can lead to an uneven, lumpy consistency.
      • The Fix: Always bring your liquid (water, broth, or milk) to a simmer before you start adding the polenta. A hot start ensures the grains begin cooking immediately and evenly for the smoothest possible texture.
    • Not Cooking Long Enough: Rushing the process is a sure way to get gritty, undercooked polenta. The cornmeal needs time to fully soften and swell.
      • The Fix: Be patient, as proper cooking takes time. Most recipes require at least 30-45 minutes for the cornmeal to fully soften. Always taste it before serving—the texture should be creamy and tender, with no grittiness. For truly authentic results, some Italian chefs cook polenta for an hour or more [4].
    • Incorrect Liquid-to-Polenta Ratio: Too much liquid will make your polenta soupy, while too little will make it thick, dry, and dense.
      • The Fix: Start by following your recipe’s recommended ratio. Remember, it’s easy to stir in a splash of extra hot liquid if your polenta gets too thick, but it’s difficult to fix if it’s too thin.
    • Forgetting to Season Properly: On its own, polenta is quite bland. A common mistake is not seasoning it enough or at the right time.
      • The Fix: Season the cooking liquid with salt before adding the polenta. Since ingredients like cheese and butter will change the flavor, always taste and adjust the seasoning again just before serving. This is a crucial step for a flavorful result.
    • Using the Wrong Type of Cornmeal: Not all cornmeal is the same. Instant, fine, and medium-grind cornmeal all cook very differently and yield different results.
      • The Fix: Pay close attention to the type of cornmeal your recipe calls for. For a classic creamy texture, medium-grind polenta is often the best choice. While instant polenta is faster, be aware that its flavor and texture will not be the same.

    By keeping these simple tips in mind, you will avoid common mistakes and feel more confident making impressive, flavorful polenta. Master this comforting dish, and you’ll have a wonderful meal for any occasion.

    Frequently Asked Questions About Polenta

    Is polenta the same as grits?

    While polenta and grits aren’t the same, they are very similar. Both are comforting porridges made from ground corn.

    The main differences are the type of corn used and the size of the grind. Here’s a quick comparison:

    Feature Polenta Grits
    Corn Type Typically made from yellow flint or dent corn, which gives it a slightly sweet, earthy flavor. Often made from hominy—corn that has been treated with an alkali [5]. This process changes its flavor and texture.
    Grind Usually a coarser grind, which leads to a more textured and hearty finished dish. Can be fine, medium, or coarse, but it is often finer than polenta for a smoother consistency.
    Origin A staple in Northern Italian cuisine. A traditional dish from the Southern United States.

    In short, while they are both corn-based porridges, their distinct origins and processing methods give them unique characteristics. You can enjoy both as a comforting, quick meal!

    Is polenta healthy or fattening?

    On its own, polenta is a very healthy food. As a whole grain made from ground corn, it offers several nutritional benefits.

    Here’s why polenta can be a great addition to your diet:

    • Good Source of Energy: Polenta provides complex carbohydrates for sustained energy.
    • Rich in Fiber: It contains dietary fiber, which is important for digestive health and helps you feel full, aiding in weight management [6].
    • Vitamins and Minerals: Polenta can be a good source of vitamins and minerals, including B vitamins, iron, and magnesium.
    • Naturally Gluten-Free: It is a great option for those with celiac disease or gluten sensitivities.

    Whether polenta becomes “fattening” depends on its preparation. Cooked simply with water or broth, polenta is low in fat and calories. However, adding butter, cream, or large amounts of cheese will significantly increase its calorie and fat content, turning it into a richer dish.

    For a healthy and flavorful meal, serve polenta with plenty of fresh vegetables and lean proteins to create a balanced and satisfying dish.

    How do Italians eat polenta?

    In Italy, especially in the northern regions, polenta is a cherished comfort food, not just a simple side dish. It is incredibly versatile and served in many delicious ways.

    Here are some popular ways Italians serve polenta:

    • Creamy Polenta (Polenta Morbida): This soft, smooth version is served much like mashed potatoes. It often accompanies rich, slow-cooked meat stews, braised mushrooms, or a sprinkle of Parmesan or Gorgonzola cheese [7].
    • Firm Polenta (Polenta Solida): Once cooled, polenta becomes firm enough to be sliced. These slices can then be:
      • Grilled or Pan-Fried: This method creates a crisp outside and a tender inside. Slices are fantastic with roasted vegetables, sausages, or seafood.
      • Baked: Slices are used in layered dishes, similar to a savory lasagna, with cheese and tomato sauce.
    • Breakfast Polenta: In some regions, a sweeter polenta is enjoyed for breakfast, served with milk, sugar, or honey.
    • As a Base for Soups and Stews: A scoop of thick polenta is often served in a bowl and topped with hearty soups or stews, soaking up all the rich flavors.

    Essentially, Italians use polenta as a wonderful canvas for many different flavors, making it a truly adaptable ingredient for home cooking.

    What’s the difference between cornmeal and polenta?

    This is a common question! The key distinction is that “polenta” refers to both a specific dish and the type of cornmeal used to make it. While all polenta is a form of cornmeal, not all cornmeal is ideal for making the classic polenta dish.

    Here’s what sets polenta apart from general cornmeal:

    • Grind Size: Polenta is typically made from coarsely ground yellow corn. This texture gives the finished dish its characteristic hearty bite. General cornmeal can range from very fine to coarse.
    • Corn Type: Authentic polenta is often made from specific Italian varieties of corn, like flint or dent, which are known for their distinct flavor and texture. Regular cornmeal can be made from any type of corn.
    • Labeling: A package labeled “polenta” contains cornmeal that is the correct grind for making the classic creamy dish. You may also see “instant” or “quick-cooking” polenta, which is pre-cooked or more finely ground for faster preparation.

    So, can you use any cornmeal to make polenta? Yes, but the texture will vary. Fine cornmeal will result in a much smoother, creamier dish. For the traditional, heartier texture, it’s best to use a cornmeal specifically labeled “polenta” or one that is coarsely ground.


    Sources

    1. https://www.britannica.com/topic/polenta
    2. https://www.nccorn.com/nixtamalization-what-is-it/
    3. https://www.academiabarilla.com/italian-recipes/polenta-traditional-dish-italian-cuisine
    4. https://www.academiabarilla.com/the-italian-food-academy/polenta-a-staple-of-northern-italian-cuisine/
    5. https://nchfp.uga.edu/how/can_06/hominy.html
    6. https://www.hsph.harvard.edu/nutritionsource/carbohydrates/fiber/
    7. https://www.lacucinaitaliana.com/glossary/polenta

  • Perfect Pan-Seared Lamb Chops: An Easy Recipe for Beginners

    Perfect Pan-Seared Lamb Chops: An Easy Recipe for Beginners

    Cooking lamb chops is a quick and simple process, perfect for a weeknight meal. The most popular method is pan-frying: season the chops generously, heat oil in a skillet over medium-high heat, and sear for 2-4 minutes per side. This creates a delicious golden-brown crust while keeping the inside tender and juicy.

    Cooking lamb chops can seem intimidating, especially for a home cook seeking easy recipes. You may have admired them on a restaurant menu, wondering if the elegant dish was too complex to make at home. We get it. But the good news is that preparing a delicious, flavorful meal of perfect lamb chops is easier than you think and isn’t just for special occasions.

    Here at Recipesmondial, we believe anyone can master dishes like pan-seared lamb chops. This guide removes the guesswork with a simple garlic and herb recipe. Our clear, step-by-step instructions will help you build your skills and bring that restaurant-quality taste to your own dining table. It’s time to enjoy stress-free, approachable home cooking.

    You’re about to see just how simple it is to achieve tender, juicy lamb chops with a perfect golden sear. Prepare to impress your family and friends—or simply treat yourself to an indulgent yet easy dinner. Let’s explore why this lamb chop recipe will quickly become a new favorite.

    Why You’ll Love This Simple Lamb Chop Recipe

    Ready to transform your dinner routine? This pan-seared lamb chop recipe is about to become your new favorite. At Recipesmondial, we believe cooking should be fun and stress-free, which is why we designed this dish to bring incredible, fuss-free flavor to your table.

    Say goodbye to overwhelming, complex recipes. Perfect for home cooks of all levels, this simple dinner recipe not only builds your confidence in the kitchen but also delivers a meal that tastes truly special. You’ll be amazed at how easy it is to create something so delicious.

    Here’s why this recipe will win your heart:

    • Effortless Elegance: Our simple, step-by-step instructions guide you to creating a restaurant-quality meal right at home.
    • Beginner-Friendly: New to cooking lamb? No problem. Our foolproof, step-by-step guidance ensures you’ll achieve a perfect sear every time.
    • Quick & Convenient: Ready in under 30 minutes, this quick dinner idea is ideal for busy weeknights and family-friendly meals.
    • Flavorful Results: Perfectly seasoned, these lamb chops deliver tender, juicy meat with a beautiful crust and incredible flavor.
    • Build Your Confidence: Mastering this dish will boost your kitchen skills and leave you feeling proud of what you’ve created.
    • Accessible Ingredients: This recipe uses everyday ingredients you can easily find at your local grocery store.
    • Less Stress, More Enjoyment: We want to make cooking enjoyable for everyone. This approachable recipe helps you relax and savor the process.

    Discover just how simple it is to cook healthy, tasty meals quickly. At Recipesmondial, our goal is to make mealtime stress-free so you can cook confidently and enjoy delicious, flavorful meals made easy.

    What’s the Best Cut of Lamb Chop to Use?

    Choosing the right lamb chop is the first step to a delicious meal, and it’s simpler than you might think. Each cut offers a unique texture and flavor, so we’re here to help you pick the perfect one for pan-searing. This guide makes the process easy and enjoyable.

    Lamb is a fantastic source of high-quality protein and essential nutrients like iron and zinc [1]. By understanding the different cuts, you can learn how to cook them perfectly every time. Let’s explore the best options for simple, beginner-friendly lamb chop recipes.

    Loin Chops

    Loin chops are a fantastic choice for pan-searing and a favorite for easy recipes. With their classic “T-bone” shape, they are both recognizable and simple to prepare.

    • Texture: Loin chops are incredibly tender, which makes them quick to cook and easy to eat.
    • Flavor: They have a mild, delicate lamb flavor that appeals to a wide range of palates.
    • Cooking: Their even thickness ensures they cook uniformly, which means less guesswork for you.
    • Beginner-Friendly: Forgiving and quick to cook, they are ideal for busy families and those wanting simple dinner recipes.

    Because they are readily available at most grocery stores, loin chops are a convenient and reliable choice for achieving a beautiful sear.

    Rib Chops

    Rib chops are another excellent option, especially if you want an impressive presentation. Often called “lamb lollipops” because of their neat bone handle, these elegant chops are always a hit.

    • Texture: Similar to loin chops, rib chops are very tender and known for their juiciness.
    • Flavor: They offer a rich, slightly sweeter lamb flavor. The fat cap, if present, adds even more taste.
    • Cooking: They also cook very quickly, and the bone helps distribute heat evenly.
    • Visual Appeal: Their elegant look makes them great for special occasions, yet they are simple enough for everyday meals.

    With their combination of tenderness and visual appeal, rib chops are a popular choice for any meal, from weeknight dinners to special occasions.

    Shoulder Chops

    Shoulder chops are a more budget-friendly cut, offering a great way to enjoy flavorful lamb without breaking the bank. They are incredibly delicious when prepared correctly.

    • Texture: Shoulder chops can be a bit firmer than loin or rib chops. However, when pan-seared quickly, they remain tender.
    • Flavor: They boast a more robust, full-bodied lamb flavor, which makes them very satisfying.
    • Cooking: Look for thinner shoulder chops for pan-searing. Thicker cuts may benefit from a longer, slower cooking method.
    • Value: They are a great choice for family-friendly meals, offering fantastic flavor at a lower cost.

    While slightly less tender, shoulder chops are a smart pick for their robust flavor. They deliver fantastic taste at a lower cost, making them ideal for approachable home cooking.

    How to Prepare Lamb Chops for Cooking

    Three raw lamb chops seasoned with herbs and spices on a wooden cutting board, ready for cooking.
    Professional food photography, photorealistic, high-quality food magazine photo. A close-up shot of three raw lamb chops, perfectly seasoned with coarse salt, freshly cracked black pepper, and chopped fresh rosemary and thyme. The chops are neatly arranged on a rustic wooden cutting board, glistening slightly with a light coating of olive oil. A scattering of garlic cloves and additional fresh herbs are visible around them, suggesting readiness for cooking. The lighting is warm and natural, highlighting the texture and marbling of the meat, creating an inviting and approachable cooking scene for beginners.

    The Best Lamb Chop Marinade

    A simple marinade is the secret to infusing lamb chops with incredible flavor and keeping them wonderfully tender. It’s the perfect way to prevent dry or bland meat. This beginner-friendly recipe makes it easy to create delicious meals with confidence.

    The right marinade does two important things: it helps the lamb absorb delicious spices and gently breaks down tough fibers for a succulent bite. This simple technique is perfect for home cooks who want to prepare a stress-free, impressive meal.

    Simple Lamb Chop Marinade Recipe

    • Olive Oil: 1/4 cup. This creates a base and helps distribute flavors.
    • Lemon Juice (or Red Wine Vinegar): 2 tablespoons. The acidity tenderizes the lamb and brightens the flavor.
    • Garlic: 3 cloves, minced. Garlic adds a rich, aromatic flavor.
    • Fresh Rosemary: 1 tablespoon, finely chopped. Rosemary pairs beautifully with lamb.
    • Fresh Thyme: 1 tablespoon, finely chopped. Thyme offers an earthy, fragrant touch.
    • Salt: 1 teaspoon. Essential for seasoning the meat properly.
    • Black Pepper: 1/2 teaspoon, freshly ground. Adds a hint of warmth and spice.

    How to Marinade Your Lamb Chops

    Follow these simple steps for perfectly marinated lamb chops every time.

    1. Combine Ingredients: In a medium bowl, whisk together the olive oil, lemon juice (or vinegar), minced garlic, chopped rosemary, chopped thyme, salt, and black pepper until well combined.
    2. Prepare Lamb Chops: Pat your lamb chops dry with paper towels. A dry surface helps the marinade adhere properly and promotes a better sear when cooking.
    3. Marinate: Place the lamb chops in a shallow dish or a resealable plastic bag. Pour the marinade over them, ensuring each chop is fully coated.
    4. Chill: Cover the dish or seal the bag and refrigerate for at least 30 minutes. For a deeper flavor, you can marinate for up to 4 hours. Avoid marinating longer than 4-6 hours, as the acid can break down the meat too much, resulting in a mushy texture.
    5. Remove from Fridge: Take the lamb chops out of the refrigerator 15-20 minutes before cooking. Allowing them to come closer to room temperature helps them cook more evenly.

    Simple Garlic and Herb Seasoning

    When you want a delicious meal without the wait time of a marinade, this simple garlic and herb seasoning is the perfect solution. It’s a fantastic option for appreciating the natural taste of the lamb and is ideal for quick weeknight dinners.

    This blend is a staple for any home cook. It not only highlights the lamb’s natural flavor but also creates a beautiful, savory crust when you pan-sear the chops.

    Simple Garlic and Herb Seasoning Blend

    • Garlic Powder: 1 teaspoon. Offers a consistent garlic flavor.
    • Onion Powder: 1/2 teaspoon. Adds another layer of savory depth.
    • Dried Rosemary: 1 teaspoon. A classic pairing with lamb, providing an earthy aroma.
    • Dried Thyme: 1 teaspoon. Complements the rosemary with its subtle, savory notes.
    • Salt: 1 teaspoon. Crucial for enhancing the lamb’s natural flavor.
    • Black Pepper: 1/2 teaspoon, freshly ground. Adds a gentle kick.
    • Smoked Paprika (Optional): 1/2 teaspoon. This adds a lovely color and a hint of smoky flavor.

    How to Season Your Lamb Chops

    Follow this simple guide to season your lamb chops perfectly for pan-searing.

    1. Dry the Lamb Chops: Pat your lamb chops completely dry with paper towels. This crucial step helps the seasoning stick to the meat and ensures you get a beautiful, crispy crust when searing.
    2. Mix the Seasoning: In a small bowl, combine the garlic powder, onion powder, dried rosemary, dried thyme, salt, black pepper, and optional smoked paprika. Stir well.
    3. Apply Seasoning: Sprinkle the seasoning generously over both sides of each lamb chop. Use your fingertips to gently press the herbs and spices into the meat to help them adhere.
    4. Rest (Optional but Recommended): For the best results, let the seasoned lamb chops rest at room temperature for 15-20 minutes before cooking. This step allows the flavors to meld with the meat and helps the chops cook more evenly by taking the chill off.

    How to cook lamb chops pan fry (Step-by-Step)

    Two pan-frying lamb chops sizzling in a cast iron skillet, developing a golden-brown crust.
    Professional food photography, photorealistic, high-quality food magazine photo. A dynamic, slightly elevated shot of two thick-cut lamb chops sizzling in a hot, well-seasoned cast iron skillet. The chops have developed a beautiful, dark golden-brown crust, with slight charring visible in places. Wisps of steam are rising from the pan, indicating active cooking. A small amount of melted butter and fresh rosemary sprigs are visible in the pan, adding aroma. The background is a slightly blurred, warm-toned kitchen counter, suggesting a real home cooking environment. The focus is sharp on the chops, emphasizing their texture and appealing color, making the process look simple and achievable.

    Ingredients You’ll Need

    Pan-seared lamb chops are a delicious and easy meal perfect for any weeknight. With just a few simple ingredients, this beginner-friendly recipe delivers incredible flavor every time.

    • 4-6 lamb loin or rib chops (about 1-inch thick)
    • 1 tablespoon olive oil (or a high-smoke point oil like avocado oil)
    • 1 teaspoon dried rosemary, crushed
    • 1/2 teaspoon dried thyme
    • 1 clove garlic, minced (or 1/4 teaspoon garlic powder)
    • 1/2 teaspoon salt
    • 1/4 teaspoon black pepper
    • Optional: 1 tablespoon butter, 2 sprigs fresh rosemary, 2 sprigs fresh thyme for basting

    Step-by-Step Instructions

    Pan-searing is a fantastic way to give lamb chops a crispy exterior while keeping the inside tender and juicy. Follow these simple steps for a delicious, stress-free meal.

    1. Pat Dry the Chops: Remove the lamb chops from their packaging and use paper towels to pat them completely dry on all sides. This step is crucial for achieving a good sear.
    2. Season Generously: In a small bowl, combine the dried rosemary, thyme, minced garlic (or garlic powder), salt, and black pepper. Sprinkle this mixture evenly over both sides of each lamb chop, gently pressing it into the meat.
    3. Heat the Pan: Place a heavy-bottomed skillet (cast iron is ideal) over medium-high heat. Add the olive oil and allow it to get hot enough to shimmer slightly.
    4. Sear the Chops: Carefully place the lamb chops in the hot skillet, ensuring you don’t overcrowd the pan (cook in batches if needed). Sear undisturbed for 3-4 minutes per side for medium-rare, or 4-5 minutes per side for medium, until a golden-brown crust forms.
    5. (Optional) Baste for Extra Flavor: During the last minute of cooking, add the butter, fresh rosemary, and thyme to the pan. Tilt the skillet and repeatedly spoon the melted herb butter over the chops.
    6. Check for Doneness: Use a meat thermometer for accuracy. For medium-rare, the internal temperature should be 135-140°F (57-60°C). For medium, aim for 140-145°F (60-63°C). The temperature will rise a few degrees as the meat rests [2].
    7. Rest the Meat: Transfer the cooked chops to a cutting board or plate. Cover them loosely with foil and let them rest for 5-10 minutes. This step allows the juices to redistribute, ensuring every bite is tender.
    8. Serve and Enjoy: Your perfectly pan-seared lamb chops are ready. Serve immediately with your favorite sides.

    Tips for a Perfect Sear

    Achieving a gorgeous, crispy crust on your lamb chops is simple. Follow these tips to master the pan-searing technique.

    • Start with Dry Chops: Moisture on the surface of the lamb will cause it to steam instead of sear. To get a crispy exterior, always pat the chops thoroughly dry with paper towels before seasoning.
    • Hot Pan, Not Smoking Hot: Make sure your skillet is fully heated before adding the chops. The oil should be shimmering. If it’s smoking excessively, the pan is too hot.
    • Don’t Overcrowd the Pan: Give each lamb chop enough space to sear properly. Overcrowding lowers the pan’s temperature, causing the meat to steam. Cook in batches if necessary.
    • Resist the Urge to Flip: Let the chops cook undisturbed on each side. Flipping them too early or too often will prevent a deep, even crust from forming.
    • Use a Meat Thermometer: A meat thermometer removes the guesswork and is the most reliable way to cook your lamb chops to the perfect temperature without overcooking.
    • Let Them Rest: This step is non-negotiable for juicy lamb chops. Resting allows the muscle fibers to relax and reabsorb their juices, making the meat more tender.
    • Flavor Variations: Feel free to experiment with seasonings. Try adding a pinch of smoked paprika to the rub, a squeeze of fresh lemon juice at the end, or a sprinkle of fresh mint before serving.

    What Are Other Ways to Cook Lamb Chops?

    Easy Baked Lamb Chops

    While pan-searing gives a fantastic crust, baking is a hands-off method that delivers equally delicious lamb chops. This simple technique is perfect for weeknight family meals and is especially great for beginner cooks.

    What You’ll Need

    • Lamb chops (loin or rib chops work great)
    • Olive oil
    • Salt and freshly ground black pepper
    • Your favorite seasoning (garlic powder, dried rosemary, thyme are excellent)

    Step-by-Step Instructions for Baked Lamb Chops

    1. Preheat your oven: Set your oven to 400°F (200°C).
    2. Prepare the lamb chops: Pat the lamb chops dry with paper towels. This step helps ensure even browning.
    3. Season generously: Drizzle a little olive oil over the chops, then season all sides with salt, pepper, and your chosen herbs.
    4. Arrange on a baking sheet: Place the seasoned lamb chops in a single layer on a baking sheet. Using a rack is recommended for better air circulation.
    5. Bake until done: Bake for 15-25 minutes. The exact cooking time will vary depending on the thickness of the chops and your desired doneness.
    6. Check internal temperature: Use a meat thermometer for the most accurate results. The internal temperature should be 135°F (57°C) for medium-rare or 140°F (60°C) for medium [3].
    7. Rest the meat: Remove the chops from the oven and let them rest on a cutting board. Tent them loosely with foil for 5-10 minutes. This allows the juices to redistribute, ensuring every bite is tender and flavorful.

    Tips for Perfectly Baked Lamb Chops

    • Don’t overcrowd the pan: Give your chops enough space on the baking sheet to ensure they bake instead of steam.
    • Use a meat thermometer: This is the best way to guarantee your lamb is cooked perfectly without any guesswork.
    • Experiment with seasonings: Feel free to try different spice blends to discover new flavor combinations.

    How to Grill Lamb Chops

    Grilling adds a wonderful smoky char that can transform a simple dinner into a special occasion. This method is surprisingly beginner-friendly and perfect for creating flavorful meals outdoors.

    Before You Start

    • Clean your grill grates: Always start with clean grates to prevent the lamb chops from sticking.
    • Preheat the grill: Heat your grill to a medium-high temperature, around 400-450°F (200-230°C).
    • Prepare the lamb chops: Pat the chops dry and season them well. For extra flavor, marinate them in a mix of olive oil, garlic, rosemary, and lemon juice for at least 30 minutes or up to a few hours.

    Step-by-Step Grilling Instructions

    1. Lightly oil the grates: Once the grill is hot, use a paper towel dipped in high-heat oil to lightly grease the grates.
    2. Place chops on the grill: Arrange the seasoned lamb chops directly over the heat source.
    3. Grill for a few minutes per side: For medium-rare, grill for 2-4 minutes per side. Adjust the time based on the thickness of the chops and your preferred doneness.
    4. Achieve great grill marks: Let the chops sear without moving them too often to develop beautiful, dark grill marks.
    5. Check internal temperature: As with baking, a meat thermometer is your best tool. Aim for 135°F (57°C) for medium-rare or 140°F (60°C) for medium.
    6. Rest the chops: Once cooked to your liking, transfer the lamb chops to a plate. Cover them loosely with foil and let them rest for 5-10 minutes before serving to ensure maximum juiciness.

    Grilling Tips for Success

    • Don’t press down on the chops: Resist the urge to press the chops with a spatula, as this squeezes out the flavorful juices.
    • Use direct heat: Because lamb chops cook quickly, direct heat is ideal for achieving a great sear while cooking them through.
    • Consider thicker cuts: Thicker lamb chops are more forgiving on the grill and are less likely to overcook or dry out.
    • Marinade for flavor and tenderness: A good marinade not only adds taste but also helps to tenderize the meat.

    What to serve with lamb chops?

    A plated meal of two perfectly cooked lamb chops with roasted asparagus and mashed potatoes, garnished with rosemary.
    Professional food photography, photorealistic, high-quality food magazine photo. A perfectly plated meal featuring two succulent, pan-seared lamb chops, cooked to a tender medium-rare, with a beautiful browned crust. The chops are artfully arranged on a clean white ceramic plate, garnished with a sprig of fresh rosemary. Alongside the lamb are vibrant, perfectly roasted asparagus spears and a small serving of creamy garlic mashed potatoes. The overall presentation is inviting, elegant, and highlights the deliciousness of the finished dish, with warm, soft lighting, suitable for a home cook’s dinner.

    After mastering the art of pan-searing lamb chops, the next step is choosing the perfect side dishes. The right accompaniments are essential for a complete meal, adding balance, texture, and complementary flavors. To make your meal planning stress-free, our team at Recipesmondial has gathered some simple, family-friendly ideas. These recipes are easy to prepare and packed with flavor, ensuring a delicious pairing with your lamb.

    Fresh & Vibrant Vegetable Pairings

    Fresh vegetables are a fantastic choice for lamb because they cut through the richness of the meat while adding essential nutrients. The following options are quick to prepare, making them perfect for any home cook.

    • Garlic Roasted Asparagus: For an elegant side, toss asparagus spears with olive oil, minced garlic, salt, and pepper. Roast at 400°F (200°C) for 10-12 minutes until tender-crisp.
    • Sautéed Green Beans with Almonds: In this classic dish, sauté fresh green beans in butter or olive oil. Add toasted slivered almonds for crunch and finish with a squeeze of lemon juice to brighten the flavors.
    • Broccoli with Lemon Butter: Steam or lightly blanch broccoli florets until tender-crisp. Toss with melted butter and a generous squeeze of fresh lemon juice for a simple, healthy side.
    • Mediterranean Salad: Create a fresh contrast by combining mixed greens, cherry tomatoes, cucumber, red onion, and Kalamata olives. Dress the salad with a simple vinaigrette just before serving.

    Classic & Comforting Starchy Sides

    For a heartier meal, pair your lamb with a classic and comforting starchy side. These satisfying options are simple to make and perfect for a family dinner.

    • Creamy Mashed Potatoes: A true crowd-pleaser, classic mashed potatoes are simple to prepare. Boil potatoes until tender, then mash them with butter, warm milk, and a pinch of salt until smooth and creamy.
    • Roasted Rosemary Potatoes: Cut potatoes into bite-sized pieces and toss with olive oil, fresh rosemary, salt, and pepper. Roast until golden and crispy. The rosemary beautifully complements the savory notes of the lamb.
    • Fluffy Couscous with Herbs: For a side that cooks in minutes, pour boiling water or broth over couscous and let it sit for 5 minutes. Fluff with a fork and mix in fresh parsley, mint, or cilantro for an extra burst of flavor.
    • Simple Rice Pilaf: To make this home-cooking staple, sauté finely diced onion and garlic in a pot. Stir in rice for one minute, then add chicken or vegetable broth and simmer until the liquid is absorbed.

    Sauces and Accompaniments

    A flavorful sauce or accompaniment can elevate your lamb chops from great to exceptional. These simple additions pack a big punch of flavor.

    • Mint Chimichurri: For a bright, zesty contrast to rich lamb, blend fresh mint, parsley, garlic, red wine vinegar, olive oil, and a pinch of red pepper flakes. The result is a vibrant and incredibly fresh green sauce.
    • Creamy Yogurt Sauce: Create a cooling counterpoint to warm lamb by mixing plain Greek yogurt with minced garlic, chopped fresh dill, and a squeeze of lemon juice.
    • Homemade Tzatziki: Grate a cucumber, squeeze out the excess water, and combine it with Greek yogurt, minced garlic, fresh dill, and a splash of olive oil. This refreshing sauce is a classic pairing with lamb in Greek cuisine [4].

    No matter which side you choose, these simple pairings will help you serve a delicious and memorable lamb chop dinner. At Recipesmondial, we believe cooking should be enjoyable and stress-free. We hope you enjoy discovering these easy recipes and building confidence in your kitchen!

    Frequently Asked Questions

    How long does it take to cook lamb chops in a pan?

    Cooking lamb chops in a pan is surprisingly quick, making them a fantastic choice for quick meals and simple dinner recipes. The exact cooking time depends on two main factors: the thickness of your lamb chop and your desired level of doneness. Generally, you can have perfectly seared lamb chops ready in about 10-15 minutes.

    The process is straightforward. First, sear each side of the chop for 2-3 minutes over medium-high heat. After searing, reduce the heat to finish cooking them through. An essential final step is to rest your meat for 5-10 minutes after it leaves the pan. This allows the juices to redistribute, resulting in a more tender and flavorful chop.

    Here is a quick guide for cooking times, based on 1-inch thick lamb chop recipes:

    • Rare: Cook for 2-3 minutes per side, then continue for 1-2 more minutes total. (About 5-7 minutes total active cooking)
    • Medium-Rare: Cook for 3-4 minutes per side, then continue for 2-3 more minutes total. (About 7-9 minutes total active cooking)
    • Medium: Cook for 4-5 minutes per side, then continue for 3-4 more minutes total. (About 9-11 minutes total active cooking)

    Keep in mind that these are general guidelines. For the most accurate results, use a meat thermometer. This ensures your lamb chop is cooked exactly to your liking. Additionally, remember that thinner chops will cook faster, so be sure to adjust your timing accordingly.

    What is the best way to season lamb chops?

    Properly seasoning lamb chops is the key to unlocking their rich, natural flavor. The best approach is often the simplest, as the goal is to enhance the taste of the lamb, not overpower it. This makes it a perfect technique for beginner-friendly recipes and approachable home cooking.

    A classic and delicious seasoning blend includes:

    • Kosher Salt: Essential for tenderizing and enhancing flavor.
    • Freshly Ground Black Pepper: Adds a subtle warmth and spice.
    • Garlic Powder: Provides a foundational aromatic note.
    • Dried Herbs: Rosemary and thyme are traditional and highly complementary to lamb.

    To apply the seasoning, first rub your lamb chop generously with olive oil. Then, sprinkle the seasoning mixture evenly over both sides. For the best results, allow the seasoned chops to sit at room temperature for 15-30 minutes before cooking to help the flavors meld.

    For more flavorful meals made easy, consider these variations:

    • Mediterranean Twist: Add a pinch of dried oregano or marjoram. A squeeze of fresh lemon juice after cooking also brightens the flavors.
    • Smoky Kick: A touch of smoked paprika can add satisfying depth and warmth.
    • Herb Paste: Blend fresh herbs like rosemary, thyme, and parsley with garlic, olive oil, and a dash of Dijon mustard. Rub this paste all over the lamb chops before searing to create a wonderfully aromatic crust.

    Regardless of your chosen seasoning, ensure you cover the chops evenly. This will create a delicious crust and a consistently tasty lamb chop.

    What temperature should lamb chops be cooked to?

    To achieve the perfect doneness for your lamb chop, a meat thermometer is essential. Using one provides step-by-step cooking guidance and ensures reliable results every time. For an accurate reading, be sure to insert the thermometer into the thickest part of the chop while avoiding the bone.

    Here is a guide to internal temperatures for different levels of doneness:

    • Rare: 120-125°F (49-52°C)
    • Medium-Rare: 125-130°F (52-54°C)
    • Medium: 130-135°F (54-57°C)
    • Medium-Well: 135-140°F (57-60°C)
    • Well-Done: 140°F (60°C) and above

    For food safety, the USDA recommends cooking whole cuts of lamb to a minimum internal temperature of 145°F (63°C) [5]. However, many chefs and home cooks prefer lamb chops cooked to medium-rare or medium for the best tenderness and flavor. If you choose to cook your lamb below the USDA’s recommendation, please do so at your own discretion.

    It’s also important to account for “carryover cooking.” This means the lamb’s internal temperature will continue to rise by a few degrees even after you remove it from the pan. To compensate, take the chops off the heat when they are about 5°F (3°C) below your target temperature. Finally, letting the lamb chop rest for 5-10 minutes is crucial. This resting period allows the juices to redistribute throughout the meat, resulting in a tender, juicy finish. Following these steps will boost your confidence in cooking skills and lead to delicious outcomes.


    Sources

    1. https://fdc.nal.usda.gov/fdc-app.html#/food-details/170966/nutrients
    2. https://www.fsis.usda.gov/food-safety/safe-food-handling-and-preparation/meat/lamb-from-farm-table
    3. https://www.fsis.usda.gov/food-safety/safe-handling-instructions/meat-poultry-egg-products/lamb-veal-goat-and-bison
    4. https://www.food.com/recipe/authentic-greek-tzatziki-sauce-196585
    5. https://www.fsis.usda.gov/food-safety/safe-food-handling-and-preparation/food-safety-basics/safe-minimum-internal-temperature-chart

  • The Best Simple Apple Pie Recipe (Perfect for Beginners)

    The Best Simple Apple Pie Recipe (Perfect for Beginners)

    A classic apple pie recipe combines sliced fresh apples with sugar, cinnamon, and nutmeg, all baked inside a flaky, buttery pastry crust. The key to a great pie is balancing the sweetness and tartness of the apples and baking until the filling is bubbly and the crust is perfectly golden brown. This recipe is designed to be simple and approachable for home cooks.

    Is there anything more comforting than a warm slice of homemade apple pie? The combination of a golden, flaky crust and a sweet, spiced apple filling is a timeless delight. Yet, the thought of baking from scratch can feel overwhelming. If complex recipes leave you unsure where to start, you are not alone. Many home cooks dream of perfecting this classic dessert without the stress.

    Here at Recipesmondial, we believe making delicious, family-friendly meals and desserts should be an enjoyable experience, especially for beginners. That’s why we’re thrilled to share our best apple pie recipe, designed for simplicity. It offers clear, step-by-step guidance so you can create a memorable pie with confidence. Get ready to transform everyday ingredients into an amazing dessert.

    Forget overly technical jargon and daunting instructions. Our Approachable Home Cooking philosophy will help you bake an amazing apple pie that tastes like it came straight from grandma’s kitchen. You’ll build confidence with every step while discovering just how simple and rewarding baking can be. Ready to try the perfect beginner-friendly recipe for your next baking adventure?

    Why Is This the Best Apple Pie Recipe for Beginners?

    Welcome to your new favorite baking adventure! Diving into homemade pie can feel daunting, especially for beginners. If you’ve ever felt overwhelmed by complex instructions or lacked confidence in the kitchen, this recipe is for you. It isn’t just another apple pie recipe—it’s the best one for beginners, designed to make you a confident baker.

    Our goal at Recipesmondial is to make cooking enjoyable and stress-free. This apple pie recipe combines simple ingredients with clear, step-by-step guidance, empowering you to create a delicious dessert without the struggle. You’ll go from feeling uncertain to proudly presenting a homemade masterpiece.

    Here’s why this recipe is your go-to for a perfect, flavorful apple pie every single time:

    • Approachable Home Cooking: We break down every step into plain, simple language. You won’t find any intimidating culinary terms, just clear guidance from start to finish.
    • Simple, Everyday Ingredients: No need for a special trip to a gourmet store. This recipe calls for common ingredients you probably already have in your pantry.
    • Foolproof Flaky Crust: Our forgiving crust recipe is easy to handle and delivers a classic flaky texture without the fuss. We also include tips for using store-bought pastry to make it even simpler.
    • Delicious, Balanced Filling: Create a perfectly sweet and spiced apple filling with our simple instructions. We help you achieve a wonderful balance of flavors so your pie is never too tart or too sweet.
    • Confidence Building: Successfully baking a classic dessert is a huge accomplishment. This recipe is designed to be a rewarding experience that boosts your skills and inspires you to try more ambitious dishes.
    • Practical Tips and Substitutions: We include helpful tips to prevent common mistakes, along with simple substitutions to suit your pantry or dietary needs. This flexibility ensures you can adapt the recipe with ease.

    Discover how enjoyable making a delicious apple pie from scratch can be. This recipe transforms simple ingredients into a beautiful, comforting dessert. Get ready to impress family and friends with your new baking skills!

    What Ingredients Do You Need for a Classic Apple Pie?

    A flat lay photo showing fresh apples, flour, sugar, butter, and spices neatly arranged on a kitchen counter, ready for making apple pie.
    A professional food photography shot, photorealistic, high-quality food magazine photo. A beautifully arranged flat lay of fresh, raw ingredients for apple pie. Vibrant green Granny Smith apples and red Honeycrisp apples are artfully piled alongside bowls of all-purpose flour, granulated sugar, light brown sugar, ground cinnamon, nutmeg, and chunks of cold unsalted butter. A whole lemon and a small bottle of vanilla extract are also visible. The ingredients are laid out on a light, rustic wooden countertop or a clean marble surface, illuminated by soft, natural daylight. The composition is clean, inviting, and highlights the freshness and quality of each ingredient, ready for baking.

    For the Flaky Pie Crust

    Every great apple pie starts with a perfect, flaky crust. While making your own might sound daunting, our easy recipes approach simplifies the process. Using just a few basic ingredients, you’ll create a wonderfully tender and golden base for your pie. This beginner-friendly recipe focuses on clear steps to help you build confidence in the kitchen.

    Here’s what you’ll need for two 9-inch pie crusts (one for the bottom and one for the top):

    • 2 ½ cups (300g) all-purpose flour: Serves as the foundation of your crust.
    • 1 teaspoon salt: Brings out the butter’s flavor and balances the sweetness of the filling.
    • 1 cup (226g) unsalted butter, very cold and cut into ½-inch cubes: Using very cold butter is the key to flakiness. As it bakes, it creates steam pockets that result in an irresistible texture.
    • ½ cup (120ml) ice water, plus more if needed: Ice water helps keep the butter cold and brings the dough together without overworking it.

    For the Sweet and Spiced Apple Filling

    The heart of any great apple pie is the filling. Our recipe creates one that is sweet, warmly spiced, and perfectly balanced. The filling thickens beautifully, so it won’t be runny—making this one of the best apple pie recipes for beginners. You’ll love how these simple ingredients transform into a comforting classic.

    Gather these ingredients for a vibrant, flavorful filling:

    • 6-7 medium-sized baking apples (about 2 ½ – 3 pounds), peeled, cored, and sliced ¼-inch thick: For the best flavor and texture, we recommend using a mix of sweet and tart apples like Granny Smith, Honeycrisp, or Fuji.
    • ¾ cup (150g) granulated sugar: Provides sweetness. Feel free to adjust the amount based on the natural sweetness of your apples.
    • ¼ cup (50g) packed light brown sugar: Adds a lovely caramel note and depth of flavor.
    • ¼ cup (30g) all-purpose flour: Acts as a thickener to prevent a watery pie. You can use cornstarch for a gluten-free option.
    • 1 ½ teaspoons ground cinnamon: The essential warming spice in any classic apple pie.
    • ¼ teaspoon ground nutmeg: Complements the cinnamon beautifully.
    • Pinch of ground cloves or allspice (optional): Adds an extra layer of complexity to the flavor.
    • 1 tablespoon fresh lemon juice: Brightens the apple flavor and prevents the slices from browning.
    • 2 tablespoons unsalted butter, cut into small pieces: Dotted over the filling before baking, this adds richness and a golden shine.

    How to Make a Simple Apple Pie From Scratch

    A golden-brown, freshly baked apple pie with a beautiful lattice crust sits on a cooling rack, with one slice cut out revealing the warm apple filling.
    A professional food photography shot, photorealistic, high-quality food magazine photo. A warm, inviting image of a perfectly baked, golden-brown classic apple pie, fresh out of the oven. The pie is centered on a light-colored, slightly worn wooden table, resting on a wire cooling rack. It features a beautiful, intricate lattice top crust that’s evenly golden and slightly crisp, with the bubbly, caramelized apple filling peeking through. A single slice has been carefully cut and removed from the pie, revealing the tender, spiced apple filling and flaky bottom crust. Beside the pie, a scoop of melting vanilla bean ice cream or a dollop of fresh whipped cream sits on a small white plate, ready to be served. The lighting is soft, warm, and natural, evoking a cozy, homemade feel. There are subtle hints of steam rising from the cut pie.

    Ready to create a delicious, homemade apple pie that will impress everyone? This guide breaks down the process into simple steps, helping you turn basic ingredients into a warm, comforting dessert with confidence. Our goal is to make your baking journey enjoyable and stress-free.

    Step 1: Prepare the Pie Crust

    Crafting your own flaky pie crust is truly rewarding. Our beginner-friendly method ensures a tender, buttery base for your apple pie. You’ll find this easy recipe a game-changer for all your baking needs.

    1. Combine Dry Ingredients: In a large mixing bowl, whisk together 2 ½ cups (300g) all-purpose flour, 1 teaspoon granulated sugar, and ½ teaspoon salt to create an even base.
    2. Cut in Cold Butter: Add 1 cup (226g) of very cold unsalted butter, cut into ½-inch cubes. Using a pastry blender or your fingertips, cut the butter into the flour until the pieces are about the size of small peas. A mix of smaller and some larger, flatter pieces is ideal.
    3. Add Ice Water Gradually: Slowly drizzle in 6-8 tablespoons of ice water, one tablespoon at a time, mixing gently with a fork after each addition. Stop when the dough just begins to come together when squeezed. Avoid adding too much water, as it can make the crust tough.
    4. Form and Chill: Divide the dough into two equal portions and gently flatten each into a disk. Wrap each disk tightly in plastic wrap and refrigerate for at least 30 minutes, or up to 2 days. Chilling is crucial for a flaky texture.

    Expert Tip for Beginners: Do not overwork the dough! Over-mixing develops too much gluten, which results in a tough crust instead of a tender one. Handle the dough as little as possible.

    Step 2: Make the Apple Pie Filling

    Now for the heart of your pie: the sweet and spiced apple filling. This is where simple ingredients transform into irresistible flavor. Our approachable method makes it easy.

    1. Prepare Your Apples: Peel, core, and slice 6-8 medium baking apples (about 6 cups). Aim for uniform ¼-inch thick slices to ensure they cook evenly.
    2. Combine Filling Ingredients: In a large bowl, gently toss the apple slices with ¾ cup (150g) granulated sugar, 2 tablespoons all-purpose flour, 1 teaspoon ground cinnamon, ¼ teaspoon ground nutmeg, and a pinch of salt. The flour helps thicken the juices as the pie bakes.
    3. Add a Citrus Boost (Optional): For extra brightness, add 1 tablespoon of fresh lemon juice. This also helps prevent the apples from browning.
    4. Let It Mingle: Allow the apple mixture to sit for 15-20 minutes. This step draws out some of the juices, which helps create a more flavorful and less watery filling.

    Quick Tip for Flavor: Many baking experts recommend using a mix of sweet and tart apples, such as Honeycrisp and Granny Smith [1]. This balance creates a more complex and delicious taste.

    Step 3: Assemble Your Pie

    It’s time to bring all the elements together. Follow these steps to build your picture-perfect homemade apple pie.

    1. Preheat Oven and Prep Pan: Preheat your oven to 425°F (220°C) and have a 9-inch pie dish ready.
    2. Roll Out Bottom Crust: On a lightly floured surface, roll one disk of chilled dough into a 12-inch circle. Carefully transfer the dough to your pie dish, leaving about a ½-inch overhang.
    3. Fill with Apples: Pour the apple filling into the prepared crust and mound it slightly in the center. Dot the top of the filling with 1 tablespoon of unsalted butter cut into small pieces.
    4. Add Top Crust: Roll out the second disk of dough into another 12-inch circle. You can either place this over the filling as a solid top or cut it into strips for a lattice design.
    5. Seal and Crimp: Trim the edges of the top crust to match the bottom. Press the top and bottom crusts together along the rim to seal. Crimp the edges decoratively using your fingers or a fork.
    6. Vent the Pie: If you used a solid top crust, cut several slits in it to allow steam to escape during baking.
    7. Egg Wash (Optional): For a beautiful golden-brown finish, beat 1 egg with 1 tablespoon of milk or water and brush it over the top crust. Sprinkle with a little extra sugar, if desired.

    Step 4: Bake to Golden Perfection

    The aroma of a baking apple pie is incredible. This final stage is all about baking your pie until the crust is golden and the filling is bubbly.

    1. Initial High Heat Bake: Place the pie on a baking sheet to catch any drips and bake for 15 minutes at 425°F (220°C). This initial high heat helps set a flaky bottom crust.
    2. Reduce Heat and Continue Baking: Lower the oven temperature to 375°F (190°C) and continue baking for another 40-50 minutes.
    3. Check for Doneness: The pie is done when the crust is a deep golden brown and the filling is bubbling through the vents. You can also insert a thin knife into a vent; the apples should feel tender.
    4. Prevent Over-Browning: If the edges of the crust are browning too quickly, cover them loosely with a ring of aluminum foil.
    5. Cool Completely: This step is critical! Remove the pie from the oven and let it cool on a wire rack for at least 3-4 hours before slicing. This allows the filling to set, preventing a runny slice.

    Congratulations! You’ve just made a wonderful apple pie from scratch. This beginner-friendly recipe proves that delicious, homemade results are achievable for any home baker. Enjoy every bite!

    Expert Tips for a Perfect Homemade Apple Pie

    Mastering Your Pie Crust

    A truly perfect homemade apple pie starts with an amazing crust. While it might seem daunting, these expert tips will help you achieve flaky perfection every time.

    • Keep it Cold: For a wonderfully flaky texture, your butter must be ice-cold. In the oven, cold butter creates pockets of steam—the secret to a flaky crust. Remember to use ice water when mixing the dough as well.
    • Don’t Overwork the Dough: Mix your pie crust just until it comes together. Overworking develops too much gluten, which makes the crust tough instead of tender. A light touch is all you need.
    • Chill Out: After mixing, always chill your dough for at least 30 minutes. This step relaxes the gluten, keeps the butter cold, and makes the dough much easier to roll out.
    • Roll Evenly: When rolling out your dough, aim for an even thickness to ensure the crust bakes evenly. Uneven spots can burn or remain undercooked.

    Perfecting Your Apple Filling

    The filling is the heart of the apple pie. Follow these tips to ensure yours is rich, comforting, and delicious every time.

    • Mix Your Apples: Using a mix of apples creates the best flavor and texture. Some varieties hold their shape, while others break down into a saucy base. Granny Smith, Honeycrisp, and Fuji are popular choices for their balance of tartness and sweetness [2].
    • Slice Consistently: Cut your apple slices to a similar thickness so they cook evenly. Otherwise, some slices may turn mushy while others remain too firm.
    • Prevent a Watery Filling: Apples release a lot of liquid during cooking. To create a thick, luscious filling, add a thickening agent like flour, cornstarch, or tapioca.
    • Spice it Right: While cinnamon is a classic, don’t be afraid to add a pinch of nutmeg, allspice, or cardamom to elevate the flavor. Adjust the spices to create a pie that’s uniquely yours.
    • Sweetness to Taste: Taste your apples before adding sugar, and adjust the amount based on their natural sweetness. Tart apples will require more sugar than sweeter varieties.

    Baking for Golden Perfection

    The final step is baking, where all your hard work comes together. Follow these simple tips for a perfectly golden, bubbly pie.

    • Vent Your Top Crust: Always cut slits or another design in your top crust. This allows steam to escape during baking, which prevents the crust from puffing up or cracking.
    • Egg Wash for Shine: For a beautiful, golden-brown shine, brush the top crust with an egg wash (one egg whisked with a tablespoon of water). This also helps sprinkled sugar adhere to the crust.
    • Protect the Edges: If the edges of your crust are browning too quickly, cover them with aluminum foil. This will prevent them from burning while the rest of the pie finishes baking.
    • Bake Until Bubbly: A key sign of a fully baked pie is a filling that’s visibly bubbling in the center. This indicates the apples are tender and the thickener has activated. Baking typically takes 50-60 minutes, often starting at a high temperature (like 400°F/200°C) that is reduced partway through.
    • Cool Completely: This might be the hardest tip to follow, but it’s crucial to let your pie cool completely. This allows the filling to set properly, preventing a runny slice. Patience is key!

    Enjoying Your Homemade Masterpiece

    Making a homemade apple pie should be a wonderful experience, not an overwhelming one. Recipesmondial is here to make your cooking journey enjoyable. Celebrate your accomplishment with a slice of this delicious, family-friendly dessert. With every step, you’re building confidence in the kitchen!

    Recipe Variations and Substitutions

    Using a Ready-Made Pie Crust

    Feeling overwhelmed by complex recipes? Our goal at Recipesmondial is to make cooking enjoyable and stress-free. That’s why using a ready-made pie crust is a fantastic shortcut that saves you significant time and effort.

    Many home cooks, from beginners to seasoned pros, rely on these crusts as a perfectly acceptable option. Best of all, your delicious apple pie will still taste wonderfully homemade.

    Tips for success with ready-made crusts:

    • Choose wisely: Look for refrigerated pie crusts in the dairy aisle. Frozen ones also work well, but be sure to follow the package instructions for thawing.
    • Handle with care: Ready-made crusts can be delicate. Unroll them gently onto your pie plate.
    • Pinch for perfection: Crimp the edges just as you would with a homemade crust. This adds a beautiful, finished look.
    • Pre-baking (sometimes): Some recipes suggest pre-baking (or blind baking) the bottom crust. Always check the package for recommendations, but know that for most fruit pies, this step isn’t necessary.

    This simple swap lets you enjoy a flavorful apple pie without the added stress of making dough from scratch. It’s an excellent choice for quick and reliable meal solutions [3].

    Making an Egg-Free Version

    If dietary needs or preferences require you to skip the egg, don’t worry. While many traditional apple pie recipes use an egg wash for a golden shine, it’s easy to make an egg-free version. There are simple alternatives that work just as well, making our family-friendly meals even more inclusive.

    Egg-free wash alternatives:

    • Milk or cream: Brush the top crust lightly with milk or heavy cream for a nice golden color and a soft finish.
    • Melted butter: A brush of melted unsalted butter provides a rich sheen and adds a lovely buttery flavor.
    • Plant-based milk: For a completely dairy-free and egg-free option, use almond, soy, or oat milk. This works similarly to regular milk.
    • Sugar sprinkle: After brushing with milk or butter, a sprinkle of coarse sugar adds sparkle and a delightful crunchy texture.

    With these simple substitutions, everyone can enjoy a slice of your delicious apple pie without compromising on flavor or appearance.

    Adjusting the Spices

    The beauty of homemade apple pie is making it your own. Adjusting the spices is a simple way to tailor the flavor and get creative in the kitchen. Our classic recipe provides a wonderful base, but feel free to experiment with different combinations to find what you love most.

    Spice variations to try:

    • More warmth: Increase the cinnamon to 1 teaspoon or even 1.5 teaspoons.
    • Ginger kick: Add 1/4 to 1/2 teaspoon of ground ginger for a lovely, warm undertone.
    • Nutmeg nuance: Use a bit more nutmeg, up to 1/2 teaspoon. Freshly grated nutmeg offers the best flavor.
    • Cardamom complexity: For a unique twist, try 1/4 teaspoon of ground cardamom. It pairs beautifully with apples.
    • Allspice addition: A dash of allspice (about 1/4 teaspoon) can deepen the overall spice profile.
    • Pie spice blend: If you have an apple pie spice blend, you can use 1.5 to 2 teaspoons of it instead. It usually contains a mix of cinnamon, nutmeg, and allspice.

    Start with small adjustments and taste the apple filling before baking to achieve your perfect spice level. This is an easy way to elevate your flavorful meals made easy.

    How to Store and Freeze Apple Pie

    Storing a Baked Apple Pie

    After baking a beautiful apple pie, you’ll want to store it properly to keep it fresh and flavorful. Following a few simple steps will ensure your pie is ready for quick desserts or family meals later.

    At Room Temperature

    • Cool completely: First, let the pie cool completely on a wire rack for several hours. This crucial step prevents condensation from forming and making the crust soggy.
    • Cover loosely: Once the pie is fully cooled, cover it loosely with a pie dome, an inverted bowl, or aluminum foil.
    • Storage duration: An apple pie can be stored at room temperature in a cool, dry place for up to two days.

    In the Refrigerator

    • Cover tightly: For longer storage, wrap the completely cooled pie tightly, first in plastic wrap and then in aluminum foil. This protects it from absorbing refrigerator odors and drying out.
    • Storage duration: A refrigerated apple pie stays fresh for 3 to 5 days.
    • Reheating tip: To bring back the crust’s crisp texture, reheat individual slices in an oven or toaster oven until warm.

    Freezing an Apple Pie for Later

    Freezing is a fantastic way to enjoy homemade apple pie anytime. You can freeze the pie either baked or unbaked, and both methods are simple. Here’s how.

    Freezing a Baked Apple Pie

    Freezing a baked pie is perfect for busy days when you need a quick, ready-to-serve dessert. You will love having a homemade treat on hand.

    • Cool completely: Allow the pie to cool entirely after baking. This step is essential to prevent ice crystals from forming.
    • Wrap securely: Tightly wrap the whole pie in several layers of plastic wrap, followed by a layer of heavy-duty aluminum foil. This double layer is the best defense against freezer burn.
    • Label and date: Don’t forget to label the wrapped pie with the date so you know how long it has been stored.
    • Freezer duration: A baked apple pie can be frozen for up to 4 months.
    • Thawing and reheating:
      • To serve, thaw the pie in the refrigerator overnight.
      • Reheat it in an oven preheated to 350°F (175°C) for 20-30 minutes, or until warmed through.
      • If the crust begins to over-brown, cover it loosely with foil.

    Freezing an Unbaked Apple Pie

    Freezing an unbaked pie is a great time-saver that makes baking day less stressful. It’s an excellent way to prepare ahead of time.

    • Assemble the pie: Follow your recipe to assemble the apple pie completely, but do not bake it.
    • Firm up in freezer: Place the unbaked pie in the freezer, uncovered, for about 30 minutes. This helps it firm up, making it easier to wrap without damaging the crust.
    • Wrap securely: Tightly wrap the firm pie, first in multiple layers of plastic wrap and then in heavy-duty aluminum foil to protect it from freezer burn.
    • Label and date: Clearly label the pie with the date so you can track its freshness.
    • Freezer duration: An unbaked apple pie can be frozen for up to 3 months.
    • Baking from frozen:
      • When you are ready to bake, do not thaw the pie.
      • Preheat your oven to 425°F (220°C).
      • Place the frozen pie on a baking sheet and bake for 15-20 minutes.
      • Next, reduce the oven temperature to 375°F (190°C).
      • Continue to bake for another 60-80 minutes, or until the crust is golden brown and the filling is bubbly.
      • To prevent over-browning, you can cover the edges of the crust with foil during the last part of baking.

    These simple tips will help you keep your homemade apple pie delicious and ready to enjoy at a moment’s notice. Enjoy cooking confidently with Recipesmondial!

    Frequently Asked Questions

    What’s in a classic old-fashioned apple pie?

    A classic old-fashioned apple pie is all about simple, wholesome ingredients and a touch of love. Its comforting and straightforward nature makes it the perfect recipe for beginners.

    Typically, you will find:

    • Fresh Apples: Often a mix of sweet and tart varieties for the best flavor and texture.
    • Sugar: Granulated sugar, sometimes with a touch of brown sugar, to sweeten the filling.
    • Spices: Cinnamon is essential. Nutmeg, allspice, or a pinch of cloves might also be added for warmth.
    • Flour or Cornstarch: This acts as a thickener to prevent a watery filling.
    • Butter: A few pats of butter are often dotted over the filling for richness and flavor.
    • A Flaky Pie Crust: Made from flour, butter (or shortening), salt, and ice water. This creates that wonderful, tender, golden-brown shell.

    This approach emphasizes quality, everyday ingredients to create a delicious dessert that feels like a hug from your kitchen. It’s a wonderful example of a flavorful meal made easy.

    How do you make the best apple pie filling?

    Crafting the best apple pie filling is simpler than you might think and ensures a delicious, non-soggy pie every time. Here’s how to achieve it:

    • Choose the Right Apples: Use a blend of firm, crisp apples. Think Granny Smith for tartness, combined with Honeycrisp or Fuji for sweetness.
    • Balance Sweetness and Spice: Adjust the sugar based on your apples’ tartness. Also, don’t skimp on the cinnamon and a hint of nutmeg or allspice—these warming spices make the flavor sing.
    • Thicken it Well: Always use a thickener like all-purpose flour or cornstarch to prevent a watery filling and ensure your slices hold their shape. A few tablespoons are usually enough for a standard pie.
    • Pre-cook or Macerate (Optional but Recommended): To prevent a gap from forming under the top crust, you can pre-cook or macerate your apples. Pre-cooking involves simmering them briefly, while macerating means tossing them with sugar and letting them rest for 30 minutes. Both methods draw out excess moisture before baking.
    • Add a Touch of Fat: Dotting the filling with small pieces of butter before adding the top crust adds richness and helps create a beautiful, glossy result.

    Following these tips provides great step-by-step cooking guidance, helping you to cook confidently and master a flavorful meal made easy in no time!

    Can I make this apple pie recipe with ready-made pastry?

    Absolutely! Using ready-made pastry is a fantastic time-saver that makes this beginner-friendly recipe even easier. This shortcut helps you enjoy cooking without stress and is perfect when you need a quick meal or simply want to simplify the baking process.

    Here are some tips when using pre-made pastry:

    • Thaw Properly: Ensure your frozen pastry is thawed according to package directions. It should be pliable but still cool.
    • Handle Gently: Store-bought crusts can be more delicate than homemade, so handle them carefully to prevent tearing.
    • Flute with Care: When crimping the edges, work gently. You can use a fork for a simple pattern or your fingers for a more traditional look.
    • Adjust Baking Time (if needed): Some ready-made crusts may bake slightly faster. Watch your pie closely for golden-brown perfection.

    Embracing ready-made pastry is a smart choice for approachable home cooking. It allows you to focus on the delicious apple filling while still achieving a wonderful, homemade-tasting pie. It’s a perfect example of a simple dinner recipe solution!

    What are the best types of apples to use for pie?

    Choosing the right apples is key to a successful and flavorful apple pie recipe. The best pies use a blend of apples to create a balanced flavor and maintain a great texture after baking. Here are some top picks:

    • Granny Smith: A pie favorite! They are tart, firm, and hold their shape beautifully when baked, balancing the sweetness of the filling.
    • Honeycrisp: Known for their crisp texture and sweet-tart flavor. They stay firm during baking and add a lovely juiciness.
    • Braeburn: These apples offer a spicy-sweet flavor and a firm texture that holds its shape well.
    • Fuji: Sweet and crisp, Fujis contribute a pleasant sweetness and retain some texture after baking.
    • Golden Delicious: A sweeter apple that softens nicely without turning to mush. They provide a milder flavor and good moisture.

    For the ideal pie, we recommend using at least two different varieties. For instance, combining a tart apple like Granny Smith with a sweeter one like Honeycrisp or Braeburn creates a complex flavor and prevents the filling from becoming mushy. This is a great tip for elevating any beginner-friendly recipes!


    Sources

    1. https://www.seriouseats.com/best-apples-for-apple-pie
    2. https://foodprint.org/eating-sustainably/which-apple-to-use/
    3. https://www.kingarthurbaking.com/blog/2021/04/09/how-to-blind-bake-pie-crust

  • The Easiest Creme Brulee Recipe (Foolproof & Beginner-Friendly)

    The Easiest Creme Brulee Recipe (Foolproof & Beginner-Friendly)

    Creme brulee is a classic French dessert featuring a rich, creamy custard base topped with a contrasting layer of hard, caramelized sugar. The custard is traditionally made with heavy cream, egg yolks, sugar, and vanilla. The name, which means “burnt cream,” refers to the signature brittle topping created by torching or broiling sugar just before serving.

    Imagine cracking through a perfectly caramelized sugar crust to reveal a silky, rich custard beneath. While that sounds like a dream reserved for fancy restaurants, it doesn’t have to be. Many home cooks feel intimidated by crème brûlée, assuming it requires expert skills and complicated techniques. But what if we told you that creating this elegant dessert at home is surprisingly straightforward?

    At Recipesmondial, our mission is to make delicious cooking accessible to everyone. We know you want simple recipes that deliver big flavor, without overwhelming instructions or unfamiliar ingredients. That’s why we’ve designed our easiest crème brûlée recipe with beginner-friendly steps to ensure success. Our goal is to build your confidence and help you master this classic dessert, complete with a rich, creamy texture and a flawless, crunchy topping every single time.

    It’s time to forget the stress and embrace the joy of creating something spectacular. This guide will walk you through each step, making the process enjoyable and the results guaranteed. You’ll soon discover that this isn’t just an easy crème brûlée recipe; it’s the foolproof method you’ve been searching for. It promises to elevate your dessert game without the fuss. Let’s dive in and see why this is the best crème brûlée recipe for beginners!

    Why Is This the Best Creme Brulee Recipe for Beginners?

    Welcome to the world of delicious desserts! Have you always dreamed of making a beautiful creme brulee but felt intimidated by complex recipes? You’re in the right place. We designed this simple creme brulee recipe specifically for home cooks, making it the perfect choice for beginners.

    At Recipesmondial, we believe cooking should be enjoyable, not stressful. That’s why we’ve transformed this seemingly fancy dessert into an approachable home cooking project. This recipe is your first step toward creating flavorful, impressive meals with ease, starting with this classic treat.

    Why This Recipe Stands Out for New Cooks

    Many creme brulee recipes are intimidating, filled with technical jargon and complicated steps. Our version cuts through that confusion by focusing on clarity, simplicity, and reliable results. Here’s how this beginner-friendly recipe will boost your confidence in the kitchen:

    • Simple, Everyday Ingredients: No need to search for obscure items. This recipe uses common pantry staples like heavy cream, egg yolks, sugar, and a hint of vanilla, so finding what you need is easy.
    • Clear, Step-by-Step Guidance: We break down every action into easy-to-understand instructions. You’ll move confidently from one step to the next without any guesswork.
    • Foolproof Techniques Explained: We guide you through key techniques without stress. For instance, while tempering egg yolks sounds complex, we show you exactly how to do it. We also simplify the water bath method to ensure a perfectly creamy custard every time.
    • Common Pitfalls Addressed: We highlight potential challenges and provide practical tips to avoid them. This proactive advice helps prevent mistakes before they happen, so you can cook with confidence.
    • No Fancy Equipment Required (Mostly!): While a kitchen torch is fun, it’s not necessary. We offer simple alternatives so you can achieve the signature crackly sugar crust using equipment you already own.
    • Guaranteed Delicious Results: Just like our simple dinner recipes and quick breakfast ideas, this dessert delivers great flavor. You will create a rich, creamy, and impressive creme brulee that your family will love.

    This recipe is more than just a set of instructions; it’s an encouraging companion designed to help you enjoy the cooking process. Say goodbye to feeling overwhelmed and hello to making delightful desserts with ease. Get ready to build your confidence and enjoy every moment in the kitchen!

    What Ingredients Do You Need for Classic Creme Brulee?

    A flat lay of classic crème brûlée ingredients including cream, egg yolks, sugar, and a vanilla bean on a wooden table.
    A professional food photography style, photorealistic, high-quality food magazine photo of a beautifully arranged flat lay on a warm, rustic wooden surface. The classic crème brûlée ingredients are neatly organized: a small jug of heavy cream, a bowl of bright yellow egg yolks, granulated sugar, a whole vanilla bean, and a small pinch of salt. The ingredients are fresh, vibrant, and inviting, showcased with soft, natural lighting that emphasizes their textures. The overall impression is clean, simple, and encouraging for a beginner home cook.

    Making a classic creme brulee might sound fancy, but it’s a surprisingly simple dessert made with just a few ingredients. Since you likely have these staples in your kitchen already, this recipe is perfect for beginners. You can create a rich, creamy dessert without feeling overwhelmed.

    Here are the core ingredients you will need:

    • Heavy Cream (35-36% milk fat): This is the star of the show. Its high fat content is what gives the custard its incredibly rich, smooth, and luxurious texture. For a truly classic result, do not substitute it with lighter creams or milk. [1]
    • Large Egg Yolks: These provide structure and richness, giving your custard its beautiful pale yellow color. Egg yolks are key to achieving a firm yet silky set.
    • Granulated Sugar: You will use this in two ways: first, to sweeten the custard, and second, to create that iconic crunchy, caramelized crust on top.
    • Vanilla Extract or Vanilla Bean: This adds the warm, comforting flavor that defines a classic creme brulee. While a good quality vanilla extract works wonderfully, a vanilla bean will offer a more intense, aromatic experience.
    • Pinch of Salt: A tiny bit of salt balances the sweetness and enhances all the other flavors, making your creme brulee taste even better.

    A Note on Cream vs. Milk

    For a truly classic creme brulee, heavy cream is non-negotiable. Its high-fat content is crucial for creating the custard’s characteristic rich, silky texture—the secret to that melt-in-your-mouth experience.

    If you use milk or half-and-half, the result will be a much lighter custard that may not set as firmly and will have a less luxurious mouthfeel. While you can certainly experiment for a lighter dessert, it won’t be the traditional creme brulee you expect. To ensure a foolproof first attempt, we recommend sticking to heavy cream.

    Because Recipesmondial focuses on reliable results, this beginner-friendly recipe calls for full-fat heavy cream. Using it guarantees that perfect creamy consistency every time, so you can cook confidently, knowing you’re set up for success.

    What Equipment Will You Need?

    Making a delicious creme brulee might seem intimidating, but this easy recipe is designed for success. We’ll show you how to get reliable, delicious results using common kitchen tools you likely already own. Our goal is to help you feel confident and excited in the kitchen, not stressed.

    • Medium Saucepan: Use this for gently heating the cream and vanilla. A saucepan with a heavy bottom works best because it distributes heat evenly.
    • Whisk: An essential tool for smoothly combining the egg yolks and sugar. A whisk also helps you properly temper the hot cream into the egg mixture.
    • Mixing Bowls (2-3): You will need at least one bowl for separating your egg yolks and another for mixing the custard base ingredients.
    • Fine-Mesh Sieve: This is the secret to a perfectly silky custard. Straining the mixture catches any small bits of cooked egg or vanilla bean, ensuring a flawless texture.
    • Ramekins: These individual oven-safe ceramic dishes are essential for baking. Standard 4- to 6-ounce ramekins work perfectly, and you will need 4 to 6 of them for this recipe.
    • Large Roasting Pan or Baking Dish: This will hold your ramekins during their crucial water bath (bain-marie). Choose a pan large enough to fit all the ramekins without them touching.
    • Kettle or Pot: You’ll need this to heat the water for your water bath. Starting with hot water is key to ensuring the custard bakes evenly and sets properly.
    • Measuring Cups and Spoons: Precise measurements are key to a perfect custard. Use these to ensure a consistent balance of ingredients every time.
    • Oven Mitts: Safety first! Always use oven mitts when handling hot dishes and pans from the oven.

    Do You Really Need a Kitchen Torch?

    The iconic crackly sugar top is a hallmark of creme brulee, leading many to wonder if a kitchen torch is necessary. While it’s the most effective and traditional tool for the job, you can still make this dessert without one.

    A kitchen torch, also known as a culinary torch, provides quick, high-impact heat. This creates the beautiful golden-brown crust without warming the cool custard underneath, keeping it perfectly chilled and creamy. Using a torch also adds a professional touch to the final step.

    If you don’t have a torch, don’t worry—you can use your oven’s broiler instead. Simply place the chilled ramekins under a preheated broiler for a minute or two. Be sure to watch them constantly, as the sugar can go from caramelized to burnt in seconds. This alternative makes the recipe accessible to everyone, using equipment you already have.

    For beginners, starting with the broiler is a great way to build confidence without buying special equipment. If you find yourself making this dessert often, a kitchen torch can be a fun and useful tool to add to your collection. It speeds up the final step and guarantees a perfect crust every time.

    How to Make Creme Brulee: A Step-by-Step Guide

    A home cook's hands carefully pouring creamy custard into a white ramekin set in a roasting pan.
    A professional food photography style, photorealistic, high-quality food magazine photo capturing a close-up of a home cook’s hands in a brightly lit, clean home kitchen. The hands are gently pouring creamy, pale yellow crème brûlée custard from a clear glass measuring cup into a white ceramic ramekin. The ramekin is already placed inside a larger, shallow roasting pan, implying it’s ready for a water bath (bain-marie). The focus is on the smooth, pourable texture of the custard and the careful, precise movement. The background is softly blurred to keep attention on the pouring action, suggesting an easy and approachable cooking process.

    Step 1: Infuse the Cream

    To create a truly flavorful creme brulee, the magic starts here. By gently warming the cream and vanilla together, you’ll infuse a beautiful, deep aroma into the custard base. This simple step is key to a remarkable dessert.

    • Gather your ingredients: Pour the heavy cream into a medium saucepan. If using a vanilla bean, add it now. If using vanilla extract, you will add it later.
    • Heat gently: Place the saucepan over medium-low heat and warm the cream until it becomes steamy with small bubbles forming around the edges. Be careful not to let it boil, as this can scorch the cream.
    • Infuse the flavor: Remove the saucepan from the heat. If you used a vanilla bean, cover the pan and let it steep for 15-20 minutes to allow the flavor to deepen.
    • Strain (if needed): After steeping, remove the vanilla bean. For extra visual appeal, you can scrape the seeds out and stir them back into the cream. To guarantee a silky custard, strain the cream through a fine-mesh sieve.

    Step 2: Temper the Egg Yolks

    Tempering might sound intimidating, but it’s a simple technique to prevent the eggs from scrambling when they meet the warm cream. Mastering this step is essential for a perfectly smooth custard and will build your confidence in the kitchen.

    1. Whisk yolks and sugar: In a large mixing bowl, whisk the egg yolks and granulated sugar together vigorously. Continue until the mixture is pale yellow and slightly thickened, which incorporates air and helps dissolve the sugar.
    2. Slowly add warm cream: While whisking constantly, gradually pour about a quarter of the warm cream into the egg mixture. This slowly raises the temperature of the eggs, preventing them from cooking too quickly.
    3. Combine everything: Once tempered, pour the egg yolk mixture back into the saucepan with the remaining cream. Whisk gently until well combined. If using vanilla extract, stir it in now.
    4. Strain for smoothness: For the ultimate silky texture, pour the finished custard base through a fine-mesh sieve into a clean bowl or large measuring cup. This final straining removes any small bits of cooked egg and ensures a foolproof, wonderfully smooth result.

    Step 3: Bake in a Water Bath (Bain-Marie)

    A water bath, also known as a bain-marie, is the secret weapon for a perfectly cooked creme brulee. It provides gentle, even heat, which prevents the delicate custard from overcooking or cracking at the edges.

    • Preheat oven and prepare bath: Preheat your oven to 325°F (160°C). Arrange 4-6 ramekins (4- to 6-ounce size) inside a large roasting pan or baking dish with high sides.
    • Fill ramekins: Carefully pour the strained custard mixture into each ramekin, filling them almost to the top. Using a measuring cup with a spout makes this easier.
    • Add hot water: Place the baking dish on the oven rack. Carefully pour hot water into the dish until it comes halfway up the sides of the ramekins. This creates the essential bain-marie.
    • Bake until set: Bake for 30-40 minutes, depending on ramekin size. The custards are done when the edges are set but the centers still have a slight jiggle, similar to firm Jell-O.
    • Cool carefully: Gently remove the baking dish from the oven. Using tongs, carefully lift the ramekins out of the water bath and place them on a wire rack to cool completely to room temperature.

    Step 4: Chill to Perfection

    Patience is key during this next step. Chilling is crucial because it allows the custard to fully set and develop the delightful, firm texture that creme brulee is known for. Do not skip this step.

    • Cover and refrigerate: Once the ramekins are completely cool, cover each one with plastic wrap and place them in the refrigerator.
    • Chill thoroughly: Chill for at least 4 hours, but overnight is ideal. This ensures the custard is perfectly set, which is essential for creating the signature crisp sugar crust later.
    • Plan ahead: The custards can be prepared up to three days in advance, making this a fantastic make-ahead dessert for entertaining or busy weeknights.

    Step 5: Create the Signature Sugar Crust

    Now for the grand finale: creating the iconic, caramelized sugar crust. This final step provides that satisfying crunch against the creamy custard, making your homemade creme brulee truly special.

    1. Prepare for torching: Just before serving, uncover the chilled ramekins. Gently blot any condensation from the custard’s surface with a paper towel to ensure the sugar stays dry.
    2. Sprinkle sugar evenly: Sprinkle a fine, even layer of about 1-2 teaspoons of granulated sugar over the top of each custard. Too much sugar can create a crust that is overly thick and hard.
    3. Caramelize with a torch: Using a kitchen torch, move the flame steadily and continuously across the sugar’s surface to melt and caramelize it. Keeping the torch moving prevents any single spot from burning.
    4. Achieve the perfect crust: Continue torching until all the sugar has melted into a beautiful, even, golden-brown crust.
    5. Let it harden: Allow the caramelized sugar to cool for a minute or two. It will harden into a brittle, glass-like layer that creates the satisfying “crack” when tapped with a spoon.
    6. Serve immediately: Present your beautiful creme brulee right away to be enjoyed while the contrast between the warm, crisp topping and the cool, creamy custard is at its best.

    Top Tips for Foolproof Creme Brulee Success

    Three perfect crème brûlées in white ramekins, each with a golden cracked sugar topping, on a wooden table.
    A professional food photography style, photorealistic, high-quality food magazine photo featuring three exquisite, perfectly finished crème brûlée desserts. Each dessert is presented in an elegant white ceramic ramekin, arranged appealingly on a simple, inviting rustic wooden table. The top of each crème brûlée boasts a glistening, golden-brown, caramelized sugar crust with a distinct, satisfying crack, inviting the viewer. Soft, warm, natural lighting highlights the rich texture and appealing color. A single antique silver spoon rests beside one of the ramekins, ready for enjoyment, emphasizing the indulgent and achievable perfection of the dessert.

    Making delicious crème brûlée is easier than you think. Even beginner cooks can achieve a restaurant-quality dessert with a few simple tricks. These foolproof tips will guide you to a perfect crème brûlée every time, helping you cook with confidence.

    Mastering the Custard Base

    • Heat the Cream Gently: Never boil the cream. Instead, bring the mixture to a gentle simmer. Boiling can scald the cream and give it an unpleasant flavor, making your custard more likely to curdle.
    • Temper Your Egg Yolks Slowly: This crucial step ensures a creamy custard. To prevent the eggs from scrambling, slowly whisk a small amount of warm cream into the yolks. This gently raises their temperature before you add the warmed yolk mixture back into the rest of the cream.
    • Strain for Silkiness: For the smoothest possible texture, pour your custard mixture through a fine-mesh sieve before filling the ramekins. This removes any small bits of cooked egg or vanilla bean, resulting in a wonderfully silky finish.

    Baking for Perfection

    • The Water Bath (Bain-Marie) is Essential: A water bath creates a gentle, humid environment that cooks the custard evenly, preventing it from cracking or becoming rubbery. Use hot tap water, not boiling, filling the pan until it reaches halfway up the sides of your ramekins.
    • Do Not Overbake: Avoid overbaking, a common mistake that leads to a rubbery custard. Your crème brûlée is ready when the edges are set but the center still has a slight jiggle. It will continue to firm up as it cools.
    • Chill Thoroughly: Patience is a must! After baking, allow the crème brûlée to cool completely at room temperature before transferring it to the refrigerator. Chill for at least four hours, or ideally overnight, to allow the custard to set properly for that perfect, creamy consistency.

    Achieving the Signature Crust

    • Even Sugar Layer for the Crust: Right before serving, sprinkle a thin, even layer of granulated sugar over the chilled custard. Too much sugar creates an overly thick, hard crust, while too little may burn before it can caramelize.
    • Torch with Confidence: A kitchen torch provides the best results. Hold it a few inches from the sugar and move it in a constant motion until it melts and caramelizes into a deep amber color. If you don’t have a torch, you can use your oven’s broiler—just watch it closely, as it can burn in seconds.

    With these tips, you’ll be creating beautiful, flavorful crème brûlée like a pro. This beginner-friendly recipe will quickly become a family favorite. Enjoy cooking without stress, and discover new simple dishes with Recipesmondial!

    How Do You Store Leftover Creme Brulee?

    Properly storing your creamy, dreamy creme brulee is key to savoring every bite, even days later. Good storage not only prevents waste but also makes enjoying your homemade treats simple and stress-free.

    Storing Un-Caramelized Creme Brulee

    The best way to store creme brulee is before torching the sugar topping. This method keeps the custard perfectly creamy and allows you to create a fresh, crispy crust just before serving. As a fantastic meal prep strategy, this approach lets you make the dessert ahead of time, ensuring a stress-free serving day.

    • Chill Completely: First, let your baked creme brulee ramekins cool completely to room temperature before placing them in the refrigerator.
    • Cover Tightly: Cover each ramekin individually with plastic wrap or an airtight lid. This step is crucial to prevent the custard from absorbing fridge odors or drying out.
    • Refrigerate Promptly: Store the covered ramekins in the refrigerator, where they will stay fresh for up to 3-4 days [source: https://www.foodsafety.gov/keep-food-safe/food-safety-by-food-type/eggs].
    • Torch Before Serving: When you’re ready to serve, simply remove the ramekins from the fridge, sprinkle with sugar, and torch the top to create that signature crisp crust.

    Storing Caramelized Creme Brulee

    If you’ve already torched your creme brulee, you can still store it. However, be aware that the crisp sugar crust will soften as it absorbs moisture from the custard and the air, so it won’t be as crunchy. While a caramelized creme brulee recipe stored this way will have a softer top, it will still be delicious—a compromise many home cooks find worthwhile.

    • Cool Down: Allow the torched creme brulee to cool completely to room temperature.
    • Gentle Covering: Cover the ramekins carefully with plastic wrap or place them in an airtight container. To minimize stickiness, try to avoid letting the plastic touch the caramelized top.
    • Refrigerate: Store in the refrigerator for up to 2-3 days. Keep in mind the texture of the crust will change during this time.

    Tips for the Freshest Creme Brulee

    To get the best results from your easy creme brulee recipe, keep these tips in mind:

    • Seal It Well: Always use airtight covers to protect the delicate custard from outside odors and air.
    • Keep It Cold: Refrigeration is crucial for both safety and freshness. Never leave creme brulee at room temperature for an extended period.
    • Avoid Condensation: To prevent condensation from making the custard’s surface watery, create a slight dome with the plastic wrap when covering. This keeps water droplets from dripping down.
    • Plan Ahead: Making the custard base ahead of time is an excellent strategy that saves you effort on the day of your gathering, making it an ideal make-ahead dessert.

    Following these simple storage steps will ensure your creme brulee stays delicious, allowing you to confidently serve this delightful dessert anytime. Recipesmondial aims to make your kitchen experiences enjoyable and stress-free as you discover new flavors.

    Frequently Asked Questions

    What makes a creme brulee recipe easy?

    An easy creme brulee recipe simplifies the process with clear, step-by-step instructions, helping home cooks feel confident rather than overwhelmed.

    Our beginner-friendly recipes prioritize practical tips and reliable results, so you can build confidence in your cooking skills.

    Key elements that make a creme brulee recipe easy include:

    • Minimal Ingredients: Our recipes use everyday items found in most kitchens.
    • Clear Steps: Each instruction is broken down into simple, detailed steps without technical jargon.
    • Foolproof Techniques: Methods like slow tempering and using a water bath prevent common mistakes, ensuring a creamy custard every time.
    • Common Equipment: You won’t need specialized gadgets, aside from a kitchen torch for the crust—and we even offer an alternative for that!
    • Focus on Flavor: The recipe highlights how simple ingredients can create a delicious dessert with incredible flavor.

    Ultimately, an easy recipe means you can enjoy the cooking process without stress and achieve delicious, reliable results.

    Can you make creme brulee with milk instead of heavy cream?

    While you can technically use milk, we strongly recommend heavy cream for the best results. Heavy cream is essential for creating the classic, rich, and velvety texture that makes creme brulee so special.

    Here’s a breakdown of why heavy cream is preferred:

    • Fat Content: Heavy cream has a much higher fat content, which creates a luxurious, smooth custard that holds its shape beautifully.
    • Texture: Using milk or half-and-half will result in a lighter, thinner custard that may be more prone to curdling.
    • Stability: The fat in cream adds stability, which helps prevent a watery or grainy texture in the final dessert.

    If you must substitute, you can try a blend of whole milk and half-and-half, but expect a noticeable difference in richness and consistency. For a truly authentic experience, heavy cream is the star ingredient.

    What is an authentic French creme brulee recipe like?

    An authentic French creme brulee recipe celebrates simplicity and quality ingredients, highlighting classic dessert traditions. [2]

    The core components are straightforward and typically include:

    • Rich Dairy: High-fat heavy cream (or a mix of cream and whole milk) creates a luscious base.
    • Egg Yolks: These provide the custard’s structure and signature richness.
    • Sugar: Granulated sugar sweetens the custard, while an additional sprinkle on top is caramelized to create the famous crisp crust.
    • Vanilla: A real vanilla bean or pure vanilla extract is used to infuse the cream, adding an elegant, aromatic flavor.

    The method is just as simple and elegant. It involves gently heating the cream, tempering the egg yolks, baking the custards in a water bath, and chilling them completely. The signature crunchy sugar crust is then created just before serving.

    Authentic recipes emphasize quality ingredients and precise, gentle cooking, allowing the natural flavors to shine. Our recipes bring this traditional elegance to your kitchen with simple, easy-to-follow steps.


    Sources

    1. https://www.foodnetwork.com/how-to/packages/food-network-essentials/what-is-heavy-cream
    2. https://www.larousse.fr/dictionnaires/francais/cr%C3%A8me_br%C3%BBl%C3%A9e/20268

  • Easy Chicken Piccata Recipe: A Step-by-Step Guide for Beginners

    Easy Chicken Piccata Recipe: A Step-by-Step Guide for Beginners

    Chicken piccata is a classic Italian-American dish made with thinly sliced chicken cutlets that are dredged in flour, pan-fried, and served with a bright sauce. The signature piccata sauce consists of lemon juice, butter, chicken broth or white wine, and capers, creating a flavorful and elegant meal that is simple to prepare at home.

    Are you searching for easy recipes that impress without the fuss? When you’re short on time or new to the kitchen, complex dishes can feel overwhelming. Imagine serving a gourmet-tasting meal that comes together effortlessly. That’s where a classic like chicken piccata shines. Though it sounds elegant, this flavorful dish is surprisingly simple to master—even for beginners—and promises a delightful, stress-free dining experience.

    At Recipesmondial, we believe mealtimes should be enjoyable. That’s why we’ve created the ultimate beginner-friendly chicken piccata recipe. Our step-by-step guide will walk you through preparing succulent chicken cutlets in a bright, tangy lemon-butter sauce. You’ll build confidence and see how simple dinner recipes can transform your weeknights into delicious culinary experiences, perfect for family-friendly meals.

    Get ready to discover why this easy chicken piccata recipe is about to become a new family favorite. We’ll cover everything from using everyday ingredients to sharing practical tips for perfecting your sauce. With our guide, you can expect reliable results every time. Let’s dive in and make this beloved dish accessible to everyone!

    What Is Chicken Piccata?

    Chicken Piccata is a classic Italian-American dish featuring tender, thin chicken cutlets pan-fried until golden brown. The cutlets are then bathed in a bright and zesty sauce, which is the heart of this incredibly flavorful meal.

    Home cooks love this dish because it delivers gourmet results with minimal effort. Its simplicity and impressive taste make it a perfect choice for an easy yet elegant weeknight dinner.

    The Heart of Piccata: Chicken and Sauce

    At its core, a classic chicken piccata recipe combines two main elements:

    • Thin Chicken Cutlets: The dish starts with boneless, skinless chicken breasts pounded to about 1/4 inch thick, which ensures they cook quickly and evenly. A light dredge in flour before pan-frying creates a beautiful, crispy crust.
    • Lemony Caper Sauce: This vibrant sauce is what makes piccata so unique. Its base combines savory chicken broth with fresh lemon juice for brightness and rich butter for a luxurious texture. The addition of tiny, briny capers provides a salty pop that perfectly balances the rich and tangy notes.

    Why Home Cooks Love This Easy Recipe

    Chicken piccata is a fantastic choice for cooks of all skill levels because it offers incredible flavor without requiring complex techniques. It’s an ideal, beginner-friendly recipe for anyone looking to create a restaurant-quality meal at home.

    Recipesmondial focuses on approachable home cooking, and this recipe embodies that philosophy. It’s a quick, reliable, and family-friendly meal that delivers impressive flavor without the stress. With every delicious plate, you’ll gain confidence and find more joy in the kitchen.

    What Does “Piccata” Mean?

    The Italian word “piccata” can mean “larded” or “punished” in a culinary context. More commonly, it refers to a method of preparing meat that has been thinly sliced, pounded flat, dredged in flour, and pan-fried. This technique is used for various proteins, with veal piccata being another popular variation. [1]

    Why Is This the Best Chicken Piccata Recipe for Home Cooks?

    Welcome to your new favorite way to make chicken piccata! While many home cooks feel overwhelmed by complex recipes, we believe you deserve delicious results without the stress. That’s why this recipe is specifically crafted for you.

    At Recipesmondial, we focus on making cooking enjoyable by helping you create flavorful meals with confidence. This chicken piccata recipe is a perfect example, and it stands out for several key reasons:

    • Super Simple Steps: We break down the cooking process into clear, easy-to-follow instructions so you’ll never feel lost in the kitchen. This makes it a perfect beginner-friendly recipe.
    • Quick Weeknight Solution: Need a fast meal after a busy day? This easy recipe delivers a restaurant-quality dish in no time, making it ideal for simple dinner recipes and family-friendly meals.
    • Everyday Ingredients: Forget trips to a specialty store. Our chicken piccata uses common items you likely already have or can easily find at your local grocery store.
    • Guaranteed Delicious Flavor: You don’t need to be a chef to create an amazing dish. This recipe guarantees a bright, zesty, and savory taste, ensuring a truly flavorful meal made easy.
    • Build Your Confidence: Mastering a classic dish like piccata is a great way to boost your kitchen skills. Our step-by-step cooking guidance is designed to help you cook with confidence every step of the way.
    • Practical Tips Included: We provide helpful advice throughout the recipe, including tricks for perfectly golden chicken and a velvety sauce. These tips help ensure reliable, delicious results every time.
    • Easy Variations: If you want to switch things up, we offer simple suggestions to customize your piccata, allowing you to adapt it to your taste or the ingredients you have on hand.

    Our approach transforms meal prep from a stressful chore into an enjoyable experience, guiding you from uncertainty to confidence in the kitchen. Get ready to discover new flavors and make mealtime stress-free with Recipesmondial!

    What Ingredients Do You Need for Chicken Piccata?

    Making delicious Chicken Piccata at home is surprisingly simple. This classic dish comes together with just a few everyday ingredients—no fancy items or complex preparations required. Many of these are likely already in your pantry. To keep it simple, we’ll break down the ingredients for the chicken cutlets first, followed by the signature lemon-butter sauce.

    For the Chicken Cutlets

    First, let’s gather what you need for the star of the dish. We use boneless, skinless chicken breasts because they cook quickly and absorb flavors beautifully, helping you get a delicious dinner on the table fast.

    • Boneless, Skinless Chicken Breasts: 2 large (about 1.5 lbs total). These will be sliced or pounded thin for quick cooking.
    • All-Purpose Flour: ½ cup. This creates a light, golden crust on the chicken and helps thicken our piccata sauce.
    • Salt: ½ teaspoon. Essential for seasoning the chicken.
    • Black Pepper: ¼ teaspoon. Freshly ground pepper offers the best flavor.
    • Olive Oil: 2 tablespoons. For pan-frying the chicken to a perfect golden brown.

    Chef’s Tip: To get thin cutlets, you can either slice each chicken breast horizontally to create two thinner pieces, or place them between two sheets of plastic wrap and gently pound them to about ½-inch thickness with a rolling pin or meat mallet. Thinner cutlets cook faster and stay more tender, making this a truly quick and easy recipe.

    For the lemon-butter piccata sauce

    Next up is the bright, tangy lemon-butter sauce that truly defines this classic dish. It comes together in just a few minutes and relies on a handful of common pantry staples.

    • Unsalted Butter: ¼ cup (4 tablespoons). Butter adds richness and a silky texture to the sauce.
    • Garlic: 2 cloves, minced. Fresh garlic adds a wonderful aromatic base to the sauce.
    • Chicken Broth: ¾ cup. Low-sodium broth is best. It provides savory depth without being too salty.
    • Fresh Lemon Juice: ¼ cup (from about 1-2 lemons). This is non-negotiable for authentic piccata flavor. Always use fresh for the best taste.
    • Capers: 2 tablespoons, drained. These tiny, briny flower buds add a distinct salty and tangy pop. They are a signature ingredient of piccata.
    • Fresh Parsley: 2 tablespoons, chopped. A sprinkle of fresh parsley adds color and a herbaceous finish.

    Substitution Idea: While fresh parsley offers the best vibrant flavor and appearance, dried parsley can work in a pinch. The one non-negotiable ingredient is fresh lemon juice; bottled juice simply lacks the bright, zesty taste essential for authentic piccata. For a richer sauce, you can add a splash of white wine during the deglazing step, as highlighted in our “Chicken Piccata with White Wine” variation.

    How to Make Chicken Piccata: A Simple Step-by-Step Guide

    Step 1: Prepare the Chicken

    First, let’s prepare the chicken. This initial step ensures the chicken cooks evenly and quickly, making it perfect for a weeknight meal.

    1. Slice the Chicken: If your boneless, skinless chicken breasts are thick, slice them horizontally to create thinner cutlets. You should get two or three cutlets from each breast.
    2. Pound the Chicken: Place a chicken cutlet between two sheets of plastic wrap or inside a large zip-top bag. Using a meat mallet or heavy rolling pin, gently pound the chicken to a uniform ¼-inch thickness. This step is key for tender results and even cooking.
    3. Season Well: Remove the chicken from the plastic. Season both sides of each cutlet with salt and black pepper to build flavor from the start.

    Chef’s Tip: Don’t skip pounding the chicken! This extra step tenderizes the meat and helps it cook much faster—a great skill for many quick recipes.

    Step 2: Dredge and Pan-Fry

    With the chicken prepped, it’s time to create a golden-brown crust. This is where the dish builds its signature flavor and texture.

    1. Set Up for Dredging: On a shallow plate, combine the all-purpose flour with a pinch of salt and pepper.
    2. Dredge the Chicken: Dip each seasoned chicken cutlet into the flour mixture, coating both sides. Gently shake off any excess flour; a thin, even layer is all you need for a perfect crust.
    3. Heat the Pan: Place a large skillet over medium-high heat. Add the olive oil and butter. When the butter is melted and the oil begins to shimmer, the pan is ready.
    4. Pan-Fry the Chicken: Carefully place 2-3 chicken cutlets in the hot skillet, making sure not to overcrowd the pan. Cook for 3-4 minutes per side, until golden-brown and cooked through.
    5. Remove and Rest: Transfer the cooked chicken to a clean plate and cover it loosely with foil to keep warm. Letting the chicken rest keeps it juicy and tender while you make the sauce.

    Beginner’s Insight: Overcrowding the pan lowers its temperature, causing the chicken to steam instead of brown. For the best results, cook the chicken in batches if needed.

    Step 3: Make the Piccata Sauce

    The key to chicken piccata is its bright, tangy lemon-butter caper sauce. This is what makes the dish a classic.

    1. Deglaze the Pan: Leave the flavorful browned bits in the bottom of the skillet. Pour in the chicken broth and use a wooden spoon to scrape the bottom of the pan. This process, called deglazing, builds the sauce’s foundation.
    2. Add Key Flavors: Stir in the fresh lemon juice, capers, and caper brine. Bring the mixture to a simmer and let it cook for 2-3 minutes to allow the flavors to meld.
    3. Finish with Butter: Reduce the heat to low. Add the cold butter one piece at a time, whisking constantly until it is fully melted and incorporated. This creates a smooth, emulsified sauce.
    4. Taste and Adjust: Sample the sauce and season with additional salt and pepper if needed to achieve a bright, savory balance.

    Flavor Focus: Freshly squeezed lemon juice is essential for the signature zesty flavor of chicken piccata. Avoid using bottled juice for the best results.

    Step 4: Combine and Serve

    In this final step, we’ll bring the chicken and the sauce together for a delicious finished dish.

    1. Return Chicken to Pan: Place the cooked chicken cutlets back into the skillet. Spoon the sauce over them and let everything warm through for 1-2 minutes.
    2. Garnish: Sprinkle fresh, chopped parsley over the chicken for a pop of color and fresh flavor.
    3. Serve Immediately: Transfer the chicken piccata to serving plates and drizzle any remaining sauce from the pan over the top.

    Your chicken piccata is ready to serve! This simple recipe delivers impressive flavor and is perfect for any night of the week. Enjoy your homemade meal.

    Tips for Perfecting Your Piccata Sauce

    A truly perfect chicken piccata recipe hinges on its delicious sauce. This bright, tangy, and rich sauce brings the whole dish together. Even as a beginner, you can master it with a few simple techniques. Let’s explore how to make your piccata sauce shine.

    Embrace the Pan Drippings (Fond)

    • After cooking the chicken, do not clean the pan. Those browned bits stuck to the bottom, known as “fond,” are packed with flavor and form the foundation of your sauce.
    • To harness that flavor, pour in your liquid (broth or wine) and gently scrape up the fond. This process, called deglazing, releases all those savory notes into the sauce.

    Use Fresh Lemon, Added Last

    • Always opt for fresh lemons over bottled juice. Bottled varieties simply lack the vibrant, zesty flavor needed for an authentic piccata.
    • To preserve its bright aroma, add the lemon juice at the very end of the cooking process. If you add it too early, the delicate flavor will cook off and dissipate.

    Choose Quality Broth or Wine

    • The quality of your liquid base matters. Choose a good-quality chicken broth—preferably low-sodium, so you can control the saltiness of the final sauce.
    • For extra depth and complexity, consider using a dry white wine like Pinot Grigio or Sauvignon Blanc. The alcohol will cook off, leaving only rich flavor behind.

    Swirl in Cold Butter for Silkiness

    Capers Are Essential

    • A hallmark of piccata, capers provide a unique, briny burst of acidity that is essential to the dish’s signature flavor.
    • Be sure to drain them well before adding them to the sauce. If you’re sensitive to salt, you can also give them a quick rinse under cold water.

    Always Taste and Adjust Seasoning

    • Taste your sauce frequently as you cook. This is the key to achieving a perfectly balanced flavor.
    • Adjust the seasoning with salt, pepper, or another squeeze of lemon as needed. Remember, even a small pinch of salt can amplify all the other flavors in the sauce.

    Master Sauce Consistency

    • Aim for a consistency that is just thick enough to coat the back of a spoon. This ensures the sauce clings beautifully to the chicken.
    • If the sauce is too thin, let it simmer gently (do not boil) to reduce and thicken. If it becomes too thick, simply whisk in a splash of broth or water until you reach the perfect texture.

    What to serve with chicken piccata?

    Pasta and Grains

    Pasta and grains are excellent choices for pairing with chicken piccata because they soak up its vibrant lemon-caper sauce, creating a comforting and filling meal. Best of all, they’re easy to prepare, making them ideal for any home cook.

    • Linguine or Angel Hair Pasta: These delicate pastas are perfect for gently absorbing the bright, tangy sauce. Cook until al dente for the best texture.
    • Orzo: This small, rice-shaped pasta blends seamlessly with the chicken and becomes infused with the sauce, offering a unique texture.
    • Rice: Steamed white or brown rice provides a neutral base that soaks up every drop of the delicious piccata sauce, making it a simple and reliable option.
    • Quinoa: For a nutritious whole-grain option, quinoa’s subtle nutty flavor and pleasant texture complement the chicken perfectly.

    After cooking your chosen pasta or grain according to package instructions, toss it with a spoonful of extra piccata sauce. This simple tip adds a major flavor boost and elevates the entire dish.

    Vegetable Sides

    Fresh vegetables balance the richness of chicken piccata while adding vibrant color and essential nutrients to the plate. Many options are also quick to prepare, saving precious time for busy families.

    • Steamed Asparagus: Steam asparagus until tender-crisp and finish with a squeeze of lemon juice to enhance its natural flavor. It’s an exceptional pairing for the piccata sauce.
    • Sautéed Green Beans: Sauté green beans with olive oil and garlic until they are tender with a slight crunch. This simple method yields a flavorful and easy side dish.
    • Roasted Broccoli or Broccolini: Roast broccoli or broccolini florets with olive oil, salt, and pepper until tender and slightly caramelized. Roasting brings out their natural sweetness, which complements the savory chicken.
    • Sautéed Spinach: For a light and healthy side, sauté fresh spinach with a touch of garlic. It wilts in minutes, making it a fantastic and quick addition to your meal.
    • Garlic Mashed Potatoes: For a more indulgent option, creamy garlic mashed potatoes are the perfect comforting side for soaking up every bit of the delicious sauce.

    These simple vegetable sides help you create a tasty, well-rounded meal. You can feel confident serving a delicious and balanced dinner to your family.

    Salads

    A crisp salad provides a refreshing contrast to the warm, savory chicken piccata recipe. Its lightness cuts through the richness of the sauce while adding a welcome crunch and bright flavor to the meal.

    • Simple Green Salad: Toss mixed greens or butter lettuce with a light lemon vinaigrette. This simple preparation keeps the flavors clean and bright, perfectly complementing the main dish.
    • Arugula Salad with Shaved Parmesan: The peppery bite of arugula pairs wonderfully with the chicken. Finish with a simple lemon dressing and shaved Parmesan for a sophisticated yet beginner-friendly salad.
    • Cucumber and Tomato Salad: For a colorful and hydrating option, combine diced cucumbers and tomatoes with a light vinaigrette or a simple drizzle of olive oil.

    A simple salad adds freshness to any meal and makes a great side for leftover chicken piccata. These easy recipes are designed to impress without adding stress, so you can enjoy the cooking process.

    Easy Recipe Variations to Try

    Once you’ve mastered the classic chicken piccata, you can explore delicious new twists. These simple variations add new flavors and textures, making it easy to adapt the dish to your taste. Experimenting with these recipes is a great way to discover new dishes and enjoy stress-free cooking.

    Creamy Chicken Piccata Recipe

    If you love a richer, smoother sauce, this creamy chicken piccata is a wonderfully comforting option. Perfect for a cozy family dinner, this easy variation adds a delightful richness to the classic dish.

    Here’s how to make it:

    • Prepare as usual: Follow steps 1 and 2 of our main recipe to dredge and pan-fry the chicken cutlets.
    • Add cream to the sauce: After making the lemon-butter piccata sauce in step 3, reduce the heat to low.
    • Stir in cream: Gently pour in about 1/2 cup of heavy cream or half-and-half, whisking until fully combined.
    • Simmer gently: Let the sauce simmer for 2 to 3 minutes until it thickens slightly. Avoid letting it boil vigorously.
    • Combine and serve: Return the chicken to the creamy sauce, toss to coat, and serve immediately.

    Chef’s Tip: For an extra luxurious touch, stir in a tablespoon of grated Parmesan cheese with the cream. This creates an even deeper flavor and is a fantastic way to elevate a simple dinner.

    Chicken Piccata with White Wine

    Adding white wine to your piccata sauce introduces a bright, acidic note and a wonderful depth of flavor. This popular variation is a staple in many kitchens and an easy way to elevate your meal.

    Here’s how to incorporate it:

    • Deglaze the pan: After removing the cooked chicken cutlets, keep the pan on medium-high heat.
    • Add wine: Pour in 1/4 cup of dry white wine, such as Sauvignon Blanc or Pinot Grigio.
    • Scrape up bits: Use a wooden spoon to scrape up the flavorful browned bits from the bottom of the pan.
    • Reduce the wine: Let the wine simmer for 1 to 2 minutes, or until it has reduced by about half. This will also cook off the alcohol.
    • Continue with sauce: Proceed with adding the chicken broth, lemon juice, capers, and butter as described in step 3 of the main recipe.

    Substitution Alert: If you prefer not to use wine, you can skip this step and add an extra 1/4 cup of chicken broth instead for a delicious, wine-free sauce.

    Making Piccata with Other Proteins (Fish, Beef)

    The beauty of piccata sauce lies in its versatility, as it pairs wonderfully with other proteins. This opens up a world of creative, flavorful, and family-friendly meals for when you want to change things up.

    • Fish Piccata:
      • Choose your fish: Firm white fish fillets like cod, tilapia, or snapper work best. Salmon also makes a delightful piccata.
      • Preparation: Pat the fish dry and lightly dredge it in seasoned flour, just like the chicken.
      • Cooking: Pan-fry the fish for 2-4 minutes per side until it is flaky and cooked through. Keep in mind that fish cooks much faster than chicken.
      • Sauce: Remove the fish and prepare the piccata sauce in the same pan. Gently return the cooked fish to the sauce to warm through before serving.
    • Beef Piccata:
      • Choose your beef: Use thinly sliced beef cutlets, such as sirloin or tenderloin.
      • Preparation: Lightly pound the beef to an even thickness and dredge it in seasoned flour.
      • Cooking: Quickly sear the beef in hot oil for 1-2 minutes per side, or to your desired doneness.
      • Sauce: Remove the beef and prepare the piccata sauce. Return the beef to the pan and toss to coat.

    These easy recipe variations allow you to use basic cooking skills in new ways and simplify mealtime decisions. Enjoy experimenting with these flavorful options!

    Frequently Asked Questions

    What does piccata mean?

    The Italian term “piccata” refers to a technique where meat is sliced, pounded thin, and then sautéed. This method not only makes the meat very tender but also allows it to cook quickly. Chicken piccata, for example, uses chicken cutlets prepared this way, ensuring every bite is soft and delicious. It’s perfect for quick meals and beginner-friendly recipes [2].

    What is piccata sauce made of?

    The classic piccata sauce is bright, zesty, and incredibly flavorful. This simple but elegant sauce is a highlight of the dish and typically includes these main ingredients:

    • Lemon Juice: This provides the signature bright, tangy flavor and cuts through the richness of the butter.
    • Capers: These small, briny flower buds add a distinct salty and savory punch essential to the authentic piccata flavor.
    • Chicken Broth: Forming the base of the sauce, it adds savory depth without being too heavy.
    • Butter: Swirled in at the end, butter creates a velvety texture and adds a delicious richness to the sauce.
    • Fresh Parsley: Chopped fresh parsley adds a pop of color and a fresh, herbaceous note.
    • Flour or Cornstarch (optional): A small amount of flour or cornstarch is sometimes used to thicken the sauce slightly.

    Together, these ingredients create a balanced sauce that is both tangy and savory, coating the chicken beautifully for a simple, flavorful meal.

    Can you serve chicken piccata with pasta?

    Absolutely! Chicken piccata and pasta are a classic, family-friendly pairing because the zesty lemon-butter caper sauce is perfect for coating noodles. This popular combination creates a satisfying and complete meal by adding incredible flavor to the pasta.

    Here are some popular ways to serve it with pasta:

    • Toss the piccata sauce directly with cooked spaghetti, linguine, or angel hair pasta.
    • Serve the chicken cutlets over a bed of pasta and drizzle extra sauce over everything.
    • Consider adding steamed or roasted vegetables to your plate for a more balanced meal.

    Serving piccata with pasta transforms the dish into an even more substantial and comforting meal, making it an excellent option for a quick and satisfying family dinner.

    What’s the difference between chicken piccata and chicken Milanese?

    While both Chicken Piccata and Chicken Milanese are delicious Italian-inspired dishes, they have key differences in their preparation and flavor. Understanding them will help you choose which one to make next.

    Feature Chicken Piccata Chicken Milanese
    Preparation Thin chicken cutlets are lightly floured, pan-fried until golden, and served with a bright lemon-butter caper sauce. Thin chicken cutlets are coated in seasoned breadcrumbs and pan-fried or baked until crispy.
    Breading A light dusting of flour, which helps create a golden crust. A substantial coating of seasoned breadcrumbs, often Panko for extra crunch.
    Sauce The signature of the dish is its vibrant lemon-butter caper sauce. Typically served without a sauce, just a simple squeeze of fresh lemon.
    Flavor Profile Tangy, savory, and rich, with a zesty kick from the lemon and briny notes from capers. Crispy and savory, with a milder flavor that comes from the seasoned breading and the chicken.
    Texture Tender chicken with a delicate, golden crust, coated in a smooth sauce. A very crispy exterior with a tender inside, offering a satisfying crunch.

    Both are excellent choices for home cooking, but they offer different experiences. Choose piccata for a saucy, zesty meal, or opt for Milanese when you want a satisfyingly crispy and simple dish. Recipesmondial helps you master both with step-by-step cooking guidance!


    Sources

    1. https://www.tasteofhome.com/article/what-is-chicken-piccata/
    2. https://en.wikipedia.org/wiki/Piccata

  • The Perfect Prime Rib Recipe: A Simple Guide for Beginners

    The Perfect Prime Rib Recipe: A Simple Guide for Beginners

    Prime rib, also known as a standing rib roast, is a premium cut of beef celebrated for its rich flavor and tender texture. The best way to cook it is using a ‘reverse sear’ method: roast it low and slow in the oven until it’s about 15 degrees from your target temperature, let it rest, then sear it in a hot oven or pan for a perfect crust.

    Imagine serving a show-stopping meal that impresses everyone at the table: a perfectly cooked prime rib roast, golden-brown on the outside and wonderfully juicy within. For many home cooks, however, the idea of preparing a magnificent prime rib can feel daunting. You might worry about complex steps or lack confidence in your skills. But what if we told you that mastering this impressive dish is far simpler than you think? Here at Recipesmondial, we believe flavorful meals made easy are within everyone’s reach, and we’re here to guide you every step of the way.

    This prime rib recipe is designed to replace that intimidation with confidence. Whether you’re a novice cook or just need reliable step-by-step guidance, our beginner-friendly recipe delivers a stunning prime rib roast without the stress. We will walk you through the process of creating a tender, mouthwatering prime rib that will be the star of any holiday gathering or special family meal. Say goodbye to guesswork and hello to delicious results.

    Ready to unlock the secrets to a truly unforgettable roast? We’ll show you why this is more than just another recipe—it’s the definitive guide for approachable home cooking that guarantees success. Let’s dive in and discover why this is the best prime rib recipe for your kitchen.

    Why Is This the Best Prime Rib Recipe for Home Cooks?

    If you’re looking for an exceptional holiday meal, you’ve come to the right place. This isn’t just another prime rib recipe—it’s a guide designed specifically for home cooks. We’ll help you transform a daunting task into an enjoyable experience.

    Simplicity and Confidence in Every Step

    Cooking a majestic prime rib roast can feel overwhelming. Many recipes are filled with complex jargon and too many steps, leaving you unsure of where to start. At Recipesmondial, we believe in approachable home cooking and want you to feel confident in your kitchen.

    • No Overwhelm: Our step-by-step guidance breaks down the process into clear, manageable instructions, so you’ll never feel lost or intimidated.
    • Beginner-Friendly Focus: We avoid confusing culinary terms and use plain language, making it easy to master the basics.
    • Guaranteed Success: Follow our guide to achieve a perfectly cooked, flavorful standing rib roast. We set you up for success, just like with all our simple dinner recipes.

    Flavorful Results, Stress-Free Experience

    A delicious meal shouldn’t require hours of complex work. That’s why this prime rib recipe delivers maximum flavor with minimal fuss. We focus on simple techniques that work in a real home kitchen, allowing you to enjoy the cooking process from start to finish.

    • Everyday Ingredients: Our recipe relies on common ingredients you can find at any grocery store, so there’s no need for a special trip.
    • The Perfect Reverse Sear: We’ll guide you through the reverse sear, a chef-approved method that creates an incredible crust and ensures tender, evenly cooked meat.
    • Perfect Doneness Every Time: With our clear timing chart and meat thermometer tips, you can achieve your desired doneness without guesswork, resulting in a juicy, tender prime rib roast recipe.

    Designed for Your Recipesmondial Journey

    This prime rib guide is a perfect example of the Recipesmondial spirit. We’re dedicated to making mealtime stress-free with easy, family-friendly meals that help you build confidence and discover new flavors.

    • Clear Guidance: We present our recipes in a clear, easy-to-follow format, so you always know what to do next.
    • Practical Tips: We include smart substitutions and meal prep advice to help you save time and cook more efficiently.
    • Inspiring Creativity: This recipe provides a great foundation, inspiring you to explore other flavorful and simple meals.

    From simple breakfast ideas to comforting dinners, Recipesmondial supports your entire culinary journey. This prime rib roast is just one example of our commitment to helping you create memorable, delicious meals with ease.

    What’s the Difference Between Prime Rib and Standing Rib Roast?

    Navigating the world of beef roasts can feel like learning a new language. You might see recipes for “prime rib” and others for “standing rib roast,” leaving you to wonder what the difference is. The good news is, they’re just two names for the same fantastic cut of beef.

    It’s like how some people say “soda” while others say “pop” to describe the same fizzy drink. In the same way, prime rib and standing rib roast refer to the exact same delicious, impressive cut of meat.

    Understanding the Names

    While the names are interchangeable, each one tells a small part of the cut’s story:

    • Prime Rib: This name comes from the fact that the cut is from the “primal” rib section of the cow. While this cut was historically graded USDA “Prime” for its high quality, the name is now used more broadly. That means a roast labeled “prime rib” today might be of a different grade, like Choice or Select.
    • Standing Rib Roast: This name is more literal, describing how the roast is cooked. It “stands” on its rack of rib bones in the pan. This technique helps protect the meat from the direct heat of the pan and adds incredible flavor as the bones render.

    So, the next time you’re at the butcher shop, don’t let the terminology confuse you. A standing rib roast recipe is the same as a prime rib recipe. No matter what it’s called, you’re getting a tender, juicy, and incredibly flavorful centerpiece for your table.

    At Recipesmondial, our goal is to make cooking simple. Now that you know this secret, you’re one step closer to mastering a delicious prime rib, no matter what your recipe calls it!

    Choosing Your Cut: A Quick Shopping Guide

    Understanding Grades: Prime, Choice, and Select

    Choosing the perfect prime rib roast starts at the butcher’s counter, where you’ll often see different grades of beef. The United States Department of Agriculture (USDA) assigns these grades to indicate the meat’s quality, helping you know what to expect from your purchase.

    Understanding these grades makes shopping easier and helps you pick the right prime rib for your meal. Here’s a quick guide to the most common grades:

    • USDA Prime: This is the highest quality grade, characterized by abundant marbling—the small flecks of fat within the muscle. As the meat cooks, this fat melts, making Prime cuts incredibly tender, juicy, and flavorful. Often found in high-end restaurants, it’s an excellent choice for a truly special occasion.
    • USDA Choice: Choice is also a high-quality grade with less marbling than Prime, but still plenty to ensure a rich, tender, and flavorful cut. Widely available in supermarkets, Choice beef offers a fantastic balance of quality and value, making it an ideal option for most home cooks.
    • USDA Select: This grade is leaner, with the least amount of marbling. As a result, Select cuts are less juicy and tender than Prime or Choice. While they can be improved with marinades or slow cooking, this grade is not typically recommended for a show-stopping prime rib roast.

    For your perfect prime rib roast, we highly recommend a USDA Choice cut. It delivers amazing flavor and tenderness and is usually more budget-friendly than Prime.

    Bone-In vs. Boneless Prime Rib

    Next, you’ll need to decide between a bone-in and a boneless prime rib. While both options can make a wonderful meal, they offer slightly different benefits.

    • Bone-In Prime Rib (Standing Rib Roast): Often called a “standing rib roast” because it can stand on its own rib bones, many chefs prefer this cut. The bones are believed to add flavor and insulate the meat, which promotes even cooking. While a bone-in roast makes for an impressive presentation, it can be trickier to carve.
    • Boneless Prime Rib: A boneless prime rib is easier to season, carves more easily, and typically cooks a little faster than its bone-in counterpart. Butchers often tie it with string to help it hold a uniform shape. The main drawback is that some people find it slightly less flavorful without the bones.

    Ultimately, either option works well. If you prioritize ease of carving, go boneless. If you want maximum flavor and an impressive presentation, choose bone-in. Both will result in a delicious roast.

    How Much Prime Rib Per Person?

    Planning the right amount of prime rib ensures everyone gets a satisfying portion without creating food waste. Since prime rib is a rich cut, a little goes a long way. Your calculations should also factor in your guests’ appetites and how many side dishes you plan to serve. With many hearty sides, for example, you’ll likely need less meat.

    Here is a simple guide to help you plan your family-friendly meal:

    Roast Type Serving Size Per Person
    Bone-In Prime Rib About 1 pound (450g)
    Boneless Prime Rib About 1/2 pound to 3/4 pound (225g to 340g)

    For example, if you are serving six people, you would need a 6-pound bone-in roast or a 3- to 4.5-pound boneless roast. It’s always a good idea to buy a little extra to ensure enough for seconds—plus, leftover prime rib makes amazing sandwiches!

    Essential Ingredients & Tools for Your Roast

    A flat lay photo showing a raw prime rib roast, fresh herbs, garlic, salt, pepper, olive oil, a roasting pan, kitchen twine, and a meat thermometer on a wooden kitchen counter.
    A professional food photography, photorealistic, high-quality food magazine photo of a meticulously arranged flat lay on a clean, rustic wooden countertop. The main subject is a raw, beautiful prime rib roast, surrounded by essential ingredients: fresh rosemary and thyme sprigs, whole garlic cloves, coarse sea salt, black peppercorns, and a small bottle of olive oil. Adjacent to the ingredients are the key tools: a sturdy roasting pan, kitchen twine, and a digital meat thermometer. The lighting is warm and inviting, highlighting the textures and freshness of the ingredients, creating a sense of simplicity and readiness for cooking in a home kitchen setting. No human hands visible.

    For the Prime Rib Roast

    A truly memorable prime rib starts with a great cut of meat—it’s the foundation of your masterpiece. Let’s make sure your cooking experience is stress-free and yields delicious results.

    • A Quality Prime Rib Roast: Look for a standing rib roast (often called prime rib). You can choose bone-in or boneless, but bone-in roasts tend to add more flavor and promote even cooking.
    • Size Matters: Plan on 1 to 1.5 pounds per person for a bone-in roast or 0.75 to 1 pound for boneless. This calculation ensures everyone gets a generous serving.
    • USDA Choice or Prime: While “prime rib” is the name of the cut, the USDA grade is also important. Aim for “Choice” for excellent quality and value, or choose “Prime” for superior marbling and tenderness if your budget allows. [source: https://www.ams.usda.gov/grades-standards/beef-grades] If you’re unsure, your butcher can help you select the perfect roast.
    • Bringing it Home: Purchase your roast a day or two before you plan to cook it and store it in the refrigerator until you’re ready.

    Remember, starting with a quality roast is the first step to a successful, family-friendly meal that everyone will rave about.

    Simple Herb & Garlic Seasoning

    You don’t need fancy ingredients for incredible flavor. This simple herb and garlic rub will elevate your prime rib from good to absolutely amazing.

    • Fresh Garlic: 6-8 cloves, minced. Using fresh garlic provides the most aromatic flavor.
    • Fresh Rosemary: 2 tablespoons, finely chopped. Its piney notes are a beautiful complement to beef.
    • Fresh Thyme: 1 tablespoon, finely chopped, to add a subtle, earthy depth.
    • Coarse Kosher Salt: 2-3 tablespoons. Salt is crucial for seasoning the meat and creating a delicious crust.
    • Freshly Ground Black Pepper: 1-2 tablespoons. Grinding it fresh provides the best flavor.
    • Olive Oil: 2-3 tablespoons. The oil helps the seasoning adhere to the meat and promotes a beautiful sear.

    Simply combine these ingredients to create a robust, flavorful coating. You’ll be amazed at the flavor this easy blend produces!

    Kitchen Tools You’ll Need

    Having the right tools makes cooking a prime rib roast easier and more enjoyable. You don’t need a gourmet kitchen—these simple items are all it takes to achieve perfect results.

    • Large Roasting Pan with a Rack: This is an essential tool. The rack lifts the roast off the pan, allowing heat to circulate for even cooking and preventing a soggy bottom.
    • Instant-Read Meat Thermometer: This is your secret weapon for perfectly cooked meat, as it takes away all the guesswork. A reliable thermometer is especially invaluable for a beginner-friendly recipe.
    • Sharp Chef’s Knife: A sharp knife is necessary for preparing the herbs and garlic, and it also makes carving the finished roast much safer and easier.
    • Cutting Board: A sturdy board is crucial for both prep and carving your magnificent roast.
    • Small Bowl: For mixing your herb and garlic rub.
    • Butcher’s Twine (Optional, but Recommended): If your roast is irregularly shaped, tying it with twine helps it hold its shape and cook more evenly for consistent results.
    • Heavy-Bottomed Skillet or Cast Iron Pan (Optional, for Searing): If you choose to sear your roast before roasting, a good skillet creates an amazing crust.

    With these tools, you’ll be well-equipped to create a delicious prime rib with confidence. Making flavorful meals at home should be an easy and enjoyable process for everyone.

    How to Cook a Prime Rib Roast: Step-by-Step

    Slices of perfectly cooked medium-rare prime rib roast on a wooden cutting board, garnished with fresh rosemary and thyme.
    A professional food photography, photorealistic, high-quality food magazine photo of a perfectly cooked, golden-brown prime rib roast, beautifully carved into thick, succulent slices, arranged on a rustic wooden cutting board. The interior of the meat should clearly display a tender, juicy medium-rare pink center with a flavorful, seared crust. A few sprigs of fresh rosemary and thyme are artfully placed on the board for garnish. Subtle steam rises from the warm meat. The background is softly blurred, suggesting a cozy, well-lit kitchen environment. The focus is entirely on the deliciousness and perfection of the finished roast, emphasizing its restaurant-quality appearance for home cooks.

    Step 1: Bring the Roast to Room Temperature

    This first step is crucial for an evenly cooked prime rib. Allowing the roast to come to room temperature before cooking prevents it from having a cold center and overcooked edges.

    • Plan ahead: Remove your prime rib from the refrigerator 3-4 hours before you plan to cook it. Larger roasts may need up to 5 hours.
    • Unwrap it: Let the roast sit unwrapped on a wire rack set over a baking sheet to allow for air circulation.
    • Even cooking: A room-temperature roast cooks more predictably, making it easier to reach your desired doneness.

    Step 2: Prepare the Herb and Garlic Rub

    This simple herb and garlic rub infuses the prime rib with flavor, creating a delicious crust and a fragrant aroma. It’s a key part of the recipe.

    In a small bowl, combine all the rub ingredients, which typically include:

    • Minced garlic
    • Fresh or dried rosemary
    • Fresh or dried thyme
    • Coarse salt
    • Freshly ground black pepper
    • Olive oil (to make a paste)

    Mix everything until it forms a thick paste. The olive oil helps the rub adhere to the meat and melds the flavors together.

    Step 3: Season the Prime Rib Generously

    Now it’s time to season the roast. Generous seasoning is the secret to a restaurant-quality prime rib, so don’t be shy with the rub.

    • Apply the rub: Use your hands to thoroughly coat the entire surface of the prime rib with the herb and garlic paste.
    • Massage it in: Gently massage the rub into every crevice to ensure maximum flavor penetration.
    • All sides: Make sure to cover the top, bottom, and all sides of the roast, including the bones.
    • Prep for success: This step is vital for developing a flavorful crust that locks in the juices.

    Step 4: Sear for a Perfect Crust

    To create an incredible, golden-brown crust, we’ll start with an initial high-heat sear in the oven. This technique adds immense flavor and texture to your prime rib.

    • Preheat your oven: Set your oven to a high temperature, around 450-500°F (232-260°C).
    • Place on a rack: Put the seasoned prime rib, fat-cap up, on a wire rack in a roasting pan.
    • Initial sear: Roast at this high temperature for 15-20 minutes. This creates a beautiful sear on your standing rib roast.
    • Lower the temperature: After the initial sear, reduce the oven temperature for the slow-roasting phase, as detailed in the next step.

    Expert Tip: A good sear adds depth of flavor and creates a satisfying texture contrast, making your prime rib truly special.

    Step 5: Roast to Your Desired Doneness

    After the initial sear, the next stage is slow roasting. This gentle cooking method ensures a tender, juicy interior. For this step, a meat thermometer is essential.

    • Reduce heat: Lower your oven temperature to 250-300°F (120-150°C) for the slow roast.
    • Insert thermometer: Place an oven-safe meat thermometer into the thickest part of the roast, being careful to avoid touching any bones.
    • Cook slowly: Continue roasting until the internal temperature is about 5-10°F (3-6°C) below your desired final doneness. For medium-rare, aim for 120-125°F (49-52°C) before removing it from the oven.
    • Check regularly: Monitor the temperature closely. While our prime rib cooking time chart offers estimates, always trust your thermometer, as cooking times can vary based on the roast’s size and your oven [1].

    Using a thermometer is the most reliable way to achieve your preferred doneness and transform simple ingredients into a delicious meal.

    Step 6: The Most Important Step – Let it Rest!

    This final step is non-negotiable for a succulent prime rib. Do not skip the resting period, as it is critical for a juicy result.

    • Remove from oven: Once your prime rib reaches its target temperature, take it out of the oven.
    • Tent loosely: Transfer the roast to a clean cutting board and tent it loosely with aluminum foil.
    • Resting time: Let the prime rib rest for at least 20-30 minutes. Larger roasts benefit from resting up to 45 minutes.
    • Why it matters: Resting allows the juices to redistribute throughout the meat, resulting in a tender and moist roast. Skipping this step will cause the juices to run out onto the cutting board when you slice it.
    • Carryover cooking: During the rest, the internal temperature will continue to rise by a few degrees. This is known as “carryover cooking.”

    This crucial resting period ensures every slice of your prime rib is perfectly juicy and flavorful. It’s the final key to a perfect result.

    How long to cook prime rib roast?

    Prime Rib Cooking Time Chart

    Cooking a show-stopping prime rib roast might seem daunting, but it’s simpler than you think. The key is to understand that cooking time depends on two main factors: the size of the roast and your desired doneness.

    The table below offers approximate cooking times, but remember, these are only guidelines. Factors like your specific oven and the roast’s starting temperature can cause variations. For the most accurate results, you should always use a reliable meat thermometer.

    The times in this chart are for the reverse sear method, an excellent beginner-friendly recipe approach. This technique uses a low oven temperature for roasting followed by a high-heat sear, which creates an even cook and a delicious, crispy crust.

    Roast Size (Weight) Rare (120-125°F) Medium-Rare (130-135°F) Medium (135-140°F)
    3-4 lbs (2 Ribs) 1.5 – 2 hours 2 – 2.5 hours 2.5 – 3 hours
    5-7 lbs (3-4 Ribs) 2 – 2.5 hours 2.5 – 3 hours 3 – 3.5 hours
    8-10 lbs (4-5 Ribs) 2.5 – 3 hours 3 – 3.5 hours 3.5 – 4 hours
    11-13 lbs (6-7 Ribs) 3 – 3.5 hours 3.5 – 4 hours 4 – 4.5 hours

    Don’t forget the resting period after roasting—it’s crucial. Your prime rib continues to cook even after it’s out of the oven, a process known as carry-over cooking. The internal temperature can rise by an additional 5-10°F. For this reason, you should always remove the roast from the oven slightly before it reaches your final target temperature.

    Using a Meat Thermometer for Perfect Results

    When cooking prime rib, a meat thermometer is your most essential tool. It eliminates guesswork and is the only reliable way to guarantee your desired doneness every time. Using one will give you confidence in the kitchen, which is why so many easy recipes recommend this technique for success.

    To achieve a *flavorful meal made easy*, here’s how to use your thermometer correctly:

    • Insert It Correctly: Push the thermometer into the thickest part of the roast. Make sure it doesn’t touch any bones, which conduct heat differently and can give an inaccurate reading.
    • Monitor Regularly: Begin checking the temperature about 30 minutes before the estimated cook time ends. This allows you to remove the roast at the perfect moment.
    • Know Your Temperatures: To get the exact result you want, you need to know the target internal temperature for your preferred level of doneness.

    Here are the target temperatures to guide you:

    • Rare: 120-125°F (pull from oven at 115-120°F)
    • Medium-Rare: 130-135°F (pull from oven at 125-130°F)
    • Medium: 135-140°F (pull from oven at 130-135°F)
    • Medium-Well: 145-150°F (pull from oven at 140°F)
    • Well-Done: 150-155°F (pull from oven at 145°F)

    For food safety, the USDA recommends cooking whole cuts of beef like prime rib to a minimum internal temperature of 145°F (63°C) [2]. However, many people prefer a lower temperature for optimal tenderness and flavor. If you choose a doneness below 145°F, be aware of the official guidelines and ensure everyone eating the roast is comfortable with this choice.

    Ultimately, using a thermometer is the key to achieving restaurant-quality results at home. It makes *approachable home cooking* a joy and helps build confidence, even if you feel you are *lacking confidence in cooking skills* right now. This simple step is what makes any *beginner-friendly recipe* for roasts a success.

    Tips for a Flawless, Restaurant-Style Prime Rib

    Transforming a beautiful cut of beef into a show-stopping, restaurant-style prime rib roast might seem challenging, but you can achieve incredible results right in your own kitchen. At Recipesmondial, we want to help you create memorable meals. These practical strategies will elevate your prime rib recipe and guide you toward a truly flawless feast.

    Achieving Restaurant-Quality Results at Home

    You can easily prepare a magnificent standing rib roast that rivals your favorite steakhouse, taking the stress out of cooking an impressive dish. To help you build confidence, we’ve made these tips straightforward and beginner-friendly, ensuring a delicious outcome every time.

    • Start at Room Temperature: For even cooking, this step is crucial. Remove your prime rib from the refrigerator 2-3 hours before roasting. Cold meat cooks unevenly, which means the outer layers can overcook before the center reaches your desired doneness.
    • Season Generously and Early: Don’t be shy with your seasoning—apply a liberal coating of salt, pepper, and herbs all over the roast. For the best flavor, season the meat at least 45 minutes to an hour before cooking. Many chefs even season it a day ahead, storing it uncovered in the fridge [3]. This technique helps draw out moisture to create a better crust.
    • Master the Sear: A high-heat sear is what creates an irresistible, flavorful crust. Whether you sear at the beginning (traditional method) or the end (reverse sear), high heat is key. Use a heavy-bottomed pan or cast-iron skillet to caramelize the exterior and add a deep, rich flavor.
    • Use a Reliable Meat Thermometer: A meat thermometer is your secret weapon for perfect results, as guessing often leads to an over or undercooked roast. Insert the probe into the thickest part of the meat, avoiding any bones. Remember to pull the roast from the oven when it’s 5-10°F below your target temperature to account for carryover cooking.
    • The Golden Rule: Let It Rest: This might be the most important step for a juicy prime rib roast. After removing it from the oven, tent the roast loosely with foil and let it rest for at least 20-30 minutes (or up to 45 for a large roast). This resting period allows the juices to redistribute throughout the meat, ensuring every slice is tender and succulent. Skipping this step will result in dry meat.
    • Carve Against the Grain: For maximum tenderness, always slice your prime rib against the grain. Look for the direction of the muscle fibers and slice perpendicularly across them. This shortens the fibers, making each bite tender and much easier to chew.
    • Make a Simple Jus or Sauce: Don’t discard the flavorful pan drippings. Deglaze the pan with a little wine or broth to create a simple jus or pan sauce. This adds another layer of restaurant-quality taste that truly elevates your prime rib recipe.

    Following these straightforward tips will help you create a memorable and delicious prime rib roast. Say goodbye to uncertainty and hello to confident cooking!

    What Should You Serve with Prime Rib?

    A plated meal featuring sliced prime rib, creamy mashed potatoes, roasted asparagus, and a side of au jus on a rustic dining table.
    A professional food photography, photorealistic, high-quality food magazine photo of a single, elegantly plated serving of prime rib, showcasing several thick, juicy slices with a perfect medium-rare interior. The prime rib is accompanied by classic, comforting side dishes: a generous scoop of creamy, fluffy mashed potatoes, and a vibrant portion of perfectly roasted green asparagus spears. A small, elegant ramekin of rich au jus is placed beside the plate. The setting is a warm, inviting rustic dining table, with soft, natural lighting, creating an appetizing and approachable feel. Shallow depth of field to keep the food in sharp focus.

    You’ve mastered the main course. Now, let’s complete your perfect prime rib meal! Pairing your magnificent roast with the right sides and sauces elevates the entire dining experience. Don’t feel overwhelmed by the choices; we have simple, flavorful ideas that will complement your roast beautifully and ensure a balanced, satisfying feast.

    Classic Side Dishes

    The right side dishes are key to complementing the rich flavors of your prime rib roast. To make your meal memorable, here are some easy recipes that pair perfectly.

    • Creamy Mashed Potatoes: These fluffy, rich potatoes are a timeless choice that soaks up all the delicious prime rib juices. You can easily make them with butter, milk, and a pinch of salt.
    • Roasted Asparagus: For a simple yet elegant green vegetable, toss fresh asparagus with olive oil, salt, and pepper, then roast until tender-crisp. This side adds a lovely, fresh contrast to the rich meat.
    • Yorkshire Pudding: This traditional English popover is a must-have for many prime rib enthusiasts. It’s made from a simple batter and cooked in hot beef drippings, resulting in a light, airy, and savory accompaniment.
    • Garlic Herb Roasted Potatoes: For an approachable side dish everyone loves, cut potatoes into bite-sized pieces and toss them with olive oil, rosemary, thyme, garlic, salt, and pepper. Roast until golden and crispy.
    • Creamed Spinach: Rich and savory, creamed spinach offers a wonderful texture and flavor contrast. It is surprisingly easy to prepare using fresh spinach, cream, and a touch of nutmeg.
    • Simple Green Salad with Vinaigrette: A light and tangy salad is sometimes all you need to cut through the richness of the meat. For a fresh option, use mixed greens, cherry tomatoes, and a homemade lemon vinaigrette.

    Easy Sauce and Gravy Ideas

    No prime rib is complete without a fantastic sauce to add extra moisture and bring out the best in your roast. With these easy ideas, you can confidently serve restaurant-quality gravy and sauces at home.

    • Homemade Gravy (Au Jus): Arguably the most essential accompaniment, this savory sauce is made directly from the rich pan drippings. After the prime rib rests, skim excess fat from the pan, then deglaze it with beef broth or red wine. Simmer until slightly reduced for a sauce packed with flavor.
    • Creamy Horseradish Sauce: This classic pairing adds a delightful zing and provides a fantastic counterpoint to the meat’s richness. Simply mix prepared horseradish with sour cream or Greek yogurt, then add a squeeze of lemon juice, a dash of Worcestershire sauce, and a pinch of salt and pepper.
    • Red Wine Reduction: For a touch of elegance, try a simple red wine reduction. Sauté shallots, add a red wine like Cabernet Sauvignon and beef broth, then simmer until the liquid reduces by half and thickens slightly. This easy yet flavorful sauce adds a deep, sophisticated note to your prime rib.

    Frequently Asked Questions About Prime Rib

    How to cook a small prime rib roast?

    Cooking a small prime rib roast is just like cooking a large one—you simply need to adjust the roasting time. The goal remains the same: a beautiful crust and a juicy, perfectly cooked interior. This makes it a great option for an easy family dinner or a smaller gathering.

    Here are the key things to keep in mind:

    • Follow the same prep: Always bring your roast to room temperature before cooking to ensure it cooks evenly. Then, season it generously with your favorite rub.
    • Sear it well: A good sear is essential for creating a delicious, flavorful crust. Don’t skip this step.
    • Adjust roasting time: A smaller roast will cook faster, so a meat thermometer is your most reliable guide for perfect results.
    • Rest is crucial: Like any large roast, a small one needs to rest after cooking. This allows the juices to redistribute, keeping your prime rib tender and moist.

    For specific temperature guidelines, refer to our Prime Rib Cooking Time Chart. Remember, using a meat thermometer takes the guesswork out of cooking and helps build confidence in the kitchen.

    What is the prime rib 500 rule?

    The “500-degree rule,” also known as the “high-heat method,” is a popular technique for cooking prime rib. The goal is to create a perfect crust while keeping the inside tender and juicy. While its simplicity appeals to many home cooks, this method requires a well-calibrated oven and careful monitoring.

    Here’s how it generally works:

    1. Preheat your oven: Preheat the oven to a very high temperature, usually between 450°F and 500°F (232-260°C).
    2. Sear the roast: Place the seasoned prime rib in the hot oven for a short time, typically 15-30 minutes, depending on its size.
    3. Turn off the heat: After the initial searing time, turn the oven off completely. It is critical that you do not open the oven door.
    4. Cook with residual heat: The roast continues to cook gently in the oven’s residual heat, which helps keep it incredibly juicy.
    5. Rest: Once the internal temperature reaches your target, remove the roast from the oven and let it rest before carving.

    While this method can produce excellent results, keep in mind that oven temperatures can vary significantly [4]. A well-insulated oven will work best. Above all, use a reliable meat thermometer to track the internal temperature. This is the only way to ensure your prime rib is cooked to your desired doneness safely.

    What is the difference between prime rib vs ribeye?

    Prime rib and ribeye both come from the same cut of beef—the primal rib section. The key difference lies in how they are prepared and sold. Understanding this distinction will help you choose the right cut for your meal.

    Here’s a simple breakdown:

    Feature Prime Rib (Standing Rib Roast) Ribeye Steak
    Cut A large roast containing several ribs, often sold with the bones attached. An individual steak cut from the prime rib roast before cooking. Usually boneless, but bone-in options are available.
    Cooking Method Slow-roasted whole in an oven, resulting in a tender and succulent roast. Cooked quickly over high heat, such as grilling, pan-searing, or broiling.
    Size & Presentation A grand centerpiece dish that serves multiple people and is often carved at the table. An individual portion perfect for a single serving or a weeknight steak dinner.
    Fat Content Known for its generous marbling, which provides incredible flavor and tenderness. Also highly marbled, giving the steak its signature rich taste and juicy texture.

    Essentially, prime rib is the entire roast, while a ribeye is an individual steak sliced from it. Both offer a luxurious and flavorful beef experience.

    Can I use a boneless prime rib recipe with a bone-in roast?

    Yes, you can absolutely adapt a boneless prime rib recipe for a bone-in roast. The core principles—seasoning, searing, and resting—remain the same. However, you’ll need to consider a few key adjustments to get the best results.

    Here’s what you should keep in mind:

    • Cooking Time: Bone-in roasts take longer to cook than boneless ones of the same weight [5]. The bones act as insulators, slowing down heat penetration. Always rely on a meat thermometer for accuracy.
    • Flavor: Many cooks believe the bones add significant flavor and help keep the meat moist during cooking.
    • Carving: Carving a bone-in roast requires you to slice along the bones to separate the meat. For easier carving, some butchers will cut the bones off and tie them back on, giving you flavor without the hassle.
    • Heat Distribution: The bones can sometimes lead to slightly uneven cooking in the meat directly surrounding them.

    The main takeaway is to allow for more cooking time. Always use a meat thermometer to check the internal temperature in several spots (avoiding the bone), and you’ll have a delicious and impressive prime rib roast.


    Sources

    1. https://www.fsis.usda.gov/food-safety/safe-food-handling-and-preparation/food-safety-basics/safe-minimum-internal-temperature-chart
    2. https://www.fsis.usda.gov/food-safety/safe-handling-instructions/meat-poultry-and-egg-products/beef-safety-qa
    3. https://www.seriouseats.com/how-to-dry-brine-meat-turkey-chicken-pork-ribs-steaks
    4. https://www.seriouseats.com/2014/11/what-does-the-temperature-knob-on-my-oven-actually-do.html
    5. https://www.foodnetwork.com/recipes/articles/food-network-kitchens-prime-rib-cooking-guide

  • How to Make The Best Carne Asada: An Easy Recipe for Beginners

    How to Make The Best Carne Asada: An Easy Recipe for Beginners

    Carne asada, which translates to ‘grilled meat,’ is a popular Mexican dish made from marinated and grilled steak, typically skirt or flank steak. The key to delicious carne asada is a flavorful marinade, usually featuring citrus juices, garlic, cilantro, and spices, which tenderizes the meat before it’s seared over high heat for a juicy, savory result.

    Dreaming of a tender, juicy steak bursting with smoky flavor? You can create that restaurant-quality experience right in your own kitchen. While many home cooks feel overwhelmed by complex recipes, we believe amazing food like carne asada should be accessible to everyone, regardless of skill level.

    That’s why we at Recipesmondial created the ultimate carne asada recipe designed for beginners. Forget intimidating techniques and long ingredient lists. Our simple yet authentic marinade infuses the steak with incredible flavor, turning a good cut of meat into a truly memorable meal. We will guide you step-by-step, helping you cook confidently and enjoy making a dish that’s perfect for family dinners or fun gatherings.

    Get ready to grill perfectly tender carne asada that will impress everyone, including yourself. We’re here to prove that making mouthwatering meals doesn’t have to be stressful or difficult. Let’s explore what makes this recipe so ideal for beginners, helping you build confidence and cook without stress.

    What Makes This Carne Asada Recipe Perfect for Beginners?

    Welcome to the world of delicious, easy-to-make meals! At Recipesmondial, we know cooking can feel overwhelming. That’s why this carne asada recipe is designed to turn a restaurant favorite into an approachable, beginner-friendly recipe.

    Our clear guidance helps you cook without stress. We break down every step to ensure a successful and flavorful result, building your confidence in the kitchen along the way.

    What Makes This Recipe So Easy?

    • Everyday Ingredients: We focus on widely available ingredients, so you won’t have to search for obscure items. Most are likely in your pantry already, which makes shopping simple and budget-friendly.
    • Simplified Marinade: Our carne asada marinade uses a balanced blend of common spices and citrus. It’s easy to mix but delivers maximum flavor to your steak.
    • Clear, Step-by-Step Instructions: Each part of the process is broken down into simple directions. We provide precise guidance from preparing the marinade to grilling the meat, using no confusing culinary terms.
    • Focus on Core Techniques: This carne asada recipe helps you master fundamental skills like marinating and grilling. These are valuable techniques for many simple dinner recipes.
    • Reliable Results: We’ve tested this recipe extensively to guarantee juicy, tender, and perfectly seasoned carne asada every time. This consistency is perfect for approachable home cooking.
    • Helpful Tips and Tricks: We include advice for avoiding common pitfalls, such as how to choose the right cut of meat and our best tips for achieving perfect tenderness.

    Our approach is designed to empower you, helping you move from being unsure in the kitchen to cooking with confidence. Get ready for truly flavorful meals made easy with this incredible carne asada recipe!

    What Ingredients Do You Need for Carne Asada?

    An overhead shot of fresh carne asada ingredients, including raw steak, whole limes, a bunch of cilantro, garlic, chilies, onions, and various spices arranged neatly on a rustic wooden surface.
    A vibrant, well-organized flat lay of fresh, high-quality ingredients for carne asada. The centerpiece is a raw, perfectly marbled flank or skirt steak. Around it, arrange fresh limes, a bunch of vibrant green cilantro, whole garlic cloves, various chilies such as poblano and jalapeño, sliced white onions, and a selection of ground spices (cumin, chili powder, oregano) in small, rustic ceramic bowls. Everything should appear pristine, clean, and ready for cooking, set against a rustic wooden cutting board or tabletop background. Use soft, natural overhead lighting to highlight textures and colors. This must be professional food photography, 100 percent photorealistic, high-quality food magazine photo style, no artistic interpretations or illustrations.

    Crafting the best carne asada starts with the right ingredients. But don’t worry—this recipe is simple and approachable, our specialty at Recipesmondial. To help you cook with confidence, we’ve broken down exactly what you’ll need for this flavorful meal made easy.

    You’ll likely find most of these items are everyday staples at your local grocery store. Let’s gather your essentials for a truly delicious experience!

    For the Carne Asada Marinade

    The marinade is the heart of this easy carne asada recipe. It tenderizes the meat while infusing it with incredible, bright flavors. This beginner-friendly recipe uses common ingredients to deliver maximum impact.

    • 1/2 cup fresh orange juice: Freshly squeezed is best for that vibrant citrus note. It helps tenderize the meat, too!
    • 1/4 cup fresh lime juice: Adds a zesty tang and works alongside the orange juice for tenderizing.
    • 1/4 cup soy sauce: Provides umami depth and a hint of saltiness, rounding out the overall flavor.
    • 2 tablespoons olive oil: Helps carry flavors and keeps the meat moist.
    • 3 cloves garlic, minced: Essential for a robust, aromatic foundation.
    • 1/2 white onion, roughly chopped: Adds a subtle sweetness and aromatic base.
    • 1/2 cup fresh cilantro, chopped: Offers a fresh, herbaceous burst. (See variations if you prefer a carne asada marinade without cilantro.)
    • 1 teaspoon ground cumin: A warming spice that brings authentic Mexican flavor.
    • 1/2 teaspoon black pepper: Adds a gentle warmth and spiciness.
    • 1/4 teaspoon red pepper flakes (optional): For a little kick if you like some heat!

    Pro Tip: Using fresh citrus juice is key. The natural acids in the orange and lime juice break down tough meat fibers, which is the secret to incredibly tender and juicy carne asada [1]. This simple step makes all the difference.

    For the Steak

    Choosing the right cut of beef is crucial for the best carne asada. Our recipe makes it simple to pick the perfect one.

    • 2 pounds flank steak or skirt steak: These cuts are ideal for grilling, known for their rich beefy flavor and ability to absorb marinade beautifully. Flank steak is leaner, while skirt steak offers a slightly more intense flavor.

    A Note on Steak Selection: Both flank and skirt steak are thin, allowing them to cook quickly and absorb the marinade efficiently. This makes them excellent choices for a beginner-friendly recipe. Either option is easy to work with and will give you fantastic results for your family-friendly meals.

    How to Make Carne Asada (Step-by-Step Guide)

    A close-up of a juicy flank steak sizzling with char marks on an outdoor charcoal grill, being flipped by a home cook's hand with tongs.
    A dynamic, mouth-watering close-up shot of a seasoned and marinated flank steak grilling on a hot outdoor charcoal grill. Capture visible, appetizing char marks and gentle smoke rising from the steak. A real human hand, belonging to an approachable home cook, is using stainless steel tongs to carefully flip the steak, showing its juicy interior. The background should be softly blurred, hinting at an inviting backyard patio setting. Emphasize the rich, cooked color of the meat and the appealing sizzle. This must be professional food photography, 100 percent photorealistic, high-quality food magazine photo style, no artistic interpretations or illustrations.

    Step 1: Prepare the Authentic Carne Asada Marinade

    A fantastic marinade is the key to delicious carne asada. This simple recipe combines fresh citrus, herbs, and spices to infuse your steak with amazing flavor. You’ll be surprised at how easy it is to whip up.

    To create the marinade, combine the following ingredients in a large bowl or a resealable plastic bag:

    • 1/2 cup fresh orange juice (about 1-2 oranges)
    • 1/4 cup fresh lime juice (about 2-3 limes)
    • 1/4 cup olive oil
    • 1/4 cup finely chopped fresh cilantro
    • 4 cloves garlic, minced
    • 1 tablespoon chili powder
    • 1 teaspoon ground cumin
    • 1 teaspoon dried oregano
    • 1 teaspoon salt
    • 1/2 teaspoon black pepper
    • A pinch of cayenne pepper (optional, for a little kick)

    Whisk everything together until well combined. Your flavorful carne asada marinade is now ready for the steak. This mix is crucial for achieving that signature taste.

    Step 2: Marinate the Steak for Maximum Flavor

    With the marinade ready, it’s time to let the steak soak. Marinating not only tenderizes the meat but also infuses every bite with incredible flavor, transforming your carne asada from good to spectacular.

    1. Place your steak (about 1.5-2 pounds flank or skirt steak) into the bowl or bag with the marinade.
    2. Ensure the steak is fully coated by turning it a few times and gently massaging the marinade into the meat.
    3. Seal the bag or cover the bowl tightly.
    4. Refrigerate for at least 2 hours. For the best flavor, marinate for 4-6 hours. If you have time, marinating overnight (up to 12 hours) is fantastic.

    Pro Tip: Do not marinate for more than 12 hours, as the citrus juices can start to “cook” the meat and make it mushy. The goal is a tender steak, not an over-marinated one. This beginner-friendly recipe ensures perfect results every time.

    Step 3: Grill the Carne Asada to Perfection

    Grilling is what gives carne asada its signature char and smoky flavor. But don’t worry if you don’t have a grill—a cast-iron skillet works well too.

    1. Prepare your grill: Preheat your gas grill to high heat, or prepare a charcoal grill for direct high heat. Aim for a temperature around 450-500°F (230-260°C).
    2. Remove from marinade: Take the steak out of the marinade and let any excess drip off. Do not wipe it completely dry.
    3. Grill the steak: Place the steak directly on the hot grill grates and grill for 3-5 minutes per side for medium-rare to medium doneness. Adjust the time based on steak thickness.
    4. Check for doneness: Use a meat thermometer for accuracy. Aim for an internal temperature of 130-135°F (54-57°C) for medium-rare, or 135-140°F (57-60°C) for medium [2]. You’ll see a nice sear and char develop.
    5. Alternative cooking method: No grill? No problem. Heat a large cast-iron skillet over medium-high heat with a tablespoon of olive oil. Sear the steak for 4-6 minutes per side.

    This simple dinner recipe makes grilling fun. You’ll quickly gain confidence in your approachable home cooking skills!

    Step 4: Rest and Slice the Meat Correctly

    Don’t skip this final step—it’s vital for juicy, tender carne asada. Resting the meat allows the juices to redistribute throughout, ensuring every slice is incredibly flavorful and moist.

    1. Rest the steak: Once cooked, transfer the carne asada to a cutting board and cover it loosely with aluminum foil.
    2. Allow it to rest: Let the steak rest for at least 5-10 minutes. Resisting the urge to slice it too soon is key to a tender result.
    3. Slice against the grain: After resting, thinly slice the steak against the grain. Look for the direction of the muscle fibers and cut perpendicular to them. This simple technique shortens the fibers, making each bite much more tender.
    4. Serve immediately: Your perfectly cooked and sliced carne asada is ready! Enjoy this truly flavorful meal made easy.

    Following these step-by-step cooking guidance tips will lead to a delicious outcome. You’ll be amazed at your culinary success!

    What Are the Best Tips for Juicy, Flavorful Carne Asada?

    Making truly juicy and flavorful carne asada is easier than you might think. With a few simple tricks, you can elevate your home cooking and create a delicious, memorable meal that will impress your family and friends.

    • Choose the Right Cut: Flank steak or skirt steak are fantastic choices for carne asada because they absorb marinade exceptionally well. These cuts are known for their rich flavor and become incredibly tender when cooked correctly.
    • Marinate Generously: Don’t rush this crucial step. A good marinade needs time to work its magic, tenderizing the meat and infusing it with flavor. Marinate your steak for at least 2 hours, but for the best results, aim for 4-12 hours.
    • Bring Steak to Room Temperature: Before grilling, remove the marinated steak from the fridge and let it sit on the counter for about 30 minutes. This helps the meat cook evenly from edge to center, preventing dry spots.
    • Heat Your Grill High: A blazing hot grill is essential for a perfect sear. High heat not only locks in the steak’s juices but also creates a delicious, caramelized crust that adds a deep layer of flavor.
    • Don’t Overcrowd the Grill: If necessary, cook your steak in batches. Placing too much meat on the grill at once lowers its temperature, which prevents a good sear and can cause the meat to steam instead. Give each piece enough space to achieve that desirable char.
    • Cook to Medium-Rare/Medium: To ensure your carne asada is as tender and juicy as possible, avoid overcooking it. Aim for a medium-rare to medium doneness, using a meat thermometer for accuracy. For perfect results, the internal temperature should be around 130-135°F (54-57°C).
    • Rest Your Meat: This is a critical step for a juicy steak. Once grilled, transfer the carne asada to a cutting board and cover it loosely with foil. Letting it rest for 5-10 minutes allows the juices to redistribute throughout the meat, resulting in a much more flavorful bite.
    • Slice Against the Grain: Before serving, identify the direction of the muscle fibers in the steak and slice perpendicular to them. This technique shortens the fibers, making each bite significantly more tender and easier to chew—an essential step for cuts like skirt and flank steak.

    Following these simple steps will ensure you make a fantastic, beginner-friendly carne asada every time. Enjoy your delicious, home-cooked meal with confidence!

    How Can You Serve Carne Asada?

    You’ve mastered grilling delicious carne asada, so now let’s transform it into amazing meals. This flavorful, versatile steak makes it easy to create quick weeknight dinners and family-friendly dishes. Recipesmondial is here to help you serve it creatively.

    From simple dinners to exciting meal prep, these approachable ideas ensure you get the most out of your perfectly cooked carne asada.

    Classic Carne Asada Tacos

    Tacos are a go-to choice for carne asada because they are simple to assemble, packed with incredible flavor, and loved by everyone. As a fantastic way to enjoy your juicy steak, this is the perfect beginner-friendly recipe.

    How to Assemble Your Tacos:

    • Warm Tortillas: First, gently warm corn or flour tortillas in a dry skillet, in the microwave, or on the grill.
    • Add Carne Asada: Next, spoon a generous amount of your sliced carne asada onto each tortilla.
    • Choose Your Toppings: Then, pile on your favorite fresh toppings.
    • Drizzle with Sauce: Finally, add a touch of salsa or crema for extra flavor.

    Popular Toppings to Consider:

    • Fresh Cilantro: Chopped for a burst of freshness.
    • Diced Onions: White or red onions add a nice bite.
    • Salsa Roja or Verde: A must-have for authentic flavor.
    • Guacamole or Sliced Avocado: Adds creamy richness.
    • Cotija Cheese: Crumbly, salty goodness.
    • Lime Wedges: A squeeze of fresh lime brightens everything.

    Burritos and Bowls

    For a heartier meal, carne asada shines in burritos and bowls. These options are fantastic for meal prep and busy weeknights because they offer endless customization and are perfect for using up leftovers.

    For a Flavorful Carne Asada Burrito:

    • Large Flour Tortilla: Start with a burrito-sized tortilla.
    • Layer Ingredients: Spread on a thin layer of refried beans or rice.
    • Add Carne Asada: Place your sliced steak down the center.
    • Include Fillings: Incorporate cheese, salsa, and guacamole.
    • Roll Tightly: Fold in the sides, then roll from the bottom up to create a snug burrito.

    Building a Delicious Carne Asada Bowl:

    • Start with a Base: Use fluffy rice (white or brown) or a bed of crisp lettuce.
    • Add Protein: Top generously with your tender carne asada.
    • Include Veggies: Add corn, black beans, bell peppers, or sautéed onions.
    • Finishing Touches: Garnish with avocado, a dollop of sour cream, and a drizzle of your favorite hot sauce.

    With Rice and Beans

    Sometimes, simple is best. Serving carne asada with rice and beans is a comforting, classic combination that makes for a satisfying and easy family meal. This simple pairing truly allows the delicious steak flavor to shine.

    Pairing Perfection:

    • Rice Options:
      • Cilantro Lime Rice: A fragrant and zesty choice.
      • Mexican Red Rice: Savory and deeply flavorful.
      • Simple White Rice: A perfect canvas for the steak.
    • Bean Options:
      • Black Beans: Often seasoned with garlic and cumin.
      • Pinto Beans: Creamy and mild, perfect refried or whole.
      • Frijoles Charros: Hearty “cowboy beans” with bacon and chorizo.
    • Optional Garnishes:
      • Chopped avocado
      • Fresh cilantro
      • A sprinkle of cheese
      • A squeeze of lime

    No matter how you serve it, your homemade carne asada is sure to be the highlight of the meal. Recipesmondial is here to help you create easy, flavorful dishes. Enjoy your cooking, discover new recipes, and make mealtime stress-free!

    Variations and Substitutions

    Can I Make Carne Asada in the Oven?

    Absolutely! While grilling gives carne asada its classic smoky char, you can make a delicious version right in your oven. This method is perfect for beginners and ideal for busy weeknights or when bad weather keeps you from cooking outdoors.

    Here’s how to adapt your carne asada recipe for the oven:

    • Preheat your oven: Get it nice and hot, around 400°F (200°C).
    • Use an oven-safe skillet: A cast-iron skillet is ideal because it retains heat so well. Place it in the oven to preheat for about 10-15 minutes.
    • Sear on the stovetop: Carefully remove the hot skillet from the oven. Add a tablespoon of oil and sear your marinated steak over medium-high heat for 2-3 minutes per side. This step creates a wonderful crust and locks in flavor.
    • Finish in the oven: Transfer the skillet to the preheated oven and cook for another 5-10 minutes, depending on your steak’s thickness and desired doneness. For medium-rare, aim for an internal temperature of 130-135°F (54-57°C). A meat thermometer will give you the most accurate results.
    • Rest the meat: Just as you would with grilling, always let your carne asada rest for 5-10 minutes before slicing. This step is crucial for keeping it juicy.

    Making carne asada in the oven is an easy recipe that proves you don’t need special equipment to enjoy flavorful, homemade meals.

    Carne Asada Marinade Without Cilantro

    Cilantro isn’t for everyone. For some people, its flavor is polarizing and can even taste like soap [3]. If you’re looking for a delicious carne asada marinade without cilantro, rest assured you can easily adjust the recipe to create a fantastic, flavorful steak.

    Here are some simple substitutions and variations:

    • Simply omit it: The marinade will still be incredibly flavorful thanks to the other ingredients like garlic, onion, and spices.
    • Fresh parsley: Flat-leaf parsley offers a fresh, herbaceous note without cilantro’s distinct flavor. Use it in the same amount.
    • Chives or green onions: For a milder, oniony freshness, add finely chopped chives or the green parts of scallions.
    • More citrus zest: Amp up the lime or orange zest for an extra-bright flavor kick.

    With these adjustments, this beginner-friendly recipe becomes even more versatile, ensuring everyone at the table can enjoy a delicious, family-friendly meal.

    Carne Asada Marinade Without Orange Juice

    In a traditional carne asada marinade, orange juice plays a key role. It adds acidity and a hint of sweetness that helps tenderize the meat and build flavor. However, if you don’t have orange juice or simply prefer a different taste, several excellent substitutions work just as well.

    Here are some practical alternatives for your marinade:

    • Lime juice: A classic substitute, lime juice provides a brighter, zesty acidity that beautifully complements the other Mexican-inspired flavors. Use an equal amount in place of orange juice.
    • Lemon juice: Similar to lime, lemon juice offers strong acidity and a fresh taste, making it a reliable alternative.
    • Pineapple juice: Because of its enzymes, a small amount of pineapple juice is great for tenderizing. Be careful not to marinate the meat for too long (more than 4-6 hours), as it can become mushy.
    • Vinegar: White wine vinegar, apple cider vinegar, or distilled white vinegar can provide the necessary acidity. Start with about half the amount you would use for citrus juice and adjust to taste.

    Choosing the right substitute ensures your homemade carne asada is always perfectly seasoned and tender, making this delicious meal easy to prepare with ingredients you already have on hand.

    Frequently Asked Questions About Carne Asada

    What is the best cut of meat for carne asada?

    For the most flavorful carne asada, choose either skirt steak or flank steak. Both cuts have an excellent texture and are known for absorbing marinades well. [4]

    • Skirt Steak: A popular choice from the cow’s diaphragm muscle, skirt steak has a rich, beefy flavor and a loose grain that makes it perfect for soaking up a delicious carne asada marinade.
    • Flank Steak: This is another excellent, leaner option from the abdominal muscles. While it has less fat than skirt steak, it still boasts great flavor and a distinct grain.

    Regardless of which cut you choose, look for good marbling—the small streaks of fat that add moisture and flavor. After cooking, it’s crucial to slice the meat thinly against the grain. This simple step ensures every bite is tender, a key tip for any beginner-friendly recipes using these cuts.

    How do you make carne asada for tacos?

    Making carne asada for tacos is simple because it follows the main carne asada recipe. The key difference for tacos is how you slice and serve the meat. Here’s an overview of the process:

    1. Marinate Well: Begin with a quality carne asada marinade. Allow your steak to soak for at least 2 hours, or overnight for the deepest flavor.
    2. Grill to Perfection: Cook the steak over high heat to achieve a beautiful sear on both sides. Cook to your preferred doneness, typically medium-rare to medium.
    3. Rest the Meat: This crucial step ensures juicy tacos. Let the cooked steak rest for 5-10 minutes to allow the juices to redistribute throughout the meat.
    4. Slice Against the Grain: Using a sharp knife, slice the carne asada thinly against the grain. This technique guarantees each piece is exceptionally tender.
    5. Assemble Your Tacos: Warm your favorite tortillas, then pile on the sliced carne asada and add toppings like chopped onions, cilantro, salsa, and a squeeze of lime. These easy recipes quickly become family-friendly meals!

    This method ensures every taco is bursting with flavor and tender meat, making it perfect for quick meals or a fun dinner party.

    What is in an authentic carne asada marinade?

    An authentic carne asada marinade is key for both flavoring and tenderizing the steak. It’s a vibrant blend of fresh ingredients and aromatic spices. While recipes vary, the following are core components:

    • Citrus Juices: Fresh orange juice and lime juice are essential. They add bright flavor, and the acidity helps break down muscle fibers, which tenderizes the meat.
    • Garlic: A generous amount of freshly minced garlic provides a pungent, savory base.
    • Cilantro: Freshly chopped cilantro contributes a distinct, herbaceous note.
    • Onion: Thinly sliced white onion is often included for sweetness and a subtle bite.
    • Oil: A quality olive oil or vegetable oil helps distribute the flavors and prevents the meat from sticking to the grill.
    • Spices: A typical spice blend includes:
      • Cumin (earthy, warm)
      • Chili powder (mild heat, depth of flavor)
      • Dried oregano (aromatic, slightly bitter)
      • Salt and black pepper (to season)

    This combination creates a complex marinade that will make your carne asada recipe stand out, delivering the deep flavors essential for flavorful meals made easy.

    How do you prepare juicy carne asada?

    To get juicy carne asada every time, follow a few simple, beginner-friendly techniques. Here’s how to avoid dry meat and ensure your steak is cooked perfectly:

    • Marinate Adequately: Let the steak marinate for at least two hours, or overnight for maximum flavor and tenderness. The acidic components in the carne asada marinade are essential for this process.
    • Start with Room Temperature Meat: Take your steak out of the fridge 30 minutes before grilling to help it cook more evenly.
    • Use High Heat: A very hot grill or cast-iron pan is essential. High heat quickly sears the outside of the steak, creating a flavorful crust that locks in the juices.
    • Don’t Overcook: Skirt and flank steak cook quickly. Aim for medium-rare to medium (130-135°F or 54-57°C for medium-rare). Use an instant-read thermometer for accuracy. [5]
    • Rest Your Meat: This step is non-negotiable for juicy steak. Once cooked, transfer the steak to a cutting board, cover it loosely with foil, and let it rest for 5-10 minutes. This resting period allows the juices to redistribute, making every slice tender and moist.
    • Slice Against the Grain: Finally, always slice the meat thinly against the grain. This shortens the muscle fibers, resulting in a much more tender bite.

    By following this step-by-step cooking guidance, you will master juicy carne asada with confidence and make your meal prep more enjoyable.


    Sources

    1. https://www.exploratorium.edu/cooking/meat/activity-marinate.html
    2. https://www.foodsafety.gov/food-safety-charts/safe-minimum-internal-temperature-chart
    3. https://www.britannica.com/story/why-does-cilantro-taste-like-soap-to-some-people
    4. https://www.usda.gov/media/blog/2013/01/22/meat-cut-carne-asada-mexican-steak-fajitas-or-grilling
    5. https://www.foodsafety.gov/food-safety-charts/safe-minimum-cooking-temperatures