Tag: Comfort food

  • Baked Ziti vs. Lasagna: Which Cheesy Pasta Bake Is Best for Dinner?

    Baked Ziti vs. Lasagna: Which Cheesy Pasta Bake Is Best for Dinner?

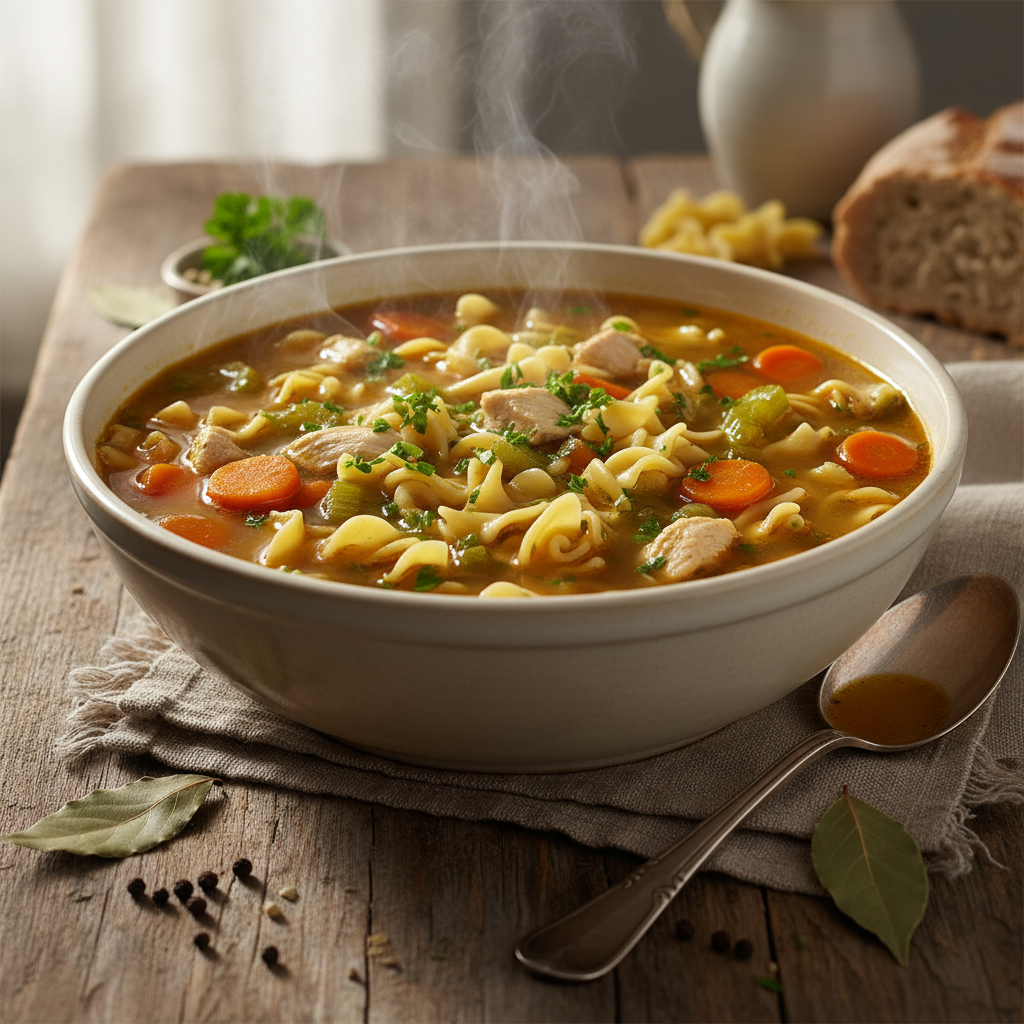
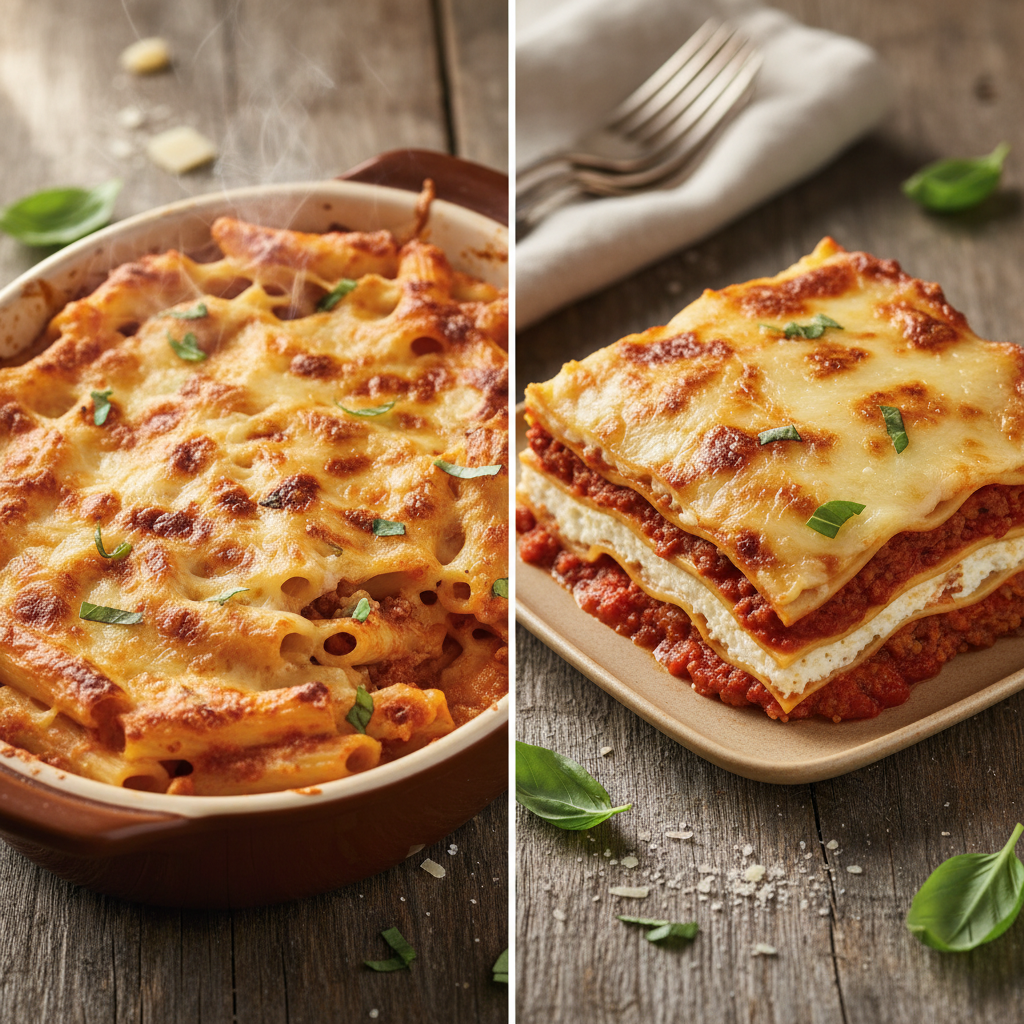
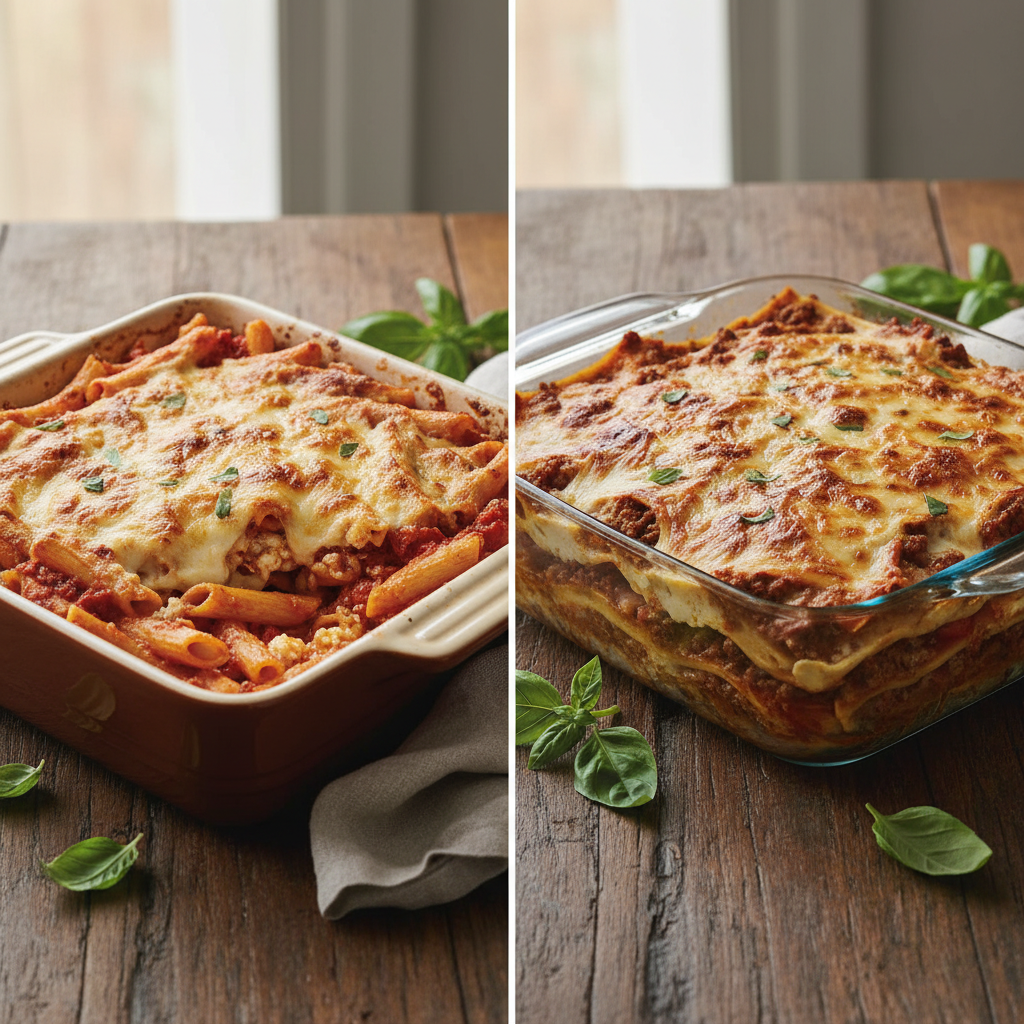
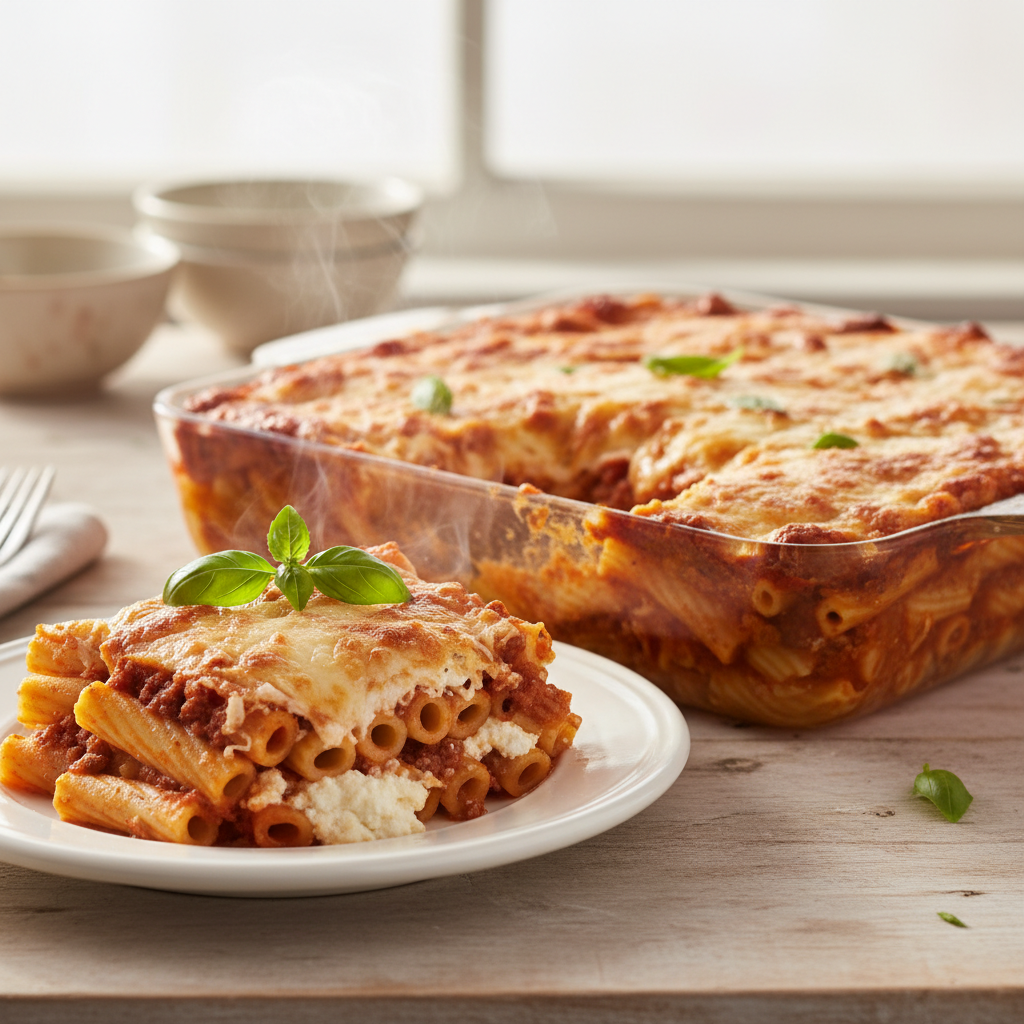
    Baked ziti is a classic Italian-American casserole made with ziti pasta tubes mixed with a savory tomato-based sauce, ricotta cheese, and topped with melted mozzarella. It’s known for being a comforting, family-friendly meal that is generally easier and faster to assemble than lasagna because the pasta and sauce are stirred together rather than carefully layered.

    Are you in the kitchen wondering what comforting, cheesy dinner to make? The choice often comes down to two Italian-American superstars: classic baked ziti or hearty lasagna. Both feature layers of pasta, rich sauce, and melted cheese, making them perfect for a family meal or a cozy night in. But how do you choose the right one, especially when you want an easy recipe that delivers big flavor without the fuss?

    At Recipesmondial, we know choosing the right meal can be overwhelming, especially when you want simple dinner recipes that are also great family-friendly meals. This guide will help you navigate the delightful world of these two beloved pasta bakes. We’ll break down the key differences, from their unique pasta shapes and preparation times to their ingredient variations and flavor profiles. We’ll also share an easy baked ziti recipe perfect for beginners, with step-by-step guidance to help you cook confidently.

    Whether you’re seeking approachable home cooking inspiration or simply want to discover new simple dishes, get ready to uncover the secrets to these flavorful meals. Let’s dive in to make your next dinner decision stress-free and delicious, helping you trade kitchen uncertainty for cooking with confidence.

    Baked Ziti or Lasagna: What’s the Real Difference?

    A side-by-side comparison of a baked ziti and a lasagna, fresh from the oven, showing their distinct layers and cheesy tops.
    A professional food photography shot, photorealistic, high-quality food magazine photo, showcasing a side-by-side comparison of a freshly baked ziti casserole and a classic lasagna dish. Both are presented in their rustic baking dishes, with golden-brown, bubbly cheese tops, distinct layers visible in the lasagna, and the hearty, saucy interior of the baked ziti. The setting is a warm, inviting kitchen table with natural light, perhaps a scattering of fresh basil leaves nearby. The focus is on the textural and structural differences, making each dish look incredibly appealing and ready to serve.

    What is Baked Ziti?

    Baked ziti is a beloved Italian-American comfort food made with tubular ziti pasta, a rich tomato sauce, and various cheeses. Essentially, it’s a hearty casserole that’s perfect for a weeknight dinner.

    The name “ziti” comes from the Italian word “zita,” meaning “bride” or “fiancée” [1], as it was traditionally served at weddings. Today, it’s a fantastic and approachable option for family-friendly meals.

    Key ingredients in a classic baked ziti recipe include:

    • Ziti Pasta: Small, tube-shaped pasta.
    • Tomato Sauce: Often a marinara or meat sauce (ragu).
    • Cheese: Commonly ricotta, mozzarella, and Parmesan.
    • Ground Meat (Optional): Many recipes use ground beef or Italian sausage for extra flavor.

    The ingredients are either layered or mixed together, then baked until bubbly and golden. It’s a flavorful meal that’s easy enough for any busy family.

    What is Lasagna?

    Lasagna is another iconic Italian baked pasta dish, but it stands out because of its wide, flat pasta sheets. These sheets are carefully layered with sauce, cheese, and fillings like meat or vegetables to create a beautiful, multi-layered masterpiece.

    The term “lasagna” refers to both the dish and the noodles themselves. As one of the oldest known pasta dishes [2], it has become a global comfort food staple that many home cooks enjoy preparing.

    A traditional lasagna often includes:

    • Wide Lasagna Noodles: Flat, rectangular pasta sheets.
    • Sauce: Often a slow-cooked meat ragu or a rich béchamel sauce.
    • Cheese: Commonly ricotta, mozzarella, and Parmesan, similar to baked ziti.
    • Fillings: Ground meat, vegetables like spinach, or a combination.

    Building each layer results in a dense, rich, and incredibly satisfying meal. Because of this, lasagna is a fantastic choice for special occasions or a comforting Sunday dinner.

    Key Differences at a Glance

    While both baked ziti and lasagna are beloved cheesy pasta bakes, they have several distinct characteristics. Understanding these differences will help you choose the perfect dish for your dinner table. Let’s compare them at a glance:

    Feature Baked Ziti Lasagna
    Pasta Shape Small, tube-shaped (ziti pasta) Wide, flat, rectangular noodles
    Structure Usually mixed together or loosely layered; more uniform Distinct, organized layers
    Common Cheeses Ricotta, mozzarella, Parmesan Ricotta, mozzarella, Parmesan (or béchamel)
    Sauce Type Marinara or meat sauce (often simpler) Meat ragu or béchamel sauce (often richer, slow-cooked)
    Texture Creamy, homogenous, easy to scoop Distinct layers, firmer, sliced into portions
    Preparation Often quicker to assemble, beginner-friendly recipes More involved layering, can take more time
    Serving Scooped directly from the dish Sliced into individual portions

    In summary, baked ziti offers a simpler, more uniform casserole, while lasagna provides a structured, multi-layered experience. Both, however, are delicious and comforting options for any home cook.

    The Ultimate Easy Baked Ziti Recipe for Beginners

    A close-up of a golden-brown baked ziti casserole, with a slice served on a plate, showing the melted cheese and rich sauce.
    A professional food photography shot, photorealistic, high-quality food magazine photo, capturing a perfectly baked ziti casserole. The top is a rich, golden-brown crust with bubbling, melted cheese, and hints of savory tomato sauce peaking through. A slice has just been served onto a simple white plate, revealing the inviting layers of ziti pasta, ricotta cheese, and hearty meat sauce. Gentle steam is rising from the freshly cut portion. The background is a clean, warm kitchen counter, with soft, inviting lighting that emphasizes the dish’s comforting appeal. Garnish with a sprig of fresh basil.

    Why You’ll Love This Recipe

    Overwhelmed by complex recipes or struggling to plan family-friendly meals? You’ve come to the right place. At Recipesmondial, we believe cooking should be enjoyable, not stressful.

    This beginner-friendly baked ziti recipe is designed for simplicity. Perfect for busy weeknights or relaxed weekends, it helps you create a comforting, flavorful meal with minimal effort.

    Here’s why this will become one of your favorite simple dinner recipes:

    • Effortless Preparation: Simple, step-by-step instructions ensure success for cooks of all skill levels.
    • Family-Friendly Flavors: This cheesy, satisfying pasta bake is a guaranteed crowd-pleaser, even for picky eaters.
    • Reliable Results: Our straightforward method helps you turn simple ingredients into a delicious dish with confidence.
    • Great for Meal Prep: Baked ziti stores and reheats beautifully, making it perfect for tasty leftovers.
    • Budget-Friendly: This recipe relies on common, affordable ingredients, making it a smart choice for any budget.

    Say goodbye to cooking doubts. Get ready to enjoy cooking and discover new flavors with Recipesmondial!

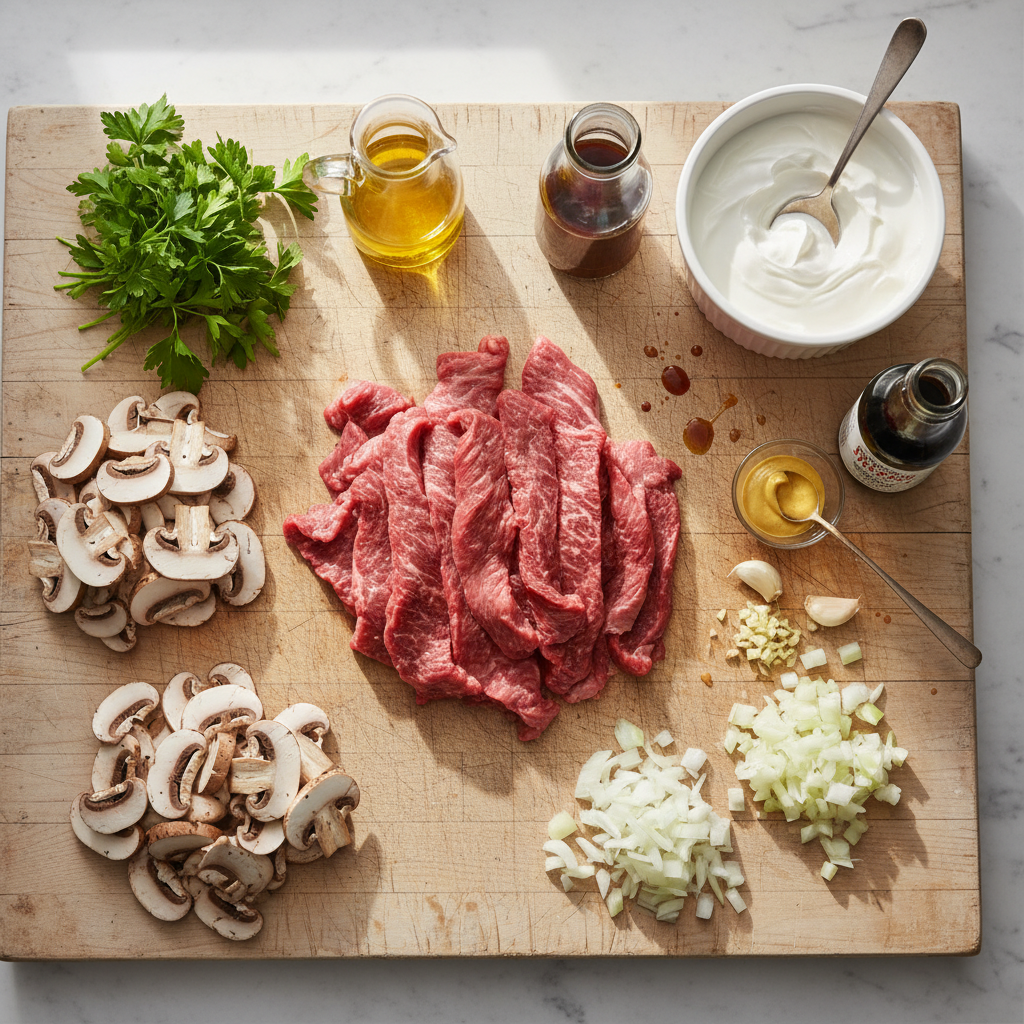
    Ingredients for Classic Baked Ziti

    Gathering your ingredients is the first step. This recipe uses everyday staples to create an approachable home-cooked meal. Here’s what you’ll need:

    • 1 pound ziti pasta (or penne if ziti is unavailable)
    • 1 tablespoon olive oil
    • 1 pound ground beef (or Italian sausage, or a mix)
    • 1 medium onion, chopped
    • 2 cloves garlic, minced
    • 1 (28 ounce) can crushed tomatoes
    • 1 (15 ounce) can tomato sauce
    • 1 teaspoon dried oregano
    • ½ teaspoon dried basil
    • ¼ teaspoon red pepper flakes (optional, for a little heat)
    • Salt and freshly ground black pepper, to taste
    • 1 cup ricotta cheese
    • 1 large egg
    • ¼ cup fresh parsley, chopped
    • 2 cups shredded mozzarella cheese, divided
    • ½ cup grated Parmesan cheese, divided

    Ingredient Tip: Using high-quality canned tomatoes makes a big difference. Look for brands with few added ingredients for the freshest taste. Fresh parsley adds a lovely, bright finish to the dish.

    Step-by-Step Cooking Instructions

    Ready to cook? Follow these simple steps to create a delicious baked ziti. You’ll be amazed at how easily this flavorful meal comes together.

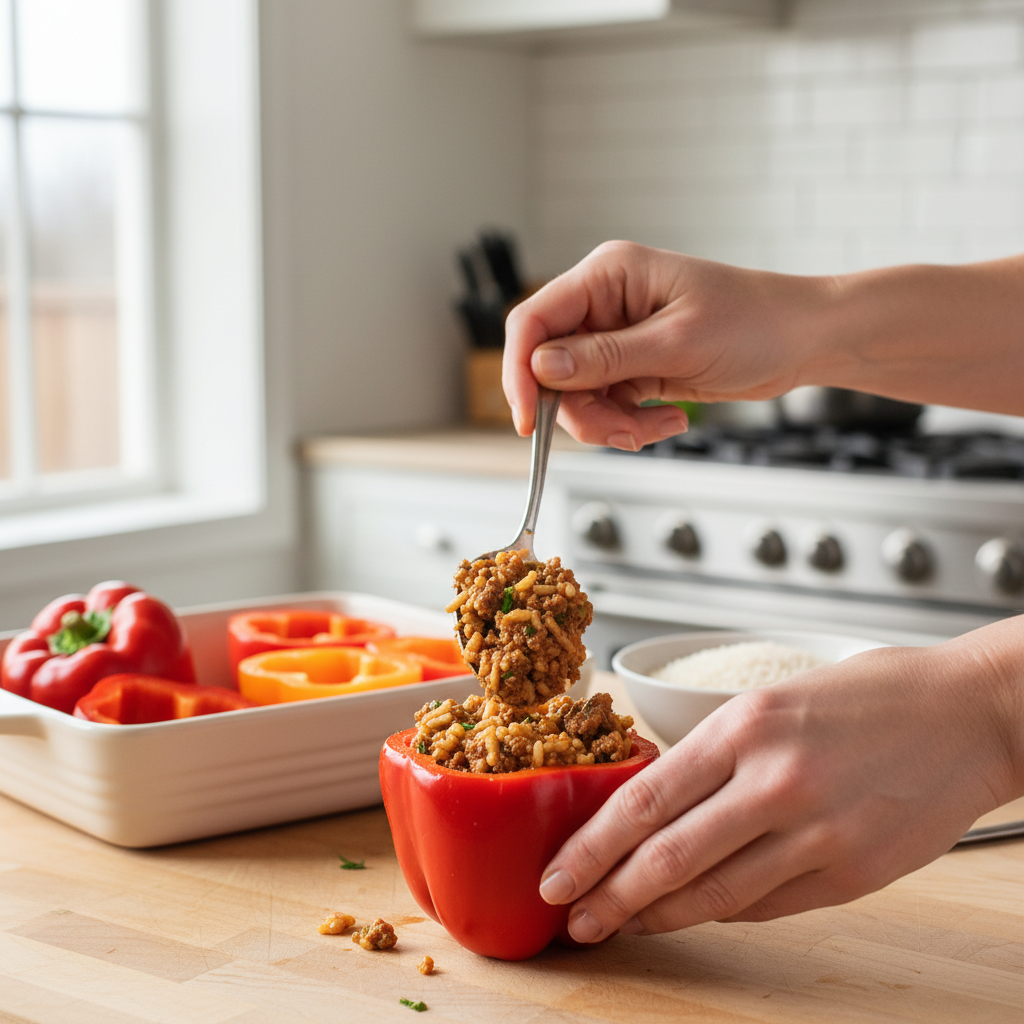
    1. Cook the Pasta: Bring a large pot of salted water to a boil. Add the ziti and cook according to package directions until al dente, meaning it should still have a slight bite. Drain the pasta well and set it aside.
    2. Brown the Meat: While the pasta cooks, heat the olive oil in a large skillet over medium-high heat. Add the ground beef and cook, breaking it apart with a spoon, until it is browned. Drain off any excess fat.
    3. Sauté the Aromatics: Add the chopped onion to the skillet and cook for about 5 minutes, until softened. Stir in the minced garlic and cook for another minute until fragrant.
    4. Simmer the Sauce: Pour in the crushed tomatoes and tomato sauce. Stir in the oregano, basil, and red pepper flakes (if using). Season with salt and pepper. Bring the sauce to a simmer, then reduce the heat to low, cover, and let it cook for at least 15 minutes to allow the flavors to meld.
    5. Prepare the Ricotta Mixture: In a medium bowl, combine the ricotta cheese, egg, and fresh parsley. Mix until smooth and season lightly with salt and pepper.
    6. Preheat Oven: Preheat your oven to 375°F (190°C). Lightly grease a 9×13-inch baking dish.
    7. Assemble the Casserole:
      • Spread about 1 cup of meat sauce on the bottom of the prepared baking dish.
      • Layer half of the cooked ziti over the sauce.
      • Dot with spoonfuls of half of the ricotta mixture.
      • Pour half of the remaining meat sauce over the ziti and ricotta.
      • Repeat with a second layer of the remaining ziti, the rest of the ricotta mixture, and the final portion of meat sauce.
    8. First Bake: Cover the baking dish loosely with aluminum foil and bake for 20 minutes.
    9. Add Topping and Final Bake: Remove the foil and sprinkle the 2 cups of mozzarella and ½ cup of Parmesan cheese evenly over the top. Return the dish to the oven and bake uncovered for another 15-20 minutes, until the cheese is melted, bubbly, and lightly golden.
    10. Rest and Serve: Let the baked ziti rest for 10-15 minutes before serving. This step is important, as it allows the layers to set and makes slicing much easier. Enjoy your homemade meal!

    Cooking Tip: Be careful not to overcook the pasta in step 1. It will continue to soften in the oven, and cooking it al dente ensures the final dish has the perfect texture.

    Substitution Idea: To make a vegetarian baked ziti, simply omit the ground beef. For extra flavor and texture, you can add sautéed mushrooms, bell peppers, or spinach to the tomato sauce.

    Baked ziti vs lasagna

    Pasta Shape: Ziti vs. Flat Noodles

    When choosing between baked ziti and lasagna, the pasta shape is the most significant difference. This single element defines the structure and feel of the entire dish.

    Baked ziti is made with medium-sized, tube-shaped pasta. The ziti’s smooth surface and hollow shape are perfect for capturing sauce, ensuring every bite delivers a satisfying burst of flavor. This simple but effective design is key to a great baked ziti.

    Lasagna, in contrast, uses wide, flat, rectangular sheets of pasta. These noodles are specifically designed for creating distinct strata. The large surface area of each sheet holds plenty of sauce, cheese, and other fillings, building an impressive, layered meal.

    While both are delicious baked pasta dishes, their foundational pasta shapes set them on two very different paths.

    Preparation Time and Effort

    The time and effort required in the kitchen are key differences between baked ziti and lasagna. One is a straightforward weeknight meal, while the other is more of a weekend cooking project.

    Baked ziti is known for its simple assembly. After cooking the pasta, you just mix it with sauce and cheese, transfer it to a baking dish, and bake. This approachable method makes it a fantastic choice for a quick and satisfying dinner without much fuss.

    Lasagna typically requires a more detailed layering process. You carefully arrange the flat noodles with sauce, ricotta, and other fillings, repeating the steps to build the dish. This process takes more hands-on time and is often reserved for special occasions, but the effort results in a stunning, family-friendly meal.

    If you need a simple recipe with minimal steps, baked ziti is your winner. If you have more time and want to enjoy the cooking process, lasagna is a wonderful option.

    Texture and Flavor Profile

    The different pasta shapes and preparation methods result in two very distinct eating experiences. Each dish offers a unique combination of textures and flavors.

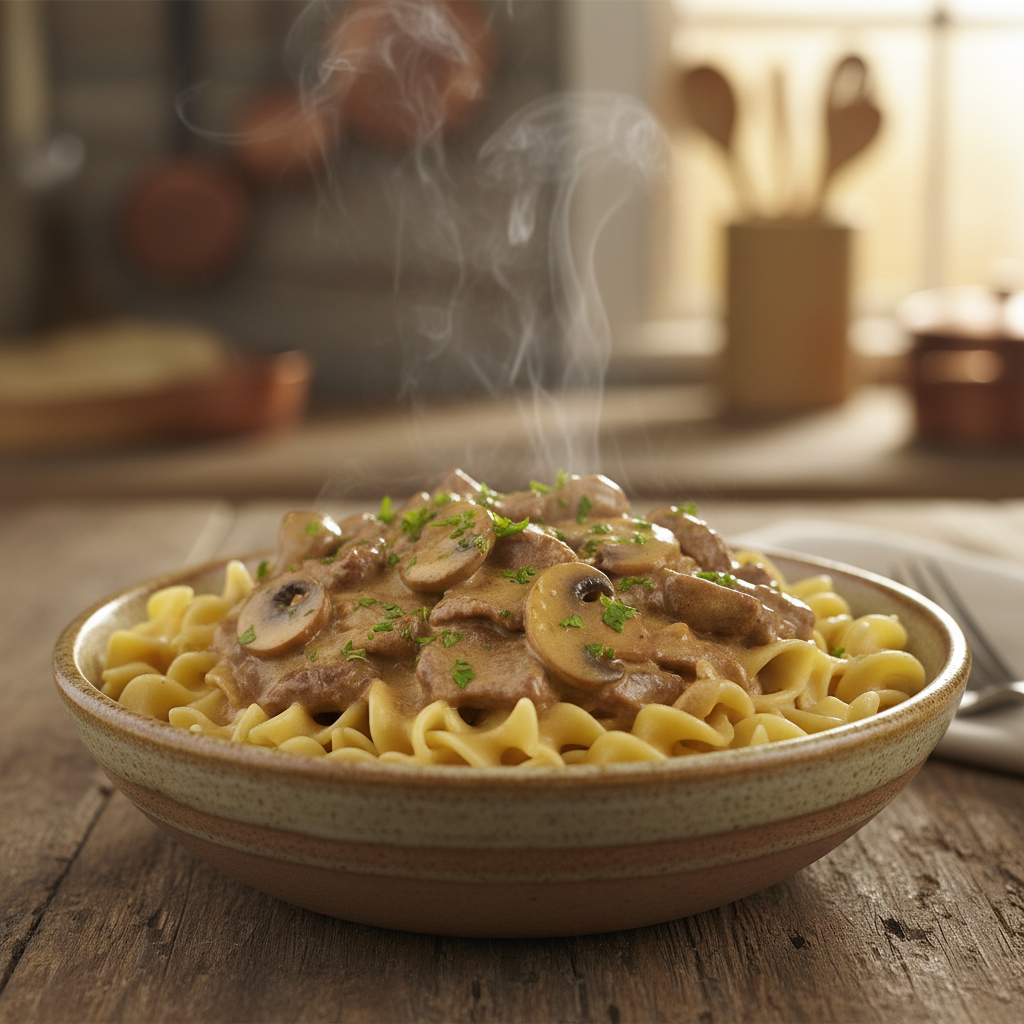
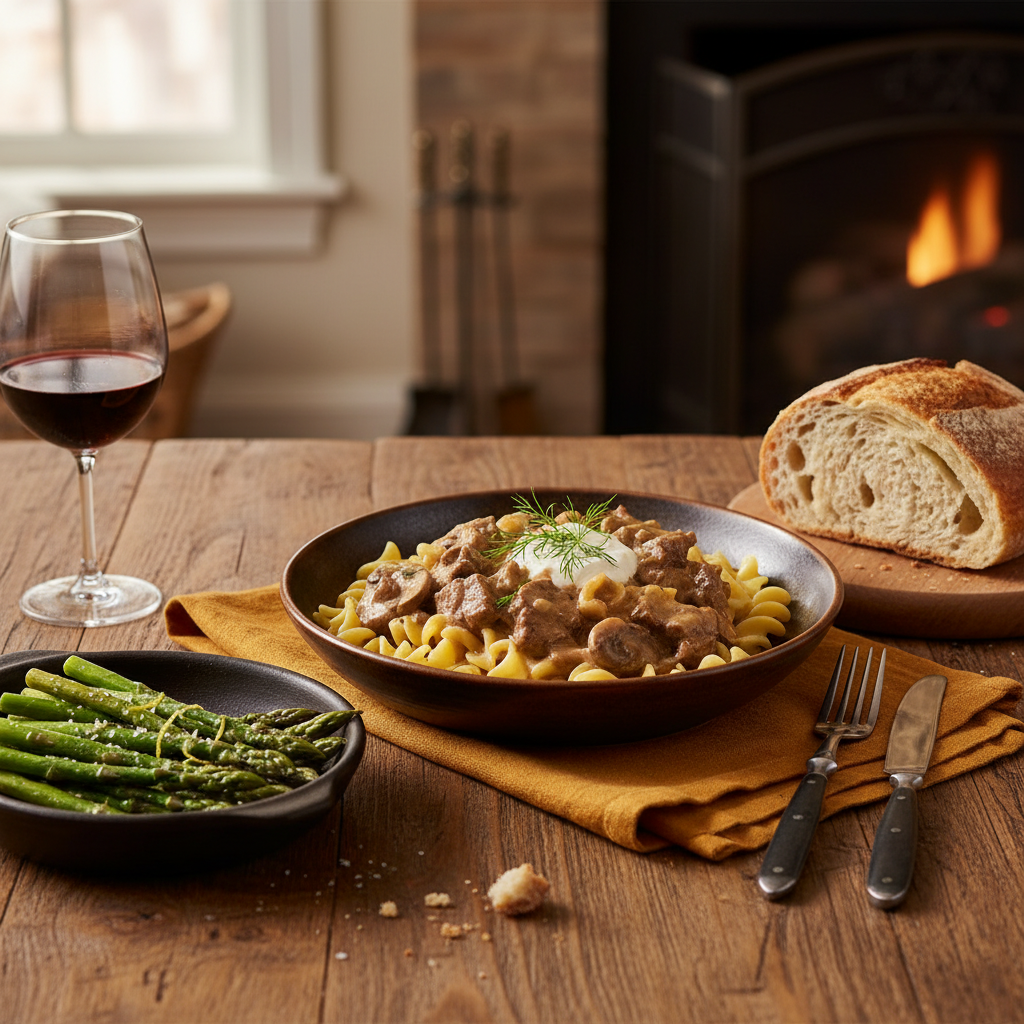
    In baked ziti, all the ingredients are mixed together before baking. This creates a cohesive and uniform texture where the flavors meld into a rich, cheesy, and tomato-forward comfort food. Each forkful delivers a consistent blend of soft pasta, savory sauce, and gooey melted cheese.

    Lasagna, by contrast, provides a delightful variety of textures in every bite. The distinct layers allow you to experience the firm chew of the pasta, the creaminess of the ricotta, the savory fillings, and the stretchy mozzarella separately yet all at once. This structure allows individual flavors to shine, creating a more complex profile.

    Ultimately, your choice depends on what you’re craving. Do you prefer a blended, uniform dish, or one with distinct, stacked layers of flavor and texture?

    Common Recipe Variations You Can Try

    Baked Ziti with Ricotta

    Adding ricotta cheese is a classic way to make baked ziti incredibly creamy and rich. Its mild sweetness balances the savory tomato sauce and creates pockets of soft, delicious cheese throughout the dish.

    To use ricotta, you can mix it into your sauce for uniform creaminess or layer it between the pasta and sauce. For an even richer texture, try combining it with an egg and fresh parsley. This simple step elevates any baked ziti.

    • Creamy Layers: Mix ricotta with a little egg, salt, and pepper. Spread this mixture as a layer over your pasta before adding the sauce and more cheese.
    • Mixed In: For a more uniform creaminess, stir ricotta directly into your tomato sauce before combining it with the cooked ziti.
    • Flavor Boost: Add fresh parsley and a pinch of nutmeg to your ricotta mixture for extra flavor that makes this family-friendly meal even more special.

    Baked Ziti without Ricotta

    Don’t have ricotta on hand, or simply prefer a different texture? You can still make a delicious, comforting baked ziti. Without ricotta, the dish remains wonderfully cheesy, and many recipes adapt easily to achieve a rich, creamy result.

    Here are some simple ways to keep your baked ziti moist and flavorful without ricotta:

    • Extra Mozzarella: Simply increase the amount of mozzarella or add provolone for extra-melty results.
    • Cottage Cheese: As a fantastic substitute, cottage cheese provides a similar texture and tang. Blend it briefly for a smoother consistency.
    • Cream Cheese: Stir a few tablespoons of softened cream cheese into your sauce for incredible richness. It melts beautifully and adds a lovely tang.
    • Bechamel Sauce: For a truly decadent touch, make a simple béchamel (white sauce) and layer it with your pasta and tomato sauce. This adds a luxurious creaminess.

    Vegetarian Baked Ziti (No Meat)

    A vegetarian baked ziti is a flavorful and satisfying meal for everyone. By swapping meat for healthy vegetables, you can easily adapt any recipe into a comforting, family-friendly pasta bake.

    Adding a variety of vegetables is a simple way to boost the dish’s flavor and nutrients, creating a satisfying meal that’s perfect for beginners.

    • Mushroom Magic: Sauté sliced mushrooms (cremini, shiitake, or portobello) until golden. They add a deep, umami flavor that mimics meatiness.
    • Spinach and Zucchini: Wilt fresh spinach or sauté diced zucchini and bell peppers to add color, texture, and vitamins.
    • Legume Power: Stir a can of rinsed and drained lentils or chickpeas into your sauce. They add protein and make the dish more filling. [3]
    • Roasted Vegetables: Roast chunks of eggplant, bell peppers, and onions before adding them to the bake. Roasting deepens their flavor and brings out their natural sweetness.

    Baked Ziti with Ground Beef or Sausage

    For a heartier, classic baked ziti, add ground beef or Italian sausage. These meats provide a robust flavor and satisfying texture, turning the dish into a filling, crowd-pleasing meal.

    Here’s how to create a delicious, meaty baked ziti:

    • Ground Beef: In a large skillet, brown one pound of lean ground beef, then drain any excess fat. Stir in your favorite marinara sauce, season with Italian herbs, and simmer.
    • Italian Sausage: For a wonderful punch of flavor, use hot or mild Italian sausage. Remove the casings, crumble the sausage into a skillet, and brown it. Drain the fat before adding your sauce.
    • Flavorful Mix: For a deeper, more complex flavor profile, use a combination of both ground beef and Italian sausage.
    • Spice It Up: Add a pinch of red pepper flakes while the meat cooks to give your baked ziti a subtle, warm kick.

    What’s the Difference Between Ziti Pasta vs Penne?

    A close-up comparison of uncooked ziti and penne pasta, showing their smooth vs. ridged textures and straight vs. diagonal cuts.
    A professional food photography shot, photorealistic, high-quality food magazine photo, featuring a crisp, clear close-up from a top-down perspective. Uncooked ziti pasta is artfully arranged next to uncooked penne pasta on a minimalist, light-colored surface. The image clearly highlights the smooth, straight-cut ends of the ziti tubes compared to the ridged surface and diagonally cut ends of the penne, emphasizing their distinct shapes and textures. The lighting is bright and even, ensuring every detail of the pasta is sharp and distinct.

    Ziti vs. Penne vs. Rigatoni

    Navigating the world of pasta can be daunting, especially with so many similar-looking shapes. But don’t worry—we’re here to make it simple. Ziti, penne, and rigatoni are all delicious tube-shaped pastas, but each has unique characteristics. These differences determine how well they hold sauce and what their texture is like. Understanding them will help you pick the best pasta for your next easy dinner recipe.

    Here’s a quick breakdown:

    Pasta Shape Key Features Ideal Use
    Ziti
    • Long, smooth, straight-sided tubes.
    • Often broken into smaller pieces before cooking.
    • Similar in diameter to penne.
    • Originates from Southern Italy [4].
    • Baked dishes like baked ziti.
    • Thick, hearty sauces that can fill the tubes.
    Penne
    • Medium-sized tubes with diagonally cut ends.
    • Often has ridges (Penne Rigate) to trap sauce.
    • Can also be smooth (Penne Lisce), though it’s less common.
    • The name translates to “pens” from Italian, due to its shape.
    • Versatile enough for most sauces.
    • Tomato-based sauces, pesto, and cream sauces.
    • Great in simple dinner recipes.
    Rigatoni
    • Wider and shorter than ziti or penne.
    • Always has ridges on the outside.
    • Its large diameter and deep ridges hold lots of sauce.
    • Hearty meat or chunky vegetable sauces.
    • Baked casseroles.
    • Excellent for family-friendly meals.

    Ultimately, while they are all tubes, their length, end cuts, and ridges make a significant difference. These features affect how much sauce clings to each piece and change the overall texture of your dish.

    Can You Substitute Penne for Ziti?

    Absolutely! This is a common question for home cooks who need to work with what’s in the pantry. Penne makes an excellent substitute for ziti in most baked dishes, and many beginner-friendly recipes allow for this flexibility.

    Here’s why penne works so well:

    • Similar Shape: Both are tubes, making them great for trapping rich sauces and cheeses inside.
    • Holds Up to Baking: Penne is sturdy enough to withstand long baking times without becoming mushy, which is crucial for any baked pasta dish.
    • Sauce Absorption: Penne rigate, with its ridges, is fantastic at holding onto sauce, ensuring every bite is flavorful.

    When using penne in a baked ziti recipe, follow these simple tips:

    • Cook Al Dente: Boil the penne until it’s just slightly firm, as it will finish cooking in the oven. This step prevents overcooked, mushy pasta.
    • Consider the Ridges: If you use penne rigate, the ridges will add texture and help the delicious sauce cling to the pasta.
    • No Breaking Needed: Unlike traditional ziti, you don’t need to break penne before cooking because it’s already the perfect size.

    So, if you’re out of ziti, feel free to grab that box of penne. Your baked pasta dish will still be delicious and satisfying!

    Best Pasta Shapes for a Baked Dish

    Choosing the right pasta for a baked dish is key. You need a shape that is sturdy enough to hold up to baking and can trap plenty of sauce and cheese. This ensures a delicious and cohesive meal.

    Look for these qualities in a pasta for baking:

    • Durability: The pasta needs to hold its shape and not turn to mush under the oven’s high heat.
    • Sauce Retention: Shapes with holes, ridges, or curves are best because they effectively trap rich sauces and melted cheese.
    • Even Cooking: The shape should allow for even cooking throughout the casserole.

    Beyond ziti and penne, many other shapes shine in baked dishes. These are perfect for quick dinner recipes and family-friendly meals:

    • Rigatoni: Its large size and deep ridges are ideal for thick, hearty sauces.
    • Cavatappi: These corkscrew-shaped tubes have excellent sauce-holding capabilities.
    • Orecchiette: Known as “little ears,” this pasta creates small scoops that capture chunky sauces wonderfully.
    • Large Shells (Conchiglie): These are perfect for stuffing with cheese and meat fillings.
    • Elbow Macaroni: A classic for baked macaroni and cheese, it’s sturdy and holds creamy sauces well.

    Experiment with different shapes to discover your family’s favorite for a comforting pasta bake. The goal is always a delicious and easy meal, and these practical tips can help you cook more confidently.

    Tips for the Best Baked Ziti Every Time

    Don’t Overcook Your Pasta

    The secret to perfect baked ziti starts before it even hits the oven. For the best results, cook your pasta al dente, which means it should still be slightly firm to the bite. Since it will finish cooking in the oven, this crucial step prevents a mushy texture.

    • Boil for less time: Check the cooking instructions on your ziti pasta package, but reduce the recommended time by 2-3 minutes. This ensures the pasta is perfectly al dente.
    • Why it matters: Properly al dente pasta absorbs the sauce as it bakes to perfection. In contrast, overcooked pasta will become soft and lose its shape.
    • Drain well: After cooking, drain your pasta thoroughly to avoid adding extra water to your dish.

    This simple step makes a huge difference in achieving the ideal texture, ensuring your baked ziti is delicious every time.

    Choosing the Right Sauce

    A delicious sauce is the heart of any baked ziti recipe because it brings all the flavors together. Your choice of sauce can elevate the entire dish, so don’t underestimate its importance.

    • Quality matters: For a quick option, use a high-quality jarred marinara sauce. Alternatively, you can try making your own simple sauce from scratch.
    • Thickness is key: Your sauce shouldn’t be too watery. A thicker sauce coats the pasta better and prevents the ziti from drying out in the oven.
    • Flavor options:
      • Classic Marinara: A rich, simple tomato sauce is always a winner.
      • Meat Sauce: For a heartier meal with a robust flavor profile, add ground beef or Italian sausage.
      • Vegetable Sauce: Boost nutrition by adding finely diced veggies like carrots, celery, and bell peppers.
    • Taste and adjust: Always taste your sauce before assembling and adjust seasonings like salt, pepper, and herbs as needed.

    A well-balanced sauce ensures every bite is bursting with flavor, making your baked ziti truly irresistible.

    How to Store and Reheat Leftovers

    Baked ziti is a fantastic meal prep option that often tastes even better the next day. Knowing how to store and reheat it properly is essential for enjoying your leftovers.

    • Cool quickly: To prevent bacterial growth, allow your baked ziti to cool down before storing it.
    • Airtight containers: Transfer leftovers into airtight containers to keep them fresh in the refrigerator or freezer.
    • Refrigeration: Store in the refrigerator for up to 3-4 days [5].
    • Freezing for later: Baked ziti freezes wonderfully.
      • Divide it into individual portions.
      • Place portions in freezer-safe containers or bags.
      • It can be frozen for up to 2-3 months.
    • Reheating in the oven:
      • Preheat your oven to 350°F (175°C).
      • Cover the dish with foil to prevent it from drying out.
      • Bake for 20-30 minutes, or until heated through.
      • For the last 5-10 minutes, remove the foil to help crisp the top.
    • Reheating in the microwave:
      • Place a single serving on a microwave-safe plate.
      • Add a splash of water or broth to help keep it moist.
      • Cover the plate loosely.
      • Heat for 2-3 minutes, stirring halfway through.

    These simple storage tips make it easy to enjoy delicious baked ziti anytime, providing a perfect solution for quick meals on busy weeknights.

    Frequently Asked Questions About Baked Ziti

    What is an authentic baked ziti recipe?

    An authentic baked ziti recipe is all about simple, comforting flavors that make for a hearty pasta dish. At its core, it combines ziti pasta with a rich tomato sauce and a blend of delicious cheeses—typically creamy ricotta, melty mozzarella, and sharp Parmesan.

    Classic recipes often include ground meat, such as beef or Italian sausage, to add a wonderful depth of flavor. However, delicious vegetarian versions are also very popular. The ingredients are layered in a baking dish and baked until bubbly and golden, creating an irresistible crust over a tender interior. It’s a perfect example of family-friendly meals and approachable home cooking.

    What is a good ziti pasta substitute?

    If you don’t have ziti on hand, don’t worry. Many other pasta shapes work beautifully in a baked dish. The key is to choose a sturdy pasta that can hold sauce well and stand up to baking without becoming mushy.

    Here are some excellent substitutes for ziti:

    • Penne: This is arguably the most common substitute. Its tube shape and angled ends are perfect for holding sauce.
    • Rigatoni: These wide, ridged tubes are fantastic for capturing hearty meat sauces and cheese.
    • Mostaccioli: Similar to penne but often smooth instead of ridged, this is another great tube-shaped option.
    • Cavatappi: This fun, corkscrew-shaped pasta has plenty of nooks and crannies to trap sauce.

    Using these alternatives ensures you can still enjoy a delicious baked pasta dish, highlighting the flexibility of simple dinner recipes. No matter which pasta you choose, just remember to cook it al dente before baking.

    How do you keep baked ziti from drying out?

    No one wants a dry baked ziti. Fortunately, keeping your dish moist and delicious is simple. Follow these tips for a perfectly tender and saucy result every time:

    • Use enough sauce: This is the most crucial step. Don’t be shy with the sauce, as it keeps the pasta hydrated while baking. Make sure every piece of pasta is well coated.
    • Cook pasta al dente: The pasta will continue to cook in the oven, so boil it only until it’s al dente. This allows it to absorb sauce without becoming mushy.
    • Cover while baking: Cover the dish with aluminum foil for most of the baking time. This step traps steam and moisture, preventing the top from drying out.
    • Add extra liquid if needed: If your sauce seems very thick, a little extra liquid can make a big difference. Stir in about a quarter cup of water or vegetable broth.
    • Don’t overbake: A common cause of dryness is simply baking it too long. Your ziti is ready once it’s heated through and the cheese is bubbly and melted.

    Following this step-by-step cooking guidance will help you achieve a wonderfully moist and flavorful meal made easy.

    Can I assemble baked ziti ahead of time?

    Absolutely! Baked ziti is a fantastic make-ahead meal, which is great news for busy families and anyone seeking meal prep ideas. Assembling it in advance not only saves time but also allows the flavors to meld beautifully.

    Here’s how to prepare baked ziti ahead of time:

    • Cook and cool the pasta: Cook your pasta to al dente. To stop the cooking process, rinse it under cold water, then toss with a little olive oil to prevent sticking. Let it cool completely.
    • Prepare the other components: Make your sauce and prepare any cheese mixtures according to your recipe.
    • Assemble the dish: Layer the cooled pasta, sauce, and cheeses in your baking dish as you normally would.
    • Cover and refrigerate: Cover the dish tightly, first with plastic wrap and then with aluminum foil. You can refrigerate it for up to 2-3 days. [6]
    • Bake from the fridge: When you’re ready to bake, let the dish sit at room temperature for about 30 minutes. Bake as directed, adding an extra 10-15 minutes to ensure it is heated through and bubbly.

    Making baked ziti in advance is a simple hack that makes this easy recipe perfect for any night of the week. It’s a great example of approachable home cooking that makes mealtime stress-free.


    Sources

    1. https://www.barilla.com/en-us/pasta-shapes/ziti
    2. https://www.sharethrough.com/resources/blog/origins-of-lasagna
    3. https://www.hsph.harvard.edu/nutritionsource/legumes/
    4. https://www.thenibble.com/reviews/main/pasta/pasta2/ziti-rigatoni.asp
    5. https://www.foodsafety.gov/food-safety-charts/cold-food-storage-chart
    6. https://www.foodsafety.gov/keep/charts/cookfrozendanger.html
  • The Easiest Fish and Chips Recipe (Perfectly Crispy & Simple)

    The Easiest Fish and Chips Recipe (Perfectly Crispy & Simple)

    Making classic fish and chips involves creating a simple batter for a firm white fish, such as cod or haddock, and double-frying potatoes for extra crispy chips. The keys to success are maintaining the correct oil temperature for a light, golden-brown finish and keeping the batter cold before use.

    There’s something uniquely comforting about a plate of golden, crispy fish and fluffy, hot chips. While this classic British takeaway has captured hearts worldwide, making it at home can feel like a daunting task. Complex recipes can leave you overwhelmed by technical terms, and you might be unsure how to get that perfect crunch without a professional fryer. We understand the challenge of cooking healthy, tasty meals quickly, especially when you’re planning family-friendly dinners or just need a confidence boost in the kitchen.

    At Recipesmondial, we believe enjoying delicious meals shouldn’t be a source of stress. That’s why we’ve crafted the easiest fish and chips recipe for every home cook. It’s perfect for beginners or anyone seeking reliable, beginner-friendly recipes. Imagine serving perfectly crispy battered fish and golden chips, all made from scratch in your own kitchen, without any fuss. Our step-by-step guidance will boost your confidence and make cooking enjoyable again. With our collection of simple dinner recipes, you’ll discover new dishes that become instant family favorites.

    Get ready to transform simple ingredients into a spectacular meal. We’ll walk you through every step, from choosing the best fish to mastering the crispy batter and golden chips. Say goodbye to guesswork and hello to a homemade fish and chips experience that rivals your favorite takeaway. This approachable home cooking guide will make the iconic dish an easy and flavorful staple in your home. Let’s dive in!

    Why You’ll Love This Simple Fish and Chips Recipe

    A platter of golden-brown crispy fish fillets and thick-cut chips, garnished with lemon and parsley, with a side of tartar sauce.
    Professional food photography, photorealistic, high-quality food magazine photo of a beautifully plated, golden-brown fish and chips dish, perfectly crispy, served on a rustic wooden board with vibrant lemon wedges, a sprinkle of fresh chopped parsley, and a small ceramic ramekin of creamy tartar sauce. The focus is on the inviting texture of the crispy batter and perfectly golden chips, with subtle steam rising, illuminated by warm, natural light creating a mouth-watering, appealing scene.

    Imagine a classic British takeaway right in your own kitchen. Our simple fish and chips recipe makes it happen! If you’ve ever felt overwhelmed by complex instructions or struggled to get that perfectly crispy finish, this recipe is for you.

    We believe cooking should be fun, not stressful. This guide makes creating delicious, restaurant-quality fish and chips incredibly easy, building your confidence along the way. Get ready to say goodbye to guesswork and hello to homemade perfection!

    Here’s why you will absolutely love making this:

    • Effortless Perfection: Our step-by-step cooking guidance is designed for success, ensuring you get golden, crispy fish and fluffy chips every time.
    • Beginner-Friendly: You don’t need any special culinary skills. As an ideal beginner-friendly recipe, it uses only basic techniques and everyday ingredients.
    • Family-Favorite Meal: A guaranteed crowd-pleaser! This perfect family-friendly meal makes dinner enjoyable for all ages.
    • Achieve Crispy Bliss: Learn our secrets for a light, crunchy batter that leaves your fish perfectly flaky inside and your chips golden and tender.
    • Enjoy Cooking Without Stress: Our simplified process helps you transform simple ingredients into flavorful meals made easy, so you can truly enjoy your time in the kitchen.
    • Quick and Reliable: When you need a tasty dinner fast, this simple dinner recipe delivers delicious, reliable results in no time.
    • Boost Your Confidence: Mastering this classic dish will empower you to move from uncertainty to confidence in the kitchen. Discover the joy of approachable home cooking.

    What Ingredients Do You Need for Fish and Chips?

    For the Fish

    The secret to irresistible homemade fish and chips begins with the right fish. You’ll want a mild, flaky white fish that holds its shape well during frying. Using the right type of fish ensures your easy recipe turns out perfectly every time!

    • Cod Fillets: About 1.5 lbs (680g) total, cut into 4 equal portions. Cod is a classic choice for its mild flavor and firm, flaky texture. It is very forgiving for beginners and always delivers delicious results.
    • Haddock Fillets: Haddock is another fantastic option. It has a slightly sweeter flavor than cod and a wonderful texture that fries up beautifully crispy.
    • Salt and Black Pepper: Just a pinch of each to season the fish before battering. This simple step enhances the flavor of your family-friendly meal.

    Pro Tip: Pat your fish fillets completely dry with paper towels before seasoning and battering. Excess moisture prevents the batter from sticking properly and results in a less crispy finish. This small trick makes a big difference!

    For the Chips (Fries)

    Crispy, golden chips are just as important as the fish. Starting with the right potatoes is the key to achieving a perfectly fluffy interior and a crunchy exterior.

    • Russet Potatoes (or Maris Piper if available): About 2 lbs (900g). Russets are ideal because their high starch content helps them get wonderfully crispy on the outside while staying fluffy inside. In the UK, Maris Piper potatoes are the traditional choice for their excellent frying qualities.
    • Cold Water: You’ll need this for soaking the cut potatoes. This step removes excess starch, which is the secret to making your chips extra crispy.
    • Vegetable Oil (or other high smoke point oil): About 6-8 cups (1.5-2 liters) for deep frying. You need enough oil to fully submerge the chips and fish. Canola or sunflower oil also work well for this simple dinner recipe.
    • Salt: For seasoning your chips as soon as they come out of the fryer. A generous sprinkle brings out their flavor.

    Beginner’s Tip: Cut your potatoes into even-sized sticks, about 1/2-inch thick. This ensures they all cook at the same rate. Don’t worry if they aren’t perfect—consistency is the goal!

    For the Batter

    A great batter is what gives your fish that incredible light and airy crunch. This beginner-friendly recipe uses simple ingredients to create a coating with maximum flavor and crispness.

    • All-Purpose Flour: 1.5 cups (180g). This forms the base of the crispy coating.
    • Baking Powder: 1 teaspoon. As a leavening agent, it helps the batter become light and puffy as it fries.
    • Salt: 1/2 teaspoon. A little salt in the batter enhances the overall flavor of the fish.
    • Cold Beer (Lager or Pale Ale works great): 1 cup (240ml). Carbonation from the beer creates tiny air pockets, resulting in a light and airy texture. The yeast also adds a lovely depth of flavor.
    • OR Cold Sparkling Water: 1 cup (240ml). For a non-alcoholic option, sparkling water is an excellent substitute. It provides the same carbonation needed for a crispy, light batter, making this an adaptable and approachable home cooking solution.

    Quick Tip: Make sure your beer or sparkling water is very cold! A chilled liquid inhibits gluten development in the flour, which creates a thinner, crispier batter. This is a key step for flavorful meals made easy.

    How to Make the Best Fish and Chips: A Step-by-Step Guide

    Step 1: Prepare the Potatoes for Perfect Chips

    Creating wonderfully crispy chips starts with careful potato preparation. This essential first step ensures a fluffy interior and a golden, crunchy exterior for your homemade fish and chips.

    1. Choose Your Potatoes: For the best texture, start with starchy potatoes like Russets or Maris Pipers.
    2. Peel and Cut: Peel the potatoes, then cut them into even strips, about 1/2 inch thick. Consistent sizing helps them cook evenly.
    3. Rinse and Soak: Place the cut potatoes in a large bowl of cold water and let them soak for at least 30 minutes. This key step removes excess starch, which is crucial for achieving extra crispiness.
    4. Dry Thoroughly: Drain the potatoes well, then lay them in a single layer on a clean kitchen towel or paper towels. Pat them completely dry. This is critical, as any remaining moisture will cause the oil to splatter and prevent the chips from becoming crisp.

    Step 2: Mix the Crispy Batter

    A light, airy, and super-crispy batter is the heart of amazing fish and chips. This simple recipe ensures a delicious, golden coating for your fish.

    1. Combine Dry Ingredients: In a large mixing bowl, whisk together the all-purpose flour, cornstarch, baking powder, and salt until there are no lumps. The cornstarch is a key ingredient for crispiness.
    2. Add Wet Ingredients: Gradually pour in the very cold beer or sparkling water, whisking gently until just combined. A few small lumps are perfectly fine—be careful not to overmix. Overmixing develops gluten, which will make the batter tough instead of light and crispy.
    3. Chill the Batter: For the best results, place the batter in the refrigerator to chill for at least 15-20 minutes. A cold batter adheres better to the fish and creates a lighter texture when it hits the hot oil.

    Tip from Recipesmondial: If you prefer a non-alcoholic option, chilled sparkling water or club soda works beautifully instead of beer. Both create bubbles that give the batter a lovely airy texture, making this a truly easy recipe for everyone.

    Step 3: First Fry for the Chips

    To achieve ultimate crispiness, we’ll cook the chips twice. This first fry cooks them through, making them perfectly tender on the inside.

    1. Heat the Oil: Pour about 3-4 inches of a neutral oil like vegetable, canola, or peanut oil into a large, heavy-bottomed pot or deep fryer. Heat the oil to 325°F (160°C), using a kitchen thermometer for accuracy.
    2. First Fry the Chips: Carefully add about half of the dried potatoes to the hot oil. Be sure not to overcrowd the pot, as this lowers the oil temperature and results in soggy, not crispy, chips.
    3. Cook Until Soft: Fry the chips for 5-7 minutes. They should be soft and cooked through but not yet golden brown.
    4. Drain and Rest: Using a slotted spoon, remove the chips and place them on a wire rack set over a baking sheet. Let them rest while you prepare and fry the fish.

    Step 4: Fry the Fish

    Now it’s time to cook your delicious fish. This step is quick and delivers a perfectly golden and flaky result.

    1. Increase Oil Temperature: While the chips are resting, increase the oil temperature to 375°F (190°C).
    2. Prepare the Fish: Pat your fish fillets completely dry with paper towels to help the batter stick, then season them lightly with salt and pepper.
    3. Dip in Batter: Working with one fillet at a time, dip the fish into the cold batter, ensuring it’s completely coated. Allow any excess batter to drip off.
    4. Fry the Fish: Carefully lower the battered fish into the hot oil. To prevent overcrowding, fry just one or two fillets at a time.
    5. Cook Until Golden: Fry for 5-8 minutes, depending on the thickness of your fillets, until the batter is golden brown and the fish flakes easily.
    6. Drain: Remove the cooked fish with a slotted spoon and place it on a wire rack to drain. To keep it warm, you can place the rack in a low oven (around 200°F/95°C) while you finish the chips.

    Beginner-friendly tip: Using a thermometer is crucial for achieving perfectly crispy results. If the oil is too cool, your food will be greasy; if it’s too hot, it will burn before cooking through.

    Step 5: Second Fry for Extra Crispy Chips

    This final step is the secret to achieving that ultimate golden crunch, transforming your chips into the best part of a classic fish and chips meal.

    1. Reheat Oil: Make sure your oil is back up to the target temperature of 375°F (190°C).
    2. Second Fry: Carefully return the par-fried chips to the hot oil, working in batches if necessary to avoid overcrowding.
    3. Cook to Golden Perfection: Fry for an additional 2-4 minutes, until the chips are a deep golden brown and wonderfully crisp.
    4. Drain and Season: Immediately remove the chips from the oil and place them on a paper-towel-lined wire rack. For the best flavor, season them generously with salt while they are still hot.

    Step 6: Serve and Enjoy

    Your delicious, easy-to-make fish and chips are ready to serve. This is a truly satisfying meal perfect for the whole family.

    1. Assemble Plates: Arrange the hot, crispy fish and golden chips on individual plates.
    2. Add Classic Sides: Serve immediately with your favorite accompaniments. Traditional choices include creamy tartar sauce, tangy malt vinegar, and a sprinkle of sea salt. Mushy peas or fresh lemon wedges are also fantastic additions.
    3. Savor Your Creation: Enjoy your perfectly crispy and flavorful homemade fish and chips! It’s an approachable home cooking triumph.

    This step-by-step cooking guidance helps you create restaurant-quality results right in your own kitchen. Recipesmondial makes flavorful meals made easy!

    What is the best fish for fish and chips?

    Top Choices: Cod and Haddock

    Choosing the right fish is essential for perfect fish and chips. The ideal choice is a white fish with a mild flavor and flaky flesh that’s firm enough to hold up to frying. This combination ensures a delicious, crispy coating and tender, moist fish every time.

    When it comes to the classic recipe, two types of fish consistently stand out as the best:

    • Cod: Arguably the most popular and traditional choice, cod has a mild, clean flavor and large, flaky fillets. It cooks beautifully, staying moist and tender inside a crispy batter. Its wide availability also makes it an excellent and convenient choice for most home cooks [1].
    • Haddock: Another fantastic option, haddock is often preferred for its slightly richer, sweeter flavor compared to cod. Its flesh is a bit firmer but still becomes wonderfully flaky once cooked. Many fish and chip connoisseurs argue that haddock provides the most authentic taste.

    You truly can’t go wrong with either cod or haddock. Both promise a delicious, authentic fish and chips experience, making them perfect choices for even a first-time cook.

    Other Great Options

    What if cod or haddock aren’t available? Or maybe you’re just looking to try something new. Luckily, several other types of fish work beautifully for homemade fish and chips.

    Here are some excellent alternatives for your next meal:

    • Pollock: A member of the cod family, pollock offers a similar mild flavor and flaky texture but is often a more budget-friendly option. It fries exceptionally well, making it a great substitute when cod isn’t available.
    • Plaice: This flatfish has delicate fillets and a subtle, sweet flavor. Because it’s so light, plaice cooks up with an incredibly crispy coating, making it a lovely choice for a more refined taste.
    • Tilapia: Known for its very mild flavor and wide availability, tilapia is an easy-to-cook fish that holds its shape well during frying. This makes it an approachable and reliable option for any home cook.
    • Halibut: If you’re looking for a more premium option, halibut is a superb choice. It has firm, thick, white flesh with a richer, sweeter flavor. Keep in mind that it is typically pricier than the other fish on this list.

    Ultimately, the best fish for your recipe is any white, flaky variety that is fresh. When in doubt, don’t hesitate to ask your fishmonger for their recommendation. They can guide you to the best catch of the day. Enjoy discovering the perfect fish for your next homemade meal!

    What sauce goes with fish and chips?

    The right sauce is essential for the perfect plate of homemade fish and chips. These classic accompaniments add extra layers of flavor and texture, elevating every bite. Choosing your favorite dip is part of the fun!

    Classic Tartar Sauce

    Tartar sauce is a timeless partner for crispy fish. It’s wonderfully creamy and tangy.

    • Flavor Profile: With its bright, zesty flavor, this sauce provides a perfect contrast to rich, fried fish.
    • Key Ingredients: Most recipes start with a mayonnaise base, then add chopped capers, gherkins (or pickles), fresh dill, and a squeeze of lemon juice.
    • Why It Works: The acidity from the lemon and pickles cuts through the richness of the fried fish, creating a balanced and satisfying taste.
    • Quick Tip: You can find excellent ready-made tartar sauce at your local grocery store. For a homemade touch, simply mix good-quality mayonnaise with finely chopped cornichons, capers, and a bit of fresh parsley.

    Mushy Peas

    A beloved British tradition, mushy peas are a surprisingly delicious addition to fish and chips.

    • What They Are: These are simply dried marrowfat peas that have been soaked and then gently mashed, resulting in a distinctive, earthy flavor and a vibrant green color.
    • Flavor Profile: Mushy peas offer a comforting, slightly sweet taste and a creamy consistency, providing a welcome textural contrast.
    • Why It Works: Their soft texture and sweet notes beautifully complement the crispy fish and salty chips, making for a comforting and authentic pairing.
    • Finding Them: You can often find canned mushy peas in the international aisle of larger supermarkets. Just heat them gently before serving.

    Curry Sauce

    Curry sauce is a hugely popular choice, especially in UK chippies. It brings a delightful warmth to your meal.

    • Flavor Profile: Typically mild and savory, this golden-colored sauce gets its comforting depth from a blend of gentle spices.
    • Growing Popularity: Its popularity has soared in recent years, becoming a top pick for fish and chips. Many consider it a modern classic [2].
    • Why It Works: The warm, aromatic spices pair perfectly with the crispy batter and fluffy chips for a truly satisfying combination.
    • Quick Tip: You can buy ready-made chip shop curry sauce mixes or jars. Simply follow the package directions to heat it up for an easy option.

    Malt Vinegar and Salt

    For the purists, nothing beats a generous splash of malt vinegar and a sprinkle of salt. This is the most traditional way to enjoy fish and chips.

    • Simplicity is Key: This classic pairing highlights the natural flavors of the fish and chips without any fuss or fancy preparation.
    • Flavor Profile: The sharp tang of malt vinegar cuts through the richness of the fried food, while a sprinkle of salt enhances all the flavors.
    • How to Use: Simply sprinkle salt liberally over your hot fish and chips, then drizzle malt vinegar to your liking.
    • The Authentic Experience: Many believe this is the only way to savor authentic British fish and chips. It’s a simple yet perfect pairing.

    Tips from Our Kitchen for Recipe Success

    Keep the Batter Cold

    For truly crispy fish, this tip is a game-changer. When cold batter hits hot oil, it creates a powerful steam reaction that causes the batter to puff up. The result is an incredibly light and crunchy coating.

    • Chill your ingredients: Use very cold water, or even ice water, when mixing your batter.
    • Mix just before frying: Prepare your batter right before you dip the fish and keep it in the fridge until ready to use. This simple step helps you achieve that perfect, airy coating for your homemade fish and chips.

    Get the Oil Temperature Right

    The right oil temperature is vital for successful frying, as it’s the key to preventing greasy fish and chips. If the oil is too cool, your food will absorb too much of it. If it’s too hot, the outside will burn before the inside cooks through.

    • Use a thermometer: A thermometer is your best friend for stress-free frying. For the perfect golden chips, aim for around 325-350°F (160-175°C) for the first fry.
    • Maintain consistent heat: For your fish, keep the oil at about 350°F (175°C). Maintaining a consistent temperature ensures even cooking and delivers that wonderful crispness to every piece [3].
    • Adjust as needed: The temperature will drop slightly when you add food, so be prepared to increase the heat briefly to bring it back up.

    Don’t Overcrowd the Pan

    Overcrowding the pan is a common mistake that dramatically lowers the oil’s temperature. When the oil cools down too much, your food steams instead of fries, resulting in a soggy, oily finish.

    • Fry in small batches: Give your fish and chips plenty of space in the pan. This allows each piece to cook evenly while helping to maintain the ideal oil temperature.
    • Be patient: While frying in batches takes a little longer, the superior texture and crispiness are absolutely worth the extra time.

    Drain Excess Oil Properly

    Don’t let your hard work go to waste with a greasy finish. Draining your fish and chips correctly is the final step to ensuring they stay perfectly crispy and delicious.

    • Use a wire rack: Instead of placing fried food on paper towels, set a wire rack over a baking sheet. Then, arrange your freshly fried fish and chips on top of the rack.
    • Allow air circulation: This setup allows air to circulate completely around the food, letting excess oil drip away. As a result, the coating stays wonderfully crisp and the bottom won’t turn soggy.

    Recipe Variations: How to Adapt Your Fish and Chips

    How to Make Fish and Chips Without Beer

    Craving crispy fish and chips but want to skip the beer? No problem. This simple variation on our classic batter recipe is perfect for anyone who avoids alcohol or just wants an easy alternative. You’ll still get a wonderfully light and crunchy coating.

    The secret lies in using a carbonated liquid. The carbonation creates tiny air bubbles in the batter that expand when fried, resulting in the same airy, crispy texture you get from a traditional beer batter.

    Simple Beer-Free Batter Swaps:

    • Sparkling Water: This is our top recommendation. Use it chilled for the best results. It provides excellent fizz.
    • Club Soda: Another great option. It offers similar carbonation to sparkling water.
    • Lemon-Lime Soda: For a subtle hint of sweetness and citrus, try this. Opt for a clear soda.

    How to Adapt Your Batter:

    Making the swap is incredibly easy. Simply replace the beer in our main recipe with an equal amount of your chosen carbonated beverage. For the best results, make sure your substitute is very cold. A cold liquid helps keep the batter thick and bubbly, leading to maximum crispiness.

    Making Fish and Chips in an Air Fryer

    For a quicker, less oily method, your air fryer is the perfect tool. It uses circulating hot air to give the fish and chips a satisfying crispness with a fraction of the oil used in deep-frying. This makes it a great option for a faster, healthier meal.

    For Your Chips:

    1. Prepare Potatoes: Follow Step 1 of our main recipe for cutting and soaking the potatoes. This step is key for achieving crispy chips.
    2. Season: Pat the potatoes completely dry, then toss them with 1-2 teaspoons of oil until lightly coated.
    3. Air Fry Chips: Preheat your air fryer to 375°F (190°C). Arrange the chips in a single layer in the basket, making sure not to overcrowd it. Cook for 15-20 minutes, shaking the basket halfway through. For extra crispness, increase the temperature to 400°F (200°C) and cook for another 5-7 minutes.

    For Your Fish:

    A traditional wet batter doesn’t work well in an air fryer, as it can drip off the fish before it has a chance to set. Instead, we recommend using a simple breading method to ensure a perfectly crispy coating.

    1. Season Fish: Pat your fish fillets dry and season them with salt and pepper.
    2. Dredge: Create a three-station dredging line.
      • First, plain flour.
      • Second, beaten egg.
      • Third, panko breadcrumbs. Panko gives a super crispy texture.
    3. Coat Fish: Dip each fillet first in flour, then egg, and finally in the panko. Press the breadcrumbs gently to ensure they adhere.
    4. Air Fry Fish: Lightly spray the coated fish with cooking oil and place it in the preheated air fryer. Cook at 380°F (195°C) for 10-15 minutes, flipping halfway through. The cooking time will vary depending on the thickness of your fillets. The fish is done when it’s flaky and the coating is golden brown.

    This straightforward air fryer method is a stress-free way to enjoy this classic dish, making it a perfect beginner-friendly recipe.

    Oven-Baked Fish and Chips for a Healthier Option

    Oven-baking is the ideal choice for a significantly healthier version of fish and chips. This method uses very little oil but still produces delicious, crispy results, making it a wonderful way to enjoy a lighter, family-friendly meal.

    For Your Chips:

    The trick to wonderfully crispy oven-baked chips is high heat and proper preparation.

    1. Prepare Potatoes: Wash, peel, and cut your potatoes into even chip shapes. Soaking them in cold water for at least 30 minutes removes excess starch. Afterwards, pat them completely dry.
    2. Season and Toss: Preheat your oven to a hot 425°F (220°C) and line a large baking sheet with parchment paper. Toss the dried chips with 1-2 tablespoons of olive oil, salt, and pepper. You can also add a pinch of paprika for color.
    3. Bake Chips: Spread the chips in a single, even layer on the baking sheet, ensuring they are not overcrowded. Bake for 25-35 minutes, flipping them halfway through, until they are golden brown and tender on the inside.

    For Your Fish:

    Similar to the air fryer method, a breaded coating works best for oven-baked fish because it creates a reliably crispy crust without the need for deep-frying.

    1. Season Fish: Pat your fish fillets dry. Season them with salt, pepper, and a squeeze of lemon juice.
    2. Breading Station: Set up a dredging station with a plate of flour, a shallow dish of beaten egg, and a third plate of panko breadcrumbs. For extra flavor, mix herbs like parsley or dill into your panko.
    3. Coat Fish: Dip each fillet into the flour, then the egg, then the panko. Make sure it’s fully coated, pressing gently to help the breadcrumbs stick.
    4. Bake Fish: Place the coated fillets on a separate baking sheet lined with parchment paper and lightly spray them with olive oil to promote browning. Bake alongside your chips for 15-20 minutes, depending on thickness. The fish is done when the crust is golden and the inside is opaque and flaky.

    This oven-baked method is a simple and approachable way to make a classic dish, proving you don’t need a deep fryer for fantastic fish and chips.

    Frequently Asked Questions

    What is the traditional British recipe for fish and chips?

    Traditional British fish and chips is a comforting classic. The dish features fresh white fish, typically cod or haddock, which is dipped in a light, crispy batter and deep-fried until golden brown. The accompanying “chips” are thick-cut potatoes, often twice-fried for a fluffy interior and a perfectly crunchy exterior. Traditionally, the meal is served with a sprinkle of salt and a splash of malt vinegar. Popular sides include mushy peas, tartar sauce, or even a rich curry sauce [4]. Our easy-to-follow recipes embrace this tradition while providing simple dinner ideas for your family.

    What is the secret to a crispy batter?

    Achieving a perfectly crispy batter is simpler than you might think. For best results, follow these key tips:

    • Keep it cold: Use very cold liquid, like ice water or beer, in your batter. This temperature difference helps create a super-crispy coating when the batter hits the hot oil.
    • Leavening power: Many traditional batters use a leavening agent, such as baking powder or a carbonated liquid like beer or soda water. The bubbles trapped in the batter expand during frying, making it light and airy.
    • Don’t overmix: Mix your batter just until the ingredients are combined; a few lumps are fine. Overmixing develops gluten, which can make the batter tough instead of crisp.
    • Hot oil is key: Ensure the oil is at the right temperature (around 350-375°F or 175-190°C). If the oil is too cool, the batter will absorb it and become greasy. If it’s too hot, the batter will burn before the fish cooks through.
    • Light coating: Aim for a relatively thin coating of batter on your fish. Too much batter can make the final result heavy and less crispy.

    Following these beginner-friendly steps will help you master a wonderfully crispy batter every time.

    Can you make fish and chips in the oven?

    Yes, you can definitely make a delicious version of fish and chips in the oven. While it won’t have the exact same texture as its deep-fried counterpart, this method is a fantastic, healthier alternative that creates less mess. Here’s a simple guide to this approachable home-cooking technique:

    • For the fish: Pat your fish fillets dry, brush them with a little oil, and then coat them in seasoned panko breadcrumbs for extra crunch. Bake on a parchment-lined baking sheet until cooked through and golden.
    • For the chips: Cut your potatoes into thick fries and toss them with a little oil, salt, and pepper. Roast them on a separate baking sheet, flipping them halfway through, until they are tender inside and crispy outside.

    This oven-baked method results in a satisfying, lower-calorie meal that’s perfect for busy families. To save even more time, you can prepare the potatoes and bread the fish ahead of time.

    What is the history of fish and chips?

    The rich history of fish and chips dates back to the mid-19th century in the United Kingdom, though its two main components developed separately. Fried fish was introduced by Jewish immigrants from Portugal and Spain, who brought their tradition of frying fish in oil [5]. Meanwhile, fried potatoes, or chips, gained popularity due to French culinary influence. Eventually, street vendors began selling the two foods together, creating an affordable and filling meal for working-class families. The dish quickly spread across the country and remains a beloved symbol of British cuisine today, often enjoyed as a comforting and simple dinner.


    Sources

    1. https://www.fishwatch.gov/profiles/atlantic-cod
    2. https://www.theguardian.com/lifeandstyle/wordofmouth/2012/nov/29/fish-and-chips-curry-sauce
    3. https://www.seriouseats.com/the-best-way-to-fry-food
    4. https://www.historic-uk.com/CultureUK/Fish-Chips/
    5. https://www.nationalgeographic.com/culture/article/a-brief-history-of-fish-and-chips
  • How to Make The Best Sloppy Joe Recipe (Quick & Easy!)

    How to Make The Best Sloppy Joe Recipe (Quick & Easy!)

    This classic sloppy joe recipe involves browning one pound of ground beef with diced onion and bell pepper. The mixture is then simmered in a savory, sweet, and tangy sauce made from ketchup, Worcestershire sauce, brown sugar, and mustard until thickened. Serve the flavorful meat on toasted hamburger buns for a quick and easy family-friendly meal.

    Need a stress-free dinner idea that your whole family will love? Planning weeknight meals that are both delicious and easy can be a challenge. Sometimes, the simplest classics are the best solution, and few dishes are as comforting as a hearty sloppy joe. This crowd-pleasing meal guarantees minimal fuss and maximum flavor, making it a perfect choice for any night of the week.

    At Recipesmondial, we believe approachable home cooking should be joyful, not daunting. That’s why we’re sharing our ultimate sloppy joe recipe, designed to transform simple ingredients into a flavorful, easy meal. This beginner-friendly recipe provides clear, step-by-step guidance to ensure perfect homemade sloppy joes every time. You’ll create an incredible dish that comes together quickly, proving that simple dinner recipes can be truly spectacular.

    Whether you’re an experienced cook or just starting out, this guide will help you master the perfect sloppy joe. We’ll show you what makes this version stand out—from its balanced savory and tangy flavor to its incredibly simple preparation. Get ready to make a quick and easy classic that is guaranteed to become a regular request at your dinner table.

    Why Will You Love This Easy Sloppy Joe Recipe?

    A perfectly built sloppy joe sandwich, overflowing with savory meat, served on a toasted bun with pickle chips on the side.
    Professional food photography, photorealistic, high-quality food magazine photo. A perfectly assembled, mouth-watering Sloppy Joe sandwich, featuring a generous mound of rich, savory ground beef mixture spilling slightly from a golden-toasted brioche bun. The sandwich is presented on a rustic wooden board or a simple ceramic plate, with a few crinkle-cut dill pickle chips on the side. Soft, warm overhead lighting highlights the glossy sauce and the texture of the bun, creating an inviting and appealing scene. Shallow depth of field. Clean, approachable kitchen background slightly out of focus.

    Searching for a delicious, easy dinner that brings smiles to every face and doesn’t keep you in the kitchen all evening? This homemade sloppy joe recipe is the perfect weeknight hero. Here’s why you’ll love it:

    • It’s Incredibly Simple: This recipe offers clear, step-by-step guidance and uses common ingredients you likely already have. It’s incredibly beginner-friendly, making it a perfect starting point for new cooks.
    • It’s Super Quick: Ideal for busy families, this dish is wonderfully quick to prepare. You can have a hot, hearty meal on the table in under 30 minutes, solving those frantic weeknight dinner dilemmas.
    • It’s a Family Favorite: This family-friendly meal appeals to all ages. The sweet and savory flavor is a guaranteed hit, and kids especially adore the messy, delicious fun of a classic sloppy joe.
    • It Builds Kitchen Confidence: Because this recipe delivers reliable and delicious results every time, it’s a fantastic way to build your skills. You’ll enjoy a stress-free cooking experience and feel more confident in the kitchen.
    • It Embodies Recipesmondial’s Values: This recipe is a perfect example of what we love: approachable home cooking that transforms your kitchen experience. We aim to take you from feeling uninspired to discovering delicious new flavors.

    What Ingredients Do You Need for Homemade Sloppy Joes?

    An overhead flat lay of fresh ingredients for sloppy joes, including ground beef, diced vegetables, sauces, spices, and hamburger buns.
    Professional food photography, photorealistic, high-quality food magazine photo. An organized overhead flat lay shot of all fresh ingredients for homemade Sloppy Joes. Ingredients include a package of lean ground beef, finely diced yellow onion and green bell pepper in small prep bowls, minced garlic, a small can of tomato paste, a bottle of classic ketchup, a bottle of Worcestershire sauce, yellow mustard, and a selection of dry spices (chili powder, cumin, salt, black pepper) in small ramekins. Fresh, soft hamburger buns are stacked neatly nearby. All items are artfully arranged on a clean, light marble countertop or a rustic wooden board. Bright, natural, even lighting from above, with vibrant colors.

    Ready to make incredible homemade sloppy joes? This recipe is simple, using accessible, everyday ingredients you likely already have. It’s a stress-free way to cook a delicious, family-friendly meal. Let’s gather what you need!

    For the Meat Mixture

    A flavorful meat mixture is the foundation of any great sloppy joe. We’re aiming for a hearty base that will soak up all the delicious sauce.

    • Ground Beef: We suggest lean ground beef (85-90%) for a rich flavor without excessive grease. It also cooks down beautifully. For a lighter option, ground turkey works well too.
    • Onion: A finely chopped yellow onion adds essential aromatic depth, creating a wonderful savory base.
    • Garlic: Fresh minced garlic elevates the flavor profile, bringing a fragrant note that perfectly complements the beef.
    • Olive Oil: Just a touch helps sauté the vegetables, allowing them to soften and release their flavors before you add the beef.
    • Salt and Black Pepper: These pantry staples are crucial for enhancing all the other flavors in the dish.

    Expert Tip: Brown the ground meat well. This step develops a deeper flavor and helps prevent a watery sauce.

    For the Tangy Sauce

    The magic of sloppy joes is in the sauce. Our recipe creates an irresistible combination of sweet, tangy, and savory flavors using simple ingredients for a big impact.

    • Ketchup: This is the classic base for sloppy joe sauce, bringing sweetness and a rich tomato flavor.
    • Tomato Paste: Adding tomato paste intensifies the tomato notes and helps thicken the sauce to the perfect consistency.
    • Brown Sugar: A touch of brown sugar balances the tanginess with a subtle molasses flavor and a hint of sweetness.
    • Apple Cider Vinegar: This adds a crucial zing that cuts through the richness of the meat and sugar, creating a perfectly balanced sauce.
    • Worcestershire Sauce: A secret weapon for umami, this sauce adds complexity and depth that makes the flavor truly special.
    • Mustard: Yellow or Dijon mustard adds a sharp, complementary note to the sauce.
    • Chili Powder: This adds a mild warmth and earthy flavor—not spicy, just a comforting touch.
    • Garlic Powder and Onion Powder: These seasonings reinforce the fresh aromatics, ensuring a consistent savory flavor throughout the sauce.
    • Water or Beef Broth: A small amount thins the sauce to the right consistency and helps the flavors meld as it simmers.

    Substitution Idea: For a version with no ketchup, use tomato sauce or crushed tomatoes instead. You’ll need to adjust the sugar and vinegar to taste, but it’s a great way to customize the recipe or experiment in the kitchen.

    How to Make Sloppy Joes From Scratch: A Step-by-Step Guide

    A close-up of a bubbling cast iron skillet filled with sloppy joe meat, being stirred by a hand with a wooden spoon.
    Professional food photography, photorealistic, high-quality food magazine photo. A close-up, eye-level shot of a sturdy cast-iron skillet bubbling with the rich, thick, and glossy Sloppy Joe meat mixture. A real human hand, belonging to a home cook, is gently stirring the mixture with a wooden spoon, creating motion and indicating the cooking process. Subtle steam rises from the pan. The background shows a warm, inviting, and clean home kitchen counter and stovetop, slightly blurred to keep focus on the simmering pan. Warm, natural lighting.

    Step 1: Brown the Ground Beef

    Browning the ground beef is the crucial first step to building flavor in your homemade sloppy joes. Best of all, it’s a straightforward process, making this a fantastic beginner-friendly recipe!

    1. Heat Your Pan: Place a large skillet or Dutch oven over medium-high heat. If your beef is very lean, add a tablespoon of olive oil. Otherwise, the fat from the beef will be sufficient.
    2. Add the Beef: Carefully add 1 pound of ground beef to the hot pan.
    3. Break It Up: Use a wooden spoon or spatula to break the beef into smaller crumbles.
    4. Cook Until Browned: Continue cooking and stirring occasionally until the beef is fully browned with no pink remaining, about 5-7 minutes.
    5. Drain the Fat: Once browned, carefully drain the excess fat to prevent a greasy result. You can do this by tilting the pan and scooping the fat out or by using a colander.
    6. Return to Pan: Return the drained beef to the skillet.

    Expert Tip: For the best browning, don’t overcrowd the pan. If you’re doubling the recipe, brown the beef in two separate batches. Properly browned meat creates a depth of flavor that is key to a truly delicious meal.

    Step 2: Create the Sauce Base

    Now it’s time to build the rich, tangy sauce. This step layers in delicious aromatics and seasonings and is easy to follow, even for new cooks.

    1. Sauté the Aromatics: Add 1 small chopped onion and 1 small chopped green bell pepper to the skillet with the beef. Cook over medium heat for 5-7 minutes, stirring occasionally, until softened.
    2. Stir in Garlic: Add 2 cloves of minced garlic and cook for 1 minute more, stirring constantly to prevent it from burning.
    3. Add Tomato Paste: Stir in 2 tablespoons of tomato paste and cook for 1-2 minutes. Cooking the paste deepens the tomato flavor and removes any raw taste.
    4. Add Liquids and Spices: Pour in 1 cup of beef broth and 1/2 cup of ketchup. Then, add 1 tablespoon of Worcestershire sauce, 1 tablespoon of brown sugar, 1 teaspoon of yellow mustard, and 1/2 teaspoon each of salt and black pepper.
    5. Mix Well: Stir thoroughly until all ingredients are completely combined.

    Substitutions and Variations: For a slightly different twist, you can use chicken or vegetable broth instead of beef broth. If you don’t have a green bell pepper, red or yellow bell peppers work wonderfully too!

    Step 3: Simmer to Perfection

    This is where all the flavors meld together into that classic sloppy joe taste. Simmering thickens the sauce and allows the ingredients to combine perfectly. A little patience here makes all the difference!

    1. Bring to a Simmer: Bring the mixture to a simmer over medium heat.
    2. Reduce Heat and Cook: Once simmering, immediately reduce the heat to low. Let it cook, uncovered, for 15-20 minutes.
    3. Stir Occasionally: Stir the mixture every few minutes to prevent it from sticking to the bottom of the pan.
    4. Check Consistency: The sauce will thicken as it simmers. If it gets too thick for your liking, add a splash of beef broth or water. If it’s too thin, simply simmer for a few more minutes.
    5. Taste and Adjust: Before serving, give it a taste. Adjust the seasonings if needed—you might want a little more salt, pepper, or brown sugar.

    Tip for Confidence: Don’t worry if it’s not perfect on the first try! Adjusting seasonings to your personal taste is a key part of home cooking. This is how you make a good recipe into your best sloppy joe recipe!

    Step 4: Assemble Your Sandwiches

    You’re at the best part! With the filling ready, it’s time to assemble your delicious sloppy joe sandwiches. This quick assembly makes for a perfect family-friendly meal any night of the week.

    1. Prepare the Buns: Lightly toast your hamburger buns in a dry skillet, under the broiler, or in a toaster. Toasting helps the buns hold up to the saucy filling and adds a pleasant texture.
    2. Scoop the Filling: Generously spoon the warm sloppy joe mixture onto the bottom half of each toasted bun. Don’t be shy—it’s called “sloppy” for a reason!
    3. Add the Top: Place the top half of the bun over the filling.
    4. Serve Immediately: Serve your delicious sloppy joes while they are warm.

    Creative Serving Ideas:

    • Add a slice of cheddar cheese on top of the warm meat before adding the bun for a gooey, extra-cheesy treat.
    • Top with pickles, a dollop of coleslaw, or a sprinkle of fresh chives for added texture and freshness.
    • Turn it into a “sloppy joe bowl” by serving the meat mixture over rice, mashed potatoes, or baked potatoes.

    You’ve just made a fantastic, flavorful meal from scratch! Enjoy!

    Expert Tips for the Best Homemade Sloppy Joes

    Crafting the best homemade sloppy joes is surprisingly simple. With these expert tips, you can elevate your dish and create a memorable meal every time. Let’s make your next cooking adventure both stress-free and delicious.

    Achieve Perfect Ground Beef Browning

    The first step to a flavorful sloppy joe is browning your ground beef correctly. This crucial process adds immense flavor, so be sure not to rush it. Achieving a good sear on the meat will result in a much richer final taste.

    Layering Flavors for Depth

    Building layers of flavor is what makes homemade sloppy joes truly stand out. This technique transforms simple ingredients into something special, creating a depth you can’t get from a can.

    • Sauté aromatics: Cook onions and bell peppers first. They soften and release their sweet flavors. This creates a wonderful base.
    • Garlic last: Add garlic towards the end of sautéing. It cooks quickly. This prevents it from burning and becoming bitter.
    • Bloom spices: Briefly cook any dry spices with the aromatics. This brings out their full aroma and taste.

    Mastering Your Sloppy Joe Sauce

    The sauce is the heart of any sloppy joe, and balancing its sweet, tangy, and savory notes is key. The best part is that you can easily adjust the ingredients to match your family’s preferences.

    • Adjust sweetness: Taste the sauce as it simmers. Add a little more brown sugar if you like it sweeter.
    • Boost tanginess: A splash of apple cider vinegar or extra mustard works wonders. This brightens the flavor profile.
    • Umami depth: A dash of Worcestershire sauce or a tiny bit of soy sauce adds complexity. It provides a savory depth to the sauce.

    The Art of Simmering

    Simmering is a crucial step that both melds the flavors and thickens the sauce to perfection. Allowing the mixture to gently bubble is how you develop that classic, rich sloppy joe taste.

    • Low and slow: Keep the heat on low. Let the sauce gently bubble. This allows flavors to combine fully.
    • Uncovered simmer: Simmer with the lid off. This helps the sauce reduce and thicken. It ensures your sloppy joes aren’t watery.
    • Taste and adjust: Always taste before serving. Add salt, pepper, or more sauce ingredients as needed. This ensures a perfect final dish.

    Choosing the Right Bun

    Don’t underestimate the importance of the bun; it’s more than just a holder for the meat. Choosing the right one is an essential part of the sloppy joe experience and can make a good meal great.

    • Soft, sturdy buns: Choose brioche buns or soft hamburger buns. They absorb the sauce without falling apart.
    • Toast them: Briefly toast the buns. This adds texture and prevents sogginess. It also enhances their flavor.
    • Consider brioche: Brioche buns offer a slight sweetness. This complements the savory sloppy joe meat beautifully.

    Smart Make-Ahead and Meal Prep Tips

    Sloppy joes are an excellent choice for meal prep, making them a fantastic option for busy families. By preparing the meat mixture ahead of time, you can have a quick and delicious dinner ready in minutes.

    • Cook in advance: Make the sloppy joe meat mixture a day or two ahead. Store it in an airtight container in the fridge. This saves time on busy evenings.
    • Freeze for later: The cooked sloppy joe mixture freezes well. Portion it into freezer-safe bags or containers. It is great for future family-friendly meals.
    • Reheat gently: Thaw frozen mixture in the fridge overnight. Reheat on the stovetop over low heat. Add a splash of water or broth if it seems too thick. This helps you enjoy flavorful meals made easy.

    What Are Some Common Recipe Variations?

    Cooking is all about making a dish your own, and our homemade sloppy joes are a fantastic starting point. You can easily tweak this recipe to fit your taste or dietary needs. These simple variations help make cooking enjoyable and stress-free.

    Sloppy Joe Recipe with Turkey

    For a lighter, family-friendly meal, try swapping ground beef with ground turkey. This popular variation makes your sloppy joes leaner while still delivering classic flavor. It’s a great way to enjoy a healthier twist on a favorite dish.

    • How to Substitute: Simply use an equal amount of ground turkey in place of the ground beef.
    • Cooking Tips: Ground turkey often cooks faster than beef. Break it up well as it browns. You might need a tiny bit of extra oil if your turkey is very lean, as it has less natural fat. Drain any excess liquid after browning.
    • Flavor Profile: The sauce’s robust flavor shines through, making ground turkey a great choice for a healthy and balanced meal without sacrificing taste.

    Sloppy Joe Recipe with No Ketchup

    Ketchup is a staple in many sloppy joe recipes, but it’s not essential. Whether you’ve run out or simply prefer a different flavor profile, you can still create a delicious sauce from scratch. This easy adjustment is perfect for keeping your beginner-friendly recipes exciting.

    Here are some excellent alternatives:

    • Tomato Paste & Vinegar: Combine tomato paste with a touch of apple cider vinegar or white vinegar. Add a pinch of sugar to balance the acidity. This creates a rich, tangy base.
    • Canned Crushed Tomatoes: Use crushed tomatoes for a fresh, robust tomato flavor. You’ll still want to add a bit of sweetness (like brown sugar) and tang (vinegar or mustard) to mimic ketchup’s balance.
    • Tomato Sauce + Seasonings: A can of plain tomato sauce works well. Enhance it with extra Worcestershire sauce, a dash of hot sauce, and a teaspoon or two of brown sugar. This ensures your sloppy joe has that signature sweet and savory balance.

    Adding Extra Vegetables

    It’s easy to boost the nutrition and texture of your sloppy joes by adding extra vegetables. This is a fantastic way to create more well-rounded, family-friendly meals and use up any produce lingering in your fridge.

    Consider these easy-to-add vegetables:

    • Bell Peppers: Diced red, green, or yellow bell peppers add color, crunch, and a subtle sweetness.
    • Carrots: Finely diced carrots add a touch of sweetness and extra nutrients. They blend right into the sauce.
    • Zucchini: Grated or finely diced zucchini is nearly invisible in the sauce but adds moisture and health benefits.
    • Mushrooms: Sliced mushrooms add an earthy, umami depth.

    When to Add: For the best texture, sauté tougher vegetables like carrots and bell peppers with the onion. Add softer vegetables, such as zucchini or mushrooms, during the simmering stage to prevent them from becoming mushy. Adding vegetables significantly increases the nutritional density of your meal, and it’s a great strategy for meal prep, making your batches even more versatile [1].

    What Should You Serve with Sloppy Joes?

    So, you’ve mastered the best sloppy joe recipe! Now, let’s find the perfect sides to serve with this family-friendly favorite. The right dish can elevate your meal from a simple dinner into a complete, satisfying feast. These easy recipes will help you confidently create a flavorful meal every time.

    Classic Comfort Sides

    Since sloppy joes are a nostalgic comfort food, classic comfort sides are a natural fit. These tried-and-true recipes are sure to please everyone at your table.

    • Crispy French Fries or Tater Tots: A timeless companion, these salty, crunchy delights provide the perfect textural balance to the sweet and savory sloppy joe meat. For a slightly healthier option, try baking them. It’s no surprise they’re one of America’s favorite side dishes [2].
    • Creamy Coleslaw: A refreshing coleslaw provides a wonderful, tangy contrast. Its crisp cabbage and creamy dressing cut through the richness of the meat, adding a cool crunch to every bite.
    • Macaroni and Cheese: For the ultimate comfort food pairing, you can’t go wrong with a warm bowl of mac and cheese. The creamy, cheesy texture makes it a hearty and satisfying addition that’s always a crowd-pleaser.
    • Crunchy Potato Chips: When time is short, nothing is easier than a bowl of your favorite potato chips. They provide a satisfying, salty crunch with zero prep time, making them the simplest way to complete your meal.

    Fresh and Flavorful Vegetable Sides

    To balance the richness of the main dish, consider a lighter, vegetable-based side. These fresh and flavorful options are easy to prepare and help create a more well-rounded meal.

    • Simple Green Salad: A crisp green salad tossed in a light vinaigrette brightens the entire plate. It adds a welcome freshness and crunch that cuts through the savory sauce.
    • Roasted Vegetables: Roasting vegetables like broccoli, green beans, or sweet potatoes brings out their natural sweetness and earthiness. Simply toss them with olive oil, salt, and pepper, then roast until tender and slightly caramelized for a nutritious and delicious side.
    • Corn on the Cob or Steamed Corn: Whether you serve it on the cob or as steamed kernels, sweet corn adds a pop of natural sweetness and texture. It’s a quick, satisfying choice that contrasts nicely with the savory sloppy joe recipe.

    Quick and Simple Additions

    For those busy weeknights, sometimes the best sides require almost no effort at all. These simple additions add extra flavor and texture to your meal without any fuss.

    • Pickle Spears or Chips: The bright, vinegary tang of a pickle offers a fantastic, zesty crunch that acts as the perfect counterpoint to the rich meat sauce in your sloppy joe recipe.
    • Fresh Fruit Salad: A colorful fruit salad with berries, melon, or grapes provides a refreshing and sweet finish to the meal. It’s an easy and healthy way to add a light, balancing side dish.

    How Do You Store and Reheat Leftover Sloppy Joe Meat?

    Making delicious homemade sloppy joes is perfect for meal prepping, allowing you to enjoy your hard work more than once. Storing and reheating your sloppy joe meat is simple, ensuring you have a quick, flavorful meal ready whenever you need it.

    This is a great strategy for busy families and anyone looking for easy recipes to make mealtime less stressful. Let’s explore how to keep your leftovers tasty and safe to eat!

    Storing Your Leftover Sloppy Joe Meat

    To keep your leftover sloppy joe recipe fresh and safe, proper storage is essential. The first step is to always let the meat cool down before putting it away, as this helps prevent bacterial growth.

    For Refrigerator Storage:

    • Cool First: Allow the cooked sloppy joe meat to cool to room temperature. For safety, this should happen within two hours of cooking.
    • Use Airtight Containers: Transfer the cooled meat mixture into a clean, airtight container.
    • Refrigerate Promptly: Store the container in the refrigerator for up to 3 to 4 days. [3] This sets you up for quick meals later in the week!

    For Freezer Storage:

    • Cool and Portion: Once cooled, divide the sloppy joe meat into single-serving or family-sized portions for easier use later.
    • Freezer-Safe Containers: Place portions in airtight freezer bags or containers. Be sure to squeeze any excess air from bags to prevent freezer burn.
    • Freeze Duration: You can safely freeze sloppy joe meat for up to 2 to 3 months for the best quality. [4]
    • Thawing: When you’re ready to use it, thaw the frozen meat overnight in the refrigerator. For a quicker option, use your microwave’s defrost setting.

    Reheating Sloppy Joe Meat for Delicious Results

    When you’re ready for another meal, reheating your leftover homemade sloppy joes is easy. This means less time cooking and more time enjoying! For safety, always reheat the meat until it is steaming hot throughout.

    On the Stovetop:

    • Gentle Heat: Place the thawed sloppy joe meat in a saucepan or skillet and warm it over medium-low heat.
    • Add Moisture: If the mixture looks dry, add a splash of water or beef broth to restore its saucy texture.
    • Stir Often: Stir frequently until the meat is heated through, reaching an internal temperature of 165°F (74°C). [5]

    In the Microwave:

    • Microwave-Safe Dish: Put the sloppy joe meat in a microwave-safe dish and cover it loosely to prevent splatters.
    • Short Intervals: Heat on high for 1-2 minutes, stir well, and then continue heating in 30-second intervals until it’s fully heated.
    • Check Temperature: Make sure the meat reaches an internal temperature of 165°F (74°C).

    Important Food Safety Tips

    Your safety is our priority. Following these simple food handling rules will ensure every meal is both delicious and worry-free.

    • Cool Quickly: Never leave cooked food at room temperature for more than two hours.
    • Reheat Thoroughly: Always reheat leftovers to an internal temperature of 165°F (74°C) to kill any harmful bacteria.
    • One Reheat Rule: For the best quality and safety, you should only reheat leftover sloppy joe meat once.
    • Trust Your Senses: If the meat smells off, has an unusual appearance, or you have any doubts about its freshness, it is safest to discard it.

    By following these simple meal prep tips, you can ensure you always have a fantastic, flavorful meal made easy and ready to enjoy. This approach helps transform meal planning from a chore into a stress-free part of your routine.

    Frequently Asked Questions About This Sloppy Joe Recipe

    What is sloppy Joe sauce made of?

    Sloppy Joe sauce is the heart of the classic American sandwich, known for its signature blend of sweet, tangy, and savory flavors. This easy recipe uses common pantry staples to create a delicious sauce from scratch.

    The main ingredients for a classic homemade sloppy Joe sauce include:

    • Tomato Base: Often ketchup, tomato paste, or tomato sauce, this ingredient provides a rich, foundational taste.
    • Sweetener: Brown sugar or honey balances the tanginess, creating the signature sticky-sweet flavor.
    • Acidity: Apple cider vinegar or mustard adds a zesty kick that brightens the overall taste.
    • Savory Enhancers: Worcestershire sauce provides depth and umami—a little dash goes a long way.
    • Aromatics: Sautéed onion and garlic build a flavorful foundation for a comforting taste.
    • Spices: Chili powder, paprika, or a pinch of red pepper flakes can add warm, subtle heat.

    This combination results in a rich, spoonable sauce that perfectly coats the ground meat, making every bite flavorful and satisfying. Best of all, it’s incredibly simple to whip up.

    How do you make old fashioned sloppy joes?

    Making old-fashioned sloppy joes is straightforward, relying on classic ingredients and simple cooking methods. Following these traditional steps will help you achieve the nostalgic, comforting flavor everyone loves.

    Here’s the basic approach for these family-friendly meals:

    1. Brown the Ground Meat: Start by browning ground beef (or your preferred meat) in a large skillet, then drain any excess fat.
    2. Sauté Aromatics: Add diced onions and garlic to the pan and cook until soft and fragrant to build the flavor foundation.
    3. Stir in Sauce Ingredients: Whisk together the tomato base, sweetener, vinegar, mustard, and spices, then pour the mixture over the browned meat and aromatics.
    4. Simmer to Perfection: Bring the mixture to a gentle simmer and let it cook for 15-20 minutes. This allows the flavors to meld and the sauce to thicken.
    5. Assemble: Serve the hot, saucy meat mixture on toasted hamburger buns for a quick and simple meal perfect for any night.

    This simple process ensures a rich, savory, and perfectly balanced sloppy Joe. It’s an easy recipe that consistently delivers delicious results, making it ideal for busy families and beginner cooks.

    Can I make this sloppy joe recipe with ground turkey?

    Yes, this sloppy Joe recipe works wonderfully with ground turkey. It’s a fantastic substitution for a leaner option and creates a slightly lighter, yet still balanced, meal.

    Here are a few tips for using ground turkey:

    • Cooking Time: Ground turkey often cooks faster than ground beef, so keep a close eye on it to prevent overcooking.
    • Add Moisture: Since ground turkey is leaner, it can sometimes be dry. Consider adding a tablespoon of olive oil when browning the meat to help keep it moist.
    • Flavor Boost: Turkey has a milder flavor than beef, so be generous with aromatics like onion and garlic. You can also add a pinch more of your favorite spices to enhance the taste.
    • Texture: As the turkey browns, break it up well to ensure a consistent, crumbly texture.

    Using ground turkey makes this recipe versatile, allowing you to tailor it to your dietary preferences. The delicious sauce ensures the flavor remains rich and satisfying.

    What’s the difference between Manwich and homemade sloppy joes?

    While both Manwich and homemade sloppy joes make for a delicious meal, they differ significantly in ingredients, flavor, and preparation. The primary tradeoff is control and freshness (homemade) versus ultimate convenience (Manwich).

    Here’s a look at the key differences:

    • Ingredients:
      • Homemade: Uses fresh ingredients like ground meat and real vegetables, plus pantry staples for the sauce. You know exactly what goes into your meal.
      • Manwich: A convenient, pre-made sauce mix containing a blend of tomato puree, high-fructose corn syrup, and seasonings [6]. You just add it to cooked ground meat.
    • Flavor Profile:
      • Homemade: Offers a rich, complex, and customizable flavor. You can easily adjust the sweetness, tanginess, and spice to your liking.
      • Manwich: Provides a distinct, consistent flavor that is often sweeter and tangier than homemade versions. Its taste is classic and familiar to many.
    • Preparation Time:
      • Homemade: Requires more time for chopping vegetables and making the sauce from scratch, typically taking 30–40 minutes.
      • Manwich: Extremely quick and takes only 10–15 minutes. Simply brown the meat, drain it, and stir in the canned sauce.
    • Nutritional Control:
      • Homemade: Gives you full control over the amount of sugar, salt, and fat, allowing for healthier modifications.
      • Manwich: The nutritional content is fixed and can be higher in sodium and sugar than a comparable homemade sauce.

    Ultimately, the choice is yours. A homemade sloppy joe allows for a more creative and flavorful meal, while Manwich is the perfect solution when you need a quick, no-fuss dinner.


    Sources

    1. https://www.choosemyplate.gov/eat-healthy/vegetables
    2. https://yougov.com/topics/food/articles-reports/2021/07/28/what-are-americas-favorite-side-dishes
    3. https://www.fsis.usda.gov/food-safety/safe-food-handling-and-preparation/food-safety-basics/how-chill-food-properly
    4. https://www.fsis.usda.gov/food-safety/safe-food-handling-and-preparation/food-safety-basics/freezing-and-food-safety
    5. https://www.fsis.usda.gov/food-safety/safe-food-handling-and-preparation/food-safety-basics/how-reheat-food-safely
    6. https://www.conagrabrands.com/our-brands/manwich/original

  • Classic Stuffed Peppers Recipe: A Simple Step-by-Step Guide

    Classic Stuffed Peppers Recipe: A Simple Step-by-Step Guide

    A classic stuffed peppers recipe involves hollowing out bell peppers and filling them with a savory mixture of cooked ground beef, rice, onions, and seasonings. The peppers are then typically topped with a simple tomato sauce and cheese and baked in the oven until the peppers are tender and the filling is heated through, creating a delicious and complete meal.

    Are you looking for a hearty dinner that’s comforting but not complicated? Planning family-friendly meals everyone will enjoy is a common challenge, especially on busy weeknights. The good news is that an impressive meal can be surprisingly simple, even for beginner cooks. Get ready to rediscover a true classic: stuffed peppers, a perfect example of flavorful meals made easy.

    At Recipesmondial, we believe cooking should be a stress-free and enjoyable experience. That’s why we created this ultimate guide to classic stuffed bell peppers. Our simple recipe walks you through each step, ensuring great results whether you’re building confidence or just looking for approachable home cooking. We want to help you cook confidently and turn basic ingredients into a truly special meal.

    In this step-by-step guide, you’ll learn everything from choosing the perfect bell peppers to mastering a savory filling and baking it to perfection. We also share clever variations, including vegetarian options and meal prep tips, to help this dish become a staple in your rotation. Say goodbye to complicated recipes and hello to a simple, satisfying dinner guaranteed to please.

    Why You’ll Love This Easy Stuffed Peppers Recipe

    Two golden-brown classic stuffed bell peppers, garnished with parsley, served on a wooden board in a warm kitchen setting.
    A professional food photography shot, photorealistic, high-quality food magazine photo, featuring two perfectly baked classic stuffed bell peppers arranged on a rustic wooden cutting board. The peppers are vibrant, glossy, and slightly browned on top, overflowing with a rich, savory filling of seasoned ground meat and rice, topped with melted cheese and fresh chopped parsley. A hint of steam rises gently from one pepper. The background is a softly blurred, warm kitchen setting, emphasizing an inviting and comforting meal. Natural, warm overhead lighting. Shot at eye level, making the dish appear approachable and delicious.

    Looking for a reliable, delicious dinner that impresses without the stress? This classic stuffed peppers recipe is a true crowd-pleaser, perfect for busy weeknights or a cozy family meal. Our step-by-step guide is designed for home cooks, making the entire process enjoyable and straightforward.

    Here’s why you’ll fall in love with this easy stuffed peppers recipe:

    • Simple Dinner Solution: This recipe simplifies mealtime by offering a complete, flavorful meal in just one dish. It’s the perfect go-to for an easy weeknight dinner.
    • Beginner-Friendly Cooking: Forget overwhelming instructions. Our clear, approachable guide builds your confidence in the kitchen, helping you master this classic dish with ease.
    • Unforgettable Flavor: Every bite is a perfect blend of tender bell peppers, savory meat, and a rich tomato sauce. It’s a satisfying and flavorful meal, made easy.
    • Perfect for Families: This is a classic family-friendly meal. Both kids and adults love the colorful presentation and comforting taste, making it a great way to serve more vegetables.
    • Customizable and Versatile: Easily adapt this recipe to suit your tastes or what’s in your pantry. Try a vegetarian filling, use a different grain, or add your favorite spices. Our meal prep tips also help you plan.
    • Stress-Free Prep: We guide you through each step, removing the guesswork from planning and cooking. You can relax and enjoy the process from start to finish.
    • Nourishing and Wholesome: Enjoy a balanced dish packed with protein and fresh vegetables. It’s a satisfying and hearty meal for any day of the week.

    This stuffed peppers recipe is a perfect example of our commitment at Recipesmondial: providing simple, delicious recipes for every home cook. Get ready to turn everyday ingredients into a memorable meal!

    What Ingredients Do You Need for Classic Stuffed Peppers?

    A flat lay of fresh, colorful ingredients for classic stuffed peppers, including bell peppers, ground meat, rice, and herbs, arranged on a light kitchen counter.
    A professional food photography shot, photorealistic, high-quality food magazine photo, featuring a beautiful flat lay of all the fresh ingredients for classic stuffed peppers. The layout is clean and organized on a light, neutral-toned countertop. Components include whole, vibrant bell peppers (red, yellow, orange, green), a bowl of uncooked ground beef, a bowl of uncooked rice, a can of crushed tomatoes, a head of garlic, a whole onion, fresh parsley and basil, shredded cheese, and a small dish of spices. Each ingredient is clearly visible, fresh, and appealing. Bright, even overhead lighting.

    Choosing the Right Bell Peppers

    The first step to making classic stuffed peppers is choosing the right bell peppers, as they are the star of this easy recipe.

    You can use any color you prefer. Green bell peppers have a traditional, slightly bitter taste, while red, yellow, and orange varieties are sweeter and soften beautifully during baking.

    When selecting peppers for stuffing, look for large, firm ones with a flat bottom. This shape helps them stand upright, which makes them easier to fill and ensures they hold their savory contents in the oven.

    • Green Bell Peppers: These are the classic choice. They have a robust, earthy flavor.
    • Red, Yellow, or Orange Bell Peppers: Opt for these if you prefer a sweeter taste. They also add a vibrant pop of color.
    • Size Matters: Select larger peppers, as they are easier to stuff and provide a more satisfying portion.
    • Stability: Pick peppers with a flat bottom. This helps them stay stable in your baking dish.

    Pro Tip: Remove the core and seeds carefully, then give the peppers a quick rinse to prepare them for stuffing.

    For the Savory Filling

    This hearty and flavorful filling is the heart of the dish, creating a satisfying meal the whole family will enjoy.

    Seasoned Ground Beef and fluffy rice create the base, while aromatics and tomato add depth and moisture. This simple combination results in a balanced and delicious stuffing.

    • Ground Beef: 1 pound (450g) lean ground beef. This forms the delicious base.
    • Rice: 1 cup (185g) uncooked white rice. Long-grain or medium-grain works well. We cook it partially first.
    • Onion: 1 medium onion, finely chopped. It adds a lovely sweetness and depth.
    • Garlic: 2 cloves garlic, minced. Garlic is essential for rich flavor.
    • Canned Diced Tomatoes: 1 (14.5 ounce / 411g) can, undrained. These add moisture and a tangy element.
    • Tomato Paste: 2 tablespoons. It intensifies the tomato flavor.
    • Beef Broth: 1/2 cup (120ml). This adds savory liquid to the filling.
    • Worcestershire Sauce: 1 tablespoon. It brings a umami punch.
    • Dried Oregano: 1 teaspoon. A classic herb for Italian-inspired dishes.
    • Salt: 1/2 teaspoon, or to taste.
    • Black Pepper: 1/4 teaspoon, or to taste. Freshly ground is always best.

    Substitution Idea: For a lighter version, feel free to swap ground beef for ground turkey or chicken. You can also use pre-cooked rice to save time.

    For the Simple Tomato Sauce and Topping

    A simple tomato sauce is poured around the peppers before baking. It keeps them moist, adds extra flavor, and comes together in minutes. To finish, a generous layer of melted cheese creates the perfect golden, bubbly topping.

    • Tomato Sauce: 1 (15 ounce / 425g) can. This forms the base of our savory sauce.
    • Water or Beef Broth: 1/2 cup (120ml). This thins the sauce slightly.
    • Brown Sugar: 1 tablespoon. It balances the acidity of the tomatoes.
    • Shredded Mozzarella Cheese: 1 cup (113g). This creates a gooey, golden topping.

    Variation Tip: Experiment with different cheeses! Cheddar, Monterey Jack, or a blend of Italian cheeses all work beautifully. You can also add a pinch of red pepper flakes to the sauce for a subtle kick.

    Gathering these simple ingredients is the first step toward a delicious, easy-to-make dinner!

    How to Make Stuffed Peppers: A Step-by-Step Guide

    A pair of hands in a home kitchen carefully filling a halved red bell pepper with a seasoned meat and rice mixture.
    A professional food photography shot, photorealistic, high-quality food magazine photo, capturing a home cook’s hands actively stuffing a vibrant red bell pepper with the prepared savory meat and rice filling. The scene is set in a clean, bright, and inviting home kitchen with warm, natural light. The cook’s hands are visible, demonstrating the approachable nature of the task. Other prepped ingredients, like a baking dish and more empty bell pepper halves, are softly blurred in the background, keeping the focus on the hands and the stuffing process. The filling looks moist and rich. Eye-level shot.

    Step 1: Prepare the Bell Peppers

    First, get the bell peppers ready. This essential prep work ensures your stuffed peppers cook evenly and become perfectly tender.

    • Choose Your Peppers: Select 6 medium-sized bell peppers. Any color works, but red, yellow, and orange varieties are typically sweeter.
    • Wash and Halve: Rinse the peppers under cool water, then carefully slice each one in half lengthwise.
    • Remove Seeds and Core: Use a small spoon to scoop out the seeds and white membrane from each half, creating a clean cavity for the filling.
    • Optional: Blanch for Softer Peppers: To ensure an extra-tender texture, you can blanch the peppers. Bring a large pot of salted water to a boil, add the pepper halves, and cook for 3–5 minutes. This pre-cook step prevents them from being too firm after baking. Drain them well and set aside. This is a great tip if you’re new to cooking!

    Step 2: Cook the Beef and Rice Filling

    Next, create the savory filling. This is the key to a successful stuffed bell pepper recipe, and it will make your kitchen smell amazing.

    1. Brown the Beef: In a large skillet, heat 1 tablespoon of olive oil over medium-high heat. Add 1 pound of lean ground beef and break it apart with a spoon as it cooks. Continue cooking until the beef is fully browned with no pink remaining.
    2. Drain Excess Fat: Carefully drain the excess fat from the skillet. This step makes the filling lighter.
    3. Sauté Aromatics: Add 1 diced onion and 2 cloves of minced garlic to the beef. Sauté for 5–7 minutes, until the onion is soft and translucent.
    4. Combine Ingredients: Stir in 1 cup of cooked white rice (leftover or freshly cooked), 1 (14.5-ounce) can of undrained diced tomatoes, 1 teaspoon of dried oregano, 1 teaspoon of dried basil, 1/2 teaspoon of salt, and 1/4 teaspoon of black pepper.
    5. Simmer to Blend Flavors: Mix all ingredients thoroughly and let the filling simmer for 5 minutes. This allows the flavors to meld together perfectly.

    Chef’s Tip for Beginner Cooks: Pre-cooking the rice ensures it’s tender. If you use uncooked rice, you will need to add more liquid and increase the baking time. Using cooked rice is the best way to get consistent results for this easy recipe.

    Step 3: Assemble the Stuffed Peppers

    Now it’s time to assemble the peppers. This is a simple process that gets your family-friendly meal ready for the oven.

    1. Prepare the Baking Dish: Pour 1/2 cup of tomato or marinara sauce into the bottom of a 9×13-inch baking dish. This adds moisture and prevents sticking.
    2. Fill Each Pepper Half: Spoon the beef and rice mixture generously into each pepper half. Avoid packing the filling too tightly.
    3. Arrange in the Dish: Place the filled pepper halves cut-side up in the prepared baking dish. Arrange them snugly to help them stay upright.
    4. Top with More Sauce: Spoon a little more tomato sauce over the top of the filling in each pepper to keep them moist during baking.

    Quick Idea: Have extra filling? Save it for a quick lunch or serve it as a side dish. It’s delicious on its own!

    Step 4: Bake the Peppers

    Finally, it’s time to bake. This last step melds the flavors and makes your stuffed bell peppers wonderfully tender.

    1. Preheat Oven: Set your oven to 375°F (190°C). A properly preheated oven ensures everything cooks evenly.
    2. First Bake (Covered): Cover the baking dish tightly with aluminum foil and bake for 30 minutes. This initial step steams the peppers, making them tender.
    3. Add Cheese (Optional): Carefully remove the foil and sprinkle about 1 cup of shredded mozzarella or cheddar cheese over the tops.
    4. Second Bake (Uncovered): Return the dish to the oven and bake uncovered for another 15–20 minutes. The peppers are done when they are fork-tender and the cheese is melted and bubbly.
    5. Rest Before Serving: Let the peppers rest for 5–10 minutes after baking. This allows the juices to settle, making them easier to serve.

    Pro-Tip for Flavorful Meals: For a golden, bubbly topping, place the peppers under the broiler for 1–2 minutes after baking. Watch them closely to prevent burning. This adds a beautiful finish to your flavorful meal!

    What to put in stuffed peppers?

    Easy Recipe Variations

    Stuffed peppers are a versatile dish, perfect for culinary creativity. You can adapt this classic recipe to suit your tastes, use ingredients you have on hand, or create a fun meal the whole family will enjoy. These straightforward swaps simplify meal planning without the need for complex recipes.

    • Switch Your Protein: While ground beef is classic, feel free to use other ground meats.
      • Ground Turkey or Chicken: For a lighter option, these are excellent choices. They cook quickly and absorb flavors beautifully.
      • Ground Pork or Sausage: For a richer flavor, try ground pork or sausage. Italian sausage works wonderfully for a different twist.
    • Add More Veggies: Boost the nutrition and texture of your filling.
      • Mushrooms: Sautéed diced mushrooms add an earthy depth.
      • Zucchini or Spinach: Finely diced zucchini or wilted spinach blend seamlessly into the filling.
      • Corn or Peas: Introduce a touch of sweetness and color.
    • Spice it Up: Experiment with different herbs and spices to change the flavor profile.
      • Italian Herbs: Add oregano, basil, and a pinch of fennel for an Italian flair.
      • Smoked Paprika: A smoky note pairs well with the beef and tomato.
      • Garlic Powder and Onion Powder: These staple seasonings always enhance flavor.

    Vegetarian Stuffed Peppers

    Creating delicious vegetarian stuffed peppers is surprisingly simple. It’s a fantastic option for a healthy, balanced meal that’s also perfect for family dinners. With fillings this flavorful, you won’t miss the meat.

    Here are some simple, hearty bases to make your stuffed peppers vegetarian:

    • Lentil Love: Packed with protein, cooked brown or green lentils provide a wonderful texture. Mix them with diced vegetables and a tomato base for a satisfying filling [1].
    • Quinoa Power: As a complete protein, cooked quinoa offers a light, fluffy texture. Combine it with black beans, corn, and your favorite seasonings.
    • Mushroom Magic: Finely chopped mushrooms, sautéed until deeply browned, mimic the texture of ground meat. Mix them with breadcrumbs and herbs for a savory filling.
    • Bean Blast: A mix of black beans, kidney beans, and corn creates a robust filling. Add some salsa and spices for a zesty flavor.

    Remember to adjust seasonings to your taste. A little extra cheese or breadcrumbs can help bind your vegetarian fillings.

    Stuffed Peppers Without Rice

    If you’re looking for rice alternatives, you have plenty of great choices. These options offer dietary flexibility and can introduce new textures and flavors to your classic stuffed bell peppers, making it easy to customize your meal.

    Consider these simple and delicious rice substitutes:

    • Quinoa: Cooked quinoa offers a protein boost and a texture similar to rice, making it a great choice for a healthy, balanced meal.
    • Cauliflower Rice: For a low-carb option, use riced cauliflower. Sauté it lightly before mixing with your other filling ingredients to help remove excess moisture.
    • Couscous: This tiny pasta cooks very quickly and provides a soft, delightful texture, making it a simple addition to your savory filling.
    • Breadcrumbs or Crushed Crackers: Use these to bind your filling. They add a comforting texture and are perfect for budget-friendly cooking.
    • Lentils: As mentioned, lentils are an excellent substitute that adds heartiness and protein.
    • Barley: A nutritious grain, cooked pearl barley offers a chewy texture that holds up well in baked dishes.

    When swapping ingredients, taste your filling before baking and adjust seasonings as needed to ensure a flavorful result.

    Mexican-Style Stuffed Peppers

    Transform your classic stuffed peppers into a vibrant, Mexican-inspired dish that brings global comfort food right to your kitchen. The bold and satisfying flavors are sure to make this a new family favorite.

    To create Mexican-style stuffed peppers, simply adjust your filling ingredients:

    • Spices: Add generous amounts of chili powder, cumin, and a pinch of cayenne pepper. A dash of smoked paprika enhances the flavor.
    • Beans: Include black beans or kidney beans. Rinse them well before adding them to your filling.
    • Corn: Fresh, frozen, or canned corn adds sweetness and texture.
    • Salsa or Diced Tomatoes with Chilies: Use these in place of plain tomato sauce in your filling for a zesty kick.
    • Cheese: Top your peppers with Monterey Jack, cheddar, or a Mexican blend cheese.
    • Garnish: Finish with fresh cilantro, a dollop of sour cream or Greek yogurt, and a squeeze of lime juice after baking.

    These variations prove just how versatile stuffed peppers can be, allowing you to create a quick and flavorful meal every time!

    Tips for the Perfect Stuffed Bell Peppers

    How to Prevent Soggy Peppers

    Nobody wants a soggy bell pepper! Achieving that perfect tender-crisp texture for your stuffed bell peppers is easier than you think. Here are our top tips to ensure your stuffed peppers hold their shape and flavor beautifully.

    • Pre-Cook Your Peppers: A quick par-cook softens the peppers slightly before you stuff them, which helps them cook evenly with the filling. You can either boil them for 3-5 minutes or bake them empty for 10-15 minutes.
    • Don’t Overfill: Avoid overstuffing the peppers, as this can make them collapse and prevent the filling from cooking thoroughly. Be sure to leave a small gap at the top.
    • Drain Your Filling: Excess liquid in the filling, especially from meat, will make the peppers mushy. Be sure to drain it well before stuffing to prevent the pepper walls from getting soggy.
    • Control Baking Time: Follow the recipe’s baking time closely to avoid soft, overcooked peppers. For a nicely browned and caramelized top, bake them uncovered for the last 10-15 minutes.

    Meal Prep and Storage Instructions

    Our classic stuffed peppers recipe is perfect for meal prep, saving you precious time on busy weeknights. You can easily prepare these flavorful, family-friendly dishes ahead of time.

    • Assemble Ahead: To save time, you can fully assemble the stuffed peppers, cover them tightly, and refrigerate for up to 2 days before baking. Just add an extra 15-20 minutes to the baking time to account for the cold temperature.
    • Freezing Cooked Peppers: Once cooked, stuffed bell peppers freeze beautifully. First, let them cool completely. Then, wrap each pepper individually in plastic wrap and store them in a freezer-safe bag or container for up to 3 months.
    • Reheating from Frozen: To reheat, remove the wrapping and place the frozen peppers in a baking dish. Cover with foil and bake at 350°F (175°C) for 45-60 minutes, or until heated through. You can also microwave individual peppers on high for 5-7 minutes.
    • Refrigerating Leftovers: Store leftover cooked stuffed peppers in an airtight container in the refrigerator for 3-4 days. Reheat them in the oven or microwave.

    What to Serve with Stuffed Peppers

    While stuffed peppers are a satisfying meal on their own, pairing them with a simple side dish can elevate your dinner. These suggestions will help you create a balanced and delicious experience for any family meal.

    • Fresh Green Salad: A crisp green salad with a light vinaigrette provides a refreshing contrast and is a healthy, quick addition to your meal.
    • Crusty Bread: A warm, crusty baguette or Italian bread is perfect for soaking up any delicious sauce, making the meal extra comforting.
    • Steamed or Roasted Vegetables: Simply seasoned vegetables like broccoli, green beans, or asparagus add extra nutrients and a pleasant texture that complements the rich flavors of the peppers.
    • Simple Grains: If your stuffed peppers don’t contain rice, a side of quinoa or couscous works wonderfully to absorb the savory sauce.

    Frequently Asked Questions

    How do you make a simple stuffed peppers recipe?

    Making stuffed peppers is wonderfully straightforward. At Recipesmondial, we specialize in easy recipes, and this classic dish is no exception. It’s a perfect beginner-friendly meal that the whole family will enjoy.

    Here is a quick overview of the steps:

    • Prepare the Peppers: First, wash your bell peppers. Slice them in half lengthwise, then remove the seeds and membranes. This creates the perfect little bowls for your filling.
    • Make the Filling: Next, cook ground meat (like beef or turkey) with onions and garlic until browned. Stir in cooked rice, tomato sauce, and your favorite seasonings. This savory mixture is the heart of the dish.
    • Stuff and Sauce: Fill each pepper half generously with the meat and rice mixture and place them in a baking dish. Pour a little tomato sauce around the peppers and sprinkle cheese on top for extra flavor.
    • Bake to Perfection: Finally, bake the stuffed peppers until they are tender and the filling is heated through. The result is a delicious and easy meal every time.

    Can you make stuffed peppers ahead of time?

    Yes, absolutely! Stuffed peppers are an excellent choice for meal prep. Preparing them in advance saves time during the week and makes it easier to serve a delicious, stress-free dinner.

    You have a couple of great options for making them in advance:

    • Prepare the Filling Only: Cook the meat and rice filling, let it cool completely, and store it in an airtight container in the refrigerator for up to 3 days. When you’re ready, simply stuff fresh peppers and bake as directed. This method helps keep the peppers crisp.
    • Assemble Fully: For a grab-and-bake option, you can assemble the peppers completely. Stuff them, place them in a baking dish, and cover tightly with plastic wrap or foil. Refrigerate for up to 24 hours. Just add a few extra minutes to the baking time when cooking straight from the refrigerator.
    • Freeze for Later: For longer storage, freeze unbaked stuffed peppers. Place the fully assembled peppers on a baking sheet and freeze until solid. Then, transfer them to a freezer-safe bag or container. They will last for up to 3 months. Thaw them overnight in the refrigerator before baking, or bake from frozen by adding significant extra cooking time.

    These practical tips from Recipesmondial make home cooking even more convenient and approachable.

    Do you have to cook the meat before stuffing the peppers?

    Yes, for the best results, you should always pre-cook ground meat before stuffing the peppers. This simple step is crucial for several key reasons, ensuring your dish is both flavorful and well-cooked.

    • Enhances Flavor: Browning the meat develops a rich, savory flavor that creates a delicious foundation for the filling. Raw meat cooked inside the pepper will not be as flavorful.
    • Removes Excess Fat: Pre-cooking allows you to drain off excess grease from the meat. This important step prevents the final dish from becoming oily or soggy.
    • Ensures Even Cooking: Fully cooking the ground meat beforehand guarantees the filling is safe to eat. It also ensures the peppers don’t get overcooked while you wait for raw meat to reach a safe temperature. This way, the filling and peppers are perfectly done at the same time.
    • Better Texture: Sautéing ground meat creates a pleasant, crumbly texture. If you use raw meat, it can sometimes clump together or turn rubbery when baked inside the pepper.

    Following this simple, beginner-friendly tip helps you get delicious and reliable results every time.

    How do I make a healthy stuffed peppers recipe?

    It’s easy to make a healthy stuffed peppers recipe with a few simple substitutions. While stuffed peppers are already quite wholesome, you can boost their nutritional value to create a delicious and balanced meal.

    Consider these simple swaps and tips:

    • Choose Leaner Protein: Instead of ground beef, use lean ground turkey or chicken to reduce saturated fat. Plant-based crumbles are also a great vegetarian alternative.
    • Boost Veggies: Finely dice extra vegetables like carrots, zucchini, mushrooms, or spinach and add them to the filling to increase vitamins, minerals, and fiber.
    • Opt for Whole Grains: Swap white rice for a higher-fiber option like brown rice, quinoa, or lentils. Whole grains keep you feeling full longer, and quinoa also adds extra protein.
    • Control Sodium: Use low-sodium broth and tomato sauce. Build flavor with herbs and spices like garlic powder, oregano, and basil instead of relying only on salt.
    • Lighten the Cheese: If you’re adding cheese, choose a reduced-fat variety or simply use less. A small sprinkle on top is often all you need for great flavor.
    • Add Beans: Incorporate black beans or kidney beans into the filling for an easy and budget-friendly boost of plant-based protein and fiber.

    These simple adjustments help you create a flavorful meal that aligns with your health goals and makes home cooking work for your lifestyle.


    Sources

    1. https://www.hsph.harvard.edu/nutritionsource/food-features/lentils/
  • Easy Goulash Recipe: A Simple Step-by-Step Guide for Beginners

    Easy Goulash Recipe: A Simple Step-by-Step Guide for Beginners

    Goulash is a comforting stew made with beef, onions, and paprika. This easy goulash recipe is an American-style version featuring ground beef and macaroni cooked in a rich, savory tomato sauce. It’s a one-pot, family-friendly meal that is perfect for a quick weeknight dinner and comes together in about 30 minutes.

    Are you looking for a comforting, hearty meal that won’t keep you in the kitchen for hours? We understand. Planning family-friendly dinners can feel like a constant quest for easy, flavorful recipes. Many home cooks feel overwhelmed by complex instructions or lack confidence when trying a new dish. But what if we told you that a classic, deeply satisfying goulash is surprisingly simple to master?

    At Recipesmondial, our mission is to make home cooking a joy, not a chore. That’s why we’ve crafted this ultimate easy goulash recipe. Forget the intimidating jargon; our step-by-step guide will walk you through creating a delicious beef goulash perfect for any weeknight. Whether you’re a beginner or an intermediate cook seeking new simple dinner recipes, you’ll learn to create flavorful meals with confidence and ease.

    Get ready to transform simple ingredients into a rich, savory masterpiece. This beginner-friendly guide ensures you can cook without stress, creating a Hungarian goulash that tastes like it took hours to prepare. Let’s dive in and discover why this is the perfect goulash recipe for busy families!

    Why Is This The Perfect Goulash Recipe for Busy Families?

    For busy families, a delicious, satisfying dinner without the kitchen chaos can feel like a dream. This goulash recipe makes it a reality. More than just a meal, it offers a solution to common dinner dilemmas and is designed with your busy schedule in mind for a truly stress-free cooking experience.

    At Recipesmondial, we believe cooking should be enjoyable, not a chore. This easy goulash recipe helps you put a flavorful, comforting classic on the table while also saving you precious time. It transforms simple ingredients into a meal your family will request again and again.

    Why Our Goulash Recipe Stands Out for Busy Families

    This beef goulash is the perfect weeknight solution for your bustling household because it seamlessly combines ease, flavor, and practicality. It’s a marvel of approachable home cooking.

    • Effortless Preparation: Forget complex instructions. This simple recipe features clear, step-by-step guidance, so even beginner cooks can feel confident in the kitchen. There are no overwhelming technical terms.
    • Family-Friendly Flavors: With a rich, savory taste that appeals to all ages, goulash is a true crowd-pleaser. Its comforting, hearty flavors make it a go-to meal the whole family will love.
    • Time-Saving Solution: Designed for your busy schedule, this meal comes together quickly. By minimizing active cooking time, it allows you to enjoy more precious moments with your family.
    • Budget-Friendly Ingredients: This goulash uses everyday pantry staples, which helps keep grocery costs down. It’s an excellent choice for budget-conscious cooking because eating well shouldn’t break the bank.
    • Versatile and Adaptable: This recipe is flexible, so you can easily make substitutions to suit your family’s tastes. It’s also perfect for meal prep—simply double the batch for quick lunches or dinners later in the week.
    • Confidence Booster: Mastering this flavorful meal will build your kitchen skills and confidence. You’ll discover that cooking delicious, simple dishes without stress can be your new reality.

    This goulash recipe is a testament to the Recipesmondial promise: to provide delicious, reliable, and approachable recipes. It’s designed to help you move from uncertainty to confidence, so you can start enjoying your time in the kitchen again.

    What Ingredients Do You Need for Easy Beef Goulash?

    For the Goulash:

    This comforting beef goulash recipe uses simple, everyday ingredients to create a meal packed with flavor. You likely have many of these staples in your pantry already. Here’s what you’ll need to get started.

    • 1 ½ pounds beef chuck roast: Cut into 1-inch cubes. This cut is perfect for slow simmering.
    • 2 tablespoons olive oil: For browning beef and sautéing vegetables.
    • 1 large yellow onion: Chopped. It adds a sweet, aromatic base.
    • 3 cloves garlic: Minced. Essential for deep, savory flavor.
    • 2 tablespoons tomato paste: Adds a concentrated boost of tomato flavor.
    • 1 (28-ounce) can crushed tomatoes: Forms the rich, flavorful base of the sauce.
    • 2 cups beef broth: Enhances the meaty flavor and creates a perfect consistency.
    • 1 tablespoon Worcestershire sauce: Adds a layer of umami and depth.
    • 2 tablespoons sweet Hungarian paprika: The signature spice for authentic goulash.
    • 1 teaspoon dried thyme: A classic herb that complements beef beautifully.
    • 2 bay leaves: Infuses subtle, earthy notes as the goulash simmers.
    • 1 teaspoon salt: Adjust to taste.
    • ½ teaspoon black pepper: For a gentle warmth.
    • 12 ounces egg noodles: Or your favorite short pasta, cooked separately for serving.
    • Optional: Fresh parsley: Chopped, for a bright garnish.
    • Optional: Sour cream: Adds a dollop of creamy richness when serving.

    Ingredient Substitutions & Variations

    Don’t be afraid to make this recipe your own. Feel free to adjust the ingredients based on what you have on hand or what your family prefers. Use these simple variations to accommodate different tastes and dietary needs.

    • Beef Alternatives:
      • Ground Beef: Use 1 ½ pounds of ground beef instead of chuck roast for a quick meal. Brown it well and drain any excess fat.
      • Pork Shoulder: Cubed pork shoulder also works wonderfully for a rich, tender stew.
    • Vegetable Boost:
      • Carrots and Celery: Add 1 cup of diced carrots and 1 cup of diced celery with the onion for extra flavor and nutrition.
      • Bell Peppers: For added sweetness and color, add sliced bell peppers (any color) during the last 30 minutes of simmering.
      • Mushrooms: Sliced mushrooms are a great addition for an earthy flavor. They can also be used as a meat substitute for a vegetarian option.
    • Pasta Choices:
      • Different Short Pasta: Instead of egg noodles, any short pasta like macaroni, penne, or rotini will work well.
      • Gluten-Free Pasta: Simply use your favorite gluten-free pasta to make this a gluten-friendly dish.
    • Spice it Up (or Down!):
      • Smoked Paprika: For a deeper, smoky flavor, try using a mix of sweet and smoked paprika.
      • A Touch of Heat: Add a pinch of cayenne pepper or a dash of hot sauce if you enjoy a little kick.
    • Broth Options:
      • Vegetable Broth: If you’re out of beef broth, a good quality vegetable broth is an excellent substitute.
    • Dairy-Free Creaminess:
      • Coconut Cream: For a dairy-free topping, a swirl of full-fat coconut cream can replace sour cream, adding a subtle richness.

    How to Make Goulash: A Step-by-Step Guide

    A close-up of a rustic cast-iron pot filled with rich, simmering beef goulash with tender beef and colorful vegetables on a stovetop.
    A professional food photography, photorealistic, high-quality food magazine photo of a large, rustic cast-iron pot of rich, simmering beef goulash on a stovetop. The goulash is bubbling gently, showcasing tender chunks of beef, colorful pieces of red and green bell peppers, and a thick, savory paprika-infused sauce. Soft, warm steam is subtly rising from the pot, indicating deliciousness. The lighting is warm and inviting, highlighting the deep, appetizing colors and textures of the dish, creating a comforting home-cooked feel.

    Step 1: Brown the Beef and Sauté Aromatics

    This first step builds a deep, savory base for your goulash. First, you’ll brown the beef to create a rich crust, and then you’ll sauté aromatics like onion and garlic to add warmth and complexity. Don’t rush this process—it’s the key to a flavorful result.

    1. Prepare Your Pan: Place a large Dutch oven or heavy-bottomed pot over medium-high heat and add 1 tablespoon of olive oil. Allow the oil to become hot enough to shimmer, but not smoke.
    2. Brown the Beef: Add 1.5 pounds of cubed beef chuck, stew meat, or ground beef to the hot pan in a single layer. To avoid overcrowding the pan and steaming the meat, work in batches if necessary. Cook for 5-7 minutes, turning occasionally, until the beef is well-browned on all sides. A dark crust equals more flavor. Transfer the browned beef to a plate and set it aside, leaving the drippings in the pot.
    3. Sauté the Onions: Add the remaining 1 tablespoon of olive oil to the pot. Add 1 large chopped yellow onion and cook for 5-7 minutes, stirring often, until softened and translucent.
    4. Add Garlic: Stir in 3 cloves of minced garlic and cook for 1 minute more until fragrant. Be careful not to burn the garlic, as it can quickly turn bitter.

    Chef’s Tip: Properly browning meat triggers the Maillard reaction, a chemical process that creates hundreds of new flavor compounds. Don’t skip this step; it’s essential for the richest-tasting goulash.

    Step 2: Create the Savory Sauce

    Next, you’ll create the rich, savory sauce that forms the heart of the goulash. By combining spices and liquids in the same pot, you’ll capture all the flavor from the beef and aromatics, turning it into a cohesive and comforting sauce.

    1. Toast the Spices: Reduce the heat to medium-low. Add 2 tablespoons of sweet paprika, 1 teaspoon of dried oregano, 1/2 teaspoon of salt, and 1/4 teaspoon of black pepper to the pot. Stir constantly for 1 minute to toast the spices and release their aroma.
    2. Deglaze the Pan: Pour in 1/2 cup of beef broth. Use a wooden spoon to scrape up any flavorful browned bits stuck to the bottom of the pot.
    3. Add Liquid Ingredients: Stir in 1 (14.5-ounce) can of diced tomatoes with their juice, 1 (8-ounce) can of tomato sauce, and 1 tablespoon of Worcestershire sauce. For a deeper tomato flavor, add 1 tablespoon of tomato paste as well.
    4. Return the Beef: Add the browned beef back into the pot. Stir gently to ensure the beef is fully coated in the sauce.

    Substitution Idea: For a richer, slightly smoky flavor, you can use smoked paprika instead of sweet paprika. This offers a lovely twist for those who enjoy a bolder taste.

    Step 3: Simmer to Perfection

    This step requires patience, but the reward is worth it. A long, gentle simmer makes the beef incredibly tender while allowing the flavors to meld into a rich, cohesive sauce. This slow cooking process is what creates that classic, comforting goulash taste.

    1. Bring to a Simmer: Increase the heat to medium-high and bring the sauce to a gentle bubble.
    2. Reduce Heat and Cover: Immediately reduce the heat to low to maintain a gentle simmer, not a boil. Cover the pot with a tight-fitting lid.
    3. Cook Until Tender: Simmer the goulash for 1.5 to 2 hours, stirring occasionally to prevent sticking. The beef is ready when it is fork-tender and easily falls apart. This slow cooking time is essential for maximum tenderness.

    Helpful Hint: If the sauce thickens too much during simmering, stir in a splash of beef broth or water until it reaches a rich, hearty consistency that can perfectly coat the pasta.

    Step 4: Cook and Add the Pasta

    In this final step, you’ll cook the pasta and combine it with the goulash. Cooking the pasta separately and adding it at the end is key to achieving the perfect texture. This method ensures the pasta is perfectly coated in sauce without becoming mushy.

    1. Cook the Pasta: During the last 20 minutes of the goulash’s simmer time, bring a separate large pot of salted water to a rolling boil. Add 2 cups of elbow macaroni or another small pasta shape and cook according to package directions until al dente (tender but with a slight bite).
    2. Drain the Pasta: Drain the cooked pasta well in a colander. Do not rinse it.
    3. Combine Goulash and Pasta: Stir the drained pasta directly into the pot with the finished goulash. Mix gently until the pasta is fully coated in the sauce.
    4. Serve Immediately: Ladle the goulash into bowls. If desired, garnish with fresh parsley. Serve hot and enjoy.

    Meal Prep Tip: For the best leftovers, store the goulash sauce and cooked pasta in separate containers in the refrigerator. This prevents the pasta from absorbing too much liquid and becoming soft. Combine and reheat portions as needed for optimal texture.

    Helpful Tips for Making the Best Goulash

    Don’t Overcook the Pasta

    Perfect timing is essential when cooking goulash, especially for the pasta. A common pitfall is overcooking it, which can turn a hearty goulash into a mushy disappointment. To avoid this, aim for al dente pasta—tender with a slight bite.

    Overcooked pasta doesn’t just lose its texture; it also absorbs too much of the rich, savory sauce, leaving the final dish dry and less flavorful. To get it right, follow the recipe’s guidance carefully. Adding the pasta at the precise moment ensures it finishes cooking in the sauce to perfection. The goal is for every forkful to be a perfect blend of tender beef, flavorful sauce, and perfectly cooked pasta.

    Let the Flavors Meld

    Like many stews, goulash tastes even better with time. The key is allowing the flavors to “meld,” or fully combine, which creates a deeper and more complex taste. As the goulash rests, the spices and ingredients continue to infuse the sauce, enriching the entire dish.

    While it’s tempting to eat it immediately, letting your goulash rest after cooking is worth the wait. Even just 30 minutes off the heat can make a noticeable difference. For the best possible flavor, prepare it a day in advance. Gently reheating it the next day allows the flavors to intensify even further, turning a great meal into an amazing one. This simple step is the secret to elevating your goulash.

    How to Store and Reheat Goulash

    Since goulash often tastes even better the next day, it’s a fantastic choice for meal prep. To enjoy it again safely, proper storage and reheating are key. Here’s how to do it right.

    • Refrigeration: Let the goulash cool at room temperature for no more than two hours before transferring it to an airtight container. It will keep in the refrigerator for up to 3-4 days [source: https://www.foodsafety.gov/food-safety-charts/cold-food-storage-chart], making it perfect for quick lunches or dinners.
    • Freezing: For longer storage, goulash freezes beautifully. Once cooled, pack it into freezer-safe containers or bags, removing as much air as possible to prevent freezer burn. It can be frozen for up to 2-3 months. For best results, thaw it overnight in the refrigerator before reheating.
    • Reheating on the Stovetop: Place the goulash in a saucepan over medium-low heat, stirring occasionally until it simmers gently. If the sauce has thickened, add a splash of beef broth or water to reach your desired consistency.
    • Reheating in the Microwave: For a single serving, place the goulash in a microwave-safe bowl. Heat it on medium power, stirring every minute or so until it is piping hot throughout. You can also add a little liquid to loosen the sauce.

    Before serving, always ensure your leftovers reach an internal temperature of 165°F (74°C) for food safety. With these storage tips, you can enjoy your flavorful goulash more than once.

    What Should You Serve With Goulash?

    A beautifully plated bowl of beef goulash garnished with parsley, served with fluffy egg noodles and a dollop of sour cream on a warm dining table.
    A professional food photography, photorealistic, high-quality food magazine photo of a perfectly plated bowl of hearty homemade beef goulash, garnished with a sprinkle of fresh chopped parsley. The goulash is served alongside a generous portion of fluffy, golden egg noodles and a dollop of sour cream on a warm, inviting wooden dining table. The setting is cozy and friendly, with soft, natural light illuminating the dish, making it look incredibly appetizing and comforting, ready for a family meal.

    Our easy goulash recipe is a hearty, all-in-one meal featuring tender beef and pasta in a rich tomato sauce. To make your dinner even more special, consider adding a simple side dish. The right pairing creates a balanced, flavorful experience for your family, and these easy suggestions are perfect for any busy weeknight.

    Complementary Sides for Your Beef Goulash

    The best sides for goulash either offer a fresh, crisp contrast to its richness or help you soak up every drop of the delicious sauce. Here are a few fantastic, easy-to-prepare options:

    • Crusty Bread or Garlic Bread: A classic for a reason, warm crusty bread is perfect for soaking up the savory goulash sauce. Toasted garlic bread adds another layer of flavor, making this a simple and beloved addition to the meal.
    • Simple Green Salad: For a quick and healthy option, a crisp green salad provides a refreshing balance to the goulash’s richness. Simply toss mixed greens, cherry tomatoes, and cucumber slices with a light vinaigrette.
    • Cucumber Salad: Offering a cool, tangy counterpoint, this refreshing salad is easy to prepare. Just toss thinly sliced cucumbers with vinegar, dill, and a pinch of sugar for a bright side that cuts through the hearty sauce.
    • Steamed Green Beans or Broccoli: For a simple, nutritious side, quickly steam some green beans or broccoli. They add vibrant color to your plate, and a drizzle of olive oil with a sprinkle of salt is all they need to be delicious.
    • Roasted Root Vegetables: Roasting vegetables like carrots and parsnips with olive oil brings out their natural sweetness. This adds a more substantial, flavorful layer of texture to your meal.

    Making Mealtime Easy and Enjoyable

    Choosing the right side dish transforms a simple goulash into a complete and satisfying meal your family will love. At Recipesmondial, we believe cooking should be enjoyable, not stressful. Our goal is to help you gain confidence in the kitchen with approachable recipes and effortless meal-planning ideas so you can focus on sharing delicious food with your loved ones. Explore our platform for more quick meal solutions and beginner-friendly recipes.

    Frequently Asked Questions About Goulash

    What is the difference between Hungarian goulash and American goulash?

    If you’ve ever wondered about the difference, you’re not alone! While both are comforting dishes, they come from distinct culinary traditions. As a result, they offer unique flavors and textures, making each one a great family-friendly meal.

    Here’s a simple breakdown:

    Feature Hungarian Goulash American Goulash
    Origin Hungary, a traditional stew or soup. Developed in the United States, often called “American chop suey.”
    Main Ingredients Plenty of beef (or other meat), onions, and a generous amount of paprika. It often includes carrots, potatoes, and sometimes caraway seeds. Ground beef, pasta (like elbow macaroni), canned tomatoes, onions, and often bell peppers.
    Consistency A hearty, rich, and thick stew or soup meant to be eaten with a spoon. A saucy, casserole-like dish that is typically thicker than Hungarian goulash but not as stew-like.
    Spice Profile Deep, earthy, and aromatic from sweet Hungarian paprika, which provides a warm, rich flavor. Savory and tomato-based, with milder seasonings like Italian seasoning or chili powder.
    Serving Often served on its own, with a slice of rustic bread, or with a dollop of sour cream. Typically served as a one-pot meal, perfect for busy families looking for simple dinner recipes.

    Our easy goulash recipe leans toward the American style, making it an approachable home cooking dish. By simplifying dinner prep, it delivers a flavorful meal with minimal fuss, which is perfect for beginners.

    Can I make this goulash recipe in a slow cooker?

    Absolutely! A slow cooker is a fantastic tool for making this recipe, as it creates tender, flavorful meals with minimal effort. It’s especially useful for busy families and for meal prep. Better yet, adapting our goulash recipe for your slow cooker is simple and transforms the cooking experience into an even more relaxed process.

    Follow these easy steps:

    • Brown the Beef: First, brown the beef in a skillet on the stovetop and drain any excess fat. This step is vital for developing a deep, rich flavor, so don’t skip it!
    • Sauté Aromatics: Next, briefly sauté the onions and garlic in the same skillet until they soften and release their aroma.
    • Combine Ingredients: Transfer the browned beef, sautéed aromatics, tomatoes, broth, and seasonings to your slow cooker. Stir well to combine.
    • Cook Low and Slow: Cook on low for 6-8 hours or on high for 3-4 hours. During this time, the beef will become wonderfully tender as all the flavors meld together.
    • Add Pasta: About 30-45 minutes before serving, stir in the uncooked pasta. If the sauce seems too thick, add a little extra liquid. Continue cooking until the pasta is tender.

    Using a slow cooker is a fantastic way to enjoy this hearty goulash. Because you can prepare it ahead, it helps reduce stress at mealtime and ensures a delicious, reliable result every time.

    What is the best beef to use for beef goulash?

    Choosing the right cut of beef is key to a delicious goulash. For this recipe, you’ll want a cut that becomes rich and tender after simmering, which is why meats designed for slow cooking are the best choice. These cuts offer the ideal flavor and texture for a hearty stew.

    Here are our top recommendations for beef goulash:

    • Chuck Roast: Often called a “chuck eye roast” or “blade roast,” this cut is a fantastic choice. Its marbling (intramuscular fat) breaks down during slow cooking, making the meat incredibly tender and juicy.
    • Stew Beef/Stew Meat: Most grocery stores sell pre-cut “stew beef,” which usually comes from the chuck or round. It’s a convenient, budget-friendly option that’s perfect for beginner-friendly recipes.
    • Round Steak (Bottom Round, Top Round): While leaner than chuck, these cuts can also work well. Just be sure to cut them into smaller pieces and allow for a longer cooking time to ensure they become tender.

    For the best results, we highly recommend chuck roast. Its marbling guarantees a melt-in-your-mouth texture that will elevate your goulash. Best of all, chuck roast is generally affordable, making it perfect for budget-friendly cooking without sacrificing taste.

    What kind of pasta works best for goulash?

    In American-style goulash, the right pasta can make all the difference. You’ll want a shape that can stand up to simmering in the sauce while being easy to eat. The best choices are pastas that absorb flavor and hold their shape, ensuring a comforting, balanced bite every time.

    Here are the best pasta choices for goulash:

    • Elbow Macaroni: This is the classic choice. Its small, curved shape is perfect for scooping up the savory sauce and ground beef.
    • Ditalini: These tiny, tube-shaped pasta pieces are even smaller than elbow macaroni. They are excellent for blending seamlessly into the sauce.
    • Small Shells (Conchigliette): The hollows in small shell pasta are perfect for catching bits of meat and sauce, adding delightful texture to each spoonful.
    • Rotini or Spirals: These corkscrew shapes are also a great choice, as their nooks and crannies excel at holding the rich goulash sauce.
    • Penne or Ziti (cut short): If you prefer a slightly larger bite, short-cut penne or ziti can work well. Just make sure the pieces are small enough to be easily managed in one spoonful.

    Regardless of the shape you choose, be careful not to overcook the pasta. Add it directly to the simmering sauce near the end of the cooking time. This method ensures it cooks to a perfect al dente texture without becoming mushy, leading to a more satisfying and reliable result.

  • The Best Homemade Chicken Soup Recipe: A Simple Step-by-Step Guide

    The Best Homemade Chicken Soup Recipe: A Simple Step-by-Step Guide

    A classic chicken soup recipe involves simmering chicken (breasts or thighs) with aromatic vegetables like carrots, celery, and onions in a flavorful chicken broth. Fresh herbs such as parsley, thyme, and bay leaves are added to create a deep, comforting flavor. This simple, nourishing combination is perfect for a cozy meal and is widely considered beneficial when feeling unwell.

    A warm bowl of chicken soup is the perfect comfort food, especially on a chilly day. But if you’ve ever felt overwhelmed by complex recipes or unsure how to achieve that perfect, rich flavor, you’re not alone. We believe making delicious, homemade chicken soup should be a simple and stress-free experience for everyone, regardless of your skill level.

    That’s why we created the ultimate homemade chicken soup recipe. Our easy, step-by-step guide is designed for beginner-friendly recipes and busy home cooks. We’ll show you how to transform simple ingredients into a deeply flavorful, family-friendly meal using approachable cooking techniques. You’ll build confidence in the kitchen while creating a classic chicken noodle soup that tastes like it came straight from grandma’s kitchen.

    This comprehensive guide covers how to make a great chicken soup from scratch. It also provides helpful tips for making it your own, including how to easily turn it into a comforting chicken noodle soup. Let’s dive in and see why this is the best chicken soup recipe for beginners.

    Why Is This The Best Chicken Soup Recipe for Beginners?

    If you’re looking for an easy chicken soup recipe that delivers amazing flavor every time, you’ve found it. We know cooking can feel overwhelming, especially with recipes that use complicated steps or unusual ingredients. That’s not the case here. At Recipesmondial, our goal is to make home cooking enjoyable and help you feel confident in the kitchen. This recipe is designed with beginners in mind, using simple techniques and everyday ingredients to create a rich, comforting, and incredibly flavorful meal.

    Here’s what makes this recipe the perfect choice for beginners:

    • Simple, Everyday Ingredients: This recipe uses ingredients you can easily find at any grocery store, making preparation quick and hassle-free. No specialty trips required.
    • Clear, Step-by-Step Instructions: We break down every step into plain language, avoiding confusing culinary jargon. You’ll always know exactly what to do next, making it easy for anyone to follow along.
    • Reliable & Consistent Results: Because this recipe has been thoroughly tested, it guarantees a delicious and flavorful meal. You can count on perfect chicken soup every time.
    • Builds Confidence in the Kitchen: Successfully making a homemade chicken soup boosts your cooking confidence. You will learn fundamental techniques that apply to many other easy recipes.
    • Highly Customizable & Versatile: Think of this basic recipe as a fantastic starting point. You can easily add your favorite vegetables, transform it into a classic chicken noodle soup, or make it creamy.
    • Perfect for family-friendly meals: As a universal comfort food, chicken soup is ideal for busy families. This recipe provides a healthy, satisfying, and crowd-pleasing dinner option.
    • Reduces Mealtime Stress: Struggling to plan your next meal? This approachable recipe is a lifesaver, helping you get flavorful meals made easy.

    This recipe will help you move from uncertainty to confidence in the kitchen. It’s more than just a chicken soup—it’s a stepping stone to a world of enjoyable home cooking. Welcome to Recipesmondial, where we believe cooking should always be simple, flavorful, and inspiring.

    What Ingredients Do You Need for Homemade Chicken Soup?

    A flat lay of fresh chicken soup ingredients, including raw chicken, chopped carrots, celery, onion, and herbs, arranged on a rustic wooden surface.
    A photorealistic, high-quality food magazine photo in professional food photography style. Capture a beautiful flat lay of fresh, vibrant ingredients for homemade chicken soup. Include raw chicken pieces (like thighs or drumsticks), chopped carrots, celery stalks, yellow onion, fresh parsley, bay leaves, whole peppercorns, and a container of chicken broth or water. Arrange them artfully on a light wooden cutting board or a rustic kitchen counter with warm, inviting natural light. The focus should be on the freshness and quality of each ingredient, making them look appealing and easy to identify. No artistic interpretations or illustrations.

    The Best Chicken for Soup

    Delicious homemade chicken soup starts with the right chicken—one that provides both rich flavor and tender meat. Our easy recipe focuses on simple-to-prepare cuts that guarantee amazing results every time.

    Here are our top picks for the best chicken to use:

    • Bone-in, Skin-on Chicken Thighs: These are our top choice for a flavorful broth. As the soup simmers, the bones and skin release incredible depth and richness. The meat also becomes wonderfully tender and easy to shred, making this perfect for a classic, comforting chicken soup.
    • Boneless, Skinless Chicken Thighs: For a quicker prep time, boneless thighs are an excellent option. They cook faster and are very easy to shred. While quicker, they still offer more flavor than chicken breast, making them a great choice for a simple dinner recipe.
    • Whole Chicken (Cut into Pieces): For the most robust and complex flavor, nothing beats a whole chicken. Using a variety of cuts and bones creates a deeply satisfying and traditional homemade soup.

    You can also use a combination of cuts. For instance, pairing bone-in thighs with a boneless breast gives you both deep flavor and lean meat. Our goal is to keep things simple, so you can make delicious soup without feeling overwhelmed.

    Essential Aromatic Vegetables

    A flavorful chicken soup starts with an aromatic vegetable base. These ingredients build a deep foundation of taste before you even add the chicken, making your broth rich and inviting.

    You’ll need these essential vegetables for your homemade chicken soup:

    • Yellow Onion: One medium yellow onion, chopped. When sautéed, onions add a sweet and savory depth that is fundamental to a good soup base.
    • Carrots: Two large carrots, peeled and sliced or chopped. They contribute a subtle sweetness, vibrant color, and nutrients to your healthy meal.
    • Celery Stalks: Two celery stalks, sliced or chopped. Celery adds a subtle, savory note that beautifully rounds out the flavor of the other vegetables.

    This classic trio of vegetables is known as a “mirepoix,” and it creates a balanced and delicious foundation for your soup. To save time, you can even use a pre-chopped mirepoix mix from the grocery store.

    Herbs and Seasonings for a Flavorful Broth

    With your chicken and vegetables ready, it’s time for herbs and seasonings. These ingredients elevate your soup, infusing the broth with warmth, complexity, and the comforting flavor we all love.

    Gather these herbs and seasonings for a truly memorable chicken soup:

    • Garlic: Four cloves of garlic, minced. Fresh garlic adds a pungent, aromatic kick that is essential for a deep, savory broth.
    • Dried Thyme: One teaspoon of dried thyme. Thyme offers an earthy, slightly minty note that pairs perfectly with chicken. It’s a classic herb for comforting dishes.
    • Bay Leaf: Two dried bay leaves. Bay leaves contribute a subtle, almost floral flavor that enhances the overall savory quality of the broth. Remember to remove them before serving.
    • Salt and Black Pepper: To taste. Salt and pepper are crucial for enhancing all the other flavors in the soup. Start with a generous pinch and add more as needed after tasting the broth.
    • Chicken Broth or Stock: Eight cups of low-sodium chicken broth or stock. A good quality broth is the key to a flavorful soup, so choose one you enjoy.
    • Fresh Parsley (for garnish): A handful of fresh parsley, chopped. While optional, fresh parsley adds a pop of color and fresh flavor right before serving.

    Together, these ingredients transform simple components into a rich and inviting soup. The most important step is to taste and adjust the seasonings as you cook. This ensures the final flavor is perfectly suited to your preferences.

    How to Make Chicken Soup From Scratch (Step-by-Step)

    Homemade chicken soup simmering gently in a large pot on a stovetop, with a hand stirring it with a wooden ladle.
    A photorealistic, high-quality food magazine photo in professional food photography style. A close-up shot of homemade chicken soup gently simmering in a large, rustic stainless steel or enameled cast iron pot on a stovetop. Wisps of steam are rising from the surface, indicating warmth and freshness. The soup is rich with tender chicken pieces, diced carrots, celery, and onions, visible through the clear broth. A human hand, belonging to a home cook, is gently stirring the soup with a wooden ladle. The background is a softly blurred, warm kitchen setting, emphasizing a cozy and approachable cooking atmosphere. Natural light illuminates the scene. No artistic interpretations or illustrations.

    Making chicken soup from scratch is a rewarding experience that brings warmth and comfort to your kitchen. Our simple, step-by-step guide makes this classic dish approachable for everyone, so you can forget about complex recipes.

    Follow these easy steps to create a flavorful, hearty homemade chicken soup that will impress your family and friends. This chicken soup recipe is perfect for beginners and designed for success.

    Step 1: Sauté the Vegetables

    This initial step builds the foundation of flavor for your chicken soup. It’s often called creating an “aromatic” base.

    1. Gather Your Aromatics: Have your chopped onions, carrots, and celery ready. These vegetables are essential for a rich broth.
    2. Heat the Pot: Place a large pot or Dutch oven over medium heat and add a tablespoon of olive oil or butter.
    3. Sauté Gently: Add the chopped vegetables to the hot pot. Cook them slowly for 8-10 minutes, stirring occasionally, until they soften without browning. This gentle process releases their sweet, earthy flavors.
    4. Add Garlic: Stir in minced garlic during the final minute of cooking. This prevents it from burning while adding a wonderful depth to your soup.

    Pro Tip: Don’t rush this step! Properly softening the vegetables makes a significant difference in the final taste of your homemade chicken soup.

    Step 2: Poach and Shred the Chicken

    Next, you’ll gently cook the chicken. This process not only yields tender meat but also begins to create a flavorful broth, a key part of this easy chicken soup recipe.

    1. Add Chicken and Water: Place the chicken pieces (such as bone-in, skin-on thighs or a whole chicken) into the pot with the sautéed vegetables. Pour in enough cold water to cover the chicken completely.
    2. Season Lightly: Add a pinch of salt and a few black peppercorns.
    3. Gentle Simmer: Bring the liquid to a gentle simmer over medium-low heat, being careful not to let it boil. Skim off any foam that rises to the surface to keep your broth clear.
    4. Cook Until Done: Simmer for 25-35 minutes, or until the chicken is tender and cooked through. A meat thermometer inserted into the thickest part should read 165°F (74°C) [1].
    5. Remove and Cool: Carefully transfer the cooked chicken from the pot to a cutting board and let it cool slightly.
    6. Shred the Chicken: Once the chicken is cool enough to handle, remove and discard the skin and bones. Use two forks to shred the meat into bite-sized pieces, then set it aside.

    Helpful Hint: If you used bone-in chicken, consider adding the bones back to the pot for the next step to add even more richness to your broth.

    Step 3: Simmer for Maximum Flavor

    Now it’s time to transform the liquid into a robust, comforting broth. This step is all about developing deep, savory flavors.

    1. Strain the Broth: Carefully pour the liquid from the pot through a fine-mesh sieve into a large, clean bowl. Discard the cooked vegetables from the sieve, as they have already given up their flavor.
    2. Return Broth to Pot: Pour the clear, strained broth back into the empty pot.
    3. Add Fresh Aromatics and Herbs: For extra flavor, you can add a fresh set of chopped carrots and celery to the broth, along with herbs like a few sprigs of thyme and a bay leaf.
    4. Long, Slow Simmer: Bring the broth to a gentle simmer and let it cook uncovered for at least 30 minutes, or up to an hour. A longer simmer allows the flavors to meld and deepen.
    5. Taste and Adjust: Taste the broth and add more salt and pepper as needed. A well-seasoned broth is the secret to an amazing chicken soup.

    Meal Prep Tip: You can make the broth ahead of time. It stores well in the refrigerator for up to 3 days, making it easy to finish the soup later.

    Step 4: Combine and Serve

    You’re in the final stretch! It’s time to bring all the delicious components together to finish your amazing homemade chicken soup.

    1. Reintroduce Chicken: Add the shredded chicken back into the flavorful, simmering broth.
    2. Heat Through: Let the soup gently heat for another 5-10 minutes, just until the chicken is warmed through.
    3. Finish with Fresh Herbs: Stir in a handful of freshly chopped parsley or dill right before serving to add a bright flavor and lovely aroma.
    4. Serve Warm: Ladle the comforting chicken soup into bowls and enjoy immediately.

    This easy chicken soup is perfect on its own. If you’re making chicken noodle soup, add cooked noodles at the very end or directly to each bowl to prevent them from becoming soggy. Enjoy this delicious, easy, family-friendly meal from Recipesmondial!

    Helpful Tips for the Most Flavorful Soup

    Making a truly delicious chicken soup is easier than you think—no gourmet chef skills required. With a few simple tricks, you can elevate your chicken soup recipe from good to extraordinary. These tips will help you create a rich, comforting, and flavorful bowl every time, without the stress of complex recipes.

    • Start with Great Chicken and Bones: The foundation of any amazing homemade chicken noodle soup is the chicken itself.

      • For the deepest flavor, use a mix of chicken pieces. Bone-in, skin-on thighs, drumsticks, and even backs or wings work wonderfully.
      • Roasting these chicken pieces and bones before simmering creates a richer, more complex broth and adds incredible depth.
      • Alternatively, a store-bought rotisserie chicken is a great time-saver that adds excellent flavor, perfect for quick meals.
    • Sauté Your Aromatics Thoroughly: Do not rush this step. The initial sauté of your vegetables—like onions, carrots, and celery—builds the soup’s flavor base.

      • Cook them gently in a little oil or butter until they soften and become fragrant and lightly golden. This process, called “sweating,” releases their natural sugars and deepens their taste.
      • This simple step makes a huge difference in the final taste of your chicken soup.
    • Layer Your Herbs and Spices: Great flavor comes from more than just salt and pepper.

      • Add fresh herbs like parsley, thyme, or bay leaves during the simmering process. You can tie them into a bundle with kitchen twine for easy removal.
      • A few whole black peppercorns, garlic cloves, or a pinch of dried herbs like oregano or marjoram will enhance the flavor.
      • For an extra boost, add a sprig of fresh dill or a sprinkle of fresh parsley right before serving.
    • Simmer, Don’t Boil: Patience is key for maximum flavor extraction.

      • After adding your chicken and liquids, bring the soup to a gentle simmer, but do not let it come to a rolling boil.
      • A slow, steady simmer for at least an hour (or longer for raw chicken and bones) allows all the flavors to meld beautifully. This gentle heat extracts more flavor from the ingredients than rapid boiling.
      • This process ensures a clear, flavorful broth rather than a cloudy one.
    • Season as You Go (and at the End): Seasoning correctly is crucial for flavorful meals made easy.

      • Add a little salt when sautéing the vegetables and more when the chicken and broth go in.
      • Always taste your soup toward the end of cooking and adjust the salt, pepper, or other seasonings as needed.
      • At the very end, a squeeze of fresh lemon juice or a dash of apple cider vinegar can brighten all the flavors and add a lovely zest.
    • Consider Finishing Touches: Small additions can make a big impact.

      • A swirl of high-quality olive oil or a knob of butter stirred in just before serving adds richness.
      • Freshly chopped herbs like chives or cilantro offer a burst of freshness and color.
      • If you are making chicken noodle soup, cook your noodles perfectly al dente to prevent them from becoming mushy.

    Following these beginner-friendly recipe tips will help you create a comforting bowl of chicken soup every time. This step-by-step cooking guidance is designed to make your home cooking journey more enjoyable, confident, and stress-free.

    How to Make Homemade Chicken Noodle Soup

    A steaming bowl of homemade chicken noodle soup, garnished with fresh parsley, sitting on a rustic wooden table.
    A photorealistic, high-quality food magazine photo in professional food photography style. A perfectly plated, steaming bowl of classic homemade chicken noodle soup. The rich, golden broth is filled with tender shredded chicken, perfectly cooked egg noodles, vibrant diced carrots, and celery, all garnished with a generous sprinkle of fresh chopped parsley. The bowl sits on a rustic wooden table, perhaps with a textured linen napkin peeking from underneath, creating a warm and inviting atmosphere. The lighting is soft and warm, highlighting the comforting steam rising from the soup. The image evokes a sense of home, comfort, and deliciousness. No artistic interpretations or illustrations.

    What Kind of Noodles Should You Use?

    Adding noodles transforms chicken soup into the classic homemade version we all love. Choosing the right noodle is key to a satisfying bowl, as the best ones hold their texture and complement the broth.

    Here are some excellent choices for your easy chicken noodle soup recipe:

    • Egg Noodles: The traditional choice for a reason. Their tender texture absorbs the broth beautifully. Look for wide or medium egg noodles for a hearty feel.
    • Orzo: This small, rice-shaped pasta is perfect if you prefer smaller bites. It cooks quickly and blends seamlessly into the soup.
    • Ditalini: These tiny, tube-shaped noodles are another great option. Common in Italian wedding soup, they also work wonderfully in chicken soup.
    • Acini di Pepe: Meaning “peppercorns” in Italian, these tiny pasta pieces create a delicate texture in the broth for an extra comforting feel.
    • Thin Spaghetti or Vermicelli (broken): If you’re in a pinch, you can break thin spaghetti or vermicelli into shorter pieces. Keep in mind that they can become soft more quickly than other pasta types.
    • Gluten-Free Pasta: Many excellent gluten-free options are available, typically made from rice, corn, or quinoa. Just be sure to follow the package directions, as their cooking times can vary.

    Ultimately, the choice depends on your personal preference. For the best result, aim for a pasta that won’t become mushy too quickly. This ensures a delightful texture in every spoonful of your homemade chicken noodle soup.

    When to Add Noodles to the Soup

    Perfectly cooked noodles are the hallmark of a great chicken noodle soup. To keep them from becoming overly soft or mushy, it’s essential to add them at the right time.

    Follow these steps for flawless noodles in your chicken soup recipe:

    1. Near the End of Cooking: Add your chosen noodles during the last 10-15 minutes of the soup’s simmering time. Always check the package for specific cooking instructions, as times can vary.
    2. Simmer Gently: Once the noodles are in, let the soup simmer gently. Stir occasionally to prevent sticking and cook until they are al dente—cooked through but still with a slight bite.
    3. Taste and Adjust: Before taking the soup off the heat, taste a noodle to ensure it’s cooked perfectly. This is the best way to guarantee great texture for your easy recipes.

    Pro Tip for Meal Prep and Leftovers: If you plan to have leftovers or are using meal prep ideas, cook the noodles separately. Boil them in salted water, drain, and rinse with cold water to stop the cooking process. Store the noodles in a separate container and add them to individual servings of hot soup. This prevents them from soaking up broth and becoming mushy when reheated, ensuring every bowl of your flavorful meals made easy tastes fresh.

    The same principle applies to an instant pot chicken noodle soup. Add the noodles after the main pressure cooking cycle is complete, then use the simmer function until they are tender. This prevents overcooking and ensures a wonderful texture in your beginner-friendly recipes.

    How Do You Make Instant Pot Chicken Noodle Soup?

    Ready to make a comforting bowl of homemade chicken noodle soup even faster? Your Instant Pot is a game-changer. This brilliant kitchen tool transforms long-simmered recipes into quick meals, making it perfect for busy weeknights. You’ll love achieving a rich, flavorful soup in a fraction of the time. It’s the ideal solution for busy families or anyone seeking easy recipes without sacrificing taste.

    Making Instant Pot Chicken Noodle Soup is incredibly straightforward, making it a fantastic example of beginner-friendly recipes. This method combines cooking the chicken and building the broth into one efficient process. Say goodbye to being overwhelmed by complex recipes!

    Why the Instant Pot is Perfect for Speedy Soup

    The Instant Pot simplifies the process of cooking healthy, tasty meals quickly. Its pressure cooking function infuses flavors deeply while tenderizing chicken rapidly, giving you a delicious, flavorful meal made easy.

    • Saves Time: Chicken cooks significantly faster under pressure, which means less waiting for your delicious soup.
    • One-Pot Wonder: Sautéing and cooking happen in a single pot, which dramatically reduces cleanup.
    • Deep Flavor: Pressure cooking expertly melds ingredients, creating a rich and satisfying broth every time.
    • Consistent Results: It reliably achieves perfectly cooked chicken and vegetables, so you can cook with confidence.

    Step-by-Step Guide: Making Instant Pot Chicken Noodle Soup

    Here’s how to whip up a comforting bowl of homemade chicken soup using your Instant Pot. This simple dinner recipe is sure to become a family favorite.

    Sautéing Your Aromatics

    Building a strong flavor base is key. Just like a traditional soup, this recipe starts with the good stuff!

    1. Prepare the Pot: Plug in your Instant Pot and select the “Sauté” function on its normal setting.
    2. Add Oil and Vegetables: Once the display reads “Hot,” add 1 tablespoon of olive oil. Follow with 1 cup chopped yellow onion, 1 cup chopped carrots, and 1 cup chopped celery.
    3. Sauté until Fragrant: Cook for 3-5 minutes, stirring occasionally, until the vegetables soften slightly and become fragrant.

    Cooking the Chicken and Broth

    Now it’s time to let the Instant Pot do its magic. This stage makes your broth incredibly flavorful.

    1. Add Chicken and Liquids: Press “Cancel” to turn off the “Sauté” function. Place 1 pound of boneless, skinless chicken breasts or thighs into the pot. Pour in 6 cups of chicken broth and add 1 teaspoon dried thyme, ½ teaspoon dried rosemary, ½ teaspoon salt, and ¼ teaspoon black pepper.
    2. Seal and Pressure Cook: Secure the lid and ensure the steam release valve is in the “Sealing” position. Select “Manual” or “Pressure Cook” and set the timer for 10 minutes on high pressure.
    3. Release Pressure: After cooking, let the pressure release naturally for 5 minutes (Natural Pressure Release). Then, carefully turn the steam release valve to the “Venting” position to release any remaining steam (Quick Release).

    Finishing with Noodles and Freshness

    You’re almost there! The noodles cook directly in the flavorful broth, soaking up all the deliciousness.

    1. Shred the Chicken: Carefully remove the cooked chicken and place it on a cutting board. Use two forks to shred it into bite-sized pieces.
    2. Cook the Noodles: Return the shredded chicken to the pot. Select the “Sauté” function to bring the soup to a boil. Add 2 cups of egg noodles and cook for 5-7 minutes, or according to package directions. Stir often to prevent sticking.
    3. Stir in Herbs and Serve: Turn off the Instant Pot by pressing “Cancel.” Stir in ¼ cup of fresh chopped parsley. Taste the soup and adjust seasonings if needed before serving your delicious chicken noodle soup.

    Expert Tips for Your Best Instant Pot Chicken Noodle Soup

    Want to elevate your Instant Pot Chicken Noodle Soup? These simple tips will help you create a truly spectacular meal, completely stress-free.

    • Chicken Choice: For the most flavor and moisture, use boneless, skinless chicken thighs. However, chicken breasts also work well if you prefer leaner meat.
    • Noodle Timing is Key: Always add noodles *after* the pressure cooking cycle is complete. Cooking them under pressure will result in a mushy texture. Use the “Sauté” setting at the end for perfect noodles.
    • Boost the Flavor: For an even richer broth, add a Parmesan rind to the pot during the pressure cooking stage. Be sure to remove it before adding the noodles.
    • Vary Your Veggies: Feel free to add other quick-cooking vegetables like green beans, peas, or corn. Simply stir them in during the last few minutes of cooking the noodles.
    • Meal Prep Idea: If you plan to freeze the soup, cook it without the noodles. You can then add and cook fresh noodles when reheating, which preserves their texture. This is a great meal prep tip!
    • Don’t Overfill: Always respect the “Max Fill” line inside your Instant Pot. Overfilling can interfere with the cooking process and may be dangerous.

    This chicken soup recipe is designed for success, showing just how approachable home cooking can be. With every delicious batch, you’ll gain more confidence in the kitchen!

    Storing, Freezing, and Reheating Your Soup

    How to Store Leftover Chicken Soup

    Making a large batch of homemade chicken soup is a great meal prep strategy. Proper storage is key to keeping your soup fresh and safe to eat. Follow these steps for the best results.

    • Cool Quickly: To cool your soup safely, never leave it on the counter for more than two hours. For faster cooling, divide the warm soup into smaller, shallow containers.
    • Choose Airtight Containers: Transfer the cooled soup into clean, airtight containers. Using glass or BPA-free plastic will prevent air exposure and keep your soup tasting fresh.
    • Refrigerate Promptly: Place the sealed containers in the refrigerator right away. Properly stored, chicken soup will last for 3 to 4 days [2].

    Can You Freeze Chicken Soup?

    Absolutely! Freezing chicken soup is an excellent way to extend its shelf life. This meal prep tip is perfect for busy weeks—simply make a double batch and freeze half for a future meal.

    • Cool Completely: Always ensure the soup is fully cooled before you freeze it. Placing warm soup in the freezer can affect the temperature and safety of other frozen foods.
    • Container Choice: Use freezer-safe containers or heavy-duty freezer bags. If using containers, leave about an inch of headspace to allow the liquid to expand as it freezes. Lay freezer bags flat for more efficient storage.
    • Label and Date: Don’t forget to label your containers with the contents and the date. For the best quality, use frozen chicken soup within 2 to 3 months [2].
    • Noodle Note: If your soup contains noodles, it’s best to freeze the broth and chicken separately. Cooked noodles can become mushy when thawed. Add freshly cooked noodles when you reheat the soup for the best texture.
    • Thawing Safely: The safest way to thaw soup is in the refrigerator overnight. If you’re short on time, use the defrost setting on your microwave or place the sealed container in a bowl of cold water.

    The Best Way to Reheat Soup

    Reheating your soup correctly is essential for preserving its flavor and ensuring it’s safe to eat. Here are the two best methods.

    • On the Stovetop: This method provides the most even heating.
      • Pour the soup into a saucepan.
      • Heat over medium-low, stirring occasionally to prevent sticking.
      • Bring the soup to a gentle simmer. Avoid a rolling boil, which can make ingredients mushy.
      • Taste and adjust seasonings if necessary.
    • In the Microwave: For a quick and convenient option, use the microwave.
      • Place the soup in a microwave-safe bowl.
      • Cover the bowl loosely to avoid splatters.
      • Heat in 1- to 2-minute intervals, stirring between each one.
      • Continue heating until the soup is hot all the way through.
    • Important Tip: Whichever method you choose, make sure the soup reaches an internal temperature of 165°F (74°C) to ensure it’s safe to eat.
    • Freshen It Up: Before serving, brighten the flavors with a sprinkle of fresh herbs, like parsley or cilantro, or a squeeze of fresh lemon juice.

    Frequently Asked Questions

    What is the best chicken soup recipe for flu?

    When you’re feeling under the weather, our homemade chicken soup is the perfect remedy. It is packed with nourishing ingredients to help you feel better, offering the hydration, electrolytes, and nutrients your body needs. [3]

    Here’s why it’s a great choice:

    • Hydrating Broth: The warm broth helps keep you hydrated, which is crucial when battling a cold or flu.
    • Soothing Aromatics: Fresh ginger and garlic offer comforting flavors and beneficial natural compounds.
    • Easy to Digest: The gentle flavors and tender ingredients are kind to your stomach, which is helpful when your appetite is low.
    • Nutrient-Rich: It delivers vitamins and minerals from the vegetables, while the chicken provides protein for energy.

    Remember, this easy recipe is designed for comfort and health, making it a delicious and therapeutic meal.

    How do you make an old fashioned chicken noodle soup?

    Making an old-fashioned chicken noodle soup is simpler than you might think, and our main recipe is a fantastic base. The secret lies in a rich, homemade broth and quality noodles. To adapt our recipe for that timeless taste, follow these tips:

    • Start with a Whole Chicken: For the deepest flavor, simmer a whole chicken or chicken pieces with bones. This creates a wonderfully rich broth from scratch.
    • Build Your Aromatics: Sautéing chopped carrots, celery, and onions is the foundation of the soup’s classic flavor.
    • Herbs and Seasonings: Use fresh herbs like parsley, thyme, and a bay leaf to add traditional depth. Seasoning with salt and pepper brings out the best in all the ingredients.
    • Add Your Noodles: For an old-fashioned touch, use wide egg noodles. You can cook them directly in the broth or cook them separately and add just before serving to prevent them from becoming too soft.
    • Gentle Simmer: Allow your soup to simmer slowly. This helps the flavors meld beautifully for that comforting, nostalgic taste.

    This approach will result in a truly flavorful and satisfying homemade chicken noodle soup, perfect for a family-friendly meal.

    Can I make this a creamy chicken soup recipe?

    Yes, absolutely! You can easily transform our versatile chicken soup recipe into a creamy delight. With just a few simple additions, you can add another layer of richness and comfort, creating a wonderful variation for your family-friendly meals.

    Here are a few ways to make your soup creamy:

    • Heavy Cream: For a silky texture and rich taste, stir in 1/2 to 1 cup of heavy cream or half-and-half during the last 5-10 minutes of simmering.
    • Coconut Milk: For a dairy-free option, add full-fat coconut milk during the last few minutes of cooking. This gives the soup a subtle sweetness and a creamy finish.
    • Roux: To make a roux, melt 2 tablespoons of butter before adding the broth. Whisk in 2 tablespoons of flour and cook for 1-2 minutes, then slowly whisk in the broth. This will thicken the soup as it simmers.
    • Cornstarch Slurry: For a quick and easy method, mix 1 tablespoon of cornstarch with 2 tablespoons of cold water. Stir this slurry into the simmering soup and cook for a few minutes until it thickens.

    Adding a creamy element transforms this simple recipe into a luxurious experience, and it’s just one of many ways you can customize our recipes with confidence.

    What’s the secret to a really good chicken soup?

    The secret to an exceptional chicken soup lies in a few key principles. Follow these tips to create the best batch every time:

    • Quality Ingredients: Always start with fresh, high-quality chicken and vibrant vegetables. Fresh aromatics like garlic and ginger make a huge difference.
    • Homemade Broth: The foundation of great soup is a rich, flavorful broth. Taking the time to simmer chicken bones and vegetables creates an unparalleled depth of flavor.
    • Low and Slow Simmering: Don’t rush the cooking process. A gentle, slow simmer is essential for allowing the flavors to fully develop and meld together.
    • Layering Flavors: Sautéing your vegetables first builds a strong flavor base. Adding herbs at different stages can also enhance the soup’s complexity.
    • Proper Seasoning: Taste as you go and adjust salt and pepper as needed. A squeeze of fresh lemon juice or a dash of herbs at the end can brighten all the flavors.

    By following this guidance, you’ll create a chicken soup that is not only delicious but also deeply satisfying. Enjoy building your confidence in the kitchen!


    Sources

    1. https://www.foodsafety.gov/keep/charts/mintemp.html
    2. https://www.foodsafety.gov/food-safety-charts/cold-storage-chart
    3. https://www.health.harvard.edu/staying-healthy/the-science-behind-chicken-soup

  • Easy BBQ Chicken Recipe: A Simple Guide for Juicy, Flavorful Results

    Easy BBQ Chicken Recipe: A Simple Guide for Juicy, Flavorful Results

    BBQ chicken is a classic dish featuring chicken cooked with barbecue sauce, serving as either a marinade, basting sauce, or finishing glaze. It is most commonly prepared by grilling, baking, or smoking, which results in tender, juicy meat with a sweet, smoky, and tangy caramelized exterior. This popular meal is a staple for cookouts, family dinners, and casual gatherings.

    Few dishes capture the essence of a relaxed, delicious meal quite like classic BBQ chicken. With its smoky aroma, sticky-sweet glaze, and perfectly tender bite, it’s pure comfort food. But making it at home can feel intimidating. Have you ever worried about dry chicken or struggled to find a reliable bbq chicken recipe that delivers amazing results? You’re not alone. Many home cooks feel overwhelmed by complex instructions or find it challenging to plan quick, healthy, and family-friendly meals everyone will love.

    At Recipesmondial, we believe cooking should be a stress-free, enjoyable experience. That’s why we’ve crafted the ultimate easy bbq chicken recipe, designed for home cooks of all skill levels—whether you’re a beginner or looking to perfect your weeknight dinner repertoire. Our guide offers simple, step-by-step cooking guidance to ensure your chicken turns out succulent and packed with flavor every single time. We focus on approachable home cooking, transforming simple ingredients into a truly memorable dish.

    Forget the guesswork and get ready to create a dish that will become a go-to in your kitchen. We’ll walk you through everything, from selecting the right chicken and mastering seasoning techniques to choosing your preferred cooking method—be it on the grill, in the oven, or even in the air fryer. Plus, we’ll share our best tips for the juiciest results and clever serving ideas. Let’s build your confidence to cook delicious, flavorful meals with ease!

    Why Is This the Best Beginner-Friendly BBQ Chicken Recipe?

    Ready to enjoy incredible BBQ chicken without the fuss? You’ve come to the right place. At Recipesmondial, we believe cooking should be a joy, not a chore. This isn’t just another recipe; it’s a guide designed for home cooks who want delicious results with minimal stress.

    We’ll guide you every step of the way, helping you build confidence in the kitchen. Our goal is to ensure you can create a flavorful, family-friendly meal that everyone will love.

    Why Our Recipe Stands Out for Beginners

    If you feel overwhelmed by complex instructions or worry about getting a tasty meal on the table quickly, this recipe is for you. We focus on making cooking enjoyable and stress-free. Here’s why our approach is perfect for beginners:

    • Simple Ingredients: This recipe uses common ingredients found at any grocery store. No need to hunt for specialty items.
    • Clear, Step-by-Step Guidance: We break down the entire process into simple, easy-to-follow steps. You’ll never be left wondering what to do next.
    • Multiple Cooking Methods: Whether you prefer grilling, baking, or using an air fryer, our guide covers it all. Choose the method that suits your equipment and comfort level for reliable results every time.
    • No Fancy Techniques: Forget about complicated marinades or precise knife skills. This recipe focuses on simple techniques that yield juicy, tender chicken every time.
    • Quick and Convenient: This recipe won’t keep you in the kitchen for hours. It’s a perfect solution for busy nights and anyone seeking quick meals, getting a delicious dinner on the table fast.
    • Guaranteed Flavor: Simplicity doesn’t mean sacrificing taste. We show you how to get that classic tangy and sweet BBQ flavor without any guesswork.
    • A Real Confidence Booster: Successfully making a delicious meal is incredibly rewarding. This recipe is designed to help you build skills and feel more confident in the kitchen.
    • Family-Friendly Favorite: BBQ chicken is a universal crowd-pleaser, and this recipe is sure to become a staple in your meal rotation. It’s one of those easy recipes that makes mealtime stress-free.

    Our goal at Recipesmondial is to help you enjoy cooking, discover new flavors, and make mealtime easier. This BBQ chicken recipe is a perfect example of what we stand for: simple, flavorful, and inspiring recipes for everyday life.

    What Ingredients Do You Need for Perfect BBQ Chicken?

    An overhead shot of fresh chicken pieces, BBQ sauce, garlic, olive oil, rosemary, salt, and pepper laid out on a wooden board.
    A professional food photography, photorealistic, high-quality food magazine photo of a flat lay composition showing all fresh, high-quality ingredients for an easy BBQ chicken recipe. The ingredients are neatly arranged on a rustic wooden cutting board or a clean, light-colored kitchen counter. Include raw chicken pieces (a mix of thighs and drumsticks), a small bowl of vibrant, homemade-looking BBQ sauce, a clear glass bottle of olive oil, fresh garlic cloves, a sprig of fresh rosemary, a pinch of coarse sea salt, and black peppercorns. The lighting is warm and natural, creating an inviting and approachable atmosphere, highlighting the freshness of the ingredients. No people visible.

    Creating perfect BBQ chicken starts with the right ingredients. Don’t worry if you’re new to cooking—this ingredient list is simple and approachable. By focusing on everyday items that deliver big flavor, you can make a delicious, stress-free family meal. Let’s get cooking!

    For the Chicken

    The foundation of our easy BBQ chicken recipe is the chicken itself. For juicy, flavorful results, we suggest using chicken thighs because they are incredibly forgiving and ideal for beginners. But you have other options, too!

    • 2-3 pounds Boneless, Skinless Chicken Thighs: These are our top pick. They cook quickly and stay moist, ensuring a delightful bite every time.
    • Alternatively, Bone-In, Skin-On Chicken Thighs: These offer more flavor and yield wonderfully crispy skin. Just be sure to adjust your cooking time if using this cut.
    • Substitution Tip: You can also use chicken breasts. To ensure they cook evenly, cut them into similar-sized pieces. Since breasts are leaner, cook them carefully to prevent dryness. They’re still a great option for healthy and balanced meals.

    Before you begin, make sure your chicken is thawed, then pat it completely dry with paper towels. This simple step helps seasonings stick better and promotes a crisp crust during cooking.

    For a Simple Homemade BBQ Sauce (or Your Favorite Store-Bought)

    A great BBQ sauce elevates your chicken from good to amazing. You have two fantastic choices: whip up a quick homemade version or grab your favorite from the store. Either option will give you delicious results and help you get dinner on the table fast!

    Homemade BBQ Sauce Ingredients

    Making your own BBQ sauce is easier than you think, and it uses common pantry staples. It’s a fantastic option for budget-friendly cooking, plus you get to control the flavor! Here’s what you’ll need:

    • 1 ½ cups Ketchup: This forms the base of our sauce.
    • ½ cup Brown Sugar (packed): For that classic sweet and smoky flavor. Adjust to your taste.
    • ¼ cup Apple Cider Vinegar: Adds a crucial tangy balance.
    • 2 tablespoons Worcestershire Sauce: Deepens the savory notes.
    • 1 tablespoon Dijon Mustard: Provides a pleasant zesty kick.
    • 1 teaspoon Garlic Powder: A fundamental flavor enhancer.
    • 1 teaspoon Onion Powder: Another essential aromatic.
    • ½ teaspoon Smoked Paprika: For a lovely, subtle smokiness. You can use regular paprika too.
    • ¼ teaspoon Black Pepper: Freshly ground is always best.
    • Optional: Pinch of Cayenne Pepper: If you like a little heat, add a dash!

    Simply combine these ingredients, and you’ll have a rich, flavorful sauce in minutes.

    Choosing Your Favorite Store-Bought BBQ Sauce

    When life calls for simplicity, a quality store-bought BBQ sauce is the perfect shortcut for busy families. With so many excellent options available—from smoky and sweet to tangy—you can easily find one you love. Just read the label to find a flavor profile that fits your preferences and get a delicious, family-friendly meal on the table with minimal effort.

    How Do You Make BBQ Chicken Step-by-Step?

    Close-up of glossy BBQ chicken sizzling on a hot grill with visible char marks and gentle smoke.
    A professional food photography, photorealistic, high-quality food magazine photo capturing a close-up, mouth-watering scene of juicy BBQ chicken pieces sizzling and charring slightly on a hot outdoor grill. The chicken has visible, enticing grill marks and is generously coated in a glistening, caramelized BBQ sauce. Wisps of smoke are gently rising from the grill grates. The background is softly blurred, hinting at a warm, inviting backyard or patio setting. The focus is entirely on the delicious texture and color of the chicken, emphasizing its juiciness and flavor. No people visible.

    Step 1: Prepare the Chicken

    Properly preparing your chicken is the key to a juicy, flavorful BBQ experience. This simple step sets the stage for success.

    • Pat Your Chicken Dry: Gently pat the chicken pieces dry with paper towels. This step removes excess moisture, which helps the seasoning stick better and creates a crispier skin.
    • Trim Excess Fat: Next, trim away any large pieces of excess fat from the chicken. Trimming prevents grill flare-ups and results in a leaner, more enjoyable bite.

    This quick prep is an essential part of our easy recipes, guaranteeing fantastic results for all beginner-friendly recipes.

    Step 2: Season Generously

    Now it’s time to build flavor. Generously seasoning the chicken creates a delicious base for your bbq chicken recipe, so don’t be shy with the spices!

    • A Little Oil Goes a Long Way: Lightly brush the chicken with a bit of olive oil. This simple coating helps the seasoning adhere and promotes even browning.
    • Season All Over: Sprinkle your chosen seasoning blend over every surface. For a classic barbecue flavor, use a generous pinch of salt and pepper, along with garlic powder, onion powder, and smoked paprika.
    • Consider a BBQ Rub: Alternatively, use your favorite store-bought BBQ rub. These blends are perfect for flavorful meals made easy. Just be sure to coat the chicken evenly.

    Proper seasoning is a vital step in our step-by-step cooking guidance, ensuring every bite is packed with taste.

    Step 3: Choose Your Cooking Method

    With your chicken prepped and seasoned, you’re ready to cook. You can achieve fantastic results with several different methods, giving you the flexibility to cook your bbq chicken perfectly.

    Consider the equipment you have and your personal preferences, as your choice will determine the next steps. This flexibility is what makes approachable home cooking so enjoyable.

    Step 4: Sauce and Finish to Perfection

    The final step is all about creating that signature sticky, sweet, and tangy glaze for your bbq chicken. Here, timing is crucial.

    • When to Add the Sauce: Wait to apply BBQ sauce until the final 10-15 minutes of cooking. The sugars in the sauce can burn easily, so adding it too early will result in a charred exterior.
    • Brush and Glaze: Use a pastry brush to generously coat the chicken with your favorite BBQ sauce. Flip the pieces once or twice during this process, brushing again after each turn to build an even, beautiful glaze.
    • Check for Doneness: To guarantee your chicken is both juicy and safe to eat, always use a meat thermometer. Insert it into the thickest part of the chicken without touching the bone. It’s fully cooked when the internal temperature reaches 165°F (74°C) [source: https://www.foodsafety.gov/food-safety-charts/safe-minimum-cooking-temperatures].
    • Rest Before Serving: After cooking, remove the chicken from the heat and let it rest for 5-10 minutes before serving. This important step allows the juices to redistribute, ensuring your chicken is wonderfully moist and tender.

    These simple techniques are the foundation of a great beginner-friendly recipe and will help you serve up perfectly finished, family-friendly bbq chicken every time.

    What Is the Best Way to Cook BBQ Chicken?

    How to Make BBQ Chicken on the Grill

    Grilling gives bbq chicken an irresistible smoky flavor that brings out the best in the meat. Plus, cooking outside is always a fun experience!

    Here’s how to get delicious, tender chicken on your grill:

    1. Preheat Your Grill: Preheat your grill to a medium-high heat, around 375-400°F (190-205°C), to ensure even cooking.
    2. Clean and Oil Grates: Clean your grill grates thoroughly, then lightly oil them to prevent the chicken from sticking.
    3. Arrange the Chicken: Place your seasoned chicken on the grill. For bone-in cuts, start skin-side down to achieve a nice sear.
    4. Cook and Flip: Cook for 6-8 minutes per side, flipping every few minutes to prevent burning and promote even cooking.
    5. Add BBQ Sauce: During the last 10-15 minutes of cooking, brush your favorite bbq chicken recipe sauce generously onto the chicken. Turn it frequently to build up a lovely caramelized layer.
    6. Check Doneness: Use a meat thermometer to check for doneness. The chicken is ready when it reaches an internal temperature of 165°F (74°C) in the thickest part of the meat [1].
    7. Rest and Serve: Remove the chicken from the grill and let it rest for 5-10 minutes before serving. This step is crucial for keeping the chicken juicy.

    Grilling Tips for Success:

    • Do not overcrowd the grill; leave enough space for heat to circulate evenly around each piece.
    • Keep a spray bottle of water handy to tame any sudden flare-ups from dripping fat.
    • For bone-in cuts, start with indirect heat to cook the chicken through, then finish over direct heat for crispy skin and sauce caramelization.

    How to Make BBQ Chicken in the Oven

    Cooking bbq chicken in the oven is a reliable method that gives you consistent results every time. It’s a perfect option for any weather, making it a truly family-friendly meal.

    Follow these easy steps for tender, flavorful oven-baked BBQ chicken:

    1. Preheat Oven: Preheat your oven to 400°F (200°C).
    2. Prepare Baking Sheet: Line a large baking sheet with foil and place a wire rack on top. The rack allows air to circulate, helping the chicken cook more evenly.
    3. Arrange Chicken: Place the seasoned chicken pieces in a single layer on the wire rack.
    4. Initial Bake: Bake the chicken for 20-25 minutes.
    5. First Sauce Application: Remove the chicken from the oven and brush it generously with your chosen BBQ sauce.
    6. Continue Baking: Return the chicken to the oven and bake for another 15-20 minutes, flipping and basting again halfway through.
    7. Final Sauce and Broil (Optional): For a thicker, caramelized sauce, brush with more sauce and broil for 2-3 minutes at the end. Watch carefully to prevent burning.
    8. Check Doneness: Confirm the chicken has reached an internal temperature of 165°F (74°C).
    9. Rest: Allow the chicken to rest for a few minutes before serving to keep the meat moist.

    Oven Baking Tips:

    • Using a wire rack is key to lifting the chicken off the pan, helping it crisp up on all sides.
    • Do not add the BBQ sauce too early in the cooking process, as its sugars can burn easily.
    • Line your baking sheet with foil for an easy cleanup.

    How to Make BBQ Chicken in the Air Fryer

    The air fryer is a fantastic tool for making quick and crispy bbq chicken, especially for smaller portions or when you need quick dinner ideas.

    Here’s how to create perfectly cooked air fryer BBQ chicken:

    1. Preheat Air Fryer: Preheat your air fryer to 375°F (190°C) for about 5 minutes.
    2. Lightly Oil Chicken: Lightly coat your seasoned chicken pieces with a little oil to help them get crispy.
    3. Place in Basket: Arrange the chicken in a single layer in the air fryer basket. Do not overcrowd it; work in batches if necessary.
    4. Initial Cook: Cook for 10-12 minutes, flipping the chicken halfway through.
    5. Add BBQ Sauce: Pull out the basket and brush a generous amount of BBQ sauce onto the chicken.
    6. Continue Cooking: Return the chicken to the air fryer and cook for another 5-7 minutes, or until the sauce is caramelized and bubbly.
    7. Check Doneness: Confirm the chicken’s internal temperature is 165°F (74°C) with a meat thermometer.
    8. Rest: Let the chicken rest for a couple of minutes before serving to lock in the juices.

    Air Fryer Tips:

    • Always cook in a single layer, as overcrowding prevents the hot air from circulating properly.
    • Shake the basket or flip the chicken a few times during cooking to ensure all sides cook evenly and get crispy.
    • Keep a close watch on your chicken, since air fryers cook quickly and food can burn easily.

    What Are Some Tips for the Juiciest BBQ Chicken?

    Creating juicy BBQ chicken is easier than you think. You can avoid dry, tough results with a few smart choices and simple techniques that ensure every bite is tender and full of flavor.

    Choosing the Right Cut: Thighs vs. Breasts

    The cut of chicken you choose plays a big role in the final juiciness. While both breasts and thighs work well for BBQ, they have different textures and cooking requirements.

    • Chicken Thighs: Because dark meat has a higher fat content, thighs are naturally more forgiving. They stay moist and tender even if slightly overcooked, which makes them a fantastic choice for beginner cooks.
    • Chicken Breasts: Leaner white meat means breasts can dry out quickly. If you prefer their milder flavor, be extra careful with cooking times. To help lock in moisture, consider using bone-in, skin-on breasts.

    For the juiciest result every time, we recommend bone-in, skin-on chicken thighs. They deliver rich flavor, incredible tenderness, and are forgiving enough to help you build confidence at the grill.

    The Secret to Preventing Dry Chicken

    No one likes dry chicken, but luckily, avoiding it is simple. Follow these key steps for perfectly moist results:

    • Don’t Overcook: This is the most common mistake. Since chicken continues to cook from residual heat after being removed from the grill, a meat thermometer is your most important tool.
    • Target Temperature: Cook chicken to an internal temperature of 165°F (74°C) in the thickest part [2]. This ensures it’s both safe to eat and perfectly juicy.
    • Rest Your Chicken: Always let the chicken rest for 5-10 minutes after cooking. This step allows the juices to redistribute throughout the meat, keeping it tender. Tenting it loosely with foil can help keep it warm.
    • Consider a Brine: For an extra layer of insurance against dryness, try a simple brine. A quick soak in a salt-water solution before cooking adds moisture and enhances the overall flavor.

    By following these tips, you can confidently create flavorful meals without the stress of serving dry chicken.

    When Is the Right Time to Add BBQ Sauce?

    Timing your BBQ sauce application is crucial. Since most sauces contain sugar, adding them too early is a common mistake that causes them to burn, leaving you with a bitter, charred exterior.

    Instead, follow this simple rule:

    • Add Sauce Towards the End: Brush BBQ sauce onto the chicken only during the last 10-15 minutes of cooking. This allows the sauce to caramelize and become sticky and delicious without burning.
    • Multiple Coats: For a thicker, more even layer of sauce, apply it in two or three thin coats. Brush on a coat, let it set for a few minutes, then repeat. This method builds a beautiful, glossy finish.

    This simple technique guarantees a sticky, flavorful crust and is the key to perfect BBQ chicken every time.

    What Can You Serve With BBQ Chicken?

    A serving of perfectly glazed BBQ chicken on a rustic plate, accompanied by a fresh green salad and grilled corn.
    A professional food photography, photorealistic, high-quality food magazine photo showcasing a perfectly plated serving of tender, glazed BBQ chicken. A beautifully browned and juicy chicken thigh, glistening with a rich BBQ sauce, is artfully arranged on a rustic, inviting ceramic plate. It is accompanied by vibrant, fresh side dishes: a small portion of a crisp green salad with cherry tomatoes and a light vinaigrette, and a piece of perfectly grilled corn on the cob. The setting is a warm, inviting dinner table, possibly outdoors or by a window with soft, natural light illuminating the dish, enhancing its appeal and highlighting the textures and colors of the food. No people visible.

    Your juicy, flavorful BBQ chicken is the star of the show, but a great main course deserves equally delicious companions. Choosing the right side dish transforms a good meal into a fantastic one. That’s why we’ve compiled this list of perfect pairings for your easy BBQ chicken recipe, designed for busy families and beginner cooks.

    You’ll find simple dinner ideas that are big on flavor, whether you’re looking for something quick, healthy, or comforting. Get ready to build a complete and satisfying family-friendly meal!

    Classic BBQ Sides That Always Delight

    Some dishes are simply meant to be served with BBQ chicken. These timeless classics complement its sweet and tangy flavors beautifully, bringing a comforting and familiar touch to your plate.

    • Creamy Coleslaw: A cool, crisp coleslaw provides a wonderful contrast. Its tanginess cuts through the richness of the BBQ sauce, making it a refreshing and easy side to whip up.
    • Homestyle Potato Salad: A true crowd-pleaser, creamy potato salad adds a hearty and satisfying element to your meal. It’s a classic comfort food that pairs wonderfully with chicken.
    • Baked Beans (Homemade or Canned): Sweet and savory baked beans are a quintessential BBQ side. They offer a rich flavor and a comforting texture. You can easily elevate canned beans with a few extra ingredients.
    • Corn on the Cob: Whether grilled, boiled, or roasted, sweet corn is always a hit. A little butter and salt are all it needs to become a simple, healthy side that tastes amazing.

    Fresh and Healthy Companions

    To balance the richness of BBQ chicken, try one of these fresh and healthy companions. They add vibrant flavor and nutrients to your bbq chicken meal, creating a balanced dinner without feeling heavy.

    • Simple Green Salad: A mixed green salad with a light vinaigrette is always a good choice. It adds a refreshing crunch and a vibrant taste, making it one of the easiest sides to prepare.
    • Grilled Vegetables: Zucchini, bell peppers, asparagus, or onions can be grilled right alongside your chicken. Grilling enhances their natural sweetness and smokiness—all you need is a drizzle of olive oil and some seasoning.
    • Roasted Sweet Potatoes: Cubed sweet potatoes roasted with a touch of olive oil and spices are delicious and offer a wonderful sweet-and-savory balance. Plus, they are packed with vitamins.
    • Quinoa Salad: A light quinoa salad with chopped cucumbers, tomatoes, and a lemon dressing is a filling yet healthy option. It’s packed with protein and fiber, making it a great choice for a balanced meal.

    Quick and Easy Additions for Busy Days

    When time is tight, you need sides that come together fast. These simple options will help you get a delicious, family-friendly dinner on the table without the stress.

    • White or Brown Rice: A simple bowl of rice is a versatile companion that soaks up all that wonderful BBQ sauce. For a healthier option, choose brown rice for its higher fiber content.
    • Garlic Bread or Dinner Rolls: Warm, crusty bread is perfect for dipping and a comforting addition that everyone enjoys. You can find ready-to-bake options for ultimate convenience.
    • Steamed Green Beans: For a healthy side that takes very little effort, quickly steam some fresh green beans. A simple pat of butter and a pinch of salt is all they need.
    • Boxed Macaroni and Cheese: Sometimes, comfort food is exactly what you need. A quick box of mac and cheese is a nostalgic favorite and a simple dinner recipe that kids always love.

    Tips for Perfect Pairings and Meal Planning

    Choosing the right sides goes beyond just taste. Consider balance, ease of preparation, and your family’s preferences. These practical tips will help you create a stress-free, flavorful meal.

    • Balance Flavors and Textures: Pair your rich BBQ chicken with something fresh or tangy, like a creamy coleslaw. This contrast creates a more interesting and balanced eating experience.
    • Consider Prep Time: If your chicken takes a while to cook, choose quick-prep sides. Using pre-chopped veggies or ready-made salads is a key strategy for efficient meal planning.
    • Use Seasonal Ingredients: Fresh, in-season produce always tastes best and often requires less work to make it shine. Buying seasonal is also a great way to cook on a budget.
    • Don’t Be Afraid to Mix and Match: You don’t need to stick to just one side. Offering two or three different options gives everyone at the table a choice and adds more variety to the meal.

    With these simple side dish suggestions, you can confidently serve a complete, delicious meal with your easy BBQ chicken. Enjoy cooking and eating well with Recipesmondial!

    How Should You Store and Reheat Leftovers?

    One of the best parts of a delicious BBQ chicken dinner is enjoying the leftovers! Proper storage and reheating are key to making sure your chicken stays safe and tastes just as amazing the second time around. Here at Recipesmondial, we want your home cooking experience to be stress-free from start to finish.

    Storing Your BBQ Chicken Safely

    To keep leftover BBQ chicken flavorful and safe to eat, follow these simple storage steps:

    • Cool Quickly: Let the chicken cool to room temperature, but for no more than two hours. This step is crucial for preventing bacteria growth.
    • Use Airtight Containers: Once cool, place the chicken in an airtight container. This locks in moisture and prevents the chicken from absorbing other fridge odors.
    • Refrigerate Promptly: Store the airtight container in the refrigerator for up to 3 to 4 days [3]. This makes leftovers perfect for quick lunches or easy weeknight meals.
    • Freeze for Longer Storage: To store chicken for up to 3 months, wrap individual portions tightly and place them in freezer-safe bags or containers [3]. Thaw it overnight in the refrigerator before you plan to reheat it.

    Following these guidelines will help you enjoy your easy recipes for days, making meal prep a breeze.

    Reheating Your BBQ Chicken for Best Flavor

    Proper reheating is the secret to enjoying your leftovers. The goal is to warm the chicken thoroughly without drying it out. For safety, always use a meat thermometer to ensure the internal temperature reaches 165°F (74°C).

    Reheating in the Oven (Recommended for Best Results)

    The oven is our top recommendation because it gently warms the chicken, keeping it moist while helping the skin crisp up again.

    1. Preheat your oven to 300°F (150°C).
    2. Place the chicken in an oven-safe dish.
    3. Add a splash of chicken broth or water to the dish. This creates steam and prevents the chicken from drying out.
    4. Cover the dish tightly with aluminum foil.
    5. Bake for 15–25 minutes. The exact time will depend on the size and thickness of the chicken pieces.
    6. For crispier skin, remove the foil for the last 5 minutes of heating.

    Reheating in the Air Fryer (Great for Small Portions)

    The air fryer is a fantastic option for reviving the chicken’s crispy texture, especially for smaller portions like wings or drumettes.

    1. Preheat the air fryer to 350°F (175°C).
    2. Lightly spray the chicken pieces with cooking oil to help them crisp up.
    3. Place the chicken in the basket in a single layer, making sure not to overcrowd it.
    4. Air fry for 5–8 minutes, flipping the pieces halfway through cooking.
    5. Check the internal temperature to ensure it’s fully heated.

    Reheating in the Microwave (Quickest Option)

    While it’s the fastest method, be careful not to overcook, as the microwave can make chicken rubbery. This method is best when you’re short on time.

    1. Place the chicken in a microwave-safe dish.
    2. Add a small splash of water or broth to the dish.
    3. Cover the dish with a microwave-safe lid or a damp paper towel to trap steam and keep the chicken moist.
    4. Heat on medium power (50%) in 60-second intervals. Check and flip the chicken after each interval to ensure even heating.
    5. Continue until the chicken is hot throughout.

    Tips for Juicy Reheated Chicken

    • Don’t Overheat: This is the most common mistake. Overheating is the fastest way to make chicken dry and tough.
    • Add Moisture: A splash of liquid—like broth, water, or even a fresh bit of BBQ sauce—makes a huge difference in keeping the chicken from drying out.
    • Slice Thick Pieces: For large pieces like chicken breasts, slice them before reheating. This helps them warm up quickly and evenly.
    • Check Temperature: Always use a meat thermometer to ensure your chicken reaches 165°F (74°C). This guarantees it’s safe to eat.

    With these simple tips, your leftover BBQ chicken will be just as delicious as when it was freshly cooked. At Recipesmondial, we’re here to make home cooking easy and enjoyable for everyone!

    Frequently Asked Questions About BBQ Chicken

    What is the best internal temperature for BBQ chicken?

    For juicy and safe BBQ chicken, cook it to an internal temperature of 165°F (74°C). This is the USDA-recommended temperature to ensure all poultry is cooked safely. [4]

    To check for doneness, use a meat thermometer. Insert it into the thickest part of the chicken, making sure it doesn’t touch any bones.

    Reaching 165°F not only guarantees the chicken is fully cooked, but it also helps keep the meat tender and flavorful. This simple check is the key to cooking with confidence every time.

    How do you get BBQ sauce to stick to chicken?

    Getting that perfect sticky, caramelized BBQ sauce on your chicken is easier than you think. The secret lies in timing and technique. Here’s how:

    • Pat the chicken dry: Before seasoning, gently pat your chicken pieces dry with paper towels. Excess moisture creates steam and prevents the sauce from adhering properly.
    • Apply in layers: Don’t smother the chicken in sauce too early. Instead, brush on thin layers during the final 10-15 minutes of cooking to allow each layer to set and caramelize.
    • Use moderate heat: If you’re grilling, move the chicken to a cooler, indirect heat zone before saucing. In an oven, keep the temperature moderate. This prevents the sugars in the sauce from burning.
    • Baste often: Apply a new layer of sauce every few minutes. This builds up a beautiful, glossy coating as the sugars thicken and create that delicious, sticky glaze.

    This method prevents the sauce from dripping off, giving you a wonderfully flavorful meal that’s perfect for any family dinner.

    Should you marinate chicken before making BBQ chicken?

    While marinating your chicken before grilling is optional, it’s an excellent way to elevate your dish. A marinade can significantly improve your BBQ chicken in three key ways:

    • Boosts flavor: A good marinade infuses the chicken with flavor, going much deeper than a surface-level dry rub.
    • Adds moisture: Marinades help the chicken retain its natural juices, preventing it from drying out during cooking.
    • Tenderizes the meat: Acidic ingredients like vinegar or buttermilk gently break down tough fibers, resulting in incredibly tender chicken.

    If you’re short on time, don’t worry. A good dry rub is a fantastic alternative, or you can simply let the rich flavor of your BBQ sauce shine. Both options offer great flexibility for a quick meal.

    Can I use chicken breasts instead of thighs for this recipe?

    Absolutely! Chicken breasts are a great substitute for thighs in this recipe. Because they are leaner, you’ll need to make a few small adjustments.

    Here are a few tips for using chicken breasts:

    • Watch the cooking time: Chicken breasts are leaner and cook much faster than thighs, so keep a close eye on them to prevent overcooking.
    • Monitor the temperature: Use a meat thermometer and pull the chicken from the heat the moment it reaches 165°F. This is crucial for preventing dry results.
    • Consider brining: For extra juicy breasts, a quick brine before seasoning can make a big difference by helping the meat retain moisture.
    • Pound them flat: Pounding chicken breasts to an even thickness helps them cook uniformly, ensuring no part becomes dry while another is still undercooked.

    While thighs are more forgiving, chicken breasts can be just as delicious when cooked carefully. Simply adjust your cooking time and monitor the temperature closely!


    Sources

    1. https://www.foodsafety.gov/food-safety-charts/safe-minimum-internal-temperature-chart
    2. https://www.foodsafety.gov/food-safety-charts/safe-minimum-cooking-temperatures
    3. https://www.foodsafety.gov/food-safety-charts/cold-food-storage-chart
    4. https://www.fsis.usda.gov/food-safety/safe-food-handling-and-preparation/food-safety-basics/safe-internal-temperature-chart

  • How to Make Perfect Risotto: A Simple Step-by-Step Recipe for Beginners

    How to Make Perfect Risotto: A Simple Step-by-Step Recipe for Beginners

    Risotto is a classic Northern Italian rice dish cooked slowly with broth until it becomes creamy and velvety. Its signature creamy texture comes not from cream, but from the starch released by short-grain, high-starch rice varieties like Arborio or Carnaroli as they are stirred during cooking.

    Imagine a rich, creamy bowl of risotto, with each spoonful melting in your mouth. That’s the magic of this classic Italian dish. For many home cooks, however, risotto can feel intimidating. It has a reputation for requiring constant stirring and precise timing. Perhaps you’ve been overwhelmed by complex recipes or unsure how to create healthy, tasty meals that impress. But what if we told you that making a delicious risotto is far simpler than you think, even for beginners?

    At Recipesmondial, we believe amazing food shouldn’t require culinary school. Our mission is to make approachable home cooking a joyful experience, turning simple dinner recipes into triumphs. This guide will empower you with step-by-step guidance to build your confidence and skills. You will discover how easy it is to create flavorful, family-friendly meals, transforming meal prep from a chore into a fun kitchen adventure.

    We’ll skip the complicated jargon and get straight to what works. This guide covers everything you need to know, from selecting the right risotto rice to mastering the techniques for that signature creamy texture. Soon, you’ll be impressing yourself and your loved ones with flavorful meals made easy. Let’s dive in and start with the heart of the dish.

    What Makes a Perfect Risotto?

    Imagine a dish that’s wonderfully creamy, incredibly flavorful, and deeply comforting. That’s the magic of a perfect risotto! This classic Italian rice dish feels both elegant and incredibly homey.

    Achieving this perfection isn’t complicated, even for beginners. The secret lies in two things: patient cooking and the right ingredients. The process involves gently stirring a special, starchy rice with warm broth. This slow stirring releases the rice’s natural starches, which is what creates that signature luxurious texture.

    So, what truly sets a perfect risotto apart? Here are the key elements you’ll want to achieve with our easy recipes:

    • Creamy Texture: The hallmark of great risotto is its unbelievably creamy texture. It should flow softly, almost like a thick soup, yet still hold its shape on a plate. This creaminess comes from the rice’s starch, which naturally thickens the broth and other liquids.
    • Al Dente Rice: While incredibly creamy, the individual rice grains should remain distinct. Each one needs a slight, pleasant chew at its very center. This texture is called ‘al dente,’ which means ‘to the tooth’ in Italian, offering a satisfying bite without being hard.
    • Rich, Balanced Flavor: A perfect risotto bursts with deep, savory flavors. These come from high-quality broth, a splash of white wine, and fresh aromatics like onion and garlic. Each ingredient should blend together to create one harmonious taste.
    • Just the Right Consistency (All’onda): It should never be too soupy or too stiff. Instead, it should flow like a gentle wave when you tilt the plate. This ideal consistency is known as *all’onda*, which means ‘on the wave’ in Italian—the true sign of a perfectly cooked risotto.
    • Freshness: Risotto is best enjoyed the moment it’s made. Its delicate texture and comforting warmth are at their absolute peak when served immediately.

    Once you master these key elements, you can create delicious risotto for your family with confidence. This approachable dish is a fantastic way to build your skills and feel more at home in the kitchen!

    What kind of rice is used in risotto?

    Three bowls displaying different types of uncooked risotto rice: Arborio, Carnaroli, and Vialone Nano.
    Professional food photography, photorealistic, high-quality food magazine photo. A clear and precise close-up shot showcasing three distinct types of risotto rice: Arborio, Carnaroli, and Vialone Nano. Each type of uncooked rice is neatly presented in a small, simple, and elegant white ceramic or glass bowl. The bowls are arranged in a row or slight triangle on a clean, neutral-toned surface, allowing the viewer to clearly discern the shape, size, and texture of each rice grain. The lighting is bright and even, highlighting the unique characteristics of each rice variety.

    Arborio: The Go-To Risotto Rice

    When you first make risotto, you’ll most likely encounter Arborio rice. It’s the go-to choice for many home cooks for a few key reasons.

    • Easy to find: Arborio is available in most grocery stores, making it a perfect starting point for beginner-friendly recipes.
    • Creamy texture: This plump, oval-shaped short-grain rice is packed with a starch called amylopectin. As you stir the risotto, this starch is released, creating the classic creamy consistency.
    • Absorbs flavor well: Arborio soaks up broth and seasonings effectively, delivering a rich and flavorful meal.

    Because of these qualities, Arborio is a reliable choice for successful, flavorful risotto and other simple dinner recipes.

    Carnaroli: The ‘King’ of Risotto Rice

    If you’re ready to elevate your risotto, consider Carnaroli. Many professional chefs refer to it as the “King of Risotto Rice.”

    • Superior texture: As a medium-grain rice, Carnaroli has a higher amylose content than Arborio. This structure helps the grains hold their shape well during cooking, resulting in a distinct al dente bite.
    • Extra creamy: Despite its firmness, Carnaroli releases plenty of starch, which creates a very creamy risotto without becoming mushy.
    • Rich flavor absorption: This rice excels at absorbing liquids and flavors, making every bite exceptionally rich.

    While it can be pricier and harder to find, Carnaroli is worth the effort for a restaurant-quality dish at home [1].

    Vialone Nano: For a Softer Texture

    Vialone Nano is another excellent but lesser-known option for risotto. It offers a different texture that is just as appealing.

    • Smaller grain: A short-grain variety, Vialone Nano is noticeably smaller and rounder than Arborio or Carnaroli.
    • Quick absorption: Its grains absorb liquid more quickly than other varieties, which can shorten the overall cooking time.
    • Softer, creamier result: The final dish is very creamy with a softer, almost soupy consistency. This texture makes it a preferred choice for delicate seafood risottos and vegetable dishes.

    Choose Vialone Nano if you want a risotto with a lighter, looser texture, which is ideal for exploring different flavors and cooking styles.

    Can I Make Risotto with Normal Rice?

    A common question, especially for those budget cooking, is whether regular rice can be used for risotto. The short answer is no—at least not if you want an authentic, creamy result.

    • Lack of starch: Standard long-grain rice, such as jasmine or basmati, has much less surface starch, which is essential for creating risotto’s signature creamy sauce.
    • Mushy texture: Instead of absorbing liquid gradually, these grains tend to become mushy and lose their individual shape.
    • Different cooking properties: The unique starch in risotto rice allows it to release creaminess while the grain itself remains firm in the center (al dente). Regular rice cannot do this.

    For the best risotto experience, it is essential to use a specialized Italian rice variety. Using the correct type ensures a creamy texture and reliable results, helping you avoid the frustration of a dish that doesn’t turn out as expected, which can feel like an overly complex recipe.

    Essential Ingredients for a Basic Risotto Recipe

    An organized display of fresh risotto ingredients including Arborio rice, Parmesan, onion, garlic, broth, white wine, butter, and parsley.
    Professional food photography, photorealistic, high-quality food magazine photo. A warm, inviting flat lay arrangement of fresh, high-quality essential ingredients for a basic risotto recipe. Include a small bowl of uncooked Arborio rice, a wedge of Parmesan cheese with a grater nearby, a fresh shallot or small onion, a few cloves of garlic, a clear glass pitcher filled with golden chicken or vegetable broth, a small bottle of dry white wine, a stick of butter, and a bunch of vibrant fresh parsley. All items are artfully arranged on a clean, light-colored wooden or marble kitchen counter, highlighting their freshness and readiness for cooking. The lighting is soft and natural.

    The Rice

    The star of any amazing risotto is the rice. Choosing the right grain is crucial for achieving that signature creamy texture, making it a key step in creating truly flavorful meals made easy.

    • Arborio Rice: As the most common choice, this is perfect for beginner-friendly recipes. Arborio grains are plump, absorb liquid beautifully, and release starch as they cook to create a lovely creamy sauce.
    • Carnaroli Rice: Often called the “king of risotto rice,” Carnaroli offers an even creamier result while holding its shape wonderfully.
    • Vialone Nano Rice: This smaller grain cooks a bit faster and yields a slightly softer, very creamy risotto.

    Avoid using long-grain white rice for risotto, as it won’t release enough starch for the desired creaminess. For the best outcome, stick to these specific risotto rice varieties.

    The Broth

    Broth is more than just liquid in risotto; it’s a primary source of flavor. For the best taste, always use a good-quality broth. It’s what transforms your simple dinner recipes into something special.

    • Chicken Broth: A classic choice, chicken broth adds a rich, savory depth that pairs well with many ingredients.
    • Vegetable Broth: For a vegetarian or vegan risotto, vegetable broth is essential. Choose a low-sodium option to better control the saltiness.

    Pro Tip: Always keep your broth warm in a separate pot on the stove. Adding cold broth to the hot rice can shock it, which slows the cooking process and prevents the grains from absorbing liquid evenly. This simple trick ensures a consistently creamy finish.

    The Aromatics (Onion & Garlic)

    These humble ingredients form the aromatic foundation of your risotto, providing the initial burst of flavor. They are vital for adding depth to any easy recipe. A classic risotto starts with finely diced onion and sometimes garlic.

    • Onion: Finely chop half a medium onion. You want it to almost disappear into the rice as it cooks, adding a subtle sweetness and depth.
    • Garlic: One or two cloves of minced garlic can enhance the flavor. Be sure to add it after the onion softens to prevent it from burning.

    Sautéing these ingredients gently until translucent releases their wonderful aromas and creates a welcoming base for the rice. This step-by-step cooking guidance ensures you build flavor from the very beginning.

    The Fat (Butter & Olive Oil)

    Fat plays a dual role in risotto: it’s used for both sautéing and for richness. Butter and olive oil each bring unique qualities to the dish.

    • Olive Oil: Start with a good-quality extra virgin olive oil. It’s perfect for sautéing the aromatics and toasting the rice, providing a light, fruity base.
    • Unsalted Butter: Butter is added later for richness and creaminess, contributing to the dish’s luxurious final texture. Using unsalted butter also lets you control the seasoning.

    Together, they create a silky, smooth mouthfeel that makes your risotto feel truly indulgent. This small detail makes a big difference in approachable home cooking.

    The Wine (Optional but Recommended)

    Adding wine is a traditional step that enhances the risotto’s complexity and elevates family-friendly meals. However, this step is optional. If you prefer not to use wine, simply use a little more broth instead.

    • Dry White Wine: A dry white wine, like Pinot Grigio or Sauvignon Blanc, is ideal. It adds a bright acidity that helps deglaze the pan and balances the richness of the butter and cheese.

    The alcohol cooks off completely, leaving behind a wonderful, nuanced flavor that makes the dish more sophisticated. It’s a great way to discover new simple dishes and build confidence in the kitchen.

    The Finishers (Parmesan & Butter)

    The final touches, stirred in right at the end, make all the difference in achieving a perfectly creamy risotto. This process, called “mantecatura,” is essential for a truly flavorful meal made easy.

    • Freshly Grated Parmesan Cheese: Use high-quality Parmesan or Pecorino Romano. The cheese melts into the rice, adding a salty, umami depth and incredible creaminess. Avoid pre-grated cheese, which often contains anti-caking agents that can ruin the texture.
    • Cold Unsalted Butter: Stirring in a final knob of cold butter off the heat allows it to emulsify with the rice’s starches and the broth. This is the key to a glossy, velvety-smooth finish.

    These finishers are the secret to a dreamy, restaurant-quality risotto, helping to transform simple ingredients into delicious, visually appealing meals at home.

    How to Make Simple & Creamy Risotto: A Step-by-Step Guide

    A creamy bowl of perfectly cooked risotto topped with freshly grated Parmesan cheese and chopped parsley, with steam gently rising.
    Professional food photography, photorealistic, high-quality food magazine photo. A close-up, top-down shot of a perfectly cooked, golden-hued, and visibly creamy risotto served in an elegant, rustic ceramic bowl. The risotto is generously garnished with a sprinkle of freshly grated Parmesan cheese and a few bright green chopped parsley leaves. Soft steam is gently rising from the dish, emphasizing its warmth and freshness. The background is softly blurred, suggesting a cozy, inviting kitchen environment. The texture of the risotto should look rich, comforting, and perfectly al dente.

    Step 1: Prepare Your Ingredients (Mise en Place)

    Preparing all your ingredients before you start is a game-changer. This practice, known by the French term “Mise en Place” (everything in its place), helps you cook with confidence and makes the process more enjoyable.

    Gathering and prepping everything beforehand prevents any last-minute scrambling. This is a fantastic habit for beginner-friendly recipes and a key part of our meal prep tips.

    • Warm the broth: Pour the chicken or vegetable broth into a saucepan and gently heat it over low heat. It should be hot but not boiling. Keeping the broth warm helps the risotto cook evenly.
    • Dice the onion: Finely chop one small to medium onion.
    • Mince the garlic: Peel and finely mince 2-3 cloves of garlic.
    • Measure the rice: You’ll need 1 cup (180-200g) of Arborio or Carnaroli rice.
    • Grate the cheese: Grate ½ cup of fresh Parmesan and set it aside.
    • Prepare the butter: Cut 2 tablespoons of unsalted butter into small cubes.
    • Measure the wine (optional): Pour ½ cup of dry white wine, such as Pinot Grigio or Sauvignon Blanc.

    Step 2: Sauté the Aromatics

    This step builds the first layer of flavor for your risotto. Your kitchen is about to start smelling amazing!

    1. Place a large, heavy-bottomed pot or a Dutch oven over medium heat.
    2. Add 1 tablespoon of olive oil and 1 tablespoon of butter.
    3. Once the butter has melted and the oil shimmers, add the finely diced onion.
    4. Sauté the onion for 5-7 minutes, stirring occasionally, until it becomes soft and translucent. Be careful not to let it brown.
    5. Stir in the minced garlic and cook for one more minute until fragrant. Watch it closely, as burnt garlic tastes bitter.

    Step 3: Toast the Rice (Tostatura)

    Next is “Tostatura,” the Italian term for toasting the rice. This is a crucial step for achieving the perfect risotto texture. Toasting helps each grain absorb liquid more slowly, which prevents it from becoming mushy and ensures a wonderful ‘al dente’ bite.

    1. Add the risotto rice to the pot with the onions and garlic.
    2. Stir constantly for 2-3 minutes to coat each grain.
    3. You’ll know it’s ready when the edges of the rice grains look translucent, but the centers remain white and opaque.
    4. Toasting also brings out a pleasant, nutty flavor. It’s a simple technique that makes a big difference.

    Step 4: Deglaze with Wine

    Deglazing with wine adds a rich depth of flavor and helps lift any tasty bits of food stuck to the bottom of the pot. This little trick is a secret to flavorful meals made easy.

    1. Pour the white wine into the pot.
    2. Stir continuously as the wine bubbles and evaporates, which should happen quickly.
    3. Continue stirring until the wine is fully absorbed and no liquid pools at the bottom of the pot.
    4. Quick Tip: If you prefer not to use wine, you can skip this step. Just add an extra ½ cup of warm broth in the next step instead.

    Step 5: Gradually Add Warm Broth

    This step is the heart of making risotto, and patience is key. By adding broth slowly, you are coaxing the starches out of the rice, which creates its signature creamy texture. This is a fundamental technique in basic cooking skills.

    1. Add one ladleful (about ½ cup) of the warm broth to the rice.
    2. Stir gently but constantly until the broth is almost completely absorbed by the rice.
    3. Once the liquid is absorbed, add another ladleful of broth.
    4. Repeat this process—adding one ladleful of broth at a time and stirring until it’s absorbed—for about 18-25 minutes.
    5. Taste the rice periodically. It’s ready when it’s creamy but still has a slight bite in the center (known as “al dente”).
    6. You may not use all the broth, or you might need a bit more. The goal is a creamy consistency, not a soupy one.

    Step 6: The Final Stir (Mantecatura)

    The final step, “Mantecatura,” is how you achieve an incredibly rich and creamy finish. This technique brings all the flavors together and gives the risotto its classic velvety texture.

    1. Once the risotto is al dente, remove the pot from the heat.
    2. Add the remaining 1 tablespoon of cubed butter.
    3. Stir in the grated Parmesan cheese.
    4. Stir vigorously for about 30 seconds. This action emulsifies the butter and cheese with the starch from the rice, creating a beautiful, velvety sauce.
    5. Cover the pot and let it rest for 2-3 minutes. This allows the flavors to meld and makes the risotto even creamier.
    6. Serve the risotto immediately. Garnish with extra Parmesan and fresh parsley, if desired.

    Top Tips for Foolproof Risotto

    Always Use Warm Broth

    One of the most important secrets to a truly creamy risotto is using warm broth. This simple step makes a huge difference. Adding cold broth to hot rice instantly drops the pan’s temperature, which shocks the rice kernels. As a result, the cooking process slows down and becomes uneven.

    In contrast, warm broth helps the rice cook consistently and encourages a smooth release of starches. This process is what creates that lovely, velvety texture. Keep your broth at a gentle simmer in a separate pot, and ladle it in gradually as needed. This technique ensures your risotto cooks beautifully every time.

    Stir Constantly, but Gently

    Consistent, gentle stirring is essential for a great risotto. The constant movement causes the rice grains to rub against each other, which releases their natural starches. These starches create the creamy, luscious texture of an authentic risotto. Without enough stirring, your dish might end up sticky or less creamy.

    However, avoid stirring too aggressively. Too much force can break down the delicate rice grains, resulting in a mushy texture instead of a perfectly al dente bite. Think of it as a gentle, continuous motion. Mastering this simple technique will help you achieve perfect results and boost your confidence in the kitchen.

    Don’t Rush the Process

    Patience is essential when making risotto. While it isn’t a quick meal, the results are incredibly satisfying. Rushing can lead to an undercooked or unevenly textured dish. The gradual addition of warm broth is key, as it allows the rice to slowly absorb the liquid, building flavor and creaminess layer by layer.

    Plan on about 20-30 minutes for the cooking stage, and try to enjoy the process. By taking your time to stir and add the broth ladle by ladle, you ensure each grain is cooked perfectly to the ideal al dente texture. Remember, good things come to those who wait—especially a delicious risotto.

    Taste As You Go

    Tasting your risotto throughout the cooking process is crucial for achieving the best results. This simple tip allows you to adjust flavors and monitor the texture for perfect doneness. Start tasting the rice about 15 minutes after you begin adding broth. You’re looking for a tender bite with a slight firmness in the center, also known as ‘al dente’.

    This is also your chance to check the seasoning. Since your broth likely contains salt, add any extra salt and pepper carefully. You can also add more cheese at the end if you like. Adjust as you go to create a balanced, flavorful dish. This final step is key to making a perfect risotto every time.

    Easy Risotto Recipe Variations to Try Next

    Mushroom Risotto

    Once you master the basic risotto, an easy mushroom risotto recipe is a popular next step. It’s a classic for a reason, offering an incredible depth of flavor and an earthy aroma that elevates any simple dinner.

    Here’s how to create this delightful variation:

    • Key Ingredients: Use fresh mushrooms like cremini, shiitake, or a mix of wild varieties. A little garlic and fresh thyme will also enhance the flavor.
    • Preparation: Start by sautéing sliced mushrooms in a separate pan until golden brown. This crucial step concentrates their flavor. Remove them from the pan and set aside.
    • Cooking Adjustments: Follow the basic risotto steps: sauté your aromatics, toast the rice, deglaze with white wine, and then gradually add warm broth.
    • Adding the Mushrooms: Stir the sautéed mushrooms back into the risotto during the last 5 minutes of cooking to prevent them from becoming rubbery.
    • Flavor Boost: For extra richness, use mushroom broth instead of chicken or vegetable broth. A sprinkle of fresh parsley at the end adds a bright finish.

    Chicken Risotto

    For a hearty, protein-packed meal, chicken risotto is a fantastic choice. This family-friendly dish is both comforting and satisfying. It’s also perfect for using leftover chicken, making it a quick weeknight meal.

    Here’s how to make a delicious chicken risotto:

    • Key Ingredients: You’ll need cooked chicken—shredded rotisserie chicken is a great shortcut. Fresh or frozen peas and a touch of lemon zest are also excellent additions.
    • Preparation: If using raw chicken, cut it into small, bite-sized pieces. Sauté the pieces in olive oil until cooked through, then set the chicken aside.
    • Cooking Adjustments: Follow the standard risotto cooking method. Make sure your broth is warm before you begin.
    • Incorporating Chicken and Peas: Stir in the cooked chicken and peas during the last 5-7 minutes of cooking. This gives them enough time to warm through completely.
    • Serving Tip: A squeeze of fresh lemon juice at the end brightens all the flavors and cuts through the richness of the dish beautifully.

    Vegetarian Risotto with Spring Vegetables

    A vibrant vegetarian risotto is the perfect way to enjoy the freshness of the season. This healthy and balanced dish is ideal for lighter dining, offering a beautiful mix of colors and textures.

    Here’s how to bring spring to your plate:

    • Key Ingredients: Choose tender spring vegetables like asparagus, peas, and fresh spinach. Lemon zest and fresh mint or basil add a wonderful aroma.
    • Preparation: To prepare the vegetables, blanch the asparagus and peas in boiling water, then plunge them into an ice bath. This preserves their vibrant color and crisp texture. Chop the asparagus into small pieces.
    • Cooking Adjustments: Use vegetable broth for this recipe and follow the standard risotto method.
    • Adding Vegetables: Stir in the blanched asparagus and peas during the final 3-5 minutes of cooking. Add fresh spinach at the very end, as the residual heat will wilt it perfectly.
    • Finishing Touch: A generous amount of lemon zest and a handful of chopped fresh herbs elevate this dish, making it truly taste like spring.

    Seafood Risotto

    For a touch of elegance, try a seafood risotto. This impressive dish might seem fancy, but it’s surprisingly simple to prepare. It’s a wonderful option for a special occasion or any time you want an extraordinary meal.

    Here’s how to create a stunning seafood risotto:

    • Key Ingredients: Select your favorite seafood, such as shrimp, scallops, calamari, or mussels. A good dry white wine and fresh parsley are also essential.
    • Preparation: Gently sauté the seafood in a separate pan with a little olive oil. Cook just until opaque (or until mussels open) to avoid overcooking. Remove the seafood and set it aside.
    • Cooking Adjustments: Use fish stock or a light vegetable broth if possible. Follow the basic risotto steps, including deglazing the pan with white wine.
    • Integrating Seafood: Stir the cooked seafood into the risotto during the last 2-3 minutes of cooking. This gently warms it through without overcooking, ensuring it remains tender.
    • Pro Tip: Garnish with plenty of fresh, chopped parsley. This adds a burst of fresh flavor and creates a beautiful presentation.

    Frequently Asked Questions About Risotto

    Is risotto more healthy than rice?

    Risotto generally contains more calories and fat than plain steamed rice. This is because it’s enriched with ingredients like butter, broth, and cheese, while plain rice is typically just cooked with water.

    Here’s a simple comparison:

    • Plain Rice: Consists of rice and water, offering simple carbohydrates for energy.
    • Risotto: Starts with rice but adds butter, wine, broth, and Parmesan cheese. These ingredients are what create its famously rich flavor and creamy texture.

    However, you can easily make a healthier risotto. Try reducing the amount of butter and cheese, and boost its nutritional value by adding plenty of vegetables like mushrooms, spinach, or asparagus. This can turn it into a well-rounded and flavorful meal.

    At Recipesmondial, we believe enjoyment is key to home cooking. So while plain rice is lower in calories, a homemade risotto packed with vegetables can be a wonderful part of a balanced diet. It’s all about preparation and balance.

    Can I make risotto with normal rice?

    While you can technically use regular long-grain rice, it won’t produce the classic creamy texture of a true risotto. The type of rice you use is critical for getting the right result.

    Here’s why:

    • High Starch Content: Risotto rice like Arborio and Carnaroli has a high content of a starch called amylopectin. As you stir the rice and add liquid, this starch releases and creates the signature creamy, velvety sauce.
    • Slow Absorption: The grains are also great at absorbing liquid slowly without becoming mushy. This allows them to cook to a perfect al dente texture.

    Regular long-grain rice, like basmati or jasmine, has much less of this starch. It will absorb the broth but won’t create that creamy consistency. Instead, you’ll end up with a dish that’s more like a pilaf. For authentic results, using proper risotto rice makes all the difference.

    What is traditional risotto rice?

    To make an authentic, creamy risotto, you need to use a specific type of short- to medium-grain rice. These varieties have the high starch content required for a creamy texture and the ability to absorb liquids while remaining firm, or “al dente.”

    Here are the top traditional risotto rice types:

    • Arborio: The most widely available risotto rice, making it a popular choice for beginner-friendly recipes. Its large, plump grains release a lot of starch, producing a very creamy risotto. It’s a great starting point for anyone new to making the dish.
    • Carnaroli: Often called the “king of risotto rice,” Carnaroli has longer grains and an even higher starch content than Arborio. It creates an exceptionally creamy texture while the grains hold their shape beautifully. Many chefs prefer it for its reliable results.
    • Vialone Nano: With shorter, plumper grains, Vialone Nano cooks a bit faster than the others. It produces a very creamy risotto with a slightly softer finish and is a favorite for seafood dishes.

    Choosing the right rice is the most important step for achieving that signature creamy texture. It ensures your risotto will turn out perfectly every time.

    What wine is best to use in risotto?

    A dry white wine is a classic ingredient in risotto for a reason. It adds a fantastic depth of flavor and a touch of acidity that cuts through the richness of the dish.

    Here’s what you should look for:

    • Dry White Wine: Opt for a crisp, unoaked wine. Good choices include Pinot Grigio, Sauvignon Blanc, or a dry Vermouth. The alcohol cooks off during cooking, leaving behind a subtle flavor that enhances the dish.
    • Pro Tip: Follow the golden rule of cooking with wine: if you wouldn’t drink it, don’t cook with it. A low-quality wine will not improve with cooking.

    And here’s what to avoid:

    • Sweet Wines: Avoid sweet wines like Moscato or a sweet Riesling, as they will make your risotto taste sugary.
    • Red Wines: Unless a specific recipe calls for it (like a Barolo risotto), it’s best to avoid red wine. It will dramatically change the dish’s color and intended flavor.

    If you prefer to cook without alcohol, you can easily skip the wine. Simply substitute it with an equal amount of warm broth. Your risotto will still be delicious and full of flavor.


    Sources

    1. https://www.finedininglovers.com/article/risotto-rice-varieties-carnaroli-arborio-vialone-nano

  • The Best Beef Stroganoff: A Step-by-Step Guide for Beginners

    The Best Beef Stroganoff: A Step-by-Step Guide for Beginners

    Beef Stroganoff is a classic comfort food dish featuring tender strips of sautéed beef and mushrooms, all coated in a rich, creamy sauce made with sour cream. It is traditionally served over egg noodles, rice, or potatoes. This simple, one-pan recipe is perfect for a quick and flavorful weeknight dinner.

    Are you searching for a hearty, comforting meal that feels special but isn’t complicated to prepare? It can be overwhelming to find family-friendly dishes that satisfy everyone, especially when you want incredible flavor without the stress. That’s where this beef stroganoff comes in. It’s a timeless classic that brings warmth and deliciousness to any dinner table, made simple and enjoyable for cooks of all levels.

    Our goal is to help you build confidence and make cooking an enjoyable experience, not a chore. This beef stroganoff recipe is designed with clear, step-by-step guidance perfect for beginners and busy home cooks. We’ll walk you through every stage, ensuring you achieve perfectly tender beef and a rich, creamy mushroom sauce. You’ll see how simple ingredients transform into a truly impressive, stress-free meal.

    Forget guesswork and confusing technical terms. Our approachable home cooking method focuses on practical steps for delicious results. This isn’t just another stroganoff recipe—it’s proof that cooking can be both easy and incredibly rewarding. Ready to see why this will become your new go-to for a quick family dinner? Let’s get started.

    Why Is This The Best Beef Stroganoff Recipe?

    Welcome to your new favorite beef stroganoff! We believe cooking should be enjoyable, not overwhelming, which is why we designed this recipe to be the absolute best for home cooks. It transforms a classic dish into a delicious and comforting meal you can create without any stress.

    This recipe was crafted with you in mind. Our clear, step-by-step guidance makes the entire process approachable from start to finish, ensuring you achieve a perfect result every single time.

    So, why is this beef stroganoff recipe truly exceptional?

    • Simple, Everyday Ingredients: We focus on ingredients you can easily find at any grocery store. No exotic or hard-to-source items are needed for this flavorful meal.
    • Unbeatable Flavor, Made Easy: Our simple method ensures tender beef and a rich, creamy mushroom sauce, so you can achieve restaurant-quality taste in your own kitchen.
    • Beginner-Friendly Steps: Each instruction is broken down into simple, actionable steps. You won’t be overwhelmed by complex techniques or jargon, making this recipe perfect for building your confidence in the kitchen.
    • Reliable Results: Say goodbye to guesswork! This recipe is designed for consistent success. You will create a comforting, family-friendly meal that everyone will love.
    • Quick & Convenient: Perfect for busy weeknights, this beef stroganoff comes together surprisingly fast, helping you solve mealtime decisions quickly and deliciously.
    • Customizable for Your Family: We include practical tips for substitutions and variations. You can easily adapt this stroganoff recipe to fit different tastes or dietary needs.

    Many home cooks feel intimidated by complex recipes or lack confidence in the kitchen. This beef stroganoff recipe is the perfect solution. It’s designed to make cooking a stress-free joy, providing a reliable and delicious meal every time. Get ready to transform simple ingredients into a truly memorable dish!

    What are the ingredients for beef stroganoff?

    A beautiful flat lay of fresh ingredients for beef stroganoff, including raw beef strips, sliced mushrooms, sour cream, and various spices.
    Professional food photography, photorealistic, high-quality food magazine photo. An overhead shot of all fresh, raw ingredients for homemade beef stroganoff, beautifully arranged on a rustic light wood cutting board or kitchen counter. Key ingredients include: tender cuts of beef sirloin or tenderloin, thinly sliced cremini mushrooms, finely chopped yellow onion, minced garlic cloves, a tub of creamy sour cream, rich beef broth, a dollop of Dijon mustard, a splash of Worcestershire sauce, olive oil, and a small bunch of fresh parsley. Each ingredient is distinct and vibrant, showcased in its best light with warm, natural kitchen lighting. The scene evokes a sense of freshness and inviting preparation.

    The Best Cut of Beef for Stroganoff

    Choosing the right cut of beef is key to a tender, delicious stroganoff. The best options are those that cook quickly while staying juicy, guaranteeing a successful and family-friendly meal.

    Here are our top recommendations for approachable home cooking:

    • Sirloin Steak: A fantastic and lean choice that becomes wonderfully tender when sliced correctly. Sirloin is ideal for a quick-cooking, flavorful meal.
    • Beef Tenderloin (Filet Mignon): For ultimate tenderness, beef tenderloin is unmatched. It cooks incredibly fast, ensuring a supremely tender result that makes any simple dinner feel indulgent.
    • Ribeye Steak: While a slightly pricier option, ribeye offers exceptional flavor and tenderness due to its rich marbling, which guarantees a delicious result.

    Pro Tip for Tender Beef: For the most tender beef, always slice the meat against the grain. This crucial technique shortens the muscle fibers, resulting in a better chew and preventing toughness. [1] For this recipe, you will need about 1.5 pounds (approximately 680g) of beef.

    For the Creamy Mushroom Sauce

    The delicious, creamy sauce is the heart of this comforting dish. Fortunately, creating it is simpler than you might think, using everyday ingredients to build incredible flavor.

    Here’s what you’ll need to make our signature creamy mushroom sauce:

    • Mushrooms: About 8 ounces (225g) of thinly sliced cremini (baby bella) or white button mushrooms, which add an earthy depth.
    • Onion: One small yellow onion, finely chopped to provide a sweet base when sautéed.
    • Garlic: Two cloves of minced garlic, a key flavor booster in any savory dish.
    • Beef Broth: 2 cups (480ml) of low-sodium beef broth to create the foundation of the rich sauce.
    • Worcestershire Sauce: 1 tablespoon, which adds a deep, savory umami complexity.
    • Dijon Mustard: 1 tablespoon for a subtle tang that balances the sauce’s richness and enhances the overall taste.
    • All-Purpose Flour: 2 tablespoons to thicken the sauce, creating a lovely, luscious texture.
    • Sour Cream: 1 cup (240g) of full-fat sour cream, the key to the signature creaminess and tang. Bring it to room temperature before adding to the hot sauce to prevent curdling.
    • Unsalted Butter or Olive Oil: 2 tablespoons for sautéing.

    Substitution Tip: If you don’t have sour cream, full-fat plain Greek yogurt is a good substitute. For the best texture and to prevent curdling, ensure it also comes to room temperature before using.

    Essential Herbs and Spices

    The right herbs and spices are vital for transforming simple ingredients into a rich, well-rounded beef stroganoff. These seasonings bring out the best in the dish and ensure a flavorful meal.

    Here are the essential spices you’ll need:

    • Salt: About 1 teaspoon of kosher or sea salt to season the beef and sauce. Adjust to your taste.
    • Black Pepper: Half a teaspoon of freshly ground black pepper for a subtle warmth and spice.
    • Paprika: 1 teaspoon of sweet or smoked paprika, which adds beautiful color and a mild, earthy flavor.
    • Fresh Parsley: For garnish. A sprinkle of freshly chopped parsley at the end brightens the dish with a pop of color and freshness.

    These common seasonings are easy to find and make a significant difference in the final flavor of the dish.

    How to Make Easy Beef Stroganoff (Step-by-Step)

    A close-up, mouth-watering image of creamy beef stroganoff served over egg noodles, garnished with fresh parsley.
    Professional food photography, photorealistic, high-quality food magazine photo. A stunning hero shot of a generous serving of perfectly cooked Beef Stroganoff, plated elegantly in a warm, rustic ceramic bowl. The creamy, rich mushroom and beef sauce coats tender slices of beef, served over a bed of al dente wide egg noodles. A sprinkle of freshly chopped green parsley garnishes the top, adding a pop of color. Wisps of steam gently rise from the hot dish, indicating its warmth and freshness. The background is a softly blurred, inviting home kitchen setting with warm, ambient lighting, emphasizing comfort and deliciousness. Shot from a slightly elevated angle, capturing depth and texture.

    Step 1: Prepare the Beef and Vegetables

    A delicious Beef Stroganoff starts with good prep work. This step ensures everything cooks evenly and infuses your dish with maximum flavor.

    • Slice the Beef: Cut your chosen beef into thin strips, about 1/4-inch thick and 2-3 inches long. For the most tender results, always slice across the grain. [2] This is a key technique for tender, flavorful meals made easy.
    • Chop the Onion: Peel and finely dice the onion. Small, even pieces will melt beautifully into the sauce.
    • Slice the Mushrooms: Wipe the mushrooms clean with a damp cloth and slice them evenly. You can leave smaller mushrooms whole if you prefer.

    Step 2: Sauté the Mushrooms and Onions

    Building layers of flavor is crucial for an amazing beef stroganoff recipe. Sautéing the vegetables first brings out their natural sweetness and deepens the overall taste of the dish.

    1. Heat Your Skillet: Place a large skillet or Dutch oven over medium-high heat and add 1 tablespoon of olive oil or butter.
    2. Cook the Mushrooms: Add the sliced mushrooms to the hot pan. Cook for 5-7 minutes, stirring occasionally, until they have released their liquid and started to brown nicely. This adds a rich, earthy note.
    3. Add the Onions: Push the mushrooms to one side of the skillet and add the diced onion to the empty side. Cook for 3-5 minutes, until the onions soften and become translucent.
    4. Combine and Season: Stir the mushrooms and onions together. Season with a pinch of salt and black pepper, then remove the mixture from the skillet and set it aside.

    Pro Tip: Avoid overcrowding the pan when cooking mushrooms. If needed, cook them in two batches to ensure they brown properly instead of steaming. This gives you a much better flavor and texture.

    Step 3: Sear the Beef Strips

    Searing the beef locks in its juices and creates a flavorful browned crust. This step adds incredible depth to this simple dinner recipe and makes your beef stroganoff truly special.

    1. Increase the Heat: Return the same skillet to medium-high heat and add another tablespoon of olive oil or butter.
    2. Sear in Batches: Place about one-third of the beef strips in the hot pan in a single layer. Do not overcrowd the pan. Cook for 1-2 minutes per side, until the beef is nicely browned.
    3. Remove the Beef: Transfer the seared beef to a plate. Repeat the process with the remaining beef in two more batches.
    4. Keep the Flavor: After searing all the beef, you’ll see delicious browned bits stuck to the bottom of the pan. Don’t wash them away! These are packed with flavor for your sauce.

    Why this step matters: Searing meat develops a rich, savory crust through the Maillard reaction. [3] This chemical reaction is essential for a truly flavorful meal made easy.

    Step 4: Create the Creamy Stroganoff Sauce

    Now it’s time to build the heart of this family-friendly meal: the rich and creamy sauce. This step is surprisingly simple, making this one of many great beginner-friendly recipes.

    1. Deglaze the Pan: Reduce the heat to medium-low. Pour 1/2 cup of beef broth into the skillet and use a wooden spoon to scrape up all those flavorful browned bits from the bottom.
    2. Make a Roux: Add 2 tablespoons of butter to the pan. Once it melts, sprinkle in 2 tablespoons of all-purpose flour. Whisk continuously for 1-2 minutes to create a roux, which will thicken the sauce.
    3. Whisk in the Broth: Gradually pour in the remaining 1 1/2 cups of beef broth, whisking constantly to prevent lumps as the sauce begins to thicken.
    4. Add Seasoning: Stir in 1 tablespoon of Worcestershire sauce and 1 teaspoon of Dijon mustard. These ingredients add a wonderful, tangy depth.
    5. Stir in the Sour Cream: Remove the pan from the heat and let it cool for a minute. This crucial step prevents the sour cream from curdling. Stir in 1 cup of sour cream, whisking until the sauce is smooth and creamy.

    Quick Tip: If your sauce seems too thick, add a splash more beef broth or water until it reaches your desired consistency. This step-by-step cooking guidance helps you adjust as you go.

    Step 5: Combine and Simmer to Perfection

    You’re almost there! This final step brings all the elements together into a comforting, delicious easy recipe that is sure to become a new family favorite.

    1. Return Ingredients to the Pan: Add the seared beef and the sautéed mushrooms and onions back into the skillet with the creamy sauce.
    2. Simmer Gently: Stir everything together and place the skillet back over low heat. Allow the stroganoff to simmer gently for 5-10 minutes. This will finish cooking the beef and meld all the flavors. Avoid boiling, which can cause the sour cream to separate.
    3. Taste and Adjust: Give the stroganoff a final taste. Add more salt and pepper if needed. You can also add a pinch of paprika for extra color and flavor.
    4. Garnish and Serve: Remove from the heat and garnish generously with fresh chopped parsley. Serve your homemade easy beef stroganoff immediately over egg noodles, rice, or mashed potatoes for a satisfying, approachable home cooking experience.

    From simple ingredients to a delicious, beautiful meal – that’s the Recipesmondial way! You’ve just created an amazing dish that proves great cooking can be both enjoyable and stress-free.

    What Should I Serve With Beef Stroganoff?

    A complete, comforting dinner setting featuring a bowl of beef stroganoff with egg noodles, a side of green asparagus, and a slice of crusty bread.
    Professional food photography, photorealistic, high-quality food magazine photo. A warm and inviting dinner scene featuring a complete meal. The main focus is a beautifully plated bowl of Beef Stroganoff with egg noodles, positioned centrally. Alongside it, there is a small, rustic side dish of perfectly steamed and bright green asparagus spears, lightly seasoned, and a thick slice of crusty, artisanal bread with a golden-brown crust. The setting is a cozy, wooden dining table, possibly with a simple, warm-toned linen napkin or placemat. Natural, soft lighting highlights the textures and colors of the food, creating an appealing and wholesome meal presentation.

    Classic Egg Noodles

    You’ve crafted a fantastic beef stroganoff recipe, and now it’s time to find its perfect partner. Classic egg noodles are the quintessential choice because their wide, flat shape is ideal for soaking up the rich, creamy sauce, making every bite wonderfully flavorful.

    Best of all, preparing egg noodles is incredibly simple, making them a quick and easy option for any busy home cook.

    • Boil Water: Bring a large pot of salted water to a rolling boil.
    • Add Noodles: Carefully add the egg noodles to the water.
    • Cook to Al Dente: Cook according to package directions, typically 6-8 minutes. Aim for an al dente texture, which is slightly firm to the bite.
    • Drain and Serve: Drain the noodles well. You can either toss them directly with the stroganoff or serve them alongside.

    Serving egg noodles with stroganoff guarantees a comforting, family-friendly meal that’s both easy and delicious.

    Fluffy White Rice

    Fluffy white rice is a superb choice for beef stroganoff, whether you need a gluten-free option or simply prefer a different texture. Its mild flavor allows the rich sauce to shine, while the individual grains provide a lovely textural contrast to the creamy beef.

    Here’s how to get perfectly fluffy rice every time:

    • Rinse Rice (Optional but Recommended): For fluffier results, rinse the rice under cold water until the water runs clear. This step removes excess starch.
    • Combine Rice and Water: Use a 1:2 ratio for most white rice. Combine 1 cup of rice with 2 cups of water in a saucepan.
    • Bring to a Boil: Heat over medium-high heat until the water begins to boil.
    • Simmer: Reduce the heat to low, cover the pot tightly, and simmer for about 18 minutes. Do not lift the lid during this time.
    • Rest: Remove the pot from the heat and let it stand, still covered, for 5-10 minutes.
    • Fluff and Serve: Uncover the rice and fluff it with a fork. Serve warm with your delicious stroganoff.

    This method can be adapted for brown rice by adjusting the cooking time based on package instructions. Mastering fluffy rice is a foundational skill for any home cook.

    Creamy Mashed Potatoes

    For the ultimate comfort food pairing, serve your beef stroganoff over a bed of creamy mashed potatoes. Their smooth, buttery texture perfectly cradles the rich, savory sauce, creating a deeply satisfying meal that the whole family will love.

    Making delicious mashed potatoes is simpler than you think:

    • Prepare Potatoes: Peel and cube about 2 pounds of starchy potatoes, such as Russets or Yukon Golds.
    • Boil Until Tender: Place the potatoes in a pot and cover with cold, salted water. Bring to a boil, then reduce the heat and cook until fork-tender, about 15-20 minutes.
    • Drain Thoroughly: To prevent watery mashed potatoes, drain them well and return them to the hot, empty pot over low heat for a minute to dry them out.
    • Mash: Use a potato masher or ricer for the smoothest texture.
    • Add Dairy: Stir in about 1/2 cup of warm milk or cream and 1/4 cup of melted butter. Season with salt and pepper. For extra creaminess, add a dollop of sour cream.
    • Serve Warm: Spoon a generous amount onto each plate and top with your amazing stroganoff.

    This classic side dish elevates a simple dinner into a memorably warm and hearty meal.

    Low-Carb Alternatives

    If you’re following a low-carb diet, you can still enjoy your favorite beef stroganoff. The following alternatives are simple to prepare and allow you to savor all the rich flavors without the extra carbs.

    Here are some excellent low-carb pairings:

    • Cauliflower Rice: A popular and versatile choice. Sauté riced cauliflower in butter or olive oil until tender. It’s an excellent substitute for rice.
    • Zucchini Noodles (Zoodles): Spiralize fresh zucchini into noodles. You can briefly sauté them or toss them raw with the warm stroganoff for a fresh, crisp texture.
    • Spaghetti Squash: Bake or microwave a spaghetti squash until tender, then use a fork to scrape out the spaghetti-like strands. This makes a fantastic pasta substitute.
    • Steamed Green Beans or Asparagus: For a simple, vibrant side, quickly steam some green beans or asparagus. Their crispness provides a refreshing contrast to the creamy sauce.
    • Mashed Cauliflower: Boil or steam cauliflower florets until tender, then mash them just like potatoes. Blend with butter, cream cheese, or heavy cream for a creamy, low-carb alternative to mashed potatoes.

    These versatile options prove that a satisfying meal doesn’t have to be high in carbs, making it easy to adapt this classic dish to a healthier lifestyle.

    What Are Some Popular Recipe Variations?

    Easy Ground Beef Stroganoff

    For a quicker twist on classic beef stroganoff, ground beef is a fantastic, budget-friendly option. Using ground beef significantly cuts down on cooking time, making this variation perfect for busy weeknights and a favorite for family-friendly meals.

    How to Make It:

    • Brown the Beef: Instead of beef strips, use 1 pound of lean ground beef. Brown it in a large skillet over medium-high heat, breaking it apart with a spoon as it cooks.
    • Drain Fat: Once the beef is browned, carefully drain any excess fat from the pan. This step ensures your sauce won’t be greasy.
    • Add Aromatics: Add diced onions and minced garlic to the skillet. Cook for 3-5 minutes, or until softened and fragrant.
    • Build the Sauce: Stir in flour or cornstarch, then slowly add beef broth, Worcestershire sauce, and Dijon mustard. Bring the mixture to a simmer, stirring until the sauce thickens.
    • Finish with Dairy: Remove the skillet from the heat before stirring in sour cream or Greek yogurt. Season to taste with salt and pepper.
    • Serve: Serve immediately over your favorite noodles or rice.

    This easy ground beef stroganoff delivers all the comforting flavors you love with less fuss. It’s a great home-cooked meal for beginners and a reliable weeknight dinner.

    Slow Cooker Beef Stroganoff

    Imagine coming home to a delicious, warm meal that’s ready to serve. A slow cooker makes it possible. This hands-off method is fantastic for tenderizing beef and building deep flavors with minimal effort, making it a perfect choice for easy family dinners.

    Steps for Your Slow Cooker:

    1. Sear the Beef (Optional, but Recommended): For the best flavor, quickly sear your beef strips in a hot skillet before adding them to the slow cooker. This step creates a rich crust.
    2. Combine Ingredients: In your slow cooker, combine the seared beef, sliced mushrooms, chopped onion, beef broth, Worcestershire sauce, and any herbs you’d like, such as thyme.
    3. Cook Low and Slow: Cook on low for 6-8 hours or on high for 3-4 hours. The beef should be incredibly tender when done.
    4. Thicken the Sauce: About 30 minutes before serving, whisk a small amount of cornstarch with cold water to create a slurry. Stir the mixture into the slow cooker to thicken the sauce.
    5. Add Dairy: Turn off the heat. Stir in the sour cream or Greek yogurt. Adding the dairy at the end prevents it from curdling.
    6. Season and Serve: Taste the stroganoff and adjust seasonings as needed. Serve hot.

    This slow cooker method simplifies making a flavorful meal. It’s perfect for busy schedules, as it delivers a comforting dinner without requiring constant attention.

    Healthy Beef Stroganoff Swaps

    You can still enjoy a hearty beef stroganoff while making it a healthier, more balanced meal. With a few small changes, you can customize the dish to fit your dietary goals without sacrificing the classic flavor.

    Smart Swaps for a Lighter Dish:

    • Leaner Beef: Opt for leaner cuts of beef, such as sirloin or flank steak. Be sure to trim any visible fat before cooking.
    • More Vegetables: Boost nutrition by adding extra vegetables like sliced bell peppers, spinach, or even grated carrots. Mushrooms are already a healthy addition, rich in B vitamins and antioxidants [4].
    • Dairy Alternatives: Swap full-fat sour cream for light sour cream or plain Greek yogurt. Greek yogurt offers a similar tang and creaminess but has fewer calories and more protein.
    • Whole Grains: Serve your stroganoff over whole wheat egg noodles, brown rice, or quinoa instead of white pasta to increase the fiber content.
    • Low-Carb Options: For a low-carb version, serve the stroganoff over cauliflower rice, zucchini noodles, or steamed green beans.
    • Reduced Sodium Broth: Choose low-sodium beef broth to better control your salt intake.

    With these simple variations, you can create a delicious, customized stroganoff that everyone can enjoy. At Recipesmondial, our goal is to make cooking accessible and fun, helping you prepare flavorful meals with or without healthy modifications.

    How to Store and Reheat Leftovers

    Enjoyed your delicious Beef Stroganoff? Great news! This flavorful meal is perfect for meal prep because it tastes just as wonderful the next day. Learning how to store and reheat it properly ensures your leftovers are always safe, delicious, and ready for a quick meal. Follow these simple steps and you’ll be cooking confidently!

    Storing Your Beef Stroganoff

    To keep your leftovers safe and delicious, proper storage is key. After cooking, allow the stroganoff to cool slightly, but for no more than two hours at room temperature. This is a critical food safety rule to prevent bacterial growth [5].

    • For the Refrigerator: Transfer the cooled stroganoff into an airtight container and seal it tightly. It will keep for up to 3-4 days in the refrigerator, making it a simple solution for planning family-friendly meals.
    • For the Freezer: To store your stroganoff for longer, spoon it into freezer-safe containers or heavy-duty freezer bags. Press out as much air as possible before sealing. It will last in the freezer for up to 2-3 months. When you’re ready to eat, thaw it overnight in the refrigerator.

    Reheating Beef Stroganoff Like a Pro

    Reheating creamy sauces and pasta can be challenging, but our step-by-step cooking guidance from Recipesmondial makes it easy. Follow these methods to keep your stroganoff perfectly creamy and delicious.

    • Stovetop (Recommended for Best Results):
      1. Transfer the stroganoff to a saucepan or skillet over medium-low heat.
      2. Add a splash of beef broth, milk, or water (about 1-2 tablespoons per serving) to help rehydrate the sauce and prevent it from drying out.
      3. Stir gently and frequently until warmed through, which typically takes 5-8 minutes.
      4. For safety, ensure the internal temperature reaches 165°F (74°C) [5].

      This method helps the sauce stay creamy and smooth.

    • Microwave (Quick Option):
      1. Place a single serving of stroganoff in a microwave-safe dish.
      2. Stir in a teaspoon or two of broth or milk to add moisture.
      3. Cover the dish loosely with a microwave-safe lid or wrap.
      4. Heat on medium power for 1-2 minutes, then stir. Continue heating in 30-second intervals, stirring after each one, until the stroganoff is heated through.

      Microwaving is quick, but the sauce can sometimes separate. Stirring frequently helps prevent this.

    Helpful Tips for Reheating:

    • Noodles stored in the sauce can become too soft upon reheating. For the best texture, we recommend cooking a fresh batch of noodles when you’re ready to serve your leftovers.
    • Taste the stroganoff after reheating and adjust the seasoning if needed, as flavors can mellow in the refrigerator.
    • For best quality and safety, never reheat leftovers more than once.

    With these practical tips, this beginner-friendly recipe allows you to enjoy flavorful meals made easy for days. You’ll be cooking confidently knowing your leftovers are just as good as the first night!

    Frequently Asked Questions

    What is the origin of Beef Stroganoff?

    Beef Stroganoff is a classic comfort dish with a rich history that began in Russia in the mid-19th century. It is believed to have been created by French chefs working for the wealthy Stroganov family [6]. The dish quickly gained popularity, especially among the Russian aristocracy.

    From its Russian roots, this meal traveled around the world, adapting over time to local ingredients and tastes. Today, many countries have their own spin on the recipe. Our version offers a simple yet incredibly flavorful take on this beloved dish.

    What is in a traditional beef stroganoff recipe?

    A traditional beef stroganoff recipe relies on high-quality ingredients to create its signature rich, creamy sauce without shortcuts. An authentic version typically includes the following key components:

    • Beef: Thinly sliced tender cuts like beef tenderloin or sirloin.
    • Mushrooms: Cremini or white button mushrooms are most common.
    • Onions: Finely diced yellow or white onions form the flavor base.
    • Mustard: Dijon or a similar tangy mustard adds depth.
    • Sour Cream: This is the hallmark ingredient for the creamy sauce.
    • Broth: Beef broth or stock provides a savory foundation.
    • Flour or Cornstarch: Used as a thickening agent for the sauce.
    • Fresh Herbs: Parsley or dill adds a touch of freshness for garnish.

    When combined, these simple ingredients create a deeply flavorful meal. Our beginner-friendly recipe will show you how to bring them all together step by step.

    Can I make this recipe with cream of mushroom soup?

    While many cooks use cream of mushroom soup as a shortcut, we highly recommend making the sauce from scratch. This approach delivers a much richer, more authentic flavor and is worth the extra few minutes.

    However, if you’re short on time, you can use condensed cream of mushroom soup as a substitute. To do so, simply swap the broth, flour, and some of the sour cream for one can of soup. Remember to season it well, and add a splash of milk or water to reach your desired consistency. Keep in mind that this shortcut will result in a different flavor and texture than our from-scratch recipe.

    What’s the best way to get tender beef in stroganoff?

    Tender beef is the key to a perfect beef stroganoff. To avoid tough or chewy results, follow these essential tips for preparation and cooking:

    • Choose the Right Cut: Start with a tender cut of beef. Sirloin, beef tenderloin, or thinly sliced ribeye are excellent choices. While skirt or flank steak can also work, be sure to slice them very thinly against the grain.
    • Cut Against the Grain: No matter the cut, always slice the beef against the muscle fibers. This simple step shortens the tough strands, making each bite significantly more tender.
    • Sear Quickly and Hot: Use a very hot pan and sear the beef in small batches for just 1-2 minutes per side. Overcrowding the pan lowers its temperature, causing the beef to steam instead of sear, which makes it tough.
    • Don’t Overcook: The beef only needs a brief sear, as it will finish cooking gently in the sauce later. Overcooking at this stage can make the meat rubbery.
    • Avoid Boiling the Sauce: Once you return the beef to the pan, keep the sauce at a gentle simmer. Boiling the sauce can toughen the meat, even if it was seared perfectly.

    By following these techniques, you can ensure your beef is perfectly tender every time you make this classic dish.


    Sources

    1. https://www.fsis.usda.gov/food-safety/safe-handling-instructions/meat-poultry-and-egg-products/beef-from-farm-table
    2. https://www.bhg.com/recipes/how-to/cooking-basics/cut-meat-against-grain/
    3. https://www.seriouseats.com/what-is-the-maillard-reaction-foods-science-explainer
    4. https://www.hsph.harvard.edu/nutritionsource/food-features/mushrooms/
    5. https://www.fsis.usda.gov/food-safety/safe-food-handling-and-preparation/food-safety-basics/danger-zone
    6. https://www.britannica.com/topic/beef-Stroganoff

  • Easy Chicken Pot Pie Recipe: A Simple Step-by-Step Guide

    Easy Chicken Pot Pie Recipe: A Simple Step-by-Step Guide

    This classic chicken pot pie recipe features tender chunks of chicken and vegetables like carrots, peas, and potatoes in a rich, creamy sauce. The savory mixture is baked inside a flaky, golden-brown pie crust, creating the ultimate comfort food meal perfect for families and beginner cooks.

    A warm, comforting meal brings everyone to the table, especially when life gets busy. For many home cooks, the classic chicken pot pie is the ultimate cozy dish. Still, the thought of making it from scratch can feel daunting. If you want to cook healthy, tasty meals the whole family will love without complex steps, you’re in the right place. We believe delicious, flavorful meals made easy should be a cornerstone of every home kitchen.

    At Recipesmondial, we want to make family-friendly cooking an enjoyable, stress-free experience. That’s why we’re sharing our incredibly simple chicken pot pie recipe, designed to guide you step-by-step. You’ll learn how to create a golden, flaky-crusted pot pie with a rich, savory filling that tastes like it took hours but comes together easily. This simple dinner recipe is about to become a reliable favorite.

    Our beginner-friendly recipe provides practical guidance to ensure great results, whether you’re a seasoned cook or just starting. We’ll show you how to achieve the perfect chicken pot pie every time, complete with helpful tips, substitutions, and variations to make it your own. Get ready to cook with confidence and serve a meal that is sure to gather rave reviews.

    Why You’ll Love This Homemade Chicken Pot Pie Recipe

    A golden-brown chicken pot pie with a slice removed, revealing the creamy chicken and vegetable filling inside, on a wooden table.
    A perfectly baked chicken pot pie, golden-brown and flaky crust with a lovely lattice top, steam gently rising from a slice that’s been cut out, revealing the creamy, rich filling with chunks of chicken and vibrant mixed vegetables. The pie is served on a rustic wooden surface, with a cozy, warm kitchen in the softly blurred background. Professional food photography, photorealistic, high-quality food magazine photo style.

    There’s nothing quite like the comforting embrace of a warm, savory homemade chicken pot pie. While it’s a true classic for any occasion, this isn’t just any pot pie recipe. We’ve designed it specifically for home cooks like you.

    At Recipesmondial, we believe cooking should be enjoyable, not stressful. That’s why our easy chicken pot pie recipe delivers reliable results and incredible flavor without the fuss. Instead of being overwhelmed by complex recipes, you’ll find simple steps and practical guidance.

    Here’s why you’ll absolutely love making this homemade chicken pot pie:

    • Effortless Comfort Food: This pot pie recipe brings cozy warmth to your table using everyday ingredients you likely already have. It’s the perfect choice for a satisfying dinner any night of the week.
    • Beginner-Friendly Approach: We break down every step clearly, providing step-by-step cooking guidance from start to finish. This approachable home cooking experience helps even new cooks feel confident in the kitchen.
    • Incredible Flavor, Made Easy: Get ready to enjoy a rich, creamy filling and a perfectly flaky crust. Our straightforward method ensures maximum taste with minimal fuss, making this a truly flavorful meal made easy.
    • Perfect for Busy Families: As a family-friendly meal, this chicken pot pie is a guaranteed crowd-pleaser. Plus, our meal prep tips show you how to prepare it ahead of time.
    • Customizable to Your Liking: Feel free to adapt this recipe by swapping vegetables or using leftover chicken. We also include variations, like a chicken pot pie casserole, to suit your taste and what you have on hand.
    • Say Goodbye to Mealtime Stress: Stop struggling to plan family-friendly meals. With clear directions and delicious results, this recipe lets you enjoy cooking without stress.

    Get ready to create a memorable dish that will quickly become a staple in your kitchen. This chicken pie recipe proves how simple ingredients can transform into a spectacular meal. Recipesmondial is here to guide you toward culinary success!

    What Ingredients Do You Need for This Pot Pie Recipe?

    An overhead view of all the fresh ingredients for chicken pot pie, including raw chicken, mixed vegetables, and pie crusts, neatly arranged on a counter.
    An overhead flat lay, professional food photography shot of all fresh, raw ingredients for an easy chicken pot pie neatly arranged on a clean, light-colored kitchen counter or rustic wooden board. Ingredients include raw chicken breast, frozen mixed vegetables (peas, carrots, corn), chicken broth, cream of chicken soup, milk, butter, all-purpose flour, salt, black pepper, and two store-bought pie crusts (one in its package, one unrolled). The ingredients are vibrant, fresh, and perfectly lit. Photorealistic, high-quality food magazine photo.

    For the Creamy Chicken Filling

    A rich and creamy filling is the heart of a delicious homemade chicken pot pie. Using everyday ingredients, it comes together quickly to create a comforting, flavorful meal your family will adore. This recipe makes approachable home cooking both simple and enjoyable.

    Here’s what you’ll need for this savory core:

    • Cooked Chicken: 2 cups, shredded or diced. Leftover roast chicken or a store-bought rotisserie chicken works perfectly and saves so much time!
    • Unsalted Butter: 1/4 cup (4 tablespoons). This forms the base for our flavorful sauce.
    • Yellow Onion: 1/2 medium, chopped. It adds a sweet and savory depth.
    • Carrots: 1 cup, peeled and diced. They bring natural sweetness and color.
    • Celery: 1 cup, diced. This adds a subtle crunch and classic flavor.
    • All-Purpose Flour: 1/4 cup. It helps to thicken the creamy sauce beautifully.
    • Chicken Broth: 1 1/2 cups. Choose low-sodium to control the saltiness.
    • Milk: 1/2 cup (whole milk or 2%). This makes the filling wonderfully creamy.
    • Frozen Peas: 1 cup. No need to thaw them; they add a pop of green and sweetness.
    • Dried Thyme: 1/2 teaspoon. It provides that classic, aromatic pot pie taste.
    • Salt and Black Pepper: To taste. Start with 1/2 teaspoon salt and 1/4 teaspoon pepper, then adjust as needed.

    Substitution Tip: Feel free to customize the filling! You can easily swap in other vegetables like diced potatoes, green beans, or corn. This flexibility makes it a truly family-friendly meal. For an even richer sauce, replace half the milk with heavy cream. This beginner-friendly recipe encourages creativity in your kitchen!

    For the Flaky Pie Crust (Store-Bought or Homemade)

    The golden, flaky crust is what makes a chicken pot pie irresistible. To create an easy chicken pot pie, we recommend a store-bought crust. It’s a great shortcut for getting this simple dinner recipe on the table fast. However, if you love to bake, a homemade crust is a wonderful and rewarding option.

    Here are your crust choices:

    • Refrigerated Pie Crusts: 2 (one 14.1-ounce package). This is our top pick for a quick and stress-free pie. They are readily available in most grocery stores—simply unroll and use!

    For the Homemade Crust (Optional, but rewarding!):

    • All-Purpose Flour: 2 1/2 cups.
    • Unsalted Butter: 1 cup (2 sticks), very cold and cut into small cubes. Cold butter is the key to a flaky crust!
    • Ice Water: 1/2 cup to 3/4 cup. Add it slowly until the dough just comes together.
    • Salt: 1 teaspoon. This enhances the flavor of the crust.

    Pro Tip for Beginners: Don’t hesitate to use a store-bought crust! It’s a fantastic shortcut for a flavorful meal made easy without the extra work. Our step-by-step cooking guidance is designed to provide simple paths to delicious results. You can always tackle the homemade version when you’re feeling more adventurous. You’ll build kitchen confidence with every recipe you try!

    How to Make Chicken Pot Pie Step-by-Step

    A home cook's hands gently placing and crimping a top pie crust onto a dish filled with chicken pot pie mixture.
    A close-up, photorealistic professional food photography shot of a home cook’s hands, with clean, unadorned nails, gently placing a golden-brown, pre-made pie crust over a glass pie dish filled with a creamy chicken and mixed vegetable mixture. The hands are carefully crimping the edges to seal the pie. The background is a soft, warm, and inviting kitchen setting, slightly blurred to keep focus on the hands and the pie assembly. High-quality food magazine photo.

    Step 1: Prepare and Sauté the Vegetables

    Let’s begin your delicious easy chicken pot pie recipe by preparing the vegetables. Proper prep work makes the cooking process much smoother and is a great habit for meal prep.

    1. Dice the aromatics. Finely dice one medium onion and two cloves of garlic. Smaller pieces will ensure they cook evenly.
    2. Melt the butter. In a large pot or Dutch oven, melt two tablespoons of unsalted butter over medium heat.
    3. Sauté the onion. Add the diced onion to the pot and sauté for about 5 minutes, stirring occasionally until it has softened.
    4. Add remaining vegetables. Add one cup of sliced carrots and one cup of frozen peas to the pot. You can also add corn for extra sweetness.
    5. Stir in the garlic. Add the minced garlic and cook for one more minute until you can smell its aroma.
    6. Set the vegetables aside. Remove the cooked vegetables from the pot and transfer them to a bowl. This step prevents them from overcooking while you prepare the sauce.

    Step 2: Cook the Chicken and Create the Creamy Sauce

    Now it’s time to build the heart of your homemade chicken pot pie: the creamy, flavorful filling. This rich sauce is what makes a pot pie so comforting.

    1. Cook the chicken. If using raw chicken, dice two boneless, skinless chicken breasts and cook them in the same pot with a tablespoon of olive oil until no longer pink, about 6-8 minutes. If you are using pre-cooked rotisserie chicken, you will add two cups of shredded meat later.
    2. Make the roux. In the same pot, melt another two tablespoons of butter. Whisk in 1/4 cup of all-purpose flour and cook for 1-2 minutes, stirring constantly, to create a thickening paste.
    3. Create the sauce. Gradually pour in 1 3/4 cups of chicken broth while whisking constantly to prevent lumps. Then, whisk in 1 cup of whole milk. Continue until the sauce begins to thicken and can coat the back of a spoon.
    4. Season the sauce. Stir in 1/2 teaspoon of dried thyme, 1/2 teaspoon of salt, and 1/4 teaspoon of black pepper. Taste and adjust the seasonings if needed.
    5. Combine all ingredients. Return the cooked vegetables to the pot. Add the cooked chicken (either the freshly cooked pieces or the shredded rotisserie chicken) and stir everything together. Simmer for 2-3 minutes to allow the flavors to meld.

    Step 3: Assemble the Chicken Pot Pie

    The assembly step is where your chicken pot pie comes to life. This process is simple, satisfying, and a great example of beginner-friendly recipes.

    1. Preheat the oven. Set your oven to 400°F (200°C).
    2. Prepare the pie plate. Lightly grease a standard 9-inch pie plate.
    3. Line the pie plate. Gently unroll one refrigerated pie crust and press it into the bottom and up the sides of the prepared plate. Trim any excess dough from the edge.
    4. Add the filling. Pour the warm chicken and vegetable filling into the bottom crust and spread it out evenly.
    5. Cover with the top crust. Place the second pie crust over the filling. Trim the edges, leaving a 1/2-inch overhang.
    6. Seal the edges. Fold the top crust’s overhang under the bottom crust’s edge and crimp them together with your fingers or a fork to create a seal.
    7. Vent the crust. Cut a few small slits in the top crust to allow steam to escape during baking. This helps prevent a soggy pie.
    8. Add an optional egg wash. For a rich, golden-brown finish, brush the top crust with an egg wash (one egg beaten with a tablespoon of water).

    Step 4: Bake to Golden Brown Perfection

    The final step is baking. This is where the magic happens, turning simple ingredients into a classic, flavorful meal made easy. Prepare for a truly comforting chicken pot pie experience!

    1. Bake the pie. Place the assembled pot pie in the preheated oven. Bake for 30-40 minutes, or until the crust is golden brown and the filling is bubbly.
    2. Prevent over-browning. If you notice the edges of the crust browning too quickly, you can cover them with a strip of aluminum foil.
    3. Check for doneness. For food safety, the internal temperature of the filling should reach 165°F (74°C) [1].
    4. Rest the pie before serving. Once baked, remove the pot pie from the oven and let it cool for at least 10-15 minutes. This crucial step allows the creamy filling to set, so it doesn’t run out when you slice it.
    5. Serve and enjoy! Slice the warm, homemade chicken pot pie and serve immediately. It’s a satisfying dish perfect for any night of the week.

    What Are Some Tips and Variations for the Best Chicken Pie?

    Time-Saving Tip: Using Rotisserie Chicken

    When life gets busy, smart shortcuts in the kitchen are a lifesaver.

    Using a pre-cooked rotisserie chicken is a fantastic way to make this easy chicken pot pie even quicker. This simple swap saves you valuable time, especially when you’re preparing dinner on a tight schedule.

    Here’s how to do it:

    • Shred the Chicken: Once the rotisserie chicken has cooled, remove the skin and bones. Shred or dice the meat into bite-sized pieces. You’ll need about 2-3 cups for this recipe.
    • Skip a Step: Add the cooked chicken directly to your sautéed vegetables and creamy sauce. This allows you to skip the step of cooking raw chicken from scratch.
    • Flavor Boost: Rotisserie chicken often comes pre-seasoned, which adds an extra layer of savory flavor to your homemade chicken pot pie.

    This simple trick makes preparing family-friendly, beginner-friendly meals a breeze.

    Crust Alternatives: Can I use biscuits or puff pastry?

    Absolutely! The beauty of a pot pie recipe is its versatility, and you can easily switch up the crust.

    If you’re looking for a different texture or an even simpler approach, these alternatives are perfect for stress-free cooking.

    Many home cooks enjoy these popular variations:

    • Flaky Puff Pastry: For an elegant, super-flaky top, use a sheet of store-bought puff pastry. Thaw it according to package directions, lay it over your filling, crimp the edges, and bake until golden brown for a beautiful, light crust.
    • Comforting Biscuits: Biscuit dough makes a wonderful, soft topping. You can use canned biscuit dough or your favorite homemade recipe. Simply arrange the biscuits over the filling for a more rustic, casserole-style pot pie.
    • No Bottom Crust: For a lighter option, you can skip the bottom crust entirely. This is a great approach when making a chicken pot pie in a bowl or in a “pot pie soup” style.

    These crust alternatives open up new possibilities for creating easy and flavorful meals.

    Making a Chicken Pot Pie Casserole

    Transforming your chicken pot pie into a casserole is an excellent idea that’s often even easier to assemble.

    This variation is perfect for feeding a crowd because it simplifies serving, making it a fantastic solution for busy family dinners.

    Follow these simple adjustments:

    • Choose Your Dish: Prepare your creamy chicken filling as directed, then pour it into a large baking dish (like a 9×13 inch casserole dish) instead of a pie plate.
    • Crust on Top Only: A casserole typically has a top crust only. You can use a single pie crust, puff pastry, or biscuits. If using pie crust, you might need two sheets to cover a larger casserole dish.
    • Crumb Topping (Optional): For a lighter, crunchier topping, consider a savory crumb. Mix breadcrumbs with melted butter, herbs, and Parmesan cheese, then sprinkle the mixture over the filling before baking.
    • Bake and Serve: Bake at 375°F (190°C) for 25-35 minutes, or until the filling is bubbly and the top is golden brown. Adjust the baking time based on your dish size and topping.

    This adaptation creates an approachable home cooking experience, and you’ll love how simple and delicious it is!

    Meal Prep: Making the Filling Ahead of Time

    Meal prep is a game-changer for stress-free cooking, and preparing your chicken pot pie filling in advance is a smart move.

    This approach saves significant time, helping you get delicious, family-friendly meals on the table fast, even on the most hectic days.

    Here’s how to do it efficiently:

    • Cook the Filling: Follow the recipe steps to prepare the creamy chicken filling, ensuring the chicken is fully cooked and the sauce is thickened.
    • Cool Completely: It is crucial to let the filling cool down completely before storing it. Storing it while hot can create condensation and affect freshness.
    • Store Properly: Transfer the cooled filling to an airtight container. It will keep in the refrigerator for up to 3-4 days or in the freezer for up to 3 months [2].
    • Assemble and Bake Later: When you’re ready to bake, thaw the filling if frozen and warm it gently on the stovetop. Pour it into your pie crust, add the top crust, and bake as usual.

    This meal prep tip ensures you can enjoy flavorful, home-cooked meals with less last-minute effort.

    How to Store and Reheat Leftover Pot Pie

    Making a delicious homemade chicken pot pie is incredibly satisfying. By learning how to properly store and reheat your leftovers, you can enjoy that comforting flavor for days! Here at Recipesmondial, we want to help you make the most of every meal.

    How to Store Leftover Chicken Pot Pie

    To keep your leftover pot pie fresh and delicious, follow these simple storage steps:

    • Cool Completely: Let your chicken pot pie cool to room temperature before storing. For safety, do not leave it out for more than two hours [3].
    • Use Airtight Containers: Transfer the cooled leftovers into an airtight container. This keeps the pie from drying out and locks in freshness.
    • Refrigerate Promptly: Place the sealed container in the refrigerator, where it will stay fresh for 3-4 days. This is perfect for quick lunches or easy dinners later in the week.
    • Freeze for Longer Storage: For longer-term storage, freezing is an excellent option.
      • To Freeze a Whole Pie: Wrap the entire pot pie tightly, first in plastic wrap and then in aluminum foil.
      • To Freeze Individual Portions: For convenient meal prep, divide the pie into single servings before freezing. Be sure to label each container with the date.
      • Frozen pot pie is best if used within 2-3 months. Remember to thaw it in the refrigerator overnight before you plan to reheat it.

    How to Reheat Leftover Chicken Pot Pie

    Reheating your pot pie the right way is key to restoring its delicious flavor and flaky crust. Here are the best methods:

    • In the Oven (Recommended for Best Results): Using the oven is the best way to revive the pot pie’s crispy, flaky crust.
      1. Preheat your oven to 300°F (150°C). A lower temperature gently reheats the filling without burning the crust.
      2. Place the pot pie on a baking sheet. If the crust is already golden brown, cover it loosely with aluminum foil to prevent over-browning.
      3. Bake a single slice for 20-30 minutes or a whole pie for 45-60 minutes.
      4. The pie is ready when the filling is bubbly. For food safety, ensure it reaches an internal temperature of 165°F (74°C) [4].
      5. To make the crust extra crispy, remove the foil for the last 5-10 minutes of baking.
    • In the Microwave (Quickest Option): While the oven delivers the best texture, the microwave is a great alternative when you’re short on time.
      1. Place a slice of pot pie on a microwave-safe dish.
      2. Cover the slice loosely with a damp paper towel to prevent it from drying out.
      3. Heat on medium power for 2-3 minutes, checking for doneness.
      4. If it’s not hot enough, continue heating in 30-second intervals.
      5. Use caution when removing, as the filling can become extremely hot.

      Pro Tip: To get a crispier crust after microwaving, place the slice in a toaster oven or air fryer for a few minutes. It’s the perfect trick for a quick and satisfying lunch!

    Frequently Asked Questions

    What makes a good old-fashioned chicken pot pie recipe?

    A good old-fashioned chicken pot pie is the ultimate comfort food. It combines simple, delicious elements to create a heartwarming meal for the whole family.

    Here’s what goes into a great homemade chicken pot pie:

    • A Rich, Creamy Filling: The heart of the pie is its luscious, savory sauce, which should coat every ingredient beautifully.
    • Tender Chicken: Cooked chicken, whether shredded or diced, provides the main protein. For the best result, it should be juicy and flavorful.
    • Classic Vegetables: A colorful mix of peas, carrots, and corn adds texture and nutrition, making the dish vibrant. Potatoes or green beans are also great additions.
    • A Flaky Crust: A golden, buttery crust is non-negotiable. Whether it’s a simple store-bought option or homemade, the crust seals in all the delicious flavors.

    Together, these elements create a satisfying, flavorful meal that feels just like home—an easy recipe perfect for any weeknight.

    Can I make this an easy chicken pot pie recipe with cream of chicken soup?

    Yes, absolutely! Using canned cream of chicken soup is a great shortcut for an even easier chicken pot pie. This simple swap streamlines the filling process, making dinner quick and stress-free.

    Here’s how to make it work for a simple dinner recipe:

    • Combine Ingredients: In a bowl, mix your cooked chicken and vegetables with a can of cream of chicken soup.
    • Adjust Consistency: If the filling seems too thick, add a splash of milk or chicken broth to reach your desired creamy texture.
    • Boost Flavor: To enhance the taste, stir in a pinch of dried thyme, a dash of garlic powder, or some freshly ground black pepper. These simple additions will elevate the flavor.

    This method makes a family-friendly meal accessible for busy cooks. It’s a fantastic, beginner-friendly recipe that delivers a delicious outcome with minimal effort.

    Can I make just the chicken pot pie filling?

    Yes, you certainly can! Making the chicken pot pie filling ahead of time is a smart meal prep strategy. It saves valuable time on busy weeknights and makes getting dinner on the table much less of a rush.

    Here are a few ways to prepare and use your chicken pot pie filling:

    • Make Ahead for Pot Pie: Prepare the filling as directed, then let it cool completely. Store it in an airtight container in the refrigerator for up to 3-4 days [5]. When you’re ready to eat, just assemble the pot pie and bake.
    • Versatile Serving Ideas: The filling is delicious on its own and can be enjoyed in several ways. Serve it over warm biscuits for a deconstructed pot pie, or thin it with a little extra broth to create a comforting chicken pot pie soup.
    • Freezing for Later: For longer storage, freeze the cooled filling in freezer-safe bags or containers. It will last for up to 2-3 months. Thaw it overnight in the fridge before using.

    This flexibility makes meal planning much simpler, helping you enjoy a stress-free cooking experience.

    What is the difference between a chicken pie and a chicken pot pie?

    While the terms “chicken pie” and “chicken pot pie” are often used interchangeably, there’s a subtle difference that usually comes down to the crust and presentation.

    Here’s a simple breakdown:

    • Chicken Pot Pie: This version features a creamy filling baked in a deep dish—or “pot.” It typically has only a top crust, which can be made from pastry, biscuits, or puff pastry. The name highlights the deep dish vessel it’s baked in, signifying a hearty, all-in-one meal.
    • Chicken Pie: This term often refers to a savory pie with both a top and bottom crust, similar in structure to a traditional fruit pie. In some regions, a chicken pie might also be a smaller, hand-held pastry.

    Ultimately, both are comforting and delicious options for a family-friendly meal. At Recipesmondial, we focus on approachable home cooking, so we embrace both delicious styles!


    Sources

    1. https://www.fsis.usda.gov/food-safety/safe-food-handling-and-preparation/food-safety-basics/safe-minimum-internal-temperature-chart
    2. https://www.fsis.usda.gov/food-safety/safe-food-handling-and-preparation/food-safety-basics/freezing-and-food-safety
    3. https://www.fsis.usda.gov/food-safety/safe-food-handling-and-preparation/food-safety-basics/danger-zone
    4. https://www.foodsafety.gov/keep-food-safe/food-safety-by-topic/cooking-temperature-chart
    5. https://www.foodsafety.gov/food-safety-charts/cold-storage-chart