Tag: Comfort food

  • How to Make The Best Homemade Meatballs (An Easy Recipe)

    How to Make The Best Homemade Meatballs (An Easy Recipe)

    A classic homemade meatball recipe involves combining ground meat, such as beef and pork, with binders like breadcrumbs and egg. Key flavorings include grated Parmesan cheese, minced garlic, parsley, and seasoning. The mixture is gently formed into balls and then baked or pan-fried until golden brown before being simmered in tomato sauce.

    Imagine serving a plate of perfectly tender, flavorful homemade meatballs—so juicy they practically melt in your mouth. While this might sound like a dish only an experienced chef can master, we’re here to prove otherwise. We know that complex recipes can feel overwhelming, but creating the perfect meatball from scratch is simpler and more satisfying than you think.

    Here at Recipesmondial, we believe every home cook deserves to feel confident in the kitchen. That’s why we’re sharing our ultimate easy meatball recipe. This guide will walk you through every step, whether you’re a beginner or just seeking simple dinner recipes. You’ll learn how to transform basic ingredients into succulent Italian meatballs perfect for any family-friendly meals—all without intimidating jargon.

    It’s time to say goodbye to bland, dry meatballs and hello to a culinary triumph. This recipe does more than just teach you to cook; it builds confidence and makes mealtime stress-free. You’ll discover all the tips for making perfect meatballs every time, whether you’re pairing them with spaghetti, stuffing them into a sub, or serving them as a delicious appetizer. Let’s start cooking some amazing homemade meatballs together!

    Why Is This the Best Homemade Meatball Recipe for Beginners?

    This isn’t just another meatball recipe—it’s designed with you in mind. We created it for anyone new to making homemade meals or searching for truly easy recipes. We know cooking can feel overwhelming, which is why we focus on beginner-friendly recipes. Our goal is to deliver incredible flavor without the stress.

    Here’s why this homemade meatball recipe stands out as the best for beginners:

    • Simple, Everyday Ingredients: Forget hunting for special items. This recipe uses common, affordable ingredients from any grocery store, making it perfect for budget cooking and family-friendly meals.
    • Clear, Step-by-Step Instructions: Our directions provide clear step-by-step cooking guidance in plain language. We break down each action into a manageable task to eliminate guesswork and build your confidence.
    • No Special Equipment Needed: You don’t need a stand mixer or any fancy gadgets. Your hands and a simple mixing bowl are all it takes to make perfect meatballs, which makes approachable home cooking a reality.
    • Foolproof Method for Juicy Results: Our recipe includes specific tips to prevent common mistakes, like overmixing. This method ensures your homemade meatballs are tender and juicy every single time.
    • Quick to Prepare: We designed this recipe to be fast, so you can get flavorful meals made easy. It’s the perfect solution for busy weeknights when you need quick meals that still taste incredible.
    • Confidence Booster: Making these meatballs from scratch is a fantastic way to feel more empowered in the kitchen. It’s the perfect recipe for building your skills for future culinary adventures.

    We believe everyone deserves to enjoy sharing delicious food. This best meatball recipe is part of our commitment to making cooking stress-free, enjoyable, and rewarding. Say goodbye to being overwhelmed by complex recipes and hello to confident cooking!

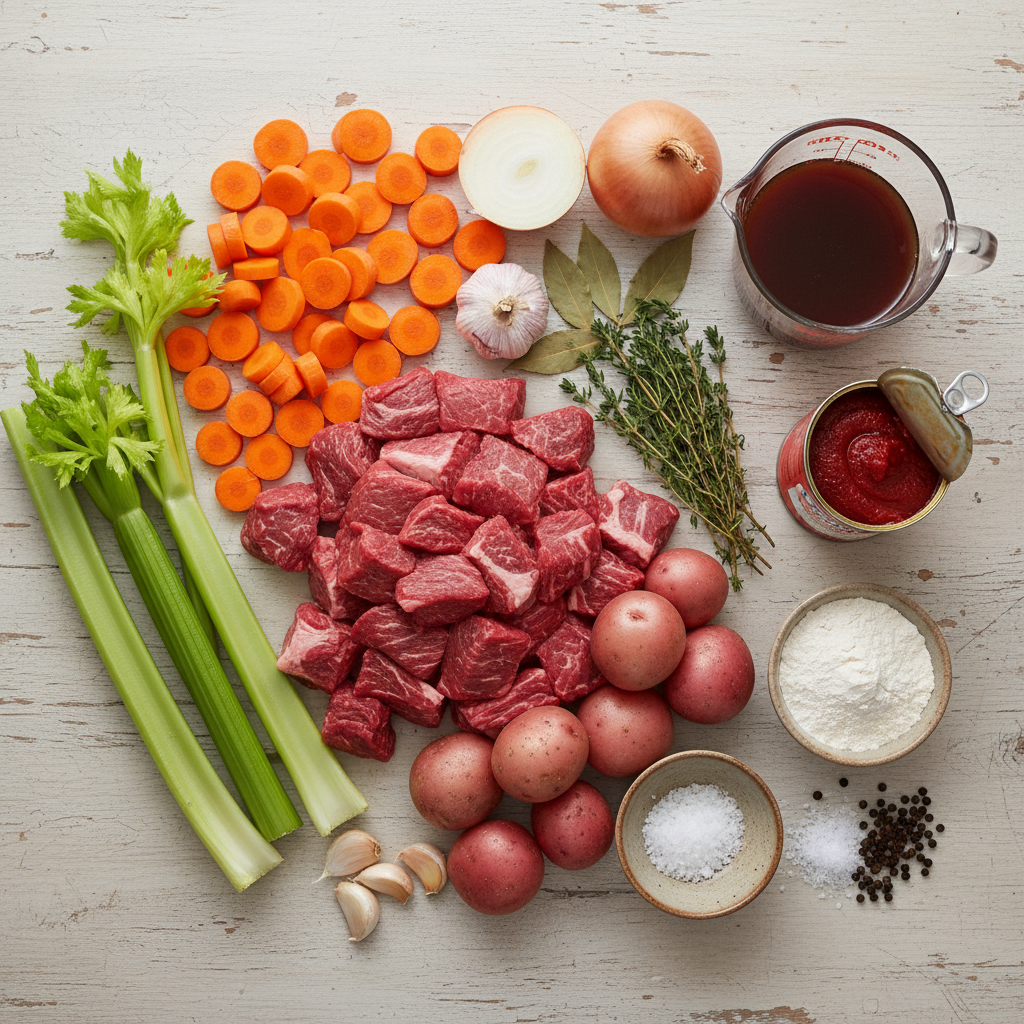
    What Ingredients Do You Need for Italian Meatballs?

    Making delicious Italian meatballs starts with the right ingredients—and don’t worry, you won’t need anything fancy. Recipesmondial focuses on easy recipes that use everyday items you likely already have. Our goal is to help you create flavorful meals made easy without the stress of complex instructions.

    Here’s a breakdown of what you’ll need for this simple dinner recipe. Each ingredient works to create juicy, tender, and incredibly tasty homemade meatballs that your family will love.

    The Heart of Your Meatballs: The Meat Blend

    The foundation of any great meatball is the meat itself. We suggest a classic blend for the best possible texture and flavor, ensuring rich and tender results.

    • 1 pound (450g) Ground Beef: Choose an 80/20 lean-to-fat ratio for the juiciest meatballs.
    • ½ pound (225g) Ground Pork: Pork adds extra moisture and a wonderful savory flavor.
    • Optional: ½ pound (225g) Ground Veal: For an even more authentic and tender Italian meatball, add veal to create the classic “meatball trifecta.”

    Essential Binders and Moisture

    These next ingredients are crucial for holding your meatballs together and keeping them incredibly moist. Don’t skip this step—it’s the secret to truly tender results.

    • ¾ cup Panko Breadcrumbs: Panko creates a lighter, airier texture than traditional breadcrumbs. You can also use fresh breadcrumbs.
    • ½ cup Whole Milk (or water): Soaking the breadcrumbs in milk makes the meatballs super tender and prevents them from drying out [1].
    • 1 Large Egg: The egg acts as a binder, helping all your ingredients stick together beautifully.

    Flavor Powerhouses: Herbs, Cheese, and Aromatics

    This is where the classic, aromatic flavors come from. These key additions are what truly elevate your Italian meatballs, making this a standout beginner-friendly recipe.

    • ½ cup Grated Parmesan Cheese: Use freshly grated for the best flavor. It adds a salty, umami depth.
    • ¼ cup Fresh Parsley: Finely chopped, flat-leaf parsley adds freshness and a hint of peppery flavor.
    • 2 cloves Garlic: Minced finely, garlic provides that authentic Italian taste.
    • ¼ cup Finely Chopped Onion (or shallot): A little onion adds a touch of sweetness and aromatic depth.

    Seasoning and Cooking Essentials

    Finally, a few simple seasonings will bring all the flavors together, enhancing the natural taste of the meat and other ingredients. You’ll also need oil for cooking.

    • 1 teaspoon Salt: Adjust to your personal taste.
    • ½ teaspoon Black Pepper: Freshly ground pepper is always best.
    • 2 tablespoons Olive Oil: For browning your meatballs if you choose to pan-fry them.

    Ingredient Tips and Swaps for Your Perfect Meatballs

    Cooking should be accessible, so feel free to adapt these ingredients to your preferences or what you have on hand. Use these tips to customize your recipe and build confidence in the kitchen.

    • Meat Variations: You can use all ground beef if you prefer. For a leaner option, try ground turkey or chicken, but be aware they may be less juicy.
    • Breadcrumb Choices: If you don’t have panko, regular dried breadcrumbs work well. Simply reduce the amount slightly, as they absorb less liquid. You can also use fresh breadcrumbs from stale bread.
    • Cheese Alternatives: Pecorino Romano cheese makes a great substitute for Parmesan, offering a sharper, saltier flavor.
    • Herb Swaps: While parsley is traditional, feel free to add a pinch of dried oregano or basil for extra herbal notes. Use fresh herbs whenever possible for the best taste.
    • Dairy-Free Option: To avoid dairy, simply use water instead of milk for soaking the breadcrumbs. The meatballs will still be tender.

    With these simple ingredients in hand, you’re ready to make delicious, family-friendly meals. This straightforward approach ensures your Italian meatball recipe is not only easy to make but also incredibly satisfying.

    How to Make Meatballs from Scratch: A Step-by-Step Guide

    A close-up of a home cook's hands gently mixing ground meat and other ingredients for meatballs in a large ceramic bowl.
    Professional food photography, photorealistic, high-quality food magazine photo. A close-up, dynamic shot focusing on a home cook’s hands (natural, not overly manicured) gently but confidently mixing the meatball ingredients in a large, rustic ceramic mixing bowl. The mixture, containing ground meats, breadcrumbs, cheese, and herbs, is perfectly combined but not overmixed, showing a pleasant texture. The lighting is soft and warm, highlighting the texture of the mixture and the hands. The background is a softly blurred, inviting home kitchen setting with natural light, reinforcing a friendly and approachable cooking environment.

    Step 1: Combine the Binders and Seasonings

    A powerful seasoning base is the secret to flavorful, juicy meatballs. This first step not only infuses every bite with taste but also helps bind the ingredients, so your meatballs won’t fall apart while cooking.

    To prepare your flavor foundation:

    • In a large mixing bowl, combine the fresh breadcrumbs and milk.
    • Add a large egg, which acts as a natural binder to hold the mixture together.
    • Next, add the seasonings: grated Parmesan cheese, finely chopped fresh parsley, minced garlic, red pepper flakes (for a little kick), and salt and black pepper to taste.
    • Mix everything thoroughly until it forms a moist, paste-like consistency.
    • Let the mixture sit for about five minutes. This allows the breadcrumbs to absorb the liquid, which is key for tender meatballs.

    Tip for Success: Don’t be afraid to taste a tiny bit of this binder mixture (before adding meat!) to adjust seasonings. This ensures your Italian meatballs will be perfectly seasoned.

    Step 2: Gently Mix in the Ground Meat

    Now it’s time to add the ground meat. The secret to tender, melt-in-your-mouth meatballs is to mix gently. Overworking the meat will make it tough and dense, so a light touch is essential.

    Follow these simple steps for perfectly mixed meat:

    • Add your ground meat to the seasoning mixture in the bowl. For the richest flavor, use a combination of ground beef, pork, and veal.
    • Using your hands, gently fold the meat into the other ingredients until just combined. The goal is to incorporate, not to knead.
    • Stop mixing as soon as you no longer see streaks of plain ground meat.
    • Avoid compacting the mixture. A light touch ensures a light meatball texture.

    Beginner-Friendly Tip: If you’re unsure, it’s always better to under-mix slightly than to over-mix. This simple technique is crucial for making delicious, juicy homemade meatballs every time.

    Step 3: Roll the Meatballs

    With the mixture ready, it’s time to roll the meatballs. Making them a uniform size is important because it ensures they cook evenly for consistent, reliable results.

    Here’s how to roll perfect meatballs:

    • Line a baking sheet or large plate with parchment paper to prevent sticking.
    • Lightly moisten your hands with water to keep the meat from sticking to them.
    • Scoop the mixture using a standard ice cream scoop to create uniform 1.5- to 2-inch meatballs (about the size of a golf ball).
    • Gently roll each portion between your palms to form a smooth, round ball without pressing too hard.
    • Place the finished meatballs on the prepared baking sheet.
    • Repeat until all the meat mixture has been rolled.

    Pro-Home Cook Hint: If you’re short on time, you can roll these meatballs ahead and chill them. This is a great meal prep tip for busy families!

    Step 4: Choose Your Cooking Method (Bake or Pan-Fry)

    It’s time to cook your meatballs. You have two excellent, beginner-friendly options: baking in the oven or pan-frying on the stovetop. Both methods produce delicious results.

    Baking Your Meatballs (Oven Method)

    Baking is a great hands-off option that creates less mess, making it ideal for cooking large batches.

    • Preheat your oven to 400°F (200°C).
    • Arrange your rolled meatballs in a single layer on a baking sheet lined with parchment paper. Make sure they aren’t touching each other.
    • Bake for 18-22 minutes, or until the meatballs are golden brown and cooked through.
    • To ensure they are fully cooked and safe, the internal temperature should reach 160°F (71°C) [2].

    Outcome: Baked meatballs are exceptionally juicy and are a lighter option. They are perfect for simmering directly in your favorite tomato sauce.

    Pan-Frying Your Meatballs (Stovetop Method)

    Pan-frying creates a delicious, crispy exterior and is a quick cooking method, especially if you plan to serve the meatballs right away.

    • Heat a large skillet over medium-high heat. Add a tablespoon or two of olive oil.
    • Once the oil is shimmering, carefully add the meatballs to the hot skillet. Do not overcrowd the pan; cook in batches if necessary.
    • Sear the meatballs for 2-3 minutes per side, turning occasionally, until all sides are nicely browned.
    • Reduce the heat to medium-low. Cover the skillet and let the meatballs cook for another 8-10 minutes, or until they are cooked through.
    • Again, verify the internal temperature reaches 160°F (71°C) for food safety.

    Outcome: Pan-fried meatballs have a rich, seared crust. They are excellent on their own, with a dipping sauce, or tossed into a pasta dish.

    No matter which method you choose, you’re on your way to enjoying perfect homemade meatballs!

    What Are Some Tips for Making Perfect, Juicy Meatballs?

    Crafting perfect, juicy meatballs is an art, but it’s one that’s easy to master. With these simple, beginner-friendly tips, you’ll make delicious homemade meatballs every time. Impress your family and friends with flavorful, easy-to-make meals.

    • Do Not Overmix the Meat: This is the most crucial tip for tender meatballs. Overmixing compresses the meat proteins, which can make your meatballs tough and dense. Gently combine the ingredients until they are just incorporated to prevent a rubbery texture.
    • Choose the Right Meat Blend: For the best flavor and texture, use a mix of ground beef and ground pork. Beef provides a rich taste, while pork adds essential fat for moisture. This balance is key to a juicy result. An 80/20 lean-to-fat ratio is ideal for tenderness [3].
    • Embrace the Panade: A panade—a mixture of bread or breadcrumbs soaked in milk—is the secret to moist meatballs. The bread absorbs the liquid and slowly releases it during cooking, keeping the meatballs tender. It also acts as a binder for the ingredients.
    • Roll Evenly Sized Meatballs: For even cooking, consistency is key. Use a small ice cream scoop or your hands to form meatballs of a similar size. This ensures they all cook at the same rate, preventing some from being overcooked while others are undercooked.
    • Do Not Overcrowd the Pan: When browning your meatballs, work in batches to avoid overcrowding the pan. A crowded pan lowers the temperature, causing the meatballs to steam instead of brown. Giving them enough space is essential for developing a flavorful crust that adds depth to the dish.
    • Cook Gently and Do Not Overcook: Whether you’re baking or pan-frying, be careful not to cook your meatballs for too long, as overcooked meat dries out quickly. Cook them until they are just done. You can finish them with a gentle simmer in your favorite sauce, which will keep them extra moist and flavorful.

    By following these simple tips, you can confidently create perfect, juicy meatballs every time. At Recipesmondial, we’re here to help you enjoy cooking and make mealtime stress-free. Get ready to serve delicious, family-friendly meals!

    What Are the Best Ways to Serve Homemade Meatballs?

    Delicious homemade Italian meatballs simmering in a rich red marinara sauce, garnished with fresh basil, in a rustic pot.
    Professional food photography, photorealistic, high-quality food magazine photo. A mouth-watering, close-up, high-angle hero shot of perfectly cooked, glistening homemade Italian meatballs simmering in a rich, vibrant red marinara sauce in a rustic cast-iron pot or an elegant, shallow serving dish. Several fresh basil leaves are artfully scattered on top, adding a pop of green. A hint of steam is gently rising from the hot sauce. The background is softly blurred, suggesting a cozy, inviting dining table setting with warm lighting, emphasizing the deliciousness and comfort of the meal.

    Once you’ve mastered our easy meatball recipe, the fun truly begins. Because they are so versatile, homemade meatballs can transform simple ingredients into flavorful meals for any occasion, from a quick family dinner to an impressive appetizer. To help you get started, here are some of our favorite serving ideas that make mealtime decisions delicious and stress-free.

    Classic & Comforting Combinations

    There’s a reason some pairings are timeless. Perfect for family-friendly meals, these classic options highlight the rich flavors of your Italian meatballs.

    • Spaghetti and Meatballs: Arguably the most famous way to enjoy them, simply toss your juicy meatballs with your favorite marinara sauce. Serve over al dente spaghetti for a satisfying and simple dinner that everyone loves.
    • Meatball Subs: Pile warm homemade meatballs onto a crusty hoagie roll. Add plenty of melted provolone or mozzarella cheese and a generous spoonful of marinara, then bake until golden and bubbly for a hearty lunch or casual dinner.
    • Meatball Parmesan: Similar to a sub but served as a main dish, place meatballs in an oven-safe dish and cover them with marinara, mozzarella, and a sprinkle of Parmesan. Bake until the cheese is melted and serve with a side salad or crusty bread.

    Creative & Quick Meal Ideas

    Looking to switch things up? Your homemade meatballs are perfect for exploring new dishes that are both delicious and easy to prepare.

    • Meatball Pizza Topping: Cut or crumble your meatballs and sprinkle them over a homemade or store-bought pizza crust with sauce and cheese. This adds incredible flavor to any pizza night.
    • Meatball Skewers: For a fun appetizer or light meal, thread cooked meatballs onto skewers with cherry tomatoes, bell pepper pieces, and onion. Grill or broil until the veggies are tender and serve with a dipping sauce.
    • Stir-Fry with Meatballs: Add sliced homemade meatballs to your favorite vegetable stir-fry with a savory sauce like teriyaki or peanut. This transforms a classic stir-fry into a heartier, protein-packed dish and is a great way to use leftovers.

    Appetizers & Party Pleasers

    Homemade meatballs are excellent, crowd-pleasing appetizers that are incredibly easy to prepare for gatherings. Try these simple ideas for your next event.

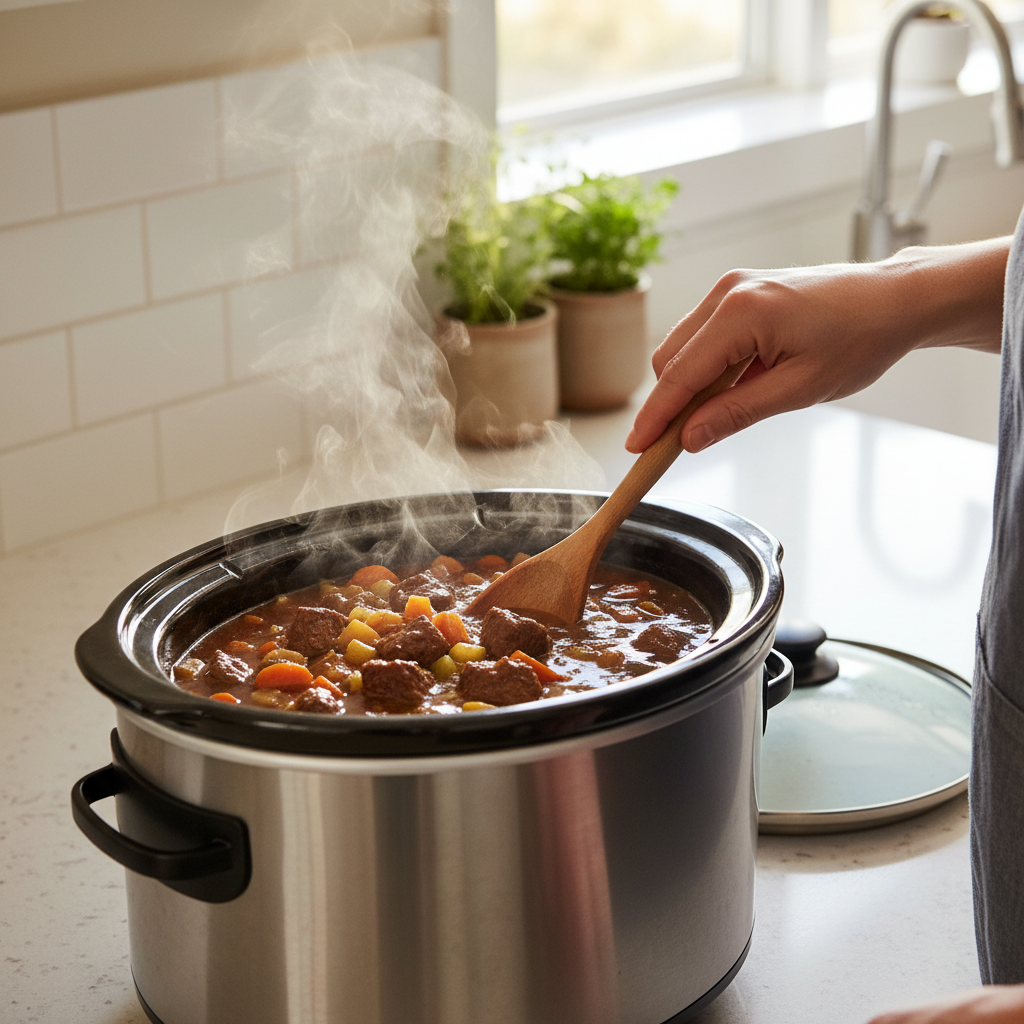
    • Cocktail Meatballs: To create a sweet and tangy glaze, simmer your meatballs in a slow cooker with a simple sauce like grape jelly and BBQ sauce or chili sauce and cranberry sauce. They are perfect for parties and potlucks.
    • Mini Meatball Sliders: Place smaller meatballs on slider buns with a dollop of marinara and a slice of cheese. Serve them as bite-sized appetizers or a fun party food.
    • Meatball & Dip Platter: Arrange cooked meatballs on a platter with various dips, such as marinara, pesto, or a creamy ranch. Add some toothpicks for easy serving.

    Low-Carb & Healthy Alternatives

    If you’re looking for healthier options, your homemade meatballs can easily fit into a low-carb or balanced meal plan, making it simple to enjoy flavorful meals while sticking to your dietary goals.

    • Zucchini Noodles (Zoodles): Instead of pasta, serve your Italian meatballs over a bed of fresh zucchini noodles topped with your favorite marinara. This significantly reduces carbs while still providing a satisfying meal.
    • Cauliflower Rice Bowl: Create a delicious and healthy bowl with cauliflower rice, homemade meatballs, and a vibrant vegetable medley. Add a light sauce to complete the dish.
    • Lettuce Wraps: Crumble or slice meatballs and serve them in crisp lettuce cups with a flavorful sauce and fresh herbs for a refreshing and light meal option.

    No matter how you serve them, your homemade meatballs are sure to be a hit. Our recipe is designed for versatility, allowing you to easily adapt it to your family’s tastes and mealtime needs. Enjoy creating delicious, stress-free meals with Recipesmondial!

    How to Store and Freeze Leftover Meatballs

    How to Store and Freeze Leftover Meatballs

    Making a big batch of homemade meatballs is a great way to prepare for future meals. When you know how to store and freeze them properly, you’ll always have a delicious, easy dinner option on hand.

    Storing in the Refrigerator

    Proper refrigeration is key to keeping your meatballs fresh for a few days. Follow these simple steps to ensure they stay delicious and safe to eat.

    • Cool Them Completely: First, let your cooked meatballs cool to room temperature, which usually takes 30-60 minutes. Storing hot food can create condensation and encourage bacterial growth.
    • Use an Airtight Container: Transfer the cooled meatballs to a clean, airtight container. If they are in a sauce, make sure the lid seals tightly to prevent spills.
    • Refrigerate Promptly: Place the container in the refrigerator within two hours of cooking to keep them safe.
    • Shelf Life: Your homemade meatballs will stay fresh in the refrigerator for 3 to 4 days, making them perfect for lunches or quick weeknight dinners.
    • Reheating Tips: To reheat, gently warm the meatballs in their sauce on the stovetop over low heat. For a quicker option, you can also use the microwave.

    This simple method helps you enjoy your leftovers for days, making mealtime less stressful.

    Freezing for Later

    Freezing meatballs is a game-changer for meal prep. Whether you freeze them cooked or uncooked, you’ll always have a quick, comforting meal ready to go.

    Freezing Cooked Meatballs:

    This method is ideal if you like to cook in bulk and want meals that are ready to heat and serve.

    • Cool Thoroughly: As with refrigerating, ensure your cooked meatballs are completely cool before freezing. This simple step helps prevent ice crystals and maintains their texture.
    • Flash Freeze (Recommended for Best Results): To stop the meatballs from clumping together, arrange them in a single layer on a parchment-lined baking sheet. Freeze for 1 to 2 hours, or until they are firm.
    • Package Them Well: Transfer the flash-frozen meatballs into heavy-duty freezer bags or airtight, freezer-safe containers. Squeeze out as much air as possible to prevent freezer burn.
    • Label and Date: Always label your bags or containers with the contents and date. This helps you keep your freezer organized and use food at its best.
    • Freezer Life: For the best quality, use cooked meatballs within 3 to 4 months. While they are safe to eat beyond this, their flavor and texture may decline.

    Freezing Uncooked Meatballs:

    Choose this option if you prefer to cook your meatballs fresh or want to prepare a large batch of the mixture ahead of time.

    • Form and Flash Freeze: Shape your meatball mixture and arrange the raw meatballs in a single layer on a parchment-lined baking sheet. Freeze for 1 to 2 hours until solid.
    • Store Securely: Once solid, transfer the uncooked meatballs to freezer bags or airtight containers, removing any excess air before sealing.
    • Cook from Frozen: There’s no need to thaw before cooking. Simply bake them or simmer them in sauce straight from the freezer. Just add a few extra minutes to the cooking time.

    Thawing and Reheating Frozen Meatballs:

    When you’re ready to enjoy your frozen meatballs, follow these simple steps for thawing and reheating.

    • Thawing Options: For the best results, thaw cooked meatballs overnight in the refrigerator before reheating. If you’re short on time, you can also reheat them directly from frozen.
    • Reheating Cooked Meatballs: To reheat thawed meatballs, warm them gently in sauce on the stovetop or bake at 350°F (175°C) for 15-20 minutes. To reheat from frozen, simmer them in sauce or bake at a lower temperature, like 300°F (150°C), until they reach an internal temperature of 165°F (74°C).
    • Cooking Uncooked Meatballs: Cook uncooked meatballs directly from frozen by simmering them in sauce or baking them in the oven. Ensure they are browned and fully cooked to an internal temperature of 160°F (71°C).

    With these simple storage tips, you can master meal prep and always have homemade meatballs on hand for quick, family-friendly dinners. It’s all about making home cooking more enjoyable and stress-free!

    Frequently Asked Questions

    How to make meatballs from mince?

    Turning simple mince (ground meat) into delicious homemade meatballs is a breeze! Our easy recipes help you create tender, flavorful meatballs every time.

    Here’s a quick step-by-step guide to help you create fantastic meatballs:

    • Choose Your Mince: You can use ground beef, pork, chicken, turkey, or a mix. For the best flavor and juiciness, a combination of beef and pork is often recommended.
    • Add Binders: Mix in ingredients like breadcrumbs (or stale bread soaked in milk) and an egg. These ingredients hold the meatballs together and keep them moist.
    • Season Well: This is where the flavor comes from. Include grated Parmesan cheese, minced garlic, finely chopped fresh parsley, salt, black pepper, and perhaps a pinch of red pepper flakes for a little kick.
    • Mix Gently: Use your hands to combine all the ingredients. Be careful not to overmix, as this can make your meatballs tough. Mix just until everything is evenly distributed.
    • Roll Evenly: Roll the mixture into meatballs of a consistent size, about as big as a golf ball. This helps them cook evenly.
    • Cook Them Up: You can bake your meatballs in the oven for a hands-off approach or pan-fry them until beautifully browned. After that, simply simmer them in your favorite sauce!

    This beginner-friendly process ensures a fantastic outcome every time. You’ll build confidence in the kitchen and enjoy cooking without stress!

    What is the best meatball recipe for spaghetti?

    For spaghetti, the best meatballs are incredibly tender, packed with savory flavor, and perfect for soaking up a rich tomato sauce. A great recipe focuses on achieving classic flavor and ultimate juiciness.

    Here’s what makes for truly great spaghetti meatballs:

    • Meat Blend is Key: A mix of ground beef and ground pork provides the best texture and depth of flavor. Some recipes also include ground veal for extra tenderness.
    • Rich Flavorings: Be generous with fresh garlic, finely chopped parsley, and grated Parmesan cheese. A touch of onion powder or finely minced onion also adds a savory, aromatic flavor.
    • Moisture & Tenderness: A combination of milk-soaked breadcrumbs and an egg is crucial. This technique keeps the meatballs moist and prevents them from becoming dense.
    • Gentle Hand: Overmixing is the enemy of tender meatballs. Mix just until the ingredients are combined. This simple tip makes a huge difference.
    • Cooking Method: Pan-fry the meatballs first to get a nice crust, then simmer them directly in your marinara sauce. This allows them to absorb the rich flavor of the sauce as they finish cooking.

    This simple and satisfying recipe is perfect for dinner and is sure to become a family favorite!

    What are authentic Italian meatballs made of?

    When we talk about “authentic Italian meatballs” (known as polpette in Italy), it’s important to know that traditions vary widely by region. However, there are several common themes that set them apart from the Italian-American versions many are familiar with.

    Traditionally, authentic Italian meatballs often feature:

    • Mixed Meats: You’ll frequently find a blend of ground beef, pork, and sometimes veal. In some regions, lamb or sausage meat may be included.
    • Stale Bread, Not Dry Crumbs: Instead of dry breadcrumbs, many traditional recipes use stale bread soaked in milk or water, which is then squeezed dry. This creates a much lighter and softer texture.
    • Cheese: Grated Parmesan or Pecorino Romano cheese is a staple, adding a salty, savory depth.
    • Eggs: An egg acts as a binder, helping to hold the mixture together.
    • Fresh Herbs: Finely chopped fresh parsley is almost always included. While other herbs like basil or oregano might be used, parsley is the most common choice.
    • Aromatics: Minced garlic is common, and sometimes finely grated or sautéed onion is added.
    • Simple Seasoning: Salt and freshly ground black pepper are often all that’s needed, allowing the quality of the ingredients to shine.
    • Smaller Size: Authentic Italian polpette are often smaller than their Italian-American counterparts, sometimes just bite-sized.
    • Cooking Method: They are frequently cooked in a simple tomato sauce or fried briefly before being added to a stew or soup. They are rarely served with spaghetti; instead, they are enjoyed as a small appetizer or part of a larger meal. [4]

    Understanding these elements helps home cooks appreciate the nuances of different meatball traditions. At Recipesmondial, we celebrate global comfort foods by making their diverse flavors accessible for every home cook.


    Sources

    1. https://www.seriouseats.com/the-food-lab-best-meatball-recipe-italian-american-new-york-cooking-tips
    2. https://www.fsis.usda.gov/food-safety/safe-food-handling-and-preparation/meat/ground-beef-and-food-safety
    3. https://www.usda.gov/media/blog/2019/04/24/ground-meat-whats-lean-and-whats-fatty
    4. https://www.academiabarilla.com/italian-recipes/meatballs-polpette

  • The Ultimate Beef Stew Recipe (Stove, Slow Cooker & Instant Pot)

    The Ultimate Beef Stew Recipe (Stove, Slow Cooker & Instant Pot)

    A classic beef stew recipe combines chunks of beef (like chuck roast) seared for flavor, then slow-simmered in a rich beef broth with hearty vegetables such as potatoes, carrots, onions, and celery. The long, slow cooking process makes the beef incredibly tender and develops a deep, savory gravy, creating a perfect one-pot comfort meal.

    Is there anything more comforting than a simmering pot of hearty beef stew on a chilly evening? We think not! While many of us crave that cozy meal, the thought of complex recipes can feel overwhelming, especially when planning family-friendly meals. At Recipesmondial, we’re here to change that. We’ve developed the ultimate, approachable beef stew recipe designed to help you create delicious, comforting dishes with confidence and ease. Our goal is to make your mealtime decisions easy and enjoyable.

    This isn’t just any beef stew recipe—it’s your new go-to for achieving tender, flavorful results every single time, regardless of your skill level. We know you want quick and reliable meal solutions. That’s why we’ll guide you through making this classic dish using three convenient methods: the traditional stovetop, the hands-off slow cooker, and the super-fast Instant Pot. Say goodbye to kitchen uncertainty and hello to a satisfying stew that tastes like it simmered all day.

    Our recipe focuses on clear, step-by-step guidance to help you transform simple ingredients into a rich, savory feast with confidence. We’ve included practical tips, ingredient substitutions, and everything you need to master this classic. Ready to see how effortless a flavorful meal can be? Let’s dive into what makes this the best beginner-friendly beef stew recipe!

    Why Is This The Best Beginner-Friendly Beef Stew Recipe?

    Welcome to your new favorite kitchen adventure! This isn’t just another beef stew recipe; it’s the ultimate starting point for creating a delicious, comforting meal. If you’ve ever felt overwhelmed by complex recipes, we crafted this one for you.

    At Recipesmondial, we believe cooking should be fun and approachable. That’s why this beef stew stands out for its simplicity and foolproof methods, designed to build your confidence from day one.

    Here’s why this is truly the best beginner-friendly beef stew recipe:

    • Clear, Step-by-Step Guidance: We break down every step into precise, easy-to-follow instructions to ensure your success, even if you’re new to cooking.
    • Simple, Everyday Ingredients: No exotic items required. You’ll find everything you need at your local grocery store, making approachable home cooking a reality.
    • Multiple Cooking Methods: To fit any schedule, we provide flexible instructions for the stove, slow cooker beef stew (or crockpot beef stew), and instant pot beef stew.
    • Flavorful Meals Made Easy: Our techniques guarantee a rich, deep flavor every time, showing you just how simple it is to achieve incredible taste.
    • Focus on Practicality: We include helpful tips for meal prep and variations to make your dinner planning stress-free.
    • Confidence Boosting: As you follow these clear steps, you’ll learn essential cooking skills and finish with both a delicious meal and a true sense of accomplishment.

    We want you to enjoy cooking without the stress. This stew recipe removes all the guesswork, guiding you step-by-step to a hearty, family-friendly meal you’ll be proud to serve.

    Forget the fear of difficult dishes. This recipe is your guide from uncertainty to confidence in the kitchen. With Recipesmondial, you’ll discover the joy of making flavorful meals made easy!

    What Ingredients Do You Need for Classic Beef Stew?

    An overhead flat lay of fresh, high-quality ingredients for beef stew, including cubed beef, colorful vegetables, herbs, and spices, neatly arranged on a wooden kitchen counter.
    An overhead flat lay shot displaying all the fresh, high-quality ingredients required for a classic beef stew. Include neatly cubed beef chuck, vibrant carrots, celery stalks, whole potatoes, yellow onions, garlic cloves, fresh sprigs of thyme, bay leaves, a measuring cup of rich beef broth, a small can of tomato paste, a glass of red wine, a small bowl of all-purpose flour, coarse salt, and black peppercorns. The ingredients are artfully arranged on a clean, light-colored rustic wooden kitchen counter with natural, soft lighting. The image should be 100 percent photorealistic, professional food photography style, capturing a high-quality food magazine photo aesthetic, emphasizing freshness and vibrant colors.

    A comforting, flavorful beef stew starts with the right ingredients. The good news? You won’t need anything fancy or hard to find. At Recipesmondial, we believe in making delicious meals accessible, and this classic recipe uses everyday items to create incredible flavor.

    Let’s break down the essential components that make this stew a family favorite.

    What is the Best Cut of Beef for Stew?

    The star of any beef stew is, of course, the beef. Choosing the right cut is crucial for achieving the melt-in-your-mouth tenderness we all crave. You want a cut that benefits from long, slow cooking, which allows its tough connective tissues to break down beautifully.

    • Chuck Roast (or Chuck Steak): This is your best choice for beef stew. Coming from the shoulder, chuck has excellent marbling (fat woven through the meat) that keeps it moist and adds amazing flavor during the slow cook. The connective tissue also breaks down into gelatin, which makes the meat incredibly tender and enriches the gravy. Many stores sell “stew meat” that is simply pre-cut chuck.
    • Other Good Options: You can also use leaner cuts like round (bottom round, top round) or brisket. However, they may require slightly longer cooking times to achieve the same tenderness as chuck.

    Pro Tip for Flavor: No matter which cut you pick, searing the beef before stewing is a non-negotiable step. This simple action creates a deeply flavorful crust, adding a rich, savory depth that transforms your entire dish.

    Choosing Your Vegetables

    Vegetables are essential for transforming a simple beef dish into a hearty, well-rounded meal. They add flavor, texture, and nutrition, acting as the perfect supporting cast to make the beef truly shine.

    Here are the go-to vegetables for a traditional beef stew:

    • Yellow Onions: Sautéed onions provide a sweet and savory base flavor, forming the foundation of the dish.
    • Carrots: Sweet and vibrant, carrots add a lovely pop of color and a subtle sweetness that balances the savory beef.
    • Celery: Often paired with onions and carrots to create a “mirepoix,” celery brings an aromatic, slightly bitter note that adds complexity.
    • Potatoes: Hearty and comforting, potatoes absorb the stew’s delicious flavors and help thicken the gravy naturally. Russet or Yukon Gold potatoes work wonderfully here.

    Fun Variations: Feel free to get creative by adding other vegetables. Consider mushrooms for an earthy depth, peas or green beans for a touch of freshness near the end of cooking, or parsnips for a unique, slightly spicy sweetness. Customizing the vegetables is an easy way to make this simple dinner recipe your own.

    The Secret to a Rich Gravy

    A thick, flavorful gravy is the soul of a classic beef stew. Creating that rich, comforting consistency isn’t complicated—it just requires a few key steps. Here are the essential elements:

    • Browning the Beef: This is the first step to deep flavor. Searing the beef creates a browned layer called “fond” at the bottom of the pan, which is packed with concentrated flavor.
    • Aromatics: Sautéing onions, carrots, and celery (and often garlic) in the same pot scrapes up that fond from the bottom, releasing those delicious flavors into the dish.
    • Tomato Paste: A small amount of tomato paste adds a touch of sweetness and acidity, which deepens the gravy’s flavor and contributes to a rich color.
    • Flour or Cornstarch: These are common thickening agents.
      • Flour: Dusting the seared beef with flour before adding liquid helps create a roux-like base that thickens the stew as it simmers.
      • Cornstarch Slurry: If your stew needs more thickening at the end, a slurry (cornstarch mixed with a little cold water) works wonders.
    • Rich Liquids:
      • Beef Broth: Use a good quality, low-sodium beef broth as the primary liquid base.
      • Red Wine (Optional): A splash of dry red wine, like Cabernet Sauvignon or Pinot Noir, adds incredible depth. It also helps deglaze the pan, lifting all those flavorful browned bits from the bottom.
    • Herbs and Spices: Simple herbs like bay leaves and fresh or dried thyme or rosemary are essential. They infuse the gravy with aromatic goodness as the stew simmers.

    The Power of Simmering: Finally, patience is key. Allowing your stew to simmer gently for an extended period is crucial. This slow cooking process helps all the flavors meld and deepen, tenderizes the beef, and thickens the gravy naturally.

    How to Make Beef Stew on the Stovetop (Step-by-Step)

    A steaming bowl of classic beef stew, brimming with tender beef, carrots, and potatoes, garnished with fresh parsley, served on a rustic wooden table.
    A close-up, inviting shot of a steaming bowl of classic beef stew, plated in a rustic ceramic bowl placed on a warm wooden dining table. The stew features visibly tender, browned chunks of beef, brightly colored carrots, potatoes, and celery swimming in a thick, rich, savory gravy. The stew is garnished with freshly chopped parsley. The background is a gently blurred, cozy kitchen scene with soft, natural light spilling in from a window, creating a warm and comforting ambiance. The image must be 100 percent photorealistic, professional food photography style, capturing a high-quality food magazine photo aesthetic, emphasizing texture, steam, and appetizing appeal.

    Making delicious beef stew on the stovetop is a rewarding experience that fills your kitchen with a warm, comforting aroma. This method gives you complete control over the flavors and textures, transforming simple ingredients into a rich, hearty, and unbelievably flavorful meal.

    Our step-by-step guide makes this classic beef stew recipe approachable for everyone. You’ll build flavor at each stage, ensuring a deeply satisfying result.

    Step 1: Sear the Beef for Maximum Flavor

    Searing the beef is the crucial first step. This process creates a delicious, browned crust that adds incredible depth and complexity to the finished stew.

    Here’s how to do it perfectly:

    1. Prepare the Beef: Pat the cubed beef dry with paper towels to help it brown better. Then, season it generously with salt and black pepper on all sides.
    2. Heat the Pan: Place a large Dutch oven or heavy-bottomed pot over medium-high heat. Add 1-2 tablespoons of olive oil or vegetable oil and let it get shimmering hot.
    3. Sear in Batches: Add about a third of the seasoned beef to the hot pan in a single layer. Do not overcrowd it, or the beef will steam instead of sear.
    4. Brown Thoroughly: Cook for 2-3 minutes per side until deeply browned. You’re not cooking the beef through, just building that fantastic crust.
    5. Remove and Repeat: Transfer the seared beef to a plate. Repeat with the remaining beef in batches, adding a little more oil if the pan becomes dry.

    Chef’s Tip: Those browned bits left in the pan are called “fond,” and they’re packed with flavor! We’ll use them in the next step.

    Step 2: Sauté the Aromatics

    With the beef seared, it’s time to build the stew’s aromatic foundation. These vegetables add sweetness, depth, and a wonderful fragrance.

    Follow these easy steps:

    1. Add More Oil (If Needed): If the pan is dry, add another tablespoon of oil and reduce the heat to medium.
    2. Sauté Vegetables: Add the chopped onions, carrots, and celery to the pot. Cook for 5-7 minutes, stirring occasionally, until they soften and become translucent.
    3. Introduce Garlic: Stir in the minced garlic and cook for 1 more minute until fragrant. Be careful not to let the garlic burn.

    Why This Matters: Sautéing these vegetables releases their natural sugars, which contributes to a richer, more complex flavor in the final stew.

    Step 3: Deglaze the Pan

    Deglazing is a simple technique that unlocks a huge amount of flavor. You’ll use liquid to lift all the delicious browned bits from the bottom of the pot, making your stew base even richer.

    Let’s deglaze:

    1. Add Liquid: Pour in the red wine or beef broth. Use a wooden spoon to scrape up the browned bits (the “fond”) from the bottom of the pot as the liquid sizzles. Continue stirring until the bits have dissolved.
    2. Cook Tomato Paste: Stir in the tomato paste and cook for 1-2 minutes, stirring constantly. Cooking the paste briefly deepens its flavor and color.
    3. Thicken (Optional): For a thicker stew, sprinkle the all-purpose flour over the vegetables. Stir well to combine and cook for 1 minute to form a roux.

    Substitution Idea: If you prefer not to use wine, simply use extra beef broth. The result will still be wonderful!

    Step 4: Simmer to Perfection

    Now for the magic. A long, slow simmer is what tenderizes the beef and allows all the flavors to meld together into a comforting stew.

    Follow these steps to finish your stew:

    1. Return Beef: Add the seared beef and any juices from the plate back into the pot.
    2. Add Liquids and Herbs: Pour in the beef broth and stir in the bay leaf and thyme sprigs.
    3. Add Potatoes: Add the cubed potatoes, ensuring they are mostly submerged in the liquid.
    4. Bring to Simmer: Increase the heat to medium-high to bring the stew to a gentle simmer.
    5. Cover and Cook: Once simmering, reduce the heat to low, cover the pot tightly, and let it cook for 1.5-2 hours, or until the beef is fork-tender. Check periodically to ensure it’s not boiling and stir to prevent sticking.
    6. Check Seasoning: When the beef is tender, remove and discard the bay leaf and thyme sprigs. Taste the stew and season with additional salt and pepper if needed.
    7. Final Touches (Optional): For a pop of color and freshness, stir in the frozen peas during the last 5 minutes of cooking.

    Your stovetop beef stew is now ready to serve! This recipe proves that delicious, home-cooked meals can be incredibly approachable and deliver satisfying results every time.

    How to Make Crockpot Beef Stew (Slow Cooker Method)

    A home cook's hand stirs simmering beef stew in a stainless steel slow cooker on a kitchen counter, with steam gently rising from the pot.
    A warm and inviting medium shot of a stainless steel slow cooker gently simmering a rich beef stew on a clean, modern kitchen counter. A real human hand, belonging to a home cook, is seen from the side, holding a wooden spoon and carefully stirring the bubbling stew. Visible steam rises gracefully from the pot, highlighting the warmth and aroma. The stew inside shows dark, rich broth with discernible chunks of beef and softened vegetables. The kitchen background is bright, clean, and inviting, with a soft, warm glow. The image should be 100 percent photorealistic, professional food photography style, capturing a high-quality food magazine photo aesthetic, emphasizing warmth, ease, and comfort in home cooking.

    When life gets busy, you need a comforting meal that practically cooks itself. That’s where the slow cooker shines! Making a rich, hearty crockpot beef stew is wonderfully simple and one of the best easy recipes for a cozy night in. This stress-free method is perfect for anyone who wants to prepare delicious family-friendly meals.

    The slow cooker transforms tougher cuts of beef into incredibly tender, melt-in-your-mouth pieces while infusing all the flavors beautifully over several hours. You’ll love how little hands-on time this simple dinner recipe requires. Just prep a few ingredients, set it, and forget it!

    1. Sear the Beef (Optional but Recommended): For the deepest flavor, start by searing the beef chunks. Pat the beef dry, season it generously with salt and pepper, and heat a tablespoon of oil in a large skillet over medium-high heat. Brown the beef on all sides until nicely caramelized. This step builds a fantastic foundation of rich, complex flavor, but you can skip it if you’re short on time—the stew will still be delicious.
    2. Sauté Aromatics (Optional): After searing the beef, you can sauté the chopped onions, carrots, and celery in the same skillet for a few minutes. This step softens the vegetables and enhances their sweetness, adding extra flavor depth. However, feel free to add them raw directly to the slow cooker to save time.
    3. Combine Ingredients in Slow Cooker: Place your seared (or unseared) beef into the slow cooker pot. Add your prepared vegetables: potatoes, carrots, celery, and onions, along with the garlic if using.
    4. Add Liquids and Seasonings: Pour in the beef broth, red wine (if using), and tomato paste. Add the bay leaves, dried thyme, and any other seasonings. Stir gently to combine, ensuring the beef and vegetables are mostly submerged.
    5. Cook Low and Slow: Cover the slow cooker and cook on LOW for 6-8 hours or on HIGH for 3-4 hours, until the beef is incredibly tender. Cooking on LOW is generally recommended for the most tender results. This “set it and forget it” approach is perfect for busy days, allowing you to handle other tasks while dinner cooks.
    6. Thicken and Finish: If you prefer a thicker stew, make a slurry about 30 minutes before serving. Whisk together 2 tablespoons of cornstarch with 3 tablespoons of cold water, then stir the mixture into the hot stew. Replace the lid and cook until the stew has thickened. Remember to taste, adjust seasonings, and remove the bay leaves before serving.

    Tips for the Best Crockpot Beef Stew

    A few simple tricks will help you achieve a truly remarkable beef stew slow cooker version. Follow these tips to create a flavorful and comforting meal every time.

    • Don’t Overfill: To ensure everything cooks properly, avoid filling your slow cooker more than two-thirds full. Overfilling can lead to uneven cooking.
    • Resist Peeking: Try to keep the lid on throughout the cooking process. Opening it releases heat and can extend the cooking time significantly—each peek can add 20-30 minutes [1].
    • Layer for Even Cooking: Place heartier vegetables like carrots and potatoes at the bottom of the slow cooker. This ensures they are fully submerged and cook through properly.
    • Taste and Adjust: Always taste your stew before serving and adjust salt, pepper, or other seasonings as needed. A splash of fresh parsley or a squeeze of lemon juice can brighten the final flavors.
    • Meal Prep Friendly: This beginner-friendly recipe is excellent for meal prep. Feel free to double the batch, enjoy half now, and freeze the rest for a quick, healthy meal later.

    Flavor Variations for Your Crockpot Stew

    One of the joys of making a stew recipe is its adaptability. Feel free to customize it with ingredients you love or have on hand for a more creative cooking experience.

    • Herb Power: Add fresh rosemary sprigs or a bouquet garni for a more aromatic stew.
    • Vegetable Boost: Incorporate mushrooms, parsnips, or a handful of frozen peas during the last hour of cooking for added nutrition and color.
    • Spice It Up: A pinch of smoked paprika or a dash of Worcestershire sauce can introduce extra depth and warmth.
    • Dairy-Free Creaminess: For a richer, dairy-free finish, stir in a splash of coconut cream just before serving.

    You’ll discover that making a hearty crockpot beef stew is not only delicious but also incredibly satisfying. It’s an approachable home cooking triumph that will boost your kitchen confidence!

    How to Make Instant Pot Beef Stew (Pressure Cooker Method)

    Want to make a rich, flavorful beef stew in a fraction of the time? The Instant Pot is your secret weapon for getting incredibly tender beef and deep flavor, fast. It’s the perfect solution for busy families who need delicious quick meals without spending hours in the kitchen.

    Enjoy classic comfort food without the long simmer. Our simple, step-by-step guide makes this instant pot beef stew foolproof. Get ready for stress-free cooking and a meal your whole family will love.

    Ingredients for Instant Pot Beef Stew

    The ingredients for this Instant Pot beef stew are nearly identical to the classic stovetop version, with a small adjustment to the liquid for pressure cooking. We’ve designed this easy recipe to use simple, everyday ingredients.

    • Beef: 2 pounds beef chuck, cut into 1-2 inch cubes.
    • Aromatics: 1 large yellow onion (chopped), 3 cloves garlic (minced).
    • Vegetables: 1 pound baby carrots or chopped carrots, 1.5 pounds Yukon gold potatoes (peeled and quartered), 1 cup chopped celery.
    • Liquid: 3 cups beef broth, 1 cup dry red wine (optional, see substitution below).
    • Flavor Boosters: 2 tablespoons tomato paste, 1 tablespoon Worcestershire sauce, 1 teaspoon dried thyme, 2 bay leaves, salt, and black pepper.
    • Thickener: 2 tablespoons cornstarch mixed with 2 tablespoons cold water (slurry).
    • Oil: 2 tablespoons olive oil or vegetable oil.

    Quick Tip: Patting the beef dry with paper towels before searing is the key to creating a delicious, browned crust.

    Step-by-Step Instant Pot Beef Stew Instructions

    Making a hearty beef stew recipe in your Instant Pot is incredibly straightforward. Follow these clear steps for a perfect result every time.

    1. Sear the Beef: Select the “Sauté” function on High (or “More”). Once hot, add 1 tablespoon of oil. Working in batches, brown the beef on all sides for 2-3 minutes per batch. Do not overcrowd the pot. Transfer the seared beef to a plate and set aside.
    2. Sauté Aromatics: Add the remaining tablespoon of oil to the pot. Sauté the chopped onion for 3-4 minutes until it begins to soften. Add the minced garlic and cook for one more minute until fragrant.
    3. Deglaze the Pot: Pour in the red wine (or 1 cup of beef broth). Use a wooden spoon to scrape all the browned bits from the bottom of the pot. This step, known as deglazing, adds incredible flavor and prevents a “Burn” warning.
    4. Build the Stew: Press “Cancel” to turn off the “Sauté” function. Stir in the tomato paste, Worcestershire sauce, dried thyme, and bay leaves. Return the seared beef and any accumulated juices to the pot.
    5. Add Vegetables and Liquid: Add the potatoes, carrots, and celery, then pour in the beef broth. Avoid stirring after this point to help prevent a “Burn” notice. Make sure the liquid covers most of the ingredients, but do not fill the pot above the “Max Fill” line.
    6. Pressure Cook: Secure the lid, turn the steam release valve to the “Sealing” position, and select “Pressure Cook” or “Manual” on High Pressure for 35 minutes.
    7. Natural Pressure Release: When the timer goes off, let the Instant Pot sit undisturbed for 10-15 minutes for a Natural Pressure Release (NPR). This crucial step allows the meat to relax and become incredibly tender. After 10-15 minutes have passed, carefully turn the vent to “Venting” to release any remaining steam before removing the lid.
    8. Thicken the Stew: Remove and discard the bay leaves. Select the “Sauté” function. In a small bowl, whisk the cornstarch and cold water together to create a smooth slurry. Slowly pour the slurry into the simmering stew, stirring constantly for 2-3 minutes until it thickens to your liking.
    9. Season and Serve: Turn off the Instant Pot. Taste the stew and season with additional salt and pepper as needed. Your delicious family-friendly meal is ready to serve!

    Instant Pot Tips for the Best Beef Stew

    Mastering this instant pot beef stew is easy with a few key pointers. Keep these tips in mind for a perfect result, especially if you’re new to pressure cooking.

    • Don’t Overfill: Always respect the “Max Fill” line inside your Instant Pot. Overfilling can interfere with the pot’s ability to build pressure and is a safety concern.
    • Patience with NPR: Don’t rush the natural pressure release. This resting period is essential for tender, juicy meat as it allows the muscle fibers to relax and reabsorb moisture.
    • Prevent the Burn Notice: The most common cause of a “Burn” notice is unscraped food bits. Deglaze thoroughly after sautéing. Also, never add thickeners like cornstarch or flour before pressure cooking—always add them at the end.
    • Control the Consistency: If your stew isn’t thick enough, the “Sauté” function and a cornstarch slurry are your best friends. It’s an easy fix to achieve the perfect texture.
    • Add Soft Veggies Later: Root vegetables like potatoes and carrots hold up well to pressure cooking. For softer vegetables like peas or green beans, stir them in after pressure cooking during the final “Sauté” step. Cook for a few minutes until tender-crisp.

    The Instant Pot makes approachable home cooking a reality, turning what was once a long-simmering project into an easy weeknight meal.

    Expert Tips for Perfect Beef Stew Every Time

    How to Thicken Your Beef Stew

    Achieving that perfect, rich gravy in your beef stew recipe is easier than you think. A thick stew adds wonderful comfort and holds all those delicious flavors together. Here are simple ways to get it just right:

    • Flour or Cornstarch Slurry: This is a classic method. In a small bowl, mix one tablespoon of all-purpose flour or cornstarch with two tablespoons of cold water. Whisk until smooth. Gradually stir this slurry into your simmering stew during the last 15-20 minutes of cooking. It will thicken beautifully as it cooks.
    • Reduce it Down: Sometimes, the simplest solution is more time. If your stew is too thin, remove the lid and let it simmer gently for another 20-30 minutes. As the excess liquid evaporates, the stew will thicken naturally and its flavors will become more concentrated.
    • Add Mashed Potatoes or Root Vegetables: This is a clever trick! If you have leftover mashed potatoes, stir a spoonful or two into the stew; they will dissolve and thicken the liquid. Alternatively, you can mash some of the cooked carrots or potatoes directly in the pot for natural thickness.
    • Tomato Paste: A little extra tomato paste, stirred in while sautéing your onions and garlic, can add both flavor and body to your gravy. It’s a great way to build a robust base for your stew recipe.

    Ingredient Variations & Substitutions

    Part of the joy of home cooking is making recipes your own. This best beef stew recipe is incredibly versatile, so don’t be afraid to experiment with what you have on hand!

    • Beef Cuts: While chuck roast is ideal, other cuts work well. Sirloin tip, bottom round, or even short ribs are excellent choices. Just be aware that cooking times might vary slightly. These cuts are also great options for budget cooking.
    • Vegetable Swaps: Don’t hesitate to customize the vegetables based on what you have. Consider these simple swaps:
      • For Potatoes: Sweet potatoes, parsnips, or turnips are delicious alternatives.
      • For Carrots: Try adding celery root or butternut squash for different sweetness and texture.
      • Leafy Greens: For extra nutrition, stir in a handful of spinach or kale during the last 10 minutes of cooking.
      • Mushrooms: Sliced cremini or button mushrooms will add an earthy depth. Add them with your other vegetables.
    • Liquid Alternatives: If you don’t have red wine, you can use several other liquids to add depth and flavor:
      • Beef Broth: For a classic flavor, simply use all beef broth.
      • Dark Beer: A stout or porter can add incredible richness. This works especially well in a crockpot beef stew or instant pot beef stew.
      • Non-Alcoholic Options: More beef broth with a splash of balsamic vinegar or Worcestershire sauce is a wonderful substitute. This ensures your family-friendly meals are always a hit.
    • Herb & Spice Boosts: Fresh thyme, rosemary, or bay leaves are classic additions. For a twist, try a pinch of smoked paprika for a subtle smoky flavor, or add a dash of red pepper flakes for a little warmth.
    • Gluten-Free Option: To make this stew recipe gluten-free, use a cornstarch slurry for thickening instead of flour. You should also ensure your beef broth is certified gluten-free.

    What to Serve With Beef Stew

    A hearty beef stew is a meal in itself, but pairing it with a simple side can elevate your dinner. Here are some perfect, easy-to-prepare accompaniments:

    • Crusty Bread or Dinner Rolls: This is a must-have for soaking up every last drop of the amazing gravy. Warm some store-bought bread or make your own for a truly comforting experience.
    • Creamy Mashed Potatoes: Serving your stew over a bed of fluffy mashed potatoes is a classic pairing. The creamy and hearty textures complement each other beautifully, making it a simple dinner recipe favorite.
    • Rice: White or brown rice makes a great base, as it’s a light option that absorbs the rich gravy perfectly.
    • Noodles: For another comforting meal, serve the stew over egg noodles or even wide pasta.
    • Simple Green Salad: A fresh, crisp green salad with a light vinaigrette offers a lovely contrast to the stew’s richness and adds a refreshing element to the meal.
    • Roasted Vegetables: A side of roasted broccoli, green beans, or asparagus adds extra nutrients and a pop of vibrant color to your plate.

    How to Store and Reheat Leftover Stew

    One of the best things about a hearty beef stew is the incredible leftovers! Your beef stew recipe often tastes even more delicious the next day, making it a fantastic solution for quick meals or family-friendly meals. However, to maintain that wonderful flavor and ensure food safety, proper storage and reheating are crucial. Let’s make sure your best beef stew recipe stays perfect for days to come!

    How to Store Leftover Beef Stew

    Storing your leftover beef stew correctly is a simple way to ensure you can enjoy it safely later. Think of this as a smart meal prep idea!

    Cool Down Quickly

    • Speed is Key: It’s important to cool your stew as quickly as possible after cooking.
    • Two-Hour Rule: To prevent harmful bacteria from growing, never leave your stew recipe at room temperature for more than two hours [2].
    • Shallow Containers: To speed up the cooling process, divide the stew into smaller, shallow containers.

    Choose the Right Containers

    Once cooled, transfer the stew into appropriate containers to lock in freshness.

    • Airtight is Best: Always use airtight containers. This prevents freezer burn and keeps the stew from absorbing other odors in your fridge or freezer.
    • Material Matters: Glass or BPA-free plastic containers are both excellent choices.

    Refrigeration

    For quick weekday lunches or dinners, the refrigerator is your best option.

    • Storage Time: Your leftover beef stew will keep safely in the refrigerator for 3 to 4 days [2].
    • Easy Portions: For convenience, store the stew in individual portions for easy grab-and-reheat meals.

    Freezing for Longer Storage

    Freezing is a fantastic way to extend the life of your crockpot beef stew or instant pot beef stew. It’s a great meal prep tip for busy weeks!

    • Cool Completely: Always let the stew cool completely before freezing it.
    • Portion Wisely: Divide the stew into single-serving or family-sized portions. This makes it much more convenient to thaw and reheat later.
    • Freezer-Safe Containers: Use airtight, freezer-safe containers or heavy-duty freezer bags. If using rigid containers, leave about an inch of headspace to allow for expansion as the liquid freezes.
    • Label and Date: Clearly label your containers with the contents and the date it was frozen.
    • Freezer Life: For the best quality, use frozen beef stew within 2 to 3 months [2].

    How to Reheat Leftover Stew

    Reheating your leftover stew is simple. The most important rule is to ensure it reaches an internal temperature of 165°F (74°C) for safety [2].

    Reheating on the Stovetop

    This is often the best method for even heating while maintaining the stew’s texture. It’s perfect for any beef stew slow cooker or instant pot beef stew.

    1. Thaw First (if frozen): If the stew is frozen, thaw it in the refrigerator overnight for the best results.
    2. Transfer to a Pot: Pour the stew into a heavy-bottomed pot or saucepan.
    3. Add Liquid: If the stew has thickened, add a splash of beef broth or water (about 1/4 to 1/2 cup) to reach your desired consistency.
    4. Heat Gently: Warm the stew over medium-low heat, stirring occasionally to prevent it from sticking to the bottom of the pot.
    5. Simmer to Perfection: Bring the stew to a gentle simmer and heat until it is piping hot throughout, which usually takes 10 to 15 minutes.

    Reheating in the Microwave

    For individual servings, the microwave offers a quick and convenient option, making it ideal for simple dinner recipes.

    1. Use a Microwave-Safe Dish: Place a single portion of stew in a microwave-safe bowl.
    2. Cover Loosely: Cover the bowl with a microwave-safe lid or wrap, leaving a corner open to vent. This prevents splatters and promotes even heating.
    3. Heat in Intervals: Microwave on high for 2 to 3 minutes, then stir well to distribute the heat.
    4. Continue Heating: Continue heating in 1-minute intervals, stirring in between, until the stew is steaming and heated through.

    Reheating in the Oven (for Larger Portions)

    The oven is an excellent choice for reheating a large batch of leftover stew because it ensures even heat distribution.

    1. Preheat Oven: Set your oven to 325°F (160°C).
    2. Transfer to Dish: Place the stew in an oven-safe casserole dish and cover it with a lid or foil.
    3. Add Liquid: If needed, add a small amount of broth or water to keep the stew moist.
    4. Bake: Heat for 20 to 30 minutes, or until hot. Stir halfway through the cooking time to ensure it heats evenly.

    Tips for Perfect Leftover Stew

    A few extra touches can make your reheated beef stew taste just as delicious as when it was freshly made!

    • Adjust Seasoning: Always taste the reheated stew. You may need to add a pinch more salt or pepper to enhance the flavors.
    • Add Fresh Herbs: A sprinkle of fresh parsley or thyme just before serving beautifully brightens the flavor.
    • Avoid Multiple Reheating: Only reheat the amount of stew you plan to eat. Repeatedly cooling and reheating can degrade its quality and texture.
    • Serve Immediately: Once the stew is hot, serve and enjoy it right away.

    Frequently Asked Questions

    How long to cook beef stew in a pressure cooker?

    Using a pressure cooker, like an Instant Pot, significantly speeds up the cooking process because the high pressure tenderizes tough cuts of meat quickly. For a classic beef stew with 1- to 1.5-inch cubes of meat, the general cooking time is:

    • 25-35 minutes on high pressure, followed by a natural pressure release for 10-15 minutes. This ensures the beef is melt-in-your-mouth tender [3].

    Always use a natural pressure release. This crucial step prevents the meat from becoming tough and allows the flavors to meld beautifully.

    Can I make crockpot beef stew without browning the meat?

    Yes, you can absolutely make a delicious crockpot beef stew without browning the meat first. This is a fantastic time-saver, especially on busy days.

    Here’s what to consider if you skip this step:

    • Flavor Depth: Browning creates a rich, caramelized crust on the beef through the Maillard reaction. This process adds a deep, savory flavor to the finished stew.
    • Texture: Without browning, your beef will have a slightly different texture. It will still be tender, but it won’t have that savory crust.
    • Convenience: For many, the ease of adding all ingredients to the slow cooker at once outweighs the extra flavor from browning. This makes for an incredibly simple dinner.

    If you’re short on time, don’t hesitate to skip the browning step. Your beef stew will still be wonderfully flavorful and comforting.

    What makes beef stew tough?

    Tough beef is a common stew problem, but it’s usually easy to prevent. Here are the most likely reasons your beef is tough:

    • Wrong Cut of Beef: Lean cuts like sirloin can become tough because they lack the collagen that breaks down into tender gelatin during long, slow cooking.
    • Not Enough Cooking Time: Beef stew needs to cook low and slow. Rushing the process leaves the beef chewy because the connective tissues haven’t had enough time to break down.
    • Cooking at Too High a Heat (Stovetop/Slow Cooker): High heat can cause the muscle fibers to seize up, making the meat dry and tough. A gentle simmer is key to keeping the beef tender.
    • Too Quick a Pressure Release (Pressure Cooker): A quick pressure release can shock the meat, causing it to toughen. In contrast, a natural pressure release lets the meat’s fibers relax, keeping it tender.

    For the best results, choose a cut like chuck roast and cook it patiently until it’s fork-tender. This ensures a delicious and tender stew.

    What can I use if I don’t have red wine?

    Red wine adds depth and acidity to beef stew, but there are excellent non-alcoholic substitutions if you prefer to leave it out. These alternatives will still help you create a rich, flavorful stew:

    • Beef Broth or Stock: This is the simplest substitute. For the best flavor, use a high-quality, low-sodium beef broth to provide a rich base.
    • Non-Alcoholic Red Wine: Available in most grocery stores, this offers a similar flavor profile without any alcohol content.
    • Grape Juice (Unsweetened): Use a splash of unsweetened grape juice for a fruity note. Be sure to add a tablespoon of vinegar (like red wine or balsamic) to balance the sweetness with acidity.
    • Beer (Dark or Stout): A dark beer adds a robust, malty flavor that pairs wonderfully with beef. Just be aware that it will create a noticeably different flavor profile than wine.
    • Tomato Paste with Broth: Dissolving a tablespoon of tomato paste in beef broth is a great way to add umami and acidity, creating a rich gravy base.

    Choose the substitute that best fits your desired flavor profile. With these simple swaps, you can easily create a fantastic, family-friendly meal.


    Sources

    1. https://www.fsis.usda.gov/food-safety/safe-food-handling-and-preparation/food-safety-basics/slow-cookers-and-food-safety
    2. https://www.foodsafety.gov/food-safety-charts/cold-food-storage-chart
    3. https://instantpot.com/

  • How to Make the Best Mashed Potatoes: An Easy Step-by-Step Recipe

    How to Make the Best Mashed Potatoes: An Easy Step-by-Step Recipe

    To make the best mashed potatoes, start by boiling peeled, evenly-cut potatoes like Russets or Yukon Golds in salted water until fork-tender. Drain them thoroughly, then mash with warmed butter, milk, or cream. Season generously with salt and pepper until you reach a smooth, creamy, and flavorful consistency.

    Few dishes bring comfort to the table quite like a steaming bowl of perfectly creamy mashed potatoes. It’s a classic star side dish for a holiday feast and a simple addition to any weeknight meal. But have you ever felt overwhelmed by complicated recipes? At Recipesmondial, we believe finding reliable and easy recipes for family-friendly meals is key to making cooking enjoyable, not stressful. That’s why we are sharing our ultimate mashed potatoes recipe, designed to take the guesswork out of this beloved side.

    You can forget about dry, lumpy, or gummy results for good. Our best mashed potatoes recipe offers clear, step-by-step cooking guidance that even beginners can follow with confidence. We’ll show you everything, from selecting the right potatoes to the simple techniques for achieving that incredible, melt-in-your-mouth creaminess. With our approachable home cooking tips, you’ll master the best mashed potatoes and serve delicious homemade mashed potatoes everyone will love. Get ready to transform everyday ingredients into truly flavorful meals made easy and build your confidence in the kitchen.

    Why You’ll Love This Easy Homemade Mashed Potatoes Recipe

    Simple, Everyday Ingredients

    You don’t need a pantry full of specialty items to make these incredible homemade mashed potatoes. Our recipe prioritizes common ingredients you likely already have, like humble potatoes, fresh milk, rich butter, and simple seasonings. This budget-friendly approach makes cooking accessible and stress-free, allowing you to create a flavorful meal without extra trips to the store.

    Foolproof for Beginners

    If you’re often overwhelmed by complex recipes or lack confidence in the kitchen, this mashed potato recipe is for you. It’s truly foolproof and designed for beginners. We provide clear, step-by-step guidance to support you through each stage, ensuring you get perfect results every time. This recipe will help you build confidence and make preparing delicious, family-friendly meals an enjoyable experience.

    The Perfect Creamy Texture

    Our recipe delivers wonderfully light, fluffy, and incredibly smooth mashed potatoes—never gummy or lumpy. Each bite offers a rich, comforting experience. The secret lies in a few simple techniques and the perfect ratio of ingredients, allowing you to achieve a restaurant-quality texture right at home. It’s a classic, flavorful dish your family will adore.

    What ingredients to put in mashed potatoes?

    An inviting flat lay of fresh ingredients for mashed potatoes: whole potatoes, butter, milk, salt, pepper, and chives.
    A professional food photography shot, 100 percent photorealistic, high-quality food magazine photo. A clean, organized flat lay composition of fresh, high-quality mashed potato ingredients on a light-colored wooden cutting board or marble countertop. The arrangement includes whole, unpeeled golden Yukon Gold potatoes, a stick of unsalted butter, a small glass pitcher of whole milk or heavy cream, a small ceramic bowl containing a pinch of coarse sea salt and freshly ground black pepper, and a small bunch of fresh green chives. Each ingredient is perfectly lit with soft, natural light, emphasizing freshness and quality, set against a clean, uncluttered background that evokes a bright home kitchen.

    Creating delicious homemade mashed potatoes is simpler than you think—it all starts with choosing the right ingredients. We’ll focus on everyday staples that combine to make a side dish that is both comforting and full of flavor. Selecting the best components will help you build kitchen confidence and achieve perfect results every time.

    The Best Potatoes for Mashing

    The type of potato you choose is crucial for the final texture of your dish. To achieve a light, fluffy, and creamy mash, select a variety that is high in starch. Starchy potatoes break down easily during cooking and absorb dairy without becoming gummy.

    • Russet Potatoes (Idaho Potatoes): Often considered the champions of mashed potatoes, Russets have a high starch content and a fluffy texture. This makes them ideal for absorbing butter and milk, resulting in a wonderfully airy mash. They are excellent for family-friendly meals.
    • Yukon Gold Potatoes: If you prefer a denser, creamier mash with a naturally buttery flavor, Yukon Golds are a fantastic choice. With their medium starch content and lovely golden hue, many home cooks love them for their rich taste, making them perfect for flavorful meals made easy.

    Quick Tip: Avoid waxy potatoes like red bliss or new potatoes. They have less starch and more moisture, which will make them gluey and dense—not light and fluffy—when mashed [1].

    Essential Dairy: Butter, Milk, or Cream

    Dairy is what transforms cooked potatoes into a rich, decadent side dish. For best results, warm your dairy before adding it. This key step keeps the potatoes from cooling down and helps them absorb the liquid more effectively.

    • Unsalted Butter: Using unsalted butter gives you complete control over the saltiness of your dish. It also adds incredible richness and flavor, so don’t be shy.
    • Whole Milk: For a smooth consistency that isn’t overly heavy, whole milk is a reliable choice. It provides a perfect balance of creaminess for your beginner-friendly mashed potatoes.
    • Heavy Cream or Half-and-Half: To create an extra luxurious and ultra-creamy texture, use heavy cream or half-and-half. These additions make your mashed potatoes incredibly indulgent and are wonderful for elevating simple dinner recipes.

    Substitution Idea: For a dairy-free version, you can use a dairy-free milk alternative (like unsweetened almond or oat milk) and plant-based butter. This makes it an adaptable easy recipe for various dietary needs.

    Simple Seasonings for Maximum Flavor

    Proper seasoning is crucial for bringing out the full flavor of your best mashed potatoes recipe. Don’t be afraid to taste as you go and adjust accordingly.

    • Salt: Kosher salt is ideal. Add it to the potato boiling water and again while mashing to layer the flavor beautifully.
    • Black Pepper: Freshly ground black pepper adds a subtle kick and aroma that perfectly complements the creamy potatoes.
    • Optional Flavor Boosters:
      • Garlic Powder or Roasted Garlic: A pinch of garlic powder or a few cloves of mashed roasted garlic offers a wonderful savory depth.
      • Fresh Herbs: Add a bright, fresh note with finely chopped chives, parsley, or thyme. Stir them in just before serving.
      • Onion Powder: Similar to garlic powder, a little onion powder can add another layer of savory taste without being overpowering.

    Start with these basic yet high-quality ingredients, and you’ll be on your way to mastering homemade mashed potatoes. Recipesmondial is here to help you turn simple components into something truly special, making your time in the kitchen enjoyable and stress-free.

    How to Make the Best Mashed Potatoes: Step-by-Step

    A home cook's hands mashing steaming potatoes in a large pot with a potato masher.
    A professional food photography shot, 100 percent photorealistic, high-quality food magazine photo. A close-up, action shot in a real, brightly lit home kitchen. A home cook’s hands are actively using a sturdy, silver potato masher to mash freshly boiled, steaming potatoes in a large, stainless steel heavy-bottomed pot. The potatoes are visibly soft, fluffy, and perfectly cooked, with subtle steam rising from the pot. The cook’s hands are natural and confident, conveying ease and approachability. The background is softly blurred, showing hints of a clean, warm kitchen counter and possibly a window, maintaining a focus on the mashing process.

    Step 1: Peel and Boil the Potatoes

    Properly preparing your potatoes is the cornerstone of creamy mashed potatoes. This first step ensures they cook evenly, setting the stage for a perfectly smooth final texture.

    • Peel your potatoes: Use a vegetable peeler to remove all the skin. A sturdy Y-peeler works best for quick peeling.
    • Cut into equal pieces: Slice the peeled potatoes into uniform 1.5 to 2-inch chunks. This ensures every piece cooks at the same rate, preventing hard spots or overcooked edges.
    • Rinse them well: Place the cut potatoes in a colander and rinse them under cold water. This washes away excess starch, which helps prevent a gummy texture.
    • Place in a pot: Transfer the rinsed potatoes to a large pot and cover them with cold water by about one inch.
    • Add salt: Generously salt the water with about 1 tablespoon of salt per gallon, similar to how you would for pasta. Salting the water seasons the potatoes from the inside out, making a huge difference in the final flavor [2].
    • Boil until tender: Bring the water to a boil, then reduce the heat to a simmer. Cook for 15-20 minutes, or until a fork slides easily into a potato chunk.

    Step 2: Drain and Steam Dry

    Do not overlook this crucial step. Draining and steam-drying the potatoes is the secret to a light, fluffy texture, preventing them from becoming watery or dense.

    • Drain thoroughly: Carefully pour the potatoes into a colander and shake gently to let all the hot water drain away.
    • Return to the hot pot: Return the drained potatoes directly to the still-warm pot. The residual heat will help steam them dry.
    • Steam for a few minutes: Let the potatoes sit for 3-5 minutes, allowing the steam to evaporate any excess moisture. This creates a drier potato, which is essential for a fluffy result.

    Step 3: Warm Your Butter and Milk

    Warming your butter and milk is essential for a smooth, lump-free texture. Cold dairy can cool the potatoes, preventing them from absorbing the fat evenly and resulting in a less silky finish. This quick step ensures creamy results.

    • Combine dairy: Combine the butter and milk (or cream) in a small saucepan or a microwave-safe bowl.
    • Gently heat: Warm the mixture over low heat, stirring occasionally, until the butter is melted and the milk is warm to the touch. Be careful not to let it boil.
    • Keep it ready: Set the warm dairy mixture aside so it’s ready to add to the potatoes.

    Step 4: Mash to Creamy Perfection

    Now it’s time to mash. The key to a perfect creamy texture is to work gently and avoid overmixing, which can make the potatoes gummy.

    • Return potatoes to pot: Ensure the steam-dried potatoes are in the pot you used for boiling.
    • Mash them well: Use a potato ricer or a hand masher to break down the potatoes until they are mostly smooth. A ricer will create the lightest, fluffiest texture.
    • Add warm dairy: Gradually pour in about two-thirds of the warm butter and milk mixture. It’s best to start with less, as you can always add more.
    • Mix gently: Using a sturdy spoon or spatula, fold the dairy into the potatoes until just combined and creamy. Do not overmix! Overmixing develops the starch and leads to gluey potatoes.
    • Season to taste: Season with salt and freshly ground black pepper. Taste and adjust as needed, adding more warm milk for a creamier consistency if desired.
    • Serve immediately: For the best taste and texture, serve your mashed potatoes immediately while they are warm.

    What is the secret to really good mashed potatoes?

    Tip 1: Use the Right Kind of Potato

    Excellent mashed potatoes start with the right type of potato. Starchy potatoes are your best friend here because they break down easily and absorb butter and milk beautifully. This creates the light, fluffy texture everyone loves.

    Waxy potatoes, on the other hand, have less starch and hold their shape well, which is great for salads. However, when mashed, they can become gluey and dense, resulting in a less enjoyable texture.

    For the ultimate creamy, fluffy mashed potatoes, reach for these varieties:

    • Russet Potatoes: Also known as Idaho potatoes, these are high in starch and low in moisture. They cook up light and fluffy, perfect for absorbing all the delicious dairy you add.
    • Yukon Gold Potatoes: These have a naturally buttery flavor and creamy texture. While slightly less starchy than Russets, they still mash wonderfully and give your dish a lovely yellow hue.

    Choosing the right potato from the start makes the entire process easier and helps you avoid common mistakes. [3]

    Tip 2: Always Use Warm Milk and Butter

    This tip is a game-changer for homemade mashed potatoes. Adding cold ingredients to hot potatoes cools them down, which prevents them from fully absorbing the dairy. This can lead to a lumpy or uneven consistency.

    Instead, gently warm your milk (or cream) and butter together in a small saucepan over low heat until the butter is melted. The mixture should be warm, not boiling. Warm ingredients incorporate more smoothly into hot potatoes, creating a silky and perfectly consistent texture. This simple step elevates your mashed potatoes, making them reliably smooth and flavorful.

    Tip 3: Don’t Overwork or Over-mix

    Overworking potatoes is the most common cause of a gummy, gluey texture. When potatoes are mashed too aggressively, their starch cells break down and release excess starch, which creates that unappetizing stickiness.

    To achieve the best results, be gentle. Mash your cooked potatoes until they are mostly broken down. Then, add your warm milk and butter mixture and mix just until everything is combined and creamy. A potato ricer or a hand masher works best for this. Avoid using a food processor or an electric mixer, as these tools are too aggressive and will quickly overwork the potatoes. Remember, stopping at the right moment is the key to a perfectly fluffy result.

    Tip 4: Salt Your Cooking Water

    Building flavor should start early in the cooking process. Salting the cooking water is essential because as the potatoes boil, they absorb the salt, seasoning them from the inside out. Since potatoes are bland on their own, they need this foundation of seasoning.

    Think of it like cooking pasta—you want the water to be well-seasoned. A good guideline is to add 1-2 tablespoons of salt per gallon of water before adding your potatoes. This initial salting makes a huge difference, ensuring every bite of your mashed potatoes is flavorful and well-balanced. It’s a small step that guarantees a delicious result.

    What is a common mistake when making mashed potatoes?

    Mistake 1: Using the Wrong Tool to Mash

    The secret to perfectly creamy mashed potatoes is using the right tool. Many beginners reach for a food processor or an electric mixer, but these high-speed gadgets can actually ruin the texture.

    Here’s why:

    • Overworks the Starch: High-speed blades and beaters break down the potato cells too aggressively. This process releases an excessive amount of starch.
    • Creates a Gummy Texture: All that extra starch is what turns fluffy potatoes into a sticky, glue-like mess.

    For the best results, use a hand-held potato masher or a potato ricer. These tools gently break down the potatoes without overworking the starches, giving you the light and fluffy texture you want.

    Mistake 2: Adding Cold Ingredients

    Adding cold ingredients to hot potatoes can ruin their texture and flavor. This common oversight prevents the potatoes from becoming perfectly smooth and creamy.

    Here’s the impact:

    • Cools the Potatoes Down: Cold dairy instantly lowers the temperature of your potatoes, which makes them more difficult to mash into a smooth consistency.
    • Prevents Proper Absorption: Warm potatoes absorb liquids much more effectively. Adding cold ingredients prevents them from blending seamlessly, resulting in a lumpy, less creamy texture.

    The fix is simple: gently warm your butter, milk, or cream before adding them. This small step ensures all the ingredients combine smoothly for the richest, creamiest result.

    Mistake 3: Not Draining the Potatoes Properly

    Watery mashed potatoes are a common disappointment, usually caused by one simple mistake: not draining them properly. Getting rid of excess moisture is a crucial step for great results.

    Here’s how it affects your dish:

    • Dilutes the Flavor: Excess water dilutes the taste of the potatoes and any seasonings you add, making your final dish bland.
    • Creates a Soupy Texture: Instead of being thick and fluffy, potatoes with too much water will turn thin and runny.
    • Inhibits Creaminess: The presence of water makes it difficult for potatoes to absorb the butter and cream, preventing a rich, creamy result.

    After boiling, drain the potatoes thoroughly in a colander. For an extra step, return them to the hot, empty pot and place it over low heat for a minute. This allows any remaining moisture to steam off, leaving your potatoes perfectly dry and ready to absorb the butter and cream.

    Easy Variations for Your Mashed Potatoes

    Creamy Garlic Mashed Potatoes

    Ready for a simple twist on classic mashed potatoes? Adding garlic creates a wonderful depth of flavor that will impress everyone. This easy variation is perfect for simple dinner recipes and a fantastic way to elevate family-friendly meals.

    Here’s how to make your mashed potatoes deliciously garlicky:

    • Prepare the Garlic: You have two easy options.
      • Sautéed Garlic: Mince 3-4 cloves of garlic, then sauté them gently in a tablespoon of butter or olive oil for 1-2 minutes until fragrant. Be careful not to let the garlic brown, as it can become bitter.
      • Roasted Garlic: For a milder, sweeter flavor, slice the top off a head of garlic. Drizzle it with olive oil, wrap it in foil, and roast at 400°F (200°C) for 30-40 minutes until soft. Simply squeeze the soft cloves out of the peel.
    • Mix It In: After mashing your potatoes, it’s time to add the garlic. For sautéed garlic, stir it in with the warm milk and butter. For roasted garlic, mash the soft cloves directly into the potatoes until well combined.
    • Taste and Adjust: Finally, taste your homemade mashed potatoes and add more salt or pepper if needed. Enjoy this flavorful meal made easy!

    Cheesy Mashed Potatoes

    Who doesn’t love cheese? Turning your best mashed potatoes recipe into a cheesy delight is incredibly simple. This variation adds a comforting flavor and is a guaranteed hit for all your family-friendly meals.

    Follow these quick steps to create a cheesy masterpiece:

    • Choose Your Cheese: Medium or sharp cheddar is a popular choice, but Monterey Jack, Gruyere, or a blend of cheeses also work wonderfully. For a standard batch (about 2 pounds of potatoes), you’ll need about 1 cup of shredded cheese.
    • Add the Cheese: The key is to add the shredded cheese right after you’ve mashed the potatoes and mixed in the warm milk and butter. The residual heat will melt it beautifully.
    • Stir and Serve: Gently stir until the cheese is fully melted and incorporated, creating lovely, gooey strings. For the best texture, serve immediately. This easy recipe adds big flavor!

    Mashed Potatoes Recipe Without Milk (Dairy-Free)

    Need a dairy-free option? You can still enjoy creamy, delicious mashed potatoes without milk or butter. This fantastic beginner-friendly recipe proves that approachable home cooking can cater to everyone’s dietary needs.

    Here are some simple substitutions to make your mashed potatoes dairy-free:

    • Plant-Based Milk: Swap regular milk or cream for an unsweetened, plain variety like almond, oat, or soy milk. Start with a smaller amount and add more as needed, since some plant-based milks are thinner than dairy milk.
    • Dairy-Free Fat: To get that silky texture, replace butter with a high-quality olive oil or your favorite vegan butter alternative. This will add the necessary richness.
    • Flavor Boosters: For a deeper, savory flavor, consider using vegetable broth instead of plant-based milk. You can also add nutritional yeast for a cheesy, umami note.
    • Preparation: Simply follow the main recipe steps, but substitute the dairy ingredients with their plant-based counterparts. Be sure to warm your chosen plant-based milk and dairy-free fat together before adding them to the mashed potatoes.

    Your mashed potatoes recipe without milk will be just as comforting and delicious!

    Herbed Mashed Potatoes

    Adding fresh herbs is an easy way to bring a vibrant, earthy flavor to your homemade mashed potatoes. This simple variation makes a big impact and is a wonderful way to boost your confidence in the kitchen.

    Here’s how to infuse your potatoes with wonderful herbal notes:

    • Choose Your Herbs: Fresh chives, parsley, rosemary, and thyme are all excellent choices. Feel free to use a single herb or create a combination. For a standard batch, aim for 2-3 tablespoons of finely chopped fresh herbs.
    • Prep the Herbs: Thoroughly wash your chosen herbs, pat them completely dry, and then finely chop them.
    • Add at the End: For the best flavor and color, stir the fresh herbs into your mashed potatoes just before serving. Adding them too early can dull both their taste and appearance.
    • Seasoning Tip: Before adding extra salt, taste your herbed mashed potatoes. Some herbs, like chives, have a natural savory note that may be enough.

    Enjoy this delightful and flavorful meal made easy with the simple addition of fresh herbs!

    How to Store and Reheat Leftovers

    Making a big batch of your favorite homemade mashed potatoes is a smart move, as they’re perfect for holiday meals or as a comforting side dish any night of the week. Knowing how to store and reheat them properly turns them into delicious, stress-free leftovers. This also makes them a fantastic option for meal prep ideas that can save you time later.

    Storing Mashed Potatoes Safely

    Proper storage is key to keeping your mashed potatoes fresh, delicious, and safe to eat. Following food safety guidelines is especially important when preparing family-friendly meals.

    • Cool Down Quickly: Let your mashed potatoes cool to room temperature within two hours of cooking. This crucial step prevents harmful bacteria growth [4].
    • Airtight Container: Once cooled, transfer the mashed potatoes to an airtight container. This will prevent them from drying out or absorbing other odors from the fridge.
    • Refrigerate Promptly: Stored in the refrigerator, mashed potatoes will last for 3-4 days, making them perfect for planning quick meals to enjoy throughout the week.

    Can You Freeze Mashed Potatoes?

    Absolutely! Freezing homemade mashed potatoes is a brilliant way to extend their shelf life. This meal-prep hack ensures you always have a delicious side dish ready for future easy recipes.

    Here’s how to freeze your best mashed potatoes:

    1. Cool Completely: Ensure your mashed potatoes are completely cool before freezing to prevent ice crystals from forming.
    2. Portion Out: Divide the mashed potatoes into single-serving or family-sized portions to make thawing and reheating much easier later.
    3. Wrap Well: Place portions in freezer-safe bags or airtight containers. If using bags, press out all excess air to help prevent freezer burn. For extra protection, you can cover the surface of the potatoes with a thin layer of melted butter.
    4. Label and Freeze: Label each container or bag with the date. Your mashed potatoes will keep well in the freezer for up to two months, ensuring they taste great when you’re ready to enjoy them.

    Reheating Mashed Potatoes for the Best Flavor

    Reheating can sometimes dry out mashed potatoes, but a few simple tricks can bring them back to their original creamy glory. This ensures your leftovers contribute to flavorful meals made easy.

    The key to perfect reheating is restoring moisture. No matter which method you choose, plan to stir in a splash of warm milk, cream, or broth and a pat of butter. This will bring back their signature creamy texture.

    Reheating in the Oven (Recommended for Large Batches)

    The oven is the best method for reheating large quantities, especially if you want to create a slightly crisp top. It evenly warms the potatoes, restoring their delicious texture.

    1. Preheat Oven: Set your oven to 350°F (175°C).
    2. Prepare Dish: Spread the mashed potatoes in an oven-safe dish and add a tablespoon or two of milk or broth over the top.
    3. Cover and Heat: Cover the dish tightly with foil to prevent the potatoes from drying out.
    4. Bake: Bake for 20-30 minutes, or until heated through. For the most even heating, give them a stir halfway through the cooking time.

    Reheating on the Stovetop (Quick and Easy)

    The stovetop method is fast, efficient, and perfect for reheating smaller or individual portions of homemade mashed potatoes.

    1. Use a Pot: Transfer the mashed potatoes to a saucepan or pot.
    2. Add Liquid: Add a splash of milk, cream, or broth, using about 1-2 tablespoons per cup of potatoes.
    3. Heat Gently: Heat over medium-low, stirring constantly to prevent sticking and ensure the potatoes warm up evenly.
    4. Serve When Ready: Continue stirring until the potatoes are hot, smooth, and ready to serve.

    Reheating in the Microwave (Fastest Method)

    When speed is your top priority, the microwave is the fastest reheating method. It’s ideal for a quick meal on a busy day.

    1. Microwave-Safe Dish: Place the mashed potatoes in a microwave-safe bowl.
    2. Add Liquid: Stir in a small amount of milk or broth to add moisture.
    3. Cover and Heat: Cover the bowl with a microwave-safe lid or plastic wrap, leaving a corner vented to allow steam to escape.
    4. Heat in Intervals: Heat on medium power for 1-2 minutes, then stir well. Continue heating in 30-second intervals, stirring each time, until the potatoes are hot throughout. This frequent stirring is key to preventing hot spots.

    With these simple tips, your leftover mashed potatoes will be just as comforting and delicious as when they were freshly made. Enjoy confident, approachable home cooking with Recipesmondial!

    Frequently Asked Questions About Mashed Potatoes

    How do you make mashed potatoes creamy and not gummy?

    Gummy mashed potatoes are a common problem caused by overworking the starch. To achieve a perfectly creamy and smooth consistency instead, follow a few key techniques.

    • Choose the Right Potatoes: Select starchy varieties like Russets or Yukon Golds. These are perfect for a fluffy mash because they break down easily and absorb butter and milk beautifully. [5]
    • Cook Evenly: Cut potatoes into uniform pieces to ensure they cook at the same rate. Unevenly cooked potatoes can result in a lumpy or inconsistent mash.
    • Drain and Steam Dry: After cooking, drain the potatoes thoroughly. Return them to the hot pot for a minute or two to steam dry. Removing this excess water is a crucial step to prevent a watery, gummy mash.
    • Warm Your Dairy: Gently warm your milk, cream, and butter before adding them. Cold ingredients cool the potatoes down, making them difficult to mash and preventing the butter from emulsifying properly.
    • Use the Right Tool: For the best texture, use a potato ricer or a handheld masher. Avoid a food processor or blender, as these tools overwork the starch quickly and will make your potatoes gluey.
    • Mash Gently: Be careful not to over-mix. Mash the potatoes gently and stop as soon as they are smooth and combined. Overworking them develops too much starch, which creates a gummy consistency.

    Can I make mashed potatoes ahead of time?

    Yes, you can absolutely make mashed potatoes ahead of time. This is a fantastic time-saver for holiday meal prep or busy weeknights, helping you get a delicious side dish on the table with less stress.

    1. Prepare your homemade mashed potatoes as directed in your recipe, making sure they are perfectly seasoned.
    2. After mashing, allow them to cool completely. This step is important for safe storage.
    3. Transfer the cooled mashed potatoes to an airtight container. Store them in the refrigerator for up to 3-4 days or freeze them for up to one month.

    When you’re ready to serve, reheating is simple. Adding a splash of warm milk or cream while reheating will help restore the potatoes’ original creamy texture and flavor.

    • Oven: Place mashed potatoes in an oven-safe dish with a splash of warm milk or cream. Cover with foil and bake at 350°F (175°C) for 20-30 minutes, stirring occasionally until heated through.
    • Stovetop: Transfer potatoes to a saucepan over low heat. Add a little warm milk or butter and stir frequently until warmed through and creamy.
    • Slow Cooker: For a large batch, place the potatoes in a slow cooker on low. Add a bit of liquid and stir often. This keeps them warm for hours, which is perfect for gatherings.
    • Microwave: For a single serving, place potatoes in a microwave-safe bowl with a tablespoon of milk. Heat in 1-minute increments, stirring between each, until hot.

    Should you peel potatoes for mashed potatoes?

    Traditionally, potatoes are peeled to create the smoothest, most refined texture. Removing the skin ensures your mash is consistently creamy and gives it a classic, elegant look.

    However, for a more rustic and flavorful result, you can leave the skins on. This method works especially well with thin-skinned varieties like Yukon Golds or red potatoes. Just be sure to scrub them thoroughly before boiling.

    Leaving the skins on adds extra fiber and nutrients [6]. It also provides a rustic visual appeal, saves on prep time, and adds more character to the dish.

    The choice really depends on your personal preference. Do you prefer a silky smooth texture or a slightly more wholesome, textured mash? Both are delicious, and Recipesmondial supports your culinary adventure!


    Sources

    1. https://www.idahopotato.com/recipes/mashed-potatoes-faq
    2. https://www.seriouseats.com/the-best-mashed-potatoes-recipe
    3. https://www.potatogoodness.com/potato-fun-facts/potato-types-and-varieties/
    4. https://www.foodsafety.gov/food-safety-charts/cold-food-storage-charts
    5. https://www.idahopotato.com/recipes/how-to-make-mashed-potatoes
    6. https://www.potatogoodness.com/potato-nutrition-facts/
  • The Easiest Shepherd’s Pie Recipe (A Step-by-Step Guide)

    The Easiest Shepherd’s Pie Recipe (A Step-by-Step Guide)

    Shepherd’s pie is a classic comfort food dish made with a savory filling of minced meat (traditionally lamb) and vegetables cooked in a rich gravy. This hearty filling is then topped with a generous layer of creamy mashed potatoes and baked until the top is golden brown and bubbly.

    Is there anything as comforting as a warm, hearty shepherd’s pie? It’s the kind of dish that brings everyone together on evenings when you crave something truly satisfying. But if you’ve ever felt overwhelmed by complex instructions or struggled to plan family-friendly meals, you’re not alone. Many home cooks want to create flavorful meals without the stress, especially when life gets busy.

    Here at Recipesmondial, we believe cooking should be an enjoyable, confidence-building experience—not a chore. That’s why we’re excited to share our easiest shepherd’s pie recipe. This beginner-friendly guide transforms simple ingredients into a rich, savory meat filling under a golden, creamy mashed potato crust. It’s a perfect example of approachable home cooking. Whether you make a classic shepherd’s pie with lamb or a cottage pie with beef, our step-by-step instructions will guide you to a perfect result every time.

    Get ready to build your confidence and see just how simple this beloved dish can be. We’ll walk you through preparing each layer with ease, guiding you toward a heartwarming meal your family will love. This isn’t just another simple dinner recipe—it’s your path to creating a memorable, flavorful dinner without the fuss. Let’s get started!

    What Makes This The Best Easy Shepherd’s Pie Recipe?

    Are you searching for a cozy, comforting dinner without the fuss? This easy shepherd’s pie recipe is your perfect solution. We know that finding reliable, flavorful meals that don’t take hours can be a struggle. That’s why we designed this simple, satisfying recipe with you in mind.

    At Recipesmondial, our goal is to make delicious cooking accessible to everyone. We want you to enjoy your time in the kitchen, not stress over complex steps. This shepherd’s pie is a perfect example of our mission in action. It transforms simple ingredients into a deeply satisfying meal the whole family will love, building your confidence with every step.

    Why Our Shepherd’s Pie Recipe Shines

    This isn’t just another dinner recipe—it’s a carefully designed guide that guarantees a mouth-watering result every time. Here’s what makes our easy shepherd’s pie the absolute best:

    • Uncomplicated Steps for Every Cook: We break down the process into clear, concise actions. Our step-by-step guidance means no guessing games, removing the anxiety that even some beginner-friendly recipes can cause.
    • Everyday Ingredients, Extraordinary Flavor: You won’t need to hunt down specialty items. This dish uses common pantry staples, so you can create a flavorful meal without an extra trip to the store.
    • Quick Preparation for Busy Lives: We know your time is precious, so this recipe is optimized for efficiency. You’ll have a hearty, homemade dinner on the table faster than you might expect, making it an ideal solution for busy families.
    • Reliable Results, Zero Stress: Forget recipes that leave you guessing. Our method guarantees a perfectly cooked, golden-topped shepherd’s pie every single time, so you can feel proud of your results.
    • A True Family Favorite: Shepherd’s pie is a classic comfort food, and our version is designed to appeal to all ages. Get ready for smiles around the dinner table!
    • Adaptable to Your Needs: While our classic recipe is fantastic, it’s also wonderfully versatile. We provide practical tips and substitutions later in this guide, so you can easily tweak it to suit your family’s preferences.

    This simple shepherd’s pie recipe is your next step toward more confident, enjoyable cooking. It empowers you to create a delicious meal with an organized, stress-free process. Get ready to savor every forkful!

    What is the Difference Between Shepherd’s Pie and Cottage Pie?

    Have you ever wondered about the true difference between shepherd’s pie and cottage pie? Although many home cooks use these names interchangeably, there is one key distinction. Understanding it will make you a true comfort food connoisseur!

    The key difference is simple: it’s all about the meat. This single ingredient is what separates a classic shepherd’s pie from its close cousin, cottage pie.

    • Shepherd’s Pie: This traditional dish features a savory filling made with ground lamb. The name itself offers a clue: shepherds tend sheep, which gives us lamb. This detail is what makes for an authentic shepherd’s pie recipe.
    • Cottage Pie: In contrast, cottage pie uses a hearty filling of ground beef. The term “cottage” historically referred to the humble dwellings of rural workers, who were more likely to have access to beef as a common and affordable meat.

    So, the next time you’re cooking, remember this simple rule. Knowing whether to use lamb or beef is a great tip for elevating your basic cooking skills. Both versions make for fantastic family-friendly meals!

    Key Similarities

    Despite the difference in meat, both shepherd’s pie and cottage pie share the same core qualities that make them so beloved. Their wonderful combination of flavors and textures makes them perfect approachable home cooking dishes.

    • Creamy Topping: Both pies are famously crowned with a generous layer of fluffy mashed potatoes that bakes to a beautiful golden brown.
    • Savory Filling: Beneath the potatoes lies a rich, savory meat filling, typically simmered in a delicious gravy.
    • Wholesome Vegetables: Both recipes commonly include a mix of vegetables like peas, carrots, and onions, which add color, flavor, and nutrition.
    • Comfort Food Status: Ultimately, both dishes are the epitome of comfort food, perfect for chilly evenings or as simple dinner recipes any night of the week.

    Shepherd’s Pie vs. Cottage Pie: A Quick Comparison

    Here’s a clear overview of these two beloved dishes. This table will help you decide which easy recipe to make for your next meal.

    Feature Shepherd’s Pie Cottage Pie
    Main Meat Ground lamb Ground beef
    Name Origin ‘Shepherd’ refers to tending sheep (lamb) ‘Cottage’ refers to humble country homes (beef)
    Flavor Profile Often richer, slightly gamier from lamb Hearty, robust beef flavor
    Common Vegetables Peas, carrots, onions, celery Peas, carrots, onions, celery
    Topping Creamy mashed potatoes Creamy mashed potatoes
    Serving Suggestion A classic comforting meal A popular family-friendly meal

    At Recipesmondial, we believe in making flavorful meals made easy. Whether you choose a classic shepherd’s pie with lamb or a hearty cottage pie with beef, you can count on our step-by-step cooking guidance to help you achieve delicious, reliable results every time. Get ready to cook confidently and enjoy every bite!

    What Ingredients Do You Need for Shepherd’s Pie?

    A collection of fresh, raw ingredients for shepherd's pie, including ground meat, chopped vegetables, and potatoes, neatly arranged on a rustic kitchen counter.
    A professional food photography shot of a perfectly arranged ‘mise en place’ for Shepherd’s Pie. All fresh ingredients are beautifully displayed on a light-colored, rustic wooden kitchen counter, bathed in bright, natural light. Components include lean ground lamb (or beef), vibrant chopped carrots, green peas, corn kernels, diced yellow onion, fresh thyme and rosemary sprigs, golden-skinned potatoes ready for mashing, butter, milk, and common seasonings like salt and black pepper in small ceramic bowls. The layout is clean, organized, and inviting, emphasizing freshness and ease for a beginner cook. Photorealistic, high-quality food magazine photo, shallow depth of field.

    For the Savory Meat Filling

    A rich and savory meat filling is the heart of a great shepherd’s pie. This recipe uses simple, everyday ingredients to create a comforting meal that’s both budget-friendly and quick to prepare.

    • Ground Lamb: 1.5 lbs (about 680g). Lamb is traditional for shepherd’s pie, offering a distinct, delicious flavor. However, feel free to use ground beef for a classic cottage pie recipe!
    • Olive Oil: 1 tablespoon. For sautéing your vegetables.
    • Onion: 1 medium, chopped. Forms the flavor base.
    • Carrots: 2 medium, diced. Adds a touch of sweetness and texture.
    • Celery: 1 stalk, diced. Another essential aromatic for depth.
    • Garlic: 2-3 cloves, minced. For an irresistible aroma.
    • All-Purpose Flour: 2 tablespoons. This helps thicken the sauce beautifully.
    • Tomato Paste: 2 tablespoons. Adds rich, umami depth to the sauce.
    • Worcestershire Sauce: 1 tablespoon. A secret weapon for savory flavor.
    • Beef Broth: 1.5 cups (about 360ml). Creates the gravy for the filling. Lamb broth also works wonderfully.
    • Frozen Peas: 1 cup. Brightens the filling and adds sweetness.
    • Fresh Thyme: 1 teaspoon, chopped, or ½ teaspoon dried. Provides an earthy, aromatic touch.
    • Salt and Black Pepper: To taste. Essential for seasoning your filling perfectly.

    Together, these ingredients create a deeply flavorful filling—the perfect foundation for an easy and delicious shepherd’s pie.

    For the Creamy Mashed Potato Topping

    A golden, creamy mashed potato topping is the crowning glory of any shepherd’s pie. Here’s what you’ll need to create this simple yet essential layer.

    • Potatoes: 2 lbs (about 900g) Russet or Yukon Gold, peeled and quartered. These varieties mash beautifully and create a fluffy texture.
    • Unsalted Butter: 4 tablespoons (½ stick). Adds richness and flavor.
    • Milk: ½ cup (whole milk or 2% recommended). Makes the potatoes wonderfully creamy. For a dairy-free option, use a plant-based milk.
    • Salt and Black Pepper: To taste. Don’t forget to season your potatoes well!
    • Optional: Shredded Cheddar Cheese: ½ cup. For an extra cheesy, golden crust. This is a lovely addition to any family-friendly meal.

    These straightforward ingredients guarantee a delicious, fuss-free topping every time.

    How to Make Shepherd’s Pie, Step-by-Step

    A golden-brown shepherd's pie, fresh from the oven in a ceramic baking dish, with the meat filling bubbling at the edges and a sprig of fresh parsley on top.
    A close-up, inviting, professional food photography shot of a single, perfectly baked Shepherd’s Pie fresh out of the oven. The pie is in a rustic ceramic baking dish, slightly angled to show its depth. The mashed potato topping is golden brown and beautifully crusted with visible fork marks, showing subtle crispiness, while the rich, savory meat and vegetable filling gently bubbles up from the edges. A delicate wisp of steam rises from the warm dish. A sprig of fresh parsley is gently placed on top as a garnish. The lighting is warm and golden, emphasizing comfort and deliciousness. Photorealistic, high-quality food magazine photo, focus on texture and warmth.

    Step 1: Prepare the Mashed Potatoes

    Start by making the creamy potato topping. This step is key to a comforting shepherd’s pie, and the goal is to create a smooth, fluffy mash.

    1. Peel and Chop Potatoes: Peel the potatoes and cut them into 1-inch pieces to ensure they cook evenly.
    2. Boil Until Tender: Place the potato pieces in a large pot and cover with cold water. Add a generous pinch of salt, bring to a boil over medium-high heat, then reduce the heat to a simmer. Cook for 15-20 minutes, or until the potatoes are very tender when pierced with a fork.
    3. Drain Thoroughly: Drain the potatoes in a colander and let them sit for a minute or two to allow excess steam to escape. Drier potatoes result in a creamier mash.
    4. Mash and Mix: Return the potatoes to the warm pot. Add the butter, warm milk, salt, and pepper. Mash with a potato masher or fork until mostly smooth. For the creamiest texture, use a potato ricer.
    5. Adjust Seasoning: Taste the mashed potatoes and add more salt or pepper if needed. Set aside while you prepare the filling.

    Pro Tip: Warm milk absorbs more easily into the potatoes and keeps the mash from cooling down. Be careful not to overmix, as that can make the potatoes gummy.

    Step 2: Cook the Meat Filling

    Next, prepare the rich, savory meat filling. This is the heart of the shepherd’s pie and is key to developing its deep, comforting flavor.

    1. Brown the Meat: Heat olive oil in a large skillet or Dutch oven over medium-high heat. Add the ground lamb (or beef for cottage pie) and cook for 5-7 minutes, breaking it apart with a spoon, until fully browned.
    2. Drain Excess Fat: Carefully drain the excess fat from the skillet to prevent a greasy filling.
    3. Sauté Aromatics: Reduce the heat to medium and add the chopped onion, carrots, and celery. Cook for 5-8 minutes until the vegetables have softened.
    4. Add Flavor Boosters: Stir in the garlic and tomato paste and cook for one minute until fragrant. Pour in the broth, Worcestershire sauce, dried thyme, and rosemary.
    5. Simmer and Thicken: Bring the mixture to a simmer and cook for 10-15 minutes, allowing the sauce to reduce and thicken slightly. Stir in the frozen peas and corn during the last 2 minutes of cooking. Season with salt and pepper to taste.
    6. Prepare for Assembly: Remove the skillet from the heat and set the filling aside.

    Substitution Idea: If you don’t have fresh herbs, 1 teaspoon of dried mixed Italian herbs works well as a substitute.

    Step 3: Assemble the Pie

    Now it’s time to assemble the shepherd’s pie. This step brings the filling and the potato topping together before baking.

    1. Preheat Oven: Preheat your oven to 375°F (190°C).
    2. Spread Meat Filling: Spread the cooked meat filling in an even layer in a 9×13 inch baking dish.
    3. Top with Mashed Potatoes: Spoon the mashed potatoes over the meat filling. Use a spatula to gently spread them to the edges of the dish, creating a seal.
    4. Create Ridges: For a classic look and extra texture, drag a fork across the top of the potatoes to create ridges. These will brown nicely in the oven.

    Presentation Tip: To get an extra golden-brown top, sprinkle a little paprika or grated cheddar cheese over the potatoes before baking. This adds both color and flavor.

    Step 4: Bake to Golden Perfection

    The final step is baking. This will make the filling bubbly and give the potato topping a perfect golden-brown crust.

    1. Bake Until Golden: Place the pie in the preheated oven and bake for 25-30 minutes, or until the filling is bubbly and the potato topping is golden brown.
    2. Broil for Extra Crisp (Optional): For an even crispier top, switch the oven to broil for the last 2-3 minutes. Watch carefully to prevent burning.
    3. Rest Before Serving: Remove the shepherd’s pie from the oven and let it rest for 10-15 minutes. This allows the filling to set, making it easier to serve.

    Confidence Boost: You’ve successfully made a delicious, comforting shepherd’s pie! Enjoy your homemade, hearty meal.

    Helpful Tips and Variations for the Perfect Pie

    How to Make a Vegetarian Shepherd’s Pie

    Looking for a delicious plant-based option? It’s simple to transform shepherd’s pie into a vegetarian delight. By substituting the meat with a hearty combination of vegetables and legumes, you can create healthy and balanced meals for everyone.

    This makes a wonderful family-friendly meal that caters to different preferences. Try these ingredients for a flavorful base:

    • Lentil Power: Brown or green lentils are perfect. They offer a rich, earthy flavor and a satisfying texture. Cook them according to package directions.
    • Mushroom Magic: Sauté sliced mushrooms (cremini, button, or portobello) until golden brown. They add depth and a lovely umami taste.
    • Veggie Medley: Incorporate finely diced carrots, celery, peas, and corn. You can also add chopped bell peppers or zucchini for extra nutrients.
    • Flavor Boost: Use vegetable broth instead of beef or chicken broth. Add a touch of soy sauce or Worcestershire sauce (ensure it’s vegetarian) for savory notes. Tomato paste also deepens the flavor.

    Simply sauté your chosen vegetables, then stir in the cooked lentils and seasonings. Continue with the creamy mashed potato topping as usual. This beginner-friendly recipe is packed with flavor!

    What Other Meats Can I Use?

    While traditional shepherd’s pie is made with lamb, don’t feel limited to just one option. This versatile dish is easy to customize with different meats based on your preference or what you have on hand. Exploring these variations is a great way to personalize your simple dinner recipes and enjoy this approachable home cooking classic.

    • Beef (Cottage Pie): This is the most common variation. When made with ground beef, the dish is technically called Cottage Pie. It’s incredibly popular and equally comforting.
    • Ground Turkey: For a lighter option, ground turkey works wonderfully. It absorbs flavors beautifully. Cook it until no longer pink, then drain any excess liquid.
    • Ground Chicken: Similar to turkey, ground chicken offers a mild flavor. It’s excellent for absorbing spices and herbs.
    • Mixed Meats: You can even combine ground lamb with ground beef. This gives a unique flavor profile that many enjoy.

    Remember to adjust your cooking time slightly if using a different meat. Ensure it is fully cooked through before assembling your pie. This simple change can completely transform your flavorful meals made easy.

    How to Thicken the Gravy

    A rich, thick gravy is essential for a perfect shepherd’s pie. If your filling seems too thin, don’t worry—it’s an easy fix. Achieving the right consistency is key, and these practical tips will help you create a robust, flavorful gravy.

    • Flour Slurry: Whisk 1 tablespoon of all-purpose flour with 2 tablespoons of cold water. Stir this mixture into your simmering filling and cook for another 2-3 minutes, allowing the gravy to thicken.
    • Cornstarch Slurry: For a gluten-free option, use cornstarch. Mix 1 tablespoon of cornstarch with 2 tablespoons of cold water. Stir into your simmering filling and cook for 1-2 minutes. Cornstarch thickens quickly, so watch it closely.
    • Reduce the Liquid: Simply let your filling simmer uncovered for a bit longer. The excess liquid will evaporate, naturally thickening the sauce. This method also concentrates the flavors.
    • Tomato Paste: Adding an extra spoonful of tomato paste can also help create a thicker consistency while adding richness.

    Always add your thickening agent gradually, as it’s easier to add more than it is to correct a gravy that’s too thick. This approach helps ensure your step-by-step cooking guidance leads to a perfect pie every time.

    Make-Ahead and Freezing Instructions

    Shepherd’s pie is a fantastic dish to prepare in advance, making it ideal for meal prep ideas and busy weeknights. Having a homemade meal ready to go is a perfect way to create quick and reliable meal solutions for your family.

    • Make-Ahead (Refrigerate):
      • Assemble the entire pie, including the mashed potato topping, in an oven-safe dish.
      • Cover it tightly with plastic wrap or foil.
      • Store it in the refrigerator for up to 2-3 days.
      • When ready to bake, let the dish sit at room temperature for 30 minutes before baking. Bake as directed, adding an extra 10-15 minutes to account for the cold temperature.
    • Freezing Instructions:
      • Unbaked Pie: Assemble the pie in a freezer-safe and oven-safe dish. Cover tightly with a double layer of foil and freeze for up to 3 months.
      • Baked Pie: Allow the baked pie to cool completely. Cover tightly with foil and freeze for up to 3 months.
    • Reheating from Frozen:
      • Unbaked Pie: For best results, thaw the pie overnight in the refrigerator, then bake as directed (you may need to add extra time). Alternatively, to bake from frozen, cover with foil and bake at 350°F (175°C) for 1 hour. Then, remove the foil and bake for another 30-45 minutes, or until the internal temperature reaches 165°F (74°C) [1].
      • Baked Pie: Thaw the pie overnight in the refrigerator. To reheat, place it covered in a 350°F (175°C) oven until warmed through. Alternatively, reheat individual portions in the microwave.

    Label your frozen pies with the date for easy tracking. This makes preparing easy recipes even more convenient and helps you plan family-friendly meals with ease.

    How to Store and Reheat Leftovers

    If your delicious shepherd’s pie recipe yields leftovers, that’s great news! This family-friendly meal often tastes even better the next day. To help you enjoy every bite safely, we’ve gathered our best tips for storing and reheating your homemade shepherd’s pie or cottage pie.

    How to Store Cooked Shepherd’s Pie

    Proper storage is key to keeping your shepherd’s pie fresh, safe, and ready for future easy meals.

    • Cool it quickly: To prevent bacteria growth, never leave cooked shepherd’s pie at room temperature for more than two hours [2].
    • Use airtight containers: Once cooled, transfer the leftovers to an airtight container. This locks in moisture and keeps out other odors.
    • Refrigerator storage: Shepherd’s pie will stay fresh in the refrigerator for up to 4 days, making it perfect for quick lunches or another simple dinner later in the week.
    • Freezer storage: For longer storage, wrap the pie tightly with plastic wrap and then aluminum foil. Alternatively, place individual portions in freezer-safe containers. Frozen shepherd’s pie keeps well for up to 3 months—a fantastic meal prep solution for busy families.

    How to Reheat Leftover Shepherd’s Pie

    Reheating shepherd’s pie the right way ensures it stays moist and flavorful, with a perfectly creamy potato topping. Here are two simple methods to restore your pie to its delicious, freshly-baked state.

    Reheating in the Oven (Recommended for Best Results)

    Using the oven is the best way to restore the original texture and help the mashed potato topping become golden and crisp again.

    1. Preheat your oven: Set it to 350°F (175°C).
    2. Prepare the pie: Place the leftovers in an oven-safe dish and cover loosely with aluminum foil to prevent the top from drying out.
    3. Bake until hot: Heat for 20-30 minutes from the refrigerator or 45-60 minutes from frozen. Keep the pie covered during this initial heating.
    4. Uncover and brown: For the last 5-10 minutes of baking, remove the foil to allow the mashed potatoes to get golden and slightly crispy.
    5. Check the temperature: For food safety, make sure the pie’s internal temperature reaches 165°F (74°C) before serving.

    Reheating in the Microwave (Quickest Method)

    The microwave is the ideal choice when you are short on time and need a quick meal.

    1. Portion and plate: Place a single serving on a microwave-safe plate.
    2. Cover loosely: Use a microwave-safe cover or a damp paper towel to trap steam and keep the pie from drying out.
    3. Heat in intervals: Microwave on high for 2 minutes, then stir the filling if possible to ensure even heating.
    4. Check and finish: Continue heating in 30-second intervals until the pie is heated all the way through.

    Whichever method you choose, your reheated shepherd’s pie will be a comforting and delicious meal. Recipesmondial is here to make your cooking journey enjoyable and stress-free. Enjoy every flavorful bite!

    Frequently Asked Questions About Shepherd’s Pie

    What are the traditional ingredients for shepherd’s pie?

    Traditionally, a true shepherd’s pie is made with humble, flavorful lamb. This classic comfort food brings warmth to any table. Here are the core components:

    • Minced Lamb: This is the defining ingredient. The name “shepherd’s” refers to the lamb, a staple of shepherds.
    • Vegetables: A medley of diced root vegetables adds flavor and texture. Common choices include carrots, peas, and onions, and sometimes celery is also included.
    • Rich Gravy: The lamb and vegetables are simmered in a savory gravy, which often features beef or lamb broth, tomato paste, and a splash of Worcestershire sauce for depth.
    • Mashed Potato Topping: A creamy, fluffy layer of mashed potatoes crowns the pie. It’s usually enriched with butter, milk, or cream and then browned beautifully in the oven.

    This delightful combination creates a hearty and satisfying dish, making it a fantastic example of a simple, nourishing dinner recipe.

    Can I use beef instead of lamb in shepherd’s pie?

    Absolutely, you can use beef instead of lamb! However, if you use beef, the dish is technically called “cottage pie.” The distinction comes down to the meat used.

    • Shepherd’s Pie: Made with lamb.
    • Cottage Pie: Made with beef.

    In everyday cooking, many people use the terms interchangeably. Using beef is a wonderfully easy option, especially if lamb isn’t readily available or is less preferred. Both versions offer a delicious, comforting experience, so feel free to choose the meat your family loves most!

    What spices go well in shepherd’s pie?

    The right blend of spices and herbs can elevate your shepherd’s pie from good to truly amazing. These additions enhance the savory lamb (or beef) filling while adding depth to the rich gravy. Here are some excellent choices:

    • Thyme: This herb is a classic pairing with lamb and beef, adding an earthy, slightly floral note.
    • Rosemary: Another traditional choice, rosemary offers a piney, pungent aroma. Use it sparingly, as its flavor can be strong.
    • Bay Leaf: Adding a bay leaf to the simmering gravy infuses it with a subtle, aromatic background flavor. Remember to remove it before baking.
    • Worcestershire Sauce: While not technically a spice, a dash of this sauce adds a tangy, umami complexity that significantly deepens the flavor profile.
    • Garlic Powder & Onion Powder: These pantry staples boost the savory base, ensuring a robust flavor even when you’re short on fresh aromatics.
    • Black Pepper: Freshly ground black pepper is essential for adding warmth and a gentle spice.
    • Paprika: A pinch of sweet or smoked paprika can add a lovely color and a subtle warmth.

    Don’t be afraid to experiment with your favorites! Because this is approachable home cooking at its best, you can adjust the seasonings to your personal taste and create flavorful meals made easy.

    How many calories are in shepherd’s pie?

    The calorie count for shepherd’s pie can vary quite a bit, depending on factors like the specific ingredients you use and your portion size.

    • Meat Choice: Lamb tends to have a higher fat content than lean ground beef, which impacts the total calories.
    • Vegetables: Adding more non-starchy vegetables can slightly lower the calorie density of the dish.
    • Potato Topping: The amount of butter, milk, or cream in your mashed potatoes affects the final calorie count.
    • Portion Size: Larger servings will naturally contain more calories.

    Generally, a serving of traditional shepherd’s pie can range from 350 to 550 calories or more [source: https://www.myfitnesspal.com/food/calories/shepherds-pie-homemade-500693246]. For a more precise estimate, use an online calculator to evaluate your specific recipe. If you’re looking to create a healthier, more balanced meal, consider these tips to reduce calories:

    • Use lean ground lamb or beef.
    • Increase the proportion of vegetables in the filling.
    • Substitute some of the butter in the mashed potatoes with plain Greek yogurt or chicken broth.
    • Opt for skim milk instead of full-fat milk or cream in your potatoes.
    • Control your portion sizes carefully.

    Recipesmondial focuses on helping you make simple dinner recipes that are both delicious and adaptable. This dish is a great example—you can easily adjust it to fit your dietary goals.


    Sources

    1. https://www.foodsafety.gov/food-safety-charts/cold-food-storage-charts
    2. https://www.fsis.usda.gov/food-safety/safe-food-handling-and-preparation/food-safety-basics/food-safety-during-power-outage

  • How to Make The Best Homemade Mac and Cheese Recipe (Easy & Creamy!)

    The best mac and cheese recipe starts with a classic béchamel sauce made from a butter and flour roux, whole milk, and plenty of sharp cheddar cheese. Cooked macaroni is folded into the creamy sauce and can be served immediately for a stovetop version or topped with breadcrumbs and baked until golden for a classic baked mac and cheese.

    Imagine a dish so rich, so cheesy, and so utterly comforting it brings a smile to everyone’s face. That’s the magic of a truly incredible homemade mac and cheese recipe. Perhaps you’ve felt overwhelmed by complex recipes, or maybe you’re just struggling to plan family-friendly meals that everyone will love. At Recipesmondial, we believe cooking should be a joy, not a chore. We’ll show you that achieving the perfect, creamy mac and cheese is easier than you think.

    At Recipesmondial, we understand you want to enjoy cooking without stress. Our goal is to turn kitchen uncertainty into confident culinary success. This easy mac and cheese recipe is your go-to solution for a quick, reliable, and flavorful meal. We’ve broken down every step into simple, approachable home cooking guidance. This ensures that even beginner cooks can achieve a delightfully creamy, perfectly cheesy result.

    Get ready to transform simple ingredients into the best homemade mac and cheese your family has ever tasted. We’ll share our secrets for the creamiest sauce and tips for choosing the perfect cheeses. We’ll also offer variations to fit your busy life, like an easy baked mac and cheese or a quick instant pot mac and cheese. Say goodbye to uninspiring dinners and hello to a truly satisfying recipe that will become a staple in your home. Let’s make some magic in the kitchen!

    What Makes This The Best Homemade Mac and Cheese Recipe?

    A close-up of a bubbling, golden-brown baked mac and cheese with a scoop taken out, showing creamy cheese sauce and macaroni noodles.
    A close-up, mouth-watering, eye-level shot of a golden-brown baked mac and cheese casserole, still bubbling slightly, with a generous scoop freshly taken out of the dish. The scoop reveals incredibly creamy, rich, velvety cheese sauce coating every macaroni noodle, stretching slightly. Soft, natural light highlights the texture and steam gently rising. Garnished with a sprinkle of fresh chopped parsley. Photorealistic, professional food photography, high-quality food magazine photo.

    Welcome to your new favorite homemade mac and cheese! At Recipesmondial, we know you want delicious food without the fuss. That’s why we created this go-to easy mac and cheese solution. It delivers incredible flavor with minimal stress, making it more than just another recipe.

    We crafted this mac and cheese recipe with home cooks like you in mind. If you feel overwhelmed by complex recipes or struggle to plan family-friendly meals, this dish is for you. We focus on clarity and simplicity so you can cook with confidence. Consider this recipe your secret weapon for a satisfying meal.

    Uncomplicated and Beginner-Friendly Steps

    Our approach removes all the guesswork from cooking. You don’t need to be a gourmet chef to succeed, as this recipe uses the best principles of simple dinner recipes. We break down each step so clearly that anyone can make this amazing dish. Our guidance is designed to help you build confidence in the kitchen.

    • Clear Instructions: We provide step-by-step cooking guidance. This makes the process incredibly straightforward.
    • Everyday Ingredients: You will use common items found in any grocery store. No special trips are needed.
    • Quick Preparation: This recipe is designed for those seeking quick meals. You will have dinner on the table in no time.

    Irresistibly Creamy and Flavorful Results

    The hallmark of great mac and cheese is its texture and taste, and our recipe delivers on both. We’ll show you how to achieve maximum creaminess and rich, cheesy goodness in every bite—all without any fuss. The result is a stunningly delicious dish that truly shines.

    • Perfectly Smooth Sauce: Say goodbye to grainy sauces. Our method ensures a silky, luscious cheese sauce.
    • Rich Cheese Blend: We recommend a blend that maximizes flavor. This creates a deep, comforting taste.
    • Consistent Excellence: Each batch will be as delicious as the last. This recipe is reliably flavorful.

    Family-Friendly and Versatile

    Perfect for any occasion, this homemade mac and cheese is a guaranteed crowd-pleaser that busy families will love. It’s also incredibly easy to customize to your liking. We offer delightful variations, including options for a baked mac and cheese recipe or a simple crockpot mac and cheese.

    • Kid-Approved: Even picky eaters will ask for seconds. This is a true family favorite.
    • Customizable: Add your favorite proteins or vegetables. Make it your own special dish.
    • Multiple Methods: Explore options like instant pot mac and cheese. You can even try smoked mac and cheese for a twist.

    Reliable and Rewarding Cooking Experience

    At Recipesmondial, our goal is to help you enjoy cooking without stress. This macaroni and cheese recipe is a prime example of that philosophy, offering a foolproof way to prepare a beloved classic. You’ll not only love the delicious outcome but also gain confidence with every plate you serve.

    • Guaranteed Success: Follow our simple steps for perfect results. You will feel proud of your creation.
    • Stress-Free Meals: Our approachable home cooking philosophy shines through. Dinner becomes an enjoyable event.
    • Inspiring Creativity: Learn the basics, then get creative. Discover new flavors and techniques easily.

    This best mac and cheese recipe will truly transform your mealtime. It guides you from uncertainty to confidence, turning simple ingredients into a delicious, visually appealing meal. Get ready to enjoy the ultimate comfort food!

    What are the ingredients for mac and cheese?

    An overhead view of all fresh ingredients for mac and cheese laid out: uncooked macaroni, cheddar cheese, milk, butter, flour, and spices.
    An overhead shot (flat lay) of all the fresh, high-quality ingredients for homemade mac and cheese artfully arranged on a light-colored marble or rustic wooden countertop. Ingredients include uncooked elbow macaroni in a small bowl, a solid block of sharp cheddar cheese, a glass measuring cup of whole milk, sticks of unsalted butter, a small pile of all-purpose flour, small bowls with mustard powder, paprika, salt, and black pepper. Everything is clean, fresh, and visually appealing, with bright, natural light. Photorealistic, professional food photography, high-quality food magazine photo.

    For the Pasta

    Every fantastic mac and cheese recipe starts with the perfect pasta. We choose elbow macaroni for our classic homemade version—it’s the traditional shape everyone loves!

    Elbow macaroni is the ideal choice. Its small, curved shape captures the creamy cheese sauce beautifully, ensuring a delicious bite every time. Cooking your pasta properly is a simple but crucial step for success.

    • Elbow Macaroni: 1 pound (about 450g) is perfect. It’s the classic choice for a reason.
    • Water: Enough to boil your pasta.
    • Salt: 1-2 teaspoons for the boiling water. Seasoning the water adds flavor directly to the pasta.

    Quick Tip: While elbow macaroni is a staple, feel free to use other small pasta shapes. Shells, cavatappi, or even penne work wonderfully because they also hold onto that rich, creamy sauce well. This helps you create a truly satisfying macaroni and cheese dish.

    For the Creamy Cheese Sauce

    The heart of any truly amazing mac n cheese recipe is its luscious, velvety cheese sauce. Better yet, this sauce is surprisingly simple to make from scratch using everyday ingredients to create a rich, flavorful base.

    Our approach ensures a smooth, non-grainy sauce that melts perfectly over every piece of pasta. Get ready for the best homemade mac and cheese!

    • Unsalted Butter: 1/2 cup (113g). Butter creates the base of our roux and adds incredible richness.
    • All-Purpose Flour: 1/2 cup (60g). This combines with butter to form a roux, which thickens the sauce beautifully.
    • Whole Milk: 4 cups (about 960ml). Whole milk provides the creamiest texture. While 2% milk works, whole milk gives the best results.
    • Sharp Cheddar Cheese: 3 cups (about 340g), freshly shredded. Cheddar offers that iconic tangy flavor. Always shred your own cheese for the smoothest melt.
    • Gruyère Cheese: 1 cup (about 115g), freshly shredded. Gruyère adds a nutty, complex flavor and melts beautifully into the sauce.
    • Monterey Jack Cheese: 1 cup (about 115g), freshly shredded. This cheese brings extra creaminess with a mild, buttery taste.
    • Dijon Mustard: 1 teaspoon. A tiny bit of Dijon enhances the cheese flavor without making the sauce taste like mustard.
    • Salt: 1 teaspoon, or to taste.
    • Black Pepper: 1/2 teaspoon, freshly ground, or to taste.
    • Pinch of Nutmeg: This optional secret ingredient adds a warm, subtle complexity that complements cheese perfectly.

    Pro Tip for Success: Always shred your own cheese. Pre-shredded cheeses contain anti-caking agents that can make your sauce gritty, while fresh-shredded cheese melts much more smoothly. This is a vital step for a truly creamy sauce and makes all the difference in your macaroni cheese.

    Substitution Idea: For a lighter sauce, you can use 2% milk, but remember that whole milk delivers the richest flavor and texture. Feel free to experiment with your favorite cheese combinations too. Colby, fontina, or even a smoked gouda can add wonderful new twists!

    How to Make Our Step-by-Step Macaroni and Cheese Recipe

    A home cook's hand scooping a generous portion of hot, creamy mac and cheese from a baking dish into a white bowl.
    A warm, inviting scene in a home kitchen. A friendly and approachable home cook, with neatly rolled-up sleeves and clean hands, is using a large serving spoon to scoop a generous portion of hot, creamy homemade mac and cheese from a rustic ceramic baking dish into a modern white serving bowl. The mac and cheese is perfectly golden and slightly crisp on top, with a rich, bubbling interior, and steam gently rising, highlighting its warmth and freshness. The background is a softly blurred, cozy kitchen countertop with hints of kitchen utensils. Photorealistic, professional food photography, high-quality food magazine photo.

    Step 1: Cook the Macaroni

    First, let’s cook the heart of your mac and cheese: the macaroni. This simple step sets the stage for a truly comforting dish.

    Here’s how to do it perfectly:

    1. Boil Water: Fill a large pot with about 6 quarts of water. Bring it to a rolling boil over high heat.
    2. Season Well: Add a generous tablespoon of salt to the boiling water. This flavors the pasta from the inside out and is a key secret for a truly delicious macaroni and cheese.
    3. Add Pasta: Pour in 1 pound (about 450g) of elbow macaroni. Stir immediately to prevent sticking.
    4. Cook to Al Dente: Cook the pasta according to package directions, usually 7 to 9 minutes. Aim for “al dente,” meaning it’s still slightly firm to the bite. Remember, it will finish cooking in the hot cheese sauce, so avoid overcooking.
    5. Drain: Drain the cooked macaroni in a colander. Do not rinse it. The starch left on the pasta helps the sauce stick beautifully.

    Quick Tip: Cooking your pasta al dente is key for the best texture in your mac and cheese recipe. It prevents a mushy outcome.

    Step 2: Create the Roux

    A roux is the foundation for our creamy cheese sauce. It’s a simple mixture of butter and flour. Don’t be intimidated—this is an easy skill to master and a building block for many beginner-friendly recipes.

    Follow these simple steps:

    1. Melt Butter: In a large, heavy-bottomed pot or Dutch oven, melt 1/2 cup (113g) of unsalted butter over medium heat.
    2. Whisk in Flour: Once the butter is melted and bubbly, add 1/2 cup (60g) of all-purpose flour.
    3. Cook the Roux: Whisk continuously for 1 to 2 minutes until the mixture forms a thick paste. This step cooks out the raw flour taste. The roux should be pale yellow, not browned, for our homemade mac and cheese.

    Why it Matters: A properly made roux ensures a smooth, lump-free sauce. It’s essential for that rich, velvety texture we crave.

    Step 3: Make the Béchamel Sauce

    Now, we’ll turn the roux into a luscious béchamel sauce—the perfect canvas for our cheese. Follow this step-by-step cooking guidance to create a truly comforting meal.

    Here’s how to build your sauce:

    1. Warm Milk: Gently warm 4 cups (about 1 liter) of whole milk in a separate saucepan. Do not boil it. Using warm milk helps prevent lumps when added to the roux.
    2. Add Milk Gradually: Slowly pour the warm milk into the roux, about 1/2 cup at a time, whisking constantly as you add.
    3. Continue Whisking: Keep whisking until each addition of milk is fully incorporated and the sauce is perfectly smooth.
    4. Thicken the Sauce: Bring the sauce to a gentle simmer over medium heat, still whisking. Let it cook for 5 to 7 minutes, or until it thickens enough to coat the back of a spoon. It will be silky and rich.
    5. Season: Remove the pot from the heat. Stir in 1 teaspoon of salt, 1/2 teaspoon of black pepper, and 1/4 teaspoon of nutmeg. Nutmeg adds a lovely warmth that complements cheese sauces.

    Troubleshooting Tip: If your sauce has a few lumps, don’t worry. A quick pass with an immersion blender or pushing it through a fine-mesh sieve will make it perfectly smooth. It’s a great trick for approachable home cooking.

    Step 4: Melt the Cheeses

    This is where the magic happens! Adding cheese to your warm béchamel creates the gooey, irresistible heart of your mac n cheese recipe. Using high-quality, freshly grated cheese makes all the difference.

    Let’s get cheesy:

    1. Remove from Heat: Ensure your béchamel sauce is off the direct heat. This prevents the cheese from separating or becoming oily.
    2. Add Cheeses in Batches: Gradually add your shredded cheeses (4 cups total, e.g., 2 cups sharp cheddar, 1 cup Gruyère, 1 cup Monterey Jack) to the warm sauce, about one-third at a time.
    3. Stir Until Smooth: Stir constantly with a wooden spoon or whisk until the cheese is completely melted. Your sauce will become incredibly creamy and smooth.
    4. Taste and Adjust: Taste the cheese sauce and add more salt, pepper, or a pinch of cayenne pepper if you like a little kick. This makes it your best mac and cheese recipe.

    Expert Advice: Always grate your own cheese. Pre-shredded cheeses often contain anti-caking agents that can make your sauce gritty. Freshly grated cheese melts much more smoothly, leading to the creamiest macaroni cheese imaginable.

    Step 5: Combine and Serve

    The moment you’ve been waiting for! Let’s combine the cooked macaroni and rich cheese sauce to complete this easy mac and cheese masterpiece. It’s a flavorful meal made easy that your whole family will love.

    Finish your dish with these steps:

    1. Add Pasta to Sauce: Pour the drained, cooked macaroni directly into the pot with the warm cheese sauce.
    2. Gently Combine: Use a large spoon or spatula to gently fold the macaroni into the cheese sauce. Make sure every piece of pasta is coated in that luscious goodness.
    3. Serve Immediately: Transfer your glorious macaroni and cheese to serving bowls. It’s best enjoyed fresh and warm.
    4. Optional Garnish: If desired, sprinkle with fresh parsley or chives. A dash of paprika also adds a pop of color and subtle flavor.

    Mealtime Made Easy: This family-friendly meal comes together quickly, proving that simple dinner recipes can be incredibly satisfying. Stop wondering “how to cook tasty meals quickly” and start enjoying them stress-free with Recipesmondial!

    How Can You Customize This Recipe?

    Our classic homemade mac and cheese is wonderfully delicious as is. However, we love helping you make dishes your own! Customizing this recipe is a fantastic way to discover new flavors and tailor it to your family’s preferences. Here are some popular variations to try.

    Classic Baked Mac and Cheese Variation

    Transforming your stovetop mac and cheese into a bubbling, golden-brown baked version is incredibly easy. This variation adds a delightful crispy topping and a richer, more comforting texture. It’s perfect for a family-friendly meal or a potluck dish.

    To make a baked mac and cheese:

    • Prepare your base: Follow our step-by-step guidance for the stovetop mac and cheese as described in the main recipe.
    • Preheat oven: Set your oven to 375°F (190°C).
    • Choose your dish: Lightly butter a 9×13-inch baking dish.
    • Add a little liquid: Stir an extra 1/4 cup of milk into your prepared mac and cheese. This helps keep it moist during baking.
    • Transfer: Pour the macaroni and cheese mixture into the prepared baking dish and spread it evenly.
    • Create the topping: In a small bowl, combine 1 cup of panko breadcrumbs with 2 tablespoons of melted butter. You can also add 1/2 cup of shredded cheddar or Parmesan for extra flavor.
    • Bake: Sprinkle the breadcrumb mixture evenly over the top. Bake for 20-25 minutes, or until the topping is golden brown and the cheese is bubbly.
    • Serve: Let it rest for a few minutes before serving. This allows the sauce to set.

    This baked macaroni and cheese is a true crowd-pleaser. It’s also a simple dinner recipe that feels extra special.

    Easy Crockpot Mac and Cheese Method

    For days when you need a simple mac and cheese without the fuss, your Crockpot is your best friend. This hands-off method delivers a creamy dish that’s ideal for busy families. It’s also an excellent option for meal prep!

    Here’s how to make Crockpot mac and cheese:

    • Combine ingredients: In your slow cooker, mix 1 pound of uncooked elbow macaroni, 4 cups of whole milk, 1 teaspoon of salt, 1/2 teaspoon of black pepper, and 1/4 cup of unsalted butter (cut into pieces).
    • Stir well: Ensure the pasta is mostly submerged in the liquid.
    • Cook: Cover and cook on LOW for 2-3 hours, or on HIGH for 1-1.5 hours.
    • Stir during cooking: Stir the mixture gently halfway through to prevent sticking and ensure even cooking. The pasta should be tender.
    • Add cheese: Once the pasta is cooked, stir in 8 ounces of shredded sharp cheddar and 4 ounces of shredded Gruyère or Monterey Jack until completely melted and smooth.
    • Serve warm: Enjoy your delicious, creamy crockpot mac and cheese!

    This method saves you from boiling pasta separately. It also keeps your kitchen clean, making it a perfect quick meal solution.

    Quick Instant Pot Mac and Cheese Guide

    When time is short, the Instant Pot is a game-changer for making quick mac and cheese. You can have a creamy, flavorful dish on the table in minutes. It’s the perfect solution for a simple dinner after a long day.

    Follow these steps for Instant Pot mac and cheese:

    • Add pasta and liquid: Pour 1 pound of elbow macaroni, 4 cups of water or chicken broth, and 1 tablespoon of unsalted butter into your Instant Pot. Add 1/2 teaspoon of salt.
    • Cook: Close the lid and set the valve to sealing. Cook on HIGH pressure for 4 minutes.
    • Release pressure: Once cooking is complete, perform a quick pressure release by carefully turning the valve to venting.
    • Stir in dairy: Open the lid and stir in 1/2 cup of whole milk or evaporated milk and 1/4 teaspoon of black pepper.
    • Melt cheese: Add 8 ounces of shredded sharp cheddar and 4 ounces of shredded Monterey Jack or Colby. Stir continuously until the cheese is melted and the sauce is smooth.
    • Serve immediately: This easy mac and cheese is best enjoyed fresh from the pot.

    The Instant Pot creates a gourmet-tasting mac and cheese with minimal effort. It’s one of the best easy recipes for busy weeknights.

    Smoked Mac and Cheese for Extra Flavor

    Ready to elevate your homemade mac and cheese? Adding a smoky twist introduces an incredible depth of flavor. This variation is fantastic for barbecues and other gatherings. It brings a uniquely flavorful meal to your table.

    There are two main ways to achieve a delicious smoked mac and cheese:

    Method 1: Smoking the Assembled Dish

    • Prepare the base: Make our stovetop mac and cheese recipe up to the point of combining the pasta and sauce.
    • Transfer: Pour the creamy mac and cheese into an aluminum foil pan or a cast-iron skillet.
    • Preheat smoker: Set your smoker to 225-250°F (107-121°C). Use wood chips like apple, cherry, or pecan for a mild, sweet smoke. [1]
    • Smoke: Place the dish in the smoker for 1.5-2 hours. Stir occasionally to ensure even smoke distribution.
    • Add topping (optional): For the last 30 minutes, you can top it with extra shredded cheese and breadcrumbs for a crispy crust.
    • Serve: The result is a delightfully smoky, comforting dish.

    Method 2: Incorporating Smoked Ingredients

    • Use smoked cheese: Swap some of the cheddar or Gruyère for a smoked gouda or smoked cheddar. This adds a subtle smoky note directly into the sauce.
    • Add smoked paprika: Stir 1/2 to 1 teaspoon of smoked paprika into your cheese sauce for an earthy, smoky flavor without needing a smoker.
    • Cook with bacon: Crispy bacon bits, or rendered bacon fat used in the roux, also imparts a fantastic smoky essence.

    Smoked mac and cheese is an adventurous yet approachable option. It proves that an easy-to-make meal can also be incredibly unique.

    What Are the Secrets to the Creamiest Mac and Cheese?

    Choosing the Best Cheeses for Your Sauce

    Crafting the perfect mac and cheese starts with amazing cheese. The right blend makes all the difference. You want a creamy, smooth sauce that’s full of flavor. Luckily, you don’t need fancy cheeses for an outstanding result.

    Here’s what to look for when choosing your cheeses:

    • Good Melting Properties: Some cheeses melt beautifully into a silky sauce, while others can become clumpy or oily. Always pick cheeses known for melting smoothly.
    • Flavor Balance: A mix of sharp, mild, and nutty cheeses creates depth. This ensures your mac and cheese is neither bland nor overwhelming.

    These are some of our favorite cheeses for the creamiest mac and cheese:

    • Sharp Cheddar: A classic for a reason. It offers that signature tangy, rich flavor.
    • Gouda: Known for its mild, nutty, and slightly sweet notes. Gouda melts incredibly well, adding to the silkiness.
    • Gruyère: This Swiss cheese brings a sophisticated, savory, and complex flavor. It melts like a dream.
    • Fontina: This Italian cheese is buttery and nutty. It provides an amazing stretch and creaminess to your sauce.
    • Monterey Jack: Mild and very easy to melt. It’s fantastic for balancing stronger flavors and ensuring a smooth texture.

    Here’s a helpful tip for the best homemade mac and cheese: always shred your own cheese. Pre-shredded packages contain anti-caking agents that can make your sauce grainy or less smooth. Taking a few extra minutes to grate it fresh is well worth the effort for a perfect texture.

    Tips to Avoid a Grainy Cheese Sauce

    A grainy cheese sauce can be disappointing after all your effort. The secret to the best mac and cheese is a smooth, velvety sauce that elevates your family-friendly meal. Thankfully, achieving this perfect texture is easy. Avoid common mistakes with these simple tips:

    • Start with a Good Roux: This is the foundation of your cheese sauce. Melt butter, then whisk in an equal amount of flour. Cook it for a minute or two until it forms a paste, which cooks out the raw flour taste.
    • Use Warm Milk: When adding milk to your roux, make sure it’s at least room temperature, or even slightly warm. Adding cold milk to a hot roux can cause clumps.
    • Add Cheese Gradually: Don’t dump all your cheese in at once. Add a handful at a time, whisking each addition until fully melted before adding more.
    • Keep the Heat Low: Cheese melts best over low to medium-low heat. High heat can cause the proteins in cheese to seize, separating the fat and resulting in a grainy or oily texture.
    • Don’t Overcook: As soon as the cheese is fully melted and incorporated, remove the sauce from the heat. Continued cooking can ruin the texture as proteins tighten and fat separates.
    • Consider Room Temperature Cheese: Let your shredded cheese sit at room temperature for 15-20 minutes before you add it. This simple step helps it melt more smoothly and evenly into the sauce.

    Following these steps will help you create a wonderfully creamy and smooth sauce every time. Your easy mac and cheese will be perfectly luxurious.

    Storing and Reheating Leftover Macaroni and Cheese

    Delicious mac and cheese rarely leaves leftovers. But if you have some, you’ll want to keep it tasting great. Properly storing and reheating your homemade mac and cheese ensures it’s still a delightful treat the next day. This also works as a great meal prep tip for busy families.

    Here’s how to handle your leftovers:

    Storing Your Mac and Cheese

    • Cool Quickly: Let your mac and cheese cool down to room temperature within two hours of cooking. This prevents bacterial growth [2].
    • Airtight Container: Transfer the cooled mac and cheese to an airtight container. This keeps it fresh and prevents it from drying out in the fridge.
    • Refrigeration: Store in the refrigerator for up to 3-4 days. For longer storage, you can freeze it, but the texture may change slightly upon thawing.

    Reheating Leftover Macaroni and Cheese

    Reheating can sometimes make mac and cheese dry, but you can bring it back to life. The secret is adding a splash of liquid.

    • Stovetop Method (Best for Creaminess):
      1. Place your mac and cheese in a saucepan over low heat.
      2. Add a splash of milk, cream, or even water. Start with a tablespoon or two.
      3. Stir gently and continuously.
      4. Heat until warmed through and creamy again. Add more liquid if needed.
    • Oven Method (Good for Baked Varieties):
      1. Preheat your oven to 325°F (160°C).
      2. Place mac and cheese in an oven-safe dish.
      3. Add a few tablespoons of milk or cream over the top. Cover the dish loosely with foil.
      4. Bake for 15-25 minutes, or until heated through.
    • Microwave Method (Quickest Option):
      1. Put a single serving in a microwave-safe dish.
      2. Add a small amount of milk or cream (about 1-2 teaspoons).
      3. Cover and heat on medium power for 1-2 minutes.
      4. Stir well, then continue heating in 30-second intervals until warmed.

    With these simple tips, your leftover mac and cheese can be almost as good as fresh. This makes for easy lunches or quick dinners on busy days. Recipesmondial aims to make your family-friendly meals enjoyable and stress-free, even with leftovers!

    Frequently Asked Questions About Homemade Mac and Cheese

    What is a simple mac and cheese recipe?

    Making a delicious, simple mac and cheese is easier than you think. It’s a perfect beginner-friendly recipe for a comforting meal. Our approach focuses on minimal steps and everyday ingredients.

    Here’s a simplified breakdown of how to make a creamy, quick mac and cheese:

    • Cook your pasta: Start by boiling your favorite macaroni until it’s al dente. Drain it well, but save a little pasta water. This water adds a wonderful richness to your sauce.
    • Make a quick roux: In the same pot, melt some butter. Then, whisk in an equal amount of flour. Cook this mixture for about a minute. This creates the base for your creamy sauce.
    • Whisk in milk: Slowly pour in warm milk, whisking constantly. Continue to stir until the sauce thickens. This forms a smooth béchamel.
    • Melt the cheese: Remove the pot from the heat. Stir in your shredded cheeses until they are completely melted and smooth. A pinch of salt and pepper enhances the flavor.
    • Combine and enjoy: Add your cooked macaroni back into the cheese sauce. Stir everything together until it is perfectly coated. Serve your homemade mac and cheese immediately for the best taste!

    This easy mac and cheese method delivers a flavorful, family-friendly meal with little fuss. It’s perfect for those busy weeknights.

    What is the best cheese for mac and cheese?

    Choosing the best cheese for mac and cheese is key to getting incredible flavor and creaminess. For the best results, use a blend of cheeses. This combination creates a rich, complex taste. It’s also important to know that some cheeses melt better than others—generally, younger cheeses melt smoother than aged ones [3].

    Consider these popular options for your ultimate homemade mac and cheese:

    • Sharp Cheddar: This is a classic for a reason. It provides that iconic, tangy mac n cheese flavor.
    • Gruyère: For a nutty, sophisticated depth, Gruyère is an excellent choice. It melts beautifully into a silky sauce.
    • Fontina: This Italian cheese offers a wonderfully mild, buttery flavor. It adds incredible meltiness to your sauce.
    • Monterey Jack: A mild, semi-hard cheese that melts exceptionally well. It contributes to a super smooth texture.
    • Smoked Gouda: If you love a hint of smoky flavor, add some smoked Gouda. It makes for a unique twist on the traditional.

    Pro Tip: Always grate your own cheese from a block. Pre-shredded cheeses often contain anti-caking agents. These can make your cheese sauce grainy or prevent it from melting smoothly. Freshly grated cheese melts like a dream, giving you the creamiest mac and cheese every time.

    How do you make old fashioned baked macaroni and cheese?

    An old fashioned baked macaroni and cheese takes comfort food to another level with its delightful crispy topping and deeper flavors. This baked mac and cheese recipe is ideal for feeding a crowd or a special family dinner.

    Here’s how to elevate your stovetop mac and cheese into a classic baked dish:

    • Prepare your basic mac and cheese: Follow the steps for our creamy stovetop macaroni and cheese recipe. Make sure your cheese sauce is well-seasoned and perfectly smooth.
    • Preheat and prep: Preheat your oven to 375°F (190°C). Lightly grease a 9×13 inch baking dish. This prevents sticking.
    • Add a topping: For that signature crunch, combine breadcrumbs with a little melted butter. You can also mix in some grated Parmesan cheese for extra flavor.
    • Layer in the dish: Pour your prepared macaroni and cheese into the greased baking dish. Spread it evenly.
    • Sprinkle and bake: Generously sprinkle the breadcrumb mixture over the top of the macaroni and cheese. Bake for 20-25 minutes. Look for a bubbly sauce and a golden-brown, crispy topping.
    • Rest and serve: Let the baked macaroni and cheese rest for 5-10 minutes after baking. This allows the sauce to set slightly. Then, scoop out generous portions and enjoy!

    This method transforms simple dinner recipes into an approachable home cooking masterpiece. It’s a truly satisfying and family-friendly meal that everyone will love.


    Sources

    1. https://www.traeger.com/recipes/smoked-mac-and-cheese
    2. https://www.fsis.usda.gov/food-safety/safe-food-handling-and-preparation/food-safety-basics/danger-zone-40f-140f
    3. https://www.seriouseats.com/the-science-of-melted-cheese-what-makes-a-cheese-melt-nicely

  • How to Make The Best Lasagna Recipe (A Simple Step-by-Step Guide)

    How to Make The Best Lasagna Recipe (A Simple Step-by-Step Guide)

    A classic lasagna recipe consists of layering flat pasta sheets with alternating fillings of a rich meat sauce (ragù) and a creamy cheese mixture, typically made with ricotta, mozzarella, and Parmesan. The assembled dish is then baked in the oven until it is hot, bubbly, and golden-brown on top. This guide provides a simple, step-by-step method perfect for beginner home cooks.

    Few dishes are as comforting as a classic lasagna. Just thinking about its tender pasta layers, rich meat sauce, and bubbling cheese is enough to make your mouth water. For many home cooks, however, making one from scratch can feel daunting, suggesting complex instructions and long hours in the kitchen. But what if we told you that creating an incredible homemade lasagna doesn’t have to be overwhelming?

    At Recipesmondial, we believe delicious family-friendly meals should be accessible to everyone, regardless of cooking experience. That’s why we’ve crafted this easy lasagna recipe to guide you through each step with clarity. We want to help you master this beloved dish, transforming simple ingredients into a show-stopping meal that tastes like it came straight from an Italian nonna’s kitchen.

    This comprehensive, step-by-step guide is perfect for both beginners and intermediate cooks seeking beginner-friendly recipes. Our goal is to ensure your experience is stress-free and full of flavor. Get ready to impress your family and friends with a hearty, cheesy, and utterly delicious lasagna that will become a go-to favorite in your kitchen.

    Why Is This The Best Easy Lasagna Recipe for Your Family?

    There’s nothing quite like a bubbling, cheesy tray of homemade lasagna. It’s the ultimate comfort food, but many lasagna recipe options can seem daunting with their long ingredient lists and complex instructions.

    Here at Recipesmondial, we understand you want delicious meals without the stress. That’s exactly why we created the best easy lasagna recipe for your family, simplifying the process without sacrificing flavor.

    We designed this recipe with busy home cooks in mind, ensuring a mouthwatering result every single time. Our goal is to help you build confidence in the kitchen so you no longer feel overwhelmed by complex recipes!

    Why Our Easy Lasagna Recipe Stands Out

    We believe cooking should be an enjoyable experience, not a chore. Our easy lasagna recipe focuses on clear instructions and incredible flavor, making it perfect for family-friendly meals.

    • Simple, Everyday Ingredients: We use common items you probably have in your pantry already, saving you a trip to the store.
    • Straightforward Step-by-Step Guidance: Forget confusing jargon. Our instructions are clear and easy to follow, making homemade lasagna accessible for everyone.
    • Time-Saving Techniques: We streamline the process so you can create a fantastic meal without spending all day in the kitchen. It’s truly a simple dinner recipe.
    • Guaranteed Delicious Results: This lasagna recipe consistently delivers rich, savory flavors and gooey cheese. Your family will ask for seconds.
    • Perfect for All Skill Levels: Whether you’re looking for beginner-friendly recipes or you’re a seasoned cook, you’ll love how easy this is. Build your cooking confidence with us.
    • Flexible and Adaptable: We include tips for variations so you can customize the dish to fit your family’s tastes. Meal prep tips are also included.

    If you’re struggling to plan family-friendly meals or lacking confidence in cooking skills, this lasagne recipe is the perfect solution. It’s more than just a dish—it’s an invitation to enjoy cooking without stress. Discover just how easy it is to make flavorful meals made easy today!

    What Are the Ingredients for a Classic Lasagna?

    A beautiful flat lay of fresh lasagna ingredients: pasta sheets, meat sauce, ricotta, mozzarella, Parmesan, basil, tomatoes, ground beef, onion, garlic, and olive oil.
    A highly detailed, 100 percent photorealistic, professional food photography flat lay shot showcasing all the fresh, high-quality ingredients for a classic homemade lasagna. The arrangement includes fresh pasta sheets, a rich, simmering red meat sauce (ragu) in a small bowl, creamy ricotta cheese, shredded mozzarella, grated Parmesan, a vibrant bunch of fresh basil leaves, a can of crushed tomatoes, uncooked ground beef, a halved onion, cloves of garlic, and a bottle of extra virgin olive oil. All elements are neatly and attractively arranged on a rustic light-colored wooden table with soft, natural daylight, emphasizing freshness, quality, and readiness for cooking. This is a high-quality food magazine photo, evoking a sense of warmth and invitation to cook.

    For the Rich Meat Sauce

    A rich, savory meat sauce is the heart of any great lasagna. Our simple recipe is full of comforting flavors your family will adore, transforming everyday ingredients into a truly special meal.

    • Ground Beef: We suggest 80/20 lean ground beef for the best flavor, but ground turkey also works as a lighter option.
    • Onion & Garlic: These aromatics are essential for building the sauce’s flavor foundation.
    • Crushed Tomatoes: High-quality canned crushed tomatoes provide the perfect texture and tangy base for a classic sauce.
    • Tomato Paste: This adds depth and richness by concentrating the tomato flavor.
    • Dried Herbs: Traditional dried herbs like oregano, basil, and a bay leaf infuse the sauce with aromatic Italian flavors.
    • Olive Oil: A good quality extra virgin olive oil is used for sautéing the aromatics and enhancing the overall taste.
    • Salt & Pepper: Seasoning is vital, so be sure to taste and adjust as you cook for the best results.

    This combination creates a hearty, robust sauce that’s perfect for family meals. You’ll be surprised how easily it develops such a deep, satisfying flavor.

    For the Creamy Ricotta Cheese Layer

    The creamy ricotta layer provides a cool, tangy contrast to the rich meat sauce. This luscious filling is a key part of what makes homemade lasagna so irresistible and comforting.

    • Ricotta Cheese: Whole milk ricotta is recommended for the creamiest, most luscious texture.
    • Egg: A large egg binds the cheese mixture, preventing it from becoming runny during baking.
    • Parmesan Cheese: Freshly grated Parmesan adds salty, nutty notes that boost the overall cheese flavor.
    • Mozzarella Cheese: Use shredded low-moisture mozzarella in this layer, as it melts beautifully and adds a satisfying stretch.
    • Fresh Parsley: Chopped fresh parsley adds a touch of brightness and a lovely herbaceous flavor.
    • Salt & Pepper: A pinch of salt and pepper seasons the cheese filling, ensuring every layer is perfectly flavored.

    This simple, beginner-friendly blend creates the rich and luscious filling that makes your lasagna truly special.

    For Assembling the Lasagna

    Assembling the lasagna is where all the components come together. Choosing the right noodles and cheese is key to a perfect bake, and this part of the process is surprisingly straightforward.

    • Lasagna Noodles: You have a choice of noodles. Traditional noodles require pre-boiling, while oven-ready (no-boil) noodles are a fantastic time-saver. Both work well, though many home cooks prefer the convenience of no-boil noodles to make cooking quicker and less messy [1].
    • Mozzarella Cheese: You’ll need extra shredded mozzarella for the layers and to create that iconic gooey, cheesy top.
    • Parmesan Cheese: A final sprinkle of Parmesan creates a beautiful golden-brown crust and adds a final layer of savory flavor.

    With these ingredients ready, you’re prepared to assemble your delicious homemade lasagna. Get ready to enjoy one of the best meals you’ve ever made!

    How to Make Homemade Lasagna: A Step-by-Step Guide

    A golden-brown, bubbling baked lasagna in a ceramic dish, with a slice removed onto a plate, revealing its perfectly layered pasta, cheese, and meat sauce.
    A close-up, 100 percent photorealistic, professional food photography shot of a golden-brown, bubbling, freshly baked lasagna straight out of the oven. The lasagna is in an attractive ceramic baking dish, perfectly positioned on a heat-resistant surface in a warm, inviting home kitchen setting. The top layer of melted mozzarella and Parmesan cheese is slightly browned and caramelized in spots, with visible rich red sauce and tender pasta peeking out from the edges. A perfect, generous slice has been carefully removed and placed onto a white serving plate, revealing the distinct, well-defined layers of pasta, creamy ricotta, hearty meat sauce, and more cheese. Subtle steam rises from the dish and the cut slice. The lighting is soft, natural, and highlights the textures and delicious appeal of the dish. This is a high-quality food magazine photo, designed to inspire hunger and confidence in cooking.

    Step 1: Cook the Hearty Meat Sauce

    The first step to an incredible homemade lasagna is creating a rich, flavorful meat sauce. This easy recipe forms the foundation of the dish and is a true game-changer for family meals. Follow these simple instructions for a delicious start.

    1. Brown the Ground Meat: Heat a large pot or Dutch oven over medium heat with a touch of olive oil. Add your ground beef (or a mix of beef and Italian sausage) and cook, breaking it up with a spoon, until browned. Drain any excess fat for a lighter sauce.
    2. Sauté Aromatics: Add the chopped onion and minced garlic to the pot. Cook, stirring frequently, until the onion is soft and translucent, about 5-7 minutes. This step builds a deep flavor base.
    3. Add Tomatoes and Seasonings: Pour in the crushed tomatoes, tomato paste, and diced tomatoes (if using). Stir in dried herbs like oregano and basil, then add salt, black pepper, and a pinch of sugar to balance the tomato acidity.
    4. Simmer to Perfection: Bring the sauce to a simmer, then reduce the heat to low. Cover the pot loosely and let it cook for at least 30 minutes, or up to an hour for deeper flavor. Stir occasionally to prevent sticking. The longer the sauce simmers, the richer it will become.

    Quick Tip: You can make this meat sauce a day ahead. The flavors often meld and taste even better the next day, making it a great meal prep option.

    Step 2: Prepare the Cheese Filling

    Next, create the creamy ricotta cheese layer. This simple filling adds a wonderful texture and tangy balance to the rich meat sauce, and it only takes a few minutes to prepare.

    1. Combine Ingredients: In a large mixing bowl, combine the ricotta cheese, one large egg, grated Parmesan cheese, chopped fresh parsley, salt, and pepper.
    2. Mix Until Smooth: Use a spoon or spatula to gently mix until the ingredients are smooth and well combined. The egg is essential, as it helps bind the cheese and prevents a watery filling.
    3. Check for Consistency: The filling should be thick but easy to spread. If it seems too thin, stir in a little more Parmesan cheese to reach the desired consistency.

    Substitution Idea: For a lasagna without ricotta cheese, you can use well-drained cottage cheese. Alternatively, try a blend of shredded mozzarella and a creamy béchamel sauce for a different texture.

    Step 3: Layer Your Lasagna Like a Pro

    Assembling the lasagna is where all the elements come together. Following these layering instructions will help you build a beautiful, structurally sound dish that holds its shape when sliced.

    1. Prepare Your Baking Dish: Lightly grease a 9×13 inch baking dish to prevent sticking and make serving easier.
    2. Start with Sauce: Spread a thin layer of meat sauce on the bottom of the dish. This creates a base that prevents the noodles from sticking.
    3. First Noodle Layer: Arrange a single layer of lasagna noodles over the sauce, overlapping them slightly to cover the surface. Oven-ready (no-boil) noodles are a great time-saver.
    4. Add Ricotta Filling: Carefully spread half of the ricotta cheese mixture evenly over the noodles.
    5. Add Sauce and Mozzarella: Spoon about one-third of the remaining meat sauce over the ricotta. Sprinkle generously with shredded mozzarella cheese.
    6. Repeat the Layers: Add a second layer of noodles. Top with the remaining ricotta mixture, another third of the meat sauce, and more mozzarella.
    7. Final Layer: Place the last layer of noodles on top. Cover with the remaining meat sauce and finish with a generous sprinkle of mozzarella and Parmesan cheese for a perfect golden crust.

    Pro Tip for No-Boil Noodles: If you’re using no-boil noodles, ensure your sauce is moist enough, as the noodles will absorb liquid while baking to become tender.

    Step 4: Bake Until Bubbly and Golden

    Baking is the final step that melts all the flavors together. You’re just moments away from serving a delicious homemade lasagna your family will love.

    1. Preheat Oven: Preheat your oven to 375°F (190°C).
    2. Cover and Bake: Cover the baking dish tightly with aluminum foil to trap steam and cook the noodles. Bake for 25 minutes.
    3. Uncover and Finish Baking: Remove the foil and continue baking for another 20-25 minutes, or until the sauce is bubbling and the cheese on top is golden-brown.
    4. Rest Before Serving: This step is crucial. Remove the lasagna from the oven and let it rest for at least 15-20 minutes before slicing. This allows the layers to set, ensuring clean cuts.

    Why Resting Matters: Letting the lasagna rest is the secret to perfect slices. It gives the layers time to firm up, making it much easier to serve without falling apart.

    Tips for Making the Perfect Lasagna Every Time

    Making the perfect lasagna doesn’t have to be complicated. With a few simple tricks, you can elevate your homemade dish from good to truly amazing. These tips will help you create a delicious, family-friendly meal with confidence every time.

    Master Your Meat Sauce

    The secret to an exceptional lasagna is the sauce. A rich, flavorful meat sauce forms the heart of the dish, so don’t skip these crucial steps.

    • Simmer Slowly: Allow your meat sauce to simmer gently for at least 30-60 minutes. This extended cooking time melds the flavors, resulting in a deeper, more complex taste.
    • Layer Flavors: Start by sautéing aromatic vegetables like onions and garlic before browning your ground meat. Next, add crushed tomatoes, herbs, and spices. Each addition builds the sauce’s complexity and flavor.
    • Taste and Adjust: Always taste your sauce before layering. You may need to adjust seasonings like salt, pepper, or even a pinch of sugar to ensure the flavor is perfectly balanced.

    Perfect Your Noodle Strategy

    Noodles provide the essential structure for lasagna, so preparing them correctly is vital for a successful dish.

    • No-Boil Noodles: A true time-saver, these noodles absorb moisture directly from the sauce as they bake. This method dramatically cuts down on preparation and cleanup.
    • Regular Noodles: If using traditional noodles, cook them only until al dente, meaning they still have a slight firmness. Overcooked noodles can become mushy in the final dish.
    • Prevent Sticking: When boiling regular noodles, add salt and a small amount of olive oil to the water to prevent sticking. After draining, lay them flat on parchment paper to cool.

    Creamy Ricotta Cheese Layer Secrets

    The ricotta layer brings a delightful creaminess that balances the rich meat sauce, making it a key component for a comforting, flavorful lasagna.

    • Drain Excess Liquid: Ricotta holds a lot of water, which can make your lasagna runny. To prevent this, place the ricotta in a fine-mesh sieve for 15-30 minutes to drain before using.
    • Season Well: Be sure to season the ricotta mixture. Stir in an egg, grated Parmesan, fresh parsley, salt, and pepper. The egg acts as a binder, helping the layer hold its shape.
    • Fresh Herbs Matter: Whenever possible, use fresh herbs like parsley or basil. They contribute a vibrant flavor that dried alternatives cannot replicate.

    Layering Like a Pro

    Proper assembly is key to a lasagna that holds together beautifully and bakes evenly, resulting in perfect portions every time.

    • Start with Sauce: Always spread a thin layer of meat sauce on the bottom of the baking dish. This adds moisture and prevents the first layer of noodles from sticking.
    • Don’t Overdo It: Use just enough sauce and cheese to cover the noodles in each layer. Avoid making them excessively thick, as too much filling can cause the lasagna to be messy and difficult to slice.
    • Consistent Layers: Aim for consistent, even layers of noodles, ricotta, sauce, and mozzarella. This ensures every bite is perfectly balanced and creates a visually appealing result.
    • Finish with Cheese: The top layer should be a final spread of sauce, generously covered with shredded mozzarella to create an irresistible golden, bubbly crust.

    The Importance of Resting Time

    This often-overlooked tip is critical for serving a perfect slice. Letting the lasagna rest after baking prevents it from becoming a messy, collapsed dish.

    • Let it Settle: After removing the lasagna from the oven, cover it loosely with foil and let it rest on the counter for at least 15-20 minutes. This allows the layers to set properly.
    • Prevents Collapse: Resting helps the cheese and sauce firm up, so your lasagna will slice cleanly into neat, intact portions.
    • Enhances Flavor: As the lasagna rests, the flavors continue to meld and deepen. Resting also improves food safety by ensuring heat is distributed evenly throughout the dish [2].

    Achieving the Perfect Bake

    Proper baking is the final step to a bubbly and delicious lasagna. Follow these guidelines to get it just right.

    • Cover Initially: Bake the lasagna covered with foil for most of the cooking time. This steams the noodles and prevents the top from burning.
    • Uncover for Browning: Remove the foil for the final 10-15 minutes. This allows the cheese to melt and turn a beautiful golden brown. Keep a close eye on it to prevent scorching.
    • Check for Doneness: The lasagna is ready when the sauce is bubbly and the cheese is melted and lightly browned. For best results, check that the internal temperature has reached 165°F (74°C).

    Recipe Variations to Try

    Lasagna Recipe Vegetarian Option

    You don’t need meat to make a delicious lasagna. A vegetarian version can be just as hearty and flavorful, making it an excellent way to enjoy a comforting dish while adding more vegetables to your family’s table. This family-friendly meal proves that easy recipes can be both nutritious and incredibly tasty.

    Here are some simple ways to make a vegetarian lasagna:

    • Mushroom Power: Replace ground meat with finely chopped mushrooms. Sauté them until they release their liquid and brown beautifully. This process creates a rich, umami flavor that mimics meat.
    • Lentil Love: Cook brown or green lentils until tender, then simmer them in your favorite marinara sauce. Lentils add a wonderful texture and protein, making your homemade lasagna truly satisfying.
    • Spinach and Zucchini Delight: For a fresh, vibrant filling, wilt a generous amount of spinach and sauté sliced zucchini and yellow squash until tender. Then, combine them with your tomato sauce.
    • Eggplant Excellence: Roast thin slices of eggplant until soft and layer them with your sauce and cheeses. Eggplant adds a lovely texture and depth of flavor to your easy lasagna recipe.

    Feel free to mix and match these vegetables, or add diced bell peppers, onions, and crumbled tofu for extra protein. Just remember to cook your vegetables until tender before layering to ensure your lasagna bakes perfectly. This flavorful variation makes weekly meal planning a breeze and is perfect for beginner cooks exploring new twists on classic dishes.

    Easy Lasagna Recipe Without Ricotta Cheese

    Don’t have ricotta cheese on hand, or simply not a fan? No problem. You can still create an incredibly creamy and delicious lasagna without it. In fact, many homemade recipes skip ricotta entirely, making this an approachable option for any home cook.

    Here are fantastic alternatives for a super creamy layer:

    • Cottage Cheese: A popular and easy substitute is small-curd cottage cheese. Simply mix it with an egg and a pinch of salt, just as you would with ricotta. While the texture is slightly different, the flavor is wonderfully similar.
    • Cream Cheese Blend: For a rich and smooth layer, soften 8 ounces of cream cheese and mix it with half a cup of milk or heavy cream and one egg. Stir in a dash of grated Parmesan cheese for extra flavor.
    • Béchamel Sauce: For a classic Italian style, make a simple béchamel sauce. Melt 3 tablespoons of butter, stir in 3 tablespoons of flour, and cook for one minute. Slowly whisk in 2 cups of warm milk until the sauce thickens. Season with salt, pepper, and a pinch of nutmeg for a velvety, luxurious layer.
    • Extra Mozzarella and Parmesan: For a simple and gooey result, just increase the amount of mozzarella and Parmesan cheese you layer between the noodles and sauce. This method is perfect for a simple dinner, relying on ingredients you likely already have.

    Whichever option you choose, your lasagna will be packed with flavor. These simple substitutions prove you don’t need fancy ingredients to create an amazing meal, allowing you to cook confidently even when pantry staples are limited.

    How to Store, Freeze, and Reheat Lasagna

    Mastering our easy lasagna recipe gives you a fantastic meal for today and an easy one for later. Properly storing, freezing, and reheating your homemade lasagna reduces food waste and provides delicious, stress-free meals on demand. This is a perfect choice for busy families and anyone looking for smart meal prep tips!

    Storing Cooked Lasagna in the Refrigerator

    Got leftovers? Great! Storing cooked lasagna properly will keep it fresh and delicious for days. This makes it an excellent way to prepare family-friendly meals in advance.

    • Cool Completely: Before refrigerating, let the lasagna cool to room temperature, which takes about 30-60 minutes. For food safety, do not leave it out for more than two hours [3].
    • Airtight Container: Transfer the cooled lasagna to an airtight container. If you keep it in the baking dish, cover it tightly with plastic wrap and then a layer of aluminum foil.
    • Refrigerate Promptly: Store your lasagna in the refrigerator and enjoy it within 3 to 4 days.

    Freezing Lasagna for Future Meals

    Freezing lasagna is a fantastic way to save time on busy weeknights. It’s a game-changer for anyone who wants quick, comforting meals without the fuss.

    Freezing Baked Lasagna

    If you have leftover baked lasagna or you’ve made a double batch, freezing the cooked dish is incredibly convenient.

    • Cool It Down: First, let the baked lasagna cool completely to room temperature. This is a crucial step to prevent ice crystals from forming.
    • Portion if Desired: For quick individual meals, cut the lasagna into single servings before wrapping. This also makes reheating much faster.
    • Wrap Securely: Tightly wrap individual portions or the entire dish with plastic wrap, followed by a layer of aluminum foil for extra protection.
    • Label and Date: Clearly write the date on the foil or container. Frozen baked lasagna is best enjoyed within 2-3 months for optimal flavor and texture [4].

    Freezing Unbaked Lasagna

    Assembling an unbaked lasagna for the freezer is a smart way to have a meal ready to bake for unexpected guests or a busy evening. This simple meal prep strategy makes weeknight dinners effortless.

    • Assemble as Usual: Follow the layering steps in our homemade lasagna recipe, but do not bake it.
    • Cover Thoroughly: Cover the baking dish with plastic wrap, pressing it directly onto the lasagna’s surface to prevent freezer burn. Add a second layer of plastic wrap, then cover securely with aluminum foil.
    • Freeze: Place the covered dish in the freezer. Unbaked lasagna can be frozen for up to 2 months.
    • Ready to Bake: To bake, first thaw the lasagna overnight in the refrigerator. Then, bake as the recipe directs, adding 10-15 minutes to the cooking time. For a no-thaw option, bake it from frozen (covered with foil) at 375°F (190°C) for 1.5 to 2 hours, uncovering it for the last 30 minutes.

    Reheating Lasagna to Perfection

    Whether it’s from the fridge or the freezer, reheating lasagna properly is the key to ensuring it stays moist and delicious.

    Reheating from the Refrigerator

    • Oven Method (Recommended): For the best results, preheat your oven to 375°F (190°C). Cover the lasagna with foil to prevent it from drying out and bake for 20-30 minutes, or until heated through and bubbly.
    • Microwave Method (Quickest): Place a single serving on a microwave-safe plate. Cover it loosely with a paper towel or microwave-safe lid and heat on high for 2-4 minutes, checking halfway through.

    Reheating from Frozen (Baked Lasagna)

    • Thawing First: For the best texture, transfer the frozen baked lasagna to the refrigerator and let it thaw overnight. Then, follow the oven reheating method described above.
    • From Frozen (No Thaw): If you’re short on time, you can reheat directly from frozen. Keep the lasagna covered with foil and bake in a preheated 350°F (175°C) oven for 60-90 minutes. Remove the foil for the last 15-20 minutes to brown the cheese. For food safety, ensure the internal temperature reaches 165°F (74°C) [5].

    Pro Tips for Reheating Success

    • Add Moisture: If your lasagna looks dry, add a splash of water or broth around the edges of the dish before placing it in the oven.
    • Cheese Check: If the cheese on top starts to brown too quickly, cover the dish loosely with foil.
    • Rest Before Serving: Like a freshly baked lasagna, let the reheated dish rest for 5-10 minutes. This helps it set, making it easier to slice and serve.

    With these simple storage and reheating tips, your homemade lasagna becomes a reliable and delightful meal you can enjoy anytime. Cook without stress, knowing a delicious meal is always ready to go!

    Frequently Asked Questions

    What is in a traditional beef lasagna recipe?

    A classic beef lasagna is a comforting, family-friendly meal built from delicious layers that combine to create an amazing flavor. Most traditional recipes contain three main components:

    • A Rich Meat Sauce: This is typically a hearty Bolognese-style sauce featuring ground beef cooked with onions, garlic, and sometimes carrots or celery. A deep, savory base is created with crushed tomatoes, tomato paste, and Italian herbs like oregano and basil.
    • Creamy Cheese Filling: Most traditional lasagnas use a ricotta cheese mixture. Ricotta is blended with eggs, Parmesan, and fresh parsley to create a wonderfully creamy and flavorful layer.
    • Pasta and Cheese Topping: Lasagna noodles are used to separate the savory layers. The dish is then topped with a generous amount of mozzarella cheese, which melts to create an irresistible golden-brown crust. Some recipes also include an extra sprinkle of Parmesan.

    At Recipesmondial, we focus on making flavorful meals easy. Our version simplifies these elements for home cooks, delivering a fantastic result without complex steps.

    Can you use cottage cheese instead of ricotta in lasagna?

    Yes, you can absolutely use cottage cheese in your lasagna. It’s a common substitution that works well if you don’t have ricotta or simply prefer a different texture. Many easy lasagna recipes call for it.

    However, keep a few key differences in mind:

    • Texture Difference: Cottage cheese has a grainier texture, while ricotta is much smoother.
    • Moisture Content: Cottage cheese contains more liquid, so it’s best to drain it first to prevent your lasagna from becoming watery. To do this, simply place it in a fine-mesh sieve for 15-20 minutes.
    • Flavor Profile: Ricotta has a mild, slightly sweet flavor, while cottage cheese is a bit tangier. To balance this, you can add a pinch of sugar or extra Parmesan cheese to your filling.

    Using cottage cheese is a fantastic way to adapt recipes. This kind of flexible substitution shows how approachable home cooking can be. Feel free to experiment to create family-friendly meals that suit your tastes.

    How do you make lasagna sauce from scratch?

    Making a flavorful lasagna sauce from scratch is surprisingly easy and adds incredible depth to your dish. This step-by-step method is perfect for beginners.

    1. Brown the Meat: First, heat a large pot or Dutch oven over medium-high heat. Add the ground beef and cook until fully browned, breaking it apart with a spoon. Drain any excess fat.
    2. Sauté Aromatics: Next, add a chopped onion and minced garlic to the pot. Sauté for 5-7 minutes until they have softened and become fragrant.
    3. Add Tomatoes and Flavor: Pour in the crushed tomatoes, tomato paste, and a splash of beef broth for extra richness. Stir well to combine.
    4. Season Generously: Now it’s time for seasoning. Stir in dried oregano, basil, a bay leaf, salt, and black pepper. For a subtle kick, add a pinch of red pepper flakes.
    5. Simmer for Flavor: Bring the sauce to a simmer, then reduce the heat to low. Cover loosely and let it simmer for at least 30 minutes (an hour is even better) to allow the flavors to meld. Be sure to stir occasionally to prevent sticking.
    6. Taste and Adjust: Finally, taste the sauce and adjust seasonings as needed. Remember to remove the bay leaf before using the sauce.

    This simple method creates a rich and savory sauce that forms the perfect base for your lasagna. Enjoy the process of creating flavorful meals made easy!

    Do you have to cook lasagna noodles before baking?

    Whether you need to cook lasagna noodles before baking depends entirely on the type you are using. This is a common question, and understanding the difference will make your preparation easier.

    • Traditional Lasagna Noodles: Most standard lasagna noodles require pre-boiling in salted water until al dente (still firm). This step ensures they soften completely during baking and prevents a tough, undercooked texture in the final dish.
    • No-Boil Lasagna Noodles: These noodles are a wonderful time-saver because they are designed to absorb moisture directly from the sauce and cheese while baking [6]. This means you can layer them into your dish dry. Just make sure your sauce is moist enough to hydrate them properly.

    For best results, always check the package instructions for your specific noodles. At Recipesmondial, we aim to provide clear cooking guidance that makes creating delicious, family-friendly meals enjoyable and stress-free.


    Sources

    1. https://www.bonappetit.com/test-kitchen/how-to/article/no-boil-lasagna-noodles
    2. https://www.foodsafety.gov/keep/charts/cooktemp.html
    3. https://www.fsis.usda.gov/food-safety/safe-food-handling-and-preparation/food-safety-basics/food-safety-charts
    4. https://nchfp.uga.edu/how/freeze/lasagna.html
    5. https://www.foodsafety.gov/keep/charts/mintemp.html
    6. https://www.seriouseats.com/no-boil-lasagna-noodles-how-they-work

  • The Best Classic Meatloaf Recipe (Easy, Juicy, and Flavorful!)

    The Best Classic Meatloaf Recipe (Easy, Juicy, and Flavorful!)

    This classic meatloaf recipe creates a perfectly moist and flavorful dinner using simple ingredients like ground beef, breadcrumbs, onion, milk, and a sweet, tangy ketchup-based glaze. The key to a juicy result is not overmixing the ingredients and allowing the loaf to rest after baking. This easy, step-by-step guide is perfect for a comforting family-friendly meal.

    A classic meatloaf is more than just a meal—it’s a comforting memory that brings families together. But creating that perfect, juicy loaf can feel like a challenge. Many home cooks worry about dry results or get frustrated by overly complex recipes. We understand, and we believe enjoying this timeless dish should be simple and stress-free.

    That’s where Recipesmondial comes in. We’re here to help you cook with confidence, starting with beloved dishes like this one. Our best classic meatloaf recipe is designed to be an incredibly easy meatloaf recipe. It’s perfect for beginner cooks and guarantees a juicy, tender result every time. Say goodbye to complicated steps. It’s time for approachable home cooking that delivers on taste and makes preparing family-friendly meals a joy.

    This meatloaf recipe isn’t just simple; it’s also packed with incredible flavor. It’s a true family favorite that will have everyone asking for seconds. We’ll walk you through every step, from choosing the right ingredients to forming the perfect loaf and creating that irresistible tangy glaze. Get ready to discover why this will become your go-to meatloaf. Flavorful meals made easy are truly within reach.

    Why Is This the Best Meatloaf Recipe?

    A thick slice of glazed meatloaf on a plate, revealing its juicy interior, served with mashed potatoes and green beans.
    A single, generous slice of classic meatloaf, showcasing a perfectly moist and tender interior, rich brown crust, and glistening glaze, artfully arranged on a rustic white ceramic plate with a small side of creamy mashed potatoes and green beans. The meatloaf has a slight sheen from the glaze. The background is a blurred, warm, inviting home kitchen. Photorealistic, professional food photography, high-quality food magazine photo, warm, soft lighting, focus on deliciousness and texture.

    If you’re looking for a meatloaf recipe that’s easy to make, incredibly juicy, and packed with flavor, you’ve found it. This classic recipe from Recipesmondial is perfect for home cooks of all skill levels and is quickly becoming a favorite for busy families everywhere.

    Cooking should be enjoyable, not stressful. You want delicious, reliable results, which is why we perfected this simple dinner recipe to turn everyday ingredients into a memorable meal. Say goodbye to complex instructions and dry, crumbly meatloaf—our method focuses on clear steps and incredible flavor.

    Here’s what makes this the best meatloaf recipe you’ll ever try:

    • Unbeatable Juiciness: Our special technique locks in moisture, ensuring a tender, juicy meatloaf every single time. No more dry, disappointing results.
    • Rich, Savory Flavor: A perfect blend of seasonings creates deep, comforting flavors. The savory meat is perfectly balanced for a meal that’s both simple and delicious.
    • Perfectly Tangy Glaze: Our simple, sweet, and tangy glaze elevates the entire dish. It bakes right onto the loaf, adding a beautiful finish and an irresistible taste.
    • Beginner-Friendly Approach: With clear, step-by-step instructions, even new cooks can feel confident in the kitchen. This is a truly approachable home cooking experience.
    • Quick & Easy Preparation: We know your time is valuable. This recipe uses simple techniques so you can get a delicious meal on the table without feeling overwhelmed.
    • Reliable Results: This recipe is tested to work every time. You can count on this classic meatloaf to turn out perfectly, making it a dependable choice for family-friendly meals.
    • Versatile & Adaptable: We include practical tips and substitutions, so you can easily adjust the recipe to fit your family’s preferences. It’s a great base for your own culinary creativity.

    This meatloaf isn’t just a meal—it’s an invitation to enjoy cooking again and build confidence in the kitchen. Get ready to impress your family with an outstanding dish they will request again and again.

    What Ingredients Do You Need for a Classic Meatloaf?

    An overhead view of classic meatloaf ingredients, including ground beef, eggs, breadcrumbs, and vegetables, neatly arranged on a wooden board.
    A visually appealing flat lay of all classic meatloaf ingredients arranged on a rustic wooden cutting board or light-colored kitchen counter. Includes fresh ground beef in a small bowl, eggs, breadcrumbs, finely chopped onion and garlic, milk, Worcestershire sauce, ketchup, mustard, and a sprig of fresh parsley. Ingredients are clean, vibrant, and neatly presented, with good separation. Photorealistic, professional food photography, high-quality food magazine photo, bright, natural lighting, overhead shot.

    Ready to make a delicious meatloaf that will become a family favorite? The secret to the best meatloaf recipe is using simple, fresh ingredients—many of which you likely already have on hand. This makes preparing a flavorful and stress-free meal easier than ever.

    We’ve broken down the ingredients into two main parts: the juicy meatloaf mixture and the irresistible tangy glaze. With this simple guide, you’ll have everything you need to cook with confidence.

    For the Meatloaf Mixture

    The foundation of any great meatloaf is a well-seasoned, balanced mixture. These ingredients work together to ensure your meatloaf is moist, flavorful, and holds its shape perfectly.

    • 1 ½ pounds ground beef (80/20 lean): This is our star ingredient! The 80/20 blend is perfect, offering enough fat for moisture and flavor without being greasy. For a leaner option, you can use 90/10 ground beef.
    • 1 small yellow onion, finely diced: Onion adds a wonderful savory depth. Dicing it finely ensures it blends seamlessly into the meatloaf.
    • 2 cloves garlic, minced: Fresh garlic brings a warm, aromatic touch that elevates the overall flavor.
    • ¾ cup plain breadcrumbs: Breadcrumbs act as a binder, helping absorb moisture and keeping the meatloaf tender. For a gluten-free option, use gluten-free breadcrumbs or crushed crackers.
    • 1 large egg: As another essential binder, the egg helps hold everything together and prevents your meatloaf from crumbling.
    • ½ cup milk (whole or low-fat): Milk adds essential moisture, which is key for a juicy texture. You can use any type you prefer.
    • 2 tablespoons Worcestershire sauce: This ingredient adds a fantastic umami kick that deepens the meat’s savory flavor.
    • 1 tablespoon ketchup: A little ketchup in the mixture adds a hint of sweetness and tang for that classic meatloaf flavor.
    • 1 teaspoon Dijon mustard: Dijon mustard offers a subtle, sharp flavor that beautifully complements the other savory ingredients.
    • 1 teaspoon salt: Essential for seasoning your meatloaf just right.
    • ½ teaspoon black pepper: Adds a touch of warmth and spice.
    • ½ teaspoon dried Italian seasoning (or a mix of dried parsley, oregano, and basil): These herbs add aromatic notes that tie all the flavors together for a classic, comforting taste.

    For the tangy meatloaf glaze

    A classic meatloaf isn’t complete without its tangy and slightly sweet glaze. This simple topping adds a beautiful finish and an extra layer of flavor, making the final dish irresistible.

    • ½ cup ketchup: This forms the base of the glaze, providing a rich, tomatoey flavor.
    • ¼ cup packed light brown sugar: Brown sugar adds sweetness to balance the tang and gives the glaze a lovely caramelization.
    • 1 tablespoon apple cider vinegar: The vinegar brings a bright, tangy note that cuts through the richness of the meatloaf.
    • 1 tablespoon Worcestershire sauce: As in the meatloaf mixture, this sauce adds a savory, complex depth to the glaze.
    • 1 teaspoon Dijon mustard: A touch of mustard enhances the tang and gives the glaze an extra zing.

    How Do You Make Meatloaf from Scratch?

    A home cook's hands gently mixing ground beef and other ingredients for meatloaf in a large bowl.
    A warm, inviting close-up action shot of a real human home cook’s hands gently mixing the meatloaf ingredients in a large, clean stainless steel or ceramic mixing bowl. The ingredients, including ground beef, chopped vegetables, and binder, are clearly visible and well-combined, showcasing the rich texture. The kitchen background is slightly blurred, suggesting a cozy, approachable home cooking environment with good counter space. Photorealistic, professional food photography, high-quality food magazine photo, natural, soft lighting, focus on the hands and ingredients, conveying ease and engagement.

    Step 1: Prepare the Meatloaf Mixture

    A great meatloaf starts with the right mixture. Follow these steps to create a flavorful foundation, remembering to mix gently for the best texture.

    1. Sauté the Aromatics: Melt olive oil in a skillet over medium heat. Add the chopped onion, bell pepper, and garlic, then cook for 5–7 minutes until soft and fragrant. Let the vegetables cool slightly before adding them to the meat.
    2. Combine Wet Ingredients: In a large mixing bowl, whisk together the milk, eggs, Worcestershire sauce, ketchup, Dijon mustard, salt, and black pepper until well combined.
    3. Add Dry Binders: Stir the breadcrumbs and fresh parsley into the wet mixture. This step helps the breadcrumbs absorb moisture, which will bind the meatloaf together.
    4. Introduce the Meat and Veggies: Add the ground beef and the cooled sautéed vegetables to the bowl with the wet ingredients.
    5. Mix Gently: Use your hands to gently combine all the ingredients. Be careful not to overmix, as this can result in a tough meatloaf. Mix only until everything is incorporated.

    Step 2: Shape the Loaf

    Properly shaping the meatloaf ensures it cooks evenly and holds its form. Follow these steps for a perfect loaf.

    1. Choose Your Pan: Use a standard loaf pan for a classic shape, or form the loaf freehand on a parchment-lined baking sheet. A baking sheet will yield a crustier exterior.
    2. Transfer the Mixture: Carefully move the meat mixture to your chosen pan or baking sheet.
    3. Shape and Compact: If using a loaf pan, gently press the mixture down to eliminate air pockets. If shaping freehand, form it into an oval about 9 inches long and 4–5 inches wide. Slope the sides slightly to help the loaf hold its shape while baking.

    Step 3: Make the Glaze

    This tangy glaze is the secret to an exceptional meatloaf, adding a final layer of moisture and flavor. Making it is quick and simple.

    1. Gather Ingredients: In a small bowl, combine the ketchup, brown sugar, apple cider vinegar, and a dash of ground mustard.
    2. Whisk Together: Whisk the ingredients until the brown sugar has completely dissolved and the glaze is smooth.
    3. Set Aside: Set the glaze aside to use later in the baking process.

    Step 4: Bake and Glaze the Meatloaf

    The key to a perfectly caramelized finish is adding the glaze at the right time during baking. Follow these steps for a straightforward cooking process.

    1. Preheat Your Oven: Preheat your oven to 350°F (175°C). This moderate temperature ensures the meatloaf cooks evenly.
    2. Initial Bake: Place the meatloaf in the preheated oven and bake for 45 minutes. This initial bake, without the glaze, helps the loaf set.
    3. Apply the Glaze: After 45 minutes, carefully remove the meatloaf from the oven and spread about two-thirds of the glaze evenly over the top and sides.
    4. Continue Baking: Return the meatloaf to the oven and bake for an additional 15-20 minutes, or until the glaze is bubbly and lightly caramelized.
    5. Check for Doneness: To ensure the meatloaf is cooked through, insert an instant-read thermometer into the center. It is safe to eat when the internal temperature reaches 160°F (71°C) [source: https://www.fsis.usda.gov/food-safety/safe-food-handling-and-preparation/food-safety-basics/safe-temperature-chart].

    Step 5: Rest and Serve

    Don’t skip this final step. Resting the meatloaf is crucial for locking in juices, which makes it more flavorful and easier to slice.

    1. Rest the Meatloaf: Remove the meatloaf from the oven and let it rest for at least 10–15 minutes before slicing. This crucial step allows the juices to redistribute, ensuring every slice is moist and tender.
    2. Slice and Serve: After resting, transfer the meatloaf to a cutting board and slice it into thick portions.
    3. Garnish: For extra flavor and a touch of color, drizzle with the remaining glaze and garnish with fresh parsley.
    4. Enjoy Your Creation: Serve the meatloaf hot and enjoy this classic comfort food with your family.

    Expert Tips for the Juiciest, Most Flavorful Meatloaf

    Crafting the perfect meatloaf is easier than you think. With a few simple tricks, you can elevate your classic recipe from good to absolutely incredible. These expert tips focus on maximizing juiciness and flavor, helping you achieve a truly memorable meal every time.

    Recipesmondial is here to guide you. Say goodbye to dry, bland meatloaf and get ready for a delicious, family-friendly meal that everyone will love!

    Choosing Your Meat for Ultimate Flavor and Juiciness

    • Embrace a Meat Blend: For the most flavorful and juicy meatloaf, use a mix of ground meats. An 80/20 ground beef provides richness, while ground pork or veal boosts moisture and complex flavor. This combination is the key to a tender result.
    • Fat Content Matters: Opt for ground beef with an 80% lean to 20% fat ratio. The fat renders during baking, which adds incredible flavor and keeps the meatloaf from drying out. Using leaner meats can result in a drier loaf.

    The Secret to a Tender and Moist Loaf

    • Don’t Overmix: This is a crucial step for a tender meatloaf. Gently mix the ingredients with your hands just until they are combined. Overworking the meat develops proteins that will make your final loaf tough and dense.
    • Boost Moisture with Liquids: Incorporate a liquid like milk, beef broth, or tomato juice into your mixture. This adds essential moisture that keeps the meatloaf tender and prevents it from drying out as it bakes.
    • Sauté Your Aromatics: Always sauté aromatics like onions, garlic, and bell peppers before adding them to the mix. This process softens them and deepens their flavor, adding complexity and preventing any raw, crunchy bits in your finished meatloaf.
    • Use the Right Binder: Breadcrumbs and eggs are essential binders. They not only hold the loaf together but also absorb moisture, which contributes to a tender texture. For the best results, use fresh breadcrumbs whenever possible.

    Baking and Glazing for Perfection

    • Shape Your Loaf Properly: For a better crust, form your meatloaf into a free-form loaf on a baking sheet instead of pressing it into a pan. This allows heat to circulate more evenly, creating a delicious crust on all sides.
    • The Magic of Glaze: A tangy glaze adds a burst of flavor and creates a beautiful, caramelized exterior. For the best results, apply half of the glaze at the start of baking and the remaining half about 15-20 minutes before it’s done cooking.
    • Bake to the Right Temperature: Use a meat thermometer to guarantee your meatloaf is cooked perfectly. Remove it from the oven when the internal temperature reaches 160°F (71°C) [1]. This ensures it is safe to eat and prevents the meat from overcooking.

    The Essential Resting Period

    • Rest Your Meatloaf: Once baked, let your meatloaf rest for at least 10-15 minutes before slicing. This vital step allows the juices to redistribute throughout the loaf, ensuring every slice is incredibly moist. Cutting it too soon will cause those flavorful juices to run out.

    Following these simple tips will transform your meatloaf into a juicy, flavorful, and truly satisfying dish. Enjoy cooking this easy, family-friendly meal with confidence!

    What Should You Serve With Meatloaf?

    A delicious, juicy meatloaf is the star of any dinner plate, but pairing it with the right side dishes turns it into a complete and comforting meal. For busy home cooks, choosing easy and flavorful sides is the key to success.

    At Recipesmondial, we love helping you create amazing family-friendly meals without the stress. Here are some of our favorite simple side dish ideas to serve with your classic meatloaf for a delightful and balanced dinner.

    Classic Comfort Sides

    These go-to choices are simple, heartwarming recipes that bring a sense of satisfaction to the dinner table.

    • Creamy Mashed Potatoes: There’s a reason this pairing is timeless! Fluffy, buttery mashed potatoes are perfect for soaking up extra meatloaf glaze. You can easily make them ahead of time for quick meal prep.
    • Cheesy Macaroni and Cheese: For a truly indulgent and family-friendly meal, creamy mac and cheese is a winner. Its comforting flavor beautifully balances the savory meatloaf.
    • Warm Dinner Rolls or Crusty Bread: Don’t underestimate the power of a good roll. They are wonderful for sopping up every last bit of glaze or gravy. Serve them warm for an extra touch of coziness.

    Fresh & Flavorful Vegetable Sides

    Adding a vegetable is the easiest way to create a healthy, balanced meal. These quick and beginner-friendly options add both freshness and flavor.

    • Garlic Green Beans: Lightly steamed or sautéed green beans with a hint of garlic are crisp and refreshing, providing a lovely contrast to the richness of the meatloaf.
    • Roasted Asparagus: Toss fresh asparagus with olive oil, salt, and pepper, then roast until tender-crisp. This elegant side is surprisingly simple and adds a pop of color.
    • Sweet Glazed Carrots: Carrots cooked until tender and lightly glazed with butter and a touch of brown sugar offer a sweet complement. It’s a simple side dish loved by all ages.
    • Steamed Broccoli: A classic for good reason, steamed broccoli is quick, healthy, and versatile. A squeeze of lemon or a sprinkle of cheese can easily elevate it.
    • Creamed Corn or Corn on the Cob: Sweet corn, whether creamed for a rich texture or served simply on the cob, is a delightful addition. This simple side dish always pleases.

    Hearty Starchy Alternatives

    Looking for an alternative to mashed potatoes? These satisfying options are just as delicious and easy to prepare.

    • Crispy Roasted Potatoes: Cubed potatoes roasted until golden and tender make a fantastic side. Season them with herbs like rosemary or thyme for extra flavor.
    • Baked Sweet Potatoes: A healthier and naturally sweet alternative. Simply bake them until tender and serve with a dollop of butter or a sprinkle of cinnamon for a different flavor profile that pairs wonderfully.
    • Rice Pilaf: For a lighter grain option, a fluffy rice pilaf is an excellent choice. It’s flavorful without being too heavy, making it an ideal side for a hearty main like meatloaf.

    Tips for Perfect Pairings

    To create the perfect meal, focus on balance. Since meatloaf is a rich dish, it benefits from sides that offer contrasting textures and flavors.

    • Balance Richness: Pair the savory meatloaf with lighter, fresher vegetables to prevent the meal from feeling too heavy.
    • Mix Textures: Combine creamy sides, crunchy vegetables, and soft bread. A variety of textures makes the meal more enjoyable.
    • Add Color: A vibrant plate is more appealing. Green beans, bright carrots, or other colorful vegetables can make your dinner visually exciting.

    With these simple side dish ideas, you can easily create a flavorful meatloaf dinner that’s a joy to both cook and eat. Enjoy!

    Recipe Variations and Substitutions

    Meat Variations

    While our classic meatloaf recipe shines with ground beef, you can easily switch things up with other meats. Each type brings a unique flavor and texture, allowing you to tailor the meatloaf to your family’s preferences. It’s a great way to make family-friendly meals even more special.

    • Ground Beef (Lean or Medium): This is the traditional choice for a juicy, flavorful meatloaf recipe. We recommend an 80/20 lean-to-fat ratio for the best meatloaf recipe, as it ensures moisture without being too greasy.
    • Pork: Adding ground pork provides extra moisture and richness. For a deeper flavor, try combining half ground beef with half ground pork. This blend, common in many easy meatloaf recipe variations, also helps keep the meatloaf tender.
    • Veal: Ground veal offers a very tender and mild flavor. It’s often combined with beef and pork to create a “meatloaf mix” that’s incredibly succulent. This blend is truly a flavorful meal made easy.
    • Ground Turkey or Chicken: For a lighter option, use ground turkey or chicken. Keep in mind that these leaner meats can dry out more easily. To maintain moisture, add a bit more liquid to the mixture, such as extra broth, milk (or a dairy-free alternative), or even a touch of olive oil. For the best results, choose dark meat ground turkey for more flavor and moisture.
    • Custom Blends: Feel free to experiment with your own combinations. A popular choice is a mix of beef, pork, and veal, which yields the ultimate rich and juicy meatloaf. You can also blend leaner meats with a small amount of fattier meat to help maintain tenderness and flavor.

    How to Make it Gluten-Free

    Making our easy meatloaf recipe gluten-free is simple. The main ingredient to replace is the breadcrumbs, which bind the meatloaf and add moisture. Luckily, with so many great gluten-free substitutes available, you can still enjoy a delicious, beginner-friendly recipe that fits your dietary needs.

    • Gluten-Free Breadcrumbs: For the easiest swap, simply use an equal amount of your favorite gluten-free breadcrumbs. They work just like the regular kind.
    • Rolled Oats (Gluten-Free Certified): Old-fashioned rolled oats are an excellent binder and add a lovely texture. Use them in place of breadcrumbs, but be sure to choose a certified gluten-free brand to prevent cross-contamination.
    • Crushed Gluten-Free Crackers: Crushed plain gluten-free crackers also work well as a replacement for regular breadcrumbs and add a savory touch.
    • Cooked Quinoa or Rice: For a different approach, try using about 1/2 to 3/4 cup of cooked and cooled quinoa or rice per pound of meat. These options add moisture and bind the meatloaf effectively.

    Always double-check the labels of all your ingredients to ensure the entire meatloaf recipe remains gluten-free.

    Making Meatloaf Without Milk

    Prefer to make meatloaf without milk? No problem. While milk adds moisture and helps tenderize the meat, several easy substitutions work perfectly. With these simple swaps, you can still achieve a wonderfully juicy and flavorful result, ensuring your approachable home cooking always meets your needs.

    • Water: Plain water is the simplest substitute. Use the same amount called for in the recipe to add moisture without changing the flavor.
    • Beef or Chicken Broth: Broth not only keeps the meatloaf moist but also adds an extra layer of savory flavor. To control the saltiness, opt for a low-sodium version. This is a fantastic choice for a flavorful meal made easy.
    • Vegetable Broth: For a non-meat option, vegetable broth works well, providing moisture and a subtle savory depth.
    • Non-Dairy Milk: Unsweetened non-dairy milks like almond, soy, or oat milk are also great alternatives. They function just like regular milk to maintain moisture and tenderness, but be sure they’re unsweetened to avoid altering the taste.

    These simple changes ensure everyone can enjoy this best meatloaf recipe. It’s all about making cooking enjoyable and stress-free.

    How to Store and Reheat Leftovers

    Storing Your Delicious Meatloaf Leftovers

    Enjoyed your meatloaf and have leftovers? Great! Proper storage will keep it fresh and flavorful for another easy meal. Follow these simple steps to preserve your meatloaf perfectly.

    Refrigeration for Short-Term Storage

    Cooked meatloaf can be safely stored in the refrigerator for a few days. This is perfect for quick lunches or a second dinner.

    • Cool Down Quickly: First, allow the meatloaf to cool completely at room temperature. To prevent bacterial growth, this should take no more than two hours [2].
    • Portion and Pack: For convenience, slice the meatloaf into individual servings. Transfer the slices or the whole loaf into an airtight container.
    • Seal and Store: Ensure the container is sealed tightly before placing it in the refrigerator.
    • Enjoy Within: Your meatloaf will stay fresh for 3 to 4 days when stored this way.

    Freezing for Longer-Term Meal Prep

    For longer storage, freezing is an excellent option. It’s a great way to plan future meals, allowing you to enjoy your meatloaf weeks later.

    • Cool Completely: As with refrigeration, let the meatloaf cool entirely before freezing.
    • Wrap Well: Wrap individual slices or smaller portions tightly in plastic wrap, then add a layer of aluminum foil. This double layer protects against freezer burn.
    • Use Freezer-Safe Containers: Alternatively, place wrapped portions into a freezer-safe bag or airtight container, removing as much air as possible.
    • Label Clearly: Always label the container with the date so you know how long it’s been stored.
    • Freeze Duration: Frozen meatloaf maintains its best quality for up to 3 months.
    • Thaw Safely: When you’re ready to eat, thaw the frozen meatloaf in the refrigerator overnight. For a quicker option, use the defrost setting on your microwave.

    Reheating Your Leftover Meatloaf

    When it’s time to eat your leftovers, reheating them properly will keep the meatloaf juicy and delicious. Here are a few simple methods that work for any schedule.

    Oven Reheating for Best Results

    The oven is the best method for reheating meatloaf because it helps preserve the original texture and flavor.

    • Preheat Oven: Set your oven to a low temperature, around 250°F (120°C), to prevent drying out the meat.
    • Add Moisture: Place meatloaf slices in an oven-safe dish and add a tablespoon or two of beef broth or water. This creates steam and keeps the meatloaf moist.
    • Cover and Heat: Cover the dish tightly with aluminum foil to trap moisture.
    • Reheat Time: Heat for 20-30 minutes, or until an instant-read thermometer shows the internal temperature has reached 165°F (74°C) [3].

    Microwave for Quick Servings

    For speedy individual portions, the microwave is your best bet. It’s perfect for a quick lunch or for busy families.

    • Portion Out: Place a slice or two of meatloaf on a microwave-safe plate.
    • Add Moisture: Drizzle a small amount of water or broth over the meatloaf. Cover it loosely with a damp paper towel or a microwave-safe lid.
    • Heat in Bursts: Microwave on medium power for 1-2 minutes. Check and rearrange the meatloaf, then continue heating in 30-second intervals until it’s hot throughout.
    • Check Temperature: For food safety, make sure the meatloaf reaches an internal temperature of 165°F (74°C).

    Pan-Frying for Crispy Edges

    If you love crispy edges, pan-frying individual slices is a fantastic option. This method adds a delicious new texture to your leftovers.

    • Heat Skillet: Warm a small amount of oil or butter in a non-stick skillet over medium heat.
    • Sear Slices: Carefully place the meatloaf slices in the hot skillet.
    • Cook Until Crispy: Cook for 3-5 minutes per side, until a delicious caramelized crust forms.
    • Ensure Warmth: Make sure the center of each slice is heated through before serving.

    With these simple tips, your leftover meatloaf will be just as delicious as when it was first baked. Enjoy cooking confidently with Recipesmondial!

    Frequently Asked Questions

    What are the main ingredients in a traditional meatloaf?

    A classic meatloaf is a comforting, family-friendly dish that combines simple, everyday ingredients to create a rich, savory flavor. It’s a longtime favorite for many home cooks.

    Here are the core components you’ll typically find:

    • Ground Meat: Ground beef is the most common choice, but a mix of beef, pork, and veal also creates a delicious taste and texture.
    • Binder: To help hold the loaf together, breadcrumbs or crushed crackers are common binders.
    • Liquid: Milk, broth, or tomato juice adds moisture, which keeps your meatloaf from drying out.
    • Eggs: Acting as an additional binder, eggs are crucial for preventing the meatloaf from crumbling.
    • Aromatics: Finely chopped onion and garlic are essential for providing a deep, savory base flavor.
    • Seasonings: Standard seasonings include salt, pepper, and herbs like parsley, while a touch of Worcestershire sauce can add extra richness.
    • Glaze: A traditional meatloaf is often finished with a sweet and tangy topping. Ketchup-based glazes are the most popular [4].

    Together, these simple ingredients create a truly satisfying and flavorful meal, making it an approachable home cooking staple.

    What is the secret to keeping meatloaf from falling apart?

    Nobody wants a crumbly meatloaf. Fortunately, keeping it intact is easy with a few simple techniques. Following these tips will help you get a perfect slice every time.

    Follow these expert tips for a sturdy meatloaf:

    • Use a Good Binder: Breadcrumbs and eggs are your best friends for creating a strong structure. They also absorb moisture, which prevents a soggy, loose texture.
    • Don’t Overmix: Mix the ingredients just until they are combined. Overmixing not only makes the meat tough but also breaks down the binding proteins, making your loaf more likely to fall apart.
    • Shape It Firmly: When shaping the mixture, be gentle but firm. Compacting it into an even loaf removes air pockets, which can weaken the structure during baking.
    • Choose the Right Fat Content: Using ground meat with a moderate fat content, such as 80/20 ground beef, is ideal. The fat helps bind the loaf while also adding essential flavor and moisture.
    • Rest Before Slicing: This step is crucial for clean slices. Always let your meatloaf rest for 10-15 minutes after baking. This allows the juices to redistribute and gives the loaf time to firm up [5].

    By following these straightforward steps, you can confidently create a beautiful meatloaf that won’t crumble.

    How do you make an easy meatloaf with few ingredients?

    When life gets busy, a delicious dinner doesn’t have to be complicated. This easy meatloaf recipe is perfect for a quick, family-friendly meal, as it uses just a few basic ingredients.

    Here’s how to simplify your meatloaf:

    • Essential Ingredients:
      • 1.5 lbs ground beef (80/20 is ideal)
      • 1 large egg
      • 1/2 cup plain breadcrumbs
      • 1/4 cup milk or water
      • 1/2 cup finely chopped onion (optional, but adds great flavor)
      • Salt and black pepper to taste
      • 1/2 cup ketchup for the glaze
    • Simple Steps:
      1. Preheat your oven to 350°F (175°C).
      2. In a large bowl, use your hands to gently combine the ground beef, egg, breadcrumbs, milk, onion (if using), salt, and pepper. Be careful not to overmix.
      3. Shape the mixture into an even loaf on a baking sheet.
      4. Spread the ketchup evenly over the top of the loaf.
      5. Bake for 55-65 minutes, or until an instant-read thermometer confirms the internal temperature has reached 160°F (71°C) [6].
      6. Let it rest for 10 minutes before slicing and serving.

    This beginner-friendly recipe is a quick and reliable solution for a flavorful meal any night of the week.

    What can I use if I don’t have breadcrumbs for meatloaf?

    Running out of breadcrumbs shouldn’t stop you from making a delicious meatloaf. While they are a popular binder, many other ingredients work just as well, offering flexibility for your home cooking.

    Here are excellent breadcrumb alternatives to keep your meatloaf juicy and cohesive:

    • Crushed Crackers: Finely crushed saltines, Ritz, or other plain crackers can be used in an equal amount. They provide a similar texture and binding power.
    • Rolled Oats: Quick-cooking or old-fashioned oats work wonderfully, adding a slightly chewier texture. Use about 3/4 cup of oats for every 1 cup of breadcrumbs.
    • Crushed Cereal: Crushed plain cornflakes or rice cereal offer a neutral flavor and serve as a good binder.
    • Cooked Rice: Leftover cooked rice is a great binder that adds a unique texture. As a rule of thumb, use about 1 cup of cooked rice per pound of meat.
    • Flour or Cornstarch: For a gluten-free option, a few tablespoons of all-purpose flour or cornstarch can thicken the mixture. Use a smaller amount—about 2-3 tablespoons per pound of meat—and add extra liquid if the mixture seems too dry.
    • Panko Breadcrumbs: Panko is a fantastic substitute that creates a lighter, airier texture in the finished loaf.

    Each of these alternatives helps absorb moisture and prevent the meatloaf from falling apart. This flexibility makes dinner planning stress-free, allowing you to create simple, delicious dishes with the ingredients you have on hand.


    Sources

    1. https://www.fsis.usda.gov/food-safety/safe-food-handling-and-preparation/meat-poultry-and-egg-products/ground-beef-and-food-safety
    2. https://www.fsis.usda.gov/food-safety/safe-food-handling-and-preparation/food-safety-basics/how-chill-food
    3. https://www.fsis.usda.gov/food-safety/safe-temperature-chart-food
    4. https://www.foodnetwork.com/recipes/articles/history-of-meatloaf
    5. https://www.seriouseats.com/the-food-lab-how-to-make-the-best-meatloaf
    6. https://www.foodsafety.gov/food-safety-charts/safe-minimum-cooking-temperatures