Tag: Easy recipe

  • How to Cook Perfect Lamb Chops: An Easy Pan-Seared Recipe

    How to Cook Perfect Lamb Chops: An Easy Pan-Seared Recipe

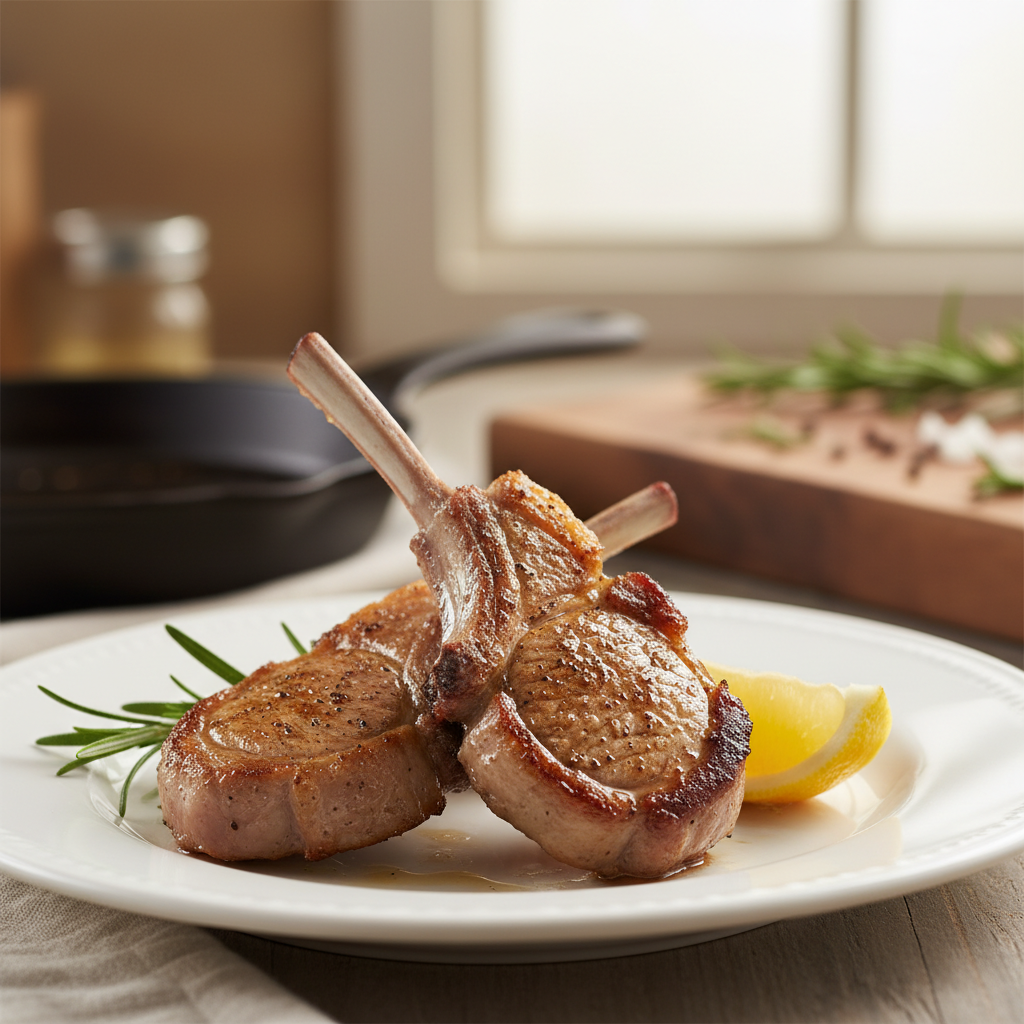
    Cooking the perfect lamb chop is simple. Start by seasoning lamb loin or rib chops generously with salt, pepper, garlic, and herbs. Sear them in a hot, oiled skillet for 3-4 minutes per side for a medium-rare finish. For maximum flavor and tenderness, allow the chops to rest for 5-10 minutes before serving.

    Imagine serving a meal that tastes like it came from a fancy restaurant—without the stress. Lamb chops often seem reserved for special occasions or experienced chefs, and many home cooks feel intimidated by the process. But what if we told you that perfectly tender and flavorful lamb chops are entirely within your reach? With this simple dinner recipe, they are, even if you’re a beginner.

    At Recipesmondial, we believe every home cook deserves great food without complicated steps. In this beginner-friendly guide, we’ll walk you through the simple process of pan-searing lamb chops. Our step-by-step instructions will help you get a beautiful crust and juicy, tender results every time. This recipe makes it easy to prepare special family-friendly meals and helps you cook with confidence.

    Whether you want a new weeknight favorite or are looking to expand your culinary skills, this article makes cooking lamb chops a breeze. You will learn how to transform simple ingredients into a flavorful meal, proving that gourmet taste is achievable in your own kitchen. Let’s get started and see why this easy lamb chop recipe will become a new staple in your collection.

    Why You’ll Love This Easy Lamb Chop Recipe

    Ever wanted to make lamb chops at home but felt unsure where to begin? Many home cooks are intimidated by complex recipes, but this one is designed to change that. It brings gourmet flavor to your kitchen with minimal fuss.

    Here’s why you’ll love adding this dish to your regular rotation:

    • Unbelievably Simple: This recipe is truly beginner-friendly. We skip complicated steps and focus on a straightforward pan-searing technique, with clear, step-by-step guidance.
    • Quick to Prepare: Forget long cooking times. You can have delicious lamb chops on the table in under 30 minutes, making this recipe perfect for busy weeknights.
    • Incredible Flavor: Learn how to get a perfect sear every time. These lamb chops have a beautiful golden crust on the outside while staying tender, juicy, and packed with flavor. Experience truly flavorful meals made easy.
    • Builds Confidence: Lacking confidence in the kitchen? This recipe helps you master a classic technique, so you can cook with confidence and achieve impressive results.
    • Family-Friendly Elegance: Lamb chops feel like a special treat, but this simple recipe makes them accessible for any night. It’s an elegant meal the whole family will enjoy.
    • Everyday Ingredients: No exotic items are needed. This recipe uses common ingredients you can find at any grocery store, keeping your cooking approachable and stress-free.
    • Stress-Free Cooking: Our goal at Recipesmondial is to help you enjoy a relaxed cooking experience. This recipe delivers on that promise by simplifying a dish that is often seen as challenging.

    In short, this isn’t just another lamb chop recipe—it’s your key to creating quick, reliable, and delicious meals that will impress everyone. Get ready to turn simple ingredients into something extraordinary!

    What Are the Best Lamb Chops for Pan-Searing?

    Want to cook a perfect, juicy lamb chop? The first step is selecting the right cut. This choice is key to elevating your pan-seared lamb chop recipe. And don’t worry—it’s simpler than it sounds. We’ll guide you through the best options, helping you make flavorful meals with ease in your own kitchen.

    Loin Chops vs. Rib Chops

    Two types of lamb chops are best for pan-searing: loin chops and rib chops. While both are delicious, they have unique characteristics. Understanding these differences will help you choose the perfect cut for your simple dinner recipes.

    Loin Chops

    • Appearance: Resembles a miniature T-bone steak, with a small bone separating the loin and tenderloin.
    • Flavor and Texture: Very tender with a rich, meaty flavor.
    • Cooking Suitability: Ideal for quick, high-heat methods like pan-searing, which creates a great crust and a juicy interior.

    Rib Chops

    • Appearance: Cut from the rib section, they are recognized by the long bone extending out to form a “handle.”
    • Flavor and Texture: Exceptionally tender with a milder, more delicate lamb flavor.
    • Cooking Suitability: Perfect for a fast sear due to their small size, resulting in a visually appealing chop.

    Both loin and rib chops are excellent, reliable choices that cook quickly, making them perfect for beginner-friendly recipes. Ultimately, the choice comes down to personal preference. If you want a robust, meaty flavor, choose loin chops. For a more delicate taste, go with rib chops. Either way, you’re set for a delicious meal.

    Choosing the Right Thickness

    The thickness of your lamb chops is crucial for pan-searing success. It determines how quickly and evenly the meat cooks, which is the key to achieving a tender, juicy result every time.

    • Ideal Thickness: For pan-searing, choose lamb chops that are 1 to 1.5 inches thick.
    • Why Thickness Matters:
      • Too Thin: Chops under 1 inch thick cook too quickly, often drying out before a good crust can form. This can result in tough, less flavorful meat.
      • Too Thick: Chops over 1.5 inches thick take longer to cook, making it difficult to cook the inside to your desired doneness without burning the exterior.
    • Shopping Tip: Ask your butcher to cut chops to your desired 1 to 1.5-inch thickness. When buying pre-packaged chops, look for pieces with a uniform thickness to ensure even cooking.

    Choosing the right lamb chop doesn’t have to be complicated. By selecting the best cut and the proper thickness, you’re setting yourself up for a stress-free cooking experience. You’ll be well on your way to pan-searing delicious, juicy lamb chops with confidence.

    Simple Ingredients for Flavorful Lamb Chops

    Fresh lamb loin chops, rosemary, garlic, salt, pepper, and olive oil beautifully arranged on a wooden board.
    Photorealistic, professional food photography, high-quality food magazine photo. An overhead shot of fresh, simple ingredients for lamb chops artfully arranged on a rustic wooden cutting board. The ingredients include raw, well-marbled lamb loin chops, fresh rosemary sprigs, whole garlic cloves, sea salt crystals, black peppercorns, and a small, elegant bottle of olive oil. The lighting is warm, bright, and natural, emphasizing freshness and quality. The background is a clean, slightly out-of-focus kitchen counter. No human hands are visible, and the composition is inviting and approachable.

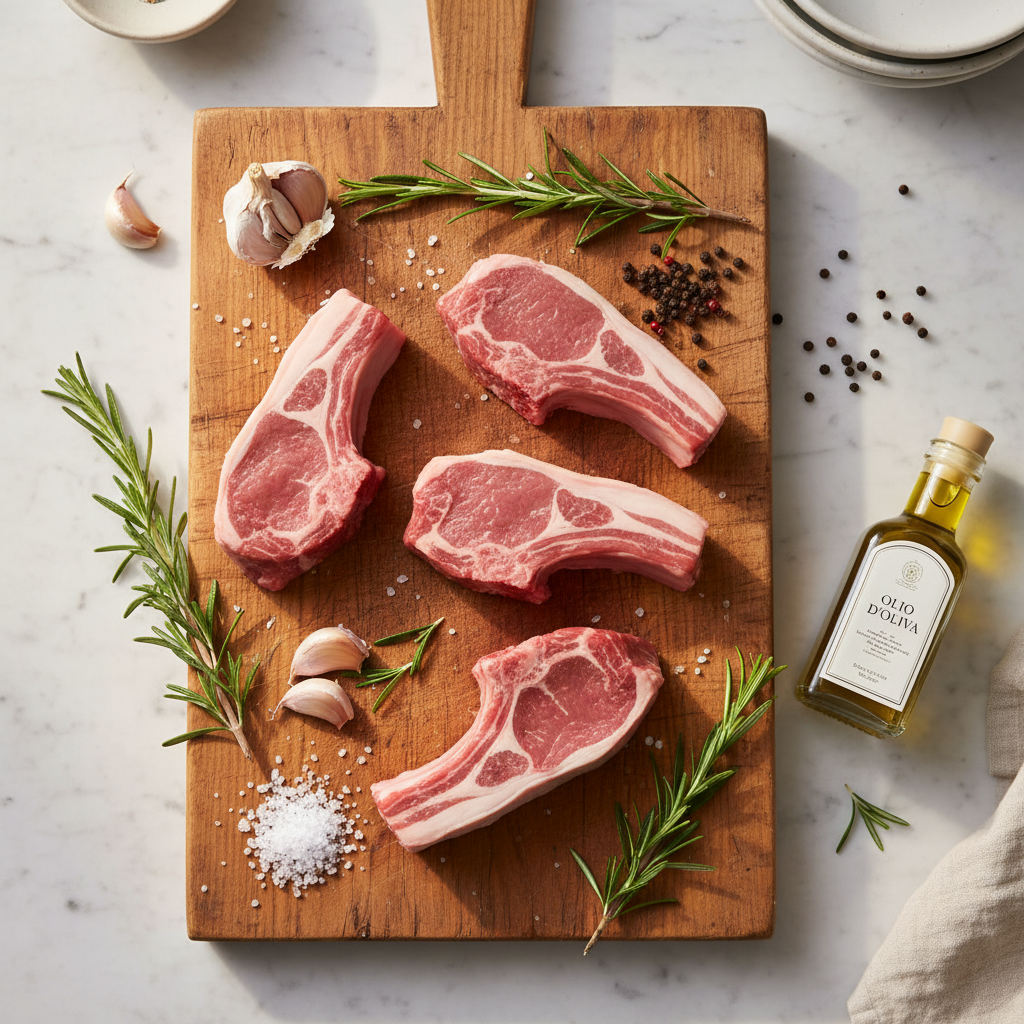
    You don’t need a long list of fancy items to cook incredibly flavorful lamb chops. In fact, the best recipes often rely on just a few simple, high-quality ingredients. This approachable method is perfect for building confidence, especially if you’re new to preparing lamb. You can create a truly delicious meal without feeling overwhelmed by a complex process.

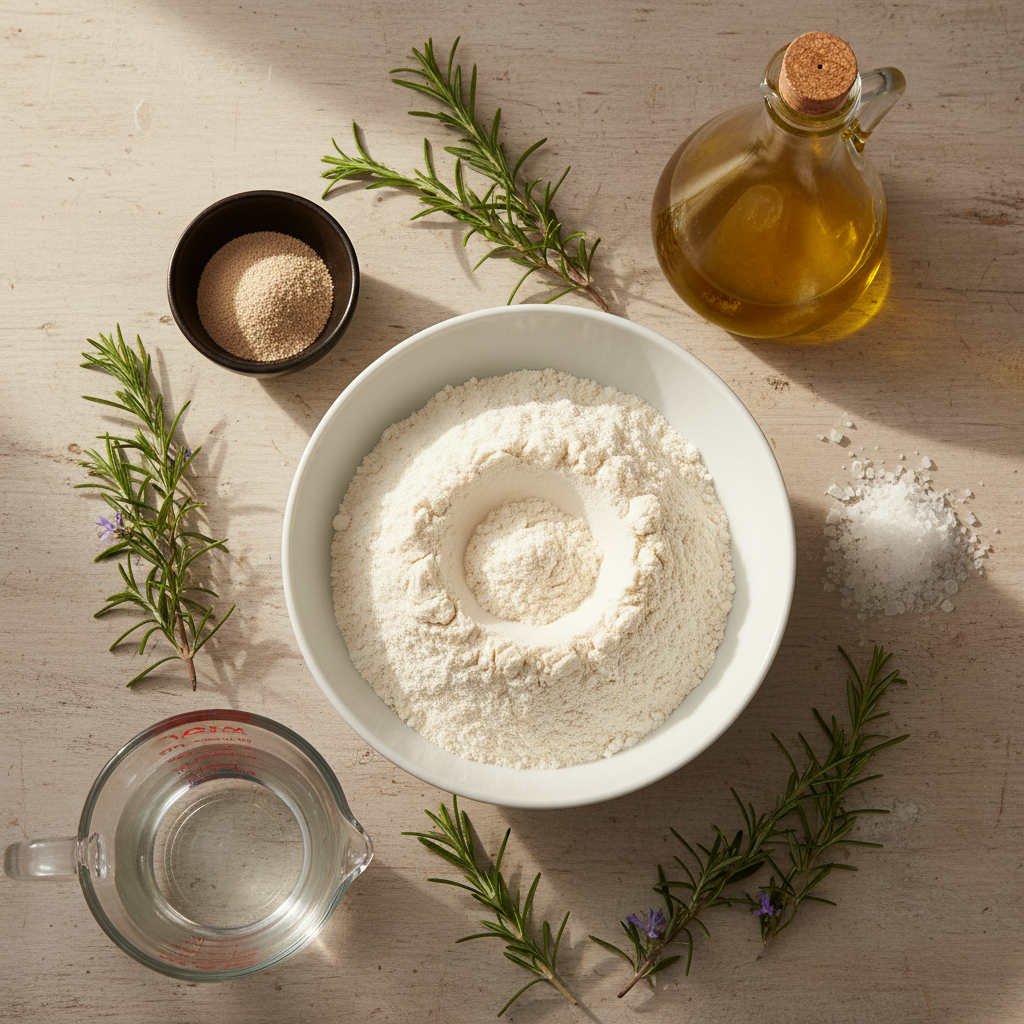
    Here’s what you’ll need to make these perfect pan-seared lamb chops:

    • Lamb Chops: Choose loin or rib chops, about 1-inch thick. Fresh, high-quality lamb is key for the best flavor.
    • Olive Oil: A good quality olive oil is perfect for searing and helps create a beautiful crust on your lamb.
    • Salt: Coarse sea salt or kosher salt works wonderfully to enhance the natural taste of the lamb.
    • Black Pepper: Freshly ground black pepper adds a lovely aromatic warmth.
    • Garlic Powder: (Optional) A touch of garlic powder adds a subtle, savory depth. It’s an easy way to boost flavor in any beginner-friendly recipe.
    • Fresh Herbs (Rosemary or Thyme): (Optional) A sprig or two of fresh rosemary or thyme infuses a wonderful aroma. These classic herbs pair beautifully with lamb.

    These core ingredients are the foundation for easy pan-seared lamb chops and are readily available at any grocery store. This simple, stress-free approach is perfect for quick dinners. You’ll be surprised by how much flavor you can achieve with so little!

    Choosing Quality Ingredients for Success

    For truly delicious, family-friendly meals, starting with quality ingredients makes all the difference. When selecting lamb, look for chops that are reddish-pink with a thin layer of white fat, which adds moisture and flavor during cooking. A good butcher can also help you choose the best cuts for this easy lamb chop recipe.

    Focusing on these simple ingredients helps you build basic cooking skills and discover new favorite dishes. At Recipesmondial, our goal is to make cooking enjoyable and stress-free, which is why we prioritize accessible ingredients and straightforward methods. You’ll go from feeling uncertain in the kitchen to cooking confidently in no time.

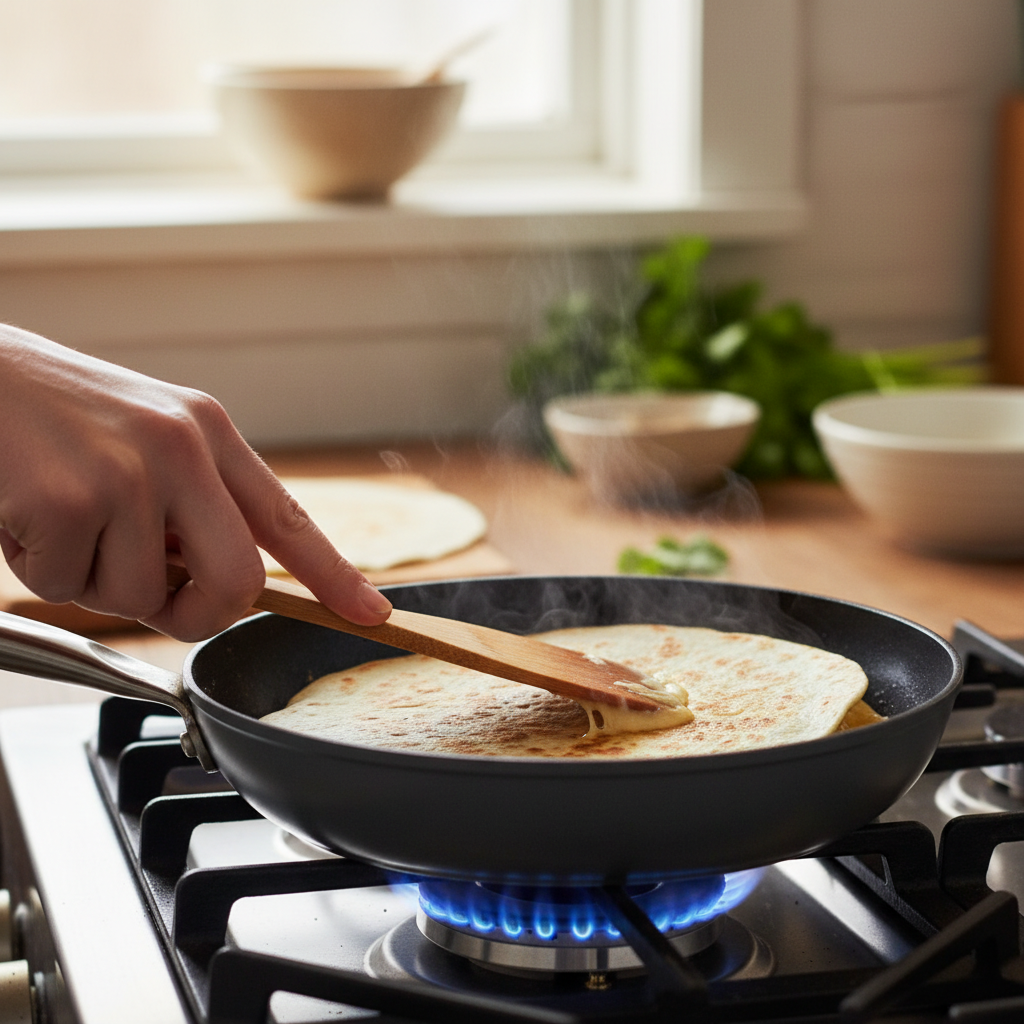
    How to cook lamb chops pan fry

    Perfectly seared lamb loin chops sizzling in a cast-iron skillet with rosemary and garlic, being turned by a hand with tongs.
    Photorealistic, professional food photography, high-quality food magazine photo. A close-up action shot of perfectly seared lamb loin chops sizzling vigorously in a hot cast-iron skillet. The chops have a beautiful, dark golden-brown crust with visible sear marks. Fresh sprigs of rosemary and crushed garlic cloves are nestled around the chops in the pan, releasing aromatics into the subtle steam rising. A skilled home cook’s hand, warm-toned and clean, is gently turning a chop with stainless steel tongs. The kitchen background is softly blurred, warm, and inviting, highlighting the cooking process.

    Ready to cook perfect lamb chops at home? Pan-frying is a fast and easy method for achieving a flavorful, golden-brown crust and a juicy, tender interior. This guide skips the complex steps and gives you simple advice for a fantastic meal every time.

    Step 1: Prepare the Lamb

    Properly preparing your lamb is the first step toward incredible flavor and a perfect cook. Following these key steps will set you up for success.

    • Pat Dry: Use paper towels to pat the lamb chops completely dry on all sides. A dry surface is crucial for getting a deep, brown sear; excess moisture will steam the meat instead of creating a crust.
    • Season Generously: Season both sides of each chop with a generous pinch of salt, freshly ground black pepper, and garlic powder. For an aromatic touch, add a little dried rosemary. Don’t be shy—this is where the flavor begins!
    • Bring to Room Temperature: Let the seasoned chops sit at room temperature for 15-20 minutes before cooking. This helps the lamb cook more evenly from edge to center, preventing the outside from overcooking while the inside comes up to temperature.

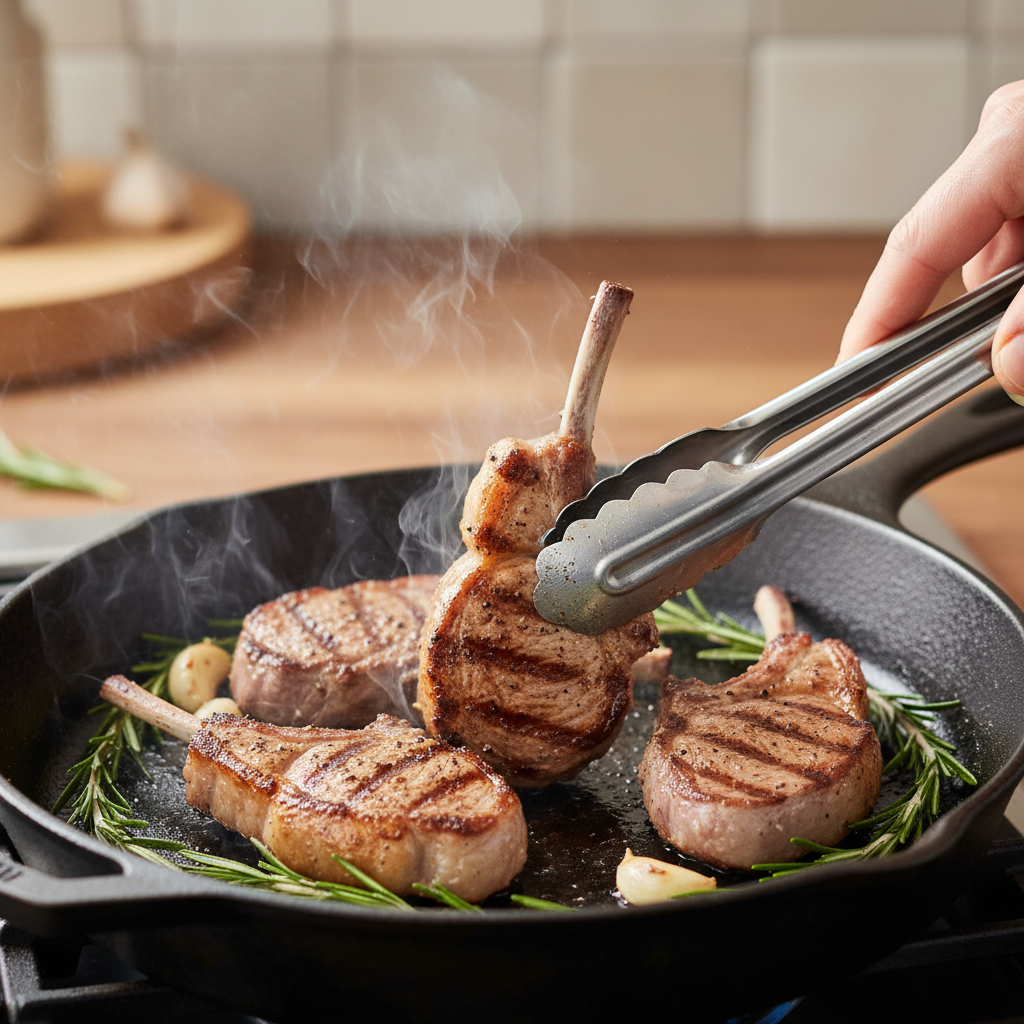
    Step 2: Sear for a Perfect Crust

    Searing is what creates that irresistible, flavorful crust. A hot pan and the right technique are all you need. Follow these steps for a perfect result.

    1. Heat Your Pan: Place a heavy-bottomed skillet, such as cast iron, over medium-high heat. Allow it to get very hot, which should take about 2-3 minutes. A properly heated pan is essential for a good sear.
    2. Add Oil: Add 1-2 tablespoons of a high-smoke-point oil, like olive oil or grapeseed oil, to the hot pan and swirl to coat the bottom.
    3. Sear the Chops: Carefully place the lamb chops in the pan, ensuring you don’t overcrowd it (cook in batches if needed). Sear for 2-4 minutes per side without moving them, until a deep, golden-brown crust forms. This step builds incredible flavor.
    4. Add Flavor (Optional): After flipping the chops, add 1 tablespoon of butter, a few sprigs of fresh rosemary, and crushed garlic cloves to the pan. As the butter melts, tilt the pan and spoon it over the chops (basting) as they cook. This adds a final layer of aromatic flavor.
    5. Check for Doneness: Cooking time will vary based on the thickness of your chops. For the most accurate results, use a meat thermometer. For medium-rare, aim for an internal temperature of 125-130°F (52-54°C). For medium, cook to 130-135°F (54-57°C) [source: https://www.fsis.usda.gov/food-safety/safe-food-handling-and-preparation/food-safety-basics/safe-minimum-internal-temperature-chart].

    Step 3: Rest for Juiciness

    Don’t skip this final, crucial step! Resting the lamb after cooking is the secret to ensuring every bite is tender and juicy.

    • Remove from Pan: Transfer the cooked lamb chops from the skillet to a clean cutting board or plate.
    • Tent with Foil: Loosely cover the chops with aluminum foil. This will keep them warm while preventing them from overcooking or steaming.
    • Rest for 5-10 Minutes: Let the lamb rest. This allows the juices to settle and redistribute throughout the meat, resulting in a much more tender and flavorful chop.
    • Serve and Enjoy: After resting, your perfectly cooked lamb chops are ready. Serve them immediately for a delicious, satisfying meal.

    What is the best lamb chops marinade?

    Classic Garlic & Herb Marinade Recipe

    Transforming simple lamb chop recipes into something special is easy with a great marinade. A classic garlic and herb marinade not only infuses your lamb with incredible flavor but also helps tenderize the meat, resulting in a more delicious and satisfying meal for your family.

    Here at Recipesmondial, we love this blend because it uses everyday ingredients you likely already have on hand. As an approachable home cooking essential, this simple recipe makes dinner enjoyable for everyone.

    Ingredients for Your Marinade:

    • 2 tablespoons olive oil
    • 4 cloves garlic, minced (about 1 tablespoon)
    • 1 tablespoon fresh rosemary, finely chopped (or 1 teaspoon dried)
    • 1 tablespoon fresh thyme, finely chopped (or 1 teaspoon dried)
    • 1 teaspoon dried oregano
    • 1 teaspoon salt
    • ½ teaspoon black pepper
    • 1 tablespoon lemon juice (freshly squeezed is best) or red wine vinegar

    Step-by-Step Marinade Instructions:

    1. Combine Ingredients: In a medium bowl, whisk together the olive oil, minced garlic, chopped rosemary, chopped thyme, and dried oregano.
    2. Add Seasoning: Stir in the salt and black pepper.
    3. Introduce Acidity: Add the lemon juice or red wine vinegar, which helps tenderize the lamb. Whisk everything until well combined.
    4. Prepare Lamb Chops: Pat your lamb chops dry with paper towels. This simple step helps the marinade adhere to the meat more effectively.
    5. Coat Evenly: Place the lamb chops in a shallow dish or a resealable plastic bag. Pour the marinade over them, making sure each lamb chop is fully coated.
    6. Chill: Cover the dish or seal the bag and place it in the refrigerator to marinate.

    Chef’s Tip: For an extra layer of flavor, add a pinch of red pepper flakes to give your quick lamb chops a subtle warmth.

    How Long to Marinate Lamb

    Marinating lamb chops for the proper amount of time is crucial for developing flavor and tenderness. The duration you choose can make a significant difference in the taste and texture of your final dish.

    Recommended Marinating Times:

    • Minimum Time (30 minutes to 1 hour): Even a short marinade helps flavors penetrate the surface of the meat. This is a great option for speedy dinners when you’re short on time.
    • Optimal Time (2-4 hours): For the best balance of flavor infusion and tenderizing, aim for this timeframe. It allows the herbs and garlic to deeply infuse the meat, resulting in juicy, flavorful lamb chops.
    • Maximum Time (Up to 12 hours): You can marinate lamb chops for up to 12 hours, which is especially effective for tougher cuts. However, for more delicate loin or rib chops, 12 hours is the absolute maximum.

    Important Considerations:

    • Refrigeration is Key: For food safety, always marinate lamb chops in the refrigerator, never at room temperature [1].
    • Avoid Over-Marinating: The acid in lemon juice or vinegar can begin to “cook” the meat over time, making its texture mushy rather than tender. Stick to less than 12 hours for acidic marinades.
    • Use Non-Reactive Containers: Use glass, ceramic, or food-grade plastic containers or bags for marinating. Metal can react with acidic ingredients and impart an off-flavor to your lamb chops.

    Following these simple guidelines will ensure your easy recipes turn out perfectly every time, helping you build confidence in the kitchen. Recipesmondial is here to guide you toward delicious, stress-free meals made easy.

    What to serve with lamb chops

    A complete dinner plate featuring two pan-seared lamb chops with creamy mashed potatoes and roasted green asparagus.
    Photorealistic, professional food photography, high-quality food magazine photo. A beautifully composed plated dinner featuring two perfectly cooked, tender pan-seared lamb loin chops. The chops are resting on a bed of creamy, smooth mashed potatoes. Alongside, there’s a vibrant green serving of perfectly roasted asparagus spears and a small pool of rich, glossy pan sauce drizzled over the lamb. The meal is presented on a modern white ceramic plate, set on a warm, rustic wooden dining table. The scene is illuminated by soft, natural light, creating an inviting and delicious ambiance, highlighting the textures and rich colors of the food.

    Classic Side Dishes

    Once your lamb chops are seared to perfection, it’s time to choose the right companions. A great side dish should complement the rich, savory flavor of the lamb without overpowering it. These classic choices are easy to prepare and always a hit, turning a simple main course into a satisfying, family-friendly meal.

    • Roasted Potatoes with Rosemary: For potatoes that are crispy on the outside and fluffy on the inside, toss wedges with olive oil, fresh rosemary, salt, and pepper. Roast them until golden brown for a simple side that always pleases.
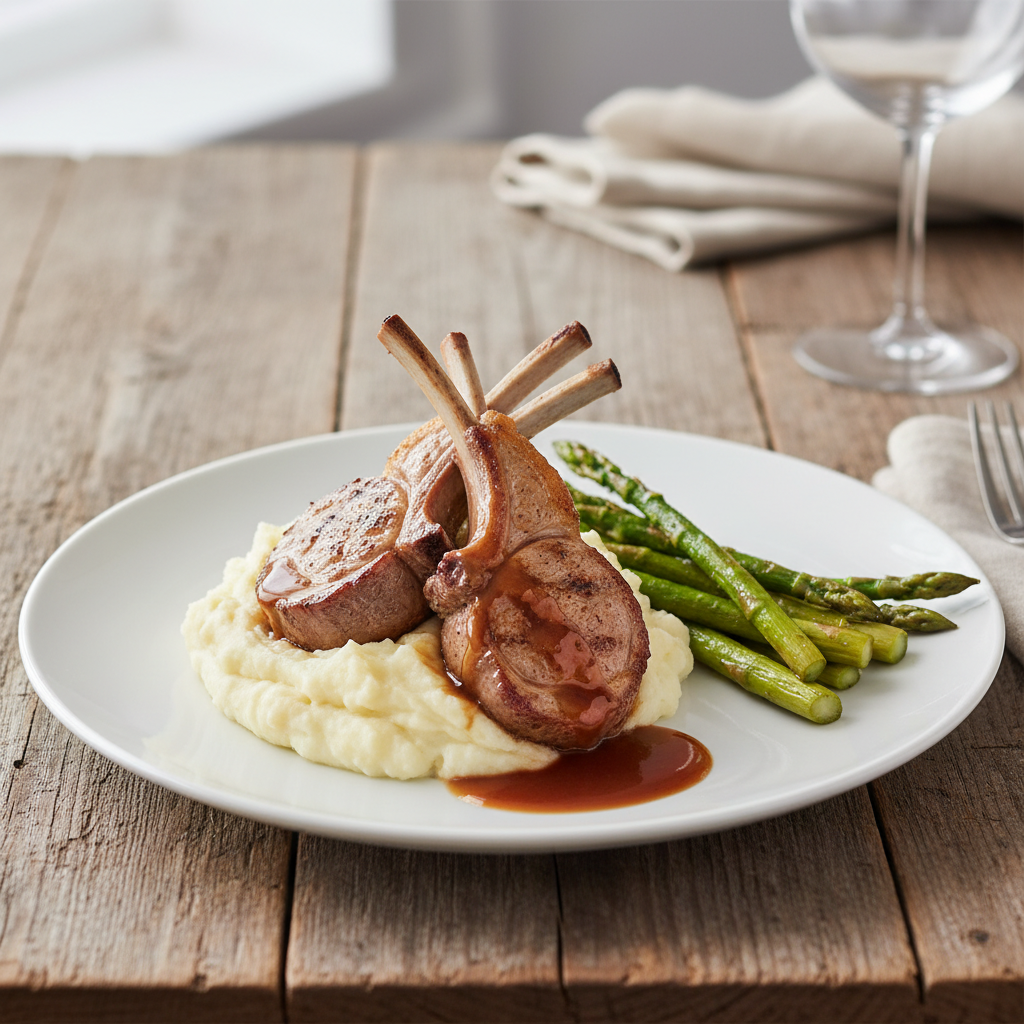
    • Creamy Mashed Potatoes: A timeless classic, smooth and buttery mashed potatoes provide a comforting contrast to the lamb. They are also perfect for soaking up any delicious pan juices.
    • Garlic Green Beans: Quick and flavorful, fresh green beans sautéed with garlic add a vibrant color and a welcome crunch. This side provides a lovely balance to the richness of the meat.
    • Asparagus with Lemon: Elegant and simple, lightly steamed or roasted asparagus is a perfect pairing. A final squeeze of fresh lemon brightens the entire plate and complements the lamb beautifully.
    • Creamy Polenta: As a rich and velvety alternative to potatoes, polenta offers a wonderfully comforting texture. It pairs beautifully with hearty meats like lamb.

    Each of these side dishes is designed to make your lamb chops shine, creating a delightful and balanced dining experience.

    Lighter, Fresher Options

    If you prefer a lighter touch, these fresh and vibrant side dishes offer a wonderful contrast to the lamb’s robust flavor. They are ideal for quick, healthy meals and prove that cooking can be enjoyable and stress-free.

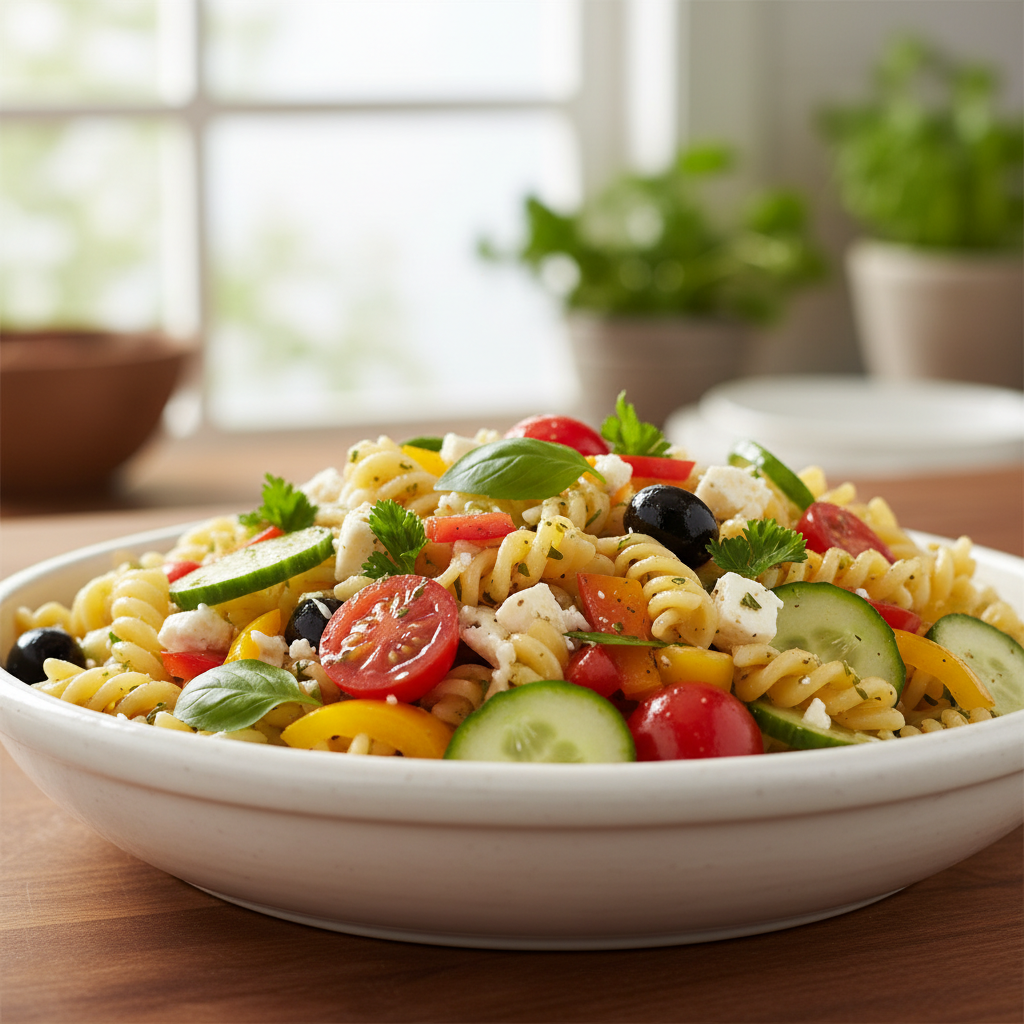
    • Mediterranean Quinoa Salad: For a colorful and healthy option, combine cooked quinoa with chopped cucumber, cherry tomatoes, red onion, and Kalamata olives. Dress it with a simple lemon-herb vinaigrette for a beginner-friendly dish that’s full of flavor.
    • Fresh Garden Salad with Vinaigrette: You can’t go wrong with a crisp green salad. Toss mixed greens and thinly sliced radishes with a simple homemade vinaigrette to add a fresh, delightful crunch to your meal.
    • Sautéed Spinach with Garlic: This nutritious side is incredibly fast to make. Simply wilt fresh spinach with a touch of garlic and olive oil for a dish that comes together in minutes.
    • Grilled Vegetable Medley: Grilling bell peppers, zucchini, and red onion until tender-crisp brings out their smoky sweetness. A final drizzle of balsamic glaze elevates this simple yet impressive side.
    • Lemon Herb Couscous: Create a light, aromatic base by infusing fluffy couscous with fresh lemon zest and chopped herbs like parsley or mint. This easy recipe adds instant sophistication to your plate.

    These fresh pairings help you create a flavorful and balanced meal with confidence, showing just how delicious simple recipes can be.

    Tips for Perfect, Tender Lamb Chops Every Time

    Cooking tender, juicy lamb chops is simpler than you might think! With a few expert tips, you can avoid common mistakes and achieve delicious, stress-free results every time.

    Mastering Your Lamb Chops: Essential Guidance

    • Bring Lamb to Room Temperature: Take your lamb chops out of the fridge 15-20 minutes before cooking. This simple step ensures they cook more evenly, preventing a tough exterior and an undercooked interior.
    • Pat Them Dry, Really Dry: Use paper towels to thoroughly pat the surface of your lamb chops. Moisture prevents a good sear, so a dry surface is essential for achieving that irresistible golden-brown crust.
    • Don’t Overcrowd the Pan: If necessary, cook your lamb chops in batches. Overcrowding lowers the pan’s temperature, which causes the lamb to steam instead of sear, leaving you with a pale, grey chop instead of a beautiful crust.
    • Start with a Hot Pan: Preheat your skillet over medium-high heat until it’s very hot before adding a little oil with a high smoke point. A hot pan immediately sears the meat, which helps lock in the juices and creates a fantastic crust.
    • Use a Meat Thermometer: A thermometer is your secret weapon for perfect lamb chops, as it eliminates all the guesswork. For an accurate reading, insert it into the thickest part of the chop without touching the bone.
      • For Medium-Rare: Cook until the internal temperature reaches 135-140°F (57-60°C).
      • For Medium: Aim for 140-145°F (60-63°C).
      • For Medium-Well: Go for 145-150°F (63-66°C).

      The USDA recommends a minimum safe internal temperature of 145°F (63°C) for lamb, followed by a 3-minute rest [2]. Using a thermometer ensures your chops are both safe and cooked exactly to your liking.

    • Rest Your Lamb Chops: Once cooked, transfer the chops to a cutting board and cover them loosely with foil for 5-10 minutes. This critical resting period allows the juices to redistribute throughout the meat, resulting in wonderfully tender and moist lamb. Skipping this step is a common cause of dry meat.
    • Season Generously: Lamb has a robust flavor that pairs well with strong seasonings, so don’t be shy. A generous sprinkle of salt and freshly ground black pepper is essential. For more flavor, consider adding garlic powder, onion powder, or a dash of dried herbs.

    Following these simple tips will transform your lamb chop cooking experience. You will confidently create flavorful meals and enjoy delicious, tender lamb chops every time!

    Frequently Asked Questions

    Can I make baked lamb chops instead?

    Absolutely! While pan-searing is quick and creates a fantastic crust, baking is another excellent option. It’s especially great for thicker chops or when you prefer a more hands-off approach to your meal.

    Here’s a simple method for tender, flavorful baked lamb chops:

    • Sear First (Optional, but Recommended): For the best flavor, briefly sear the seasoned chops in an oven-safe skillet for 2-3 minutes per side. This step creates a beautiful golden crust and seals in the juices.
    • Bake Until Done: Transfer the skillet (or place the chops in a baking dish) to a preheated 375°F (190°C) oven. Bake for 10-20 minutes, depending on the thickness of the chops.
    • Check Temperature: Use a meat thermometer to check for your desired doneness (see our temperature guide below).
    • Rest: Just like pan-seared chops, let them rest for 5-10 minutes after baking. This crucial step allows the juices to redistribute, ensuring every bite is wonderfully tender.

    Baking is an excellent, flavorful method for a simple weeknight dinner.

    What’s a good lamb shoulder chops recipe?

    Unlike quick-cooking loin or rib chops, lamb shoulder chops are thicker and have more connective tissue. This makes them perfect for slower cooking methods, like braising, which breaks down the tissue and makes the meat incredibly tender. The result is a comforting, hearty dish ideal for family-friendly meals.

    This beginner-friendly recipe for braised lamb shoulder chops is a fantastic place to start:

    Simple Braised Lamb Shoulder Chops:

    1. Brown the Chops: Season the chops generously with salt and pepper. In a large Dutch oven or oven-safe pot, sear them in olive oil over medium-high heat until browned on all sides. Remove the chops and set them aside.
    2. Sauté Aromatics: Add chopped onions, carrots, and celery to the pot and sauté for 5-7 minutes until softened. Stir in minced garlic and a sprig of fresh rosemary or thyme.
    3. Deglaze and Add Liquid: Pour in ½ cup of red wine or beef broth to deglaze the pot, scraping up any browned bits from the bottom. Stir in a tablespoon of tomato paste for depth.
    4. Braise to Perfection: Return the chops to the pot. Add enough beef or chicken broth to come halfway up their sides. Cover tightly and braise in a preheated 325°F (160°C) oven for 1.5 to 2 hours, or until the lamb is fork-tender.

    This slow-cooking approach transforms an affordable cut of lamb into a rich, tender, and incredibly satisfying meal.

    How do you know when lamb chops are done?

    The key to tender, juicy lamb chops is cooking them to the correct temperature. The most reliable way to check for doneness is with an instant-read meat thermometer, as visual cues can often be misleading.

    Here’s a guide to internal temperatures for different levels of doneness:

    • Rare: 125-130°F (52-54°C) [3]
    • Medium-Rare: 130-135°F (54-57°C)
    • Medium: 135-140°F (57-60°C)
    • Medium-Well: 140-145°F (60-63°C)
    • Well-Done: 145°F (63°C) and above

    Remember these crucial tips for perfect results:

    • Insert Correctly: Insert the meat thermometer into the thickest part of the chop, making sure to avoid touching the bone.
    • Carryover Cooking: Remove the lamb from the heat when it is about 5°F (3°C) below your target temperature. The internal temperature will continue to rise as the chops rest.
    • Resting is Essential: Don’t skip the rest! Let your lamb chops rest for 5-10 minutes after cooking. This allows the juices to redistribute, resulting in a much more tender and flavorful chop.

    With an instant-read thermometer and these simple steps, you’ll cook confidently and enjoy perfectly done lamb chops every time!


    Sources

    1. https://www.foodsafety.gov/food-safety-charts/marinades-and-food-safety
    2. https://www.fsis.usda.gov/food-safety/safe-food-handling-and-preparation/meat/lamb-from-farm-table
    3. https://www.fsis.usda.gov/food-safety/safe-food-handling-and-preparation/food-safety-basics/safe-minimum-internal-temperature-chart
  • Easy Goulash Recipe: A Simple Step-by-Step Guide for Beginners

    Easy Goulash Recipe: A Simple Step-by-Step Guide for Beginners

    Goulash is a comforting stew made with beef, onions, and paprika. This easy goulash recipe is an American-style version featuring ground beef and macaroni cooked in a rich, savory tomato sauce. It’s a one-pot, family-friendly meal that is perfect for a quick weeknight dinner and comes together in about 30 minutes.

    Are you looking for a comforting, hearty meal that won’t keep you in the kitchen for hours? We understand. Planning family-friendly dinners can feel like a constant quest for easy, flavorful recipes. Many home cooks feel overwhelmed by complex instructions or lack confidence when trying a new dish. But what if we told you that a classic, deeply satisfying goulash is surprisingly simple to master?

    At Recipesmondial, our mission is to make home cooking a joy, not a chore. That’s why we’ve crafted this ultimate easy goulash recipe. Forget the intimidating jargon; our step-by-step guide will walk you through creating a delicious beef goulash perfect for any weeknight. Whether you’re a beginner or an intermediate cook seeking new simple dinner recipes, you’ll learn to create flavorful meals with confidence and ease.

    Get ready to transform simple ingredients into a rich, savory masterpiece. This beginner-friendly guide ensures you can cook without stress, creating a Hungarian goulash that tastes like it took hours to prepare. Let’s dive in and discover why this is the perfect goulash recipe for busy families!

    Why Is This The Perfect Goulash Recipe for Busy Families?

    For busy families, a delicious, satisfying dinner without the kitchen chaos can feel like a dream. This goulash recipe makes it a reality. More than just a meal, it offers a solution to common dinner dilemmas and is designed with your busy schedule in mind for a truly stress-free cooking experience.

    At Recipesmondial, we believe cooking should be enjoyable, not a chore. This easy goulash recipe helps you put a flavorful, comforting classic on the table while also saving you precious time. It transforms simple ingredients into a meal your family will request again and again.

    Why Our Goulash Recipe Stands Out for Busy Families

    This beef goulash is the perfect weeknight solution for your bustling household because it seamlessly combines ease, flavor, and practicality. It’s a marvel of approachable home cooking.

    • Effortless Preparation: Forget complex instructions. This simple recipe features clear, step-by-step guidance, so even beginner cooks can feel confident in the kitchen. There are no overwhelming technical terms.
    • Family-Friendly Flavors: With a rich, savory taste that appeals to all ages, goulash is a true crowd-pleaser. Its comforting, hearty flavors make it a go-to meal the whole family will love.
    • Time-Saving Solution: Designed for your busy schedule, this meal comes together quickly. By minimizing active cooking time, it allows you to enjoy more precious moments with your family.
    • Budget-Friendly Ingredients: This goulash uses everyday pantry staples, which helps keep grocery costs down. It’s an excellent choice for budget-conscious cooking because eating well shouldn’t break the bank.
    • Versatile and Adaptable: This recipe is flexible, so you can easily make substitutions to suit your family’s tastes. It’s also perfect for meal prep—simply double the batch for quick lunches or dinners later in the week.
    • Confidence Booster: Mastering this flavorful meal will build your kitchen skills and confidence. You’ll discover that cooking delicious, simple dishes without stress can be your new reality.

    This goulash recipe is a testament to the Recipesmondial promise: to provide delicious, reliable, and approachable recipes. It’s designed to help you move from uncertainty to confidence, so you can start enjoying your time in the kitchen again.

    What Ingredients Do You Need for Easy Beef Goulash?

    For the Goulash:

    This comforting beef goulash recipe uses simple, everyday ingredients to create a meal packed with flavor. You likely have many of these staples in your pantry already. Here’s what you’ll need to get started.

    • 1 ½ pounds beef chuck roast: Cut into 1-inch cubes. This cut is perfect for slow simmering.
    • 2 tablespoons olive oil: For browning beef and sautéing vegetables.
    • 1 large yellow onion: Chopped. It adds a sweet, aromatic base.
    • 3 cloves garlic: Minced. Essential for deep, savory flavor.
    • 2 tablespoons tomato paste: Adds a concentrated boost of tomato flavor.
    • 1 (28-ounce) can crushed tomatoes: Forms the rich, flavorful base of the sauce.
    • 2 cups beef broth: Enhances the meaty flavor and creates a perfect consistency.
    • 1 tablespoon Worcestershire sauce: Adds a layer of umami and depth.
    • 2 tablespoons sweet Hungarian paprika: The signature spice for authentic goulash.
    • 1 teaspoon dried thyme: A classic herb that complements beef beautifully.
    • 2 bay leaves: Infuses subtle, earthy notes as the goulash simmers.
    • 1 teaspoon salt: Adjust to taste.
    • ½ teaspoon black pepper: For a gentle warmth.
    • 12 ounces egg noodles: Or your favorite short pasta, cooked separately for serving.
    • Optional: Fresh parsley: Chopped, for a bright garnish.
    • Optional: Sour cream: Adds a dollop of creamy richness when serving.

    Ingredient Substitutions & Variations

    Don’t be afraid to make this recipe your own. Feel free to adjust the ingredients based on what you have on hand or what your family prefers. Use these simple variations to accommodate different tastes and dietary needs.

    • Beef Alternatives:
      • Ground Beef: Use 1 ½ pounds of ground beef instead of chuck roast for a quick meal. Brown it well and drain any excess fat.
      • Pork Shoulder: Cubed pork shoulder also works wonderfully for a rich, tender stew.
    • Vegetable Boost:
      • Carrots and Celery: Add 1 cup of diced carrots and 1 cup of diced celery with the onion for extra flavor and nutrition.
      • Bell Peppers: For added sweetness and color, add sliced bell peppers (any color) during the last 30 minutes of simmering.
      • Mushrooms: Sliced mushrooms are a great addition for an earthy flavor. They can also be used as a meat substitute for a vegetarian option.
    • Pasta Choices:
      • Different Short Pasta: Instead of egg noodles, any short pasta like macaroni, penne, or rotini will work well.
      • Gluten-Free Pasta: Simply use your favorite gluten-free pasta to make this a gluten-friendly dish.
    • Spice it Up (or Down!):
      • Smoked Paprika: For a deeper, smoky flavor, try using a mix of sweet and smoked paprika.
      • A Touch of Heat: Add a pinch of cayenne pepper or a dash of hot sauce if you enjoy a little kick.
    • Broth Options:
      • Vegetable Broth: If you’re out of beef broth, a good quality vegetable broth is an excellent substitute.
    • Dairy-Free Creaminess:
      • Coconut Cream: For a dairy-free topping, a swirl of full-fat coconut cream can replace sour cream, adding a subtle richness.

    How to Make Goulash: A Step-by-Step Guide

    A close-up of a rustic cast-iron pot filled with rich, simmering beef goulash with tender beef and colorful vegetables on a stovetop.
    A professional food photography, photorealistic, high-quality food magazine photo of a large, rustic cast-iron pot of rich, simmering beef goulash on a stovetop. The goulash is bubbling gently, showcasing tender chunks of beef, colorful pieces of red and green bell peppers, and a thick, savory paprika-infused sauce. Soft, warm steam is subtly rising from the pot, indicating deliciousness. The lighting is warm and inviting, highlighting the deep, appetizing colors and textures of the dish, creating a comforting home-cooked feel.

    Step 1: Brown the Beef and Sauté Aromatics

    This first step builds a deep, savory base for your goulash. First, you’ll brown the beef to create a rich crust, and then you’ll sauté aromatics like onion and garlic to add warmth and complexity. Don’t rush this process—it’s the key to a flavorful result.

    1. Prepare Your Pan: Place a large Dutch oven or heavy-bottomed pot over medium-high heat and add 1 tablespoon of olive oil. Allow the oil to become hot enough to shimmer, but not smoke.
    2. Brown the Beef: Add 1.5 pounds of cubed beef chuck, stew meat, or ground beef to the hot pan in a single layer. To avoid overcrowding the pan and steaming the meat, work in batches if necessary. Cook for 5-7 minutes, turning occasionally, until the beef is well-browned on all sides. A dark crust equals more flavor. Transfer the browned beef to a plate and set it aside, leaving the drippings in the pot.
    3. Sauté the Onions: Add the remaining 1 tablespoon of olive oil to the pot. Add 1 large chopped yellow onion and cook for 5-7 minutes, stirring often, until softened and translucent.
    4. Add Garlic: Stir in 3 cloves of minced garlic and cook for 1 minute more until fragrant. Be careful not to burn the garlic, as it can quickly turn bitter.

    Chef’s Tip: Properly browning meat triggers the Maillard reaction, a chemical process that creates hundreds of new flavor compounds. Don’t skip this step; it’s essential for the richest-tasting goulash.

    Step 2: Create the Savory Sauce

    Next, you’ll create the rich, savory sauce that forms the heart of the goulash. By combining spices and liquids in the same pot, you’ll capture all the flavor from the beef and aromatics, turning it into a cohesive and comforting sauce.

    1. Toast the Spices: Reduce the heat to medium-low. Add 2 tablespoons of sweet paprika, 1 teaspoon of dried oregano, 1/2 teaspoon of salt, and 1/4 teaspoon of black pepper to the pot. Stir constantly for 1 minute to toast the spices and release their aroma.
    2. Deglaze the Pan: Pour in 1/2 cup of beef broth. Use a wooden spoon to scrape up any flavorful browned bits stuck to the bottom of the pot.
    3. Add Liquid Ingredients: Stir in 1 (14.5-ounce) can of diced tomatoes with their juice, 1 (8-ounce) can of tomato sauce, and 1 tablespoon of Worcestershire sauce. For a deeper tomato flavor, add 1 tablespoon of tomato paste as well.
    4. Return the Beef: Add the browned beef back into the pot. Stir gently to ensure the beef is fully coated in the sauce.

    Substitution Idea: For a richer, slightly smoky flavor, you can use smoked paprika instead of sweet paprika. This offers a lovely twist for those who enjoy a bolder taste.

    Step 3: Simmer to Perfection

    This step requires patience, but the reward is worth it. A long, gentle simmer makes the beef incredibly tender while allowing the flavors to meld into a rich, cohesive sauce. This slow cooking process is what creates that classic, comforting goulash taste.

    1. Bring to a Simmer: Increase the heat to medium-high and bring the sauce to a gentle bubble.
    2. Reduce Heat and Cover: Immediately reduce the heat to low to maintain a gentle simmer, not a boil. Cover the pot with a tight-fitting lid.
    3. Cook Until Tender: Simmer the goulash for 1.5 to 2 hours, stirring occasionally to prevent sticking. The beef is ready when it is fork-tender and easily falls apart. This slow cooking time is essential for maximum tenderness.

    Helpful Hint: If the sauce thickens too much during simmering, stir in a splash of beef broth or water until it reaches a rich, hearty consistency that can perfectly coat the pasta.

    Step 4: Cook and Add the Pasta

    In this final step, you’ll cook the pasta and combine it with the goulash. Cooking the pasta separately and adding it at the end is key to achieving the perfect texture. This method ensures the pasta is perfectly coated in sauce without becoming mushy.

    1. Cook the Pasta: During the last 20 minutes of the goulash’s simmer time, bring a separate large pot of salted water to a rolling boil. Add 2 cups of elbow macaroni or another small pasta shape and cook according to package directions until al dente (tender but with a slight bite).
    2. Drain the Pasta: Drain the cooked pasta well in a colander. Do not rinse it.
    3. Combine Goulash and Pasta: Stir the drained pasta directly into the pot with the finished goulash. Mix gently until the pasta is fully coated in the sauce.
    4. Serve Immediately: Ladle the goulash into bowls. If desired, garnish with fresh parsley. Serve hot and enjoy.

    Meal Prep Tip: For the best leftovers, store the goulash sauce and cooked pasta in separate containers in the refrigerator. This prevents the pasta from absorbing too much liquid and becoming soft. Combine and reheat portions as needed for optimal texture.

    Helpful Tips for Making the Best Goulash

    Don’t Overcook the Pasta

    Perfect timing is essential when cooking goulash, especially for the pasta. A common pitfall is overcooking it, which can turn a hearty goulash into a mushy disappointment. To avoid this, aim for al dente pasta—tender with a slight bite.

    Overcooked pasta doesn’t just lose its texture; it also absorbs too much of the rich, savory sauce, leaving the final dish dry and less flavorful. To get it right, follow the recipe’s guidance carefully. Adding the pasta at the precise moment ensures it finishes cooking in the sauce to perfection. The goal is for every forkful to be a perfect blend of tender beef, flavorful sauce, and perfectly cooked pasta.

    Let the Flavors Meld

    Like many stews, goulash tastes even better with time. The key is allowing the flavors to “meld,” or fully combine, which creates a deeper and more complex taste. As the goulash rests, the spices and ingredients continue to infuse the sauce, enriching the entire dish.

    While it’s tempting to eat it immediately, letting your goulash rest after cooking is worth the wait. Even just 30 minutes off the heat can make a noticeable difference. For the best possible flavor, prepare it a day in advance. Gently reheating it the next day allows the flavors to intensify even further, turning a great meal into an amazing one. This simple step is the secret to elevating your goulash.

    How to Store and Reheat Goulash

    Since goulash often tastes even better the next day, it’s a fantastic choice for meal prep. To enjoy it again safely, proper storage and reheating are key. Here’s how to do it right.

    • Refrigeration: Let the goulash cool at room temperature for no more than two hours before transferring it to an airtight container. It will keep in the refrigerator for up to 3-4 days [source: https://www.foodsafety.gov/food-safety-charts/cold-food-storage-chart], making it perfect for quick lunches or dinners.
    • Freezing: For longer storage, goulash freezes beautifully. Once cooled, pack it into freezer-safe containers or bags, removing as much air as possible to prevent freezer burn. It can be frozen for up to 2-3 months. For best results, thaw it overnight in the refrigerator before reheating.
    • Reheating on the Stovetop: Place the goulash in a saucepan over medium-low heat, stirring occasionally until it simmers gently. If the sauce has thickened, add a splash of beef broth or water to reach your desired consistency.
    • Reheating in the Microwave: For a single serving, place the goulash in a microwave-safe bowl. Heat it on medium power, stirring every minute or so until it is piping hot throughout. You can also add a little liquid to loosen the sauce.

    Before serving, always ensure your leftovers reach an internal temperature of 165°F (74°C) for food safety. With these storage tips, you can enjoy your flavorful goulash more than once.

    What Should You Serve With Goulash?

    A beautifully plated bowl of beef goulash garnished with parsley, served with fluffy egg noodles and a dollop of sour cream on a warm dining table.
    A professional food photography, photorealistic, high-quality food magazine photo of a perfectly plated bowl of hearty homemade beef goulash, garnished with a sprinkle of fresh chopped parsley. The goulash is served alongside a generous portion of fluffy, golden egg noodles and a dollop of sour cream on a warm, inviting wooden dining table. The setting is cozy and friendly, with soft, natural light illuminating the dish, making it look incredibly appetizing and comforting, ready for a family meal.

    Our easy goulash recipe is a hearty, all-in-one meal featuring tender beef and pasta in a rich tomato sauce. To make your dinner even more special, consider adding a simple side dish. The right pairing creates a balanced, flavorful experience for your family, and these easy suggestions are perfect for any busy weeknight.

    Complementary Sides for Your Beef Goulash

    The best sides for goulash either offer a fresh, crisp contrast to its richness or help you soak up every drop of the delicious sauce. Here are a few fantastic, easy-to-prepare options:

    • Crusty Bread or Garlic Bread: A classic for a reason, warm crusty bread is perfect for soaking up the savory goulash sauce. Toasted garlic bread adds another layer of flavor, making this a simple and beloved addition to the meal.
    • Simple Green Salad: For a quick and healthy option, a crisp green salad provides a refreshing balance to the goulash’s richness. Simply toss mixed greens, cherry tomatoes, and cucumber slices with a light vinaigrette.
    • Cucumber Salad: Offering a cool, tangy counterpoint, this refreshing salad is easy to prepare. Just toss thinly sliced cucumbers with vinegar, dill, and a pinch of sugar for a bright side that cuts through the hearty sauce.
    • Steamed Green Beans or Broccoli: For a simple, nutritious side, quickly steam some green beans or broccoli. They add vibrant color to your plate, and a drizzle of olive oil with a sprinkle of salt is all they need to be delicious.
    • Roasted Root Vegetables: Roasting vegetables like carrots and parsnips with olive oil brings out their natural sweetness. This adds a more substantial, flavorful layer of texture to your meal.

    Making Mealtime Easy and Enjoyable

    Choosing the right side dish transforms a simple goulash into a complete and satisfying meal your family will love. At Recipesmondial, we believe cooking should be enjoyable, not stressful. Our goal is to help you gain confidence in the kitchen with approachable recipes and effortless meal-planning ideas so you can focus on sharing delicious food with your loved ones. Explore our platform for more quick meal solutions and beginner-friendly recipes.

    Frequently Asked Questions About Goulash

    What is the difference between Hungarian goulash and American goulash?

    If you’ve ever wondered about the difference, you’re not alone! While both are comforting dishes, they come from distinct culinary traditions. As a result, they offer unique flavors and textures, making each one a great family-friendly meal.

    Here’s a simple breakdown:

    Feature Hungarian Goulash American Goulash
    Origin Hungary, a traditional stew or soup. Developed in the United States, often called “American chop suey.”
    Main Ingredients Plenty of beef (or other meat), onions, and a generous amount of paprika. It often includes carrots, potatoes, and sometimes caraway seeds. Ground beef, pasta (like elbow macaroni), canned tomatoes, onions, and often bell peppers.
    Consistency A hearty, rich, and thick stew or soup meant to be eaten with a spoon. A saucy, casserole-like dish that is typically thicker than Hungarian goulash but not as stew-like.
    Spice Profile Deep, earthy, and aromatic from sweet Hungarian paprika, which provides a warm, rich flavor. Savory and tomato-based, with milder seasonings like Italian seasoning or chili powder.
    Serving Often served on its own, with a slice of rustic bread, or with a dollop of sour cream. Typically served as a one-pot meal, perfect for busy families looking for simple dinner recipes.

    Our easy goulash recipe leans toward the American style, making it an approachable home cooking dish. By simplifying dinner prep, it delivers a flavorful meal with minimal fuss, which is perfect for beginners.

    Can I make this goulash recipe in a slow cooker?

    Absolutely! A slow cooker is a fantastic tool for making this recipe, as it creates tender, flavorful meals with minimal effort. It’s especially useful for busy families and for meal prep. Better yet, adapting our goulash recipe for your slow cooker is simple and transforms the cooking experience into an even more relaxed process.

    Follow these easy steps:

    • Brown the Beef: First, brown the beef in a skillet on the stovetop and drain any excess fat. This step is vital for developing a deep, rich flavor, so don’t skip it!
    • Sauté Aromatics: Next, briefly sauté the onions and garlic in the same skillet until they soften and release their aroma.
    • Combine Ingredients: Transfer the browned beef, sautéed aromatics, tomatoes, broth, and seasonings to your slow cooker. Stir well to combine.
    • Cook Low and Slow: Cook on low for 6-8 hours or on high for 3-4 hours. During this time, the beef will become wonderfully tender as all the flavors meld together.
    • Add Pasta: About 30-45 minutes before serving, stir in the uncooked pasta. If the sauce seems too thick, add a little extra liquid. Continue cooking until the pasta is tender.

    Using a slow cooker is a fantastic way to enjoy this hearty goulash. Because you can prepare it ahead, it helps reduce stress at mealtime and ensures a delicious, reliable result every time.

    What is the best beef to use for beef goulash?

    Choosing the right cut of beef is key to a delicious goulash. For this recipe, you’ll want a cut that becomes rich and tender after simmering, which is why meats designed for slow cooking are the best choice. These cuts offer the ideal flavor and texture for a hearty stew.

    Here are our top recommendations for beef goulash:

    • Chuck Roast: Often called a “chuck eye roast” or “blade roast,” this cut is a fantastic choice. Its marbling (intramuscular fat) breaks down during slow cooking, making the meat incredibly tender and juicy.
    • Stew Beef/Stew Meat: Most grocery stores sell pre-cut “stew beef,” which usually comes from the chuck or round. It’s a convenient, budget-friendly option that’s perfect for beginner-friendly recipes.
    • Round Steak (Bottom Round, Top Round): While leaner than chuck, these cuts can also work well. Just be sure to cut them into smaller pieces and allow for a longer cooking time to ensure they become tender.

    For the best results, we highly recommend chuck roast. Its marbling guarantees a melt-in-your-mouth texture that will elevate your goulash. Best of all, chuck roast is generally affordable, making it perfect for budget-friendly cooking without sacrificing taste.

    What kind of pasta works best for goulash?

    In American-style goulash, the right pasta can make all the difference. You’ll want a shape that can stand up to simmering in the sauce while being easy to eat. The best choices are pastas that absorb flavor and hold their shape, ensuring a comforting, balanced bite every time.

    Here are the best pasta choices for goulash:

    • Elbow Macaroni: This is the classic choice. Its small, curved shape is perfect for scooping up the savory sauce and ground beef.
    • Ditalini: These tiny, tube-shaped pasta pieces are even smaller than elbow macaroni. They are excellent for blending seamlessly into the sauce.
    • Small Shells (Conchigliette): The hollows in small shell pasta are perfect for catching bits of meat and sauce, adding delightful texture to each spoonful.
    • Rotini or Spirals: These corkscrew shapes are also a great choice, as their nooks and crannies excel at holding the rich goulash sauce.
    • Penne or Ziti (cut short): If you prefer a slightly larger bite, short-cut penne or ziti can work well. Just make sure the pieces are small enough to be easily managed in one spoonful.

    Regardless of the shape you choose, be careful not to overcook the pasta. Add it directly to the simmering sauce near the end of the cooking time. This method ensures it cooks to a perfect al dente texture without becoming mushy, leading to a more satisfying and reliable result.

  • Easy Homemade Taco Seasoning Recipe (Better Than a Packet!)

    Easy Homemade Taco Seasoning Recipe (Better Than a Packet!)

    A homemade taco seasoning recipe combines common pantry spices like chili powder, ground cumin, paprika, garlic powder, onion powder, and dried oregano. Making your own allows you to control the ingredients, adjust the salt and spice levels to your liking, and avoid the additives found in store-bought packets.

    Store-bought taco seasoning is convenient, but a homemade blend offers a fresher, more vibrant flavor. If you ever feel overwhelmed by complex recipes or unsure how to cook healthy, tasty meals quickly, you’re not alone. The good news is, creating an amazing taco experience doesn’t have to be complicated. It’s time to ditch those one-note packets and elevate your culinary game with a simple, yet incredibly flavorful homemade taco seasoning recipe.

    At Recipesmondial, we believe cooking should be enjoyable, not stressful. That’s why we’re sharing our easy homemade taco seasoning recipe, designed with beginner-friendly recipes in mind. This blend does more than make your weeknight simple dinner recipes more delicious—it puts you in control. You can customize the ingredients, adjust the spice level for your family, and build confidence in your skills. With our step-by-step guidance, you’ll see how easy it is to transform everyday pantry staples into something extraordinary.

    This article will show you how to create the best homemade taco seasoning, far superior to anything from a store. We’ll cover the essential ingredients, offer practical tips for making it mild, spicy, or low-sodium, and explain how to store it for maximum freshness. Get ready to cook confidently, savor incredible flavors, and make every taco night a delicious success. Let’s dive in!

    Why Bother Making Homemade Taco Seasoning?

    A close-up of a delicious, vibrant beef taco, generously filled with seasoned meat, fresh lettuce, tomatoes, and cheese.
    Professional food photography, photorealistic, high-quality food magazine photo: A mouth-watering, close-up shot of a perfectly assembled, vibrant beef taco. The taco is generously filled with freshly seasoned ground beef, crisp shredded lettuce, diced ripe tomatoes, and a sprinkle of melted cheddar cheese, all nestled in a warm, soft corn tortilla. The taco is held by a real human hand (warm and inviting) or resting on a simple, rustic ceramic plate. The background is a subtly blurred, warm-toned home kitchen setting, suggesting a cozy mealtime. Emphasize freshness, abundant flavor, and homemade appeal. Natural, inviting lighting. No artistic interpretations, no illustrations, no vector graphics, no abstract art.

    If you’ve ever grabbed a packet of taco seasoning and wondered if there’s a better way, we get it. While those packets are convenient, making your own is a kitchen superpower. It’s surprisingly easy, tastes incredible, and gives you complete control over the flavor.

    Taking this one simple step can change your taco night forever and boost your kitchen confidence. Here’s why making a homemade taco seasoning recipe is absolutely worth it:

    Unbeatable Flavor and Freshness

    • Taste the Difference: Store-bought packets often contain fillers and can sit on shelves for ages. In contrast, freshly mixed spices burst with a vibrant flavor that will make your tacos taste incredible.
    • Customization is Key: Love an extra kick of spice? Prefer less salt? Making your own blend means you control every ingredient, tailoring the taste perfectly to your preference.
    • No More Bland Meals: Say goodbye to generic flavors. Your homemade blend will elevate not just tacos, but countless other dishes too.

    Know What You’re Eating

    • Control Your Ingredients: Many commercial taco seasonings hide unwanted additives like anti-caking agents, excess sugar, and artificial flavors.
    • Dietary Needs Made Easy: Whether you’re watching your sodium or managing allergies, crafting your own blend ensures it perfectly fits your family’s needs. This makes it easier to create healthy and balanced meals for everyone. [1]
    • Simple, Wholesome Goodness: Your homemade blend uses everyday spices from your pantry, so you know exactly what’s in it—no mysterious ingredients.

    Save Money and Time

    • Budget-Friendly: While individual spices have a small upfront cost, they are far more economical in the long run. You can make many batches for the price of just a few packets.
    • Always Ready: Mix up a big batch once and store it in your pantry. It will always be ready for quick weeknight meals, eliminating last-minute grocery runs and making meal prep a breeze.
    • Stress-Free Cooking: Having your go-to seasoning ready simplifies mealtime, helping you whip up delicious, family-friendly meals without the stress.

    Boost Your Cooking Confidence

    • Empowering Experience: Creating your own spice blend is a simple yet powerful accomplishment. It’s an easy first step toward building fundamental cooking skills.
    • Demystify Spices: You’ll become more familiar with individual spices, which empowers you to experiment in the kitchen and start cooking with confidence.
    • From Uncertainty to Flavor Pro: This simple recipe is a fantastic confidence-builder. You’ll learn how to create amazing flavor from scratch and enjoy cooking without stress. Recipesmondial is here to help you every step of the way.

    What are the ingredients in taco seasoning?

    An overhead flat lay of various vibrant, individual spices like chili powder, cumin, and paprika arranged on a wooden table, ready for homemade taco seasoning.
    Professional food photography, photorealistic, high-quality food magazine photo: An overhead flat lay composition showcasing the individual vibrant ingredients for homemade taco seasoning. Small, distinct piles or elegant ceramic bowls of ground chili powder, ground cumin, smoked paprika, dried oregano, garlic powder, onion powder, sea salt, and black pepper are arranged neatly on a light, rustic wooden surface. The spices should be rich in color and texture. Natural, bright, diffused lighting, creating subtle shadows. No artistic interpretations, no illustrations, no vector graphics, no abstract art.

    Crafting your own homemade taco seasoning is incredibly rewarding because it puts you in control of the flavors and ingredients. You can skip the hidden additives and excess sodium common in store-bought packets and instead use simple spices you already have in your pantry. Let’s break down the core ingredients that make up the best taco seasoning blend.

    Chili Powder: The Base of Your Blend

    Chili powder is the heart of any good taco seasoning, providing a warm and earthy foundation. While pre-made chili powder is a blend of ground dried chiles and other spices, we add ingredients like cumin and oregano separately for more control over the final taste. You can find different varieties, from mild ancho to vibrant New Mexico chili powder, each offering a unique depth of flavor.

    Cumin and Paprika: For Warmth and Color

    These two spices are essential for achieving that classic taco flavor.

    • Cumin: This spice brings a distinctive smoky and earthy warmth. An irreplaceable ingredient in many Mexican-inspired dishes, a little goes a long way to build depth.
    • Paprika: Paprika adds beautiful color and a mild, sweet, or smoky flavor. Sweet paprika is common, offering a rich red hue. Smoked paprika, on the other hand, provides a deeper, campfire-like aroma and is a fantastic addition for an extra smoky kick.

    Garlic Powder and Onion Powder: The Savory Duo

    Garlic and onion powder are the secret weapons for savory richness, delivering concentrated flavor in a way fresh versions can’t in a dry mix. Using powdered aromatics is key because they disperse evenly throughout the seasoning and keep it shelf-stable, ensuring a consistent and flavorful base in every bite.

    Dried Oregano: For an Herbal Touch

    Oregano adds a subtle, herbaceous note with a slightly bitter, peppery, and aromatic quality. While any dried oregano you have will work beautifully, Mexican oregano is often used in authentic blends for its brighter, citrusy notes compared to Mediterranean oregano [2]. It provides an essential herbal balance to the seasoning.

    Salt, Pepper, and Optional Spices

    Finally, salt and pepper are crucial for bringing the blend together. Salt enhances all the other flavors, while black pepper adds a gentle, sharp heat.

    You can also customize your seasoning with optional spices:

    • Cayenne Pepper: For a spicy kick, add a pinch of cayenne. It’s perfect for making your meals a bit more adventurous.
    • Coriander: Ground coriander offers a subtle citrusy, floral note that brightens the overall flavor profile.
    • Smoked Paprika (if not already using): If your main paprika is sweet, adding a small amount of smoked paprika can deepen the smoky undertones.
    • Sugar: A tiny pinch of granulated sugar can balance the savory and spicy notes while helping the meat caramelize as it cooks.

    These simple ingredients come together to create a robust and flavorful homemade taco seasoning. It’s truly better than any store-bought packet and makes weeknight dinners incredibly easy and delicious!

    How to Make Taco Seasoning: A Simple Step-by-Step Guide

    A home cook's hands are shown up close, whisking reddish-brown homemade taco seasoning in a glass bowl.
    Professional food photography, photorealistic, high-quality food magazine photo: A close-up shot of a real human home cook’s hands (warm skin tone) gently whisking a blend of reddish-brown dry spices in a small, clear glass mixing bowl. A small metal whisk is actively mixing the powders. The background is a softly blurred, warm-toned kitchen counter or a light-colored wooden table, suggesting a clean, approachable home kitchen environment. Soft, natural light illuminates the scene, highlighting the texture of the spices. No artistic interpretations, no illustrations, no vector graphics, no abstract art.

    Step 1: Measure Your Spices

    Creating your own flavorful homemade taco seasoning begins with measuring your ingredients. Precise measurements ensure a balanced and delicious blend every time, making this recipe perfect for beginners.

    First, gather all your spices and use measuring spoons for accuracy. This simple preparation helps you cook confidently and avoids any last-minute searching. For the best taste, always use the freshest spices possible.

    • 2 tablespoons chili powder: This forms the delicious base of your blend.
    • 1 tablespoon ground cumin: Adds a warm, earthy flavor.
    • 1 tablespoon paprika (sweet or smoked): For vibrant color and a hint of sweetness or smokiness.
    • 1 teaspoon garlic powder: A savory essential for depth.
    • 1 teaspoon onion powder: Enhances the deep savory notes.
    • 1/2 teaspoon dried oregano: Brings an aromatic, herbaceous touch.
    • 1 teaspoon salt: Balances all the wonderful flavors.
    • 1/2 teaspoon black pepper: Adds a gentle, subtle kick.
    • Optional: 1/4 teaspoon cayenne pepper (for heat): Skip this if you prefer a mild blend.

    Having everything measured out beforehand makes the next step quick and stress-free, leading to simple and reliable meal solutions.

    Step 2: Mix Them Together

    Now it’s time to combine your spices. This simple step is where your homemade taco seasoning truly comes to life, creating a quick win for flavorful meals.

    To guarantee every bite of your tacos will be bursting with flavor, you must ensure all the spices are evenly distributed. No one wants a mouthful of just chili powder!

    • In a small bowl: Add all your measured spices, then use a fork or a small whisk to gently mix them until they are well combined.
    • Alternatively, in a small jar: Place all the spices inside, close the lid tightly, and shake vigorously for 30-60 seconds. This is often the easiest method and helps break up any clumps.

    Keep mixing until there are no visible streaks of individual spices. Your final blend should have a consistent color and texture.

    Step 3: Store for Maximum Freshness

    Proper storage is key to keeping your homemade taco seasoning fresh and potent. Storing it correctly ensures the flavor will last for many family-friendly meals and deliver reliable results every time you cook.

    Air, light, and moisture are the enemies of spice freshness. Protecting your blend from these elements will make it taste great for longer and help you maximize your ingredients.

    • Choose an airtight container: A small glass jar with a tight-fitting lid is ideal, as it prevents air from degrading the spices. You can also use a reusable spice jar.
    • Find a cool, dark place: Store your seasoning away from direct sunlight and heat. A pantry or cupboard, away from the stove, is the perfect spot.

    Your homemade blend will stay fresh for about 6 months to 1 year [3]. Since spices lose their potency over time, always give the seasoning a sniff before using it. If the aroma is faint, it might be time to make a fresh batch.

    With these steps, you’re ready to enjoy delicious and flavorful meals, building your kitchen confidence with Recipesmondial!

    How much taco seasoning and water for 1 pound of meat?

    One of the best things about a homemade taco seasoning recipe is having it ready for quick meals. For family-friendly dinners like tacos, using the right proportions is key to perfect flavor. For 1 pound of ground meat (such as beef, turkey, or chicken), we recommend this specific ratio for delicious results every time.

    Recommended Proportions for 1 Pound of Meat

    To ensure your tacos are bursting with flavor, here’s how much of your homemade taco seasoning and water you will need:

    • Homemade Taco Seasoning: Use about 2 tablespoons. This amount provides a robust flavor that rivals store-bought packets. You can always add more to taste if you prefer a stronger spice level.
    • Water: Add 1/2 cup (120 ml). The water helps the spices bloom and creates a rich sauce that coats the meat, preventing it from drying out.

    Step-by-Step Cooking Instructions

    Follow these simple steps to turn plain ground meat into a flavorful taco filling:

    1. Brown the Meat: In a large skillet, cook 1 pound of ground meat over medium-high heat, breaking it apart with a spoon as it cooks.
    2. Drain Excess Fat: Once the meat is fully browned, carefully drain the excess grease from the pan. This keeps your tacos from being too oily.
    3. Add Seasoning: Stir in 2 tablespoons of your homemade taco seasoning. Cook for one minute, stirring constantly to toast the spices and deepen their flavor.
    4. Pour in Water: Add 1/2 cup of water to the skillet and bring the mixture to a simmer.
    5. Simmer and Thicken: Reduce the heat to low and let it simmer for 5-7 minutes. The sauce will thicken and cling to the meat as most of the water evaporates.

    Tips for Perfect Taco Meat

    • Adjust to Taste: If you like things spicier, add a pinch of chili powder or cayenne pepper. For a milder flavor, start with 1.5 tablespoons of seasoning and add more if needed.
    • Consistency Check: If the mixture seems too dry, add another tablespoon or two of water. If it’s too watery, continue to simmer for a few more minutes until it reaches your desired thickness.
    • Meat Options: This ratio works wonderfully for ground beef, turkey, or chicken, making it a versatile base for many easy recipes and family-friendly meals.

    With these straightforward steps and clear measurements, you can cook with confidence. Say goodbye to guesswork and hello to delicious, flavorful tacos in no time.

    How Can You Customize This Recipe?

    Making it Mild

    When you make your own homemade taco seasoning, you control the flavor. To create a milder blend for kids or anyone sensitive to spice, simply adjust the heat. This ensures everyone can enjoy your family-friendly meals.

    • Reduce Chili Powder: Chili powder provides the primary heat, so start by using half the recommended amount.
    • Skip the Cayenne Pepper: Our original recipe includes an optional pinch of cayenne. Omit this completely for a much milder flavor profile.
    • Add Sweet Paprika: Increase the amount of sweet paprika slightly. This adds beautiful color and a mild, warm flavor without any heat.

    These simple tweaks create a delicious seasoning that everyone at the table will love, allowing you to customize the recipe with confidence.

    Making it Spicy

    If you’re ready to turn up the heat, customizing your taco seasoning recipe is a fun way to explore new flavors. It’s the perfect choice for anyone who loves a fiery punch in their meals.

    • Increase Cayenne Pepper: Double or even triple the amount of cayenne. Add it in small increments, tasting as you go, until you reach your desired heat level.
    • Add Crushed Red Pepper Flakes: A teaspoon or two of crushed red pepper flakes will deliver a noticeable warmth and add a nice textural element.
    • Include Chipotle Powder: For a smoky heat, stir in 1/2 to 1 teaspoon of chipotle powder. This provides a deep, robust spiciness.
    • Use a Spicier Chili Powder: Some chili powders are inherently hotter than others. Look for varieties labeled “hot chili powder” or “Ancho chili powder” for a more intense base.

    Remember to taste the seasoning as you add more heat. This simple adjustment gives you full control over your culinary adventure and helps you build confidence as you cook.

    Making it Smoky

    Adding a smoky depth to your homemade taco seasoning is a simple way to elevate its flavor. This easy technique introduces a rich, complex taste to your meals, making even quick dishes feel more special.

    • Use Smoked Paprika: Swap out regular paprika for smoked paprika. This single ingredient is a game-changer for adding a natural, savory smoky flavor.
    • Incorporate Chipotle Powder: As mentioned for spiciness, chipotle powder also brings a wonderful smoky note. Start with 1/2 teaspoon and adjust to your preference.
    • A Pinch of Cumin Seed: While not directly smoky, lightly toasting whole cumin seeds before grinding them adds a deeper, earthier aroma that complements smoky flavors.

    These simple additions will transform your basic seasoning into something memorable. This easy tweak is a great way to inspire creativity in the kitchen.

    Making a Low-Sodium Version

    If you’re monitoring your sodium intake, creating a low-sodium taco seasoning recipe is a practical way to enjoy healthy meals without sacrificing flavor. This modification is easy to do and perfect for fitting specific dietary needs.

    • Omit or Reduce Salt: The easiest method is to leave the salt out completely or significantly reduce the amount in the blend.
    • Add Salt at the Table: Instead of seasoning the entire batch, allow individuals to add salt to their finished dish. This gives everyone control over their personal intake.
    • Boost Other Flavors: Compensate for less salt by increasing other aromatic spices. Try adding an extra 1/2 teaspoon each of garlic powder, onion powder, and cumin.
    • Fresh Brightness: When cooking, a squeeze of fresh lime juice at the end can brighten all the flavors, reducing the perceived need for salt.

    Creating a low-sodium version is a beginner-friendly modification that supports your wellness goals and allows you to cook delicious, stress-free meals.

    What can I use if I don’t have taco seasoning?

    Running out of taco seasoning can feel like a setback, especially when you’re planning a delicious meal. But don’t worry! At Recipesmondial, we believe in simple, flavorful solutions for home cooks. You can easily create a fantastic flavor profile for your tacos using individual spices you likely already have in your pantry. This means your family-friendly meals are always within reach!

    Here are a few quick and reliable ways to season your meat without a store-bought packet or a pre-mixed homemade blend. These options are perfect for simple, beginner-friendly recipes.

    Mix Your Own Quick Taco Flavor

    The beauty of making your own blend is controlling the taste and tailoring it to your family’s preferences. This beginner-friendly approach guarantees a flavorful result every time.

    To make about two tablespoons of seasoning (roughly equivalent to one store-bought packet), try this simple combination. This amount is perfect for seasoning one pound of meat.

    • 1 tablespoon chili powder: This forms the delicious base of your blend.
    • 1 teaspoon ground cumin: Cumin adds a warm, earthy depth.
    • 1 teaspoon dried oregano: This gives an aromatic, herbaceous note.
    • ½ teaspoon garlic powder: For that essential savory kick.
    • ½ teaspoon onion powder: This enhances the savory profile.
    • ¼ teaspoon paprika (smoked or sweet): Paprika offers color and a mild, pleasant flavor.
    • ¼ teaspoon salt: Salt is crucial for bringing out all the other flavors.
    • ⅛ teaspoon black pepper: This adds a touch of subtle heat and spice.

    How to use it: Simply combine these spices in a small bowl and stir them into your cooked ground meat. Add 1/4 to 1/2 cup of water and simmer until the liquid reduces, allowing the flavors to meld beautifully. This quick method ensures a delicious dinner every time!

    What If I Only Have Chili Powder?

    If your spice rack is sparse, plain chili powder is an excellent starting point. Because it’s often a blend of spices like chili pepper, cumin, and oregano, it provides a solid base. However, you can easily boost its flavor to make it taste more like taco seasoning.

    To turn basic chili powder into a more taco-like seasoning for 1 pound of meat:

    • Start with 1 to 1 ½ tablespoons of chili powder.
    • Add ½ to 1 teaspoon of ground cumin: This is the most important addition for that classic taco flavor.
    • Stir in ½ teaspoon of garlic powder: For an essential savory taste.
    • Include ¼ teaspoon of salt: This is always needed to season your dish properly.
    • A pinch of black pepper: Adds a little extra warmth.

    This approachable technique is fantastic for quick meals and helps solve last-minute dinner decisions, making it perfect for busy families.

    Other Pantry Staples That Can Help

    Even if you lack some of the main spices, you can still infuse your dish with great taste. Sometimes, simplicity is the key to a flavorful meal.

    • Salt and Pepper: These are non-negotiables for any savory dish, as they enhance all other flavors.
    • Garlic Powder and Onion Powder: These two work wonders together to provide a foundational savory base.
    • Cumin: If you only have one “taco-specific” spice, make it cumin. Its distinctive flavor is unmistakable in Mexican-inspired dishes.
    • Smoked Paprika: If you have it, a dash of smoked paprika adds a wonderful smoky depth that can elevate simple dinner recipes. [source: https://www.healthline.com/nutrition/paprika-benefits]
    • A Dash of Cayenne Pepper or Red Pepper Flakes: For those who love a bit of heat, add a small amount and taste as you go.

    Don’t be overwhelmed by complex recipes. At Recipesmondial, we help you enjoy cooking without stress. By experimenting with these simple substitutions, you’ll gain confidence and learn to create delicious, family-friendly meals with ease!

    Frequently Asked Questions

    What’s the secret ingredient in the best taco seasoning?

    The secret to the best taco seasoning isn’t one single ingredient—it’s a combination of two key elements: fresh spices and a balanced blend. Spices lose their potency over time, so starting with a fresh, high-quality supply makes a huge difference. This recipe is designed to create that perfect balance for maximum flavor.

    Here are the real “secrets” to a truly flavorful homemade taco seasoning:

    • Fresh Spices: Use vibrant, fragrant spices. Older spices lose their potency and won’t deliver the same rich flavor.
    • Proper Ratios: The right balance of chili powder, cumin, and paprika creates incredible depth. These three form the heart of the blend.
    • Savory Enhancers: Garlic powder and onion powder add a fundamental savory base that is crucial for an authentic taco taste.
    • A Touch of Oregano: A small amount of dried oregano provides a subtle herbal note that rounds out the entire flavor profile.
    • Customization: The ability to adjust the heat and salt to your preference is what makes a homemade blend perfect for you.

    Ultimately, the “secret” is combining fresh, quality ingredients in thoughtful proportions to create a seasoning that is far superior to any store-bought packet.

    How much homemade seasoning is equal to one store-bought packet?

    A typical store-bought taco seasoning packet contains about 1 ounce, which is equal to 2 tablespoons. To replace one packet in a recipe, simply use 2 tablespoons of this homemade blend. This is the perfect amount for seasoning 1 pound of ground meat or beans.

    However, the best part about making your own is having complete control. Feel free to add a little more or less to match your personal taste. This flexibility ensures you get the perfect flavor for your meals every time.

    How should I store my homemade taco seasoning?

    To keep your homemade taco seasoning fresh and flavorful, proper storage is essential. If not stored correctly, spices will lose their potency over time. Follow these simple tips for the best results:

    • Use an Airtight Container: Transfer the seasoning to a small glass jar or another airtight container to keep out air and moisture.
    • Choose a Cool, Dark Place: Store the container in a pantry or cupboard, away from direct sunlight and heat. Avoid storing it above the stove.
    • Avoid Moisture: Ensure the container and any spoons you use are completely dry, as moisture can cause spices to clump and spoil.
    • Label Clearly: Don’t forget to label the container with the name of the seasoning and the date it was made. This helps you track its freshness.

    When stored correctly, your homemade taco seasoning will stay potent for up to 6 months. After that, it may start to lose flavor. A quick sniff test will tell you if it’s still good to use.

    Is it cheaper to make your own taco seasoning?

    Yes, making your own taco seasoning is much more cost-effective in the long run. Although there’s an initial cost for buying individual spices, they will last for many batches. Here’s why it’s a smart choice:

    • Long-Term Savings: While buying several spices at once seems more expensive upfront, you’ll have enough to make numerous batches. This quickly becomes cheaper than buying single-use packets [4].
    • Bulk Buying Benefits: Purchasing spices in larger quantities often reduces the per-unit cost, leading to even greater savings over time.
    • Better Ingredients: You have complete control over what goes into your blend. This means you can avoid the anti-caking agents, extra sodium, and other additives often found in store-bought packets.
    • Versatility: The individual spices in this recipe are staples for many other dishes, including global comfort foods and other beginner-friendly recipes.

    In short, while the initial shopping trip may cost more, making your own taco seasoning saves money, delivers better flavor, and gives you full control over the ingredients. It’s a simple kitchen hack that really pays off!


    Sources

    1. https://www.heart.org/en/healthy-living/healthy-eating/eat-smart/sodium/sodium-and-salt
    2. https://www.bonappetit.com/test-kitchen/ingredients/article/mexican-oregano-vs-oregano
    3. https://www.masterclass.com/articles/how-to-store-spices-to-extend-their-shelf-life
    4. https://frugalgaon.com/is-making-your-own-spice-blends-cheaper/

  • Easy Focaccia Bread Recipe (A Step-by-Step Guide for Beginners)

    Easy Focaccia Bread Recipe (A Step-by-Step Guide for Beginners)

    Focaccia is a classic Italian flatbread known for its signature dimples, soft and airy texture, and rich olive oil flavor. This beginner-friendly bread is incredibly versatile and can be enjoyed plain with sea salt or customized with various toppings like herbs, vegetables, and cheeses.

    Imagine the aroma of freshly baked bread filling your kitchen. Picture a golden crust that gives way to a soft, airy interior. For many home cooks, baking bread can feel daunting, with technical terms and complex steps that lead to overwhelming recipes. But creating this culinary magic can be surprisingly simple. That’s where homemade focaccia comes in. This beautiful, versatile Italian flatbread is not only delicious but also one of the most forgiving and beginner-friendly breads you can tackle.

    At Recipesmondial, we believe cooking should be a delightful adventure, not a source of stress. That’s why we’re excited to share our ultimate easy focaccia recipe. Our step-by-step guidance will walk you through every stage, helping you build confidence and create an impressive, flavorful bread with ease. Whether you’re looking for a delightful side dish for family-friendly meals or a delicious base for sandwiches, this focaccia recipe will quickly become a favorite in your kitchen. Say goodbye to baking anxiety and hello to delicious success!

    We’ve broken down the art of making focaccia into simple instructions using everyday ingredients and basic techniques. You’ll learn how to achieve its signature dimpled top, a crisp bottom, and a perfectly fluffy crumb—all without intimidating culinary jargon. Enjoy a stress-free experience as we guide you from mixing to baking. Let’s dive in and discover why this is the easiest focaccia recipe you’ll ever make, transforming simple ingredients into a show-stopping dish!

    Why Is This The Easiest Focaccia Recipe You’ll Ever Make?

    Welcome to the world of homemade bread, where you can bake with confidence! We know that baking bread can feel like a big challenge. That’s why we’ve designed this recipe to be the easiest focaccia you’ll ever make, especially for home cooks and beginners.

    Focaccia is a beloved Italian flatbread with ancient origins, evolving from simple hearth-baked doughs [source: https://www.britannica.com/topic/focaccia]. We’ve taken that rich tradition and made it incredibly approachable. You won’t find complex steps or technical jargon here. Instead, our clear, step-by-step instructions are designed to build your confidence in the kitchen.

    This recipe turns what seems like a difficult task into an enjoyable, stress-free experience. We focus on simple techniques and common ingredients so you can create a flavorful, impressive bread, even if you’re new to baking.

    Here’s why this particular focaccia recipe is so beginner-friendly:

    • No-Knead Method: Forget strenuous kneading! Our simple, no-knead method requires minimal effort. It’s perfect for anyone intimidated by traditional bread-making techniques.
    • Everyday Ingredients: You won’t need any special flour or hard-to-find items. This recipe uses basic pantry staples, which simplifies your shopping list.
    • Long, Slow Rise: Most of the work is passive. The dough develops its amazing flavor and texture while it rests, making this a relaxing, hands-off process.
    • Forgiving Dough: Focaccia is incredibly resilient. It’s hard to truly mess up! This allows you to experiment and learn without fear of failure.
    • Visual Cues: Our step-by-step instructions guide you with clear visual indicators. You’ll know exactly what to look for at each stage, making the process intuitive.
    • Versatile Toppings: From classic herbs to fresh vegetables, focaccia welcomes creativity. You can easily adapt it to your taste or whatever ingredients you have on hand.

    We’re passionate about making home cooking easy and enjoyable. This focaccia recipe is a fantastic way to learn basic baking skills and add a delightful homemade bread to your repertoire. Get ready to bake with confidence and impress your family and friends with minimal fuss!

    What Exactly is Focaccia Bread?

    Are you ready to explore the wonderful world of focaccia bread? Far more than a simple side dish, this delightful Italian flatbread is a fantastic project for home cooks seeking easy recipes. At Recipesmondial, we love showing you how simple it is to create flavorful meals made easy.

    Think of focaccia as Italy’s beloved, savory flatbread. It boasts a unique texture, with a wonderfully golden, crisp crust and a soft, airy crumb full of delightful pockets. This signature texture is created by a generous amount of olive oil, which also contributes to its distinct and memorable appearance.

    What makes focaccia bread instantly recognizable? It has several key characteristics:

    • Golden Crust: Baking in olive oil gives the crust its signature deep golden brown color.
    • Irregular Dimples: Gently pressed into the dough to hold pools of olive oil and toppings.
    • Airy Interior: An open, chewy crumb that feels both light and satisfying.
    • Savory Toppings: Classic toppings include coarse sea salt and fresh herbs like rosemary, though many creative variations exist.

    The history of focaccia is truly ancient, with roots dating back to the Etruscans and ancient Romans who baked a similar flatbread over hot coals. The name itself comes from the Latin “panis focacius,” meaning “hearth bread” or “baked on the hearth” [1], highlighting its deep historical origins.

    As a beginner-friendly recipe, focaccia bread is incredibly forgiving and doesn’t require complex techniques. It’s the ideal easy recipe for making fresh bread at home, and you’ll be amazed at how quickly you can achieve professional-tasting results. Say goodbye to feeling overwhelmed by complex recipes; this focaccia recipe will help you start cooking confidently so you can share a truly special homemade bread.

    Ready to discover what simple ingredients bring this classic to life? Let’s dive in!

    What Ingredients Do You Need for Focaccia?

    A flat lay photo of focaccia ingredients, including flour, olive oil, yeast, water, and fresh rosemary sprigs, neatly arranged on a light wooden surface.
    Professional food photography, photorealistic, high-quality food magazine photo: A beautifully arranged, bright flat lay of all the basic ingredients needed for focaccia bread. This includes a bowl of all-purpose flour, a small bowl of active dry yeast, a glass bottle of high-quality extra virgin olive oil, a small pile of flaky sea salt, a measuring cup with water, and fresh sprigs of rosemary. The ingredients are neatly and artfully arranged on a rustic, light-colored wooden kitchen counter, bathed in soft, warm natural light. The focus is sharp on all ingredients, showcasing their texture and freshness.

    Making delicious focaccia bread is simpler than you might think, and you don’t need fancy ingredients. In fact, you probably have most of what you need in your pantry already. At Recipesmondial, we believe in using everyday ingredients for our easy recipes to make your cooking journey stress-free and enjoyable. Let’s gather the ingredients for this beginner-friendly recipe.

    For the Focaccia Dough

    A simple yet robust dough is the foundation of any great focaccia. These basic ingredients create a wonderfully chewy texture and are surprisingly easy to work with, even if you’re new to baking bread.

    • Warm Water: This helps wake up the yeast. Aim for lukewarm, about 105-115°F (40-46°C). It should feel warm to the touch, not hot.
    • Active Dry Yeast: This is the magic ingredient that makes the bread rise. If you’re using instant yeast instead, you can skip the activation step and mix it directly with the flour.
    • Granulated Sugar: Just a pinch is needed to feed the yeast, helping it activate quickly and develop flavor.
    • All-Purpose Flour: A pantry staple, all-purpose flour works perfectly for a soft, airy focaccia. For a slightly chewier result, you can use bread flour.
    • Salt: Essential for flavor. We recommend kosher or fine sea salt to balance the dough and enhance the overall taste.
    • Extra Virgin Olive Oil: The heart of Italian cooking! A good quality extra virgin olive oil adds incredible flavor and richness to the dough and is also used for drizzling on top.

    With just these simple components, you’re on your way to a flavorful meal made easy. You’ll be amazed at the delicious bread you can create from scratch.

    For the Topping

    Toppings are where your focaccia truly shines, adding delightful texture and aroma. These classic choices are simple but create a huge impact on flavor.

    • Extra Virgin Olive Oil: Drizzled generously before baking, it creates a crispy, golden crust and infuses the bread with its signature rich taste.
    • Flaky Sea Salt: A must-have! Sprinkling flaky sea salt on top provides bursts of briny flavor and adds a wonderful crunchy texture.
    • Fresh Rosemary: The quintessential focaccia herb. Its fragrant, piney notes are simply irresistible. Feel free to use other fresh herbs like thyme or oregano too.

    These toppings transform the simple dough into an amazing focaccia, adding a fresh and aromatic finish. Best of all, these ingredients are easy to find, making this a perfect approachable home cooking project.

    How to Make Focaccia Bread Step-by-Step

    A close-up of a warm, golden-brown focaccia bread, fresh from the oven, with characteristic dimples, olive oil sheen, and rosemary on a cooling rack.
    Professional food photography, photorealistic, high-quality food magazine photo: A close-up shot of a perfectly baked, golden-brown focaccia bread, fresh out of the oven. The bread exhibits characteristic deep dimples, a glistening surface from olive oil, and is generously topped with fresh rosemary sprigs and coarse sea salt. It is placed on a simple metal cooling rack on a warm, inviting light-colored kitchen counter. The background is slightly blurred to keep the focus on the bread, suggesting a cozy home kitchen. The lighting is soft and natural, highlighting the bread’s airy, fluffy texture and inviting crust.

    Step 1: Activate the Yeast and Mix the Dough

    This first step brings together simple ingredients to create a soft, pliable dough. You’ll be amazed at how easy it is to start this delicious bread.

    1. Warm the Water: In a large mixing bowl, pour 1 ½ cups (360ml) of lukewarm water. The ideal temperature is between 105–115°F (40–46°C), which should feel warm but not hot to the touch. This temperature is crucial for activating the yeast [2].
    2. Add Sweetness and Yeast: Stir in 1 teaspoon of granulated sugar. Then, sprinkle 2 ¼ teaspoons (one packet) of active dry yeast over the water.
    3. Let it Bloom: Let the mixture sit for 5–10 minutes until it becomes foamy and bubbly. This “bloom” indicates the yeast is active. If it doesn’t foam, your yeast may be inactive, or the water was too hot or cold.
    4. Combine Dry Ingredients: In a separate bowl, whisk together 3 ½ cups (420g) of all-purpose flour and 2 teaspoons of fine sea salt.
    5. Mix the Dough: Pour the yeast mixture and ¼ cup (60ml) of olive oil into the flour mixture. Use a wooden spoon or spatula to mix until just combined. The dough will be shaggy and sticky—this is normal for focaccia.
    6. Gentle Knead: Briefly knead the dough in the bowl for 1–2 minutes to develop the gluten. The goal is to form a cohesive, sticky ball.

    Chef’s Tip: Don’t worry about perfect kneading. Focaccia is a forgiving bread; the goal is simply to bring the ingredients together for minimal effort and maximum flavor.

    Step 2: Let the Dough Rise (First Proof)

    Now it’s time for the first rise, or “proof.” During this step, the yeast will transform the dough into a light, airy base, which is crucial for achieving that signature fluffy focaccia texture.

    1. Oil the Bowl: Lightly coat a clean, large bowl with about a tablespoon of olive oil.
    2. Transfer the Dough: Place the dough ball into the oiled bowl and turn it once to coat all sides. This prevents a dry crust from forming.
    3. Cover and Rise: Cover the bowl tightly with plastic wrap or a clean kitchen towel.
    4. Find a Warm Spot: Place the bowl in a warm, draft-free location. A sunny spot on your counter or inside a slightly warm (but turned off) oven works well.
    5. Watch it Grow: Let the dough rise for 1 to 1 ½ hours, or until it has doubled in size. It should look puffy and be full of air bubbles.

    Chef’s Tip: If your kitchen is on the cooler side, the dough may need more time to rise. Patience is key for this simple recipe.

    Step 3: Shape and Dimple the Focaccia

    In this step, you’ll shape and dimple the dough, creating the classic focaccia look. These signature pockets are perfect for holding olive oil and toppings.

    1. Prepare Your Pan: Generously coat a 9×13-inch baking pan or a large cast-iron skillet with 2–3 tablespoons of olive oil. A well-coated pan prevents sticking and creates a crispy bottom crust.
    2. Transfer the Dough: Gently scrape the risen dough into the prepared pan, trying not to deflate it too much.
    3. Spread Gently: Using oiled fingertips, gently press and stretch the dough toward the edges of the pan. If it springs back, let it rest for 5–10 minutes before continuing.
    4. The Dimpling: Press your fingertips deep into the dough to create indentations all over the surface, being careful not to press all the way through. These iconic dimples are what make focaccia so recognizable.
    5. Second Rise: Loosely cover the pan and let the dough rise again in a warm spot for another 30–45 minutes, until it becomes visibly puffy.

    Chef’s Tip: Don’t be shy when dimpling the dough. Deeper indentations are better for catching olive oil and creating that classic focaccia texture.

    Step 4: Add Toppings and Bake to Perfection

    You’re at the final, most rewarding stage: topping and baking. Your kitchen will soon be filled with the irresistible aroma of fresh focaccia.

    1. Preheat Your Oven: While the dough is on its second rise, preheat your oven to 425°F (220°C).
    2. A Final Drizzle: After the second rise, uncover the dough and drizzle it with another 2–3 tablespoons of good-quality olive oil. Allow the oil to pool in the dimples.
    3. Add Your Toppings: Sprinkle generously with flaky sea salt, followed by any other toppings. Fresh rosemary is a classic choice, and you can find more ideas in our “Best Focaccia Toppings” section.
    4. Bake Until Golden: Bake in the preheated oven for 20–30 minutes, until the top is golden brown and springy to the touch. The bottom should also be golden and crisp.
    5. Cool and Serve: Carefully remove the pan from the oven. Immediately transfer the focaccia to a wire rack to cool slightly before slicing and serving.

    Chef’s Tip: A generous drizzle of olive oil before baking is essential. It creates a wonderfully crispy crust and adds incredible flavor, making this bread a perfect appetizer or side dish.

    What Are The Best Focaccia Toppings?

    Three slices of focaccia bread with different savory toppings: cherry tomatoes and basil, black olives, and caramelized onions with thyme.
    Professional food photography, photorealistic, high-quality food magazine photo: An inviting spread showcasing three distinct and delicious focaccia topping variations. Three individual squares or slices of focaccia are arranged artfully on a rustic light-colored ceramic platter or wooden board. One piece is topped with vibrant halved cherry tomatoes and fresh basil leaves. Another features thin slices of black olives and a sprinkle of flaky sea salt. The third piece is adorned with beautifully caramelized onions and fresh thyme sprigs. Each piece of focaccia has a golden-brown crust and a visible airy interior, glistening with olive oil under soft, warm natural light, emphasizing their irresistible appeal.

    Classic Herb and Salt

    Sometimes, the simplest things are the most delicious. The classic combination of fresh herbs and flaky sea salt is a timeless topping for homemade focaccia. It’s a fantastic starting point for beginners and an easy way to create a flavorful, fuss-free bread. This simple topping highlights the natural goodness of the focaccia itself.

    Here are some popular choices for a classic herb and salt focaccia:

    • Fresh Rosemary: This is the iconic herb for focaccia. Its piney, fragrant notes complement the rich olive oil beautifully.
    • Fresh Thyme: A wonderful alternative or addition to rosemary, offering a slightly more delicate, earthy flavor.
    • Dried Oregano: If fresh herbs aren’t available, dried oregano works well. Sprinkle it generously over the dough before baking.
    • Flaky Sea Salt: This is crucial! The large, irregular flakes provide a satisfying, salty crunch. The texture is a significant upgrade from regular table salt.
    • High-Quality Olive Oil: Drizzle generously over the dough before adding herbs and salt. It infuses flavor and helps create a lovely crisp crust.

    Pro Tip: Gently press the herbs into the dough’s dimples. This helps them adhere and release their aromatic oils during baking.

    Vegetable and Cheese Variations

    Focaccia is wonderfully versatile and acts as a blank canvas for your favorite flavors. By exploring vegetable and cheese variations, you can create family-friendly meals or creative snacks. These toppings add color, texture, and a burst of savory goodness to your bread.

    Consider these fantastic toppings:

    • Cherry Tomatoes: Halve or quarter colorful cherry tomatoes. They become sweet and juicy when baked.
    • Olives: Sliced black or green olives, especially Kalamata, add a briny, savory punch that is a staple in Mediterranean cooking.
    • Caramelized Onions: Sweet, tender onions bring incredible depth of flavor. This takes a little extra time but is well worth the effort.
    • Bell Peppers: Thinly sliced red, yellow, or orange bell peppers add vibrant color and a sweet crunch.
    • Thinly Sliced Zucchini or Asparagus: These vegetables become tender and slightly caramelized on top of the focaccia.
    • Parmesan Cheese: Sprinkle grated Parmesan for a salty, nutty, and cheesy crust. It’s always a crowd-pleaser.
    • Mozzarella: Cubed or shredded fresh mozzarella melts beautifully, creating gooey pockets of cheese.
    • Feta Cheese: Crumbled feta adds a tangy, salty kick that pairs wonderfully with tomatoes or olives.
    • Goat Cheese: Creamy goat cheese adds a delicate tang, especially when combined with fresh herbs or roasted red peppers.

    Get Creative: Try combinations like cherry tomatoes and basil with mozzarella, or Kalamata olives with feta. For a heartier meal, add thinly sliced pepperoni or cooked sausage. These variations can be easily adapted to suit any taste.

    Sweet Focaccia Ideas

    Focaccia doesn’t have to be savory. A sweet version makes a delightful surprise for breakfast, brunch, or a unique dessert. This creative twist transforms your basic focaccia recipe into a delicious sweet treat.

    Here are some inspiring sweet focaccia toppings:

    • Grapes and Rosemary: This Italian classic features juicy red or green grapes that caramelize slightly in the oven. A hint of fresh rosemary provides an unexpected, elegant aroma.
    • Fig and Honey: Sliced fresh figs paired with a drizzle of honey before baking create a wonderfully sweet and sophisticated focaccia.
    • Apple and Cinnamon: Use thinly sliced apples (like Granny Smith or Honeycrisp) with a sprinkle of cinnamon and sugar. It tastes like apple pie in bread form!
    • Mixed Berries: Fresh raspberries, blueberries, or sliced strawberries dotted over the dough, perhaps with a dusting of sugar, make a colorful and fruity treat.
    • Citrus Zest and Sugar: Orange or lemon zest mixed with a little sugar creates a bright, fragrant topping.

    Serving Suggestion: Sweet focaccia is wonderful on its own, but you can also serve it with a dollop of whipped cream, a scoop of vanilla ice cream, or a drizzle of balsamic glaze for an extra special touch. It works well as a quick breakfast or a unique dessert.

    What Are Some Tips for Perfect, Fluffy Focaccia?

    Making delicious, fluffy focaccia is surprisingly simple, and you don’t need to be a seasoned baker to create a masterpiece. With a few practical tips and a little patience, you’ll achieve that perfect airy texture and golden crust every time. These beginner-friendly techniques will boost your confidence and make this recipe an absolute joy to bake, freeing you from complicated instructions.

    • Give Your Yeast a Good Start: Active yeast is the secret to a light, airy focaccia. To activate it properly, always use warm water—around 105–115°F (40–46°C). Water that’s too hot will kill the yeast, while water that’s too cold will prevent it from activating. After 5–10 minutes, you should see a foamy layer on the surface, which signals your yeast is ready to work. This critical step ensures a reliable rise.
    • Embrace the Sticky Dough: Focaccia dough has high hydration, which means it will be wet and sticky. Resist the temptation to add too much extra flour, as this sticky texture is essential for creating a wonderfully open and airy crumb. To make handling easier, simply coat your hands with a little olive oil. Remember, a sticky dough means you’re on the right track for perfect focaccia.
    • Patience with Proofing Pays Off: Proper proofing, or rising, is crucial for developing flavor and texture. For the first rise, let the dough rest for at least 1–2 hours in a warm spot; this slow process builds a deeper, more complex taste. For even better results, try an overnight cold proof in the refrigerator. This longer fermentation significantly enhances both the flavor and chewiness [3]. Don’t rush this step—it’s the key to irresistible focaccia.
    • Don’t Skimp on Olive Oil: Extra virgin olive oil is fundamental to focaccia, adding rich flavor and contributing to its tender texture. Start by generously oiling your baking pan to prevent sticking and create a crispy bottom crust. Before baking, drizzle plenty of oil over the dough as well. This not only ensures a moist interior but also infuses every bite with classic focaccia flavor.
    • Master the Dimple: Focaccia’s iconic dimples aren’t just for looks; they are key to its unique texture. To create them, gently press your fingertips all over the proofed dough. This action prevents large air pockets from forming and creates signature wells that catch olive oil, salt, and other toppings. As a result, every bite is bursting with concentrated flavor.
    • Preheat Your Oven Thoroughly: A fully preheated oven is essential. The initial burst of high heat creates “oven spring,” causing the dough to rise quickly. This vital step leads to a lighter, fluffier interior and helps form a desirable golden-brown, crispy crust. Giving your oven enough time to reach the target temperature ensures consistent, professional results.
    • Bake Until Golden, Not Dry: Keep a close eye on your focaccia as it bakes, aiming for a beautifully golden-brown top and crisp, inviting edges. Overbaking can easily lead to a dry loaf. The goal is a perfect balance: soft and airy on the inside with a satisfying crunch on the outside. Since every oven is different, trust your senses more than the timer for the best results.

    How Should You Store and Serve Focaccia?

    Serving Suggestions

    Focaccia is incredibly versatile, perfect as a simple side dish or a satisfying meal on its own. Think of it as your new favorite bread for any occasion. Here are some easy serving ideas for your homemade focaccia:

    • Alongside Soups and Salads: Focaccia is the perfect companion to soups and salads. Serve it alongside a hearty minestrone to dip into the broth, or use it to scoop up a fresh garden salad.
    • With Dips and Spreads: For a simple appetizer, offer warm focaccia slices with dips like olive oil and balsamic vinegar, pesto, or hummus.
    • As a Sandwich Base: Slice focaccia horizontally to create a delicious sandwich base, great for quick lunches or picnics. Fill it with your favorite ingredients, such as deli meats, cheeses, roasted vegetables, or grilled chicken.
    • Breakfast or Brunch Treat: Enjoy a plain or sweet slice of focaccia with your morning coffee for a delightful start to the day. It’s wonderful with a light spread of cream cheese or jam.
    • Part of a Charcuterie Board: Elevate any gathering by adding slices of focaccia to a charcuterie board alongside cheeses, cured meats, olives, and fresh fruit.
    • To Mop Up Sauces: Its soft, porous texture is ideal for mopping up flavorful sauces from pasta dishes or stews.

    Storage and Reheating Instructions

    While focaccia is best enjoyed the day it’s baked, proper storage will keep it fresh and delicious for longer. Here’s how to effectively store and reheat your homemade focaccia:

    Storing Your Focaccia

    • Room Temperature:

      To keep focaccia soft and ready to eat, wrap it tightly in plastic wrap or aluminum foil and store it at room temperature. It will stay fresh for up to 2 days.

    • Refrigeration:

      For longer storage, wrap the focaccia securely and refrigerate it for up to 4-5 days. Note that refrigeration can slightly alter the texture, making it drier.

    • Freezing for Longer Storage:

      Focaccia freezes beautifully, making it a great option for meal prep. Once it has cooled completely, wrap individual slices or the whole loaf tightly in plastic wrap, then place it in a freezer-safe bag. It will keep for up to 3 months.

    Reheating Your Focaccia

    Reheating restores focaccia’s wonderful warmth and soft texture. Follow these simple steps for the best results:

    • From Room Temperature or Refrigerator:
      • Preheat your oven to 350°F (175°C).
      • Place the focaccia on a baking sheet or directly on the oven rack.
      • Heat for 5-10 minutes, or until warmed through.
      • For a crispier crust, lightly mist the top with water before reheating.
    • From Frozen:
      • You can reheat focaccia directly from the freezer; no thawing is necessary.
      • Preheat your oven to 375°F (190°C).
      • Place the frozen focaccia on a baking sheet.
      • Bake for 15-20 minutes, or until thawed and heated through.
      • Check that the center is warm before serving.
    • Quick Reheating (Single Slices):

      For a single slice, use a toaster oven or a dry skillet over medium heat. Warm until heated through and slightly crispy, being careful not to dry it out.

    Frequently Asked Questions About Focaccia

    Is focaccia bread healthy?

    Focaccia is a delicious treat! However, like most breads, its healthfulness depends on two main factors: the ingredients you use and your portion size.

    A typical focaccia recipe includes white flour, olive oil, water, yeast, and salt. The extra virgin olive oil provides healthy monounsaturated fats, making it a great addition to your diet when enjoyed in moderation [4].

    Here are a few tips for making focaccia a healthy part of your diet:

    • Moderation is Key: Enjoy focaccia in reasonable portion sizes, as you would with any delicious food.
    • Choose Whole Grains: Try using a portion of whole wheat flour in your recipe. This adds more fiber to your focaccia.
    • Go Easy on the Oil: While olive oil is a healthy fat, too much of it increases the overall calorie count. Be mindful of the amount you drizzle.
    • Load Up on Veggies: Top your focaccia with colorful vegetables like roasted bell peppers, cherry tomatoes, or spinach to boost nutrients and flavor.
    • Pair Wisely: Serve focaccia with a fresh salad or a lean protein to create a well-rounded, family-friendly meal.

    Ultimately, focaccia can be a wonderful part of a balanced diet. The key is to prepare and enjoy it thoughtfully!

    What flour is best for focaccia?

    Choosing the right flour is key to achieving the perfect focaccia texture: a fluffy inside with a crispy crust. Fortunately, the best options are simple and easy to find.

    Here are the best flour options for your focaccia:

    • All-Purpose Flour: This is a fantastic choice for home cooks. It’s readily available, easy to work with, and creates a soft, tender crumb that’s perfect for beginner recipes.
    • Bread Flour: Preferred by many bakers, bread flour has a higher protein content than all-purpose. This extra protein develops more gluten, resulting in a chewier, more structured focaccia with great elasticity.
    • “00” Flour: This finely milled Italian flour, often used for pasta and pizza, can give focaccia a very delicate and airy texture. However, it can be difficult to find in regular grocery stores and isn’t necessary for a delicious result.

    For your first focaccia, stick with all-purpose or bread flour. You will get amazing results either way!

    How do you pronounce focaccia?

    Learning to pronounce “focaccia” is fun and easy! Say it like this: “foh-KAH-chuh.”

    In this Italian word, the “cc” is pronounced like a “k” sound. Now you can confidently order or talk about your delicious homemade focaccia!

    Can you make a quick focaccia recipe?

    Yes, you absolutely can make a quicker version of focaccia! While traditional recipes involve long proofing times to develop flavor, several methods can speed up the process when you’re short on time.

    Here are a few tips for making focaccia more quickly:

    • Warm Environment: Place your dough in a warm spot to rise. A slightly warm oven (turned off!) or a sunny windowsill helps yeast activate faster.
    • Active Dry or Instant Yeast: Both work well for speeding up the process. Instant yeast is particularly useful as it often doesn’t require prior activation, shaving off a few minutes.
    • Single Rise: Some quick recipes skip the second proofing. Instead, you can shape the dough, add toppings, and bake after just one rise. This method is perfect for a simpler, beginner-friendly focaccia.

    Keep in mind that while these shortcuts work, a longer, slower rise typically develops more complex flavors. The goal is to find a recipe that balances speed with fantastic results, saving you time without sacrificing taste.


    Sources

    1. https://www.britannica.com/topic/focaccia
    2. https://redstaryeast.com/yeast-baking-lessons/yeast-proofing-tips/
    3. https://www.seriouseats.com/bread-making-fundamentals-how-to-proof-dough
    4. https://www.heart.org/en/healthy-living/healthy-eating/eat-smart/fats/monounsaturated-fats

  • How to Make The Perfect Pasta Salad: An Easy Step-by-Step Recipe

    How to Make The Perfect Pasta Salad: An Easy Step-by-Step Recipe

    A classic pasta salad recipe combines cooked and chilled pasta with fresh vegetables, cheese, and sometimes meat, all tossed in a vinaigrette or creamy dressing. It’s a versatile, make-ahead dish perfect for potlucks, picnics, and easy family meals, with popular variations including Italian, Greek, and creamy mayo-based styles.

    Are you looking for an ultimate side dish or light meal that’s both easy and satisfying? Complex recipes can feel overwhelming, and planning family-friendly meals that please everyone is a common challenge. Look no further. The perfect pasta salad is the solution, offering a delightful blend of textures and vibrant flavors. It’s ideal for potlucks, picnics, or a simple weeknight dinner, bringing joy to your table without adding stress to your kitchen.

    At Recipesmondial, we believe cooking should be an enjoyable, confidence-building experience—not a chore. That’s why we’re excited to share our guide to making the perfect pasta salad. Forget complicated techniques. Our step-by-step instructions are designed for beginner-friendly recipes and approachable home cooking. We’ll show you how to turn simple ingredients into a flavorful meal with reliable results every time. Whether you need a quick family dinner or want a stress-free recipe, this classic dish is the perfect place to start.

    This comprehensive guide will walk you through everything needed to create a show-stopping pasta salad. We make every step clear and simple, from choosing the best pasta shape and preparing fresh ingredients to whisking up a zesty dressing. You’ll also find popular variations, like classic Italian or refreshing Greek pasta salad, plus pro tips for ingredient swaps and meal prep. Get ready to build your confidence in the kitchen and master this versatile, delicious dish!

    Why Will You Love This Simple Pasta Salad Recipe?

    A beautiful, large serving bowl filled with a fresh, vibrant, and colorful pasta salad, garnished with herbs.
    Professional food photography, photorealistic, high-quality food magazine photo of a stunning hero shot of a perfectly prepared, inviting pasta salad. The salad is served in an elegant, rustic ceramic serving bowl (light cream or sky blue color) placed on a clean, light-colored wooden table. The bowl is generously filled with al dente fusilli pasta, abundant with chopped fresh cherry tomatoes, crisp cucumber, diced colorful bell peppers (red, yellow, orange), thinly sliced red onion, crumbled feta cheese, and Kalamata olives. Fresh green parsley and basil leaves are sprinkled on top as a garnish. The lighting is soft, natural, and even, creating subtle shadows and highlights that make the salad look incredibly fresh, delicious, and irresistible. A small, silver serving spoon or fork rests beside the bowl, suggesting readiness to serve.

    Ready to discover your new favorite go-to dish? This simple pasta salad recipe is more than just a side dish—it’s a delightful, stress-free solution for any meal. Perfect for cooks of all levels, our recipe helps you ditch complicated instructions and enjoy every step of the process with confidence.

    Here’s why you’ll love adding this incredible pasta salad to your regular meal rotation:

    • Effortless Preparation: This recipe is truly beginner-friendly. Our clear, step-by-step instructions make it easy to whip up a delicious meal, boosting your confidence in the kitchen and delivering reliable results every time.
    • Bursting with Flavor: Every bite is packed with fresh, vibrant tastes. This recipe combines simple ingredients to create a flavorful meal without any fuss, making it easy to discover new flavor combinations you’ll love.
    • Incredibly Versatile: This pasta salad is the perfect fit for any situation, whether you need a quick lunch, a family-friendly meal, or a dish for your next potluck. It’s also fantastic for meal prep, making weekly planning a breeze.
    • Customize to Your Heart’s Content: We provide a fantastic base recipe, but feel free to get creative. Add your favorite vegetables, cheeses, or proteins to make it your own. Craving an Italian pasta salad? Mix in mozzarella and pepperoni. Dreaming of a Greek version? Feta and olives are your friends!
    • Perfect for Any Occasion: From summer picnics to easy weeknight dinners, this cold pasta salad is always a crowd-pleaser.

    Get ready to transform simple ingredients into a delicious, beautiful dish that everyone will love. This easy pasta salad is your ticket to stress-free, flavorful cooking!

    What Ingredients Do You Need for Pasta Salad?

    An overhead view of various fresh ingredients for pasta salad, including pasta, colorful vegetables, feta cheese, and herbs, arranged on a wooden table.
    Professional food photography, photorealistic, high-quality food magazine photo of a vibrant flat lay of all fresh, raw and cooked ingredients required for pasta salad, neatly arranged on a rustic light wooden table. The composition includes cooked rotini pasta in a small white bowl, bright red cherry tomatoes, sliced green cucumber, diced red, yellow, and orange bell peppers, thinly sliced red onion, fresh green parsley and basil sprigs, crumbled feta cheese, and whole black olives. There is also a small glass bottle of olive oil and a small bowl of red wine vinegar. The lighting is soft, natural, and overhead, highlighting the textures and vibrant colors of each ingredient. The background is clean and slightly out of focus, maintaining a warm and inviting atmosphere.

    Choosing the Best Pasta Shape

    A great pasta salad recipe starts with the right pasta. The shape you choose is important because it needs to hold onto the dressing and other ingredients.

    Look for shapes with nooks, ridges, or twists, as these features are perfect for catching flavor. Selecting the right pasta ensures every bite is bursting with taste.

    Here are some of our top picks for a fantastic pasta salad:

    • Rotini: These corkscrew spirals are excellent because they have plenty of ridges for the dressing to cling to.
    • Fusilli: Similar to rotini, fusilli has a spiraled shape that works wonderfully in cold salads.
    • Penne: Penne are short, tubular shapes with ridged surfaces, making them ideal for holding chunky ingredients and dressing.
    • Farfalle (Bow Ties): These pretty bow-tie shapes add a fun visual element, and their central pinch helps scoop up other ingredients.
    • Ditalini: Small and tube-shaped, ditalini is great for salads with smaller ingredients, as it blends easily into every forkful.

    Ultimately, pick a shape you love. Just make sure it’s sturdy enough to hold up to mixing and chilling. This simple choice makes a big difference in the final dish.

    Essential Vegetables and Add-Ins

    The beauty of pasta salad lies in its vibrant mix of fresh ingredients, which add crunch, color, and nutrition. Think of this as your canvas to create a truly irresistible dish.

    Fresh, crisp vegetables will elevate your salad from good to amazing. They also add a wonderful texture contrast to the soft pasta.

    Here are the core ingredients you’ll want for a fantastic pasta salad recipe:

    • Cherry Tomatoes: Halved for juicy sweetness and easy eating.
    • Cucumber: Diced for a refreshing crunch.
    • Bell Peppers: Chopped red, yellow, or orange peppers add sweetness and color.
    • Red Onion: Thinly sliced or finely diced for a pleasant sharpness.
    • Fresh Parsley: Chopped for a bright, herbaceous note.

    Want to take your pasta salad to the next level? Consider these delicious additions:

    • Black Olives: Sliced for a briny, savory touch, especially in an Italian pasta salad.
    • Feta Cheese: Crumbled feta adds a tangy, creamy bite and is essential for a great Greek pasta salad.
    • Mozzarella Balls (Bocconcini): Small, fresh mozzarella adds a mild, milky texture.
    • Artichoke Hearts: Quartered for a tender, slightly tangy flavor.
    • Chickpeas: A great plant-based protein that makes the salad more filling.
    • Cooked Chicken or Shrimp: Add these for a heartier main course and a complete family meal.

    Feel free to mix and match based on what your family loves. This is a perfect opportunity to get creative in the kitchen.

    Ingredients for a Zesty Dressing

    Every great pasta salad needs a delicious dressing to tie all the flavors together. This zesty homemade dressing coats every ingredient with a bright, tangy, and savory finish.

    Making your own dressing is simple and tastes so much better than store-bought. Plus, you can control the ingredients for a fresh and healthy result.

    Here’s what you’ll need for our simple, flavorful dressing:

    • Extra Virgin Olive Oil: Use a good quality oil for the best flavor, as it’s the base of the dressing.
    • Red Wine Vinegar: Provides the essential tang and brightness.
    • Dijon Mustard: Adds a subtle sharpness and helps emulsify the dressing.
    • Garlic: Minced fresh garlic for aromatic depth.
    • Dried Oregano: A classic herb that brings an earthy, savory note, especially for an Italian pasta salad.
    • Salt and Black Pepper: Season to taste to enhance all the other flavors.
    • Honey or Maple Syrup (Optional): A small touch balances the acidity with a hint of sweetness.

    Simply whisk these ingredients together. This quick step creates a dressing that will completely transform your pasta salad into a memorable meal.

    How to Make Pasta Salad Step-by-Step

    A home cook's hands using tongs to toss a vibrant, colorful pasta salad in a large clear glass bowl.
    Professional food photography, photorealistic, high-quality food magazine photo of a close-up, action shot in a warm, inviting home kitchen. A real human home cook’s hands (warm skin tone) are gently tossing a vibrant, freshly made pasta salad in a large, clear glass mixing bowl using silver salad tongs. The salad is a colorful mix of al dente rotini pasta, chopped cherry tomatoes, cucumber, bell peppers, red onion, feta cheese, and olives, glistening with a light dressing. The background is a slightly blurred, bright kitchen countertop with natural light streaming in, conveying a sense of fresh preparation and ease. Focus is sharp on the salad and hands, showing movement.

    Step 1: Cook the Pasta Perfectly

    The first step to a great pasta salad is cooking the pasta perfectly. Avoid mushy pasta, a common mistake that can ruin the texture. The goal is firm, flavorful pasta that holds its shape.

    1. Boil the Water: Fill a large pot with water, add a generous tablespoon of salt, and bring it to a rolling boil. Salting the water seasons the pasta from the inside out.
    2. Add Pasta: Carefully add 1 pound of your chosen pasta shape to the boiling water. Stir occasionally to prevent sticking.
    3. Cook to Al Dente: Follow the package directions, but aim for “al dente.” This means the pasta should be cooked through but still have a firm, pleasant bite. It should not be soft. For most pasta shapes, this takes 8-10 minutes.
    4. Drain Thoroughly: Immediately drain the pasta in a colander. Do not rinse the pasta, as the starch helps the dressing cling to it for better flavor.
    5. Cool Slightly: Spread the drained pasta on a baking sheet in a single layer to cool for 10-15 minutes. This step stops the cooking, prevents clumping, and helps the pasta absorb the dressing more effectively.

    Step 2: Prepare the Vegetables and Mix-ins

    While the pasta is cooling, prepare the rest of your ingredients. This is the perfect time to chop the vegetables that will add fresh flavor, color, and crunch to the salad.

    • Chop Your Veggies: Dice 1 cup of cucumber, 1 cup of cherry tomatoes (halved), and 1/2 cup of red onion. Aim for bite-sized pieces of a similar size to ensure an even distribution of flavors.
    • Add Flavorful Extras: Slice 1/2 cup of black olives and 1/2 cup of feta cheese (crumbled or cubed). These add salty, Mediterranean-inspired notes. For a heartier salad, consider adding cooked chicken or chickpeas.
    • Get Creative: Feel free to add or swap other vegetables you enjoy. Bell peppers, carrots, or corn are all delicious additions.

    Step 3: Whisk Together the Dressing

    A zesty dressing ties all the flavors of the salad together. This simple recipe is quick to prepare and makes a big difference in the final dish.

    1. Gather Ingredients: In a medium bowl, combine 1/2 cup of extra virgin olive oil, 1/4 cup of red wine vinegar, 2 tablespoons of fresh lemon juice, 1 teaspoon of dried oregano, 1/2 teaspoon of garlic powder, 1/4 teaspoon of salt, and 1/8 teaspoon of black pepper.
    2. Whisk Vigorously: Whisk the ingredients together until the dressing is emulsified. An emulsified dressing will look slightly thicker and well-blended, not separated.
    3. Taste and Adjust: Taste the dressing and adjust the seasonings as needed. Add more salt for flavor or more vinegar for tang until it’s balanced to your preference.

    Step 4: Combine and Chill for the Best Flavor

    The final step is to combine all the components. Properly mixing and chilling the salad is essential for allowing the flavors to meld together for the best taste.

    1. Combine Ingredients: In a large mixing bowl, add the cooled pasta, chopped vegetables, and all other mix-ins.
    2. Pour the Dressing: Drizzle the whisked dressing evenly over the pasta and vegetables.
    3. Toss Gently: Use a large spoon or spatula to gently toss everything together, ensuring all ingredients are evenly coated with the dressing.
    4. Cover and Chill: Cover the bowl tightly and refrigerate for at least 1-2 hours. This chilling time is crucial for the flavors to meld together. For the best result, chill it overnight.
    5. Serve and Enjoy: Before serving, give the salad another gentle toss. If it appears a bit dry after chilling, stir in a tablespoon of extra olive oil or lemon juice to refresh it.

    What Are Some Popular Pasta Salad Variations?

    Classic Italian Pasta Salad

    Craving a taste of Italy without the fuss? Our classic Italian pasta salad is a delightful and easy choice. Packed with vibrant flavors and fresh ingredients, it’s a satisfying meal that’s simple to prepare.

    This beginner-friendly recipe comes together quickly, making it perfect for potlucks, picnics, or a simple weeknight dinner. It offers a wonderful blend of savory and tangy notes and is easy to adapt, making it a family favorite.

    Here are some popular ingredients for an Italian pasta salad:

    • Pasta: Rotini, fusilli, or penne work best.
    • Vegetables: Cherry tomatoes, sliced bell peppers (red and green), red onion, and black olives add color and crunch.
    • Cheese: Small mozzarella balls (bocconcini) are a must.
    • Meats (optional): Sliced pepperoni or salami bring a savory kick.
    • Dressing: A zesty Italian dressing, often vinaigrette-based, ties everything together.
    • Herbs: Fresh basil or oregano elevates the flavor.

    Our step-by-step guidance helps you create a dish everyone will love. It’s simple, delicious, and a true crowd-pleaser.

    Zesty Greek Pasta Salad

    If you’re looking for a refreshing and healthy option, the zesty Greek pasta salad is a superb choice that brings Mediterranean sunshine to your plate. It’s an excellent and reliable option for a quick meal or for anyone looking to try a new, simple dish.

    Known for its bright, tangy dressing and fresh components, this salad offers a balanced and flavorful experience. It’s perfect for summer gatherings or a light lunch, and you’ll appreciate how easy it is to prepare.

    Key ingredients often found in a Greek pasta salad include:

    • Pasta: Orzo, rotini, or small shells are great choices.
    • Vegetables: Crisp cucumbers, juicy cherry tomatoes, sliced red onion, and colorful bell peppers.
    • Olives: Briny Kalamata olives are essential.
    • Cheese: Crumbled feta cheese provides a salty, tangy counterpoint.
    • Dressing: A lemon and herb vinaigrette, typically with oregano, olive oil, and red wine vinegar.

    This variation helps home cooks make healthy, tasty meals quickly. It’s a vibrant and satisfying dish that proves cooking can be both easy and flavorful.

    Creamy Pasta Salad with Mayo

    For those who love a rich and comforting classic, the creamy pasta salad with mayo is a beloved choice. This version often evokes nostalgic memories of family picnics. As a family-friendly meal that’s always a hit, it’s also ideal for meal prep and effortless entertaining.

    The creamy dressing makes this pasta salad wonderfully indulgent. The salad is also incredibly versatile, so you can easily customize it with delicious additions to suit your preferences.

    Typical ingredients for a creamy pasta salad are:

    • Pasta: Elbow macaroni, shells, or ditalini are commonly used.
    • Dressing: A luscious blend of mayonnaise, a touch of mustard, vinegar, and seasonings.
    • Vegetables: Diced celery, finely chopped red onion, and sweet peas add texture and freshness.
    • Protein (optional): Cooked chicken, tuna, or hard-boiled eggs make it a more substantial dish.
    • Seasonings: Salt, black pepper, and sometimes a hint of sugar balance the flavors.

    This reliable recipe helps home cooks make quick, flavorful meals without stress. It’s proof that simple ingredients can create a truly comforting dish, making it a great recipe for building confidence in the kitchen.

    Pro Tips for the Best Cold Pasta Salad

    How to Avoid Mushy Pasta

    The key to a perfect cold pasta salad is perfectly cooked pasta—no one wants a mushy texture! Follow these easy steps to ensure your pasta stays firm and delicious from the start.

    • Cook Al Dente: Always cook your pasta “al dente,” which means it should be firm to the bite, not soft. To achieve this, check the package instructions and simply reduce the recommended cooking time by 1-2 minutes. This small change keeps it resilient.
    • Rinse Immediately: As soon as the pasta is done, drain it and immediately rinse it under cold running water. This crucial step stops the cooking process and washes away excess starch, which prevents sticking and mushiness.
    • Drain Well: After rinsing, drain the pasta thoroughly, as any excess water will dilute your dressing. Gently shake the colander and let it sit for a few minutes to remove as much water as possible.
    • Toss with a Little Oil: For extra insurance against sticking, toss the cooled and drained pasta with a small amount of olive oil. This also adds a subtle layer of flavor.
    • Choose Wisely: Some pasta shapes hold up better in cold salads than others. Sturdy shapes like rotini, fusilli, penne, and farfalle are excellent choices because they embrace dressings and mix-ins without falling apart.

    Make-Ahead and Storage Guide

    Pasta salad is a fantastic meal prep solution that often tastes even better as the flavors meld. Here’s how to prepare and store your creation for maximum enjoyment.

    • Chill for Flavor: For the best taste, chill your pasta salad for at least 30 minutes before serving. An hour or two is even better, as this allows the flavors to truly mingle and deepen.
    • Dress in Stages (Optional): If making a large batch to enjoy later, consider dressing it in stages. Initially, combine the pasta and vegetables with about half the dressing. Add the rest just before serving to keep everything crisp and fresh.
    • Airtight is Key: Store leftover pasta salad in an airtight container to keep it fresh, prevent it from drying out, and protect it from absorbing other fridge odors.
    • Refrigerate Promptly: To ensure food safety, always refrigerate your pasta salad within two hours of preparation.
    • Storage Duration: Stored properly, cold pasta salad typically lasts for 3-5 days in the refrigerator [1]. However, always trust your senses; discard the salad if it smells off or looks unusual.
    • Refreshing Before Serving: If the salad seems a bit dry after storage, refresh it by gently tossing it with a splash of extra dressing, a touch of olive oil, or a squeeze of lemon juice.

    Creative Ingredient Swaps and Substitutions

    One of the best things about pasta salad is its versatility. Feel free to experiment with what you have on hand or what you love. Use these simple swaps to easily adapt any recipe to your family’s tastes or dietary needs.

    • Pasta Power:
      • Gluten-Free: Swap traditional pasta for one of the many great gluten-free varieties now available.
      • Whole Wheat: Choose whole wheat pasta for added fiber and nutrients, creating a more balanced meal.
      • Other Shapes: Don’t be afraid to try orecchiette, cavatappi, or even tiny ditalini.
    • Veggie Adventures:
      • Greens: Add a handful of spinach, arugula, or finely chopped kale for a nutritional boost.
      • Crunchy Veggies: Classic choices include bell peppers, cucumbers, red onion, and carrots. For a different texture, try adding snap peas or radishes.
      • Roasted Veggies: For a deeper flavor, add roasted zucchini, eggplant, or cherry tomatoes. Just be sure to let them cool completely before mixing them in.
    • Protein Punch (for a more filling meal):
      • Chicken: Shredded rotisserie chicken or grilled chicken breast pieces are excellent additions.
      • Chickpeas: Add roasted or canned chickpeas for an easy, plant-based protein—perfect for vegetarian recipes.
      • Tuna or Salmon: Flaked canned tuna or salmon quickly transforms a side dish into a simple and satisfying lunch.
      • Hard-Boiled Eggs: Chopped hard-boiled eggs provide an extra boost of protein.
    • Cheese Choices:
      • Feta: Crumbled feta cheese is perfect for a Greek-inspired pasta salad.
      • Mozzarella: Mini mozzarella balls (bocconcini) are wonderful in an Italian pasta salad.
      • Parmesan: Shaved or grated Parmesan adds a salty, umami kick.
      • Vegan Cheese: Nutritional yeast or dairy-free feta alternatives work well for a vegan option.
    • Dress It Up:
      • Pesto: Swirl in some basil pesto for a vibrant, herbaceous flavor.
      • Creamy: For a creamier texture, add a dollop of Greek yogurt or a touch of mayonnaise.
      • Herb-Based: Fresh herbs like dill, parsley, cilantro, or mint can completely change the flavor profile.
      • Citrusy: A squeeze of fresh lemon or lime juice can brighten the entire salad.

    Frequently Asked Questions

    What ingredients are in a Greek pasta salad?

    Creating a delicious Greek pasta salad is a wonderful, beginner-friendly way to bring vibrant and refreshing flavors to your table. This salad is naturally packed with goodness and is simple to prepare.

    Here are the core components you will typically find:

    • Pasta: Short pasta shapes like rotini, penne, or orzo work best.
    • Fresh Vegetables: Crisp cucumber, juicy cherry tomatoes, sliced red onion, and colorful bell peppers are essential.
    • Olives: Briny Kalamata olives add a distinct Mediterranean flavor.
    • Feta Cheese: Crumbled feta cheese provides a key salty, tangy counterpoint.
    • Herbs: Fresh or dried oregano is a must, while parsley adds brightness.
    • Greek Dressing: A mix of extra virgin olive oil, red wine vinegar, minced garlic, dried oregano, salt, and pepper ties all the flavors together beautifully.

    This easy recipe creates a satisfying meal that’s perfect for family dinners or gatherings.

    How do you make a simple creamy pasta salad?

    A simple, creamy pasta salad is a classic for a reason: it’s an incredibly easy, go-to dish for quick lunches, weeknight dinners, or anyone new to cooking.

    Here’s how to create this comforting dish:

    1. Cook Your Pasta: Start by cooking 1 pound of a short pasta like rotini, elbow macaroni, or shells until al dente. Rinse with cold water and drain well to stop the cooking process and prevent mushiness.
    2. Prepare Your Veggies: For great texture, chop about 1.5 to 2 cups of mixed vegetables, such as crisp celery, shredded carrots, finely diced red onion, and bell peppers.
    3. Make the Creamy Dressing: In a large bowl, whisk together 1 to 1.5 cups of mayonnaise, 1 tablespoon of Dijon mustard, 1 tablespoon of apple cider vinegar, and 1 teaspoon of sugar (optional). Season with salt and black pepper to taste. For extra creaminess, add a splash of milk.
    4. Combine Everything: Add the cooled pasta and chopped vegetables to the dressing. Gently mix until everything is well coated.
    5. Chill and Serve: Cover the salad and chill in the refrigerator for at least 30 minutes to allow the flavors to meld. It tastes even better after a few hours or overnight.

    As a fantastic option for meal prep, this beginner-friendly recipe simplifies mealtime decisions and is sure to become a favorite.

    What is the best dressing for an Italian pasta salad?

    The best dressing for an Italian pasta salad is vibrant and tangy, infusing every bite with a wonderful depth of flavor. This simple yet impactful dressing truly makes the salad shine.

    A classic Italian dressing features a base of quality extra virgin olive oil and red wine vinegar. Here’s how to make one:

    • Olive Oil: Use 1/2 cup of extra virgin olive oil for a rich foundation.
    • Red Wine Vinegar: Add 1/4 cup of red wine vinegar for the essential tang.
    • Garlic: Include 2 cloves of minced garlic for the best punch of flavor.
    • Dried Herbs: Use 1 teaspoon each of dried oregano and dried basil for classic Italian flavor.
    • Dijon Mustard: Add about 1 teaspoon to help emulsify the dressing and add a subtle zing.
    • Seasoning: Use salt and freshly ground black pepper to taste.
    • Optional Add-ins: For extra richness, consider a sprinkle of grated Parmesan cheese or a pinch of red pepper flakes for heat.

    Whisk these ingredients together until the dressing is flavorful and well-balanced. It is the heart of any great Italian pasta salad, and this approachable home cooking method yields fantastic results.

    Can you make pasta salad vegetarian?

    Absolutely! Most pasta salads are inherently vegetarian, making them a fantastic and adaptable choice for healthy, balanced meals. You can easily adjust the ingredients to fit any dietary preference.

    Traditional pasta salads often feature an array of vegetarian ingredients like pasta, fresh vegetables, cheese, and plant-based dressings, making them naturally meat-free. If a recipe calls for meat like pepperoni or chicken, you can simply omit it or swap it for a delicious plant-based protein to create a flavorful meal.

    Here are some fantastic vegetarian substitutes:

    • Chickpeas: Roasted or canned chickpeas add protein and a satisfying texture.
    • White Beans: Cannellini or other white beans are creamy and filling.
    • Grilled Tofu or Tempeh: Marinate and grill these for a smoky, savory addition.
    • Extra Vegetables: Add more of your favorites, like roasted bell peppers, zucchini, or sun-dried tomatoes.
    • Artichoke Hearts: Marinated artichoke hearts bring a tangy, meaty texture.
    • Olives: A variety of olives can add different flavor notes.

    Making your pasta salad vegetarian is an easy way to enjoy a wholesome dish and a quick solution for simple dinners or healthy snacks. Recipesmondial is here to help you discover new simple dishes and cook confidently.


    Sources

    1. https://www.foodsafety.gov/keep-food-safe/food-safety-by-food-type/meat-poultry-seafood#chicken

  • The Easiest Creamy Coleslaw Recipe (A Simple Step-by-Step Guide)

    The Easiest Creamy Coleslaw Recipe (A Simple Step-by-Step Guide)

    A classic coleslaw recipe combines finely shredded green cabbage and carrots with a creamy dressing. The dressing is typically made from a base of mayonnaise, a splash of vinegar for tang, and a small amount of sugar for sweetness, resulting in a perfectly balanced, crunchy, and refreshing side dish.

    Are you looking for a perfect side dish that complements any meal, adds a delightful crunch, and has everyone asking for the recipe? If you’re tired of complex instructions and want to make healthy, tasty food for your family, you’ve come to the right place. We specialize in simple, flavorful meals, and our Easiest Creamy Coleslaw is here to transform your dinner table. This classic recipe is incredibly easy to follow and guarantees a delicious result that will quickly become a family favorite.

    Our goal is to make Approachable home cooking a reality for everyone. We offer clear, step-by-step guidance without intimidating jargon. Whether you’re a beginner building confidence or a busy home cook who needs quick, family-friendly meals, this easy slaw is the perfect solution. We’ll show you how to make the perfect creamy dressing using everyday ingredients, complete with practical tips, substitutions, and even a KFC-style variation. Get ready to enjoy stress-free cooking and discover how simple homemade coleslaw can be!

    Why You’ll Love This Easy Coleslaw Recipe

    A close-up of a large serving bowl filled with creamy coleslaw, featuring shredded green and purple cabbage and carrots, garnished with fresh parsley.
    Professional food photography, photorealistic, high-quality food magazine photo. A vibrant and enticing close-up shot of a large serving bowl filled with freshly made creamy coleslaw. The coleslaw should feature finely shredded green cabbage, purple cabbage, and bright orange carrots, all generously coated in a rich, smooth, creamy white dressing. Garnish with a sprinkle of fresh chopped parsley. The bowl is placed on a light wooden surface or a rustic linen tablecloth. Soft, natural light illuminates the dish from the side, highlighting the glossy texture of the dressing and the crispness of the vegetables. Shallow depth of field, warm and inviting atmosphere.

    Searching for a side dish that’s both delicious and simple? This easy coleslaw recipe is your new go-to, delivering a creamy, refreshing crunch with minimal effort.

    We know that complex recipes and long ingredient lists can be overwhelming. That’s why this creamy coleslaw is so beginner-friendly. It’s designed to help you build confidence in the kitchen, one simple step at a time.

    • Super Simple & Quick: Ready in minutes, this recipe is perfect for busy weeknights or last-minute gatherings. It’s a delicious solution that’s even faster than ordering takeout.
    • Flavorful & Satisfying: Our homemade dressing strikes the perfect balance of sweet and tangy, while the crisp cabbage adds a delightful texture for a satisfying crunch in every bite.
    • Family-Friendly Favorite: As a classic side dish loved by all ages, coleslaw is an ideal addition to any family meal. Even picky eaters often enjoy its mild, refreshing taste.
    • Approachable Home Cooking: No fancy culinary skills required! Our step-by-step guidance makes this recipe foolproof, helping you master a classic dish with confidence.
    • Versatile for Any Occasion: From picnics and potlucks to weeknight dinners, this slaw complements countless dishes. Serve it alongside barbecue, fried chicken, or even fish tacos.
    • Enjoy Cooking Without Stress: Forget complicated steps and long prep times. This simple recipe lets you relax and create something delicious with ease.

    At Recipesmondial, we believe cooking should be enjoyable, not daunting. This easy coleslaw recipe perfectly embodies our mission by offering reliable results and incredible flavor. Get ready to discover your new favorite side dish!

    What Ingredients Do You Need for Coleslaw?

    A top-down view of fresh ingredients for creamy coleslaw, including whole green and purple cabbage, carrots, mayonnaise, apple cider vinegar, sugar, salt, and pepper.
    Professional food photography, photorealistic, high-quality food magazine photo. A beautifully arranged flat lay or overhead shot displaying all the fresh ingredients needed for creamy coleslaw. Include a head of green cabbage, a smaller portion of purple cabbage, whole carrots, a jar of mayonnaise, a bottle of apple cider vinegar, a small bowl of granulated sugar, and pinches of salt and black pepper. Each ingredient should look fresh, vibrant, and perfectly prepared (e.g., washed carrots, whole cabbage). They are neatly organized on a clean, light-colored kitchen counter or a light wooden board. The lighting is bright and even, emphasizing the natural colors and textures of the ingredients. No hands or cooking utensils present, just the raw ingredients.

    For the Cabbage Slaw

    The secret to a perfect creamy coleslaw is using fresh, vibrant vegetables. You don’t need fancy ingredients—just everyday staples that combine to create that classic crunch and fresh taste. It makes an amazing component for any simple dinner recipe.

    Here’s what you’ll need for the slaw base:

    • 1 medium head green cabbage (about 2 pounds): This is the heart of your coleslaw. Look for a firm head that feels heavy for its size. You’ll want to finely shred it.
    • 2 medium carrots: Carrots add a lovely sweetness and a pop of color. Shred them finely too.

    Quick Tip for the Slaw: To save time, buy a pre-shredded coleslaw mix—it’s perfect for quick meals. For extra visual appeal and texture, add a bit of shredded red cabbage to the mix.

    For the Creamy Coleslaw Dressing

    The magic of great coleslaw is in the dressing. This simple recipe creates a perfectly balanced sweet and tangy creaminess that coats the vegetables beautifully. Best of all, the ingredients are likely already in your pantry, making it incredibly easy to whip up.

    Here are the simple ingredients for our delicious dressing:

    • 1 cup mayonnaise: This forms the rich, creamy base of your coleslaw dressing. Use your favorite brand for the best results.
    • 2 tablespoons white vinegar: Vinegar adds that essential tang that brightens up the flavors. You can also use apple cider vinegar for a slightly different note.
    • 2 tablespoons granulated sugar: A touch of sugar balances the tanginess of the vinegar and enhances the natural sweetness of the carrots.
    • 1 teaspoon Dijon mustard: Dijon mustard adds a subtle depth and a hint of zest, and it also helps to emulsify the dressing.
    • ½ teaspoon celery salt: This is the secret to a classic, deli-style coleslaw flavor. If you don’t have any, substitute with ¼ teaspoon regular salt and ¼ teaspoon celery seed.
    • ¼ teaspoon black pepper: A pinch of fresh black pepper helps round out all the flavors.

    Substitution Ideas for Your Dressing: This recipe is very flexible. For a lighter dressing, replace half of the mayonnaise with Greek yogurt. To reduce the sweetness, simply use less sugar or your favorite sugar substitute.

    How to Make Coleslaw: A Step-by-Step Guide

    A person's hands gently mixing shredded cabbage and carrots with a creamy dressing in a large glass bowl using a wooden spoon.
    Professional food photography, photorealistic, high-quality food magazine photo. A dynamic, candid shot focusing on the hands of a home cook gently mixing creamy coleslaw in a large glass mixing bowl. The bowl contains a generous amount of shredded green and purple cabbage and bright orange carrots, with the creamy dressing visibly coating the vegetables. The cook’s hands are holding a wooden spoon, actively tossing and combining the ingredients. The background is a slightly blurred, warm, and inviting kitchen setting, perhaps with a subtle hint of a clean countertop or a window. Natural, soft lighting highlights the movement and the texture of the coleslaw. The scene evokes a sense of ease and satisfaction in home cooking.

    Ready to whip up the perfect creamy coleslaw? This step-by-step guide makes it a breeze. You don’t need to be a chef to create this delightful side dish, as our easy-to-follow recipe is designed for home cooks building confidence. Get ready to enjoy a stress-free cooking experience.

    Making delicious slaw is incredibly simple. With this guide, you will quickly master the classic recipe and achieve reliable, flavorful results every time. Follow these clear steps to create a vibrant dish that is sure to become a family favorite.

    1. Prepare Your Veggies: Begin with fresh cabbage and carrots. If using a whole head of cabbage, shred it finely with a sharp knife or a food processor. Next, grate the carrots. For a convenient shortcut, a pre-shredded coleslaw mix is a fantastic option that saves time without sacrificing flavor. This is a great tip for quick meals.
    2. Whisk the Creamy Dressing: In a large mixing bowl, combine the mayonnaise, apple cider vinegar, sugar, and seasonings. Whisk everything together until the mixture is smooth and well-combined. Be sure there are no lumps. Taste the dressing and adjust the sweetness or tanginess to your liking, as a little extra sugar or vinegar can make a big difference.
    3. Combine and Toss: Add the shredded cabbage and carrots to the bowl with the dressing. Gently toss until the vegetables are fully and evenly coated. Be careful not to overmix, which can make the cabbage watery. Simply mix until everything looks uniformly dressed.
    4. Chill for Flavor Development: This step is crucial for the best taste. Cover the bowl with plastic wrap and refrigerate the coleslaw for at least 30 minutes, though an hour is even better. Chilling allows the flavors to meld beautifully and the dressing to slightly soften the cabbage, creating that perfect coleslaw texture. This dish tastes even better if made a few hours ahead, making it great for meal prep.
    5. Serve and Enjoy: Before serving, give the coleslaw another gentle stir to ensure the dressing is evenly distributed. Serve this fresh, creamy side dish alongside your favorite meals. It’s a versatile accompaniment that pairs well with almost anything.

    Tips for the Best Traditional Coleslaw

    Crafting the perfect coleslaw is simple with a few helpful pointers. These tips will ensure your dish is always a hit, helping you cook with confidence.

    • Freshness Matters: Always use the freshest cabbage and carrots you can find. Crisp ingredients make a huge difference in the final taste and crunch.
    • Don’t Overdress: It’s easier to add more dressing than it is to remove it. Start with a little less than you think you need to avoid a soggy result.
    • Season to Taste: Taste your dressing before you combine it with the vegetables. Adjust the salt, pepper, and sugar levels to suit your personal preference.
    • Chilling is Key: Don’t skip the chilling step. This essential time allows the flavors to deepen and ensures the cabbage softens to the ideal texture.
    • Shredding Size: For a consistent texture, aim to shred your vegetables uniformly. This ensures every bite is perfect.
    • Make Ahead: Coleslaw is a fantastic make-ahead dish. Preparing it a few hours in advance makes mealtime stress-free and can even enhance the flavor, making it a great family-friendly meal component.
    • Spice it Up (Optional): For a little kick, try adding a pinch of cayenne pepper to the dressing.

    Tips for Making the Best Traditional Coleslaw

    Making the best traditional coleslaw is simpler than you think. With a few key tips, you can transform simple ingredients into a creamy, crunchy side dish that everyone will love. These pointers will help you avoid common pitfalls and master this classic recipe.

    Choose Your Cabbage Wisely

    The foundation of any great coleslaw is fresh cabbage. The quality of your cabbage directly impacts the final taste and texture of the slaw.

    • Freshness First: Pick a head of cabbage that feels heavy for its size. The leaves should be crisp and vibrant, with no signs of wilting or discoloration.
    • Green or Red Cabbage: While green cabbage is traditional, red cabbage adds a pop of color and a slightly earthier flavor. For the best visual appeal and depth, try using a mix of both.
    • Shredding Methods: You can shred cabbage by hand with a sharp knife, but a food processor with a shredding disc makes the job much faster. A mandoline also works well for creating uniform pieces.

    Perfecting the Dressing Balance

    The dressing is where the magic happens. A well-balanced creamy dressing is the key to a memorable coleslaw.

    • Sweetness is Essential: Don’t skip the sugar, as it balances the tang from the vinegar. Granulated sugar, honey, or a touch of maple syrup all work well.
    • Tang for Brightness: Apple cider vinegar is a classic choice. For an extra zesty note, add a squeeze of fresh lemon juice.
    • Creaminess Counts: Mayonnaise provides the creamy base. Use full-fat mayo for maximum richness or a lighter version if you prefer. For added depth, try mixing in a spoonful of buttermilk.
    • Season Generously: Always taste the dressing and adjust the seasonings. Salt and pepper are essential for enhancing the flavors, and a pinch of celery seed is a classic secret ingredient in many a coleslaw recipe.

    Preventing Watery Coleslaw

    Nobody enjoys a soggy slaw. Follow these steps to keep your coleslaw crisp and delicious.

    • Salt the Cabbage: After shredding, place the cabbage in a colander and toss it with about 1 teaspoon of salt. Let it sit for 15-30 minutes. This simple step draws out excess moisture.
    • Squeeze and Drain: Next, rinse the cabbage thoroughly under cold water to remove the salt. Squeeze out as much water as possible using your hands or a clean kitchen towel. This step is crucial for a crunchy texture.

    The Magic of Chilling Time

    Patience is key when making coleslaw. Allowing the slaw to rest before serving makes a significant difference.

    • Mellow Flavors: For the best taste, let your coleslaw chill in the refrigerator for at least 30 minutes, or ideally for 2-4 hours. This resting period allows the flavors of the dressing to meld with the cabbage [1].
    • Softer Texture: Chilling also helps the cabbage soften just enough to absorb the dressing, resulting in a more cohesive and enjoyable texture.

    Adding Extra Flair to Your Slaw

    While classic coleslaw is fantastic on its own, you can easily add extra crunch and flavor with a few simple ingredients.

    • Carrot and Onion: Shredded carrots provide natural sweetness and vibrant color, while finely minced red or green onion offers a mild, zesty bite.
    • Crispy Add-ins: For a welcome textural contrast, try adding toasted sunflower seeds, chopped nuts, or bacon bits just before serving.
    • Fresh Herbs: A sprinkle of fresh parsley or dill brightens the flavor of your coleslaw and adds an aromatic finish.

    By following these tips, you’ll be able to create a consistently delicious traditional coleslaw. It’s the perfect side dish for cookouts, potlucks, and family-friendly meals.

    What Are Some Different Coleslaw Recipes and Variations?

    KFC Style Coleslaw Recipe

    Craving that iconic, creamy, and slightly sweet coleslaw from KFC? You’re in luck! Recreating this family favorite at home is much simpler than you might think.

    The secret to its signature taste is an extra-fine chop of the vegetables and a perfectly balanced sweet and tangy dressing.

    How to Achieve That Signature Taste and Texture:

    • Finely Chop Your Veggies: For the creamiest texture, use a food processor to get a quick and consistent chop. You want the cabbage and carrots to be almost minced, not thickly shredded.
    • Sweet and Tangy Dressing: The dressing is a smooth blend of mayonnaise, milk, a touch of buttermilk (or lemon juice for tang), sugar, white vinegar, and a pinch of onion powder.
    • Let it Chill: Like the original, this slaw tastes best after chilling for at least an hour or two. This gives the flavors time to meld together.

    This beginner-friendly recipe is a quick and reliable way to bring a classic comfort food to any gathering.

    Coleslaw Recipe Without Mayo (Vinegar Slaw)

    For a lighter, brighter take on coleslaw, a vinegar-based slaw is the perfect answer. This version is naturally dairy-free and offers a refreshing tang instead of creamy richness.

    This slaw is perfect for warmer weather, for cutting through rich main dishes, or simply for when you’re out of mayonnaise.

    Simple Vinegar Dressing Ingredients:

    • Oil: A neutral oil like canola or sunflower oil works well. Olive oil can also be used for a robust flavor.
    • Vinegar: Apple cider vinegar is a popular choice for its mild, fruity tang. White wine vinegar or even rice vinegar can also be used.
    • Sweetener: A little sugar, honey, or maple syrup balances the tartness.
    • Seasonings: Salt, black pepper, and perhaps a touch of celery seed or dried dill add depth.
    • Optional Flavor Boosters: A finely minced shallot or a spoonful of Dijon mustard can elevate the taste.

    Simply whisk these ingredients together and toss with your shredded cabbage and carrots for a delicious result every time.

    Fun Add-ins for Extra Flavor and Crunch

    One of the best parts of making coleslaw from scratch is how easily you can customize it. Simple additions can transform a basic recipe into something uniquely yours.

    Here are some of our favorite additions to boost flavor, texture, and visual appeal:

    • For Extra Crunch:
      • Toasted Nuts: Pecans, walnuts, or slivered almonds add a lovely nutty depth.
      • Seeds: Sunflower seeds, pumpkin seeds, or sesame seeds provide a delicate crunch.
      • Crispy Noodles: Fried wonton strips or ramen noodles (untoasted) can be a fun addition.
      • Bell Peppers: Finely diced red, yellow, or orange bell peppers add a fresh snap.
    • For Sweetness and Fruitiness:
      • Dried Cranberries or Raisins: These add a chewy sweetness.
      • Apple: Diced Granny Smith or Fuji apples offer a crisp, juicy bite.
      • Pineapple: Crushed or tidbit pineapple can bring a tropical flair (drain well!).
    • For Bold Flavors:
      • Fresh Herbs: Chopped parsley, cilantro, dill, or chives brighten the flavor.
      • Jalapeño: A finely minced jalapeño (seeds removed for less heat) adds a gentle kick.
      • Red Onion: Thinly sliced red onion provides a sharper, more pungent flavor.
      • Blue Cheese Crumbles: For a gourmet touch, especially with a creamy dressing.

    Experiment with these ideas to find your favorite combinations and create a signature slaw.

    What Can You Serve With Coleslaw?

    With its cool crunch and tangy flavor, creamy homemade coleslaw is an incredibly versatile side dish. This easy coleslaw recipe is the perfect companion for countless family-friendly meals.

    Classic BBQ and Comfort Food Pairings

    As a staple at any barbecue or picnic, coleslaw is also the go-to side for many beloved comfort foods.

    • Pulled Pork Sandwiches: The crisp, cool slaw perfectly balances the rich, smoky flavor of pulled pork, creating an easy and delicious meal.
    • BBQ Ribs: A tangy dressing adds a refreshing contrast that beautifully complements both sweet and savory BBQ ribs.
    • Grilled Chicken: A generous scoop alongside grilled chicken breasts or thighs creates a fresh and satisfying plate.
    • Fried Chicken: Our creamy recipe tastes just like the classic KFC coleslaw, making it the ideal companion for a crispy fried chicken dinner.
    • Fish and Chips: Coleslaw offers a zesty, crisp counterpoint to rich, battered fish and hot fries.

    Elevating Everyday Meals

    This simple coleslaw isn’t just for special occasions. It’s a fantastic way to elevate everyday meals, from quick lunches to simple dinners, making your cooking more enjoyable and stress-free.

    • Tacos and Wraps:
      • Fish Tacos: Use coleslaw as a crunchy, flavorful topping to add amazing texture and zest.
      • Chicken or Pork Wraps: For a fast and delicious lunch, fill wraps with leftover cooked meat and a spoonful of slaw. This is also a great meal prep idea.
    • Sandwiches and Burgers:
      • Hamburgers and Hot Dogs: Add a dollop to your burger or hot dog for an extra burst of crunch and flavor.
      • Veggie Burgers: Transform a basic veggie burger into a special meal by adding a scoop of fresh coleslaw.
    • Baked and Roasted Mains:
      • Roasted Chicken or Pork: A side of fresh slaw brightens up any comforting roasted meat dinner.
      • Baked Salmon: The creamy texture and tang of the slaw pair wonderfully with flaky baked salmon.

    Creative Ways to Enjoy Your Slaw

    Don’t limit this delicious recipe to a traditional side dish. Get creative with your flavorful coleslaw!

    • Salad Topper: Add a spoonful to a green salad for extra crunch and a creamy, zesty element.
    • Picnic Staple: As a refreshing addition to any outdoor gathering, coleslaw is a lighter alternative to heavier pasta or potato salads.

    As you can see, homemade coleslaw is remarkably versatile, pairing well with everything from quick weeknight lunches to impressive weekend dinners. Enjoy discovering all the delightful ways to serve this simple, flavorful side! You are now equipped to make cooking enjoyable and stress-free with Recipesmondial’s easy recipes.

    How to Store Leftover Coleslaw

    You’ve whipped up a fantastic batch of our easy creamy coleslaw recipe! It’s so fresh and flavorful, you might not have leftovers. However, if you do, storing them correctly is key. Proper storage helps you enjoy every last bite, minimize food waste, and simplify future meal prep.

    How to Keep Your Coleslaw Fresh

    To ensure your leftover coleslaw stays delicious and safe to eat, follow these simple steps for the best results:

    • Use an Airtight Container: Transfer any remaining coleslaw into a clean, airtight container. This prevents air from drying out the cabbage and degrading the dressing. It also seals out other refrigerator odors.
    • Refrigerate Promptly: Always store coleslaw in the refrigerator, as the cool temperature slows bacterial growth. This step is especially important for dressings that contain mayonnaise.
    • Check the Shelf Life: When stored properly in the fridge, homemade creamy coleslaw usually stays fresh for 3 to 4 days [2]. After this period, the texture and flavor may start to decline.

    Dealing with Watery Coleslaw

    One common issue with leftover coleslaw is that it can become watery over time. This happens because salt in the dressing draws moisture out of the cabbage. Don’t worry—this is simple to manage.

    • Drain Excess Liquid: Before serving your leftovers, give the coleslaw a gentle stir. If you see a pool of liquid at the bottom of the container, carefully drain it off to improve the texture.
    • Consider Separate Storage (Pro Tip): If you’re making a large batch for meal prep, store the shredded cabbage mix and the creamy dressing separately. Combine them just before serving to keep the slaw extra crunchy for longer.
    • Stir Before Serving: Always give your stored coleslaw a good stir right before you eat it. This will help reincorporate the dressing and distribute any separated liquid evenly.

    Even if it’s a little softer the next day, leftover coleslaw is still wonderful as a quick side dish or a topping for sandwiches. Learning how to store food correctly builds confidence in the kitchen and makes approachable home cooking even more rewarding. Enjoy your delicious recipes to the last bite!

    Frequently Asked Questions

    What are the ingredients in a traditional coleslaw?

    A traditional coleslaw recipe is simple, focusing on fresh, crisp vegetables and a creamy dressing. The main ingredient is cabbage, often a mix of green and red varieties for color.

    Here are the key components:

    • Shredded Cabbage: Typically green cabbage, often mixed with a bit of red cabbage.
    • Shredded Carrots: These add a touch of sweetness and vibrant color.
    • Creamy Dressing: This usually features mayonnaise as its base.

    This classic combination creates a refreshing side dish and is a fantastic, beginner-friendly recipe for any home cook.

    How do you make a simple coleslaw dressing?

    Making a simple, creamy coleslaw dressing is quick and easy. This recipe comes together in just a few minutes and adds fantastic flavor to shredded vegetables.

    Here’s what you need for a basic yet flavorful dressing:

    • Mayonnaise
    • White vinegar or apple cider vinegar
    • Sugar or a natural sweetener
    • A touch of Dijon mustard
    • Salt and black pepper to taste

    To make the dressing:

    1. In a medium bowl, combine the mayonnaise, vinegar, sugar, and Dijon mustard.
    2. Whisk everything together until the mixture is smooth and well combined.
    3. Season with salt and pepper. Taste the dressing and adjust as needed.
    4. Pour the dressing over your shredded cabbage and carrots, then toss gently to coat.

    This dressing transforms simple ingredients into a flavorful side dish, perfect for a quick family meal.

    Can you make coleslaw dressing without mayo?

    Yes, you can easily make a delicious coleslaw dressing without mayonnaise. For a lighter option or if you prefer to avoid mayo, this variation—often called a vinegar slaw—is a great alternative.

    A vinegar-based dressing provides a tangy, bright flavor and holds up well in the refrigerator, making it a great option for meal prep.

    Common ingredients for a mayo-free dressing include:

    • Olive oil or another neutral oil
    • Vinegar (apple cider vinegar, white vinegar, or rice vinegar work well)
    • Sugar or honey, to balance the tang
    • Dijon mustard for a little kick
    • Salt and pepper
    • Optional additions: celery seeds, poppy seeds, or a pinch of red pepper flakes

    To prepare it, simply whisk all the ingredients together and pour the dressing over your shredded vegetables. This fresh take on slaw is a wonderful way to enjoy a classic side dish with a different twist, creating a healthy option for family meals.

    Get the Easiest Creamy Coleslaw Recipe

    Ready for a perfect, creamy, and undeniably delicious coleslaw recipe? Forget complicated instructions and bland, watery results. This simple guide guarantees a crowd-pleasing side dish every single time.

    At Recipesmondial, we believe cooking should be an enjoyable experience, not a chore. This easy coleslaw recipe was designed with that in mind. It’s perfect for home cooks, busy families, and anyone who wants a great meal without the stress.

    Here’s why this is the easiest and best creamy coleslaw you’ll ever make:

    • Beginner-Friendly: Our step-by-step guidance makes it nearly impossible to go wrong. You’ll build kitchen confidence with every simple chop and stir.
    • Quick to Make: This coleslaw comes together in minutes, making it the ideal side for busy weeknights or last-minute potlucks.
    • Family-Friendly: The classic, creamy flavor is a hit with everyone, even picky eaters. It’s a versatile side that complements almost any meal.
    • Simply Flavorful: We use fresh, everyday ingredients to deliver maximum taste without any fuss. The homemade coleslaw dressing recipe is the true star.
    • Approachable Cooking: Say goodbye to overwhelming instructions. We keep our recipes clear, practical, and focused on incredible flavor.

    This classic, homemade slaw is more than just a side dish—it’s proof that simple ingredients can create something truly special. Whether you’re craving the iconic taste of a KFC coleslaw recipe or just want a fresh, crunchy addition to your dinner, this recipe delivers.

    So, go ahead and give it a try! You’re moments away from serving the freshest, most delicious homemade creamy coleslaw. Let Recipesmondial help you discover new flavors and make mealtime stress-free. Happy cooking!


    Sources

    1. https://www.thekitchn.com/why-you-should-let-your-salads-rest-229606
    2. https://www.foodsafety.gov/food-safety-by-events/cookouts-and-picnics
  • How to Make Authentic Carbonara: A Simple Step-by-Step Recipe

    How to Make Authentic Carbonara: A Simple Step-by-Step Recipe

    Carbonara is a classic Italian pasta dish from Rome made with eggs, hard cheese (typically Pecorino Romano), cured pork (guanciale), and black pepper. The creamy sauce is created without any cream by combining the hot pasta with a mixture of raw eggs, cheese, and the rendered pork fat, which emulsifies into a rich coating.

    Imagine a bowl of silky pasta coated in a rich, luscious sauce of egg, cheese, and crispy pork. This is authentic carbonara, a timeless Italian classic that many home cooks find intimidating. The biggest fears? Scrambling the eggs and failing to create that perfectly creamy sauce. But what if you could master a truly delicious pasta carbonara with confidence? Our recipe makes it much simpler than you think—no professional chef skills required.

    Our simple, step-by-step guide is designed to make the process joyful and foolproof. We’ll walk you through every detail to ensure you get a perfectly creamy, intensely flavorful spaghetti carbonara. Best of all, it takes only 20 minutes from start to finish. This makes it an ideal family-friendly meal for a quick weeknight dinner, yet it’s special enough for any occasion.

    We’ll break down the secrets to a flawless carbonara, showing you how to achieve its iconic creamy texture using just a few simple ingredients—no cream needed. You’ll gain confidence in the kitchen and experience the satisfaction of serving a restaurant-quality meal at home. So, what makes this the ultimate carbonara recipe for home cooks? Let’s dive in and find out.

    Why Is This The Best Carbonara Recipe for Home Cooks?

    Welcome to the ultimate guide for making authentic, delicious, and surprisingly simple carbonara at home. If you’ve ever felt intimidated by classic Italian pasta, you’re not alone. Many home cooks struggle to create that perfect, creamy sauce, often ending up with scrambled eggs or a dry dish.

    At Recipesmondial, we believe cooking should be enjoyable, not stressful. That’s why we’ve crafted this carbonara recipe specifically for the home cook. We simplified the process without sacrificing an ounce of authentic flavor, so you can cook confidently and enjoy one of Italy’s most beloved dishes.

    This spaghetti carbonara recipe unlocks a stress-free kitchen experience by offering:

    • Simplified Step-by-Step Cooking Guidance: We break down every stage into clear, manageable steps. From prep to plating, you’ll move with ease—even if you’re a beginner.
    • Reliable, Creamy Results: Our instructions deliver a luscious, silky carbonara sauce every single time. Say goodbye to scrambled eggs and dry pasta—this recipe guarantees success.
    • Focus on Essential, Flavorful Ingredients: You won’t find a long, confusing list here. We highlight the five key ingredients that make an authentic carbonara sing, and we’ll guide you on choosing and using them for maximum flavor.
    • Practical Tips for Success: We share all the secrets, from perfectly emulsifying the sauce to rendering the pork just right. These practical tips make great home cooking approachable.
    • Confidence-Building Techniques: This isn’t just a recipe; it’s a cooking lesson. You’ll learn fundamental techniques you can apply to many other easy recipes. As you build your skills, you’ll transform from an unsure cook into one who truly enjoys the process.
    • Quick and Easy Preparation: We know you need delicious meals fast. This pasta carbonara recipe is designed for efficiency, delivering flavorful meals made easy right to your weeknight table.

    Enjoy gourmet flavor without being overwhelmed by complex instructions. Our beginner-friendly recipes are designed to inspire creativity and make mealtime exciting. This carbonara recipe is a perfect example of how Recipesmondial helps you cook confidently and eat well, every day.

    What Are the 5 Ingredients for Authentic Carbonara?

    The five essential ingredients for authentic carbonara: guanciale, Pecorino Romano cheese, eggs, black pepper, and spaghetti, neatly arranged on a wooden surface.
    Professional food photography, photorealistic, high-quality food magazine photo of the five essential ingredients for authentic spaghetti carbonara laid out on a rustic wooden countertop. The ingredients include fresh eggs (some whole, some with yolks separated), a block of Pecorino Romano cheese with a grater nearby, a generous slab of guanciale, a bowl of whole dried spaghetti, and a small pile of freshly cracked black pepper. The lighting is warm and inviting, showcasing the textures and freshness of each item. The composition is clean and appealing, ready for a home cook to begin.

    Authentic Carbonara is all about a few key ingredients working together to create its irresistible creamy sauce. The focus is on simplicity and flavor, ensuring your recipe turns out perfectly every time. Forget complex instructions—let’s break down the five essential components for an easy-to-make, classic Carbonara.

    Here are the five essential ingredients for an authentic, easy-to-make Carbonara:

    Guanciale vs. Pancetta vs. Bacon

    The heart of any classic Carbonara is cured pork, and guanciale is the most traditional choice. This cured pork jowl is prized for its rich flavor and the unique texture it develops when rendered. Its fat melts into a silky base for the sauce [source: https://www.eataly.com/us_en/what-is-guanciale].

    Since guanciale can be hard to find, **pancetta** (cured pork belly) is a fantastic substitute that offers a similar depth of flavor and is more widely available. While not traditional, **bacon** is another accessible option. Its smoky flavor delivers savory notes and crispy bits, creating a comforting, family-friendly meal. Each choice brings something unique to your pasta carbonara.

    Here is a quick comparison to help you choose:

    Ingredient Description Flavor Profile Availability Authenticity
    Guanciale Cured pork jowl Rich, fatty, intense pork flavor Specialty stores Most authentic
    Pancetta Cured pork belly Salty, savory, milder than guanciale Most grocery stores Excellent alternative
    Bacon Smoked pork belly Smoky, salty, crispy Widely available Common substitution (less authentic)

    The Best Cheese for Carbonara: Pecorino Romano or Parmesan?

    For the signature creamy, tangy sauce, cheese is crucial. **Pecorino Romano** is the authentic choice. Made from sheep’s milk, this hard, salty cheese has a sharp, pungent flavor that cuts through the richness of the pork and eggs [source: https://www.cheese.com/pecorino-romano/].

    If Pecorino Romano isn’t available, **Parmigiano Reggiano** (Parmesan) is a delicious alternative. This cow’s milk cheese offers a nuttier, more savory taste and is widely available. For a more balanced profile, you can even use a blend of both. No matter which you choose, always use freshly grated cheese. Pre-grated varieties contain anti-caking agents that can make your sauce gritty.

    The Role of Eggs in the Creamy Sauce

    Eggs are what give Carbonara its luxurious, silky sauce—no cream required. The secret is a combination of whole eggs and egg yolks. Yolks provide richness and help emulsify the sauce, while whole eggs add body. Many traditional recipes call for one whole egg and two additional yolks for the ideal consistency. This mixture is combined with the hot pasta and a splash of starchy pasta water to create the sauce.

    To avoid scrambling the eggs, it’s crucial to temper them gently. This beginner-friendly recipe will help you master the technique. Using fresh, high-quality eggs also makes a significant difference in the final flavor and texture of your spaghetti carbonara. This simple dinner recipe is all about technique.

    What is the best pasta for carbonara?

    Choosing the right pasta shape is essential. **Spaghetti** is the traditional and most popular choice, as its long, thin strands coat evenly with the creamy sauce [source: https://www.barilla.com/en-us/products/pasta/classic-blue-box/spaghetti-no-5]. This ensures you get a consistent flavor in every bite.

    While spaghetti is classic, other shapes also work well:

    • Bucatini: This pasta resembles thick spaghetti with a hole through the center, which captures the sauce beautifully.
    • Rigatoni: A shorter, ridged tube pasta. The ridges and hollow center hold onto the sauce effectively.
    • Fettuccine: Wider, flat strands offer a different mouthfeel and are still great for rich sauces.

    The key is to select a pasta that holds the sauce effectively. No matter which shape you choose, be sure to cook it al dente (firm to the bite). This texture is crucial for a perfect finish to your easy carbonara recipe.

    Freshly Ground Black Pepper

    Don’t overlook the **freshly ground black pepper**—it’s a non-negotiable ingredient in authentic Carbonara. More than just a garnish, pepper provides a warm, pungent counterpoint to the dish’s rich, savory flavors. It adds a subtle kick and complexity that elevates the final result. For the best aroma and taste, always use freshly ground whole peppercorns instead of pre-ground pepper; this small detail makes a huge difference.

    A generous amount ground directly over the pasta creates a classic “cacio e pepe” (cheese and pepper) effect, transforming simple ingredients into a flavorful meal. Remember, fresh is always best for this crucial seasoning.

    How to Make Perfect Spaghetti Carbonara Step-by-Step

    A home cook's hands gently toss spaghetti with creamy carbonara sauce and crispy guanciale in a large pan.
    Professional food photography, photorealistic, high-quality food magazine photo depicting a close-up of a home cook’s hands, in a warm, friendly kitchen, expertly tossing freshly cooked spaghetti with the creamy, emulsified egg and Pecorino Romano sauce in a large stainless steel pan. Steam gently rises from the pasta, highlighting the perfect coating of the rich, golden sauce on each strand. The guanciale pieces are visible, crispy and well-integrated. The focus is on the action and the appealing texture of the developing carbonara. The scene conveys a sense of ease and mastery for a beginner cook.

    Making authentic spaghetti carbonara can seem intimidating, but this recipe makes it wonderfully simple. At Recipesmondial, our goal is to make cooking enjoyable and stress-free. Follow these steps to create a truly flavorful meal without feeling overwhelmed.

    This beginner-friendly recipe focuses on core techniques, so you can forget the stress of elaborate cooking. You’ll quickly learn how to transform a few simple ingredients into a creamy, delicious dish. Let’s get started on your authentic spaghetti carbonara.

    Step 1: Prepare the Egg and Cheese Mixture

    This crucial step creates the creamy base for your carbonara sauce, so it’s important to get it ready before your pasta finishes cooking.

    • Crack 2 whole large eggs and 2 extra large egg yolks into a medium-sized bowl. The extra yolks add richness and creaminess.
    • Add 1 cup (about 80g) of finely grated Pecorino Romano cheese. This traditional cheese provides a sharp, salty flavor, but finely grated Parmesan is a great substitute if you prefer a milder taste.
    • Grind in a generous amount of freshly ground black pepper. We recommend about 1 teaspoon, but feel free to adjust to your preference. Freshly ground pepper adds a wonderful aroma and spice.
    • Whisk the mixture vigorously with a fork until it is thoroughly combined and smooth. It should look like a thick, pale yellow paste. Set this bowl aside.

    Step 2: Cook the Pasta

    Perfectly cooked pasta is key to a great carbonara. You want it to be al dente, which means it should be slightly firm to the bite.

    • Bring a large pot of water to a rolling boil.
    • Add a generous amount of salt to the boiling water. It should taste like the sea [1].
    • Add 12 ounces (about 340g) of spaghetti or your preferred pasta to the boiling water.
    • Cook the pasta according to the package directions, but aim for 1-2 minutes less than the recommended time for al dente. This prevents the pasta from getting mushy when it finishes cooking in the sauce.
    • Before draining, reserve about 1½ cups of the starchy pasta cooking water. This cloudy water is the secret to a luscious sauce.
    • Drain the pasta well, but do not rinse it.

    Step 3: Render the Pork

    The pork provides incredible flavor and the essential fat for the carbonara sauce. While guanciale is traditional, pancetta or bacon are also delicious alternatives.

    • Dice 4 ounces (about 115g) of guanciale (or pancetta/bacon) into small, uniform ¼-inch pieces. Cutting them to an even size helps them cook more evenly.
    • Place the diced pork in a large, cold skillet. Make sure the skillet is large enough to hold all of the pasta later.
    • Turn the heat to medium-low. Cook slowly, stirring occasionally, until the pork is crispy and its fat has rendered. This process usually takes 8-10 minutes.
    • Use a slotted spoon to remove the crispy pork pieces from the skillet. Set them on a paper towel-lined plate to drain excess fat.
    • Leave the flavorful rendered fat in the skillet—it is a crucial part of the sauce. Keep the skillet over very low heat to ensure the fat stays warm.

    Step 4: Combine Everything to Create the Sauce

    This is where the magic happens! To get a creamy, emulsified sauce instead of scrambled eggs, you need to work quickly and confidently. This final step transforms your ingredients into an irresistible pasta carbonara.

    • Immediately add the hot, drained pasta to the skillet with the warm pork fat. Toss well to coat every strand of spaghetti.
    • Pour about ¼ cup of the hot, reserved pasta water into the skillet and stir to combine.
    • Now, remove the skillet from the heat completely. This is the most important step to prevent the eggs from scrambling.
    • Quickly pour the egg and cheese mixture over the hot pasta.
    • Using tongs, toss and stir everything continuously and very quickly. The residual heat from the pasta and the skillet gently cooks the eggs, while the starchy water helps create a rich, creamy sauce. It is essential that you do not stop stirring.
    • The sauce will thicken as you stir. If it seems too thick, add more of the reserved pasta water, one tablespoon at a time, until it reaches a silky, creamy consistency.
    • Stir in most of the crispy pork, saving a small amount for garnish.
    • Serve immediately in warm bowls. Garnish with the remaining pork, an extra sprinkle of Pecorino Romano, and another grind of black pepper.

    And there you have it: a perfect spaghetti carbonara, made easy and approachable. Enjoy this delicious, restaurant-quality meal, cooked with confidence in your own kitchen.

    Top Tips for a Flawless, Creamy Carbonara (Without Cream)

    A close-up of a beautifully plated bowl of creamy, authentic spaghetti carbonara, garnished with fresh black pepper and grated Pecorino Romano cheese.
    Professional food photography, photorealistic, high-quality food magazine photo of a perfectly plated, steaming bowl of authentic spaghetti carbonara, presented on a simple, elegant white plate. The spaghetti is glistening, coated generously with a luscious, creamy, emulsified sauce that has no visible liquid or cream, demonstrating the flawless technique. It is garnished with abundant freshly cracked black pepper and finely grated Pecorino Romano cheese. The lighting is soft and inviting, emphasizing the rich texture and delicious appeal of the dish, making it look incredibly appetizing and achievable for a home cook.

    Making a perfectly rich and creamy carbonara is simpler than you might think—and it doesn’t require any cream. The magic lies in a few key techniques. Follow our pro tips to achieve a restaurant-quality spaghetti carbonara recipe at home. You’ll master this classic pasta carbonara in no time.

    Avoid Scrambled Eggs

    A common fear when making a classic carbonara recipe is accidentally scrambling the eggs. To avoid this, the key is temperature control.

    • Remove from Heat: Always take your hot pasta off the stove before adding the egg and cheese mixture.
    • Temper the Eggs: Whisk constantly while slowly drizzling a spoonful or two of hot pasta water into the egg and cheese mixture. This gentle warming process helps prevent the eggs from curdling when they meet the hot pasta [2].
    • Constant Motion: As you add the egg mixture to the pasta, stir continuously. This constant movement is what creates a smooth, velvety sauce instead of unwanted chunky bits.

    Follow these steps, and your pasta carbonara sauce will be perfectly smooth and creamy.

    Use Pasta Water

    The starchy water from cooking your pasta is liquid gold. This secret ingredient binds the sauce together, creating a luscious, creamy texture without any cream.

    • Save It: Before draining your pasta, reserve at least one cup of the cooking water.
    • Add Gradually: Slowly drizzle the starchy water into your pasta and egg mixture, just a tablespoon or two at a time, until the sauce reaches your desired consistency.
    • Emulsify: The starch in the water is essential for emulsifying the sauce. It helps blend the fat from the pork with the cheese and eggs, creating a silky, cohesive coating for your spaghetti carbonara.

    This simple trick makes all the difference for an authentic carbonara recipe.

    Work Quickly

    Timing is crucial for a creamy carbonara. Once the pasta is cooked and the pork is rendered, the final steps must be done quickly.

    • Be Prepared: Have all your ingredients measured and ready before you begin. This includes the egg mixture, rendered pork, and reserved pasta water.
    • Combine Fast: Immediately after taking the pasta off the heat, toss it with the pork, and then pour in the egg mixture.
    • Stir Vigorously: Stir quickly and constantly to coat every strand of pasta. This rapid movement helps the sauce emulsify while preventing the eggs from overcooking.

    Working swiftly is key to a fluid sauce that clings perfectly to the pasta.

    Serve Immediately

    Carbonara is best enjoyed the moment it’s made. The delicate sauce changes consistency as it cools, so timing is everything.

    • Enjoy Fresh: Have everyone at the table and ready to eat as soon as the pasta carbonara is finished.
    • Best Texture: The sauce is at its peak creamy consistency right after it’s made—warm, velvety, and coating the pasta perfectly.
    • Avoid Thickening: If it sits for too long, the sauce will thicken, and the pasta may clump together.

    Plate it immediately, garnish with extra cheese and pepper, and enjoy your delicious carbonara recipe!

    Easy Carbonara Recipe Variations

    While authentic carbonara is a masterpiece, sometimes a recipe needs to adapt. Whether it’s to fit your pantry, suit dietary needs, or simply try something new, we’re here to help! At Recipesmondial, we love showing you how versatile cooking can be. These easy carbonara variations are perfect for beginner cooks and busy families. They provide simple, flavorful dinner recipes so you can enjoy cooking without stress.

    Vegetarian Carbonara

    Going vegetarian doesn’t mean sacrificing flavor, and creating a delicious veggie carbonara is simple. Just replace the guanciale or pancetta with a savory, plant-based alternative. This variation is a wonderful way to enjoy a comforting pasta dish and makes a great family-friendly meal.

    Here are some fantastic substitutes for the cured pork:

    • Mushrooms: Sauté sliced cremini, shiitake, or portobello mushrooms until deeply browned and slightly crispy. They offer a rich, umami flavor and a satisfying chew.
    • Smoked Tofu or Tempeh: Dice smoked tofu or tempeh into small cubes and pan-fry them until golden and crisp. This adds a lovely smoky depth that mimics bacon.
    • Sun-dried Tomatoes: Finely chop oil-packed sun-dried tomatoes. Sauté them briefly to warm them through and release their concentrated flavor for a sweet and tangy contrast.
    • Zucchini or Asparagus: For a lighter touch, roast or sauté diced zucchini or asparagus until tender-crisp. These vegetables add freshness and a pop of color.

    Pro Tip: Whichever option you choose, cook it until it has a good sear or crispiness. This step is key to mimicking the texture and savory flavor of the pork, ensuring your vegetarian carbonara is just as satisfying. Remember to use a vegetarian-friendly hard cheese, as some Pecorino Romano varieties contain animal rennet.

    Carbonara with Bacon

    While guanciale is traditional, bacon is a more common ingredient in many home kitchens. This simple swap makes the classic Italian dish more approachable for everyday cooking, and you can still achieve a wonderfully rich and creamy result.

    Here’s how to adapt the recipe:

    • Choose Good Quality Bacon: Opt for thick-cut, smoked bacon if possible. It will provide the best flavor and texture.
    • Render Slowly: Cut the bacon into small pieces. Cook it slowly in a cold pan over medium-low heat to gradually render the fat and perfectly crisp the bacon.
    • Save the Fat: Keep a tablespoon or two of the rendered bacon fat in the pan. This flavorful fat is crucial for tossing with the pasta and emulsifying the sauce. Drain any excess.
    • Adjust Seasoning: Bacon is generally saltier than guanciale. Taste the crispy bacon before adding extra salt to your pasta water or cheese mixture, as you might need less overall.

    This simple swap creates an easy weeknight meal with all the comforting flavor you expect—no specialty ingredients required. Bacon carbonara is a fantastic family-friendly dish that everyone will love.

    Using Different Pasta Shapes

    Spaghetti is the classic choice for carbonara because the creamy sauce coats each strand so well. However, you can absolutely use other pasta shapes. Experimenting with different pastas is a fun way to add variety to this simple dinner and keep mealtime exciting.

    Here are some excellent alternatives:

    • Bucatini: This thick, spaghetti-like pasta has a hole through the center, making it fantastic for trapping sauce inside and out for a satisfying bite.
    • Rigatoni: These large, ridged tubes are perfect for catching the rich carbonara sauce. Their ridges and hollow centers ensure every mouthful is packed with flavor.
    • Penne: Similar to rigatoni but smaller, penne also has ridges and a hollow interior that holds sauce well. It’s a widely available choice that offers a slightly different texture.
    • Fettuccine or Tagliatelle: These wider, flat ribbons provide a different mouthfeel and pair wonderfully with rich sauces, creating a substantial base for the carbonara.
    • Mezzi Rigatoni or Maccheroni: Shorter, smaller pasta shapes also work well. They are ideal if you prefer a more bite-sized pasta in your carbonara.

    The key is to choose a pasta shape that the egg and cheese sauce can cling to well. These variations ensure that even if you’re out of spaghetti, you can still enjoy a delicious carbonara with minimal fuss. Learning these simple cooking tips will boost your confidence in the kitchen!

    Frequently Asked Questions about Carbonara

    What makes a carbonara recipe authentic?

    An authentic spaghetti carbonara recipe is simpler than you might think. The secret lies in using a few high-quality ingredients and the right technique to create a rich, creamy sauce without any cream.

    Here are the key elements for an authentic pasta carbonara:

    • Guanciale: This cured pork jowl is essential for its rich fat and distinct flavor. If you can’t find it, good-quality pancetta is the next best thing.
    • Pecorino Romano Cheese: A hard, salty sheep’s milk cheese, Pecorino Romano adds a sharp, tangy taste that is non-negotiable for true authenticity.
    • Eggs: The sauce uses a mix of whole eggs and extra yolks. This mixture creates the silky, emulsified coating for the pasta.
    • Black Pepper: Freshly ground black pepper is crucial, adding a delightful warmth and spice.
    • Pasta: While spaghetti is the traditional choice, other pasta shapes like rigatoni or bucatini also work well.
    • Pasta Water: Starchy pasta water is vital. It helps emulsify the sauce and makes it incredibly creamy.

    A truly authentic carbonara never includes cream, garlic, onions, or mushrooms. Instead, its incredible flavor comes from the simple combination of these core ingredients [3].

    Can you make carbonara with cream?

    For an authentic Italian carbonara recipe, the answer is a firm “no.” Traditional pasta carbonara achieves its creaminess through a clever emulsion of rendered pork fat, egg yolks, Pecorino Romano cheese, and starchy pasta water. This process creates a rich, velvety sauce without any dairy cream.

    Many recipes, especially those outside of Italy, add cream to make the sauce-making process easier and reduce the risk of scrambling the eggs. However, adding cream significantly changes the dish’s texture and flavor, moving it away from what makes a classic spaghetti carbonara so special. We focus on authentic flavor, showing you how to achieve that perfect creaminess the traditional way. Mastering this technique is a rewarding experience.

    What’s the difference between Italian and Filipino Carbonara?

    While both are beloved pasta dishes, Italian and Filipino carbonara recipes are quite different, reflecting local ingredients and culinary preferences. Here’s a quick comparison:

    Feature Italian Carbonara Filipino Carbonara
    Main Pork Product Guanciale (cured pork jowl) Bacon, ham, or hotdogs
    Dairy Base No cream; uses eggs, Pecorino Romano, and pasta water for creaminess Cream, evaporated milk, or condensed milk for a sweeter, richer sauce
    Cheese Pecorino Romano (salty sheep’s milk cheese) Parmesan cheese, often grated, for a milder flavor
    Additional Ingredients Freshly ground black pepper, minimal other additions Often includes mushrooms, onions, garlic, and sometimes a touch of sugar for a sweeter profile [4]
    Flavor Profile Savory, peppery, cheesy, rich umami Creamier, often sweeter, milder cheese flavor, sometimes smoky from bacon

    Both versions are delicious and showcase how a classic dish can evolve across different cultures. Recipesmondial celebrates these diverse, flavorful meals made easy!

    Can I use bacon instead of guanciale in carbonara?

    Yes, absolutely! While guanciale is traditional for an authentic carbonara recipe, bacon is a common and perfectly acceptable substitute. Since guanciale can be hard to find, using bacon makes this delicious dish more accessible to home cooks.

    Here’s what to keep in mind when using bacon for your spaghetti carbonara:

    • Choose Wisely: Opt for good-quality, thick-cut bacon. Avoid heavily smoked or maple-cured varieties, as their strong flavors can overpower the dish.
    • Render Slowly: Cook the bacon gently over low heat until it’s crispy. This process renders out the fat, which is a crucial component of the sauce.
    • Flavor Difference: Bacon gives the carbonara a smokier flavor, while guanciale offers a deeper, porkier richness. Even so, bacon still creates a fantastic and flavorful meal.

    Our easy recipes are all about helping you create delicious family-friendly meals with what you have on hand. Don’t let the lack of guanciale stop you from enjoying a wonderful plate of pasta carbonara!


    Sources

    1. https://www.seriouseats.com/how-to-salt-pasta-water
    2. https://www.seriouseats.com/what-is-tempering-eggs-guide
    3. https://www.accademiaitalianachef.com/en/blog/carbonara-history-and-original-recipe/
    4. https://www.foxyfolksy.com/filipino-style-carbonara-recipe/

  • The Easiest Fried Rice Recipe: A Step-by-Step Guide for Beginners

    The Easiest Fried Rice Recipe: A Step-by-Step Guide for Beginners

    The best fried rice recipe uses cold, leftover rice stir-fried in a hot wok or large skillet with scrambled eggs, vegetables, and a protein like chicken, shrimp, or pork. The key is using day-old rice to ensure it’s dry enough not to clump, combined with a simple sauce made from soy sauce and sesame oil for that authentic, restaurant-quality flavor.

    There’s a special comfort that comes with a steaming plate of perfectly seasoned fried rice. It’s a takeout favorite, but making it at home can feel overwhelming—especially for new cooks. Many people struggle with complex recipes or feel unsure how to create healthy, tasty meals quickly for their families. If you’re looking for simple dinner recipes that deliver on flavor without the stress, you’ve come to the right place.

    At Recipesmondial, we believe cooking should be an enjoyable, confidence-building experience. That’s why we developed the easiest fried rice recipe, designed with beginner-friendly steps and approachable home cooking in mind. This step-by-step guide simplifies the process, helping you achieve restaurant-quality results in your own kitchen. Prepare to master a dish that’s as flavorful as it is versatile, whether you’re making a classic chicken fried rice or a zesty shrimp version.

    Why You’ll Love This Easy Fried Rice Recipe

    A close-up of a steaming bowl of perfectly cooked fried rice, garnished with green onions and sesame seeds.
    Professional food photography, photorealistic, high-quality food magazine photo: A beautifully plated, steaming bowl of golden-brown fried rice, garnished generously with vibrant chopped green onions and a sprinkle of toasted sesame seeds. The rice is fluffy with visible peas, carrots, and scrambled egg pieces, suggesting a perfect texture. Shot from a slightly overhead angle on a warm wooden table in a brightly lit, inviting home kitchen, emphasizing comfort and deliciousness. Soft natural lighting highlights the texture and steam. No hands or people visible.

    Ready to transform simple ingredients into a dazzling dish? Our easy fried rice recipe is more than a meal—it’s your gateway to stress-free, flavorful cooking. You’ll love making it, and your family will love eating it!

    Effortless Cooking, Incredible Flavor

    • Super Simple Steps: We break down every step, so no complex techniques are needed. This recipe is truly beginner-friendly and builds your kitchen confidence.
    • Quick & Convenient: Perfect for busy weeknights, this dish comes together fast, so you can have a delicious, hot meal on the table in minutes.
    • Uses Everyday Ingredients: No special trips to the store are required. This budget-friendly option uses items you likely already have on hand.
    • Beyond Delicious: Satisfy your cravings with authentic, savory flavor that’s often even better than takeout.

    Versatility for Every Taste

    One of the best things about this fried rice is its incredible adaptability. It’s a fantastic solution for family-friendly meals, as you can easily adjust it to suit everyone’s preferences.

    • Protein Power: Easily swap in your favorite protein. Create a classic chicken fried rice recipe, a delightful shrimp fried rice recipe, or a robust pork fried rice recipe. You can even stick with simple egg fried rice.
    • Veggie Heaven: Clean out your fridge! This recipe welcomes nearly any vegetable, making it an excellent way to use up produce and boost your veggie intake.
    • Leftover Lifesaver: This dish shines with day-old rice, transforming simple leftovers into a culinary triumph. It’s smart cooking at its best.

    Say Goodbye to Cooking Stress

    We know cooking can feel overwhelming, especially when you’re looking for quick dinner ideas. This fried rice recipe from Recipesmondial is designed to banish those mealtime worries.

    • No More Guesswork: Our clear, step-by-step guidance eliminates guesswork, ensuring reliable and delicious results every time.
    • Enjoy the Process: Cooking should be fun, not a chore. This simple recipe helps you enjoy your time in the kitchen and brings the joy back to meal preparation.
    • Impress Your Loved Ones: Serve a dish that everyone will rave about. Your family and friends will ask for this recipe again and again.

    Join us in making delicious meals accessible to all. This easy fried rice recipe is just the beginning of your journey toward new flavors and kitchen confidence!

    What Ingredients Do You Need for Fried Rice?

    Fresh ingredients for fried rice, including rice, vegetables, eggs, and sauces, neatly arranged on a kitchen counter.
    Professional food photography, photorealistic, high-quality food magazine photo: A meticulously organized flat lay of all fresh ingredients for fried rice on a clean, light-colored kitchen counter or rustic wooden board. Ingredients include a bowl of day-old cooked white rice, fresh eggs in a bowl, shelled green peas, diced carrots, chopped garlic, soy sauce in a small dish, sesame oil in a small bottle, and sliced green onions. All ingredients are vibrant, fresh, and perfectly prepped, bathed in soft, natural overhead lighting, evoking a sense of ease and readiness to cook.

    The Best Rice for Fried Rice (Hint: It’s Leftover!)

    The secret to truly amazing fried rice starts with the right rice. But it’s not just about the type—it’s about its age!

    For the best texture, always use day-old, cooked rice. Freshly cooked rice has too much moisture, which makes your fried rice soggy and clumpy. Nobody wants that!

    Using leftover rice helps achieve that perfect, slightly chewy, separate grain texture. It’s a game-changer for any beginner-friendly recipe.

    What kind of rice should you use?

    • Medium or long-grain white rice: Varieties like jasmine rice or basmati rice work wonderfully. Their grains hold up well to stir-frying.
    • Avoid short-grain or sticky rice: These types tend to clump together too much. They won’t give you the individual grain texture you want for fried rice.

    Don’t have leftover rice? No problem!

    You can still make delicious fried rice. Just cook your rice as usual, but use about 10-20% less water. Afterward, spread it out on a baking sheet and let it cool completely for at least an hour. You can even pop it into the fridge for 30 minutes to help it dry out. Planning ahead makes meal prep for family-friendly meals like this even easier!

    Essential Vegetables and Aromatics

    Fresh vegetables and pungent aromatics add incredible flavor, color, and texture to homemade fried rice. This is where your dish really comes alive!

    Here are the core ingredients you’ll need:

    • Eggs: Lightly scrambled eggs add a wonderful richness and protein. They cook quickly and easily.
    • Garlic: Freshly minced garlic is a must. It builds a foundational layer of flavor.
    • Ginger: A small amount of grated or minced fresh ginger adds a bright, zesty kick.
    • Onion or Scallions (Green Onions): Finely diced yellow onion or chopped scallions provide a savory base. Scallions also offer a fresh, mild onion flavor at the end.
    • Peas and Carrots: These classic additions bring sweetness and vibrant color. Frozen peas and carrots work perfectly and save time.
    • Optional additions: Feel free to get creative! Bell peppers, corn, broccoli florets, or mushrooms are all great choices. This is an easy recipe to customize.

    Pro Tip for Beginners: Dice all your vegetables uniformly to ensure they cook evenly. It’s also best to prep everything before you start cooking. This strategy, called “mise en place,” makes the process stress-free—perfect for busy families looking for simple dinner recipes.

    The Perfect Fried Rice Sauce

    The sauce is the soul of your fried rice. It brings all the ingredients together with a savory, umami-rich coating. This simple blend is key to flavorful meals made easy.

    You’ll whisk together just a few pantry staples:

    • Soy Sauce: Use a good quality light (or “all-purpose”) soy sauce. It provides salty depth without being overpowering. If you prefer a darker color, you can add a touch of dark soy sauce.
    • Sesame Oil: A drizzle of toasted sesame oil adds a distinctive nutty aroma and flavor. Be sure to add it towards the end of cooking to preserve its delicate notes.
    • Sugar: Just a pinch of granulated sugar balances the salty soy sauce and enhances the overall flavor profile beautifully.
    • White Pepper: This subtle spice adds an authentic, mild heat. It’s a traditional ingredient in many Chinese fried rice recipes.

    Combine these ingredients in a small bowl before you begin. This makes adding the sauce at the right moment a breeze. Having the sauce pre-mixed is a crucial step for achieving that authentic, perfectly balanced fried rice taste.

    How to Make the Best Fried Rice (Step-by-Step)

    A home cook actively stirring colorful fried rice in a large wok on a stovetop, with steam rising.
    Professional food photography, photorealistic, high-quality food magazine photo: A dynamic shot of a home cook’s hands, in a clean and inviting home kitchen, actively stirring colorful fried rice in a large, well-seasoned wok or skillet over a gas burner. Steam is visibly rising from the wok, and the rice grains, mixed with peas, carrots, and egg pieces, appear perfectly separated and slightly golden. The scene captures the motion and energy of cooking, with focus on the food’s appealing texture and vibrant colors. Natural light illuminates the cooking process.

    Step 1: Prepare Your Ingredients (Mise en Place)

    Cooking is a joy when you’re organized. This is the idea behind “mise en place,” which simply means having “everything in its place” before you begin. Think of this step as your secret weapon for making the cooking process smooth and stress-free. Say goodbye to feeling overwhelmed by complex recipes!

    Here’s how to prep for your best fried rice recipe:

    • Chop Vegetables: Dice your onion, carrots, and any other veggies. Aim for small, uniform pieces to ensure they cook evenly.
    • Mince Aromatics: Finely mince your garlic and ginger. These give your fried rice its amazing flavor.
    • Dice Protein: Cut your chosen protein into bite-sized pieces. Whether it’s chicken for a flavorful chicken fried rice, shrimp for a quick shrimp fried rice, or pork for a hearty pork fried rice recipe, get it ready.
    • Whisk Eggs: Beat your eggs in a small bowl.
    • Mix Sauce: Combine all the sauce ingredients in a separate small bowl. This prevents any last-minute scrambling.

    These few minutes of prep will save you so much time later. It’s the key to approachable home cooking success and a fantastic meal prep tip for any beginner-friendly recipes.

    Step 2: Scramble the Eggs

    Next, let’s get those fluffy eggs ready. They add a wonderful texture and richness to your fried rice.

    1. Heat a large pan or wok over medium-high heat and add 1 tablespoon of cooking oil.
    2. Once the oil shimmers, pour in your whisked eggs.
    3. Let them set for a moment, then gently scramble them with your spatula, breaking them into small pieces.
    4. Cook until they are just set but still soft. Do not overcook them, as they will cook a little more later.
    5. Remove the scrambled eggs from the pan and set them aside on a plate.

    This quick step ensures tender eggs in every bite of your chinese fried rice.

    Step 3: Sauté Aromatics and Protein

    Now, let’s build those delicious layers of flavor. This is where your kitchen will start to smell incredible!

    1. Add another tablespoon of oil to the same pan or wok over medium-high heat.
    2. Add your minced garlic, ginger, and diced onion. Sauté for about 1 minute until fragrant, but not browned.
    3. Add your protein of choice.
      • For chicken fried rice: Add the diced chicken and cook until it’s no longer pink, about 3-5 minutes.
      • For shrimp fried rice: Add the shrimp and cook until it turns pink and opaque, about 2-3 minutes.
      • For pork fried rice: Add the diced pork and cook until browned and cooked through, about 5-7 minutes.
    4. Stir in any hardier vegetables, like diced carrots, and cook for another 2-3 minutes until slightly tender-crisp.

    Pro Tip: Do not overcrowd your pan. If you have a large amount of protein or vegetables, cook them in batches. This allows them to sear nicely instead of steam and is key for a truly flavorful meal made easy.

    Step 4: Add Rice and Sauce

    This step brings everything together. The rice is the heart of your fried rice recipe!

    1. Push the cooked aromatics, protein, and vegetables to one side of the pan.
    2. Add your cold, day-old rice to the empty side. It’s crucial that your rice is cold and day-old to prevent your fried rice from becoming soggy [1].
    3. Use your spatula to break up the rice. Spread it out as much as possible and let it sizzle for 1-2 minutes. This helps dry it out and can create delicious crispy bits.
    4. Pour your pre-mixed fried rice sauce evenly over the rice.
    5. Stir everything together vigorously, making sure every grain of rice is coated with the amazing sauce.
    6. Add softer vegetables, such as peas and corn, if using, and stir for another minute.

    You’re almost there! Your kitchen should smell absolutely incredible. This is how to make fried rice not soggy and bursting with flavor.

    Step 5: Combine Everything and Serve

    Time for the final step! Let’s bring all the delicious components together for a fantastic simple dinner recipe.

    1. Add the scrambled eggs you set aside back into the pan.
    2. Gently toss and stir to combine all the ingredients, ensuring the eggs, protein, vegetables, and rice are evenly distributed.
    3. Continue to stir-fry for another 1-2 minutes to ensure everything is heated through.
    4. Taste your fried rice and adjust seasonings if needed. A little more soy sauce or a dash of white pepper can make all the difference.
    5. Remove from the heat and garnish generously with sliced green onions.

    Serve your homemade fried rice immediately. You’ve just created a delicious, family-friendly meal that everyone will love. Enjoy cooking without the stress, knowing you’ve mastered this quick meal. This approach is what makes approachable home cooking so rewarding.

    What is the secret ingredient in Chinese fried rice?

    Ever wonder about the magic behind truly amazing Chinese fried rice? While you might think there’s a single secret ingredient, the truth is even better. It’s actually a combination of simple techniques and flavorful additions that makes all the difference. Master these, and you can create delicious fried rice right at home.

    At Recipesmondial, we break down complex ideas to empower you to cook with confidence. When it comes to fried rice, there isn’t one “secret ingredient.” Instead, it’s a few key elements working in harmony. Mastering them will elevate your easy fried rice recipe from good to great.

    The Real “Secrets” to Amazing Fried Rice

    Here are the crucial components that create that irresistible flavor and texture:

    • Cold, Day-Old Rice: This is the non-negotiable foundation. Using rice that’s at least a day old and fully chilled prevents it from getting soggy. This ensures the individual grains stay firm and separate, allowing them to absorb all the delicious flavors.
    • High Heat Cooking: This is where the magic happens. Quickly cooking over very high heat creates a smoky, slightly charred flavor known as “wok hei,” or the “breath of the wok” [2]. A super-hot pan or large skillet is essential to achieve this effect. This quick sear not only locks in flavor but also gives your chicken fried rice or shrimp fried rice an incredible texture.
    • Umami-Rich Sauce: A well-balanced sauce is key for depth and savory flavor. A typical blend includes light soy sauce for saltiness, dark soy sauce for color and richness, and often oyster sauce for complexity. A final touch of sesame oil adds a lovely aroma. Together, these ingredients deliver the essential umami taste that makes fried rice so satisfying.
    • Fresh Aromatics: Don’t skip these! Fresh garlic, ginger, and green onions are essential for building a vibrant base of flavor. Sautéing them briefly at the start releases their fragrant oils, which permeate the entire dish.
    • Quick Stir-Frying: Speed is crucial. The goal is to cook ingredients just until tender-crisp, not a moment longer. This technique maintains their fresh texture and crunch while preventing vegetables from becoming watery.

    By focusing on these core elements, you can confidently transform simple ingredients into a restaurant-quality meal. Forget being overwhelmed by complex recipes. Instead, enjoy the process of cooking flavorful meals, made easy with Recipesmondial!

    What are common mistakes in making fried rice?

    Making delicious fried rice is easier than you might think! However, like any dish, there are a few common pitfalls that can turn your perfectly planned meal into something less than ideal. Don’t worry, we’re here to guide you. Learning from these easy-to-avoid mistakes will help you create flavorful fried rice every time.

    Many home cooks feel overwhelmed by complex recipes and often struggle with getting the texture right. But with these simple tips, you’ll gain confidence in the kitchen and enjoy cooking without stress.

    Mistake 1: Using Freshly Cooked, Warm Rice

    • Why it’s a mistake: Freshly cooked rice is moist and sticky. It clumps together in the pan, which makes your fried rice soggy and mushy. This prevents you from getting that desired dry, separate grain texture.
    • The easy fix: Always use cold, day-old cooked rice. Long-grain rice like Jasmine works best. Cook your rice the day before, spread it on a tray to cool completely, and store it in the fridge overnight. This process dries out the grains, so they will fry up perfectly light and fluffy. This is a game-changer for any fried rice recipe!

    Mistake 2: Overcrowding Your Pan or Wok

    • Why it’s a mistake: Filling your pan too much reduces the heat. This causes ingredients to steam instead of fry, leading to mushy vegetables and rice. You won’t achieve that lovely browned, slightly crispy texture.
    • The easy fix: Cook your fried rice in batches if needed. Use a large pan or wok over high heat and give your ingredients plenty of space. This ensures everything fries properly. As a result, each grain of rice and every piece of vegetable gets beautifully caramelized.

    Mistake 3: Not Prepping All Ingredients First (No Mise en Place!)

    • Why it’s a mistake: Fried rice cooks very quickly, so you need to add ingredients in rapid succession. If you’re chopping while cooking, ingredients in the pan can easily burn. This can turn your simple dinner recipes into a stressful experience.
    • The easy fix: Prepare everything before you even turn on the stove. Chop all your vegetables, measure out your sauce, and have your eggs scrambled and protein cooked. This organized approach, often called “mise en place,” makes the cooking process smooth. It’s key for quick breakfast ideas and family-friendly meals.

    Mistake 4: Using Too Much Sauce or Oil

    • Why it’s a mistake: Excess liquid or oil can weigh down your rice. This makes the dish greasy and soggy, ruining the light, fluffy texture.
    • The easy fix: Be mindful of your measurements. Use just enough oil to coat the pan and add the sauce sparingly—you can always add more if needed. Start with the recommended amount in your easy recipes. This ensures flavorful meals made easy without the extra grease.

    Mistake 5: Not Using High Enough Heat

    • Why it’s a mistake: Fried rice needs high heat to create its characteristic wok hei (smoky flavor) and crisp texture. Low heat causes ingredients to stew in their own juices, resulting in soft, unappealing fried rice.
    • The easy fix: Always cook your fried rice over high heat. Let your pan or wok get smoking hot before adding oil, and keep the ingredients moving constantly. This helps achieve the perfect balance of tenderness and slight crispness. It’s essential for classic chicken fried rice or savory shrimp fried rice recipes.

    By avoiding these common mistakes, you’ll be well on your way to making delicious, restaurant-quality fried rice at home. You’ll go from feeling uncertain in the kitchen to cooking with confidence. Enjoy the journey of discovering new simple dishes with Recipesmondial!

    Easy Fried Rice Variations to Try

    You’ve mastered the basic, super-easy fried rice recipe—fantastic! Now, let’s unlock a world of flavor. Building on your skills, these simple variations will help you create diverse, family-friendly meals. Get ready to explore new tastes, as each twist makes for a quick and satisfying dinner.

    Classic Chicken Fried Rice Recipe

    A beloved classic, chicken fried rice adds lean protein and a satisfying texture to your meal. This variation is perfect for busy weeknights and is a great way to use up leftover chicken.

    • Preparation: Dice 1 cup of cooked chicken. For extra speed, use rotisserie chicken. You can also quickly sauté small, bite-sized pieces of raw chicken breast or thigh until no longer pink.
    • When to Add: Add the cooked chicken to the pan along with the rice, mixing it thoroughly with the vegetables and sauce.
    • Tip: Season the chicken lightly with salt and pepper before cooking to enhance its flavor.

    Flavorful Shrimp Fried Rice Recipe

    For a delicate and delicious flavor, try shrimp fried rice. Shrimp cooks very quickly, making this a fantastic way to elevate your fried rice on a tight schedule. Both fresh and frozen shrimp work well.

    • Preparation: Peel and devein 1 cup of raw, small-to-medium shrimp. Pat them dry with a paper towel to ensure they sear nicely in the pan.
    • When to Add: Cook the shrimp right after the aromatics. Sauté for just 2-3 minutes per side until pink and opaque. Be careful not to overcook them, as they can become rubbery.
    • Tip: A squeeze of fresh lemon juice at the end will brighten the shrimp’s flavor.

    Hearty Pork Fried Rice Recipe

    Wonderfully savory and filling, pork fried rice is true comfort food. This version is excellent for using up leftover roasted pork, but you can also easily prepare it with fresh pork.

    • Preparation: Dice 1 cup of cooked pork, such as leftover loin or shoulder. If using raw pork, choose lean cuts like tenderloin or boneless chops and cut them into small pieces.
    • When to Add: Sauté raw pork until fully cooked and browned before adding aromatics. If you’re using cooked pork, add it with the rice and heat it through gently.
    • Tip: Briefly marinating raw pork in a little soy sauce and sesame oil is a simple step that adds incredible depth of flavor.

    Simple Egg Fried Rice

    Sometimes, simplicity is key. Egg fried rice is the ultimate quick and budget-friendly meal, perfect for a light lunch or dinner. Since you already know how to scramble eggs, you’re halfway there!

    • Preparation: Follow the main recipe’s steps for scrambling eggs. Feel free to add an extra egg or two to boost the protein content.
    • When to Add: Stir the scrambled eggs back into the fried rice at the very end, ensuring they are well integrated.
    • Why it’s great: As one of the easiest and most versatile variations, this classic beginner-friendly recipe proves that a delicious meal doesn’t require many ingredients.

    How to Store and Reheat Leftover Fried Rice

    One of the best things about making your own delicious fried rice recipe is enjoying the leftovers! Our easy fried rice is often even tastier the next day. But it’s crucial to store and reheat it safely. Let’s make sure you can enjoy every last bite without any worries.

    Storing Leftover Fried Rice Safely

    Proper storage is key to keeping your fried rice fresh and safe. Always act quickly after cooking.

    • Cool Quickly: Transfer leftover fried rice into shallow containers within one hour of cooking. This promotes rapid, even cooling.
    • Airtight Containers: Use airtight containers. This protects your rice from drying out and absorbing other food odors.
    • Refrigerate Promptly: Place the sealed containers in the refrigerator. Your chicken fried rice or shrimp fried rice will stay fresh for up to 3-4 days when stored correctly.
    • Freezing (Optional): For longer storage, you can freeze fried rice for up to one month, though the texture may change slightly. Make sure it’s completely cool first, and thaw it in the refrigerator overnight before reheating.

    Important Food Safety Note: Cooked rice can contain spores of a bacteria called Bacillus cereus. If cooked rice is left at room temperature for too long, these spores can multiply and produce toxins that cause food poisoning. Therefore, it is crucial to cool and refrigerate your fried rice quickly [3].

    How to Reheat Fried Rice for Best Results

    Reheating fried rice properly ensures it tastes great and is safe to eat. For safety, aim for an internal temperature of 165°F (74°C).

    Method 1: Microwave (Quickest Option)

    This is a super-fast way to warm up your pork fried rice or chinese fried rice.

    1. Portion Control: Place a single serving of fried rice in a microwave-safe dish.
    2. Add Moisture: Sprinkle a tablespoon of water or broth over the rice to prevent it from drying out.
    3. Cover: Loosely cover the dish with a microwave-safe lid or a damp paper towel.
    4. Heat: Microwave on high for 1-2 minutes, stirring halfway through. Continue heating in 30-second intervals until it is piping hot throughout.

    Method 2: Stovetop (Best for Texture)

    If you have a little more time, the stovetop method helps restore that delicious, freshly made texture. This works wonderfully for chicken fried rice recipe leftovers.

    1. Heat Pan: Add 1-2 teaspoons of oil to a non-stick skillet or wok over medium-high heat.
    2. Add Rice: Once the oil is shimmering, add your leftover fried rice. Use a spoon to break up any large clumps.
    3. Stir-Fry: Stir-fry constantly for 3-5 minutes, ensuring all ingredients are heated through. You should hear some sizzling.
    4. Add Moisture (Optional): If the rice seems dry, add a splash of water, broth, or a little more soy sauce.
    5. Serve Hot: Once it’s steaming hot, remove it from the heat and enjoy immediately.

    No matter which method you choose, always make sure your fried rice is steaming hot throughout before serving. Following these simple steps will ensure your leftovers are just as delicious and safe as when they were first made!

    Frequently Asked Questions

    What meat goes best with fried rice?

    Fried rice is wonderfully versatile! You can easily customize it with your favorite protein. This flexibility makes it a fantastic choice for family-friendly meals and easy recipes.

    Here are some popular and delicious options:

    • Chicken: Diced chicken breast or thighs are a classic choice. They cook quickly, absorb flavors beautifully, and make for a hearty chicken fried rice recipe that everyone loves.
    • Shrimp: For a lighter, flavorful option, shrimp is an excellent choice. It cooks very fast, so add it near the end to keep it tender. This makes a shrimp fried rice recipe a great solution for a quick meal.
    • Pork: Diced pork loin or tenderloin adds a lovely savory depth. Char siu (Chinese BBQ pork) is also a fantastic, authentic choice for pork fried rice.
    • Beef: Thinly sliced steak, like sirloin or flank steak, is also delicious. Marinate it briefly for extra tenderness and flavor.
    • Tofu or Tempeh: For a vegetarian or vegan version, firm tofu or tempeh works perfectly. Simply press out the excess water and fry it until golden before adding it to your fried rice.

    Ultimately, the best meat for your fried rice is the one you enjoy most! Feel free to experiment and discover your personal favorite for flavorful meals made easy.

    How do I make my fried rice not soggy?

    Achieving perfectly dry, fluffy fried rice is key for flavorful meals made easy! Soggy fried rice is a common frustration, but it’s easily avoided with a few tips perfect for beginner-friendly recipes.

    Follow these practical steps for a great result every time:

    • Use Cold, Day-Old Rice: This is the golden rule! Freshly cooked rice is warm and moist, which makes it steam and turn mushy in the pan. Chilling leftover rice in the fridge dries it out, so the grains stay separate and firm. This step is essential for the best texture. [4]
    • High Heat is Your Friend: Cook your fried rice in a very hot wok or large skillet. High heat evaporates moisture quickly and gives the rice those lovely crispy bits.
    • Don’t Overcrowd the Pan: Cook in batches if necessary. Too much food in the pan lowers the temperature, causing ingredients to steam instead of fry. This releases moisture and leads to sogginess.
    • Use Enough Oil (But Not Too Much): A sufficient amount of oil helps toast the rice and prevents sticking. However, too much oil can make it greasy.
    • Add Sauce Towards the End: Add your sauces just before the rice is finished cooking. Toss them quickly to coat the rice without making the dish wet.
    • Dry Your Ingredients: Make sure any vegetables or protein are dry before you add them to the pan. Excess water will create steam.

    By following this step-by-step cooking guidance, you’ll create delightful, non-soggy fried rice. You will be cooking confidently in no time!

    What kind of soy sauce is best for fried rice?

    Choosing the right soy sauce significantly impacts your fried rice‘s flavor and appearance. It’s a key ingredient for flavorful meals made easy, and understanding the types is a great step for approachable home cooking.

    For the best results, you’ll typically use a combination:

    • Light Soy Sauce (or Regular Soy Sauce): This is your primary seasoning, providing the main salty, umami flavor. Using a good quality brand will give you the best taste. It’s a staple in many simple dinner recipes.
    • Dark Soy Sauce: This type is thicker, slightly sweeter, and less salty than light soy sauce. Its main purpose is to add a rich, beautiful caramel color to your fried rice while also imparting a deeper, more complex flavor.
    • Low-Sodium Soy Sauce: If you’re watching your salt intake, low-sodium varieties are a great option. They allow you to control the saltiness more easily, and you can always adjust with a pinch of salt if needed.

    For an authentic Chinese fried rice, we recommend using both light and dark soy sauce. The light soy sauce brings the salt and umami, while the dark soy sauce provides that signature deep color and a hint of sweetness. This combination creates a perfect balance that elevates your fried rice recipe to restaurant quality!


    Sources

    1. https://www.foodandwine.com/essential-kitchen-tips/day-old-rice-fried-rice-myth-busted-7965922
    2. https://www.seriouseats.com/what-is-wok-hei-how-to-get-it-at-home
    3. https://www.nhs.uk/common-health-questions/food-and-diet/can-you-reheat-rice/
    4. https://www.seriouseats.com/the-best-fried-rice-recipe-how-to-make-fried-rice
  • Easy Sweet Potato Casserole Recipe (A Step-by-Step Guide)

    Easy Sweet Potato Casserole Recipe (A Step-by-Step Guide)

    Sweet potato casserole is a classic American side dish, popular during the holidays. It features a base of mashed sweet potatoes mixed with butter, sugar, eggs, and warm spices like cinnamon and nutmeg. The casserole is typically finished with a sweet and crunchy pecan streusel or a soft, toasted marshmallow topping before being baked until golden brown.

    Few dishes evoke warmth and comfort like a classic sweet potato casserole. With its creamy texture and sweet, nutty topping, it’s always a crowd-pleaser, whether as a holiday centerpiece or a comforting side for a weeknight family dinner. However, achieving that perfect balance of flavors can feel overwhelming. You’re not alone if you’ve ever struggled with complex recipes or found it challenging to plan family-friendly meals that are both delicious and easy to prepare.

    That’s where Recipesmondial comes in. We believe cooking should be an enjoyable, stress-free experience for every home cook, regardless of skill level. This easy sweet potato casserole recipe was designed with clear, step-by-step guidance to help you create a flavorful dish without any fuss. It’s perfect for those seeking simple dinner recipes, and its reliable, beginner-friendly results will build your confidence in the kitchen.

    Get ready to transform simple ingredients into a show-stopping sweet potato casserole that everyone will adore. We’re here to show you why this isn’t just another recipe—it’s the best approach for beginners to master this beloved dish with ease and enjoy cooking without stress.

    Why Is This the Best Sweet Potato Casserole Recipe for Beginners?

    Welcome to your new favorite sweet potato casserole recipe! We know that diving into a new recipe can feel daunting, but our goal at Recipesmondial is to make home cooking simple and stress-free. This particular casserole is the perfect beginner-friendly option, and here’s why.

    We designed this easy sweet potato casserole recipe to build your confidence in the kitchen. It delivers fantastic results without complex steps, so you can create a delightful dish effortlessly.

    Key Features for Beginner Cooks

    This recipe’s straightforward approach ensures success, even for those new to baking. We’ve focused on clarity and simplicity at every turn.

    • Simple, Everyday Ingredients: You won’t need to hunt for exotic items. All the ingredients are easy to find at your local grocery store, making shopping a breeze.
    • Clear, Step-by-Step Guidance: We break down the process into simple, manageable steps. Our instructions are easy to follow, so you’ll never feel overwhelmed by technical terms.
    • Foolproof Method: Our recipe is designed to minimize common mistakes, helping you achieve a perfect result every time. You can cook with confidence and joy.
    • Delicious and Reliable Results: Create a rich, creamy sweet potato filling with a crunchy, sweet pecan streusel topping that your family and friends will love.
    • Time-Saving Techniques: We include practical tips to streamline the cooking process, helping you get this delicious meal on the table faster.
    • Flexible and Adaptable: Learn how to customize your casserole with our simple variations, whether you prefer a savory version or a healthier one.

    Solving Common Cooking Challenges

    Many home cooks find complex recipes intimidating or feel unsure how to make healthy, tasty meals quickly. This sweet potato casserole recipe is designed to solve those exact challenges.

    • No More Overwhelm: Our clear, step-by-step instructions banish confusion, allowing you to cook with confidence.
    • Boost Your Confidence: A successful cooking experience is the best way to build skill. This recipe is designed for success, so you’ll be proud of your creation.
    • Stress-Free Meal Prep: Enjoy cooking again with a simple, family-friendly recipe that takes the stress out of mealtime.
    • Practical Tips Included: Throughout the guide, we provide expert advice, including simple substitutions and make-ahead instructions.

    At Recipesmondial, we want you to discover the joy of cooking. This beginner-friendly sweet potato casserole recipe is the perfect starting point. It’s designed to transform uncertainty into confidence and simple ingredients into a truly delicious dish. Get ready to cook with confidence and enjoy every bite!

    What Ingredients Do You Need for This Casserole?

    A professional flat lay photo of all ingredients for sweet potato casserole, including sweet potatoes, butter, sugar, milk, spices, vanilla, marshmallows, and pecans, arranged on a wooden counter.
    Professional food photography, photorealistic, high-quality food magazine photo of all ingredients for a sweet potato casserole laid out neatly on a warm, rustic wooden kitchen counter. Ingredients include: several vibrant orange sweet potatoes (some peeled, some whole), a stick of butter, bowls of brown sugar and granulated sugar, a bottle of milk or heavy cream, a small bowl of ground cinnamon and nutmeg, vanilla extract, a bag of mini marshmallows, and chopped pecans. The items are arranged artfully and invitingly, bathed in soft, natural light, emphasizing freshness and readiness for cooking. The scene evokes a friendly, approachable home cooking environment.

    For the Sweet Potato Filling

    Crafting the perfect sweet potato casserole begins with simple ingredients for the creamy filling, many of which you may already have on hand. This combination creates a rich, flavorful base, making this a truly beginner-friendly recipe. With this step-by-step cooking guidance, you’ll create a delicious filling with confidence.

    • 3 pounds Sweet Potatoes: Look for medium-sized sweet potatoes, which you will bake or boil until tender. They are the star of this family-friendly meal.
    • ½ cup (1 stick) Unsalted Butter: Melted butter adds incredible richness. Use good quality butter for the best flavor.
    • ½ cup Granulated Sugar: This provides the classic, clean sweetness.
    • ¼ cup Brown Sugar (packed): Adds a lovely depth and a hint of caramel flavor.
    • ½ cup Milk: Whole milk creates the creamiest texture, but 2% milk also works well if that’s what you have.
    • 2 Large Eggs: Help bind the filling and give it a light, custardy texture.
    • 1 teaspoon Vanilla Extract: Pure vanilla extract enhances all the sweet flavors. It’s a must-have!
    • ½ teaspoon Ground Cinnamon: Cinnamon’s warm spice perfectly complements the sweet potatoes.
    • ¼ teaspoon Ground Nutmeg: A pinch of nutmeg adds warmth and a classic holiday aroma.
    • ¼ teaspoon Salt: Just a touch of salt is essential to balance all the sweetness.

    These ingredients come together easily, making this a flavorful meal made easy and stress-free. You’re now on your way to a comforting and delicious sweet potato casserole!

    For the Classic Pecan Streusel Topping

    No sweet potato casserole is complete without a crunchy, buttery finish. This pecan streusel adds a delightful texture and nutty sweetness, making it a special but easy recipe addition.

    • ½ cup All-Purpose Flour: This forms the base of the crumbly topping.
    • ½ cup Brown Sugar (packed): Provides a rich, molasses sweetness and a slightly chewy texture.
    • ½ cup Chopped Pecans: Add a wonderful crunch and nutty flavor. You can lightly toast them beforehand for even more depth.
    • ½ teaspoon Ground Cinnamon: This ties the topping’s flavor to the filling below.
    • ¼ cup (½ stick) Unsalted Butter: It’s essential that the butter is very cold and cut into small pieces. This is the key to an irresistible crumbly texture.

    Mixing these simple ingredients quickly creates a crisp, golden-brown topping. This final layer ensures every spoonful of your sweet potato casserole recipe is delicious, making it a perfect addition to your family-friendly meals.

    How to Make Sweet Potato Casserole Step-by-Step

    A professional photo of a freshly baked sweet potato casserole in a ceramic dish, topped with golden-brown marshmallows, on a kitchen table.
    Professional food photography, photorealistic, high-quality food magazine photo of a perfectly baked sweet potato casserole, presented warm and inviting on a clean, light kitchen table. The casserole is in a beautiful ceramic baking dish, with its golden-brown, lightly toasted marshmallow topping glistening. A serving spoon is gently nestled beside the dish, suggesting readiness to be enjoyed. Steam subtly rises from the dish, highlighting its warmth. The background is softly blurred, focusing entirely on the delicious, comforting casserole, evoking a sense of accomplishment and flavor for a home cook.

    Step 1: Cook the Sweet Potatoes

    First, let’s cook the sweet potatoes. This simple step is key to achieving the perfectly smooth and creamy texture everyone loves in a classic casserole. It’s a foundational skill for many easy, family-friendly meals.

    1. Wash and Prep: Thoroughly wash 3 pounds of sweet potatoes. There’s no need to peel them yet.
    2. Boil Until Tender: Place the whole sweet potatoes in a large pot and cover them with cold water by about an inch. Bring to a boil, then reduce the heat to a gentle simmer. Cook for 20-30 minutes, or until a fork easily pierces the potatoes. This ensures they will be easy to mash.
    3. Drain and Cool: Carefully drain the hot water. Let the sweet potatoes cool for 10-15 minutes, or until they are cool enough to handle.
    4. Peel with Ease: Once cooled, the skins will slip off easily. Use your hands or a small paring knife to peel them, then discard the skins.

    Recipesmondial Tip: Boiling is a quick, beginner-friendly method. For a deeper, more caramelized flavor, you can bake the sweet potatoes instead. Prick them with a fork, then bake at 400°F (200°C) for 45-60 minutes until very soft.

    Step 2: Prepare the Creamy Filling

    Now, let’s transform the cooked potatoes into the casserole’s rich and creamy base. This step creates the comforting flavor perfect for family dinners.

    1. Mash the Sweet Potatoes: In a large mixing bowl, mash the peeled sweet potatoes with a potato masher, a fork, or an electric mixer until smooth. A few small lumps are fine and add homemade charm.
    2. Add Wet Ingredients: To the bowl, add ½ cup (1 stick) of melted unsalted butter and ½ cup of milk. For the richest texture, use whole milk or half-and-half. Stir until well combined.
    3. Sweeten and Spice: Mix in ½ cup granulated sugar (adjust to taste), 2 lightly beaten large eggs, 1 teaspoon of vanilla extract, and ½ teaspoon of ground cinnamon for classic warmth and flavor.
    4. Season to Perfection: Stir in ¼ teaspoon of salt to balance the sweetness. Continue mixing until the filling is completely smooth and creamy.
    5. Taste and Adjust: This is the perfect time to taste the filling. Feel free to add another pinch of sugar or cinnamon if you think it needs it.

    Chef’s Tip: For an exceptionally smooth filling, use a hand mixer or a food processor. Be careful not to overmix, which can make the texture gummy. For most home cooks, however, a simple potato masher works perfectly.

    Step 3: Make the Topping

    The streusel topping is what elevates this casserole, adding a wonderful crunch and buttery flavor to complement the creamy filling. This step is quick and simple.

    1. Combine Dry Ingredients: In a medium bowl, whisk together ½ cup all-purpose flour, ½ cup packed light brown sugar, and ½ teaspoon ground cinnamon until evenly mixed.
    2. Cut in the Butter: Add ¼ cup (½ stick) of cold unsalted butter, cut into small pieces. Using a pastry blender, two forks, or your fingertips, cut the butter into the dry mixture until it resembles coarse, pea-sized crumbs.
    3. Stir in Pecans: Gently fold in 1 cup of chopped pecans. They provide a wonderful texture and rich, nutty flavor.

    Recipesmondial Variation: Not a fan of pecans? You can substitute them with chopped walnuts. For a nut-free version, replace the pecans with an equal amount of rolled oats to create a delicious crumble topping.

    Step 4: Assemble and Bake the Casserole

    You’re almost there! This final step brings everything together into one beautiful, comforting casserole. Mastering simple assembly and baking builds confidence in the kitchen.

    1. Preheat Oven and Prep Dish: Preheat your oven to 375°F (190°C). Lightly grease a 9×13-inch baking dish.
    2. Spread the Filling: Spoon the sweet potato filling into the prepared dish and use a spatula to smooth the top.
    3. Add the Topping: Sprinkle the pecan streusel topping evenly over the filling. An even layer ensures a perfect crunch in every bite.
    4. Bake to Perfection: Place the casserole in the preheated oven and bake for 25-30 minutes. It’s done when the topping is golden brown and the filling is bubbly around the edges.
    5. Cool and Serve: Remove the casserole from the oven and let it cool for at least 10-15 minutes before serving. This allows the filling to set, making it easier to scoop.

    Your easy sweet potato casserole is now ready to enjoy! This flavorful, simple dish is sure to impress everyone. With Recipesmondial, you can create delicious, family-friendly meals without the stress.

    What Are Some Popular Recipe Variations?

    Sweet Potato Casserole with Marshmallows

    Adding marshmallows to sweet potato casserole is a classic way to create an irresistible, dessert-like treat. This holiday favorite adds extra sweetness and a wonderfully gooey, toasted top that the whole family will love.

    Here’s how to add them:

    • Mini Marshmallows: The easiest option. Sprinkle 3 to 4 cups of mini marshmallows evenly over the filling during the last 10 to 15 minutes of baking.
    • Large Marshmallows: For a different look, cut large marshmallows in half or quarters and arrange them in a single layer over the casserole.
    • Baking Tip: Watch the casserole carefully as it bakes. The marshmallows should turn golden brown and puffy. Avoid letting them burn.

    This simple addition is ideal for beginner cooks and offers a quick, reliable way to put a popular twist on a classic dish.

    How to Make a Savory Sweet potato Casserole

    For a delicious alternative, try a savory sweet potato casserole. This versatile side dish pairs wonderfully with roasted meats or can be served as a standalone vegetarian meal.

    Creating a savory casserole involves adjusting the filling and topping. Here are some easy modifications:

    • Reduce Sugar: Omit or significantly reduce the brown sugar in the sweet potato filling.
    • Add Aromatics: Sauté finely diced onion, garlic, or shallots in olive oil and mix them into the sweet potato mash for a fragrant base.
    • Spice It Up: Incorporate savory spices like smoked paprika, garlic powder, and onion powder. Fresh or dried herbs like rosemary, thyme, or sage also add depth.
    • Add Cheese: Stir in shredded cheese for richness. Sharp cheddar or Gruyère melt beautifully, while Parmesan adds a salty, umami kick.
    • Savory Topping Ideas: Instead of a sweet topping, try one of these savory options:
      • Crispy Onions: Sprinkle store-bought crispy fried onions over the top before baking.
      • Breadcrumbs and Herbs: Mix panko breadcrumbs with melted butter, Parmesan, and fresh herbs.
      • Bacon Crumbles: Add crispy, cooked bacon for a smoky flavor.
      • Nutty Crunch: Toss chopped pecans or walnuts with savory spices like cumin or chili powder.

    This approach transforms a sweet classic into a flavorful, hearty side dish that’s perfect for any meal.

    Making a Healthier Sweet Potato Casserole

    To make a lighter sweet potato casserole, a few simple adjustments can reduce sugar and fat without sacrificing flavor. These small changes make a big difference to the nutritional profile of this comforting dish.

    Here are practical tips for a healthier version:

    For the Sweet Potato Filling:

    • Reduce Sugar: Cut the brown sugar in half, or replace it with a natural sweetener like maple syrup or honey. You can also rely on the natural sweetness of the potatoes themselves.
    • Dairy Swaps: Instead of heavy cream, use unsweetened almond milk, oat milk, or low-fat milk. Plain Greek yogurt can replace some butter or cream, adding tang and protein.
    • Reduce Butter: Use a smaller amount of butter, or substitute some of it with applesauce or mashed banana to maintain moisture.
    • Boost Flavor Naturally: Add more cinnamon, nutmeg, and ginger. These spices enhance the sweet taste without adding extra sugar.

    For the Topping:

    • Oat and Nut Streusel: Create a crunchy, nutrient-dense topping by combining rolled oats, chopped pecans or walnuts, a small amount of maple syrup, and a touch of coconut oil.
    • Seed Mix: Add texture and healthy fats with a blend of pumpkin seeds, sunflower seeds, and chia seeds.
    • Use Marshmallows Sparingly: If you love marshmallows, simply use fewer of them. You can also look for natural, lower-sugar brands if they are available.

    With these adjustments, you can serve a nutritious and flavorful dish that your family will love, all while making smart, healthy choices. [source: https://www.heart.org/en/healthy-living/healthy-eating/eat-smart/nutrition-basics/added-sugars-infographic]

    Tips for Perfect Results Every Time

    A close-up photo of a serving spoon scooping a perfect portion of creamy sweet potato casserole from a baking dish onto a plate, highlighting its texture.
    Professional food photography, photorealistic, high-quality food magazine photo, close-up shot of a perfectly scooped serving of sweet potato casserole being lifted from a baking dish onto a white plate. A real human hand, belonging to a home cook, is holding a silver serving spoon, revealing the creamy, smooth interior of the casserole beneath a delicate, golden marshmallow or pecan streusel topping. The texture is clearly visible, rich and inviting, emphasizing a successful, delicious result. Soft, warm lighting illuminates the dish, creating a sense of comfort and culinary satisfaction.

    A delicious sweet potato casserole is easier to make than you think. With a few simple tricks, you can ensure your sweet potato casserole recipe is perfectly golden and tasty every single time. These beginner-friendly tips will help you turn simple ingredients into a flavorful, crowd-pleasing dish.

    Selecting and Preparing Your Sweet Potatoes

    • Pick the Right Potatoes: Look for firm, blemish-free sweet potatoes. Jewel or Garnet varieties are wonderful choices for their creamy texture and vibrant color, making them ideal for a classic sweet potato casserole.
    • Cook Them Just Right: For the best flavor and texture, roast or bake your sweet potatoes instead of boiling them. This method enhances their natural sweetness and prevents them from becoming waterlogged. Cook them until they are just tender enough to mash easily, as overcooked potatoes can result in a loose filling.
    • Mash Them Smooth: For a silky-smooth casserole, mash your cooked sweet potatoes thoroughly. A potato masher works well, but for extra creaminess, use an electric mixer or food processor to eliminate any lumps.

    Crafting the Perfect Filling and Topping

    • Balance the Sweetness: Always taste the filling before you bake it. Since the topping also adds sweetness, adjust the sugar in the filling to achieve a perfectly balanced flavor.
    • Room Temperature Ingredients: For the creamiest possible filling, use room-temperature ingredients. Butter, eggs, and milk will combine more smoothly into the sweet potato mixture, ensuring a consistent texture.
    • Even Topping Distribution: Spread the pecan streusel topping in an even layer across the filling. This not only ensures every bite has a delightful crunch but also helps it bake to a perfect golden-brown finish.
    • Prevent Burning the Topping: Keep an eye on your topping as it bakes. If it starts to brown too quickly, loosely cover the casserole with aluminum foil to protect it while the filling finishes cooking.

    Baking and Serving for Success

    • Preheat Your Oven: Always preheat your oven completely before baking to ensure even cooking from the start. A consistent temperature is key for a perfectly baked casserole.
    • Bake Until Bubbly: Your casserole is ready when the filling is set and bubbly around the edges and the topping is golden brown and fragrant. This usually takes about 25-30 minutes.
    • Let It Rest: After baking, let the casserole rest for 10-15 minutes before serving. This important step allows the filling to set, making it much easier to scoop.

    By following these simple tips, you can confidently create a fantastic sweet potato casserole every time. Recipesmondial is here to help you enjoy stress-free cooking and turn everyday ingredients into delicious, visually appealing meals.

    How Do You Store and Reheat Leftovers?

    Having leftover sweet potato casserole is a wonderful thing because it means you get to enjoy this delicious, family-friendly dish all over again. To ensure it tastes just as good the second time, it’s important to store and reheat it correctly. Additionally, mastering a few make-ahead steps can simplify meal prep, which is especially helpful for busy families or special occasions.

    Storing Sweet Potato Casserole

    To keep your sweet potato casserole fresh and safe, follow these simple storage steps:

    • Cool Completely: Before storing, allow the casserole to cool to room temperature, which usually takes 30 to 60 minutes. For safety, do not leave it out for more than two hours.
    • Airtight Container: Transfer the cooled casserole into an airtight container. This prevents it from drying out and absorbing other odors from your fridge.
    • Refrigerate: Your sweet potato casserole will stay fresh in the refrigerator for 3 to 4 days [1].
    • Freeze (Optional): For longer storage, freeze individual portions or the whole casserole. Wrap it tightly in plastic wrap and then foil, or place it in a freezer-safe, airtight container. It will keep for 2-3 months for the best quality [2]. Always label the container with the date.

    Reheating Sweet Potato Casserole

    When you’re ready to enjoy your leftovers, choose the reheating method that best fits your schedule and desired texture:

    • Oven Method (Best for Texture):
      • Preheat your oven to 300°F (150°C).
      • Place the casserole in an oven-safe dish. If it’s frozen, allow it to thaw in the refrigerator overnight first.
      • Cover the dish loosely with foil to prevent the topping from over-browning.
      • Bake for 20-30 minutes, or until heated through. For a crispier topping, uncover it for the last few minutes of baking.
    • Microwave Method (Quickest Option):
      • Scoop a single serving onto a microwave-safe plate.
      • Cover the plate with a microwave-safe lid or a damp paper towel to retain moisture.
      • Heat on medium power for 1-2 minutes, stirring halfway through if possible.
      • Continue heating in 30-second intervals until it’s warmed to your liking. Be careful not to overheat it, which can cause the casserole to dry out.

    Make-Ahead Instructions

    Save time on busy holidays or weeknights by preparing your sweet potato casserole in advance. Following these steps helps you get ahead without the stress.

    • Prepare the Filling: You can cook, mash, and mix the sweet potato filling ingredients ahead of time. Store the mixture in an airtight container in the refrigerator for up to 2-3 days.
    • Make the Topping: The pecan streusel topping can also be prepared in advance. Store it in a separate airtight container in the refrigerator for up to 2-3 days.
    • Assemble Unbaked: For ultimate convenience, assemble the entire casserole up to 2 days before you plan to bake it. Simply spread the filling in your baking dish, sprinkle the topping over it, and cover tightly with plastic wrap before refrigerating.
    • Bake from Chilled: When ready to bake, remove the casserole from the fridge about 30 minutes beforehand to let it come closer to room temperature. You will need to add about 10-15 minutes to the original baking time since the dish is starting cold.
    • Freeze Unbaked: You can also assemble the entire casserole, wrap it tightly, and freeze it for up to 1-2 months. Before baking, thaw it completely in the refrigerator and add extra baking time as needed to ensure it’s heated through.

    Frequently Asked Questions

    Can you make sweet potato casserole from canned sweet potatoes?

    Yes, you absolutely can! Using canned sweet potatoes is a fantastic time-saver for busy home cooks, making this a truly *quick meal* option and a perfect *beginner-friendly recipe*.

    While fresh sweet potatoes often offer a richer flavor and texture, canned ones work beautifully. If you opt for canned, here are a couple of tips for the best results:

    • Drain them well: Be sure to drain all the liquid from the cans. Excess moisture can make your casserole watery.
    • Adjust sweetness: Canned sweet potatoes are sometimes packed in syrup. Taste them before adding other ingredients, as you may need to reduce the amount of sugar in your filling.

    It’s an easy way to enjoy a *flavorful meal made easy*, even when you’re short on time!

    How do you make a sweet potato casserole without marshmallows?

    Our recipe already skips the marshmallows in favor of a delicious pecan streusel topping. It provides a lovely crunch and nutty sweetness without being overly sugary, creating a more sophisticated, less-sweet profile that many people prefer.

    If you’re looking for other alternatives to marshmallows for your *sweet potato casserole recipe*, here are some excellent ideas:

    • Pecan Streusel: Our classic choice, made with brown sugar, flour, butter, and pecans, is both crunchy and flavorful.
    • Oatmeal Crumble: For a hearty, comforting crumble, combine rolled oats, brown sugar, a touch of cinnamon, and melted butter.
    • Toasted Coconut: Sprinkle shredded coconut over the casserole during the last 10-15 minutes of baking for a tropical twist and a golden crunch.
    • Savory Herbs: For a less traditional, savory approach, try a topping of breadcrumbs, Parmesan cheese, and fresh herbs like thyme or rosemary. This is perfect for those seeking *healthy and balanced meals* with less sugar.

    These variations help you customize this *family-friendly meal* exactly how you like it!

    What makes an old fashioned sweet potato casserole?

    An old-fashioned sweet potato casserole is all about its rich, creamy base and comforting, classic flavor. The sweet potatoes are typically sweetened and spiced, making it a beloved *simple dinner recipe* or holiday side dish.

    Key characteristics include:

    • Creamy Sweet Potato Base: Mashed sweet potatoes are mixed with butter, sugar (often brown sugar), milk or cream, eggs, and warming spices like cinnamon and nutmeg to create a smooth, indulgent texture.
    • Classic Topping: The most common old-fashioned toppings are either a sugary marshmallow layer or a buttery, crunchy pecan streusel. Both provide a delightful contrast to the soft filling.
    • Sweet & Savory Balance: While sweet, the casserole has an underlying earthy depth from the sweet potatoes that makes it a versatile side dish.

    This traditional approach has made sweet potato casserole a staple in *family-friendly meals* for generations, especially during holidays.

    Can this recipe be made ahead of time for Thanksgiving?

    Absolutely! Making this *easy sweet potato casserole* ahead of time is a brilliant *meal prep tip* for big holidays like Thanksgiving. Prepping in advance reduces stress and helps you enjoy more time with your loved ones.

    Here’s how to prepare it in advance:

    • Assemble the Day Before: Prepare the sweet potato filling and the pecan streusel topping as directed in the recipe.
    • Layer and Store: Spread the sweet potato mixture into your baking dish, then sprinkle the streusel topping evenly over the top.
    • Cover and Refrigerate: Cover the dish tightly with plastic wrap or aluminum foil and store it in the refrigerator for up to 24 hours.
    • Bake on the Day: When you’re ready, remove the casserole from the fridge about 30 minutes before baking to let it come to room temperature. Since it will be chilled, you will need to add an extra 10-15 minutes to the baking time.

    This simple strategy allows you to serve a delicious, *flavorful meal* without feeling overwhelmed on the big day. It’s perfect for *planning weekly meals efficiently* too, not just holidays!


    Sources

    1. https://www.fsis.usda.gov/food-safety/safe-food-handling-and-preparation/food-safety-basics/how-chill-foods-safely
    2. https://www.fsis.usda.gov/food-safety/safe-food-handling-and-preparation/food-safety-basics/freezing-and-food-safety

  • The Perfect Quesadilla Recipe: Easy, Cheesy, and Ready in 10 Minutes

    The Perfect Quesadilla Recipe: Easy, Cheesy, and Ready in 10 Minutes

    A quesadilla is a traditional Mexican dish consisting of a tortilla, usually a corn or flour tortilla, filled primarily with cheese. It is often folded in half and cooked on a griddle or skillet until the cheese is melted and the tortilla becomes crispy. Optional ingredients like meats, beans, and vegetables can also be added.

    Searching for a speedy, delicious meal the whole family will love? It can be challenging to whip up something satisfying when you’re short on time, especially with overwhelming, complex recipes. That’s why we’re excited to share one of our favorite easy recipes: the humble yet mighty quesadilla. Forget stressing about dinner tonight—this simple dish delivers big flavor with minimal effort.

    At Recipesmondial, our mission is to make cooking enjoyable and accessible for everyone. This quesadilla recipe embodies that mission perfectly. It’s quick to prepare, packed with cheesy goodness, and easily adaptable to whatever ingredients you have on hand. It’s the perfect solution for a speedy lunch, a fun family meal, or a satisfying healthy snack. Our step-by-step guidance helps you create a fantastic dish without any fuss, boosting your kitchen confidence with simple, beginner-friendly recipes.

    Get ready to learn how to make the best quesadillas—consistently crispy on the outside and perfectly gooey on the inside. We’ll walk you through everything you need to know, from essential ingredients and simple techniques to creative filling ideas and practical tips. Let’s turn everyday ingredients into an extraordinary meal and prove that cooking can be easy and stress-free!

    Why You’ll Love This Easy Quesadilla Recipe

    Sliced quesadilla on a wooden board, revealing gooey melted cheese, garnished with cilantro and served with salsa.
    A professional food photography, photorealistic, high-quality food magazine photo of a perfectly golden-brown quesadilla, sliced into wedges, revealing abundant, gooey, melted cheese stretching slightly between the pieces. The quesadilla is artfully arranged on a rustic wooden cutting board, garnished with a sprinkle of fresh chopped cilantro and a small side of vibrant salsa in a ceramic bowl. The lighting is warm and inviting, showcasing the delicious texture and appealing simplicity of the dish. Shot from a slightly overhead angle.

    Discover your new favorite go-to meal with this easy quesadilla recipe. It’s more than just cheese in a tortilla; it’s the perfect solution for busy days and hungry appetites, designed specifically for home cooks like you.

    Whether you need quick breakfast ideas, easy lunches, or simple dinner recipes, this versatile recipe delivers. It helps you enjoy cooking without stress and builds your confidence in the kitchen.

    Here’s why you’ll absolutely adore making these flavorful meals made easy:

    • Ready in Minutes: This easy quesadilla recipe comes together in just 10 minutes, making it perfect for quick meals and impromptu cravings.
    • Incredibly Simple: Forget being overwhelmed by complex recipes. Our step-by-step cooking guidance makes this one of our most beginner-friendly recipes, ensuring anyone can make a perfect quesadilla.
    • Family-Friendly Favorite: Kids and adults alike love these cheesy delights, making it a perfect solution if you’re struggling to plan family-friendly meals. Everyone will be asking for seconds!
    • Customizable for Everyone: This basic recipe is the perfect canvas. Add your favorite proteins or veggies to create endless variations that suit any taste or dietary need.
    • Budget-Friendly: Made with everyday ingredients, this is an excellent choice for budget cooking, letting you create a delicious meal without breaking the bank.
    • Reliably Delicious: Get a golden, crispy tortilla filled with gooey, melted cheese every single time. Say goodbye to dry, bland meals—this recipe guarantees flavorful meals made easy.
    • Build Your Confidence: If you’re lacking confidence in cooking skills, this is the perfect recipe for you. It offers a clear path to success, so you’ll feel like a pro in no time!

    This quesadilla recipe is designed to take you from uncertainty to confidence, turning stressful meal prep into an enjoyable experience. At Recipesmondial, we’re here to help you discover new flavors through approachable home cooking.

    What Ingredients Do You Need for Perfect Quesadillas?

    Flat lay of fresh quesadilla ingredients: tortillas, shredded cheese, diced peppers, onions, and spices.
    A professional food photography, photorealistic, high-quality food magazine photo showcasing a neatly arranged flat lay of fresh, essential quesadilla ingredients on a clean, light-colored kitchen counter. The arrangement includes a stack of soft flour tortillas, a generous pile of shredded Monterey Jack and cheddar cheese, a bowl of diced bell peppers (red and green), a small bowl of diced onions, and a sprinkle of a simple spice blend. The lighting is bright and natural, emphasizing the freshness and simplicity of the ingredients, ready for an easy cooking process.

    For the Basic Cheese Quesadilla

    Perfect quesadillas start with just a few simple ingredients. You don’t need anything fancy to create a delicious, cheesy meal built on classic flavors.

    Here’s what you’ll need to make a basic yet incredibly satisfying cheese quesadilla. This simple recipe is quick to assemble and always a family favorite.

    • Flour Tortillas (8-inch or 10-inch): Soft, fresh flour tortillas are ideal because they fold easily and crisp up beautifully in the pan.
    • Shredded Cheese (1/2 cup per quesadilla): A good melting cheese is key. Monterey Jack, cheddar, or a Mexican blend are all excellent choices. For the best results, grate a block of cheese yourself—it melts better and tastes fresher.
    • Butter or Oil (1 teaspoon per quesadilla): A little fat is essential for achieving a golden-brown, crispy tortilla. Butter adds rich flavor, while a neutral oil like canola or vegetable also works well.
    • Optional: Salt & Pepper (to taste): A pinch can enhance the flavor of the cheese.

    Quick Tip for Success: Using freshly shredded cheese makes a big difference. Pre-shredded varieties often contain anti-caking agents that can prevent the cheese from melting smoothly. For the ultimate gooey quesadilla, opt for a block of cheese and grate it yourself—this extra step is worth it!

    Essential Equipment

    You don’t need a gourmet kitchen to make great quesadillas, just a few basic tools. Having the right items on hand will help you cook confidently and keep the process stress-free.

    Gather these essentials before you start cooking:

    • Non-Stick Skillet or Frying Pan (10-12 inch): A good non-stick pan is crucial for preventing sticking and ensuring your tortillas brown evenly.
    • Spatula: A wide spatula is essential for flipping quesadillas, as it supports the entire tortilla to prevent it from breaking.
    • Cheese Grater (if using block cheese): If you’re following our tip to grate your own cheese, a simple box grater or microplane is all you need.
    • Cutting Board & Knife (optional, for other fillings): You won’t need these for a basic cheese quesadilla, but they are essential if you plan to add other fillings like chicken or vegetables.

    Cook’s Note: Using the right pan size is important. A 10-inch skillet, for example, is perfect for an 8-inch tortilla because it leaves enough space to easily fold the quesadilla without crowding the pan.

    How to Make Quesadillas: A Simple Step-by-Step Guide

    Hands of a home cook pressing down on a golden-brown quesadilla in a skillet on the stovetop.
    A professional food photography, photorealistic, high-quality food magazine photo capturing a close-up of a home cook’s hands gently pressing down on a quesadilla in a hot, non-stick skillet on a gas stovetop. The quesadilla is golden-brown and slightly crispy on one side. The background is a softly blurred, warm-toned home kitchen, suggesting a cozy and inviting cooking environment. The focus is on the action of cooking, emphasizing ease and approachability. Subtle steam might be visible. Real human cook, not a model.

    Ready to create the perfect, cheesy quesadilla? This simple recipe is designed for everyone, from kitchen newcomers to anyone looking for a stress-free meal. Follow our step-by-step guide, and you’ll be cooking with confidence in no time.

    As one of our favorite beginner-friendly recipes, it’s a fantastic solution for easy dinners, quick lunches, or a fun family meal. Let’s get started and turn a few simple ingredients into a delicious, satisfying dish.

    1. Warm Your Pan: Place a non-stick skillet or griddle over medium heat and allow it to warm up for 1-2 minutes. This important first step ensures the tortilla cooks evenly and develops a golden-brown crust.

    2. Add Fat: Drizzle about a half teaspoon of oil or add a small pat of butter (about 1/2 tablespoon) to the hot pan. Swirl the pan to lightly coat the bottom. This adds flavor and helps the tortilla get crispy.

    3. Place Tortilla: Carefully lay one tortilla flat in the pan. Let it warm for about 30 seconds.

    4. Add Cheese: Generously sprinkle 1/4 to 1/3 cup of your favorite shredded cheese over one half of the tortilla. For the best results, remember that freshly grated cheese melts beautifully!

    5. Add Fillings (Optional): If using extra fillings like cooked chicken, beans, or veggies, spread them evenly over the cheese. Avoid overstuffing, as less is more for a perfectly melted quesadilla.

    6. Fold and Cook: When the cheese begins to melt, use a spatula to gently fold the empty half of the tortilla over the filled side. Press down lightly to seal it.

    7. Brown Both Sides: Cook the quesadilla for 2-3 minutes on each side, or until the exterior is golden brown and the cheese inside is completely melted. Keep a close eye on the heat to prevent the tortilla from burning.

    8. Slice and Serve: Carefully remove the quesadilla from the pan and transfer it to a cutting board. Slice it into wedges with a pizza cutter or sharp knife and serve immediately with your favorite dips. Enjoy your delicious, homemade meal!

    Pro Tips for Perfect Quesadillas Every Time

    While making a quesadilla is simple, a few key tricks can make it truly amazing. Keep these tips in mind for delicious, consistent results every time you cook.

    • Don’t Overstuff: It’s tempting to add lots of fillings, but this can prevent the quesadilla from cooking evenly. A thin, even layer ensures everything heats through and the cheese melts perfectly.

    • Medium Heat is Your Friend: Always cook quesadillas over medium heat. High heat will burn the tortilla before the cheese has a chance to melt. Medium heat gives you a crispy, golden tortilla and perfectly gooey cheese.

    • Grate Your Own Cheese: Pre-shredded cheese is often coated in anti-caking agents that prevent smooth melting. For the ultimate cheesy texture, take a moment to grate cheese from a block. It makes a noticeable difference!

    • Pre-Cook Fillings: Make sure any meat or vegetable fillings are already cooked and warm before you add them. This helps them heat through quickly without overcooking the tortilla or making it soggy.

    • Press and Flip: Gently press down on the quesadilla with your spatula as it cooks. This increases contact with the pan, which helps it brown evenly and ensures all the cheese melts. Be sure to flip it carefully.

    • Serve Immediately: Quesadillas are best enjoyed right out of the pan while the cheese is hot and melty. Have your plates and toppings ready to go before you start cooking.

    What should you put in a quesadilla?

    Classic & Popular Cheese Blends

    The heart of any delicious quesadilla is the cheese. Choosing the right blend makes all the difference, creating a perfect melt and amazing flavor. Fortunately, there are many excellent options available.

    Here are some classic and popular cheese blends for your perfect quesadilla:

    • Monterey Jack: A top choice for its mild flavor and excellent melting qualities, this cheese becomes incredibly creamy when hot.
    • Cheddar Cheese: Mild or medium cheddar works wonderfully, adding a familiar, savory taste. For a bolder flavor, try sharp cheddar.
    • Mexican Blend: Many stores offer pre-shredded “Mexican Blend” cheese, which typically combines Monterey Jack, Cheddar, Asadero, and Queso Blanco. It&#x2019s a convenient shortcut for busy families.
    • Asadero or Oaxaca: These authentic Mexican cheeses are fantastic for quesadillas. They have a mild, buttery flavor and melt with a lovely stretch.
    • Provolone: For something a little different, provolone offers a smooth melt and a slightly sharper, more distinctive taste.

    Recipesmondial Tip: For the best results, grate your own cheese. Pre-shredded varieties often contain anti-caking agents that can prevent a smooth melt. Freshly grated cheese ensures the creamiest, gooiest filling and makes a noticeable difference in your final dish.

    Easy Chicken Quesadilla Filling

    Adding chicken is a simple way to turn a basic cheese quesadilla into a hearty meal. This filling is perfect for a quick lunch or an easy weeknight dinner because it comes together in minutes.

    Here’s how to prepare a delicious chicken filling:

    • Pre-Cooked Chicken: The easiest method is to use leftover cooked chicken. Shredded rotisserie chicken is a huge time-saver, but cooked chicken breast or thighs also work well.
    • Quick Sauté Method:
      1. Heat 1 tablespoon of olive oil in a skillet over medium heat.
      2. Add 1 cup of shredded cooked chicken.
      3. Stir in 1/2 teaspoon of chili powder, 1/4 teaspoon of cumin, and a pinch of salt and pepper.
      4. Cook for 2-3 minutes, just until the chicken is warmed through and fragrant.
    • Flavor Boosters: For extra taste, add a tablespoon of your favorite salsa or a squeeze of lime juice to the chicken mixture. This creates a more vibrant filling.

    This simple preparation keeps cooking enjoyable and stress-free, giving you a healthy and tasty meal without a lot of effort.

    Flavorful Beef Quesadilla Filling

    For a rich and savory option, try a ground beef filling. This beginner-friendly recipe is a fantastic choice for a simple and satisfying dinner that delivers reliable results.

    Follow these easy steps for a delicious beef filling:

    • Prepare Your Beef:
      1. In a skillet over medium heat, brown 1/2 pound of ground beef (80/20 lean works well).
      2. Use a spoon to break up the meat as it cooks.
      3. Once the beef is fully cooked, drain any excess fat.
    • Season It Well:
      1. Return the skillet to the heat and stir in 1/2 teaspoon of chili powder, 1/4 teaspoon of cumin, 1/4 teaspoon of garlic powder, and a pinch of salt and pepper.
      2. Alternatively, use 1 teaspoon of your favorite taco seasoning mix.
      3. Cook for another 1-2 minutes to allow the spices to toast and become fragrant.
    • Optional Add-ins: For extra texture and flavor, add a tablespoon of diced onions or bell peppers to the skillet while browning the beef.

    This straightforward recipe is a great solution for busy weeknights, offering clear, step-by-step guidance for a delicious family meal.

    Simple Vegetarian & Vegan Options

    Quesadillas are also incredibly versatile, making them perfect for vegetarian and vegan meals. With a few simple ingredients, you can create a healthy snack or a satisfying main course.

    Here are some simple and flavorful ideas:

    • Black Bean & Corn:
    • Sautéed Veggies:
      • Thinly slice bell peppers, onions, mushrooms, or zucchini.
      • Sauté them in a little olive oil until tender-crisp.
      • Season with salt, pepper, and a dash of garlic powder.
    • Spinach & Mushroom:
      • Sauté fresh spinach and sliced mushrooms in a pan until the spinach wilts and the mushrooms soften.
      • Season simply with salt, pepper, and a touch of nutmeg.
    • Spicy Potato:
      • Dice cooked potatoes (boiled or roasted work well).
      • Toss them with smoked paprika and a pinch of cayenne for a spicy kick.

    To make these quesadillas vegan, use your favorite dairy-free cheese alternative. Many plant-based shreds melt surprisingly well and can be combined with any vegetarian filling for a flavorful, satisfying meal. This flexibility allows you to get creative and adapt the recipe to your dietary needs.

    How do I make my quesadillas better?

    Tip 1: Grate Your Own Cheese

    For the best results, skip the bag of pre-shredded cheese. Store-bought shredded cheese contains anti-caking agents that prevent it from melting smoothly. Freshly grated cheese, on the other hand, melts much more evenly and creates that perfect, gooey texture inside your quesadilla [1].

    Grating your own cheese is easy and adds only a minute or two to your prep time. This simple step elevates the flavor and texture of your quesadilla, making it a quick win for any home cook.

    Tip 2: Don’t Overstuff the Tortilla

    While it’s tempting to load your quesadilla with fillings, overstuffing is a common mistake. Too much filling can tear the tortilla, spill out during cooking, and prevent the quesadilla from heating evenly. This often results in a cold center with unmelted cheese.

    Instead, aim for a thin, even layer of cheese and other ingredients. This ensures the tortilla crisps up perfectly while everything inside gets hot and melted. When it comes to building a great quesadilla, less is often more.

    Tip 3: Cook on Medium Heat for a Crispy Finish

    The right cooking temperature is essential. High heat often burns the tortilla before the cheese has a chance to melt. For a better result, use medium heat. This allows the tortilla to toast slowly to a beautiful, golden-brown and crispy finish. Meanwhile, the cheese inside has enough time to become completely melted and gooey.

    Patience is key. Cooking slowly ensures even heating, creating that irresistible crispy exterior without any burnt spots. This simple technique will help you make delicious and reliable quesadillas every time.

    Tip 4: Use a Little Butter or Oil

    For an extra layer of flavor and crispiness, cook your quesadilla in a small amount of fat. Butter adds a rich, savory flavor, but olive or avocado oil also works well. The fat helps the tortilla turn golden brown and prevents it from sticking to the pan, which makes flipping much easier.

    You only need a teaspoon or two per quesadilla. Spread it evenly across your skillet before cooking to achieve a restaurant-quality crispness. This simple trick makes your homemade quesadillas truly shine.

    What is the spice mix for quesadillas?

    Simple Homemade Quesadilla Seasoning

    The secret to a great quesadilla isn’t just cheese and tortillas—it’s the perfect blend of spices. While you can buy seasoning, making your own is surprisingly easy and adds incredible flavor to any quesadilla. Best of all, you can customize the mix to suit your family’s tastes.

    This go-to recipe transforms simple ingredients into a delicious meal. It’s an approachable home cooking tip that will make you feel more confident in the kitchen.

    What You’ll Need for Your Flavorful Blend

    Gather these common spices from your pantry:

    • 1 tablespoon chili powder: Provides a foundational warmth.
    • 1 teaspoon ground cumin: Adds an earthy, savory depth.
    • 1 teaspoon dried oregano: A classic herb for Mexican-inspired dishes.
    • 1/2 teaspoon garlic powder: For a mellow, aromatic touch.
    • 1/2 teaspoon onion powder: Enhances the savory profile.
    • 1/4 teaspoon smoked paprika (optional): Adds a lovely smoky note.
    • 1/4 teaspoon cayenne pepper (optional): If you enjoy a little heat.
    • 1/2 teaspoon salt: Essential for bringing out all the flavors.
    • 1/4 teaspoon black pepper: A simple, yet effective flavor enhancer.

    How to Mix Your Seasoning

    Creating this blend couldn’t be simpler. Just follow these steps:

    1. Combine all spices: In a small bowl, add the chili powder, cumin, oregano, garlic powder, onion powder, salt, and black pepper. Include the smoked paprika and cayenne if you’re using them.
    2. Mix well: Stir everything together with a spoon or small whisk until the blend is uniform and free of clumps.
    3. Store it: Transfer your homemade seasoning to an airtight container, like a small jar.

    Your seasoning will stay fresh in the pantry for several months, so it’s always ready for family-friendly meals or even quick breakfast quesadillas.

    How to Use Your Quesadilla Seasoning

    It’s easy to add this seasoning to your favorite recipes. Here are a few ideas:

    • For meat fillings: Sprinkle 1-2 teaspoons of seasoning directly onto cooked chicken, beef, or pork. Mix well before assembling the quesadillas to ensure every bite is flavorful.
    • For vegetarian options: Add the seasoning to sautéed vegetables like bell peppers and onions. It also works wonderfully with black beans or corn.
    • Adjust to taste: Start with a small amount of seasoning. You can always add more, but you can’t take it away.
    • Make it a paste: For a deeper flavor, mix 1 tablespoon of seasoning with 1 tablespoon of olive oil. Toss your cooked filling in this paste before adding it to the tortilla.

    This beginner-friendly recipe guarantees your quesadillas will never be bland again. It’s a simple way to make cooking more enjoyable and less overwhelming.

    Is it better to bake or pan fry quesadillas?

    Deciding whether to bake or pan-fry your quesadillas is a common dilemma for home cooks. While both methods yield delicious results, they offer distinct advantages. Your choice often depends on your priorities, like how much time you have and how many servings you’re preparing. Let’s explore each option to help you find the best fit for your needs.

    Pan-Frying for Classic Crispness and Speed

    Pan-frying is the traditional and most popular method, ideal for making just one or two servings. This technique delivers that signature crispy tortilla with a beautifully golden-brown finish. Meanwhile, the cheese melts quickly inside, creating a satisfyingly gooey center.

    • Speed: Pan-frying is incredibly fast, with each quesadilla ready in just a few minutes per side. This makes it perfect for a quick lunch or an easy dinner.
    • Crisp Texture: Direct contact with the hot pan creates an unmatched crispy exterior, delivering a satisfying crunch with every bite.
    • Control: You can easily monitor the browning and adjust the heat as you go. This level of control helps prevent burning and makes the method very beginner-friendly.

    For the best results, use medium heat and add a little butter or oil to your pan to ensure even browning and add flavor. Remember to keep a close eye on your quesadilla and flip it when it’s golden brown and crispy.

    Baking for Convenience and Large Batches

    Baking quesadillas is a fantastic alternative, especially when you need to prepare several servings at once. For busy families or anyone feeding a crowd, this method simplifies the process significantly.

    • Hands-Off Cooking: This method requires less active cooking time. Once the quesadillas are in the oven, you are free to prepare toppings or side dishes.
    • Even Cooking: The oven’s ambient heat cooks everything uniformly, so the cheese melts beautifully and consistently from edge to edge.
    • Great for Batches: You can easily arrange multiple quesadillas on a single baking sheet, making this approach perfect for meal prep or entertaining guests.

    When baking, preheat your oven to a moderate temperature, such as 375°F (190°C), for consistent heat that melts the cheese effectively [2]. A light spray of oil on the tortillas will also help them crisp up.

    Which Method Should You Choose?

    Ultimately, the “better” method depends on your specific needs. If you want a single, super-crispy quesadilla in a hurry, reach for the frying pan. However, if you’re making quesadillas for your whole family, baking is a fantastic time-saver that lets you cook a large batch at once. Both methods yield delicious results and bring warm, cheesy goodness to your table. Just pick the one that fits your cooking style and enjoy a simple, satisfying meal!

    What to Serve with Your Quesadillas

    With your quesadillas hot and ready, the next step is transforming them into a truly memorable meal. Because quesadillas are so versatile, they work equally well as a quick lunch or a satisfying dinner, especially when paired with simple sides. This approach also makes meal planning much easier. At Recipesmondial, we love easy recipes for family-friendly meals, so let’s explore some delicious, beginner-friendly recipes to serve alongside your perfect quesadillas.

    There’s no need to feel overwhelmed by complex recipes. To help you cook healthy and tasty meals quickly and confidently, these suggestions focus on fresh ingredients and simple techniques. You’ll be enjoying stress-free cooking in no time.

    Essential Toppings and Dips

    Start with these classic additions to elevate your quesadilla experience. They introduce fresh flavors and textures and are incredibly simple to prepare.

    • Salsa: A vibrant salsa is a must-have. Try a fresh pico de gallo with diced tomatoes, onions, cilantro, and a squeeze of lime. Alternatively, a zesty salsa verde offers a tangy kick.
    • Guacamole or Sliced Avocado: Creamy, rich avocado adds a wonderful balance. Make a simple guacamole with mashed avocado, lime juice, salt, and a pinch of chili powder. Or, simply serve fresh avocado slices.
    • Sour Cream or Greek Yogurt: A dollop of cool sour cream provides a delightful contrast. For a healthier twist, use plain Greek yogurt, which adds creaminess and a touch of tang.
    • Fresh Cilantro and Lime Wedges: A sprinkle of fresh cilantro brightens every bite, while lime wedges offer a burst of citrus. This simple addition makes a big difference in flavor.

    Fresh and Light Sides

    To create healthy and balanced meals, round out your plate with these vibrant, light options. They add essential nutrients and satisfying textures without feeling heavy.

    • Simple Green Salad: A crisp mixed green salad tossed with a light vinaigrette is a fantastic choice. It offers a refreshing break from the richness of the quesadilla and is a simple way to boost your nutrient intake [3].
    • Black Bean and Corn Salad: This colorful salad is full of flavor. Combine canned black beans (rinsed), corn, diced bell peppers, red onion, and a lime-cilantro dressing for a quick and satisfying option.
    • Fruit Salad: For a sweet and refreshing contrast, serve a simple fruit salad with watermelon, cantaloupe, berries, and mango. It cleanses the palate beautifully.

    Heartier Accompaniments

    For a more substantial dinner, or when quesadillas are part of a larger spread, consider these comforting sides. They are key to creating truly flavorful meals made easy.

    • Cilantro Lime Rice: Fluffy white or brown rice infused with lime juice and fresh cilantro is delicious and an excellent companion for soaking up any extra flavors.
    • Refried Beans: A classic pairing, refried beans add a comforting, savory element. You can find ready-made options or make your own for a fresher taste.
    • Mexican Street Corn (Esquites): For a truly special side, try this warm salad that mixes corn with mayonnaise, cotija cheese, chili powder, and lime juice. It’s a wonderful burst of flavor.

    Cooking at home should be enjoyable, not stressful. We hope these ideas inspire you to create a complete and delicious meal with confidence. Enjoy discovering new flavors with Recipesmondial!

    The Easiest Quesadilla Recipe (Printable Card)

    Looking for the ultimate easy quesadilla recipe? This is it. Our simple guide will help you confidently create delicious, cheesy quesadillas in minutes, perfect for busy weeknights or a quick lunch. Get ready for stress-free mealtimes with this family-friendly favorite.

    Classic Cheese Quesadilla Recipe

    Enjoy a flavorful meal that’s perfect for cooks of all skill levels. This beginner-friendly recipe is a true staple for approachable home cooking.

    Prep Time: 5 minutes

    Cook Time: 5-7 minutes

    Yield: 2 quesadillas (serves 4)

    Ingredients:

    • 4 small (6-inch) or 2 large (8-10 inch) flour tortillas
    • 1 cup shredded cheese (Monterey Jack, cheddar, or a Mexican blend)
    • 1 tablespoon unsalted butter or olive oil
    • Optional: Pinch of salt, black pepper, or a dash of chili powder

    Essential Equipment:

    • Large non-stick skillet or cast-iron pan
    • Spatula
    • Cutting board
    • Pizza cutter or knife

    Step-by-Step Instructions:

    1. Prepare Your Pan: Heat the butter or oil in a large skillet over medium heat until shimmering or fully melted.
    2. Lay Down Tortilla: Place one tortilla flat in the hot pan.
    3. Add Cheese: Sprinkle half of the cheese evenly over one half of the tortilla, leaving a small border to prevent it from spilling out.
    4. Fold or Top: After about 1-2 minutes, once the cheese begins to melt, fold the empty half of the tortilla over the cheese. Press down gently with a spatula. If using two large tortillas, sprinkle the cheese over the entire surface of the bottom tortilla and place the second one on top.
    5. Cook Until Golden: Cook for 2-3 minutes per side, until the tortilla is golden brown and crispy and the cheese is completely melted. Flip carefully to cook the second side.
    6. Remove and Slice: Transfer the quesadilla to a cutting board and let it rest for a moment, which makes it easier to slice.
    7. Slice and Serve: Cut into wedges using a pizza cutter or a sharp knife. Serve immediately with your favorite toppings.

    Tips for Success & Variations:

    Use these tips to guarantee delicious results every time and discover new flavor combinations.

    • Don’t Overstuff: Avoid adding too much filling, as it makes the quesadilla difficult to flip and can prevent it from cooking evenly. Keep it simple for the best results.
    • Low to Medium Heat: Cooking over low to medium heat is essential. This allows the tortilla to get crispy and golden while the cheese melts perfectly without the risk of burning.
    • Cheese Choices: Experiment with different cheeses. Mozzarella offers a great stretch, while a blend provides a more complex flavor. Find your favorite combination!
    • Add Protein: For a heartier meal, include cooked protein like leftover shredded chicken or seasoned ground beef.
    • Vegetarian Boost: Add sautéed onions, bell peppers, or spinach. Black beans or corn are also delicious additions for a more substantial meal.
    • Spice It Up: Elevate the flavor by sprinkling a pinch of cumin, chili powder, or garlic powder over the cheese before cooking.
    • Serving Suggestions: Serve with salsa, guacamole, sour cream, or a squeeze of fresh lime juice to complement these quick meals.
    • Meal Prep Idea: Store cooked quesadillas in the fridge for a quick meal. Reheat gently in a dry pan until warm and crisp for a perfect grab-and-go lunch or breakfast.

    Designed for busy families, this step-by-step quesadilla recipe makes it simple to get a delicious and satisfying meal on the table. Enjoy this easy approach to flavorful home cooking!

    Frequently Asked Questions About Quesadillas

    What should you put in a quesadilla?

    Quesadillas are wonderfully versatile, making them perfect for using up leftovers or whipping up a quick, flavorful meal. While cheese is the essential ingredient, the filling possibilities are nearly endless. Simply consider what you love and what you already have in your fridge.

    Here are some popular and easy filling ideas:

    • Cheese: This is a must! Use a good melting cheese like Monterey Jack, cheddar, or a Mexican blend.
    • Cooked Chicken: Shredded rotisserie chicken makes for a super quick and easy chicken quesadilla. Leftover grilled chicken works beautifully too.
    • Seasoned Ground Beef: Taco-seasoned ground beef adds bold flavor and is great for family-friendly meals.
    • Black Beans & Corn: For a fantastic vegetarian option, combine black beans and corn. Add a sprinkle of chili powder for extra zing.
    • Sautéed Veggies: Bell peppers, onions, mushrooms, or spinach are all delicious additions. Be sure to cook them until tender before adding them to your tortilla.
    • Pork Carnitas: If you have leftover pulled pork, it makes an incredibly tasty and simple dinner.
    • Scrambled Eggs: For a delightful breakfast quesadilla, add some scrambled eggs and a little cooked sausage.

    Remember, don’t overstuff your quesadilla. A thin, even layer of fillings ensures everything cooks through and stays neatly inside the tortilla.

    How do I make my quesadillas better?

    Turning a good quesadilla into a great one is all about technique. These simple tips will elevate your results.

    • Grate Your Own Cheese: Pre-shredded cheese contains anti-caking agents like cellulose, which prevent it from melting smoothly [4]. For that gooey, irresistible texture, freshly grated cheese melts much more evenly.
    • Don’t Overstuff: While it’s tempting to load up on fillings, too much makes the quesadilla difficult to fold and causes it to cook unevenly. A thin, even layer is best to ensure everything heats through and the cheese melts perfectly.
    • Use Medium Heat: Patience is key. Cooking on medium heat allows the tortilla to become golden and crispy while giving the cheese enough time to melt completely. High heat will burn the tortilla before the filling is ready.
    • Add a Little Fat: A small amount of butter or oil in the pan is essential. It adds flavor and helps create a beautifully golden, crispy crust on the tortilla.
    • Pre-cook Fillings: Always cook any raw meat or hard vegetables beforehand. This ensures every component of your filling is tender and hot when the quesadilla is done.

    Following these steps will help you achieve wonderfully crispy, cheesy, and flavorful quesadillas every time.

    Is it better to bake or pan fry quesadillas?

    Both methods have their advantages, so the best choice depends on your priorities. Consider whether you need to make a large batch or want the crispiest possible tortilla.

    Method Pros Cons Best For
    Pan Frying
    • Achieves the crispiest tortillas.
    • Quickest for one or two quesadillas.
    • Excellent cheese melt and golden-brown exterior.
    • Easy to monitor for perfect browning.
    • Requires more hands-on attention.
    • Can be time-consuming for large batches.
    • Only cooks one or two at a time.
    • Single servings.
    • Extra crispy results.
    • Quick lunch or dinner ideas.
    Baking
    • Great for making large batches at once.
    • More hands-off once in the oven.
    • Still results in a warm, melted quesadilla.
    • Good for family meals or gatherings.
    • Less crispy than pan-fried.
    • Can sometimes dry out the tortilla if overcooked.
    • Takes longer overall due to oven preheating.
    • Feeding a crowd.
    • Meal prep for busy families.
    • When you need a more hands-off approach.

    For the ultimate crispy texture, pan-frying is the clear winner. However, baking is a fantastic and convenient option when making several quesadillas for a family dinner. You can even combine methods: lightly pan-fry each quesadilla, then transfer them to a baking sheet in the oven to keep warm and finish melting.

    What kind of cheese is best for quesadillas?

    The best cheese for quesadillas is one that melts beautifully and offers great flavor, giving you that gooey, stringy pull in every bite. Here are some top choices:

    • Monterey Jack: A classic for a reason, this cheese melts incredibly well and has a mild, buttery flavor.
    • Cheddar: Medium or sharp cheddar adds a lovely tangy flavor and melts reliably, especially when freshly grated.
    • Mexican Blend: Found in most grocery stores, these blends typically combine Monterey Jack, cheddar, asadero, and Oaxaca cheeses for convenient, great-tasting results.
    • Oaxaca Cheese: This traditional Mexican cheese is fantastic. It has a mild, milky flavor and a superb stringy melt similar to mozzarella.
    • Asadero Cheese: Similar to Oaxaca, Asadero is another excellent Mexican melting cheese with a mild, smooth taste.
    • Colby Jack: A marbled blend of Colby and Monterey Jack, it melts wonderfully and provides a balanced, mild flavor.

    For the best results, always choose a block of cheese and grate it yourself. This simple step ensures the smoothest, most delicious melt. It’s also wise to avoid overly watery or crumbly cheeses, as they won’t provide that classic, gooey texture.


    Sources

    1. https://www.seriouseats.com/shredded-cheese-vs-block-cheese-best-for-cooking
    2. https://www.bhg.com/recipes/how-to-bake-everything-3022513
    3. https://www.choosemyplate.gov/eat-healthy/vegetables
    4. https://www.seriouseats.com/how-to-choose-the-best-cheese-for-mac-and-cheese