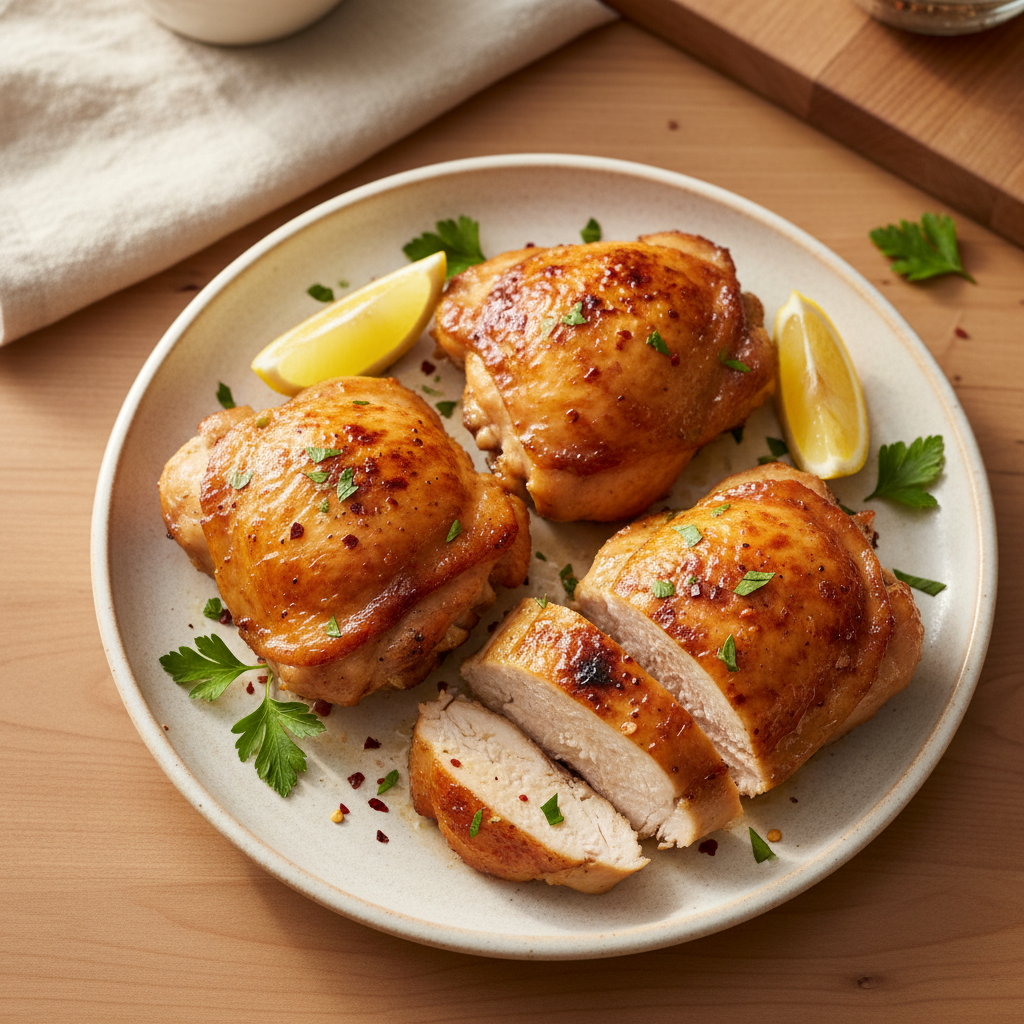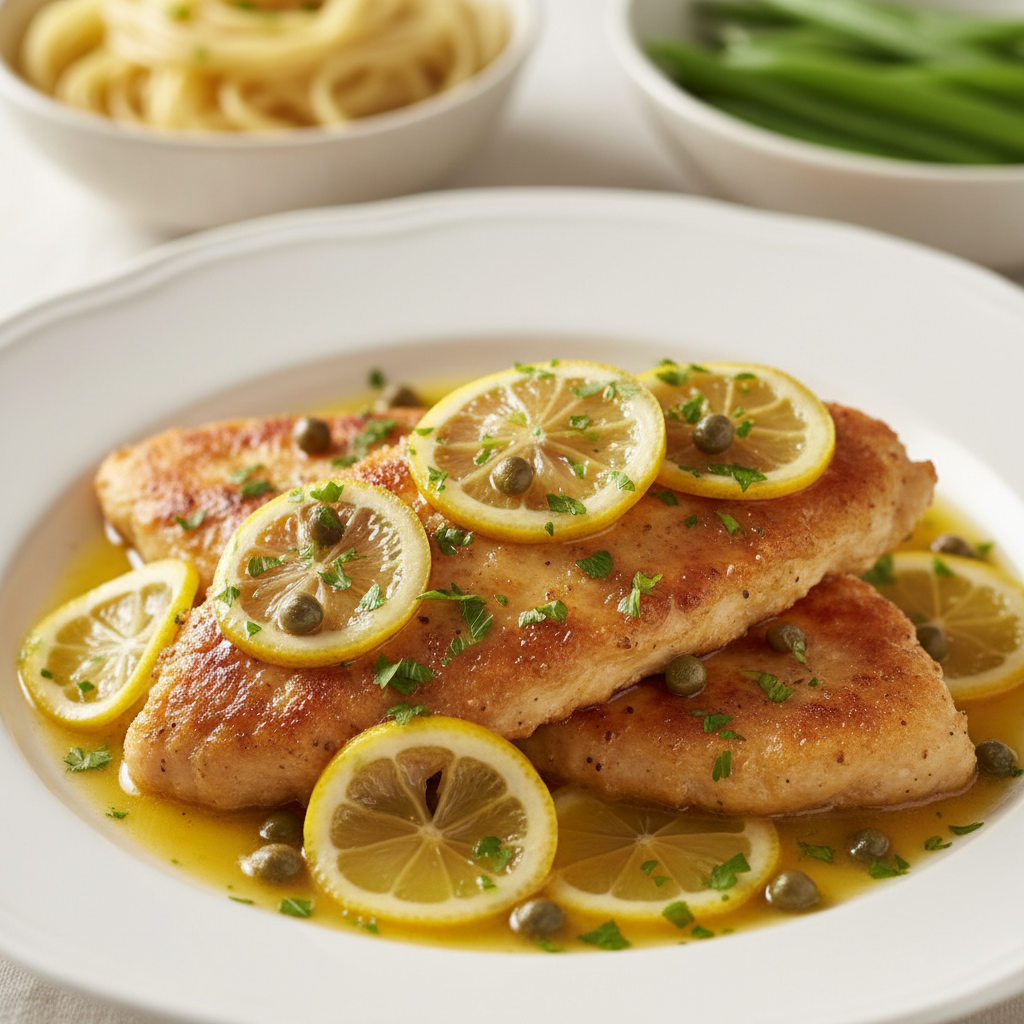
Chicken piccata is a classic Italian-American dish made with thinly sliced chicken cutlets that are dredged in flour, pan-fried, and served with a bright sauce. The signature piccata sauce consists of lemon juice, butter, chicken broth or white wine, and capers, creating a flavorful and elegant meal that is simple to prepare at home.
Are you searching for easy recipes that impress without the fuss? When you’re short on time or new to the kitchen, complex dishes can feel overwhelming. Imagine serving a gourmet-tasting meal that comes together effortlessly. That’s where a classic like chicken piccata shines. Though it sounds elegant, this flavorful dish is surprisingly simple to master—even for beginners—and promises a delightful, stress-free dining experience.
At Recipesmondial, we believe mealtimes should be enjoyable. That’s why we’ve created the ultimate beginner-friendly chicken piccata recipe. Our step-by-step guide will walk you through preparing succulent chicken cutlets in a bright, tangy lemon-butter sauce. You’ll build confidence and see how simple dinner recipes can transform your weeknights into delicious culinary experiences, perfect for family-friendly meals.
Get ready to discover why this easy chicken piccata recipe is about to become a new family favorite. We’ll cover everything from using everyday ingredients to sharing practical tips for perfecting your sauce. With our guide, you can expect reliable results every time. Let’s dive in and make this beloved dish accessible to everyone!
What Is Chicken Piccata?
Chicken Piccata is a classic Italian-American dish featuring tender, thin chicken cutlets pan-fried until golden brown. The cutlets are then bathed in a bright and zesty sauce, which is the heart of this incredibly flavorful meal.
Home cooks love this dish because it delivers gourmet results with minimal effort. Its simplicity and impressive taste make it a perfect choice for an easy yet elegant weeknight dinner.
The Heart of Piccata: Chicken and Sauce
At its core, a classic chicken piccata recipe combines two main elements:
- Thin Chicken Cutlets: The dish starts with boneless, skinless chicken breasts pounded to about 1/4 inch thick, which ensures they cook quickly and evenly. A light dredge in flour before pan-frying creates a beautiful, crispy crust.
- Lemony Caper Sauce: This vibrant sauce is what makes piccata so unique. Its base combines savory chicken broth with fresh lemon juice for brightness and rich butter for a luxurious texture. The addition of tiny, briny capers provides a salty pop that perfectly balances the rich and tangy notes.
Why Home Cooks Love This Easy Recipe
Chicken piccata is a fantastic choice for cooks of all skill levels because it offers incredible flavor without requiring complex techniques. It’s an ideal, beginner-friendly recipe for anyone looking to create a restaurant-quality meal at home.
Recipesmondial focuses on approachable home cooking, and this recipe embodies that philosophy. It’s a quick, reliable, and family-friendly meal that delivers impressive flavor without the stress. With every delicious plate, you’ll gain confidence and find more joy in the kitchen.
What Does “Piccata” Mean?
The Italian word “piccata” can mean “larded” or “punished” in a culinary context. More commonly, it refers to a method of preparing meat that has been thinly sliced, pounded flat, dredged in flour, and pan-fried. This technique is used for various proteins, with veal piccata being another popular variation. [1]
Why Is This the Best Chicken Piccata Recipe for Home Cooks?
Welcome to your new favorite way to make chicken piccata! While many home cooks feel overwhelmed by complex recipes, we believe you deserve delicious results without the stress. That’s why this recipe is specifically crafted for you.
At Recipesmondial, we focus on making cooking enjoyable by helping you create flavorful meals with confidence. This chicken piccata recipe is a perfect example, and it stands out for several key reasons:
- Super Simple Steps: We break down the cooking process into clear, easy-to-follow instructions so you’ll never feel lost in the kitchen. This makes it a perfect beginner-friendly recipe.
- Quick Weeknight Solution: Need a fast meal after a busy day? This easy recipe delivers a restaurant-quality dish in no time, making it ideal for simple dinner recipes and family-friendly meals.
- Everyday Ingredients: Forget trips to a specialty store. Our chicken piccata uses common items you likely already have or can easily find at your local grocery store.
- Guaranteed Delicious Flavor: You don’t need to be a chef to create an amazing dish. This recipe guarantees a bright, zesty, and savory taste, ensuring a truly flavorful meal made easy.
- Build Your Confidence: Mastering a classic dish like piccata is a great way to boost your kitchen skills. Our step-by-step cooking guidance is designed to help you cook with confidence every step of the way.
- Practical Tips Included: We provide helpful advice throughout the recipe, including tricks for perfectly golden chicken and a velvety sauce. These tips help ensure reliable, delicious results every time.
- Easy Variations: If you want to switch things up, we offer simple suggestions to customize your piccata, allowing you to adapt it to your taste or the ingredients you have on hand.
Our approach transforms meal prep from a stressful chore into an enjoyable experience, guiding you from uncertainty to confidence in the kitchen. Get ready to discover new flavors and make mealtime stress-free with Recipesmondial!
What Ingredients Do You Need for Chicken Piccata?
Making delicious Chicken Piccata at home is surprisingly simple. This classic dish comes together with just a few everyday ingredients—no fancy items or complex preparations required. Many of these are likely already in your pantry. To keep it simple, we’ll break down the ingredients for the chicken cutlets first, followed by the signature lemon-butter sauce.
For the Chicken Cutlets
First, let’s gather what you need for the star of the dish. We use boneless, skinless chicken breasts because they cook quickly and absorb flavors beautifully, helping you get a delicious dinner on the table fast.
- Boneless, Skinless Chicken Breasts: 2 large (about 1.5 lbs total). These will be sliced or pounded thin for quick cooking.
- All-Purpose Flour: ½ cup. This creates a light, golden crust on the chicken and helps thicken our piccata sauce.
- Salt: ½ teaspoon. Essential for seasoning the chicken.
- Black Pepper: ¼ teaspoon. Freshly ground pepper offers the best flavor.
- Olive Oil: 2 tablespoons. For pan-frying the chicken to a perfect golden brown.
Chef’s Tip: To get thin cutlets, you can either slice each chicken breast horizontally to create two thinner pieces, or place them between two sheets of plastic wrap and gently pound them to about ½-inch thickness with a rolling pin or meat mallet. Thinner cutlets cook faster and stay more tender, making this a truly quick and easy recipe.
For the lemon-butter piccata sauce
Next up is the bright, tangy lemon-butter sauce that truly defines this classic dish. It comes together in just a few minutes and relies on a handful of common pantry staples.
- Unsalted Butter: ¼ cup (4 tablespoons). Butter adds richness and a silky texture to the sauce.
- Garlic: 2 cloves, minced. Fresh garlic adds a wonderful aromatic base to the sauce.
- Chicken Broth: ¾ cup. Low-sodium broth is best. It provides savory depth without being too salty.
- Fresh Lemon Juice: ¼ cup (from about 1-2 lemons). This is non-negotiable for authentic piccata flavor. Always use fresh for the best taste.
- Capers: 2 tablespoons, drained. These tiny, briny flower buds add a distinct salty and tangy pop. They are a signature ingredient of piccata.
- Fresh Parsley: 2 tablespoons, chopped. A sprinkle of fresh parsley adds color and a herbaceous finish.
Substitution Idea: While fresh parsley offers the best vibrant flavor and appearance, dried parsley can work in a pinch. The one non-negotiable ingredient is fresh lemon juice; bottled juice simply lacks the bright, zesty taste essential for authentic piccata. For a richer sauce, you can add a splash of white wine during the deglazing step, as highlighted in our “Chicken Piccata with White Wine” variation.
How to Make Chicken Piccata: A Simple Step-by-Step Guide
Step 1: Prepare the Chicken
First, let’s prepare the chicken. This initial step ensures the chicken cooks evenly and quickly, making it perfect for a weeknight meal.
- Slice the Chicken: If your boneless, skinless chicken breasts are thick, slice them horizontally to create thinner cutlets. You should get two or three cutlets from each breast.
- Pound the Chicken: Place a chicken cutlet between two sheets of plastic wrap or inside a large zip-top bag. Using a meat mallet or heavy rolling pin, gently pound the chicken to a uniform ¼-inch thickness. This step is key for tender results and even cooking.
- Season Well: Remove the chicken from the plastic. Season both sides of each cutlet with salt and black pepper to build flavor from the start.
Chef’s Tip: Don’t skip pounding the chicken! This extra step tenderizes the meat and helps it cook much faster—a great skill for many quick recipes.
Step 2: Dredge and Pan-Fry
With the chicken prepped, it’s time to create a golden-brown crust. This is where the dish builds its signature flavor and texture.
- Set Up for Dredging: On a shallow plate, combine the all-purpose flour with a pinch of salt and pepper.
- Dredge the Chicken: Dip each seasoned chicken cutlet into the flour mixture, coating both sides. Gently shake off any excess flour; a thin, even layer is all you need for a perfect crust.
- Heat the Pan: Place a large skillet over medium-high heat. Add the olive oil and butter. When the butter is melted and the oil begins to shimmer, the pan is ready.
- Pan-Fry the Chicken: Carefully place 2-3 chicken cutlets in the hot skillet, making sure not to overcrowd the pan. Cook for 3-4 minutes per side, until golden-brown and cooked through.
- Remove and Rest: Transfer the cooked chicken to a clean plate and cover it loosely with foil to keep warm. Letting the chicken rest keeps it juicy and tender while you make the sauce.
Beginner’s Insight: Overcrowding the pan lowers its temperature, causing the chicken to steam instead of brown. For the best results, cook the chicken in batches if needed.
Step 3: Make the Piccata Sauce
The key to chicken piccata is its bright, tangy lemon-butter caper sauce. This is what makes the dish a classic.
- Deglaze the Pan: Leave the flavorful browned bits in the bottom of the skillet. Pour in the chicken broth and use a wooden spoon to scrape the bottom of the pan. This process, called deglazing, builds the sauce’s foundation.
- Add Key Flavors: Stir in the fresh lemon juice, capers, and caper brine. Bring the mixture to a simmer and let it cook for 2-3 minutes to allow the flavors to meld.
- Finish with Butter: Reduce the heat to low. Add the cold butter one piece at a time, whisking constantly until it is fully melted and incorporated. This creates a smooth, emulsified sauce.
- Taste and Adjust: Sample the sauce and season with additional salt and pepper if needed to achieve a bright, savory balance.
Flavor Focus: Freshly squeezed lemon juice is essential for the signature zesty flavor of chicken piccata. Avoid using bottled juice for the best results.
Step 4: Combine and Serve
In this final step, we’ll bring the chicken and the sauce together for a delicious finished dish.
- Return Chicken to Pan: Place the cooked chicken cutlets back into the skillet. Spoon the sauce over them and let everything warm through for 1-2 minutes.
- Garnish: Sprinkle fresh, chopped parsley over the chicken for a pop of color and fresh flavor.
- Serve Immediately: Transfer the chicken piccata to serving plates and drizzle any remaining sauce from the pan over the top.
Your chicken piccata is ready to serve! This simple recipe delivers impressive flavor and is perfect for any night of the week. Enjoy your homemade meal.
Tips for Perfecting Your Piccata Sauce
A truly perfect chicken piccata recipe hinges on its delicious sauce. This bright, tangy, and rich sauce brings the whole dish together. Even as a beginner, you can master it with a few simple techniques. Let’s explore how to make your piccata sauce shine.
Embrace the Pan Drippings (Fond)
- After cooking the chicken, do not clean the pan. Those browned bits stuck to the bottom, known as “fond,” are packed with flavor and form the foundation of your sauce.
- To harness that flavor, pour in your liquid (broth or wine) and gently scrape up the fond. This process, called deglazing, releases all those savory notes into the sauce.
Use Fresh Lemon, Added Last
- Always opt for fresh lemons over bottled juice. Bottled varieties simply lack the vibrant, zesty flavor needed for an authentic piccata.
- To preserve its bright aroma, add the lemon juice at the very end of the cooking process. If you add it too early, the delicate flavor will cook off and dissipate.
Choose Quality Broth or Wine
- The quality of your liquid base matters. Choose a good-quality chicken broth—preferably low-sodium, so you can control the saltiness of the final sauce.
- For extra depth and complexity, consider using a dry white wine like Pinot Grigio or Sauvignon Blanc. The alcohol will cook off, leaving only rich flavor behind.
Swirl in Cold Butter for Silkiness
- For a classic, professional finish, turn off the heat once the sauce is nearly done and whisk in a few pats of cold butter.
- This technique emulsifies the fat into the liquid, creating a silky, glossy texture and adding incredible richness to your piccata sauce source: https://www.seriouseats.com/how-to-make-pan-sauce-deglazing-butter-techniques.
Capers Are Essential
- A hallmark of piccata, capers provide a unique, briny burst of acidity that is essential to the dish’s signature flavor.
- Be sure to drain them well before adding them to the sauce. If you’re sensitive to salt, you can also give them a quick rinse under cold water.
Always Taste and Adjust Seasoning
- Taste your sauce frequently as you cook. This is the key to achieving a perfectly balanced flavor.
- Adjust the seasoning with salt, pepper, or another squeeze of lemon as needed. Remember, even a small pinch of salt can amplify all the other flavors in the sauce.
Master Sauce Consistency
- Aim for a consistency that is just thick enough to coat the back of a spoon. This ensures the sauce clings beautifully to the chicken.
- If the sauce is too thin, let it simmer gently (do not boil) to reduce and thicken. If it becomes too thick, simply whisk in a splash of broth or water until you reach the perfect texture.
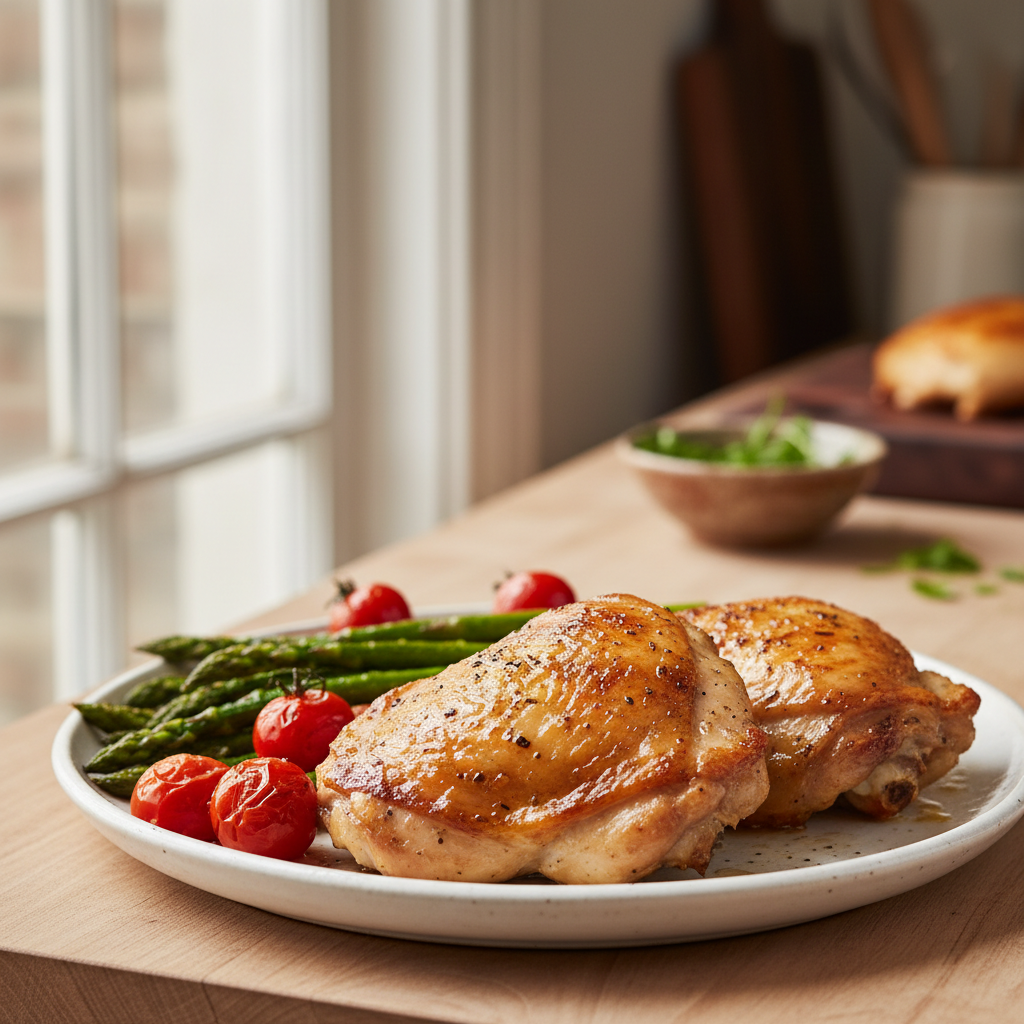
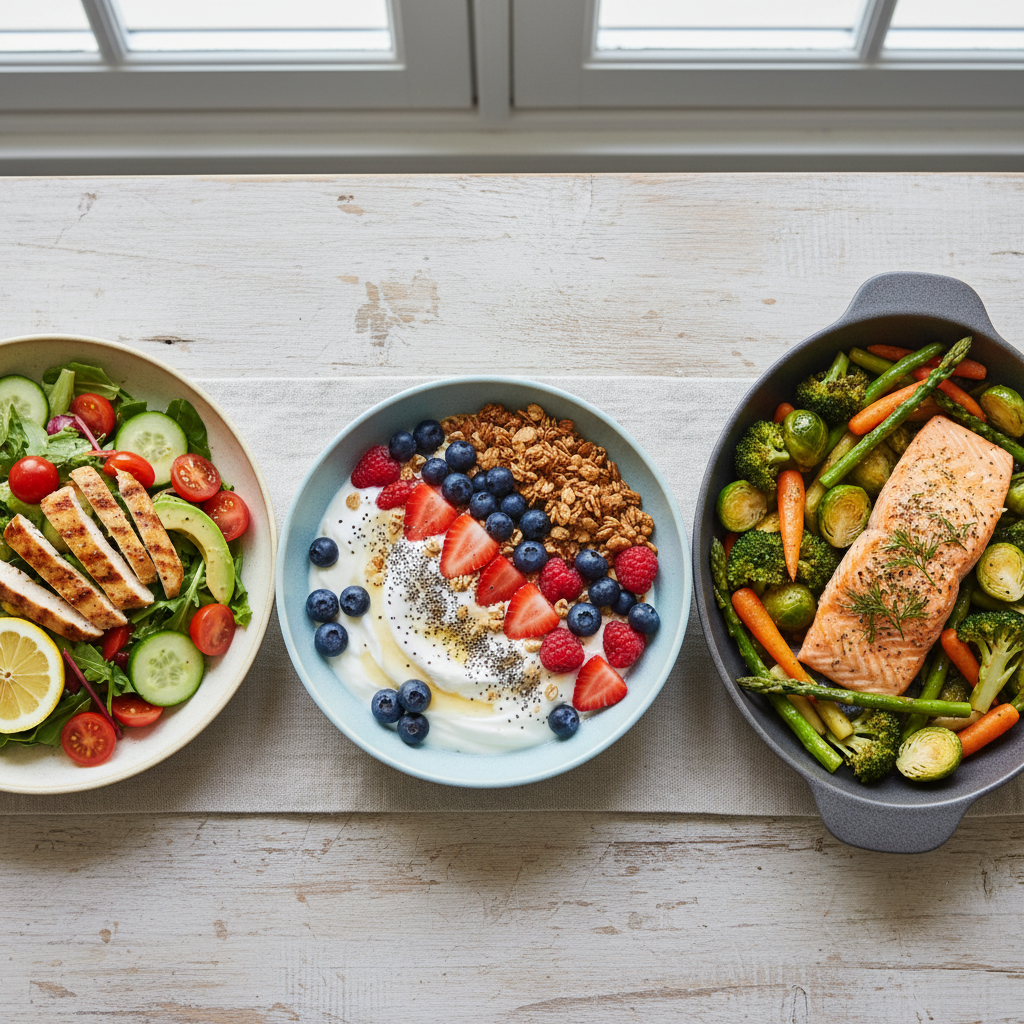
What to serve with chicken piccata?
Pasta and Grains
Pasta and grains are excellent choices for pairing with chicken piccata because they soak up its vibrant lemon-caper sauce, creating a comforting and filling meal. Best of all, they’re easy to prepare, making them ideal for any home cook.
- Linguine or Angel Hair Pasta: These delicate pastas are perfect for gently absorbing the bright, tangy sauce. Cook until al dente for the best texture.
- Orzo: This small, rice-shaped pasta blends seamlessly with the chicken and becomes infused with the sauce, offering a unique texture.
- Rice: Steamed white or brown rice provides a neutral base that soaks up every drop of the delicious piccata sauce, making it a simple and reliable option.
- Quinoa: For a nutritious whole-grain option, quinoa’s subtle nutty flavor and pleasant texture complement the chicken perfectly.
After cooking your chosen pasta or grain according to package instructions, toss it with a spoonful of extra piccata sauce. This simple tip adds a major flavor boost and elevates the entire dish.
Vegetable Sides
Fresh vegetables balance the richness of chicken piccata while adding vibrant color and essential nutrients to the plate. Many options are also quick to prepare, saving precious time for busy families.
- Steamed Asparagus: Steam asparagus until tender-crisp and finish with a squeeze of lemon juice to enhance its natural flavor. It’s an exceptional pairing for the piccata sauce.
- Sautéed Green Beans: Sauté green beans with olive oil and garlic until they are tender with a slight crunch. This simple method yields a flavorful and easy side dish.
- Roasted Broccoli or Broccolini: Roast broccoli or broccolini florets with olive oil, salt, and pepper until tender and slightly caramelized. Roasting brings out their natural sweetness, which complements the savory chicken.
- Sautéed Spinach: For a light and healthy side, sauté fresh spinach with a touch of garlic. It wilts in minutes, making it a fantastic and quick addition to your meal.
- Garlic Mashed Potatoes: For a more indulgent option, creamy garlic mashed potatoes are the perfect comforting side for soaking up every bit of the delicious sauce.
These simple vegetable sides help you create a tasty, well-rounded meal. You can feel confident serving a delicious and balanced dinner to your family.
Salads
A crisp salad provides a refreshing contrast to the warm, savory chicken piccata recipe. Its lightness cuts through the richness of the sauce while adding a welcome crunch and bright flavor to the meal.
- Simple Green Salad: Toss mixed greens or butter lettuce with a light lemon vinaigrette. This simple preparation keeps the flavors clean and bright, perfectly complementing the main dish.
- Arugula Salad with Shaved Parmesan: The peppery bite of arugula pairs wonderfully with the chicken. Finish with a simple lemon dressing and shaved Parmesan for a sophisticated yet beginner-friendly salad.
- Cucumber and Tomato Salad: For a colorful and hydrating option, combine diced cucumbers and tomatoes with a light vinaigrette or a simple drizzle of olive oil.
A simple salad adds freshness to any meal and makes a great side for leftover chicken piccata. These easy recipes are designed to impress without adding stress, so you can enjoy the cooking process.
Easy Recipe Variations to Try
Once you’ve mastered the classic chicken piccata, you can explore delicious new twists. These simple variations add new flavors and textures, making it easy to adapt the dish to your taste. Experimenting with these recipes is a great way to discover new dishes and enjoy stress-free cooking.
Creamy Chicken Piccata Recipe
If you love a richer, smoother sauce, this creamy chicken piccata is a wonderfully comforting option. Perfect for a cozy family dinner, this easy variation adds a delightful richness to the classic dish.
Here’s how to make it:
- Prepare as usual: Follow steps 1 and 2 of our main recipe to dredge and pan-fry the chicken cutlets.
- Add cream to the sauce: After making the lemon-butter piccata sauce in step 3, reduce the heat to low.
- Stir in cream: Gently pour in about 1/2 cup of heavy cream or half-and-half, whisking until fully combined.
- Simmer gently: Let the sauce simmer for 2 to 3 minutes until it thickens slightly. Avoid letting it boil vigorously.
- Combine and serve: Return the chicken to the creamy sauce, toss to coat, and serve immediately.
Chef’s Tip: For an extra luxurious touch, stir in a tablespoon of grated Parmesan cheese with the cream. This creates an even deeper flavor and is a fantastic way to elevate a simple dinner.
Chicken Piccata with White Wine
Adding white wine to your piccata sauce introduces a bright, acidic note and a wonderful depth of flavor. This popular variation is a staple in many kitchens and an easy way to elevate your meal.
Here’s how to incorporate it:
- Deglaze the pan: After removing the cooked chicken cutlets, keep the pan on medium-high heat.
- Add wine: Pour in 1/4 cup of dry white wine, such as Sauvignon Blanc or Pinot Grigio.
- Scrape up bits: Use a wooden spoon to scrape up the flavorful browned bits from the bottom of the pan.
- Reduce the wine: Let the wine simmer for 1 to 2 minutes, or until it has reduced by about half. This will also cook off the alcohol.
- Continue with sauce: Proceed with adding the chicken broth, lemon juice, capers, and butter as described in step 3 of the main recipe.
Substitution Alert: If you prefer not to use wine, you can skip this step and add an extra 1/4 cup of chicken broth instead for a delicious, wine-free sauce.
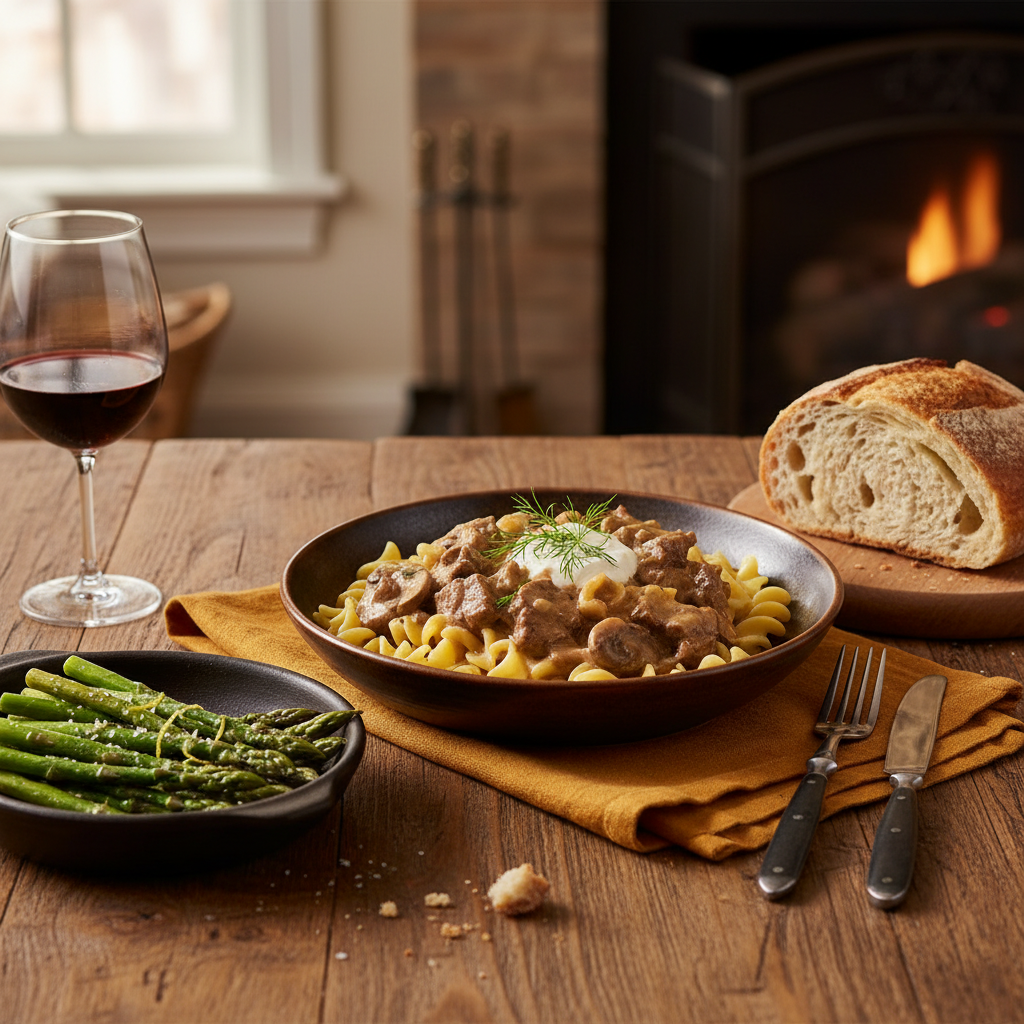
Making Piccata with Other Proteins (Fish, Beef)
The beauty of piccata sauce lies in its versatility, as it pairs wonderfully with other proteins. This opens up a world of creative, flavorful, and family-friendly meals for when you want to change things up.
- Fish Piccata:
- Choose your fish: Firm white fish fillets like cod, tilapia, or snapper work best. Salmon also makes a delightful piccata.
- Preparation: Pat the fish dry and lightly dredge it in seasoned flour, just like the chicken.
- Cooking: Pan-fry the fish for 2-4 minutes per side until it is flaky and cooked through. Keep in mind that fish cooks much faster than chicken.
- Sauce: Remove the fish and prepare the piccata sauce in the same pan. Gently return the cooked fish to the sauce to warm through before serving.
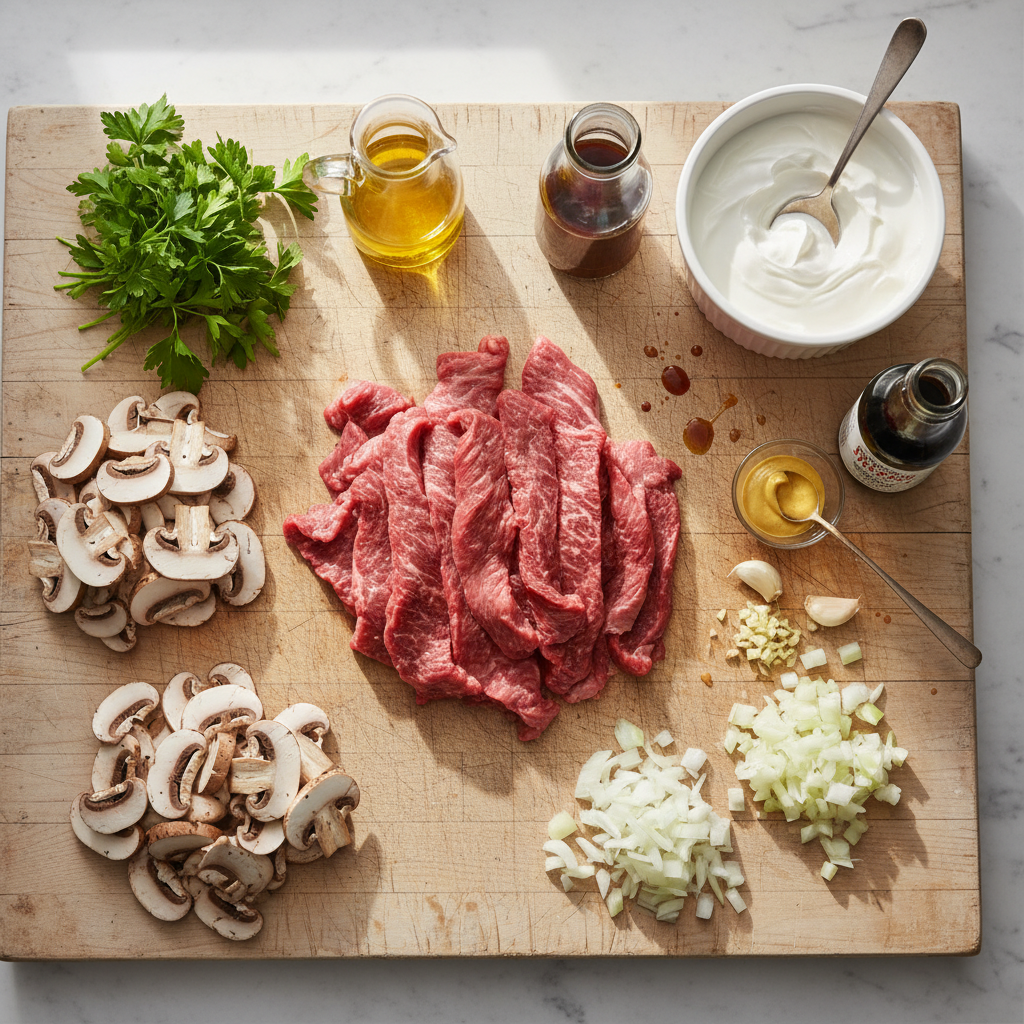
- Beef Piccata:
- Choose your beef: Use thinly sliced beef cutlets, such as sirloin or tenderloin.
- Preparation: Lightly pound the beef to an even thickness and dredge it in seasoned flour.
- Cooking: Quickly sear the beef in hot oil for 1-2 minutes per side, or to your desired doneness.
- Sauce: Remove the beef and prepare the piccata sauce. Return the beef to the pan and toss to coat.
These easy recipe variations allow you to use basic cooking skills in new ways and simplify mealtime decisions. Enjoy experimenting with these flavorful options!
Frequently Asked Questions
What does piccata mean?
The Italian term “piccata” refers to a technique where meat is sliced, pounded thin, and then sautéed. This method not only makes the meat very tender but also allows it to cook quickly. Chicken piccata, for example, uses chicken cutlets prepared this way, ensuring every bite is soft and delicious. It’s perfect for quick meals and beginner-friendly recipes [2].
What is piccata sauce made of?
The classic piccata sauce is bright, zesty, and incredibly flavorful. This simple but elegant sauce is a highlight of the dish and typically includes these main ingredients:
- Lemon Juice: This provides the signature bright, tangy flavor and cuts through the richness of the butter.
- Capers: These small, briny flower buds add a distinct salty and savory punch essential to the authentic piccata flavor.
- Chicken Broth: Forming the base of the sauce, it adds savory depth without being too heavy.
- Butter: Swirled in at the end, butter creates a velvety texture and adds a delicious richness to the sauce.
- Fresh Parsley: Chopped fresh parsley adds a pop of color and a fresh, herbaceous note.
- Flour or Cornstarch (optional): A small amount of flour or cornstarch is sometimes used to thicken the sauce slightly.
Together, these ingredients create a balanced sauce that is both tangy and savory, coating the chicken beautifully for a simple, flavorful meal.
Can you serve chicken piccata with pasta?
Absolutely! Chicken piccata and pasta are a classic, family-friendly pairing because the zesty lemon-butter caper sauce is perfect for coating noodles. This popular combination creates a satisfying and complete meal by adding incredible flavor to the pasta.
Here are some popular ways to serve it with pasta:
- Toss the piccata sauce directly with cooked spaghetti, linguine, or angel hair pasta.
- Serve the chicken cutlets over a bed of pasta and drizzle extra sauce over everything.
- Consider adding steamed or roasted vegetables to your plate for a more balanced meal.
Serving piccata with pasta transforms the dish into an even more substantial and comforting meal, making it an excellent option for a quick and satisfying family dinner.
What’s the difference between chicken piccata and chicken Milanese?
While both Chicken Piccata and Chicken Milanese are delicious Italian-inspired dishes, they have key differences in their preparation and flavor. Understanding them will help you choose which one to make next.
| Feature | Chicken Piccata | Chicken Milanese |
|---|---|---|
| Preparation | Thin chicken cutlets are lightly floured, pan-fried until golden, and served with a bright lemon-butter caper sauce. | Thin chicken cutlets are coated in seasoned breadcrumbs and pan-fried or baked until crispy. |
| Breading | A light dusting of flour, which helps create a golden crust. | A substantial coating of seasoned breadcrumbs, often Panko for extra crunch. |
| Sauce | The signature of the dish is its vibrant lemon-butter caper sauce. | Typically served without a sauce, just a simple squeeze of fresh lemon. |
| Flavor Profile | Tangy, savory, and rich, with a zesty kick from the lemon and briny notes from capers. | Crispy and savory, with a milder flavor that comes from the seasoned breading and the chicken. |
| Texture | Tender chicken with a delicate, golden crust, coated in a smooth sauce. | A very crispy exterior with a tender inside, offering a satisfying crunch. |
Both are excellent choices for home cooking, but they offer different experiences. Choose piccata for a saucy, zesty meal, or opt for Milanese when you want a satisfyingly crispy and simple dish. Recipesmondial helps you master both with step-by-step cooking guidance!