Tag: Healthy Recipes

  • 15 Best Salmon Recipes (Easy, Quick, and Healthy Ideas)

    15 Best Salmon Recipes (Easy, Quick, and Healthy Ideas)

    The best salmon recipes are often simple and quick, making them perfect for weeknight dinners. Popular methods include a classic oven baked salmon with lemon and dill, a pan-seared salmon with a crispy skin, or a healthy air fryer salmon that’s ready in minutes. These recipes require minimal prep and deliver flavorful, flaky results every time.

    Are you looking for a meal that’s delicious, healthy, and simple enough for a busy weeknight? Many home cooks feel overwhelmed by complex recipes or struggle to make healthy, tasty meals quickly. That’s where salmon shines! This fantastic fish is packed with nutrients and flavor, making it a perfect choice for family-friendly meals or a quick, satisfying dinner for one.

    At Recipesmondial, we believe cooking should be enjoyable, not stressful. That’s why we’ve gathered our 15 best salmon recipes, designed for beginner-friendly cooking and busy schedules. Whether you’re new to cooking fish or seeking fresh inspiration, our collection will help you cook with confidence. You’ll find easy recipes using everyday ingredients for flavorful, fuss-free meals, complementing our other guides to simple dinner recipes and quick breakfast ideas.

    Get ready to transform your mealtimes with reliable, step-by-step guidance. We’ll explore everything from a perfect oven-baked salmon recipe to quick pan-seared options and healthy air fryer salmon ideas. Let’s dive in and discover why these are the best salmon recipes for home cooks, setting you up for delicious, stress-free cooking.

    Why Are These the Best Salmon Recipes for Home Cooks?

    At Recipesmondial, we know you want delicious meals without the stress. That’s why we created this collection of salmon recipes just for you. If you’re looking for simple, reliable ways to create impressive dishes, you’ve come to the right place.

    Feeling overwhelmed by complex instructions? Unsure how to cook healthy, tasty meals quickly? Struggling with family-friendly meal planning? You’re not alone. Our goal is to replace that frustration with confidence and joy in the kitchen. We designed these best salmon recipes to be your go-to solution.

    Why Our Salmon Recipes Stand Out for Home Cooks

    We carefully developed these recipes to meet the needs of busy individuals and families. From quick weeknight dinners to impressive yet simple weekend meals, you’ll find an option for any occasion. Each dish focuses on ease, flavor, and healthy eating.

    • Effortless Simplicity: Forget complicated techniques. Our easy recipes offer clear, step-by-step guidance that helps you cook with confidence—even if you’re a beginner.
    • Speedy Preparation: Your time is precious, so our recipes are designed for efficiency. Many options, like our oven baked salmon or quick pan-seared methods, are ready in under 30 minutes, making healthy eating a reality on busy days.
    • Reliable Results Every Time: Say goodbye to guesswork. We’ve thoroughly tested each recipe, so you can trust it to deliver perfectly flaky, flavorful salmon. Enjoy delicious, stress-free results every time.
    • Family-Friendly Flavors: Finding meals the whole family enjoys can be tough. These family-friendly meals are designed to appeal to both adults and kids, with options for even the pickiest eaters.
    • Healthy & Wholesome: Salmon is packed with omega-3s and protein, and our recipes make it easy to enjoy these benefits. They help you maintain a balanced diet without sacrificing taste. Research shows salmon can improve heart health and brain function [1].
    • Versatility & Customization: Adapt these recipes to fit your needs. We offer practical tips and substitutions, so you can use what’s in your pantry or adjust for dietary preferences.

    Cooking Confidence, Delivered

    This is more than just a recipe collection—it’s our commitment to making home cooking approachable and enjoyable. We want you to feel confident in the kitchen, which is why we focus on clear instructions and delicious outcomes.

    Our step-by-step cooking guidance empowers you to discover new dishes and flavors with ease. Many recipes use minimal ingredients, often calling for pantry staples you already have. For instance, our baked salmon recipe is simple and budget-friendly, making home cooking more accessible for everyone.

    Ultimately, our salmon dishes help you cook with joy by eliminating the guesswork. You can impress family and friends while enjoying tasty, nourishing meals together. Let Recipesmondial be your guide to stress-free, flavorful cooking.

    Our Top 15 Easy and Flavorful Salmon Recipes

    A perfectly pan-seared salmon fillet garnished with fresh dill and lemon wedges on a white plate.
    Professional food photography, photorealistic, high-quality food magazine photo of a stunning, perfectly pan-seared salmon fillet, moist and flaky, presented as the hero on a simple white ceramic plate. It’s garnished with vibrant fresh dill sprigs and bright lemon wedges. A subtle wisp of steam rises from the salmon, emphasizing its freshness and warmth. The background is a soft, out-of-focus blur of a clean, warm-toned kitchen counter, suggesting an approachable home cooking setting with natural light streaming in. The focus is entirely on the delicious, inviting appearance of the salmon.

    Our Top 15 Easy and Flavorful Salmon Recipes

    Welcome to our collection of the best salmon recipes! At Recipesmondial, we believe cooking delicious, healthy meals should be easy and enjoyable. Salmon is a fantastic choice for any home cook because it’s packed with omega-3 fatty acids, full of protein, and cooks in minutes [1].

    If you’re looking for simple recipes that don’t take all day, you’ve come to the right place. We’ve gathered 15 of our most approachable salmon dishes, designed to build your confidence in the kitchen. These flavorful meals are perfect for any busy schedule.

    Get ready to turn simple ingredients into beautiful and delicious meals. We’ll show you how to enjoy stress-free cooking. Let’s dive into these dinner ideas, perfect for any night of the week!

    Simple Oven Baked Salmon Recipes

    Baking salmon in the oven is one of the easiest ways to get perfectly flaky fish. This method is beginner-friendly, requires minimal hands-on time, and makes cleanup a breeze. These recipes are fantastic for reliable, hands-off cooking.

    • Lemon Herb Baked Salmon: This classic dish features fresh lemon slices and a medley of herbs like dill and parsley. It’s a light and healthy meal, ideal for a quick weeknight dinner.
    • Garlic Parmesan Baked Salmon: A savory blend of minced garlic and grated Parmesan cheese creates a delicious crust. This flavorful dish is packed with flavor and always a family favorite.
    • Teriyaki Baked Salmon: Marinate your salmon in a store-bought or homemade teriyaki sauce, then bake until caramelized and tender. This dish offers a touch of global comfort food.

    Pro Tip: Line your baking sheet with parchment paper to prevent sticking and make cleanup even easier. Avoid overcooking; salmon is best when slightly pink in the center.

    Quick Pan-Seared Salmon Recipes

    If you love crispy skin and a fast cooking time, pan-searing is your go-to method. It delivers a beautiful sear and moist interior. These quick meals are perfect for when you need dinner on the table in minutes.

    • Classic Pan-Seared Salmon with Dill: Season salmon with salt, pepper, and fresh dill, then sear it skin-side down for a wonderfully crispy finish. It’s an easy technique with restaurant-quality results.
    • Honey-Garlic Glazed Pan-Seared Salmon: A sweet and savory honey-garlic glaze adds incredible depth of flavor. This quick and delicious meal is surprisingly simple to whip up.
    • Blackened Salmon: Rub your salmon with a blend of Cajun spices and sear it until a flavorful crust forms. This bold dish is a fantastic way to discover new favorite recipes.

    Cooking Hack: Pat your salmon dry with paper towels before searing to help achieve that desirable crispy skin. Make sure your pan is hot before adding the fish.

    Healthy Air Fryer Salmon Ideas

    The air fryer is a game-changer for quick and healthy cooking. It circulates hot air to give salmon a wonderfully crispy exterior with a juicy interior. These recipes create a healthy meal using very little oil.

    • Air Fryer Lemon Pepper Salmon: A simple sprinkle of lemon pepper seasoning is all you need for this fast and delicious meal. It’s one of our simplest healthy recipes.
    • Spicy Air Fryer Salmon with Paprika: A blend of smoked paprika, chili powder, and a pinch of cayenne adds a nice kick. This simple recipe is a great way to add flavor without fuss.
    • Dijon Herb Air Fryer Salmon: A light coating of Dijon mustard and mixed dried herbs creates a flavorful crust. It’s a quick dinner solution for busy weeknights.

    Air Fryer Wisdom: Don’t overcrowd the air fryer basket; cook in batches if necessary for even results. Most salmon fillets cook in 10-15 minutes, depending on thickness [2].

    Delicious Salmon Recipes with Sauce

    Sauces can elevate any salmon dish by adding moisture, richness, and complex flavors. They are perfect for transforming simple ingredients into a gourmet experience. These recipes prove that a simple dish can also be elegant.

    • Creamy Lemon Dill Sauce with Baked Salmon: A light, creamy sauce infused with lemon and fresh dill perfectly complements baked or pan-seared salmon. This sauce adds a sophisticated touch to an easy recipe.
    • Mango Salsa Salmon: Bright, fresh mango salsa with red onion, cilantro, and lime juice pairs beautifully with grilled or pan-seared salmon. It’s a refreshing and healthy meal.
    • Garlic Butter Sauce Salmon: A rich garlic butter sauce, often enhanced with white wine or lemon, is a classic pairing. This sauce is simple to make and adds incredible flavor to any salmon preparation.

    Sauce Secret: Prepare your sauce while the salmon cooks to ensure everything is ready at the same time for a stress-free meal. A great sauce makes these simple dinners truly special.

    Family-Friendly Salmon Dinners

    Getting the whole family to enjoy healthy fish can be a challenge, but not with these recipes! These family-friendly meals are designed to appeal to all ages. They prioritize ease of preparation and delicious results.

    • Sheet Pan Salmon & Veggies: Combine salmon fillets with colorful vegetables like broccoli, bell peppers, and cherry tomatoes on one sheet pan. Toss with olive oil and seasonings for a complete, easy dinner. This is an excellent meal prep idea.
    • Salmon Tacos with Creamy Slaw: Flaky, seasoned salmon becomes a delicious filling for soft tortillas. Add a simple creamy slaw for a fun, interactive meal. It’s a fun, easy twist on a family favorite.
    • Crispy Salmon Patties: Made with cooked salmon, breadcrumbs, and seasonings, these patties are pan-fried until golden. They’re a fantastic way to use leftover salmon or introduce fish to picky eaters. Serve with a side of dipping sauce for a simple dinner.

    Family Meal Tip: Involve your kids in the cooking process, even if it’s just seasoning or mixing. This can make them more excited to try new dishes. These easy recipes make cooking with family enjoyable.

    What is the very best way to cook salmon?

    A home cook's hands carefully place a seasoned salmon fillet onto a hot cast-iron skillet, beginning to sear.
    Professional food photography, photorealistic, high-quality food magazine photo depicting a close-up of a home cook’s hands, with clean, well-manicured nails, carefully placing a seasoned raw salmon fillet skin-side down into a very hot, slightly oiled cast-iron skillet. You can see the initial sizzle and the beginning of a beautiful golden-brown sear on the skin. The kitchen setting is modern and clean, with a clean wooden countertop or light-colored tile backsplash in the blurred background. Natural, bright light illuminates the scene, emphasizing the simple, tactile joy of cooking.

    Deciding on the “very best” way to cook salmon can feel like a big decision. At Recipesmondial, we know you want reliable results without complex recipes. The truth is, the best cooking method isn’t one-size-fits-all—it depends on your goals. Are you looking for a super quick meal? Do you want perfectly crispy skin? Or would you prefer a hands-off approach that yields flaky, moist fish every time?

    We’re here to make mealtime decisions easier and help you build confidence in the kitchen. By exploring the most popular and dependable cooking techniques, you can choose the best salmon recipe for your needs and enjoy a stress-free cooking experience.

    The Top Cooking Methods for Your Salmon

    Each cooking method brings out different qualities in your salmon. Some are perfect for quick meals, while others are fantastic for family-friendly meals that require less active time. Let’s dive into our favorites:

    1. Oven Baked Salmon: The Effortless Champion

    For many home cooks, baking salmon in the oven is the ultimate beginner-friendly recipe. It’s incredibly straightforward, requires minimal hands-on time, and consistently delivers a perfectly cooked, flaky fillet. This method is also fantastic for family-friendly meals because you can easily cook multiple fillets at once.

    • Why it’s great: As a truly easy recipe, the oven does most of the work. Simply season the salmon, place it in the oven, and enjoy a perfect simple dinner recipe for busy weeknights.
    • Outcome: Beautifully moist, tender, and flaky baked salmon with minimal fuss.
    • Quick Tip: Line your baking sheet with parchment paper for super easy cleanup.

    2. Pan-Seared Salmon: For Crispy Perfection

    If you love salmon with beautifully crisp skin and a tender, juicy interior, pan-searing is your go-to method. This technique is quick, making it ideal for quick meals when you want a restaurant-quality dish in minutes. It also adds incredible flavor and texture.

    • Why it’s great: This quick method uses high heat to create a delightful golden, crispy skin while sealing in moisture for a tender, juicy interior.
    • Outcome: A gorgeous crust on the outside with a succulent, flavorful meal inside.
    • Quick Tip: Ensure your pan is hot before adding the salmon, skin-side down first, for the best crisp.

    3. Air Fryer Salmon: Speedy and Healthy

    The air fryer has become a kitchen superstar for a reason! Cooking salmon in an air fryer is incredibly fast, resulting in a wonderfully crispy exterior while keeping the inside moist and juicy. It’s a fantastic option for healthy and balanced meals with less oil.

    • Why it’s great: It cooks salmon significantly faster than a traditional oven and creates a fantastic crispy texture, making it an excellent quick meal solution for smaller portions.
    • Outcome: Salmon with a satisfyingly crispy crust and a perfectly cooked, tender interior.
    • Quick Tip: Don’t overcrowd the air fryer basket. Cook in batches if necessary for even crisping.

    4. Other Great Options for Your Salmon Recipes

    While the above methods are our top picks for everyday cooking, you have other wonderful choices too:

    • Grilling: Perfect for a smoky flavor, especially during warmer months. It’s a fantastic way to enjoy a flavorful meal made easy outdoors.
    • Poaching/Steaming: These gentle methods yield incredibly delicate, moist, and tender salmon. They are an excellent choice for creating healthy and balanced meals with minimal added fat. Salmon is also celebrated for its rich content of omega-3 fatty acids, which are crucial for heart and brain health [1].

    Choosing Your Best Salmon Recipe Method

    Ultimately, the “best” way to cook salmon comes down to your personal preference and desired result. To help you get started, Recipesmondial provides step-by-step cooking guidance for each of these methods.

    • For ease and reliability: Go with oven baked salmon. It’s an ideal beginner-friendly recipe and our top recommendation for most home cooks.
    • For speed and crispy skin: Choose pan-searing or air frying. Both deliver quick meals with a fantastic texture.
    • For delicate texture: Consider poaching or steaming for a very light and flaky result.

    No matter which method you pick, cooking salmon at home can be an enjoyable and rewarding experience. You’ll move from uncertainty in the kitchen to cooking confidently, creating delicious, visually appealing meals every time!

    Should salmon be covered or uncovered when baking?

    When baking salmon, a common question is whether to cover it with foil. For most baked salmon recipes, we recommend leaving it uncovered. This simple method is the key to achieving delicious, flaky fish every time.

    Why Bake Salmon Uncovered?

    Baking salmon uncovered allows hot air to circulate freely around the fish. This promotes even cooking and helps form a delicious golden-brown crust. For anyone who loves crispy skin, leaving the salmon exposed to the oven’s direct heat is the secret to success.

    • Crispy Skin: Direct heat results in wonderfully crisp skin, adding both texture and flavor.
    • Beautiful Browning: An uncovered fillet develops a much more appealing golden-brown color as it bakes.
    • Even Cooking: Consistent heat circulation ensures your salmon cooks perfectly from edge to center.
    • Flavor Development: The dry, direct heat helps concentrate the salmon’s flavor, leading to a richer taste for your oven baked salmon.

    When to Consider Covering Salmon

    While uncovered baking is usually best, there are exceptions. You might cover salmon if you’re worried about it drying out, especially with very thin or lean fillets. Covering can help retain moisture, but it’s less common for most salmon in oven recipes.

    • Preventing Dryness: For lean fillets or longer baking times at low temperatures, a loose foil tent can lock in moisture.
    • Steaming Effect: Tightly covering the salmon creates a steaming effect, resulting in a very delicate, moist texture. However, you will sacrifice the crispy skin.

    If you choose to cover the salmon, tent it loosely with aluminum foil. This method retains moisture without fully steaming the fish, which still allows some hot air to circulate.

    Tips for Perfect Baked Salmon

    Achieving the best salmon recipe starts with a few simple techniques. Follow these tips from Recipesmondial to ensure your easy recipes turn out great.

    • Pat Dry: Before seasoning, always pat the salmon dry with paper towels. This step is crucial for crispy skin and helps the seasonings adhere properly.
    • Season Well: Don’t be shy with seasoning. A generous coating of salt, pepper, and your favorite herbs makes a big difference in flavor.
    • Proper Temperature: For best results, bake salmon at a high heat of 400°F (200°C), which cooks it quickly and keeps it moist.
    • Doneness Check: Salmon is cooked when it flakes easily with a fork. For accuracy, use an instant-read thermometer to check that the thickest part has reached 145°F (63°C) [3].
    • Rest Your Salmon: Let the salmon rest for a few minutes after taking it out of the oven. This allows the juices to redistribute, keeping the fish moist and flavorful.

    With these straightforward tips from Recipesmondial, you can confidently cook delicious, perfectly baked salmon every time and enjoy a stress-free meal.

    Tips for Perfect, Flaky Salmon Every Time

    Cooking salmon to perfection might seem daunting, but it’s simpler than you think. At Recipesmondial, we want to help you confidently create delicious, flaky salmon every time. Say goodbye to dry, overcooked fish and hello to flavorful, easy meals. Follow these beginner-friendly tips to master the art of cooking salmon!

    Choose Your Salmon Wisely

    • Fresh or Frozen? Both are great options. If using frozen salmon, thaw it completely in the refrigerator overnight. For a quicker method, seal the salmon in a leak-proof bag and immerse it in cold water for about 30 minutes, changing the water every 10 minutes.
    • Wild vs. Farmed: Wild salmon has a stronger flavor and leaner texture, while farmed salmon is typically richer and fattier. Choose based on your taste preference and budget. Both are excellent sources of omega-3 fatty acids [1].
    • Skin On or Off? We recommend cooking salmon with the skin on. The skin acts as a protective layer, shielding the delicate flesh from overcooking and locking in moisture. Plus, crispy salmon skin is delicious! You can easily remove it after cooking if you prefer.

    Preparation is Key for Flavorful Results

    • Pat It Dry: For crispy skin and even cooking, this step is crucial. Use paper towels to pat both sides of the fillet completely dry before seasoning. Excess moisture prevents a good sear and will steam the fish instead.
    • Season Simply: High-quality salmon shines with minimal seasoning. Often, a generous sprinkle of salt and black pepper is all you need. To add more flavor, consider a squeeze of lemon juice, a sprig of fresh dill, or a dash of garlic powder. These simple additions enhance the fish’s natural taste without overpowering it.
    • Oil Your Pan or Tray: Whether you’re baking or pan-searing, a light coating of oil prevents sticking and helps create a beautiful crust. Olive oil and avocado oil are both great choices.

    Mastering the Cook Time and Temperature

    The most important secret to perfect, flaky salmon is not to overcook it. This is a common mistake, but it’s an easy one to avoid with the right techniques.

    • Don’t Overcook: Remember that salmon cooks quickly. Overcooked salmon becomes dry and tough. Aim for a slightly translucent center for medium-rare, or cook until it is opaque throughout for well-done.
    • Use a Food Thermometer: To know for sure when your salmon is done, a food thermometer is your most reliable tool. Insert it into the thickest part of the fillet. The salmon is safely cooked when it reaches an internal temperature of 145°F (63°C) [4]. This method eliminates guesswork and guarantees perfect results.
    • The Flake Test: If you don’t have a thermometer, use a fork to gently press on the thickest part of the salmon. When it’s done, the flesh will flake apart easily. If it resists, it needs another minute or two.
    • Rest Your Salmon: Just like steak, salmon benefits from a short rest after cooking. Let it sit for 5-10 minutes before serving. This simple step allows the juices to redistribute throughout the fillet, resulting in more tender and moist fish.

    Quick Tips for Different Cooking Methods

    Salmon is incredibly versatile. Here’s how to achieve great results with three popular cooking methods:

    • Oven-Baked Salmon: Preheat your oven to 375-400°F (190-200°C). Place the salmon on a baking sheet and cook for 12-18 minutes, depending on the fillet’s thickness. This method is wonderfully hands-off.
    • Pan-Seared Salmon: Heat your pan over medium-high heat before adding oil and then the fish. For the crispiest results, always start skin-side down. Sear for 4-6 minutes per side. This method is ideal for a fast and delicious meal.
    • Air Fryer Salmon: The air fryer provides very even cooking and a great crispy exterior. Cook at 375-400°F (190-200°C) for 10-15 minutes, flipping about halfway through the cooking time.

    Enhance the Flavor Experience

    A perfectly cooked salmon fillet is delicious on its own, but you can elevate it further with these simple, customizable flavor additions.

    • Citrus and Herbs: Place lemon or lime slices on top of or underneath the salmon. Add fresh herbs like dill, parsley, or thyme to impart brightness and a fresh aroma.
    • Simple Sauces: A quick drizzle of honey-garlic sauce, a touch of pesto, or a spoonful of a creamy dill sauce can completely transform your dish.
    • Marinades: For an extra layer of flavor and moisture, marinate your salmon for 15-30 minutes before cooking. A simple marinade of soy sauce, ginger, and garlic works wonderfully.

    With these foundational tips, you are now ready to cook salmon with confidence. At Recipesmondial, we’re here to make your cooking journey enjoyable, stress-free, and full of flavorful results.

    Frequently Asked Questions About Cooking Salmon

    How long to cook salmon on 400 in the oven?

    Cooking salmon at 400°F (200°C) is a fantastic way to get perfectly flaky results. For a typical 1-inch thick salmon fillet, the ideal cooking time is 12 to 15 minutes. This timeframe is usually all it takes to produce delicious, tender salmon.

    However, the exact time can vary based on a few factors:

    • Thickness: Thicker fillets need more time in the oven, while thinner fillets cook faster.
    • Skin-on vs. Skin-off: Skin-on salmon often cooks more evenly because the skin acts as a protective layer, shielding the flesh from direct heat.
    • Desired Doneness: For safety, the FDA recommends cooking fish to an internal temperature of 145°F (63°C) [5].

    To check if your salmon is done, gently press a fork into the thickest part of the fillet. If it flakes easily and the flesh is opaque, it’s ready. For the most accurate results, use an instant-read thermometer. This simple method ensures perfectly cooked salmon every time.

    What is the secret to the best salmon in the oven?

    The secret to the best oven-baked salmon is simpler than you might think. Following a few key steps will help you achieve tender, juicy, and flavorful results consistently.

    • Start with Quality Salmon: Fresh, high-quality salmon makes a significant difference. Look for fillets with bright, firm flesh.
    • Season Generously: Don’t be shy with your seasonings. A simple mix of salt, pepper, garlic powder, and a squeeze of lemon juice works wonderfully. You can also experiment with different herb crusts or glazes.
    • High Heat is Key: Roasting at a higher temperature, like 400°F (200°C), helps the outside of the salmon caramelize slightly while keeping the inside moist and tender.
    • Don’t Overcook It: This is the most important tip. Overcooked salmon is dry and tough, so watch it closely. Remove it from the oven as soon as it’s cooked through.
    • Let It Rest: Like other proteins, salmon benefits from resting for a few minutes after cooking. Covering it with foil allows the juices to redistribute, resulting in an even more tender fillet.

    Following these simple guidelines will transform your salmon-baking experience and help you master this delicious fish.

    Is salmon healthier than chicken?

    Both salmon and chicken are excellent sources of protein and can be part of a healthy diet. However, they offer different nutritional benefits, making one not necessarily “better” than the other.

    • Salmon’s Strengths: Salmon is best known for its high content of omega-3 fatty acids, which are essential for heart health, brain function, and reducing inflammation [6]. It is also a great source of Vitamin D, Vitamin B12, and selenium.
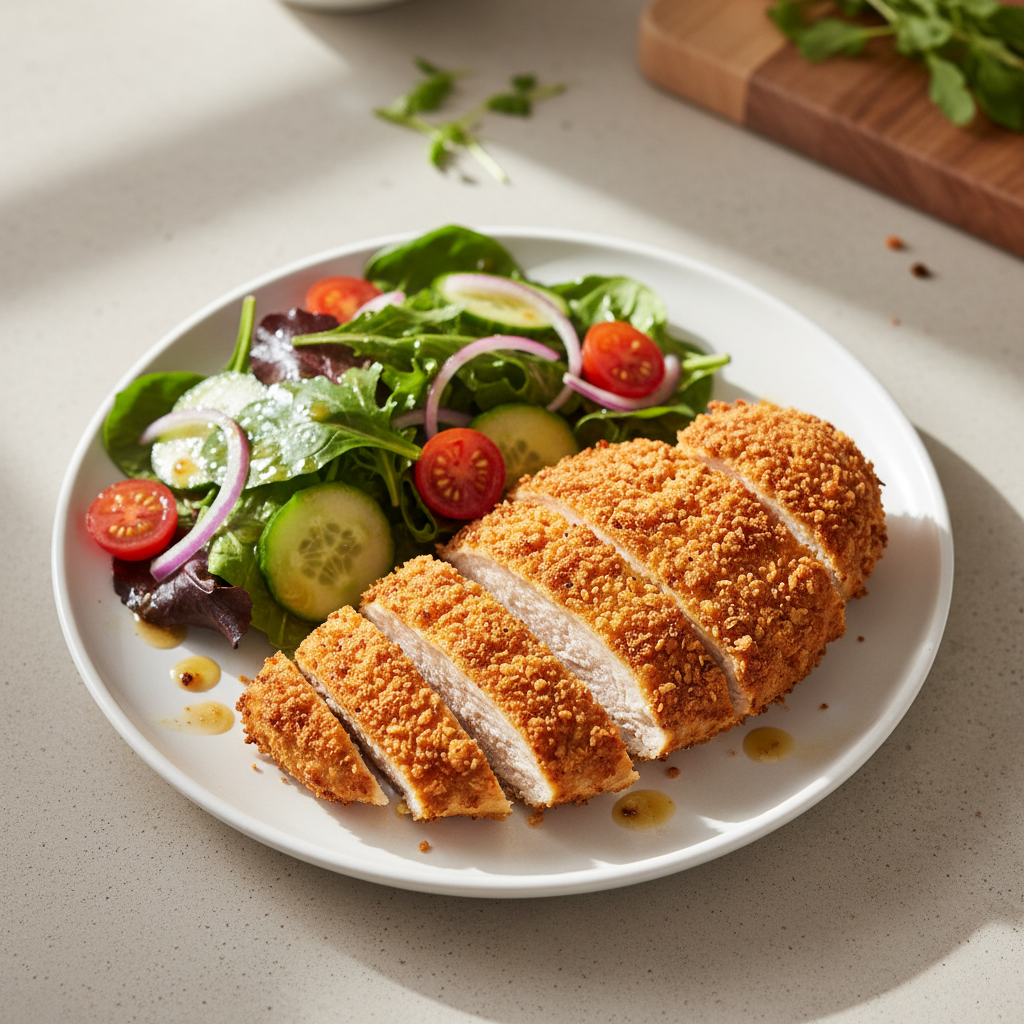
    • Chicken’s Strengths: Chicken, particularly lean cuts like the breast, is a fantastic source of low-fat protein. It is lower in saturated fat and calories than many other meats and provides essential nutrients like B vitamins and phosphorus.

    Ultimately, variety is key to a healthy eating plan. Incorporating both salmon and chicken, along with other lean proteins, ensures you receive a wide range of essential nutrients.

    Why is salmon good for you?

    Salmon is a nutritional powerhouse, and including it in your diet offers numerous health benefits. It’s a simple and delicious way to boost your overall well-being.

    Here’s a closer look at why salmon is so healthy:

    • Rich in Omega-3 Fatty Acids: These crucial healthy fats, which your body can’t produce on its own, support heart health, lower blood pressure, and help reduce the risk of chronic diseases [6].
    • Excellent Source of Protein: Salmon provides high-quality protein, which is vital for building and repairing tissues, supporting muscle mass, and helping you feel full and satisfied after a meal.
    • Packed with B Vitamins: Salmon contains several B vitamins, including B12, B6, and niacin. These vitamins are important for converting food into energy, creating and repairing DNA, and supporting brain function.
    • Good Source of Potassium: This mineral helps manage blood pressure and may reduce the risk of stroke.
    • Loaded with Antioxidants: Salmon contains an antioxidant called astaxanthin, which gives the fish its vibrant pink color. This compound helps protect against cellular damage and may reduce the risk of heart disease [7].

    Adding salmon to your diet is an excellent choice for anyone looking to enjoy meals that are both nourishing and flavorful.


    Sources

    1. https://www.hsph.harvard.edu/nutritionsource/food-features/salmon/
    2. https://www.eatthis.com/how-long-to-air-fry-salmon/
    3. https://www.fsis.usda.gov/food-safety/safe-handling-instructions/meat-poultry-egg-products/fish-and-shellfish
    4. https://www.foodsafety.gov/food-safety-charts/safe-minimum-cooking-temperatures
    5. https://www.fda.gov/food/buy-store-serve-safe-food/safe-minimum-internal-temperature-chart
    6. https://www.hsph.harvard.edu/nutritionsource/what-should-you-eat/protein/fish/
    7. https://www.ncbi.nlm.nih.gov/pmc/articles/PMC7011400/
  • 25+ Easy Quinoa Recipes for Breakfast, Lunch, and Dinner

    25+ Easy Quinoa Recipes for Breakfast, Lunch, and Dinner

    Quinoa is a highly versatile, gluten-free seed used in countless healthy recipes. It works well in savory dishes like salads, dinner bowls with chicken or vegetables, and hearty soups, as well as sweet preparations like breakfast porridge. Its mild, nutty flavor and fluffy texture make it a popular and easy-to-prepare base for any meal.

    Struggling with complex recipes and stressful meal prep? Quinoa is the simple solution you’ve been looking for. This versatile superfood, packed with protein and fiber, is a game-changer for anyone wanting quick, healthy, and tasty meals. It’s perfect for busy home cooks, beginner chefs, and everyone who wants to make cooking a stress-free experience.

    At Recipesmondial, we believe cooking should be an enjoyable experience, not a chore. That’s why we’ve gathered over 25 easy quinoa recipes to build your confidence and inspire creativity. Our step-by-step guidance ensures reliable results for every meal, whether you need quick breakfast ideas, simple lunches, or hearty, flavorful dinner recipes. You’ll also discover a world of effortless options, from healthy snacks to comforting global flavors.

    Ready to unlock the full potential of quinoa? We’ll start by showing you how to cook perfect, fluffy quinoa every time—a key foundational skill. Then, we’ll dive into our collection of beginner-friendly recipes. Each one offers practical tips and approachable inspiration to make mealtime delicious and stress-free. Let’s make cooking with quinoa simple, flavorful, and rewarding!

    Why Is Quinoa a Great Choice for Easy Meals?

    Looking for wholesome meals that are also easy to prepare? Quinoa is the perfect solution. This popular “superfood” is a favorite in kitchens worldwide for good reason, making it an excellent choice for anyone who wants to enjoy stress-free cooking.

    At Recipesmondial, we understand the need for quick and reliable meal solutions. Quinoa delivers just that, transforming simple ingredients into delicious, beautiful meals. With this versatile grain, you’ll discover new flavors and build confidence in the kitchen.

    Why Quinoa is a Kitchen Essential

    Quinoa is more than just a trend—it’s a kitchen staple that makes healthy, flavorful meals accessible to everyone. Here’s why it should be your go-to for easy recipes:

    • Nutritional Powerhouse: Quinoa is a complete protein, containing all nine essential amino acids, which makes it a fantastic choice for vegetarians, vegans, and anyone looking to boost their protein intake [source: https://www.hsph.harvard.edu/nutritionsource/food-features/quinoa/]. It’s also rich in fiber to aid digestion and help you feel full longer.
    • Effortless to Prepare: As simple as boiling water, quinoa cooks much faster than other grains—often in just 15–20 minutes. This speed makes it perfect for quick meals on busy days and removes the stress of complex recipes.
    • Incredibly Versatile: Quinoa’s mild, nutty flavor makes it an ideal canvas for any cuisine, from savory to sweet. Use it as a base for simple dinner recipes, a hearty addition to salads, or even a creative ingredient in quick breakfast ideas.
    • Perfect for Meal Prep: Cook a large batch of quinoa at the start of the week to use in various dishes for days. This simple strategy is one of our top meal prep tips because it saves valuable time and keeps you organized during busy weekdays.
    • Naturally Gluten-Free: Quinoa is a safe and delicious option for anyone with gluten sensitivities or dietary restrictions, allowing you to enjoy grain-based meals without worry.
    • Absorbs Flavors Beautifully: While it has a subtle, nutty taste on its own, quinoa readily soaks up the flavors of dressings, sauces, and spices. This unique quality allows you to create flavorful meals made easy without needing complex techniques.

    With quinoa, you can confidently prepare healthy, tasty, and family-friendly meals in minutes. It simplifies home cooking, making it a truly enjoyable and stress-free experience.

    How to Cook Perfect, Fluffy Quinoa Every Time

    A close-up of a bowl of perfectly cooked, fluffy white quinoa, steaming lightly.
    Professional food photography, photorealistic, high-quality food magazine photo. A perfectly cooked bowl of fluffy white quinoa, steaming gently, shot with a shallow depth of field to emphasize the individual grains. The quinoa is presented in a rustic ceramic bowl on a light wooden surface, with soft, natural lighting creating subtle shadows. No artistic interpretations, no illustrations, no vector graphics, no abstract art.

    How to Cook Perfect, Fluffy Quinoa Every Time

    Cooking quinoa perfectly is a simple skill that transforms healthy, tasty meals. While it might seem daunting, our step-by-step guide makes it easy to get fluffy, flavorful results every time. This versatile, grain-like seed is perfect for quick family dinners and beginner-friendly recipes. Let’s make cooking quinoa a stress-free and enjoyable part of your routine.

    The Ideal Quinoa-to-Water Ratio

    The secret to fluffy quinoa is the ratio of grain to liquid. Too much liquid makes quinoa mushy, while too little leaves it undercooked. For the perfect light and airy texture, a reliable ratio is key.

    For most types of quinoa (white, red, or black), use this simple formula:

    • 1 cup dry quinoa
    • 2 cups liquid (water or broth)

    This ratio helps the grains absorb just enough liquid to become tender and separate, preventing them from clumping. Mastering this is a simple step that guarantees great results.

    Step-by-Step Cooking Instructions

    Following these simple steps will give you perfectly cooked quinoa every time. Prepare to go from uncertain to confident in just a few minutes!

    1. Rinse the Quinoa: Place the dry quinoa in a fine-mesh sieve and rinse it under cold running water for about 30 seconds. This crucial step removes saponin, a natural coating that can give quinoa a bitter taste. [1]
    2. Combine Ingredients: Transfer the rinsed quinoa to a medium saucepan. Pour in 2 cups of your chosen liquid (water or broth works well) and add a pinch of salt to enhance the flavor.
    3. Bring to a Boil: Place the saucepan over medium-high heat and bring the liquid to a rolling boil.
    4. Reduce and Simmer: Once boiling, immediately reduce the heat to low and cover the saucepan tightly with a lid. Let it simmer gently for 15 minutes. Try not to lift the lid during this time.
    5. Rest Off Heat: After 15 minutes, remove the saucepan from the heat but keep the lid on. Let the quinoa rest and steam for another 5-10 minutes. This step is essential for making the grains extra fluffy.
    6. Fluff and Serve: Finally, remove the lid and use a fork to gently fluff the quinoa. The grains should be light, separate, and tender. Your perfect quinoa is ready to serve!

    This straightforward method consistently delivers delicious, fluffy quinoa perfect for any meal.

    Tips for Adding More Flavor

    While delicious on its own, quinoa is also a perfect canvas for other flavors. These simple additions can easily transform it from a simple side to the star of the dish.

    • Use Broth: Instead of water, cook your quinoa in vegetable, chicken, or beef broth to instantly infuse it with a savory depth.
    • Aromatics First: Before adding the quinoa, sauté finely diced onion or garlic in a little olive oil in the saucepan until fragrant.
    • Herbs and Spices: Stir in dried herbs like oregano, thyme, or a bay leaf while the quinoa simmers. Add fresh herbs like parsley or cilantro after fluffing.
    • Citrus Zest: After cooking, stir in a teaspoon of lemon or lime zest for a bright, fresh finish that complements many dishes.
    • Toasted Nuts or Seeds: For added texture and flavor, fold in a handful of toasted pine nuts, slivered almonds, or pumpkin seeds after fluffing.
    • A Dash of Fat: Stir in a small pat of butter or a drizzle of extra virgin olive oil after fluffing to add richness and a beautiful sheen.

    Use these tips to get creative in the kitchen. At Recipesmondial, our goal is to help you discover new flavors and make mealtime delicious and stress-free.

    Quick and Healthy Quinoa Breakfast Recipes

    A colorful quinoa breakfast bowl topped with fresh berries, banana, chia seeds, and honey.
    Professional food photography, photorealistic, high-quality food magazine photo. A vibrant and appealing quinoa breakfast bowl, artfully arranged. The bowl contains cooked quinoa topped generously with fresh, colorful ingredients: sliced strawberries, blueberries, a few banana slices, a sprinkle of chia seeds, and a delicate drizzle of maple syrup or honey. The background is softly blurred, suggesting a cozy kitchen setting with natural morning light. No artistic interpretations, no illustrations, no vector graphics, no abstract art.

    Starting your day with a nutritious breakfast sets a positive tone, and quinoa is a fantastic choice. As a complete protein, it contains all nine essential amino acids, making it a powerful ingredient for quick and healthy breakfast recipes [1]. Plus, quinoa is incredibly versatile.

    You can easily transform this superfood into delicious, energy-boosting morning meals. Forget complex instructions; our step-by-step guidance makes it simple. Let’s explore some flavorful ways to enjoy quinoa for breakfast.

    Comforting Quinoa Porridge (Sweet)

    Think of quinoa porridge as a warm, comforting, and gluten-free alternative to oatmeal. This beginner-friendly recipe is perfect for busy mornings, as you can prepare a large batch and enjoy it all week.

    Basic Quinoa Porridge Recipe

    This simple recipe is an excellent starting point for making your own delicious quinoa porridge.

    1. Combine Ingredients: In a small saucepan, combine 1/2 cup cooked quinoa, 1 cup milk (dairy or non-dairy), and 1/4 teaspoon cinnamon.
    2. Simmer Gently: Bring the mixture to a gentle simmer over medium heat, stirring occasionally.
    3. Thicken: Continue cooking for 5-7 minutes until the porridge thickens to your desired consistency.
    4. Sweeten and Serve: Remove from the heat and stir in 1-2 teaspoons of maple syrup or honey. Serve warm.

    Flavorful Variations and Topping Ideas

    Personalize your quinoa porridge to make every bowl unique. These ideas add wonderful flavor and texture.

    • Fresh Fruit: Sliced bananas, berries, diced apples, or peaches add natural sweetness.
    • Nuts and Seeds: A sprinkle of chopped almonds, walnuts, chia seeds, or flaxseeds boosts healthy fats and crunch.
    • Dried Fruit: Raisins, cranberries, or chopped dates are also delicious additions.
    • Spices: A pinch of nutmeg, cardamom, or pumpkin pie spice blend enhances the flavor.
    • Nut Butters: A swirl of almond butter or peanut butter adds creaminess and extra protein.

    Energizing Savory Quinoa Breakfast Bowls

    If you prefer a savory start to your day, quinoa bowls are an excellent choice. They are quick, satisfying, and highly adaptable, making them perfect for meal prep. Best of all, you can use any leftover cooked quinoa.

    Simple Savory Quinoa Bowl Idea

    Follow this basic formula to turn simple ingredients into a delicious and healthy meal.

    1. Warm Quinoa: Gently warm 1 cup of cooked quinoa in a pan or microwave.
    2. Add Protein: Top with a fried egg, scrambled eggs, or some leftover cooked chicken.
    3. Introduce Veggies: Add your favorite cooked vegetables, such as sautéed spinach, roasted bell peppers, or cherry tomatoes.
    4. Garnish and Enjoy: Finish with sliced avocado and a sprinkle of everything bagel seasoning or fresh herbs. A dash of hot sauce is optional.

    Creative Savory Quinoa Toppings

    Experiment with different toppings to keep your breakfast exciting. These combinations offer variety and bold flavor.

    • Cheese: Crumbled feta, goat cheese, or a sprinkle of cheddar.
    • Beans: Black beans or chickpeas for added fiber and plant-based protein.
    • Pesto or Salsa: A spoonful adds a burst of instant flavor.
    • Hummus: A dollop of hummus makes the bowl extra creamy and delicious.

    Handy Quinoa Breakfast Bites (Meal Prep Friendly)

    For truly busy mornings, these grab-and-go quinoa breakfast bites are a lifesaver. They are easy to make ahead, making them a perfect meal prep solution for the whole family.

    How to Make Quinoa Breakfast Bites

    These nutrient-packed bites are like mini frittatas and are incredibly easy to prepare.

    1. Preheat Oven: Preheat your oven to 375°F (190°C) and lightly grease a muffin tin.
    2. Combine Ingredients: In a large bowl, whisk 4 eggs. Stir in 1 cup cooked quinoa, 1/2 cup shredded cheese, and 1/4 cup finely chopped vegetables (e.g., bell peppers, spinach, zucchini). Season with salt and pepper.
    3. Fill Muffin Tin: Spoon the mixture evenly into the muffin cups.
    4. Bake: Bake for 15-20 minutes, or until the bites are set and lightly golden.
    5. Cool and Store: Let the bites cool before removing them from the tin. Store in an airtight container in the fridge for up to 4 days.

    Delicious Flavor Combinations

    Get creative with your breakfast bites! Here are some ideas to inspire you:

    • Mediterranean: Feta cheese, sun-dried tomatoes, and spinach.
    • Southwestern: Black beans, corn, diced jalapeño, and cheddar cheese.
    • Broccoli Cheddar: Steamed, chopped broccoli florets with sharp cheddar.

    Tips for the Best Quinoa Breakfasts

    Keep these practical tips in mind to make your morning routine even smoother.

    • Pre-cook Quinoa: Cook a large batch of quinoa at the start of the week and store it in the fridge. This saves significant time each morning.
    • Customize to Taste: Quinoa is a blank canvas, so feel free to adjust sweetness, spices, and toppings to suit your preferences.
    • Use Up Leftovers: Savory quinoa bowls are fantastic for using up leftover roasted vegetables or cooked meats from dinner.
    • Add Protein: Boost your breakfast by adding eggs, nuts, seeds, or even a scoop of protein powder to sweet porridges.

    With these quick and healthy quinoa breakfast recipes, you’re ready to start your day with a flavorful, stress-free meal. Whether you prefer sweet or savory, quinoa is a simple and versatile ingredient for a nutritious morning. Enjoy!

    Simple Quinoa Recipes for Lunch and Salads

    Looking for a lunch that’s quick, nutritious, and incredibly tasty? Quinoa is your answer. It’s a fantastic choice for satisfying lunches and vibrant salads, packed with protein and fiber to keep you full and energized all afternoon.

    At Recipesmondial, we believe cooking should be enjoyable, not stressful. That’s why we bring you easy quinoa recipes that are flavorful, approachable, and perfect for busy weekdays. Say goodbye to complicated instructions and hello to confidence in the kitchen with our clear, step-by-step guidance.

    Why Quinoa Excels for Lunch & Salads

    Quinoa isn’t just a healthy grain; it’s a versatile foundation for countless easy meals. Here’s why it stands out as a lunch and salad superstar:

    • Quick to Cook: Quinoa cooks in about 15 minutes, making it perfect for last-minute meals.
    • Nutrient Powerhouse: It’s a complete protein with all essential amino acids and is rich in fiber, iron, and magnesium [1].
    • Excellent for Meal Prep: Cook a large batch on the weekend to use in different lunches throughout the week.
    • Absorbs Flavors: Quinoa beautifully takes on the flavors of dressings, herbs, and other ingredients.
    • Naturally Gluten-Free: It’s a safe and delicious option for anyone with gluten sensitivities.

    Crafting the Perfect Quinoa Salad or Bowl

    Building a delicious quinoa lunch is simpler than you think. Just focus on layering complementary flavors and textures. Here are the core components to consider:

    • Fluffy Quinoa: Start with a base of perfectly cooked quinoa.
    • Fresh Vegetables: Add color and nutrients with chopped cucumber, tomatoes, bell peppers, or leafy greens.
    • Protein Boost: To make your meal more satisfying, include grilled chicken, chickpeas, black beans, or feta cheese.
    • Flavorful Dressing: A simple vinaigrette or creamy sauce brings all the elements together.
    • Crunchy Elements: Finish with toasted nuts, seeds, or crispy croutons for a delightful texture.

    Simple Quinoa Recipes for Delicious Lunches

    Ready to get started? Here are a few beginner-friendly recipes perfect for quick lunches, easy dinners, or weekly meal prep.

    1. Zesty Mediterranean Quinoa Salad

    Bursting with fresh Mediterranean flavors, this vibrant salad is a healthy, balanced, and family-friendly meal that’s incredibly easy to make.

    Ingredients:
    • 1 cup cooked quinoa, cooled
    • 1 cup chopped cucumber
    • 1 cup cherry tomatoes, halved
    • 1/2 cup crumbled feta cheese (omit for dairy-free)
    • 1/4 cup chopped red onion
    • 1/4 cup chopped fresh parsley
    • 1/4 cup Kalamata olives, halved
    • For the Lemon Vinaigrette:
      • 3 tablespoons extra virgin olive oil
      • 2 tablespoons fresh lemon juice
      • 1 teaspoon dried oregano
      • 1/2 teaspoon salt
      • 1/4 teaspoon black pepper
    Instructions:
    1. In a large bowl, combine the cooled quinoa, cucumber, tomatoes, feta, red onion, parsley, and olives.
    2. In a small bowl, whisk together the olive oil, lemon juice, oregano, salt, and pepper.
    3. Pour the dressing over the quinoa mixture and toss gently to combine.
    4. Serve immediately, or chill for at least 30 minutes to allow the flavors to meld.
    Tips & Variations:
    • Add Protein: For a heartier meal, stir in grilled chicken or chickpeas.
    • Spice it Up: A pinch of red pepper flakes adds a nice kick.
    • Meal Prep: Prepare the quinoa and chop vegetables ahead of time. Store the dressing separately and combine just before serving to keep it fresh.

    2. Southwestern Black Bean & Corn Quinoa Bowl

    This flavorful, budget-friendly meal is a go-to for quick lunches. Packed with plant-based protein and fiber, it’s also incredibly satisfying.

    Ingredients:
    • 1 cup cooked quinoa, cooled
    • 1 (15-ounce) can black beans, rinsed and drained
    • 1 cup corn (frozen, canned, or fresh)
    • 1/2 cup chopped red bell pepper
    • 1/4 cup chopped red onion
    • 2 tablespoons chopped fresh cilantro
    • 1 avocado, diced
    • For the Creamy Lime Dressing:
      • 1/4 cup plain Greek yogurt or sour cream (use dairy-free for vegan)
      • 2 tablespoons lime juice
      • 1 tablespoon olive oil
      • 1/2 teaspoon cumin
      • 1/4 teaspoon chili powder
      • Salt and pepper to taste
    Instructions:
    1. In a large bowl, combine the cooled quinoa, black beans, corn, red bell pepper, red onion, and cilantro.
    2. In a separate small bowl, whisk together all dressing ingredients until smooth.
    3. Pour the dressing over the quinoa mixture and toss to combine.
    4. Gently fold in the diced avocado just before serving to prevent browning.
    Tips & Variations:
    • Add Heat: Include a diced jalapeño or a dash of your favorite hot sauce.
    • Extra Crunch: Top with crushed tortilla chips for added texture.
    • Roast the Corn: For a deeper, smokier flavor, roast fresh or frozen corn kernels before adding them.

    3. Green Goddess Quinoa Salad

    Wonderfully refreshing and full of fresh herbs, this healthy salad makes a perfect light lunch or a vibrant side dish.

    Ingredients:
    • 1 cup cooked quinoa, cooled
    • 2 cups mixed greens (spinach, romaine, or spring mix)
    • 1/2 cup chopped cucumber
    • 1/2 cup green peas (frozen, thawed)
    • 1/4 cup chopped green onions
    • 2 tablespoons toasted pumpkin seeds or sunflower seeds
    • For the Green Goddess Dressing:
      • 1/2 cup plain Greek yogurt (or dairy-free yogurt for vegan)
      • 1/4 cup fresh parsley leaves
      • 1/4 cup fresh dill sprigs
      • 2 tablespoons fresh chives, chopped
      • 1 tablespoon lemon juice
      • 1 tablespoon olive oil
      • 1 small garlic clove, minced
      • Salt and pepper to taste
    Instructions:
    1. First, prepare the dressing. Combine all Green Goddess dressing ingredients in a blender or food processor and blend until smooth and creamy.
    2. In a large bowl, combine the cooled quinoa, mixed greens, cucumber, green peas, and green onions.
    3. Pour your desired amount of dressing over the salad and toss gently to coat.
    4. Serve immediately, garnished with toasted seeds.
    Tips & Variations:
    • Add Chicken or Chickpeas: For more protein, add shredded cooked chicken or a can of drained chickpeas.
    • Different Veggies: Try adding blanched asparagus, broccoli florets, or diced avocado.
    • Make it a Wrap: Spoon the finished salad into large lettuce leaves or whole wheat tortillas.

    Smart Meal Prep Tips for Quinoa Lunches

    Planning lunches ahead of time is a game-changer for busy weeks. These simple tips will streamline your routine and make healthy eating easy:

    • Cook Quinoa in Bulk: Make a large batch of quinoa once a week. Store it in an airtight container in the fridge for up to 5 days.
    • Chop Ahead: Wash and chop your vegetables on prep day and store them in separate containers for quick assembly.
    • Dressings on the Side: Always store dressings separately from your salad ingredients to prevent sogginess and keep vegetables crisp.
    • Layer Your Bowls: When packing lunches, place quinoa at the bottom, followed by heavier vegetables, and finish with leafy greens on top.
    • Portion Control: Use individual containers for each lunch for easy grab-and-go meals.

    With these approachable recipes, you can confidently cook healthy and tasty meals in no time. Enjoy discovering new flavors with Recipesmondial!

    Hearty and Flavorful Quinoa Dinner Recipes

    Vegetarian Quinoa Recipes

    Looking for easy, healthy dinner ideas that are bursting with flavor? Quinoa is your perfect plant-based hero. It’s a complete protein, meaning it contains all nine essential amino acids [source: https://www.ncbi.nlm.nih.gov/pmc/articles/PMC8900010/], which makes it a fantastic base for satisfying vegetarian meals. With these beginner-friendly recipes, you’ll discover new simple dishes and enjoy stress-free cooking.

    Mediterranean Quinoa Bowls

    Full of fresh tastes, these vibrant bowls are quick to assemble, making them perfect for a light yet filling dinner. To make weeknight meals a breeze, you can easily prep the quinoa and chop the vegetables ahead of time.

    • Ingredients: Cooked quinoa, chopped cucumber, cherry tomatoes (halved), Kalamata olives, crumbled feta cheese, red onion (thinly sliced), chickpeas (rinsed and drained), fresh parsley, lemon vinaigrette.
    • Simple Steps:
      1. In a large bowl, combine the cooked quinoa, cucumber, tomatoes, olives, feta, red onion, and chickpeas.
      2. Drizzle with lemon vinaigrette.
      3. Toss gently to combine all ingredients.
      4. Garnish with fresh parsley before serving.
    • Tips & Variations:
      • Add grilled halloumi or roasted bell peppers for extra flavor.
      • Swap chickpeas for cannellini beans.
      • For a vegan option, omit feta and add avocado slices.
      • For easy meal prep, prepare the components ahead of time and store the dressing separately.

    Black Bean and Corn Quinoa Stuffed Bell Peppers

    A visual treat, these colorful stuffed peppers are an incredibly satisfying and family-friendly way to enjoy a hearty, vegetable-based meal.

    • Ingredients: Large bell peppers (any color), cooked quinoa, black beans (rinsed and drained), corn (fresh, frozen, or canned), diced onion, minced garlic, cumin, chili powder, salsa, shredded cheese (optional), olive oil.
    • Simple Steps:
      1. Preheat your oven to 375°F (190°C).
      2. Cut the bell peppers in half lengthwise, then remove the seeds and membranes.
      3. In a bowl, mix the cooked quinoa, black beans, corn, diced onion, garlic, cumin, chili powder, and salsa.
      4. Lightly grease a baking dish and place the pepper halves inside, cut-side up.
      5. Spoon the quinoa mixture into each pepper half.
      6. Bake for 20-25 minutes.
      7. If using cheese, sprinkle it on top during the last 5 minutes of baking.
    • Tips & Variations:
      • Add diced zucchini or spinach to the filling.
      • For a smoky flavor, add a pinch of smoked paprika.
      • Serve with a dollop of sour cream or Greek yogurt.
      • Use mini bell peppers to create a fun appetizer.

    Quinoa Recipes with Chicken

    For a robust and satisfying dinner, try incorporating chicken into your quinoa dishes. These simple recipes deliver great protein and flavor, making them perfect for busy families or anyone looking for approachable home cooking.

    Lemon Herb Chicken and Quinoa Skillet

    This easy skillet meal brings together tender chicken, fluffy quinoa, and fresh herbs for a quick and flavorful dinner. Plus, with minimal cleanup, it’s a perfect weeknight solution.

    • Ingredients: Boneless, skinless chicken breasts (diced), cooked quinoa, chicken broth, lemon juice, fresh parsley (chopped), dried oregano, garlic powder, olive oil, salt and pepper.
    • Simple Steps:
      1. Heat olive oil in a large skillet over medium-high heat.
      2. Add the diced chicken and season with salt, pepper, and garlic powder.
      3. Cook until the chicken is browned and cooked through, then remove it from the skillet.
      4. Pour the chicken broth into the skillet and bring it to a simmer.
      5. Stir in the cooked quinoa, lemon juice, and oregano.
      6. Return the chicken to the skillet and heat through for 2-3 minutes.
      7. Stir in fresh parsley just before serving.
    • Tips & Variations:
      • Add some frozen peas or chopped spinach for extra vegetables.
      • Use dried thyme or rosemary instead of oregano.
      • A splash of white wine can deepen the flavor.
      • Serve with a side salad for a complete meal.

    Quick Chicken and Veggie Quinoa Stir-Fry

    A versatile and healthy option, this stir-fry incorporates quinoa for added texture and nutrition. It’s also a quick way to use up leftover vegetables, creating a balanced meal in minutes.

    • Ingredients: Cooked chicken (shredded or diced), cooked quinoa, mixed stir-fry vegetables (broccoli, carrots, snap peas, bell peppers), soy sauce (or tamari), ginger (grated), garlic (minced), sesame oil, olive oil.
    • Simple Steps:
      1. Heat olive oil in a large wok or skillet over medium-high heat.
      2. Add minced garlic and grated ginger, and cook for 30 seconds until fragrant.
      3. Add the stir-fry vegetables and cook for 5-7 minutes until tender-crisp.
      4. Stir in the cooked chicken and cooked quinoa.
      5. Pour in the soy sauce and sesame oil, then toss everything to combine.
      6. Cook for another 2-3 minutes to ensure all ingredients are heated through.
    • Tips & Variations:
      • Add a sprinkle of sesame seeds for garnish.
      • Use different vegetables based on what you have.
      • For a spicy kick, add a dash of sriracha.
      • This is a great meal prep idea; portions can be stored for lunches.

    Family-Friendly One-Pan Meals

    One-pan meals are a busy cook’s best friend because they involve simple steps and incredibly easy cleanup. These recipes simplify cooking, so you can enjoy more time with your family without sacrificing a flavorful meal.

    One-Pan Sausage, Veggies, and Quinoa

    The epitome of a simple dinner, this dish combines protein, vegetables, and grain on a single baking sheet. It’s a perfect, crowd-pleasing solution for busy weeknights.

    • Ingredients: Cooked quinoa, chicken or turkey sausage (sliced), broccoli florets, bell peppers (chopped), red onion (wedges), olive oil, garlic powder, paprika, salt, pepper.
    • Simple Steps:
      1. Preheat your oven to 400°F (200°C).
      2. Line a large baking sheet with parchment paper for easy cleanup.
      3. On the baking sheet, toss the sausage, broccoli, bell peppers, and red onion with olive oil, garlic powder, paprika, salt, and pepper.
      4. Spread the ingredients in a single layer.
      5. Roast for 20-25 minutes, or until the vegetables are tender and slightly caramelized.
      6. Remove from the oven and stir in the cooked quinoa directly on the baking sheet.
      7. Serve immediately.
    • Tips & Variations:
      • Add other quick-cooking vegetables like zucchini or cherry tomatoes.
      • A sprinkle of grated Parmesan cheese adds a savory finish.
      • Use your favorite seasonings for a custom flavor profile.
      • This method is great for meal prep throughout the week.

    Cheesy Quinoa Taco Bake

    If your family loves tacos, they will adore this easy, cheesy bake. It offers all the classic taco flavors in a comforting, crowd-pleasing casserole style.

    • Ingredients: Cooked quinoa, ground beef or turkey (cooked and drained), taco seasoning, black beans (rinsed and drained), corn, canned diced tomatoes with green chilies (undrained), shredded cheddar or Mexican blend cheese.
    • Simple Steps:
      1. Preheat your oven to 375°F (190°C).
      2. In a large oven-safe dish (like a 9×13 inch baking dish), combine the cooked quinoa, cooked ground meat, taco seasoning, black beans, corn, and diced tomatoes with green chilies.
      3. Stir well to mix all ingredients evenly.
      4. Sprinkle the shredded cheese generously over the top.
      5. Bake for 20-25 minutes, or until the cheese is melted and bubbly.
      6. Let the dish rest for a few minutes before serving.
    • Tips & Variations:
      • Top with fresh cilantro, sour cream, or avocado slices.
      • Add a layer of crushed tortilla chips before baking for extra crunch.
      • For a vegetarian version, swap the meat for extra beans or lentils.
      • This dish reheats beautifully for next-day lunches.

    Frequently Asked Questions About Cooking With Quinoa

    What are the best quinoa recipes for beginners?

    Starting your quinoa journey is exciting! The best recipes for beginners are simple, use everyday ingredients, and build your confidence. These easy recipes will show you just how versatile quinoa can be.

    We recommend starting with basic preparations to get comfortable with cooking quinoa perfectly. Once you master the basics, you can easily add your favorite flavors.

    • Basic Fluffy Quinoa Side Dish: Simply cook quinoa with water or broth to create a fantastic base. You can serve it instead of rice or pasta, as it pairs well with almost any meal.
    • Quick Quinoa Salad: Once your quinoa is cooked and cooled, toss it with chopped cucumbers, tomatoes, bell peppers, and a simple lemon vinaigrette. It’s a fresh, healthy lunch idea and an easy staple for home cooking.
    • Simple Quinoa Breakfast Bowl: Cook quinoa with milk (dairy or non-dairy), then add a pinch of cinnamon and a touch of maple syrup. Top with fresh berries and nuts for a nourishing and delicious breakfast.
    • Easy Quinoa Stuffed Bell Peppers: Mix cooked quinoa with ground turkey or black beans, corn, and your favorite salsa. Stuff this mixture into bell peppers and bake until tender for a simple dinner that looks impressive.

    These beginner-friendly recipes require minimal fuss and offer a great introduction to cooking with quinoa. You will be making easy, flavorful meals in no time!

    What are some good quinoa recipes for dinner?

    Quinoa is a true dinner hero that easily transforms into hearty, flavorful meals. Because it soaks up flavors so well, it’s perfect for making simple dinner recipes shine on busy weeknights or during relaxed family dinners.

    Here are some excellent quinoa recipes for dinner that are both delicious and easy to make:

    • One-Pan Lemon Herb Chicken and Quinoa: This family-friendly meal cooks everything together for easy cleanup. Combine chicken pieces, quinoa, and vegetables like broccoli or asparagus. Toss them with lemon, herbs, and olive oil, then roast until cooked through.
    • Vegetarian Quinoa Chili: This comforting and robust chili features quinoa, beans, tomatoes, and your favorite chili spices. It is a fantastic option for a healthy, satisfying dinner. Serve with a dollop of Greek yogurt or avocado.
    • Quinoa Stuffed Sweet Potatoes: Bake sweet potatoes until tender, then stuff them with a mixture of cooked quinoa, black beans, corn, and a sprinkle of cheese. A drizzle of lime juice adds brightness to this wonderfully nutritious and tasty dinner.
    • Mediterranean Quinoa Bowls: Build a bowl with a base of cooked quinoa. Top it with grilled chicken or chickpeas, Kalamata olives, feta cheese, cherry tomatoes, and cucumber. Drizzle with a red wine vinaigrette for a vibrant and balanced meal.
    • Spicy Shrimp and Quinoa Stir-Fry: As a great alternative to rice in stir-fries, quinoa pairs perfectly with sautéed shrimp and vegetables. Serve your favorite stir-fry over a bed of fluffy quinoa for a quick and flavorful meal.

    These options provide variety and prove that cooking with quinoa can be both simple and incredibly satisfying for dinner.

    How can I use quinoa for weight loss?

    If you’re focusing on weight loss, quinoa is a fantastic ally. It’s packed with nutrients that support a healthy diet, and its unique nutritional profile helps you feel full longer. That’s why we often feature it in our balanced meals at Recipesmondial.

    Here’s why quinoa is great for weight loss and how to use it:

    • High in Protein: Quinoa is a complete protein, meaning it contains all nine essential amino acids. Protein helps reduce appetite and increase satiety, which can help you eat less overall and maintain muscle mass during weight loss [2].
    • Rich in Fiber: Quinoa is high in dietary fiber, which adds bulk to your meals and helps you feel full faster. Fiber also aids digestion and can prevent overeating, helping you manage hunger.
    • Low Glycemic Index: Quinoa has a relatively low glycemic index, so it causes a slower rise in blood sugar. Stable blood sugar levels can help control cravings and support consistent energy throughout your day.
    • Nutrient Density: Quinoa provides essential vitamins and minerals, including magnesium, B vitamins, iron, and zinc. Eating nutrient-dense foods like quinoa keeps your body nourished and helps prevent deficiencies.

    To use quinoa for weight loss, incorporate it into your meals regularly:

    • Replace Refined Grains: Swap white rice or pasta for quinoa to instantly boost the protein and fiber in your meal.
    • Build Balanced Bowls: Create balanced meal bowls by combining cooked quinoa with a lean protein like chicken or fish, plenty of non-starchy vegetables, and a light dressing.
    • Meal Prep with Quinoa: Cook a large batch of quinoa at the start of the week. Use it for quick breakfasts, easy lunches, or simple dinners. This simple meal prep strategy ensures you always have a healthy option ready.
    • Mindful Portions: While healthy, quinoa still contains calories. Pay attention to portion sizes to support your weight loss goals. A half-cup serving of cooked quinoa is a good starting point for most meals.

    By making these simple changes, you can enjoy delicious, filling meals with quinoa that help you work towards your weight loss goals without feeling deprived.


    Sources

    1. https://www.hsph.harvard.edu/nutritionsource/food-features/quinoa/
    2. https://www.hsph.harvard.edu/nutritionsource/what-should-you-eat/protein/

  • 50+ Easy Chicken Breast Recipes (Simple Ideas for Dinner Tonight)

    50+ Easy Chicken Breast Recipes (Simple Ideas for Dinner Tonight)

    Chicken breast is a versatile protein perfect for quick and easy meals. Popular recipes include simple baked chicken breast seasoned with herbs, juicy air fryer chicken breast for a healthy option, and pan-seared chicken with a flavorful sauce for a fast weeknight dinner. For best results, always cook chicken breast to an internal temperature of 165°F (74°C).

    Struggling with what to make for dinner? It’s a common challenge to find quick, healthy, and delicious meals without feeling overwhelmed by complex recipes. Juggling busy schedules and trying to plan family-friendly meals can make you long for an easy win in the kitchen. Thankfully, there’s a culinary hero that comes to the rescue: the humble chicken breast. As a versatile and lean protein, it’s the ultimate foundation for countless easy, flavorful meals that truly satisfy.

    Here at Recipesmondial, we want you to enjoy stress-free cooking, build confidence, and bring exciting flavors to your table. That’s why we’ve gathered over 50 easy chicken breast recipes designed with you in mind. Whether you’re searching for simple dinner recipes, quick breakfast ideas, or a hearty lunch, this collection has you covered. From perfectly baked chicken to crispy air fryer chicken breast and savory pan-seared options, each recipe offers approachable home cooking with clear, step-by-step guidance.

    Say goodbye to uninspiring meals and hello to a world of simple, delicious possibilities. Get ready to transform everyday ingredients into extraordinary dishes that your whole family will love. Let’s dive in and discover why chicken breast is your go-to for effortless, flavorful meals.

    Why Is Chicken Breast a Go-To for Easy Dinners?

    Chicken breast is a superstar in the kitchen, especially when you need easy dinner ideas. At Recipesmondial, we know that busy lives call for simple, reliable, and delicious solutions. This versatile ingredient consistently delivers on all fronts, making it a beloved choice for home cooks of all skill levels.

    So, why does chicken breast earn such a prominent spot in our recipe collection? It effortlessly solves many common mealtime dilemmas. For those nights when you’re overwhelmed by complex instructions or unsure how to prepare a healthy meal quickly, chicken breast provides a straightforward solution.

    Incredible Versatility for Flavorful Meals

    One of the biggest advantages of boneless skinless chicken breast is its incredible versatility. It acts as a blank canvas, ready to absorb any flavor you pair it with. This adaptability opens up endless possibilities for creative meals, no matter what your taste buds crave.

    Because it suits so many cooking methods, you’ll find it easy to discover new and simple dishes.

    • Baking: Perfect for juicy baked chicken breast recipes with minimal effort.
    • Pan-Searing: Achieves a golden, crispy exterior in minutes.
    • Air Frying: Great for quick, crispy air fryer chicken breast that’s ready in a flash.
    • Grilling: Adds a smoky char, ideal for warmer weather.
    • Stir-Frying: Cuts easily into strips for quick, vibrant stir-fries.

    A Lean Protein Powerhouse for Healthy Eating

    Chicken breast is an excellent choice for healthy meals because it’s naturally low in fat and packed with lean protein. This combination makes it a fantastic foundation for balanced and nourishing dishes.

    By providing essential nutrients without excessive calories, chicken breast helps keep you feeling full and satisfied. In fact, a 3.5-ounce serving of cooked chicken breast contains about 31 grams of protein [1], making it a smart choice for anyone focusing on wellness.

    Quick and Easy Cooking for Busy Schedules

    Time is precious on weeknights, and this is where chicken breast truly shines. Because it cooks so quickly, you can get a delicious, stress-free meal on the table in 30 minutes or less. This speed is essential for easy weeknight dinners.

    Our simple chicken breast recipes are designed with your busy schedule in mind, helping you solve the “what’s for dinner?” question without any hassle.

    Family-Friendly and Budget-Smart

    Chicken breast is a universal crowd-pleaser, which is perfect when planning meals everyone will enjoy. Its mild flavor appeals to both adults and children, making dinnertime stress-free and enjoyable for the whole family.

    Furthermore, chicken breast is widely available and often budget-friendly. This makes it an economical choice for feeding your family delicious and wholesome meals without breaking the bank.

    Ideal for Efficient Meal Prep

    For those who like to plan ahead, chicken breast is a meal prep essential. Cooking a larger batch over the weekend can save you a significant amount of time during the week, simplifying your meal plan.

    Cooked chicken breast also reheats beautifully and can be used in salads, sandwiches, pasta dishes, or grain bowls. This versatility makes it effortless to enjoy healthy, delicious meals all week long.

    At Recipesmondial, we believe cooking should be enjoyable, not a chore. With boneless skinless chicken breast in your kitchen, you are always just a few steps away from a satisfying, flavorful, and easy dinner. It’s a reliable, go-to ingredient that builds confidence and makes mealtime a pleasure.

    Quick and Easy Chicken Breast Recipes (Ready in 30 Minutes!)

    A perfectly pan-seared and sliced chicken breast meal with fresh green beans and cherry tomatoes, ready in minutes.
    Professional food photography, photorealistic, high-quality food magazine photo. A vibrant, pan-seared chicken breast, expertly sliced into thick pieces, served on a modern ceramic plate. The chicken is golden-brown and juicy. It’s accompanied by brightly colored, fresh side vegetables such as tender-crisp green beans and glistening cherry tomatoes, artfully arranged. Subtle steam rises from the dish, indicating freshness. A real home cook’s hands are visible in the background, out of focus, reaching to add a final sprig of fresh parsley, conveying speed and ease. The scene is lit with warm, inviting natural light, set on a clean, light-colored kitchen counter. Shallow depth of field, focused on the chicken. Bright, appetizing colors.

    Simple Pan-Seared Chicken Breast

    Discover how easy it is to make a perfect weeknight dinner with this simple pan-seared chicken breast recipe. Ideal for beginners, this method builds kitchen confidence by creating tender, juicy chicken with a lovely golden crust every time.

    Pan-searing is a quick and straightforward cooking technique that delivers delicious results without any fuss. This easy chicken recipe is sure to become a regular in your meal rotation.

    Ingredients:

    • 2 boneless, skinless chicken breasts (about 6-8 oz each)
    • 1 tablespoon olive oil
    • 1/2 teaspoon salt
    • 1/4 teaspoon black pepper
    • 1/2 teaspoon garlic powder (optional)
    • 1/2 teaspoon onion powder (optional)

    Instructions:

    1. Prepare the Chicken: Place each chicken breast between two pieces of plastic wrap. Use a meat mallet or a heavy pan to pound them to an even 1/2-inch thickness. This step ensures even cooking.
    2. Season Generously: Season both sides of the chicken breasts with salt, pepper, garlic powder, and onion powder. Gently pat the seasoning onto the meat.
    3. Heat the Pan: In a large skillet, heat the olive oil over medium-high heat. Allow the pan to get hot, but not to the point of smoking.
    4. Sear the Chicken: Carefully place the seasoned chicken breasts in the hot skillet. Cook for 5-7 minutes per side, or until a golden-brown crust forms.
    5. Check for Doneness: The chicken is fully cooked when its internal temperature reaches 165°F (74°C) [2]. Use an instant-read thermometer for the most accurate reading.
    6. Rest the Chicken: Remove the chicken from the pan and let it rest on a cutting board for 5 minutes before slicing. This helps the juices redistribute, keeping the chicken moist.

    Tips and Variations:

    • Add Fresh Herbs: For extra aroma, toss a sprig of rosemary or thyme into the pan during the last few minutes of cooking.
    • Deglaze for Sauce: After removing the chicken, add a splash of chicken broth or white wine to the hot pan. Scrape up any browned bits to create a quick, flavorful pan sauce.
    • Spice It Up: Add a pinch of paprika or cayenne pepper to your seasoning mix for a subtle kick of heat.
    • Serve With: This chicken pairs well with a side of steamed vegetables or a fresh salad.

    5-Ingredient Honey Garlic Chicken

    This 5-ingredient honey garlic chicken is a game-changer for busy weeknights, proving a delicious, family-friendly meal can be both quick and simple. It’s a satisfying dish that transforms a few pantry staples into something special.

    Forget feeling overwhelmed by complex instructions. This recipe comes together effortlessly, allowing you to create a restaurant-worthy meal in your own kitchen.

    Ingredients:

    • 1 lb boneless, skinless chicken breasts, cut into 1-inch pieces
    • 1 tablespoon olive oil
    • 1/2 cup honey
    • 1/4 cup soy sauce (low-sodium recommended)
    • 2 cloves garlic, minced

    Instructions:

    1. Cook the Chicken: Heat the olive oil in a large skillet over medium-high heat. Add the chicken pieces and cook for 5-7 minutes, stirring occasionally, until browned and cooked through. Remove the chicken from the pan and set it aside.
    2. Make the Sauce: In the same skillet, reduce the heat to medium. Add the honey, soy sauce, and minced garlic, whisking well to combine.
    3. Simmer the Sauce: Bring the sauce to a gentle simmer and cook for 2-3 minutes, stirring constantly, until it thickens slightly.
    4. Combine Chicken and Sauce: Return the cooked chicken to the skillet. Gently toss the chicken to coat it completely with the honey garlic sauce.
    5. Serve Immediately: Serve the honey garlic chicken while hot. It pairs wonderfully with rice or noodles.

    Tips and Variations:

    • Thicken the Sauce: For a thicker sauce, mix 1 teaspoon of cornstarch with 1 tablespoon of water to create a slurry. Stir it into the simmering sauce and cook for another minute until thickened.
    • Add Veggies: Stir in steamed broccoli florets or sliced bell peppers during the last minute of cooking for a complete stir-fry.
    • Meal Prep Idea: Cook a larger batch and portion it out for quick and easy lunches throughout the week.
    • Spice it Up: A pinch of red pepper flakes will add a nice touch of heat to the sauce.

    Quick Lemon Herb Chicken Cutlets

    Brighten your dinner plate with these quick lemon herb chicken cutlets. As a simple and healthy option, this vibrant, fresh dish is incredibly fast to prepare, making it a perfect solution for an easy weeknight meal.

    Even if you’re new to cooking, this recipe is for you. The thin cutlets cook quickly and evenly, making this a forgiving and delightful dish to master without any stress.

    Ingredients:

    • 1 lb boneless, skinless chicken breasts
    • 1 tablespoon olive oil
    • 1/2 teaspoon salt
    • 1/4 teaspoon black pepper
    • 1/2 teaspoon dried Italian seasoning or mixed herbs (like dried thyme, oregano, parsley)
    • Juice of 1/2 lemon
    • Fresh parsley, chopped, for garnish (optional)

    Instructions:

    1. Prepare Cutlets: Slice each chicken breast horizontally to create two thinner cutlets. Alternatively, pound whole chicken breasts to an even 1/2-inch thickness.
    2. Season the Chicken: Pat both sides of the chicken cutlets dry, then season with salt, pepper, and dried herbs.
    3. Cook the Cutlets: Heat the olive oil in a large skillet over medium-high heat. Add the chicken cutlets in a single layer, being careful not to overcrowd the pan.
    4. Sear Quickly: Cook for 3-4 minutes per side until golden brown and cooked through. Because the cutlets are thin, they will cook very quickly.
    5. Finish with Lemon: Remove the skillet from the heat and squeeze the fresh lemon juice over the cooked chicken.
    6. Garnish and Serve: Garnish with fresh chopped parsley, if using, and serve immediately.

    Tips and Variations:

    • Fresh Herbs are Best: If available, use finely chopped fresh herbs like rosemary, thyme, or oregano instead of dried.
    • Add Garlic: For extra flavor, stir one minced clove of garlic into the pan during the last minute of cooking.
    • Serve with Asparagus: Pan-sear asparagus spears in the same pan after removing the chicken for a wonderful, complete meal.
    • Creamy Sauce: After cooking the chicken, add a splash of chicken broth and a tablespoon of cream to the pan. Reduce slightly for a quick, luxurious sauce.

    Chicken Stir-Fry with Vegetables

    Whip up a vibrant, healthy, and family-friendly chicken stir-fry in minutes. This easy recipe is perfect for using up leftover vegetables and provides a delicious solution for a speedy weeknight dinner.

    This guide simplifies the stir-fry process, giving you the confidence to cook a healthy and tasty meal without stress. Get ready to enjoy a quick and flavorful dish tonight.

    Ingredients:

    • 1 lb boneless, skinless chicken breasts, cut into thin strips
    • 1 tablespoon olive oil or sesame oil
    • 2 cups mixed stir-fry vegetables (e.g., sliced bell peppers, broccoli florets, snap peas, carrots)
    • 1/4 cup soy sauce (low sodium preferred)
    • 1 tablespoon honey or brown sugar
    • 1 teaspoon fresh ginger, grated (or 1/2 teaspoon dried ginger)
    • 1 clove garlic, minced
    • Cooked rice or noodles, for serving

    Instructions:

    1. Prepare Chicken and Veggies: Cut the chicken into thin strips against the grain to ensure it’s tender. Wash and chop all your vegetables so they are ready for the skillet.
    2. Cook the Chicken: Heat the oil in a large skillet or wok over medium-high heat. Add the chicken strips and cook for 4-6 minutes, stirring frequently, until no longer pink. Remove the chicken from the pan and set aside.
    3. Stir-Fry Vegetables: Add the mixed vegetables to the same skillet. Cook for 3-5 minutes, stirring often, until the vegetables are tender-crisp.
    4. Make the Sauce: While the vegetables cook, whisk together the soy sauce, honey or brown sugar, grated ginger, and minced garlic in a small bowl.
    5. Combine and Coat: Return the cooked chicken to the skillet with the vegetables. Pour the prepared sauce over everything and toss well to coat.
    6. Simmer Briefly: Cook for another 1-2 minutes to allow the sauce to thicken slightly and coat all the ingredients.
    7. Serve: Serve the chicken stir-fry immediately over hot cooked rice or noodles.

    Tips and Variations:

    • Don’t Overcrowd: To ensure proper browning, cook the chicken and vegetables in batches if your pan isn’t large enough.
    • Add Crunch: Garnish with sesame seeds or chopped peanuts for extra texture.
    • Spice Level: For a spicy kick, add a pinch of red pepper flakes along with the sauce.
    • Vegetable Swaps: Use any quick-cooking vegetables you have on hand. Mushrooms, cabbage, or baby corn are great additions.
    • Meal Prep Friendly: Cook the stir-fry and portion it into containers for easy lunches or dinners throughout the week.

    Flavorful Oven Baked Chicken Breast Recipes

    Two golden-brown oven-baked chicken breasts with fresh rosemary and thyme in a cast iron skillet.
    Professional food photography, photorealistic, high-quality food magazine photo. A close-up shot of two perfectly golden-brown and succulent oven-baked chicken breasts, glistening with a light herb butter glaze. Fresh sprigs of rosemary and thyme are artfully placed on and around the chicken. The chicken is served in a rustic cast iron skillet, placed on a light wooden cutting board. The background features a subtly blurred, warm-toned kitchen with natural light streaming in from a window. The focus is sharp on the texture and appealing color of the chicken. The atmosphere is warm, inviting, and comforting.

    Baking chicken breast in the oven is a home cook’s secret weapon because it’s incredibly simple. With minimal effort, this method transforms plain chicken into tender, flavorful meals, making it perfect for busy families and anyone seeking stress-free cooking.

    You can achieve amazing results with just a few ingredients, and cleanup is often a breeze. Let Recipesmondial guide you through these delicious oven-baked chicken breast recipes. You’re sure to enjoy every bite!

    The Juiciest Herb-Roasted Chicken Breast

    Say goodbye to dry chicken forever! This beginner-friendly recipe shows you how to bake chicken breast that is incredibly moist and flavorful. As a healthy and satisfying dinner choice, this herb-roasted chicken promises delicious results every time.

    Ingredients:

    • 2 boneless, skinless chicken breasts (about 6-8 oz each)
    • 1 tablespoon olive oil
    • 1 teaspoon dried Italian seasoning (or a mix of dried rosemary, thyme, and oregano)
    • 1/2 teaspoon garlic powder
    • 1/4 teaspoon salt
    • 1/8 teaspoon black pepper

    Instructions:

    1. Preheat your oven to 400°F (200°C). Lightly grease a baking dish or line a baking sheet with parchment paper.
    2. Pat the chicken breasts dry with paper towels to help achieve a nice crust.
    3. Place the chicken breasts in the prepared dish.
    4. Drizzle the olive oil evenly over the chicken.
    5. In a small bowl, mix together the Italian seasoning, garlic powder, salt, and pepper.
    6. Sprinkle this herb mixture generously over both sides of the chicken breasts.
    7. Bake for 20-25 minutes, or until the internal temperature reaches 165°F (74°C) at the thickest part [3].
    8. Let the chicken rest for 5 minutes before slicing. This step is crucial for locking in the juices.

    Tips for Success:

    • Pound it Flat: For more even cooking, pound the chicken breasts to a uniform thickness.
    • Don’t Overcook: A meat thermometer is the best way to prevent dry chicken.
    • Rest Time: Always let your chicken rest after cooking so the juices can redistribute, making it much juicier.

    Variations & Substitutions:

    • Fresh Herbs: Use 1 tablespoon of chopped fresh herbs instead of 1 teaspoon of dried herbs.
    • Spicy Kick: Add a pinch of red pepper flakes to the seasoning mix for a little heat.
    • Lemon Zest: Grate some fresh lemon zest over the chicken before baking for a bright, citrusy flavor.

    Baked Chicken Breast with Sauce (BBQ & Honey Mustard)

    Dress up your chicken dinner with an incredible sauce! Baking chicken with a delicious glaze adds a huge boost of flavor, making this method perfect for family-friendly meals. You can achieve restaurant-quality taste right at home with these simple recipes that are sure to impress.

    Ingredients for Base Chicken:

    • 2 boneless, skinless chicken breasts
    • 1/2 tablespoon olive oil
    • Salt and pepper to taste

    Sauce Options:

    • BBQ Sauce: 1/2 cup of your favorite BBQ sauce.
    • Honey Mustard Sauce: Mix 1/4 cup Dijon mustard, 2 tablespoons honey, 1 tablespoon olive oil, and 1 teaspoon apple cider vinegar.

    Instructions:

    1. Preheat your oven to 400°F (200°C). Lightly grease a baking dish or line a baking sheet with parchment paper.
    2. Pat the chicken breasts dry and season them with salt and pepper.
    3. Drizzle the chicken with olive oil and place it in the prepared baking dish.
    4. Bake for 15 minutes to give the chicken a head start.
    5. Carefully remove the dish from the oven and brush your chosen sauce generously over the chicken.
    6. Return the dish to the oven and bake for another 8-10 minutes, or until the sauce is slightly caramelized and the chicken’s internal temperature reaches 165°F (74°C).
    7. Let the chicken rest for a few minutes before serving.

    Tips for Flavorful Glazing:

    • Timing is Key: Add the sauce towards the end of baking to prevent the sugars from burning.
    • Homemade vs. Store-Bought: Both work great! Use your favorite brand or whip up a simple homemade sauce for a personal touch.
    • Even Coating: Make sure the sauce covers the chicken well for maximum flavor in every bite.

    Cheesy Baked Chicken Breast Casserole

    Feeling overwhelmed by complex recipes? This cheesy chicken casserole is the simple answer. A hearty and family-friendly meal, it delivers pure comfort and makes mealtime decisions easy. Our cheesy baked chicken breast casserole is a complete dinner in one dish and a true time-saver for meal prep.

    Ingredients:

    • 2 cups cooked, shredded chicken breast (use leftover chicken or quickly boil/bake 2 breasts)
    • 1 can (10.5 oz) cream of mushroom soup (or cream of chicken)
    • 1/2 cup milk
    • 1/2 cup sour cream (optional, for extra creaminess)
    • 1 cup frozen mixed vegetables (such as peas, carrots, and corn)
    • 1/2 cup cooked rice or small pasta (optional, for a fuller meal)
    • 1 cup shredded cheddar cheese, plus more for topping
    • 1/4 teaspoon garlic powder
    • Salt and pepper to taste

    Instructions:

    1. Preheat your oven to 375°F (190°C). Lightly grease an 8×8 inch baking dish.
    2. In a large bowl, combine the cooked chicken, cream of mushroom soup, milk, and sour cream (if using).
    3. Stir in the frozen mixed vegetables, cooked rice or pasta (if using), 1 cup of cheddar cheese, and garlic powder.
    4. Season with salt and pepper, then mix well until all ingredients are evenly coated.
    5. Pour the mixture into the prepared baking dish and spread it evenly.
    6. Sprinkle extra shredded cheese generously over the top.
    7. Bake for 25-30 minutes, until the casserole is bubbly and the cheese is melted and golden brown.
    8. Let the casserole stand for 5 minutes before serving to allow it to set.

    Meal Prep & Customization Tips:

    • Cook Ahead: Assemble the casserole the day before. Just cover and refrigerate, then bake when you’re ready to eat.
    • Veggie Swap: Feel free to use fresh steamed broccoli florets or spinach instead of frozen mixed vegetables.
    • Spice It Up: Add a dash of paprika or a pinch of cayenne pepper for a little extra kick.
    • Crunchy Topping: For added texture, sprinkle crushed butter crackers or breadcrumbs over the cheese before baking.

    Oven Baked Chicken with Onions and Potatoes

    This incredible sheet pan meal is a complete dinner on one pan, making meal planning easier than ever. One-pan meals are a proven way to simplify dinner routines [4]. Tender chicken, soft potatoes, and sweet onions roast together for a flavorful and healthy meal that’s a true lifesaver on busy weeknights.

    Ingredients:

    • 2 boneless, skinless chicken breasts, cut into 1-inch pieces
    • 1 pound small potatoes, quartered (e.g., Yukon Gold or red potatoes)
    • 1 large onion, cut into wedges
    • 2 tablespoons olive oil
    • 1 teaspoon dried rosemary
    • 1/2 teaspoon garlic powder
    • 1/2 teaspoon salt
    • 1/4 teaspoon black pepper
    • Optional: 1/2 cup chopped bell peppers or cherry tomatoes for extra color and nutrition.

    Instructions:

    1. Preheat your oven to 400°F (200°C). Line a large baking sheet with parchment paper for easy cleanup.
    2. In a large bowl, combine the quartered potatoes and onion wedges. Toss with 1 tablespoon of olive oil, rosemary, garlic powder, salt, and pepper.
    3. Spread the seasoned vegetables in a single layer on the prepared baking sheet.
    4. Bake the vegetables for 15 minutes first to give the potatoes a head start.
    5. While the vegetables bake, toss the chicken pieces in the same bowl with the remaining 1 tablespoon of olive oil and a pinch of salt and pepper.
    6. After 15 minutes, remove the baking sheet from the oven. Add the seasoned chicken and any optional vegetables to the empty side of the sheet.
    7. Return the baking sheet to the oven and bake for another 20-25 minutes.
    8. The dish is ready when the chicken is cooked through to 165°F (74°C) and the potatoes are tender and golden.
    9. Serve hot and enjoy.

    Helpful Tips:

    • Even Cut: Cut the vegetables and chicken into similar-sized pieces to ensure they cook evenly.
    • Don’t Crowd the Pan: Give everything space to allow it to roast, not steam. Use two pans if necessary.
    • Flavor Boost: For extra freshness, add a squeeze of fresh lemon juice over the dish just before serving.

    Simple Variations:

    • Different Veggies: Swap potatoes for sweet potatoes, or add other sturdy vegetables like broccoli and carrots.
    • Spice Profile: Try using smoked paprika, chili powder, or your favorite all-purpose seasoning blend instead of rosemary.
    • Mediterranean Twist: For a different flavor, add Kalamata olives and cherry tomatoes to the pan with the chicken.

    Crispy & Healthy Air Fryer Chicken Breast Recipes

    A crispy, golden-brown air-fried chicken breast, sliced, served with a fresh green salad.
    Professional food photography, photorealistic, high-quality food magazine photo. A mouth-watering, perfectly crispy, golden-brown air-fried chicken breast, sliced diagonally to showcase its tender, juicy interior. It’s elegantly plated on a simple white dish, alongside a vibrant and fresh mixed green salad with a light, glistening vinaigrette. The texture of the crispy exterior is clearly visible and enticing. The setting is a clean, bright, modern kitchen counter. Overhead natural light illuminates the dish, highlighting its fresh and healthy appeal. The composition is clean, simple, and focused on the deliciousness.

    The air fryer is a popular kitchen tool for a reason: it delivers incredibly crispy food using far less oil. That means you can enjoy crunchy, delicious chicken breast dishes that are also healthier. If you find most recipes too complex, these simple air fryer options are a reliable way to transform boneless, skinless chicken breast into a flavorful meal the whole family will love.

    Recipesmondial is here to help. We’ll show you how to master the air fryer for quick and satisfying chicken dinners. Get ready to cook with confidence and enjoy stress-free meal prep!

    Perfectly Seasoned Air Fryer Chicken Breast

    Cooking chicken breast in the air fryer is one of the best ways to prepare it. This simple method locks in moisture for juicy results while creating a perfectly crisp exterior. It’s an ideal starting point for anyone new to air frying or looking for a fast, healthy chicken recipe.

    How to Make It:

    1. Prep Your Chicken: Pat 1 pound boneless, skinless chicken breasts dry with paper towels. If they are very thick, slice them in half lengthwise to create cutlets. This ensures even cooking.
    2. Season Generously: Drizzle the chicken with 1 tablespoon olive oil. Then, sprinkle generously with your favorite seasoning blend. A simple mix of 1 teaspoon paprika, 1 teaspoon garlic powder, ½ teaspoon onion powder, ½ teaspoon dried Italian herbs, salt, and black pepper is a great option.
    3. Air Fry: Place the seasoned chicken in a single layer in your air fryer basket. Do not overcrowd it. Air fry at 375°F (190°C) for 15-20 minutes, flipping halfway.
    4. Check Doneness: The chicken is done when it reaches an internal temperature of 165°F (74°C) [5]. A meat thermometer is your best friend here!
    5. Rest: Let the chicken rest for 5 minutes before slicing. This keeps it extra juicy.

    Quick Tips for Success:

    • Don’t Skip the Pat Dry: Removing excess moisture helps the chicken get a crispier crust.
    • Seasoning Variations: Try lemon pepper, taco seasoning, or a simple garlic salt blend.
    • Meal Prep Idea: Cook extra chicken for salads or sandwiches throughout the week.

    Crispy Air Fryer Chicken Strips

    Enjoy the satisfying crunch of fried chicken without the extra grease. These air fryer chicken strips are a family-friendly meal that uses significantly less oil. This easy recipe turns a classic comfort food into a healthier main dish or snack.

    Ingredients You’ll Need:

    • 1 pound boneless, skinless chicken breast, cut into 1-inch thick strips
    • ½ cup all-purpose flour (or gluten-free blend)
    • 1 teaspoon garlic powder
    • 1 teaspoon onion powder
    • ½ teaspoon paprika
    • ¼ teaspoon cayenne pepper (optional, for a little kick)
    • Salt and black pepper to taste
    • 1 large egg, whisked
    • 1 cup panko breadcrumbs
    • Cooking spray or 1 tablespoon olive oil

    Step-by-Step Instructions:

    1. Prepare Breading Stations: Set up three shallow dishes.
      1. Dish 1: Combine flour, garlic powder, onion powder, paprika, cayenne (if using), salt, and pepper.
      2. Dish 2: Whisked egg.
      3. Dish 3: Panko breadcrumbs.
    2. Coat Chicken: Dip each chicken strip first into the flour mixture, shaking off excess. Next, dip into the egg, letting excess drip off. Finally, coat thoroughly in the panko breadcrumbs. Press gently to ensure crumbs stick.
    3. Arrange in Air Fryer: Lightly spray the air fryer basket with cooking spray. Place the coated chicken strips in a single layer, leaving space between each. Work in batches if necessary to avoid overcrowding.
    4. Air Fry: Cook at 400°F (200°C) for 10-15 minutes, flipping halfway. The strips should be golden brown and cooked through.

    Tips for Extra Crispiness:

    • Don’t Overcrowd: Air needs to circulate for maximum crispiness. Cook in batches.
    • Lightly Spray: A quick spritz of cooking oil on the strips before frying helps them brown beautifully.
    • Serve with Dipping Sauces: Try honey mustard, BBQ sauce, or a simple ranch.

    Air Fryer Chicken and Vegetables

    For a simple all-in-one dinner, try cooking your main course and side dish together in the air fryer. This recipe for chicken and vegetables is a great way to create a healthy, balanced meal with minimal fuss. This single-basket approach saves time on both cooking and cleanup, making it perfect for busy weeknights.

    What You’ll Need:

    • 1 pound boneless, skinless chicken breast, cut into 1-inch cubes
    • 3 cups mixed vegetables, cut into bite-sized pieces (broccoli florets, bell peppers, zucchini, red onion, cherry tomatoes work well)
    • 2 tablespoons olive oil
    • 1 teaspoon garlic powder
    • ½ teaspoon dried oregano
    • Salt and black pepper to taste

    Easy Cooking Steps:

    1. Prepare Ingredients: In a large bowl, combine the chicken cubes and chopped vegetables.
    2. Season: Drizzle with olive oil. Sprinkle with garlic powder, oregano, salt, and pepper. Toss everything together until well coated.
    3. Air Fry: Place the chicken and vegetable mixture in your air fryer basket in a single layer. If your basket is small, cook in two batches.
    4. Cook: Air fry at 380°F (195°C) for 18-22 minutes. Shake the basket well every 7-8 minutes to ensure even cooking and browning.
    5. Check for Doneness: The chicken should be cooked through, and the vegetables tender-crisp.

    Flavor Variations & Substitutions:

    • Spice it Up: Add a pinch of red pepper flakes or smoked paprika.
    • Different Veggies: Sweet potatoes (cut small), asparagus, or mushrooms are great additions. Note that harder vegetables like potatoes or carrots may require a longer cooking time. For best results, add them to the air fryer for 5-10 minutes before adding the chicken and softer veggies.
    • Herb Swaps: Try rosemary, thyme, or a pre-made Italian seasoning blend.

    Spicy Cajun Air Fryer Chicken

    Bring bold, zesty flavor to your table with this spicy Cajun air fryer chicken. This easy recipe delivers a satisfying kick without being complicated, making it a perfect way to add some excitement to your dinner routine. It’s another great example of how the air fryer can produce flavorful meals with minimal effort.

    Simple Ingredients:

    • 1 pound boneless, skinless chicken breast, cut into 1-inch thick pieces or whole cutlets
    • 1 tablespoon olive oil
    • 1½ tablespoons Cajun seasoning blend (store-bought or homemade)

    Directions for a Flavorful Meal:

    1. Prepare Chicken: Pat chicken pieces dry. Place them in a bowl.
    2. Season: Drizzle the chicken with olive oil. Sprinkle generously with the Cajun seasoning. Use your hands to rub the seasoning all over each piece of chicken, ensuring it’s evenly coated.
    3. Arrange: Place the seasoned chicken in a single layer in your air fryer basket. Do not overcrowd.
    4. Air Fry: Cook at 380°F (195°C) for 15-20 minutes, flipping halfway through. Adjust cooking time based on the thickness of your chicken.
    5. Verify Doneness: Ensure the internal temperature reaches 165°F (74°C).

    Adjusting the Spice & Serving Ideas:

    • Less Heat: Use a mild Cajun seasoning or reduce the amount used.
    • More Heat: Choose a hot Cajun blend or add a pinch of extra cayenne pepper to your seasoning mix.
    • Serving Suggestions: This spicy chicken is wonderful with rice, a simple side salad, or steamed green beans.
    • Leftovers: Shred any leftover chicken. It makes a fantastic addition to wraps or quesadillas.

    What Are Some Healthy Chicken Breast Dinner Ideas?

    Chicken Breast with Roasted Vegetables

    Making a delicious and healthy chicken dinner is easier than you think. This sheet pan meal with chicken and roasted vegetables is a simple, flavorful, and nutritious option perfect for busy weeknights. You will love how simple this recipe is to prepare.

    With this method, you can skip complex steps and still get a tasty, family-friendly meal with minimal cleanup. It’s the perfect solution for a quick and healthy dinner.

    How to Make It:

    • Prep your chicken: Pat boneless, skinless chicken breast dry. Slice it into thinner cutlets or cubes for faster cooking. Season with salt, pepper, garlic powder, and paprika.
    • Chop your veggies: Choose sturdy vegetables like broccoli florets, bell peppers, zucchini, red onion, carrots, or Brussels sprouts. Cut them into similar-sized pieces for even roasting.
    • Season and roast: Toss the vegetables with olive oil, herbs (like dried oregano or thyme), salt, and pepper. Spread them on a baking sheet with the seasoned chicken. Bake at 400°F (200°C) until the chicken is cooked through and the vegetables are tender and slightly caramelized, about 20-25 minutes.

    Tips for Success:

    • Don’t overcrowd the pan: Give everything space to roast, not steam. Use two baking sheets if needed.
    • Add flavor: A squeeze of fresh lemon juice or a sprinkle of fresh parsley after roasting brightens the dish.
    • Meal prep friendly: Prepare your vegetables and chicken ahead of time and store them separately in the fridge. This makes weeknight dinners even faster.

    Simple Chicken Salad with Greek Yogurt

    Looking for a light and easy lunch or dinner? This simple chicken salad is a fantastic choice. It replaces traditional mayonnaise with Greek yogurt, a healthier, protein-packed alternative, making it a great low-calorie option.

    This recipe is perfect for meal prep, helping you stay on track with healthy eating. Prepare a big batch on Sunday to enjoy in sandwiches, wraps, or lettuce cups all week long.

    What You’ll Need:

    • Cooked chicken breast (shredded or diced)
    • Plain Greek yogurt (full-fat or low-fat)
    • Celery (finely diced)
    • Red onion (finely diced, optional)
    • Fresh herbs (dill, chives, or parsley work well)
    • Salt, black pepper, and a pinch of garlic powder
    • A squeeze of fresh lemon juice

    How to Make It:

    • In a medium bowl, combine the cooked chicken, Greek yogurt, diced celery, and red onion.
    • Stir in the fresh herbs, salt, pepper, and garlic powder.
    • Add a squeeze of fresh lemon juice for brightness.
    • Mix everything until well combined.
    • Taste and adjust seasonings as needed.

    Serving Suggestions:

    • Serve on whole-wheat bread or in a pita.
    • Stuff into lettuce cups for a low-carb option.
    • Enjoy with crackers or sliced cucumber.

    Low-Calorie Lemon Rosemary Chicken

    This low-calorie lemon rosemary chicken is proof that healthy eating can be incredibly flavorful. Using just a few simple ingredients, this recipe creates a bright, aromatic dish perfect for a quick and wholesome meal.

    Lemon and rosemary are a classic pairing that infuses the chicken with a wonderful aroma and taste. Light yet satisfying, this simple dinner is an excellent choice for a creative and flavorful meal.

    Ingredients You’ll Need:

    • Boneless, skinless chicken breast
    • Fresh lemon juice and zest
    • Fresh rosemary sprigs (or dried rosemary)
    • Garlic (minced)
    • Olive oil (just a touch)
    • Salt and black pepper

    Simple Steps for Deliciousness:

    1. Prepare the chicken: Pat the chicken breasts dry. You can butterfly them or slice them in half horizontally to create thinner cutlets, which helps them cook faster and more evenly.
    2. Make the marinade: In a shallow dish, whisk together the lemon juice, lemon zest, minced garlic, a tablespoon of olive oil, chopped rosemary, salt, and pepper.
    3. Marinate: Add the chicken breasts to the marinade, turning to coat them completely. Marinate for at least 15-30 minutes, or for up to 2 hours in the refrigerator for more flavor.
    4. Cook the chicken: You can pan-sear, grill, or bake this chicken.
      • Pan-searing: Heat a skillet over medium-high heat with a small amount of olive oil. Cook the chicken for 4-6 minutes per side, or until golden brown and cooked through.
      • Baking: Place marinated chicken on a baking sheet. Bake at 400°F (200°C) for 15-20 minutes, or until the internal temperature reaches 165°F (74°C) [5].
    5. Serve: Garnish with extra fresh rosemary and a lemon wedge.

    Quick Tip:

    To boost the flavor, add a sprinkle of red pepper flakes to the marinade for a subtle kick. Serve with a side of quinoa or steamed green beans for a complete meal.

    Chicken and Rice Skillet

    A chicken and rice skillet is a classic one-pan dinner. This comforting, family-friendly meal means less cleanup and more time to enjoy your evening, making it an ideal solution for busy households.

    Hearty and satisfying, this dish combines lean protein with wholesome grains and vegetables, offering a quick and reliable meal solution for any night of the week.

    What You’ll Need:

    • Boneless, skinless chicken breast (diced)
    • White or brown rice
    • Chicken broth
    • Onion and garlic (diced)
    • Mixed vegetables (frozen peas, carrots, and corn work wonderfully)
    • Olive oil
    • Dried herbs (e.g., thyme, oregano)
    • Salt and pepper

    How to Create Your One-Pan Wonder:

    1. Brown the chicken: Heat a large, oven-safe skillet over medium-high heat with a splash of olive oil. Sear the diced chicken until lightly browned on all sides. Remove the chicken and set aside.
    2. Sauté aromatics: In the same skillet, add a little more oil if needed. Sauté diced onion and minced garlic until softened and fragrant.
    3. Add rice and broth: Stir in the uncooked rice, chicken broth, and dried herbs. Bring the mixture to a simmer.
    4. Combine and cook: Return the chicken to the skillet and stir in the mixed vegetables. Cover the skillet tightly with a lid or foil.
    5. Simmer: Reduce heat to low and let it simmer for about 18-20 minutes for white rice or 35-40 minutes for brown rice. Do not lift the lid while it cooks.
    6. Rest and serve: Once the liquid is absorbed and the rice is tender, remove the skillet from the heat. Let it rest, covered, for 5 minutes. Fluff with a fork and serve immediately.

    Customization Ideas:

    • Spice it up: Add a pinch of chili powder or cayenne pepper for a little heat.
    • Cheese please: Stir in some shredded cheddar or Monterey Jack cheese at the end for extra creaminess.
    • Different veggies: Feel free to use fresh bell peppers, spinach, or mushrooms. Add them at different stages based on their cooking time. Spinach can be stirred in right at the end.

    How long do you cook chicken breast in the air fryer?

    The air fryer is a game-changer for cooking chicken breast, delivering perfectly cooked, juicy results with minimal effort. This makes it ideal for easy chicken breast recipes and quick meals. However, cooking times can vary depending on your air fryer model and the thickness of the chicken.

    For food safety, the most important rule is to cook chicken to an internal temperature of 165°F (74°C). This guarantees your air fryer chicken breast is both safe to eat and delicious. To help you get it right every time, let’s explore the best cooking times.

    Cooking Time at 375°F (190°C)

    Cooking chicken breast at 375°F (190°C) is a great option because the slightly longer cooking window often results in exceptionally tender meat. This makes it a fantastic, forgiving temperature for beginner-friendly recipes.

    For boneless, skinless chicken breasts (about 6-8 ounces or 170-225 grams each), follow these guidelines:

    • Total Time: Cook for 15-20 minutes.
    • Flipping: Remember to flip the chicken halfway through to ensure even browning and thorough cooking.
    • Thickness Matters: Thicker breasts will require more time, while thinner ones will cook faster.

    To eliminate guesswork, always use a meat thermometer to confirm doneness. This simple step helps you serve perfectly cooked, flavorful meals made easy.

    Cooking Time at 400°F (200°C)

    For a crispier exterior and a faster cooking time, 400°F (200°C) is your go-to temperature. The higher heat is perfect for achieving a golden-brown finish, making it excellent for simple dinner recipes when you’re short on time.

    For boneless, skinless chicken breasts (about 6-8 ounces or 170-225 grams each), use these guidelines:

    • Total Time: Cook for 12-16 minutes.
    • Flipping: Just as with the lower temperature, flip the chicken at the halfway mark to promote uniform cooking.
    • Watch Closely: Because chicken cooks quickly at this temperature, keep a close eye on it to prevent it from drying out.

    This method is ideal for air fryer chicken recipes that promise a crispy, delicious result—perfect for family-friendly meals everyone will love.

    Tips for Checking Doneness

    Properly cooked chicken is a matter of both food safety and flavor. To ensure your chicken is juicy and tender—not dry and rubbery—follow these essential tips for approachable home cooking.

    Use these simple methods to confirm your chicken breast in air fryer is perfectly done:

    • Use a Meat Thermometer: The most reliable method is to insert an instant-read meat thermometer into the thickest part of the breast, avoiding bone. The internal temperature must reach 165°F (74°C) [6].
    • Check Juices: If you don’t have a thermometer, make a small cut into the thickest part. The juices should run clear, not pink. This is a good visual indicator.
    • Texture Test: Cooked chicken feels firm to the touch, whereas raw chicken is soft and squishy.
    • Don’t Overcook: Overcooking is the number one cause of dry chicken. Remove it from the air fryer as soon as it reaches 165°F (74°C).
    • Rest the Chicken: After cooking, let the chicken breast rest for 5-10 minutes. This crucial step allows the juices to redistribute, resulting in incredibly moist and tender meat.

    These tips will help you confidently cook delicious and safe healthy chicken breast recipes. Mastering these basics means you’ll be making simple chicken breast recipes like a pro!

    How long to cook chicken breast in oven?

    Baking Time at 350°F (175°C)

    Baking chicken at 350°F (175°C) is a fantastic, forgiving method for achieving tender, juicy results. While the cooking time is a bit longer, this lower temperature is perfect for beginner cooks and helps prevent overcooking.

    For an average 6-8 ounce (170-225 gram) boneless, skinless chicken breast, plan for a baking time of 25-35 minutes. Remember, the exact time depends on a few key factors:

    • Thickness: Thicker chicken breasts will naturally require more time in the oven.
    • Starting Temperature: Chicken straight from the fridge will cook slower, while chicken closer to room temperature will cook faster.
    • Oven Calibration: Every oven is different. Yours might run hotter or cooler than the set temperature.

    Always use a meat thermometer to guarantee your chicken is cooked perfectly. This tool is your best friend for consistent results. Chicken is safely cooked when it reaches an internal temperature of 165°F (74°C) in the thickest part [5]. This simple step helps you avoid both undercooked and dry chicken, boosting your confidence in the kitchen.

    Baking Time at 400°F (200°C)

    For a quicker cooking method that creates a lovely golden-brown exterior, increasing the temperature to 400°F (200°C) is an excellent choice. The higher heat cooks the chicken more rapidly, making it perfect for simple dinner recipes when time is tight.

    At 400°F (200°C), the same 6-8 ounce boneless, skinless chicken breasts will typically cook in 18-25 minutes. Keep a close eye on them, as thinner pieces will cook even faster. This temperature is fantastic for getting flavorful meals on the table in less time.

    As always, the most reliable way to ensure your chicken is safe and perfectly cooked is by checking its internal temperature. Once your meat thermometer reads 165°F (74°C), your chicken is ready to enjoy. This step removes guesswork, helping you cook with stress-free confidence.

    How to Avoid Dry Chicken

    Dry chicken is a common concern, but achieving juicy, tender results is simple. At Recipesmondial, we want you to enjoy cooking stress-free. Here are our top tips to ensure your oven-baked chicken is perfect every time:

    • Don’t Overcook It: This is the golden rule. Remove your chicken from the oven as soon as it reaches 165°F (74°C). Even a few extra minutes can lead to tough, dry meat.
    • Pound it Evenly: Chicken breasts are often thicker on one end. To ensure they cook evenly, use a meat mallet or heavy pan to gently pound them to a uniform thickness. This prevents thinner parts from drying out.
    • Marinate or Brine: Soaking chicken in a flavorful marinade or a simple saltwater brine before cooking is an easy technique that adds significant moisture and flavor to your chicken breast recipes.
    • Rest Your Chicken: After baking, let the chicken rest for 5-10 minutes on a cutting board, tented loosely with foil. This allows the juices to redistribute throughout the meat, keeping it moist and tender.
    • Add Moisture During Cooking: Placing a small amount of liquid, like chicken broth or a simple sauce, in the bottom of the baking dish helps keep the chicken moist as it cooks.
    • Use a Reliable Meat Thermometer: We can’t say it enough! This essential kitchen tool takes the guesswork out of cooking and is crucial for achieving consistent results.

    By following this simple guidance, you’ll transform basic ingredients into a delicious meal. Say goodbye to dry chicken and hello to confident, enjoyable cooking!

    What Are Some Global Flavors to Try?

    Ready to take your chicken breast dinners on a global adventure? Exploring international flavors is a fantastic way to spice up your weekly menu and discover exciting new tastes. You don’t need a passport to enjoy these delicious dishes—Recipesmondial makes it simple to bring the world’s most vibrant flavors right into your kitchen. We focus on approachable home cooking, creating easy recipes that use everyday ingredients. Perfect for beginner cooks and busy families alike, these meals will have you cooking confidently in no time!

    Easy Indian-Spiced Chicken Breast

    Indian cuisine is famous for its rich, aromatic spices, and this easy recipe brings those complex flavors home with simple steps. It’s a wonderful way to introduce your family to global comfort food. Get ready to enjoy a flavorful meal that’s surprisingly simple to make.

    Here’s how to make your own delicious, easy Indian-Spiced Chicken Breast:

    • Gather Your Ingredients: You will need boneless, skinless chicken breasts, plain yogurt, ginger-garlic paste (or minced ginger and garlic), turmeric, cumin, coriander, and garam masala. A pinch of chili powder is optional for extra heat.
    • Marinate for Flavor: Cut the chicken into bite-sized pieces. In a bowl, combine the yogurt, ginger-garlic paste, and all the spices. Add the chicken to the mixture and stir until it’s thoroughly coated. Let it marinate for at least 30 minutes, or overnight in the fridge for a deeper flavor.
    • Cook It Up: Heat a little oil in a skillet over medium-high heat. Add the marinated chicken and cook, stirring occasionally, for 5-7 minutes, or until browned and cooked through. The yogurt helps create a wonderfully tender texture.
    • Serve and Enjoy: Serve your Indian-spiced chicken with warm naan bread or fluffy rice. A side of cucumber raita (yogurt with cucumber) adds a refreshing touch. This is one of our favorite family-friendly meals.

    Recipesmondial Tip: If you don’t have all the individual spices, a good quality curry powder is a convenient shortcut. For a richer sauce, try adding a can of diced tomatoes or a splash of coconut milk. This variation creates another simple dinner that’s ready in no time.

    Sweet and Sour Chicken

    A beloved classic worldwide, sweet and sour chicken wins everyone over with its irresistible balance of tangy and savory flavors. This takeout-style version is surprisingly easy to make at home with fresh ingredients, making it an excellent choice for a quick weeknight meal.

    Follow these simple steps for a perfect Sweet and Sour Chicken:

    • Prepare Your Chicken: Cut boneless, skinless chicken breasts into 1-inch pieces and toss them with a little cornstarch to help them get crispy.
    • Sauté the Chicken: Heat a bit of oil in a large skillet or wok over medium-high heat. Add the chicken pieces and cook until golden brown and cooked through. Remove the chicken from the pan and set it aside.
    • Whip Up the Sauce: In the same pan, add sliced bell peppers (red and green work well) and chopped onion. Sauté for a few minutes until slightly softened. While the vegetables cook, whisk the sauce ingredients in a small bowl: combine ketchup, rice vinegar, soy sauce, a little sugar or honey, and a teaspoon of cornstarch mixed with water.
    • Combine and Serve: Pour the sauce over the vegetables and cook, stirring, until it thickens. Return the cooked chicken to the pan along with some pineapple chunks for extra sweetness. Toss everything to coat evenly and serve immediately over steamed white rice.

    Recipesmondial Tip: For extra crunch, you can lightly bread the chicken before frying. Simply dip the pieces in egg, then in a mix of flour and seasoning. You can also add other vegetables like snap peas or carrots to make it an even healthier chicken breast recipe.

    Simple Mexican Chicken Fajitas

    Fajitas are a vibrant and interactive meal perfect for a fun family dinner or for entertaining friends. This easy recipe delivers bold, satisfying flavors and is quick to prepare. Best of all, it’s highly customizable—everyone at the table can build their own perfect fajita!

    Here’s how to create your own Simple Mexican Chicken Fajitas:

    • Slice and Season Chicken: Slice boneless, skinless chicken breasts into thin strips and place them in a bowl. Add a generous amount of store-bought fajita seasoning, or make your own simple mix of chili powder, cumin, paprika, garlic powder, and onion powder. Toss to coat the chicken thoroughly.
    • Chop Your Veggies: Slice bell peppers of various colors (red, yellow, green) and an onion into thin strips. This will add fantastic flavor and color to your dish.
    • Sauté to Perfection: Heat a tablespoon of oil in a large skillet or cast-iron pan over medium-high heat. Add the seasoned chicken strips and cook for 5-7 minutes, stirring, until they are mostly cooked through. Add the sliced peppers and onions to the pan and continue to cook for another 5-8 minutes, stirring often, until the vegetables are tender-crisp.
    • Assemble Your Fajitas: Warm some tortillas (corn or flour) in a dry skillet, the microwave, or the oven. Serve the sizzling chicken and vegetable mixture immediately with a variety of toppings, such as salsa, guacamole, sour cream, shredded cheese, and lime wedges.

    Recipesmondial Tip: If you don’t have a large enough skillet, cook the chicken and vegetables in batches to prevent overcrowding the pan, which can steam the ingredients instead of searing them. For an even quicker meal, use pre-cut chicken or vegetables—a great meal prep tip to reduce cooking time.

    Frequently Asked Questions About Cooking Chicken Breast

    Can I put raw chicken in an air fryer?

    Yes, you absolutely can. An air fryer is a fantastic tool that uses hot air circulation to cook raw chicken evenly and quickly. This method results in tender, juicy chicken with a lovely, crisp exterior.

    It’s one of the easiest ways to get a healthy chicken dinner on the table fast. For the best results, just follow these simple steps.

    • Preheat your air fryer: Always preheat your air fryer to the recommended temperature to ensure the chicken cooks evenly.
    • Don’t overcrowd the basket: Arrange the chicken in a single layer. Overlapping pieces will steam instead of crisping, so giving them space ensures they cook consistently.
    • Season well: Season your boneless, skinless chicken breast with your favorite spices.
    • Check doneness: Always use a meat thermometer. To be safe to eat, chicken breast must reach an internal temperature of 165°F (74°C) [5].

    How do you cook chicken breast in the oven without drying it out?

    Nobody wants dry chicken, but achieving a juicy, oven-baked breast can be tricky. Luckily, several simple methods can help you lock in moisture for perfectly tender results every time.

    • Brine your chicken: Soaking chicken in a simple brine (a saltwater solution) adds moisture and significantly enhances flavor. Even a quick 15-30 minute brine makes a difference.
    • Marinate for flavor and tenderness: Marinades with acids (like lemon juice or vinegar) and oils help break down tough fibers to keep the meat moist and flavorful.
    • Pound it thin: Pound thicker chicken breasts to an even thickness to ensure they cook uniformly.
    • Use a meat thermometer: Overcooking is the primary cause of dryness. Use a meat thermometer and remove the chicken from the oven as soon as it reaches an internal temperature of 165°F (74°C) [6].
    • Cover with foil: Loosely tent the chicken with foil for part of the baking time to trap steam and moisture. Remove the foil at the end to allow the chicken to brown.
    • Lower heat, longer time: Baking at a slightly lower temperature for a longer period allows the chicken to cook more gently, which can help it retain moisture.
    • Rest the chicken: Always let the chicken rest for 5-10 minutes after taking it out of the oven. This allows the juices to redistribute throughout the meat, making it extra juicy.

    How do you cook chicken breast in a pan?

    Pan-searing is a quick method that creates a beautiful golden crust while keeping the inside tender, making it perfect for weeknight dinners. Follow this step-by-step guide for delicious results.

    1. Prepare the chicken: Pat the boneless, skinless chicken breast dry with paper towels, as excess moisture prevents a good sear. Season generously with salt, pepper, and your favorite spices.
    2. Heat the pan: Heat a large skillet (cast iron or stainless steel works best) over medium-high heat. Add 1-2 tablespoons of oil with a high smoke point, such as avocado, grapeseed, or canola oil [7].
    3. Sear the chicken: Once the oil shimmers, carefully place the chicken in the hot pan. To ensure a good crust, do not overcrowd it. Cook in batches if needed.
    4. Cook without moving: Sear the first side for 5-7 minutes without moving the chicken. This is crucial for developing a deep golden-brown crust.
    5. Flip and finish: Flip the chicken and continue cooking for another 5-7 minutes. The exact time will depend on the thickness of the meat.
    6. Check for doneness: Use a meat thermometer to confirm the internal temperature has reached 165°F (74°C) in the thickest part.
    7. Rest: Transfer the chicken to a cutting board and let it rest for 5 minutes before slicing. This step is essential for keeping the chicken juicy.

    What temperature should chicken breast be cooked to?

    For food safety, chicken breast must be cooked to an internal temperature of 165°F (74°C) [5]. Reaching this temperature ensures that harmful bacteria like Salmonella are destroyed.

    The only way to accurately check for doneness is with a reliable meat thermometer. Insert the probe into the thickest part of the breast, making sure to avoid touching any bone.

    Cooking to the correct temperature not only keeps your food safe but also helps you avoid the common pitfalls of undercooked or dry, overcooked chicken. It’s the key to delicious and safe results every time.


    Sources

    1. https://fdc.nal.usda.gov/fdc-app.html#/food-details/171057/nutrients
    2. https://www.fsis.usda.gov/food-safety/safe-food-handling-and-preparation/food-safety-basics/safe-minimum-internal-temperature-chart
    3. https://www.fsis.usda.gov/food-safety/safe-food-handling-and-preparation/food-safety-basics/safe-internal-temperatures
    4. https://www.healthline.com/nutrition/one-pan-meals
    5. https://www.foodsafety.gov/food-safety-charts/safe-minimum-cooking-temperatures
    6. https://www.fsis.usda.gov/food-safety/safe-food-handling-and-preparation/food-safety-basics/safe-internal-temperature-chart
    7. https://www.fryingoil.com/post/oil-smoke-points
  • 80+ Best Soups and Salads Recipes for Easy, Flavorful Meals

    80+ Best Soups and Salads Recipes for Easy, Flavorful Meals

    Soups and salads are incredibly versatile dishes that serve as perfect appetizers, light lunches, or hearty main courses. They provide a simple and delicious way for home cooks to incorporate a wide variety of vegetables, proteins, and grains into their diet, with endless recipe variations from comforting chicken soup to refreshing Caesar salad.

    Do you ever stare into the fridge, wondering what to make? Or perhaps you feel overwhelmed by complex recipes after a long day. You want to prepare healthy, tasty meals quickly, but planning family-friendly meals can feel like a chore that takes the joy out of cooking. What if there was a simple, delicious solution to boost your confidence and make mealtime exciting again?

    At Recipesmondial, we believe cooking should be an enjoyable experience, not a source of frustration. That’s why we’ve gathered over 80 of our best soup and salad recipes, designed for home cooks of all skill levels. Whether you’re craving a hearty simple dinner recipe like classic chicken noodle soup or a light salad for a quick lunch, our step-by-step guidance makes creating flavorful meals easy.

    This collection is packed with easy recipes that deliver reliable results, helping you make mealtime decisions with confidence. From comforting classics like a warming chicken soup to vibrant dishes perfect for meal prep, quick lunches, or even healthy snacks, you’ll find inspiration to transform everyday ingredients into something delicious. Now, let’s dive into why soups and salads are perfect for any meal, anytime.

    Why Are Soups and Salads Perfect for Any Meal?

    Soups and salads are more than just side dishes. They are versatile, delicious, and practical options for any meal of the day. Whether you need a quick lunch, a satisfying dinner, or even a light breakfast, these dishes deliver.

    At Recipesmondial, we know home cooks want easy, reliable, and tasty solutions. That’s where soups and salads come in. They help you transform simple ingredients into flavorful meals, making cooking a stress-free experience.

    Why Soups and Salads Are Your Mealtime Heroes

    Here’s why making soups and salads a regular part of your routine can solve common mealtime dilemmas and make cooking more enjoyable.

    • Effortless Preparation for Busy Lives: Many soup and salad recipes are incredibly quick and simple. You can whip up a fresh tomato soup recipe or a classic chicken Caesar salad in just minutes. This makes them perfect for busy weeknights when you need a fast, satisfying meal without the stress of a complex recipe.
    • Packed with Nutrition and Flavor: Soups and salads make it easy to pack your meals with vegetables, lean proteins, and healthy fats. A hearty homemade chicken noodle soup, for example, can be a complete, nourishing meal in one bowl. Likewise, a colorful salad can be customized with your favorite greens and proteins for a balanced dish. These meals are a great way to meet daily vegetable intake recommendations [1].
    • Incredible Versatility and Customization: The possibilities are endless. Soups and salads can be easily adapted to fit any dietary need or preference.

      You can swap ingredients, adjust seasonings, and make these dishes your own. Their flexibility makes them perfect for family-friendly meals where everyone can find something to enjoy.

    • Budget-Friendly and Reduces Waste: Soups are an excellent way to use up leftover vegetables and pantry staples, which helps reduce waste and save money. Salads can also be built from ingredients you already have on hand. This practical approach helps you create delicious, economical meals while discovering new ways to use everyday ingredients.
    • Perfect for Meal Prep: Many soups and salads store well, making them ideal for meal prep. Cook a large batch of chicken soup over the weekend, or prepare your salad components in advance. This simple strategy helps you plan weekly meals efficiently, so you always have a quick, flavorful option ready to go.
    • Comfort and Warmth (or Refreshment): A warm bowl of roasted tomato soup offers unmatched comfort on a chilly day. Conversely, a crisp, cool salad is wonderfully refreshing in warmer weather. These dishes can be tailored to suit any mood or season.

    At Recipesmondial, our goal is to provide approachable guidance that helps you feel confident in the kitchen. Soups and salads are a fantastic starting point for building your skills and discovering new flavors. With our step-by-step instructions, you can move from uncertainty to confidence, making mealtime an enjoyable experience for everyone.

    Our Favorite Comforting & Classic Soup Recipes

    A steaming bowl of creamy tomato soup with basil and olive oil, next to a grilled cheese sandwich.
    Professional food photography, photorealistic, high-quality food magazine photo of a rustic ceramic bowl filled with creamy, rich tomato soup, garnished with fresh basil leaves and a drizzle of olive oil. In the background, out of focus, a slice of golden-brown grilled cheese sandwich with melted cheese peeking out. The lighting is warm and inviting, highlighting the steam gently rising from the soup. Shot from a slightly overhead angle on a wooden table, with a linen napkin. No artistic interpretations, no illustrations, no vector graphics, no abstract art.

    Nothing says comfort quite like a warm bowl of soup. At Recipesmondial, we believe everyone can enjoy cooking flavorful, comforting meals. Our curated collection of favorite soup recipes is designed for every home cook, offering easy-to-follow, step-by-step guidance. You’ll gain confidence in the kitchen with these soups and other simple dinner recipes.

    Say goodbye to complex instructions and get ready to create heartwarming, family-friendly meals. Perfect for any occasion, these classics are ideal for a quick lunch or a cozy dinner. Each recipe focuses on taste and simplicity, making cooking enjoyable for everyone.

    The Ultimate Homemade Chicken Noodle Soup

    As the quintessential comfort food, our homemade chicken noodle soup is bursting with flavor. It’s perfect for chilly days or when you simply need a pick-me-up. Packed with nourishing ingredients, this classic recipe is a true family favorite that delivers comfort in every spoonful.

    Here’s why you’ll love this recipe:

    • Simple Ingredients: You likely have most items in your pantry already.
    • Rich Broth: We guide you in creating a deeply flavorful and savory broth.
    • Hearty & Satisfying: It’s packed with tender chicken, vegetables, and noodles.

    Expert Tip: For a quicker version of this easy chicken noodle soup, use a store-bought rotisserie chicken. Add the shredded meat during the last 15 minutes of cooking for a fantastic quick meal solution.

    Creamy Roasted Tomato Soup

    Elevate your tomato soup experience with our creamy roasted version. Roasting the tomatoes brings out their incredible sweetness and depth, transforming humble ingredients into a rich, velvety soup that’s far superior to any canned version. For the ultimate comfort meal, enjoy it with a grilled cheese sandwich.

    What makes this soup a standout:

    • Deep Flavor: Roasting intensifies the tomato’s natural sweetness and taste.
    • Velvety Texture: A touch of cream makes the final soup irresistibly smooth.
    • Easy Process: Our step-by-step guidance simplifies the roasting and blending process.

    Substitution Idea: No fresh tomatoes? You can use high-quality canned whole peeled tomatoes. Roast them briefly to achieve a similar depth of flavor. This makes it an excellent beginner-friendly recipe.

    Classic French Onion Soup

    Don’t be intimidated by French onion soup! Our recipe makes this bistro staple approachable for any home cook. It features perfectly caramelized onions swimming in a savory beef broth, all finished with a crusty bread topping and melted Gruyère cheese. While this soup is a true showstopper, it’s surprisingly simple to master.

    The secret to our special French onion soup:

    • Perfectly Caramelized Onions: We show you the trick to achieving sweet, golden onions.
    • Rich, Deep Broth: This is the cornerstone of its incredible, savory flavor.
    • Golden Cheesy Topping: The ultimate comforting and iconic finish.

    Cooking Confidence Tip: Patience is key when caramelizing onions. Cook them slowly over medium-low heat to bring out their natural sugars. Do not rush this step, as it builds the foundation for this amazing soup.

    Hearty Potato Soup (Crockpot & Stovetop)

    Our hearty potato soup is the ultimate in customizable comfort. This incredibly versatile, family-friendly meal fits any schedule, as we offer instructions for both crockpot and stovetop methods. Enjoy a rich, creamy soup topped with your favorite fixings—like bacon, cheese, or chives—for a satisfying and flavorful meal.

    Why this recipe is a staple:

    • Choose Your Method: Use a Crockpot for hands-off cooking or a stovetop for quicker results.
    • Customizable: Feel free to add your preferred toppings and mix-ins.
    • Budget-Friendly: This soup is made with simple, affordable ingredients.

    Meal Prep Guidance: This soup reheats beautifully. Make a big batch on the weekend and enjoy it throughout the week for easy lunches or dinners.

    Rich Butternut Squash Soup

    Embrace the vibrant flavors of autumn with our rich butternut squash soup. Naturally sweet with a silky texture, this healthy and satisfying soup is a wonderful way to enjoy seasonal produce. We add incredible depth by roasting the squash before blending, creating a flavorful and rewarding meal that’s surprisingly simple to make.

    Benefits of this vibrant soup:

    • Naturally Sweet: Roasting butternut squash lends a delightful, deep sweetness.
    • Healthy & Wholesome: This is a delicious and easy way to get your vegetables.
    • Simple Steps: Roasting and blending make this soup surprisingly easy to prepare.

    Flavor Booster: A pinch of nutmeg or a sprig of fresh sage complements butternut squash beautifully. Add your choice during the last few minutes of cooking.

    Simple Lentil Soup

    Looking for a healthy, protein-packed, and budget-friendly meal? Our simple lentil soup is the perfect answer. This incredibly nutritious and comforting recipe uses everyday ingredients, making it ideal for beginner cooks. Because it tastes even better the next day, this soup is an excellent choice for meal prep, quick lunches, or simple dinners.

    Top reasons to make this soup:

    • High in Protein & Fiber: It keeps you feeling full and satisfied for hours.
    • Very Affordable: Lentils are a nutritious and cost-effective ingredient.
    • One-Pot Wonder: This recipe minimizes cleanup and fuss in the kitchen.

    Quick Tip: A squeeze of fresh lemon juice at the very end brightens all the flavors. This simple addition makes a big difference!

    Classic Minestrone Soup

    Our classic minestrone is a true celebration of fresh vegetables. Packed with flavor, this versatile Italian soup combines a rich tomato broth with pasta, beans, and an array of seasonal veggies. It’s a hearty and satisfying family-friendly meal that you can easily adapt to what you have on hand, ensuring a flavorful result every time.

    Why minestrone is a must-try:

    • Vegetable-Packed: A great way to enjoy a wide variety of fresh produce.
    • Customizable: Use your favorite seasonal vegetables or whatever you have in the fridge.
    • Complete Meal: With pasta and beans, it’s a filling dish all on its own.

    Meal Prep Hint: If you plan to make a big batch for later, cook the pasta separately and add it just before serving. This keeps the pasta from getting too soft in the leftover soup.

    Hearty & Satisfying Salad Recipes Everyone Will Love

    A large, colorful cobb salad with chicken, eggs, avocado, bacon, tomatoes, and blue cheese on a white platter.
    Professional food photography, photorealistic, high-quality food magazine photo of a vibrant, hearty cobb salad presented on a large white platter. The salad features crisp mixed greens, perfectly grilled chicken breast slices, hard-boiled egg quarters, ripe avocado cubes, crispy bacon bits, cherry tomatoes, and crumbled blue cheese, all arranged beautifully. A small glass bowl of vinaigrette dressing sits beside the platter. Bright, natural lighting emphasizes the freshness and texture of the ingredients. Shot from a slightly elevated angle. No artistic interpretations, no illustrations, no vector graphics, no abstract art.

    Salads often get a bad rap for being “just a side” or too light. But a great salad can be the star of any meal, and we’re here to show you how. Forget the idea that salads are only for summer. Our collection features hearty, satisfying recipes that are flavorful, filling, and perfect for any time of year.

    Each recipe transforms simple ingredients into a delicious, main-course-worthy dish. Designed for approachable home cooking, these meals build confidence in the kitchen and help you enjoy cooking without stress. Discover new favorites perfect for busy weeknights or relaxed weekend gatherings.

    Classic Chicken Caesar Salad

    A timeless favorite for a reason, the Classic Chicken Caesar Salad is both satisfying and packed with flavor. This isn’t just a side dish; it’s a complete meal. Our straightforward recipe makes it easy for anyone to create this delicious classic at home.

    We combine crisp romaine lettuce with tender, perfectly cooked chicken, then top it with crunchy croutons and a rich, creamy Caesar dressing. It’s a quick, indulgent meal that the whole family will love.

    • Pro Tip: For extra crunch, toast your croutons in a pan with a little garlic powder and olive oil.
    • Substitution: If you don’t have romaine, use another sturdy leafy green.

    The Best Chicken Salad Recipe (for Sandwiches or Greens)

    Versatile and flavorful, this chicken salad is a staple for quick and easy lunches. It’s far from boring and can be served in many ways, making it perfect for meal prep or a simple dinner.

    Our recipe combines tender shredded chicken, crisp celery, and a creamy, tangy dressing for a satisfying texture and taste. Enjoy it on its own, scooped onto fresh greens, or piled high in a sandwich. It’s a time-saving dish that’s incredibly simple to put together for a busy week.

    • Meal Prep Idea: Make a big batch at the start of the week. Enjoy it for several quick lunches.
    • Variation: Add chopped grapes or toasted pecans for a touch of sweetness and crunch.

    Easy Pasta Salad (Italian & Greek Variations)

    Pasta salad is the ultimate crowd-pleaser. Hearty, colorful, and endlessly customizable, it’s a perfect choice for picnics, potlucks, and family meals. We offer two delicious variations to suit your taste: Italian and Greek.

    The Italian version bursts with savory deli meats, cheeses, and olives in a tangy dressing. For a different flavor profile, the Greek variation features feta cheese, Kalamata olives, and fresh vegetables. Our step-by-step guidance makes either version effortless to prepare.

    • Italian Twist: Add sun-dried tomatoes and fresh basil for extra flavor.
    • Greek Secret: Use good quality olive oil and a squeeze of fresh lemon juice in the dressing.

    Classic American Potato Salad

    Nothing says comfort quite like Classic American Potato Salad. A staple at barbecues and family gatherings, this hearty side can also be enjoyed as a surprisingly satisfying light meal.

    Our recipe creates the perfect blend of creamy, tangy dressing with tender potatoes and crisp vegetables. It’s designed to deliver reliable, delicious results every time, helping you cook with confidence and bring a classic dish to the table.

    • Common Mistake: Don’t overcook your potatoes! They should be tender but still firm.
    • Tip for Flavor: Dress the potatoes while they are still warm to absorb more flavor.

    Creamy Macaroni Salad

    Another beloved classic, Creamy Macaroni Salad is incredibly easy to make. This satisfying dish is a fantastic addition to any potluck or family meal and serves as a delightful alternative to potato salad.

    Our recipe guarantees a perfectly balanced, creamy texture with just the right amount of tang. It combines tender macaroni pasta, crisp veggies, and a rich dressing for a simple dish that delivers big on flavor.

    • Freshness Factor: Always use fresh celery and onion for the best crunch.
    • Make Ahead: This salad tastes even better after chilling for a few hours.

    Flavorful Broccoli Salad

    For a vibrant and nutritious option, our Flavorful Broccoli Salad is a must-try. This surprisingly hearty dish packs a punch of flavor and texture, making it substantial enough for a light lunch or a standout side.

    We combine crisp broccoli florets with savory bacon, sweet dried cranberries, and crunchy sunflower seeds. A sweet and tangy dressing brings it all together beautifully, creating an impressive dish that’s easy to prepare.

    Protein-Packed Chickpea Salad

    Looking for a satisfying plant-based option? Our Protein-Packed Chickpea Salad is full of flavor and texture. It’s a perfect choice for healthy, balanced meals and works wonderfully for meal prep.

    Mashed chickpeas create a creamy base that mimics classic tuna or chicken salad. We then mix in crisp vegetables, fresh herbs, and a zesty dressing for a delightful finish. This is a fantastic recipe for anyone exploring plant-based eating, proving that healthy food can be both delicious and filling.

    • Serving Suggestion: Enjoy it in lettuce cups, on whole-grain bread, or as a dip with crackers.
    • Flavor Variation: Add a pinch of curry powder for an Indian-inspired twist.

    How to Master the Perfect Caesar Salad

    What are the Ingredients for Caesar Salad?

    A truly delicious Caesar salad starts with a few key ingredients—and you don’t need anything fancy. In fact, you probably have many of them in your kitchen already. This classic salad is simple and fresh, making it a fantastic, beginner-friendly recipe for any home cook.

    Here are the essential components for a traditional Caesar salad:

    • Crisp Romaine Lettuce: Fresh, crunchy hearts of romaine are the foundation. For the best texture, make sure the lettuce is cold and thoroughly dried.
    • Homemade Croutons: Toasted bread cubes add a wonderful crunch. You can easily make them with day-old bread, olive oil, and garlic.
    • Parmesan Cheese: Freshly grated Parmesan Reggiano makes a huge difference. Avoid pre-shredded varieties for the best taste and texture.
    • Creamy Caesar Dressing: This is the heart of the salad. A classic dressing includes:
      • Egg yolk (or mayonnaise for a simpler, safer option)
      • Olive oil
      • Fresh lemon juice
      • Worcestershire sauce
      • Dijon mustard
      • Minced garlic
      • Anchovy fillets (optional, but they add incredible depth without tasting “fishy”)

    Together, these straightforward ingredients create a surprisingly complex and satisfying dish—a flavorful meal made easy.

    What Are Common Caesar Salad Mistakes?

    Even simple recipes have common pitfalls, but these tips will help you master a Caesar salad in no time. Avoiding these mistakes ensures you get perfect results every time with less stress.

    • Over-Dressing the Lettuce: Too much dressing will make the lettuce soggy. Add it a little at a time and toss gently until the leaves are lightly coated. You can always add more, but you can’t take it away.
    • Wilted or Wet Lettuce: Always start with very cold, dry lettuce. A salad spinner is a great tool for this. Excess water dilutes the dressing and makes the lettuce limp, which ruins the salad’s overall texture.
    • Stale or Store-Bought Croutons: Pre-packaged croutons often lack the flavor and texture of homemade ones, which are surprisingly easy to make and will elevate your salad immediately.
    • Using Pre-Grated Parmesan: Pre-shredded Parmesan often contains anti-caking agents, which can give it a powdery texture and dull the flavor. Freshly grate your Parmesan just before serving for the best results.
    • Skipping the Anchovies (or Worcestershire): Anchovies are a traditional ingredient that adds a salty, umami depth that is hard to replicate. If you strongly dislike them, Worcestershire sauce offers a similar savory kick, as it often contains anchovy extract [2].
    • Not Seasoning Properly: Taste your dressing as you make it, and adjust the salt, pepper, and lemon juice to your preference. A well-seasoned dressing is crucial for a flavorful salad.

    By keeping these points in mind, you can confidently create a stunning Caesar salad that tastes better than any restaurant version.

    What Goes on a Chicken Caesar Salad?

    By adding chicken, a classic Caesar salad transforms from a simple side into a substantial, family-friendly meal. This protein-packed version is perfect for a satisfying lunch or a light dinner, making it one of our favorite quick meals.

    Here is how to build the perfect chicken Caesar salad:

    • The Classic Base: Start with all the traditional Caesar ingredients: crisp romaine, homemade croutons, freshly grated Parmesan, and that amazing Caesar dressing.
    • Cooked Chicken Breast: Lean protein is key. You have several easy, delicious options for preparing the chicken:
      • Grilled Chicken: Marinate chicken breasts for 30 minutes in olive oil, lemon juice, garlic, salt, and pepper. Grill until cooked through and slightly charred, then slice thinly against the grain.
      • Baked Chicken: Season chicken breasts and bake at 400°F (200°C) for 20-25 minutes, or until the internal temperature reaches 165°F (74°C) [3]. Shred or dice when done.
      • Pan-Seared Chicken: Cook chicken breasts quickly in a hot skillet with a little olive oil to create a lovely golden crust.
      • Rotisserie Chicken: For the ultimate quick meal, use a pre-cooked rotisserie chicken. Shredding the meat is an incredibly easy and flavorful way to finish your salad.
    • Optional Toppings:
      • Cherry tomatoes for a pop of color and sweetness.
      • Sliced avocado for a creamy texture and healthy fats.
      • Crispy bacon bits for an extra savory crunch.

    Building a chicken Caesar salad is a simple way to create a flavorful meal and solve any weeknight dinner dilemma.

    What Goes Well With Caesar Salad?

    While a Caesar salad (especially with chicken) is often a meal in itself, it also pairs beautifully with other dishes to create a more satisfying and well-rounded meal. These ideas are great for family dinners or entertaining guests.

    • Classic Soups: A warm bowl of soup offers a wonderful contrast to the cool, crisp salad. Consider these options:
      • A creamy tomato soup recipe, like our Creamy Roasted Tomato Soup.
      • A light and comforting chicken noodle soup.
      • Our simple lentil soup for a hearty vegetarian option.
    • Garlic Bread or Breadsticks: Extra crunchy bread is always a welcome addition and is perfect for soaking up any leftover dressing.
    • Pasta Dishes: A lighter pasta dish works well alongside the salad. Think of a simple pasta primavera or spaghetti with marinara sauce.
    • Grilled or Roasted Vegetables: Sides like asparagus, broccoli, or bell peppers offer extra nutrients and flavors. Roasting brings out their natural sweetness.
    • Other Proteins: If you are serving a Caesar salad without chicken, consider pairing it with another protein, such as:
      • Grilled salmon or shrimp for a seafood twist.
      • A perfectly seared steak for a more indulgent meal.
      • Black bean burgers for a vegetarian option.

    These pairings help you create diverse, flavorful meals that can be easily adapted to your family’s preferences.

    Globally-Inspired Soups and Salads to Try

    A bowl of Thai coconut curry soup next to a bowl of Mediterranean quinoa salad, showcasing global flavors.
    Professional food photography, photorealistic, high-quality food magazine photo showcasing two distinct globally-inspired dishes side-by-side on a light, textured surface. On the left, a vibrant bowl of Thai coconut curry soup, garnished with fresh cilantro, a lime wedge, and chili flakes. On the right, a fresh, colorful Mediterranean quinoa salad with chopped cucumbers, tomatoes, red onion, feta cheese, and fresh parsley, drizzled with olive oil. Both dishes are presented in elegant, earthy-toned ceramic bowls, with bright, natural light emphasizing their colors and textures. No artistic interpretations, no illustrations, no vector graphics, no abstract art.

    Ready to explore new tastes and expand your cooking horizons? At Recipesmondial, we love celebrating global flavors. We believe delicious, authentic dishes can be easy to make at home—no culinary expertise required.

    This section brings you comforting and exciting soups and salads from around the world. These recipes are perfect for anyone seeking quick, reliable meal solutions or hoping to discover new, simple dishes.

    Get ready to impress your family and friends with these easy-to-make, flavorful meals. From hearty Eastern European stews to light Asian broths, there is a global delight for every palate.

    Ukrainian Borscht Recipe

    Dive into the vibrant, soulful flavors of Ukrainian Borscht. This beautiful beet soup is a true global comfort food, featuring a rich, sweet-and-sour profile and packed with healthy vegetables. Many consider it the national dish of Ukraine [source: https://www.smithsonianmag.com/travel/true-borscht-180962322/].

    Our approachable recipe makes this classic easy to prepare at home. It’s a fantastic, family-friendly meal, perfect for chilly evenings.

    • Key Ingredients: Beets, cabbage, potatoes, carrots, and a savory broth.
    • Practical Tip: Serve your Borscht with a dollop of sour cream or a sprinkle of fresh dill for a lovely creamy finish.
    • Variations: Some versions include meat like beef or pork, but a vegetarian version is equally satisfying.

    Simple Miso Soup

    Experience the delicate, umami-rich taste of Simple Miso Soup. This traditional Japanese starter is incredibly quick to prepare, making it a perfect light meal or appetizer.

    Known for its health benefits, miso soup supports gut health due to its fermented ingredients [source: https://www.healthline.com/nutrition/miso-soup-benefits], making it a wonderfully nutritious choice.

    • Key Ingredients: Miso paste, dashi broth, soft tofu, and dried wakame seaweed.
    • Practical Tip: Never boil miso paste. Add it at the end, after removing the soup from the heat, to preserve its delicate flavor and beneficial enzymes.
    • Substitutions: Feel free to add thinly sliced mushrooms or green onions for extra texture.

    Spicy Tom Yum Soup (Thai Hot and Sour Soup)

    Ignite your taste buds with Spicy Tom Yum Soup. This iconic Thai hot and sour soup is a burst of exciting flavors, perfectly balancing spicy, sour, salty, and sweet notes.

    Tom Yum is widely popular in Thailand and internationally [source: https://www.thaitradeusa.com/history-of-tom-yum-goong/]. Our easy recipe helps you recreate this authentic experience at home. It’s a Thai classic you can now master in your own kitchen.

    • Key Ingredients: Lemongrass, galangal, kaffir lime leaves, chili, lime juice, and often shrimp.
    • Practical Tip: Adjust the amount of chili paste or fresh chilies to suit your preferred spice level.
    • Variations: You can use chicken (Tom Yum Gai) or mushrooms (Tom Yum Hed) instead of shrimp.

    Authentic Wonton Soup

    Savor the comforting warmth of Authentic Wonton Soup. This beloved Chinese soup, featuring delicate wontons in a savory, clear broth, is a simple dinner that feels special.

    While making wontons from scratch can be fun, using quality store-bought wontons is a great shortcut. This makes the soup a perfect family-friendly meal for busy weeknights.

    • Key Ingredients: Pork or shrimp wontons, chicken broth, bok choy, and green onions.
    • Practical Tip: If using frozen wontons, cook them directly in the broth. They are done when they float to the top.
    • Substitutions: Add a dash of sesame oil or white pepper to the broth for extra depth of flavor.

    Italian Wedding Soup

    Discover the heartwarming embrace of Italian Wedding Soup. Despite its name, this soup isn’t just for weddings. The “wedding” refers to the delightful marriage of flavors between small meatballs, greens, and pasta in a rich broth [source: https://www.foodreference.com/html/artitalianweddingsoup.html].

    It’s a satisfying and easy-to-make dish that’s a favorite for families. Our step-by-step guidance makes it simple.

    • Key Ingredients: Tiny meatballs, acini de pepe pasta, spinach or escarole, and chicken broth.
    • Practical Tip: For quick meatballs, use a small cookie scoop to portion them evenly.
    • Variations: You can use ground turkey or chicken for lighter meatballs.

    Zuppa Toscana (Olive Garden Copycat)

    Bring the flavors of your favorite restaurant home with our Zuppa Toscana copycat recipe. This creamy, hearty soup, popularized by Olive Garden [source: https://www.eater.com/2019/3/13/18263155/olive-garden-history-breadsticks-italian-american-food], is incredibly satisfying. This rich soup is surprisingly simple to make.

    A rich and indulgent comfort food, our simple recipe lets you make this cozy meal without any stress. It is perfect for a night in.

    • Key Ingredients: Spicy Italian sausage, potatoes, kale, heavy cream, and bacon.
    • Practical Tip: Cook the bacon until crispy before browning the sausage to add extra flavor to the pot.
    • Substitutions: Use turkey sausage for a slightly lighter version, or use Swiss chard instead of kale if preferred.

    Mexican Taco Soup & Taco Salad

    Spice up your mealtime with our versatile Mexican Taco Soup and Taco Salad recipes. These are perfect for quick, customizable, and family-friendly meals.

    Enjoy the bold flavors of Tex-Mex cuisine. Our simple recipes let you choose between a warm, comforting soup or a fresh, crisp salad—both are delicious and easy to prepare.

    • Key Ingredients (Soup): Ground beef or turkey, beans, corn, diced tomatoes, taco seasoning, and broth.
    • Key Ingredients (Salad): Seasoned ground meat, lettuce, tomatoes, cheese, crushed tortilla chips, and a zesty dressing.
    • Practical Tip: Set up a “taco bar” with toppings like avocado, sour cream, cilantro, and jalapeños so everyone can customize their meal.
    • Variations: For a vegetarian version, use extra beans and lentils or a plant-based ground meat substitute.

    Classic Greek Salad

    Refresh your palate with a Classic Greek Salad. A staple of Mediterranean cuisine, this simple yet flavorful salad highlights fresh ingredients and vibrant colors.

    It’s a fantastic healthy option that works as a quick lunch or a light dinner. Our beginner-friendly recipe makes it a cinch to prepare.

    • Key Ingredients: Tomatoes, cucumbers, red onion, Kalamata olives, feta cheese, and bell peppers.
    • Practical Tip: Using good quality olive oil for the dressing makes a significant difference in flavor.
    • Substitutions: Add grilled chicken or chickpeas for extra protein to turn it into a more substantial meal.

    Quick & Healthy Recipes for Busy Weeknights

    Life gets busy, and weeknights can feel like a race against the clock. Cooking a healthy, delicious meal might seem like a challenge, but it doesn’t have to be overwhelming. Here at Recipesmondial, we understand you want stress-free cooking and simple, flavorful meals.

    This section is your go-to guide for quick and healthy recipes perfect for those demanding evenings. We focus on simple, tasty dinner recipes that boost your cooking confidence. Using everyday ingredients, these beginner-friendly dishes include step-by-step guidance. It’s time to say goodbye to takeout and hello to easy, satisfying homemade meals!

    We’ll show you how to whip up nourishing soups and refreshing salads in no time. Get ready to transform your weeknights by discovering how enjoyable and organized cooking can be.

    Easy Vegetable Soup

    A simple vegetable soup is a true lifesaver on busy weeknights. It’s a comforting, healthy meal that comes together quickly. Packed with essential nutrients, this soup is also incredibly versatile. You can use whatever vegetables you have on hand, which makes it perfect for reducing food waste.

    Why you’ll love it:

    • Budget-Friendly: Uses common, inexpensive ingredients.
    • Highly Customizable: Swap vegetables based on preference or season.
    • Great for Meal Prep: Makes a large batch for lunches all week.
    • Beginner-Friendly: Simple chopping and simmering are the main steps.

    To make this soup, start with a base of onion, carrots, and celery. Add your favorite broth, then toss in any seasonal vegetables like zucchini, green beans, or potatoes. Simmer until the vegetables are tender, season well, and enjoy an easy, home-cooked meal.

    Quick Tips:

    • Add a can of diced tomatoes for extra flavor.
    • Use a good quality vegetable or chicken broth, as this adds significant depth to the flavor.
    • For a protein boost, stir in cooked lentils or chickpeas at the end.
    • Fresh herbs like parsley or dill brighten the flavor.

    Instant Pot Chicken Noodle Soup

    When you crave a comforting classic, our Instant Pot Chicken Noodle Soup is the answer. This recipe delivers all the flavor of homemade chicken noodle soup in a fraction of the time, making it a perfect family-friendly meal. You can have a warm bowl on the table fast—no more waiting hours for the chicken to simmer!

    Benefits of using an Instant Pot:

    • Speed: Reduces cooking time significantly.
    • One-Pot Meal: Less cleanup afterwards.
    • Consistent Results: Tender chicken and perfectly cooked noodles every time.
    • Hands-Off Cooking: Allows you to focus on other tasks.

    This simple dinner recipe transforms chicken, vegetables, and noodles into a hearty meal. It’s also a fantastic way to boost your confidence in the kitchen as you master the Instant Pot’s basic functions.

    Variations:

    • Use gluten-free noodles for dietary needs.
    • Add different herbs, such as thyme or rosemary.
    • Shred rotisserie chicken for an even quicker start.

    Quick Egg Drop Soup

    Egg drop soup is a delightful and light option for a speedy appetizer or a simple meal. This classic Asian soup is surprisingly easy to make and is ready in just minutes. Its speed makes it an excellent choice for a quick breakfast or light lunch, proving that simple ingredients can create incredible flavor.

    What makes it quick:

    • Minimal ingredients are required.
    • It cooks in under 10 minutes.
    • No complicated techniques are involved.

    The key to perfect egg drop soup is a hot broth and a steady stream of beaten egg, which cooks instantly into delicate ribbons. A touch of sesame oil and green onions provides a beautiful finish. With these simple steps, even new cooks can achieve great results.

    Tips for Success:

    • Use cold eggs; they stream better.
    • Stir the broth gently as you pour in the egg.
    • Add a pinch of white pepper for authentic flavor.
    • A dash of soy sauce enhances the savory notes.

    Refreshing Cucumber Salad (Asian & Creamy Styles)

    A refreshing cucumber salad is the ideal light, crisp side dish or healthy snack. We’ll explore two popular and incredibly simple styles. By providing a wonderful contrast to richer main courses, these salads make a welcome addition to any meal.

    Asian-Style Cucumber Salad:

    • Flavor Profile: Tangy, savory, and a little spicy.
    • Key Ingredients: Cucumbers, rice vinegar, soy sauce, sesame oil, chili flakes.
    • Preparation: Slice cucumbers thinly. Toss with the dressing ingredients. Let it marinate briefly.

    Creamy Cucumber Salad:

    • Flavor Profile: Cool, rich, and slightly sweet.
    • Key Ingredients: Cucumbers, sour cream or Greek yogurt, fresh dill, vinegar, a touch of sugar.
    • Preparation: Slice cucumbers. Mix with the creamy dressing. Serve chilled.

    Perfect for warm weather, both styles offer a delightful crunch and fresh flavor. They also make excellent meal prep additions—just be sure to store the dressing separately if preparing ahead. Cucumbers are naturally hydrating [4].

    Simple Kale Salad with Lemon Dressing

    Kale has a reputation for being super healthy, but it can also be intimidating. Our simple kale salad with lemon dressing makes it easy and approachable. Packed with nutrients and flavor, this healthy snack or hearty side is an easy recipe that builds confidence in the kitchen.

    Key to a great kale salad:

    • Massage the Kale: This softens the leaves and removes bitterness.
    • Bright Dressing: Lemon juice cuts through kale’s strong flavor.
    • Crunchy Add-ins: Nuts or seeds provide texture.

    To prepare, simply wash and destem the kale, then tear it into bite-sized pieces. Drizzle with olive oil and a pinch of salt, then massage it with your hands for a minute or two to tenderize the leaves. Next, whisk together a simple lemon vinaigrette. Toss the kale with the dressing and finish with your favorite toppings, such as toasted almonds, dried cranberries, or grated Parmesan cheese. This salad is also a fantastic meal prep option.

    Dressing Ingredients:

    • Extra virgin olive oil
    • Fresh lemon juice
    • Dijon mustard
    • Salt and black pepper
    • A touch of maple syrup or honey (optional)

    Fresh Watermelon Feta Salad

    For a burst of unexpected flavor, try a fresh watermelon feta salad. This perfect summer dish combines sweet, salty, and tangy notes for a truly delightful experience. It’s an easy recipe that’s perfect for picnics, barbecues, or as a healthy snack.

    Why this combination works:

    • Sweet Watermelon: Juicy and hydrating.
    • Salty Feta: Provides a sharp, briny contrast.
    • Fresh Mint/Basil: Adds aromatic freshness.
    • Tangy Dressing: Often lime or balsamic based.

    Simply cube fresh watermelon, crumble feta cheese over it, and add a handful of fresh mint or basil leaves. Drizzle with a simple dressing of lime juice and a little olive oil. The result is a vibrant, flavorful salad that looks as good as it tastes. While this dish is best prepared just before serving, it also holds up well for a short time, which is helpful for meal planning.

    Serving Suggestions:

    • Alongside grilled chicken or fish.
    • As a light appetizer.
    • For a refreshing dessert on a hot day.

    Quick Corn Salad

    A quick corn salad is a versatile and vibrant dish. It’s perfect for using fresh summer corn but can also be made with frozen or canned corn year-round. This bright, flavorful salad comes together rapidly, making it an excellent family-friendly side dish.

    What you’ll need:

    • Fresh, canned, or frozen corn
    • Red onion or green onions
    • Bell peppers (any color)
    • Fresh herbs like cilantro or parsley
    • A simple vinaigrette

    If using fresh corn, quickly blanch it or cut it from the cob. For frozen corn, simply thaw it. Combine the corn with finely diced red onion, colorful bell peppers, and plenty of fresh cilantro, then toss with a zesty lime vinaigrette. This quick and healthy salad is fantastic as a side dish or as a topping for tacos and grilled meats, adding a pop of fresh flavor to any meal.

    Pro Tip:

    • Roast the corn slightly before adding it to the salad for a smoky depth of flavor.
    • Add a can of black beans for extra protein and fiber.
    • A tiny pinch of chili powder can add a subtle kick.

    Frequently Asked Questions About Soups and Salads

    Is a chicken Caesar salad healthy?

    A chicken Caesar salad can be a delicious and satisfying meal, but its healthiness depends entirely on the ingredients and preparation. While often considered a healthy option, traditional elements like creamy dressing and croutons can add significant calories and fat [5].

    Here’s a breakdown of the nutritional pros and cons:

    • The Good:
      • Lean Protein: Grilled chicken provides an excellent source of lean protein, which helps you feel full and supports muscle health.
      • Leafy Greens: Romaine lettuce offers vitamins K and A, along with some fiber.
    • The Not-So-Good (in large amounts):
      • Dressing: Traditional Caesar dressing is made with olive oil, egg yolks, and Parmesan cheese, making it high in calories and saturated fat.
      • Croutons: Usually fried or baked with oil, croutons are high in refined carbs and calories.
      • Cheese: Parmesan cheese adds extra calories, sodium, and fat.

    At Recipesmondial, we want to help you make smart choices for flavorful meals. You can easily make a chicken Caesar salad a healthy, family-friendly meal with a few simple tweaks:

    • Lighten the Dressing: Make your own using less oil, or try a yogurt-based version. A simple vinaigrette is also a great alternative.
    • Homemade Croutons: Bake whole-wheat bread cubes with a touch of olive oil and herbs, or skip them for a lower-carb option.
    • Control the Cheese: Use Parmesan sparingly. For a cheesy flavor without dairy, try nutritional yeast.
    • Add More Veggies: Boost the nutrient content by adding vegetables like cherry tomatoes, cucumbers, or bell peppers.
    • Watch Portions: Be mindful of how much dressing, cheese, and croutons you use.

    With these adjustments, you can enjoy a delicious and genuinely healthy chicken Caesar salad that fits perfectly into your meal plans.

    What is the classic Caesar salad?

    The classic Caesar salad is a beloved dish known for its distinctive flavor and simple elegance. Credited to chef Caesar Cardini, it originated in Tijuana, Mexico, in the 1920s. The salad is a balanced combination of textures and tastes, featuring more than just lettuce and dressing.

    The heart of a classic Caesar salad lies in its key components:

    • Crisp Romaine Lettuce: Fresh, crunchy romaine hearts form the base.
    • Garlic Croutons: Toasted bread cubes, seasoned with garlic, provide a satisfying crunch.
    • Parmesan Cheese: Shaved or grated Parmesan adds a salty, umami depth.
    • The Signature Dressing: The star of the show is an emulsified dressing that typically includes:
      • Fresh garlic
      • Olive oil
      • Raw egg or egg yolk
      • Lemon juice
      • Worcestershire sauce
      • Dijon mustard (sometimes)
      • Black pepper
      • Salt

    This recipe’s beauty lies in its balance of simple yet flavorful ingredients. Because it is so straightforward, this beginner-friendly dish is a great way to build confidence in the kitchen.

    How does Gordon Ramsay make Caesar salad?

    Gordon Ramsay’s Caesar salad recipe emphasizes fresh, high-quality ingredients and meticulous technique. His method elevates the classic dish by focusing on creating intense flavor and perfect texture through a few key steps.

    First, Ramsay insists on making the dressing from scratch to ensure maximum freshness and control over the flavor. His version features a robust blend of:

    • Anchovies: Crushed into a paste, they provide a deep, savory, umami flavor.
    • Garlic: Finely minced for a pungent kick.
    • Egg Yolk: Creates the essential creamy emulsion.
    • Dijon Mustard: Adds tangy depth and helps stabilize the dressing.
    • Fresh Lemon Juice: Provides brightness that cuts through the richness.
    • High-Quality Olive Oil: Drizzled in slowly to create a smooth, thick consistency.
    • Worcestershire Sauce: Enhances the savory notes.
    • Parmesan Cheese: Grated directly into the dressing for an integrated flavor.

    For texture, Ramsay makes his own croutons, frying or baking bread cubes with garlic and herbs until golden and crisp. He also prepares the romaine lettuce with care, ensuring it is washed, thoroughly dried, and chilled for maximum crunch.

    The salad is tossed just before serving to ensure every leaf is lightly coated but not saturated with dressing [6]. This attention to detail transforms simple ingredients into an extraordinary dish.

    What are the traditional ingredients in a Caesar salad?

    To make an authentic Caesar salad, it’s essential to know the traditional ingredients. Although many variations exist today, the original recipe was very specific, relying on a few core components to create its iconic flavor.

    Here are the traditional ingredients found in a classic Caesar salad:

    • Romaine Lettuce: Crisp, fresh heads of romaine are fundamental.
    • Croutons: Made from day-old bread, cubed and toasted or fried until golden to add essential texture.
    • Parmesan Cheese: Freshly grated or shaved Parmesan provides a salty, nutty element.
    • The Dressing: A freshly made emulsion that includes:
      • Garlic: Crushed or finely minced.
      • Olive Oil: Good quality extra virgin olive oil is preferred.
      • Egg (or Egg Yolk): Traditionally, a raw or lightly coddled egg is used to emulsify the dressing.
      • Lemon Juice: Freshly squeezed for bright acidity.
      • Worcestershire Sauce: Adds savory depth and tang.
      • Salt and Freshly Ground Black Pepper: To season the dressing perfectly.

    It’s important to note that anchovies, while a common addition today, were not part of Caesar Cardini’s original recipe. The savory flavor we associate with them comes from the Worcestershire sauce.


    Sources

    1. https://www.cdc.gov/nutrition/data-statistics/fruit-vegetable-consumption.html
    2. https://www.bonappetit.com/test-kitchen/ingredients/article/what-is-worcestershire-sauce
    3. https://www.foodsafety.gov/food-safety-charts/safe-minimum-cooking-temperatures
    4. https://www.webmd.com/diet/health-benefits-cucumbers
    5. https://www.health.harvard.edu/staying-healthy/the-truth-about-salads
    6. https://www.gordonramsayrestaurants.com/recipes/caesar-salad/