Tag: Homemade

  • How to Make the Best Homemade Alfredo Sauce: A Beginner’s Guide

    How to Make the Best Homemade Alfredo Sauce: A Beginner’s Guide

    This homemade alfredo sauce recipe is a rich and creamy sauce perfect for pasta, made from a few simple ingredients. The classic version combines butter, heavy cream, and freshly grated Parmesan cheese, which are gently heated until smooth and emulsified. Garlic, salt, and pepper are often added for extra flavor.

    A rich, creamy alfredo sauce coating every strand of pasta is truly irresistible. This classic comfort food often brings back memories of favorite restaurant meals. But what if you could create that same velvety, flavorful experience at home? It’s not only possible—it’s surprisingly simple. Many home cooks are put off by complex recipes or have been disappointed by sauces that just didn’t turn out right. That’s where we come in.

    At Recipesmondial, we believe delicious cooking should be approachable and stress-free. Forget bland store-bought options and overly technical instructions. This guide provides easy, step-by-step instructions on how to make the best homemade alfredo sauce you’ve ever tasted. Perfect for beginners and seasoned cooks alike, our recipe ensures a consistently rich and creamy result every single time. It will transform your simple dinner recipes into something extraordinary. Get ready to build your kitchen confidence and discover how easy flavorful meals can be.

    Why Will You Love This Homemade Alfredo Sauce Recipe?

    A close-up of creamy fettuccine Alfredo in a ceramic bowl, garnished with parsley and Parmesan cheese, on a rustic wooden table.
    A professional food photography, photorealistic, high-quality food magazine photo of a generous serving of perfectly cooked fettuccine pasta coated in a rich, creamy, homemade Alfredo sauce, garnished with freshly chopped parsley and a sprinkle of grated Parmesan cheese. The dish is presented in a warm, inviting ceramic bowl on a rustic wooden table, with soft, natural lighting creating a comforting and appetizing scene. Emphasize the silky texture of the sauce and the fresh ingredients, typical of high-end cookbook visuals. No artistic interpretations or illustrations.

    Are you ready to transform your dinner table? This homemade alfredo sauce recipe is a true game-changer, delivering a world of creamy, rich flavor that’s so much better than anything from a jar. It’s guaranteed to become a new family favorite.

    We understand that home cooks can feel overwhelmed by complex recipes or struggle to plan quick family-friendly meals. This simple recipe is designed to solve those problems. With our clear, step-by-step guidance, you’ll gain confidence in the kitchen.

    Here’s why you’ll love making this alfredo sauce at home:

    • Unbeatable Taste and Freshness: Made with fresh ingredients, this homemade alfredo sauce delivers an incredible, rich flavor that tastes like a gourmet meal, proving it’s far superior to store-bought options.
    • Effortlessly Easy: You don’t need to be an expert chef. This alfredo recipe features simple, step-by-step instructions perfect for beginners, so you can create a delicious sauce with ease.
    • Quick Meal Solution: Facing a busy weeknight? No problem. This easy recipe comes together quickly, making it the ideal solution for fast lunches or family dinners.
    • Perfectly Creamy Texture: Achieve a perfectly velvety and smooth consistency every time. Our method ensures the sauce will coat your pasta beautifully for a restaurant-quality result.
    • Versatile and Family-Friendly: This sauce pairs wonderfully with many dishes beyond pasta, like chicken, shrimp, or steamed vegetables. It’s a fantastic base for countless family-friendly meals, so get creative with your additions!
    • Build Your Confidence: Successfully making this delicious sauce from scratch is a huge confidence booster. You’ll feel proud of what you create, and Recipesmondial helps you enjoy a stress-free cooking experience.
    • Save Money and Enjoy Quality: Dining out for alfredo can be costly. Making it at home is not only budget-friendly but also gives you complete control over the quality of the ingredients.

    This recipe will transform your kitchen experience. You’ll move from uncertainty to confidence, creating delicious and visually appealing meals. Discover new flavors and find the joy in approachable home cooking with Recipesmondial.

    What Ingredients Do You Need for Classic Alfredo Sauce?

    A flat lay photo showing fresh ingredients for Alfredo sauce: butter, heavy cream, garlic, a block of Parmesan cheese, salt, and pepper.
    A professional food photography, photorealistic, high-quality food magazine photo of the essential ingredients for classic Alfredo sauce, meticulously arranged on a clean, light-colored kitchen countertop or a rustic wooden board. The composition should be an inviting flat lay, featuring sticks of unsalted butter, a carton of fresh heavy cream, whole garlic cloves alongside some minced garlic, a block of high-quality Parmesan cheese (with a small pile of freshly grated Parmesan next to it), and a small dish of salt and black pepper. The lighting is soft and even, highlighting the freshness and simplicity of the ingredients, resembling high-end cookbook photos. No artistic interpretations or illustrations.

    Core Ingredients

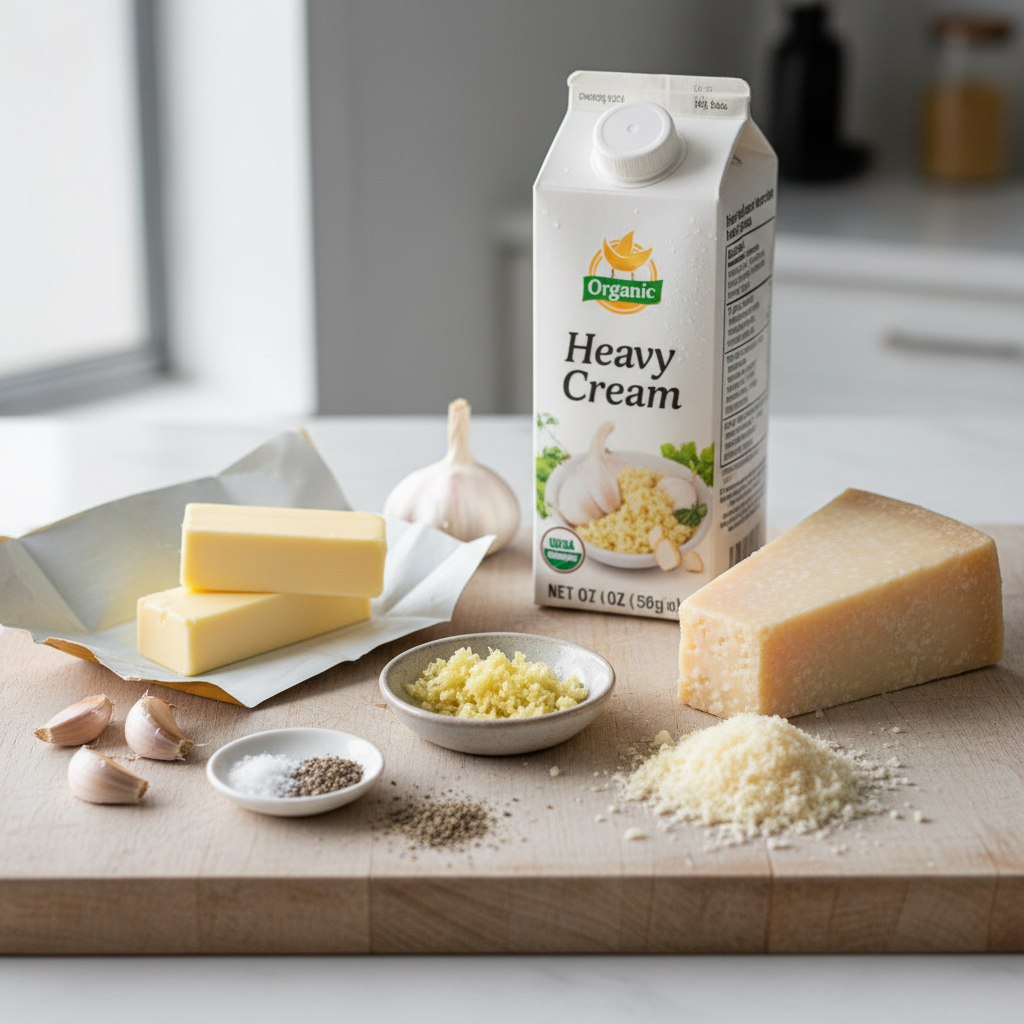
    The best homemade alfredo sauce starts with a few simple, high-quality ingredients—no fancy tools or a long shopping list required. Our goal is to make delicious, stress-free meals accessible to everyone. Let’s gather the essentials for that rich, creamy classic you’ll love.

    Here’s what you’ll need for a truly classic, flavorful alfredo sauce:

    • Unsalted Butter (1/2 cup or 1 stick): This forms the rich base of your sauce. Using unsalted butter allows you to control the saltiness while helping to develop a luxurious texture.
    • Heavy Cream (2 cups): As the star of the show, heavy cream provides the signature creamy texture that makes this sauce so incredibly indulgent.
    • Freshly Grated Parmesan Cheese (1 ½ cups, packed): For an authentic, nutty flavor, freshly grated Parmesan is non-negotiable. We recommend Parmigiano-Reggiano. Pre-grated varieties contain anti-caking agents that can create a gritty texture, but fresh cheese melts beautifully into a silky-smooth sauce.
    • Garlic (2-3 cloves, minced): Freshly minced garlic adds an aromatic depth, infusing the sauce with a warm, savory note that isn’t overpowering.
    • Salt (to taste): Seasoning is key. Start with a small amount and adjust to your preference, keeping in mind that Parmesan cheese is naturally salty.
    • Freshly Ground Black Pepper (to taste): A dash of freshly ground black pepper adds a subtle warmth and helps brighten the sauce’s rich flavors.

    Optional Add-ins for Extra Flavor

    While the classic recipe is amazing on its own, you can easily customize it. These optional add-ins introduce new dimensions of flavor, allowing you to create your perfect version of this family-friendly meal.

    • Nutmeg (a pinch): A secret ingredient for many chefs, a tiny dash of freshly grated nutmeg enhances the nutty notes of the Parmesan and adds a sophisticated warmth to the sauce.
    • White Pepper (a pinch): For a milder pepper flavor that won’t add black specks to your sauce, use white pepper. It provides a more subtle heat.
    • Cream Cheese (2 tablespoons): For an even thicker and tangier sauce, stir in a bit of cream cheese. This makes the sauce extra decadent and is a great trick for achieving maximum creaminess.
    • Lemon Juice (1 teaspoon, fresh): A small squeeze of fresh lemon juice at the end brightens the entire sauce, cutting through the richness with a touch of zing. Be sure to use it sparingly to avoid a sour taste.
    • Pasta Water (1/4 – 1/2 cup): This starchy water is the secret to a perfect sauce consistency. Before draining your pasta, reserve about a half-cup. Adding it to the alfredo helps emulsify the fats and creates a silky texture that clings beautifully to the pasta.
    • Cooked Chicken or Shrimp: To turn your alfredo sauce into a complete meal, add a protein like cooked, sliced chicken breast or sautéed shrimp. It’s a simple way to create a quick and flavorful dinner.

    How to Make Alfredo Sauce: A Step-by-Step Guide

    Hands stirring melting Parmesan cheese into creamy Alfredo sauce in a stainless steel saucepan on a stovetop.
    A professional food photography, photorealistic, high-quality food magazine photo capturing a pivotal moment in making homemade Alfredo sauce. A real human home cook’s hands (visible, clean, and warm) are gently stirring a wooden spoon or whisk into a simmering, rich, creamy Alfredo sauce in a gleaming stainless steel saucepan on a stovetop. Freshly grated Parmesan cheese is being incorporated, creating visible swirls of melting cheese into the smooth, bubbling sauce. Steam is subtly rising, and the kitchen background is softly blurred to keep focus on the action. The scene evokes a friendly, helpful, and approachable cooking atmosphere, typical of high-end cookbook visuals. No artistic interpretations or illustrations.

    Making a delicious, creamy Alfredo sauce at home is easier than you think. Our step-by-step guide will help you create a rich, flavorful sauce that rivals any restaurant’s version. Perfect for beginner cooks, this recipe is a fantastic addition to any family meal. Get ready for enjoyable, approachable home cooking.

    Before you begin, gather the core ingredients for this classic sauce:

    • 1/2 cup (113g) unsalted butter
    • 2 cloves garlic, minced
    • 2 cups (480ml) heavy cream
    • 1 1/2 cups (150g) freshly grated Parmesan cheese
    • 1/2 teaspoon salt
    • 1/4 teaspoon black pepper
    • Optional: Pinch of freshly grated nutmeg

    Now, let’s get cooking! Follow these simple steps for a perfect Alfredo sauce:

    1. Melt the Butter and Sauté Garlic: In a medium saucepan over medium heat, melt the unsalted butter. Once melted, add the minced garlic and sauté for about 1 minute until fragrant. Be careful not to let the garlic brown.
    2. Add Heavy Cream and Simmer: Pour in the heavy cream and stir to combine. Bring the mixture to a gentle simmer, then reduce the heat to low. Keeping the sauce at a low simmer, without boiling, is key to creating a smooth base.
    3. Gradually Incorporate Parmesan Cheese: Remove the saucepan from the heat to prevent the sauce from breaking. Slowly whisk in the freshly grated Parmesan cheese, a little at a time, until the sauce is smooth and thick. The residual heat will melt the cheese perfectly.
    4. Season to Taste: Stir in the salt and black pepper. Taste the sauce and adjust the seasonings if needed. For an extra layer of flavor, add the optional pinch of freshly grated nutmeg, which enhances creamy dishes [1].
    5. Serve Immediately: Your homemade Alfredo sauce is ready! For the best texture, toss it immediately with your favorite cooked pasta, such as fettuccine. It also pairs wonderfully with chicken, shrimp, or roasted vegetables.

    Tips for Perfect, Creamy Alfredo Every Time

    To achieve a perfect, restaurant-quality Alfredo sauce, keep these simple tricks in mind. They will help you get the ideal flavor and texture with every batch.

    • Use Freshly Grated Parmesan: This cannot be stressed enough! Pre-grated cheese contains anti-caking agents that can make your sauce gritty or prevent it from melting smoothly. For the best flavor and texture, always grate your own Parmesan.
    • Don’t Overheat the Sauce: High heat can cause the cream to separate and the cheese to become stringy. Always remove the sauce from direct heat before adding the cheese. The warmth of the cream is enough to melt it perfectly.
    • Whisk Constantly: Continuous whisking helps emulsify the fat and dairy, creating a uniformly smooth and luscious texture. This step is crucial for preventing clumps.
    • Adjust Consistency: If your sauce is too thick, stir in a splash of warm pasta water until you reach your desired consistency. If it’s too thin, simmer it gently on low heat for another minute or two, stirring constantly. Remember, the sauce will thicken as it cools.
    • Serve Promptly: Alfredo sauce is best enjoyed fresh, as its texture can change upon cooling. For the best experience, have your pasta cooked and ready to go as soon as the sauce is finished.

    How Do You Make Alfredo Sauce Without Heavy Cream?

    Alfredo Sauce Recipe with Milk

    Craving rich, creamy Alfredo sauce but don’t have heavy cream? You can make a delicious, lighter version right at home. This recipe shows you how to achieve the classic flavor and texture you love using simple, everyday ingredients.

    Using milk as the base creates a sauce that’s satisfying without being overly rich. It’s a simple, beginner-friendly recipe that comes together quickly, making it a perfect choice for a family-friendly meal.

    Ingredients for Alfredo with Milk:

    • 2 tablespoons unsalted butter
    • 2 tablespoons all-purpose flour
    • 2 cups whole milk (or 2% milk for a slightly lighter sauce)
    • 1 cup freshly grated Parmesan cheese
    • 1/2 teaspoon garlic powder (or 1 clove minced garlic)
    • 1/4 teaspoon salt
    • Pinch of black pepper
    • Optional: Pinch of nutmeg for depth of flavor

    Step-by-Step Instructions:

    1. Melt the Butter: In a medium saucepan, gently melt the butter over medium heat.
    2. Make a Roux: Whisk in the flour and cook for 1 minute, stirring constantly. This creates a roux, which will thicken your sauce.
    3. Add Milk Gradually: To prevent lumps, slowly pour in the milk while whisking continuously until the mixture is completely smooth.
    4. Simmer and Thicken: Bring the sauce to a gentle simmer, whisking often, until it thickens. This should take about 5-7 minutes.
    5. Stir in Cheese: Remove the pan from the heat and stir in the freshly grated Parmesan cheese. Whisk until the cheese has melted completely.
    6. Season: Add the garlic powder, salt, pepper, and nutmeg (if using). Taste the sauce and adjust the seasoning as needed.

    Tips for Success:

    • Use Whole Milk: For the creamiest result, whole milk is best. However, 2% milk also works well.
    • Whisk Constantly: Whisking is key to a smooth, lump-free sauce and helps prevent scorching on the bottom of the pan.
    • Fresh Parmesan is Best: Pre-grated cheese often contains anti-caking agents that can make your sauce gritty. Grate your own for the smoothest texture.
    • Adjust Thickness: If your sauce is too thick, whisk in a splash of warm milk. If it’s too thin, allow it to simmer for a few more minutes.

    Alfredo Sauce Recipe with Cream Cheese

    For an incredibly rich and tangy Alfredo sauce without heavy cream, try using cream cheese. This method is quick, simple, and guarantees a velvety smooth texture every time.

    Cream cheese also adds stability, creating a sauce that holds up well. It’s the perfect solution for a delicious and easy weeknight meal.

    Ingredients for Alfredo with Cream Cheese:

    • 2 tablespoons unsalted butter
    • 2 cloves garlic, minced
    • 8 ounces cream cheese, softened and cut into cubes
    • 1 cup milk (whole or 2%) or chicken broth
    • 1/2 cup freshly grated Parmesan cheese
    • 1/4 teaspoon salt
    • Pinch of black pepper
    • Optional: Fresh parsley for garnish

    Step-by-Step Instructions:

    1. Sauté Garlic: Melt the butter in a medium saucepan over medium-low heat. Add the minced garlic and sauté for about 1 minute until fragrant, being careful not to let it brown.
    2. Melt the Cream Cheese: Add the cubed cream cheese and about a quarter cup of the milk or broth to the pan. Whisk constantly until the cream cheese melts completely into a smooth, lump-free sauce.
    3. Gradually Add Liquid: Slowly whisk in the remaining milk or broth until the sauce is creamy and well combined.
    4. Stir in Parmesan: Remove the pan from the heat and stir in the freshly grated Parmesan cheese. Whisk until it fully melts into the sauce.
    5. Season: Season with salt and pepper, then taste and adjust. Stir in fresh parsley just before serving, if desired.

    Tips for Success:

    • Soften Cream Cheese: Using room-temperature cream cheese is essential for helping it melt easily and smoothly into the sauce.
    • Low Heat is Key: Cook over medium-low heat to prevent the cream cheese from separating or scorching.
    • Whisk Thoroughly: Continuous whisking is the key to preventing lumps and achieving a silky-smooth texture.
    • Storage: This sauce will thicken as it cools. When reheating, you can loosen it with a splash of milk or broth.

    What Are The Top Tips for Perfect, Creamy Alfredo Every Time?

    Use Freshly Grated Parmesan

    For the best homemade alfredo sauce, skip the pre-grated cheese. Freshly grated Parmesan is a game-changer because it melts beautifully into a silky, smooth sauce. Pre-grated options often contain anti-caking agents, which can make your sauce gritty and prevent it from becoming truly creamy.

    For the best results, choose a good quality block of Parmesan and grate it yourself just before adding it to the sauce. This simple step elevates your alfredo to restaurant quality [2]. You will immediately notice the difference in both texture and flavor, a key tip for a truly rich and authentic alfredo recipe.

    Don’t Overheat the Sauce

    A common mistake is overheating the alfredo sauce. High heat can cause dairy to separate, resulting in a broken, oily sauce instead of a smooth, creamy one.

    To avoid this, cook the sauce gently over low to medium-low heat, stirring constantly as it thickens. Once the sauce reaches your desired creaminess, remove it from the heat. This careful approach ensures a perfect emulsification, keeping your alfredo sauce silky and smooth every time [3].

    How to Thicken Your Sauce Naturally

    A classic alfredo sauce doesn’t need flour or cornstarch for thickening. Instead, it gets its rich body from the careful combination of butter, cream, and cheese. Here’s how to achieve that perfect thickness:

    • Reduce Gently: Let the cream simmer slowly over low heat. As some of the liquid evaporates, the sauce will naturally thicken. This process also concentrates the flavors, creating a richer base for your homemade alfredo sauce.
    • Emulsify with Pasta Water: This is a secret weapon for many Italian sauces. Reserve some of the starchy water from cooking your pasta. Adding a splash or two to your sauce at the end helps bind everything together, as the starches in the water help create a smooth, glossy emulsion [4].
    • Add More Cheese: As you stir in your freshly grated Parmesan, it will naturally thicken the sauce even more. The melting cheese helps create that signature creamy texture. Continue adding it gradually until you reach your preferred consistency.

    By using these natural methods, you’ll create a beautifully thick and luxurious alfredo sauce. It will be full of flavor and perfectly creamy, making delicious, family-friendly meals easier than ever.

    What Can You Serve with Alfredo Sauce?

    Pasta Pairings

    To help your Alfredo sauce truly shine, choose a pasta that can hold onto its creamy richness. Shapes with ample surface area or plenty of nooks and crannies are ideal because they prevent the sauce from slipping off, ensuring every bite is wonderfully flavorful.

    Here are some classic, beginner-friendly pasta choices that pair beautifully with homemade Alfredo sauce, perfect for your next family-friendly meal:

    • Fettuccine: The traditional choice for a reason, these flat, wide strands are perfect for generously coating with a creamy homemade alfredo sauce. It’s a classic pairing for a hearty, satisfying dish.
    • Linguine: Similar to fettuccine but slightly narrower, linguine also holds the rich sauce well. It offers a slightly lighter feel without sacrificing any flavor.
    • Penne: For those who prefer a shorter pasta, penne is a fantastic option. Its tubular shape and ridges capture the sauce both inside and out, making it a delicious choice and great for kids.
    • Rigatoni: Similar to penne but larger, this ridged tube pasta is excellent for absorbing even more sauce, delivering an extra creamy experience in every bite.
    • Spaghetti or Bucatini: Though less traditional, these long, round pastas are convenient options that work well. Bucatini is especially effective, as its hollow center delivers extra sauce with each bite, making it great for a quick and simple dinner recipe.

    Pro Tip: Always cook your pasta al dente, meaning it’s still firm to the bite. It will finish cooking in the warm Alfredo sauce, which prevents it from becoming mushy. This simple step for beginner-friendly recipes makes a huge difference!

    Protein Additions

    Adding a protein like chicken or shrimp transforms pasta Alfredo into a complete and satisfying flavorful meal made easy. It’s an excellent way to make your alfredo sauce recipe a balanced and family-friendly meal.

    Here’s how to prepare these classic additions to mix into your homemade alfredo sauce:

    Chicken for Alfredo

    A beloved comfort food, Chicken Alfredo features juicy, tender chicken breast that pairs perfectly with the creamy sauce. This easy recipe addition truly completes the meal.

    Step-by-Step Cooking Guidance:

    1. Prepare the Chicken: Take 1-2 boneless, skinless chicken breasts (about 1 pound total) and pat them dry with paper towels.
    2. Season Well: Season both sides generously with salt, black pepper, garlic powder, and a touch of paprika for extra flavor.
    3. Heat Your Pan: Heat 1 tablespoon of olive oil or butter in a large skillet over medium-high heat.
    4. Cook the Chicken: Place the seasoned chicken breasts in the hot pan and cook for 5-7 minutes per side, until golden brown and cooked through. The internal temperature should reach 165°F (74°C).
    5. Rest and Slice: Transfer the cooked chicken to a cutting board and let it rest for 5 minutes before slicing it into thin strips or dicing it. This keeps the chicken juicy.
    6. Combine: Gently fold the cooked chicken into your prepared Alfredo sauce and pasta just before serving.

    Substitution Idea: You can also use cooked rotisserie chicken. This makes for an even quicker simple dinner recipe. Just shred or dice it and warm it through with the sauce.

    Shrimp for Alfredo

    For a lighter yet luxurious option, try Shrimp Alfredo. Because shrimp cooks in minutes, it’s ideal for quick meals when you’re short on time.

    Step-by-Step Cooking Guidance:

    1. Prepare the Shrimp: Use 1 pound of large raw shrimp, peeled and deveined. Pat them very dry with paper towels.
    2. Season: Toss the shrimp with a pinch of salt, black pepper, and garlic powder.
    3. Heat Your Pan: Heat 1 tablespoon of olive oil or butter in a large skillet over medium-high heat.
    4. Cook the Shrimp: Add the seasoned shrimp to the hot pan in a single layer. Cook for 1-2 minutes per side, just until they turn pink and opaque. Be careful not to overcook the shrimp, or they will become rubbery.
    5. Combine: Stir the perfectly cooked shrimp directly into your alfredo sauce and pasta. Serve immediately to enjoy their tender texture.

    Tips for Success: Fresh or frozen shrimp both work great. If using frozen, thaw them completely first and be sure to pat them very dry before cooking to ensure the best sear and texture. This is part of approachable home cooking that delivers great results.

    Vegetable Mix-ins

    Adding vegetables is a fantastic way to introduce color, texture, and nutrients to your Alfredo, turning it into a more balanced and vibrant meal. This simple trick helps create healthy and balanced meals and makes any easy recipes even more impressive.

    Here are some of our favorite vegetables to mix into your homemade alfredo sauce, along with quick prep tips:

    • Broccoli Florets: A classic pairing for good reason, steamed or lightly blanched broccoli adds a lovely pop of green and a satisfying crunch. Simply steam the florets until they are tender-crisp.
    • Spinach: Fresh spinach wilts beautifully into hot Alfredo sauce, adding a healthy boost with minimal effort. Simply stir in fresh spinach leaves at the very end; they will wilt in seconds.
    • Mushrooms: Sliced sautéed mushrooms (like cremini or button) bring an earthy depth of flavor. Sauté them in a separate pan with a little butter and garlic until golden brown.
    • Peas: Frozen peas are a super convenient addition. Add them to the boiling pasta water during the last minute of cooking, or stir them into the hot sauce to warm through.
    • Asparagus: Blanched or roasted asparagus spears add an elegant, fresh note that complements the rich sauce. Cut them into bite-sized pieces after cooking.
    • Bell Peppers: Sautéed strips of red or yellow bell peppers add sweetness and vibrant color, making them perfect for family-friendly meals.

    Meal Prep Tip: You can often prepare your vegetables ahead of time. Steam broccoli or blanch asparagus, then store them in the fridge. This makes assembling your simple dinner recipe even quicker on a busy weeknight.

    How to Store and Reheat Leftover Alfredo Sauce

    Properly Storing Your Homemade Alfredo Sauce

    Made too much delicious homemade alfredo sauce? No problem. Proper storage is the key to enjoying those leftovers later, ensuring your sauce stays fresh and safe to eat. Follow these simple steps for stress-free meal prep.

    • Cool It Quickly: Let your alfredo sauce cool down before storing, but don’t leave it at room temperature for more than two hours. Cooling the sauce quickly helps prevent bacterial growth [5].
    • Choose an Airtight Container: Once cool, transfer the sauce into a clean, airtight container. This will protect it from air and prevent it from absorbing other odors in your fridge.
    • Refrigerate Promptly: Place the airtight container in the refrigerator right away. Stored this way, homemade alfredo sauce will last for 3 to 4 days, making it perfect for quick meals throughout the week.
    • Freezing Considerations (Use with Caution): Freezing alfredo sauce is not recommended because the dairy tends to separate upon thawing, resulting in a grainy texture. However, if you must freeze it, store the sauce in an airtight container for up to two months. Thaw it overnight in the refrigerator and be prepared to whisk it vigorously during reheating to improve the texture.

    Reheating Leftover Alfredo Sauce Like a Pro

    Reheating alfredo sauce requires a gentle touch to prevent it from separating. The goal is to bring it back to its original creamy consistency. Follow these methods for perfect results every time.

    Stovetop Reheating Method (Recommended)

    The stovetop is the best way to reheat alfredo sauce because it gives you maximum control over the temperature. This gentle heating method helps maintain the sauce’s rich, smooth texture.

    1. Use Low Heat: Pour the sauce into a saucepan and warm it over low heat. Rushing this process with high heat can cause the cream and butter to separate, making the sauce oily.
    2. Add a Splash of Liquid: The sauce will likely thicken in the fridge. As it warms, add a tablespoon or two of milk, half-and-half, or pasta water to help restore its original creamy texture.
    3. Whisk Constantly: Whisk the sauce gently and continuously as it heats. This will prevent it from sticking to the pan and help the ingredients re-emulsify into a smooth sauce.
    4. Optional: Extra Parmesan: For an even richer taste, stir in a small amount of freshly grated Parmesan cheese at the very end. This adds extra flavor and helps thicken it slightly if needed.

    Microwave Reheating Method (Quick and Easy)

    If you’re short on time, the microwave is a good option. However, you’ll need to pay close attention to prevent the sauce from separating.

    1. Use a Microwave-Safe Bowl: Place your alfredo sauce in a microwave-safe bowl.
    2. Heat in Short Bursts: Microwave the sauce on medium power (50%) in 30-second intervals. It’s crucial to stop and whisk the sauce thoroughly after each interval.
    3. Add Liquid as Needed: If the sauce is too thick, stir in a splash of milk or half-and-half. Continue heating in short bursts, whisking each time, until it is warm and smooth.

    Troubleshooting Separated Alfredo Sauce

    If your sauce looks oily or grainy after reheating, don’t worry—it can usually be fixed. Separation is common with dairy-based sauces. Here’s how to bring your sauce back together.

    • Whisk Vigorously: Remove the pan from the heat and start by whisking the sauce vigorously. Often, this is enough to re-emulsify it.
    • Add a Touch of Warm Liquid: If whisking alone doesn’t work, slowly drizzle in a tablespoon of warm milk or half-and-half while whisking constantly. This can help the fats and liquids recombine.
    • Stir in More Cheese: As a last resort, add a small amount of freshly grated Parmesan. The cheese acts as an emulsifier and can help bind the sauce back together. Be sure to add it off the heat or on very low heat while whisking.

    With these practical tips, you can confidently store and reheat your homemade alfredo sauce. Now you can enjoy delicious, creamy pasta anytime, reducing food waste and making future meals even easier.

    Frequently Asked Questions

    What is in a traditional Italian Alfredo sauce recipe?

    You might be surprised to learn that a truly traditional Italian Alfredo sauce, often called “Fettuccine Alfredo,” is incredibly simple and relies on just a few high-quality ingredients.

    • Butter: Rich, unsalted butter is key.
    • Parmigiano-Reggiano Cheese: This must be freshly grated. It provides the essential nutty, salty flavor.
    • Pasta Water: The starchy water from cooking your pasta helps create a creamy emulsion.
    • Freshly Cooked Fettuccine: The hot pasta mixes directly with the butter and cheese.

    The original recipe, invented in Rome by Alfredo di Lelio, does not include heavy cream. Instead, the creaminess comes from a perfect emulsion of melted butter, cheese, and starchy pasta water [6]. This method creates a lighter, yet incredibly rich, coating for the pasta, proving how simple ingredients can deliver huge flavor.

    How do you make a 3 ingredient Alfredo sauce?

    For a quick, easy, and family-friendly Alfredo sauce, many home cooks turn to a popular three-ingredient version that greatly simplifies the process.

    Here’s how to whip up this beginner-friendly recipe:

    1. Melt Butter: In a saucepan over medium-low heat, melt 1/2 cup (1 stick) of unsalted butter. Keep the heat gentle to prevent burning.
    2. Add Heavy Cream: Pour in 1 1/2 cups of heavy cream. Stir gently and let it warm through for about 2-3 minutes. Do not boil.
    3. Whisk in Parmesan: Gradually whisk in 1 1/2 cups of freshly grated Parmigiano-Reggiano cheese until smooth and melted. Continue to whisk until the sauce thickens slightly.

    This method results in a rich, creamy sauce that’s perfect for a quick meal. Just remember to use freshly grated cheese for the best taste and texture. This simple approach makes it enjoyable and stress-free to create a restaurant-quality sauce at home.

    Can you use mozzarella in Alfredo sauce?

    While you *can* add mozzarella to a white sauce, it is not a typical ingredient in a classic Alfredo recipe. Traditional Alfredo relies on the unique sharp flavor and melting properties of Parmigiano-Reggiano, and mozzarella behaves very differently when heated.

    Here’s what to consider about using mozzarella:

    • Texture: Mozzarella tends to be stringy when melted. This can give your sauce a different, less smooth texture than traditional Alfredo.
    • Flavor: It has a much milder, less complex flavor compared to Parmesan. Your sauce might lack the signature rich, nutty taste.
    • Melt: While it melts well, it doesn’t emulsify with butter and cream in the same way Parmesan does.

    If you’re looking for a super cheesy, gooey white sauce with a stretchy cheese pull, mozzarella can be a great addition. As a beginner-friendly option, try using a blend of half Parmesan and half low-moisture mozzarella. This gives you some of that cheesy stretch without completely losing the classic Alfredo flavor. Experimenting with blends is a great way to discover the taste your family enjoys most.

    What’s the best way to make shrimp Alfredo sauce?

    Making shrimp Alfredo is a fantastic way to add protein to this rich and flavorful meal, and it comes together quickly. The key is to cook the shrimp perfectly so they remain tender and juicy.

    Here are two easy, step-by-step methods for delicious shrimp Alfredo:

    Method 1: Cook Shrimp Separately

    1. Prepare Shrimp: Pat your peeled and deveined shrimp dry. Season them with salt, pepper, and a pinch of garlic powder.
    2. Cook Shrimp: In a separate skillet, melt 1 tablespoon of butter or olive oil over medium-high heat. Add the shrimp and cook for 1-2 minutes per side, until pink and opaque. Don’t overcook them!
    3. Combine: Gently fold the cooked shrimp into your finished homemade Alfredo sauce right before serving.

    Method 2: Cook Shrimp in the Saucepan

    1. Sauté Aromatics: In your Alfredo sauce pan, melt 1 tablespoon of butter over medium heat. Add 1-2 cloves of minced garlic and cook for about 30 seconds until fragrant.
    2. Cook Shrimp: Add your seasoned shrimp to the pan. Cook for 1-2 minutes per side until they turn pink. Remove the shrimp from the pan and set aside.
    3. Make Sauce: Proceed with making your Alfredo sauce in the same pan. The delicious flavors from the shrimp and garlic will enhance your sauce.
    4. Add Back: Once the sauce is ready, gently stir the cooked shrimp back in.

    Both methods yield delicious results, so choose the one that best fits your cooking style. Either approach will help you create a quick and satisfying meal that makes dinner enjoyable and stress-free.


    Sources

    1. https://www.masterclass.com/articles/nutmeg-substitute-guide
    2. https://www.thespruceeats.com/how-to-grate-parmesan-cheese-1808006
    3. https://www.bonappetit.com/test-kitchen/how-to-prevent-sauces-from-breaking-or-curdling
    4. https://www.seriouseats.com/the-science-of-pasta-water-and-how-to-use-it-for-better-sauces
    5. https://www.fsis.usda.gov/food-safety/safe-food-handling-and-preparation/food-safety-basics/how-chill-food-safely
    6. https://www.smithsonianmag.com/arts-culture/the-true-story-of-fettuccine-alfredo-2047585/

  • How to Make Perfect Croissants: An Easy Step-by-Step Guide

    How to Make Perfect Croissants: An Easy Step-by-Step Guide

    A croissant is a buttery, flaky French pastry known for its distinct crescent shape and layered texture. It is made from a yeast-leavened dough that is laminated with butter, a process which involves repeatedly folding and rolling the dough to create hundreds of delicate, airy layers.

    Imagine waking up to the aroma of freshly baked, golden croissants with flaky layers waiting to be pulled apart. For many, the idea of creating these delicate French pastries from scratch can feel daunting. You might feel overwhelmed by complex recipes or lack the confidence for such an intricate bake, leading you to believe they’re best left to the professionals.

    At Recipesmondial, we believe every home cook deserves the satisfaction of mastering classic recipes, even challenging ones. That’s why we developed a step-by-step guide to demystify the art of making perfect croissants. Our beginner-friendly recipe removes the stress by focusing on clear, approachable techniques. It’s designed to deliver reliable results and boost your confidence in the kitchen.

    Get ready to transform simple ingredients into a delightful pastry experience. We’ll walk you through each stage, from preparing the dough to achieving the signature flaky texture and rich, buttery flavor. Ready to learn what sets a perfect homemade croissant apart? Let’s uncover the secrets to baking this iconic treat.

    What Makes a Perfect Homemade Croissant?

    A perfectly baked, golden-brown croissant, split open to show its airy, layered interior.
    Professional food photography, photorealistic, high-quality food magazine photo of a perfectly baked, golden-brown croissant, split in half to reveal its airy, open honeycomb interior and distinct, delicate layers. A subtle wisp of steam rises from the warm pastry. The croissant sits on a clean, light-colored rustic wooden board next to a simple white linen napkin, with soft, natural morning light. Emphasize crispness, flakiness, and depth of color. No people, no abstract art, no illustrations.

    Imagine biting into a warm, crisp pastry that shatters delicately in your mouth to reveal a tender, airy interior. This is the magic of a perfect homemade croissant. Achieving this bakery-quality delight at home is incredibly rewarding, transforming a simple breakfast into a special occasion. At Recipesmondial, we believe everyone can master this treat because our approach makes even complex-sounding recipes simple and enjoyable.

    So, what makes a croissant truly perfect? It comes down to a few key elements that create an unforgettable experience. Understanding these characteristics will not only help you bake with confidence but will also ensure delicious results every time.

    The Hallmarks of Croissant Perfection

    A truly perfect homemade croissant delights all your senses. It’s more than just a pastry—it’s a testament to careful technique and quality ingredients. Here are the qualities to aim for:

    • A Golden, Crisp Exterior: The outside should be a beautiful golden brown and crackle audibly when you break it. This signature crispness is a hallmark of proper lamination and baking.
    • An Airy, Honeycomb Interior: When sliced in half, a perfect croissant reveals a magnificent, open crumb structure resembling a delicate honeycomb. This indicates light, airy layers that are never dense or bready. These air pockets are formed by steam created during baking within the butter layers [1].
    • Rich, Buttery Flavor: Quality butter is essential, providing the irresistible, rich aroma and pure, luxurious taste that is the heart of any great croissant.
    • Feathery Lightness: Despite its richness, a perfect croissant feels incredibly light and practically melts in your mouth. This lightness comes from the many thin layers of dough and butter.
    • Delicate Flakiness: Each bite should offer a satisfying flakiness as the layers separate beautifully, creating a delightful texture. This is achieved through careful folding and chilling during lamination.
    • Beautiful Shape: A classic, visually appealing crescent shape signifies a properly rolled pastry and adds to the overall homemade charm.

    Achieving these results might seem daunting, but it’s entirely possible with our step-by-step guidance. Our beginner-friendly recipes are designed to make cooking flavorful meals easy and stress-free. Get ready to impress your family and friends with this classic treat!

    What Ingredients Do You Need for Croissants?

    A neatly arranged selection of croissant ingredients including flour, butter, milk, yeast, sugar, and salt on a marble counter.
    Professional food photography, photorealistic, high-quality food magazine photo of all essential raw ingredients for croissants neatly and aesthetically arranged on a clean, light marble countertop. Ingredients include a mound of unbleached all-purpose flour in a ceramic bowl, cold sticks of unsalted butter, a small pitcher of warm milk, a packet of active dry yeast, a small bowl of granulated sugar, and a pinch of salt. The setup is bright, well-organized, and inviting, with a shallow depth of field focusing on the ingredients. No hands, no people, no abstract art, no illustrations.

    For the Dough (Détrempe)

    The foundation of a perfect croissant is the dough, known in French baking as the “détrempe.” This is a simple mixture of pantry staples that creates the croissant’s signature structure and flavor. Don’t be intimidated by the name—this recipe is very beginner-friendly!

    Here’s what you’ll need:

    • All-Purpose Flour: Unbleached all-purpose flour provides the ideal gluten balance for a chewy yet tender crumb, forming the backbone of your dough.
    • Granulated Sugar: A small amount of sugar feeds the yeast to help the dough rise and adds a subtle sweetness to the finished pastry.
    • Fine Sea Salt: Salt is essential for flavor, but it also controls the yeast’s activity and strengthens the gluten structure.
    • Active Dry Yeast: This is the key to a light, airy croissant. As yeast produces carbon dioxide, it creates the delicate air pockets that define the pastry’s texture. Be sure your yeast is fresh for the best results.
    • Cold Water: Using cold water keeps the dough cool. This is crucial for controlling the yeast and preventing the butter from melting prematurely during lamination.
    • Whole Milk: Milk adds richness and tenderness to the dough and helps the croissants develop a beautiful golden-brown crust during baking.

    With these straightforward components, you’re on your way to creating a delicious pastry. Simple ingredients are often the starting point for the best baked goods, from croissants to other quick breakfast ideas.

    For the Butter Block (Beurrage)

    The “beurrage” is the block of butter that gets folded into the dough to create iconic, flaky layers. This step is where the magic happens, turning a simple dough into a spectacular pastry. It sounds technical, but it’s all about preparing one key ingredient correctly.

    You will need:

    • High-Quality Unsalted Butter: The quality of your butter is the single most important factor for great croissants. Choose a high-fat, European-style butter (ideally 82% fat or more) [2]. Its low water content creates supremely flaky layers and a richer flavor. Using unsalted butter also gives you full control over the final saltiness.

    Chef’s Tip: Your butter must be cold but pliable—it should bend without cracking. Achieving this texture is the key to successful lamination, as it allows the butter to spread evenly without melting into the dough.

    For the Egg Wash

    A simple egg wash is the final touch that gives your homemade croissants a professional, bakery-quality finish. While it’s a small step, it makes a huge difference in the appearance of the final pastry.

    For a perfect golden shine, you will need:

    • Large Egg: A whole egg provides richness and promotes a deep, even browning.
    • Splash of Water or Milk: Thinning the egg with a little water or milk helps it brush on smoothly, creating a consistent, glossy sheen after baking.

    This easy step ensures your croissants look as incredible as they taste, giving them a beautiful, golden-brown crust that’s impossible to resist.

    How to Make Croissants: A Step-by-Step Guide

    How to Make Croissants: A Step-by-Step Guide

    Ready to create flaky, buttery croissants in your own kitchen? This guide will walk you through each step, making the process simple and enjoyable. We’ll cover everything from preparing the dough to baking these golden delights. You’ll soon discover that making these delicious pastries is an incredibly rewarding experience, transforming simple ingredients into an extraordinary treat.

    Forget feeling overwhelmed by complex recipes. We’re here to guide you with approachable home cooking techniques. Let’s get baking!

    Step 1: Preparing the Dough (Détrempe)

    The journey to perfect croissants begins with a simple but crucial dough, known as the détrempe. This initial mixture sets the foundation for all the wonderful layers to come.

    • Warm the Milk: Gently heat 1 cup (240ml) of whole milk until it’s lukewarm, about 100-110°F (38-43°C). It should feel warm to the touch, but not hot.
    • Activate the Yeast: In a large mixing bowl, combine the warm milk, 2 ¼ teaspoons (7g) of active dry yeast, and 2 tablespoons (25g) of granulated sugar. Stir gently and let it sit for 5-10 minutes until it becomes foamy. This foam is a sign that your yeast is active and ready to work.
    • Mix Dry Ingredients: In a separate bowl, whisk together 3 ½ cups (420g) of all-purpose flour and 1 teaspoon (6g) of fine sea salt.
    • Combine and Knead: Add the dry ingredients to the activated yeast mixture. Mix with a spoon or your hands until a shaggy dough forms.
    • Knead the Dough: Turn the dough out onto a lightly floured surface and knead for 5-7 minutes. The dough should become smooth and elastic, and it should spring back when you lightly poke it.
    • Chill the Dough: Shape the dough into a flat 6×8 inch rectangle and wrap it tightly in plastic wrap. Refrigerate for at least 2 hours, or preferably overnight. This chilling step is essential for easier handling and creating a better texture.

    Step 2: Creating the Butter Block (Beurrage)

    The butter block, or beurrage, is the heart of a croissant’s flakiness. The key is to create a pliable block of butter that has the same consistency as your chilled dough.

    • Prepare the Butter: Start with 1 cup (226g) of cold, unsalted butter. European-style butter is ideal for its higher fat content and superior flavor.
    • Shape the Butter: Place the cold butter between two sheets of parchment paper. Using a rolling pin, pound and roll the butter into an 8×8 inch square, aiming for an even thickness throughout.
    • Chill the Butter: Place the parchment-enclosed butter block back into the refrigerator to chill. It needs to be firm but still pliable, which will prevent it from breaking apart during the lamination stage.

    Expert Tip: For perfect layers, the butter and dough must be roughly the same temperature. If the butter is too cold, it will shatter within the dough. If it’s too warm, it will melt and absorb into the dough, ruining the layers.

    Step 3: The Lamination Process (Making the Layers)

    This is where the magic happens. Lamination is the process of folding butter into dough to create hundreds of thin, alternating layers. Don’t be intimidated; we’ll break it down into a series of simple “turns.”

    The First Turn

    1. Roll out the Dough: On a lightly floured surface, roll your chilled dough into a 9×18 inch rectangle. Try to keep the edges as straight as possible.
    2. Place the Butter: Position the chilled butter block on one half of the dough, leaving a ½-inch border around the edges.
    3. Fold the Dough: Fold the empty half of the dough over the butter block, carefully lining up the edges. You have now encased the butter.
    4. Seal the Edges: Gently press the edges together to fully enclose the butter. This crucial step prevents the butter from leaking out while you roll.
    5. First Roll: Rotate the dough 90 degrees. Lightly flour the surface and your rolling pin. Carefully roll the dough into a 10×20 inch rectangle. Be firm but gentle to maintain an even thickness.
    6. First Fold (Letter Fold): Imagine the dough is a letter. Fold the bottom third of the dough up to the center, then fold the top third down over it.
    7. Chill: Wrap the folded dough tightly in plastic wrap and refrigerate for at least 30-45 minutes. This rest allows the gluten to relax and the butter to firm up again.

    The Second Turn

    1. Repeat Rolling: Remove the chilled dough from the fridge. On a lightly floured surface, place the dough so the seam is on your side. Roll it out again into a 10×20 inch rectangle.
    2. Second Fold: Perform another letter fold, just as you did before.
    3. Chill Again: Wrap the dough and refrigerate for another 30-45 minutes.

    The Third and Final Turn

    1. Last Roll: Remove the dough from the fridge. With the seam to your side, roll it one last time into a 10×20 inch rectangle.
    2. Final Fold: Complete a third and final letter fold.
    3. Final Chill: Wrap the dough tightly and refrigerate for at least 1-2 hours, or up to overnight. This extensive chill is vital for making the dough firm and easy to shape.

    Congratulations! You’ve successfully laminated your dough, creating the foundation for truly flaky, delicious croissants.

    Step 4: Shaping the Croissants

    Now for the fun part: transforming your laminated dough into its iconic crescent shape. This step is easier than you might think!

    • Prepare Your Workspace: Lightly flour a clean surface and remove your chilled dough from the refrigerator.
    • Roll the Dough: Carefully roll the dough into a large 12×24 inch rectangle that is approximately ¼ inch thick.
    • Trim and Cut: Using a sharp knife or a pizza cutter, trim the edges to create clean, straight lines. Cut the rectangle in half lengthwise to create two 6×24 inch strips.
    • Cut Triangles: On each strip, make alternating diagonal cuts to create long triangles with a base of about 4-5 inches.
    • Make a Slit: At the center of the wide base of each triangle, make a small ½-inch slit. This helps the croissant roll more evenly.
    • Roll the Croissant: Gently stretch the two points of the base outwards. Starting from the wide end, roll the dough towards the point. Roll snugly, but not so tightly that you compress the layers. Your goal is to create a visible spiral.
    • Shape the Crescent: Once rolled, gently curve the ends inward to form the classic crescent shape.
    • Place on Baking Sheet: Transfer the shaped croissants to a baking sheet lined with parchment paper, leaving plenty of space between them to allow for expansion.

    Creative Variation: For a delicious twist, make pain au chocolat by placing two small chocolate batons at the base of the triangle before rolling.

    Step 5: Proofing the Pastries

    Proofing is the final rise before baking. This critical step creates a light, airy texture and helps develop the beautiful honeycomb interior that makes croissants so special.

    • Create a Warm Environment: Place the baking sheets in a warm, humid, and draft-free spot to proof. A great option is to place them in an oven (turned off!) with a bowl of hot water inside to create the perfect environment.
    • Proofing Time: Let the croissants proof for 2-3 hours. The exact time will depend on the warmth and humidity of your kitchen.
    • Check for Proofing: They are ready when they have visibly puffed up, feel light, and jiggle when you gently shake the pan. If you gently press one, the indentation should spring back slowly. If it springs back immediately, they need more time. If it collapses, they are over-proofed.
    • Important Note: Avoid proofing in a place that is too hot. If the butter melts out of the dough, the layers will be ruined. The ideal temperature for yeast activity is typically between 75-95°F (24-35°C) [3].

    Troubleshooting Tip: Under-proofed croissants will be dense and bready. Over-proofed croissants may collapse in the oven or have a coarse texture. Patience is key here!

    Step 6: Baking to Golden Perfection

    This is the moment of truth! Baking will transform your proofed pastries into golden, crispy, and utterly delicious croissants. You’re just minutes away from enjoying the results of your hard work.

    • Preheat Oven: Preheat your oven to 400°F (200°C) for at least 20 minutes before baking.
    • Prepare Egg Wash: In a small bowl, whisk together 1 large egg with 1 tablespoon of milk or water.
    • Apply Egg Wash: Just before baking, gently brush the tops of the proofed croissants with the egg wash. This will give them a beautiful golden color and shine.
    • Bake the Croissants: Place the baking sheets in the preheated oven and bake for 10 minutes at 400°F (200°C).
    • Reduce Heat and Continue Baking: Without opening the oven, reduce the temperature to 375°F (190°C). Continue baking for another 10-15 minutes, or until the croissants are a deep golden brown and sound hollow when tapped on the bottom.
    • Cooling: Immediately transfer the baked croissants to a wire rack. Let them cool for at least 15-20 minutes before serving. This allows the butter to set and the interior to finish cooking.

    There you have it! Your homemade, perfect croissants are ready to be devoured. Enjoy this classic pastry for breakfast or as a delightful snack anytime. You have successfully transformed simple ingredients into an extraordinary treat!

    What Are the Most Common Mistakes to Avoid?

    Making perfect croissants can feel like a daunting culinary challenge, but many common errors are surprisingly easy to fix. We’re here to guide you through them. Learning from these mistakes will not only boost your baking confidence but also help you create delicious, flaky pastries every time. Let’s make your croissant journey stress-free and enjoyable!

    Ignoring Temperature Control

    When making croissants, temperature is one of your most critical factors. The entire process relies on keeping both the butter and the dough cold. If either gets too warm, you’ll run into problems.

    • Melting Butter During Lamination: If the butter gets too warm, it will mix into the dough instead of forming distinct layers, which prevents that beautiful, flaky texture. To avoid this, keep your kitchen cool, work quickly when rolling, and chill the dough often.
    • Dough Too Warm: Warm dough becomes sticky and difficult to handle, which also causes the butter to melt faster.
    • Dough Too Cold: On the other hand, dough that is too cold will be stiff and can tear during rolling, causing the butter block to break into pieces.

    Tip: To keep everything perfectly chilled, always return the dough to the fridge between each fold. A dough thermometer can also be a helpful tool; the ideal dough temperature is usually between 60-65°F (15-18°C) before lamination [4].

    Rushing the Lamination Process

    Lamination—the process of rolling and folding the dough to create many thin layers of butter—is what gives croissants their signature flaky texture. While it can be tempting to rush this step, patience is key.

    • Not Enough Turns: Insufficient folds result in fewer layers and, consequently, a dense, less flaky croissant. Be sure to follow your recipe’s instructions on the correct number of turns for optimal results.
    • Uneven Rolling: Aim to roll the dough evenly, avoiding thin spots or thick patches. Uneven thickness creates inconsistent layers and can cause pockets of raw dough or burnt sections in the final product.
    • Overworking the Dough: Too much handling develops excess gluten, which makes the dough tough and difficult to roll. This can lead to a chewy, rather than tender, croissant.

    Tip: Take your time, flour your work surface lightly, and use a gentle, even pressure when rolling. Think of it as stretching the dough, not forcing it.

    Incorrect Proofing

    Proofing, the final rise before baking, is a critical stage where your shaped croissants develop the air pockets that create their light, airy texture. Getting this step right is essential for success.

    • Under-Proofing: Croissants that haven’t proofed long enough will be dense and won’t rise much in the oven. Their texture will be more bready than airy, and they may also appear pale after baking.
    • Over-Proofing: Allowing croissants to proof for too long can cause their delicate structure to collapse and the butter to melt out during baking. This leads to greasy, flat pastries that don’t hold their shape.

    Tip: Always proof your croissants in a warm, humid, and draft-free place. To test for readiness, gently press a finger into the dough: it should spring back slowly. If it springs back quickly, it needs more time. If the indentation remains, it’s likely over-proofed. The ideal proofing temperature is around 75-78°F (24-26°C).

    Improper Baking Temperature

    The oven temperature directly impacts both the final texture and color of your croissants, so getting it right is crucial for a perfect bake.

    • Oven Too Hot: If the oven is too hot, the exterior can brown too quickly while the inside remains raw or undercooked. This intense heat can also cause the butter to escape too rapidly.
    • Oven Too Cold: Conversely, an oven that’s too cool will dry out the croissants, preventing them from achieving a beautiful golden color and a full, airy puff.
    • Forgetting Egg Wash: Don’t skip this simple step! A good egg wash is essential for creating a beautiful shine and encouraging a deep, golden-brown crust.

    Tip: Preheat your oven thoroughly and use an oven thermometer to ensure accuracy. To promote even baking, rotate your baking sheet halfway through. Your goal is a rich, golden-brown color for perfectly baked croissants.

    How Do You Pronounce Croissant Correctly?

    Want to pronounce croissants like a pro? When you’re exploring new global comfort foods, getting the name right is part of the fun. You’re not alone in wondering, and it’s simpler than it looks!

    Because the word “croissant” is French, it has a distinct sound. Don’t worry, we’re here to help you say it with confidence.

    Breaking Down the Pronunciation

    Here’s an easy way to remember how to say “croissant” correctly:

    • First part: “Kwah”

      This sounds like the beginning of the word “quality,” but quicker. Think “Kwah.”

    • Second part: “Sahn”

      This part has a soft, nasal sound. Imagine saying “song” but dropping the hard “g” at the end. The “n” is very light, not like the “ant” in “want.” Think “Sahn.”

    • Putting it together: “Kwah-Sahn”

      Say it smoothly as one word: “Kwah-Sahn.” Remember, the final ‘t’ is completely silent.

    Now you can confidently say you’ve made delicious “Kwah-Sahns”! Practicing is a fun part of your beginner-friendly recipes journey. Enjoy every flaky bite and every perfectly pronounced word!

    Frequently Asked Questions About Croissants

    What are the main ingredients in a croissant?

    Delicious croissants start with a few simple, everyday ingredients. The magic is in the technique, which combines these basic components through careful preparation and patience.

    Here are the core ingredients you’ll need for a classic croissant:

    • All-Purpose Flour: This forms the structure of your dough.
    • Active Dry Yeast: Yeast helps the dough rise, creating a light and airy texture.
    • Granulated Sugar: A touch of sugar feeds the yeast and adds a subtle sweetness.
    • Salt: Essential for flavor balance and strengthening the dough.
    • Whole Milk: Adds richness and moisture to the dough, contributing to a tender crumb.
    • Unsalted Butter: This is the star ingredient for lamination, creating those incredible, flaky layers.

    When combined with our step-by-step cooking guidance, these humble ingredients transform into an amazing pastry right in your own kitchen.

    How many calories are in a typical croissant?

    A classic, plain butter croissant is a wonderful treat. On average, a standard-sized one contains approximately 220-250 calories [5].

    However, this number can vary. For instance, larger croissants or those filled with chocolate, almond paste, or cheese will naturally have a higher calorie count. At Recipesmondial, our goal is to help you enjoy delicious food, whether it’s an occasional treat or a healthy and balanced meal. We believe in making informed choices while still savoring every bite!

    Is there an easy croissant recipe for beginners?

    Absolutely! We know many home cooks feel overwhelmed by complex recipes, especially when it comes to laminated pastries like croissants. Traditional recipes involve many specific steps and chilling times, which can feel like a major project. That’s why we focus on helping you find easy recipes fast and without stress.

    Here at Recipesmondial, we focus on beginner-friendly recipes and approachable home cooking. Our guide, “How to Make Perfect Croissants: An Easy Step-by-Step Guide,” breaks the process down into clear, manageable steps. We’ve simplified the techniques and provided the practical tips you need to build confidence in the kitchen.

    With our clear instructions, you’ll find that making croissants at home is a fun and rewarding experience. It’s all about making cooking enjoyable, even for those new to baking!

    What’s the difference between homemade and store-bought croissants?

    There’s a world of difference between homemade and store-bought croissants. Once you taste the homemade version, you’ll understand why!

    • Homemade Croissants:
      • Flavor: Unmatched freshness and depth of flavor. You control the quality of ingredients, like using premium butter, which makes a huge difference.
      • Texture: Incredibly flaky, tender, and airy. The layers are distinct and shatter delicately with each bite.
      • Ingredients: You know exactly what goes into them—no artificial flavors, preservatives, or unnecessary additives. This is great for those who prioritize healthy and balanced meals.
      • Effort & Reward: A labor of love that results in immense satisfaction and a superior pastry. It’s a fantastic way to develop your cooking skills and enjoy creating flavorful meals made easy at home.
    • Store-Bought Croissants:
      • Convenience: Ready to eat immediately, making them a perfect quick breakfast idea when you’re short on time.
      • Consistency: They generally have a consistent look and taste due to being mass-produced.
      • Ingredients: May contain dough conditioners, emulsifiers, and preservatives to extend shelf life. Sometimes, cheaper fats are used instead of pure butter.
      • Texture: Can be denser, less flaky, or have a more “bready” texture compared to homemade.

    While store-bought croissants offer convenience, nothing compares to the freshness, flavor, and pride of making your own. It’s a wonderful journey that transforms simple ingredients into a delightful pastry.


    Sources

    1. https://www.scientificamerican.com/article/the-science-of-baking-bread/
    2. https://www.seriouseats.com/what-is-european-style-butter-versus-american-style-butter
    3. https://bakerpedia.com/ingredients/yeast/
    4. https://www.kingarthurbaking.com/blog/2021/04/09/how-to-make-croissants-at-home
    5. https://fdc.nal.usda.gov/fdc-app.html#/food-details/780829/nutrients

  • How to Make The Best Homemade Meatballs (An Easy Recipe)

    How to Make The Best Homemade Meatballs (An Easy Recipe)

    A classic homemade meatball recipe involves combining ground meat, such as beef and pork, with binders like breadcrumbs and egg. Key flavorings include grated Parmesan cheese, minced garlic, parsley, and seasoning. The mixture is gently formed into balls and then baked or pan-fried until golden brown before being simmered in tomato sauce.

    Imagine serving a plate of perfectly tender, flavorful homemade meatballs—so juicy they practically melt in your mouth. While this might sound like a dish only an experienced chef can master, we’re here to prove otherwise. We know that complex recipes can feel overwhelming, but creating the perfect meatball from scratch is simpler and more satisfying than you think.

    Here at Recipesmondial, we believe every home cook deserves to feel confident in the kitchen. That’s why we’re sharing our ultimate easy meatball recipe. This guide will walk you through every step, whether you’re a beginner or just seeking simple dinner recipes. You’ll learn how to transform basic ingredients into succulent Italian meatballs perfect for any family-friendly meals—all without intimidating jargon.

    It’s time to say goodbye to bland, dry meatballs and hello to a culinary triumph. This recipe does more than just teach you to cook; it builds confidence and makes mealtime stress-free. You’ll discover all the tips for making perfect meatballs every time, whether you’re pairing them with spaghetti, stuffing them into a sub, or serving them as a delicious appetizer. Let’s start cooking some amazing homemade meatballs together!

    Why Is This the Best Homemade Meatball Recipe for Beginners?

    This isn’t just another meatball recipe—it’s designed with you in mind. We created it for anyone new to making homemade meals or searching for truly easy recipes. We know cooking can feel overwhelming, which is why we focus on beginner-friendly recipes. Our goal is to deliver incredible flavor without the stress.

    Here’s why this homemade meatball recipe stands out as the best for beginners:

    • Simple, Everyday Ingredients: Forget hunting for special items. This recipe uses common, affordable ingredients from any grocery store, making it perfect for budget cooking and family-friendly meals.
    • Clear, Step-by-Step Instructions: Our directions provide clear step-by-step cooking guidance in plain language. We break down each action into a manageable task to eliminate guesswork and build your confidence.
    • No Special Equipment Needed: You don’t need a stand mixer or any fancy gadgets. Your hands and a simple mixing bowl are all it takes to make perfect meatballs, which makes approachable home cooking a reality.
    • Foolproof Method for Juicy Results: Our recipe includes specific tips to prevent common mistakes, like overmixing. This method ensures your homemade meatballs are tender and juicy every single time.
    • Quick to Prepare: We designed this recipe to be fast, so you can get flavorful meals made easy. It’s the perfect solution for busy weeknights when you need quick meals that still taste incredible.
    • Confidence Booster: Making these meatballs from scratch is a fantastic way to feel more empowered in the kitchen. It’s the perfect recipe for building your skills for future culinary adventures.

    We believe everyone deserves to enjoy sharing delicious food. This best meatball recipe is part of our commitment to making cooking stress-free, enjoyable, and rewarding. Say goodbye to being overwhelmed by complex recipes and hello to confident cooking!

    What Ingredients Do You Need for Italian Meatballs?

    Making delicious Italian meatballs starts with the right ingredients—and don’t worry, you won’t need anything fancy. Recipesmondial focuses on easy recipes that use everyday items you likely already have. Our goal is to help you create flavorful meals made easy without the stress of complex instructions.

    Here’s a breakdown of what you’ll need for this simple dinner recipe. Each ingredient works to create juicy, tender, and incredibly tasty homemade meatballs that your family will love.

    The Heart of Your Meatballs: The Meat Blend

    The foundation of any great meatball is the meat itself. We suggest a classic blend for the best possible texture and flavor, ensuring rich and tender results.

    • 1 pound (450g) Ground Beef: Choose an 80/20 lean-to-fat ratio for the juiciest meatballs.
    • ½ pound (225g) Ground Pork: Pork adds extra moisture and a wonderful savory flavor.
    • Optional: ½ pound (225g) Ground Veal: For an even more authentic and tender Italian meatball, add veal to create the classic “meatball trifecta.”

    Essential Binders and Moisture

    These next ingredients are crucial for holding your meatballs together and keeping them incredibly moist. Don’t skip this step—it’s the secret to truly tender results.

    • ¾ cup Panko Breadcrumbs: Panko creates a lighter, airier texture than traditional breadcrumbs. You can also use fresh breadcrumbs.
    • ½ cup Whole Milk (or water): Soaking the breadcrumbs in milk makes the meatballs super tender and prevents them from drying out [1].
    • 1 Large Egg: The egg acts as a binder, helping all your ingredients stick together beautifully.

    Flavor Powerhouses: Herbs, Cheese, and Aromatics

    This is where the classic, aromatic flavors come from. These key additions are what truly elevate your Italian meatballs, making this a standout beginner-friendly recipe.

    • ½ cup Grated Parmesan Cheese: Use freshly grated for the best flavor. It adds a salty, umami depth.
    • ¼ cup Fresh Parsley: Finely chopped, flat-leaf parsley adds freshness and a hint of peppery flavor.
    • 2 cloves Garlic: Minced finely, garlic provides that authentic Italian taste.
    • ¼ cup Finely Chopped Onion (or shallot): A little onion adds a touch of sweetness and aromatic depth.

    Seasoning and Cooking Essentials

    Finally, a few simple seasonings will bring all the flavors together, enhancing the natural taste of the meat and other ingredients. You’ll also need oil for cooking.

    • 1 teaspoon Salt: Adjust to your personal taste.
    • ½ teaspoon Black Pepper: Freshly ground pepper is always best.
    • 2 tablespoons Olive Oil: For browning your meatballs if you choose to pan-fry them.

    Ingredient Tips and Swaps for Your Perfect Meatballs

    Cooking should be accessible, so feel free to adapt these ingredients to your preferences or what you have on hand. Use these tips to customize your recipe and build confidence in the kitchen.

    • Meat Variations: You can use all ground beef if you prefer. For a leaner option, try ground turkey or chicken, but be aware they may be less juicy.
    • Breadcrumb Choices: If you don’t have panko, regular dried breadcrumbs work well. Simply reduce the amount slightly, as they absorb less liquid. You can also use fresh breadcrumbs from stale bread.
    • Cheese Alternatives: Pecorino Romano cheese makes a great substitute for Parmesan, offering a sharper, saltier flavor.
    • Herb Swaps: While parsley is traditional, feel free to add a pinch of dried oregano or basil for extra herbal notes. Use fresh herbs whenever possible for the best taste.
    • Dairy-Free Option: To avoid dairy, simply use water instead of milk for soaking the breadcrumbs. The meatballs will still be tender.

    With these simple ingredients in hand, you’re ready to make delicious, family-friendly meals. This straightforward approach ensures your Italian meatball recipe is not only easy to make but also incredibly satisfying.

    How to Make Meatballs from Scratch: A Step-by-Step Guide

    A close-up of a home cook's hands gently mixing ground meat and other ingredients for meatballs in a large ceramic bowl.
    Professional food photography, photorealistic, high-quality food magazine photo. A close-up, dynamic shot focusing on a home cook’s hands (natural, not overly manicured) gently but confidently mixing the meatball ingredients in a large, rustic ceramic mixing bowl. The mixture, containing ground meats, breadcrumbs, cheese, and herbs, is perfectly combined but not overmixed, showing a pleasant texture. The lighting is soft and warm, highlighting the texture of the mixture and the hands. The background is a softly blurred, inviting home kitchen setting with natural light, reinforcing a friendly and approachable cooking environment.

    Step 1: Combine the Binders and Seasonings

    A powerful seasoning base is the secret to flavorful, juicy meatballs. This first step not only infuses every bite with taste but also helps bind the ingredients, so your meatballs won’t fall apart while cooking.

    To prepare your flavor foundation:

    • In a large mixing bowl, combine the fresh breadcrumbs and milk.
    • Add a large egg, which acts as a natural binder to hold the mixture together.
    • Next, add the seasonings: grated Parmesan cheese, finely chopped fresh parsley, minced garlic, red pepper flakes (for a little kick), and salt and black pepper to taste.
    • Mix everything thoroughly until it forms a moist, paste-like consistency.
    • Let the mixture sit for about five minutes. This allows the breadcrumbs to absorb the liquid, which is key for tender meatballs.

    Tip for Success: Don’t be afraid to taste a tiny bit of this binder mixture (before adding meat!) to adjust seasonings. This ensures your Italian meatballs will be perfectly seasoned.

    Step 2: Gently Mix in the Ground Meat

    Now it’s time to add the ground meat. The secret to tender, melt-in-your-mouth meatballs is to mix gently. Overworking the meat will make it tough and dense, so a light touch is essential.

    Follow these simple steps for perfectly mixed meat:

    • Add your ground meat to the seasoning mixture in the bowl. For the richest flavor, use a combination of ground beef, pork, and veal.
    • Using your hands, gently fold the meat into the other ingredients until just combined. The goal is to incorporate, not to knead.
    • Stop mixing as soon as you no longer see streaks of plain ground meat.
    • Avoid compacting the mixture. A light touch ensures a light meatball texture.

    Beginner-Friendly Tip: If you’re unsure, it’s always better to under-mix slightly than to over-mix. This simple technique is crucial for making delicious, juicy homemade meatballs every time.

    Step 3: Roll the Meatballs

    With the mixture ready, it’s time to roll the meatballs. Making them a uniform size is important because it ensures they cook evenly for consistent, reliable results.

    Here’s how to roll perfect meatballs:

    • Line a baking sheet or large plate with parchment paper to prevent sticking.
    • Lightly moisten your hands with water to keep the meat from sticking to them.
    • Scoop the mixture using a standard ice cream scoop to create uniform 1.5- to 2-inch meatballs (about the size of a golf ball).
    • Gently roll each portion between your palms to form a smooth, round ball without pressing too hard.
    • Place the finished meatballs on the prepared baking sheet.
    • Repeat until all the meat mixture has been rolled.

    Pro-Home Cook Hint: If you’re short on time, you can roll these meatballs ahead and chill them. This is a great meal prep tip for busy families!

    Step 4: Choose Your Cooking Method (Bake or Pan-Fry)

    It’s time to cook your meatballs. You have two excellent, beginner-friendly options: baking in the oven or pan-frying on the stovetop. Both methods produce delicious results.

    Baking Your Meatballs (Oven Method)

    Baking is a great hands-off option that creates less mess, making it ideal for cooking large batches.

    • Preheat your oven to 400°F (200°C).
    • Arrange your rolled meatballs in a single layer on a baking sheet lined with parchment paper. Make sure they aren’t touching each other.
    • Bake for 18-22 minutes, or until the meatballs are golden brown and cooked through.
    • To ensure they are fully cooked and safe, the internal temperature should reach 160°F (71°C) [2].

    Outcome: Baked meatballs are exceptionally juicy and are a lighter option. They are perfect for simmering directly in your favorite tomato sauce.

    Pan-Frying Your Meatballs (Stovetop Method)

    Pan-frying creates a delicious, crispy exterior and is a quick cooking method, especially if you plan to serve the meatballs right away.

    • Heat a large skillet over medium-high heat. Add a tablespoon or two of olive oil.
    • Once the oil is shimmering, carefully add the meatballs to the hot skillet. Do not overcrowd the pan; cook in batches if necessary.
    • Sear the meatballs for 2-3 minutes per side, turning occasionally, until all sides are nicely browned.
    • Reduce the heat to medium-low. Cover the skillet and let the meatballs cook for another 8-10 minutes, or until they are cooked through.
    • Again, verify the internal temperature reaches 160°F (71°C) for food safety.

    Outcome: Pan-fried meatballs have a rich, seared crust. They are excellent on their own, with a dipping sauce, or tossed into a pasta dish.

    No matter which method you choose, you’re on your way to enjoying perfect homemade meatballs!

    What Are Some Tips for Making Perfect, Juicy Meatballs?

    Crafting perfect, juicy meatballs is an art, but it’s one that’s easy to master. With these simple, beginner-friendly tips, you’ll make delicious homemade meatballs every time. Impress your family and friends with flavorful, easy-to-make meals.

    • Do Not Overmix the Meat: This is the most crucial tip for tender meatballs. Overmixing compresses the meat proteins, which can make your meatballs tough and dense. Gently combine the ingredients until they are just incorporated to prevent a rubbery texture.
    • Choose the Right Meat Blend: For the best flavor and texture, use a mix of ground beef and ground pork. Beef provides a rich taste, while pork adds essential fat for moisture. This balance is key to a juicy result. An 80/20 lean-to-fat ratio is ideal for tenderness [3].
    • Embrace the Panade: A panade—a mixture of bread or breadcrumbs soaked in milk—is the secret to moist meatballs. The bread absorbs the liquid and slowly releases it during cooking, keeping the meatballs tender. It also acts as a binder for the ingredients.
    • Roll Evenly Sized Meatballs: For even cooking, consistency is key. Use a small ice cream scoop or your hands to form meatballs of a similar size. This ensures they all cook at the same rate, preventing some from being overcooked while others are undercooked.
    • Do Not Overcrowd the Pan: When browning your meatballs, work in batches to avoid overcrowding the pan. A crowded pan lowers the temperature, causing the meatballs to steam instead of brown. Giving them enough space is essential for developing a flavorful crust that adds depth to the dish.
    • Cook Gently and Do Not Overcook: Whether you’re baking or pan-frying, be careful not to cook your meatballs for too long, as overcooked meat dries out quickly. Cook them until they are just done. You can finish them with a gentle simmer in your favorite sauce, which will keep them extra moist and flavorful.

    By following these simple tips, you can confidently create perfect, juicy meatballs every time. At Recipesmondial, we’re here to help you enjoy cooking and make mealtime stress-free. Get ready to serve delicious, family-friendly meals!

    What Are the Best Ways to Serve Homemade Meatballs?

    Delicious homemade Italian meatballs simmering in a rich red marinara sauce, garnished with fresh basil, in a rustic pot.
    Professional food photography, photorealistic, high-quality food magazine photo. A mouth-watering, close-up, high-angle hero shot of perfectly cooked, glistening homemade Italian meatballs simmering in a rich, vibrant red marinara sauce in a rustic cast-iron pot or an elegant, shallow serving dish. Several fresh basil leaves are artfully scattered on top, adding a pop of green. A hint of steam is gently rising from the hot sauce. The background is softly blurred, suggesting a cozy, inviting dining table setting with warm lighting, emphasizing the deliciousness and comfort of the meal.

    Once you’ve mastered our easy meatball recipe, the fun truly begins. Because they are so versatile, homemade meatballs can transform simple ingredients into flavorful meals for any occasion, from a quick family dinner to an impressive appetizer. To help you get started, here are some of our favorite serving ideas that make mealtime decisions delicious and stress-free.

    Classic & Comforting Combinations

    There’s a reason some pairings are timeless. Perfect for family-friendly meals, these classic options highlight the rich flavors of your Italian meatballs.

    • Spaghetti and Meatballs: Arguably the most famous way to enjoy them, simply toss your juicy meatballs with your favorite marinara sauce. Serve over al dente spaghetti for a satisfying and simple dinner that everyone loves.
    • Meatball Subs: Pile warm homemade meatballs onto a crusty hoagie roll. Add plenty of melted provolone or mozzarella cheese and a generous spoonful of marinara, then bake until golden and bubbly for a hearty lunch or casual dinner.
    • Meatball Parmesan: Similar to a sub but served as a main dish, place meatballs in an oven-safe dish and cover them with marinara, mozzarella, and a sprinkle of Parmesan. Bake until the cheese is melted and serve with a side salad or crusty bread.

    Creative & Quick Meal Ideas

    Looking to switch things up? Your homemade meatballs are perfect for exploring new dishes that are both delicious and easy to prepare.

    • Meatball Pizza Topping: Cut or crumble your meatballs and sprinkle them over a homemade or store-bought pizza crust with sauce and cheese. This adds incredible flavor to any pizza night.
    • Meatball Skewers: For a fun appetizer or light meal, thread cooked meatballs onto skewers with cherry tomatoes, bell pepper pieces, and onion. Grill or broil until the veggies are tender and serve with a dipping sauce.
    • Stir-Fry with Meatballs: Add sliced homemade meatballs to your favorite vegetable stir-fry with a savory sauce like teriyaki or peanut. This transforms a classic stir-fry into a heartier, protein-packed dish and is a great way to use leftovers.

    Appetizers & Party Pleasers

    Homemade meatballs are excellent, crowd-pleasing appetizers that are incredibly easy to prepare for gatherings. Try these simple ideas for your next event.

    • Cocktail Meatballs: To create a sweet and tangy glaze, simmer your meatballs in a slow cooker with a simple sauce like grape jelly and BBQ sauce or chili sauce and cranberry sauce. They are perfect for parties and potlucks.
    • Mini Meatball Sliders: Place smaller meatballs on slider buns with a dollop of marinara and a slice of cheese. Serve them as bite-sized appetizers or a fun party food.
    • Meatball & Dip Platter: Arrange cooked meatballs on a platter with various dips, such as marinara, pesto, or a creamy ranch. Add some toothpicks for easy serving.

    Low-Carb & Healthy Alternatives

    If you’re looking for healthier options, your homemade meatballs can easily fit into a low-carb or balanced meal plan, making it simple to enjoy flavorful meals while sticking to your dietary goals.

    • Zucchini Noodles (Zoodles): Instead of pasta, serve your Italian meatballs over a bed of fresh zucchini noodles topped with your favorite marinara. This significantly reduces carbs while still providing a satisfying meal.
    • Cauliflower Rice Bowl: Create a delicious and healthy bowl with cauliflower rice, homemade meatballs, and a vibrant vegetable medley. Add a light sauce to complete the dish.
    • Lettuce Wraps: Crumble or slice meatballs and serve them in crisp lettuce cups with a flavorful sauce and fresh herbs for a refreshing and light meal option.

    No matter how you serve them, your homemade meatballs are sure to be a hit. Our recipe is designed for versatility, allowing you to easily adapt it to your family’s tastes and mealtime needs. Enjoy creating delicious, stress-free meals with Recipesmondial!

    How to Store and Freeze Leftover Meatballs

    How to Store and Freeze Leftover Meatballs

    Making a big batch of homemade meatballs is a great way to prepare for future meals. When you know how to store and freeze them properly, you’ll always have a delicious, easy dinner option on hand.

    Storing in the Refrigerator

    Proper refrigeration is key to keeping your meatballs fresh for a few days. Follow these simple steps to ensure they stay delicious and safe to eat.

    • Cool Them Completely: First, let your cooked meatballs cool to room temperature, which usually takes 30-60 minutes. Storing hot food can create condensation and encourage bacterial growth.
    • Use an Airtight Container: Transfer the cooled meatballs to a clean, airtight container. If they are in a sauce, make sure the lid seals tightly to prevent spills.
    • Refrigerate Promptly: Place the container in the refrigerator within two hours of cooking to keep them safe.
    • Shelf Life: Your homemade meatballs will stay fresh in the refrigerator for 3 to 4 days, making them perfect for lunches or quick weeknight dinners.
    • Reheating Tips: To reheat, gently warm the meatballs in their sauce on the stovetop over low heat. For a quicker option, you can also use the microwave.

    This simple method helps you enjoy your leftovers for days, making mealtime less stressful.

    Freezing for Later

    Freezing meatballs is a game-changer for meal prep. Whether you freeze them cooked or uncooked, you’ll always have a quick, comforting meal ready to go.

    Freezing Cooked Meatballs:

    This method is ideal if you like to cook in bulk and want meals that are ready to heat and serve.

    • Cool Thoroughly: As with refrigerating, ensure your cooked meatballs are completely cool before freezing. This simple step helps prevent ice crystals and maintains their texture.
    • Flash Freeze (Recommended for Best Results): To stop the meatballs from clumping together, arrange them in a single layer on a parchment-lined baking sheet. Freeze for 1 to 2 hours, or until they are firm.
    • Package Them Well: Transfer the flash-frozen meatballs into heavy-duty freezer bags or airtight, freezer-safe containers. Squeeze out as much air as possible to prevent freezer burn.
    • Label and Date: Always label your bags or containers with the contents and date. This helps you keep your freezer organized and use food at its best.
    • Freezer Life: For the best quality, use cooked meatballs within 3 to 4 months. While they are safe to eat beyond this, their flavor and texture may decline.

    Freezing Uncooked Meatballs:

    Choose this option if you prefer to cook your meatballs fresh or want to prepare a large batch of the mixture ahead of time.

    • Form and Flash Freeze: Shape your meatball mixture and arrange the raw meatballs in a single layer on a parchment-lined baking sheet. Freeze for 1 to 2 hours until solid.
    • Store Securely: Once solid, transfer the uncooked meatballs to freezer bags or airtight containers, removing any excess air before sealing.
    • Cook from Frozen: There’s no need to thaw before cooking. Simply bake them or simmer them in sauce straight from the freezer. Just add a few extra minutes to the cooking time.

    Thawing and Reheating Frozen Meatballs:

    When you’re ready to enjoy your frozen meatballs, follow these simple steps for thawing and reheating.

    • Thawing Options: For the best results, thaw cooked meatballs overnight in the refrigerator before reheating. If you’re short on time, you can also reheat them directly from frozen.
    • Reheating Cooked Meatballs: To reheat thawed meatballs, warm them gently in sauce on the stovetop or bake at 350°F (175°C) for 15-20 minutes. To reheat from frozen, simmer them in sauce or bake at a lower temperature, like 300°F (150°C), until they reach an internal temperature of 165°F (74°C).
    • Cooking Uncooked Meatballs: Cook uncooked meatballs directly from frozen by simmering them in sauce or baking them in the oven. Ensure they are browned and fully cooked to an internal temperature of 160°F (71°C).

    With these simple storage tips, you can master meal prep and always have homemade meatballs on hand for quick, family-friendly dinners. It’s all about making home cooking more enjoyable and stress-free!

    Frequently Asked Questions

    How to make meatballs from mince?

    Turning simple mince (ground meat) into delicious homemade meatballs is a breeze! Our easy recipes help you create tender, flavorful meatballs every time.

    Here’s a quick step-by-step guide to help you create fantastic meatballs:

    • Choose Your Mince: You can use ground beef, pork, chicken, turkey, or a mix. For the best flavor and juiciness, a combination of beef and pork is often recommended.
    • Add Binders: Mix in ingredients like breadcrumbs (or stale bread soaked in milk) and an egg. These ingredients hold the meatballs together and keep them moist.
    • Season Well: This is where the flavor comes from. Include grated Parmesan cheese, minced garlic, finely chopped fresh parsley, salt, black pepper, and perhaps a pinch of red pepper flakes for a little kick.
    • Mix Gently: Use your hands to combine all the ingredients. Be careful not to overmix, as this can make your meatballs tough. Mix just until everything is evenly distributed.
    • Roll Evenly: Roll the mixture into meatballs of a consistent size, about as big as a golf ball. This helps them cook evenly.
    • Cook Them Up: You can bake your meatballs in the oven for a hands-off approach or pan-fry them until beautifully browned. After that, simply simmer them in your favorite sauce!

    This beginner-friendly process ensures a fantastic outcome every time. You’ll build confidence in the kitchen and enjoy cooking without stress!

    What is the best meatball recipe for spaghetti?

    For spaghetti, the best meatballs are incredibly tender, packed with savory flavor, and perfect for soaking up a rich tomato sauce. A great recipe focuses on achieving classic flavor and ultimate juiciness.

    Here’s what makes for truly great spaghetti meatballs:

    • Meat Blend is Key: A mix of ground beef and ground pork provides the best texture and depth of flavor. Some recipes also include ground veal for extra tenderness.
    • Rich Flavorings: Be generous with fresh garlic, finely chopped parsley, and grated Parmesan cheese. A touch of onion powder or finely minced onion also adds a savory, aromatic flavor.
    • Moisture & Tenderness: A combination of milk-soaked breadcrumbs and an egg is crucial. This technique keeps the meatballs moist and prevents them from becoming dense.
    • Gentle Hand: Overmixing is the enemy of tender meatballs. Mix just until the ingredients are combined. This simple tip makes a huge difference.
    • Cooking Method: Pan-fry the meatballs first to get a nice crust, then simmer them directly in your marinara sauce. This allows them to absorb the rich flavor of the sauce as they finish cooking.

    This simple and satisfying recipe is perfect for dinner and is sure to become a family favorite!

    What are authentic Italian meatballs made of?

    When we talk about “authentic Italian meatballs” (known as polpette in Italy), it’s important to know that traditions vary widely by region. However, there are several common themes that set them apart from the Italian-American versions many are familiar with.

    Traditionally, authentic Italian meatballs often feature:

    • Mixed Meats: You’ll frequently find a blend of ground beef, pork, and sometimes veal. In some regions, lamb or sausage meat may be included.
    • Stale Bread, Not Dry Crumbs: Instead of dry breadcrumbs, many traditional recipes use stale bread soaked in milk or water, which is then squeezed dry. This creates a much lighter and softer texture.
    • Cheese: Grated Parmesan or Pecorino Romano cheese is a staple, adding a salty, savory depth.
    • Eggs: An egg acts as a binder, helping to hold the mixture together.
    • Fresh Herbs: Finely chopped fresh parsley is almost always included. While other herbs like basil or oregano might be used, parsley is the most common choice.
    • Aromatics: Minced garlic is common, and sometimes finely grated or sautéed onion is added.
    • Simple Seasoning: Salt and freshly ground black pepper are often all that’s needed, allowing the quality of the ingredients to shine.
    • Smaller Size: Authentic Italian polpette are often smaller than their Italian-American counterparts, sometimes just bite-sized.
    • Cooking Method: They are frequently cooked in a simple tomato sauce or fried briefly before being added to a stew or soup. They are rarely served with spaghetti; instead, they are enjoyed as a small appetizer or part of a larger meal. [4]

    Understanding these elements helps home cooks appreciate the nuances of different meatball traditions. At Recipesmondial, we celebrate global comfort foods by making their diverse flavors accessible for every home cook.


    Sources

    1. https://www.seriouseats.com/the-food-lab-best-meatball-recipe-italian-american-new-york-cooking-tips
    2. https://www.fsis.usda.gov/food-safety/safe-food-handling-and-preparation/meat/ground-beef-and-food-safety
    3. https://www.usda.gov/media/blog/2019/04/24/ground-meat-whats-lean-and-whats-fatty
    4. https://www.academiabarilla.com/italian-recipes/meatballs-polpette