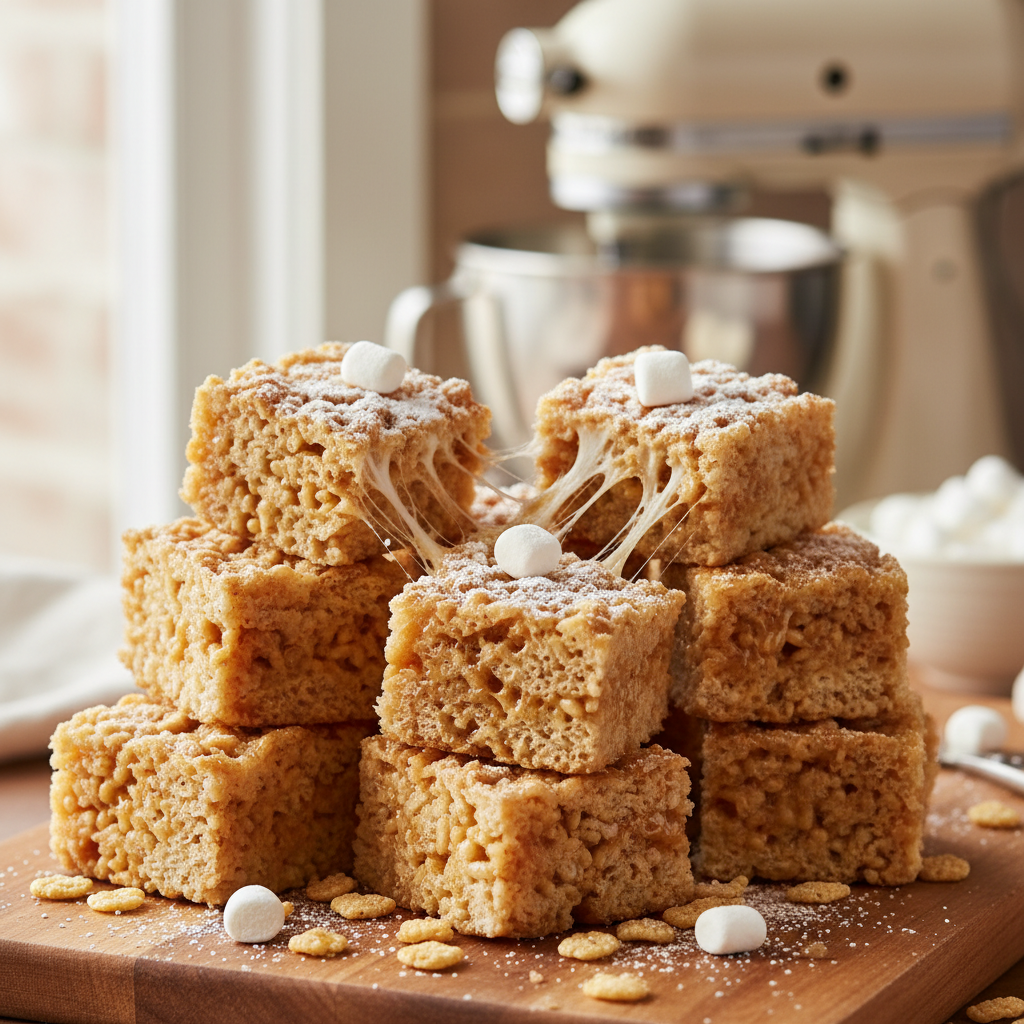
Rice Krispie treats are a classic no-bake dessert made from three simple ingredients: puffed rice cereal, marshmallows, and butter. The butter and marshmallows are melted together, then combined with the cereal and pressed into a pan to cool before being cut into squares.
Who can resist the comforting crunch and chew of a perfect Rice Krispie Treat? These delightful squares bring back sweet childhood memories and are a go-to for a quick snack, a lunchbox surprise, or a simple dessert. If you’ve ever wanted that ultimate gooey texture without a complicated recipe, you’re in the right place. At Recipesmondial, we believe cooking should be stress-free, so we’re sharing our favorite no-fail rice krispie treats recipe for perfectly gooey results every time.
Forget feeling overwhelmed or unsure how to get the ideal chewiness. This rice krispie treat recipe is designed with home cooks in mind, offering step-by-step cooking guidance that makes the process incredibly simple. It’s perfect for kitchen beginners, busy parents looking for easy snacks to serve with family-friendly meals, or anyone who wants a delicious treat in minutes. With just three basic ingredients, you’ll see how easy it is to make flavorful meals made easy, turning pantry staples into a treat that builds your confidence in the kitchen.
Why You’ll Love This Classic Rice Krispie Treat Recipe
Get ready to discover your new favorite treat! This classic Rice Krispie Treat recipe is incredibly simple and delivers delicious results without any fuss. It’s a guaranteed path to kitchen success and pure joy.
Here’s why you’ll love making these perfectly gooey Rice Krispie treats:
- Effortlessly Simple: Forget overwhelming recipes. This is a fantastic beginner-friendly recipe with clear, step-by-step guidance. It’s genuinely one of the easiest treats you’ll ever make.
- Lightning Fast: Whip up a batch in under 15 minutes. It’s the perfect solution for quick snacks, unexpected guests, or any time you want tasty treats fast.
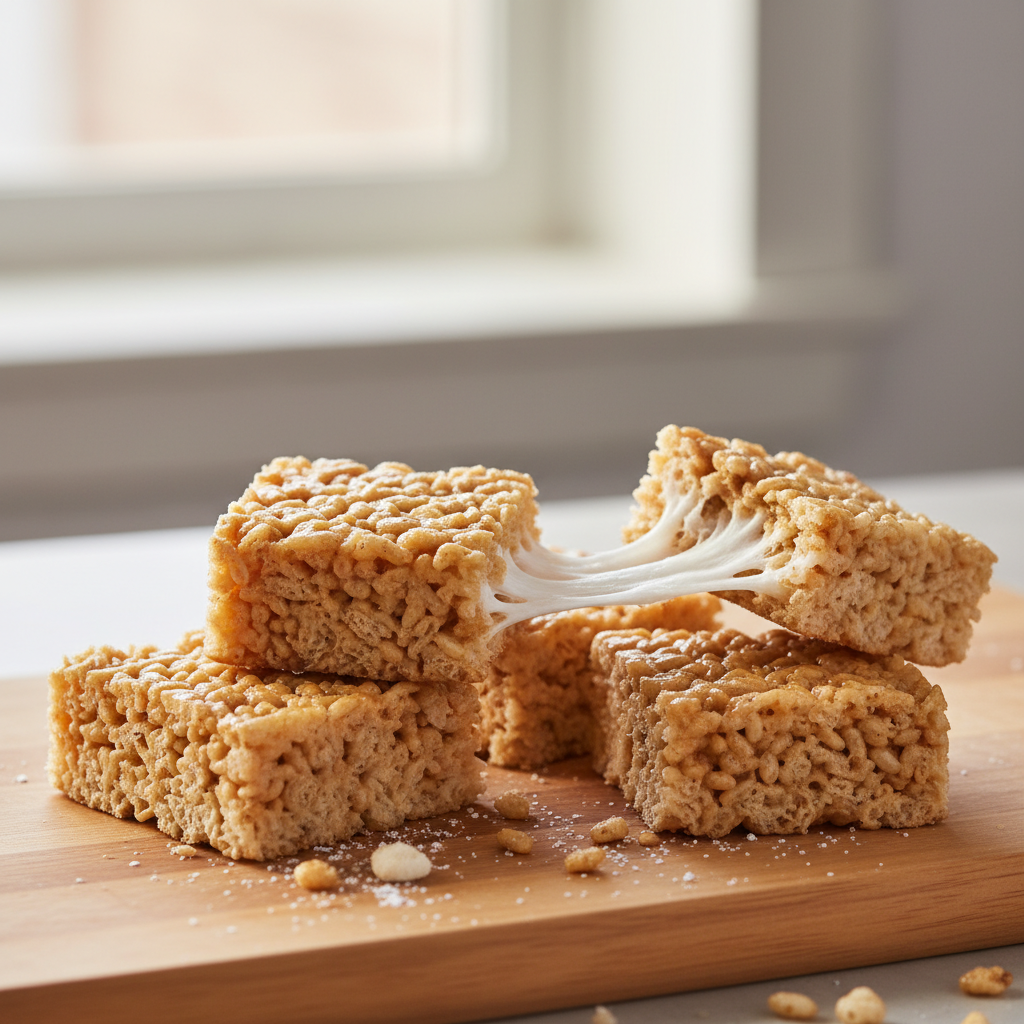
- Gooey Perfection: Say goodbye to hard, brittle treats. Our secret technique ensures a wonderfully soft, chewy, and perfectly gooey texture in every single bite.
- Everyday Ingredients: No special shopping trip needed. This recipe uses simple, common ingredients you likely already have, making it a great choice for budget-friendly cooking.
- Family Favorite: This is a guaranteed crowd-pleaser for all ages, making it a perfect solution for a family-friendly snack everyone will love.
- Boost Your Confidence: Build your kitchen confidence with this foolproof recipe. It delivers reliable, stress-free results every time, making you feel like a pro after just one batch.
- Endless Customization: The classic version is amazing, but this recipe is also a fantastic base for creativity. Add your own spin with extras like chocolate chips, sprinkles, or a hint of vanilla.
At Recipesmondial, we believe cooking should be stress-free and fun. This classic Rice Krispie Treat recipe embodies that spirit, proving how simple items can create something truly delicious. You’ll love turning basic ingredients into a delightful treat that you can proudly share with everyone!
What Ingredients Do You Need for Rice Krispie Treats?
Making the perfect batch of gooey, delicious Rice Krispie treats requires just a few basic ingredients you likely have in your pantry already. This makes them a fantastic choice for a quick, family-friendly dessert. You won’t need any fancy equipment or hard-to-find items for this classic recipe.
This is beginner-friendly cooking at its best. Let’s gather what you need to create these iconic treats!
- Rice Krispies Cereal: You’ll need 6 cups of this classic puffed rice cereal. It provides the crunchy base that makes these treats so satisfying. For the best texture, make sure your cereal is fresh.
- Mini Marshmallows: A 10-ounce bag is perfect. Mini marshmallows melt more quickly and evenly than larger ones. Freshness is crucial for a perfectly gooey texture, as stale marshmallows can make your treats stiff.
- Unsalted Butter: You’ll need 3 tablespoons. Butter adds rich flavor, helps the marshmallows melt smoothly, and prevents sticking. We recommend unsalted butter to control the saltiness, but if you only have salted, simply omit the added salt.
- Vanilla Extract (Optional but Recommended): Just 1 teaspoon makes a big difference by adding a wonderful depth of flavor. A good quality vanilla extract elevates these treats from good to unforgettable.
- Pinch of Salt (Optional but Recommended): A small ¼ teaspoon of salt balances the sweetness and enhances all the other flavors without making the treats taste salty. Trust us, this small addition is a game-changer.
Tips for Ingredient Success
Using high-quality ingredients and knowing a few simple tricks will ensure your Rice Krispie treats turn out perfectly every time. These tips will help you avoid common pitfalls and achieve the best results.
- Fresh Marshmallows are Key: Always use a fresh bag of marshmallows. Stale ones don’t melt as smoothly and can result in hard, brittle treats. If your marshmallows feel stiff in the bag, they’re past their prime for this recipe.
- Good Quality Butter: The flavor of good quality butter will shine through, adding richness and a delightful aroma.
- Don’t Skimp on Cereal: Measure your Rice Krispies accurately. Too little cereal will make the treats overly sticky, while too much will make them dry and crumbly.
- Control the Heat: Melt the butter and marshmallows over low heat. Using high heat can scorch them and cause the finished treats to become hard once they cool.
Ingredient Substitutions and Dietary Considerations
This recipe can be easily adapted to fit different dietary needs. Here are a few simple swaps you can make.
- Dairy-Free: Swap regular butter for a plant-based butter alternative. Most brands work wonderfully in this recipe.
- Vegan: For a fully vegan version, use a plant-based butter alternative along with vegan marshmallows. Dandies is a popular brand that melts well.
- Gluten-Free: While rice is naturally gluten-free, some brands of puffed rice cereal contain malt flavoring, which has gluten. Always check the label and choose a certified gluten-free brand to be safe. [1]
- Brown Butter Variation: For a richer, nuttier flavor, brown your butter in the pan before adding the marshmallows. This easy step adds incredible depth. We’ll cover this in more detail later!
How to Make Rice Krispie Treats Step-by-Step
Step 1: Melt the Butter and Marshmallows
To create the perfect marshmallow base, start by grabbing a large pot to prevent spills and give you plenty of room to stir. Place it over low heat and add the butter, allowing it to melt completely.
Once the butter has melted, add all the marshmallows to the pot. Continue to stir the mixture constantly over low heat. This is important because it helps the marshmallows melt evenly and prevents them from sticking to the bottom of the pot. Keep stirring until the mixture is smooth and completely melted—a crucial step for achieving gooey treats.
- Expert Tip: Melting marshmallows too quickly or over high heat can make your Rice Krispie treats hard later on. So, be patient and keep that heat low!
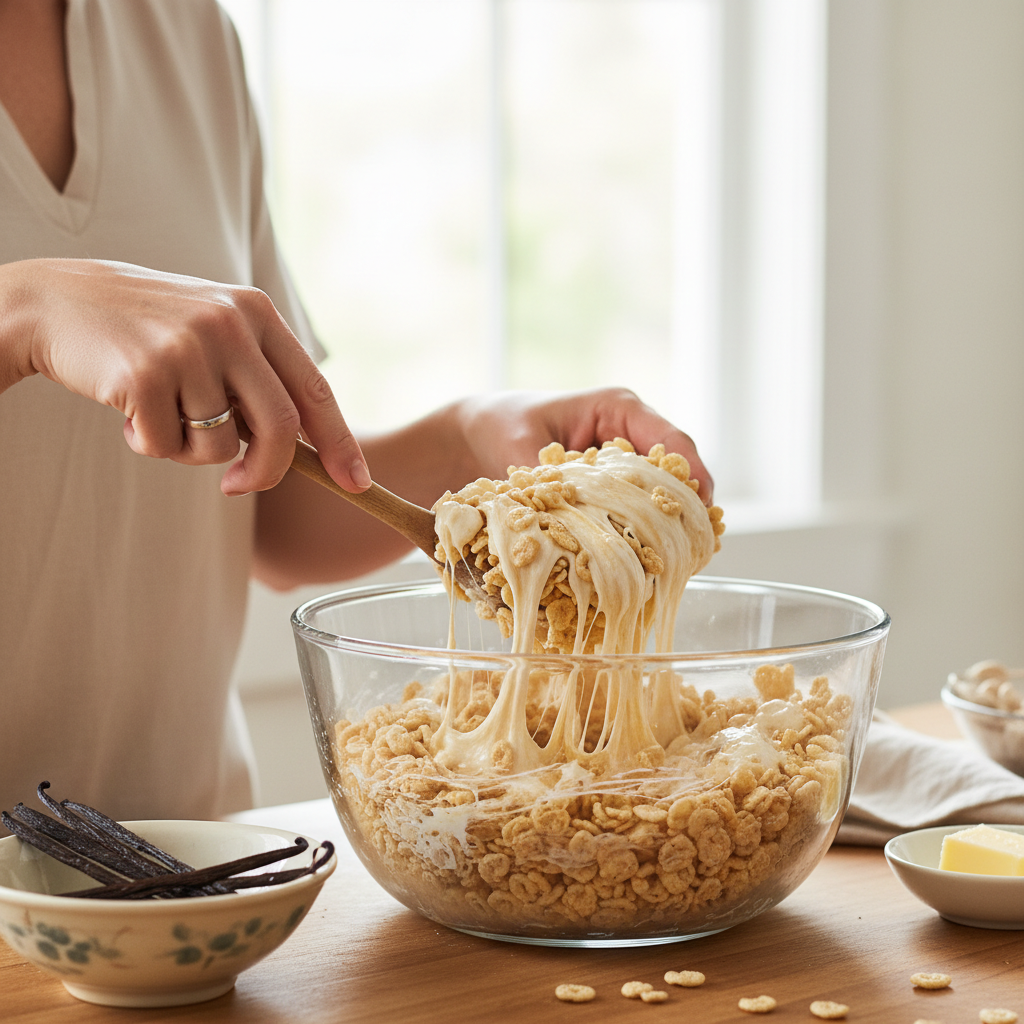
Step 2: Stir in the Cereal
Once the marshmallow mixture is perfectly smooth, remove the pot from the heat. This important step prevents the cereal from getting too soft. Immediately add the entire box of Rice Krispies to the pot.
Using a large spoon or a heat-safe spatula, gently stir until every piece of cereal is evenly coated. Work quickly but carefully to avoid overmixing, which can crush the cereal and make the treats dense instead of light and airy.
- Quick Tip: Ensure all the cereal is coated. This guarantees a consistent texture and flavor in every bite.
Step 3: Gently Press into the Pan
After the cereal is well-coated, transfer the mixture to a prepared 9×13 inch baking pan. For easy removal and cleanup, we recommend lining the pan with parchment paper or lightly greasing it with butter or non-stick spray.
Next, scoop the warm mixture into the pan. The key to perfectly gooey treats is to press them down gently. Compacting the mixture too firmly will make them tough. To prevent sticking, use a buttered spatula, a piece of parchment paper, or lightly buttered hands to press the mixture into an even layer.
- Pro Hack: A light touch makes all the difference here. Gentle pressing equals delightfully chewy treats.
Step 4: Let Cool and Cut
Now for the hardest part: waiting! Allow the Rice Krispie treats to cool completely in the pan, which usually takes about 1 to 2 hours at room temperature. For a quicker set, you can also refrigerate them for about 30 minutes.
Once fully cooled and firm, use a sharp knife to cut the treats into squares or rectangles. While 2×2 inches is a standard size, feel free to make them as big or small as you like. Your homemade, easy Rice Krispie treats are now ready to enjoy as a fantastic snack or quick dessert.
- Serving Suggestion: For extra fun, try using cookie cutters to make festive shapes once they’re cool!
Expert Tips for the Best, Gooiest Treats Every Time
Crafting gooey, irresistible rice krispie treats is easier than you think. Follow these expert tips from Recipesmondial to ensure they’re perfectly soft and chewy every time. Soon, you’ll be confidently making this easy, family-friendly treat for any occasion.
- Low and Slow for Marshmallows: When melting your butter and marshmallows, keep the heat on low. This prevents them from hardening or caramelizing, a common mistake that leads to tough treats.
- Fresh Marshmallows are Key: Always use fresh, soft marshmallows. Older, stale ones won’t melt as smoothly and can make your treats less pliable. When it comes to texture, freshness truly makes a difference.
- A Touch of Vanilla (Optional but Recommended): Once the marshmallows are melted and off the heat, stir in a teaspoon of vanilla extract. This simple addition elevates the flavor profile, adding a wonderful depth to your recipe.
- Don’t Overmix the Cereal: Once you add the Rice Krispies cereal, fold it in gently. Overmixing can crush the cereal and lead to an uneven coating, so stir just enough to combine everything.
- Lightly Press into the Pan: Use a buttered spatula or wax paper to gently press the mixture into your prepared pan. Avoid pressing too firmly, as compacting the mixture results in dense, hard treats instead of soft and airy ones.
- A Pinch of Salt: Adding a tiny pinch of salt (about 1/4 teaspoon) with the butter can truly enhance the sweetness and balance the flavors. This simple secret ingredient is a game-changer.
- Let Them Cool Naturally: Resist the urge to cut your treats too soon. Allow them to cool completely at room temperature. This lets them set properly, ensuring that perfect gooey-yet-firm texture you love.
- Grease Everything: Lightly grease your mixing bowl, spatula, and even your hands. This prevents the sticky marshmallow mixture from clinging to everything, which keeps your treats intact and makes cleanup a breeze.
What are some fun Rice Krispie Treats variations?
Chocolate Rice Krispie Treats
Transform classic Rice Krispie Treats into a chocolate lover’s dream with this easy, rich twist. Perfect for family-friendly meals or a fun baking project, there are a few simple ways to add a delicious chocolate flavor.
- Add Cocoa Powder: Stir 2-3 tablespoons of unsweetened cocoa powder into the melted butter and marshmallow mixture to create a deep chocolate base.
- Mix in Chocolate Chips: After stirring in the cereal, fold in 1 cup of chocolate chips. Milk chocolate, semi-sweet, or white chocolate chips all work well. The residual heat will slightly melt them, creating lovely pockets of gooey chocolate.
- Drizzle with Melted Chocolate: Once your rice krispie treat recipe has cooled, melt chocolate chips and drizzle them over the top for a beautiful finish and extra goodness.
Brown Butter Rice Krispie Treats
To elevate your Rice Crispy Treats recipe with a gourmet touch, use brown butter. This secret ingredient adds a nutty, toasted flavor that makes a huge difference. A favorite technique among approachable home cooking enthusiasts, this simple step creates an incredible depth of flavor.
- How to Brown Butter: Melt butter in a saucepan over medium heat. Continue cooking, stirring occasionally, as it foams and then turns golden. Once you see small brown bits at the bottom and smell a nutty aroma, remove it from the heat immediately.
- Why It’s Special: The browning process creates fragrant, caramel-like milk solids, giving your rice krispie treats an incredibly rich and complex flavor.
- Proceed as Usual: Once the butter is browned, add the marshmallows to the warm, nutty butter and stir until melted. From there, follow the rest of the beginner-friendly recipes steps.
Rice Krispie Treats with Sprinkles
Adding sprinkles is a fantastic and easy way to make your rice krispie treats more festive and fun. This simple enhancement makes them perfect for birthdays, parties, or just a colorful snack.
- When to Add: For even distribution, stir sprinkles into the marshmallow and cereal mixture right before pressing it into the pan. You can also add more on top after pressing.
- Choose Your Style: Use classic rainbow sprinkles for a vibrant look, or pick specific colors to match a holiday or party theme.
- Tip for Success: To prevent the sprinkles from melting, make sure the marshmallow mixture isn’t too hot before stirring them in.
Halloween Rice Krispie Treats
Get into the spooky spirit with fun Halloween-themed Rice Krispie Treats. A huge hit for family-friendly meals and parties, this variation lets you get creative with minimal effort using a few simple additions.
- Color Them Spooky: Add a few drops of orange or green food coloring to your melted marshmallow mixture to instantly transform them into festive treats.
- Shape Them Up: Instead of a square pan, press the mixture into a cookie sheet. Once set, use lightly greased Halloween cookie cutters (like ghosts, pumpkins, or bats) to create fun shapes.
- Decorate with Candy: Press candy corn, gummy worms, or other Halloween candies onto the treats while they are still warm. To create monster treats, attach edible candy eyes with a bit of frosting once they have cooled.
- Drizzle and Design: For a haunted look, drizzle melted colored candy melts over your treats. You can draw spider webs, zigzags, or other spooky patterns.
How to Store Your Treats to Keep Them Fresh
So, you’ve made a delicious batch of perfectly gooey rice krispie treats. How do you keep them tasting their best? The secret to preserving their wonderful texture and flavor is proper storage. Follow these simple tips to ensure your homemade rice crispy treats stay fresh for as long as possible.
Best Way to Store Rice Krispie Treats
The ideal way to keep your rice krispie treat recipe creations soft and chewy is at room temperature. Refrigeration makes them hard and less enjoyable, so always choose a cool, dry spot away from direct sunlight.
- Use an Airtight Container: This is the most crucial step. A well-sealed container prevents air from drying out your rice crispy treats, which is essential for keeping them soft.
- Layer with Parchment Paper: If you need to stack the treats, place a sheet of parchment or wax paper between each layer. This simple trick prevents them from sticking together.
- Store at Room Temperature: Keep the container in a pantry or on a countertop, away from any heat sources.
- Enjoy Within Days: For the best possible texture, enjoy your treats within 2 to 3 days. While they may last longer, they are most delightfully chewy during this time.
Tips for Extra Freshness
Want to go the extra mile? These small steps can make a big difference in keeping your treats perfectly fresh.
- Wrap Individually: For maximum freshness, especially if you’re packing them for lunches or parties, wrap each square in plastic wrap before placing them in an airtight container.
- Avoid the Fridge: It’s worth repeating: storing rice krispie treats in the refrigerator will make them hard. The cold temperature causes the marshmallows to seize up, ruining their signature chewiness.
- Don’t Freeze: While freezing works for some desserts, it is not recommended for classic rice crispy treats. Thawing can negatively alter their texture, so stick with room temperature storage for the best results.
By following these easy storage tips, you’ll ensure every bite of your homemade rice krispie treats is as perfectly gooey and delicious as the first!
Frequently Asked Questions
Can I make Rice Krispie treats in the microwave?
Yes, absolutely! Making rice krispie treats in the microwave is a fantastic shortcut. It’s perfect for when you need a quick snack or a speedy dessert. This beginner-friendly method is also a great option for new cooks.
Here’s how to do it:
- First, melt the butter in a large, microwave-safe bowl in 30-second intervals.
- Next, add the marshmallows to the melted butter.
- Microwave them for 1 to 2 minutes, stopping to stir every 30 seconds until the marshmallows are puffy and fully melted. Be careful not to overcook them.
- Then, stir in the Rice Krispies cereal until it is well coated.
- Finally, gently press the mixture into a prepared pan.
This quick method is a great way to enjoy delicious, gooey treats without much fuss!
Why are my Rice Krispie treats hard?
Hard rice krispie treats are a common frustration, but the problem is usually easy to fix. The cause is often one of a few key issues. Understanding them will help you make perfectly gooey treats every time.
- Overcooking the marshmallows: This is the most common reason for hard treats. When marshmallows are cooked too long or at too high a heat, their sugar caramelizes. This makes them brittle once they cool. To avoid this, always melt marshmallows slowly over low heat or in the microwave with careful timing.
- Pressing too firmly: When you press the mixture into the pan, do it gently. Packing the rice crispy treats too tightly squeezes out the air, resulting in dense, hard squares instead of light, chewy ones. Use a buttered spatula or wax paper and press just enough to create an even layer.
- Not enough butter or marshmallows: The butter and marshmallows are the gooey binder. If the ratio is off, your treats can turn out dry and hard. Always use the correct measurements from your recipe.
- Stale marshmallows: For the best texture, use fresh marshmallows. They melt more easily and stay softer than older marshmallows, which can lead to a tougher final product.
For the best results, remember to melt your marshmallows gently and press the mixture lightly into the pan. These simple tips will guarantee perfectly soft and chewy rice crispy treats every single time.
Can you use big marshmallows for Rice Krispie treats?
Yes, you can certainly use large marshmallows for rice krispie treats. The recipe is forgiving enough to work with different marshmallow sizes. However, keep a couple of things in mind for the best results.
- Melting time: Large marshmallows take longer to melt than mini ones. Be patient and stir them frequently to ensure they are fully melted and smooth before you add the cereal. This step prevents an uneven distribution of the gooey binder.
- Cutting them down: For a faster, more even melt, you can cut larger marshmallows in half or quarters. This increases their surface area, helping them melt more quickly and blend smoothly with the butter.
Regardless of the size, the key is to melt them slowly and gently. Avoid high heat to prevent the marshmallows from becoming hard. This tip helps ensure your treats turn out perfectly gooey every time.
Are Rice Krispie treats gluten-free?
This is an excellent question for anyone with dietary needs. While core ingredients like butter and marshmallows are often gluten-free, the answer for rice krispie treats isn’t a simple “yes.”
Here’s what you need to know:
- Marshmallows: Most standard marshmallow brands, like Jet-Puffed, are gluten-free [2]. However, it’s always smart to double-check the ingredient list for any hidden gluten-containing additives.
- Butter: Plain butter is naturally gluten-free.
- Rice Krispies Cereal: This is the key ingredient to watch. In the United States, traditional Kellogg’s Rice Krispies cereal contains malt flavoring, which is derived from barley, a gluten-containing grain [3]. For this reason, original Kellogg’s Rice Krispies are NOT gluten-free.
- Gluten-Free Alternatives: The good news is that many brands now offer certified gluten-free crisp rice cereal. These products are made without malt flavoring. To be safe, look for packaging that is clearly labeled “gluten-free,” especially if you are preparing them for someone with celiac disease or a gluten sensitivity.
In summary, to make truly gluten-free rice crispy treats, you must use a certified gluten-free brand of crisp rice cereal. This simple substitution makes these delicious snacks accessible to everyone, allowing those with dietary restrictions to enjoy them safely.