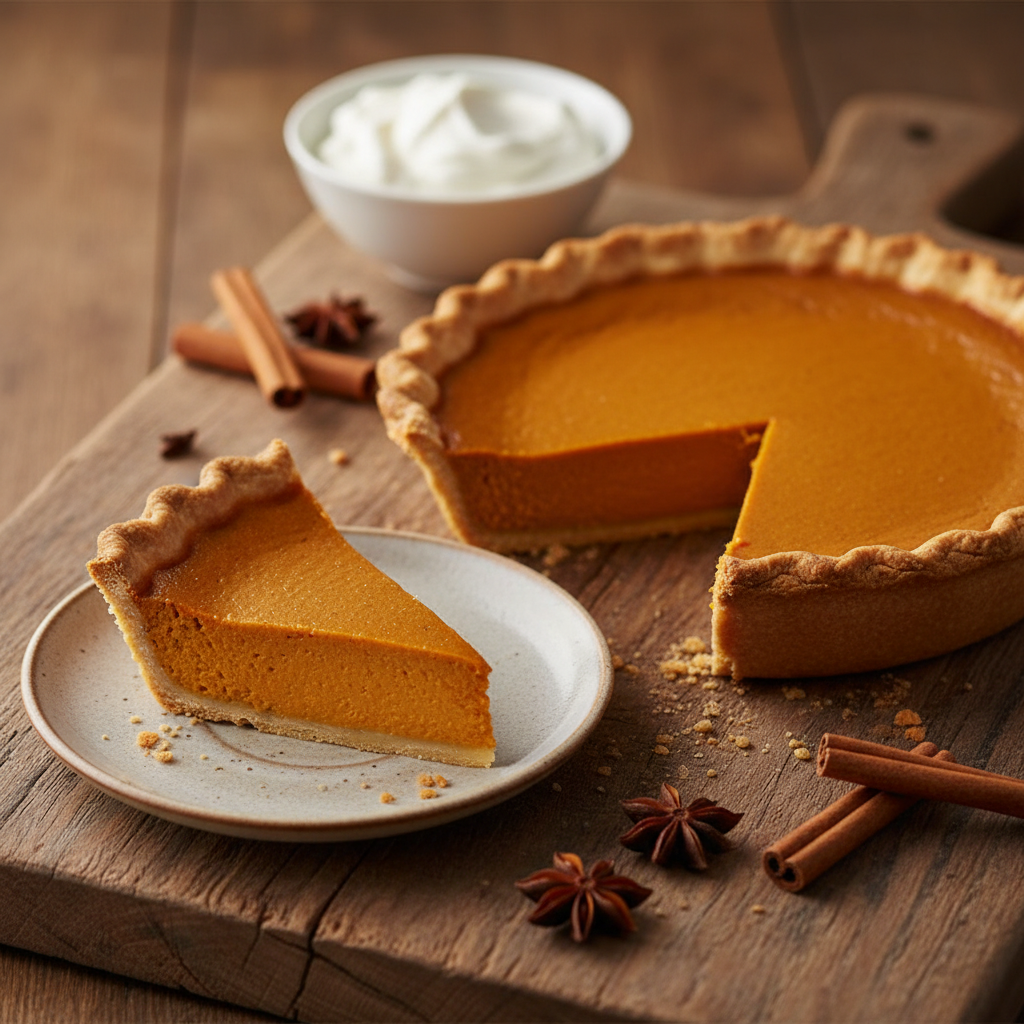
A classic pumpkin pie recipe involves making a smooth filling by combining pumpkin puree, eggs, sugar, heavy cream or evaporated milk, and warm spices like cinnamon, nutmeg, ginger, and cloves. This mixture is poured into an unbaked pie crust and baked until the center is just set. The result is a creamy, flavorful dessert perfect for holidays.
The aroma of warm, spiced pumpkin pie instantly transports us to cozy gatherings and cherished traditions. But if the thought of baking one from scratch feels daunting—or you worry about achieving a perfect, creamy filling without cracks—you’re not alone. Many home cooks feel overwhelmed by complex recipes, especially during holiday baking. At Recipesmondial, we believe dessert should be a joy to make and even more delightful to eat. That’s why we’re sharing our ultimate, beginner-friendly pumpkin pie recipe.
This isn’t just any pumpkin pie recipe; it’s your guide to a simple, foolproof dessert with rich flavor and a perfectly smooth texture. Designed with approachable home cooking in mind, our step-by-step guidance ensures you’ll create a stunning pie with confidence. Forget stressing over cracked tops or soggy crusts. We’ll walk you through each easy step, making the baking process enjoyable and rewarding. Get ready to bake a delicious, family-friendly pumpkin pie with ease!
Why Is This The Only Pumpkin Pie Recipe You’ll Need?
Perfect for Beginners (And Experts!)
Tackling a new dessert can feel daunting, but this pumpkin pie recipe is designed for everyone. With clear, step-by-step guidance, the process is enjoyable and stress-free. It’s the perfect way for beginners to build confidence in the kitchen and achieve reliable, delicious results.
Even seasoned bakers will appreciate this recipe’s simplicity and fantastic outcome. It’s a quick and reliable dessert for any occasion that is sure to leave a memorable impression. Get ready to bake with confidence!
Simple Ingredients, Incredible Flavor
You don’t need a pantry full of exotic items to create incredible flavor. This recipe calls for simple, everyday ingredients you likely already have, making it both approachable and budget-friendly. You won’t have to hunt for any special components.
We focus on combining these simple elements for maximum taste. Each one plays a vital role in creating a rich, creamy, and wonderfully spiced pumpkin pie. You’ll be amazed by the depth of flavor you can achieve with such basic ingredients. It’s a family-friendly dessert perfect for any gathering.
Our Foolproof, No-Crack Filling Secret
A cracked pumpkin pie can be disheartening after all your hard work. Our simple method, however, guarantees a smooth, beautiful top every time. This secret tip ensures a flawless presentation and a pie you’ll be proud to share.
Our foolproof approach focuses on two key steps: precise baking and gentle cooling. First, we show you how to avoid overbaking, the most common cause of cracks. Next, we guide you through a slow cooling process that allows the filling to set perfectly. The result is a stunning, picture-perfect pumpkin pie that will boost your confidence and make baking stress-free.
What Ingredients Do You Need for Pumpkin Pie?
For the Perfect Pie Crust (Store-Bought vs. Homemade)
A delicious pumpkin pie starts with a fantastic crust—it’s the base that holds all that creamy, spiced goodness. We know life gets busy, so you have two great options to choose from.
For the quickest option, choose a store-bought pie crust. This is a brilliant shortcut for quick meals and beginner-friendly recipes. It saves significant time and makes the baking process more enjoyable. For the best results, look for an unbaked, deep-dish version.
If you prefer to bake from scratch, a homemade crust offers incredible flavor and a true sense of accomplishment. It’s a wonderful way to elevate your pumpkin pie. Whichever path you choose, our guide will help you achieve a perfect result.
Ingredients for the Crust:
- 1 unbaked 9-inch pie crust: Choose a store-bought crust for convenience or use your favorite homemade recipe.
For the Rich & Creamy Pumpkin Filling
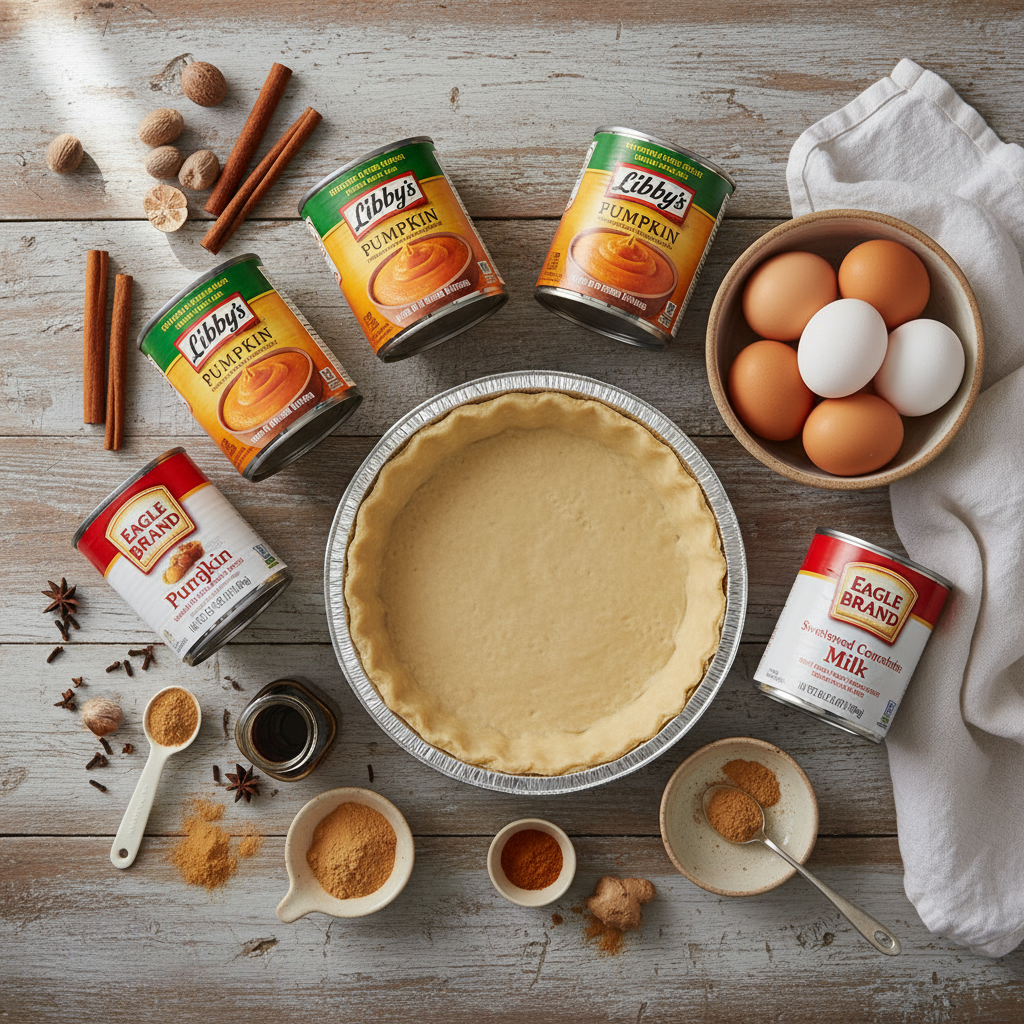
Next, let’s gather the ingredients for our rich and creamy pumpkin filling. You’ll find these are common pantry staples that are easy to find at any grocery store. This simple list is the key to making flavorful meals made easy.
- 1 (15-ounce) can pumpkin puree: Be sure to use 100% pure pumpkin, not pumpkin pie filling, as it forms the heart of your pie.
- ¾ cup granulated sugar: Adds the perfect amount of sweetness.
- ½ teaspoon salt: Balances the sweetness and enhances the spices.
- 1 teaspoon ground cinnamon: The classic warm spice for any pumpkin pie.
- ½ teaspoon ground ginger: Provides a subtle, zesty kick.
- ¼ teaspoon ground cloves: Adds a deep, aromatic note.
- ¼ teaspoon ground nutmeg: For that traditional autumn flavor. (For simplicity, you can substitute the cinnamon, ginger, cloves, and nutmeg with 2 teaspoons of pumpkin pie spice.)
- 2 large eggs: They bind the filling together for a smooth, custard-like texture.
- 1 ½ cups evaporated milk: This is the secret to an incredibly rich and creamy texture. It’s much thicker than regular milk.
- 1 teaspoon vanilla extract: Rounds out all the other flavors in the filling.
That’s it! With these simple ingredients, you’re ready to create a truly special pumpkin pie without any fancy tools or obscure items.
How Do You Make Pumpkin Pie Step-by-Step?
Step 1: Prepare Your Pie Crust
The first step is preparing the pie crust. For the easiest option, we recommend using a store-bought crust to save time and ensure a consistent result—a fantastic shortcut for busy families and beginner cooks.
However, whether your crust is store-bought or homemade, pre-baking is the key to preventing a soggy bottom. This simple step creates a crisp foundation for the creamy filling and is essential for a perfect pie.
Here’s how to prepare your crust:
- Thaw or Prepare: If using a frozen store-bought crust, let it thaw according to package directions. If making your own, prepare it and fit it into your pie plate.
- Prick the Crust: Use a fork to gently prick holes all over the bottom and sides of the pie crust. This allows steam to escape, preventing the crust from puffing up too much during baking.
- Blind Bake (Optional, but Recommended): For an extra-crispy crust, line it with parchment paper and fill with pie weights, dried beans, or rice.
- Bake Briefly: Bake the crust in a preheated 375°F (190°C) oven for 10-15 minutes, until the edges look slightly golden. If blind baking, remove the weights and parchment, then bake for another 5 minutes until the base is lightly golden.
- Cool: Let the crust cool completely on a wire rack before adding the filling. A cool crust prevents the filling from baking unevenly and helps keep the bottom crisp.
Step 2: Mix the Pumpkin Filling
Now for the heart of the pie: the filling. This straightforward method ensures a smooth, rich, and creamy result every time without any overwhelming or complex steps.
Gather your ingredients and follow these simple steps:
- Combine Wet Ingredients: In a large mixing bowl, whisk together the pumpkin puree, granulated sugar, brown sugar, and large eggs until the mixture is smooth and uniform.
- Add Spices and Salt: Stir in the ground cinnamon, ground ginger, ground nutmeg, and a pinch of salt until these classic, comforting spices are just incorporated.
- Introduce Cream or Evaporated Milk: Gradually whisk in the heavy cream or evaporated milk until the filling is perfectly smooth. Be careful not to overmix, as this can incorporate too much air and cause the pie to crack later.
- Taste (Optional): Carefully taste a tiny bit of the raw filling to adjust spices if desired. Remember to cook it fully afterward.
With that, you’ve created a delicious, classic pumpkin pie filling ready for the crust.
Step 3: Bake to Perfection
Baking is where your pumpkin pie comes to life. Following these steps carefully will help prevent common issues like cracks and ensure a perfectly set, creamy texture.
Let’s get baking:
- Preheat Oven: First, preheat your oven to 425°F (220°C). This initial high heat helps set the crust quickly.
- Pour Filling: Carefully pour the prepared pumpkin filling into your cooled, pre-baked pie crust, filling it almost to the top.
- Initial High Heat Bake: Place the pie on a baking sheet to catch any potential drips and make it easier to transfer. Bake at 425°F (220°C) for 15 minutes.
- Reduce Heat & Continue Baking: After 15 minutes, reduce the oven temperature to 350°F (175°C). Do NOT open the oven door. Continue baking for another 35-50 minutes.
- Check for Doneness: The pie is done when the edges are set but the center still has a slight jiggle. Alternatively, a knife inserted about one inch from the edge should come out clean. An internal temperature of 175°F (79°C) is ideal for custards [1].
- Prevent Over-Browning: If the crust edges start to brown too quickly, gently cover them with strips of aluminum foil or a pie crust shield.
Step 4: Cool, Chill, and Serve
The final steps—cooling and chilling—are just as crucial as baking. They ensure your pumpkin pie sets properly and develops its full flavor, so don’t be tempted to skip them!
Here’s how to finish your perfect pie:
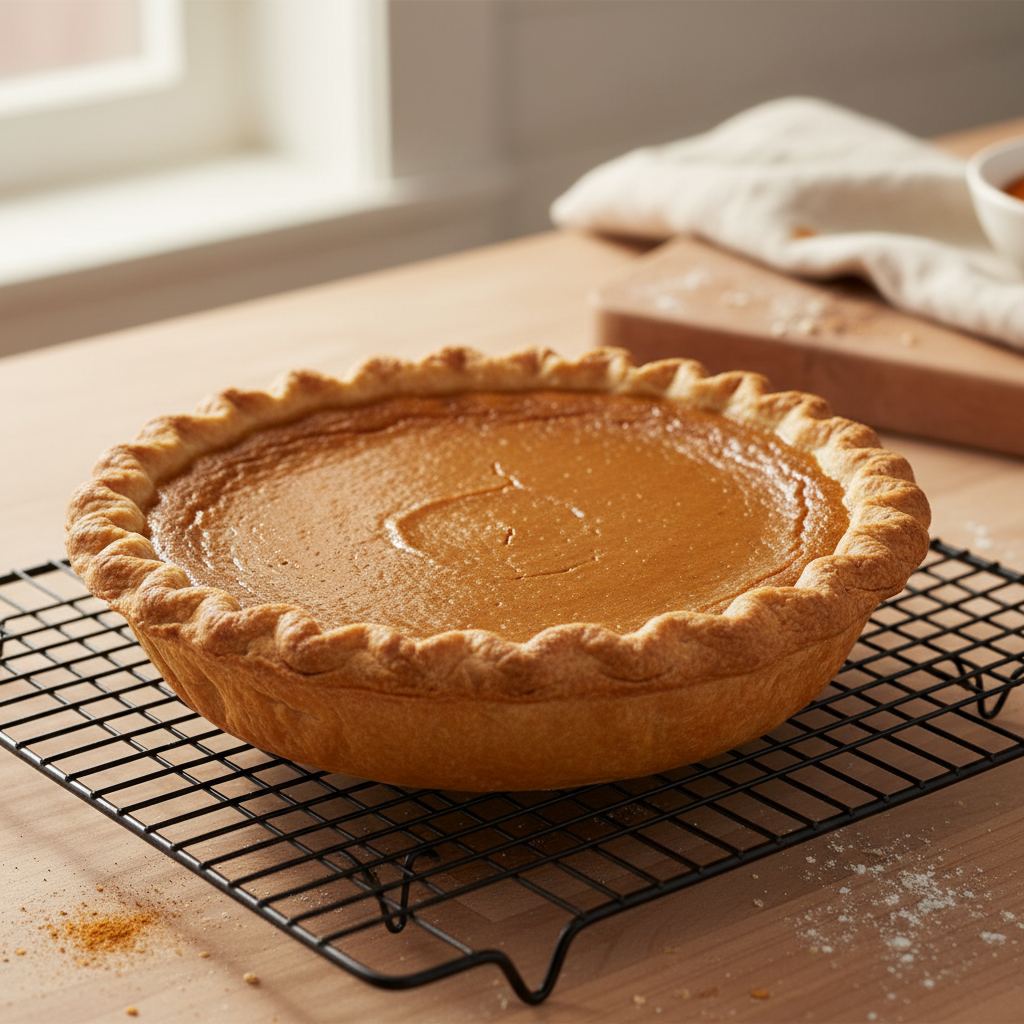
- Cool Completely: Remove the pie from the oven and place it on a wire rack to cool completely at room temperature for at least 2-3 hours. The filling will continue to set as it cools.
- Chill Thoroughly: Once cool, transfer the pie to the refrigerator to chill for at least 4 hours, or preferably overnight. Chilling not only firms up the filling for a perfect slice but also allows the flavors to meld beautifully.
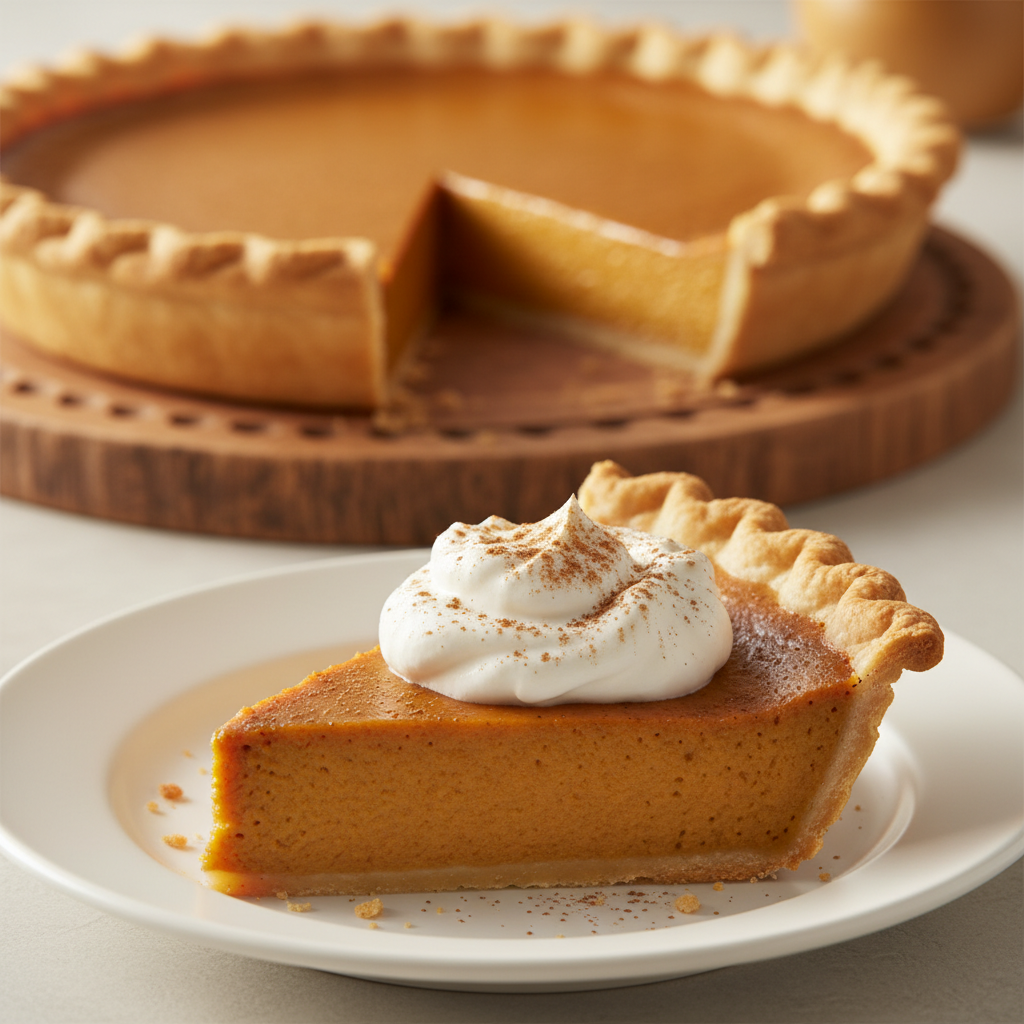
- Slice and Serve: Once chilled, your pie is ready! For clean cuts, use a sharp knife and run it under hot water between slices.
- Serving Suggestions: Serve chilled, topped with a dollop of fresh whipped cream. A sprinkle of cinnamon or a drizzle of caramel sauce also adds a lovely finishing touch.
Congratulations! You’ve made a delicious and beautiful pumpkin pie that’s sure to impress.
What Are Our Top Tips for the Best Pumpkin Pie?
Crafting the perfect pumpkin pie doesn’t have to be daunting. With a few smart techniques, you can avoid common baking woes and achieve a stunning dessert every time. These tips will help you bake with confidence, making the journey easy, enjoyable, and reliably delicious.
How to Avoid a Cracked Top
A perfectly smooth pumpkin pie top is a satisfying goal for any baker. Cracks typically form when the pie bakes too quickly or cools too fast. Fortunately, this common issue is easy to prevent. Follow these simple steps to achieve a beautiful, unblemished surface:
- Do Not Overbake: Overbaking is the main culprit for cracks. A pie that bakes too long will dry out and split. We discuss how to tell when your pie is done in the next section.
- Cool Slowly: After baking, let your pie cool gradually on a wire rack at room temperature. A sudden temperature change can shock the custard, leading to cracks.
- Avoid Over-mixing: Mix your filling just until the ingredients are combined. Over-mixing incorporates excess air, which can cause the filling to expand and then crack as it cools.
- Gentle Heat: Baking at a slightly lower temperature for a bit longer allows the custard to set more evenly, which also helps prevent cracks.
How to Know When Your Pie Is Perfectly Done
Knowing exactly when to pull your pumpkin pie from the oven is crucial for a creamy, perfectly set filling. An underbaked pie will be runny, while an overbaked one may crack. Use these easy methods to check for doneness:
- The Jiggle Test: Gently shake the pie dish. The edges of the filling should be set and firm, but the very center (about a 1-inch circle) should still have a slight jiggle, similar to gelatin. The center will continue to set as the pie cools. This is the most reliable method.
- Visual Cues: Look for a golden-brown crust and a filling that appears opaque and slightly puffed around the edges.
- Clean Knife Test (Optional): For extra reassurance, insert a thin knife into the filling about halfway between the center and the edge. If it comes out mostly clean, the pie is ready. Avoid testing the very center to prevent leaving a visible mark.
Once your pie passes the jiggle test, remove it from the oven immediately to prevent overbaking. This final step is key to ensuring a perfectly smooth and creamy texture.
Using Canned vs. Fresh Pumpkin Puree
Both canned and fresh pumpkin puree can yield a delicious pie, but each has distinct advantages. Your choice will likely depend on your available time, personal preference, and the flavor profile you want to achieve. Let’s explore the key differences:
| Feature | Canned Pumpkin Puree | Fresh Pumpkin Puree |
|---|---|---|
| Convenience | Extremely convenient. It’s ready to use straight from the can, making it ideal for busy schedules. | More time-consuming, as it requires roasting, peeling, and pureeing a fresh pumpkin. |
| Consistency | Very consistent in texture and moisture, which leads to reliable results. Canned pumpkin puree is processed to have a smooth, uniform texture [2]. | Consistency and moisture content can vary depending on the pumpkin variety and how thoroughly it’s drained. |
| Flavor Profile | Offers the mild, classic pumpkin flavor that most people associate with traditional pumpkin pie. | Provides a deeper, richer, and more earthy pumpkin flavor that can be slightly sweeter and more vibrant. |
| Texture | Smooth and uniform, resulting in a very creamy pie filling. | Can be slightly more fibrous if not pureed thoroughly, which can add a pleasant rustic quality. |
| Best For | Anyone seeking reliable, consistent results, especially when short on time. It’s a beginner-friendly staple. | Bakers who want a gourmet touch, have extra time, or enjoy the process of making everything from scratch. |
If you opt for fresh puree, be sure to use a sugar or pie pumpkin, as carving pumpkins are too watery. Roasting the pumpkin until tender makes it easy to puree. Crucially, remember to drain any excess liquid from your fresh puree to prevent a watery filling. Whichever option you choose, you’re on your way to a delicious homemade pumpkin pie.
What Are Some Popular Recipe Variations?
Easy Pumpkin Pie with Condensed Milk
Craving classic pumpkin pie with less fuss? A version made with sweetened condensed milk is the perfect solution. This method simplifies the filling, making it a fantastic choice for beginner-friendly recipes and busy home cooks.
Sweetened condensed milk adds rich creaminess and sugar in one step. As a result, you’ll need fewer ingredients overall. This makes it a quick and reliable way to get a delicious dessert on the table.
Here’s why it’s a great variation:
- Simplified Sweetness: Condensed milk is already sweetened, which cuts down on the amount of added sugar you need.
- Extra Creaminess: It delivers an incredibly smooth and rich texture, creating a luxurious mouthfeel.
- Foolproof Method: It’s hard to go wrong with this approach, ensuring a consistently good result.
To adapt your recipe, simply swap out some of the sugar and regular milk for the condensed milk. This variation offers a great way to make desserts for simple dinner recipes even simpler.
Classic Old-Fashioned Pumpkin Pie with Milk
For a more traditional approach, the classic old-fashioned pumpkin pie uses regular or evaporated milk. This method creates a slightly less sweet filling that allows the warm spices to shine, making it a staple among family-friendly meals.
Using milk—whether whole, 2%, or evaporated—gives the pie a delicate, custardy texture. While different from the condensed milk version, it’s just as satisfying and a perfect example of truly flavorful meals made easy.
Why choose this classic approach?
- Balanced Sweetness: You have full control over the sugar levels, letting you adjust the pie to your preference.
- Spice Forward: The subtle sweetness allows the cinnamon, nutmeg, and ginger to truly pop.
- Traditional Texture: It creates the beloved, tender custard that many remember from childhood.
Since this variation uses standard pantry ingredients and follows traditional steps, it’s a wonderful way to enjoy a pie that feels both homemade and familiar.
Using a Pre-Made (Libby’s) Filling
When life gets busy, a pre-made pumpkin pie filling like Libby’s Famous Pumpkin Pie Mix is the fastest route to a delicious dessert. This convenient option is perfect for quick meals and last-minute baking, helping to solve mealtime decisions effortlessly.
Because the mix comes pre-spiced and pre-sweetened, it significantly simplifies the baking process. You can enjoy a homemade-tasting pie with minimal effort, making it an ideal solution for anyone new to baking.
Consider these benefits for your next baking adventure:
- Ultimate Time-Saver: With the spices and sugar already measured and mixed, this option drastically cuts down on prep time.
- Guaranteed Flavor: The mix provides a consistent and delicious flavor profile every single time.
- Minimal Ingredients: You often only need to add eggs and milk to the mix to complete the filling.
Simply pour the filling into your prepared pie crust and bake as directed. This variation offers an incredibly approachable home cooking experience, ensuring delicious results even on your busiest days.
How Should You Store and Serve Pumpkin Pie?
Make-Ahead and Storage Instructions
Making your pumpkin pie ahead of time is a smart move that saves time, especially on busy meal prep days. You can bake it up to two days before serving, and it will stay perfectly fresh.
After baking, always let your pie cool completely on a wire rack. This crucial step helps the filling set properly and prevents condensation from forming during storage.
Because pumpkin pie is a dairy-based dessert, it must be refrigerated once it’s completely cool. Store it in the fridge by covering it loosely with plastic wrap, aluminum foil, or a pie dome to keep it from drying out.
Pumpkin pie will stay delicious in the refrigerator for 3-4 days [3], so be sure to enjoy it within this timeframe.
If you want to plan even further ahead, freezing is an excellent solution.
- Bake your easy pumpkin pie as directed.
- Let it cool completely on a wire rack (about 2-3 hours).
- Wrap the cooled pie very tightly with a layer of plastic wrap.
- Add a second layer of heavy-duty aluminum foil for extra protection.
- Label and freeze the pie for up to 1 month.
To serve your frozen pie, thaw it safely overnight in the refrigerator. After it has thawed, let it stand at room temperature for 30-60 minutes before serving to bring out its best flavor and texture.
Our Favorite Serving Suggestions
Serving your homemade pumpkin pie is the best part! Here are a few simple ideas to make each slice extra special.
The classic choice is a dollop of fresh whipped cream, which adds both richness and lightness. For the best taste, make it yourself and sprinkle a little cinnamon or nutmeg on top to boost the pie’s spice flavor.
For a wonderful contrast, consider a scoop of vanilla ice cream, which pairs beautifully with the spiced pie. A drizzle of warm caramel sauce is also fantastic, and chocolate sauce works surprisingly well too.
Feeling a bit fancy?
- Candied Pecans: Sprinkle some crunchy candied pecans over each slice.
- Toasted Coconut: A light sprinkle of toasted coconut flakes adds a unique twist.
- Maple Syrup: A tiny drizzle of pure maple syrup enhances the fall flavors.
- Coffee or Tea: Serve your pie with a fresh cup of coffee or a warm herbal tea.
- Fruit: A side of fresh berries or sliced apples offers a refreshing counterpoint.
Remember, pumpkin pie can be served chilled or slightly warm. To serve it warm, simply let it sit at room temperature for about 30 minutes, which brings out its full aromatic profile. Enjoy every flavorful bite
Frequently Asked Questions
How do you make an easy pumpkin pie?
Making a delicious pumpkin pie is simpler than you might think. At Recipesmondial, we focus on clear, step-by-step guidance to help you create desserts with confidence. We designed our foolproof pumpkin pie recipe for home cooks who want to enjoy the process without the stress.
Here’s how we make it extra easy:
- Simple Ingredients: Our recipe uses readily available ingredients, so you won’t need to visit a specialty store.
- Store-Bought Crust Option: Using a pre-made pie crust saves significant time and effort, making it a fantastic shortcut for busy families.
- Foolproof Filling: Our recipe helps prevent common issues like a cracked filling. We guide you through each step to ensure it turns out creamy and rich.
- Clear Baking Instructions: We provide exact temperatures and times, plus tips on how to tell when your pie is perfectly done. This helps build confidence for beginner cooks.
- Minimal Steps: We break the process down into simple, manageable actions so you can move from preparation to baking smoothly.
This approach ensures you get a flavorful, impressive pumpkin pie every time. It’s one of our favorite beginner-friendly recipes.
Can you make pumpkin pie from a fresh pumpkin?
Absolutely! Making pumpkin pie from a fresh pumpkin offers a wonderful, subtle earthiness. However, be prepared for more prep work compared to using canned pumpkin puree.
Here’s a quick overview of the process:
- Choose the Right Pumpkin: Select small “sugar” or “pie” pumpkins, which have sweeter, less stringy flesh. Avoid using large carving pumpkins.
- Roast the Pumpkin: Cut the pumpkin in half and scoop out the seeds. Place the halves cut-side down on a baking sheet and roast at 375°F (190°C) for 45-60 minutes, or until very tender.
- Scoop and Puree: Once the pumpkin is cool enough to handle, scoop out the soft flesh. Puree it in a food processor until completely smooth, adding a splash of water if it seems too thick.
- Drain Excess Water: Fresh pumpkin puree contains more water than canned. To prevent a watery pie, place the puree in a fine-mesh sieve lined with cheesecloth and let it drain for a few hours.
While using fresh pumpkin is a rewarding culinary experience, we generally recommend canned pumpkin puree for its convenience and consistent texture.
What does condensed milk do for pumpkin pie?
Sweetened condensed milk is a fantastic ingredient for pumpkin pie. It plays several key roles in creating a delicious, creamy filling with a velvety texture.
Here’s what it brings to your pie:
- Sweetness: Condensed milk is already sweetened, so you often need less added sugar. It provides a balanced, rich sweetness.
- Creaminess: Its incredibly thick consistency gives the pie filling a luxurious, smooth texture for a truly indulgent dessert.
- Richness: It adds a distinct depth of flavor that perfectly complements the warm spices in pumpkin pie.
- Simplicity: Using condensed milk can simplify your ingredient list, as it often replaces both evaporated milk and a large portion of the sugar.
Historically, condensed milk became a popular dessert ingredient for its long shelf life and consistent quality [4]. Because of this, many easy pumpkin pie recipes feature it as a shortcut to a velvety smooth and incredibly tasty pie.