Tag: quick meals

  • Easy Chicken Fajita Recipe: A Simple Step-by-Step Guide

    Easy Chicken Fajita Recipe: A Simple Step-by-Step Guide

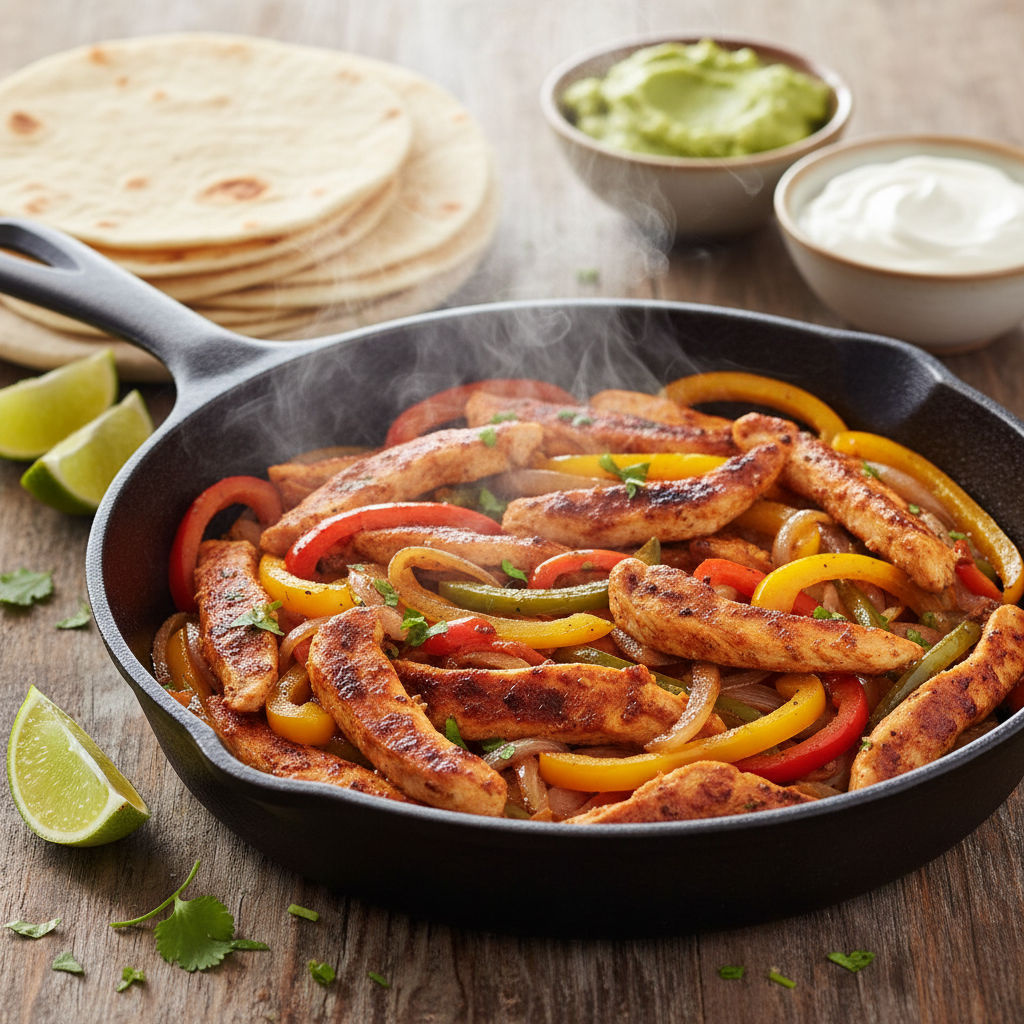
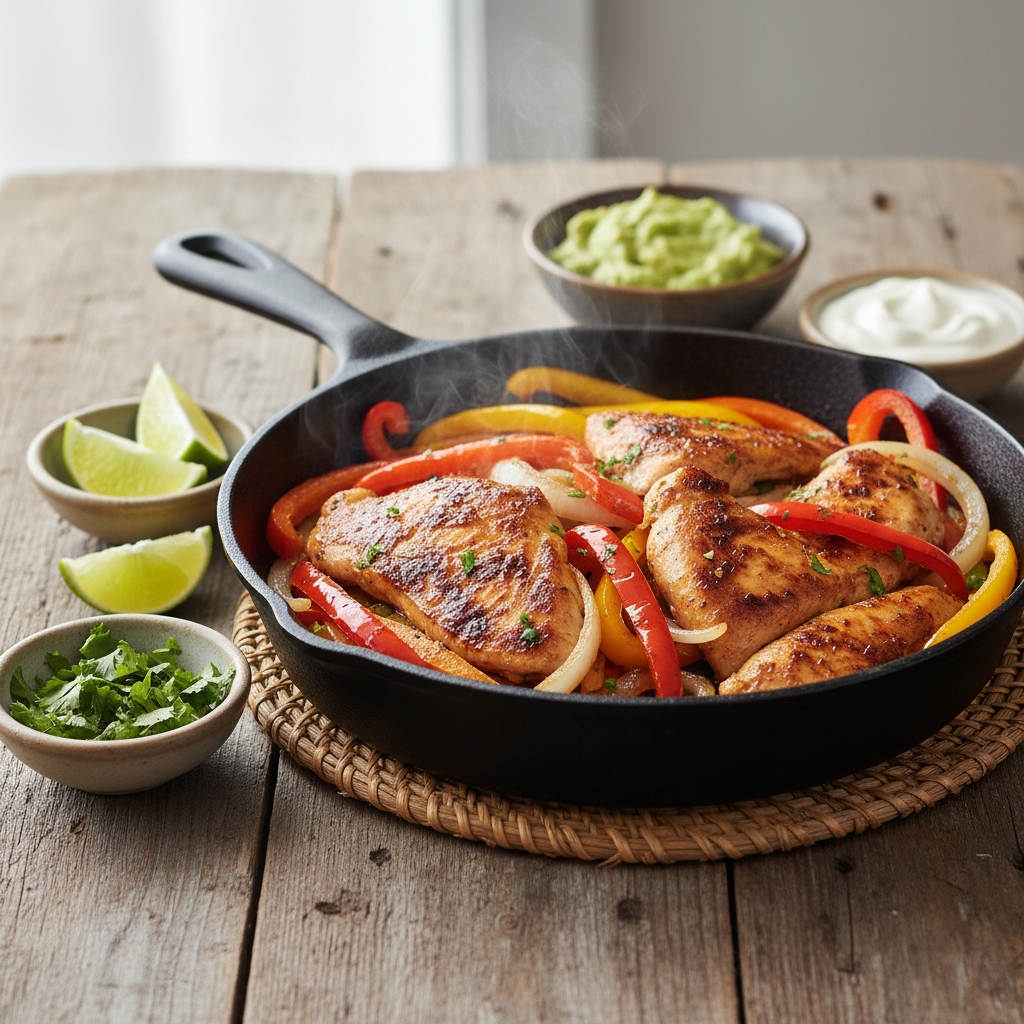
    A fajita is a popular Tex-Mex dish featuring grilled strips of meat, commonly chicken, beef, or steak, cooked with sliced onions and bell peppers. It is typically served sizzling on a cast-iron platter with warm flour or corn tortillas and a variety of toppings like salsa, guacamole, sour cream, and cheese.

    Tired of weeknight dinner dilemmas? We’ve all been there: staring into the fridge, wanting a flavorful, satisfying dinner that doesn’t take hours to make. Finding quick, family-friendly meals that please everyone can feel overwhelming, especially when you’re short on time or lack confidence in your cooking skills. But what if a restaurant-quality meal with vibrant flavors was just a few simple steps away?

    Enter the humble yet mighty chicken fajita! At Recipesmondial, we believe cooking should be a stress-free adventure, not a chore. That’s why we created this easy chicken fajita recipe—to take the guesswork out of dinner and help you cook with confidence. This guide is packed with approachable home cooking tips, so you can transform simple ingredients into a sizzling, spectacular meal that will quickly become a go-to in your repertoire.

    Get ready to discover how simple it is to create incredible chicken fajitas in your own kitchen. We’ll walk you through every step, from preparing your ingredients and mastering the perfect homemade seasoning to cooking everything perfectly. We’ll also share fun variations and serving suggestions to make it a complete feast. Let’s dive in and see what makes this chicken fajita recipe so wonderfully easy!

    What Makes This Chicken Fajita Recipe So Easy?

    Looking for a fantastic meal without the fuss? This chicken fajita recipe is one of our easiest. At Recipesmondial, we believe cooking should be fun, not stressful. We designed this recipe to remove the guesswork from making flavorful, family-friendly meals, so you won’t be overwhelmed by complex steps or technical terms.

    We know that busy home cooks and families need healthy, tasty meals they can make quickly. This recipe is your answer. It transforms simple ingredients into a delicious dinner, helping you enjoy cooking without the stress.

    Why This Chicken Fajita Recipe Is So Simple

    We’ve stripped away the complications to guarantee a successful, stress-free meal. Here’s what makes this recipe so approachable:

    • Everyday Ingredients: Find everything you need at your local grocery store. This recipe uses fresh chicken, vibrant bell peppers, onions, and other pantry staples—no obscure items.
    • Quick Prep Time: Prepare the chicken and veggies in just a few minutes. We use simple, straightforward cuts that are perfect for beginners and minimize chopping time.
    • Homemade Seasoning, Made Easy: Our simple seasoning blend uses common spices you probably already own. It’s easy to mix and tastes much better than store-bought packets.
    • Minimal Marinating: While a long marinade adds flavor, this recipe works perfectly with just a quick 15-minute soak. It’s ideal for busy weeknights when you’re short on time.
    • One-Pan Wonder: Everything cooks in a single skillet or cast-iron pan. That means less cleanup and more time to enjoy your meal.
    • Clear, Step-by-Step Guidance: Our instructions are precise and actionable, guiding you through every step. You’ll go from feeling uncertain to cooking with confidence.
    • Fast Cooking: From start to finish, you can have these flavorful chicken fajitas on the table in about 30 minutes, making it the perfect quick meal for any day.
    • Reliable Results: This recipe has been thoroughly tested to ensure delicious, consistent results every time. You’ll build confidence with each successful meal.

    This fajitas recipe proves that flavorful, easy meals are possible. It’s perfect for anyone who needs quick, reliable dinner ideas or wants to discover new simple dishes. Get ready to cook with confidence and enjoy every bite!

    What Ingredients Do You Need for Fajitas?

    A flat lay photo showing fresh chicken fajita ingredients, including raw chicken, sliced bell peppers, red onion, seasoning, lime, cilantro, and tortillas on a light wooden surface.
    A bright, clean overhead shot (flat lay) of all fresh, vibrant ingredients for easy chicken fajitas, meticulously arranged on a rustic light wooden cutting board or a light stone countertop. Ingredients should include thinly sliced raw chicken breast, colorful bell peppers (red, yellow, green) cut into strips, sliced red onions, a small bowl of fajita seasoning mix, fresh lime wedges, a bunch of fresh cilantro, and a stack of warm flour tortillas. The lighting is soft and natural, emphasizing the freshness and inviting colors. Professional food photography, photorealistic, high-quality food magazine photo. No hands or people.

    For the Chicken and Vegetables

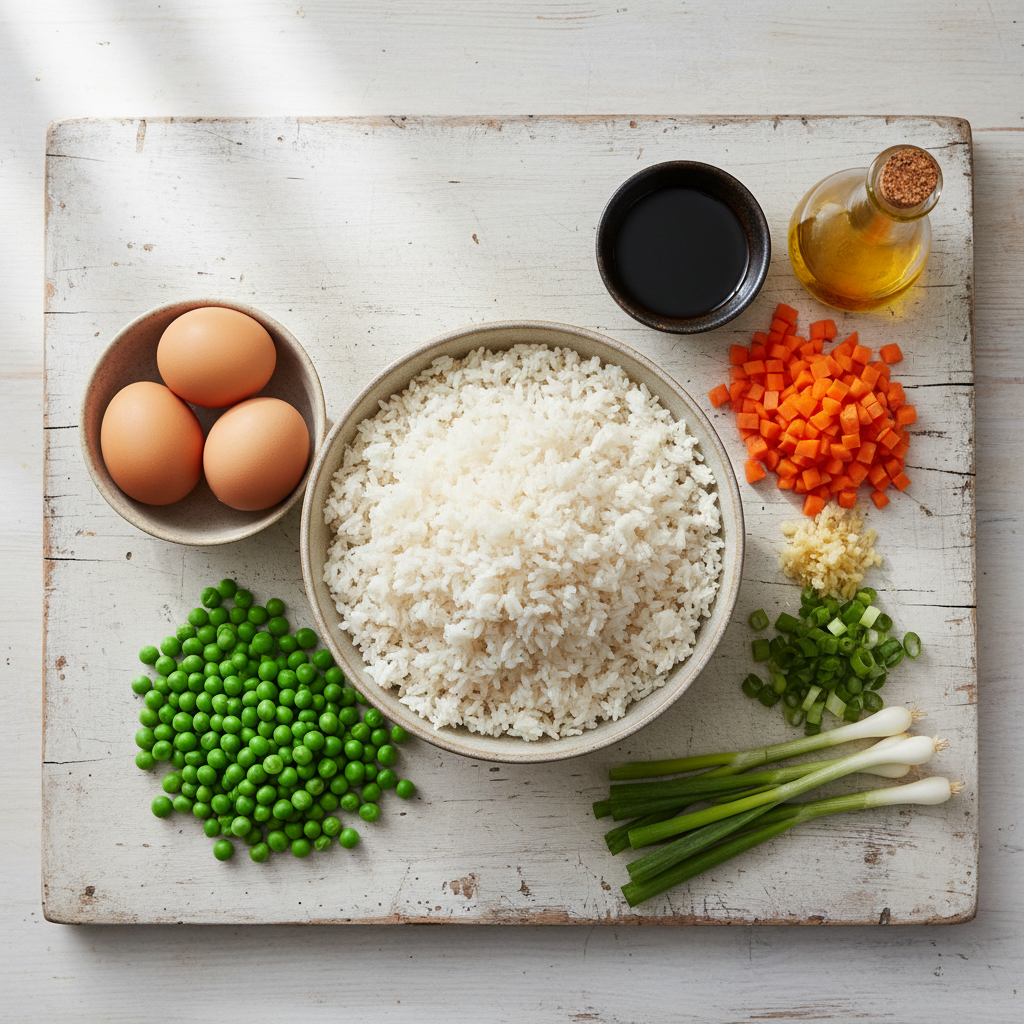
    Delicious chicken fajitas start with fresh, simple ingredients you probably already have in your kitchen. Here’s what you’ll need for this easy chicken fajita recipe:

    • Chicken: 1.5 lbs boneless, skinless chicken breasts or thighs, sliced into thin 1/4-inch strips. While chicken breasts are leaner, thighs offer more flavor and stay juicier.
    • Bell Peppers: 3 large bell peppers, thinly sliced. Using a mix of red, green, and yellow creates a vibrant dish.
    • Onion: 1 large yellow onion, thinly sliced to match the size of your bell peppers.
    • Olive Oil: 2 tablespoons, to cook the chicken and vegetables and prevent them from sticking to the pan.

    These core ingredients create a flavorful, family-friendly meal that everyone will love.

    For the Homemade Fajita Seasoning

    The secret to amazing fajitas is a great homemade seasoning blend. Making your own lets you control the flavor and avoid the additives found in store-bought packets. This simple mix brings authentic taste directly to your chicken fajitas.

    • Chili Powder: 1 tablespoon, to provide a warm, earthy base for the seasoning.
    • Cumin: 1 teaspoon, which adds that distinctive, smoky flavor characteristic of fajitas.
    • Smoked Paprika: 1 teaspoon, for a touch of rich color and a subtle smoky note.
    • Garlic Powder: 1 teaspoon, for essential savory depth.
    • Onion Powder: 1 teaspoon, to perfectly complement the fresh onion in the fajitas.
    • Salt: 1 teaspoon, which is essential for enhancing all the other flavors.
    • Black Pepper: 1/2 teaspoon, for a hint of mild spice.
    • Cayenne Pepper: 1/4 teaspoon (optional), to add a little kick if you like your fajitas spicy.

    You can easily double or triple this recipe. Store extra seasoning in an airtight container to have a quick shortcut for your next meal!

    How to Make the Best Chicken Fajitas (Step-by-Step)

    A sizzling cast iron skillet filled with golden-brown chicken fajitas, colorful bell peppers, and onions, garnished with fresh cilantro and lime wedges.
    A professional food photography shot capturing a sizzling hot cast iron skillet filled with perfectly cooked, caramelized chicken and vibrant bell peppers and onions, fresh off the stove. Steam is subtly rising, indicating its warmth and freshness. The chicken is golden-brown with slight charring, and the vegetables are tender-crisp. The skillet is placed on a heat-resistant trivet on a rustic wooden table, surrounded by small bowls of fresh garnishes like chopped cilantro, extra lime wedges, and perhaps a dollop of sour cream or guacamole in the background, slightly out of focus. The scene is warm, inviting, and appetizing. Photorealistic, high-quality food magazine photo. No hands or people.

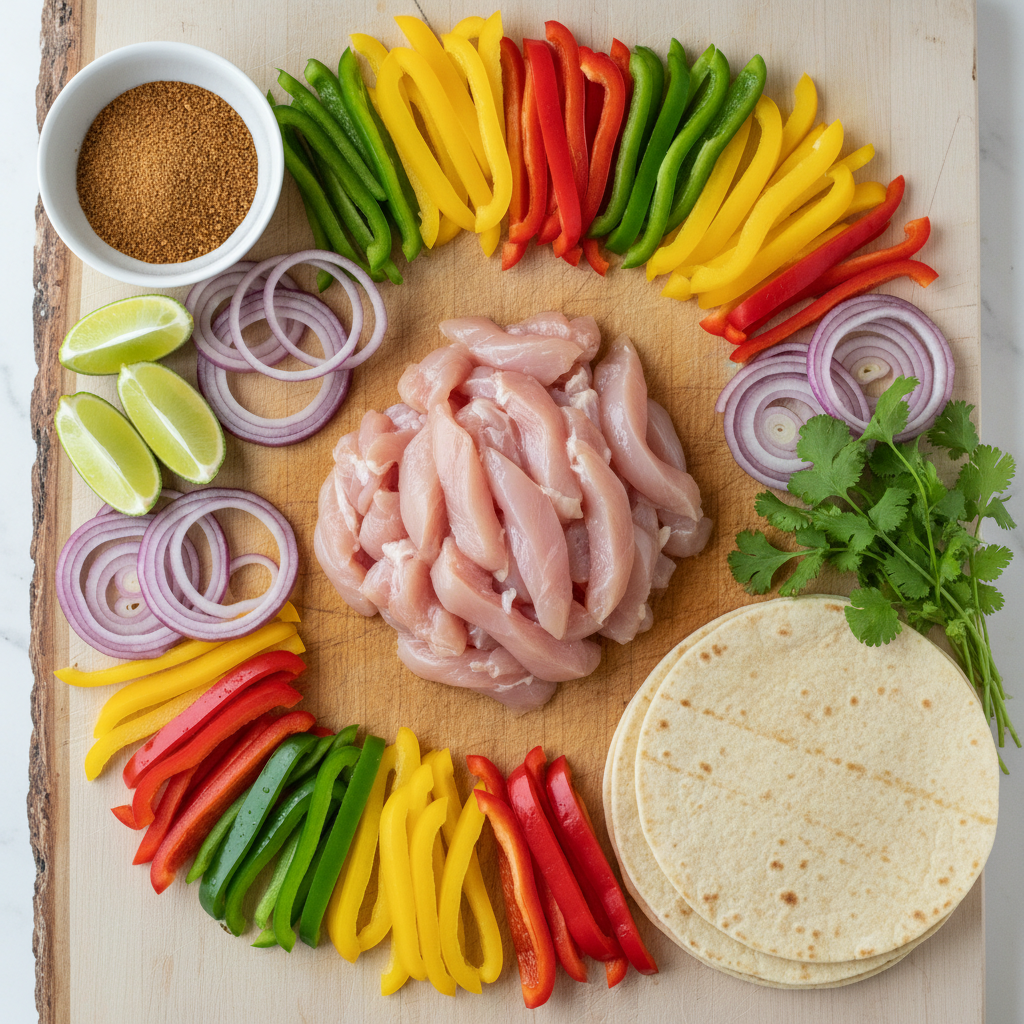
    Step 1: Prepare the Chicken and Vegetables

    Let’s begin with the foundation of your delicious fajitas: prepping the chicken and vegetables. This step is straightforward and essential for a great result, even for beginner cooks.

    For the Chicken:

    • Start with 1.5 lbs (about 680g) of boneless, skinless chicken breasts or thighs.
    • Pat the chicken completely dry with paper towels.
    • Slice the chicken into thin, bite-sized strips, about ¼ to ½ inch thick and 2-3 inches long.
    • Aim for uniform slices to ensure the chicken cooks evenly.

    For the Vegetables:

    Next, prepare the fresh, vibrant vegetables:

    • Grab 1 large onion (yellow or white).
    • Peel the onion, cut it in half, and then slice each half into thin strips.
    • Wash and deseed 2 large bell peppers (use different colors like red, yellow, or green for a beautiful dish).
    • Slice the bell peppers into strips similar in size to your chicken and onion.
    • Place your prepped chicken and vegetables into separate large bowls.

    Chef’s Tip: Prepping your ingredients ahead of time is a fantastic meal prep tip. It makes the cooking process smoother and less stressful!

    Step 2: Mix the Seasoning and Marinate

    Now it’s time to infuse the chicken with incredible flavor. This homemade fajita seasoning is simple to mix and takes the dish to the next level.

    Make the Fajita Seasoning Blend:

    In a small bowl, combine the following spices:

    • 2 teaspoons chili powder
    • 1 teaspoon ground cumin
    • 1 teaspoon smoked paprika
    • ½ teaspoon garlic powder
    • ½ teaspoon onion powder
    • ½ teaspoon dried oregano
    • ¼ teaspoon cayenne pepper (optional, for a little heat)
    • 1 teaspoon salt
    • ½ teaspoon black pepper

    Stir until everything is well combined. This seasoning blend is your secret weapon for amazing flavor!

    Marinate the Chicken:

    Marinating is an essential step for tender, juicy, restaurant-quality fajitas.

    1. Add the sliced chicken from Step 1 to a large bowl.
    2. Pour 2 tablespoons of olive oil over the chicken.
    3. Sprinkle about two-thirds of the homemade fajita seasoning over the chicken.
    4. Toss thoroughly to ensure all chicken strips are evenly coated.
    5. Cover the bowl and let the chicken marinate at room temperature for at least 15-20 minutes.
    6. For even deeper flavor, you can refrigerate it for up to 2 hours. This is a great meal prep tip for busy families!

    Quick Tip: Don’t have time to marinate? No problem! While marinating enhances flavor, you can still get delicious results by seasoning the chicken just before cooking.

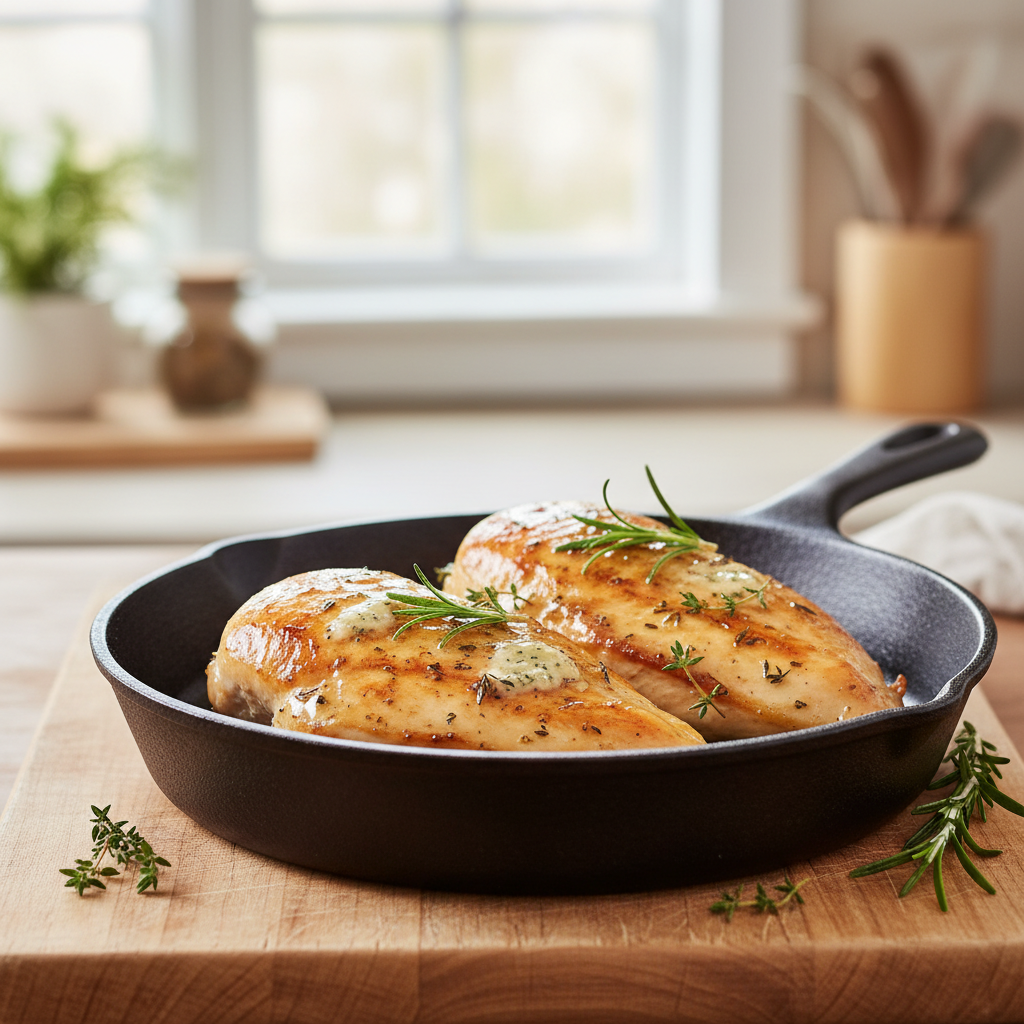
    Step 3: Cook the Fajitas in a Pan

    Get ready for your kitchen to smell amazing! Cooking the fajitas in a hot pan creates that signature sizzle and perfectly seared texture.

    1. Heat a large skillet or cast-iron pan over medium-high heat.
    2. Add 1 tablespoon of olive oil to the hot pan.
    3. Once the oil shimmers, add the marinated chicken in a single layer. Cook in batches if necessary to avoid overcrowding, which steams the chicken instead of searing it.
    4. Cook the chicken for 3-4 minutes per side, until golden brown and cooked through.
    5. Remove the cooked chicken from the pan and set it aside on a plate.
    6. Add another ½ tablespoon of olive oil to the same pan if it looks dry.
    7. Add the sliced onions and bell peppers.
    8. Sprinkle the remaining one-third of your homemade fajita seasoning over the vegetables.
    9. Sauté for 5-7 minutes, stirring occasionally, until the vegetables are tender-crisp and slightly charred.
    10. Return the cooked chicken to the pan with the vegetables.
    11. Toss everything together for about 1 minute to ensure all the flavors meld.
    12. Remove the pan from the heat.

    Cooking Confidence Tip: Don’t be afraid to use high heat to get a good sear on your chicken and veggies for incredible flavor. Just keep an eye on everything to prevent burning!

    Step 4: Warm the Tortillas and Serve

    You’re almost done! The final touch for the best fajitas is warming the tortillas. This simple step makes a huge difference, creating the perfect taste and texture for your meal.

    How to Warm Tortillas:

    Choose one of these easy methods to warm your tortillas:

    • Microwave: Stack 5-6 tortillas, wrap them in a damp paper towel, and microwave for 30-60 seconds until warm and soft.
    • Oven: Wrap a stack of tortillas in foil. Bake at 300°F (150°C) for 10-15 minutes.
    • Dry Skillet/Griddle: Heat a dry skillet over medium-high heat. Warm each tortilla for 15-20 seconds per side until soft, pliable, and slightly charred. This is our favorite method for the most authentic feel!
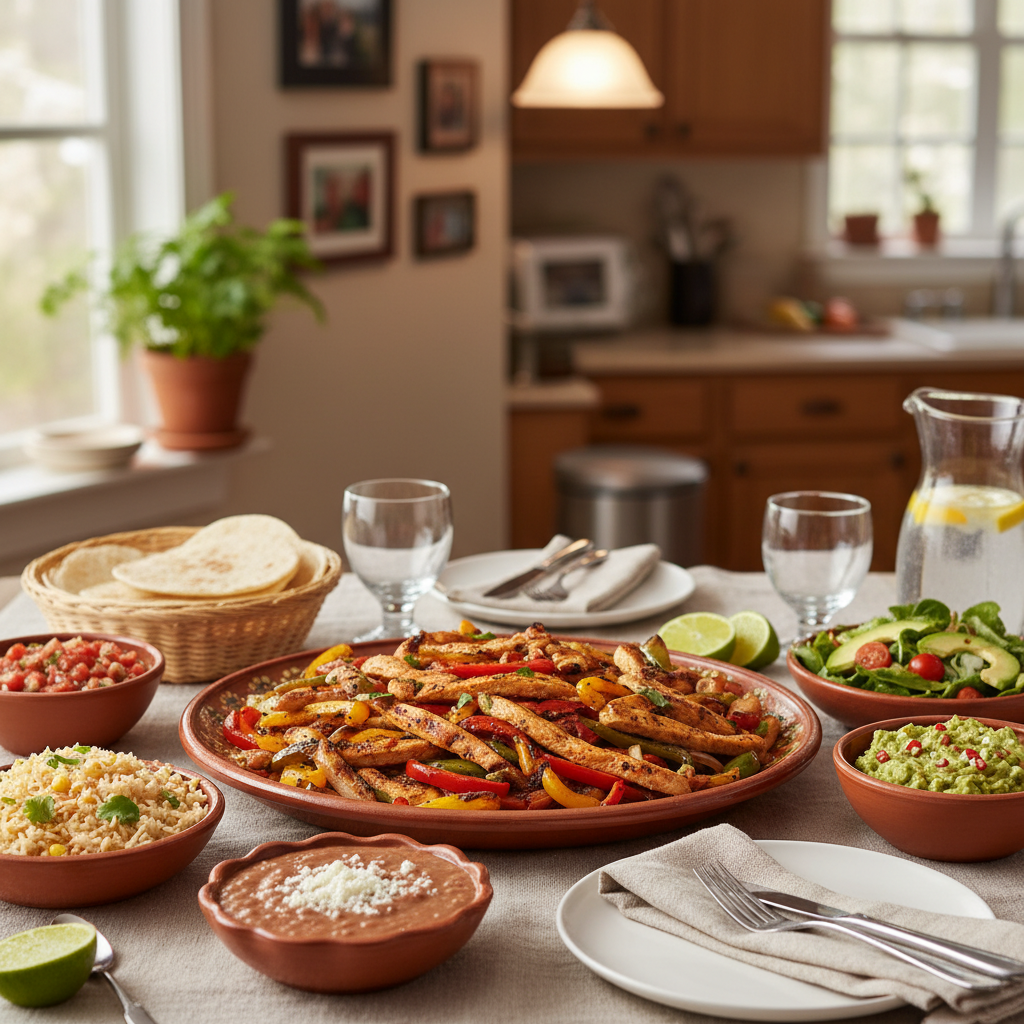
    Time to Serve:

    Transfer the sizzling chicken and vegetable mixture to a serving platter. Arrange your warm tortillas alongside it, and set out your favorite fajita toppings (we’ll cover delicious topping ideas in the next section).

    Congratulations! You’ve just made a fantastic, beginner-friendly chicken fajita dinner, perfect for any weeknight. Enjoy your stress-free cooking success with Recipesmondial!

    What Are Some Fun Fajita Variations?
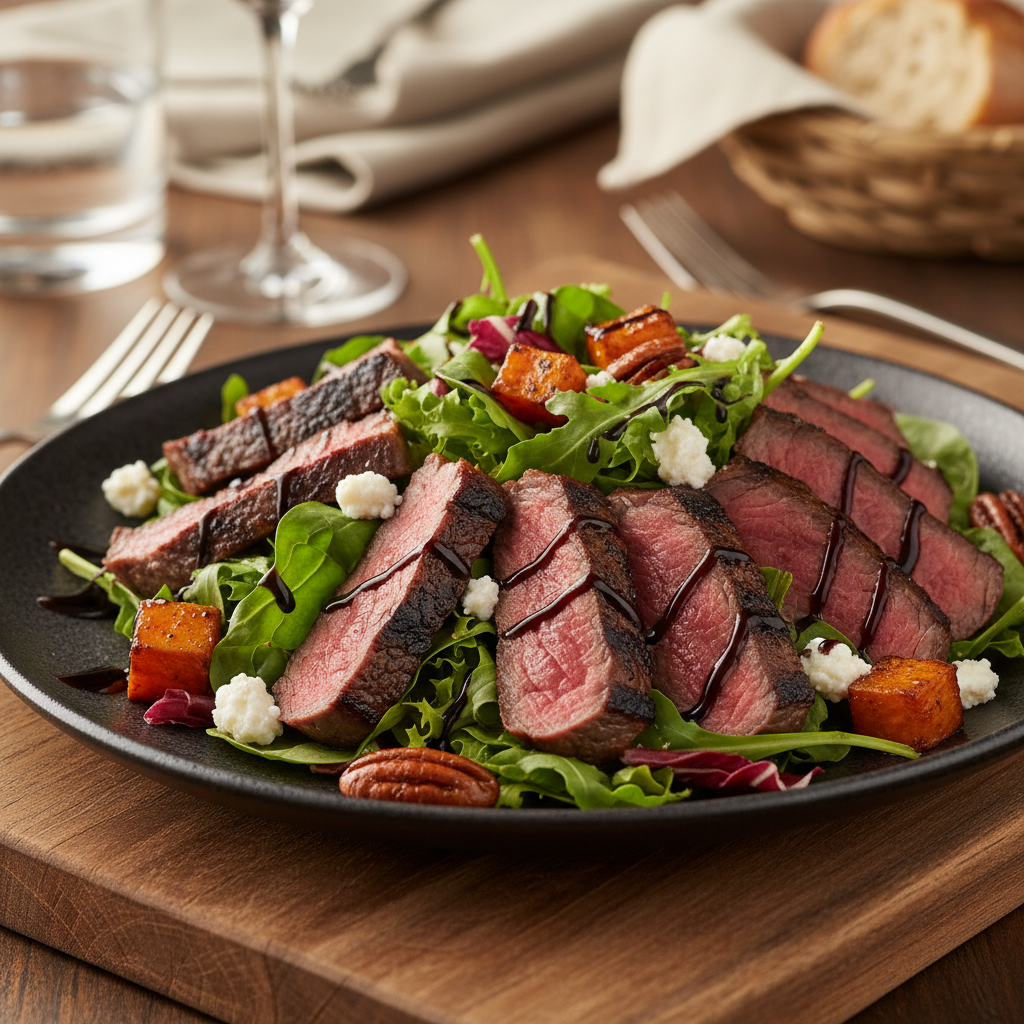
    Easy Steak Fajitas

    Love fajitas but prefer steak? It’s simple to swap out the chicken. This steak variation is a fantastic and flavorful twist on our classic recipe, making it a quick and satisfying dinner for any night of the week.

    For the most tender steak fajitas, choosing the right cut makes all the difference. We recommend using either skirt steak or flank steak, as both lean cuts soak up marinades beautifully. Be sure to slice the steak against the grain after cooking for the best texture.

    Here’s how to make delicious steak fajitas:

    • Prepare the Steak: Slice your chosen steak thinly against the grain into strips about 1/4-inch thick.
    • Marinate: In a bowl, toss the steak strips with the fajita seasoning mix from our main recipe, a splash of olive oil, and fresh lime juice. Let the steak marinate for at least 15 minutes, or for 30-60 minutes for a deeper flavor.
    • Cook the Steak: Heat a little oil in a cast iron skillet or heavy pan over medium-high heat. To ensure a good sear, cook the steak in batches, taking care not to overcrowd the pan. Cook for 2-3 minutes per side until the steak is seared and tender.
    • Add Veggies: Remove the steak from the pan and set it aside. Add your sliced bell peppers and onions to the same pan and cook until tender-crisp.
    • Combine and Serve: Return the steak to the pan with the vegetables and toss briefly to combine. Serve immediately with warm tortillas and your favorite toppings.

    Ready in a flash, this easy and family-friendly variation brings robust flavor to your dinner table.

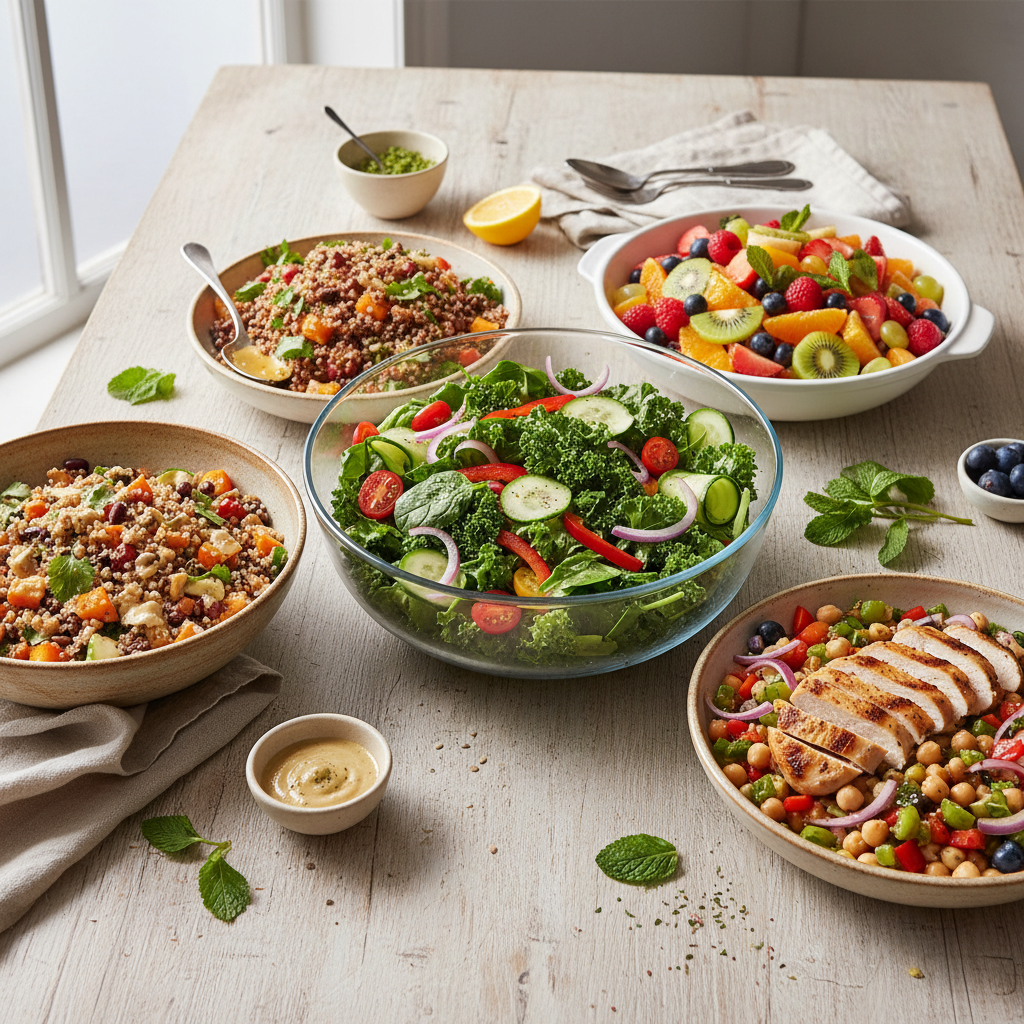
    Simple Vegetarian Fajitas

    Looking for a delicious meatless meal? Vegetarian fajitas are a fantastic and versatile option. This healthy and flavorful choice is perfect for any weeknight dinner.

    For vibrant vegetarian fajitas, use a wide array of vegetables. Think beyond just peppers and onions—we love adding mushrooms, zucchini, or even sliced sweet potatoes for extra sweetness.

    For a protein boost, consider these additions:

    • Black Beans: Rinse and drain a can of black beans, then add them to your cooked veggies at the end to warm through.
    • Chickpeas: Like black beans, chickpeas add great texture and protein. Simply rinse, drain, and add them with the veggies to warm through.
    • Firm Tofu: First, press extra-firm tofu to remove excess water. Then, cube or slice it, toss with fajita seasoning, and pan-fry until golden before adding your other vegetables.
    • Halloumi Cheese: Slice halloumi and pan-fry it until nicely browned on both sides. Its salty, squeaky texture is a delightful surprise in fajitas.

    Here’s how to create your simple vegetarian fajitas:

    • Prepare Veggies: Slice your chosen vegetables into uniform strips.
    • Season: In a large bowl, toss the vegetables with olive oil and the fajita seasoning mix until well coated.
    • Cook: Heat a large skillet over medium-high heat. Add the vegetables and cook until they are tender-crisp and slightly charred. If using tofu, cook it first and set it aside before cooking the other veggies.
    • Add Protein: Stir in your chosen protein, such as black beans or the cooked tofu, and warm everything through.
    • Serve: Spoon the flavorful mixture into warm tortillas and top with fresh salsa, guacamole, or a dollop of sour cream.

    Colorful, satisfying, and full of zest, this beginner-friendly recipe is a wonderful way to enjoy plant-based cooking.

    Quick Sheet Pan Chicken Fajitas

    Need a truly effortless dinner with minimal cleanup? Quick sheet pan chicken fajitas are your new best friend. This cooking method simplifies everything, making it perfect for busy weeknights.

    The beauty of this method is that everything cooks together on one tray. Roasting the chicken and vegetables in the oven results in tender meat and perfectly cooked veggies. Plus, cleanup is a breeze!

    Here’s how to make these super simple sheet pan fajitas:

    • Preheat Oven: Preheat your oven to 400°F (200°C). For the easiest cleanup, line a large baking sheet with parchment paper.
    • Prep Ingredients: Slice boneless, skinless chicken breasts or thighs into thin strips. Cut bell peppers and onions into similarly sized strips to ensure even cooking.
    • Season: In a large bowl, toss the chicken and vegetables with olive oil, the fajita seasoning mix, and a squeeze of lime juice until everything is well coated.
    • Roast: Spread the chicken and vegetables in a single, even layer on your prepared baking sheet. Do not overcrowd the pan; use two sheets if necessary to give everything space.
    • Cook: Roast for 20-25 minutes, tossing halfway through, until the chicken is cooked through and the vegetables are tender with a slight char.
    • Serve: Serve the hot fajita mixture directly from the pan with warm tortillas and your favorite toppings.

    This method makes cooking a family-friendly meal a cinch. For even faster weeknight prep, you can chop your ingredients ahead of time. Enjoy this easy and flavorful recipe!

    What Should You Serve With Fajitas?

    A dinner table spread with a platter of chicken fajitas, alongside bowls of Mexican rice, refried beans, salad, salsa, guacamole, and warm tortillas.
    A professional food photography shot of a complete, beautifully set dinner scene featuring a family-style serving of chicken fajitas. In the center is a platter piled high with cooked chicken and vegetables. Around it are appealing side dishes: a bowl of fluffy Mexican rice, a small dish of creamy refried beans, a vibrant green salad, a bowl of fresh salsa, a bowl of guacamole, and warm tortillas neatly stacked in a tortilla warmer or basket. The table setting is casual but inviting, with warm lighting and a slightly blurred background of a cozy kitchen or dining area. The emphasis is on abundance and variety, making it feel like a delightful family meal. Photorealistic, high-quality food magazine photo. No people, but implying a family meal.

    The Best Toppings for Fajitas

    Once your chicken fajitas are ready, it’s time for the best part: the toppings! A variety of toppings transforms a simple meal into a vibrant, family-friendly feast. Best of all, it lets everyone customize their own fajita, which makes dinner fun, stress-free, and perfect for picky eaters.

    • Sour Cream or Greek Yogurt: A dollop of creamy sour cream or plain Greek yogurt adds a cooling contrast to the warm, spiced chicken. Greek yogurt is a lighter option that offers a similar tangy flavor and creamy texture.
    • Fresh Guacamole or Sliced Avocado: Creamy avocado is a must-have! You can whip up a quick guacamole or simply slice fresh avocado. It adds a rich, buttery texture and healthy fats to your fajitas.
    • Salsa: Whether it’s a chunky pico de gallo, zesty salsa verde, or your favorite jarred salsa, this topping adds moisture and a burst of fresh flavor.
    • Shredded Cheese: A sprinkle of Monterey Jack, Cheddar, or a Mexican cheese blend melts beautifully over the warm filling, adding a delicious, gooey texture that everyone loves.
    • Fresh Cilantro: A scattering of chopped fresh cilantro brightens up the entire dish with its classic, herbaceous flavor.
    • Lime Wedges: A squeeze of fresh lime juice over your fajitas just before eating can awaken all the flavors. It adds a wonderful zesty finish.
    • Pickled Jalapeños: For a bit of heat, add pickled jalapeños. They offer a tangy kick without being overwhelmingly spicy.
    • Chopped Onions: Finely diced red or white onion adds a crisp texture and a pungent flavor. For a milder taste, soak the chopped onions in cold water for a few minutes before serving.

    Easy Side Dishes

    While fajitas can be a complete meal, adding a few simple side dishes will elevate your dinner. These easy accompaniments help round out the plate and are perfect for busy weeknights.

    • Mexican Rice: A classic pairing. Make a quick version using canned tomatoes and broth, or use a store-bought packet for an even faster solution. This comforting side is a reliable addition to any fajita night.
    • Black Beans: For a quick and healthy side, simply rinse, drain, and warm a can of black beans. Add extra flavor with a pinch of cumin, a dash of hot sauce, or a squeeze of lime juice.
    • Simple Corn Salad: Combine canned or frozen corn (thawed) with diced red bell pepper, red onion, and cilantro. Dress it with lime juice and a touch of olive oil for a fresh, colorful side dish.
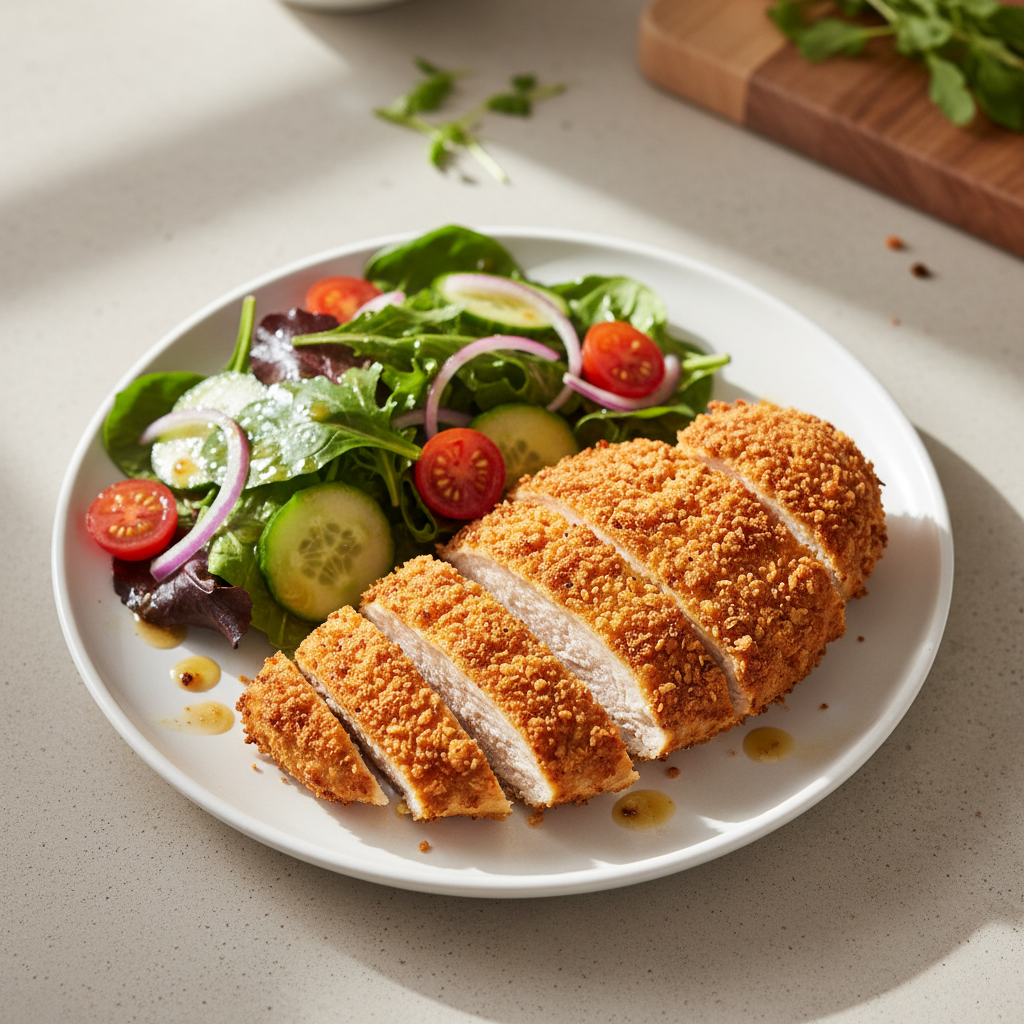
    • Green Salad with Cilantro-Lime Dressing: A crisp green salad offers a refreshing counterpoint to the rich fajita flavors. A simple dressing of lime juice, olive oil, and fresh cilantro is the perfect complement.
    • Refried Beans: Another popular choice, refried beans are both hearty and comforting. For a quick side, use a canned version and simply heat it on the stovetop or in the microwave.
    • Tortilla Chips and Guacamole/Salsa: If you aren’t using guacamole and salsa as toppings, serve them on the side with a bowl of crispy tortilla chips. It’s a perfect, shareable appetizer that adds a fun crunch to the meal.

    Frequently Asked Questions About Fajitas

    What is in fajita seasoning?

    Fajita seasoning is a vibrant blend of spices that creates an iconic smoky, zesty, and slightly spicy flavor. Our homemade fajita seasoning mix for this easy chicken fajita recipe makes your meal extra special.

    Typically, a good fajita seasoning contains the following ingredients:

    • Chili powder: Provides depth and a mild warmth.
    • Cumin: Adds an earthy, savory note.
    • Paprika: Contributes color and a sweet, smoky flavor.
    • Garlic powder: Offers aromatic depth.
    • Onion powder: Enhances the savory base.
    • Oregano: Gives a subtle herbaceous touch.
    • Salt and black pepper: Essential for balancing all the flavors.

    For extra heat, a pinch of cayenne pepper is sometimes added, while sugar can provide a touch of sweetness. Making your own seasoning is one of our best meal prep tips because it lets you adjust the spice levels to your family’s preference. This ensures flavorful meals every time!

    What’s the difference between a fajita and a taco?

    Fajitas and tacos are both beloved, Mexican-inspired dishes perfect for family-friendly meals. While similar, they have key differences in preparation and serving style. Understanding these distinctions can make cooking more enjoyable and help you feel less overwhelmed by complex recipes.

    Here’s a simple breakdown:

    Feature Fajita Taco
    Meaning “Little belts” or “girdles,” referring to the strips of meat. A “light lunch” or “wad.”
    Main Filling Grilled strips of meat (often steak or chicken) cooked together with bell peppers and onions. A wide variety of fillings, such as ground meat, shredded chicken, fish, or beans.
    Preparation The meat and vegetables are cooked together in a skillet or on a griddle and often served sizzling hot. Fillings are prepared separately before being added to the tortilla.
    Tortilla Type Usually served with soft flour tortillas. Can be served with soft corn tortillas or crispy hard shells.
    Serving Style Served deconstructed, allowing diners to assemble their own by filling tortillas with the hot meat and vegetable mixture. Tacos are often pre-assembled or assembled at the table.

    Both are delicious options for simple dinner recipes that offer a fun, interactive eating experience. You can easily learn the basic cooking skills for both with our step-by-step cooking guidance.

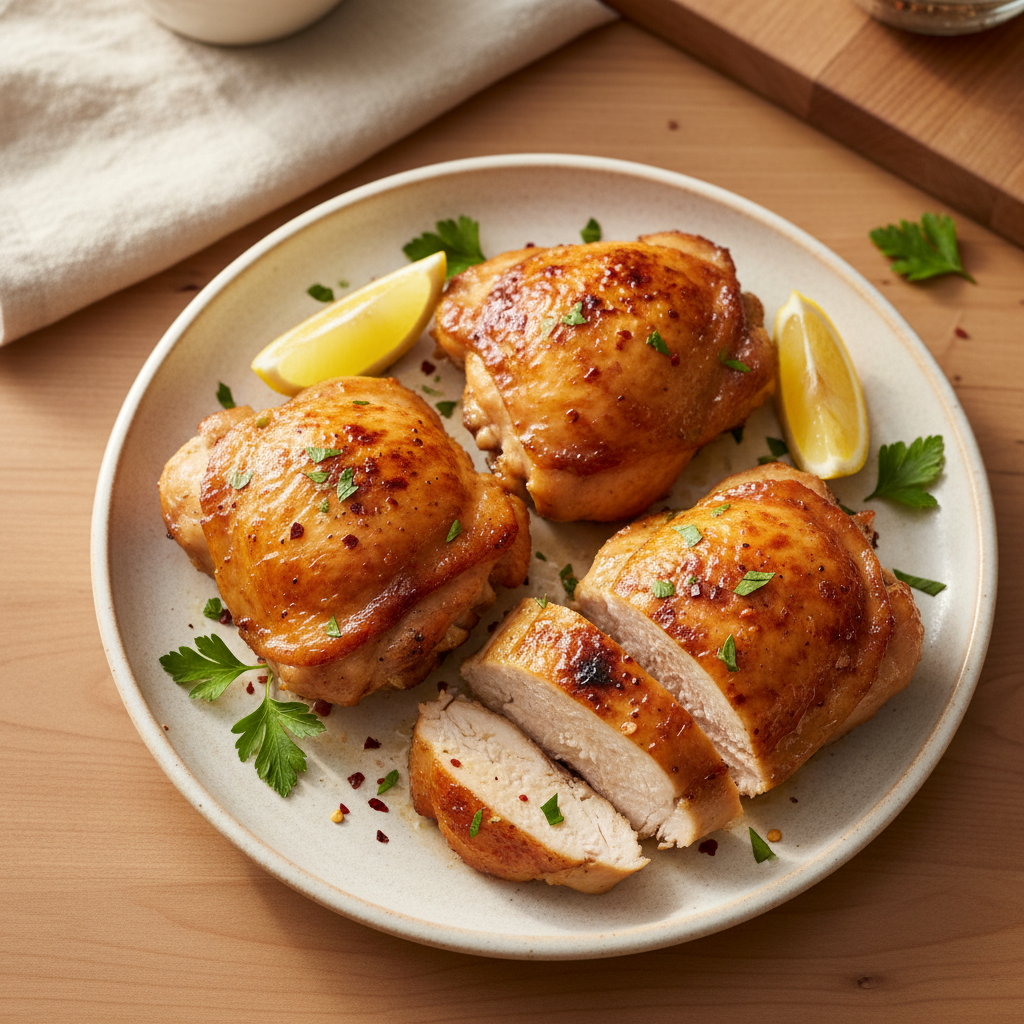
    What cut of chicken is best for fajitas?

    For tender, flavorful chicken fajita recipe, choosing the right cut of chicken is crucial. The best options are cuts that cook quickly and absorb marinade well, which makes your preparation easier.

    Here are the best options for beginner-friendly recipes:

    • Boneless, Skinless Chicken Breasts: A popular choice, chicken breasts are lean and cook quickly. To ensure they stay tender, slice them into thin strips against the grain.
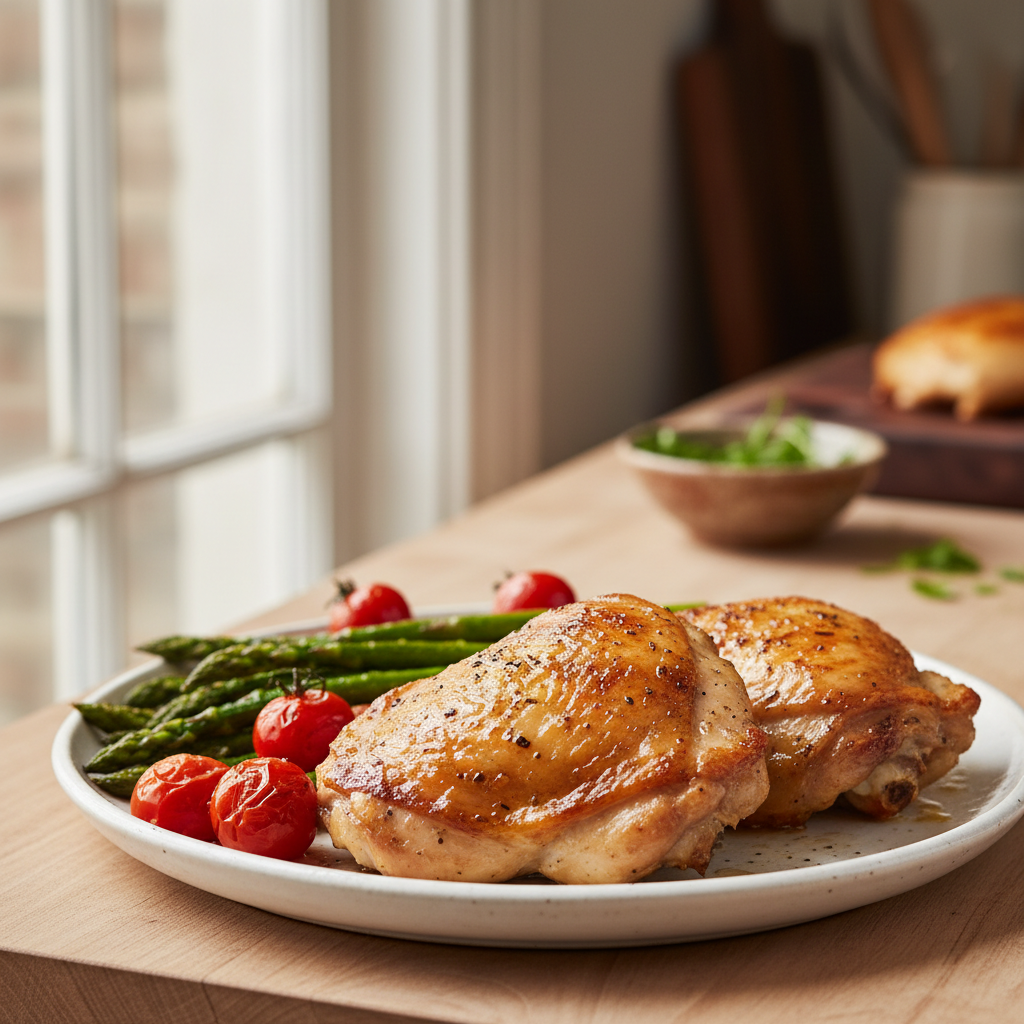
    • Boneless, Skinless Chicken Thighs: Thighs are another fantastic option. They are naturally juicier and more forgiving than breasts, offering a richer flavor. Slice them into strips just as you would chicken breasts.

    Both chicken breasts and thighs work wonderfully for approachable home cooking. For the juiciest results, avoid overcooking the chicken. Cook it just until it’s done to achieve reliable, delicious results every time.

    How do you keep fajitas from getting soggy?

    No one likes soggy fajitas! Fortunately, keeping your fajitas perfectly crisp and tender is simple with a few practical tips. These steps will help you enjoy cooking without stress.

    Follow these steps for the best texture:

    • Use a Hot Pan: Start with a very hot skillet or griddle. A high temperature creates a quick sear on the chicken and vegetables, which prevents them from steaming.
    • Do Not Overcrowd the Pan: Cook the chicken and vegetables in batches if necessary. Overcrowding lowers the pan’s temperature, causing the ingredients to steam instead of sear.
    • Slice Evenly: Cut your chicken and vegetables into uniform strips. This ensures everything cooks evenly and at the same rate.
    • Cook Quickly: Fajitas are a quick-cooking dish. Thinly sliced chicken and vegetables only need a few minutes per side. Overcooking will dry out the chicken and make the vegetables too soft.
    • Drain Excess Liquid: If the chicken or vegetables release a lot of liquid as they cook, carefully pour it off. You want a sizzle, not a boil.

    By following these simple techniques, you will achieve perfectly cooked, vibrant, and delicious fajitas recipe every time, helping you build confidence in the kitchen.

  • 10+ Easy Tortellini Recipes for Quick & Flavorful Family Dinners

    10+ Easy Tortellini Recipes for Quick & Flavorful Family Dinners

    Tortellini are small, ring-shaped pasta traditionally stuffed with a mix of meat, cheese, or vegetables. Originating from Italy’s Emilia-Romagna region, this versatile pasta is often served in a simple broth (tortellini in brodo) or with a variety of sauces, making it a popular choice for quick and flavorful meals.

    Are you searching for perfect weeknight dinners that are both satisfying and simple to prepare? As home cooks, we’ve all been there: staring into the fridge, wishing for a delicious meal that doesn’t require hours of prep. If you’re tired of complex recipes and struggling to plan family-friendly meals everyone will love, you’re in the right place. Enter tortellini—delightful, ring-shaped pasta pockets that are a game-changer for quick dinner ideas. Recipesmondial is here to show you how this humble pasta can transform your mealtime into a stress-free, flavorful experience.

    This article is your ultimate guide, featuring more than 10 easy tortellini recipes perfect for busy lives. We’ll explore a variety of simple dinner recipes, from creamy indulgences to hearty family meals that even beginners can master. You’ll find step-by-step guidance, practical tips, and plenty of inspiration to build your confidence in the kitchen. Get ready to discover just how versatile tortellini can be, turning everyday ingredients into extraordinary dishes.

    Before we get to the mouth-watering recipes, let’s start with the basics. If you’ve ever wondered what tortellini is or how to cook it perfectly, we’ve got you covered.

    What Exactly Is Tortellini?

    Welcome to the wonderful world of tortellini! As your friendly cooking companion at Recipesmondial, we’re here to demystify this delightful pasta. Many home cooks feel overwhelmed by complex recipes or unsure about different pasta shapes. But don’t worry—we make cooking flavorful meals easy!

    Tortellini are small, ring-shaped pasta originating from the Emilia-Romagna region of Italy, particularly Modena and Bologna. Traditionally, they are stuffed with a mix of meat—often pork loin, prosciutto, and mortadella—along with Parmigiano-Reggiano cheese and nutmeg [1]. Due to their unique shape, they are often compared to a “navel” or “belly button.” These tiny, filled pasta pockets are a fantastic base for simple dinner recipes and family-friendly meals.

    Because they cook quickly, tortellini are perfect for quick meals. You can use them to create countless easy tortellini recipes, from a hearty soup to a creamy pasta dish. It’s all about making home cooking approachable!

    What’s the Difference Between Tortellini and Tortelloni?

    Tortellini and tortelloni may look alike, but they have key differences. Knowing what sets them apart will help you choose the best pasta for your next meal. Don’t let the similar names fool you!

    Here’s a simple breakdown:

    • Size: This is the most noticeable difference. Tortellini are smaller, bite-sized rings, while tortelloni are significantly larger.
    • Fillings: Traditionally, tortellini are filled with a savory meat mixture of pork, prosciutto, and cheese. Tortelloni, on the other hand, typically feature vegetarian fillings, such as ricotta cheese, spinach, or pumpkin.
    • Serving: Due to their larger size and lighter fillings, tortelloni are often served with simple sauces like butter and sage. Tortellini are commonly enjoyed in broth or with richer sauces.

    Think of it this way: if you want a lighter, veggie-filled option for a healthy and balanced meal, tortelloni is your best pick. If you’re craving a rich, meaty indulgence, go for tortellini!

    Feature Tortellini Tortelloni
    Size Small, bite-sized Larger, often twice the size
    Traditional Filling Meat (pork, prosciutto, mortadella, cheese) Vegetarian (ricotta, spinach, pumpkin)
    Common Serving In broth or with cream/tomato sauces With lighter sauces like butter and sage

    What Is the Difference Between Tortellini and Ravioli?

    As you explore filled pasta, you’ll also encounter ravioli. While it’s another popular choice, ravioli differs quite a bit from tortellini. Understanding these differences will help you select the perfect pasta for your beginner-friendly recipes.

    Here’s how they compare:

    • Shape: Tortellini are ring-shaped and pinched to resemble a navel. Ravioli are typically square or round with crimped, sealed edges.
    • Sealing: Tortellini are formed from a single piece of pasta that is folded and twisted. Ravioli are made by placing a filling between two sheets of pasta, then cutting and sealing them.
    • Filling Variety: While both have diverse fillings, ravioli tend to offer an even wider variety of textures and ingredients, ranging from meat and cheese to seafood, vegetables, and even fruit.
    • Versatility: Both are incredibly versatile for approachable home cooking. You can use either for family-friendly meals and adapt them to many different sauces.

    Whether you choose tortellini or ravioli, Recipesmondial provides step-by-step cooking guidance to help you create a fantastic meal. You don’t need to be an expert to enjoy delicious filled pasta!

    Feature Tortellini Ravioli
    Shape Small, ring-shaped, pinched Typically square or round, with crimped edges
    Construction Single pasta sheet, folded and twisted Filling between two pasta sheets, sealed
    Filling Range Traditionally meat and cheese (can vary) Very wide range: meat, cheese, seafood, vegetables, fruits
    Serving Style Often in broth, or with cream/tomato sauces Paired with various sauces, from simple to complex

    How Do You Cook Tortellini Perfectly?

    Boiling Instructions for Perfect Tortellini

    Cooking tortellini perfectly is simple, making it a quick meal solution for busy evenings. Following these easy steps will ensure you achieve wonderfully tender and flavorful pasta every time.

    Here’s how to boil tortellini to create a fantastic base for your favorite dishes:

    1. Gather Your Tools: You will need a large pot, a colander, and your tortellini. A large pot is essential, as it allows the tortellini to move freely and cook evenly.
    2. Fill and Salt the Pot: Fill the pot with cold water and add a generous pinch of salt. Salting the water seasons the tortellini from the inside out. As a general rule, use about 1 teaspoon of salt per quart of water.
    3. Bring to a Rolling Boil: Place the pot on high heat and bring the water to a vigorous, rolling boil to ensure the pasta cooks evenly.
    4. Add the Tortellini: Carefully add the tortellini to the boiling water, stirring gently to prevent sticking. There is no need to thaw frozen tortellini first.
    5. Cook According to Package Directions: Cooking times vary by type: fresh tortellini takes 2-4 minutes, frozen takes 3-5, and dry takes 8-10. Always check the package for the most accurate cooking time.
    6. Test for Doneness: The best way to check for doneness is to taste a piece. It should be tender with a slight bite (al dente). You’ll also notice the tortellini will float to the surface when cooked.
    7. Drain Promptly: Once cooked, immediately drain the tortellini in a colander. Do not rinse the pasta, as the starch helps your sauce cling. Before draining, you can reserve a small cup of the starchy pasta water to use in your sauce later.
    8. Serve Immediately: Toss the hot tortellini with your favorite sauce right away. This helps the pasta absorb the sauce’s flavor.

    Tips for Not Overcooking Your Tortellini

    Overcooked tortellini can become mushy, but it’s a common mistake that is easy to avoid. Use these simple tips for perfectly cooked pasta every time.

    Follow these guidelines to prevent overcooking:

    • Read the Package Instructions: This is your most reliable guide. Different types of tortellini (fresh, frozen, and dry) have different cooking times, so always check the package first.
    • Set a Timer: Once the water returns to a boil after adding the tortellini, set a timer for the shortest recommended cooking time. This helps prevent accidental overcooking.
    • Taste, Don’t Guess: Start tasting the tortellini a minute or two before the timer goes off. You’re looking for an “al dente” texture, which means it’s firm to the bite but not hard or mushy.
    • Do Not Overcrowd the Pot: Use a large enough pot so the tortellini has space to move freely. Overcrowding lowers the water temperature and can lead to uneven, sticky pasta.
    • Keep an Eye on It: Tortellini cooks very quickly, especially fresh or frozen varieties. Do not walk away from the stove, as it can go from perfect to overcooked in a flash.
    • Cook Just Before Serving: Cook the tortellini just as your sauce is finishing. This ensures the pasta is hot and fresh when you serve it.
    • Reserve Pasta Water: Before draining all the water, scoop out about half a cup. This starchy water is excellent for thinning a sauce that is too thick and helps it cling better to the pasta.
    • Immediately Add to Sauce: Transfer the drained tortellini directly into your warm sauce. Tossing it right away prevents clumping and helps the pasta absorb the sauce’s flavors.

    What Are the Best Easy Tortellini Recipes?

    Tortellini turns simple ingredients into a flavorful meal in minutes, making it a perfect weeknight solution. If you’re looking for easy recipes that are both fast and delicious, tortellini is the answer. Whether you’re a beginner cook or just need simple dinner recipes for a busy family, Recipesmondial provides approachable, step-by-step guidance.

    From creamy sauces to hearty, meat-filled dishes and even plant-based options, tortellini adapts beautifully to any style. These ideas focus on everyday ingredients and straightforward techniques, so you can forget about feeling overwhelmed. This helps you build confidence in the kitchen and enjoy cooking without stress.

    Creamy Tortellini Recipes

    Nothing says comfort like a rich, creamy tortellini dish. These creamy tortellini recipes are perfect for a satisfying meal that’s easy to make, appealing to even the pickiest eaters. They are excellent family-friendly meals that come together quickly.

    Here are some simple, delicious ideas:

    • Creamy Tomato Tortellini: Combine cooked tortellini with a jar of your favorite marinara sauce and a splash of heavy cream or half-and-half. Stir in some fresh basil and Parmesan cheese for an irresistible finish.
    • Garlic Parmesan Cream Tortellini: Sauté minced garlic in butter, then whisk in heavy cream and Parmesan until thickened. Toss with tortellini and a sprinkle of parsley. This is a classic for a reason!
    • Spinach and Artichoke Tortellini: Stir cooked tortellini into a simple cream sauce (like the garlic Parmesan base) with chopped spinach and canned artichoke hearts. It adds a lovely texture and extra veggies.

    Tip: For an even quicker meal, use store-bought refrigerated tortellini. It cooks in just a few minutes, making these recipes genuine quick meals.

    Simple Tortellini Recipes with Chicken

    Adding chicken to tortellini transforms it into a more substantial, protein-packed dinner. These simple tortellini recipes with chicken are ideal for creating healthy and balanced meals that are also satisfying.

    Consider these straightforward combinations:

    • Chicken Pesto Tortellini: Toss cooked tortellini with pesto sauce and shredded rotisserie chicken. Add cherry tomatoes and a handful of fresh mozzarella balls for a burst of flavor and color.
    • Lemon Herb Chicken Tortellini: Sauté diced chicken breast with lemon zest, garlic, and your favorite herbs like oregano or thyme. Combine with cooked tortellini, a light broth, and a squeeze of fresh lemon juice.
    • Chicken and Vegetable Tortellini Soup: Stir cooked tortellini and shredded chicken into a comforting broth-based soup with plenty of chopped vegetables like carrots, celery, and peas. This is a wonderfully hearty option.

    Substitution Idea: If you don’t have time to cook chicken, use pre-cooked grilled chicken strips or leftover roast chicken. This helps you get dinner on the table even faster!

    Hearty Tortellini Recipes with Sausage or Ground Beef

    For nights when you need a comforting and filling dinner, pairing tortellini with sausage or ground beef is an excellent choice. These hearty tortellini recipes make perfect family-friendly meals that satisfy everyone at the table.

    Explore these robust options:

    • Sausage and Bell Pepper Tortellini: Brown Italian sausage (mild or hot, your choice!) with sliced bell peppers and onions. Add your favorite tomato sauce and cooked tortellini.
    • Ground Beef Bolognese Tortellini: Make a quick meat sauce by browning ground beef with garlic and onion, then simmering it in crushed tomatoes. Serve over hot tortellini for a simplified bolognese.
    • Cheesy Sausage Bake with Tortellini: Combine cooked tortellini with browned sausage, marinara sauce, and plenty of shredded mozzarella and Parmesan cheese. Bake until bubbly and golden for an easy casserole.

    Meal Prep Tip: Brown your sausage or ground beef ahead of time and store it in the fridge. This makes assembly even faster on a busy weeknight.

    Classic Cheese Tortellini Recipes

    Sometimes, the simplest approach is the most delicious. Classic cheese tortellini recipes let the pasta shine, making them fantastic beginner-friendly recipes and reliable favorites for any home cook.

    Here are some fuss-free ways to enjoy them:

    • Marinara and Cheese Tortellini: Toss cooked cheese tortellini with your favorite jarred marinara sauce. Sprinkle generously with fresh Parmesan cheese and a dash of red pepper flakes for a little kick.
    • Butter and Sage Tortellini: Melt butter in a pan until it turns a light golden brown (be careful not to burn it!). Add fresh sage leaves and cook for a minute, then toss with cooked tortellini. This is an elegant yet incredibly simple dish.
    • Pesto Tortellini with Cherry Tomatoes: Simply mix cooked tortellini with store-bought pesto. Halved cherry tomatoes add a burst of freshness and color. This is a vibrant and quick lunch or dinner.

    Fun Fact: Italy consumes approximately 23 kilograms (about 51 pounds) of pasta per person each year, far more than most countries, demonstrating its staple status [2].

    Simple Vegan Tortellini Dishes

    For those seeking plant-based options, these simple vegan tortellini dishes offer all the flavor and satisfaction without meat or dairy. As more vegan products become available, it’s easier than ever to create delicious and healthy meals.

    Try these fantastic vegan ideas:

    • Roasted Vegetable and Vegan Tortellini: Roast a medley of vegetables like zucchini, bell peppers, red onion, and cherry tomatoes with olive oil and herbs. Toss with cooked vegan tortellini and a light balsamic glaze.
    • Creamy Vegan Mushroom Tortellini: Sauté mushrooms and garlic, then add a plant-based cream sauce (made with cashews or coconut milk) and nutritional yeast for a cheesy flavor. Stir in cooked vegan tortellini.
    • Spinach and Garlic Vegan Tortellini: Sauté fresh spinach with plenty of garlic in olive oil. Add cooked vegan tortellini and a squeeze of lemon juice. A light and flavorful option that’s ready in minutes.

    Ingredient Tip: Look for vegan tortellini in the refrigerated or frozen pasta aisle of your grocery store. Many brands now offer delicious plant-based versions!

    What Is a Good Sauce for Tortellini?

    Cooked tortellini pasta generously coated in fresh green basil pesto, garnished with pine nuts and Parmesan.
    Professional food photography, photorealistic, high-quality food magazine photo. A beautifully composed shot of cooked tortellini tossed with a vibrant, homemade basil pesto sauce, served in a shallow white pasta bowl. The tortellini are coated evenly with the bright green pesto, and the dish is sprinkled with toasted pine nuts and extra Parmesan cheese. A few fresh basil leaves are scattered on top. The background is a gently blurred, rustic kitchen scene with subtle hints of a wooden table and soft, natural light, creating an inviting and wholesome atmosphere. The image emphasizes the fresh ingredients and appetizing texture. NO artistic interpretations, NO illustrations, NO vector graphics, NO abstract art.

    Choosing the right sauce can elevate your tortellini from a simple meal to a memorable one. At Recipesmondial, we believe cooking should be enjoyable, not overwhelming. That’s why we’ve gathered four straightforward sauce recipes that deliver impressive flavor without the fuss. Perfect for busy families and quick dinners, these options are simple to prepare and incredibly versatile.

    Whether you crave something light and fresh or rich and creamy, you’ll find the perfect pairing for your favorite tortellini. These approachable recipes will help you build confidence in the kitchen. Get ready to see how a few simple ingredients can create truly delicious results!

    Classic Tomato and Basil Sauce

    A timeless choice, this classic tomato and basil sauce has fresh, bright flavors that beautifully complement tortellini. It’s a family-friendly option loved by all ages, and this beginner-friendly recipe is a staple for a reason.

    Ingredients:

    • 1 tablespoon olive oil
    • 2 cloves garlic, minced
    • 1 (28-ounce) can crushed tomatoes
    • 1/2 teaspoon dried oregano (optional)
    • Salt and black pepper to taste
    • 1/2 cup fresh basil leaves, chopped

    Simple Steps:

    1. Heat the olive oil in a medium saucepan over medium heat.
    2. Add the minced garlic and cook for about 1 minute until fragrant. Do not let it brown.
    3. Pour in the crushed tomatoes and add the oregano, if using.
    4. Bring the sauce to a gentle simmer.
    5. Reduce the heat to low and let it cook for 15-20 minutes, stirring occasionally to allow the flavors to meld.
    6. Season with salt and pepper to your liking.
    7. Stir in the fresh basil just before serving with your cooked tortellini.

    Chef’s Tips: For the best flavor, use high-quality canned tomatoes. Fresh basil is key, as its aroma truly elevates the dish. This simple sauce tastes gourmet.

    Rich Cream and Parmesan Sauce

    Indulgent and comforting, this rich cream and Parmesan sauce is a perfect match for cheesy tortellini. The recipe is incredibly satisfying, comes together quickly, and is ideal for busy weeknights.

    Ingredients:

    • 2 tablespoons unsalted butter
    • 2 cloves garlic, minced (optional, but highly recommended)
    • 1 1/2 cups heavy cream
    • 1 cup grated Parmesan cheese, plus more for serving
    • 1/4 teaspoon ground nutmeg (optional)
    • Salt and white pepper to taste

    Simple Steps:

    1. Melt the butter in a large skillet over medium-low heat.
    2. If using, add the minced garlic and cook for 1 minute until fragrant.
    3. Pour in the heavy cream and bring it to a gentle simmer, but do not boil.
    4. Reduce the heat to low. Gradually stir in the Parmesan cheese.
    5. Continue stirring until the cheese is fully melted and the sauce is smooth.
    6. Add the nutmeg, if desired, and season with salt and white pepper.
    7. Toss the cooked tortellini directly in the sauce and serve immediately.

    Chef’s Tips: Always grate your own Parmesan cheese for the smoothest texture and best flavor; pre-grated varieties can make the sauce grainy. Remember, low heat is your friend here, as it prevents the cream from curdling. This quick sauce makes any weeknight meal feel special.

    Simple Pesto Sauce

    Pesto offers a vibrant, fresh, and incredibly quick option for tortellini. Whether you make it from scratch or use a high-quality store-bought version, it’s perfect for a delicious meal in minutes. Its robust flavor comes from just a handful of simple ingredients.

    Ingredients:

    • 2 cups fresh basil leaves
    • 1/2 cup grated Parmesan cheese
    • 1/2 cup extra virgin olive oil
    • 1/4 cup pine nuts, lightly toasted (optional)
    • 2 cloves garlic
    • Salt and black pepper to taste

    Simple Steps (Homemade Pesto):

    1. Combine the basil, Parmesan, pine nuts (if using), and garlic in a food processor.
    2. Pulse until all ingredients are finely chopped.
    3. With the food processor running, slowly drizzle in the olive oil until a smooth paste forms.
    4. Season with salt and pepper.
    5. Toss with hot, cooked tortellini to serve.

    Simple Steps (Store-Bought Pesto):

    1. Gently warm your favorite store-bought pesto in a saucepan over low heat.
    2. Alternatively, simply toss the pesto with freshly cooked, hot tortellini; the heat from the pasta will warm it through.
    3. If the sauce is too thick, loosen it with a splash of the pasta cooking water.

    Chef’s Tips: Toasting the pine nuts adds a wonderful depth to homemade pesto. You can easily adjust the amount of garlic to your preference. Pesto is a truly versatile sauce, perfect for a quick and simple dinner.

    Brown Butter and Sage Sauce

    For an elegant yet simple sauce, brown butter and sage is an excellent choice. This combination offers a nutty, aromatic flavor that pairs beautifully with many tortellini fillings. It is a beginner-friendly recipe that feels sophisticated, making it ideal for a stress-free meal.

    Ingredients:

    • 1/2 cup unsalted butter
    • 15-20 fresh sage leaves
    • Salt and black pepper to taste
    • Pinch of red pepper flakes (optional)

    Simple Steps:

    1. Melt the butter in a large skillet over medium heat.
    2. Continue to cook, watching closely as the butter foams, then turns clear.
    3. The milk solids at the bottom of the pan will begin to turn golden brown. Swirl the pan occasionally for even cooking.
    4. Once the butter smells fragrant and nutty, immediately add the fresh sage leaves.
    5. Cook the sage for 30 to 60 seconds, until the leaves are crispy.
    6. Remove the skillet from the heat to prevent burning.
    7. Season with salt, pepper, and red pepper flakes, if using.
    8. Pour the sauce over your cooked tortellini and serve right away.

    Chef’s Tips: Browning butter requires your full attention, as it can go from perfect to burnt very quickly. Using a light-colored pan will help you monitor the color change more easily. This sauce proves that an elegant, flavorful meal doesn’t have to be complicated.

    Frequently Asked Questions

    Tortellini or tortelloni?

    While both are types of delicious filled pasta, tortellini and tortelloni have distinct characteristics. The main differences are their size and filling, which influences the best way to serve them.

    Here’s a quick guide to tell them apart:

    Feature Tortellini Tortelloni
    Size Smaller, bite-sized (about 1-inch) Larger, about twice the size of tortellini
    Shape Often folded into a ring or navel shape Also folded, but generally more pouch-like due to size
    Fillings Traditionally meat-filled (pork, prosciutto) in Emilia-Romagna [3] Typically filled with vegetarian options like ricotta cheese and spinach, or other vegetables
    Best Uses Perfect for lighter broths, cream sauces, or simple butter and sage sauces. Their small size makes them great for quick meals. Ideal for heartier sauces, like rich tomato sauces or robust butter sauces. Their larger size stands up well to bolder flavors.

    Ultimately, you can’t go wrong with either choice. Both tortellini and tortelloni are fantastic for creating simple, flavorful meals. Don’t be afraid to experiment!

    Tortellini vs ravioli?

    Ravioli is another popular stuffed pasta you’ll find alongside tortellini. Although both are filled, they have key differences in shape, size, and origin. Understanding these distinctions will help you choose the perfect pasta for your dish.

    Let’s compare them:

    Feature Tortellini Ravioli
    Shape Small, ring-shaped pasta, often compared to a “belly button” or navel [4]. The pasta disc is folded and the ends are joined to create a ring. Typically square or round, with crimped edges. Two sheets of pasta are used, with filling sandwiched between.
    Size Generally small, bite-sized (tortelloni are larger). Can vary greatly in size, from small squares to very large rounds.
    Origin Hails from the Emilia-Romagna region of Italy, especially Modena and Bologna. Has a broader origin across Italy, with variations found in many regions [5].
    Fillings Traditionally meat-based (pork, prosciutto), but also cheese and vegetable options. Offers a wider range of fillings, including cheese (ricotta, Parmesan), meat, seafood, and various vegetables (spinach, mushroom).
    Cooking Style Often served in broth or with lighter cream or tomato sauces. Versatile with many sauces, from simple butter and sage to hearty meat sauces.

    Both pastas are wonderfully versatile and can be the star of many simple recipes. Don’t feel overwhelmed by the choice—just pick the one that sounds best for the meal you have in mind!

    How do you pronounce tortellini?

    Italian pronunciations can be tricky, but this one is easy to master. You’ll be saying “tortellini” like a pro in no time.

    The correct pronunciation is: tor-tuh-LEE-nee.

    The key is to stress the “LEE” syllable in the middle. A confident pronunciation makes exploring new recipes even more fun!

    What is the meaning of tortellini?

    The name “tortellini” has a charming origin. In Italian, “tortellino” is the diminutive form of “tortello,” which translates to “little cake” or “small pie.”

    The pasta’s unique shape also plays a role in its identity. Its distinctive ring is said to resemble a navel, earning it a special nickname. According to folklore, the shape was inspired by the navel of the goddess Venus [6].

    This bit of history adds to the enjoyment of cooking and eating this classic pasta.


    Sources

    1. https://www.academiabarilla.com/it/blog/tutto-sul-tortellino-storia-e-tradizione-di-un-piatto-cult
    2. https://www.statista.com/statistics/743846/per-capita-consumption-of-pasta-worldwide-by-country/
    3. https://www.academiabarilla.com/italian-recipes/pastas-and-risottos/tortellini-bologna
    4. https://www.newworldencyclopedia.org/entry/Tortellini
    5. https://www.britannica.com/topic/ravioli
    6. https://en.wikipedia.org/wiki/Tortellini

  • The Easiest Fried Rice Recipe: A Step-by-Step Guide for Beginners

    The Easiest Fried Rice Recipe: A Step-by-Step Guide for Beginners

    The best fried rice recipe uses cold, leftover rice stir-fried in a hot wok or large skillet with scrambled eggs, vegetables, and a protein like chicken, shrimp, or pork. The key is using day-old rice to ensure it’s dry enough not to clump, combined with a simple sauce made from soy sauce and sesame oil for that authentic, restaurant-quality flavor.

    There’s a special comfort that comes with a steaming plate of perfectly seasoned fried rice. It’s a takeout favorite, but making it at home can feel overwhelming—especially for new cooks. Many people struggle with complex recipes or feel unsure how to create healthy, tasty meals quickly for their families. If you’re looking for simple dinner recipes that deliver on flavor without the stress, you’ve come to the right place.

    At Recipesmondial, we believe cooking should be an enjoyable, confidence-building experience. That’s why we developed the easiest fried rice recipe, designed with beginner-friendly steps and approachable home cooking in mind. This step-by-step guide simplifies the process, helping you achieve restaurant-quality results in your own kitchen. Prepare to master a dish that’s as flavorful as it is versatile, whether you’re making a classic chicken fried rice or a zesty shrimp version.

    Why You’ll Love This Easy Fried Rice Recipe

    A close-up of a steaming bowl of perfectly cooked fried rice, garnished with green onions and sesame seeds.
    Professional food photography, photorealistic, high-quality food magazine photo: A beautifully plated, steaming bowl of golden-brown fried rice, garnished generously with vibrant chopped green onions and a sprinkle of toasted sesame seeds. The rice is fluffy with visible peas, carrots, and scrambled egg pieces, suggesting a perfect texture. Shot from a slightly overhead angle on a warm wooden table in a brightly lit, inviting home kitchen, emphasizing comfort and deliciousness. Soft natural lighting highlights the texture and steam. No hands or people visible.

    Ready to transform simple ingredients into a dazzling dish? Our easy fried rice recipe is more than a meal—it’s your gateway to stress-free, flavorful cooking. You’ll love making it, and your family will love eating it!

    Effortless Cooking, Incredible Flavor

    • Super Simple Steps: We break down every step, so no complex techniques are needed. This recipe is truly beginner-friendly and builds your kitchen confidence.
    • Quick & Convenient: Perfect for busy weeknights, this dish comes together fast, so you can have a delicious, hot meal on the table in minutes.
    • Uses Everyday Ingredients: No special trips to the store are required. This budget-friendly option uses items you likely already have on hand.
    • Beyond Delicious: Satisfy your cravings with authentic, savory flavor that’s often even better than takeout.

    Versatility for Every Taste

    One of the best things about this fried rice is its incredible adaptability. It’s a fantastic solution for family-friendly meals, as you can easily adjust it to suit everyone’s preferences.

    • Protein Power: Easily swap in your favorite protein. Create a classic chicken fried rice recipe, a delightful shrimp fried rice recipe, or a robust pork fried rice recipe. You can even stick with simple egg fried rice.
    • Veggie Heaven: Clean out your fridge! This recipe welcomes nearly any vegetable, making it an excellent way to use up produce and boost your veggie intake.
    • Leftover Lifesaver: This dish shines with day-old rice, transforming simple leftovers into a culinary triumph. It’s smart cooking at its best.

    Say Goodbye to Cooking Stress

    We know cooking can feel overwhelming, especially when you’re looking for quick dinner ideas. This fried rice recipe from Recipesmondial is designed to banish those mealtime worries.

    • No More Guesswork: Our clear, step-by-step guidance eliminates guesswork, ensuring reliable and delicious results every time.
    • Enjoy the Process: Cooking should be fun, not a chore. This simple recipe helps you enjoy your time in the kitchen and brings the joy back to meal preparation.
    • Impress Your Loved Ones: Serve a dish that everyone will rave about. Your family and friends will ask for this recipe again and again.

    Join us in making delicious meals accessible to all. This easy fried rice recipe is just the beginning of your journey toward new flavors and kitchen confidence!

    What Ingredients Do You Need for Fried Rice?

    Fresh ingredients for fried rice, including rice, vegetables, eggs, and sauces, neatly arranged on a kitchen counter.
    Professional food photography, photorealistic, high-quality food magazine photo: A meticulously organized flat lay of all fresh ingredients for fried rice on a clean, light-colored kitchen counter or rustic wooden board. Ingredients include a bowl of day-old cooked white rice, fresh eggs in a bowl, shelled green peas, diced carrots, chopped garlic, soy sauce in a small dish, sesame oil in a small bottle, and sliced green onions. All ingredients are vibrant, fresh, and perfectly prepped, bathed in soft, natural overhead lighting, evoking a sense of ease and readiness to cook.

    The Best Rice for Fried Rice (Hint: It’s Leftover!)

    The secret to truly amazing fried rice starts with the right rice. But it’s not just about the type—it’s about its age!

    For the best texture, always use day-old, cooked rice. Freshly cooked rice has too much moisture, which makes your fried rice soggy and clumpy. Nobody wants that!

    Using leftover rice helps achieve that perfect, slightly chewy, separate grain texture. It’s a game-changer for any beginner-friendly recipe.

    What kind of rice should you use?

    • Medium or long-grain white rice: Varieties like jasmine rice or basmati rice work wonderfully. Their grains hold up well to stir-frying.
    • Avoid short-grain or sticky rice: These types tend to clump together too much. They won’t give you the individual grain texture you want for fried rice.

    Don’t have leftover rice? No problem!

    You can still make delicious fried rice. Just cook your rice as usual, but use about 10-20% less water. Afterward, spread it out on a baking sheet and let it cool completely for at least an hour. You can even pop it into the fridge for 30 minutes to help it dry out. Planning ahead makes meal prep for family-friendly meals like this even easier!

    Essential Vegetables and Aromatics

    Fresh vegetables and pungent aromatics add incredible flavor, color, and texture to homemade fried rice. This is where your dish really comes alive!

    Here are the core ingredients you’ll need:

    • Eggs: Lightly scrambled eggs add a wonderful richness and protein. They cook quickly and easily.
    • Garlic: Freshly minced garlic is a must. It builds a foundational layer of flavor.
    • Ginger: A small amount of grated or minced fresh ginger adds a bright, zesty kick.
    • Onion or Scallions (Green Onions): Finely diced yellow onion or chopped scallions provide a savory base. Scallions also offer a fresh, mild onion flavor at the end.
    • Peas and Carrots: These classic additions bring sweetness and vibrant color. Frozen peas and carrots work perfectly and save time.
    • Optional additions: Feel free to get creative! Bell peppers, corn, broccoli florets, or mushrooms are all great choices. This is an easy recipe to customize.

    Pro Tip for Beginners: Dice all your vegetables uniformly to ensure they cook evenly. It’s also best to prep everything before you start cooking. This strategy, called “mise en place,” makes the process stress-free—perfect for busy families looking for simple dinner recipes.

    The Perfect Fried Rice Sauce

    The sauce is the soul of your fried rice. It brings all the ingredients together with a savory, umami-rich coating. This simple blend is key to flavorful meals made easy.

    You’ll whisk together just a few pantry staples:

    • Soy Sauce: Use a good quality light (or “all-purpose”) soy sauce. It provides salty depth without being overpowering. If you prefer a darker color, you can add a touch of dark soy sauce.
    • Sesame Oil: A drizzle of toasted sesame oil adds a distinctive nutty aroma and flavor. Be sure to add it towards the end of cooking to preserve its delicate notes.
    • Sugar: Just a pinch of granulated sugar balances the salty soy sauce and enhances the overall flavor profile beautifully.
    • White Pepper: This subtle spice adds an authentic, mild heat. It’s a traditional ingredient in many Chinese fried rice recipes.

    Combine these ingredients in a small bowl before you begin. This makes adding the sauce at the right moment a breeze. Having the sauce pre-mixed is a crucial step for achieving that authentic, perfectly balanced fried rice taste.

    How to Make the Best Fried Rice (Step-by-Step)

    A home cook actively stirring colorful fried rice in a large wok on a stovetop, with steam rising.
    Professional food photography, photorealistic, high-quality food magazine photo: A dynamic shot of a home cook’s hands, in a clean and inviting home kitchen, actively stirring colorful fried rice in a large, well-seasoned wok or skillet over a gas burner. Steam is visibly rising from the wok, and the rice grains, mixed with peas, carrots, and egg pieces, appear perfectly separated and slightly golden. The scene captures the motion and energy of cooking, with focus on the food’s appealing texture and vibrant colors. Natural light illuminates the cooking process.

    Step 1: Prepare Your Ingredients (Mise en Place)

    Cooking is a joy when you’re organized. This is the idea behind “mise en place,” which simply means having “everything in its place” before you begin. Think of this step as your secret weapon for making the cooking process smooth and stress-free. Say goodbye to feeling overwhelmed by complex recipes!

    Here’s how to prep for your best fried rice recipe:

    • Chop Vegetables: Dice your onion, carrots, and any other veggies. Aim for small, uniform pieces to ensure they cook evenly.
    • Mince Aromatics: Finely mince your garlic and ginger. These give your fried rice its amazing flavor.
    • Dice Protein: Cut your chosen protein into bite-sized pieces. Whether it’s chicken for a flavorful chicken fried rice, shrimp for a quick shrimp fried rice, or pork for a hearty pork fried rice recipe, get it ready.
    • Whisk Eggs: Beat your eggs in a small bowl.
    • Mix Sauce: Combine all the sauce ingredients in a separate small bowl. This prevents any last-minute scrambling.

    These few minutes of prep will save you so much time later. It’s the key to approachable home cooking success and a fantastic meal prep tip for any beginner-friendly recipes.

    Step 2: Scramble the Eggs

    Next, let’s get those fluffy eggs ready. They add a wonderful texture and richness to your fried rice.

    1. Heat a large pan or wok over medium-high heat and add 1 tablespoon of cooking oil.
    2. Once the oil shimmers, pour in your whisked eggs.
    3. Let them set for a moment, then gently scramble them with your spatula, breaking them into small pieces.
    4. Cook until they are just set but still soft. Do not overcook them, as they will cook a little more later.
    5. Remove the scrambled eggs from the pan and set them aside on a plate.

    This quick step ensures tender eggs in every bite of your chinese fried rice.

    Step 3: Sauté Aromatics and Protein

    Now, let’s build those delicious layers of flavor. This is where your kitchen will start to smell incredible!

    1. Add another tablespoon of oil to the same pan or wok over medium-high heat.
    2. Add your minced garlic, ginger, and diced onion. Sauté for about 1 minute until fragrant, but not browned.
    3. Add your protein of choice.
      • For chicken fried rice: Add the diced chicken and cook until it’s no longer pink, about 3-5 minutes.
      • For shrimp fried rice: Add the shrimp and cook until it turns pink and opaque, about 2-3 minutes.
      • For pork fried rice: Add the diced pork and cook until browned and cooked through, about 5-7 minutes.
    4. Stir in any hardier vegetables, like diced carrots, and cook for another 2-3 minutes until slightly tender-crisp.

    Pro Tip: Do not overcrowd your pan. If you have a large amount of protein or vegetables, cook them in batches. This allows them to sear nicely instead of steam and is key for a truly flavorful meal made easy.

    Step 4: Add Rice and Sauce

    This step brings everything together. The rice is the heart of your fried rice recipe!

    1. Push the cooked aromatics, protein, and vegetables to one side of the pan.
    2. Add your cold, day-old rice to the empty side. It’s crucial that your rice is cold and day-old to prevent your fried rice from becoming soggy [1].
    3. Use your spatula to break up the rice. Spread it out as much as possible and let it sizzle for 1-2 minutes. This helps dry it out and can create delicious crispy bits.
    4. Pour your pre-mixed fried rice sauce evenly over the rice.
    5. Stir everything together vigorously, making sure every grain of rice is coated with the amazing sauce.
    6. Add softer vegetables, such as peas and corn, if using, and stir for another minute.

    You’re almost there! Your kitchen should smell absolutely incredible. This is how to make fried rice not soggy and bursting with flavor.

    Step 5: Combine Everything and Serve

    Time for the final step! Let’s bring all the delicious components together for a fantastic simple dinner recipe.

    1. Add the scrambled eggs you set aside back into the pan.
    2. Gently toss and stir to combine all the ingredients, ensuring the eggs, protein, vegetables, and rice are evenly distributed.
    3. Continue to stir-fry for another 1-2 minutes to ensure everything is heated through.
    4. Taste your fried rice and adjust seasonings if needed. A little more soy sauce or a dash of white pepper can make all the difference.
    5. Remove from the heat and garnish generously with sliced green onions.

    Serve your homemade fried rice immediately. You’ve just created a delicious, family-friendly meal that everyone will love. Enjoy cooking without the stress, knowing you’ve mastered this quick meal. This approach is what makes approachable home cooking so rewarding.

    What is the secret ingredient in Chinese fried rice?

    Ever wonder about the magic behind truly amazing Chinese fried rice? While you might think there’s a single secret ingredient, the truth is even better. It’s actually a combination of simple techniques and flavorful additions that makes all the difference. Master these, and you can create delicious fried rice right at home.

    At Recipesmondial, we break down complex ideas to empower you to cook with confidence. When it comes to fried rice, there isn’t one “secret ingredient.” Instead, it’s a few key elements working in harmony. Mastering them will elevate your easy fried rice recipe from good to great.

    The Real “Secrets” to Amazing Fried Rice

    Here are the crucial components that create that irresistible flavor and texture:

    • Cold, Day-Old Rice: This is the non-negotiable foundation. Using rice that’s at least a day old and fully chilled prevents it from getting soggy. This ensures the individual grains stay firm and separate, allowing them to absorb all the delicious flavors.
    • High Heat Cooking: This is where the magic happens. Quickly cooking over very high heat creates a smoky, slightly charred flavor known as “wok hei,” or the “breath of the wok” [2]. A super-hot pan or large skillet is essential to achieve this effect. This quick sear not only locks in flavor but also gives your chicken fried rice or shrimp fried rice an incredible texture.
    • Umami-Rich Sauce: A well-balanced sauce is key for depth and savory flavor. A typical blend includes light soy sauce for saltiness, dark soy sauce for color and richness, and often oyster sauce for complexity. A final touch of sesame oil adds a lovely aroma. Together, these ingredients deliver the essential umami taste that makes fried rice so satisfying.
    • Fresh Aromatics: Don’t skip these! Fresh garlic, ginger, and green onions are essential for building a vibrant base of flavor. Sautéing them briefly at the start releases their fragrant oils, which permeate the entire dish.
    • Quick Stir-Frying: Speed is crucial. The goal is to cook ingredients just until tender-crisp, not a moment longer. This technique maintains their fresh texture and crunch while preventing vegetables from becoming watery.

    By focusing on these core elements, you can confidently transform simple ingredients into a restaurant-quality meal. Forget being overwhelmed by complex recipes. Instead, enjoy the process of cooking flavorful meals, made easy with Recipesmondial!

    What are common mistakes in making fried rice?

    Making delicious fried rice is easier than you might think! However, like any dish, there are a few common pitfalls that can turn your perfectly planned meal into something less than ideal. Don’t worry, we’re here to guide you. Learning from these easy-to-avoid mistakes will help you create flavorful fried rice every time.

    Many home cooks feel overwhelmed by complex recipes and often struggle with getting the texture right. But with these simple tips, you’ll gain confidence in the kitchen and enjoy cooking without stress.

    Mistake 1: Using Freshly Cooked, Warm Rice

    • Why it’s a mistake: Freshly cooked rice is moist and sticky. It clumps together in the pan, which makes your fried rice soggy and mushy. This prevents you from getting that desired dry, separate grain texture.
    • The easy fix: Always use cold, day-old cooked rice. Long-grain rice like Jasmine works best. Cook your rice the day before, spread it on a tray to cool completely, and store it in the fridge overnight. This process dries out the grains, so they will fry up perfectly light and fluffy. This is a game-changer for any fried rice recipe!

    Mistake 2: Overcrowding Your Pan or Wok

    • Why it’s a mistake: Filling your pan too much reduces the heat. This causes ingredients to steam instead of fry, leading to mushy vegetables and rice. You won’t achieve that lovely browned, slightly crispy texture.
    • The easy fix: Cook your fried rice in batches if needed. Use a large pan or wok over high heat and give your ingredients plenty of space. This ensures everything fries properly. As a result, each grain of rice and every piece of vegetable gets beautifully caramelized.

    Mistake 3: Not Prepping All Ingredients First (No Mise en Place!)

    • Why it’s a mistake: Fried rice cooks very quickly, so you need to add ingredients in rapid succession. If you’re chopping while cooking, ingredients in the pan can easily burn. This can turn your simple dinner recipes into a stressful experience.
    • The easy fix: Prepare everything before you even turn on the stove. Chop all your vegetables, measure out your sauce, and have your eggs scrambled and protein cooked. This organized approach, often called “mise en place,” makes the cooking process smooth. It’s key for quick breakfast ideas and family-friendly meals.

    Mistake 4: Using Too Much Sauce or Oil

    • Why it’s a mistake: Excess liquid or oil can weigh down your rice. This makes the dish greasy and soggy, ruining the light, fluffy texture.
    • The easy fix: Be mindful of your measurements. Use just enough oil to coat the pan and add the sauce sparingly—you can always add more if needed. Start with the recommended amount in your easy recipes. This ensures flavorful meals made easy without the extra grease.

    Mistake 5: Not Using High Enough Heat

    • Why it’s a mistake: Fried rice needs high heat to create its characteristic wok hei (smoky flavor) and crisp texture. Low heat causes ingredients to stew in their own juices, resulting in soft, unappealing fried rice.
    • The easy fix: Always cook your fried rice over high heat. Let your pan or wok get smoking hot before adding oil, and keep the ingredients moving constantly. This helps achieve the perfect balance of tenderness and slight crispness. It’s essential for classic chicken fried rice or savory shrimp fried rice recipes.

    By avoiding these common mistakes, you’ll be well on your way to making delicious, restaurant-quality fried rice at home. You’ll go from feeling uncertain in the kitchen to cooking with confidence. Enjoy the journey of discovering new simple dishes with Recipesmondial!

    Easy Fried Rice Variations to Try

    You’ve mastered the basic, super-easy fried rice recipe—fantastic! Now, let’s unlock a world of flavor. Building on your skills, these simple variations will help you create diverse, family-friendly meals. Get ready to explore new tastes, as each twist makes for a quick and satisfying dinner.

    Classic Chicken Fried Rice Recipe

    A beloved classic, chicken fried rice adds lean protein and a satisfying texture to your meal. This variation is perfect for busy weeknights and is a great way to use up leftover chicken.

    • Preparation: Dice 1 cup of cooked chicken. For extra speed, use rotisserie chicken. You can also quickly sauté small, bite-sized pieces of raw chicken breast or thigh until no longer pink.
    • When to Add: Add the cooked chicken to the pan along with the rice, mixing it thoroughly with the vegetables and sauce.
    • Tip: Season the chicken lightly with salt and pepper before cooking to enhance its flavor.

    Flavorful Shrimp Fried Rice Recipe

    For a delicate and delicious flavor, try shrimp fried rice. Shrimp cooks very quickly, making this a fantastic way to elevate your fried rice on a tight schedule. Both fresh and frozen shrimp work well.

    • Preparation: Peel and devein 1 cup of raw, small-to-medium shrimp. Pat them dry with a paper towel to ensure they sear nicely in the pan.
    • When to Add: Cook the shrimp right after the aromatics. Sauté for just 2-3 minutes per side until pink and opaque. Be careful not to overcook them, as they can become rubbery.
    • Tip: A squeeze of fresh lemon juice at the end will brighten the shrimp’s flavor.

    Hearty Pork Fried Rice Recipe

    Wonderfully savory and filling, pork fried rice is true comfort food. This version is excellent for using up leftover roasted pork, but you can also easily prepare it with fresh pork.

    • Preparation: Dice 1 cup of cooked pork, such as leftover loin or shoulder. If using raw pork, choose lean cuts like tenderloin or boneless chops and cut them into small pieces.
    • When to Add: Sauté raw pork until fully cooked and browned before adding aromatics. If you’re using cooked pork, add it with the rice and heat it through gently.
    • Tip: Briefly marinating raw pork in a little soy sauce and sesame oil is a simple step that adds incredible depth of flavor.

    Simple Egg Fried Rice

    Sometimes, simplicity is key. Egg fried rice is the ultimate quick and budget-friendly meal, perfect for a light lunch or dinner. Since you already know how to scramble eggs, you’re halfway there!

    • Preparation: Follow the main recipe’s steps for scrambling eggs. Feel free to add an extra egg or two to boost the protein content.
    • When to Add: Stir the scrambled eggs back into the fried rice at the very end, ensuring they are well integrated.
    • Why it’s great: As one of the easiest and most versatile variations, this classic beginner-friendly recipe proves that a delicious meal doesn’t require many ingredients.

    How to Store and Reheat Leftover Fried Rice

    One of the best things about making your own delicious fried rice recipe is enjoying the leftovers! Our easy fried rice is often even tastier the next day. But it’s crucial to store and reheat it safely. Let’s make sure you can enjoy every last bite without any worries.

    Storing Leftover Fried Rice Safely

    Proper storage is key to keeping your fried rice fresh and safe. Always act quickly after cooking.

    • Cool Quickly: Transfer leftover fried rice into shallow containers within one hour of cooking. This promotes rapid, even cooling.
    • Airtight Containers: Use airtight containers. This protects your rice from drying out and absorbing other food odors.
    • Refrigerate Promptly: Place the sealed containers in the refrigerator. Your chicken fried rice or shrimp fried rice will stay fresh for up to 3-4 days when stored correctly.
    • Freezing (Optional): For longer storage, you can freeze fried rice for up to one month, though the texture may change slightly. Make sure it’s completely cool first, and thaw it in the refrigerator overnight before reheating.

    Important Food Safety Note: Cooked rice can contain spores of a bacteria called Bacillus cereus. If cooked rice is left at room temperature for too long, these spores can multiply and produce toxins that cause food poisoning. Therefore, it is crucial to cool and refrigerate your fried rice quickly [3].

    How to Reheat Fried Rice for Best Results

    Reheating fried rice properly ensures it tastes great and is safe to eat. For safety, aim for an internal temperature of 165°F (74°C).

    Method 1: Microwave (Quickest Option)

    This is a super-fast way to warm up your pork fried rice or chinese fried rice.

    1. Portion Control: Place a single serving of fried rice in a microwave-safe dish.
    2. Add Moisture: Sprinkle a tablespoon of water or broth over the rice to prevent it from drying out.
    3. Cover: Loosely cover the dish with a microwave-safe lid or a damp paper towel.
    4. Heat: Microwave on high for 1-2 minutes, stirring halfway through. Continue heating in 30-second intervals until it is piping hot throughout.

    Method 2: Stovetop (Best for Texture)

    If you have a little more time, the stovetop method helps restore that delicious, freshly made texture. This works wonderfully for chicken fried rice recipe leftovers.

    1. Heat Pan: Add 1-2 teaspoons of oil to a non-stick skillet or wok over medium-high heat.
    2. Add Rice: Once the oil is shimmering, add your leftover fried rice. Use a spoon to break up any large clumps.
    3. Stir-Fry: Stir-fry constantly for 3-5 minutes, ensuring all ingredients are heated through. You should hear some sizzling.
    4. Add Moisture (Optional): If the rice seems dry, add a splash of water, broth, or a little more soy sauce.
    5. Serve Hot: Once it’s steaming hot, remove it from the heat and enjoy immediately.

    No matter which method you choose, always make sure your fried rice is steaming hot throughout before serving. Following these simple steps will ensure your leftovers are just as delicious and safe as when they were first made!

    Frequently Asked Questions

    What meat goes best with fried rice?

    Fried rice is wonderfully versatile! You can easily customize it with your favorite protein. This flexibility makes it a fantastic choice for family-friendly meals and easy recipes.

    Here are some popular and delicious options:

    • Chicken: Diced chicken breast or thighs are a classic choice. They cook quickly, absorb flavors beautifully, and make for a hearty chicken fried rice recipe that everyone loves.
    • Shrimp: For a lighter, flavorful option, shrimp is an excellent choice. It cooks very fast, so add it near the end to keep it tender. This makes a shrimp fried rice recipe a great solution for a quick meal.
    • Pork: Diced pork loin or tenderloin adds a lovely savory depth. Char siu (Chinese BBQ pork) is also a fantastic, authentic choice for pork fried rice.
    • Beef: Thinly sliced steak, like sirloin or flank steak, is also delicious. Marinate it briefly for extra tenderness and flavor.
    • Tofu or Tempeh: For a vegetarian or vegan version, firm tofu or tempeh works perfectly. Simply press out the excess water and fry it until golden before adding it to your fried rice.

    Ultimately, the best meat for your fried rice is the one you enjoy most! Feel free to experiment and discover your personal favorite for flavorful meals made easy.

    How do I make my fried rice not soggy?

    Achieving perfectly dry, fluffy fried rice is key for flavorful meals made easy! Soggy fried rice is a common frustration, but it’s easily avoided with a few tips perfect for beginner-friendly recipes.

    Follow these practical steps for a great result every time:

    • Use Cold, Day-Old Rice: This is the golden rule! Freshly cooked rice is warm and moist, which makes it steam and turn mushy in the pan. Chilling leftover rice in the fridge dries it out, so the grains stay separate and firm. This step is essential for the best texture. [4]
    • High Heat is Your Friend: Cook your fried rice in a very hot wok or large skillet. High heat evaporates moisture quickly and gives the rice those lovely crispy bits.
    • Don’t Overcrowd the Pan: Cook in batches if necessary. Too much food in the pan lowers the temperature, causing ingredients to steam instead of fry. This releases moisture and leads to sogginess.
    • Use Enough Oil (But Not Too Much): A sufficient amount of oil helps toast the rice and prevents sticking. However, too much oil can make it greasy.
    • Add Sauce Towards the End: Add your sauces just before the rice is finished cooking. Toss them quickly to coat the rice without making the dish wet.
    • Dry Your Ingredients: Make sure any vegetables or protein are dry before you add them to the pan. Excess water will create steam.

    By following this step-by-step cooking guidance, you’ll create delightful, non-soggy fried rice. You will be cooking confidently in no time!

    What kind of soy sauce is best for fried rice?

    Choosing the right soy sauce significantly impacts your fried rice‘s flavor and appearance. It’s a key ingredient for flavorful meals made easy, and understanding the types is a great step for approachable home cooking.

    For the best results, you’ll typically use a combination:

    • Light Soy Sauce (or Regular Soy Sauce): This is your primary seasoning, providing the main salty, umami flavor. Using a good quality brand will give you the best taste. It’s a staple in many simple dinner recipes.
    • Dark Soy Sauce: This type is thicker, slightly sweeter, and less salty than light soy sauce. Its main purpose is to add a rich, beautiful caramel color to your fried rice while also imparting a deeper, more complex flavor.
    • Low-Sodium Soy Sauce: If you’re watching your salt intake, low-sodium varieties are a great option. They allow you to control the saltiness more easily, and you can always adjust with a pinch of salt if needed.

    For an authentic Chinese fried rice, we recommend using both light and dark soy sauce. The light soy sauce brings the salt and umami, while the dark soy sauce provides that signature deep color and a hint of sweetness. This combination creates a perfect balance that elevates your fried rice recipe to restaurant quality!


    Sources

    1. https://www.foodandwine.com/essential-kitchen-tips/day-old-rice-fried-rice-myth-busted-7965922
    2. https://www.seriouseats.com/what-is-wok-hei-how-to-get-it-at-home
    3. https://www.nhs.uk/common-health-questions/food-and-diet/can-you-reheat-rice/
    4. https://www.seriouseats.com/the-best-fried-rice-recipe-how-to-make-fried-rice
  • 21 Best Chicken Thigh Recipes (Easy, Quick & Delicious Ideas)

    21 Best Chicken Thigh Recipes (Easy, Quick & Delicious Ideas)

    Chicken thigh recipes are incredibly popular because chicken thighs are a flavorful, juicy, and budget-friendly cut of meat. They are highly versatile and can be baked, pan-seared, grilled, or cooked in an air fryer, making them perfect for quick weeknight dinners, family-friendly meals, and meal prep.

    Do you dream of serving delicious, restaurant-quality meals without spending hours in the kitchen? Are you overwhelmed by complex recipes or struggling to plan family-friendly meals that everyone will love? We understand. Balancing a busy life with flavorful, satisfying food is a challenge. At Recipesmondial, we believe cooking should be an enjoyable, stress-free experience. That’s why we’re here to celebrate one of the most versatile, budget-friendly, and delicious ingredients around: chicken thighs!

    This guide unlocks the potential of chicken thighs with 21 of our best recipes, each one quick, easy, and bursting with flavor. Whether you’re a beginner seeking reliable results or a seasoned pro looking for fresh inspiration, these simple dinner recipes offer practical, step-by-step guidance. It’s time to say goodbye to kitchen uncertainty and hello to a world of approachable home cooking.

    From crispy oven-baked favorites to speedy air fryer options and versatile boneless recipes, we’ll show you how to transform this humble cut into a culinary masterpiece. Get ready to discover new flavors, boost your confidence in the kitchen, and make mealtime an exciting, delicious journey. Let’s dive in and explore why chicken thighs are perfect for easy meals!

    Why Are Chicken Thighs Perfect for Easy Meals?

    Chicken thighs are a true kitchen hero, perfect for anyone seeking easy, flavorful meals. Here at Recipesmondial, we know you need simple yet delicious options, and chicken thighs deliver with fantastic value and versatility. Naturally juicy and forgiving, these succulent cuts make weeknight cooking a joy and are ideal for both beginner cooks and creative chefs. Say goodbye to dry, boring chicken. Let’s explore why chicken thighs are a staple for stress-free, flavorful cooking.

    Boneless vs. Bone-In Thighs: What’s the Difference?

    Understanding the difference between boneless and bone-in thighs will help you choose the best option for your recipe. You will typically find both boneless, skinless and bone-in, skin-on varieties, each offering unique benefits.

    Boneless, Skinless Chicken Thighs: Incredibly convenient, these thighs cook quickly, making them excellent for fast weeknight dinners. They readily absorb marinades and sauces, which is perfect for quick stir-fries or speedy pan-sears. They are also simple to cut into uniform pieces.

    Bone-In, Skin-On Chicken Thighs: For deeper flavor and extra juiciness, choose bone-in thighs. The bone helps distribute heat evenly to keep the meat moist, while the skin crisps up beautifully for a wonderful texture. Bone-in thighs are also often a great budget-friendly option, though they do require a bit more cooking time.

    Here’s a quick comparison to help you decide:

    Feature Boneless, Skinless Chicken Thighs Bone-In, Skin-On Chicken Thighs
    Cook Time Faster, great for quick meals Slower, allows for deeper flavor
    Flavor Profile Mild, readily absorbs marinades Richer, more robust chicken flavor
    Texture Uniform, easy to shred or slice Very tender, often falls off the bone
    Prep Effort Minimal, ready to cook May require trimming some excess skin/fat
    Best For Stir-fries, quick pan-sears, curries Roasting, braising, slow cooking, grilling
    Cost Slightly higher per pound Generally more budget-friendly

    Tips for Perfectly Juicy Chicken Every Time

    Achieving perfectly juicy chicken thighs is easier than you think. With these simple tips, you can forget about dry chicken, boost your cooking confidence, and consistently create flavorful meals.

    • Use a Meat Thermometer: A meat thermometer is your best friend for juicy chicken. Thighs are fully cooked and safe at 175°F (80°C) [1]. Unlike breasts, they benefit from cooking past the typical 165°F, as this allows connective tissues to break down for extra tenderness.
    • Do Not Overcook: While thighs are forgiving, overcooking is still the primary cause of dryness. Check the internal temperature often and remove the chicken from the heat just as it reaches its target to keep it moist.
    • Consider a Simple Brine: A quick brine can work wonders. Soaking chicken thighs in salted water for 30 minutes to an hour helps the meat retain moisture while adding flavor [2].
    • Let it Rest: After cooking, always let your chicken rest for 5-10 minutes under a loose covering of foil. This crucial step allows the juices to redistribute throughout the meat, resulting in a much juicier bite.
    • Pat Dry Before Cooking: For crispy skin, this tip is crucial. Use paper towels to pat the chicken thighs completely dry, especially bone-in, skin-on varieties. Excess moisture creates steam and prevents the skin from browning properly.
    • High Heat for Crispy Skin: When cooking bone-in, skin-on thighs, start them skin-side down in the pan over medium-high heat. This technique renders the fat and creates a beautifully crispy skin.
    • Don’t Crowd the Pan: To get a good sear, cook chicken in a single layer without overcrowding the pan. If necessary, cook in batches. A crowded pan lowers the temperature, causing the chicken to steam instead of sear.

    With these straightforward techniques, you can cook with confidence and enjoy perfectly juicy, flavorful chicken thighs every time. Recipesmondial is here to guide you to delicious, easy recipes.

    Simple Oven-Baked Chicken Thigh Recipes

    A plate of golden-brown, crispy-skinned oven-baked chicken thighs served with roasted asparagus and cherry tomatoes.
    Professional food photography, photorealistic, high-quality food magazine photo: A beautifully plated dish of golden-brown, crispy-skinned oven-baked chicken thighs. The chicken is perfectly seared with visible juices, resting on a rustic white plate. Alongside, there’s a vibrant side of roasted asparagus spears and cherry tomatoes, lightly charred, suggesting fresh, simple ingredients. Soft, warm natural lighting from a window illuminates the dish, highlighting the textures and rich colors. The background is slightly blurred, showing a warm, inviting kitchen counter with a hint of a wooden cutting board. The overall feel is comforting, easy, and incredibly delicious.

    Classic Crispy Skin Baked Chicken Thighs

    Ready to master a truly satisfying dish? Our classic crispy skin baked chicken thighs recipe is the perfect place to start. This easy method promises juicy chicken with delightfully crispy skin, making it a go-to for family-friendly dinners. You’ll love how simple it is to prepare.

    Why This Recipe Works for You

    • Beginner-Friendly: With step-by-step guidance, anyone can achieve fantastic results.
    • Maximum Flavor: The skin gets wonderfully crisp, sealing in all the delicious juices.
    • Everyday Ingredients: You likely have most of these items in your pantry already.
    • Versatile: It pairs well with almost any side dish.

    Ingredients You Will Need

    • 4 bone-in, skin-on chicken thighs
    • 1 tablespoon olive oil
    • 1 teaspoon salt
    • ½ teaspoon black pepper
    • ½ teaspoon garlic powder (optional)
    • ½ teaspoon paprika (optional, for color and mild flavor)

    Simple Step-by-Step Instructions

    1. Preheat Oven: Set your oven to 400°F (200°C).
    2. Prepare Chicken: Pat the chicken thighs thoroughly dry with paper towels. This is a crucial step for achieving crispy skin.
    3. Season: Drizzle the chicken with olive oil and rub it evenly over all sides.
    4. Sprinkle Seasonings: In a small bowl, combine the salt, pepper, garlic powder, and paprika (if using). Sprinkle this mixture generously over both sides of the chicken.
    5. Arrange: Place the seasoned chicken thighs skin-side up in a single layer on a baking sheet.
    6. Bake: Bake for 35-45 minutes. Cooking time will depend on the size of the chicken thighs.
    7. Check Doneness: The chicken is done when its internal temperature reaches 165°F (74°C) [3]. Use a meat thermometer for an accurate reading.
    8. Rest and Serve: Let the chicken rest for 5 minutes before serving. This step keeps it extra juicy.

    Tips for Success and Variations

    • Extra Crispy Skin: For even crispier skin, bake the chicken on a wire rack placed over a baking sheet. This allows hot air to circulate completely.
    • Flavor Boost: Add a sprig of fresh rosemary or thyme to the baking sheet as the chicken cooks.
    • Meal Prep Idea: Cook extra thighs and shred the meat for salads or sandwiches later in the week. This makes weekly meal planning easy.
    • Spice It Up: A pinch of cayenne pepper in the seasoning mix will add a gentle kick.

    One-Pan Lemon Herb Chicken and Veggies

    Overwhelmed by complex recipes and too many dishes? This one-pan lemon herb chicken and veggies recipe is your new best friend. It delivers a full, flavorful meal on a single baking sheet, making it perfect for busy families who value simple dinners and easy cleanup.

    Why This Recipe Works for You

    • Minimal Cleanup: Only one pan to wash—a huge win on a busy night!
    • Complete Meal: Your protein and vegetables cook together for a balanced dish.
    • Nutrient-Rich: This meal is packed with fresh vegetables and lean protein.
    • Approachable Home Cooking: Simple steps that deliver delicious results every time.

    Ingredients You Will Need

    • 4 boneless, skinless chicken thighs (or bone-in, skin-on for extra flavor)
    • 1 pound small potatoes, quartered
    • 2 cups broccoli florets
    • 1 bell pepper (any color), chopped into 1-inch pieces
    • 2 tablespoons olive oil
    • Juice of 1 lemon
    • 1 tablespoon dried Italian herbs (or a mix of dried rosemary, thyme, and oregano)
    • ½ teaspoon salt
    • ¼ teaspoon black pepper
    • Fresh parsley, chopped, for garnish (optional)

    Simple Step-by-Step Instructions

    1. Preheat Oven: Heat your oven to 400°F (200°C). For even easier cleanup, line a large baking sheet with parchment paper.
    2. Prepare Veggies: In a large bowl, toss the potatoes, broccoli, and bell pepper with 1 tablespoon of olive oil, half the lemon juice, ½ tablespoon of Italian herbs, salt, and pepper.
    3. Season Chicken: Pat the chicken thighs dry. In the same bowl (or a separate one), toss the chicken with the remaining 1 tablespoon of olive oil, lemon juice, and Italian herbs.
    4. Arrange on Pan: Spread the seasoned vegetables in an even layer on the prepared baking sheet. Place the chicken thighs among the vegetables.
    5. Bake: Bake for 25-35 minutes. Cooking time varies based on the thickness of the chicken.
    6. Check Doneness: The chicken is cooked through when its internal temperature reaches 165°F (74°C), and the vegetables should be tender and lightly browned.
    7. Serve: Garnish with fresh parsley, if desired, and serve immediately.

    Tips for Success and Variations

    • Veggie Swaps: Feel free to use carrots, zucchini, asparagus, or cherry tomatoes. Just be sure to adjust cooking times as needed.
    • Spice Variation: For some heat, add a pinch of red pepper flakes with the other seasonings.
    • Marinade Ahead: For extra flavor, marinate the chicken and veggies together for at least 30 minutes before baking.
    • Meal Prep Friendly: This recipe makes fantastic leftovers and is ideal for healthy lunch prep during the week.

    Savory Garlic and Paprika Chicken Thighs

    Unlock robust flavors with our savory garlic and paprika chicken thighs. This straightforward yet incredibly satisfying recipe is perfect for beginners and makes a tasty addition to any meal plan. It’s a simple way to create a delicious dish that will impress your family without any stress.

    Why This Recipe Works for You

    • Flavorful Punch: Garlic and paprika combine to create a deep, savory taste.
    • Quick & Easy: Get maximum flavor with minimal prep time.
    • Versatile Pairing: This chicken is great with rice, pasta, or a simple green salad.
    • Budget-Friendly: Chicken thighs are an economical and delicious choice for family meals.

    Ingredients You Will Need

    • 4 boneless, skinless chicken thighs
    • 1 tablespoon olive oil
    • 1 tablespoon garlic powder
    • 1 teaspoon smoked paprika
    • ½ teaspoon onion powder
    • ½ teaspoon salt
    • ¼ teaspoon black pepper
    • Optional: Pinch of cayenne pepper for heat

    Simple Step-by-Step Instructions

    1. Preheat Oven: Preheat your oven to 400°F (200°C).
    2. Prepare Chicken: Pat the chicken thighs dry with paper towels.
    3. Create Spice Rub: In a small bowl, combine the garlic powder, smoked paprika, onion powder, salt, pepper, and cayenne (if using).
    4. Season Chicken: Drizzle the chicken with olive oil. Sprinkle the spice rub evenly over all sides, patting it gently to help it adhere.
    5. Arrange on Pan: Place the seasoned chicken thighs in a single layer on a baking sheet.
    6. Bake: Bake for 20-30 minutes, depending on the thickness of your chicken.
    7. Check Doneness: Use a meat thermometer to ensure the internal temperature has reached 165°F (74°C).
    8. Rest and Serve: Let the chicken rest for a few minutes before slicing and serving. This keeps the meat tender and juicy.

    Tips for Success and Variations

    • Marinade Option: For a deeper flavor, coat the chicken with the oil and spice rub, then refrigerate for at least 30 minutes (or up to 4 hours) before baking.
    • Smoked Paprika Power: Using smoked paprika provides a richer, more complex taste, but regular paprika works well too.
    • Make it a Sheet Pan Meal: Toss sliced onions, bell peppers, or zucchini with a little oil and salt and add them to the pan to cook alongside the chicken.
    • Serving Suggestion: A squeeze of fresh lemon juice just before serving brightens all the savory flavors.

    Easy Boneless Skinless Chicken Thigh Recipes

    15-Minute Pan-Seared Chicken Thighs with Sauce

    Craving a delicious dinner in a flash? This pan-seared chicken is the perfect solution for busy evenings. Pan-searing is a quick cooking method that locks in flavor and moisture, and since boneless thighs cook so fast, you can have a restaurant-quality meal on the table in just 15 minutes.

    This recipe is a game-changer for anyone short on time, and it’s also ideal for beginner cooks looking to build confidence in the kitchen. With this simple approach, you can say goodbye to overwhelming, complex recipes and see just how easy a flavorful meal can be.

    Why You’ll Love This Quick Meal:

    • Lightning Fast: Ready from start to finish in about 15 minutes.
    • Big Flavor: A simple pan sauce elevates the chicken.
    • Easy to Master: Perfect for learning basic cooking skills.
    • Versatile: Pairs well with almost any side dish.

    Key Ingredients (You’ll need):

    • Boneless, skinless chicken thighs
    • Olive oil or butter
    • Garlic
    • Chicken broth or white wine
    • Fresh herbs (like thyme or parsley)
    • Lemon juice

    Simple Steps:

    1. Pat your chicken thighs dry and season them well.
    2. Heat oil in a skillet over medium-high heat.
    3. Sear the chicken for 4-5 minutes per side until golden brown and cooked through, reaching an internal temperature of 165°F (74°C) for safety [4].
    4. Remove the chicken from the pan and quickly make your pan sauce. Add garlic, then deglaze with broth. Stir in herbs and lemon juice.
    5. Return the chicken to the pan to coat it in the sauce.

    Tips for Success:

    • Don’t Overcrowd: To ensure a good sear, cook the chicken in batches if needed.
    • Get Creative with Sauce: Try adding a touch of cream for richness or a spoonful of Dijon mustard for tang.
    • Serve It Up: This dish is delicious with mashed potatoes, rice, or a fresh green salad.

    Quick Honey-Garlic Chicken Stir-Fry

    If you need a healthy and tasty meal on the table fast, a stir-fry is the perfect answer. This quick honey-garlic chicken stir-fry combines tender boneless chicken with vibrant vegetables in a single pan, which makes cleanup a breeze. It’s a simple, flavorful, and family-friendly meal that tastes incredible.

    This dish is an excellent option for meal prep, as you can chop the veggies ahead of time to save precious minutes during the week. It’s also an easy recipe for beginners and can be adjusted to suit any dietary needs or preferences.

    Why This Stir-Fry is a Winner:

    • One-Pan Wonder: Less washing up means more time to relax.
    • Customizable: Use any vegetables you have on hand.
    • Healthy & Balanced: Packed with lean protein and fresh produce.
    • Sweet & Savory: The honey-garlic sauce is a universal favorite.

    Key Ingredients (You’ll need):

    • Boneless, skinless chicken thighs
    • Assorted stir-fry vegetables (broccoli, bell peppers, carrots, snap peas)
    • Soy sauce (or tamari for gluten-free)
    • Honey
    • Garlic and ginger
    • Rice vinegar

    Simple Steps:

    1. Cut the chicken and vegetables into bite-sized pieces.
    2. In a small bowl, whisk together the honey-garlic sauce ingredients.
    3. Heat oil in a large skillet or wok over high heat.
    4. Cook the chicken until it is browned and nearly cooked through.
    5. Add hardier vegetables first, then softer ones, and stir-fry until tender-crisp.
    6. Pour in the sauce and cook until it thickens and coats everything completely.

    Tips for Success:

    • Prep Ahead: For any stir-fry, it’s crucial to chop all your ingredients before you start cooking.
    • High Heat: Use high heat for searing to create that authentic stir-fry texture.
    • Serve with Grains: Enjoy over steamed rice, quinoa, or noodles.

    Simple Chicken Thigh Casserole

    For those times you need a comforting meal that practically cooks itself, this simple chicken thigh casserole is the ideal solution. It’s a fantastic, beginner-friendly recipe for busy families—just assemble the ingredients and let the oven do the work. This dish transforms simple pantry staples into a delicious and hearty dinner, making it the definition of easy home cooking.

    As a stress-free meal prep solution, this casserole is a winner. You can assemble it the night before and pop it into the oven when you’re ready to eat. It’s a reliable recipe that delivers consistent, flavorful results every time.

    Why This Casserole is a Family Favorite:

    • Minimal Effort: Enjoy hands-off cooking once it’s in the oven.
    • Comfort Food: Warm, hearty, and deeply satisfying.
    • Feeds a Crowd: Easily doubles for larger families or planned leftovers.
    • Budget-Friendly: Uses economical boneless chicken thighs and staple vegetables.

    Key Ingredients (You’ll need):

    • Boneless, skinless chicken thighs
    • Potatoes (cut into chunks)
    • Carrots and celery
    • Onion
    • Cream of mushroom/chicken soup (or a homemade creamy sauce)
    • Chicken broth
    • Seasonings (salt, pepper, herbs)

    Simple Steps:

    1. Preheat your oven to the temperature specified in the recipe.
    2. Combine the chicken, potatoes, carrots, celery, and onion in a large baking dish.
    3. In a separate bowl, mix together the soup, broth, and seasonings.
    4. Pour the sauce mixture evenly over the chicken and vegetables.
    5. Bake until the chicken is cooked through and the vegetables are tender.

    Tips for Success:

    • Add More Veggies: Bell peppers, peas, or green beans are also great additions.
    • Cheesy Goodness: Sprinkle shredded cheese on top during the last 15 minutes of baking.
    • Make Ahead: Assemble the casserole up to 24 hours in advance. Cover and refrigerate until ready to bake.

    Flavorful Bone-In Chicken Thigh Recipes

    Slow-Cooker BBQ Pulled Chicken

    Imagine a delicious meal that practically cooks itself. Our Slow-Cooker BBQ Pulled Chicken is one of the easiest recipes you’ll ever make, making it a fantastic solution for busy weeknights or feeding a crowd.

    This recipe uses bone-in chicken thighs, which become incredibly tender and flavorful as they slow cook—perfect for shredding. Loved for its ease and taste, this simple dinner recipe is a true family-friendly meal that will keep everyone at the table happy.

    Ingredients:

    • 2 pounds bone-in, skin-on chicken thighs
    • 1 medium onion, chopped
    • 1 bottle (18 ounces) your favorite BBQ sauce
    • ½ cup chicken broth or water
    • 1 tablespoon apple cider vinegar (optional, for tang)
    • Salt and black pepper to taste

    Step-by-Step Cooking Guidance:

    1. Season the Chicken: First, pat the chicken thighs dry with paper towels. Then, season them generously with salt and pepper on all sides.
    2. Combine in Slow Cooker: Place the chopped onion in the bottom of your slow cooker and arrange the seasoned chicken thighs on top.
    3. Add Liquids: In a separate bowl, whisk together the BBQ sauce, chicken broth (or water), and apple cider vinegar (if using). Pour this mixture evenly over the chicken.
    4. Cook Low and Slow: Cover the slow cooker and cook on low for 6-8 hours or on high for 3-4 hours. The chicken is done when it’s very tender and the internal temperature reaches 165°F (74°C) [5].
    5. Shred and Serve: Carefully remove the chicken from the slow cooker. Once it’s cool enough to handle, discard the bones and skin, then shred the meat using two forks. Return the shredded chicken to the slow cooker and stir to combine with the delicious BBQ sauce.

    Tips and Variations:

    • Serving Suggestions: Serve on hamburger buns for classic pulled chicken sandwiches. You can also use it in tacos, wraps, or over a bed of rice. A side of simple coleslaw completes the meal.
    • Spice It Up: For a little kick, add a pinch of cayenne pepper or a dash of your favorite hot sauce to the BBQ mixture.
    • Meal Prep Idea: This recipe is perfect for meal prep. Cook a large batch on Sunday to enjoy in different meals throughout the week—a fantastic time-saver for busy families.

    Hearty Roasted Chicken with Root Vegetables

    Looking for an easy, flavorful meal with minimal cleanup? This Hearty Roasted Chicken with Root Vegetables is your answer. Because it’s a complete meal cooked on a single pan, it’s a great choice for beginner cooks or anyone seeking approachable home cooking.

    Roasting bone-in chicken thighs alongside vegetables creates an amazing depth of flavor as the veggies absorb the savory chicken drippings. The result is a simple dinner recipe that is nourishing, satisfying, and truly comforting.

    Ingredients:

    • 4 bone-in, skin-on chicken thighs
    • 1 pound small red potatoes, quartered
    • 1 pound carrots, peeled and chopped into 1-inch pieces
    • 1 medium sweet potato, peeled and cubed
    • 1 tablespoon olive oil
    • 1 teaspoon dried rosemary
    • ½ teaspoon dried thyme
    • ½ teaspoon garlic powder
    • Salt and black pepper to taste

    Step-by-Step Cooking Guidance:

    1. Preheat Oven: Preheat your oven to 400°F (200°C) and line a large baking sheet with parchment paper for easy cleanup.
    2. Prepare Vegetables: In a large bowl, combine the potatoes, carrots, and sweet potato. Drizzle with olive oil and sprinkle with rosemary, thyme, garlic powder, salt, and pepper. Toss until everything is evenly coated, then spread the vegetables in a single layer on the prepared baking sheet.
    3. Season Chicken: Pat the chicken thighs dry and season them generously with salt, pepper, and a little extra rosemary and thyme, if desired.
    4. Roast Together: Place the seasoned chicken thighs directly on top of the vegetables.
    5. Bake to Perfection: Roast for 35-45 minutes, or until the chicken skin is golden and crispy, the vegetables are tender, and the chicken reaches an internal temperature of 165°F (74°C).

    Tips and Variations:

    • Vegetable Swaps: Feel free to use other root vegetables. Parsnips, butternut squash, or Brussels sprouts also work wonderfully.
    • Fresh Herbs: For extra aroma, use 1 tablespoon of chopped fresh rosemary or thyme instead of dried.
    • Add Citrus: A squeeze of fresh lemon juice over the finished dish adds a bright, fresh flavor.
    • Batch Cooking: As a beginner-friendly recipe, this is excellent for batch cooking. Prepare it once and have healthy meals ready for days.

    Simple Italian-Style Braised Chicken

    Unlock incredible flavor and tenderness with our Simple Italian-Style Braised Chicken. While “braising” might sound complex, the technique is incredibly easy and a fantastic way to transform simple ingredients into a rich, comforting meal.

    Bone-in chicken thighs are ideal for this method, as they stay moist while absorbing all the delicious Italian flavors. This dish is perfect for building confidence in the kitchen, delivering an impressive meal with minimal fuss.

    Ingredients:

    • 4 bone-in, skin-on chicken thighs
    • 1 tablespoon olive oil
    • 1 medium onion, chopped
    • 2 cloves garlic, minced
    • 1 (14.5 ounce) can diced tomatoes, undrained
    • ½ cup chicken broth or dry white wine
    • 1 teaspoon dried oregano
    • ½ teaspoon dried basil
    • Salt and black pepper to taste
    • Fresh parsley, chopped, for garnish (optional)

    Step-by-Step Cooking Guidance:

    1. Brown the Chicken: Pat the chicken thighs dry and season generously with salt and pepper. Heat the olive oil in a large, oven-safe pot or Dutch oven over medium-high heat. Place the chicken skin-side down and sear for 5-7 minutes, until golden and crispy. Flip and sear for another 2-3 minutes. Remove the chicken from the pot and set it aside.
    2. Sauté Aromatics: Reduce the heat to medium. Add the chopped onion to the pot and cook for 3-5 minutes, until softened. Add the minced garlic and cook for 1 more minute, until fragrant.
    3. Deglaze and Add Liquids: Pour in the chicken broth or white wine, using a spoon to scrape up any browned bits from the bottom of the pot. Stir in the undrained diced tomatoes, dried oregano, and dried basil. Bring the mixture to a gentle simmer.
    4. Braise the Chicken: Return the seared chicken to the pot, nestling the pieces into the sauce. The sauce should come about halfway up the sides of the chicken. Cover the pot with a tight-fitting lid.
    5. Cook to Perfection: Finish cooking using one of two methods: either simmer gently on the stovetop for 30-40 minutes or bake in a preheated 350°F (175°C) oven for 45-60 minutes. The chicken is ready when it’s very tender and easily pulls away from the bone.
    6. Serve: Garnish with fresh chopped parsley before serving, if desired.

    Tips and Variations:

    • Serving Suggestions: This dish is perfect over pasta, creamy polenta, or mashed potatoes. Don’t forget the crusty bread to soak up the delicious sauce.
    • Add Vegetables: To boost flavor and nutrition, add sliced bell peppers or mushrooms to the pot along with the onions.
    • Cheese Please: A sprinkle of freshly grated Parmesan cheese before serving adds a lovely, savory finish.
    • Make Ahead: The flavors in this dish deepen overnight, making it a perfect make-ahead meal. It’s great for meal prep to make your week easier.

    Quick Air Fryer Chicken Thigh Recipes

    The air fryer is a game-changer for busy home cooks, transforming simple ingredients into delicious meals with incredible speed and minimal mess. If you’re looking for family-friendly meals that are both quick and tasty, your air fryer is here to help. Plus, it’s a fantastic tool for achieving a crispy texture without excessive oil, offering a healthier cooking option [6].

    Chicken thighs are perfect for the air fryer because they cook quickly and stay wonderfully juicy. Get ready to cook confidently and enjoy stress-free dinners with these beginner-friendly recipes.

    Crispy Air Fryer Chicken Thighs

    This simple go-to recipe delivers perfectly crispy chicken thighs every time. Using just a few pantry staples, it’s one of our favorite quick meals for a busy weeknight.

    Ingredients:
    • 4 bone-in, skin-on chicken thighs (about 6-8 oz each)
    • 1 tablespoon olive oil
    • 1 teaspoon garlic powder
    • 1 teaspoon paprika
    • 1/2 teaspoon salt
    • 1/4 teaspoon black pepper
    Step-by-Step Instructions:
    1. Prepare the Chicken: Pat the chicken thighs completely dry with paper towels. This step is crucial for getting crispy skin.
    2. Season the Chicken: In a small bowl, mix the garlic powder, paprika, salt, and pepper. Drizzle the chicken with olive oil, then rub the seasoning mixture evenly over both sides of each thigh.
    3. Preheat the Air Fryer: Preheat your air fryer to 375°F (190°C).
    4. Air Fry: Place the seasoned chicken thighs in a single layer in the air fryer basket, skin-side up. Cook for 18-22 minutes, flipping the thighs halfway through.
    5. Check for Doneness: The chicken is ready when the skin is golden brown and the internal temperature reaches 165°F (74°C) on a meat thermometer.
    6. Rest and Serve: Let the chicken rest for 5 minutes before serving. This step helps keep the meat juicy.
    Tips for Success:
    • Don’t Overcrowd: Cook in batches if necessary to ensure hot air can circulate around each piece for maximum crispiness.
    • Use a Thermometer: An instant-read thermometer is the best way to ensure your chicken is cooked perfectly.
    • Ensure Skin is Dry: For the crispiest results, make sure all moisture is removed from the skin before seasoning.

    Spicy Cajun-Style Air Fryer Chicken

    Bring a burst of flavor to your dinner table with these easy Cajun-style chicken thighs. This recipe is a fantastic way to spice up your usual routine and deliver a flavorful meal without the fuss.

    Ingredients:
    • 4 bone-in, skin-on chicken thighs
    • 2 tablespoons olive oil
    • 2 tablespoons Cajun seasoning (store-bought or homemade)
    • 1/2 teaspoon onion powder
    • 1/4 teaspoon cayenne pepper (optional, for extra heat)
    Step-by-Step Instructions:
    1. Prepare the Chicken: Pat the chicken thighs dry with paper towels.
    2. Season the Chicken: Drizzle the chicken with olive oil. In a small bowl, combine the Cajun seasoning, onion powder, and cayenne pepper (if using), then rub the mixture all over the thighs.
    3. Preheat the Air Fryer: Preheat your air fryer to 375°F (190°C).
    4. Air Fry: Arrange the chicken in a single layer in the air fryer basket. Cook for 20-25 minutes, flipping halfway through.
    5. Check for Doneness: Verify the chicken’s internal temperature has reached 165°F (74°C) before removing it from the air fryer.
    6. Rest and Serve: Let the chicken rest for a few minutes before enjoying.
    Flavor Boost:
    • Homemade Cajun Seasoning: For a custom blend, mix paprika, garlic powder, onion powder, dried oregano, dried thyme, black pepper, cayenne pepper, and salt.
    • Adjust Heat: Easily increase or decrease the amount of cayenne pepper to suit your taste.

    Easy Teriyaki Chicken Thighs

    This recipe features tender, juicy boneless chicken thighs coated in a sticky, sweet, and savory teriyaki glaze. It’s a perfect quick dinner that doesn’t compromise on flavor.

    Ingredients:
    • 1.5 pounds boneless, skinless chicken thighs
    • 1/2 cup teriyaki sauce (store-bought or homemade)
    • 1 tablespoon cornstarch (optional, to thicken the sauce)
    • 1 tablespoon water (if using cornstarch)
    • Sesame seeds and sliced green onions for garnish (optional)
    Step-by-Step Instructions:
    1. Prepare the Chicken: Cut the boneless, skinless chicken thighs into 1-inch pieces to ensure they cook quickly and evenly.
    2. Marinate: In a bowl, toss the chicken pieces with the teriyaki sauce. For best results, marinate for at least 15-30 minutes in the fridge.
    3. Preheat the Air Fryer: Preheat your air fryer to 380°F (195°C).
    4. Air Fry: Place the chicken pieces in a single layer in the air fryer basket. Cook for 10-14 minutes, shaking the basket halfway through for even cooking.
    5. Check for Doneness: The chicken is cooked through when it reaches an internal temperature of 165°F (74°C).
    6. Finish and Serve: For a thicker glaze, simmer the leftover marinade in a saucepan with a cornstarch slurry (1 tbsp cornstarch mixed with 1 tbsp water) until it thickens. Toss the cooked chicken in the sauce, garnish with sesame seeds and green onions, and serve immediately.
    Meal Prep Tips:
    • Marinate Ahead: To save time, marinate the chicken the night before you plan to cook it.
    • Build a Meal: Serve the teriyaki chicken over steamed rice with a side of air-fried or steamed broccoli for a complete meal.

    Global-Inspired Chicken Thigh Recipes

    A vibrant bowl of Mediterranean-inspired chicken thighs with olives, cherry tomatoes, feta, and fresh herbs.
    Professional food photography, photorealistic, high-quality food magazine photo: A vibrant and colorful bowl of Mediterranean-inspired chicken thighs. The chicken pieces are tender, browned, and glistening with a lemon-herb sauce, mixed with Kalamata olives, halved cherry tomatoes, and crumbled feta cheese. Fresh parsley and oregano are generously sprinkled over the top. The dish is presented in an earthy ceramic bowl on a light blue linen tablecloth, with a fork gently resting beside it. The lighting is bright and airy, emphasizing the freshness and diversity of ingredients, evoking a sense of healthy and exotic indulgence.

    Easy Chicken Thigh Curry (Indian Style)

    Craving a rich, aromatic dinner without a complex recipe? Our Easy Chicken Thigh Curry is the perfect solution. This simple recipe transforms chicken thighs into a heartwarming, Indian-inspired dish full of vibrant flavors. It’s a fantastic, stress-free way to add global comfort food to your weeknight rotation.

    Using readily available ingredients, you’ll create a deeply flavorful sauce that tastes like it simmered all day. This beginner-friendly dish is ideal for busy families who want a delicious, easy meal.

    • Key Flavors: Expect warm spices like turmeric, cumin, and coriander, with a touch of ginger and garlic for depth. Coconut milk provides a creamy finish.
    • Simple Steps: We guide you through each stage, from browning the chicken to building the sauce, so you can cook with confidence from start to finish.
    • Serving Suggestions: Pair this delicious curry with fluffy basmati rice or warm naan bread to scoop up every last bit of sauce.
    • Quick Tip: Use boneless chicken thighs for faster cooking, or choose bone-in thighs for even more flavor.

    Sweet & Savory Asian Glazed Chicken Thighs

    Looking for a quick meal that bursts with flavor? These Sweet & Savory Asian Glazed Chicken Thighs are a popular weeknight winner. This recipe is fast, tasty, and uses everyday ingredients, making it a fantastic option for family dinners. Get ready for a perfect balance of sweet, savory, and tangy notes.

    The star of this recipe is the irresistible sticky glaze that perfectly coats the juicy chicken thighs. It comes together quickly, making it a go-to staple for busy evenings. This approachable dish makes home cooking easy and stress-free.

    • The Perfect Glaze: Our glaze combines soy sauce, honey or brown sugar, ginger, and garlic. A splash of rice vinegar balances the sweetness.
    • Cooking Versatility: Pan-sear these flavorful chicken thighs for a quick finish, or bake them in the oven until caramelized.
    • Meal Pairings: Serve over steamed rice with a side of stir-fried vegetables like broccoli or snap peas.
    • Beginner-Friendly Hint: For the best results, marinate the chicken for at least 30 minutes to infuse it with flavor before cooking.

    Flavorful Mexican-Inspired Chicken Marinade

    Want to cook healthy, tasty meals quickly? A great marinade is your secret weapon. Our Flavorful Mexican-Inspired Chicken Marinade is perfect for chicken thighs, tenderizing the meat while infusing it with bold, zesty flavors. This simple addition transforms your chicken into an exciting meal and is incredibly effective for meal prep.

    Marinating chicken ahead of time saves precious minutes during a busy week, making it a perfect strategy for planning family-friendly meals. It’s a simple step that guarantees a flavorful result every time.

    • Marinade Must-Haves: Combine lime juice for brightness with chili powder, cumin, and paprika for authentic warmth. A touch of olive oil and minced garlic completes the blend.
    • How to Marinate: Combine all ingredients in a resealable bag or bowl with boneless or bone-in chicken thighs. Marinate for at least 30 minutes, or up to 4 hours for maximum flavor.
    • Meal Applications: Use this marinated chicken for incredible tacos, fajitas, burritos, or atop a fresh salad bowl.
    • Practical Tip: Marinate a larger batch of chicken at the beginning of the week. This provides a versatile protein for several quick meals [7].

    How Do You Make a Good Chicken Thigh Marinade?

    Raw chicken thighs marinating in a glass bowl with fresh garlic, rosemary, lemon slices, and olive oil.
    Professional food photography, photorealistic, high-quality food magazine photo: A close-up shot of raw, boneless, skinless chicken thighs marinating in a clear glass bowl. The marinade is rich with visible fresh ingredients like chopped garlic, rosemary sprigs, lemon slices, red pepper flakes, and a vibrant olive oil-based mixture. A hand, belonging to a home cook, is gently tossing the chicken to ensure even coating. The scene is set on a clean, light-colored kitchen counter with natural overhead light, emphasizing freshness, preparation, and the promise of flavor. The focus is sharp on the chicken and marinade ingredients.

    A great marinade can transform a simple weeknight meal into something special. For chicken thighs, a marinade is a secret weapon that infuses deep flavor and tenderizes the meat, guaranteeing juicy, delicious results every time. Whether you’re cooking boneless chicken thigh recipes or bone-in varieties, a marinade effortlessly elevates your dish. Let’s dive into some easy and flavorful ideas to make your chicken thighs irresistible.

    Simple All-Purpose Marinade

    This versatile, all-purpose marinade works wonderfully for baking, grilling, or pan-searing. It’s the perfect choice for any home cook seeking reliable, flavorful results with chicken thighs.

    Ingredients:

    • 2 tablespoons olive oil
    • 1 tablespoon apple cider vinegar (or lemon juice)
    • 1 teaspoon salt
    • ½ teaspoon black pepper
    • 1 teaspoon garlic powder
    • ½ teaspoon onion powder
    • ½ teaspoon paprika (smoked or sweet)
    • 1 teaspoon dried Italian herbs (oregano, basil, thyme blend)

    Instructions:

    1. In a medium bowl, whisk together all the marinade ingredients until well blended.
    2. Place the chicken thighs in a large zip-top bag or shallow dish.
    3. Pour the marinade over the chicken, ensuring each piece is fully coated.
    4. Seal the bag (pressing out excess air) or cover the dish tightly.
    5. Refrigerate for at least 30 minutes. For the best flavor, marinate for 2 to 4 hours, but no longer than 12 hours.

    Tips for Success:

    • Quick Meals: In a hurry? Even 15-20 minutes of marinating will add a great flavor boost.
    • Spice it Up: For a little heat, add a pinch of cayenne pepper.
    • Herbs: If you have fresh herbs, feel free to use them. Just double the amount listed for dried herbs.

    Yogurt-Based Marinade for Tender Chicken

    Yogurt-based marinades create exceptionally tender and juicy chicken. The natural lactic acid in yogurt gently breaks down muscle fibers, resulting in moist and flavorful chicken thighs. It’s an excellent choice for family-friendly meals.

    Ingredients:

    • ½ cup plain yogurt (full-fat or low-fat)
    • 1 tablespoon fresh lemon juice
    • 2 cloves garlic, minced
    • 1 teaspoon grated fresh ginger
    • 1 teaspoon ground cumin
    • ½ teaspoon turmeric powder
    • 1 teaspoon paprika
    • ½ teaspoon salt
    • ¼ teaspoon black pepper

    Instructions:

    1. In a bowl, mix all the ingredients until well combined.
    2. Add the chicken thighs to a zip-top bag or bowl.
    3. Pour the yogurt marinade over the chicken, making sure all pieces are evenly coated.
    4. Seal the bag or cover the bowl tightly.
    5. Refrigerate for at least 1 hour. For optimal tenderness, marinate for 4 to 6 hours (up to 24 hours is safe).

    Tips for Success:

    • Avoid Burning: Gently scrape off excess yogurt marinade before cooking to prevent it from burning on the pan or grill.
    • Spice Variations: Try adding garam masala for an Indian-inspired flavor or a dash of chili powder for extra kick.
    • Storage: According to the USDA, it is safe to marinate chicken in the refrigerator for up to 2 days [8].

    Lemon and Herb Marinade

    This vibrant marinade adds a fresh, zesty flavor to chicken thighs. It’s a perfect option for lighter, healthy and balanced meals and works especially well with boneless chicken thigh recipes.

    Ingredients:

    • ¼ cup olive oil
    • 3 tablespoons fresh lemon juice
    • 1 tablespoon lemon zest
    • 2 cloves garlic, minced
    • 1 tablespoon chopped fresh rosemary
    • 1 tablespoon chopped fresh thyme
    • 1 teaspoon salt
    • ½ teaspoon black pepper

    Instructions:

    1. In a bowl, whisk together all the ingredients.
    2. Place the chicken thighs in a zip-top bag or shallow dish.
    3. Pour the marinade over the chicken, coating each piece well.
    4. Seal the bag or cover the dish.
    5. Refrigerate for at least 30 minutes and up to 4 hours to allow the flavors to develop.

    Tips for Success:

    • Dried Herbs: If you don’t have fresh herbs, you can substitute 1 teaspoon each of dried rosemary and thyme.
    • Sweet Touch: A teaspoon of honey or maple syrup beautifully balances the lemon’s tang.
    • Meal Prep: This marinade freezes well. Make a double batch and save half for future meal prep ideas.

    Frequently Asked Questions

    How long does it take for chicken thighs to cook in the oven?

    Cooking chicken thighs in the oven is an easy way to prepare a delicious meal, but the exact cooking time depends on your oven temperature and whether the thighs are bone-in or boneless.

    For the best results, cook chicken thighs to a safe internal temperature of 175-180°F (79-82°C). This ensures they are juicy and fully cooked [5].

    Here’s a simple guide for an oven set to 400°F (200°C):

    • Boneless, Skinless Chicken Thighs: These typically take 20-25 minutes.
    • Bone-In, Skin-On Chicken Thighs: Expect these to take 35-45 minutes, as the bone requires a longer cooking time.
    • Lower Temperatures (e.g., 375°F / 190°C): If you bake at a slightly lower temperature, add about 5-10 minutes to the times above.

    Always use a meat thermometer for the most accurate results. Insert it into the thickest part of the thigh without touching the bone. This is the best way to achieve perfectly cooked chicken thighs every time.

    What is the nutritional value of chicken thighs?

    Chicken thighs are a flavorful and nutritious choice for a balanced diet. While they are richer in fat than chicken breasts—which is what makes them so juicy—they are still considered a good source of lean protein.

    Here’s a snapshot of their key nutritional benefits:

    • High-Quality Protein: Chicken thighs are packed with protein, which helps build and repair muscles and keeps you feeling full.
    • Vitamins and Minerals: They are a good source of essential nutrients like iron, zinc, and B vitamins (such as B6 and B12), which are vital for energy and overall health.
    • Healthy Fats: Much of the fat in chicken thighs is monounsaturated, which can support heart health when eaten in moderation.

    For a specific example, a 3.5-ounce (100g) serving of cooked, boneless, skinless chicken thigh contains roughly 209 calories, 26 grams of protein, and 10 grams of fat [9]. Keep in mind that bone-in, skin-on versions will have more fat and calories.

    What is a good sauce for boneless skinless chicken thighs?

    Boneless, skinless chicken thighs are incredibly versatile. Their mild flavor makes them a perfect canvas for delicious sauces, which can turn a simple protein into a quick, family-friendly meal. Here are a few popular and easy sauce ideas:

    • Honey Garlic Sauce: Whisk together soy sauce, honey, minced garlic, and a touch of ginger. Simmer and thicken with a cornstarch slurry for a sweet and savory winner.
    • Lemon Herb Sauce: For a bright, fresh flavor, combine lemon juice, olive oil, and chopped fresh herbs like parsley, thyme, or oregano with a pinch of salt and pepper.
    • Creamy Mushroom Sauce: Create a comforting sauce by sautéing sliced mushrooms with garlic, then stirring in chicken broth and a splash of cream. Let it simmer until it thickens.
    • Teriyaki Glaze: Use a store-bought teriyaki sauce or make your own with soy sauce, mirin, sugar, and ginger. This is perfect for quick stir-fries or as a glaze.
    • BBQ Sauce: A classic choice for a reason. Simply brush your favorite barbecue sauce over the thighs during the last few minutes of cooking.

    These simple sauces can transform basic chicken into a delicious meal, and they’re easy enough for any home cook to master.

    How many calories are in chicken thighs?

    The number of calories in chicken thighs depends on two main factors: the cut (bone-in or boneless) and whether you eat the skin. Chicken thighs are slightly higher in calories than chicken breasts because of their higher fat content, which is also what gives them so much flavor and juiciness.

    Here’s a general breakdown for a 3.5-ounce (100g) serving of cooked chicken thigh:

    • Boneless, Skinless Chicken Thighs: Approximately 180-210 calories [9].
    • Bone-In, Skin-On Chicken Thighs: Roughly 220-250 calories [10].

    Removing the skin before eating is an easy way to reduce the calorie and fat content, though the skin does add wonderful flavor and crispiness. Remember that these are estimates. To manage calories, be mindful of your portion sizes and choose lighter cooking methods like baking or grilling over frying.


    Sources

    1. https://www.fsis.usda.gov/food-safety/safe-food-handling-and-preparation/food-safety-basics/safe-minimum-internal-temperature
    2. https://www.extension.iastate.edu/food/making-meat-more-tender
    3. https://www.fsis.usda.gov/food-safety/safe-food-handling-and-preparation/food-safety-basics/safe-internal-temperature-chart
    4. https://www.fsis.usda.gov/food-safety/safe-food-handling-and-preparation/food-safety-basics/safe-temperature-chart
    5. https://www.foodsafety.gov/food-safety-charts/safe-minimum-cooking-temperatures
    6. https://www.heart.org/en/news/2023/10/25/do-air-fryers-make-food-healthier-what-to-know-about-the-popular-appliance
    7. https://www.foodsafety.gov/food-safety-charts/marinade-safety
    8. https://www.fsis.usda.gov/food-safety/safe-food-handling-and-preparation/food-safety-basics/marinades-and-food-safety
    9. https://fdc.nal.usda.gov/fdc-app.html#/food-details/171077/nutrients
    10. https://fdc.nal.usda.gov/fdc-app.html#/food-details/171075/nutrients

  • How to Make Perfect Overnight Oats: The Easiest Recipe for Beginners

    How to Make Perfect Overnight Oats: The Easiest Recipe for Beginners

    Overnight oats are a no-cook breakfast made by soaking rolled oats in a liquid, typically milk, yogurt, or water, overnight in the refrigerator. The basic formula is a 1:1 ratio of oats to liquid, plus any desired mix-ins like chia seeds, sweeteners, or fruit. This process softens the oats, creating a creamy, pudding-like texture for a ready-to-eat meal in the morning.

    Are your mornings a whirlwind of activity? Do you struggle to find time for a nutritious, satisfying breakfast? It can be overwhelming to plan family-friendly meals that are both healthy and quick, especially when you lack the confidence to try new recipes. But what if there was a delicious, effortless solution to transform your busy mornings into a calm, flavorful start?

    Enter overnight oats. This simple, versatile dish is the ultimate quick breakfast for anyone seeking easy recipes and a stress-free start to their day. Our beginner-friendly recipe is designed to make cooking enjoyable. We’ll guide you with clear, step-by-step instructions to create a wholesome meal that practically makes itself while you sleep. Whether you need healthy snacks or more quick breakfast ideas, this is a fantastic way to build your kitchen confidence without the stress.

    Get ready to say goodbye to rushed mornings and hello to a delicious, ready-to-eat breakfast. In this guide, you will discover the magic of overnight oats, from the basic formula to exciting variations and practical meal prep tips. Let’s explore why this is the perfect quick breakfast, whether you’re a complete beginner or just looking for new inspiration.

    Why Are Overnight Oats the Perfect Quick Breakfast?

    Are your mornings a whirlwind? Do you struggle to find time for a nutritious meal before heading out the door? If so, overnight oats are the secret weapon you need for quick breakfast ideas.

    Because busy lives demand simple solutions, this easy recipe is designed to transform your morning routine. Overnight oats offer a perfect blend of convenience, nutrition, and flavor, making them the ideal solution for a stress-free start to your day.

    Let’s explore why this beginner-friendly recipe is a game-changer for home cooks everywhere:

    • Ultimate Time-Saver: The biggest advantage of overnight oats is their convenience. Simply prepare them the night before, which means zero cooking is required in the morning. Just grab your jar from the fridge and enjoy! It’s an ideal meal prep tip for hectic schedules.
    • Effortless Preparation: Forget complex cooking steps or intimidating kitchen gadgets. Making overnight oats involves just a few simple stirs. No heat is required, making this a fantastic option for anyone who feels overwhelmed by complex recipes.
    • Endless Customization: Overnight oats are incredibly versatile. You can tailor them to your exact taste preferences and dietary needs. Add your favorite fruits, nuts, seeds, spices, or sweeteners—every day can bring a new flavor adventure!
    • Packed with Nutrition: Oats are a whole grain rich in fiber, which helps you feel full and satisfied. By supporting stable energy levels throughout your morning, overnight oats are a healthy and delicious way to fuel your body [source: https://www.hsph.harvard.edu/nutritionsource/food-features/oats/].
    • Budget-Friendly: Because they’re made with inexpensive pantry staples like rolled oats and milk, this breakfast is very economical. You’ll save money compared to buying breakfast on the go.
    • Family-Friendly Favorite: Kids love the creamy texture and sweet toppings, making overnight oats an easy way to add healthy grains to their diet. You can even involve them in choosing mix-ins, turning it into a family-friendly meal.

    With overnight oats, you can trade mealtime stress for an enjoyable, organized morning. Start your day confidently, knowing a delicious meal is ready and waiting. Recipesmondial is here to help you discover how simple ingredients can lead to fantastic flavors with approachable home cooking.

    What is the basic formula for overnight oats?

    Core Ingredients You’ll Need

    Crafting delicious overnight oats is wonderfully simple, requiring only a few basic pantry staples. These ingredients come together to create a wholesome and satisfying breakfast that’s perfect for busy mornings and friendly for beginners.

    • Rolled Oats (Old-Fashioned Oats): These are the foundation of your recipe. Rolled oats soak up liquid beautifully, creating the perfect chewy texture. Avoid using instant or quick oats, as they can become mushy, and steel-cut oats won’t soften enough with this method.
    • Milk (or Dairy-Free Alternative): The liquid is what softens and transforms the oats. Cow’s milk, almond milk, soy milk, oat milk, or your favorite dairy-free alternative will all work wonderfully to create a creamy base.
    • Chia Seeds: While optional, these tiny powerhouses are highly recommended. They absorb liquid to create a thicker, pudding-like consistency and also add healthy fats and fiber, making your breakfast even more satisfying.
    • Sweetener (Optional): A touch of sweetness enhances the flavor. Maple syrup, honey, agave nectar, or a mashed banana are all great choices. Feel free to adjust the amount to your personal taste.
    • Flavor Boosters (Optional Mix-ins): This is where you can get creative. A pinch of cinnamon, a splash of vanilla extract, or a spoonful of cocoa powder can add wonderful depth of flavor and make your breakfast feel extra special.

    With these core ingredients on hand, you’re ready to create a delicious and convenient breakfast. This simple method saves time on busy mornings and will have you prepping with confidence.

    The Perfect Liquid-to-Oat Ratio

    Getting the right balance of oats to liquid is the key to achieving the perfect consistency—creamy, but not too watery or thick. Following a simple ratio guarantees reliable results every time, removing any guesswork.

    The standard starting point is a simple 1-to-1 ratio, meaning one part oats to one part liquid. If you add chia seeds to make your oats thicker and more nutritious, you will need to increase the amount of liquid.

    Here is a basic formula for a single serving:

    • 1/2 cup Rolled Oats
    • 1/2 cup Milk (or Dairy-Free Alternative)
    • 1 tablespoon Chia Seeds (This is optional, but highly recommended for creaminess and nutrition.)

    When using the optional chia seeds from the recipe above, you may want to increase the liquid to 3/4 cup to achieve that ideal creamy texture. Don’t be afraid to experiment to find what you like best!

    Remember, this is a flexible formula. If you prefer thicker oats, use slightly less liquid. If you like them thinner, add a bit more. Adjusting the ratio to your liking is part of the fun!

    How do you make overnight oats?

    A glass jar of overnight oats topped with fresh strawberries, blueberries, and almonds on a wooden table, with ingredients in the background.
    A photorealistic, professional food photography style image of a clear glass jar filled with classic overnight oats, topped with fresh berries (strawberries, blueberries) and a sprinkle of chopped almonds. The oats are perfectly creamy and inviting. The jar is placed on a light wooden surface, with a soft, warm light coming from the side. In the background, slightly out of focus, are a small bowl of rolled oats, a carton of milk, and a measuring spoon, suggesting the simple ingredients. High-quality food magazine photo, focus on freshness and appealing texture. No people. No artistic interpretations, no illustrations, no vector graphics, no abstract art.

    Step 1: Choose Your Jar and Add Oats

    Overnight oats are one of the easiest make-ahead breakfasts. To start, you’ll need the right container. We recommend a glass jar with a lid, as it lets you see the delicious layers. Mason jars, old jam jars, or even small food storage containers work perfectly.

    Next, add your oats. We suggest using rolled oats (also known as old-fashioned oats) for the best texture. Instant oats can become too mushy, while steel-cut oats won’t soften enough overnight. For a single serving, you will need:

    • ½ cup (45g) rolled oats

    This simple step is the foundation for your breakfast.

    Step 2: Pour in Your Liquid and Add Mix-ins

    Now it’s time to add your liquid, which is the key to creamy results. You can use any milk you prefer—dairy, almond, soy, and oat milk are all great choices. Using the right liquid-to-oat ratio ensures a creamy, not watery, consistency.

    Next, add your mix-ins for flavor and nutrients. Here’s a basic recipe:

    • ¾ cup (180ml) milk (or non-dairy alternative)
    • 1-2 teaspoons sweetener (like maple syrup, honey, or stevia)
    • 1 tablespoon chia seeds (these help thicken the oats and add healthy omega-3s [1])
    • Optional: ½ teaspoon vanilla extract for extra flavor
    • Optional: ¼ teaspoon cinnamon for warmth

    Don’t feel overwhelmed by the choices. Start with these basics, and you’ll see how easy it is to customize your meal.

    Step 3: Stir, Seal, and Refrigerate

    Give everything a good stir in the jar, making sure the oats and mix-ins are fully combined with the liquid. This prevents dry patches and helps the oats soften evenly. A fork or a small spoon works well for this.

    Once stirred:

    • Place the lid tightly on your jar. An airtight seal keeps your oats fresh and prevents them from absorbing other odors from the fridge.
    • Refrigerate for at least 4 hours. For the best texture, leave the jar in the fridge overnight (which is how they get their name!).

    That’s it! You’ve just prepared a delicious breakfast for a stress-free morning.

    Step 4: Add Toppings and Serve

    In the morning, your breakfast is ready to go—no cooking required. Just grab the jar from the fridge. Now for the fun part: toppings. This is where you can get creative and add more flavor, texture, and nutrition.

    Some of our favorite topping ideas include:

    • Fresh berries: blueberries, raspberries, sliced strawberries
    • Sliced banana or other fruits: apples, peaches
    • Nuts: almonds, walnuts, pecans
    • Seeds: flax seeds, pumpkin seeds, sunflower seeds
    • Nut butters: almond butter, peanut butter
    • A sprinkle of granola for crunch
    • A drizzle of honey or maple syrup for extra sweetness

    Enjoy your oats cold, straight from the fridge, or warm them in the microwave for 30-60 seconds if you prefer. Enjoy your delicious, homemade breakfast!

    What are the best recipe variations?

    Three clear glass jars of overnight oats in different flavors: chocolate peanut butter, tropical, and apple cinnamon, topped with various garnishes.
    A high-quality food magazine photo, professional food photography style, showcasing three distinct variations of overnight oats beautifully arranged on a light-colored kitchen counter. The first clear glass jar features chocolate peanut butter overnight oats, topped with a drizzle of melted chocolate and chopped peanuts. The second clear glass jar contains tropical overnight oats, garnished with sliced mango, shredded coconut, and a lime wedge. The third clear glass jar displays apple cinnamon overnight oats, topped with thinly sliced apples and a sprinkle of cinnamon. All jars are clear glass, displaying layers. The lighting is bright and natural, creating a warm and inviting atmosphere. Photorealistic. No people. No artistic interpretations, no illustrations, no vector graphics, no abstract art.

    High-Protein Overnight Oats

    Do you often feel hungry before lunch? If so, this high-protein version is your perfect answer. It helps you stay full and energized all morning, making it an excellent choice for a hearty and quick breakfast. Protein also supports muscle growth and recovery [2]. It’s a fantastic way to boost your morning meal.

    This recipe is incredibly simple, even for beginners. You just add a few key ingredients to our basic overnight oats base.

    Key Ingredients for High-Protein Oats:

    • Rolled Oats: Your base for fiber and slow-release energy.
    • Milk or Plant-Based Milk: Almond, soy, or dairy milk all work wonderfully.
    • Protein Powder: Use vanilla or unflavored whey, casein, or a plant-based option.
    • Chia Seeds: These add omega-3s, fiber, and even more protein.
    • Greek Yogurt (Optional): For an extra creamy texture and a protein boost.

    How to Make Them:

    1. In a jar, combine ½ cup rolled oats and 1 tablespoon chia seeds.
    2. Add 1 scoop of your favorite protein powder.
    3. Pour in ¾ cup milk or plant-based milk.
    4. If using, add ¼ cup plain Greek yogurt for extra creaminess.
    5. Stir thoroughly until the protein powder dissolves completely.
    6. Cover your jar and refrigerate overnight, or for at least 4 hours.
    7. In the morning, top with fresh berries, sliced almonds, or a drizzle of nut butter.

    Recipesmondial Tip: Always choose a protein powder flavor you enjoy. This ensures your breakfast is both nutritious and delicious, solving the struggle to find healthy, tasty meals on busy mornings.

    Overnight Oats with Yogurt

    Adding yogurt to overnight oats transforms them into an incredibly creamy and satisfying treat. This variation offers a delightful texture and a boost of probiotics, which are great for gut health. It also adds a tangy freshness that perfectly complements fruit toppings, resulting in a flavorful, easy-to-make breakfast.

    Why Add Yogurt?

    • Creamier Texture: Yogurt makes your oats rich and luxurious.
    • Probiotic Benefits: Supports a healthy digestive system.
    • Extra Protein: Greek yogurt, in particular, increases the protein content.
    • Tangy Flavor: Adds a lovely counterpoint to sweet fruits.

    Core Ingredients for Yogurt Overnight Oats:

    • Rolled Oats: The foundation of your breakfast.
    • Milk or Plant-Based Milk: Choose your favorite type.
    • Plain or Vanilla Yogurt: Greek yogurt is recommended for its thickness and protein.
    • Sweetener (Optional): A touch of maple syrup or honey works well.

    Making Your Creamy Creation:

    1. In a jar, combine ½ cup rolled oats and ⅓ cup plain or vanilla yogurt.
    2. Add ½ cup milk or plant-based milk.
    3. Stir in 1 tablespoon of your preferred sweetener, if using.
    4. Mix all ingredients thoroughly until well combined.
    5. Cover the jar and refrigerate for at least 4 hours, or overnight.
    6. Serve with toppings like sliced bananas, toasted coconut, or a sprinkle of cinnamon.

    Recipesmondial Tip: For a fruit-flavored version, use a fruit-on-the-bottom yogurt or stir in a spoonful of fruit jam before chilling. It’s a simple way to customize your breakfast with minimal effort.

    Overnight Oats for Weight Loss

    If you’re looking for a healthy, satisfying meal to support your weight loss goals, this overnight oats variation is ideal. It focuses on nutrient-dense ingredients that keep you feeling full without excess calories. Perfect for breakfast (or even a light dinner!), this recipe supports healthy habits without the stress of complex meal prep.

    Key Principles for Weight Loss Oats:

    • High Fiber: Promotes fullness and aids digestion.
    • Lean Protein: Helps maintain muscle mass and keeps you satisfied.
    • Low in Added Sugars: Relies on the natural sweetness from fruit.
    • Portion Control: Mindful serving sizes are essential.

    Ingredients for a Lighter Start:

    • Rolled Oats: Provides sustained energy.
    • Unsweetened Almond Milk: Low in calories and adds creaminess.
    • Chia Seeds: An excellent source of fiber and omega-3s.
    • Fresh Berries: Naturally sweet and packed with antioxidants.
    • A Touch of Sweetener (Optional): Such as stevia or a tiny bit of maple syrup.

    Your Simple Weight Loss Recipe:

    1. In a jar, combine ½ cup rolled oats and 1 tablespoon chia seeds.
    2. Pour in ¾ cup unsweetened almond milk.
    3. Add a pinch of cinnamon for flavor, if desired.
    4. Stir well to combine all ingredients.
    5. Cover and refrigerate overnight.
    6. In the morning, top with ¼ cup fresh berries, like blueberries or raspberries.

    Recipesmondial Tip: Avoid high-calorie add-ins like excessive nuts, chocolate chips, or sugary syrups. Instead, focus on fresh fruits and a sprinkle of spices for flavor. This approach keeps your meal prep simple and aligned with your health goals.

    Simple Overnight Oats for Kids

    Getting kids to eat a healthy breakfast can be a challenge. Simple overnight oats make mornings easy and fun for the whole family! This recipe is designed to appeal to kids with its mild flavor and fun, customizable toppings. It’s a perfect family-friendly solution for busy mornings.

    Making Oats Kid-Friendly:

    • Mild Flavors: Not too strong or spicy.
    • Light Sweetness: Just enough to be tasty, not overly sugary.
    • Fun Toppings: Letting kids choose makes breakfast exciting.
    • Safe Ingredients: Avoid common allergens or choking hazards for very young children.

    Kid-Approved Ingredients:

    • Rolled Oats: The wholesome base.
    • Whole Milk or Vanilla Plant Milk: For a slightly sweeter, richer taste.
    • A Hint of Sweetener: Maple syrup or honey.
    • Fun Toppings: Sprinkles, mini chocolate chips, sliced fruit, or even animal crackers.

    The Easiest Recipe for Little Ones:

    1. In a small jar or container, combine ½ cup rolled oats.
    2. Add ¾ cup whole milk or vanilla plant milk.
    3. Stir in 1 teaspoon maple syrup or honey.
    4. Mix well until everything is combined.
    5. Cover and refrigerate overnight.
    6. In the morning, let your child pick their favorite fun toppings! Ideas include:
      • Sliced strawberries or bananas
      • A few mini chocolate chips
      • A sprinkle of colored sprinkles (in moderation!)
      • A spoonful of applesauce

    Recipesmondial Tip: Involve your kids in choosing their toppings! This helps them feel excited about their healthy breakfast. This simple recipe makes breakfast a fun and stress-free activity for the whole family.

    Tips for Meal Prepping and Storing Overnight Oats

    Four clear glass jars of prepped overnight oats lined up on a kitchen counter, with a person's hands placing a lid on one jar.
    A photorealistic, professional food photography image depicting a set of four identical clear glass jars, neatly lined up on a clean, light-colored kitchen counter. Each jar is filled with classic overnight oats, prepped and ready for storage, with lids placed loosely or on the side. A real human’s hands are gently placing a lid on one of the jars in the foreground, demonstrating meal prep. The kitchen background is bright, warm, and tidy, with soft focus on a fruit bowl or a plant. The scene emphasizes organization, simplicity, and ease of meal prepping. High-quality food magazine photo. No artistic interpretations, no illustrations, no vector graphics, no abstract art.

    Meal prepping overnight oats is a true game-changer, offering a fantastic solution for busy mornings. This approach allows you to enjoy a delicious and quick breakfast idea without any fuss. It not only saves valuable time but also ensures you start your day feeling well-nourished. With a little planning, you can have a week’s worth of easy, flavorful meals made easy. Let’s dive into the best tips for preparing and storing your overnight oats recipe.

    Choosing the Right Containers for Storage

    Selecting the proper container is crucial for keeping overnight oats fresh and tasty. An airtight seal is key, as it keeps your oats from drying out and prevents them from absorbing unwanted fridge odors.

    • Glass Jars: Mason jars (8oz or 12oz are ideal) are a perfect choice. They are durable, visually appealing, reusable, and eco-friendly. Plus, you can easily see your delicious creation inside.
    • Food Prep Containers: Any container with a tight-fitting lid will work. For convenience, look for portion-sized, BPA-free plastic or glass options.
    • Airtight is Best: Always use containers that seal tightly to stop air from getting in. This simple step preserves the texture and flavor of your oats for much longer.

    How Long Do Overnight Oats Last?

    One of the best features of overnight oats is their impressive shelf life. Because you can prepare them well ahead of time, they are ideal for meal prep tips.

    • General Rule: Prepared overnight oats typically last for 3 to 5 days in the refrigerator, though this can depend on the freshness of your ingredients. [3]
    • Ingredient Impact: If you use very ripe fruit, the oats might spoil sooner. For best results, always use fresh milk or milk alternatives.
    • Smell and Sight: Trust your senses. If the oats smell off or look discolored, it’s best to discard them.
    • Freezing: While possible, freezing overnight oats is generally not recommended. The texture can become mushy upon thawing, so it’s better to enjoy them fresh from the fridge.

    Batch Prepping for Effortless Mornings

    Batch prepping overnight oats is a smart move that transforms stressful mornings into enjoyable, organized starts to your day. You’ll thank yourself later!

    • Assembly Line Method: Line up your containers and add the oats to each one. Then, pour in your liquid and add core mix-ins like chia seeds or protein powder. Stir, seal, and refrigerate.
    • Vary Your Flavors: To keep your breakfasts exciting, avoid making the same flavor for every day. Instead, consider different additions for each jar, such as berry, banana-nut, or apple-cinnamon.
    • Label and Date: Use a small label or a marker on your containers to note the date you prepared them. This will help you keep track of freshness.

    When to Add Your Toppings

    Toppings add fantastic flavor, texture, and nutrition to your easy recipes. However, adding them at the right moment is crucial for ensuring the best results.

    • Add Just Before Serving:
      • Fresh Fruit: Items like berries, sliced bananas, diced apples, or mango can get mushy or discolored if added too early.
      • Crunchy Toppings: Granola, nuts, seeds, and shredded coconut will lose their crispness if left to soak overnight.
      • Drizzles: Honey, maple syrup, nut butter, or chocolate sauce are best added last for a fresh finish.
    • Add During Prep (Optional):
      • Spices: Cinnamon, nutmeg, or pumpkin pie spice will meld well with the other ingredients overnight.
      • Protein Powder: This should be mixed in with the oats and liquid so it can dissolve properly and help thicken the mixture.
      • Dried Fruit: Raisins, cranberries, or chopped dates can be added at night, which allows them to soften and plump up.

    Common Mistakes to Avoid

    Even with a recipe as simple as overnight oats, a few common errors can occur. Being aware of them will help you make perfect oats every time.

    • Not Using an Airtight Container: This is a big one. An open container allows air to get in, which can lead to dry oats or the absorption of unwanted fridge flavors.
    • Adding All Toppings Too Early: We discussed this, but it’s worth repeating. Soggy granola or discolored fruit can ruin the experience. Keep those crunchy and fresh items separate until morning.
    • Incorrect Liquid-to-Oat Ratio: Too much liquid makes the oats soupy, while too little makes them thick and dry. For best results, stick to the recommended ratio in the main recipe.
    • Forgetting the Chill Time: Overnight oats need adequate time to thicken and soften. Rushing this step will result in a watery breakfast. Give them at least 4 hours, but ideally a full night, to set.

    Following these simple meal prep tips will help you master the art of making overnight oats. You’ll be able to plan your weekly breakfasts efficiently, ensuring you always have a delicious meal ready to go. Enjoy cooking and eating well with Recipesmondial!

    Frequently Asked Questions About Overnight Oats

    Is overnight oats actually healthy?

    Yes, overnight oats are a healthy choice for a quick breakfast or snack. This simple dish is full of nutritional benefits.

    First, oats are packed with soluble fiber, which helps lower cholesterol and supports digestive health. This fiber also keeps you feeling full for longer, making you less likely to snack before your next meal [source: https://www.hsph.harvard.edu/nutritionsource/food-features/oats/].

    In addition, oats provide complex carbohydrates for sustained energy throughout your morning, helping you avoid a mid-morning slump. They also contain important vitamins and minerals, including manganese, phosphorus, magnesium, and B vitamins.

    The overall healthiness of your overnight oats depends on what you add. With the right mix-ins, you can easily create a nutrient-dense meal:

    • Fresh or frozen fruit for vitamins and natural sweetness.
    • Nuts or seeds for healthy fats and extra protein.
    • A scoop of protein powder for high-protein overnight oats.
    • A dollop of Greek yogurt for added probiotics and creaminess.

    However, be mindful of added sugars from toppings or sweetened milks, as these can increase the calorie count. By making smart choices, overnight oats can be a cornerstone of a healthy, balanced diet.

    What if I eat overnight oats every day?

    Eating overnight oats every day can be a great habit for a healthy lifestyle, especially if you need quick breakfast ideas. You’ll consistently get a good dose of fiber, vitamins, and minerals, which can improve digestion and provide steady energy levels.

    However, variety is key to a healthy diet. To ensure you get a full range of nutrients, switch up your mix-ins. For example, try different fruits each day—use berries one day and sliced bananas or diced apples the next. This introduces a wider range of vitamins and antioxidants.

    Furthermore, alternate your protein and healthy fat sources, such as switching between chia seeds, flax seeds, and almonds. You can also experiment with different types of milk. This strategy prevents dietary boredom and ensures a broader nutrient intake, keeping your daily overnight oats both beneficial and flavorful.

    What not to add to overnight oats?

    While overnight oats are versatile, some additions can detract from their health benefits or ruin the texture. To keep your breakfast delicious and wholesome, here are a few ingredients to avoid or limit:

    • Excessive Added Sugar: While many recipes call for maple syrup or honey, use them sparingly. Too much added sugar can turn a healthy breakfast into a dessert. Instead, opt for the natural sweetness from fruit.
    • Sugary Cereals or Candies: These toppings may add a sweet crunch, but they also add empty calories and refined sugars with little nutritional value.
    • Large Chunks of Hard Fruit: Hard fruits like whole grapes or large apple pieces might not soften enough overnight, leading to an unpleasant texture. For best results, always chop them into small, bite-sized pieces.
    • Too Many High-Calorie Toppings: Although nuts, seeds, and nut butters are healthy, they are also calorie-dense. Be sure to measure your portions, as too much can significantly increase the overall calorie count.
    • Carbonated Liquids: Never use soda or sparkling water, as they will create an unappetizing texture. Stick with milk, water, or plant-based milk alternatives.

    By focusing on simple, fresh ingredients, you can enhance both the flavor and nutritional value of your meal.

    Can I make overnight oats with water instead of milk?

    Yes, you can absolutely make overnight oats with water instead of milk. This is a great option if you are avoiding dairy, want a lighter breakfast, or are looking for a budget-friendly choice.

    Keep in mind that using water will affect the taste and texture. Milk and plant-based milks create a creamier, richer consistency and add more flavor and protein. Oats made with water will have a plainer, less creamy base.

    To enhance the flavor and texture when using water, consider these tips:

    • Add More Fruit: Berries, bananas, or mango naturally sweeten and add creaminess.
    • Include Seeds: Chia seeds or ground flax seeds thicken the mixture while providing healthy fats and fiber.
    • Sweeten Naturally: A touch of maple syrup, honey, or a mashed date can add sweetness.
    • Boost Flavor: A pinch of cinnamon, vanilla extract, or a swirl of nut butter can transform the taste.
    • Add Yogurt: For extra creaminess and protein, stir in a spoonful of yogurt just before serving.

    Using water is a practical and beginner-friendly choice that allows for easy customization. With a few simple additions, you can still enjoy delicious and healthy overnight oats.


    Sources

    1. https://www.hsph.harvard.edu/nutritionsource/food-features/chia-seeds/
    2. https://www.ncbi.nlm.nih.gov/pmc/articles/PMC8308892/
    3. https://food.unl.edu/food-preparation-and-storage

  • 50+ Easy Chicken Breast Recipes (Simple Ideas for Dinner Tonight)

    50+ Easy Chicken Breast Recipes (Simple Ideas for Dinner Tonight)

    Chicken breast is a versatile protein perfect for quick and easy meals. Popular recipes include simple baked chicken breast seasoned with herbs, juicy air fryer chicken breast for a healthy option, and pan-seared chicken with a flavorful sauce for a fast weeknight dinner. For best results, always cook chicken breast to an internal temperature of 165°F (74°C).

    Struggling with what to make for dinner? It’s a common challenge to find quick, healthy, and delicious meals without feeling overwhelmed by complex recipes. Juggling busy schedules and trying to plan family-friendly meals can make you long for an easy win in the kitchen. Thankfully, there’s a culinary hero that comes to the rescue: the humble chicken breast. As a versatile and lean protein, it’s the ultimate foundation for countless easy, flavorful meals that truly satisfy.

    Here at Recipesmondial, we want you to enjoy stress-free cooking, build confidence, and bring exciting flavors to your table. That’s why we’ve gathered over 50 easy chicken breast recipes designed with you in mind. Whether you’re searching for simple dinner recipes, quick breakfast ideas, or a hearty lunch, this collection has you covered. From perfectly baked chicken to crispy air fryer chicken breast and savory pan-seared options, each recipe offers approachable home cooking with clear, step-by-step guidance.

    Say goodbye to uninspiring meals and hello to a world of simple, delicious possibilities. Get ready to transform everyday ingredients into extraordinary dishes that your whole family will love. Let’s dive in and discover why chicken breast is your go-to for effortless, flavorful meals.

    Why Is Chicken Breast a Go-To for Easy Dinners?

    Chicken breast is a superstar in the kitchen, especially when you need easy dinner ideas. At Recipesmondial, we know that busy lives call for simple, reliable, and delicious solutions. This versatile ingredient consistently delivers on all fronts, making it a beloved choice for home cooks of all skill levels.

    So, why does chicken breast earn such a prominent spot in our recipe collection? It effortlessly solves many common mealtime dilemmas. For those nights when you’re overwhelmed by complex instructions or unsure how to prepare a healthy meal quickly, chicken breast provides a straightforward solution.

    Incredible Versatility for Flavorful Meals

    One of the biggest advantages of boneless skinless chicken breast is its incredible versatility. It acts as a blank canvas, ready to absorb any flavor you pair it with. This adaptability opens up endless possibilities for creative meals, no matter what your taste buds crave.

    Because it suits so many cooking methods, you’ll find it easy to discover new and simple dishes.

    • Baking: Perfect for juicy baked chicken breast recipes with minimal effort.
    • Pan-Searing: Achieves a golden, crispy exterior in minutes.
    • Air Frying: Great for quick, crispy air fryer chicken breast that’s ready in a flash.
    • Grilling: Adds a smoky char, ideal for warmer weather.
    • Stir-Frying: Cuts easily into strips for quick, vibrant stir-fries.

    A Lean Protein Powerhouse for Healthy Eating

    Chicken breast is an excellent choice for healthy meals because it’s naturally low in fat and packed with lean protein. This combination makes it a fantastic foundation for balanced and nourishing dishes.

    By providing essential nutrients without excessive calories, chicken breast helps keep you feeling full and satisfied. In fact, a 3.5-ounce serving of cooked chicken breast contains about 31 grams of protein [1], making it a smart choice for anyone focusing on wellness.

    Quick and Easy Cooking for Busy Schedules

    Time is precious on weeknights, and this is where chicken breast truly shines. Because it cooks so quickly, you can get a delicious, stress-free meal on the table in 30 minutes or less. This speed is essential for easy weeknight dinners.

    Our simple chicken breast recipes are designed with your busy schedule in mind, helping you solve the “what’s for dinner?” question without any hassle.

    Family-Friendly and Budget-Smart

    Chicken breast is a universal crowd-pleaser, which is perfect when planning meals everyone will enjoy. Its mild flavor appeals to both adults and children, making dinnertime stress-free and enjoyable for the whole family.

    Furthermore, chicken breast is widely available and often budget-friendly. This makes it an economical choice for feeding your family delicious and wholesome meals without breaking the bank.

    Ideal for Efficient Meal Prep

    For those who like to plan ahead, chicken breast is a meal prep essential. Cooking a larger batch over the weekend can save you a significant amount of time during the week, simplifying your meal plan.

    Cooked chicken breast also reheats beautifully and can be used in salads, sandwiches, pasta dishes, or grain bowls. This versatility makes it effortless to enjoy healthy, delicious meals all week long.

    At Recipesmondial, we believe cooking should be enjoyable, not a chore. With boneless skinless chicken breast in your kitchen, you are always just a few steps away from a satisfying, flavorful, and easy dinner. It’s a reliable, go-to ingredient that builds confidence and makes mealtime a pleasure.

    Quick and Easy Chicken Breast Recipes (Ready in 30 Minutes!)

    A perfectly pan-seared and sliced chicken breast meal with fresh green beans and cherry tomatoes, ready in minutes.
    Professional food photography, photorealistic, high-quality food magazine photo. A vibrant, pan-seared chicken breast, expertly sliced into thick pieces, served on a modern ceramic plate. The chicken is golden-brown and juicy. It’s accompanied by brightly colored, fresh side vegetables such as tender-crisp green beans and glistening cherry tomatoes, artfully arranged. Subtle steam rises from the dish, indicating freshness. A real home cook’s hands are visible in the background, out of focus, reaching to add a final sprig of fresh parsley, conveying speed and ease. The scene is lit with warm, inviting natural light, set on a clean, light-colored kitchen counter. Shallow depth of field, focused on the chicken. Bright, appetizing colors.

    Simple Pan-Seared Chicken Breast

    Discover how easy it is to make a perfect weeknight dinner with this simple pan-seared chicken breast recipe. Ideal for beginners, this method builds kitchen confidence by creating tender, juicy chicken with a lovely golden crust every time.

    Pan-searing is a quick and straightforward cooking technique that delivers delicious results without any fuss. This easy chicken recipe is sure to become a regular in your meal rotation.

    Ingredients:

    • 2 boneless, skinless chicken breasts (about 6-8 oz each)
    • 1 tablespoon olive oil
    • 1/2 teaspoon salt
    • 1/4 teaspoon black pepper
    • 1/2 teaspoon garlic powder (optional)
    • 1/2 teaspoon onion powder (optional)

    Instructions:

    1. Prepare the Chicken: Place each chicken breast between two pieces of plastic wrap. Use a meat mallet or a heavy pan to pound them to an even 1/2-inch thickness. This step ensures even cooking.
    2. Season Generously: Season both sides of the chicken breasts with salt, pepper, garlic powder, and onion powder. Gently pat the seasoning onto the meat.
    3. Heat the Pan: In a large skillet, heat the olive oil over medium-high heat. Allow the pan to get hot, but not to the point of smoking.
    4. Sear the Chicken: Carefully place the seasoned chicken breasts in the hot skillet. Cook for 5-7 minutes per side, or until a golden-brown crust forms.
    5. Check for Doneness: The chicken is fully cooked when its internal temperature reaches 165°F (74°C) [2]. Use an instant-read thermometer for the most accurate reading.
    6. Rest the Chicken: Remove the chicken from the pan and let it rest on a cutting board for 5 minutes before slicing. This helps the juices redistribute, keeping the chicken moist.

    Tips and Variations:

    • Add Fresh Herbs: For extra aroma, toss a sprig of rosemary or thyme into the pan during the last few minutes of cooking.
    • Deglaze for Sauce: After removing the chicken, add a splash of chicken broth or white wine to the hot pan. Scrape up any browned bits to create a quick, flavorful pan sauce.
    • Spice It Up: Add a pinch of paprika or cayenne pepper to your seasoning mix for a subtle kick of heat.
    • Serve With: This chicken pairs well with a side of steamed vegetables or a fresh salad.

    5-Ingredient Honey Garlic Chicken

    This 5-ingredient honey garlic chicken is a game-changer for busy weeknights, proving a delicious, family-friendly meal can be both quick and simple. It’s a satisfying dish that transforms a few pantry staples into something special.

    Forget feeling overwhelmed by complex instructions. This recipe comes together effortlessly, allowing you to create a restaurant-worthy meal in your own kitchen.

    Ingredients:

    • 1 lb boneless, skinless chicken breasts, cut into 1-inch pieces
    • 1 tablespoon olive oil
    • 1/2 cup honey
    • 1/4 cup soy sauce (low-sodium recommended)
    • 2 cloves garlic, minced

    Instructions:

    1. Cook the Chicken: Heat the olive oil in a large skillet over medium-high heat. Add the chicken pieces and cook for 5-7 minutes, stirring occasionally, until browned and cooked through. Remove the chicken from the pan and set it aside.
    2. Make the Sauce: In the same skillet, reduce the heat to medium. Add the honey, soy sauce, and minced garlic, whisking well to combine.
    3. Simmer the Sauce: Bring the sauce to a gentle simmer and cook for 2-3 minutes, stirring constantly, until it thickens slightly.
    4. Combine Chicken and Sauce: Return the cooked chicken to the skillet. Gently toss the chicken to coat it completely with the honey garlic sauce.
    5. Serve Immediately: Serve the honey garlic chicken while hot. It pairs wonderfully with rice or noodles.

    Tips and Variations:

    • Thicken the Sauce: For a thicker sauce, mix 1 teaspoon of cornstarch with 1 tablespoon of water to create a slurry. Stir it into the simmering sauce and cook for another minute until thickened.
    • Add Veggies: Stir in steamed broccoli florets or sliced bell peppers during the last minute of cooking for a complete stir-fry.
    • Meal Prep Idea: Cook a larger batch and portion it out for quick and easy lunches throughout the week.
    • Spice it Up: A pinch of red pepper flakes will add a nice touch of heat to the sauce.

    Quick Lemon Herb Chicken Cutlets

    Brighten your dinner plate with these quick lemon herb chicken cutlets. As a simple and healthy option, this vibrant, fresh dish is incredibly fast to prepare, making it a perfect solution for an easy weeknight meal.

    Even if you’re new to cooking, this recipe is for you. The thin cutlets cook quickly and evenly, making this a forgiving and delightful dish to master without any stress.

    Ingredients:

    • 1 lb boneless, skinless chicken breasts
    • 1 tablespoon olive oil
    • 1/2 teaspoon salt
    • 1/4 teaspoon black pepper
    • 1/2 teaspoon dried Italian seasoning or mixed herbs (like dried thyme, oregano, parsley)
    • Juice of 1/2 lemon
    • Fresh parsley, chopped, for garnish (optional)

    Instructions:

    1. Prepare Cutlets: Slice each chicken breast horizontally to create two thinner cutlets. Alternatively, pound whole chicken breasts to an even 1/2-inch thickness.
    2. Season the Chicken: Pat both sides of the chicken cutlets dry, then season with salt, pepper, and dried herbs.
    3. Cook the Cutlets: Heat the olive oil in a large skillet over medium-high heat. Add the chicken cutlets in a single layer, being careful not to overcrowd the pan.
    4. Sear Quickly: Cook for 3-4 minutes per side until golden brown and cooked through. Because the cutlets are thin, they will cook very quickly.
    5. Finish with Lemon: Remove the skillet from the heat and squeeze the fresh lemon juice over the cooked chicken.
    6. Garnish and Serve: Garnish with fresh chopped parsley, if using, and serve immediately.

    Tips and Variations:

    • Fresh Herbs are Best: If available, use finely chopped fresh herbs like rosemary, thyme, or oregano instead of dried.
    • Add Garlic: For extra flavor, stir one minced clove of garlic into the pan during the last minute of cooking.
    • Serve with Asparagus: Pan-sear asparagus spears in the same pan after removing the chicken for a wonderful, complete meal.
    • Creamy Sauce: After cooking the chicken, add a splash of chicken broth and a tablespoon of cream to the pan. Reduce slightly for a quick, luxurious sauce.

    Chicken Stir-Fry with Vegetables

    Whip up a vibrant, healthy, and family-friendly chicken stir-fry in minutes. This easy recipe is perfect for using up leftover vegetables and provides a delicious solution for a speedy weeknight dinner.

    This guide simplifies the stir-fry process, giving you the confidence to cook a healthy and tasty meal without stress. Get ready to enjoy a quick and flavorful dish tonight.

    Ingredients:

    • 1 lb boneless, skinless chicken breasts, cut into thin strips
    • 1 tablespoon olive oil or sesame oil
    • 2 cups mixed stir-fry vegetables (e.g., sliced bell peppers, broccoli florets, snap peas, carrots)
    • 1/4 cup soy sauce (low sodium preferred)
    • 1 tablespoon honey or brown sugar
    • 1 teaspoon fresh ginger, grated (or 1/2 teaspoon dried ginger)
    • 1 clove garlic, minced
    • Cooked rice or noodles, for serving

    Instructions:

    1. Prepare Chicken and Veggies: Cut the chicken into thin strips against the grain to ensure it’s tender. Wash and chop all your vegetables so they are ready for the skillet.
    2. Cook the Chicken: Heat the oil in a large skillet or wok over medium-high heat. Add the chicken strips and cook for 4-6 minutes, stirring frequently, until no longer pink. Remove the chicken from the pan and set aside.
    3. Stir-Fry Vegetables: Add the mixed vegetables to the same skillet. Cook for 3-5 minutes, stirring often, until the vegetables are tender-crisp.
    4. Make the Sauce: While the vegetables cook, whisk together the soy sauce, honey or brown sugar, grated ginger, and minced garlic in a small bowl.
    5. Combine and Coat: Return the cooked chicken to the skillet with the vegetables. Pour the prepared sauce over everything and toss well to coat.
    6. Simmer Briefly: Cook for another 1-2 minutes to allow the sauce to thicken slightly and coat all the ingredients.
    7. Serve: Serve the chicken stir-fry immediately over hot cooked rice or noodles.

    Tips and Variations:

    • Don’t Overcrowd: To ensure proper browning, cook the chicken and vegetables in batches if your pan isn’t large enough.
    • Add Crunch: Garnish with sesame seeds or chopped peanuts for extra texture.
    • Spice Level: For a spicy kick, add a pinch of red pepper flakes along with the sauce.
    • Vegetable Swaps: Use any quick-cooking vegetables you have on hand. Mushrooms, cabbage, or baby corn are great additions.
    • Meal Prep Friendly: Cook the stir-fry and portion it into containers for easy lunches or dinners throughout the week.

    Flavorful Oven Baked Chicken Breast Recipes

    Two golden-brown oven-baked chicken breasts with fresh rosemary and thyme in a cast iron skillet.
    Professional food photography, photorealistic, high-quality food magazine photo. A close-up shot of two perfectly golden-brown and succulent oven-baked chicken breasts, glistening with a light herb butter glaze. Fresh sprigs of rosemary and thyme are artfully placed on and around the chicken. The chicken is served in a rustic cast iron skillet, placed on a light wooden cutting board. The background features a subtly blurred, warm-toned kitchen with natural light streaming in from a window. The focus is sharp on the texture and appealing color of the chicken. The atmosphere is warm, inviting, and comforting.

    Baking chicken breast in the oven is a home cook’s secret weapon because it’s incredibly simple. With minimal effort, this method transforms plain chicken into tender, flavorful meals, making it perfect for busy families and anyone seeking stress-free cooking.

    You can achieve amazing results with just a few ingredients, and cleanup is often a breeze. Let Recipesmondial guide you through these delicious oven-baked chicken breast recipes. You’re sure to enjoy every bite!

    The Juiciest Herb-Roasted Chicken Breast

    Say goodbye to dry chicken forever! This beginner-friendly recipe shows you how to bake chicken breast that is incredibly moist and flavorful. As a healthy and satisfying dinner choice, this herb-roasted chicken promises delicious results every time.

    Ingredients:

    • 2 boneless, skinless chicken breasts (about 6-8 oz each)
    • 1 tablespoon olive oil
    • 1 teaspoon dried Italian seasoning (or a mix of dried rosemary, thyme, and oregano)
    • 1/2 teaspoon garlic powder
    • 1/4 teaspoon salt
    • 1/8 teaspoon black pepper

    Instructions:

    1. Preheat your oven to 400°F (200°C). Lightly grease a baking dish or line a baking sheet with parchment paper.
    2. Pat the chicken breasts dry with paper towels to help achieve a nice crust.
    3. Place the chicken breasts in the prepared dish.
    4. Drizzle the olive oil evenly over the chicken.
    5. In a small bowl, mix together the Italian seasoning, garlic powder, salt, and pepper.
    6. Sprinkle this herb mixture generously over both sides of the chicken breasts.
    7. Bake for 20-25 minutes, or until the internal temperature reaches 165°F (74°C) at the thickest part [3].
    8. Let the chicken rest for 5 minutes before slicing. This step is crucial for locking in the juices.

    Tips for Success:

    • Pound it Flat: For more even cooking, pound the chicken breasts to a uniform thickness.
    • Don’t Overcook: A meat thermometer is the best way to prevent dry chicken.
    • Rest Time: Always let your chicken rest after cooking so the juices can redistribute, making it much juicier.

    Variations & Substitutions:

    • Fresh Herbs: Use 1 tablespoon of chopped fresh herbs instead of 1 teaspoon of dried herbs.
    • Spicy Kick: Add a pinch of red pepper flakes to the seasoning mix for a little heat.
    • Lemon Zest: Grate some fresh lemon zest over the chicken before baking for a bright, citrusy flavor.

    Baked Chicken Breast with Sauce (BBQ & Honey Mustard)

    Dress up your chicken dinner with an incredible sauce! Baking chicken with a delicious glaze adds a huge boost of flavor, making this method perfect for family-friendly meals. You can achieve restaurant-quality taste right at home with these simple recipes that are sure to impress.

    Ingredients for Base Chicken:

    • 2 boneless, skinless chicken breasts
    • 1/2 tablespoon olive oil
    • Salt and pepper to taste

    Sauce Options:

    • BBQ Sauce: 1/2 cup of your favorite BBQ sauce.
    • Honey Mustard Sauce: Mix 1/4 cup Dijon mustard, 2 tablespoons honey, 1 tablespoon olive oil, and 1 teaspoon apple cider vinegar.

    Instructions:

    1. Preheat your oven to 400°F (200°C). Lightly grease a baking dish or line a baking sheet with parchment paper.
    2. Pat the chicken breasts dry and season them with salt and pepper.
    3. Drizzle the chicken with olive oil and place it in the prepared baking dish.
    4. Bake for 15 minutes to give the chicken a head start.
    5. Carefully remove the dish from the oven and brush your chosen sauce generously over the chicken.
    6. Return the dish to the oven and bake for another 8-10 minutes, or until the sauce is slightly caramelized and the chicken’s internal temperature reaches 165°F (74°C).
    7. Let the chicken rest for a few minutes before serving.

    Tips for Flavorful Glazing:

    • Timing is Key: Add the sauce towards the end of baking to prevent the sugars from burning.
    • Homemade vs. Store-Bought: Both work great! Use your favorite brand or whip up a simple homemade sauce for a personal touch.
    • Even Coating: Make sure the sauce covers the chicken well for maximum flavor in every bite.

    Cheesy Baked Chicken Breast Casserole

    Feeling overwhelmed by complex recipes? This cheesy chicken casserole is the simple answer. A hearty and family-friendly meal, it delivers pure comfort and makes mealtime decisions easy. Our cheesy baked chicken breast casserole is a complete dinner in one dish and a true time-saver for meal prep.

    Ingredients:

    • 2 cups cooked, shredded chicken breast (use leftover chicken or quickly boil/bake 2 breasts)
    • 1 can (10.5 oz) cream of mushroom soup (or cream of chicken)
    • 1/2 cup milk
    • 1/2 cup sour cream (optional, for extra creaminess)
    • 1 cup frozen mixed vegetables (such as peas, carrots, and corn)
    • 1/2 cup cooked rice or small pasta (optional, for a fuller meal)
    • 1 cup shredded cheddar cheese, plus more for topping
    • 1/4 teaspoon garlic powder
    • Salt and pepper to taste

    Instructions:

    1. Preheat your oven to 375°F (190°C). Lightly grease an 8×8 inch baking dish.
    2. In a large bowl, combine the cooked chicken, cream of mushroom soup, milk, and sour cream (if using).
    3. Stir in the frozen mixed vegetables, cooked rice or pasta (if using), 1 cup of cheddar cheese, and garlic powder.
    4. Season with salt and pepper, then mix well until all ingredients are evenly coated.
    5. Pour the mixture into the prepared baking dish and spread it evenly.
    6. Sprinkle extra shredded cheese generously over the top.
    7. Bake for 25-30 minutes, until the casserole is bubbly and the cheese is melted and golden brown.
    8. Let the casserole stand for 5 minutes before serving to allow it to set.

    Meal Prep & Customization Tips:

    • Cook Ahead: Assemble the casserole the day before. Just cover and refrigerate, then bake when you’re ready to eat.
    • Veggie Swap: Feel free to use fresh steamed broccoli florets or spinach instead of frozen mixed vegetables.
    • Spice It Up: Add a dash of paprika or a pinch of cayenne pepper for a little extra kick.
    • Crunchy Topping: For added texture, sprinkle crushed butter crackers or breadcrumbs over the cheese before baking.

    Oven Baked Chicken with Onions and Potatoes

    This incredible sheet pan meal is a complete dinner on one pan, making meal planning easier than ever. One-pan meals are a proven way to simplify dinner routines [4]. Tender chicken, soft potatoes, and sweet onions roast together for a flavorful and healthy meal that’s a true lifesaver on busy weeknights.

    Ingredients:

    • 2 boneless, skinless chicken breasts, cut into 1-inch pieces
    • 1 pound small potatoes, quartered (e.g., Yukon Gold or red potatoes)
    • 1 large onion, cut into wedges
    • 2 tablespoons olive oil
    • 1 teaspoon dried rosemary
    • 1/2 teaspoon garlic powder
    • 1/2 teaspoon salt
    • 1/4 teaspoon black pepper
    • Optional: 1/2 cup chopped bell peppers or cherry tomatoes for extra color and nutrition.

    Instructions:

    1. Preheat your oven to 400°F (200°C). Line a large baking sheet with parchment paper for easy cleanup.
    2. In a large bowl, combine the quartered potatoes and onion wedges. Toss with 1 tablespoon of olive oil, rosemary, garlic powder, salt, and pepper.
    3. Spread the seasoned vegetables in a single layer on the prepared baking sheet.
    4. Bake the vegetables for 15 minutes first to give the potatoes a head start.
    5. While the vegetables bake, toss the chicken pieces in the same bowl with the remaining 1 tablespoon of olive oil and a pinch of salt and pepper.
    6. After 15 minutes, remove the baking sheet from the oven. Add the seasoned chicken and any optional vegetables to the empty side of the sheet.
    7. Return the baking sheet to the oven and bake for another 20-25 minutes.
    8. The dish is ready when the chicken is cooked through to 165°F (74°C) and the potatoes are tender and golden.
    9. Serve hot and enjoy.

    Helpful Tips:

    • Even Cut: Cut the vegetables and chicken into similar-sized pieces to ensure they cook evenly.
    • Don’t Crowd the Pan: Give everything space to allow it to roast, not steam. Use two pans if necessary.
    • Flavor Boost: For extra freshness, add a squeeze of fresh lemon juice over the dish just before serving.

    Simple Variations:

    • Different Veggies: Swap potatoes for sweet potatoes, or add other sturdy vegetables like broccoli and carrots.
    • Spice Profile: Try using smoked paprika, chili powder, or your favorite all-purpose seasoning blend instead of rosemary.
    • Mediterranean Twist: For a different flavor, add Kalamata olives and cherry tomatoes to the pan with the chicken.

    Crispy & Healthy Air Fryer Chicken Breast Recipes

    A crispy, golden-brown air-fried chicken breast, sliced, served with a fresh green salad.
    Professional food photography, photorealistic, high-quality food magazine photo. A mouth-watering, perfectly crispy, golden-brown air-fried chicken breast, sliced diagonally to showcase its tender, juicy interior. It’s elegantly plated on a simple white dish, alongside a vibrant and fresh mixed green salad with a light, glistening vinaigrette. The texture of the crispy exterior is clearly visible and enticing. The setting is a clean, bright, modern kitchen counter. Overhead natural light illuminates the dish, highlighting its fresh and healthy appeal. The composition is clean, simple, and focused on the deliciousness.

    The air fryer is a popular kitchen tool for a reason: it delivers incredibly crispy food using far less oil. That means you can enjoy crunchy, delicious chicken breast dishes that are also healthier. If you find most recipes too complex, these simple air fryer options are a reliable way to transform boneless, skinless chicken breast into a flavorful meal the whole family will love.

    Recipesmondial is here to help. We’ll show you how to master the air fryer for quick and satisfying chicken dinners. Get ready to cook with confidence and enjoy stress-free meal prep!

    Perfectly Seasoned Air Fryer Chicken Breast

    Cooking chicken breast in the air fryer is one of the best ways to prepare it. This simple method locks in moisture for juicy results while creating a perfectly crisp exterior. It’s an ideal starting point for anyone new to air frying or looking for a fast, healthy chicken recipe.

    How to Make It:

    1. Prep Your Chicken: Pat 1 pound boneless, skinless chicken breasts dry with paper towels. If they are very thick, slice them in half lengthwise to create cutlets. This ensures even cooking.
    2. Season Generously: Drizzle the chicken with 1 tablespoon olive oil. Then, sprinkle generously with your favorite seasoning blend. A simple mix of 1 teaspoon paprika, 1 teaspoon garlic powder, ½ teaspoon onion powder, ½ teaspoon dried Italian herbs, salt, and black pepper is a great option.
    3. Air Fry: Place the seasoned chicken in a single layer in your air fryer basket. Do not overcrowd it. Air fry at 375°F (190°C) for 15-20 minutes, flipping halfway.
    4. Check Doneness: The chicken is done when it reaches an internal temperature of 165°F (74°C) [5]. A meat thermometer is your best friend here!
    5. Rest: Let the chicken rest for 5 minutes before slicing. This keeps it extra juicy.

    Quick Tips for Success:

    • Don’t Skip the Pat Dry: Removing excess moisture helps the chicken get a crispier crust.
    • Seasoning Variations: Try lemon pepper, taco seasoning, or a simple garlic salt blend.
    • Meal Prep Idea: Cook extra chicken for salads or sandwiches throughout the week.

    Crispy Air Fryer Chicken Strips

    Enjoy the satisfying crunch of fried chicken without the extra grease. These air fryer chicken strips are a family-friendly meal that uses significantly less oil. This easy recipe turns a classic comfort food into a healthier main dish or snack.

    Ingredients You’ll Need:

    • 1 pound boneless, skinless chicken breast, cut into 1-inch thick strips
    • ½ cup all-purpose flour (or gluten-free blend)
    • 1 teaspoon garlic powder
    • 1 teaspoon onion powder
    • ½ teaspoon paprika
    • ¼ teaspoon cayenne pepper (optional, for a little kick)
    • Salt and black pepper to taste
    • 1 large egg, whisked
    • 1 cup panko breadcrumbs
    • Cooking spray or 1 tablespoon olive oil

    Step-by-Step Instructions:

    1. Prepare Breading Stations: Set up three shallow dishes.
      1. Dish 1: Combine flour, garlic powder, onion powder, paprika, cayenne (if using), salt, and pepper.
      2. Dish 2: Whisked egg.
      3. Dish 3: Panko breadcrumbs.
    2. Coat Chicken: Dip each chicken strip first into the flour mixture, shaking off excess. Next, dip into the egg, letting excess drip off. Finally, coat thoroughly in the panko breadcrumbs. Press gently to ensure crumbs stick.
    3. Arrange in Air Fryer: Lightly spray the air fryer basket with cooking spray. Place the coated chicken strips in a single layer, leaving space between each. Work in batches if necessary to avoid overcrowding.
    4. Air Fry: Cook at 400°F (200°C) for 10-15 minutes, flipping halfway. The strips should be golden brown and cooked through.

    Tips for Extra Crispiness:

    • Don’t Overcrowd: Air needs to circulate for maximum crispiness. Cook in batches.
    • Lightly Spray: A quick spritz of cooking oil on the strips before frying helps them brown beautifully.
    • Serve with Dipping Sauces: Try honey mustard, BBQ sauce, or a simple ranch.

    Air Fryer Chicken and Vegetables

    For a simple all-in-one dinner, try cooking your main course and side dish together in the air fryer. This recipe for chicken and vegetables is a great way to create a healthy, balanced meal with minimal fuss. This single-basket approach saves time on both cooking and cleanup, making it perfect for busy weeknights.

    What You’ll Need:

    • 1 pound boneless, skinless chicken breast, cut into 1-inch cubes
    • 3 cups mixed vegetables, cut into bite-sized pieces (broccoli florets, bell peppers, zucchini, red onion, cherry tomatoes work well)
    • 2 tablespoons olive oil
    • 1 teaspoon garlic powder
    • ½ teaspoon dried oregano
    • Salt and black pepper to taste

    Easy Cooking Steps:

    1. Prepare Ingredients: In a large bowl, combine the chicken cubes and chopped vegetables.
    2. Season: Drizzle with olive oil. Sprinkle with garlic powder, oregano, salt, and pepper. Toss everything together until well coated.
    3. Air Fry: Place the chicken and vegetable mixture in your air fryer basket in a single layer. If your basket is small, cook in two batches.
    4. Cook: Air fry at 380°F (195°C) for 18-22 minutes. Shake the basket well every 7-8 minutes to ensure even cooking and browning.
    5. Check for Doneness: The chicken should be cooked through, and the vegetables tender-crisp.

    Flavor Variations & Substitutions:

    • Spice it Up: Add a pinch of red pepper flakes or smoked paprika.
    • Different Veggies: Sweet potatoes (cut small), asparagus, or mushrooms are great additions. Note that harder vegetables like potatoes or carrots may require a longer cooking time. For best results, add them to the air fryer for 5-10 minutes before adding the chicken and softer veggies.
    • Herb Swaps: Try rosemary, thyme, or a pre-made Italian seasoning blend.

    Spicy Cajun Air Fryer Chicken

    Bring bold, zesty flavor to your table with this spicy Cajun air fryer chicken. This easy recipe delivers a satisfying kick without being complicated, making it a perfect way to add some excitement to your dinner routine. It’s another great example of how the air fryer can produce flavorful meals with minimal effort.

    Simple Ingredients:

    • 1 pound boneless, skinless chicken breast, cut into 1-inch thick pieces or whole cutlets
    • 1 tablespoon olive oil
    • 1½ tablespoons Cajun seasoning blend (store-bought or homemade)

    Directions for a Flavorful Meal:

    1. Prepare Chicken: Pat chicken pieces dry. Place them in a bowl.
    2. Season: Drizzle the chicken with olive oil. Sprinkle generously with the Cajun seasoning. Use your hands to rub the seasoning all over each piece of chicken, ensuring it’s evenly coated.
    3. Arrange: Place the seasoned chicken in a single layer in your air fryer basket. Do not overcrowd.
    4. Air Fry: Cook at 380°F (195°C) for 15-20 minutes, flipping halfway through. Adjust cooking time based on the thickness of your chicken.
    5. Verify Doneness: Ensure the internal temperature reaches 165°F (74°C).

    Adjusting the Spice & Serving Ideas:

    • Less Heat: Use a mild Cajun seasoning or reduce the amount used.
    • More Heat: Choose a hot Cajun blend or add a pinch of extra cayenne pepper to your seasoning mix.
    • Serving Suggestions: This spicy chicken is wonderful with rice, a simple side salad, or steamed green beans.
    • Leftovers: Shred any leftover chicken. It makes a fantastic addition to wraps or quesadillas.

    What Are Some Healthy Chicken Breast Dinner Ideas?

    Chicken Breast with Roasted Vegetables

    Making a delicious and healthy chicken dinner is easier than you think. This sheet pan meal with chicken and roasted vegetables is a simple, flavorful, and nutritious option perfect for busy weeknights. You will love how simple this recipe is to prepare.

    With this method, you can skip complex steps and still get a tasty, family-friendly meal with minimal cleanup. It’s the perfect solution for a quick and healthy dinner.

    How to Make It:

    • Prep your chicken: Pat boneless, skinless chicken breast dry. Slice it into thinner cutlets or cubes for faster cooking. Season with salt, pepper, garlic powder, and paprika.
    • Chop your veggies: Choose sturdy vegetables like broccoli florets, bell peppers, zucchini, red onion, carrots, or Brussels sprouts. Cut them into similar-sized pieces for even roasting.
    • Season and roast: Toss the vegetables with olive oil, herbs (like dried oregano or thyme), salt, and pepper. Spread them on a baking sheet with the seasoned chicken. Bake at 400°F (200°C) until the chicken is cooked through and the vegetables are tender and slightly caramelized, about 20-25 minutes.

    Tips for Success:

    • Don’t overcrowd the pan: Give everything space to roast, not steam. Use two baking sheets if needed.
    • Add flavor: A squeeze of fresh lemon juice or a sprinkle of fresh parsley after roasting brightens the dish.
    • Meal prep friendly: Prepare your vegetables and chicken ahead of time and store them separately in the fridge. This makes weeknight dinners even faster.

    Simple Chicken Salad with Greek Yogurt

    Looking for a light and easy lunch or dinner? This simple chicken salad is a fantastic choice. It replaces traditional mayonnaise with Greek yogurt, a healthier, protein-packed alternative, making it a great low-calorie option.

    This recipe is perfect for meal prep, helping you stay on track with healthy eating. Prepare a big batch on Sunday to enjoy in sandwiches, wraps, or lettuce cups all week long.

    What You’ll Need:

    • Cooked chicken breast (shredded or diced)
    • Plain Greek yogurt (full-fat or low-fat)
    • Celery (finely diced)
    • Red onion (finely diced, optional)
    • Fresh herbs (dill, chives, or parsley work well)
    • Salt, black pepper, and a pinch of garlic powder
    • A squeeze of fresh lemon juice

    How to Make It:

    • In a medium bowl, combine the cooked chicken, Greek yogurt, diced celery, and red onion.
    • Stir in the fresh herbs, salt, pepper, and garlic powder.
    • Add a squeeze of fresh lemon juice for brightness.
    • Mix everything until well combined.
    • Taste and adjust seasonings as needed.

    Serving Suggestions:

    • Serve on whole-wheat bread or in a pita.
    • Stuff into lettuce cups for a low-carb option.
    • Enjoy with crackers or sliced cucumber.

    Low-Calorie Lemon Rosemary Chicken

    This low-calorie lemon rosemary chicken is proof that healthy eating can be incredibly flavorful. Using just a few simple ingredients, this recipe creates a bright, aromatic dish perfect for a quick and wholesome meal.

    Lemon and rosemary are a classic pairing that infuses the chicken with a wonderful aroma and taste. Light yet satisfying, this simple dinner is an excellent choice for a creative and flavorful meal.

    Ingredients You’ll Need:

    • Boneless, skinless chicken breast
    • Fresh lemon juice and zest
    • Fresh rosemary sprigs (or dried rosemary)
    • Garlic (minced)
    • Olive oil (just a touch)
    • Salt and black pepper

    Simple Steps for Deliciousness:

    1. Prepare the chicken: Pat the chicken breasts dry. You can butterfly them or slice them in half horizontally to create thinner cutlets, which helps them cook faster and more evenly.
    2. Make the marinade: In a shallow dish, whisk together the lemon juice, lemon zest, minced garlic, a tablespoon of olive oil, chopped rosemary, salt, and pepper.
    3. Marinate: Add the chicken breasts to the marinade, turning to coat them completely. Marinate for at least 15-30 minutes, or for up to 2 hours in the refrigerator for more flavor.
    4. Cook the chicken: You can pan-sear, grill, or bake this chicken.
      • Pan-searing: Heat a skillet over medium-high heat with a small amount of olive oil. Cook the chicken for 4-6 minutes per side, or until golden brown and cooked through.
      • Baking: Place marinated chicken on a baking sheet. Bake at 400°F (200°C) for 15-20 minutes, or until the internal temperature reaches 165°F (74°C) [5].
    5. Serve: Garnish with extra fresh rosemary and a lemon wedge.

    Quick Tip:

    To boost the flavor, add a sprinkle of red pepper flakes to the marinade for a subtle kick. Serve with a side of quinoa or steamed green beans for a complete meal.

    Chicken and Rice Skillet

    A chicken and rice skillet is a classic one-pan dinner. This comforting, family-friendly meal means less cleanup and more time to enjoy your evening, making it an ideal solution for busy households.

    Hearty and satisfying, this dish combines lean protein with wholesome grains and vegetables, offering a quick and reliable meal solution for any night of the week.

    What You’ll Need:

    • Boneless, skinless chicken breast (diced)
    • White or brown rice
    • Chicken broth
    • Onion and garlic (diced)
    • Mixed vegetables (frozen peas, carrots, and corn work wonderfully)
    • Olive oil
    • Dried herbs (e.g., thyme, oregano)
    • Salt and pepper

    How to Create Your One-Pan Wonder:

    1. Brown the chicken: Heat a large, oven-safe skillet over medium-high heat with a splash of olive oil. Sear the diced chicken until lightly browned on all sides. Remove the chicken and set aside.
    2. Sauté aromatics: In the same skillet, add a little more oil if needed. Sauté diced onion and minced garlic until softened and fragrant.
    3. Add rice and broth: Stir in the uncooked rice, chicken broth, and dried herbs. Bring the mixture to a simmer.
    4. Combine and cook: Return the chicken to the skillet and stir in the mixed vegetables. Cover the skillet tightly with a lid or foil.
    5. Simmer: Reduce heat to low and let it simmer for about 18-20 minutes for white rice or 35-40 minutes for brown rice. Do not lift the lid while it cooks.
    6. Rest and serve: Once the liquid is absorbed and the rice is tender, remove the skillet from the heat. Let it rest, covered, for 5 minutes. Fluff with a fork and serve immediately.

    Customization Ideas:

    • Spice it up: Add a pinch of chili powder or cayenne pepper for a little heat.
    • Cheese please: Stir in some shredded cheddar or Monterey Jack cheese at the end for extra creaminess.
    • Different veggies: Feel free to use fresh bell peppers, spinach, or mushrooms. Add them at different stages based on their cooking time. Spinach can be stirred in right at the end.

    How long do you cook chicken breast in the air fryer?

    The air fryer is a game-changer for cooking chicken breast, delivering perfectly cooked, juicy results with minimal effort. This makes it ideal for easy chicken breast recipes and quick meals. However, cooking times can vary depending on your air fryer model and the thickness of the chicken.

    For food safety, the most important rule is to cook chicken to an internal temperature of 165°F (74°C). This guarantees your air fryer chicken breast is both safe to eat and delicious. To help you get it right every time, let’s explore the best cooking times.

    Cooking Time at 375°F (190°C)

    Cooking chicken breast at 375°F (190°C) is a great option because the slightly longer cooking window often results in exceptionally tender meat. This makes it a fantastic, forgiving temperature for beginner-friendly recipes.

    For boneless, skinless chicken breasts (about 6-8 ounces or 170-225 grams each), follow these guidelines:

    • Total Time: Cook for 15-20 minutes.
    • Flipping: Remember to flip the chicken halfway through to ensure even browning and thorough cooking.
    • Thickness Matters: Thicker breasts will require more time, while thinner ones will cook faster.

    To eliminate guesswork, always use a meat thermometer to confirm doneness. This simple step helps you serve perfectly cooked, flavorful meals made easy.

    Cooking Time at 400°F (200°C)

    For a crispier exterior and a faster cooking time, 400°F (200°C) is your go-to temperature. The higher heat is perfect for achieving a golden-brown finish, making it excellent for simple dinner recipes when you’re short on time.

    For boneless, skinless chicken breasts (about 6-8 ounces or 170-225 grams each), use these guidelines:

    • Total Time: Cook for 12-16 minutes.
    • Flipping: Just as with the lower temperature, flip the chicken at the halfway mark to promote uniform cooking.
    • Watch Closely: Because chicken cooks quickly at this temperature, keep a close eye on it to prevent it from drying out.

    This method is ideal for air fryer chicken recipes that promise a crispy, delicious result—perfect for family-friendly meals everyone will love.

    Tips for Checking Doneness

    Properly cooked chicken is a matter of both food safety and flavor. To ensure your chicken is juicy and tender—not dry and rubbery—follow these essential tips for approachable home cooking.

    Use these simple methods to confirm your chicken breast in air fryer is perfectly done:

    • Use a Meat Thermometer: The most reliable method is to insert an instant-read meat thermometer into the thickest part of the breast, avoiding bone. The internal temperature must reach 165°F (74°C) [6].
    • Check Juices: If you don’t have a thermometer, make a small cut into the thickest part. The juices should run clear, not pink. This is a good visual indicator.
    • Texture Test: Cooked chicken feels firm to the touch, whereas raw chicken is soft and squishy.
    • Don’t Overcook: Overcooking is the number one cause of dry chicken. Remove it from the air fryer as soon as it reaches 165°F (74°C).
    • Rest the Chicken: After cooking, let the chicken breast rest for 5-10 minutes. This crucial step allows the juices to redistribute, resulting in incredibly moist and tender meat.

    These tips will help you confidently cook delicious and safe healthy chicken breast recipes. Mastering these basics means you’ll be making simple chicken breast recipes like a pro!

    How long to cook chicken breast in oven?

    Baking Time at 350°F (175°C)

    Baking chicken at 350°F (175°C) is a fantastic, forgiving method for achieving tender, juicy results. While the cooking time is a bit longer, this lower temperature is perfect for beginner cooks and helps prevent overcooking.

    For an average 6-8 ounce (170-225 gram) boneless, skinless chicken breast, plan for a baking time of 25-35 minutes. Remember, the exact time depends on a few key factors:

    • Thickness: Thicker chicken breasts will naturally require more time in the oven.
    • Starting Temperature: Chicken straight from the fridge will cook slower, while chicken closer to room temperature will cook faster.
    • Oven Calibration: Every oven is different. Yours might run hotter or cooler than the set temperature.

    Always use a meat thermometer to guarantee your chicken is cooked perfectly. This tool is your best friend for consistent results. Chicken is safely cooked when it reaches an internal temperature of 165°F (74°C) in the thickest part [5]. This simple step helps you avoid both undercooked and dry chicken, boosting your confidence in the kitchen.

    Baking Time at 400°F (200°C)

    For a quicker cooking method that creates a lovely golden-brown exterior, increasing the temperature to 400°F (200°C) is an excellent choice. The higher heat cooks the chicken more rapidly, making it perfect for simple dinner recipes when time is tight.

    At 400°F (200°C), the same 6-8 ounce boneless, skinless chicken breasts will typically cook in 18-25 minutes. Keep a close eye on them, as thinner pieces will cook even faster. This temperature is fantastic for getting flavorful meals on the table in less time.

    As always, the most reliable way to ensure your chicken is safe and perfectly cooked is by checking its internal temperature. Once your meat thermometer reads 165°F (74°C), your chicken is ready to enjoy. This step removes guesswork, helping you cook with stress-free confidence.

    How to Avoid Dry Chicken

    Dry chicken is a common concern, but achieving juicy, tender results is simple. At Recipesmondial, we want you to enjoy cooking stress-free. Here are our top tips to ensure your oven-baked chicken is perfect every time:

    • Don’t Overcook It: This is the golden rule. Remove your chicken from the oven as soon as it reaches 165°F (74°C). Even a few extra minutes can lead to tough, dry meat.
    • Pound it Evenly: Chicken breasts are often thicker on one end. To ensure they cook evenly, use a meat mallet or heavy pan to gently pound them to a uniform thickness. This prevents thinner parts from drying out.
    • Marinate or Brine: Soaking chicken in a flavorful marinade or a simple saltwater brine before cooking is an easy technique that adds significant moisture and flavor to your chicken breast recipes.
    • Rest Your Chicken: After baking, let the chicken rest for 5-10 minutes on a cutting board, tented loosely with foil. This allows the juices to redistribute throughout the meat, keeping it moist and tender.
    • Add Moisture During Cooking: Placing a small amount of liquid, like chicken broth or a simple sauce, in the bottom of the baking dish helps keep the chicken moist as it cooks.
    • Use a Reliable Meat Thermometer: We can’t say it enough! This essential kitchen tool takes the guesswork out of cooking and is crucial for achieving consistent results.

    By following this simple guidance, you’ll transform basic ingredients into a delicious meal. Say goodbye to dry chicken and hello to confident, enjoyable cooking!

    What Are Some Global Flavors to Try?

    Ready to take your chicken breast dinners on a global adventure? Exploring international flavors is a fantastic way to spice up your weekly menu and discover exciting new tastes. You don’t need a passport to enjoy these delicious dishes—Recipesmondial makes it simple to bring the world’s most vibrant flavors right into your kitchen. We focus on approachable home cooking, creating easy recipes that use everyday ingredients. Perfect for beginner cooks and busy families alike, these meals will have you cooking confidently in no time!

    Easy Indian-Spiced Chicken Breast

    Indian cuisine is famous for its rich, aromatic spices, and this easy recipe brings those complex flavors home with simple steps. It’s a wonderful way to introduce your family to global comfort food. Get ready to enjoy a flavorful meal that’s surprisingly simple to make.

    Here’s how to make your own delicious, easy Indian-Spiced Chicken Breast:

    • Gather Your Ingredients: You will need boneless, skinless chicken breasts, plain yogurt, ginger-garlic paste (or minced ginger and garlic), turmeric, cumin, coriander, and garam masala. A pinch of chili powder is optional for extra heat.
    • Marinate for Flavor: Cut the chicken into bite-sized pieces. In a bowl, combine the yogurt, ginger-garlic paste, and all the spices. Add the chicken to the mixture and stir until it’s thoroughly coated. Let it marinate for at least 30 minutes, or overnight in the fridge for a deeper flavor.
    • Cook It Up: Heat a little oil in a skillet over medium-high heat. Add the marinated chicken and cook, stirring occasionally, for 5-7 minutes, or until browned and cooked through. The yogurt helps create a wonderfully tender texture.
    • Serve and Enjoy: Serve your Indian-spiced chicken with warm naan bread or fluffy rice. A side of cucumber raita (yogurt with cucumber) adds a refreshing touch. This is one of our favorite family-friendly meals.

    Recipesmondial Tip: If you don’t have all the individual spices, a good quality curry powder is a convenient shortcut. For a richer sauce, try adding a can of diced tomatoes or a splash of coconut milk. This variation creates another simple dinner that’s ready in no time.

    Sweet and Sour Chicken

    A beloved classic worldwide, sweet and sour chicken wins everyone over with its irresistible balance of tangy and savory flavors. This takeout-style version is surprisingly easy to make at home with fresh ingredients, making it an excellent choice for a quick weeknight meal.

    Follow these simple steps for a perfect Sweet and Sour Chicken:

    • Prepare Your Chicken: Cut boneless, skinless chicken breasts into 1-inch pieces and toss them with a little cornstarch to help them get crispy.
    • Sauté the Chicken: Heat a bit of oil in a large skillet or wok over medium-high heat. Add the chicken pieces and cook until golden brown and cooked through. Remove the chicken from the pan and set it aside.
    • Whip Up the Sauce: In the same pan, add sliced bell peppers (red and green work well) and chopped onion. Sauté for a few minutes until slightly softened. While the vegetables cook, whisk the sauce ingredients in a small bowl: combine ketchup, rice vinegar, soy sauce, a little sugar or honey, and a teaspoon of cornstarch mixed with water.
    • Combine and Serve: Pour the sauce over the vegetables and cook, stirring, until it thickens. Return the cooked chicken to the pan along with some pineapple chunks for extra sweetness. Toss everything to coat evenly and serve immediately over steamed white rice.

    Recipesmondial Tip: For extra crunch, you can lightly bread the chicken before frying. Simply dip the pieces in egg, then in a mix of flour and seasoning. You can also add other vegetables like snap peas or carrots to make it an even healthier chicken breast recipe.

    Simple Mexican Chicken Fajitas

    Fajitas are a vibrant and interactive meal perfect for a fun family dinner or for entertaining friends. This easy recipe delivers bold, satisfying flavors and is quick to prepare. Best of all, it’s highly customizable—everyone at the table can build their own perfect fajita!

    Here’s how to create your own Simple Mexican Chicken Fajitas:

    • Slice and Season Chicken: Slice boneless, skinless chicken breasts into thin strips and place them in a bowl. Add a generous amount of store-bought fajita seasoning, or make your own simple mix of chili powder, cumin, paprika, garlic powder, and onion powder. Toss to coat the chicken thoroughly.
    • Chop Your Veggies: Slice bell peppers of various colors (red, yellow, green) and an onion into thin strips. This will add fantastic flavor and color to your dish.
    • Sauté to Perfection: Heat a tablespoon of oil in a large skillet or cast-iron pan over medium-high heat. Add the seasoned chicken strips and cook for 5-7 minutes, stirring, until they are mostly cooked through. Add the sliced peppers and onions to the pan and continue to cook for another 5-8 minutes, stirring often, until the vegetables are tender-crisp.
    • Assemble Your Fajitas: Warm some tortillas (corn or flour) in a dry skillet, the microwave, or the oven. Serve the sizzling chicken and vegetable mixture immediately with a variety of toppings, such as salsa, guacamole, sour cream, shredded cheese, and lime wedges.

    Recipesmondial Tip: If you don’t have a large enough skillet, cook the chicken and vegetables in batches to prevent overcrowding the pan, which can steam the ingredients instead of searing them. For an even quicker meal, use pre-cut chicken or vegetables—a great meal prep tip to reduce cooking time.

    Frequently Asked Questions About Cooking Chicken Breast

    Can I put raw chicken in an air fryer?

    Yes, you absolutely can. An air fryer is a fantastic tool that uses hot air circulation to cook raw chicken evenly and quickly. This method results in tender, juicy chicken with a lovely, crisp exterior.

    It’s one of the easiest ways to get a healthy chicken dinner on the table fast. For the best results, just follow these simple steps.

    • Preheat your air fryer: Always preheat your air fryer to the recommended temperature to ensure the chicken cooks evenly.
    • Don’t overcrowd the basket: Arrange the chicken in a single layer. Overlapping pieces will steam instead of crisping, so giving them space ensures they cook consistently.
    • Season well: Season your boneless, skinless chicken breast with your favorite spices.
    • Check doneness: Always use a meat thermometer. To be safe to eat, chicken breast must reach an internal temperature of 165°F (74°C) [5].

    How do you cook chicken breast in the oven without drying it out?

    Nobody wants dry chicken, but achieving a juicy, oven-baked breast can be tricky. Luckily, several simple methods can help you lock in moisture for perfectly tender results every time.

    • Brine your chicken: Soaking chicken in a simple brine (a saltwater solution) adds moisture and significantly enhances flavor. Even a quick 15-30 minute brine makes a difference.
    • Marinate for flavor and tenderness: Marinades with acids (like lemon juice or vinegar) and oils help break down tough fibers to keep the meat moist and flavorful.
    • Pound it thin: Pound thicker chicken breasts to an even thickness to ensure they cook uniformly.
    • Use a meat thermometer: Overcooking is the primary cause of dryness. Use a meat thermometer and remove the chicken from the oven as soon as it reaches an internal temperature of 165°F (74°C) [6].
    • Cover with foil: Loosely tent the chicken with foil for part of the baking time to trap steam and moisture. Remove the foil at the end to allow the chicken to brown.
    • Lower heat, longer time: Baking at a slightly lower temperature for a longer period allows the chicken to cook more gently, which can help it retain moisture.
    • Rest the chicken: Always let the chicken rest for 5-10 minutes after taking it out of the oven. This allows the juices to redistribute throughout the meat, making it extra juicy.

    How do you cook chicken breast in a pan?

    Pan-searing is a quick method that creates a beautiful golden crust while keeping the inside tender, making it perfect for weeknight dinners. Follow this step-by-step guide for delicious results.

    1. Prepare the chicken: Pat the boneless, skinless chicken breast dry with paper towels, as excess moisture prevents a good sear. Season generously with salt, pepper, and your favorite spices.
    2. Heat the pan: Heat a large skillet (cast iron or stainless steel works best) over medium-high heat. Add 1-2 tablespoons of oil with a high smoke point, such as avocado, grapeseed, or canola oil [7].
    3. Sear the chicken: Once the oil shimmers, carefully place the chicken in the hot pan. To ensure a good crust, do not overcrowd it. Cook in batches if needed.
    4. Cook without moving: Sear the first side for 5-7 minutes without moving the chicken. This is crucial for developing a deep golden-brown crust.
    5. Flip and finish: Flip the chicken and continue cooking for another 5-7 minutes. The exact time will depend on the thickness of the meat.
    6. Check for doneness: Use a meat thermometer to confirm the internal temperature has reached 165°F (74°C) in the thickest part.
    7. Rest: Transfer the chicken to a cutting board and let it rest for 5 minutes before slicing. This step is essential for keeping the chicken juicy.

    What temperature should chicken breast be cooked to?

    For food safety, chicken breast must be cooked to an internal temperature of 165°F (74°C) [5]. Reaching this temperature ensures that harmful bacteria like Salmonella are destroyed.

    The only way to accurately check for doneness is with a reliable meat thermometer. Insert the probe into the thickest part of the breast, making sure to avoid touching any bone.

    Cooking to the correct temperature not only keeps your food safe but also helps you avoid the common pitfalls of undercooked or dry, overcooked chicken. It’s the key to delicious and safe results every time.


    Sources

    1. https://fdc.nal.usda.gov/fdc-app.html#/food-details/171057/nutrients
    2. https://www.fsis.usda.gov/food-safety/safe-food-handling-and-preparation/food-safety-basics/safe-minimum-internal-temperature-chart
    3. https://www.fsis.usda.gov/food-safety/safe-food-handling-and-preparation/food-safety-basics/safe-internal-temperatures
    4. https://www.healthline.com/nutrition/one-pan-meals
    5. https://www.foodsafety.gov/food-safety-charts/safe-minimum-cooking-temperatures
    6. https://www.fsis.usda.gov/food-safety/safe-food-handling-and-preparation/food-safety-basics/safe-internal-temperature-chart
    7. https://www.fryingoil.com/post/oil-smoke-points
  • 25 Best Salad Recipes: Easy & Flavorful Ideas for Lunch, Dinner, and More

    25 Best Salad Recipes: Easy & Flavorful Ideas for Lunch, Dinner, and More

    A salad is a dish made of a mixture of ingredients, typically centered around raw vegetables like lettuce, spinach, or kale. The best salad recipes combine fresh greens, colorful vegetables, proteins, and grains with a complementary dressing to create a nutritious meal that can be served as an appetizer, side dish, or main course.

    Are you often looking for quick, healthy, and incredibly flavorful meal ideas that don’t leave you overwhelmed by complex recipes or struggling to plan family-friendly meals? We understand that busy schedules can make it tricky to put a delicious and nutritious dish on the table without stress. But what if we told you that the secret to enjoyable, stress-free cooking often lies in one of the most versatile and refreshing dishes around? Enter the humble, yet mighty, salad!

    At Recipesmondial, we believe that cooking should be a joy, not a chore, and that anyone can create amazing dishes with simple, step-by-step cooking guidance. That’s why we’ve gathered our 25 best salad recipes, designed to transform your meal prep and inspire your culinary creativity. Whether you’re seeking easy salad recipes for a quick lunch, a hearty dinner, or simple dinner recipes to impress guests, our collection of salad ideas ensures you’ll always have a fresh, vibrant, and delicious option. These beginner-friendly recipes make approachable home cooking a breeze, helping you build confidence in the kitchen.

    Get ready to explore a world of vibrant flavors and textures, from quick breakfast ideas that double as light salads to satisfying main course options and healthy snacks that are anything but boring. We’ll show you how to combine everyday ingredients into flavorful meals made easy, share practical tips for making simple homemade salad dressings, and guide you through variations to fit every taste and dietary need. Say goodbye to uninspired meals and prepare to discover how easy and rewarding it is to craft truly great salads that delight your palate and simplify your life. Let’s dive in and discover what makes a salad recipe truly great!

    What Makes a Salad Recipe Truly Great?

    What makes a salad truly great? It’s more than just a mix of greens. A fantastic salad transforms simple ingredients into a delightful, satisfying meal. For home cooks, this means easy, flavorful meals that fit into busy lives without stress. You want to enjoy cooking without stress, right?

    At Recipesmondial, we believe the best salad recipes are approachable and delicious. They can be a light lunch or a hearty, family-friendly dinner. The secret lies in a few core principles. These focus on balance, freshness, and simplicity. We provide step-by-step cooking guidance to help you master these.

    • Freshness is Key: Always start with crisp, vibrant ingredients. Fresh greens make a big difference. Seasonal vegetables elevate the flavor of any dish. Fresh ingredients simply taste better.
    • Balance of Flavors and Textures: A truly great salad offers a symphony of tastes and sensations. Think sweet, savory, tangy, and a variety of textures. Crunchy nuts, creamy avocado, and tender greens create excitement. This mix keeps every bite interesting.
    • The Perfect Dressing: The dressing acts as the glue. It ties all your ingredients together. Homemade dressings are often the best salad ideas. They are surprisingly simple to make. Plus, you avoid bottled versions with hidden sugars [1].
    • Satisfying Additions: Transform your salad into a full, flavorful meal. Add a protein like grilled chicken, chickpeas, or hard-boiled eggs. Healthy fats, such as avocado or a sprinkle of seeds, add richness and keep you full. These additions make salads satisfying for dinner or quick lunches.
    • Simplicity and Ease: You don’t need complex steps to create amazing salads. Great salad recipes are straightforward. Easy recipes save you time and build cooking confidence. Recipesmondial focuses on approachable home cooking with clear instructions.

    Mastering these elements is easier than you think. Soon, you will be creating your own best salad recipes. These are perfect for quick lunches, simple dinner recipes, or even special occasions. Say goodbye to struggling to plan family-friendly meals.

    Building Your Best Salad

    Even beginners can create incredible salads with a few helpful tips. We want to empower you in the kitchen. Avoid feeling overwhelmed by complex recipes. Here’s how to make your salad journey enjoyable and stress-free.

    • Start with a Good Base: Always wash and dry your greens thoroughly. Soggy greens can ruin a salad’s texture. A salad spinner is a fantastic tool for this.
    • Chop Consistently: Cut all your ingredients into bite-sized pieces. This makes the salad easier to eat. Consistent sizes also make your salad look more appealing.
    • Don’t Overdress: Add dressing gradually. You can always add more if needed. Too much dressing makes a salad heavy and soggy. Toss lightly at first.
    • Prep Ahead: Save time during busy weekdays. Chop vegetables in advance. Store your dressing separately. This is an excellent meal prep tip. It makes healthy, tasty meals quickly accessible.
    • Get Creative: Don’t be afraid to experiment with new ingredients. Try different vegetables, fruits, nuts, or cheeses. These salad ideas keep your meals exciting. Discover new simple dishes with confidence.

    Truly great salad recipes are within your reach. Recipesmondial is here to make cooking enjoyable and inspiring. We help you make flavorful meals made easy. Say goodbye to stress in the kitchen and hello to cooking confidently. Embrace delicious, visually appealing meals every day.

    Easy Salad Recipes for Quick Lunches

    A colorful Mediterranean quinoa salad with vegetables and feta, perfect for a quick and healthy lunch.
    A bright, high-quality food magazine photo of a vibrant, appealing Mediterranean quinoa salad in a light ceramic bowl, perfect for a quick lunch. The salad features fluffy quinoa, chopped cucumbers, cherry tomatoes, red onion, Kalamata olives, crumbled feta cheese, and fresh parsley, all glistening with a light lemon-herb vinaigrette. It’s perfectly composed with excellent lighting, showcasing fresh, crisp ingredients and inviting textures. The background is a gently blurred, light-colored kitchen counter, conveying an approachable home cooking environment. Professional food photography, photorealistic, no filters.

    Classic Green Salad Recipe

    Craving a light and refreshing meal? Look no further than our Classic Green Salad. This easy recipe is a true beginner-friendly gem. It’s perfect for those busy weekdays when you need a quick lunch solution. At Recipesmondial, we believe simple ingredients can create delicious, satisfying meals. This salad proves just that!

    Making a great green salad is a foundational cooking skill. It builds confidence in the kitchen. Furthermore, it’s a versatile base for countless variations. You can easily adapt it to your taste or what you have on hand. Enjoy cooking without stress with this simple yet elegant dish.

    Ingredients:

    • 6 cups mixed salad greens (like romaine, butter lettuce, or spring mix)
    • 1/2 English cucumber, thinly sliced
    • 1 cup cherry tomatoes, halved
    • 1/2 red bell pepper, thinly sliced
    • 1/4 cup extra virgin olive oil
    • 2 tablespoons red wine vinegar
    • 1 teaspoon Dijon mustard
    • 1/4 teaspoon salt
    • 1/8 teaspoon black pepper

    Step-by-Step Cooking Guidance:

    1. Prepare the Greens: Gently wash and thoroughly dry your mixed salad greens. A salad spinner works wonderfully for this step.
    2. Chop Vegetables: Slice the cucumber, halve the cherry tomatoes, and thinly slice the red bell pepper.
    3. Make the Dressing: In a small bowl, whisk together the olive oil, red wine vinegar, Dijon mustard, salt, and black pepper. Whisk until well combined and slightly emulsified.
    4. Combine: In a large salad bowl, add the prepared greens, cucumber, cherry tomatoes, and red bell pepper.
    5. Dress and Serve: Pour the dressing over the salad. Toss gently to coat all ingredients evenly. Serve immediately and enjoy your fresh, easy lunch!

    Tips for Your Perfect Green Salad:

    • Freshness is Key: Always use the freshest greens and vegetables for the best flavor.
    • Customize Your Veggies: Feel free to add other favorites. Consider shredded carrots, radishes, or even thinly sliced red onion.
    • Add Protein: For a heartier meal, top your salad with grilled chicken, hard-boiled eggs, or chickpeas. This transforms it into a complete family-friendly meal.
    • Dressing Ahead: You can prepare the vinaigrette up to 3 days in advance. Store it in an airtight container in the refrigerator. Just give it a good shake before using.

    Quick Chickpea & Avocado Salad

    Are you looking for healthy snacks or an easy, satisfying lunch? Our Quick Chickpea & Avocado Salad is a fantastic choice! It’s packed with plant-based protein and healthy fats. This recipe is designed for busy individuals and families. You will appreciate its speed and simplicity. It’s also a delicious vegetarian salad recipe that everyone will love.

    Many home cooks feel overwhelmed by complex recipes. However, this flavorful meal made easy requires no cooking. It’s perfect for building confidence in the kitchen. Enjoy vibrant flavors and textures with minimal effort. This salad makes mealtime decisions a breeze.

    Ingredients:

    • 1 (15-ounce) can chickpeas, rinsed and drained
    • 1 ripe avocado, diced
    • 1/4 cup finely diced red onion
    • 1/2 cup cherry tomatoes, halved
    • 2 tablespoons fresh cilantro or parsley, chopped
    • 2 tablespoons fresh lime juice (from 1 lime)
    • 1 tablespoon extra virgin olive oil
    • 1/4 teaspoon salt
    • 1/8 teaspoon black pepper

    Step-by-Step Cooking Guidance:

    1. Prepare Chickpeas: Rinse and drain the canned chickpeas thoroughly. Pat them dry with a paper towel.
    2. Chop Ingredients: Dice the ripe avocado. Finely dice the red onion. Halve the cherry tomatoes. Chop the fresh cilantro or parsley.
    3. Combine: In a medium bowl, combine the chickpeas, diced avocado, red onion, cherry tomatoes, and chopped cilantro or parsley.
    4. Dress: Drizzle the lime juice and olive oil over the ingredients. Sprinkle with salt and black pepper.
    5. Toss and Serve: Gently toss everything together until well combined. Serve immediately as a quick and healthy lunch.

    Tips for Your Chickpea & Avocado Salad:

    • Creamier Texture: For a creamier salad, mash about half of the chickpeas before mixing.
    • Spice It Up: Add a pinch of red pepper flakes for a little heat.
    • Serving Suggestions: This salad is fantastic on its own. It also works well in lettuce cups, scooped into pita bread, or spread on whole-wheat toast.
    • Lemon Swap: No lime? Lemon juice works just as well.
    • Meal Prep Tip: If making ahead, add the avocado just before serving. This prevents browning.

    5-Minute Mediterranean Quinoa Salad

    Transform your lunch routine with our 5-Minute Mediterranean Quinoa Salad! This recipe is ideal for busy families and individuals. It’s a fantastic option for meal prep tips, ensuring you have healthy and balanced meals ready to go. The secret to its speed is using pre-cooked quinoa. However, cooking quinoa is also very simple. It only takes about 15 minutes to cook quinoa from scratch [2].

    This flavorful meal made easy is bursting with Mediterranean tastes. It helps you discover new simple dishes. Moreover, it’s perfect for those seeking approachable home cooking. You’ll move from uncertainty in the kitchen to cooking confidently. Enjoy vibrant flavors and textures in every bite.

    Ingredients:

    • 2 cups cooked quinoa, cooled
    • 1/2 English cucumber, diced
    • 1 cup cherry tomatoes, halved
    • 1/4 cup finely diced red onion
    • 1/2 cup Kalamata olives, pitted and halved
    • 1/2 cup crumbled feta cheese (optional, omit for dairy-free)
    • 1/4 cup fresh parsley, chopped
    • 3 tablespoons extra virgin olive oil
    • 2 tablespoons fresh lemon juice
    • 1 teaspoon dried oregano
    • 1/4 teaspoon salt
    • 1/8 teaspoon black pepper

    Step-by-Step Cooking Guidance:

    1. Prepare Quinoa: Ensure your quinoa is cooked and cooled. If not, cook 1 cup of dry quinoa with 2 cups of water according to package directions. Let it cool completely.
    2. Chop Vegetables: Dice the cucumber. Halve the cherry tomatoes. Finely dice the red onion. Halve the Kalamata olives and chop the fresh parsley.
    3. Combine: In a large mixing bowl, add the cooled quinoa, diced cucumber, halved cherry tomatoes, red onion, Kalamata olives, and crumbled feta cheese (if using). Add the chopped parsley.
    4. Make Dressing: In a small bowl, whisk together the olive oil, fresh lemon juice, dried oregano, salt, and black pepper.
    5. Dress and Toss: Pour the dressing over the quinoa mixture. Gently toss all ingredients until well combined. Serve immediately or chill for later.

    Tips for Your Mediterranean Quinoa Salad:

    • Quinoa Prep Ahead: Cook a large batch of quinoa on Sunday for quick meals throughout the week. Store it in an airtight container in the refrigerator.
    • Add Protein: For a heartier dinner salad, mix in grilled chicken, canned tuna, or roasted chickpeas.
    • Dietary Variations: For a vegan option, simply omit the feta cheese. Add a sprinkle of nutritional yeast for a cheesy flavor.
    • Extra Veggies: Include roasted bell peppers, artichoke hearts, or sun-dried tomatoes for more flavor.
    • Storage: This salad keeps well in the refrigerator for up to 3-4 days. It makes excellent leftovers for packed lunches.

    Salad Recipes for Dinner

    A hearty grilled steak salad with sweet potatoes, goat cheese, and pecans, presented as a satisfying dinner.
    A professional food photography shot, photorealistic, showcasing a substantial and inviting grilled steak salad for dinner. A medium-rare sliced grilled steak is fanned over a bed of crisp mixed greens, roasted sweet potato cubes, goat cheese crumbles, and candied pecans, drizzled with a balsamic glaze. The salad is presented on a rustic wooden board or a dark ceramic plate, with rich, warm lighting that emphasizes the savory textures and vibrant colors. The background features a subtle, warm dinner table setting, evoking a high-quality cookbook photo.

    Hearty Grilled Chicken Caesar Salad

    Who says salads can’t be a filling dinner? This Hearty Grilled Chicken Caesar Salad proves them wrong. It transforms a classic side dish into a substantial, flavorful meal. This easy recipe is perfect for busy weeknights. It’s a family-friendly option that always satisfies. Recipesmondial helps you create restaurant-quality meals at home with simple dinner recipes.

    What You’ll Need:

    • 2 boneless, skinless chicken breasts
    • 1 tablespoon olive oil
    • Salt and freshly ground black pepper, to taste
    • 1 head romaine lettuce, chopped
    • 1 cup croutons (homemade or store-bought)
    • 1/2 cup grated Parmesan cheese
    • 1/2 cup Caesar dressing (homemade or your favorite store-bought)

    Step-by-Step Guidance:

    1. Prepare the Chicken: Pat chicken breasts dry. Rub with olive oil, salt, and pepper.
    2. Grill the Chicken: Heat a grill or grill pan to medium-high. Grill chicken for 5-7 minutes per side. Cook until internal temperature reaches 165°F (74°C) [3]. This ensures tender, juicy chicken.
    3. Rest and Slice: Transfer chicken to a cutting board. Let it rest for 5 minutes. Then slice it into strips. Resting keeps the juices in.
    4. Assemble the Salad: In a large bowl, combine chopped romaine lettuce, croutons, and Parmesan cheese.
    5. Dress and Serve: Drizzle with Caesar dressing. Toss gently to coat. Top with the sliced grilled chicken. Serve immediately and enjoy your flavorful meal made easy!

    Helpful Tips and Variations:

    • Dressing Shortcuts: Make a quick Caesar dressing from scratch. Alternatively, choose a good quality store-bought option.
    • Meal Prep Idea: Grill extra chicken on Sunday. Store it for quick salads throughout the week. This is great for easy lunches too.
    • Add Flavor: Marinate the chicken in Italian dressing for an hour before grilling. This adds extra depth.
    • Gluten-Free Option: Use gluten-free croutons or omit them entirely.

    Filling Steak and Arugula Salad

    Elevate your dinner with this elegant yet incredibly simple Steak and Arugula Salad. It’s a fantastic choice for a main course. This dish offers a wonderful balance of peppery greens and savory steak. You might feel overwhelmed by complex recipes, but this one is beginner-friendly. Recipesmondial shows you how to cook confidently. It brings gourmet flavors to your table with minimal effort.

    What You’ll Need:

    • 1 lb flank steak or sirloin steak
    • 1 tablespoon olive oil
    • 1/2 teaspoon salt
    • 1/4 teaspoon black pepper
    • 5 ounces fresh arugula
    • 1/2 cup cherry tomatoes, halved
    • 1/4 cup shaved Parmesan cheese
    • For the dressing: 3 tablespoons olive oil, 1 tablespoon balsamic vinegar, 1 teaspoon Dijon mustard, salt and pepper to taste

    Step-by-Step Guidance:

    1. Prepare the Steak: Pat the steak dry with paper towels. Season generously with salt and pepper on both sides.
    2. Cook the Steak: Heat 1 tablespoon olive oil in a large skillet over medium-high heat. Once hot, add the steak. Cook for 3-5 minutes per side for medium-rare. Adjust timing for your preferred doneness. This creates a perfect sear.
    3. Rest and Slice: Remove steak from the pan. Let it rest on a cutting board for at least 5 minutes. Slice against the grain into thin strips. Resting ensures a juicy steak.
    4. Make the Dressing: In a small bowl, whisk together the dressing ingredients. Combine olive oil, balsamic vinegar, Dijon mustard, salt, and pepper.
    5. Assemble the Salad: In a large bowl, combine arugula and cherry tomatoes. Drizzle with dressing and toss gently. Top with sliced steak and shaved Parmesan. Serve your simple dinner recipe immediately.

    Helpful Tips and Variations:

    • Steak Choices: Flank steak, sirloin, or even a ribeye work well here. Choose what fits your budget and preference.
    • Don’t Overcook: Steak cooks quickly. Use a meat thermometer if you’re unsure. Aim for medium-rare for maximum tenderness.
    • Add-ins: Consider adding thinly sliced red onion, cucumber, or even crumbled blue cheese. This adds more texture and flavor.
    • Spice It Up: Rub the steak with garlic powder and a pinch of chili flakes before cooking.

    Warm Roasted Vegetable & Lentil Salad

    This Warm Roasted Vegetable & Lentil Salad is the ultimate comforting dinner. It’s packed with nutrients and flavor. This hearty, plant-based meal is perfect for healthy and balanced meals. If you are struggling to plan family-friendly meals that are also vegetarian, this is a wonderful solution. Recipesmondial offers approachable home cooking ideas for everyone. It makes eating well simple and enjoyable.

    What You’ll Need:

    • 2 cups mixed seasonal vegetables, chopped (e.g., broccoli florets, bell peppers, zucchini, carrots)
    • 1 tablespoon olive oil
    • 1/2 teaspoon dried thyme or oregano
    • Salt and black pepper, to taste
    • 1 cup cooked brown or green lentils (canned or pre-cooked is fine for quick meals)
    • 1/4 cup chopped fresh parsley
    • For the dressing: 2 tablespoons olive oil, 1 tablespoon lemon juice, 1 teaspoon maple syrup or honey, salt and pepper to taste

    Step-by-Step Guidance:

    1. Preheat Oven: Preheat your oven to 400°F (200°C).
    2. Roast Vegetables: On a baking sheet, toss the chopped vegetables with 1 tablespoon olive oil, thyme or oregano, salt, and pepper. Spread them in a single layer. Roast for 20-25 minutes. Cook until tender and slightly caramelized. Roasting brings out their natural sweetness.
    3. Prepare Lentils: If using dried lentils, cook them according to package directions. Drain well. If using canned, simply rinse and drain.
    4. Make the Dressing: In a small bowl, whisk together the dressing ingredients. Combine 2 tablespoons olive oil, lemon juice, maple syrup, salt, and pepper.
    5. Assemble and Serve: In a large bowl, combine the warm roasted vegetables and cooked lentils. Pour the dressing over the mixture. Toss gently to coat everything. Stir in fresh parsley. Serve warm for a truly satisfying and flavorful meal made easy.

    Helpful Tips and Variations:

    • Vegetable Choices: Use any vegetables you have on hand. Sweet potatoes, Brussels sprouts, or parsnips are great additions.
    • Protein Boost: Add chickpeas or black beans for extra protein. This creates an even more filling meal.
    • Flavor Enhancers: A pinch of smoked paprika or curry powder can add a new dimension to your roasted vegetables.
    • Meal Prep Friendly: Roast the vegetables and cook the lentils ahead of time. Store them separately. Combine and dress just before serving for an easy dinner recipe.
    • Serve Warm or Cold: This salad is delicious served warm. However, it also tastes great at room temperature or chilled.

    Easy Salads for Parties

    Hosting a gathering can feel overwhelming. Planning delicious food that everyone will love, especially when you are unsure of how to cook healthy, tasty meals quickly, adds to the pressure. However, with Recipesmondial, creating impressive party salads is simple and stress-free. Our easy recipes are perfect for feeding a crowd, packed with flavor, and surprisingly quick to prepare. Get ready to enjoy cooking without stress and impress your guests with these family-friendly meals!

    Crowd-Pleasing Pasta Salad

    Pasta salad is a timeless favorite for any party. It’s an easy recipe that consistently delivers delicious results. This version is full of vibrant flavors and textures, making it a perfect side dish or even a light main course. Furthermore, it’s ideal for meal prep, as it tastes even better the next day.

    Ingredients:

    • 1 pound rotini pasta (or your favorite short pasta)
    • 1 cup cherry tomatoes, halved
    • 1 cucumber, diced
    • 1/2 red onion, finely chopped
    • 1/2 cup black olives, sliced
    • 1/2 cup bell peppers (any color), diced
    • 1/4 cup fresh parsley, chopped
    • 1/2 cup Italian dressing (store-bought or homemade)
    • 1/4 cup grated Parmesan cheese (optional)
    • Salt and black pepper to taste

    Step-by-Step Cooking Guidance:

    1. Cook the pasta according to package directions. Boil until al dente.
    2. Drain the pasta well. Rinse it with cold water to stop cooking. This also prevents sticking.
    3. In a large bowl, combine the cooled pasta, cherry tomatoes, cucumber, red onion, black olives, and bell peppers.
    4. Pour the Italian dressing over the pasta and vegetables. Toss gently to coat everything evenly.
    5. Add the chopped fresh parsley. Mix again.
    6. Stir in the Parmesan cheese if you are using it.
    7. Season with salt and black pepper to your preference.
    8. Cover the bowl. Refrigerate for at least 30 minutes before serving. This allows the flavors to meld beautifully.

    Tips and Variations for Flavorful Meals Made Easy:

    • Add Protein: Include cooked chicken, pepperoni, or chickpeas for a heartier meal. This makes it a great main course salad.
    • Cheese Please: Try cubed mozzarella or feta cheese instead of Parmesan.
    • Extra Veggies: Broccoli florets or artichoke hearts are excellent additions.
    • Make Ahead: Prepare this salad up to 24 hours in advance. Store it covered in the refrigerator.

    Colorful Corn and Black Bean Salad

    This vibrant corn and black bean salad is a celebration of fresh flavors. It’s a fantastic choice for beginner-friendly recipes. Furthermore, it is naturally vegetarian and vegan, making it suitable for many dietary needs. This simple dinner recipe or side dish comes together quickly and always disappears fast at parties.

    Ingredients:

    • 2 cups cooked corn kernels (fresh, frozen, or canned and drained)
    • 1 (15-ounce) can black beans, rinsed and drained
    • 1 large ripe tomato, diced
    • 1/2 red onion, finely chopped
    • 1/4 cup fresh cilantro, chopped
    • 1 jalapeño, seeded and minced (optional, for a little heat)
    • Juice of 1-2 limes (about 1/4 cup)
    • 2 tablespoons olive oil
    • 1/2 teaspoon ground cumin
    • Salt and black pepper to taste
    • 1 avocado, diced (optional, add just before serving)

    Step-by-Step Cooking Guidance:

    1. In a large mixing bowl, combine the corn kernels, black beans, diced tomato, red onion, fresh cilantro, and minced jalapeño (if using).
    2. In a small separate bowl, whisk together the lime juice, olive oil, and ground cumin.
    3. Pour the dressing over the corn and black bean mixture. Toss gently until all ingredients are well coated.
    4. Season the salad with salt and black pepper to your liking.
    5. For best flavor, cover and chill in the refrigerator for at least 30 minutes. This helps the flavors develop.
    6. Just before serving, stir in the diced avocado, if you are using it.

    Tips and Variations for Approachable Home Cooking:

    • Add Sweetness: A small amount of diced mango or pineapple adds a lovely sweet contrast.
    • Spice It Up: Increase the jalapeño or add a pinch of cayenne pepper for more heat.
    • Serving Suggestion: Serve this salad with tortilla chips for a delightful dip. It’s also great over grilled chicken or fish.
    • Meal Prep: You can prepare the salad without avocado a day in advance. Add the avocado just before serving to prevent browning.

    Creamy Potato Salad with a Twist

    Potato salad is a true comfort food. This easy recipe takes the classic creamy potato salad and adds a delightful twist. It’s a perfect choice for family-friendly meals and gatherings. This version boasts incredible flavor and texture, ensuring no one is left lacking confidence in cooking skills.

    Ingredients:

    • 2 pounds Yukon Gold or red potatoes, scrubbed and cut into 1-inch cubes
    • 1/2 cup mayonnaise
    • 1/4 cup plain Greek yogurt (adds a fresh tang)
    • 2 tablespoons Dijon mustard
    • 1 tablespoon apple cider vinegar
    • 1/4 cup celery, finely diced
    • 1/4 cup red onion, finely chopped
    • 2 tablespoons fresh dill, chopped
    • 2 hard-boiled eggs, chopped (optional)
    • Salt and black pepper to taste

    Step-by-Step Cooking Guidance:

    1. Place the potato cubes in a large pot. Cover them with cold salted water.
    2. Bring the water to a boil over medium-high heat. Cook until the potatoes are tender when pierced with a fork. This usually takes 10-15 minutes.
    3. Drain the potatoes thoroughly. Let them cool slightly in a colander.
    4. While potatoes cool, prepare the dressing. In a medium bowl, whisk together the mayonnaise, Greek yogurt, Dijon mustard, and apple cider vinegar.
    5. In a large bowl, gently combine the cooled potatoes, diced celery, chopped red onion, and chopped hard-boiled eggs (if using).
    6. Pour the creamy dressing over the potato mixture. Stir gently until everything is well coated.
    7. Add the fresh dill. Mix again carefully.
    8. Season generously with salt and black pepper. Taste and adjust as needed.
    9. Cover the bowl. Refrigerate for at least 1 hour before serving. This allows the flavors to deepen.

    Tips and Variations for Simple Dinner Recipes:

    • Potato Choice: Yukon Gold or red potatoes hold their shape well. Russets can become too mushy.
    • Flavor Boost: Add a tablespoon of sweet pickle relish or capers for extra tang.
    • Herbs: Fresh chives or parsley can substitute for or complement the dill.
    • Make Ahead: Potato salad is excellent when made a day in advance. Store it in an airtight container in the refrigerator.

    What are the 7 different types of salads?

    Green Salads (Tossed)

    Green salads are often the first thing that comes to mind when you hear “salad.” These are simple, crisp, and refreshing. They feature a base of leafy greens. Think of tender lettuce, crunchy romaine, or peppery arugula. We then toss them with a light dressing. You might add a few fresh vegetables like tomatoes or cucumbers. They are perfect as a side dish or a light lunch. Furthermore, they are incredibly quick to put together.

    • Key Ingredients: Leafy greens (lettuce, spinach, kale), light vinaigrette, simple vegetables.
    • Why We Love Them: They are wonderfully fresh and versatile. Also, they are excellent for quick, healthy meals.
    • Recipesmondial Tip: Always wash your greens thoroughly. Then, dry them completely. This helps the dressing cling better. It also prevents a watery salad!

    Vegetable Salads

    Vegetable salads go beyond just leafy greens. They highlight a variety of fresh or cooked non-leafy vegetables. This type of salad offers amazing texture and flavor. It can be a vibrant mix of colors and nutrients. Consider crunchy bell peppers, sweet corn, or crisp radishes. These salads are a fantastic way to enjoy seasonal produce. They make a healthy and balanced meal component.

    • Key Ingredients: A mix of non-leafy vegetables (carrots, broccoli, peppers, onions, tomatoes), sometimes with a light dressing.
    • Why We Love Them: They are packed with vitamins. Moreover, they are naturally colorful and satisfying.
    • Recipesmondial Tip: Blanch harder vegetables like green beans briefly. This keeps them tender-crisp. It also brightens their color.

    Bound Salads (e.g., Potato or Tuna Salad)

    Bound salads are a true comfort food. Their ingredients are “bound” together with a thick, creamy dressing. Mayonnaise or a yogurt-based dressing typically does the job. This creates a cohesive, rich texture. These salads are usually hearty and satisfying. They are perfect for picnics, potlucks, or family-friendly meals. Potato salad, tuna salad, and chicken salad are classic examples. They are also excellent for meal prep ideas.

    • Key Ingredients: Cooked potatoes, pasta, tuna, chicken, or eggs. These combine with a creamy dressing and various additions like celery or onions.
    • Why We Love Them: They are filling and flavorful. Furthermore, they often taste even better the next day.
    • Recipesmondial Tip: Don’t overmix. Gently fold in the dressing. This prevents mushy ingredients. Also, add fresh herbs for a bright touch.

    Main Course Salads

    Sometimes, a salad isn’t just a side dish. A main course salad is a complete meal on its own. It features a generous portion of protein. Think grilled chicken, steak, fish, or legumes. These salads often include a variety of greens, vegetables, and grains. They are designed to be hearty and satisfying. They offer a flavorful meal made easy. Furthermore, they are great for simple dinner recipes or quick lunches.

    • Key Ingredients: Protein (chicken, steak, tofu, beans), leafy greens, vegetables, grains, and a flavorful dressing.
    • Why We Love Them: They are a balanced, full meal. They also provide all your nutrients in one bowl.
    • Recipesmondial Tip: Prep your protein ahead of time. This makes assembling your main course salad super fast.

    Fruit Salads

    Fruit salads are a burst of natural sweetness. They feature a delightful mix of fresh, ripe fruits. These salads are light, refreshing, and incredibly easy to make. They are perfect for quick breakfast ideas. They also make healthy snacks or a vibrant dessert. They are also wonderfully adaptable. You can use whatever seasonal fruits you have on hand. They are a simple, delicious way to enjoy nature’s candy.

    • Key Ingredients: Various fresh fruits (berries, melon, grapes, citrus, kiwi).
    • Why We Love Them: They are naturally sweet and refreshing. Moreover, they are packed with vitamins.
    • Recipesmondial Tip: A squeeze of lemon or lime juice prevents browning. It also brightens all the fruit flavors.

    Dessert Salads

    Dessert salads are a fun, sweet twist on the traditional salad concept. These are less about greens and more about indulgence. They often combine fruits with creamy ingredients. Think whipped cream, marshmallows, or sweet sauces. They might even include gelatin. These are popular at gatherings and holidays. They are a delightful treat that appeals to all ages. Furthermore, they can be surprisingly easy to prepare for family-friendly events.

    • Key Ingredients: Often canned fruits, marshmallows, whipped topping, nuts, or pudding mixes.
    • Why We Love Them: They are a nostalgic and sweet treat. They are also a unique way to end a meal.
    • Recipesmondial Tip: Chill these salads thoroughly before serving. This allows the flavors to meld beautifully.

    Grain or Pasta Salads

    Grain and pasta salads are wonderfully hearty and satisfying. They use cooked grains like quinoa, couscous, or farro as their base. Pasta, of course, is another popular choice. These salads are excellent for meal prep ideas. They hold up well in the fridge. They often include fresh vegetables, herbs, and a flavorful dressing. They are perfect for easy lunches or side dishes. Many global comfort foods also fall into this category, like tabbouleh.

    • Key Ingredients: Cooked pasta or grains (quinoa, couscous, bulgur), vegetables, herbs, and a vinaigrette or creamy dressing.
    • Why We Love Them: They are very filling and nutritious. They also make excellent packed lunches.
    • Recipesmondial Tip: Cook your pasta or grains slightly al dente. This prevents them from becoming mushy when mixed.

    How Can You Make Simple Homemade Salad Dressings?

    A home cook's hands whisking a fresh vinaigrette in a glass bowl, surrounded by ingredients like olive oil, lemon, and herbs.
    A photorealistic, professional food photography image capturing the essence of making a simple homemade salad dressing. The scene features a clean, well-lit kitchen counter with essential dressing ingredients: a bottle of extra virgin olive oil, a small bowl of fresh lemon halves, a sprig of fresh dill, a head of garlic, and a bottle of apple cider vinegar. In the foreground, a real human home cook’s hands are gently whisking a simple vinaigrette in a small glass bowl with a whisk, showing the emulsification process. The focus is on freshness and ease, with natural, bright light, in a high-quality food magazine style.

    Transforming your salad from good to truly great often starts with a fantastic dressing. While store-bought options are convenient, making your own is surprisingly simple. You control the ingredients, adjust the flavors, and avoid unnecessary additives.

    At Recipesmondial, we believe in approachable home cooking. Crafting your own dressings is a perfect example of building confidence in the kitchen. It’s a quick, easy recipe that elevates any meal. Let’s make some flavorful meals made easy!

    Classic Vinaigrette Recipe

    A classic vinaigrette is a staple. It’s an easy recipe for any beginner cook. This versatile dressing pairs wonderfully with almost any green salad or roasted vegetables.

    Ingredients:

    • 3 tablespoons (45ml) extra virgin olive oil
    • 1 tablespoon (15ml) vinegar (red wine, white wine, or apple cider)
    • 1 teaspoon (5ml) Dijon mustard
    • 1 small clove garlic, minced (optional)
    • Salt and freshly ground black pepper to taste

    Instructions:

    1. In a small bowl, combine the vinegar, Dijon mustard, and minced garlic (if using).
    2. Whisk these ingredients together until well combined.
    3. Slowly drizzle in the olive oil while continuously whisking. This creates an emulsion.
    4. Season with salt and pepper to your liking. Taste and adjust.
    5. Serve immediately or store in an airtight container in the refrigerator for up to one week.

    Tips and Variations:

    • Herb Boost: Add a pinch of dried herbs like oregano, basil, or thyme for extra flavor.
    • Sweet Touch: A tiny drizzle of honey or maple syrup balances the acidity beautifully.
    • Citrus Kick: Swap half the vinegar for fresh lemon juice.
    • Meal Prep Tip: Make a larger batch and store it in a jar. Shake well before each use.

    Creamy Yogurt Ranch Dressing

    If you love ranch, try this lighter, healthier homemade version. It’s a family-friendly meal helper that’s quick and full of flavor. This dressing is perfect for salads, as a veggie dip, or with chicken tenders.

    Ingredients:

    • ½ cup (120g) plain Greek yogurt (full-fat or low-fat)
    • 2 tablespoons (30ml) milk (dairy or non-dairy)
    • 1 tablespoon (15ml) fresh chives, finely chopped
    • 1 tablespoon (15ml) fresh parsley, finely chopped
    • ½ teaspoon garlic powder
    • ½ teaspoon onion powder
    • ¼ teaspoon dried dill
    • Salt and freshly ground black pepper to taste

    Instructions:

    1. In a medium bowl, whisk together the Greek yogurt and milk until smooth.
    2. Add in the fresh chives, parsley, garlic powder, onion powder, and dried dill.
    3. Stir well to combine all the ingredients thoroughly.
    4. Season with salt and pepper. Adjust to your personal preference.
    5. For best flavor, refrigerate for at least 30 minutes before serving.
    6. Store in an airtight container in the refrigerator for 3-5 days.

    Tips and Variations:

    • Make it Thicker: Use less milk for a dip consistency.
    • Herb Power: Feel free to add other fresh herbs like cilantro or tarragon.
    • Lemon Zest: A little lemon zest can brighten the flavor.
    • Spice It Up: Add a pinch of cayenne pepper for a subtle kick.

    Zesty Lemon Tahini Dressing

    This vibrant, creamy, and dairy-free dressing is a fantastic choice for healthy and balanced meals. It’s a beginner-friendly recipe that adds a unique flavor profile to grain bowls, roasted vegetables, or simple green salads. It’s also a great way to discover new simple dishes.

    Ingredients:

    • ¼ cup (60ml) tahini
    • ¼ cup (60ml) fresh lemon juice
    • 2 tablespoons (30ml) water (plus more if needed)
    • 1 small clove garlic, minced
    • ¼ teaspoon ground cumin (optional)
    • Pinch of salt

    Instructions:

    1. In a small bowl, combine the tahini, fresh lemon juice, water, minced garlic, cumin (if using), and salt.
    2. Whisk vigorously until the dressing is smooth and creamy. It might seize up at first.
    3. If the dressing is too thick, add a teaspoon of water at a time, whisking until you reach your desired consistency. It should be pourable.
    4. Taste and adjust seasonings as needed. You might want more lemon or salt.
    5. Serve immediately or store in an airtight container in the refrigerator for up to 5 days.

    Tips and Variations:

    • Herbaceous Twist: Add a tablespoon of finely chopped fresh parsley or cilantro.
    • Spicy Kick: A pinch of red pepper flakes or a dash of hot sauce works wonders.
    • Sweet Note: A teaspoon of maple syrup can add a touch of sweetness.
    • Thinner Consistency: For a very thin dressing, gradually add more water until it’s just right.

    Frequently Asked Questions About Salads

    Salads are truly versatile. They can be a quick lunch, a hearty dinner, or a fresh side dish. Whether you are new to cooking or just looking for fresh ideas, we are here to help. Here at Recipesmondial, we love making flavorful meals made easy for everyone. Let’s explore some common questions about salads, offering simple dinner recipes and healthy meal ideas for your kitchen.

    What are some classic salad recipes?

    You can’t go wrong with classic salad recipes. They are often family-friendly meals and perfect for approachable home cooking. These beloved dishes are simple to prepare and packed with flavor.

    • Caesar Salad: A timeless favorite. It features crisp romaine lettuce, crunchy croutons, and a creamy Caesar dressing. Often topped with Parmesan cheese. You can easily add grilled chicken for a complete meal.
    • Cobb Salad: This hearty salad is a meal in itself. It combines chopped greens, chicken, bacon, hard-boiled eggs, avocado, tomatoes, and blue cheese. A red wine vinaigrette usually ties it all together.
    • Greek Salad (Horiatiki): A vibrant and fresh choice. It includes crisp lettuce, tomatoes, cucumbers, red onion, Kalamata olives, and feta cheese. A simple olive oil and lemon dressing enhances its natural flavors.
    • Caprese Salad: This Italian classic is beautifully simple. It layers fresh mozzarella, ripe tomatoes, and basil leaves. Drizzle it with balsamic glaze for a perfect finish.
    • Niçoise Salad: A French-inspired main course salad. It typically contains tuna, hard-boiled eggs, green beans, potatoes, tomatoes, and olives. A light vinaigrette complements these fresh ingredients.

    What are the top 10 salad names?

    Many salads have become household names due to their delicious flavors and popularity. These are some of the most recognized and best salad recipes enjoyed worldwide. They are fantastic salad ideas for any occasion.

    1. Caesar Salad: Famous for its creamy dressing and romaine lettuce.
    2. Cobb Salad: A filling salad with a medley of protein and vegetables.
    3. Greek Salad: Mediterranean flavors with feta and olives.
    4. Caprese Salad: Simple yet elegant, featuring mozzarella, tomato, and basil.
    5. Niçoise Salad: A French classic with tuna and fresh vegetables.
    6. Waldorf Salad: A sweet and savory mix of apples, celery, walnuts, and grapes. It often uses a mayonnaise-based dressing.
    7. Garden Salad: A versatile and easy salad recipe. It features a mix of fresh greens and your favorite vegetables.
    8. Pasta Salad: A popular choice for parties and meal prep. It combines cooked pasta with vegetables and a dressing.
    9. Potato Salad: A creamy, comforting side dish. It is a staple at barbecues and picnics.
    10. Coleslaw: Shredded cabbage and carrots mixed with a tangy or creamy dressing. It pairs well with many dishes.

    What are some vegetarian salad recipes?

    Vegetarian salads are fantastic for adding more plant-based goodness to your diet. These salad recipes are often bursting with nutrients and full of flavor. They make healthy and balanced meals simple and enjoyable.

    • Mediterranean Quinoa Salad: A hearty and flavorful option. It combines cooked quinoa, cucumbers, tomatoes, bell peppers, and Kalamata olives. A lemon-herb dressing brings it all together.
    • Black Bean and Corn Salad: This colorful salad is both refreshing and satisfying. It features black beans, corn, red onion, cilantro, and a zesty lime dressing. It’s great as a side or a topping for tacos.
    • Caprese Salad: A naturally vegetarian delight. Fresh mozzarella, ripe tomatoes, and basil leaves shine in this simple dish. Drizzle with balsamic for extra flavor.
    • Lentil and Roasted Vegetable Salad: A warm and comforting salad. Roasted seasonal vegetables like sweet potatoes or broccoli pair perfectly with earthy lentils. A light vinaigrette completes this wholesome meal.
    • Tabbouleh: A fresh and tangy Middle Eastern salad. It uses fine bulgur wheat, parsley, mint, tomatoes, and onion. A generous amount of lemon juice and olive oil makes it vibrant.
    • Simple Green Salad with Chickpeas: Start with a base of mixed greens. Add chickpeas for protein, sliced cucumbers, carrots, and cherry tomatoes. Finish with your favorite light vinaigrette. This is a very beginner-friendly recipe.

    What are 7 healthy salad recipes for weight loss?

    Eating healthy and balanced meals can be delicious and straightforward. These salad recipes are designed to be filling, nutritious, and supportive of weight loss goals. They focus on lean protein, fiber, and plenty of vegetables, which help you feel full longer. This makes meal prep tips for these quick meals very valuable.

    1. Grilled Chicken or Chickpea Power Bowl: Start with mixed greens. Add grilled chicken breast (or roasted chickpeas for a vegetarian option), colorful bell peppers, cucumber, and a sprinkle of sunflower seeds. Dress with a light lemon-herb vinaigrette. The protein and fiber help with satiety [4].
    2. Lentil and Roasted Vegetable Salad: Combine cooked lentils with roasted broccoli, carrots, and zucchini. Lentils are high in fiber and plant-based protein, making this a very filling choice. Use a balsamic vinaigrette for flavor.
    3. Quinoa and Black Bean Salad: A complete protein and fiber-rich meal. Mix cooked quinoa, black beans, corn, diced avocado, and cilantro. A lime-cumin dressing adds a wonderful zest.
    4. Tuna (or Canned Salmon) Salad with Greens: Instead of mayo-heavy tuna salad, mix canned tuna or salmon with Greek yogurt, celery, and red onion. Serve this over a bed of crisp greens. This boosts protein while reducing unhealthy fats [5].
    5. Arugula, Berry, and Almond Salad: This refreshing salad is packed with antioxidants. Combine peppery arugula with fresh berries (strawberries, blueberries), sliced almonds, and a light raspberry vinaigrette.
    6. Greek Salad with Light Dressing: Focus on fresh vegetables like tomatoes, cucumbers, bell peppers, and red onion. Add a small amount of feta cheese and Kalamata olives. Dress with a simple mixture of olive oil, lemon juice, and oregano. Keep the dressing light to manage calories.
    7. Simple Green Salad with Lean Protein: A large bowl of mixed greens is your base. Top with grilled turkey slices, hard-boiled eggs, or tofu. Add plenty of non-starchy vegetables like radish, celery, and spinach. Use a vinegar-based dressing. This helps keep calories low while providing essential nutrients.

    Sources

    1. https://www.health.harvard.edu/blog/healthy-eating-for-a-healthy-heart-201603029272
    2. https://wholegrainscouncil.org/recipes/cooking-basics/cooking-quinoa
    3. https://www.foodsafety.gov/food-safety-charts/safe-minimum-cooking-temperatures
    4. https://www.hsph.harvard.edu/nutritionsource/what-should-you-eat/protein/
    5. https://www.heart.org/en/healthy-living/healthy-eating/eat-smart/nutrition-basics/protein-and-heart-health
  • 35 Easy Pasta Recipes: Simple & Delicious Pasta Dishes for Beginners

    35 Easy Pasta Recipes: Simple & Delicious Pasta Dishes for Beginners

    Pasta is a staple food made from an unleavened dough of wheat flour, water, or eggs, which is formed into various shapes and cooked by boiling. It is a foundational dish in Italian cuisine, known for its versatility in recipes ranging from simple garlic and oil dishes to complex baked casseroles. Popular pasta dishes include classics like Carbonara, Bolognese, and Fettuccine Alfredo.

    Few dishes bring as much comfort to the dinner table as a warm bowl of pasta. It’s the perfect solution whether you’re a busy parent planning family-friendly meals, a new cook feeling overwhelmed, or simply someone seeking fresh inspiration. This versatile and satisfying meal easily solves your weeknight dinner dilemmas.

    That’s why at Recipesmondial, we’ve gathered 35 easy pasta recipes for enjoyable, stress-free cooking. Forget technical jargon and complicated steps; our collection focuses on simple dinner recipes that deliver maximum flavor with minimal effort. From quick weeknight solutions to hearty family favorites, each dish includes clear, step-by-step guidance to help you build confidence in the kitchen.

    Get ready to transform everyday ingredients into delicious, visually appealing meals. We’ll help you master the basics and discover some of the best pasta recipes available, showing that flavorful meals made easy are truly within reach. Let’s dive into the world of pasta and explore why it remains the ultimate comfort food for so many.

    Why Is Pasta the Ultimate Comfort Food?

    When you picture the perfect comfort meal, what comes to mind? For many, it’s a warm, inviting bowl of pasta. This beloved dish stands out as the ultimate comfort food because it offers a unique blend of satisfaction, simplicity, and nostalgic joy.

    Pasta has an incredible power to make us feel good, often evoking happy memories of family gatherings. Its rich, hearty nature also provides deep satisfaction with every bite. Let’s explore why pasta recipes hold such a special place in our hearts and on our dinner tables.

    The Amazing Versatility of Pasta Dishes

    One of pasta’s greatest strengths as a comfort food is its incredible versatility. Since it can be adapted to any taste preference or dietary need, there are countless pasta dishes to explore, making it a perfect meal for everyone.

    • Endless Combinations: Pasta serves as a blank canvas, pairing beautifully with almost any sauce—from creamy Alfredo and zesty pesto to robust marinara.
    • Diverse Ingredients: You can load your pasta with fresh vegetables, lean proteins, or rich cheeses, making it suitable for both healthy options and indulgent treats.
    • Shape Variety: From long spaghetti to short penne, each pasta shape interacts differently with sauces to create diverse textures and culinary experiences.
    • Family-Friendly Meals: As a universal crowd-pleaser, pasta is an ideal choice for family-friendly meals where everyone can find a favorite.

    Simple Dinners and quick meals Made Easy

    In our busy lives, finding time to cook is often a challenge, and many people feel overwhelmed by complex recipes. This is where pasta shines, offering an easy path to delicious and stress-free meals—especially for those who need simple dinner recipes.

    • Speedy Preparation: Most pasta cooks in under 15 minutes, making it a fantastic option for quick meals on busy weeknights.
    • Minimal Effort: Pairing pasta with a simple sauce requires minimal cooking skill, making them ideal as beginner-friendly recipes that let you cook with confidence.
    • One-Pot Wonders: Many pasta recipes can be made in a single pot, which significantly reduces cleanup time. This is a huge help for anyone unsure of how to cook healthy, tasty meals quickly.
    • Reliable Results: Following step-by-step cooking guidance for pasta almost always guarantees a delicious outcome, which helps build your confidence in the kitchen.

    The Comforting Embrace of Taste and Texture

    Comfort food is all about appealing to our senses, and pasta delivers this perfectly. Its delightful texture and ability to absorb rich flavors are key to its comforting power.

    • Satisfying Texture: Properly cooked pasta has a wonderful al dente bite that provides a deeply satisfying mouthfeel.
    • Flavor Absorption: Pasta’s porous surface perfectly cradles and absorbs sauces, ensuring every forkful is bursting with flavor.
    • Warm and Inviting: A hot bowl of pasta feels like a warm hug, instantly bringing a sense of coziness and well-being. Knowing you can create this comforting feeling so easily helps you enjoy cooking without stress.

    Nostalgia and Global Appeal

    Pasta often evokes powerful feelings of nostalgia, taking us back to childhood dinners or special occasions. This deep emotional connection is a hallmark of true comfort food.

    Moreover, pasta is a true global phenomenon enjoyed in countless variations worldwide. For instance, Italians consume around 23 kilograms per capita annually, showcasing its popularity [1]. This widespread love highlights its universal appeal as a comforting and essential dish.

    At Recipesmondial, we understand the magic of pasta. That’s why we provide approachable home cooking guides for the best pasta recipes. Our goal is to help you create flavorful meals made easy, discover new tastes, and make mealtime stress-free.

    Classic Italian Pasta Dishes Everyone Should Try

    A steaming bowl of classic Spaghetti Carbonara, garnished with fresh Pecorino Romano and black pepper, on a rustic wooden table.
    Professional food photography, photorealistic, high-quality food magazine photo. A perfectly plated, steaming bowl of authentic Spaghetti Carbonara. The pasta is al dente, coated in a glossy, creamy sauce with crisp guanciale bits visible. Freshly grated Pecorino Romano cheese and finely chopped black pepper are sprinkled on top. Shot from a slightly overhead angle on a rustic, dark wooden table with soft, natural light, emphasizing warmth and deliciousness. Shallow depth of field.

    Italian pasta dishes are a cornerstone of comforting, flavorful meals, making them perfect for both beginners and experienced home cooks. They offer a fantastic way to learn basic cooking skills while enjoying incredible flavors. These recipes prove that simple ingredients can create unforgettable dishes. At Recipesmondial, we believe these global comfort foods should be accessible to everyone. To get you started, here are some classic Italian pasta dishes we think everyone should try.

    Spaghetti Carbonara

    Spaghetti Carbonara is a Roman masterpiece famous for its rich, creamy sauce, which is made without any cream. Instead, the magic comes from a simple combination of eggs, Pecorino Romano cheese, cured pork, and black pepper. It’s a simple yet elegant recipe that often surprises home cooks.

    Mastering Carbonara is a great way to build cooking confidence, as it teaches the key technique of emulsification—the process of turning simple ingredients into a silky sauce. It’s also a fantastic and simple dinner for the whole family.

    • Key Ingredients: You’ll need spaghetti, guanciale (or pancetta), egg yolks (and some whole eggs), Pecorino Romano cheese, and freshly ground black pepper.
    • Beginner Tip: The secret is to combine the egg mixture with the hot pasta off the heat to prevent scrambling. Adding a splash of starchy pasta water helps create the signature creamy texture.
    • Why Try It: This dish offers an authentic taste of Italy and helps you master a fundamental pasta-making technique.

    Cacio e Pepe

    Cacio e Pepe, which literally means “cheese and pepper,” is an iconic Roman dish celebrated for its simplicity. While it uses just a few ingredients, the secret to its delicious flavor lies in the technique. It’s a perfect recipe for beginners, showcasing how quality ingredients and proper technique can yield amazing results with minimal effort.

    This quick meal is perfect for a fast and satisfying dinner. It’s a brilliant way to practice basic cooking skills and add another simple, impressive dish to your repertoire.

    • Key Ingredients: All you need is pasta (usually spaghetti, bucatini, or tonnarelli), Pecorino Romano cheese, and black pepper. You’ll also need the starchy pasta cooking water to create the sauce.
    • Beginner Tip: For a more intense flavor, start by toasting the black pepper in a dry pan. To create the sauce, make an emulsion by vigorously stirring the grated cheese and hot pasta water with the cooked pasta until it’s smooth and clings to every strand.
    • Why Try It: You’ll learn how to create a rich sauce with minimal fuss, making this a quick and reliable meal that’s sure to impress.

    Fettuccine Alfredo

    Fettuccine Alfredo is a beloved and satisfyingly creamy pasta dish. The traditional Italian version is surprisingly simple, using just butter and Parmesan cheese to create its signature sauce. This method creates a luxurious sauce without any heavy cream, making it a very approachable dish for home cooks.

    This dish is a fantastic choice for a simple weeknight dinner and is always a hit with the family. You’ll learn how to create a rich, velvety sauce with just a couple of key ingredients.

    • Key Ingredients: Fettuccine pasta, unsalted butter, and freshly grated Parmigiano-Reggiano cheese are the stars. A splash of the starchy pasta water is key to binding it all together.
    • Beginner Tip: To avoid a greasy sauce, combine the hot pasta with butter and cheese off the heat. Stir continuously while gradually adding small amounts of pasta water until the sauce is smooth and coats the noodles beautifully.
    • Variations: Many American versions use heavy cream for extra richness. While not traditional, it’s an easy adaptation for an even creamier texture.

    Spaghetti with Bolognese Sauce

    Spaghetti with Bolognese Sauce is the ultimate comfort food. This hearty, slow-cooked meat sauce is a staple in Italian homes. Although it requires a longer cooking time, the hands-on effort is minimal. It’s a perfect family meal that tastes even better the next day, making it ideal for meal prepping.

    Making Bolognese from scratch is a rewarding experience that will boost your confidence in cooking richer, more complex sauces. It’s a great way to discover the deep flavors that develop from slow cooking.

    • Key Ingredients: Ground beef (or a mix of beef and pork), soffritto (carrots, celery, onion), crushed tomatoes, red wine, and milk are common. A touch of patience is also essential for simmering.
    • Beginner Tip: Don’t rush the simmering process; a slow, gentle simmer is crucial for the flavors to meld. Consider making a large batch and freezing portions for quick dinners later.
    • Why Try It: This robust and satisfying dish proves that simple ingredients can create profound flavor. It’s the perfect comfort food for a chilly evening.

    Classic Basil Pesto

    Originating from the Liguria region of Italy, Classic Basil Pesto is a vibrant and fresh no-cook sauce. It comes together quickly and is incredibly versatile—perfect for pasta, sandwiches, or even as a dip. Making pesto at home is simple and yields a flavor far superior to any store-bought version.

    This recipe is fantastic for beginners and a great way to incorporate fresh herbs into your diet. It inspires creativity and can be used as a healthy addition to many balanced meals.

    • Key Ingredients: Fresh basil leaves, pine nuts, garlic, Parmigiano-Reggiano cheese, and extra virgin olive oil are essential.
    • Beginner Tip: A food processor makes this job easy. To prevent the basil from oxidizing (turning dark), pulse the ingredients rather than blending them continuously. Using a high-quality extra virgin olive oil is also key for authentic flavor.
    • Variations: Feel free to substitute pine nuts with walnuts or cashews, or try using different herbs like parsley for a unique twist. This recipe is very forgiving and allows for easy substitutions.

    Quick Pasta Recipes for Busy Weeknights (Under 30 Minutes)

    A bright bowl of Lemon Garlic Shrimp Scampi with Linguine, garnished with fresh parsley and lemon, on a kitchen counter.
    Professional food photography, photorealistic, high-quality food magazine photo. A vibrant and fresh-looking quick Lemon Garlic Shrimp Scampi with Linguine, served in a stylish, shallow bowl. Bright pink shrimp, glistening with lemon-garlic sauce, are intertwined with perfectly cooked linguine. Fresh parsley and lemon wedges are visible. Shot in a brightly lit, modern kitchen with a clean background. Dynamic composition, suggesting freshness and ease of preparation. Soft focus on the background elements.

    Life gets busy, and finding time to cook a delicious, satisfying dinner can feel like a challenge. We’re here to help! At Recipesmondial, we believe that enjoying flavorful, homemade meals shouldn’t add stress to your day.

    This section is packed with quick pasta recipes designed for hectic weeknights. Each of these simple dinner ideas can be on your table in under 30 minutes, making them perfect for home cooks of all skill levels. Get ready to transform everyday ingredients into fantastic, family-friendly meals with minimal effort and maximum taste!

    Spaghetti with Garlic and Olive Oil (Aglio e Olio)

    This classic Italian pasta dish is the epitome of simplicity and flavor. Spaghetti Aglio e Olio proves that you don’t need a long list of ingredients to create something truly delicious. It’s an ideal beginner-friendly recipe and a perfect quick meal solution for any night.

    The beauty of this dish lies in its few, high-quality ingredients. You’ll be amazed how quickly it comes together, offering a burst of garlicky goodness in every bite.

    Ingredients:

    • 8 ounces spaghetti
    • 1/4 cup extra virgin olive oil
    • 4-6 cloves garlic, thinly sliced
    • 1/4 teaspoon red pepper flakes (optional, for a little kick)
    • 1/4 cup fresh parsley, chopped
    • Salt and freshly ground black pepper to taste
    • 1/2 cup reserved pasta water

    Instructions:

    1. Cook the spaghetti in a large pot of salted boiling water according to package directions until al dente.
    2. Before draining, reserve about 1 cup of the starchy pasta water.
    3. While the pasta cooks, heat the olive oil in a large skillet over medium-low heat.
    4. Add the thinly sliced garlic and red pepper flakes (if using). Cook gently for 2-3 minutes until the garlic is fragrant and lightly golden. Be careful not to burn it!
    5. Drain the cooked spaghetti and add it directly to the skillet with the garlic oil.
    6. Pour in about 1/2 cup of the reserved pasta water. Toss everything together vigorously. The pasta water helps create a light, emulsified sauce.
    7. Stir in the fresh chopped parsley.
    8. Season with salt and pepper to your liking. Serve immediately and enjoy this flavorful meal!

    Tips and Variations:

    • Don’t Burn the Garlic: Keep the heat low and watch your garlic carefully. Burnt garlic tastes bitter.
    • Fresh Ingredients Matter: Since there are so few ingredients, using good quality olive oil and fresh garlic makes a big difference.
    • Add a Protein: For a more substantial, family-friendly meal, quickly sauté some shrimp or cooked chicken before adding the pasta.
    • Cheesy Twist: A sprinkle of grated Parmesan cheese at the end is a delicious addition, though not traditional.

    3-Ingredient Tomato Penne

    When you need a simple dinner recipe that is ultra-fast and still tastes fantastic, our 3-Ingredient Tomato Penne is your secret weapon. This easy pasta dish is a lifesaver on busy weeknights, delivering comforting flavors with minimal fuss. It’s a brilliant quick meal perfect for any home cook.

    Forget complex steps; this dish focuses on the natural deliciousness of ripe tomatoes. It’s wonderfully satisfying and incredibly beginner-friendly.

    Ingredients:

    • 1 pound penne pasta
    • 28 ounces canned crushed tomatoes (good quality is key!)
    • 1/4 cup extra virgin olive oil
    • Salt to taste
    • Optional additions: Fresh basil, garlic powder, a pinch of sugar to balance acidity.

    Instructions:

    1. Cook the penne according to package directions in a large pot of well-salted boiling water until al dente.
    2. While the pasta cooks, heat the olive oil in a large saucepan or skillet over medium heat.
    3. Add the crushed tomatoes to the pan and season generously with salt.
    4. Let the sauce simmer gently for about 10-15 minutes to allow the flavors to meld.
    5. Drain the cooked penne and add it directly to the tomato sauce.
    6. Toss to coat the pasta completely.
    7. Serve hot and garnish with fresh basil if desired. This recipe makes for a wonderfully approachable home cooking experience.

    Tips and Variations:

    • Quality Tomatoes: Since tomatoes are the star, choose a good brand. San Marzano tomatoes are often recommended for their sweet, balanced flavor [2].
    • Spice it Up: Add a pinch of red pepper flakes with the tomatoes for a subtle kick.
    • Add Garlic: Sauté a clove or two of minced garlic in the olive oil before adding the tomatoes for extra depth.
    • Make it Creamy: Stir in a tablespoon of butter or a splash of heavy cream at the end for a richer sauce.
    • Kid-Friendly: This simple sauce is often a hit with children.

    Creamy Lemon Pasta

    Bright, zesty, and incredibly satisfying, this Creamy Lemon Pasta is a true showstopper that takes less than 30 minutes to make. It’s a quick meal solution that feels gourmet but is remarkably easy. This recipe is perfect for when you crave something comforting yet fresh.

    The combination of fresh lemon, garlic, and cream creates a light yet indulgent sauce. This flavorful dish will quickly become a favorite simple dinner recipe in your rotation.

    Ingredients:

    • 8 ounces spaghetti or linguine
    • 2 tablespoons olive oil
    • 3 cloves garlic, minced
    • 1/2 cup heavy cream
    • 1/4 cup fresh lemon juice
    • Zest of 1 lemon
    • 1/2 cup grated Parmesan cheese, plus more for serving
    • 1/4 cup fresh parsley or basil, chopped
    • Salt and freshly ground black pepper to taste
    • 1/2 cup reserved pasta water

    Instructions:

    1. Cook the pasta in a large pot of well-salted boiling water until al dente.
    2. Before draining, reserve about 1 cup of the starchy pasta water. Drain the pasta.
    3. While the pasta cooks, heat the olive oil in a large skillet over medium heat.
    4. Add the minced garlic and cook for about 1 minute until fragrant. Be careful not to brown it.
    5. Reduce the heat to low. Stir in the heavy cream, lemon juice, and lemon zest.
    6. Bring the sauce to a gentle simmer and cook for 2-3 minutes, allowing it to thicken slightly.
    7. Add the drained pasta to the skillet and toss to coat evenly.
    8. Gradually add the Parmesan cheese, tossing constantly.
    9. If the sauce seems too thick, add reserved pasta water, 1 tablespoon at a time, until it reaches your desired consistency.
    10. Stir in the fresh parsley or basil. Season generously with salt and black pepper.
    11. Serve immediately with extra Parmesan cheese. This easy recipe offers delightful results.

    Tips and Variations:

    • Fresh Lemon is Key: Always use fresh lemon juice and zest for the best, brightest flavor. Bottled juice won’t give the same vibrant taste.
    • Adjust Creaminess: If you prefer a lighter sauce, you can reduce the amount of heavy cream and use more pasta water.
    • Add Veggies: Sauté some spinach, asparagus, or cherry tomatoes with the garlic for added nutrients and color.
    • Protein Boost: Cooked shrimp, chicken, or chickpeas make excellent additions for a more family-friendly meal.
    • Dairy-Free Option: Use full-fat coconut milk or a plant-based cream alternative for a similar rich texture. Nutritional yeast can substitute Parmesan.

    One-Pot Spaghetti

    Imagine a delicious spaghetti dinner with just one pot to clean. Our One-Pot Spaghetti is the ultimate easy dinner recipe for any busy weeknight. This beginner-friendly method cuts down on dishes and cooking time, making it a dream come true for approachable home cooking.

    Everything cooks together in a single pot, infusing the pasta with incredible flavor from the start. It’s a truly simple dinner recipe that delivers big on taste and convenience.

    Ingredients:

    • 12 ounces spaghetti, broken in half
    • 1 (28-ounce) can crushed tomatoes
    • 1 medium onion, thinly sliced
    • 3 cloves garlic, minced
    • 4 cups vegetable or chicken broth
    • 1 teaspoon dried oregano
    • 1/2 teaspoon red pepper flakes (optional)
    • 2 tablespoons olive oil
    • Salt and freshly ground black pepper to taste
    • Fresh basil or parsley, for garnish
    • Grated Parmesan cheese, for serving

    Instructions:

    1. In a large pot or Dutch oven, combine the broken spaghetti, crushed tomatoes, sliced onion, minced garlic, broth, oregano, and red pepper flakes (if using).
    2. Drizzle with olive oil and season with a good pinch of salt and pepper.
    3. Bring the mixture to a boil over high heat, stirring frequently to prevent the pasta from sticking.
    4. Once boiling, reduce the heat to medium-low. Simmer, stirring often, for 10-12 minutes, or until the pasta is al dente and most of the liquid has been absorbed into a rich sauce.
    5. Taste and adjust seasonings as needed.
    6. Remove from heat and let it rest for a couple of minutes to allow the sauce to thicken slightly.
    7. Serve hot, garnished with fresh basil or parsley and a sprinkle of Parmesan cheese. Enjoy this fantastic and flavorful meal!

    Tips and Variations:

    • Stir, Stir, Stir: Frequent stirring is crucial to prevent the pasta from sticking together and ensure even cooking.
    • Adjust Liquid: If the pasta looks too dry, add a splash more broth or water. If it’s too soupy, let it simmer a bit longer.
    • Add Veggies: Stir in fresh spinach or cherry tomatoes during the last few minutes of cooking for added color and nutrients.
    • Protein Power: For a heartier, family-friendly meal, brown some ground beef or Italian sausage in the pot before adding the other ingredients.
    • Cheese Please: For an extra creamy finish, stir in a handful of mozzarella or cream cheese at the very end.
    • Meal Prep Tip: This easy recipe reheats well, making it great for lunch leftovers.

    Family-Friendly & Creamy Pasta Dishes

    A warm, bubbly baked ziti or mac and cheese in a ceramic dish, fresh from the oven, with golden-brown cheese topping.
    Professional food photography, photorealistic, high-quality food magazine photo. A comforting, rich, and creamy Baked Ziti or Mac and Cheese, presented in an oval ceramic baking dish, freshly out of the oven with golden-brown, bubbly cheese on top. The pasta is visibly tender and coated in a thick, savory sauce. Steam is gently rising. Shot on a warm-toned kitchen counter or a family dining table. The scene evokes warmth, home cooking, and satisfaction. Soft, inviting lighting.

    Transform your dinner table with these incredibly easy pasta recipes. We know that busy home cooks can feel overwhelmed by complex instructions and planning family-friendly meals. That’s why these dishes are designed for maximum flavor with minimal effort. They are perfect for beginners building confidence in the kitchen, helping you create delicious, stress-free meals everyone will love.

    The Easiest Homemade Macaroni and Cheese

    There’s nothing quite like homemade macaroni and cheese, the ultimate comfort food for any family dinner. This simple recipe proves that a rich, creamy sauce doesn’t have to be complicated. In no time, you’ll have a delightful meal that will make you feel like a confident cook.

    Ingredients:

    • 8 ounces elbow macaroni
    • 2 tablespoons unsalted butter
    • 2 tablespoons all-purpose flour
    • 2 cups milk (whole milk for extra creaminess)
    • 1/2 teaspoon salt
    • 1/4 teaspoon black pepper
    • Pinch of nutmeg (optional, but lovely!)
    • 2 cups shredded cheddar cheese (sharp or mild, as preferred)
    • 1/2 cup grated Parmesan cheese (optional, for extra flavor)

    Step-by-Step Instructions:

    1. Cook the macaroni according to package directions until al dente. Drain the pasta and set it aside.
    2. Melt the butter in a large saucepan or pot over medium heat.
    3. Whisk in the flour to create a roux and cook for 1-2 minutes until lightly golden. This step helps thicken the sauce.
    4. Gradually whisk in the milk, continuing to whisk to avoid lumps.
    5. Bring the mixture to a gentle simmer and cook for 5-7 minutes, stirring often, until the sauce has thickened.
    6. Remove the saucepan from the heat and stir in the salt, pepper, and nutmeg (if using).
    7. Add the shredded cheddar and Parmesan cheese. Stir until the cheese is completely melted and the sauce is smooth.
    8. Finally, add the cooked macaroni to the cheese sauce and stir until well coated.
    9. Serve immediately and enjoy!

    Tips for Success:

    • Cheese Choice: Experiment with different cheeses! Colby Jack, Gruyère, or Monterey Jack all work well.
    • Add-ins: Stir in cooked broccoli, peas, or ham for a more complete family-friendly meal.
    • Make it Baked: For a crispy topping, transfer the finished mac and cheese to a baking dish. Top with breadcrumbs and bake at 375°F (190°C) for 15-20 minutes.

    Creamy Chicken and Penne Pasta

    When you need a quick and satisfying dinner, this creamy chicken and penne pasta is a lifesaver. Perfect for busy weeknights, this easy recipe combines tender chicken and a rich Parmesan sauce into a dish that will please the whole family. It’s an approachable meal that delivers impressive flavor without the fuss.

    Ingredients:

    • 8 ounces penne pasta
    • 1 tablespoon olive oil
    • 1 pound boneless, skinless chicken breasts, cut into 1-inch pieces
    • 1 small onion, chopped
    • 2 cloves garlic, minced
    • 1 cup chicken broth
    • 1/2 cup heavy cream
    • 1/2 cup grated Parmesan cheese, plus more for serving
    • 1/2 teaspoon dried Italian seasoning
    • Salt and black pepper to taste
    • Fresh parsley, chopped, for garnish (optional)

    Step-by-Step Instructions:

    1. Cook the penne pasta according to package directions until al dente. Drain, reserving 1/2 cup of the pasta water.
    2. While the pasta cooks, heat the olive oil in a large skillet or pan over medium-high heat.
    3. Add the chicken pieces and cook for 5-7 minutes until browned and cooked through. Remove the chicken and set aside.
    4. Add the chopped onion to the same skillet and cook for 3-4 minutes until softened.
    5. Stir in the minced garlic and cook for another minute until fragrant.
    6. Pour in the chicken broth, bringing it to a simmer while scraping up any browned bits from the bottom of the pan.
    7. Reduce the heat to low. Stir in the heavy cream, Parmesan cheese, and Italian seasoning.
    8. Season the sauce with salt and black pepper to taste.
    9. Return the cooked chicken to the skillet, then add the drained penne pasta.
    10. Toss everything together until well coated in the creamy sauce. If the sauce is too thick, stir in a little of the reserved pasta water.
    11. Serve hot, garnished with fresh parsley and extra Parmesan cheese.

    Quick Variations:

    • Veggie Boost: Add spinach, mushrooms, or sun-dried tomatoes with the onions for extra nutrition.
    • Spice It Up: A pinch of red pepper flakes adds a nice kick.
    • Different Protein: Shrimp or sausage can easily replace the chicken.

    Simple Pasta Bake with Rigatoni

    A pasta bake is the ultimate hearty and comforting family meal. This simple recipe, made with rigatoni, is perfect for feeding a crowd or preparing ahead of a busy week. It’s a beginner-friendly dish that takes the stress out of meal prep while promising delicious results.

    Ingredients:

    • 1 pound rigatoni pasta
    • 1 tablespoon olive oil
    • 1 pound ground beef or Italian sausage (optional, for a meat sauce)
    • 1 medium onion, chopped
    • 2 cloves garlic, minced
    • 1 (28-ounce) can crushed tomatoes
    • 1 teaspoon dried oregano
    • 1/2 teaspoon dried basil
    • Salt and black pepper to taste
    • 1 cup ricotta cheese
    • 1/2 cup grated Parmesan cheese, divided
    • 2 cups shredded mozzarella cheese, divided
    • Fresh parsley, chopped, for garnish (optional)

    Step-by-Step Instructions:

    1. Preheat your oven to 375°F (190°C). Lightly grease a 9×13 inch baking dish.
    2. Cook the rigatoni pasta according to package directions until al dente. Drain well.
    3. While the pasta cooks, heat the olive oil in a large skillet over medium-high heat.
    4. If using meat, add the ground beef or sausage. Cook until browned, crumbling it with a spoon. Drain any excess fat.
    5. Add the chopped onion to the skillet and cook for 5 minutes until softened.
    6. Stir in the minced garlic and cook for one more minute until fragrant.
    7. Pour in the crushed tomatoes, then add the oregano, basil, salt, and pepper. Bring the sauce to a simmer.
    8. Reduce the heat and let the sauce simmer for 10-15 minutes to allow the flavors to meld.
    9. In a medium bowl, combine the ricotta cheese with 1/4 cup of the Parmesan cheese. Season lightly with salt and pepper.
    10. Spread about 1 cup of sauce in the bottom of the prepared baking dish.
    11. Layer half of the cooked rigatoni over the sauce.
    12. Dollop spoonfuls of the ricotta mixture over the pasta, then top with 1 cup of mozzarella cheese.
    13. Add the remaining rigatoni and cover with the remaining sauce.
    14. Sprinkle the remaining 1 cup of mozzarella and 1/4 cup of Parmesan cheese over the top.
    15. Bake for 25-30 minutes, or until the sauce is bubbly and the cheese is melted and golden brown.
    16. Let the bake rest for 5-10 minutes before serving, then garnish with fresh parsley.

    Make-Ahead & Storage Tips:

    • Prep Ahead: Assemble the entire pasta bake without baking. Cover tightly and refrigerate for up to 2 days. Add 15-20 minutes to the baking time if cooking from cold.
    • Freezing: The unbaked or baked pasta bake can be frozen for up to 3 months. Thaw overnight in the refrigerator before baking or reheating.
    • Customization: Feel free to add cooked vegetables like zucchini, bell peppers, or mushrooms to the sauce for a veggie boost.

    Healthy & Vegetarian Pasta Ideas

    Eating healthy doesn’t mean sacrificing flavor—that’s a myth we’re happy to bust. At Recipesmondial, we believe approachable home cooking can be delicious, nutritious, and stress-free.

    These vegetarian pasta ideas are perfect for busy weeknights or a relaxing weekend meal. They offer vibrant flavors and wholesome ingredients, and you’ll find them simple to prepare. Get ready to cook with confidence and enjoy incredible meals!

    Pasta alla Norma (Eggplant and Tomato)

    Discover a taste of Sicily with Pasta alla Norma, a classic Italian dish that celebrates fresh, vibrant flavors. It’s a wholesome and hearty vegetarian option that’s surprisingly easy to make, making it a perfect family-friendly meal.

    What Makes It Special:

    • Flavorful Eggplant: Tender, golden eggplant is the star, adding a rich and satisfying depth to the dish.
    • Sweet Tomato Sauce: A simple sauce, often made with ripe canned tomatoes, provides a bright base.
    • Fresh Herbs: Basil brings an aromatic freshness that elevates the entire dish.
    • Ricotta Salata: Traditionally, a sprinkle of salty, aged ricotta cheese finishes the plate.

    Simple Steps for Success:

    1. Prepare the Eggplant: Dice your eggplant, then either pan-fry it until golden or roast it for a lighter touch.
    2. Simmer the Sauce: Cook garlic in olive oil, add crushed tomatoes with a pinch of salt and fresh basil, and let it gently simmer.
    3. Cook the Pasta: Boil your favorite pasta shape, such as rigatoni or penne, to al dente perfection.
    4. Combine and Serve: Toss the cooked pasta with the sauce and eggplant. Garnish with more fresh basil and ricotta salata, if using.

    Chef’s Tip: For extra flavor and crispier pieces, let the eggplant sit with salt for 30 minutes before cooking to draw out excess moisture. Eggplant is also a fantastic source of fiber and antioxidants, making it a healthy addition to your diet [3].

    Veggie-Packed Pasta Primavera

    Bring the freshness of spring to your table with Pasta Primavera. This customizable dish bursts with colorful, seasonal vegetables, making it a fantastic healthy and balanced meal and a perfect way to use up any fresh produce you have on hand.

    Why You’ll Love It:

    • Nutrient-Rich: Loaded with a variety of vegetables, this dish provides plenty of vitamins and minerals.
    • Light and Fresh: A simple olive oil and garlic sauce, brightened with lemon, keeps it incredibly light.
    • Versatile: Use any vegetables you enjoy! Broccoli, bell peppers, zucchini, carrots, asparagus, and peas are popular choices.
    • Quick Meal: This easy recipe comes together fast, making it a perfect simple dinner recipe for busy evenings.

    Creating Your Primavera:

    1. Cook Pasta: Boil your pasta of choice, such as linguine or fettuccine, according to package directions.
    2. Prepare Vegetables: Chop your chosen vegetables and sauté them briefly in olive oil until tender-crisp. You can also lightly steam them.
    3. Build the Sauce: In the same pan, sauté garlic, then add a splash of pasta water, lemon juice, and olive oil.
    4. Toss and Finish: Combine the cooked pasta and vegetables with the light sauce. Season with salt, pepper, and fresh parsley or basil.

    Substitution Idea: No fresh veggies? No problem! A bag of mixed frozen vegetables works wonderfully, helping you create flavorful meals made easy even when time is tight.

    Spinach and Ricotta Stuffed Shells

    For a comforting and satisfying vegetarian option, look no further than Spinach and Ricotta Stuffed Shells. While this dish looks impressive, it’s incredibly simple to prepare, making it a wonderful family-friendly dish that’s also ideal for feeding a crowd.

    A Delicious Combination:

    • Creamy Ricotta: A luscious blend of ricotta cheese forms the heart of the filling.
    • Nutritious Spinach: Fresh or frozen spinach adds color, nutrients, and a subtle earthy flavor.
    • Melted Mozzarella: A layer of gooey mozzarella cheese bakes on top, creating a golden crust.
    • Rich Marinara: A good quality marinara sauce ties all the flavors together beautifully.

    Your Step-by-Step Guide:

    1. Cook the Shells: Boil jumbo pasta shells until al dente. Drain and rinse with cold water to prevent sticking.
    2. Make the Filling: In a bowl, combine ricotta cheese, chopped cooked spinach (squeezed dry), an egg, Parmesan cheese, salt, pepper, and a pinch of nutmeg.
    3. Stuff the Shells: Carefully spoon or pipe the ricotta mixture into each pasta shell.
    4. Assemble and Bake: Spread a layer of marinara sauce in a baking dish. Arrange the stuffed shells on top, cover with more marinara, and add a generous sprinkle of mozzarella. Bake until bubbly and golden.

    Meal Prep Tip: These stuffed shells are perfect for making ahead. Assemble them the day before and simply bake when you’re ready for dinner. This simple meal prep guidance makes it easy to enjoy a stress-free meal.

    These beginner-friendly recipes show just how satisfying and easy vegetarian pasta dishes can be. Recipesmondial is here to give you the confidence to try new things. Enjoy discovering these amazing flavors!

    How Can You Cook Pasta Perfectly Every Time?

    Salting Your Pasta Water Correctly

    Delicious pasta starts long before the noodles hit the pot. The first crucial step is to properly salt your cooking water, which seasons the pasta from the inside out. Bland pasta is a common pitfall for new cooks, but it’s simple to avoid.

    Here’s how to do it right:

    • Use a large pot: Give your pasta plenty of room to cook evenly and prevent sticking.
    • Bring water to a rolling boil: Wait until the water is bubbling vigorously before you add any salt.
    • Add plenty of salt: Many chefs say pasta water should taste “as salty as the sea.” For 4-6 quarts of water (enough for 1 pound of pasta), use 1 to 2 tablespoons of coarse sea salt or Kosher salt. This infuses flavor directly into the pasta.
    • Stir to dissolve: Make sure the salt dissolves completely before adding your pasta to ensure even seasoning.

    This simple step transforms your pasta from a plain base into a flavorful foundation for any sauce. It’s a key technique for delicious meals, right from the start.

    The Secret to a Great Sauce: Saving Pasta Water

    Want to elevate your pasta dishes? The secret is saving some of the starchy cooking water. This simple liquid is a game-changer for creating smooth, restaurant-quality sauces at home.

    Why is this water so magical?

    • Emulsification: The starch in the water helps bind the oil and water in your sauce, creating a smooth, cohesive texture instead of a separated one.
    • Glossy finish: It gives your sauce a beautiful, professional sheen.
    • Thickens naturally: It helps thicken the sauce to the perfect consistency without needing flour or cornstarch.
    • Binds the dish together: Most importantly, the starchy water helps the sauce cling to the pasta, uniting the flavors of the entire dish.

    Here’s the trick for using this secret ingredient:

    1. Before draining your cooked pasta, use a heat-proof measuring cup or ladle to scoop out about 1 to 1.5 cups of the starchy water.
    2. Set this water aside.
    3. While finishing your sauce, gradually stir in a splash or two of the reserved water until the sauce reaches your desired consistency.

    This technique works wonders for all types of sauces, from simple tomato-based recipes to rich, creamy ones. It’s a small step that makes a huge difference.

    Achieving the Perfect Al Dente Texture

    In Italian cooking, “al dente” means cooking pasta until it is firm to the bite, but not hard or mushy. This ideal texture is crucial because it provides a satisfying bite and helps the pasta hold its shape with any sauce.

    Here’s your step-by-step guide to perfect al dente pasta:

    1. Follow package directions (mostly): Use the cooking time on the pasta package as a starting point.
    2. Start tasting early: About 2-3 minutes before the recommended time, start tasting the pasta. Do not rely only on the timer.
    3. Look for firmness: The pasta should have a slight resistance when you bite it. It should not be soft or limp. A tiny white speck in the center is okay, but it shouldn’t taste raw.
    4. Drain promptly: The moment your pasta is al dente, drain it immediately. Do not rinse it, as the starch on its surface helps the sauce adhere.
    5. Finish in the sauce: For the best results, transfer the drained pasta directly into your sauce. Toss everything together over medium heat for 1-2 minutes. This allows the pasta to absorb flavor and finish cooking perfectly.

    Overcooked, mushy pasta is a common mistake, but by tasting as you go, you can cook with confidence. Following these steps will help you serve perfectly textured pasta every time.

    Frequently Asked Questions About Pasta

    What are the top 10 pasta dishes?

    Defining a “top 10” list of pasta dishes is tough, as everyone has personal favorites. However, some dishes consistently rank as beloved classics worldwide, celebrated for their rich history, incredible flavors, and comforting appeal.

    Here at Recipesmondial, we focus on approachable home cooking. Our beginner-friendly recipes are designed to help you successfully bring these flavorful meals into your own kitchen.

    Here is a list of frequently celebrated pasta dishes:

    • Spaghetti Carbonara: This Roman classic features eggs, Pecorino Romano cheese, guanciale, and black pepper. It’s incredibly rich and satisfying [4].
    • Lasagna al Forno: Layers of pasta, rich Bolognese sauce, creamy béchamel, and cheese create the ultimate comfort food, perfect for family-friendly meals.
    • Fettuccine Alfredo: A simple yet luxurious dish, Fettuccine Alfredo combines pasta with butter and Parmesan cheese, using a touch of pasta water to create a velvety sauce.
    • Spaghetti Bolognese: A true family favorite, this hearty meat sauce is slow-cooked to perfection and has become a staple in many homes.
    • Pesto Pasta: Fresh basil pesto—made with pine nuts, garlic, Parmesan, and olive oil—coats pasta for a vibrant and quick meal, making it a fantastic choice for a simple dinner.
    • Cacio e Pepe: Another Roman marvel, Cacio e Pepe highlights the beauty of simplicity with just Pecorino Romano cheese, black pepper, and pasta cooking water.
    • Pasta al Pomodoro: This dish celebrates fresh tomatoes with a simple, flavorful sauce made from ripe tomatoes, garlic, and basil.
    • Macaroni and Cheese: The ultimate cheesy comfort food, this dish is universally loved by kids and adults alike, making it an easy recipe for any night.
    • Aglio e Olio: Translating to “garlic and oil,” this super quick pasta dish is perfect for busy weeknights and is incredibly flavorful despite its simplicity.
    • Pasta Primavera: Packed with seasonal vegetables and a light sauce, this dish offers a fresh, healthy option and is a wonderful way to enjoy fresh produce.

    What are some pasta dishes?

    Pasta is wonderfully versatile, with countless delicious dishes to explore. Whether you’re seeking quick meals, family-friendly options, or something healthy, there’s a pasta recipe for every taste. Recipesmondial offers a wide array of step-by-step cooking guidance for all skill levels.

    Here are just a few examples of the incredible variety:

    • Classic & Hearty:
      • Spaghetti and Meatballs: A timeless, comforting combination.
      • Baked Ziti: Layers of pasta, ricotta, marinara, and mozzarella baked until bubbly.
      • Manicotti: Large pasta tubes filled with ricotta and spinach, then baked in sauce.
    • Quick & Easy Pasta Recipes:
      • Lemon Garlic Butter Pasta: Bright, zesty, and ready in minutes.
      • Tuna Pasta Salad: A refreshing, simple lunch or side dish.
      • One-Pot Pasta: All ingredients cook together in a single pot, which makes for easy cleanup and a simple dinner.
    • Vegetarian & Healthy Pasta Dishes:
      • Puttanesca: A robust sauce with tomatoes, olives, capers, and garlic.
      • Mushroom Aglio e Olio: Earthy mushrooms added to the classic garlic and oil base.
      • Butternut Squash Pasta: A creamy, autumnal dish featuring roasted squash.
    • Creamy & Indulgent:
      • Creamy Tomato Pasta: A comforting sauce often made with passata and a touch of cream.
      • Vodka Sauce Pasta: A rich, pink sauce with a hint of heat.
      • Four Cheese Pasta (Quattro Formaggi): A decadent blend of cheeses.

    Recipesmondial is your go-to platform to confidently create these and many more delicious meals. We help you master approachable home cooking, guiding you from simple ingredients to successful outcomes.

    What are the 4 famous pastas?

    When people refer to “the four famous pastas,” they are typically talking about the iconic pasta dishes of Rome. These recipes are foundational to Roman cuisine and showcase how simple, high-quality ingredients can create extraordinary flavor. Each dish offers a unique taste experience.

    Here are the four famous Roman pasta dishes:

    • Cacio e Pepe: Perhaps the simplest of the four, this dish features Pecorino Romano cheese, freshly ground black pepper, and starchy pasta water, which emulsify to create a creamy, flavorful sauce [5].
    • Spaghetti Carbonara: A beloved dish made with eggs, Pecorino Romano, guanciale (cured pork jowl), and black pepper. The heat from the pasta gently cooks the eggs, forming a rich and creamy sauce.
    • Pasta alla Gricia: Often called “Amatriciana’s white cousin,” this dish features guanciale, Pecorino Romano cheese, and black pepper. Lacking the tomatoes of Amatriciana, it offers a distinct salty, savory depth.
    • Bucatini all’Amatriciana: This pasta boasts a vibrant tomato sauce made with guanciale, Pecorino Romano, and a hint of chili. It’s a robust and comforting dish that perfectly blends salty, savory, and tangy notes.

    These four pastas are pillars of Italian cooking, highlighting the magic of simple yet powerful flavors. With easy-to-follow recipes from Recipesmondial, you can learn to master them all and cook with confidence.


    Sources

    1. https://www.statista.com/statistics/743019/leading-countries-by-pasta-consumption/
    2. https://www.bonappetit.com/test-kitchen/ingredients/article/what-are-san-marzano-tomatoes
    3. https://www.healthline.com/nutrition/eggplant-benefits
    4. https://www.tasteatlas.com/most-popular-pasta-dishes
    5. https://www.bonappetit.com/story/roman-pasta-dishes-guide
  • The 25 Best Recipes for Every Home Cook (2024 Edition)

    Recipes are step-by-step instructions for preparing dishes, including a detailed ingredient list, measurements, and cooking methods. On Recipesmondial, you can find a wide variety of the best recipes designed for home cooks of all skill levels, from quick family-friendly meals and healthy snacks to delicious desserts.

    Feeling overwhelmed by complex recipes? Struggling to find quick, healthy meals your whole family will enjoy? We understand how the joy of cooking can get lost in the search for reliable, delicious recipes. But creating wonderful, flavorful meals doesn’t have to be stressful. In fact, it can be one of the most rewarding parts of your day.

    At Recipesmondial, our mission is to make cooking enjoyable and accessible for everyone. That’s why we’ve curated the ultimate collection for 2024: “The 25 Best Recipes for Every Home Cook.” This handpicked list features everything from quick breakfast ideas and simple dinner recipes to healthy snacks and delightful desserts. Each recipe is designed for beginners and busy families, with approachable guidance that transforms everyday ingredients into truly flavorful meals made easy, helping you build confidence with every successful dish.

    Whether you want to master basic cooking skills, find reliable mealtime solutions, or simply cook without stress, this article is your go-to guide. Get ready to turn uncertainty into confidence and discover new, simple dishes that will become instant family favorites. So, what exactly makes a recipe one of the best, and how did we select our top picks?

    What Makes a Recipe One of the Best?

    What makes a recipe truly stand out? For home cooks, it’s more than just a list of ingredients. The best recipes act as trusted kitchen companions, helping you create delicious meals without stress or confusion. Here at Recipesmondial, we understand this. We know you want to enjoy cooking and discover new, flavorful meals. That’s why we focus on the key elements that elevate a good recipe to a great one.

    When you’re looking for easy recipes or family-friendly meals, certain qualities make a big difference. These qualities turn cooking from a chore into a joy, empowering you to cook confidently and eat well every day.

    Clarity and Simplicity are Key

    • Easy to Follow Instructions: A great recipe guides you step-by-step using clear, straightforward language, so you never feel overwhelmed.
    • No Jargon: We avoid technical culinary terms to ensure our recipes are truly accessible. Every instruction is designed to make sense and build your confidence.
    • Precise Measurements: Accurate ingredient names and measurements are crucial for achieving reliable results every time.

    Reliability You Can Count On

    You want meals that turn out right. The best recipes deliver consistent success, helping you create flavorful meals with ease. This consistency takes away the worry of trying new dishes, leaving you proud of what you cook. In fact, cooking at home more often can lead to healthier eating habits and better control over ingredients [1].

    Accessible Ingredients and Practicality

    • Everyday Staples: Great recipes use ingredients you can easily find at your local store. This makes cooking less of a hassle.
    • Budget-Friendly Options: We feature many recipes that focus on affordable items because eating well shouldn’t break the bank.
    • Smart Meal Prep Tips: We also offer guidance, including practical tips and smart substitutions, to help you plan your weekly meals more efficiently.

    Flexibility and Adaptability

    The best recipes are flexible because life happens. They offer variations and substitutions for different dietary needs. Whether you want to make a dish healthier or need to swap an ingredient you don’t have, a good recipe should provide options. Recipesmondial provides these helpful suggestions to empower your creativity in the kitchen.

    Delicious Flavor and Pure Enjoyment

    Ultimately, a great recipe must result in food that tastes amazing. It should guarantee a delicious outcome, transforming simple ingredients into a memorable meal. This success makes you want to cook more often and discover new simple dishes. It turns cooking into a stress-free, enjoyable experience for everyone.

    At Recipesmondial, we are dedicated to these principles. We aim to be your go-to platform for finding easy recipes fast and solving your mealtime decisions. Whether you seek quick breakfast ideas, simple dinner recipes, or healthy snacks, we are here for you. We want you to love cooking as much as we do. Let us inspire your next delicious meal!

    Our Top 5 Quick and Easy Dinner Recipes

    A warm and inviting spread of five different easy dinner recipes, including pasta, salmon, soup, stir-fry, and sheet pan sausage, beautifully arranged on a wooden table.
    A professional food photography, photorealistic, high-quality food magazine photo of a beautifully arranged spread of five distinct and inviting dinner dishes on a rustic wooden dining table. The dishes include a vibrant pasta primavera, perfectly seared salmon with roasted asparagus, a hearty lentil soup with crusty bread, flavorful chicken and vegetable stir-fry, and a quick sheet pan sausage and peppers. Each dish is individually plated or presented in an attractive serving bowl, showcasing fresh ingredients and appealing textures. The scene is lit with warm, natural light, creating an inviting and approachable atmosphere typical of a home kitchen. No artistic interpretations, illustrations, vector graphics, or abstract art.

    Life gets busy, and finding time for a delicious, home-cooked meal can feel like a challenge. If you’re overwhelmed by complex instructions or just short on time, we have the solution.

    Here at Recipesmondial, we believe cooking should be enjoyable, not stressful. We’ve gathered our top five quick and easy dinner recipes perfect for busy weeknights. These dishes are packed with flavor, proving that a satisfying, home-cooked meal can be fast and approachable. Get ready to cook with confidence and make your mealtime stress-free!

    15-Minute Lemon Herb Chicken

    Say goodbye to boring weeknight meals with this lifesaver recipe. Our 15-Minute Lemon Herb Chicken transforms simple ingredients into a bright, juicy dish that’s perfect for beginners and anyone seeking a fast, flavorful meal.

    Ingredients:

    • 2 boneless, skinless chicken breasts (about 6 oz each), sliced horizontally into thin cutlets
    • 1 tablespoon olive oil
    • 1/2 teaspoon dried Italian seasoning
    • 1/4 teaspoon garlic powder
    • Salt and freshly ground black pepper to taste
    • 2 tablespoons fresh lemon juice
    • 1 tablespoon chopped fresh parsley (optional, for garnish)

    Instructions:

    1. Pat the chicken cutlets dry with paper towels.
    2. Season both sides of the chicken with Italian seasoning, garlic powder, salt, and pepper.
    3. Heat olive oil in a large skillet over medium-high heat.
    4. Add chicken to the hot skillet and cook for 3-4 minutes per side, or until golden brown and cooked through.
    5. Remove from the heat and drizzle with fresh lemon juice.
    6. Garnish with fresh parsley if desired and serve immediately.

    Tips and Variations:

    • Make it a meal: Serve with a side of steamed green beans or a quick salad for a healthy, balanced dinner.
    • Spice it up: Add a pinch of red pepper flakes with the other seasonings.
    • Herb swap: If you don’t have Italian seasoning, use dried oregano, thyme, or a mix.
    • Meal prep: Cook extra chicken to use in salads or wraps for easy lunches later in the week.

    One-Pan Sausage and Veggies

    For the ultimate in convenience, this One-Pan Sausage and Veggies recipe is your new best friend. It delivers maximum flavor with minimal cleanup, making it a versatile and simple choice for any family. This dish is the definition of approachable home cooking.

    Ingredients:

    • 1 lb pre-cooked smoked sausage (such as kielbasa), sliced into 1/2-inch rounds
    • 1 red bell pepper, cored and chopped into 1-inch pieces
    • 1 green bell pepper, cored and chopped into 1-inch pieces
    • 1 medium onion, chopped into 1-inch pieces
    • 2 cups broccoli florets
    • 2 tablespoons olive oil
    • 1 teaspoon dried oregano
    • 1/2 teaspoon garlic powder
    • Salt and freshly ground black pepper to taste

    Instructions:

    1. Preheat your oven to 400°F (200°C). Line a large baking sheet with parchment paper for easy cleanup.
    2. In a large bowl, combine the sliced sausage, bell peppers, onion, and broccoli florets.
    3. Drizzle with olive oil and sprinkle with oregano, garlic powder, salt, and pepper. Toss well to coat everything evenly.
    4. Spread the mixture in a single layer on the prepared baking sheet.
    5. Roast for 20-25 minutes, until the vegetables are tender-crisp and lightly browned.
    6. Serve hot.

    Tips and Variations:

    • Veggie swaps: Keep things fresh by using zucchini, cherry tomatoes, asparagus, or cauliflower.
    • Spice variations: Try Cajun seasoning or a sprinkle of paprika for a different twist.
    • Make it heartier: Add pre-cooked cubed potatoes or sweet potatoes to the pan, adjusting the cooking time slightly.
    • Protein alternative: Swap the smoked sausage for chicken sausage or use firm tofu for a vegetarian option.

    Speedy Tomato Basil Pasta

    Craving comfort food without the fuss? This Speedy Tomato Basil Pasta comes together in a flash. It’s a beginner-friendly recipe that proves a classic, family-friendly dinner doesn’t require hours in the kitchen.

    Ingredients:

    • 8 oz pasta (any short shape like penne or rotini)
    • 1 tablespoon olive oil
    • 2 cloves garlic, minced
    • 1 (14.5 oz) can diced tomatoes, undrained
    • 1/2 cup vegetable broth or water
    • 1/2 teaspoon dried oregano
    • Salt and freshly ground black pepper to taste
    • 1/4 cup fresh basil leaves, chopped
    • 2 tablespoons grated Parmesan cheese (optional, for serving)

    Instructions:

    1. Cook the pasta according to package directions until al dente. Drain well and set aside.
    2. While the pasta cooks, heat the olive oil in a large skillet over medium heat.
    3. Add the minced garlic and cook for 30 seconds until fragrant, being careful not to let it burn.
    4. Stir in the diced tomatoes (with their juice), vegetable broth, and oregano. Bring the mixture to a simmer.
    5. Reduce the heat to low and let it simmer gently for 5-7 minutes to allow the flavors to meld.
    6. Season with salt and pepper to taste.
    7. Add the cooked pasta to the skillet and toss to coat it with the sauce.
    8. Stir in the fresh basil.
    9. Serve immediately, topped with Parmesan cheese if desired.

    Tips and Variations:

    • Add protein: For extra substance, stir in cooked shrimp, rotisserie chicken, or cannellini beans.
    • Cheesy twist: Make the sauce creamier by mixing in a tablespoon of cream cheese or mascarpone.
    • Fresh vs. dried herbs: While fresh basil is best, you can substitute 1 teaspoon of dried basil if needed.
    • Spice it up: A pinch of red pepper flakes will add a nice kick.

    5-Ingredient Black Bean Tacos

    When time is tight, these 5-Ingredient Black Bean Tacos are the answer. They are vibrant, satisfying, and incredibly simple to assemble. Perfect for budget-friendly cooking, this beginner-friendly recipe is a healthy and flavorful meal everyone will love.

    Ingredients:

    • 1 (15 oz) can black beans, rinsed and drained
    • 1 packet (1 oz) taco seasoning
    • 1/2 cup water
    • 12 small corn or flour tortillas
    • 1 cup shredded cheese (cheddar or Monterey Jack)

    Instructions:

    1. In a medium saucepan, combine the rinsed black beans, taco seasoning, and water.
    2. Bring to a simmer over medium heat. Cook for 5-7 minutes, stirring occasionally, until the sauce thickens slightly.
    3. While the beans simmer, warm the tortillas in a dry skillet over medium heat for 30 seconds per side, or microwave them briefly.
    4. To assemble, spoon the black bean mixture into the warm tortillas.
    5. Top with shredded cheese.
    6. Serve immediately.

    Tips and Variations:

    • Topping ideas: Elevate your tacos by adding your favorite toppings, such as salsa, diced avocado, sour cream, or chopped cilantro.
    • Veggie boost: Stir a handful of corn or chopped bell peppers into the beans while they simmer.
    • Vegan option: Omit the cheese or use a dairy-free shredded cheese substitute.
    • Make it spicy: Add a dash of your favorite hot sauce to the bean mixture.
    • Historical note: Tacos have a rich history, with evidence suggesting their existence in Mexico before the Spanish arrived [2].

    Simple Sheet Pan Salmon

    It doesn’t get much easier than this Simple Sheet Pan Salmon. A prime example of approachable home cooking, this recipe delivers amazing flavor with minimal effort. It’s a fantastic, stress-free way to enjoy a quick and nutritious dinner.

    Ingredients:

    • 2 salmon fillets (about 6 oz each)
    • 1 tablespoon olive oil
    • 1/2 teaspoon garlic powder
    • 1/4 teaspoon dried dill
    • Salt and freshly ground black pepper to taste
    • 1 cup broccoli florets
    • 1 cup cherry tomatoes
    • Lemon wedges, for serving

    Instructions:

    1. Preheat your oven to 400°F (200°C). Line a large baking sheet with parchment paper.
    2. Pat the salmon fillets dry and place them on one side of the prepared baking sheet.
    3. Drizzle the salmon with 1/2 tablespoon of olive oil. Sprinkle with garlic powder, dill, salt, and pepper.
    4. In a medium bowl, toss the broccoli florets and cherry tomatoes with the remaining 1/2 tablespoon of olive oil and a pinch of salt and pepper.
    5. Arrange the seasoned vegetables on the other side of the baking sheet.
    6. Bake for 12-15 minutes, or until the salmon flakes easily with a fork and the vegetables are tender-crisp. Cooking time may vary depending on the salmon’s thickness.
    7. Serve immediately with lemon wedges.

    Tips and Variations:

    • Flavor booster: Add a sprinkle of paprika or a dash of onion powder to the salmon for more flavor.
    • Veggie swaps: Asparagus, green beans, or sliced zucchini also work beautifully in this dish.
    • Different fish: This method works well with cod, halibut, or other thick white fish.
    • Meal prep: Cook extra salmon and veggies for a quick and healthy lunch the next day.

    5 Family-Friendly Recipes Kids Will Love

    A diverse family, including two children, joyfully cooking together in a bright kitchen, making a fun, family-friendly meal like mini pizzas.
    A professional food photography, photorealistic, high-quality food magazine photo featuring a diverse family (mother, father, and two children, aged approximately 6 and 9) happily cooking together in a bright, modern, and clean home kitchen. The parents are smiling and gently guiding the children as they participate in preparing a colorful, kid-friendly meal, such as making mini pizzas or assembling vibrant veggie skewers. One child is carefully adding toppings to a pizza, while another is stirring a bowl of ingredients. The focus is on the joyful, collaborative, and encouraging atmosphere of family cooking. Real human cooks in a real kitchen setting. The background shows hints of kitchen utensils and fresh ingredients. No artistic interpretations, illustrations, vector graphics, or abstract art.

    Mealtime with kids can be a challenge, but it doesn’t have to be stressful. At Recipesmondial, we believe cooking should be an enjoyable experience for the whole family. We also know that getting kids involved in healthy eating can make a big difference. This section offers a collection of simple dinner recipes designed to delight young taste buds and make parents’ lives easier. These family-friendly meals and easy recipes promise flavor, fun, and less fuss in the kitchen. Get ready to transform mealtime into happy memories with these approachable home cooking ideas.

    Homemade Mac and Cheese

    Say goodbye to boxed versions! This homemade mac and cheese is the ultimate comfort food. It’s creamy, cheesy, and incredibly simple to make. This beginner-friendly recipe will quickly become a weeknight favorite. Plus, making it yourself gives you full control over the ingredients.

    Yields: 4 servings

    Prep time: 10 minutes

    Cook time: 20 minutes

    Ingredients:
    • 1 pound elbow macaroni
    • 1/2 cup unsalted butter (1 stick)
    • 1/2 cup all-purpose flour
    • 4 cups milk (whole or 2% works best)
    • 1 teaspoon salt
    • 1/2 teaspoon black pepper
    • 1/4 teaspoon ground mustard (optional, for flavor boost)
    • 4 cups shredded sharp cheddar cheese
    Instructions:
    1. Cook the macaroni according to package directions. Drain well and set aside.
    2. In a large saucepan or Dutch oven, melt the butter over medium heat.
    3. Slowly whisk in the flour and cook for 1 minute, stirring constantly, to create a roux.
    4. Gradually whisk in the milk until the mixture is smooth. Continue whisking for 5-7 minutes as the sauce thickens.
    5. Stir in the salt, pepper, and ground mustard (if using).
    6. Remove the saucepan from the heat. Add the shredded cheddar cheese in handfuls, stirring until each batch is fully melted and the sauce is smooth.
    7. Add the cooked macaroni to the cheese sauce and stir to combine thoroughly.
    8. Serve immediately.
    Tips & Variations:
    • For Extra Flavor: Try adding a pinch of paprika or a dash of hot sauce for adult palates.
    • Add Veggies: To sneak in extra nutrition, stir in cooked peas, finely chopped carrots, or steamed broccoli florets.
    • Crispy Topping: For a delightful crust, sprinkle breadcrumbs mixed with melted butter on top and bake at 375°F (190°C) for 15 minutes.

    Crispy Baked Chicken Tenders

    Forget the fried stuff! These flavorful meals made easy are baked to perfection, resulting in chicken tenders that are wonderfully crispy on the outside and juicy on the inside. This simple dinner recipe is a healthier option that’s just as delicious. They’re perfect for dipping and always a hit with kids.

    Yields: 4 servings

    Prep time: 15 minutes

    Cook time: 20-25 minutes

    Ingredients:
    • 1 1/2 pounds boneless, skinless chicken tenderloins
    • 1 cup panko breadcrumbs
    • 1/2 cup all-purpose flour
    • 2 large eggs, beaten
    • 1 teaspoon garlic powder
    • 1 teaspoon onion powder
    • 1/2 teaspoon paprika
    • 1/2 teaspoon salt
    • 1/4 teaspoon black pepper
    • 2 tablespoons olive oil or cooking spray
    Instructions:
    1. Preheat your oven to 400°F (200°C). Line a baking sheet with parchment paper or a silicone mat.
    2. Set up a dredging station with three shallow dishes. Place the flour in the first dish, the beaten eggs in the second, and the panko breadcrumbs, garlic powder, onion powder, paprika, salt, and pepper in the third.
    3. Pat the chicken tenders dry with paper towels.
    4. Dip each tender first in the flour, shaking off any excess.
    5. Next, dip it into the egg, allowing any extra to drip off.
    6. Finally, coat the tender completely in the panko mixture, pressing gently to help the breadcrumbs adhere.
    7. Arrange the coated tenders on the prepared baking sheet in a single layer. Lightly drizzle with olive oil or spray with cooking spray.
    8. Bake for 20-25 minutes, flipping the tenders halfway through, until they are golden brown and cooked through. The internal temperature should reach 165°F (74°C).
    9. Serve immediately with your kids’ favorite dipping sauces.
    Tips & Variations:
    • Spice It Up: Add a pinch of cayenne pepper to the breadcrumb mixture for a slight kick.
    • Gluten-Free Option: Use gluten-free flour and gluten-free panko breadcrumbs.
    • For Extra Tenderness: Marinate the tenders in buttermilk for at least 30 minutes before breading for exceptionally tender and flavorful chicken.

    Easy Mini Pizzas

    Get ready for a fun, customizable, and quick dinner! These easy mini pizzas are perfect for busy weeknights and are a fantastic way to involve little chefs in the cooking process. Letting kids choose their own toppings makes them even more excited to eat their meal.

    Yields: 4-6 mini pizzas

    Prep time: 10 minutes

    Cook time: 10-12 minutes

    Ingredients:
    • 1 package (8-count) English muffins, split
    • 1/2 cup pizza sauce
    • 1 1/2 cups shredded mozzarella cheese
    • Assorted toppings: pepperoni, cooked sausage, sliced bell peppers, mushrooms, olives, pineapple
    • Optional: a sprinkle of dried oregano or Italian seasoning
    Instructions:
    1. Preheat your oven to 375°F (190°C). Arrange the split English muffins cut-side up on a baking sheet.
    2. Lightly toast the muffins in the oven for 3-5 minutes to prevent them from getting soggy.
    3. Remove the muffins from the oven. Spread about 1 tablespoon of pizza sauce evenly over each half.
    4. Sprinkle each with mozzarella cheese.
    5. Let the kids add their favorite toppings, leaving a small space around the edge for the crust.
    6. Return the baking sheet to the oven and bake for 10-12 minutes, or until the cheese is bubbly and the crusts are golden brown.
    7. If desired, sprinkle with dried oregano before serving.
    Tips & Variations:
    • Different Bases: Instead of English muffins, try using pita bread, bagels, or pre-made mini pizza crusts.
    • Veggie Power: Finely chop vegetables like spinach or zucchini and mix them into the pizza sauce before spreading.
    • Cheese Blend: Experiment with a mix of mozzarella, provolone, and parmesan for a richer flavor.

    Hearty Beef and Vegetable Stew

    Nothing beats a warm, comforting bowl of stew on a chilly evening. This hearty beef and vegetable stew is packed with tender meat and wholesome vegetables, making it a satisfying and nutritious meal for the entire family. Best of all, it’s a one-pot meal, which makes cleanup a breeze.

    Yields: 6 servings

    Prep time: 20 minutes

    Cook time: 2 hours 30 minutes

    Ingredients:
    • 2 tablespoons olive oil
    • 1 1/2 pounds beef chuck, cut into 1-inch cubes
    • 1 large yellow onion, chopped
    • 2 carrots, peeled and cut into 1/2-inch pieces
    • 2 celery stalks, cut into 1/2-inch pieces
    • 3 cloves garlic, minced
    • 4 cups beef broth
    • 1 (14.5-ounce) can diced tomatoes, undrained
    • 1 tablespoon Worcestershire sauce
    • 1 teaspoon dried thyme
    • 1 bay leaf
    • 2 large potatoes, peeled and cut into 1-inch cubes
    • 1 cup frozen peas (added at the end)
    • Salt and black pepper to taste
    • Optional: 2 tablespoons cornstarch mixed with 2 tablespoons cold water (for thickening)
    Instructions:
    1. Heat the olive oil in a large Dutch oven or heavy pot over medium-high heat.
    2. Season the beef cubes with salt and pepper. Working in batches, brown the beef on all sides to build deep flavor. Remove the browned beef and set it aside.
    3. Add the chopped onion, carrots, and celery to the pot. Sauté for 5-7 minutes, until the vegetables begin to soften.
    4. Stir in the minced garlic and cook for 1 minute more until fragrant.
    5. Return the browned beef to the pot. Add the beef broth, diced tomatoes with their juice, Worcestershire sauce, thyme, and bay leaf.
    6. Bring the stew to a boil, then reduce the heat to low. Cover and simmer for 1 hour and 30 minutes to allow the beef to become tender.
    7. Add the cubed potatoes and continue to simmer, covered, for another 30-45 minutes, or until the potatoes are fork-tender.
    8. Remove the bay leaf. Stir in the frozen peas and cook for 5 more minutes.
    9. If you prefer a thicker stew, stir in the cornstarch slurry and cook for a few minutes until the stew has thickened.
    10. Taste and adjust the seasoning with salt and pepper as needed.
    11. Serve warm with crusty bread or over rice.
    Tips & Variations:
    • Slow Cooker Option: Brown the beef and sauté the vegetables as directed. Then, combine all ingredients (except peas and cornstarch) in a slow cooker. Cook on low for 6-8 hours or high for 3-4 hours. Stir in the peas during the last 30 minutes of cooking.
    • Extra Veggies: Feel free to add other vegetables like corn, green beans, or sweet potatoes.
    • Herb Boost: Add fresh rosemary or parsley near the end of cooking for a burst of fresh flavor.

    Cheesy Broccoli and Rice Casserole

    This cheesy broccoli and rice casserole is a fantastic way to get kids to eat their greens. It’s creamy, cheesy, and incredibly satisfying. This simple dinner recipe can be served as a delicious side dish or a light main course, making it a wonderful approachable home cooking option for busy weeknights.

    Yields: 6 servings

    Prep time: 15 minutes

    Cook time: 25-30 minutes

    Ingredients:
    • 2 tablespoons butter
    • 1 small yellow onion, chopped
    • 2 cloves garlic, minced
    • 1 (10.5-ounce) can cream of mushroom soup
    • 1/2 cup milk
    • 1/2 cup sour cream
    • 1 teaspoon salt
    • 1/2 teaspoon black pepper
    • 4 cups cooked white rice (from about 2 cups uncooked)
    • 4 cups fresh broccoli florets, steamed until tender-crisp
    • 2 cups shredded cheddar cheese, divided
    Instructions:
    1. Preheat your oven to 375°F (190°C). Lightly grease a 9×13 inch baking dish.
    2. In a large skillet over medium heat, melt the butter. Add the chopped onion and cook for 3-5 minutes, until softened.
    3. Stir in the minced garlic and cook for another minute until fragrant.
    4. Remove the skillet from the heat. Stir in the cream of mushroom soup, milk, sour cream, salt, and pepper until well combined.
    5. Gently fold in the cooked rice, steamed broccoli, and 1 1/2 cups of the shredded cheddar cheese.
    6. Pour the mixture into the prepared baking dish and spread it in an even layer.
    7. Sprinkle the remaining 1/2 cup of cheddar cheese over the top.
    8. Bake for 25-30 minutes, until the casserole is bubbly and the cheese on top is golden brown.
    9. Let the casserole rest for a few minutes before serving.
    Tips & Variations:
    • Add Protein: Stir in cooked, shredded chicken or diced ham for a more substantial meal.
    • Different Cheeses: Experiment with a blend of cheddar, Colby, or Monterey Jack cheese.
    • Frozen Broccoli: If using frozen broccoli, thaw it and drain any excess water before adding it to the mixture.
    • Brown Rice Option: Use cooked brown rice for a whole grain boost. You may need to adjust the liquid slightly, as brown rice can be more absorbent.

    5 Healthy Recipes for Nutritious Meals

    Eating well can be both simple and delicious. Many home cooks feel overwhelmed by complex recipes and aren’t sure how to make healthy, tasty meals quickly. At Recipesmondial, we understand—and we’re here to help. We believe nutritious food should be easy to prepare and packed with flavor.

    This collection features five fantastic, healthy recipes perfect for anyone seeking balanced and flavorful options. From quick lunches and refreshing breakfasts to satisfying dinners, these dishes are designed to fit into any busy schedule. Get ready to cook with confidence and enjoy every bite!

    Quinoa Salad with Roasted Vegetables

    This vibrant quinoa salad is a nutritional powerhouse, packed with protein, fiber, and delicious roasted vegetables. It’s also incredibly versatile and perfect for meal prep. Enjoy it warm or cold for a convenient and healthy meal.

    Ingredients:

    • 1 cup quinoa, rinsed
    • 2 cups vegetable broth or water
    • 1 red bell pepper, diced
    • 1 cup broccoli florets
    • 1 zucchini, diced
    • 1 tablespoon olive oil
    • 1/2 teaspoon salt
    • 1/4 teaspoon black pepper
    • 2 tablespoons fresh lemon juice
    • 2 tablespoons fresh parsley, chopped

    Instructions:

    1. Cook the Quinoa: In a medium saucepan, combine the rinsed quinoa and broth (or water). Bring to a boil, then reduce the heat to low. Cover and simmer for 15 minutes, or until all the liquid is absorbed. Fluff with a fork and set aside.
    2. Prepare Vegetables: Preheat your oven to 400°F (200°C). In a large bowl, toss the diced bell pepper, broccoli, and zucchini with olive oil, salt, and pepper.
    3. Roast Vegetables: Spread the seasoned vegetables in a single layer on a baking sheet. Roast for 20-25 minutes, until tender-crisp.
    4. Combine: In a large bowl, combine the cooked quinoa and roasted vegetables.
    5. Finish: Drizzle with fresh lemon juice and stir in the chopped parsley. Serve immediately or chill for later.

    Tips and Variations:

    • Vary Your Veggies: Feel free to use carrots, cherry tomatoes, or asparagus.
    • Add Protein: Include cooked chicken, chickpeas, or crumbled feta cheese.
    • Flavor Boost: A dash of balsamic glaze or a sprinkle of toasted nuts adds extra zest.
    • Meal Prep Idea: Make a large batch and portion it into containers for easy lunches all week.

    Grilled Chicken and Avocado Wrap

    This fresh and satisfying grilled chicken and avocado wrap is the perfect solution for a quick, healthy meal. It’s easy to assemble, making it an ideal light lunch or a simple dinner when you’re short on time.

    Ingredients:

    • 2 boneless, skinless chicken breasts
    • 1 tablespoon olive oil
    • 1/2 teaspoon salt
    • 1/4 teaspoon black pepper
    • 4 large whole wheat tortillas
    • 1 ripe avocado, sliced
    • 1 cup mixed greens or spinach
    • 2 tablespoons mayonnaise or Greek yogurt dressing
    • 1/4 cup finely diced red onion (optional)

    Instructions:

    1. Prepare Chicken: Pat the chicken breasts dry and rub them with olive oil, salt, and pepper.
    2. Grill Chicken: Heat a grill pan or outdoor grill over medium-high heat. Grill the chicken for 5-7 minutes per side, or until the internal temperature reaches 165°F (74°C). Let it rest for a few minutes before slicing it into thin strips.
    3. Assemble Wraps: Lay out the tortillas and spread a thin layer of mayonnaise or dressing on each.
    4. Layer Ingredients: Evenly distribute the mixed greens, sliced chicken, avocado, and red onion (if using) onto each tortilla.
    5. Wrap It Up: Fold in the sides of the tortilla, then roll it up tightly. Slice in half and enjoy!

    Tips and Variations:

    • Different Protein: Use leftover rotisserie chicken or grilled salmon instead.
    • Extra Veggies: Add bell pepper strips, shredded carrots, or cucumber slices.
    • Spice It Up: A pinch of chili powder on the chicken or a squeeze of lime juice adds zing.
    • Make Ahead: Grill the chicken in advance and store it in the fridge to make assembly even faster.

    Lentil Soup from Scratch

    Warm, comforting, and packed with nutrition, this lentil soup is a fantastic family-friendly meal. Made with simple, budget-friendly ingredients, it’s a hearty and perfect choice for a cozy evening. This recipe is also great for beginners looking to build their cooking skills.

    Ingredients:

    • 1 tablespoon olive oil
    • 1 medium onion, chopped
    • 2 carrots, chopped
    • 2 celery stalks, chopped
    • 2 cloves garlic, minced
    • 1 cup brown or green lentils, rinsed
    • 6 cups vegetable broth
    • 1 (14.5 ounce) can diced tomatoes, undrained
    • 1 teaspoon dried thyme
    • 1/2 teaspoon dried cumin
    • 1 bay leaf
    • Salt and black pepper to taste
    • Fresh parsley for garnish (optional)

    Instructions:

    1. Sauté Aromatics: Heat olive oil in a large pot or Dutch oven over medium heat. Add the onion, carrots, and celery and cook for 5-7 minutes, until softened.
    2. Add Garlic and Spices: Stir in the minced garlic, thyme, and cumin. Cook for another minute until fragrant.
    3. Combine Ingredients: Add the rinsed lentils, vegetable broth, diced tomatoes, and bay leaf to the pot. Stir well.
    4. Simmer: Bring the soup to a boil, then reduce the heat to low. Cover and simmer for 30-40 minutes, or until the lentils are tender.
    5. Season and Serve: Remove the bay leaf. Season the soup with salt and pepper to taste. Garnish with fresh parsley if desired and serve hot.

    Tips and Variations:

    • Add Greens: Stir in a handful of fresh spinach or kale during the last 5 minutes of cooking.
    • Spicier Kick: Add a pinch of red pepper flakes with the other spices.
    • Serve With: A slice of crusty bread or a side salad completes this meal.
    • Meal Prep: This soup tastes even better the next day, so consider making a big batch! Store leftovers in the fridge for up to 4 days or freeze for up to 3 months.

    Baked Sweet Potatoes with Black Beans

    This recipe for baked sweet potatoes with black beans is a simple, vibrant, and filling weeknight dinner. Packed with plant-based goodness, it’s an approachable dish that makes mealtime decisions effortless.

    Ingredients:

    • 2 medium sweet potatoes
    • 1 (15-ounce) can black beans, rinsed and drained
    • 1/2 cup corn (fresh, frozen, or canned)
    • 1/4 cup salsa
    • 2 tablespoons chopped fresh cilantro
    • 1 tablespoon olive oil
    • Salt and black pepper to taste
    • Optional toppings: Greek yogurt, sour cream, shredded cheese, avocado slices

    Instructions:

    1. Bake Sweet Potatoes: Preheat your oven to 400°F (200°C). Pierce the sweet potatoes several times with a fork, rub them lightly with olive oil, and place them directly on an oven rack. Bake for 45-60 minutes, or until very tender.
    2. Prepare Filling: While the potatoes are baking, combine the rinsed black beans, corn, salsa, and cilantro in a small bowl.
    3. Warm Filling (Optional): To warm the filling, heat it in a saucepan over medium heat for 5-7 minutes or in the microwave for 1-2 minutes.
    4. Assemble: Carefully slice each baked sweet potato lengthwise down the middle and fluff the inside with a fork. Season with a little salt and pepper.
    5. Serve: Spoon the black bean mixture generously into each sweet potato. Add any desired toppings and serve immediately.

    Tips and Variations:

    • Quick Prep: To save time, microwave the sweet potatoes for 5-10 minutes before baking. This significantly reduces oven time.
    • Protein Boost: Add cooked ground turkey, chicken, or tofu to the black bean mixture.
    • Flavor Combos: Try different salsas. A squeeze of lime juice always brightens the flavors.
    • Meal Prep: Bake the sweet potatoes ahead of time and store them in the fridge. Reheat and top them when you’re ready to eat.

    Greek Yogurt Parfait with Berries

    Start your day with a burst of flavor and nutrition! This Greek yogurt parfait is a protein-packed, refreshing, and incredibly simple recipe. Perfect as a quick breakfast or a healthy snack, it’s a great way for beginners to build confidence in the kitchen.

    Ingredients:

    • 1 cup plain Greek yogurt
    • 1/2 cup mixed berries (fresh or frozen, thawed)
    • 1/4 cup granola
    • 1 tablespoon honey or maple syrup (optional)

    Instructions:

    1. Layer Yogurt: Spoon half of the Greek yogurt into a glass or small bowl.
    2. Add Berries: Top the yogurt with half of the mixed berries.
    3. Sprinkle Granola: Add half of the granola over the berries.
    4. Repeat Layers: Repeat the layers with the remaining yogurt, berries, and granola.
    5. Drizzle and Serve: Drizzle with honey or maple syrup, if desired, and serve immediately.

    Tips and Variations:

    • Fruit Choices: Use sliced bananas, peaches, or kiwi for variety.
    • Add Crunch: Sprinkle with chopped nuts, seeds (like chia or flax), or toasted coconut flakes.
    • Flavor Enhancers: A dash of cinnamon or vanilla extract in the yogurt is delightful.
    • Make Ahead: Layer the parfaits in jars the night before, but add the granola just before serving to keep it crunchy.

    5 Best Dessert Recipes to Satisfy Your Sweet Tooth

    An exquisite collection of five diverse and tempting desserts, including chocolate cake, fruit tart, panna cotta, cookies, and lemon loaf, beautifully arranged on a platter.
    A professional food photography, photorealistic, high-quality food magazine photo showcasing an irresistible array of five different decadent desserts. The desserts are beautifully presented on a mix of elegant plates and a pristine white marble platter. Featured desserts include a rich, multi-layered chocolate cake slice with a smooth ganache, a vibrant fruit tart with glistening berries, a creamy vanilla panna cotta in a clear glass, warm, freshly baked chocolate chip cookies stacked artfully, and a perfectly glazed lemon loaf. Each dessert highlights its unique texture and color, inviting a craving. The lighting is soft and warm, emphasizing the deliciousness and indulgence. No artistic interpretations, illustrations, vector graphics, or abstract art.

    After savoring a delicious meal, it’s time to treat your sweet tooth! Desserts bring joy and offer a wonderful way to end a busy day or celebrate a special moment.

    At Recipesmondial, we believe baking should be fun and stress-free. You don’t need to be a pastry chef to create amazing treats. Our selection of dessert recipes focuses on easy, approachable home cooking. These simple dessert recipes will help you build confidence in the kitchen. Each one guarantees a delicious result, even for beginner cooks.

    Say goodbye to feeling overwhelmed by complex instructions. We’re here to guide you. Discover delightful sweets that are quick to prepare and incredibly delicious. You’ll love sharing these family-friendly treats. Let’s dive into some truly irresistible options!

    Classic Chocolate Chip Cookies

    Nothing beats a warm, gooey chocolate chip cookie straight from the oven. This timeless classic is a cornerstone of home baking. Our easy cookie recipe is perfect for building your confidence. It’s a beloved treat for family gatherings and celebrations.

    • Why you’ll love them: This recipe uses simple ingredients to deliver reliable results every time, giving you perfectly chewy edges and soft centers.
    • Cooking Tip: For an even richer flavor, chill your cookie dough for at least 30 minutes before baking. This simple step deepens the taste.
    • Substitution Idea: Feel free to swap half the chocolate chips for chopped nuts. Walnuts or pecans add a lovely crunch.

    No-Bake Cheesecake Jars

    Craving cheesecake but don’t want to turn on the oven? These no-bake cheesecake jars are your perfect solution. They are elegant, refreshing, and incredibly simple to make. This dessert is ideal for a quick treat or stress-free entertaining, and it’s one of our top beginner-friendly recipes.

    • Why you’ll love them: They require minimal fuss and no baking. Plus, individual portions make serving a breeze.
    • Cooking Tip: Layer with fresh berries or a fruit compote to add a burst of vibrant flavor and color.
    • Variation Idea: Try different cookie crumbs for the base. Graham crackers are classic, but crushed Oreos or shortbread cookies are also delicious.

    Fudgy Brownies

    For the ultimate chocolate indulgence, look no further than our fudgy brownie recipe. These rich, dense squares are pure bliss and a fantastic addition to any celebration. This recipe proves that making delicious homemade desserts is truly possible. Our step-by-step guidance will have you baking with confidence.

    • Why you’ll love them: This recipe promises a consistently fudgy texture. It’s simple to mix and delivers maximum chocolate flavor.
    • Cooking Tip: Do not overbake your brownies. A slightly underbaked center is often the key to that perfect gooey texture.
    • Add-in Idea: Swirl in some peanut butter or sprinkle with sea salt before baking to elevate the flavor profile beautifully.

    Apple Crumble with Oat Topping

    Warm, comforting, and wonderfully aromatic, apple crumble is a hug in a bowl. This dessert is perfect for any season, using everyday ingredients and an incredibly forgiving method. It’s a wonderful example of approachable home cooking and makes a great family-friendly dessert.

    • Why you’ll love them: It’s much simpler than a pie but just as satisfying. The buttery oat topping adds a delightful crunch.
    • Cooking Tip: For extra spice, add a pinch of nutmeg or allspice to your apple filling.
    • Serving Suggestion: Enjoy it warm with a scoop of vanilla ice cream or a dollop of whipped cream.

    Easy Banana Bread

    Don’t let those overripe bananas go to waste! Our easy banana bread recipe transforms them into a moist, flavorful loaf. As a truly beginner-friendly recipe, this delicious treat is perfect for breakfast, snacks, or dessert. It’s also a great make-ahead option.

    • Why you’ll love them: This recipe is incredibly simple to follow and results in a perfectly moist and tender loaf every time.
    • Cooking Tip: The riper your bananas, the sweeter and more flavorful your bread will be. Look for bananas with lots of brown spots.
    • Variation Idea: Stir in a handful of chocolate chips or chopped walnuts. A sprinkle of cinnamon sugar on top adds a nice finish.

    5 Beginner-Friendly Cooking Recipes to Build Confidence

    Starting your cooking journey can feel overwhelming, but it doesn’t have to be. At Recipesmondial, we believe cooking should be enjoyable, not stressful. This collection of beginner-friendly recipes is designed to build your confidence, one delicious dish at a time. Using simple ingredients and straightforward steps, you’ll master essential techniques and learn to love the process. Get ready to go from uncertain in the kitchen to cooking with confidence!

    Here, you’ll discover quick and reliable meals with step-by-step guidance. Our focus is on approachable home cooking that tastes amazing. Let’s make mealtime delicious, flavorful, and stress-free.

    Perfect Scrambled Eggs

    Learning to make perfect scrambled eggs is a fundamental cooking skill and a fantastic way to build kitchen confidence. As a quick breakfast, this simple dish proves that delicious food doesn’t need to be complicated. Our easy recipe will teach you proper heat control and gentle stirring, so you can achieve creamy, fluffy eggs every time.

    Yields: 1 serving

    Prep time: 2 minutes

    Cook time: 3-5 minutes

    Ingredients:

    • 2 large eggs
    • 1 tablespoon milk or cream (optional, for creamier eggs)
    • 1/4 teaspoon salt
    • Pinch of black pepper
    • 1 teaspoon butter or olive oil

    Instructions:

    1. Crack the eggs into a small bowl.
    2. Add the milk or cream, salt, and pepper.
    3. Whisk gently with a fork until just combined. Do not over-whisk.
    4. Heat the butter or oil in a non-stick skillet over medium-low heat.
    5. Pour the egg mixture into the warm skillet.
    6. Let the edges set for about 30 seconds without stirring.
    7. Gently push the cooked egg from the edges towards the center with a spatula.
    8. Tilt the pan to let the uncooked egg flow underneath.
    9. Continue this process slowly, folding the eggs until they are mostly set but still slightly moist.
    10. Remove from heat immediately. The residual heat will continue to cook them.
    11. Serve warm and enjoy your simple yet delicious meal!

    Tips for Success:

    • Low and Slow: Cook eggs over medium-low heat. This prevents rubbery eggs.
    • Don’t Overcook: Take the eggs off the heat when they are still a bit wet. They will finish cooking on the plate.
    • Use a Non-Stick Pan: This prevents sticking and makes cleanup easy.

    Variations & Substitutions:

    • Cheesy Eggs: Stir in a tablespoon of shredded cheddar or mozzarella at the end.
    • Herby Eggs: Add a pinch of fresh chives or parsley.
    • Spice It Up: Include a dash of hot sauce or red pepper flakes.

    Simple Roasted Chicken

    While roasting a whole chicken may seem daunting, this beginner-friendly recipe is incredibly rewarding. Our method yields a juicy, flavorful bird with perfectly crispy skin, making it ideal for family dinners or meal prep. You’ll learn basic seasoning and roasting techniques that will boost your confidence and give you a new go-to meal.

    Yields: 4-6 servings

    Prep time: 15 minutes

    Cook time: 1 hour 15 minutes – 1 hour 30 minutes

    Ingredients:

    • 1 whole chicken (3-4 pounds)
    • 2 tablespoons olive oil
    • 1 teaspoon salt
    • 1/2 teaspoon black pepper
    • 1 teaspoon garlic powder
    • 1/2 teaspoon paprika
    • Optional: fresh rosemary or thyme sprigs, lemon wedges, onion slices

    Instructions:

    1. Preheat your oven to 400°F (200°C).
    2. Remove the giblets from the chicken cavity. Pat the chicken very dry with paper towels. This step is crucial for achieving crispy skin.
    3. Place the chicken in a roasting pan or on a baking sheet.
    4. Drizzle the olive oil over the chicken and rub it all over the skin.
    5. In a small bowl, mix together the salt, pepper, garlic powder, and paprika.
    6. Sprinkle this seasoning blend evenly over the entire chicken.
    7. If using, place rosemary, thyme, lemon, or onion inside the cavity.
    8. Roast for 1 hour 15 minutes to 1 hour 30 minutes.
    9. Confirm the chicken is cooked by inserting a meat thermometer into the thickest part of the thigh, making sure not to touch the bone. It is ready when the temperature reads 165°F (74°C) [3].
    10. Remove the chicken from the oven and let it rest for 10-15 minutes before carving. This step keeps the meat juicy.

    Tips for Success:

    • Pat Dry: Dry skin is the key to crispiness. Don’t skip this step.
    • Don’t Overcrowd: Give the chicken space in the pan to ensure it cooks evenly.
    • Resting is Key: Always let your roasted chicken rest. This simple step ensures a juicy result.

    Variations & Substitutions:

    • Herb Variations: Try different herbs like dried oregano or Italian seasoning.
    • Spicy Kick: Add a pinch of cayenne pepper to your seasoning blend.
    • Root Vegetables: Roast chopped carrots, potatoes, and onions around the chicken for a complete meal.

    Fluffy Pancakes from Scratch

    Impress yourself by whipping up a batch of fluffy pancakes from scratch. This classic breakfast is surprisingly easy and a delightful way to build your cooking skills. Our recipe teaches you the fundamentals of batter consistency and cooking temperature, so you can create light, airy stacks and enjoy a delicious homemade treat.

    Yields: 8-10 pancakes

    Prep time: 10 minutes

    Cook time: 15-20 minutes

    Ingredients:

    • 1 1/2 cups all-purpose flour
    • 3 1/2 teaspoons baking powder
    • 1 teaspoon salt
    • 1 tablespoon white sugar
    • 1 1/4 cups milk
    • 1 large egg
    • 3 tablespoons melted butter, plus extra for greasing

    Instructions:

    1. In a large bowl, whisk together the flour, baking powder, salt, and sugar.
    2. In a separate medium bowl, whisk the milk, egg, and melted butter until well combined.
    3. Pour the wet ingredients into the dry ingredients.
    4. Stir just until combined. A few lumps are okay; be careful not to overmix the batter.
    5. Heat a lightly buttered griddle or large non-stick skillet over medium heat.
    6. Pour about 1/4 cup of batter per pancake onto the hot griddle.
    7. Cook for 2-3 minutes per side, waiting for bubbles to form on the surface and the edges to look golden-brown.
    8. Flip carefully with a spatula and cook for another 1-2 minutes, until the other side is also golden brown.
    9. Serve immediately with your favorite toppings.

    Tips for Success:

    • Do Not Overmix: Lumps in the batter are fine. Overmixing develops gluten and leads to tough pancakes.
    • Right Temperature: Test the griddle with a drop of water. If it sizzles and evaporates, it’s ready.
    • Fresh Baking Powder: Ensure your baking powder is not expired for maximum fluffiness.

    Variations & Substitutions:

    • Buttermilk Pancakes: Use buttermilk instead of regular milk for a tangier flavor.
    • Fruity Pancakes: Gently fold blueberries, sliced bananas, or chocolate chips into the batter right before cooking.
    • Whole Wheat: Substitute half of the all-purpose flour with whole wheat flour for a heartier, healthier option.

    Basic Tomato Sauce

    A good tomato sauce is a foundational recipe for any home cook. Perfect for pasta, pizza, or as a base for stews, this approachable recipe puts you in control of the flavors. Once you see how easy it is to make your own, you’ll say goodbye to jarred sauce. This simple recipe is both versatile and delicious.

    Yields: About 3 cups

    Prep time: 10 minutes

    Cook time: 25-30 minutes

    Ingredients:

    • 2 tablespoons olive oil
    • 1/2 medium yellow onion, finely diced
    • 2 cloves garlic, minced
    • 1 (28-ounce) can crushed tomatoes
    • 1/2 teaspoon salt, or to taste
    • 1/4 teaspoon black pepper, or to taste
    • 1 teaspoon dried oregano
    • Pinch of red pepper flakes (optional, for a little heat)
    • 1 tablespoon fresh basil, chopped (optional, for serving)

    Instructions:

    1. Heat the olive oil in a medium saucepan over medium heat.
    2. Add the diced onion and cook until softened and translucent, about 5-7 minutes.
    3. Stir in the minced garlic and cook for another minute until fragrant. Be careful not to burn it.
    4. Pour in the crushed tomatoes, then add the salt, pepper, dried oregano, and red pepper flakes (if using).
    5. Stir everything together and bring the sauce to a gentle simmer.
    6. Reduce the heat to low, cover the saucepan, and let it simmer for at least 20 minutes, stirring occasionally. This allows the flavors to meld.
    7. Taste the sauce and adjust seasonings as needed.
    8. Remove from heat. If using, stir in fresh basil just before serving.
    9. Serve over pasta, on pizza, or use in other recipes.

    Tips for Success:

    • Cook Onion Well: Taking the time to soften the onions builds a sweet, flavorful base for your sauce.
    • Don’t Burn Garlic: Garlic cooks quickly and becomes bitter when burned. Add it just before the tomatoes.
    • Simmer Gently: A slow, gentle simmer is key to deepening the flavors. Avoid a rapid boil.

    Variations & Substitutions:

    • Sweetness: If your tomatoes are acidic, add a pinch of sugar to balance the flavor.
    • Fresh Tomatoes: Use 2 pounds of fresh, ripe tomatoes (blanched, peeled, and crushed) instead of canned.
    • Herb Garden: Experiment with fresh thyme or marjoram for different aromatic notes.

    Garlic Butter Shrimp

    Garlic butter shrimp is a quick and elegant meal that’s packed with flavor. As an excellent beginner recipe that comes together in minutes, it’s a perfect choice for a speedy dinner. You’ll learn how to cook shrimp perfectly, avoiding a rubbery texture, and see how simple ingredients can create an impressive result. This dish is guaranteed to build your confidence with every bite.

    Yields: 2 servings

    Prep time: 5 minutes

    Cook time: 5-7 minutes

    Ingredients:

    • 1 pound large shrimp, peeled and deveined (fresh or frozen, thawed)
    • 2 tablespoons unsalted butter
    • 3 cloves garlic, minced
    • 1/4 cup chicken broth or white wine
    • 1 tablespoon fresh lemon juice
    • 2 tablespoons fresh parsley, chopped
    • Salt and black pepper to taste

    Instructions:

    1. Pat the shrimp completely dry with paper towels, then season with salt and pepper.
    2. Heat a large skillet over medium-high heat.
    3. Add the butter to the skillet. Once it melts, add the minced garlic.
    4. Sauté the garlic for about 30 seconds until fragrant, making sure it doesn’t burn.
    5. Add the shrimp to the skillet in a single layer to ensure even cooking.
    6. Cook for 1-2 minutes per side, until pink and opaque. Shrimp cooks very quickly.
    7. Pour in the chicken broth or white wine, scraping up any browned bits from the bottom of the pan.
    8. Stir in the lemon juice and fresh parsley.
    9. Remove from heat immediately.
    10. Serve your garlic butter shrimp over pasta, rice, or with crusty bread to soak up the sauce.

    Tips for Success:

    • Dry Shrimp: Patting shrimp dry is essential for getting a good sear rather than just steaming them.
    • Don’t Overcook: Shrimp cooks in minutes. Remove the pan from the heat as soon as they turn pink and curl.
    • Fresh Ingredients: Using fresh garlic, lemon juice, and parsley will make a significant difference in flavor.

    Variations & Substitutions:

    • Spicy Shrimp: Add 1/2 teaspoon of red pepper flakes along with the garlic for some heat.
    • Herb Swap: Try using fresh dill or chives instead of parsley for a different flavor profile.
    • Vegetable Boost: Add a handful of spinach or some halved cherry tomatoes to the pan at the end of cooking.

    Frequently Asked Questions About Recipes

    What are some good recipes for dinner?

    Recipesmondial makes it easy to find inspiring dinner ideas. We focus on delicious, simple recipes perfect for any night of the week. Whether you need a quick meal after work or a comforting family dinner, you’ll find it here.

    We prioritize speed and flavor so you can enjoy stress-free cooking. Start with these popular categories for simple dinner ideas:

    • Quick & Easy Dinners: Get dinner on the table in 30 minutes or less. Try a speedy tomato basil pasta, 15-minute lemon herb chicken, or simple sheet pan salmon. These recipes are perfect for busy weeknights.
    • One-Pan Wonders: Enjoy maximum flavor with minimal cleanup. Roasting everything together on a single pan is a simple, effective technique. Popular choices include one-pan sausage and veggies or sheet pan fajitas.
    • Comforting Classics: When you crave a hearty, familiar meal, turn to the classics. A homemade mac and cheese, warming lentil soup, or classic beef stew is incredibly satisfying—like a warm hug in a bowl.
    • International Flavors Made Easy: Explore new tastes without the complexity. Our simple recipes, like 5-ingredient black bean tacos or a basic chicken stir-fry, bring global flavors to your kitchen.

    The best recipes are the ones you enjoy making and eating. Recipesmondial provides clear, step-by-step guidance to help you cook with confidence.

    How can I find simple and healthy recipes?

    Finding simple, healthy recipes should be easy. At Recipesmondial, we believe nutritious eating can also be delicious. The key is to combine fresh ingredients with straightforward cooking methods.

    To discover great options, focus on these key characteristics:

    • Prioritize Whole Ingredients: Choose recipes that feature whole foods like fresh vegetables, lean proteins, and whole grains. These ingredients are naturally flavorful and packed with nutrients. For example, the Mediterranean diet, rich in plants, is known for its health benefits [source: https://www.heart.org/en/healthy-living/healthy-eating/eat-smart/mediterranean-diet].
    • Embrace Simple Cooking Techniques: Stick with easy methods like roasting, baking, grilling, and steaming. These techniques bring out the natural flavors of your ingredients without complex steps.
    • Look for Short Ingredient Lists: Recipes with fewer ingredients usually mean less prep time and less fuss. A simple roasted chicken with seasonal vegetables is a perfect example.
    • Boost Flavor with Freshness: Use fresh herbs and spices to elevate any dish. They add vibrant flavor without extra fats or sugars.
    • Look for Meal-Prep Potential: Many healthy recipes are perfect for meal prepping. For instance, you can make a large batch of quinoa salad with roasted vegetables on Sunday for healthy lunches all week.

    Recipesmondial offers a wide range of healthy snacks, quick breakfasts, and simple dinners. Our beginner-friendly recipes will help you build confidence in the kitchen and make nutritious, tasty meals in no time.

    What are some of the best recipes for kids?

    Finding meals the whole family loves can be a challenge, especially with kids. The best recipes for children are often familiar, flavorful, and a little interactive. We understand that busy families need easy, family-friendly meals that everyone will enjoy.

    Here at Recipesmondial, we offer plenty of easy recipes designed to be a hit with younger eaters. Look for dishes with these qualities:

    • Familiar Flavors: Kids often prefer mild, recognizable tastes. Think classic comfort foods with a homemade touch.
    • Fun Textures: Crispy, gooey, or dippable foods are always popular. Crispy baked chicken tenders or easy mini pizzas are great examples.
    • Colorful Presentation: Brightly colored vegetables can be more appealing. Try incorporating them subtly or making them part of a fun dish, like a cheesy broccoli and rice casserole.
    • Get Them Involved: Kids are more likely to eat a meal they helped prepare. Let them stir, measure, or assemble simple dishes like tacos or fruit parfaits. This hands-on approach can also help reduce picky eating over time [source: https://www.ncbi.nlm.nih.gov/pmc/articles/PMC6062724/].
    • Simple, Wholesome Ingredients: Stick to recipes with straightforward ingredients. Dishes that are not overly complicated are often better received by kids.

    Our family-friendly, beginner-friendly recipes help ensure delicious results every time. We’ll help you take the stress out of cooking and make mealtime a happy experience for the whole family.


    Sources

    1. https://www.heart.org/en/healthy-living/healthy-eating/eat-smart/nutrition-basics/cooking-at-home
    2. https://www.smithsonianmag.com/arts-culture/where-did-the-taco-come-from-180970720/
    3. https://www.foodsafety.gov/food-safety-charts/safe-minimum-cooking-temperatures
  • The Ultimate Guide to Appliance-Based Recipes: Air Fryer, Slow Cooker, & More

    The Ultimate Guide to Appliance-Based Recipes: Air Fryer, Slow Cooker, & More

    Appliance and method-based recipes are dishes specifically designed for a particular kitchen gadget, such as an air fryer, slow cooker, or Instant Pot. This approach simplifies home cooking by using the unique functions of each appliance to guarantee consistent, flavorful results with minimal effort, making it perfect for beginners and busy families.

    Do you ever wish your kitchen appliances could simplify meal prep? It’s easy to feel overwhelmed by complex recipes or unsure how to create healthy, tasty meals quickly—especially when planning family-friendly meals. Not knowing how to get the most out of your gadgets can lead to kitchen stress instead of enjoyment.

    Imagine turning mealtime from a chore into an enjoyable experience by creating delicious dishes with minimal fuss. That’s exactly what your kitchen appliances are designed to do. From crispy air fryer delights to comforting slow cooker stews, these tools are game-changers for any home cook. They save you time, reduce stress, and help you enjoy cooking again, proving that simple dinner recipes can also be packed with flavor.

    At Recipesmondial, we believe cooking should be simple, flavorful, and inspiring. Our guide provides step-by-step instructions to help you master your favorite kitchen gadgets. We’ll show you how to unlock their full potential, whether you need beginner-friendly recipes, the best healthy air fryer recipes, or hearty crock pot meals. We are here to make flavorful meals made easy an everyday reality. Get ready to cook with confidence and turn every dish into a triumph.

    What Are Appliance-Based Recipes and Why Should You Use Them?

    A bright kitchen countertop showcasing an air fryer, slow cooker, and Instant Pot, with a smiling home cook in the background, ready to cook.
    A wide, professional food photography shot of a bright, clean, and inviting modern kitchen countertop. Prominently featured are a sleek air fryer, a classic slow cooker (Crock-Pot style), and a shiny Instant Pot, all arranged aesthetically. A real human home cook, with a friendly and encouraging expression, stands slightly in the background, looking towards the appliances with a gentle smile, conveying ease and readiness to cook. The lighting is warm and natural, emphasizing freshness and simplicity. The overall impression is one of helpfulness and approachable home cooking. Photorealistic, high-quality food magazine photo style, no artistic interpretations.

    Welcome to Recipesmondial, your go-to guide for making mealtime easier and more enjoyable! Are you often overwhelmed by complex recipes or struggle to plan healthy, tasty meals quickly? You’re not alone. Many home cooks face these challenges daily.

    This guide is here to help by exploring appliance-based recipes that harness the power of your kitchen gadgets—think air fryers, slow cookers, and Instant Pots. These tools turn cooking into a stress-free experience, transforming your kitchen journey. Let’s dive into why these recipes are a game-changer for every home cook.

    Save Time and Effort in the Kitchen

    Life gets busy, and finding time for elaborate meals can be tough. That’s where appliance-based cooking comes in. It’s your secret weapon for dramatically cutting down prep and cook times while simplifying the entire process.

    Consider the magic of a slow cooker: toss in ingredients in the morning and come home to a delicious, ready-to-eat dinner. Similarly, an air fryer crisps food in minutes, offering quick breakfast ideas and fast weeknight dinners. The Instant Pot uses pressure to cook meals significantly faster. As a result, you’ll spend less time hovering over the stove and gain precious moments back for yourself or your family, making it perfect for those seeking simple, family-friendly meals.

    • Hands-Off Cooking: Many appliances handle the cooking process for you, freeing you up for other tasks.
    • Faster Meal Prep: Quick-cooking appliances like the air fryer or Instant Pot get meals on the table fast.
    • Reduced Cleanup: Often, you’re cooking in a single pot or basket, which means fewer dishes to wash later.
    • Effortless Planning: Explore easy crockpot meals and quick breakfast ideas to make meal prep a breeze.

    Achieve Consistent, Delicious Results

    Lacking confidence in your cooking skills or worried about inconsistent outcomes? Appliance-based recipes are designed for reliability, helping you achieve perfectly cooked, flavorful meals every time.

    These appliances offer precise temperature control and maintain consistent cooking environments, ensuring your food cooks evenly. For example, an air fryer delivers perfectly crispy chicken, while a slow cooker produces incredibly tender meats, like crockpot chicken breast recipes. An Instant Pot can make fluffy rice or perfectly cooked vegetables with ease. By guiding you from uncertainty to success, these methods build kitchen confidence and help you achieve restaurant-quality results at home.

    • Precise Control: Appliances maintain exact temperatures, which avoids over or undercooking.
    • Even Cooking: Food cooks uniformly, enhancing flavor and texture.
    • Reliable Outcomes: Follow simple, step-by-step cooking guidance to get consistent, delicious results.
    • Enhanced Flavor: Slow cooking deepens flavors, while pressure cooking locks in moisture and taste.

    Explore New Cooking Techniques Confidently

    Cooking with appliances opens up a world of culinary possibilities, allowing you to try techniques that might otherwise seem intimidating. It’s the perfect way to discover new dishes and embrace approachable home cooking.

    For example, air frying offers a healthier alternative to deep frying by using significantly less oil. Pressure cooking with an Instant Pot dramatically speeds up braising, while a Dutch oven introduces you to the slow, even cooking perfect for stews or no-knead bread. Recipesmondial provides easy, step-by-step recipes with practical tips and guidance, making it fun and accessible to learn these methods. You’ll broaden your culinary repertoire and discover new favorite meals with confidence.

    • Beginner-Friendly: Appliances simplify complex techniques, making them accessible for all skill levels.
    • Expand Your Repertoire: Learn air fryer recipes, slow cooker recipes, and instant pot recipes to explore new cuisines.
    • Boost Creativity: These tools inspire creative, flavorful meals, encouraging you to experiment with different ingredients and spices.
    • Build Confidence: Master new skills with reliable guidance, turning you into a more adventurous cook.

    How to Master Your Air Fryer for Crispy, Healthy Meals

    Crispy golden chicken drumsticks and roasted broccoli being removed from an air fryer basket onto a plate.
    A dynamic, close-up, professional food photography shot capturing perfectly golden-brown, crispy chicken drumsticks and vibrant roasted broccoli florets being carefully lifted out of an air fryer basket onto a clean white plate. A real human’s hands, belonging to a home cook, are visible gently handling the basket. Subtle steam is rising from the freshly cooked food, highlighting its warmth and crispiness. The background is softly blurred kitchen elements, keeping the focus entirely on the delicious, healthy meal. Photorealistic, high-quality food magazine photo style, emphasizing texture and appeal, no artistic interpretations.

    Easy Air Fryer Recipes for Beginners

    Welcome to the world of air frying! An air fryer can transform your cooking, making it your new best friend in the kitchen. It creates crispy, delicious meals with less oil and effort, which is perfect for easy recipes and beginner-friendly recipes for home cooks.

    Many new cooks feel overwhelmed by complex recipes, but the air fryer simplifies meal preparation. Think of it as a mini convection oven for your countertop that helps you achieve fantastic, stress-free results.

    Here are some simple ideas to get you started:

    • Frozen Favorites: Start with frozen chicken nuggets, fish sticks, or pre-made spring rolls. They crisp up beautifully in minutes and are often much faster than a traditional oven.
    • Basic Chicken Breast: Season a boneless, skinless chicken breast with salt, pepper, and garlic powder. Cook at 375°F (190°C) for 15-20 minutes, flipping halfway. This is a quick and simple dinner recipe.
    • Roasted Small Potatoes: Cut small potatoes into bite-sized pieces and toss them with a drizzle of olive oil, salt, and paprika. Air fry at 400°F (200°C) for 15-20 minutes until golden and tender.

    Using your air fryer builds confidence in the kitchen. Soon, you’ll be experimenting with all sorts of delicious and easy meals!

    Healthy Air Fryer Chicken, Steak, and Pork Chops

    The air fryer excels at cooking proteins, making it perfect for healthy air fryer recipes. It creates a beautiful sear and a juicy interior without much added fat. This makes it ideal for preparing tasty and nutritious family-friendly meals.

    Here’s how to master cooking popular proteins:

    • Chicken Breasts: For the best crisp, pat your chicken dry. Lightly coat it with olive oil or cooking spray and season generously. Cook at 375-400°F (190-200°C) for 15-25 minutes, depending on thickness, and flip halfway through. Always check for an internal temperature of 165°F (74°C) [1].
    • Steak: You can achieve a great crust on smaller cuts like sirloin or ribeye. Season well with salt, pepper, and garlic powder. Air fry at 400°F (200°C) for 10-15 minutes for medium-rare to medium, flipping once. Adjust the time for your desired doneness.
    • Pork Chops: Thicker, boneless pork chops work wonderfully. Season them with a rub of brown sugar, paprika, and onion powder. Air fry at 380°F (195°C) for 12-18 minutes, turning once. Ensure an internal temperature of 145°F (63°C) for safety.

    Pro Tip: Do not overcrowd your air fryer basket. For even cooking and that perfect crispy texture, cook in batches if necessary.

    The Secret to Perfect Air Fryer French Fries and Potatoes

    Want to make restaurant-quality crispy fries at home? Your air fryer is the secret. You can forget deep-frying and enjoy perfectly golden potatoes with significantly less oil. This simple method is a game-changer for creating delicious sides.

    Follow these simple steps for the best results:

    • Fresh Cut Fries:
      1. Soak: Cut potatoes into uniform fries and soak them in cold water for at least 30 minutes. This removes excess starch, which helps them get crispy.
      2. Dry Thoroughly: This is a crucial step! Pat the fries completely dry with a clean kitchen towel or paper towels.
      3. Oil and Season: Toss the dry fries with 1-2 teaspoons of olive oil and your preferred seasonings, such as salt, pepper, and garlic powder.
      4. Air Fry: Arrange the fries in a single layer in your air fryer basket. Cook at 375-400°F (190-200°C) for 15-25 minutes, shaking the basket every 5-7 minutes for even browning.
    • Frozen Fries: For convenience, frozen fries are incredibly simple. Place them in a single layer in the air fryer and cook at 400°F (200°C) for 12-18 minutes, shaking the basket a few times. No extra oil is usually needed.
    • Roasted Potatoes/Wedges: Cut potatoes into wedges or cubes, then toss with oil and seasoning. Air fry at 400°F (200°C) for 20-30 minutes, shaking every 7-10 minutes until tender and crispy.

    The key to perfect results is even heat distribution, so be sure to arrange your potatoes in a single layer.

    Simple Air Fryer Vegetables (Brussel Sprouts, Asparagus, Zucchini)

    The air fryer can elevate your vegetable game and might even turn skeptics into veggie lovers. In just minutes, you can create vibrant, tender-crisp sides. This makes it easy to add healthy options to any simple dinner recipe or family-friendly meal.

    Here are some popular vegetables that shine in the air fryer:

    • Brussel Sprouts:
      • Trim and halve fresh Brussel sprouts.
      • Toss with a little olive oil, salt, and pepper. For extra flavor, add a dash of balsamic vinegar.
      • Air fry at 375°F (190°C) for 12-18 minutes, shaking the basket halfway. They should be tender inside with crispy outer leaves.
    • Asparagus:
      • Snap off the woody ends of fresh asparagus spears.
      • Toss lightly with olive oil, minced garlic, salt, and pepper.
      • Air fry at 380°F (195°C) for 7-10 minutes, shaking once. Look for vibrant green, slightly tender spears.
    • Zucchini:
      • Slice zucchini into half-moon shapes or spears.
      • Toss with olive oil, Italian seasoning, garlic powder, salt, and pepper.
      • Air fry at 375°F (190°C) for 8-12 minutes, shaking often, until tender-crisp.

    Quick Tip: Most vegetables benefit from a light coating of oil and being cooked in a single layer. This ensures they roast evenly and get wonderfully crispy instead of steaming.

    Quick Air Fryer Snacks (Grilled Cheese, Bacon, Pizza Rolls)

    The air fryer isn’t just for main courses; it’s also fantastic for making healthy snacks and small bites in a flash. Whether you need quick breakfast ideas or easy after-school treats, your air fryer will be your go-to appliance.

    Say goodbye to soggy toast and unevenly cooked bacon. The air fryer delivers consistent, delicious results every time. It simplifies cooking for busy families, making stress-free, family-friendly meals and snacks a breeze.

    Try these effortless air fryer snack ideas:

    • Grilled Cheese Sandwich:
      • Butter the outsides of two slices of bread and place cheese in between.
      • Air fry at 350°F (175°C) for 6-10 minutes, flipping halfway. The bread will be golden brown, and the cheese will be perfectly melted.
    • Crispy Bacon:
      • Lay bacon slices in a single layer in the air fryer basket without overlapping.
      • Air fry at 375°F (190°C) for 8-12 minutes, depending on your preferred crispness. Enjoy bacon without messy stovetop splatters!
    • Pizza Rolls/Pockets:
      • Place frozen pizza rolls or pockets in a single layer in the basket.
      • Air fry at 380°F (195°C) for 8-12 minutes, shaking halfway. They’ll come out perfectly hot and crispy.

    These quick options highlight the air fryer’s versatility. Enjoy simple, delicious creations with ease for any meal or snack time.

    What is the best food to cook in an air fryer?

    Top Foods for Achieving a Crispy Texture

    The air fryer is a game-changer for achieving incredible crispiness without a lot of oil. By circulating hot air like a powerful convection oven, it cooks food evenly and creates that delightful crunch you love. This method is perfect for so many dishes, turning everyday ingredients into something special.

    If you’re looking to elevate your meals, here are some top foods that truly shine in the air fryer:

    • French Fries and Tater Tots: Forget soggy oven fries! The air fryer makes both frozen and homemade fries wonderfully crispy on the outside and fluffy on the inside. You’ll use far less oil than deep-frying.
    • Chicken Wings and Tenders: Get restaurant-quality crispy wings and juicy tenders right at home. Simply toss them in a little oil and seasoning, and the air fryer will deliver amazing results every time.
    • Spring Rolls and Egg Rolls: Whether fresh or frozen, these appetizers become golden and perfectly crisp. This is a quick and easy way to get that deep-fried texture without the mess.
    • Mozzarella Sticks: Achieve gooey cheese interiors and crunchy breaded exteriors in minutes. They make a fantastic quick snack or party appetizer.
    • Bacon: Air fryer bacon cooks evenly with less splatter and turns out perfectly crispy. It’s an easy breakfast idea for busy mornings.
    • Reheating Pizza: Bring leftover pizza back to life! The air fryer crisps the crust and melts the cheese beautifully, making it taste freshly baked.
    • Toasted Sandwiches: Create incredibly crispy grilled cheese or other toasted sandwiches. The outside becomes golden and crunchy, while the inside stays warm and melty.

    For the best crispiness, remember a few simple tips: don’t overcrowd the basket, give your food a light spray of oil, and shake the basket occasionally. This approach helps the hot air circulate effectively, ensuring every piece gets perfectly golden.

    Best Proteins for the Air Fryer

    Cooking proteins in the air fryer is an efficient way to get consistently delicious results. It’s a fantastic solution for family-friendly meals or a quick weeknight dinner. The air fryer keeps proteins juicy on the inside while creating a lovely sear on the outside.

    Here are some of the best proteins to cook in your air fryer, making meal prep a breeze:

    • Chicken Breast and Thighs: Chicken breasts and thighs are air fryer superstars. Breasts stay moist and tender, while thighs develop an irresistibly crispy skin. Just season with your favorite blend or a light marinade for perfectly cooked chicken in about 15-20 minutes, depending on thickness [source: foodsafety.gov].
    • Pork Chops and Tenderloin: Air-fried pork chops come out tender and juicy with a beautiful crust. Pork tenderloin medallions also cook quickly, making them ideal for simple dinner recipes.
    • Salmon and Other Fish Fillets: Fish cooks wonderfully in the air fryer, creating a flaky interior and a slightly crispy exterior. Salmon, cod, or tilapia fillets are done in under 15 minutes, offering a healthy and quick meal solution.
    • Shrimp: Fresh or frozen shrimp cook in just a few minutes. They emerge tender and succulent, perfect for tacos, salads, or a quick appetizer.
    • Steak Bites or Smaller Cuts: While a large steak might be tricky, steak bites or thinner cuts get a great sear in the air fryer. They’re excellent for fajitas or a protein-packed salad.
    • Tofu and Tempeh: The air fryer is fantastic for plant-based proteins. It transforms tofu into crispy, flavorful cubes and gives tempeh a firm, satisfying texture that’s perfect for soaking up marinades.

    To ensure your proteins are always perfectly cooked, use a meat thermometer. Cook chicken to an internal temperature of 165°F (74°C) and pork to 145°F (63°C) [source: fsis.usda.gov]. A light spray of oil helps with browning and prevents sticking.

    Vegetables That Roast Perfectly

    The air fryer excels at turning ordinary vegetables into irresistible sides or healthy snacks. It roasts them quickly to create tender interiors with delightfully caramelized and crispy exteriors. This method makes it easy and delicious to add more vegetables to your diet.

    If you’re looking for simple air fryer vegetables that deliver big on flavor, try these:

    • Brussels Sprouts: These transform from humble to heavenly. Air frying gives them wonderfully crispy outer leaves and a tender, sweet interior. Toss them with a little olive oil, salt, and pepper for a perfect side.
    • Broccoli and Cauliflower: Both florets get beautifully roasted edges and a tender bite. They are fantastic with garlic powder, onion powder, and a squeeze of lemon after cooking.
    • Asparagus: Air-fried asparagus is vibrant, tender-crisp, and ready in minutes. It’s an elegant yet simple addition to any meal.
    • Bell Peppers and Onions: These soften and sweeten, developing a lovely char. They’re perfect for fajitas, stir-fries, or as a flavorful base for other dishes.
    • Zucchini and Summer Squash: Quick to cook, these vegetables become tender with a nice hint of browning. Slice them into spears or rounds for easy cooking.
    • Potatoes and Sweet Potatoes: Cut into wedges, cubes, or fries, these become incredibly satisfying. The air fryer gives them a fluffy inside and a crispy skin, making them a healthier alternative to deep-fried versions.

    For the best results, cut vegetables into similar-sized pieces to ensure they cook evenly. It’s also important not to overcrowd the basket, so cook in batches if needed. This allows the hot air to circulate properly, ensuring every piece gets perfectly roasted and flavorful. With these simple tips, air frying makes healthy eating both easy and enjoyable.

    How to Use Your Slow Cooker (Crock-Pot) for Effortless Meals

    A slow cooker filled with a rich, simmering beef stew with vegetables, ready for a comforting meal.
    A warm and comforting professional food photography shot focusing on a simmering slow cooker (Crock-Pot) filled to the brim with a rich, hearty beef stew. Generous chunks of tender beef, carrots, potatoes, and celery are visible in a thick, savory broth. Gentle wisps of steam rise from the surface, indicating the warmth and inviting aroma. A rustic wooden spoon is resting on the rim of the slow cooker. The background is a softly blurred, cozy kitchen setting with warm lighting, suggesting an effortless and delicious meal preparing itself. Photorealistic, high-quality food magazine photo style, no artistic interpretations.

    Welcome to the wonderful world of slow cooking! Your slow cooker, often called a Crock-Pot, is a true kitchen hero that creates incredible, flavorful meals with minimal effort. Imagine coming home to a delicious, hot dinner that’s already cooked—this appliance makes that dream a reality for busy families and home cooks alike.

    Here at Recipesmondial, we’ll guide you through mastering your slow cooker. You’ll discover simple dinner recipes and comforting dishes that take the stress out of mealtime. Say goodbye to overwhelming, complex instructions and get ready to cook with confidence and joy.

    Hearty Crockpot Chicken and Pot Roast Recipes

    Slow cooking truly shines with hearty main courses, transforming tough cuts of meat into tender, melt-in-your-mouth delights. Perfect for comforting, family-friendly meals, this method also saves you significant time and effort in the kitchen.

    Delicious Chicken Dishes

    Chicken is incredibly versatile in a slow cooker, as you can use various cuts for different results. Many crockpot chicken recipes are designed for easy preparation and deliver fantastic flavor.

    • Whole Chicken: Cooking a whole chicken slowly makes it incredibly moist. Simply add herbs, spices, and a cup of broth, then cook on low for 6-8 hours.
    • Chicken Thighs: These are very forgiving and flavorful. They work well in stews or served shredded in classic slow cooker chicken recipes like barbecue chicken or creamy Tuscan chicken.
    • Chicken Breast: For a leaner option, crockpot chicken breast recipes are ideal. They cook quickly while staying tender. Shredded chicken breast is perfect for tacos, sandwiches, or salads—for example, try cooking chicken breasts with salsa for an easy weeknight meal.

    Pro Tip: Browning chicken thighs or a pot roast before slow cooking adds a deeper flavor. While this step is optional, it’s highly recommended if you have a few extra minutes, as it creates a rich, savory crust.

    Classic Pot Roast Perfection

    A slow cooker pot roast is a comforting classic and a perfect example of how this appliance simplifies cooking. Over several hours, tough cuts like chuck roast become incredibly tender, making this an ideal meal for Sunday dinners or special occasions.

    To make an easy pot roast:

    1. Season your chuck roast generously with salt, pepper, and garlic powder.
    2. If desired, sear the roast in a pan for a few minutes on each side.
    3. Place chopped vegetables like carrots, potatoes, and onions in the bottom of your slow cooker.
    4. Set the seared roast on top of the vegetables.
    5. Pour in beef broth and your favorite seasonings, such as thyme or bay leaves.
    6. Cook on low for 8-10 hours or on high for 4-6 hours until the meat is fork-tender.

    The result is a complete meal in one pot. The meat falls apart, and the vegetables are cooked to perfection, giving you an easy, reliable way to create a memorable dish.

    Simple ‘Dump and Go’ Slow Cooker Meals for Busy Families

    Life can be hectic, which is where easy crockpot meals truly shine. ‘Dump and Go’ recipes require minimal preparation—you simply add all the ingredients to the slow cooker and let it do the work. This approach makes planning family-friendly meals completely stress-free.

    Why Choose ‘Dump and Go’ Meals?

    These recipes are designed for ultimate convenience, solving the common challenge of how to cook healthy, tasty meals on a tight schedule. They are also perfect for meal prep ideas and weekly planning.

    • Minimal Prep: Most recipes only require chopping a few ingredients.
    • Hands-Off Cooking: Once it’s set, you don’t need to monitor it.
    • Easy Cleanup: Using just one pot simplifies the washing up.
    • Reliable Results: Slow cooking ensures consistently tender and flavorful food.

    Popular ‘Dump and Go’ Ideas

    Countless easy slow cooker recipes fit the ‘dump and go’ style, making them fantastic, beginner-friendly options for quick dinners.

    • Taco Chicken: Combine chicken breasts, a jar of salsa, and taco seasoning. Cook until the chicken shreds easily, then serve in tortillas or over rice.
    • Sausage and Peppers: Add sliced sausages, bell peppers, onions, and a can of crushed tomatoes for a savory, hearty meal.
    • Meatball Subs: Place frozen meatballs, marinara sauce, and a touch of Italian seasoning in the slow cooker. Serve on hoagie rolls with melted cheese.
    • Pulled Pork: Pork shoulder, barbecue sauce, and a splash of apple cider vinegar create incredible pulled pork for sandwiches.

    Tips for Success:

    • Choose non-starchy vegetables that hold up well, such as carrots or bell peppers.
    • Do not overfill your slow cooker; aim to fill it between half and two-thirds full for best results.
    • Use parchment paper liners for even easier cleanup.
    • Always ensure meat reaches a safe internal temperature before serving [1].

    Healthy Crockpot Soups and Stews

    The slow cooker is an excellent tool for preparing healthy crockpot recipes because it allows flavors to meld beautifully over time. This process makes your soups and stews deeply satisfying and nourishing, offering a simple way to incorporate more vegetables and lean proteins into your diet.

    Benefits of Slow-Cooked Soups and Stews

    Cooking these dishes slowly brings out the best in simple ingredients, resulting in flavorful meals that are easy to make. They are perfect for beginner-friendly recipes and anyone seeking wholesome options.

    • Enhanced Flavor: Long cooking times allow ingredients to meld, creating a rich and complex taste.
    • Nutrient Retention: The gentle cooking method can help preserve nutrients.
    • Portion Control: You can easily make a large batch for meal prep throughout the week.
    • Economical: This method works well with less expensive cuts of meat and plenty of vegetables.

    Nourishing Soup and Stew Ideas

    From comforting classics to international flavors, your slow cooker can handle them all. These recipes provide quick and reliable meal solutions.

    • Chicken Noodle Soup: A true classic. Combine chicken, broth, carrots, celery, and seasonings, then add noodles during the last 30 minutes of cooking.
    • Vegetable Lentil Soup: A hearty vegetarian option packed with fiber and protein. Just combine lentils, diced tomatoes, broth, and a mix of your favorite vegetables.
    • Beef Stew: Chunks of beef, potatoes, carrots, and onions in a rich beef broth create this robust and warming dish.
    • Turkey Chili: A lighter yet incredibly flavorful chili made with ground turkey, beans, diced tomatoes, chili powder, and cumin.

    Making Them Healthier:

    • Load up on fresh vegetables. Add leafy greens like spinach or kale near the end of cooking to preserve their texture.
    • Use low-sodium broth to control your salt intake.
    • Opt for lean protein sources, such as chicken breast or ground turkey.
    • Consider adding whole grains like barley or quinoa for extra fiber.

    Your slow cooker is a powerful ally that can transform how you approach mealtime. Embrace the ease and flavor of slow cooker meals and discover how simple ingredients can turn into delicious, satisfying dinners. You’ll be cooking confidently in no time!

    Unlocking Your Instant Pot for Fast, Flavorful Dishes

    The Instant Pot is a true kitchen game-changer, helping you create incredible meals quickly. This versatile appliance combines the functions of a pressure cooker, slow cooker, rice cooker, and steamer, which means less time in the kitchen and more time enjoying delicious food with your family.

    While many home cooks feel overwhelmed by complex recipes, the Instant Pot simplifies the process. It can turn tough cuts of meat into tender delights in minutes and prepare rich stews or perfect grains with minimal effort. Here at Recipesmondial, we’ll guide you in unlocking this appliance’s full potential. Get ready to cook confidently and enjoy stress-free meals every day!

    Quick Instant Pot Chicken and Pulled Pork Recipes

    Imagine enjoying tender, flavorful chicken or succulent pulled pork without waiting for hours. The Instant Pot makes this a reality by dramatically transforming cooking times, allowing you to prepare these family-friendly meals with ease.

    Speedy Instant Pot Chicken

    Chicken is a staple for many busy families, and the Instant Pot helps you prepare it faster than ever. You can cook whole chickens, breasts, or thighs in a fraction of the traditional time, making it perfect for quick weeknight dinners.

    • Whole Chicken: A roasted-style whole chicken can be ready in under an hour, emerging incredibly juicy and tender.
    • Chicken Breasts or Thighs: These cook in about 10-15 minutes under pressure, which is ideal for quick meals.

    Once cooked, the chicken is incredibly versatile. You can shred it for:

    • Tacos or burritos
    • Chicken salad sandwiches
    • Quick casseroles
    • Stir-fries or pasta dishes

    This makes for a fantastic foundation for various flavorful dishes and simplifies your meal prep routine.

    Effortless Instant Pot Pulled Pork

    While pulled pork usually requires hours of slow cooking, the Instant Pot achieves the same tender results in a fraction of the time. A pork shoulder or butt can be ready to shred in about 60-90 minutes—a true game-changer for busy weeknight dinners.

    • Preparation: Simply season your pork and add a little liquid, like broth or apple cider.
    • Cooking: Set it to cook on high pressure, then let the pressure release naturally.
    • Serving: Shred the pork, toss it with your favorite BBQ sauce, and serve on buns, over rice, or in lettuce wraps.

    This method delivers incredibly tender, fall-apart pulled pork that is a truly satisfying dish for everyone.

    Recipesmondial Tip: For the most delicious, moist results, always allow a natural pressure release for at least 10-15 minutes. This simple step helps the meat retain its juices.

    Comfort Food Classics: Instant Pot Chili and Ribs

    Comfort food warms the soul, and the Instant Pot brings these beloved dishes to your table faster than ever. Say goodbye to all-day cooking and hello to quick, hearty meals.

    Hearty Instant Pot Chili

    Chili is a comforting classic, and the Instant Pot creates a rich, flavorful version in a fraction of the usual time. It tenderizes meat and cooks beans with impressive speed, transforming a lengthy process into a simple weeknight dinner.

    • One-Pot Wonder: You can sauté your aromatics and meat directly in the Instant Pot, which means fewer dishes to clean.
    • Beans and Meat: Even dried beans cook perfectly from scratch, becoming tender right alongside your ground beef or turkey.
    • Flavor Depth: Pressure cooking melds the flavors beautifully, resulting in a rich, complex chili in about 30 minutes of cook time.

    Feel free to customize your chili with different beans, vegetables, and spice levels. Top it with cheese, sour cream, or fresh cilantro to make it your own.

    Fall-Off-The-Bone Instant Pot Ribs

    Imagine tender, succulent ribs that practically fall off the bone. The Instant Pot delivers this perfection in about 30-40 minutes of cooking, a significant time saver compared to traditional methods [2].

    • Preparation: Remove the membrane from the back of your ribs and apply your favorite dry rub generously.
    • Cooking: Place the ribs on a trivet inside the Instant Pot with a cup of liquid, such as broth or apple cider.
    • Finishing Touch: After pressure cooking, brush the ribs with BBQ sauce and quickly broil or grill them to create a delicious, caramelized crust.

    The result is incredibly tender and juicy ribs. This simple, stress-free method is a perfect way to enjoy a favorite indulgence, especially for family dinners.

    Recipesmondial Tip: For chili, using quality canned tomatoes and a blend of chili powders will enhance the depth of flavor. For ribs, don’t skip the final broiling or grilling step—it adds that essential smoky finish.

    Essential Instant Pot Side Dishes (Mashed Potatoes, Rice)

    Beyond main courses, the Instant Pot also excels at creating perfect side dishes. Best of all, these recipes are often hands-off, which frees you up to focus on other parts of your meal.

    Creamy Instant Pot Mashed Potatoes

    Traditional mashed potatoes can be messy and time-consuming, but the Instant Pot simplifies this classic side dish. With this method, you get perfectly cooked, creamy potatoes every time.

    • Quick Cook Time: Potatoes cook in just 8-10 minutes under pressure.
    • Minimal Effort: There’s no need to monitor a boiling pot of water; the Instant Pot does the work for you.
    • Perfect Texture: They come out tender and ready for mashing with your butter, milk, and seasonings.

    This time-saving method makes it effortless to enjoy fluffy, flavorful mashed potatoes any night of the week.

    Fluffy Instant Pot Rice

    Achieving perfect rice can be tricky on the stovetop, but the Instant Pot makes it foolproof. It produces consistently fluffy grains every time, from white rice and brown rice to quinoa.

    • Consistent Results: The pressure cooker environment ensures that rice cooks evenly.
    • Variety of Grains:
      • White Rice: Typically uses a 1:1 water-to-rice ratio and cooks for 3-5 minutes.
      • Brown Rice: Usually needs a 1:1.25 water-to-rice ratio and cooks for 22-28 minutes.
    • Set It and Forget It: Just measure your ingredients, set the timer, and wait for the Instant Pot to handle the rest.

    Say goodbye to burnt or undercooked grains. With the Instant Pot, you can count on perfect results every time.

    Recipesmondial Tip: For the best texture, always use the recommended water-to-grain ratio for your specific type of rice. A natural pressure release is also key, as it allows the grains to absorb any remaining moisture.

    Exploring More Time-Saving Kitchen Appliances

    Classic Dutch Oven Recipes (Including No-Knead Bread)

    Beyond your everyday appliances, the humble Dutch oven stands out as a true kitchen hero. This heavy, lidded pot brings incredible versatility to your cooking, excelling at everything from slow simmering to baking.

    Because it heats evenly and holds moisture beautifully, a Dutch oven ensures your dishes come out consistently delicious. You can easily create tender stews, juicy roasts, and flavorful soups, like a hearty beef stew or a comforting chicken casserole.

    One of the most satisfying items to make is no-knead bread, which requires minimal effort for impressive results. You will love the crispy crust and soft, airy interior. This is a fantastic beginner-friendly recipe that helps build confidence in the kitchen.

    Here’s a simple approach for no-knead bread:

    • In a bowl, combine flour, water, yeast, and salt.
    • Stir until the ingredients are just mixed.
    • Cover the bowl and let it sit for 12-18 hours to allow the dough to ferment.
    • Preheat your Dutch oven inside a hot oven.
    • Carefully transfer the dough into the hot pot.
    • Bake with the lid on, then remove the lid to create a golden-brown crust.

    This simple process results in flavorful meals made easy. You don’t need special skills to get started; just follow the steps. Many people find making bread to be an incredibly rewarding experience [3].

    Simple Rice Cooker and Bread Machine Ideas

    Automated appliances are fantastic for busy lives because they help you get quick meals on the table. Rice cookers and bread machines are perfect examples, as they simplify kitchen staples and free up your time.

    Mastering Your Rice Cooker

    A rice cooker is a versatile tool that extends far beyond white rice. It can cook a variety of grains to perfection, giving you consistent results every time.

    Explore these simple ideas:

    • Perfect Grains: Easily cook brown rice, quinoa, or even steel-cut oats.
    • One-Pot Meals: Try cooking chicken and rice together. Just add vegetables and broth for a complete, family-friendly meal.
    • Steamed Vegetables: Use the steaming tray to quickly cook broccoli, carrots, or asparagus.
    • Soups and Stews: Some models can even handle simple soups, like a small batch of lentil soup.

    Getting fluffy rice without any effort helps tackle the challenge of struggling to plan family-friendly meals and makes dinnertime decisions easier.

    Effortless Baking with a Bread Machine

    Imagine waking up to the smell of fresh bread—a bread machine makes this dream a reality. It handles all the kneading and rising for you. Simply add the ingredients and press a button.

    Consider these easy recipes for your bread machine:

    • Classic Loaves: Bake delicious white, whole wheat, or rye bread.
    • Dough Making: Use the dough setting to prepare dough for pizza, cinnamon rolls, or dinner rolls. Then, you just shape and bake it in your oven.
    • Sweet Breads: Experiment with specialty recipes like banana bread or challah.

    A bread machine helps you enjoy home baking by removing the guesswork and physical effort. This allows you to enjoy cooking without stress.

    Quick Microwave Meals (Baked Potato, Corn on the Cob)

    While the microwave often gets a bad rap, it is a fantastic tool for speed. It can deliver quick meals and healthy snacks in minutes, which is a lifesaver on busy days. It is especially useful for quick breakfast ideas or easy lunches.

    Here are some super simple ideas:

    • Fluffy Baked Potatoes: Wash a potato, pierce it several times with a fork, and microwave for 5-10 minutes, flipping it halfway through. The exact time depends on your microwave’s power. Top it with cheese, sour cream, or chives for an ideal simple dinner recipe side or healthy snack.
    • Sweet Corn on the Cob: Leave the husk on the corn and microwave it for 3-5 minutes per ear. The husk steams the corn perfectly and makes it easy to peel after cooking.
    • Steamed Vegetables: Place chopped veggies in a microwave-safe bowl with a splash of water. Cover and microwave until they are tender-crisp.
    • Scrambled Eggs: Whisk eggs with a little milk in a bowl. Microwave in short bursts, stirring in between, and you’ll have quick breakfast ideas ready in no time.

    Using your microwave for these tasks is a smart way to save time and energy. It helps when you feel overwhelmed by complex recipes or are short on time.

    Getting Started with Sous Vide and Ninja Foodi

    Ready to try something different? These modern appliances offer exciting ways to cook and achieve restaurant-quality results at home, yet they remain wonderfully approachable home cooking tools.

    Explore Precision Cooking with Sous Vide

    Although sous vide cooking might sound fancy, the process is very straightforward. You simply seal food in a bag and cook it in a precisely controlled water bath, a method chefs have used for years to ensure perfect doneness every time [4].

    Benefits of sous vide cooking:

    • Perfectly Cooked Proteins: You can cook steak, chicken, and fish to their exact desired temperature for consistently tender results.
    • Enhanced Flavor: Because food cooks in its own juices, this method locks in moisture and flavor.
    • Batch Cooking: Prepare several meals at once, then chill and reheat them later, which perfectly supports meal prep tips.

    For example, you can sous vide chicken breasts and then quickly sear them in a hot pan. The result is incredibly juicy chicken, a truly flavorful meal made easy.

    Unleash the Power of Ninja Foodi

    The Ninja Foodi is a multi-cooker powerhouse that combines several appliances—including a pressure cooker, air fryer, and slow cooker—into one. It is designed to save both counter space and time in the kitchen.

    Key features and uses:

    • Pressure Cooker: Make instant pot recipes even faster, cooking tender meats and hearty stews in a fraction of the time.
    • Air Fryer: Achieve wonderfully crispy textures with healthy air fryer recipes like fries or chicken wings.
    • Slow Cooker: Prepare easy crockpot meals and enjoy classic comfort food with minimal effort.
    • Sear and Sauté: Brown ingredients directly in the pot before cooking to build a deep layer of flavor.

    Imagine cooking a whole chicken: you can pressure cook it until tender and then use the air crisp function for a perfect, golden finish. This appliance is excellent for creating diverse family-friendly meals and helps when you’re unsure of how to cook healthy, tasty meals quickly.

    Frequently Asked Questions About Appliance Cooking

    What foods cannot be cooked in an air fryer?

    Air fryers are fantastic for achieving crispy textures and quick cooking, but they aren’t suitable for every type of food. Knowing what to avoid can save you from messy cleanups and disappointing results. To help make your cooking journey smooth and enjoyable, here are a few items that are best kept out of your air fryer:

    • Wet Batters: Foods coated in a wet batter, like corn dogs or tempura shrimp, tend to drip and create a mess in the air fryer basket. The high-speed fan can also blow the batter off before it sets. For these, deep frying or baking is usually a better option.
    • Excessive Cheese or Light Greens: Too much shredded cheese can melt into a sticky mess, making cleanup difficult. Similarly, very light greens like spinach can fly around the basket due to the strong airflow, causing them to burn quickly or stick to the heating element.
    • Foods That Need Submersion: Items like pasta or rice that require boiling in water won’t cook properly in an air fryer. It’s designed for dry, circulating heat, not for simmering or boiling.
    • Whole Roasts or Very Large Items: While you can cook many cuts of meat, very large items like a whole roast might not fit or cook evenly. A slow cooker or conventional oven is better suited for these bigger, family-friendly meals.
    • Fresh Popcorn Kernels: An air fryer typically doesn’t reach a high enough, consistent temperature to pop kernels effectively. Stick to the stovetop or microwave for your movie night snack.

    Don’t let this list discourage you, though! Your air fryer is still a versatile tool for countless delicious meals, from healthy air fryer chicken to crispy vegetables. Recipesmondial offers plenty of easy air fryer recipes that work perfectly every time.

    What is the 25 rule for air fryers?

    The “25 rule” is a handy guideline for adapting traditional oven recipes for your air fryer. It helps you adjust the cooking time and temperature to achieve similarly delicious results. Here’s how it works:

    • Temperature Reduction: When converting an oven recipe, reduce the temperature by 25 degrees Fahrenheit (or about 15 degrees Celsius). For example, if a recipe calls for 400°F in the oven, set your air fryer to 375°F.
    • Time Adjustment: Air fryers cook faster, so you’ll also need to shorten the cooking time, typically by 20-25%. For instance, if a dish bakes for 20 minutes in the oven, start checking it after 15 minutes in the air fryer.

    Why does this rule work? Air fryers use a powerful fan to circulate hot air rapidly, cooking food much more efficiently than a conventional oven. This intense convection means you need less heat and less time. Applying the 25 rule helps prevent overcooking and ensures your food becomes perfectly crispy and evenly cooked. It’s a great starting point for anyone exploring healthy air fryer recipes and simple dinner recipes!

    Why are people getting rid of their air fryers?

    While air fryers have soared in popularity for making quick, flavorful meals, some people do choose to part with theirs. It’s often not because the appliance isn’t useful, but for a few common reasons:

    • Counter Space: Air fryers, especially larger models, can take up a lot of counter space, which can be a real challenge in smaller kitchens.
    • Learning Curve: Like any new appliance, there’s a learning curve. Some users feel overwhelmed by new recipes or are unsure how to get the best results.
    • Cleaning: While many air fryer baskets are dishwasher-safe, some models have nooks and crannies that can be challenging to clean, especially when food gets stuck.
    • Misconceptions About Use: People sometimes expect an air fryer to replace every other cooking method, leading to disappointment when it doesn’t perform exactly like a deep fryer or an oven for every single dish.

    However, for most home cooks, an air fryer remains a game-changer! At Recipesmondial, we believe that with the right guidance, anyone can master this appliance. Our easy air fryer recipes and step-by-step instructions are designed to build your confidence and solve common challenges, like planning family-friendly meals. With a little practice, your air fryer can become your go-to for quick breakfasts, healthy snacks, and easy lunches—transforming cooking from a chore into an enjoyable experience!

    Is there a difference between a Crock-Pot and a slow cooker?

    This is a common question, and the answer is simple: all Crock-Pots are slow cookers, but not all slow cookers are Crock-Pots. Let’s break it down:

    • Crock-Pot: This is a brand name. Crock-Pot was one of the original and most popular manufacturers of slow cookers. Because it became so widely recognized, “Crock-Pot” is now often used as a general term for the appliance, much like “Kleenex” for tissues or “Band-Aid” for adhesive bandages [5].
    • Slow Cooker: This is the generic term for an electric cooking appliance that simmers food at a low temperature for several hours.

    So, whether you call it a Crock-Pot or a slow cooker, you’re referring to the same type of versatile appliance. Both are fantastic for preparing everything from slow cooker chicken to hearty pot roasts. They are perfect for busy families, offering “dump and go” options that save time and deliver comforting, flavorful meals with minimal effort. At Recipesmondial, we celebrate all slow cookers by providing approachable home cooking guidance for every brand!


    Sources

    1. https://www.foodsafety.gov/food-safety-charts/safe-minimum-cooking-temperatures
    2. https://www.seriouseats.com/instant-pot-ribs-recipe-pressure-cooker-ribs-recipe
    3. https://www.kingarthurbaking.com/recipes/no-knead-crusty-white-bread-recipe
    4. https://www.scientificamerican.com/article/what-is-sous-vide/
    5. https://www.smithsonianmag.com/innovation/how-crock-pot-revolutionized-american-cooking-180976409/