Tag: roast

  • Easy Beef Wellington Recipe: A Foolproof Guide for Beginners

    Easy Beef Wellington Recipe: A Foolproof Guide for Beginners

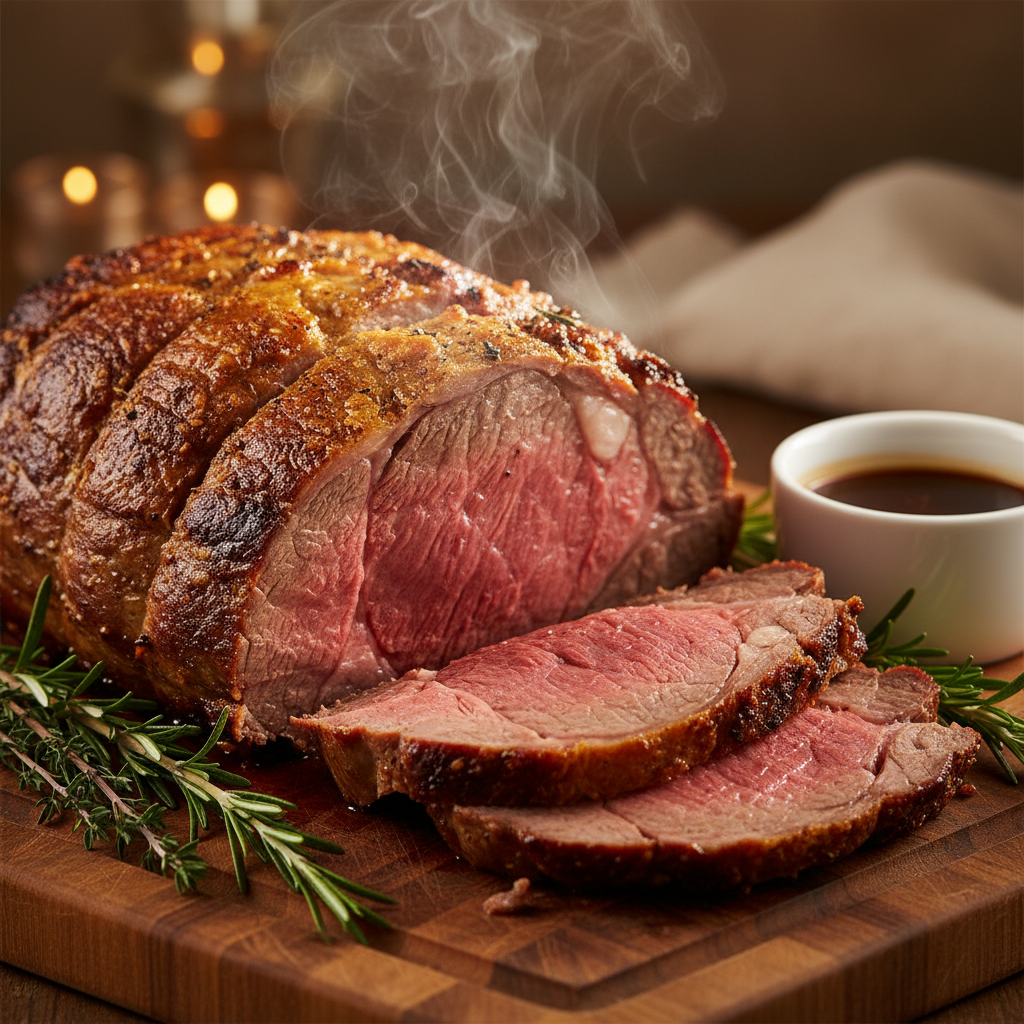
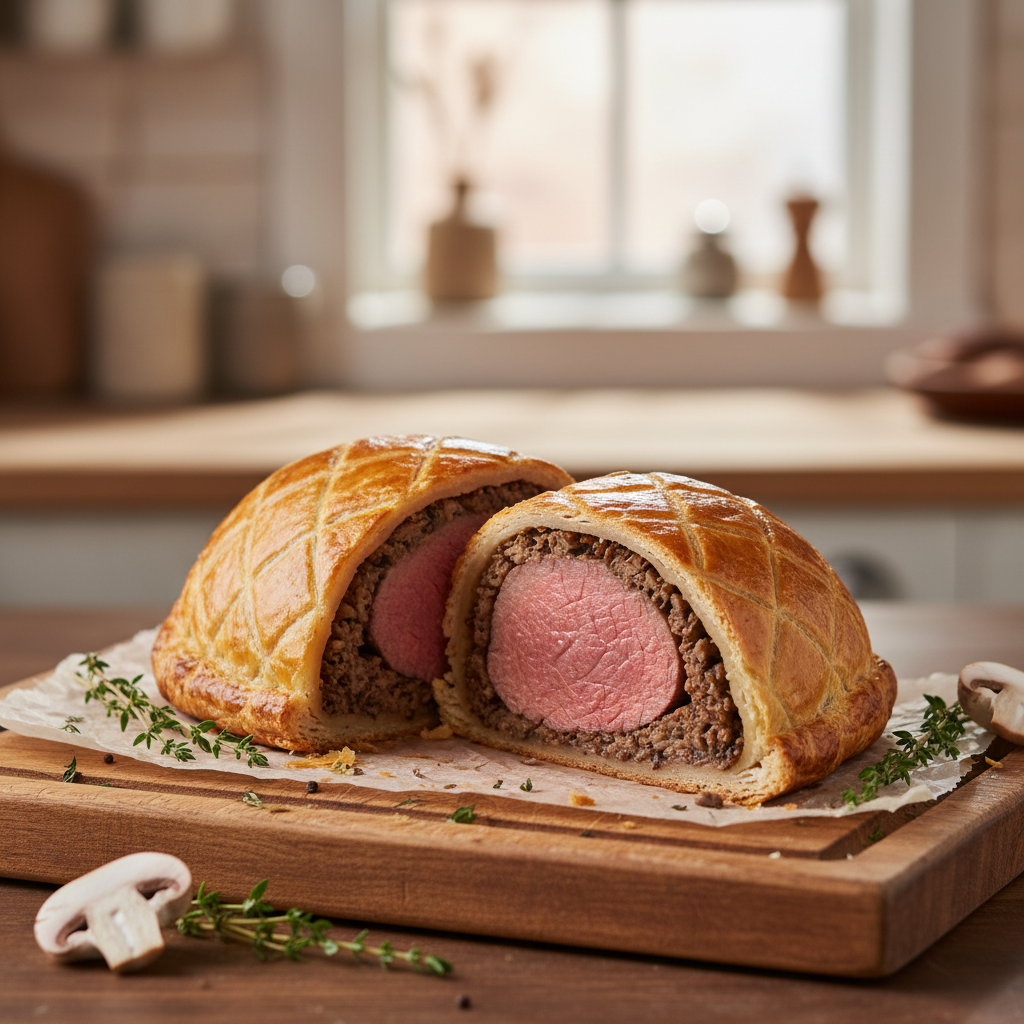
    Beef Wellington is a classic British dish featuring a beef tenderloin fillet coated with pâté and a mushroom mixture called duxelles. The entire assembly is then wrapped in puff pastry and baked until golden. This recipe is celebrated for its impressive presentation and rich, savory flavors, making it a show-stopping centerpiece for special occasions.

    The Beef Wellington. The name alone conjures images of culinary mastery—a magnificent roast encased in golden, flaky pastry. For many home cooks, this classic dish feels like a daunting challenge, one reserved for professional chefs or special occasions. You may have felt overwhelmed by complex recipes or lacked the confidence to tackle such an impressive meal. But what if we told you that mastering this iconic dish is not only achievable but genuinely enjoyable?

    At Recipesmondial, we believe cooking should be enjoyable, not stressful. Our goal is to help you transform simple ingredients into extraordinary meals. That’s precisely why we created this easy Beef Wellington recipe—a foolproof guide designed for beginners and busy families. Instead of intimidating technical terms, we provide clear, step-by-step guidance to make the process approachable. This isn’t just a recipe; it’s your invitation to build confidence and create a show-stopping dish with ease.

    With our approachable techniques, you can master the classic Beef Wellington and turn kitchen uncertainty into a delicious triumph. We’ll guide you through every step—from selecting the perfect beef to achieving that irresistible golden pastry—to ensure a perfect result. Are you ready to impress everyone with a truly memorable meal and add this elegant dish to your repertoire of delicious, family-friendly meals? Let’s dive into why this is the easiest Beef Wellington recipe you’ll ever find.

    Why Is This the Easiest Beef Wellington Recipe?

    Beef Wellington is a classic special-occasion dish that often intimidates home cooks. But at Recipesmondial, we believe every delicious meal should be within reach, and our easy Beef Wellington recipe is proof.

    We meticulously designed this guide for beginners so you can conquer the elegant dish without stress. It’s the easiest version you’ll find.

    What Makes This Beef Wellington Recipe So Approachable?

    By breaking down the complexity into simple, actionable steps, our approach builds your confidence and helps you create a truly impressive meal.

    • Clear, Step-by-Step Guidance: We use plain language instead of confusing jargon, so each step is easy to follow and you’ll always know what to do next. We make step-by-step cooking guidance a priority.
    • Simplified Techniques: By focusing on essential techniques and streamlining the process, you get maximum flavor with minimal fuss. This is approachable home cooking at its best.
    • Everyday Ingredients, Elevated: While some components are special, we ensure the ingredients are easy to find. For instance, using quality store-bought puff pastry saves significant time and effort without sacrificing flavor.
    • Confidence-Building Tips: We anticipate common challenges and provide tips to help you avoid mistakes, so you feel supported throughout the entire cooking journey. It’s perfect for anyone lacking confidence in cooking skills.
    • Strategic Prep for Success: Our guide on how to prepare ahead reduces last-minute rush, allowing you to enjoy the process instead of feeling overwhelmed by complex recipes.

    This beginner-friendly recipe transforms a daunting classic into a doable project. You’ll not only enjoy the cooking process but also love the delicious results. Our goal is to make flavorful meals made easy, and you can absolutely create this show-stopping dish!

    What Ingredients Do You Need for Beef Wellington?

    An overhead shot of all fresh ingredients for Beef Wellington, neatly arranged on a wooden table.
    A beautifully arranged flat lay of all the fresh ingredients for an Easy Beef Wellington recipe, presented on a light, rustic wooden surface. Ingredients include a raw beef tenderloin, a block of puff pastry, fresh cremini mushrooms, shallots, garlic, prosciutto slices, Dijon mustard, fresh thyme sprigs, an egg yolk in a small bowl, olive oil, salt, and black pepper. Each ingredient is perfectly clean, vibrantly colored, and artfully positioned. The lighting is soft and natural, emphasizing freshness and quality. Professional food photography, photorealistic, high-quality food magazine photo, overhead shot.

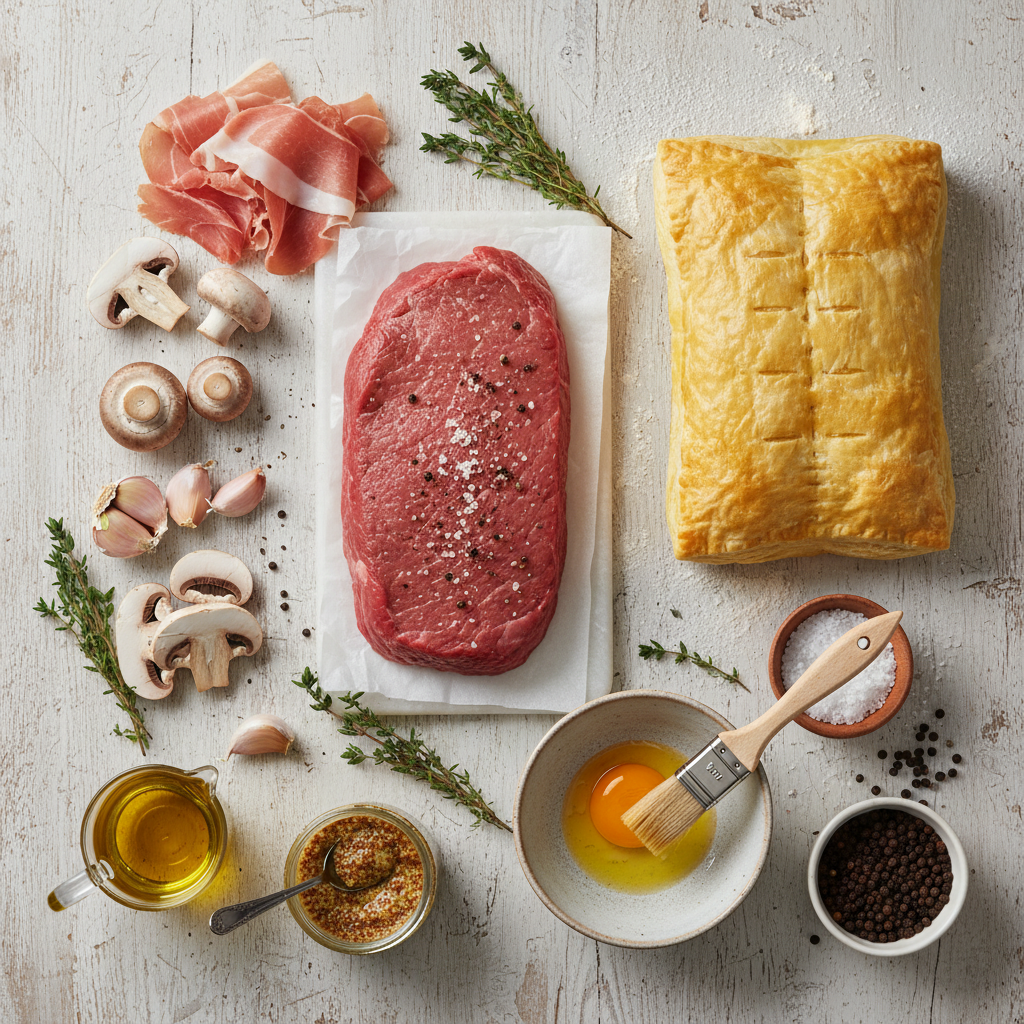
    Crafting a show-stopping Beef Wellington might sound intimidating, but our recipe breaks it down into simple, manageable steps. The ingredients are straightforward and easy to find, making your cooking journey enjoyable rather than overwhelming.

    Each component plays a vital role in building layers of flavor and texture. These ingredients are the key to making this classic dish approachable for any home cook. Let’s explore what you’ll need to create this impressive, family-friendly meal.

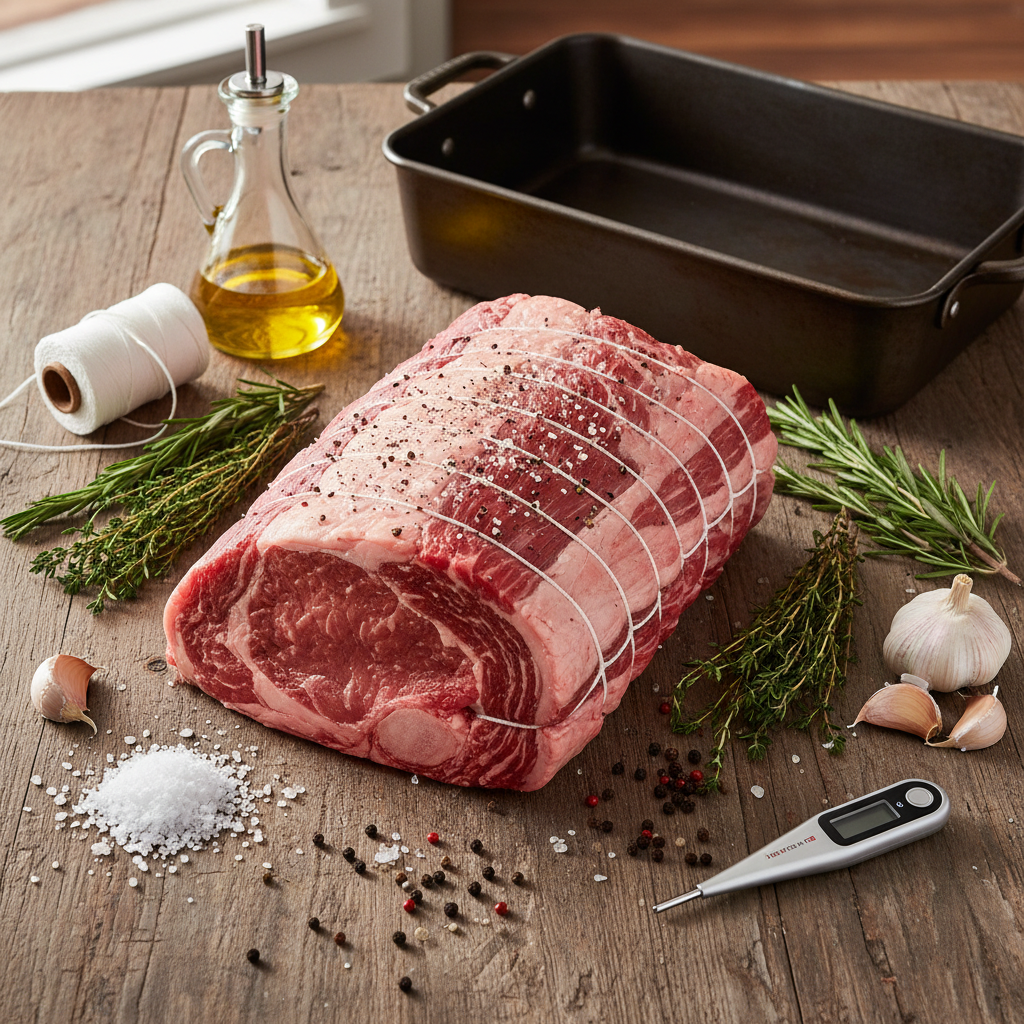
    The Best Cut of Beef for Wellington

    The heart of any Beef Wellington is the beef itself, so choosing the right cut is crucial for a tender, flavorful result. For this recipe, we recommend the best option.

    Beef Tenderloin: This cut is the star of Beef Wellington for a reason: it’s incredibly tender and lean. This allows it to cook beautifully inside the pastry. Look for a center-cut piece, aiming for about 2 to 2.5 pounds, which will serve 4-6 people. A good butcher can help you select a high-quality piece and even trim any excess fat, saving you time and effort.

    For the Mushroom Duxelles

    Mushroom duxelles, a savory paste, adds a rich, earthy flavor and acts as a crucial moisture barrier to keep the puff pastry crisp.

    Here are the ingredients you will need:

    • Mushrooms: About 1 pound of cremini or button mushrooms, finely chopped or pulsed in a food processor.
    • Shallots: Two small shallots, minced. They offer a milder, sweeter onion flavor.
    • Garlic: Two cloves of garlic, minced.
    • Fresh Thyme: One tablespoon of fresh thyme leaves. This herb pairs beautifully with mushrooms and beef.
    • Butter: Two tablespoons of unsalted butter for sautéing.
    • Brandy or Dry Sherry (Optional): One tablespoon. This adds a touch of sophistication and deepens the flavor.
    • Salt and Freshly Ground Black Pepper: To taste.

    The secret to perfect duxelles is cooking them until all the moisture has evaporated. This concentrates their flavor and prevents the pastry from becoming soggy.

    Pâté and Prosciutto: The Flavor Layer

    This layer of pâté and prosciutto is essential to a traditional Beef Wellington. It creates a savory shield around the beef, adding incredible flavor and protecting the pastry.

    • Pâté: You’ll need 4-6 ounces of smooth liver pâté (chicken or duck work best). It adds a rich, luxurious flavor while providing extra moisture to prevent the beef from drying out. If you prefer, a mushroom pâté can be a delightful alternative.
    • Prosciutto: Use 8-10 thin slices. This salty, savory cured ham is key to absorbing any juices from the beef, which protects the pastry from getting wet and adds another delicious layer of flavor. If prosciutto is hard to find, thinly sliced Parma ham or good-quality deli ham can work as a substitute.

    Choosing the Right Puff Pastry

    The puff pastry is the delicious, flaky envelope for your Beef Wellington. Using a high-quality, store-bought puff pastry is a fantastic shortcut that makes this impressive dish much more approachable for beginners.

    You will need:

    • Frozen Puff Pastry: Two sheets of all-butter puff pastry. All-butter varieties offer superior flavor and flakiness, so look for brands that specify “all-butter” for the best result [1].
    • Egg: One large egg, beaten, to create an egg wash for a beautiful, golden-brown crust.

    Remember to thaw your puff pastry according to the package directions, which is typically overnight in the refrigerator. This step ensures the dough is pliable and easy to work with.

    How to Make Beef Wellington: A Step-by-Step Guide

    Step 1: Sear the Beef Tenderloin

    The first step to a perfect Beef Wellington is searing the beef tenderloin. This simple but crucial process locks in flavor and creates a beautiful crust, setting the foundation for a delicious result.

    How to Sear Your Beef:

    1. Pat the Beef Dry: Use paper towels to pat the beef tenderloin completely dry. A dry surface is essential for achieving a perfectly crisp crust.
    2. Season Generously: Coat the entire tenderloin with a generous amount of salt and freshly ground black pepper. Don’t be shy—this is the primary seasoning for the beef.
    3. Heat Your Pan: Place a heavy-bottomed skillet (such as cast iron) over high heat. Add a tablespoon of olive oil or butter and heat until it shimmers and just begins to smoke.
    4. Sear Quickly: Carefully place the seasoned tenderloin in the hot pan. Sear for 1–2 minutes on all sides until a deep brown crust forms. The inside should remain raw, so avoid overcooking.
    5. Remove and Cool: Once seared, transfer the beef to a wire rack to cool completely. This step helps it retain its juices and prepares it for wrapping.

    Pro Tip: A quick, high-heat sear is key to building a deep flavor foundation. Cooling the beef completely is just as important, as it prevents the puff pastry from becoming soggy or cooking unevenly.

    Step 2: Prepare the Mushroom Duxelles

    Duxelles may sound fancy, but it’s just a finely chopped mushroom paste. This savory layer adds incredible depth of flavor and creates a vital moisture barrier, which keeps the puff pastry bottom perfectly crisp.

    Making Your Flavorful Duxelles:

    1. Finely Chop Mushrooms: Wash and trim cremini or white button mushrooms, then chop them very finely. For best results, use a food processor to achieve a consistent, paste-like texture [2].
    2. Sauté the Mushrooms: Heat a large skillet over medium-high heat with a tablespoon of butter or olive oil. Add the finely chopped mushrooms to the pan.
    3. Cook Until Dry: Continue to sauté, stirring occasionally, until all the liquid has evaporated and the mixture becomes a thick, dry paste. This can take 10–15 minutes and is the most critical step for preventing a soggy pastry.
    4. Flavor Boost: Stir in a minced shallot and a clove of minced garlic, and cook for another 2–3 minutes until fragrant. Season the mixture with salt, pepper, and a touch of fresh thyme.
    5. Cool Completely: Transfer the duxelles to a plate and spread it in a thin layer to cool quickly. It must be completely cold before wrapping the beef to prevent the other ingredients from warming up.

    Beginner-Friendly Tip: Don’t rush the process of cooking the moisture out of the duxelles. A dry mixture is your best defense against a soggy bottom. Ensuring it’s also fully cooled will prevent the pastry from becoming greasy.

    Step 3: Chill and Wrap the Beef

    Now it’s time to build the flavorful layers around the seared beef. This step not only adds flavor but also helps the tenderloin hold its shape. Keeping every component cold is essential for a flaky, non-greasy puff pastry.

    Layering Your Beef Wellington:

    1. Prepare Your Surface: Lay a large piece of plastic wrap on your counter, ensuring it’s long enough to fully encase the beef.
    2. Arrange the Prosciutto: On the plastic wrap, create a rectangle of overlapping prosciutto slices large enough to fully encase the tenderloin. Prosciutto adds a salty, savory flavor and acts as another barrier against moisture.
    3. Spread the Pâté: Gently spread a thin, even layer of liver pâté over the prosciutto for added richness. While you can omit this ingredient, it contributes significantly to the classic Beef Wellington flavor.
    4. Add the Duxelles: Evenly spread the cooled mushroom duxelles over the pâté, leaving a small border around the edges.
    5. Position the Beef: Place the seared and cooled beef tenderloin in the center of the duxelles-covered prosciutto.
    6. Wrap Tightly: Use the edge of the plastic wrap to lift and roll the layers tightly around the beef, forming a compact log. Twist the ends of the plastic wrap securely to create a firm, uniform package.
    7. Chill Thoroughly: Refrigerate the wrapped log for at least 30 minutes. This crucial chilling period helps the layers set and firm up, which ensures the Wellington holds its shape and is easier to wrap in pastry.

    Meal Prep Guidance: The beef log can be prepared up to this point and stored in the refrigerator for 24 hours. This makes final assembly much quicker on the day you plan to serve it.

    Step 4: Assemble the Beef Wellington

    With the beef log perfectly wrapped and chilled, it’s time for the final assembly. In this step, you’ll encase the flavorful core in a sheet of buttery puff pastry. It’s simpler than it looks!

    Bringing It All Together:

    1. Roll Out Puff Pastry: On a lightly floured surface, unroll a chilled sheet of puff pastry. It should be large enough to completely encase the beef log with a small overlap.
    2. Egg Wash Prep: In a small bowl, whisk one egg with a tablespoon of water to create an egg wash, which will seal the pastry and give it a golden shine.
    3. Position the Beef: Unwrap the chilled beef log and place it in the center of the puff pastry.
    4. Wrap the Pastry: Drape the puff pastry over the beef log, trimming any excess to leave about a 1-inch overlap where the seams will meet.
    5. Seal the Seams: Brush the overlapping edge with egg wash and press firmly to create a tight seal, which will prevent juices from escaping during baking. You can crimp the seam with a fork for a decorative touch.
    6. Seal the Ends: Trim the pastry at the ends, then fold it up and over the beef. Brush with egg wash and press to seal securely, ensuring the beef is completely encased.
    7. Decorate (Optional): If you have pastry scraps, you can cut out decorative shapes like leaves and attach them to the top of the Wellington using a little egg wash.
    8. Final Chill: Place the assembled Wellington on a parchment-lined baking sheet. Brush the entire surface with egg wash, then return it to the refrigerator for at least 15–20 minutes. This final chill is crucial for achieving an extra-crisp, flaky crust.

    Confidence-Building Tip: Don’t worry about making it perfect. Puff pastry is quite forgiving, so just take your time and focus on getting a good seal. Your guests will be impressed!

    Step 5: Bake to Golden Perfection

    This is the final step where everything comes together. Baking transforms your creation into a showstopper with a golden, flaky pastry crust and tender, perfectly cooked beef inside.

    Baking Your Masterpiece:

    1. Preheat Oven: Preheat your oven to 400°F (200°C). A hot oven helps the pastry puff up quickly and prevents a soggy bottom.
    2. Score and Glaze: Remove the chilled Wellington from the refrigerator and brush it again with egg wash. For a professional look, use a sharp knife to lightly score the top of the pastry in a crosshatch or diagonal pattern.
    3. Bake Until Golden: Place the Wellington in the preheated oven and bake for 30–40 minutes, or until the pastry is golden brown and puffed. The exact time will depend on your desired beef doneness.
    4. Check Internal Temperature: Use a meat thermometer inserted into the thickest part of the beef. For medium-rare, look for 125–130°F (52–54°C). For medium, aim for 135–140°F (57–60°C) [3].
    5. Rest the Wellington: This is a non-negotiable step. Remove the Wellington from the oven and let it rest on a cutting board for at least 10–15 minutes before slicing. Resting allows the juices to redistribute throughout the meat, ensuring every slice is tender and flavorful.
    6. Slice and Serve: Use a sharp serrated knife to cut the Beef Wellington into thick slices and serve immediately.

    Outcome Focus: You’ve successfully transformed simple ingredients into a stunning and delicious meal. Enjoy your homemade Beef Wellington, a true showstopper that proves elegant cooking can be approachable and rewarding.

    What Are Some Tips for a Perfect Beef Wellington Every Time?

    Keeping Everything Cold

    Temperature control is the key to creating a beautiful Beef Wellington, a truly impressive yet easy recipe. For beginner-friendly recipes like this one, cold ingredients are your secret weapon. The butter in the puff pastry must stay firm, which prevents it from melting too quickly. If the butter melts early, you’ll end up with a greasy, dense pastry instead of a flaky one.

    Here’s how to keep everything perfectly chilled:

    • Chill Your Components: Before you start wrapping, ensure your seared beef tenderloin and mushroom duxelles are both completely cold. This simple step prevents the pastry from warming up prematurely.
    • Work Quickly: Assemble your Wellington as efficiently as possible. The less time it spends at room temperature, the flakier your final pastry will be. You’ll build confidence as you see the difference this makes.
    • Use Cold Surfaces: If your kitchen is warm, chill your baking sheet in the fridge before using it. You can even work on a lightly floured countertop that has been chilled for a few minutes.
    • Refrigerate Between Steps: If you feel the pastry or filling is getting too warm, don’t hesitate to put the partially assembled Wellington back in the fridge. Even 15-20 minutes can make a significant difference.

    This focus on temperature helps you enjoy cooking without stress and leads to a delicious, visually stunning Beef Wellington every time.

    Ensuring a Crisp Pastry Bottom

    A soggy bottom is one of the biggest worries for home cooks making Beef Wellington. But don’t fret! We have simple tricks to guarantee a crisp, golden base. These tips help you create flavorful meals made easy in your own kitchen.

    • Super Sear the Beef: A deep, even sear on the beef creates a barrier that locks in juices, preventing them from seeping into the pastry. This is your first and best defense against sogginess.
    • The Prosciutto Layer: More than just flavor, prosciutto acts as a crucial moisture barrier. It absorbs any lingering juices from the beef and duxelles, keeping the puff pastry dry and crisp.
    • Egg Wash Seal: A thorough egg wash does more than give a golden shine; it also creates a protective layer that seals the pastry. Ensure all seams are brushed and sealed tightly.
    • Preheat Your Baking Sheet: Place your baking sheet in the oven while it preheats. Baking the Wellington on a hot surface gives the bottom pastry an immediate blast of heat, helping it crisp up right away. This is a practical tip for approachable home cooking.

    By following this step-by-step cooking guidance, you’ll achieve a perfect pastry that is golden and flaky from top to bottom.

    Resting is Non-Negotiable

    After all your effort, your Beef Wellington is out of the oven, looking magnificent and smelling incredible. It’s tempting to slice into it right away, but waiting is crucial for a truly flavorful meal made easy.

    • Why Rest? Resting allows the juices in the beef to settle and redistribute evenly throughout the meat. If you cut into it too soon, those juices will spill out, leaving you with dry meat and a less flavorful result.
    • How Long? For a standard Beef Wellington, aim to rest it for at least 15-20 minutes. A larger one may need up to 30 minutes. This period is a non-negotiable step for a perfect outcome.
    • Tent with Foil: Loosely tent the Beef Wellington with aluminum foil while it rests. This will keep it warm without trapping steam, which could soften the crisp pastry.

    This simple resting step ensures every slice is moist, tender, and bursting with flavor. It’s a small wait for a huge payoff, making your beginner-friendly recipes truly shine.

    What Should You Serve With Beef Wellington?

    A plated slice of Beef Wellington with roasted asparagus and creamy mashed potatoes.
    A beautifully plated serving of Easy Beef Wellington, featuring a thick slice of the golden-brown pastry-wrapped beef, accompanied by vibrant, roasted asparagus spears and creamy mashed potatoes. The Beef Wellington slice reveals its succulent, pink interior and duxelles layer. The plate is white and elegant, set on a warm-toned wooden dining table. A soft, inviting glow from a nearby window creates a cozy, friendly atmosphere. The focus is on the delicious, comforting meal, suggesting an easy yet impressive dinner. Professional food photography, photorealistic, high-quality food magazine photo.

    After your fantastic work preparing a showstopping Beef Wellington, the next step is choosing the perfect accompaniments. You’ll want sides and sauces that complement its rich flavors without adding extra stress. We’re here to help you pick delicious, simple-to-prepare pairings, so you can serve a complete and memorable dinner with confidence and ease.

    Classic Side Dishes

    Selecting the right side dishes is key to elevating your Beef Wellington experience. The goal is to balance the main course’s richness with fresh, lighter flavors. These easy-to-prepare options use everyday ingredients, making them perfect for home cooks of any skill level.

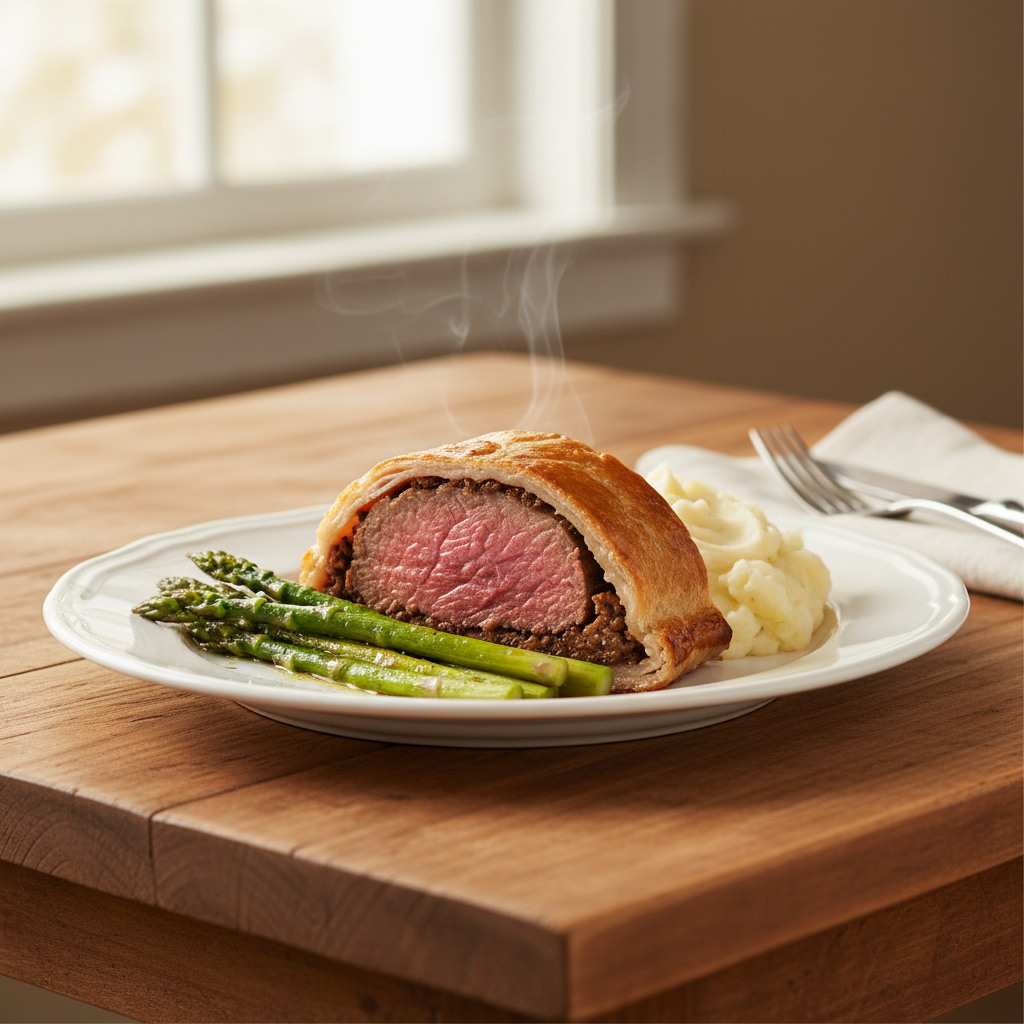
    • Roasted Asparagus: A simple yet elegant choice, roasted asparagus adds a lovely green color and a fresh, healthy bite to the meal. Just toss fresh spears with olive oil, salt, and pepper, then roast until tender-crisp.
    • Creamy Mashed Potatoes: This timeless, comforting classic offers a smooth texture that pairs perfectly with the savory Beef Wellington. For the best results, use high-quality potatoes, butter, and a splash of milk or cream.
    • Green Bean Almondine: For a delightful crunch, try this impressive yet easy dish. Simply sauté fresh green beans until tender, then toss them with toasted slivered almonds and a hint of lemon for a bright, flavorful side.
    • Glazed Carrots: Sweet glazed carrots provide a beautiful color and a lovely contrast to the savory meat. Steam or boil them until tender, then gently glaze them in a pan with a little butter and brown sugar to enhance their natural sweetness.
    • Garlic Smashed Potatoes: For a rustic twist on mashed potatoes, try smashing small, boiled potatoes and tossing them with roasted garlic and herbs. This approachable dish offers a more textured alternative with an intense, savory flavor.

    Quick Tip: To save time, many of these sides can be partially prepped ahead of serving. For the best taste, always look for fresh, seasonal vegetables.

    Easy Beef Wellington Sauce Ideas

    A delicious sauce is the perfect finishing touch for your Beef Wellington, bringing all the meal’s flavors together. You don’t need complicated techniques to create something special; these easy options will elevate your dish with minimal effort.

    • Red Wine Reduction: This classic sauce is surprisingly simple to make. Just reduce a quality red wine with beef broth, a sprig of thyme, and a touch of butter to create a rich, savory, and elegant finish.
    • Creamy Horseradish Sauce: For a quick, zesty option that requires no cooking, simply mix prepared horseradish with sour cream or crème fraîche and a pinch of salt and pepper. Its tangy kick perfectly cuts through the richness of the beef.
    • Mushroom Cream Sauce: Building on the mushroom flavor in the duxelles, this creamy sauce is a natural winner. Sauté sliced mushrooms, deglaze the pan with a splash of white wine or broth, and stir in heavy cream. Simmer until thickened for an incredibly flavorful result.
    • Simplified Béarnaise Sauce: Traditional Béarnaise can be tricky, but a simplified version is much more approachable. Whisk egg yolks over gentle heat with white wine vinegar and tarragon, then slowly whisk in melted butter. For ultimate ease, a high-quality store-bought sauce is also a great option.

    Chef’s Insight: Always use the pan drippings from searing your beef—they’re packed with flavor. Adding them to your sauce provides an incredible depth of taste. This simple step makes a huge difference and ensures a spectacular result.

    Recipe Variations for Every Occasion

    Individual Beef Wellington Recipe

    Craving the elegance of Beef Wellington but want a more manageable portion? This individual Beef Wellington recipe is your secret weapon. It’s perfect for dinner parties, special occasions, or simply treating yourself without committing to a large roast. Plus, it makes serving a breeze.

    Making smaller versions is also a fantastic way to practice your skills, as the single portions can feel less intimidating than a large, showstopper roast.

    How to Create Individual Wellingtons

    • Portion the Beef: Instead of one large tenderloin, use smaller 4-6 ounce (113-170g) beef tenderloin medallions. You can also cut a larger tenderloin into uniform portions. Just ensure each piece has an even thickness for consistent cooking.
    • Sear Individually: Sear each beef medallion on all sides until nicely browned to lock in the flavor. Allow them to cool completely before proceeding.
    • Adjust Duxelles and Layers: Prepare your mushroom duxelles as instructed in the main recipe, but use a smaller amount for each portion. To assemble, spread a thin layer of pâté (if using) over each cooled medallion. Wrap each one snugly in prosciutto, then carefully coat the prosciutto with the duxelles mixture.
    • Cut the Pastry: Roll out your puff pastry slightly thinner than you would for a large Wellington. Cut it into squares or rectangles large enough to fully encase each beef portion. A 6×6 inch (15×15 cm) square per medallion is a good starting point.
    • Assemble with Care: Place each prepared beef portion onto a puff pastry square. Bring the pastry edges together over the top and seal them securely, trimming any excess. If you like, you can use decorative pastry scraps to adorn the top.
    • Bake Shorter: Individual Wellingtons cook much faster than a large one. Bake at the same temperature (400°F or 200°C), but for a shorter time—typically 20-25 minutes. Always use a meat thermometer to check for doneness, aiming for an internal temperature of 130-135°F (54-57°C) for medium-rare.

    Tips for Success

    • Even Sizing Matters: Try to keep your beef portions uniform in size and shape. This ensures they all cook at the same rate.
    • Chill Thoroughly: Always chill your wrapped individual Wellingtons for at least 30 minutes before baking. This crucial step helps the pastry hold its shape and cook properly.
    • Egg Wash for Shine: For that beautiful golden, glossy finish, brush each Wellington generously with an egg wash right before baking.

    This individual Beef Wellington recipe makes a sophisticated dish more approachable, helping home cooks of any skill level create a delicious and impressive meal with confidence.

    Beef Wellington Recipe for 2

    Planning a romantic dinner or a special meal for two? This Beef Wellington recipe is ideal. It offers all the grandeur of the classic dish in a more intimate, manageable size, delivering an impressive culinary experience without the stress of a large roast.

    It’s also a perfect option for beginners, allowing you to focus on technique without being overwhelmed by larger quantities.

    Adapting for Two Servings

    • Select a Smaller Beef Tenderloin: Choose a single beef tenderloin roast that weighs between 8-12 ounces (225-340g). Look for a piece that is uniform in shape for even cooking.
    • Scale Down Ingredients: Reduce the quantities of your other ingredients accordingly. You’ll likely need about half the amount of mushroom duxelles, pâté, and prosciutto. The key is to have just enough to create a complete, thin layer around the beef.
    • Sear and Chill: Sear the tenderloin on all sides until a lovely crust forms. As with the full-sized version, chilling it thoroughly afterward is crucial to prevent the pastry from becoming soggy.
    • Use Less Pastry: Roll out a single sheet of store-bought puff pastry. You’ll need a rectangle large enough to comfortably wrap your tenderloin, often around 10×12 inches (25×30 cm).
    • Assemble and Seal: Lay the puff pastry on your work surface. Create the layers directly on the pastry: first, arrange the prosciutto slices in the center, then spread the duxelles evenly over the prosciutto. Place the chilled tenderloin on top (after coating it with pâté, if using). Carefully fold the pastry over the beef, sealing the edges tightly. Trim any excess and crimp the edges for a decorative finish.
    • Adjust Baking Time: A Wellington for two bakes faster than a full-size version, typically taking 25-30 minutes at 400°F (200°C). As always, rely on a meat thermometer to ensure it’s cooked to your liking. For medium-rare, aim for an internal temperature of 130-135°F (54-57°C).

    Chef’s Notes for a Smaller Wellington

    • Quality Ingredients Shine: With a simpler dish, the quality of each component stands out. Opt for fresh mushrooms, good-quality prosciutto, and a choice cut of beef.
    • Don’t Skimp on Chilling: Chilling the assembled Wellington for at least 30-60 minutes before it goes in the oven is essential. This step ensures the puff pastry becomes golden and flaky.
    • Rest is Best: After baking, let your Beef Wellington rest for 10-15 minutes before slicing. This allows the juices to redistribute, resulting in a tender and more flavorful bite.

    This scaled-down version makes Beef Wellington an achievable yet impressive dinner for couples. It lets you create a flavorful, visually stunning meal to impress a loved one without the stress.

    Frequently Asked Questions About Beef Wellington

    What is the traditional beef Wellington recipe?

    A classic beef Wellington is an impressive dish made of several distinct layers, each contributing to its rich taste and texture. The centerpiece is a perfectly seared beef tenderloin, the most tender cut of beef.

    The tenderloin is first coated with duxelles, a savory mixture of finely chopped mushrooms that adds an earthy depth. Next, a thin layer of prosciutto or pâté is often applied to add richness and seal in the juices. The entire assembly is then carefully wrapped in golden, flaky puff pastry and baked until the crust is crisp and the beef is cooked to the desired doneness.

    What is a good sauce for beef Wellington?

    The right sauce can elevate your beef Wellington, complementing the savory flavors of the beef and pastry. Fortunately, several excellent options are easy to make at home.

    Here are some popular sauce ideas:

    • Red Wine Reduction: A classic choice, this sauce is rich, robust, and full of flavor. It can be made with beef broth, red wine, and a few simple aromatics.
    • Madeira Sauce: Similar to a red wine reduction, this sauce uses Madeira wine for a slightly sweeter, nuttier profile that adds a touch of elegance.
    • Horseradish Cream: If you enjoy a bit of a kick, this creamy sauce provides a sharp, delightful contrast to the rich Wellington and is simple to prepare.
    • Simple Au Jus: Don’t underestimate the power of pan drippings. Simply deglaze the searing pan with a little broth or wine to create a quick, flavorful au jus.

    Any of these sauces will help you create a memorable and delicious meal.

    Can I make beef Wellington ahead of time?

    Yes, preparing beef Wellington in advance is a great way to reduce stress, especially when entertaining. You can do most of the assembly ahead of time and bake it just before you’re ready to serve.

    Follow these steps to prepare your Wellington in advance:

    • Assemble and Chill: The beef Wellington can be fully assembled up to 24 hours beforehand. This includes searing the beef, letting it cool, and wrapping it with the duxelles, prosciutto, and puff pastry.
    • Refrigerate Properly: Once assembled, wrap the Wellington tightly in plastic wrap and store it in the coldest part of your refrigerator. Keeping it very cold is the key to a crisp, flaky pastry.
    • Bake When Ready: When you’re ready to cook, just unwrap the Wellington and bake as the recipe directs. You may need to add a few minutes to the baking time to account for it being thoroughly chilled.
    • Freezing Option: For longer-term storage, an unbaked Wellington can be frozen for up to a month. Wrap it tightly in plastic wrap, followed by a layer of foil. Thaw it in the refrigerator overnight before baking.

    This make-ahead approach helps ensure excellent results with less last-minute effort.

    Who invented beef Wellington?

    The exact origin of beef Wellington is unclear, but the dish is widely believed to be named after Arthur Wellesley, the 1st Duke of Wellington. He was celebrated for defeating Napoleon at the Battle of Waterloo in 1815 [4].

    One theory is that the dish was created to celebrate his victory. Some stories suggest the Duke particularly enjoyed a dish of beef, mushrooms, and pastry, which later evolved into the modern recipe. Another possibility is that it was an English adaptation of a similar French dish, “filet de bœuf en croûte”. Regardless of its origins, beef Wellington is a celebrated centerpiece known for its impressive presentation.


    Sources

    1. https://www.seriouseats.com/what-is-puff-pastry-types-and-how-it-works
    2. https://www.foodnetwork.com/recipes/food-network-kitchen/mushroom-duxelles-recipe-2104112
    3. https://www.beefitswhatsfordinner.com/cooking/beef-temperature
    4. https://www.britannica.com/topic/Duke-of-Wellington-beef

  • The Perfect Prime Rib Recipe: A Simple Guide for Beginners

    The Perfect Prime Rib Recipe: A Simple Guide for Beginners

    Prime rib, also known as a standing rib roast, is a premium cut of beef celebrated for its rich flavor and tender texture. The best way to cook it is using a ‘reverse sear’ method: roast it low and slow in the oven until it’s about 15 degrees from your target temperature, let it rest, then sear it in a hot oven or pan for a perfect crust.

    Imagine serving a show-stopping meal that impresses everyone at the table: a perfectly cooked prime rib roast, golden-brown on the outside and wonderfully juicy within. For many home cooks, however, the idea of preparing a magnificent prime rib can feel daunting. You might worry about complex steps or lack confidence in your skills. But what if we told you that mastering this impressive dish is far simpler than you think? Here at Recipesmondial, we believe flavorful meals made easy are within everyone’s reach, and we’re here to guide you every step of the way.

    This prime rib recipe is designed to replace that intimidation with confidence. Whether you’re a novice cook or just need reliable step-by-step guidance, our beginner-friendly recipe delivers a stunning prime rib roast without the stress. We will walk you through the process of creating a tender, mouthwatering prime rib that will be the star of any holiday gathering or special family meal. Say goodbye to guesswork and hello to delicious results.

    Ready to unlock the secrets to a truly unforgettable roast? We’ll show you why this is more than just another recipe—it’s the definitive guide for approachable home cooking that guarantees success. Let’s dive in and discover why this is the best prime rib recipe for your kitchen.

    Why Is This the Best Prime Rib Recipe for Home Cooks?

    If you’re looking for an exceptional holiday meal, you’ve come to the right place. This isn’t just another prime rib recipe—it’s a guide designed specifically for home cooks. We’ll help you transform a daunting task into an enjoyable experience.

    Simplicity and Confidence in Every Step

    Cooking a majestic prime rib roast can feel overwhelming. Many recipes are filled with complex jargon and too many steps, leaving you unsure of where to start. At Recipesmondial, we believe in approachable home cooking and want you to feel confident in your kitchen.

    • No Overwhelm: Our step-by-step guidance breaks down the process into clear, manageable instructions, so you’ll never feel lost or intimidated.
    • Beginner-Friendly Focus: We avoid confusing culinary terms and use plain language, making it easy to master the basics.
    • Guaranteed Success: Follow our guide to achieve a perfectly cooked, flavorful standing rib roast. We set you up for success, just like with all our simple dinner recipes.

    Flavorful Results, Stress-Free Experience

    A delicious meal shouldn’t require hours of complex work. That’s why this prime rib recipe delivers maximum flavor with minimal fuss. We focus on simple techniques that work in a real home kitchen, allowing you to enjoy the cooking process from start to finish.

    • Everyday Ingredients: Our recipe relies on common ingredients you can find at any grocery store, so there’s no need for a special trip.
    • The Perfect Reverse Sear: We’ll guide you through the reverse sear, a chef-approved method that creates an incredible crust and ensures tender, evenly cooked meat.
    • Perfect Doneness Every Time: With our clear timing chart and meat thermometer tips, you can achieve your desired doneness without guesswork, resulting in a juicy, tender prime rib roast recipe.

    Designed for Your Recipesmondial Journey

    This prime rib guide is a perfect example of the Recipesmondial spirit. We’re dedicated to making mealtime stress-free with easy, family-friendly meals that help you build confidence and discover new flavors.

    • Clear Guidance: We present our recipes in a clear, easy-to-follow format, so you always know what to do next.
    • Practical Tips: We include smart substitutions and meal prep advice to help you save time and cook more efficiently.
    • Inspiring Creativity: This recipe provides a great foundation, inspiring you to explore other flavorful and simple meals.

    From simple breakfast ideas to comforting dinners, Recipesmondial supports your entire culinary journey. This prime rib roast is just one example of our commitment to helping you create memorable, delicious meals with ease.

    What’s the Difference Between Prime Rib and Standing Rib Roast?

    Navigating the world of beef roasts can feel like learning a new language. You might see recipes for “prime rib” and others for “standing rib roast,” leaving you to wonder what the difference is. The good news is, they’re just two names for the same fantastic cut of beef.

    It’s like how some people say “soda” while others say “pop” to describe the same fizzy drink. In the same way, prime rib and standing rib roast refer to the exact same delicious, impressive cut of meat.

    Understanding the Names

    While the names are interchangeable, each one tells a small part of the cut’s story:

    • Prime Rib: This name comes from the fact that the cut is from the “primal” rib section of the cow. While this cut was historically graded USDA “Prime” for its high quality, the name is now used more broadly. That means a roast labeled “prime rib” today might be of a different grade, like Choice or Select.
    • Standing Rib Roast: This name is more literal, describing how the roast is cooked. It “stands” on its rack of rib bones in the pan. This technique helps protect the meat from the direct heat of the pan and adds incredible flavor as the bones render.

    So, the next time you’re at the butcher shop, don’t let the terminology confuse you. A standing rib roast recipe is the same as a prime rib recipe. No matter what it’s called, you’re getting a tender, juicy, and incredibly flavorful centerpiece for your table.

    At Recipesmondial, our goal is to make cooking simple. Now that you know this secret, you’re one step closer to mastering a delicious prime rib, no matter what your recipe calls it!

    Choosing Your Cut: A Quick Shopping Guide

    Understanding Grades: Prime, Choice, and Select

    Choosing the perfect prime rib roast starts at the butcher’s counter, where you’ll often see different grades of beef. The United States Department of Agriculture (USDA) assigns these grades to indicate the meat’s quality, helping you know what to expect from your purchase.

    Understanding these grades makes shopping easier and helps you pick the right prime rib for your meal. Here’s a quick guide to the most common grades:

    • USDA Prime: This is the highest quality grade, characterized by abundant marbling—the small flecks of fat within the muscle. As the meat cooks, this fat melts, making Prime cuts incredibly tender, juicy, and flavorful. Often found in high-end restaurants, it’s an excellent choice for a truly special occasion.
    • USDA Choice: Choice is also a high-quality grade with less marbling than Prime, but still plenty to ensure a rich, tender, and flavorful cut. Widely available in supermarkets, Choice beef offers a fantastic balance of quality and value, making it an ideal option for most home cooks.
    • USDA Select: This grade is leaner, with the least amount of marbling. As a result, Select cuts are less juicy and tender than Prime or Choice. While they can be improved with marinades or slow cooking, this grade is not typically recommended for a show-stopping prime rib roast.

    For your perfect prime rib roast, we highly recommend a USDA Choice cut. It delivers amazing flavor and tenderness and is usually more budget-friendly than Prime.

    Bone-In vs. Boneless Prime Rib

    Next, you’ll need to decide between a bone-in and a boneless prime rib. While both options can make a wonderful meal, they offer slightly different benefits.

    • Bone-In Prime Rib (Standing Rib Roast): Often called a “standing rib roast” because it can stand on its own rib bones, many chefs prefer this cut. The bones are believed to add flavor and insulate the meat, which promotes even cooking. While a bone-in roast makes for an impressive presentation, it can be trickier to carve.
    • Boneless Prime Rib: A boneless prime rib is easier to season, carves more easily, and typically cooks a little faster than its bone-in counterpart. Butchers often tie it with string to help it hold a uniform shape. The main drawback is that some people find it slightly less flavorful without the bones.

    Ultimately, either option works well. If you prioritize ease of carving, go boneless. If you want maximum flavor and an impressive presentation, choose bone-in. Both will result in a delicious roast.

    How Much Prime Rib Per Person?

    Planning the right amount of prime rib ensures everyone gets a satisfying portion without creating food waste. Since prime rib is a rich cut, a little goes a long way. Your calculations should also factor in your guests’ appetites and how many side dishes you plan to serve. With many hearty sides, for example, you’ll likely need less meat.

    Here is a simple guide to help you plan your family-friendly meal:

    Roast Type Serving Size Per Person
    Bone-In Prime Rib About 1 pound (450g)
    Boneless Prime Rib About 1/2 pound to 3/4 pound (225g to 340g)

    For example, if you are serving six people, you would need a 6-pound bone-in roast or a 3- to 4.5-pound boneless roast. It’s always a good idea to buy a little extra to ensure enough for seconds—plus, leftover prime rib makes amazing sandwiches!

    Essential Ingredients & Tools for Your Roast

    A flat lay photo showing a raw prime rib roast, fresh herbs, garlic, salt, pepper, olive oil, a roasting pan, kitchen twine, and a meat thermometer on a wooden kitchen counter.
    A professional food photography, photorealistic, high-quality food magazine photo of a meticulously arranged flat lay on a clean, rustic wooden countertop. The main subject is a raw, beautiful prime rib roast, surrounded by essential ingredients: fresh rosemary and thyme sprigs, whole garlic cloves, coarse sea salt, black peppercorns, and a small bottle of olive oil. Adjacent to the ingredients are the key tools: a sturdy roasting pan, kitchen twine, and a digital meat thermometer. The lighting is warm and inviting, highlighting the textures and freshness of the ingredients, creating a sense of simplicity and readiness for cooking in a home kitchen setting. No human hands visible.

    For the Prime Rib Roast

    A truly memorable prime rib starts with a great cut of meat—it’s the foundation of your masterpiece. Let’s make sure your cooking experience is stress-free and yields delicious results.

    • A Quality Prime Rib Roast: Look for a standing rib roast (often called prime rib). You can choose bone-in or boneless, but bone-in roasts tend to add more flavor and promote even cooking.
    • Size Matters: Plan on 1 to 1.5 pounds per person for a bone-in roast or 0.75 to 1 pound for boneless. This calculation ensures everyone gets a generous serving.
    • USDA Choice or Prime: While “prime rib” is the name of the cut, the USDA grade is also important. Aim for “Choice” for excellent quality and value, or choose “Prime” for superior marbling and tenderness if your budget allows. [source: https://www.ams.usda.gov/grades-standards/beef-grades] If you’re unsure, your butcher can help you select the perfect roast.
    • Bringing it Home: Purchase your roast a day or two before you plan to cook it and store it in the refrigerator until you’re ready.

    Remember, starting with a quality roast is the first step to a successful, family-friendly meal that everyone will rave about.

    Simple Herb & Garlic Seasoning

    You don’t need fancy ingredients for incredible flavor. This simple herb and garlic rub will elevate your prime rib from good to absolutely amazing.

    • Fresh Garlic: 6-8 cloves, minced. Using fresh garlic provides the most aromatic flavor.
    • Fresh Rosemary: 2 tablespoons, finely chopped. Its piney notes are a beautiful complement to beef.
    • Fresh Thyme: 1 tablespoon, finely chopped, to add a subtle, earthy depth.
    • Coarse Kosher Salt: 2-3 tablespoons. Salt is crucial for seasoning the meat and creating a delicious crust.
    • Freshly Ground Black Pepper: 1-2 tablespoons. Grinding it fresh provides the best flavor.
    • Olive Oil: 2-3 tablespoons. The oil helps the seasoning adhere to the meat and promotes a beautiful sear.

    Simply combine these ingredients to create a robust, flavorful coating. You’ll be amazed at the flavor this easy blend produces!

    Kitchen Tools You’ll Need

    Having the right tools makes cooking a prime rib roast easier and more enjoyable. You don’t need a gourmet kitchen—these simple items are all it takes to achieve perfect results.

    • Large Roasting Pan with a Rack: This is an essential tool. The rack lifts the roast off the pan, allowing heat to circulate for even cooking and preventing a soggy bottom.
    • Instant-Read Meat Thermometer: This is your secret weapon for perfectly cooked meat, as it takes away all the guesswork. A reliable thermometer is especially invaluable for a beginner-friendly recipe.
    • Sharp Chef’s Knife: A sharp knife is necessary for preparing the herbs and garlic, and it also makes carving the finished roast much safer and easier.
    • Cutting Board: A sturdy board is crucial for both prep and carving your magnificent roast.
    • Small Bowl: For mixing your herb and garlic rub.
    • Butcher’s Twine (Optional, but Recommended): If your roast is irregularly shaped, tying it with twine helps it hold its shape and cook more evenly for consistent results.
    • Heavy-Bottomed Skillet or Cast Iron Pan (Optional, for Searing): If you choose to sear your roast before roasting, a good skillet creates an amazing crust.

    With these tools, you’ll be well-equipped to create a delicious prime rib with confidence. Making flavorful meals at home should be an easy and enjoyable process for everyone.

    How to Cook a Prime Rib Roast: Step-by-Step

    Slices of perfectly cooked medium-rare prime rib roast on a wooden cutting board, garnished with fresh rosemary and thyme.
    A professional food photography, photorealistic, high-quality food magazine photo of a perfectly cooked, golden-brown prime rib roast, beautifully carved into thick, succulent slices, arranged on a rustic wooden cutting board. The interior of the meat should clearly display a tender, juicy medium-rare pink center with a flavorful, seared crust. A few sprigs of fresh rosemary and thyme are artfully placed on the board for garnish. Subtle steam rises from the warm meat. The background is softly blurred, suggesting a cozy, well-lit kitchen environment. The focus is entirely on the deliciousness and perfection of the finished roast, emphasizing its restaurant-quality appearance for home cooks.

    Step 1: Bring the Roast to Room Temperature

    This first step is crucial for an evenly cooked prime rib. Allowing the roast to come to room temperature before cooking prevents it from having a cold center and overcooked edges.

    • Plan ahead: Remove your prime rib from the refrigerator 3-4 hours before you plan to cook it. Larger roasts may need up to 5 hours.
    • Unwrap it: Let the roast sit unwrapped on a wire rack set over a baking sheet to allow for air circulation.
    • Even cooking: A room-temperature roast cooks more predictably, making it easier to reach your desired doneness.

    Step 2: Prepare the Herb and Garlic Rub

    This simple herb and garlic rub infuses the prime rib with flavor, creating a delicious crust and a fragrant aroma. It’s a key part of the recipe.

    In a small bowl, combine all the rub ingredients, which typically include:

    • Minced garlic
    • Fresh or dried rosemary
    • Fresh or dried thyme
    • Coarse salt
    • Freshly ground black pepper
    • Olive oil (to make a paste)

    Mix everything until it forms a thick paste. The olive oil helps the rub adhere to the meat and melds the flavors together.

    Step 3: Season the Prime Rib Generously

    Now it’s time to season the roast. Generous seasoning is the secret to a restaurant-quality prime rib, so don’t be shy with the rub.

    • Apply the rub: Use your hands to thoroughly coat the entire surface of the prime rib with the herb and garlic paste.
    • Massage it in: Gently massage the rub into every crevice to ensure maximum flavor penetration.
    • All sides: Make sure to cover the top, bottom, and all sides of the roast, including the bones.
    • Prep for success: This step is vital for developing a flavorful crust that locks in the juices.

    Step 4: Sear for a Perfect Crust

    To create an incredible, golden-brown crust, we’ll start with an initial high-heat sear in the oven. This technique adds immense flavor and texture to your prime rib.

    • Preheat your oven: Set your oven to a high temperature, around 450-500°F (232-260°C).
    • Place on a rack: Put the seasoned prime rib, fat-cap up, on a wire rack in a roasting pan.
    • Initial sear: Roast at this high temperature for 15-20 minutes. This creates a beautiful sear on your standing rib roast.
    • Lower the temperature: After the initial sear, reduce the oven temperature for the slow-roasting phase, as detailed in the next step.

    Expert Tip: A good sear adds depth of flavor and creates a satisfying texture contrast, making your prime rib truly special.

    Step 5: Roast to Your Desired Doneness

    After the initial sear, the next stage is slow roasting. This gentle cooking method ensures a tender, juicy interior. For this step, a meat thermometer is essential.

    • Reduce heat: Lower your oven temperature to 250-300°F (120-150°C) for the slow roast.
    • Insert thermometer: Place an oven-safe meat thermometer into the thickest part of the roast, being careful to avoid touching any bones.
    • Cook slowly: Continue roasting until the internal temperature is about 5-10°F (3-6°C) below your desired final doneness. For medium-rare, aim for 120-125°F (49-52°C) before removing it from the oven.
    • Check regularly: Monitor the temperature closely. While our prime rib cooking time chart offers estimates, always trust your thermometer, as cooking times can vary based on the roast’s size and your oven [1].

    Using a thermometer is the most reliable way to achieve your preferred doneness and transform simple ingredients into a delicious meal.

    Step 6: The Most Important Step – Let it Rest!

    This final step is non-negotiable for a succulent prime rib. Do not skip the resting period, as it is critical for a juicy result.

    • Remove from oven: Once your prime rib reaches its target temperature, take it out of the oven.
    • Tent loosely: Transfer the roast to a clean cutting board and tent it loosely with aluminum foil.
    • Resting time: Let the prime rib rest for at least 20-30 minutes. Larger roasts benefit from resting up to 45 minutes.
    • Why it matters: Resting allows the juices to redistribute throughout the meat, resulting in a tender and moist roast. Skipping this step will cause the juices to run out onto the cutting board when you slice it.
    • Carryover cooking: During the rest, the internal temperature will continue to rise by a few degrees. This is known as “carryover cooking.”

    This crucial resting period ensures every slice of your prime rib is perfectly juicy and flavorful. It’s the final key to a perfect result.

    How long to cook prime rib roast?

    Prime Rib Cooking Time Chart

    Cooking a show-stopping prime rib roast might seem daunting, but it’s simpler than you think. The key is to understand that cooking time depends on two main factors: the size of the roast and your desired doneness.

    The table below offers approximate cooking times, but remember, these are only guidelines. Factors like your specific oven and the roast’s starting temperature can cause variations. For the most accurate results, you should always use a reliable meat thermometer.

    The times in this chart are for the reverse sear method, an excellent beginner-friendly recipe approach. This technique uses a low oven temperature for roasting followed by a high-heat sear, which creates an even cook and a delicious, crispy crust.

    Roast Size (Weight) Rare (120-125°F) Medium-Rare (130-135°F) Medium (135-140°F)
    3-4 lbs (2 Ribs) 1.5 – 2 hours 2 – 2.5 hours 2.5 – 3 hours
    5-7 lbs (3-4 Ribs) 2 – 2.5 hours 2.5 – 3 hours 3 – 3.5 hours
    8-10 lbs (4-5 Ribs) 2.5 – 3 hours 3 – 3.5 hours 3.5 – 4 hours
    11-13 lbs (6-7 Ribs) 3 – 3.5 hours 3.5 – 4 hours 4 – 4.5 hours

    Don’t forget the resting period after roasting—it’s crucial. Your prime rib continues to cook even after it’s out of the oven, a process known as carry-over cooking. The internal temperature can rise by an additional 5-10°F. For this reason, you should always remove the roast from the oven slightly before it reaches your final target temperature.

    Using a Meat Thermometer for Perfect Results

    When cooking prime rib, a meat thermometer is your most essential tool. It eliminates guesswork and is the only reliable way to guarantee your desired doneness every time. Using one will give you confidence in the kitchen, which is why so many easy recipes recommend this technique for success.

    To achieve a *flavorful meal made easy*, here’s how to use your thermometer correctly:

    • Insert It Correctly: Push the thermometer into the thickest part of the roast. Make sure it doesn’t touch any bones, which conduct heat differently and can give an inaccurate reading.
    • Monitor Regularly: Begin checking the temperature about 30 minutes before the estimated cook time ends. This allows you to remove the roast at the perfect moment.
    • Know Your Temperatures: To get the exact result you want, you need to know the target internal temperature for your preferred level of doneness.

    Here are the target temperatures to guide you:

    • Rare: 120-125°F (pull from oven at 115-120°F)
    • Medium-Rare: 130-135°F (pull from oven at 125-130°F)
    • Medium: 135-140°F (pull from oven at 130-135°F)
    • Medium-Well: 145-150°F (pull from oven at 140°F)
    • Well-Done: 150-155°F (pull from oven at 145°F)

    For food safety, the USDA recommends cooking whole cuts of beef like prime rib to a minimum internal temperature of 145°F (63°C) [2]. However, many people prefer a lower temperature for optimal tenderness and flavor. If you choose a doneness below 145°F, be aware of the official guidelines and ensure everyone eating the roast is comfortable with this choice.

    Ultimately, using a thermometer is the key to achieving restaurant-quality results at home. It makes *approachable home cooking* a joy and helps build confidence, even if you feel you are *lacking confidence in cooking skills* right now. This simple step is what makes any *beginner-friendly recipe* for roasts a success.

    Tips for a Flawless, Restaurant-Style Prime Rib

    Transforming a beautiful cut of beef into a show-stopping, restaurant-style prime rib roast might seem challenging, but you can achieve incredible results right in your own kitchen. At Recipesmondial, we want to help you create memorable meals. These practical strategies will elevate your prime rib recipe and guide you toward a truly flawless feast.

    Achieving Restaurant-Quality Results at Home

    You can easily prepare a magnificent standing rib roast that rivals your favorite steakhouse, taking the stress out of cooking an impressive dish. To help you build confidence, we’ve made these tips straightforward and beginner-friendly, ensuring a delicious outcome every time.

    • Start at Room Temperature: For even cooking, this step is crucial. Remove your prime rib from the refrigerator 2-3 hours before roasting. Cold meat cooks unevenly, which means the outer layers can overcook before the center reaches your desired doneness.
    • Season Generously and Early: Don’t be shy with your seasoning—apply a liberal coating of salt, pepper, and herbs all over the roast. For the best flavor, season the meat at least 45 minutes to an hour before cooking. Many chefs even season it a day ahead, storing it uncovered in the fridge [3]. This technique helps draw out moisture to create a better crust.
    • Master the Sear: A high-heat sear is what creates an irresistible, flavorful crust. Whether you sear at the beginning (traditional method) or the end (reverse sear), high heat is key. Use a heavy-bottomed pan or cast-iron skillet to caramelize the exterior and add a deep, rich flavor.
    • Use a Reliable Meat Thermometer: A meat thermometer is your secret weapon for perfect results, as guessing often leads to an over or undercooked roast. Insert the probe into the thickest part of the meat, avoiding any bones. Remember to pull the roast from the oven when it’s 5-10°F below your target temperature to account for carryover cooking.
    • The Golden Rule: Let It Rest: This might be the most important step for a juicy prime rib roast. After removing it from the oven, tent the roast loosely with foil and let it rest for at least 20-30 minutes (or up to 45 for a large roast). This resting period allows the juices to redistribute throughout the meat, ensuring every slice is tender and succulent. Skipping this step will result in dry meat.
    • Carve Against the Grain: For maximum tenderness, always slice your prime rib against the grain. Look for the direction of the muscle fibers and slice perpendicularly across them. This shortens the fibers, making each bite tender and much easier to chew.
    • Make a Simple Jus or Sauce: Don’t discard the flavorful pan drippings. Deglaze the pan with a little wine or broth to create a simple jus or pan sauce. This adds another layer of restaurant-quality taste that truly elevates your prime rib recipe.

    Following these straightforward tips will help you create a memorable and delicious prime rib roast. Say goodbye to uncertainty and hello to confident cooking!

    What Should You Serve with Prime Rib?

    A plated meal featuring sliced prime rib, creamy mashed potatoes, roasted asparagus, and a side of au jus on a rustic dining table.
    A professional food photography, photorealistic, high-quality food magazine photo of a single, elegantly plated serving of prime rib, showcasing several thick, juicy slices with a perfect medium-rare interior. The prime rib is accompanied by classic, comforting side dishes: a generous scoop of creamy, fluffy mashed potatoes, and a vibrant portion of perfectly roasted green asparagus spears. A small, elegant ramekin of rich au jus is placed beside the plate. The setting is a warm, inviting rustic dining table, with soft, natural lighting, creating an appetizing and approachable feel. Shallow depth of field to keep the food in sharp focus.

    You’ve mastered the main course. Now, let’s complete your perfect prime rib meal! Pairing your magnificent roast with the right sides and sauces elevates the entire dining experience. Don’t feel overwhelmed by the choices; we have simple, flavorful ideas that will complement your roast beautifully and ensure a balanced, satisfying feast.

    Classic Side Dishes

    The right side dishes are key to complementing the rich flavors of your prime rib roast. To make your meal memorable, here are some easy recipes that pair perfectly.

    • Creamy Mashed Potatoes: These fluffy, rich potatoes are a timeless choice that soaks up all the delicious prime rib juices. You can easily make them with butter, milk, and a pinch of salt.
    • Roasted Asparagus: For a simple yet elegant green vegetable, toss fresh asparagus with olive oil, salt, and pepper, then roast until tender-crisp. This side adds a lovely, fresh contrast to the rich meat.
    • Yorkshire Pudding: This traditional English popover is a must-have for many prime rib enthusiasts. It’s made from a simple batter and cooked in hot beef drippings, resulting in a light, airy, and savory accompaniment.
    • Garlic Herb Roasted Potatoes: For an approachable side dish everyone loves, cut potatoes into bite-sized pieces and toss them with olive oil, rosemary, thyme, garlic, salt, and pepper. Roast until golden and crispy.
    • Creamed Spinach: Rich and savory, creamed spinach offers a wonderful texture and flavor contrast. It is surprisingly easy to prepare using fresh spinach, cream, and a touch of nutmeg.
    • Simple Green Salad with Vinaigrette: A light and tangy salad is sometimes all you need to cut through the richness of the meat. For a fresh option, use mixed greens, cherry tomatoes, and a homemade lemon vinaigrette.

    Easy Sauce and Gravy Ideas

    No prime rib is complete without a fantastic sauce to add extra moisture and bring out the best in your roast. With these easy ideas, you can confidently serve restaurant-quality gravy and sauces at home.

    • Homemade Gravy (Au Jus): Arguably the most essential accompaniment, this savory sauce is made directly from the rich pan drippings. After the prime rib rests, skim excess fat from the pan, then deglaze it with beef broth or red wine. Simmer until slightly reduced for a sauce packed with flavor.
    • Creamy Horseradish Sauce: This classic pairing adds a delightful zing and provides a fantastic counterpoint to the meat’s richness. Simply mix prepared horseradish with sour cream or Greek yogurt, then add a squeeze of lemon juice, a dash of Worcestershire sauce, and a pinch of salt and pepper.
    • Red Wine Reduction: For a touch of elegance, try a simple red wine reduction. Sauté shallots, add a red wine like Cabernet Sauvignon and beef broth, then simmer until the liquid reduces by half and thickens slightly. This easy yet flavorful sauce adds a deep, sophisticated note to your prime rib.

    Frequently Asked Questions About Prime Rib

    How to cook a small prime rib roast?

    Cooking a small prime rib roast is just like cooking a large one—you simply need to adjust the roasting time. The goal remains the same: a beautiful crust and a juicy, perfectly cooked interior. This makes it a great option for an easy family dinner or a smaller gathering.

    Here are the key things to keep in mind:

    • Follow the same prep: Always bring your roast to room temperature before cooking to ensure it cooks evenly. Then, season it generously with your favorite rub.
    • Sear it well: A good sear is essential for creating a delicious, flavorful crust. Don’t skip this step.
    • Adjust roasting time: A smaller roast will cook faster, so a meat thermometer is your most reliable guide for perfect results.
    • Rest is crucial: Like any large roast, a small one needs to rest after cooking. This allows the juices to redistribute, keeping your prime rib tender and moist.

    For specific temperature guidelines, refer to our Prime Rib Cooking Time Chart. Remember, using a meat thermometer takes the guesswork out of cooking and helps build confidence in the kitchen.

    What is the prime rib 500 rule?

    The “500-degree rule,” also known as the “high-heat method,” is a popular technique for cooking prime rib. The goal is to create a perfect crust while keeping the inside tender and juicy. While its simplicity appeals to many home cooks, this method requires a well-calibrated oven and careful monitoring.

    Here’s how it generally works:

    1. Preheat your oven: Preheat the oven to a very high temperature, usually between 450°F and 500°F (232-260°C).
    2. Sear the roast: Place the seasoned prime rib in the hot oven for a short time, typically 15-30 minutes, depending on its size.
    3. Turn off the heat: After the initial searing time, turn the oven off completely. It is critical that you do not open the oven door.
    4. Cook with residual heat: The roast continues to cook gently in the oven’s residual heat, which helps keep it incredibly juicy.
    5. Rest: Once the internal temperature reaches your target, remove the roast from the oven and let it rest before carving.

    While this method can produce excellent results, keep in mind that oven temperatures can vary significantly [4]. A well-insulated oven will work best. Above all, use a reliable meat thermometer to track the internal temperature. This is the only way to ensure your prime rib is cooked to your desired doneness safely.

    What is the difference between prime rib vs ribeye?

    Prime rib and ribeye both come from the same cut of beef—the primal rib section. The key difference lies in how they are prepared and sold. Understanding this distinction will help you choose the right cut for your meal.

    Here’s a simple breakdown:

    Feature Prime Rib (Standing Rib Roast) Ribeye Steak
    Cut A large roast containing several ribs, often sold with the bones attached. An individual steak cut from the prime rib roast before cooking. Usually boneless, but bone-in options are available.
    Cooking Method Slow-roasted whole in an oven, resulting in a tender and succulent roast. Cooked quickly over high heat, such as grilling, pan-searing, or broiling.
    Size & Presentation A grand centerpiece dish that serves multiple people and is often carved at the table. An individual portion perfect for a single serving or a weeknight steak dinner.
    Fat Content Known for its generous marbling, which provides incredible flavor and tenderness. Also highly marbled, giving the steak its signature rich taste and juicy texture.

    Essentially, prime rib is the entire roast, while a ribeye is an individual steak sliced from it. Both offer a luxurious and flavorful beef experience.

    Can I use a boneless prime rib recipe with a bone-in roast?

    Yes, you can absolutely adapt a boneless prime rib recipe for a bone-in roast. The core principles—seasoning, searing, and resting—remain the same. However, you’ll need to consider a few key adjustments to get the best results.

    Here’s what you should keep in mind:

    • Cooking Time: Bone-in roasts take longer to cook than boneless ones of the same weight [5]. The bones act as insulators, slowing down heat penetration. Always rely on a meat thermometer for accuracy.
    • Flavor: Many cooks believe the bones add significant flavor and help keep the meat moist during cooking.
    • Carving: Carving a bone-in roast requires you to slice along the bones to separate the meat. For easier carving, some butchers will cut the bones off and tie them back on, giving you flavor without the hassle.
    • Heat Distribution: The bones can sometimes lead to slightly uneven cooking in the meat directly surrounding them.

    The main takeaway is to allow for more cooking time. Always use a meat thermometer to check the internal temperature in several spots (avoiding the bone), and you’ll have a delicious and impressive prime rib roast.


    Sources

    1. https://www.fsis.usda.gov/food-safety/safe-food-handling-and-preparation/food-safety-basics/safe-minimum-internal-temperature-chart
    2. https://www.fsis.usda.gov/food-safety/safe-handling-instructions/meat-poultry-and-egg-products/beef-safety-qa
    3. https://www.seriouseats.com/how-to-dry-brine-meat-turkey-chicken-pork-ribs-steaks
    4. https://www.seriouseats.com/2014/11/what-does-the-temperature-knob-on-my-oven-actually-do.html
    5. https://www.foodnetwork.com/recipes/articles/food-network-kitchens-prime-rib-cooking-guide