Making classic fish and chips involves creating a simple batter for a firm white fish, such as cod or haddock, and double-frying potatoes for extra crispy chips. The keys to success are maintaining the correct oil temperature for a light, golden-brown finish and keeping the batter cold before use.
There’s something uniquely comforting about a plate of golden, crispy fish and fluffy, hot chips. While this classic British takeaway has captured hearts worldwide, making it at home can feel like a daunting task. Complex recipes can leave you overwhelmed by technical terms, and you might be unsure how to get that perfect crunch without a professional fryer. We understand the challenge of cooking healthy, tasty meals quickly, especially when you’re planning family-friendly dinners or just need a confidence boost in the kitchen.
At Recipesmondial, we believe enjoying delicious meals shouldn’t be a source of stress. That’s why we’ve crafted the easiest fish and chips recipe for every home cook. It’s perfect for beginners or anyone seeking reliable, beginner-friendly recipes. Imagine serving perfectly crispy battered fish and golden chips, all made from scratch in your own kitchen, without any fuss. Our step-by-step guidance will boost your confidence and make cooking enjoyable again. With our collection of simple dinner recipes, you’ll discover new dishes that become instant family favorites.
Get ready to transform simple ingredients into a spectacular meal. We’ll walk you through every step, from choosing the best fish to mastering the crispy batter and golden chips. Say goodbye to guesswork and hello to a homemade fish and chips experience that rivals your favorite takeaway. This approachable home cooking guide will make the iconic dish an easy and flavorful staple in your home. Let’s dive in!
Why You’ll Love This Simple Fish and Chips Recipe
Imagine a classic British takeaway right in your own kitchen. Our simple fish and chips recipe makes it happen! If you’ve ever felt overwhelmed by complex instructions or struggled to get that perfectly crispy finish, this recipe is for you.
We believe cooking should be fun, not stressful. This guide makes creating delicious, restaurant-quality fish and chips incredibly easy, building your confidence along the way. Get ready to say goodbye to guesswork and hello to homemade perfection!
Here’s why you will absolutely love making this:
- Effortless Perfection: Our step-by-step cooking guidance is designed for success, ensuring you get golden, crispy fish and fluffy chips every time.
- Beginner-Friendly: You don’t need any special culinary skills. As an ideal beginner-friendly recipe, it uses only basic techniques and everyday ingredients.
- Family-Favorite Meal: A guaranteed crowd-pleaser! This perfect family-friendly meal makes dinner enjoyable for all ages.
- Achieve Crispy Bliss: Learn our secrets for a light, crunchy batter that leaves your fish perfectly flaky inside and your chips golden and tender.
- Enjoy Cooking Without Stress: Our simplified process helps you transform simple ingredients into flavorful meals made easy, so you can truly enjoy your time in the kitchen.
- Quick and Reliable: When you need a tasty dinner fast, this simple dinner recipe delivers delicious, reliable results in no time.
- Boost Your Confidence: Mastering this classic dish will empower you to move from uncertainty to confidence in the kitchen. Discover the joy of approachable home cooking.
What Ingredients Do You Need for Fish and Chips?
For the Fish
The secret to irresistible homemade fish and chips begins with the right fish. You’ll want a mild, flaky white fish that holds its shape well during frying. Using the right type of fish ensures your easy recipe turns out perfectly every time!
- Cod Fillets: About 1.5 lbs (680g) total, cut into 4 equal portions. Cod is a classic choice for its mild flavor and firm, flaky texture. It is very forgiving for beginners and always delivers delicious results.
- Haddock Fillets: Haddock is another fantastic option. It has a slightly sweeter flavor than cod and a wonderful texture that fries up beautifully crispy.
- Salt and Black Pepper: Just a pinch of each to season the fish before battering. This simple step enhances the flavor of your family-friendly meal.
Pro Tip: Pat your fish fillets completely dry with paper towels before seasoning and battering. Excess moisture prevents the batter from sticking properly and results in a less crispy finish. This small trick makes a big difference!
For the Chips (Fries)
Crispy, golden chips are just as important as the fish. Starting with the right potatoes is the key to achieving a perfectly fluffy interior and a crunchy exterior.
- Russet Potatoes (or Maris Piper if available): About 2 lbs (900g). Russets are ideal because their high starch content helps them get wonderfully crispy on the outside while staying fluffy inside. In the UK, Maris Piper potatoes are the traditional choice for their excellent frying qualities.
- Cold Water: You’ll need this for soaking the cut potatoes. This step removes excess starch, which is the secret to making your chips extra crispy.
- Vegetable Oil (or other high smoke point oil): About 6-8 cups (1.5-2 liters) for deep frying. You need enough oil to fully submerge the chips and fish. Canola or sunflower oil also work well for this simple dinner recipe.
- Salt: For seasoning your chips as soon as they come out of the fryer. A generous sprinkle brings out their flavor.
Beginner’s Tip: Cut your potatoes into even-sized sticks, about 1/2-inch thick. This ensures they all cook at the same rate. Don’t worry if they aren’t perfect—consistency is the goal!
For the Batter
A great batter is what gives your fish that incredible light and airy crunch. This beginner-friendly recipe uses simple ingredients to create a coating with maximum flavor and crispness.
- All-Purpose Flour: 1.5 cups (180g). This forms the base of the crispy coating.
- Baking Powder: 1 teaspoon. As a leavening agent, it helps the batter become light and puffy as it fries.
- Salt: 1/2 teaspoon. A little salt in the batter enhances the overall flavor of the fish.
- Cold Beer (Lager or Pale Ale works great): 1 cup (240ml). Carbonation from the beer creates tiny air pockets, resulting in a light and airy texture. The yeast also adds a lovely depth of flavor.
- OR Cold Sparkling Water: 1 cup (240ml). For a non-alcoholic option, sparkling water is an excellent substitute. It provides the same carbonation needed for a crispy, light batter, making this an adaptable and approachable home cooking solution.
Quick Tip: Make sure your beer or sparkling water is very cold! A chilled liquid inhibits gluten development in the flour, which creates a thinner, crispier batter. This is a key step for flavorful meals made easy.
How to Make the Best Fish and Chips: A Step-by-Step Guide
Step 1: Prepare the Potatoes for Perfect Chips
Creating wonderfully crispy chips starts with careful potato preparation. This essential first step ensures a fluffy interior and a golden, crunchy exterior for your homemade fish and chips.
- Choose Your Potatoes: For the best texture, start with starchy potatoes like Russets or Maris Pipers.
- Peel and Cut: Peel the potatoes, then cut them into even strips, about 1/2 inch thick. Consistent sizing helps them cook evenly.
- Rinse and Soak: Place the cut potatoes in a large bowl of cold water and let them soak for at least 30 minutes. This key step removes excess starch, which is crucial for achieving extra crispiness.
- Dry Thoroughly: Drain the potatoes well, then lay them in a single layer on a clean kitchen towel or paper towels. Pat them completely dry. This is critical, as any remaining moisture will cause the oil to splatter and prevent the chips from becoming crisp.
Step 2: Mix the Crispy Batter
A light, airy, and super-crispy batter is the heart of amazing fish and chips. This simple recipe ensures a delicious, golden coating for your fish.
- Combine Dry Ingredients: In a large mixing bowl, whisk together the all-purpose flour, cornstarch, baking powder, and salt until there are no lumps. The cornstarch is a key ingredient for crispiness.
- Add Wet Ingredients: Gradually pour in the very cold beer or sparkling water, whisking gently until just combined. A few small lumps are perfectly fine—be careful not to overmix. Overmixing develops gluten, which will make the batter tough instead of light and crispy.
- Chill the Batter: For the best results, place the batter in the refrigerator to chill for at least 15-20 minutes. A cold batter adheres better to the fish and creates a lighter texture when it hits the hot oil.
Tip from Recipesmondial: If you prefer a non-alcoholic option, chilled sparkling water or club soda works beautifully instead of beer. Both create bubbles that give the batter a lovely airy texture, making this a truly easy recipe for everyone.
Step 3: First Fry for the Chips
To achieve ultimate crispiness, we’ll cook the chips twice. This first fry cooks them through, making them perfectly tender on the inside.
- Heat the Oil: Pour about 3-4 inches of a neutral oil like vegetable, canola, or peanut oil into a large, heavy-bottomed pot or deep fryer. Heat the oil to 325°F (160°C), using a kitchen thermometer for accuracy.
- First Fry the Chips: Carefully add about half of the dried potatoes to the hot oil. Be sure not to overcrowd the pot, as this lowers the oil temperature and results in soggy, not crispy, chips.
- Cook Until Soft: Fry the chips for 5-7 minutes. They should be soft and cooked through but not yet golden brown.
- Drain and Rest: Using a slotted spoon, remove the chips and place them on a wire rack set over a baking sheet. Let them rest while you prepare and fry the fish.
Step 4: Fry the Fish
Now it’s time to cook your delicious fish. This step is quick and delivers a perfectly golden and flaky result.
- Increase Oil Temperature: While the chips are resting, increase the oil temperature to 375°F (190°C).
- Prepare the Fish: Pat your fish fillets completely dry with paper towels to help the batter stick, then season them lightly with salt and pepper.
- Dip in Batter: Working with one fillet at a time, dip the fish into the cold batter, ensuring it’s completely coated. Allow any excess batter to drip off.
- Fry the Fish: Carefully lower the battered fish into the hot oil. To prevent overcrowding, fry just one or two fillets at a time.
- Cook Until Golden: Fry for 5-8 minutes, depending on the thickness of your fillets, until the batter is golden brown and the fish flakes easily.
- Drain: Remove the cooked fish with a slotted spoon and place it on a wire rack to drain. To keep it warm, you can place the rack in a low oven (around 200°F/95°C) while you finish the chips.
Beginner-friendly tip: Using a thermometer is crucial for achieving perfectly crispy results. If the oil is too cool, your food will be greasy; if it’s too hot, it will burn before cooking through.
Step 5: Second Fry for Extra Crispy Chips
This final step is the secret to achieving that ultimate golden crunch, transforming your chips into the best part of a classic fish and chips meal.
- Reheat Oil: Make sure your oil is back up to the target temperature of 375°F (190°C).
- Second Fry: Carefully return the par-fried chips to the hot oil, working in batches if necessary to avoid overcrowding.
- Cook to Golden Perfection: Fry for an additional 2-4 minutes, until the chips are a deep golden brown and wonderfully crisp.
- Drain and Season: Immediately remove the chips from the oil and place them on a paper-towel-lined wire rack. For the best flavor, season them generously with salt while they are still hot.
Step 6: Serve and Enjoy
Your delicious, easy-to-make fish and chips are ready to serve. This is a truly satisfying meal perfect for the whole family.
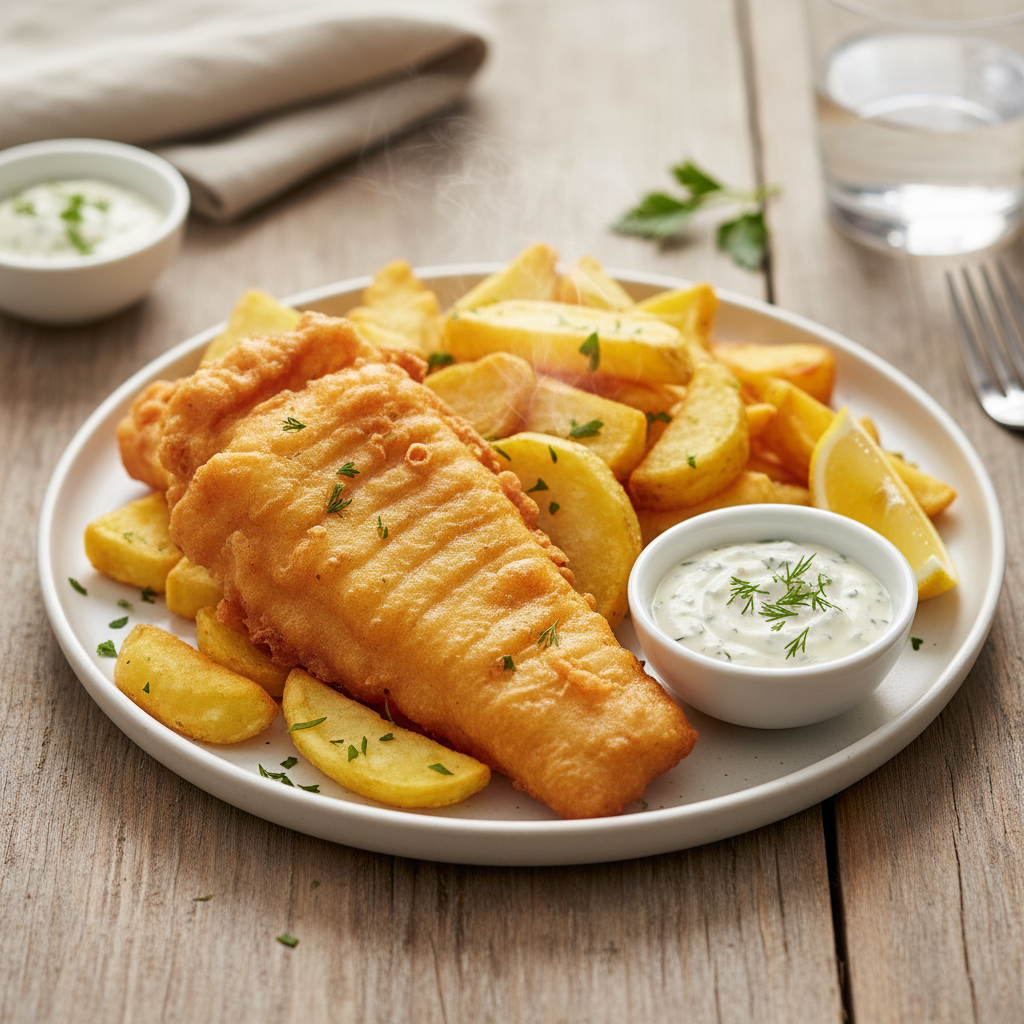
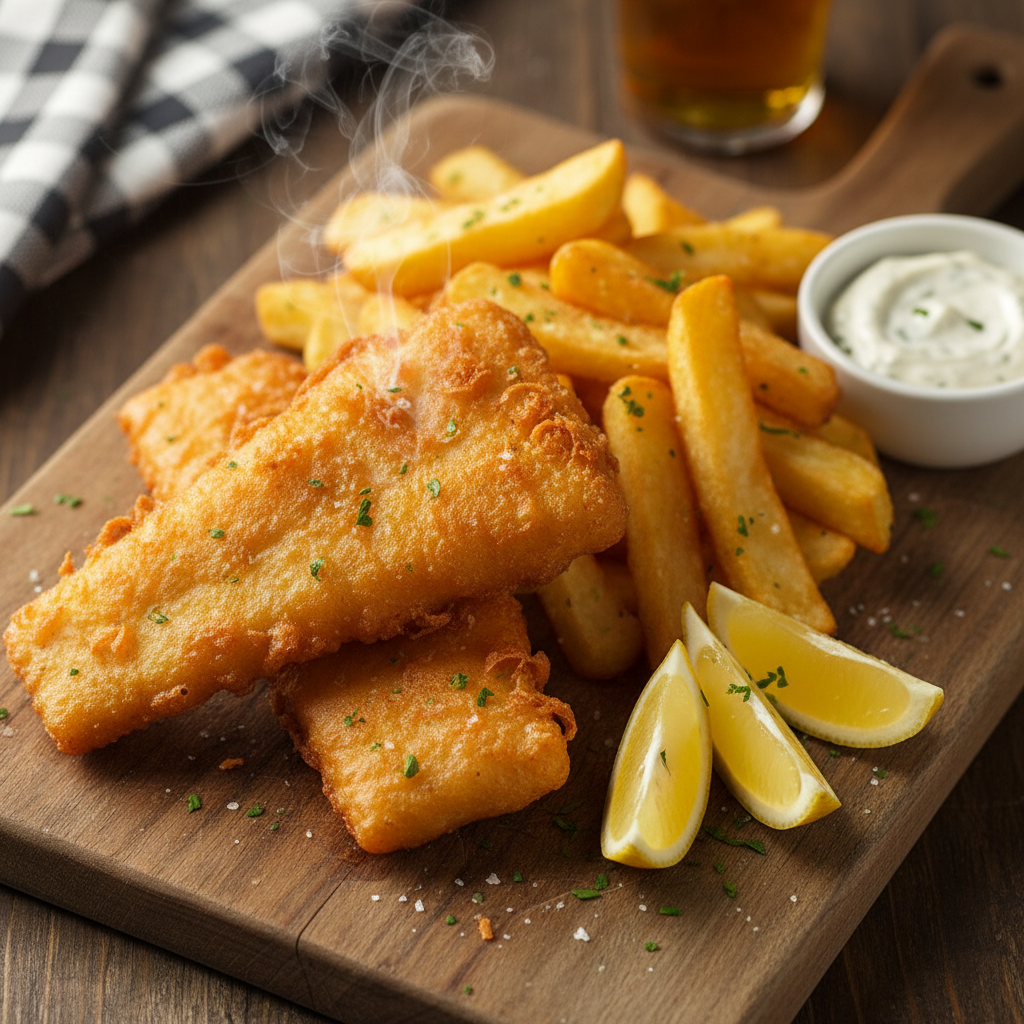
- Assemble Plates: Arrange the hot, crispy fish and golden chips on individual plates.
- Add Classic Sides: Serve immediately with your favorite accompaniments. Traditional choices include creamy tartar sauce, tangy malt vinegar, and a sprinkle of sea salt. Mushy peas or fresh lemon wedges are also fantastic additions.
- Savor Your Creation: Enjoy your perfectly crispy and flavorful homemade fish and chips! It’s an approachable home cooking triumph.
This step-by-step cooking guidance helps you create restaurant-quality results right in your own kitchen. Recipesmondial makes flavorful meals made easy!
What is the best fish for fish and chips?
Top Choices: Cod and Haddock
Choosing the right fish is essential for perfect fish and chips. The ideal choice is a white fish with a mild flavor and flaky flesh that’s firm enough to hold up to frying. This combination ensures a delicious, crispy coating and tender, moist fish every time.
When it comes to the classic recipe, two types of fish consistently stand out as the best:
- Cod: Arguably the most popular and traditional choice, cod has a mild, clean flavor and large, flaky fillets. It cooks beautifully, staying moist and tender inside a crispy batter. Its wide availability also makes it an excellent and convenient choice for most home cooks [1].
- Haddock: Another fantastic option, haddock is often preferred for its slightly richer, sweeter flavor compared to cod. Its flesh is a bit firmer but still becomes wonderfully flaky once cooked. Many fish and chip connoisseurs argue that haddock provides the most authentic taste.
You truly can’t go wrong with either cod or haddock. Both promise a delicious, authentic fish and chips experience, making them perfect choices for even a first-time cook.
Other Great Options
What if cod or haddock aren’t available? Or maybe you’re just looking to try something new. Luckily, several other types of fish work beautifully for homemade fish and chips.
Here are some excellent alternatives for your next meal:
- Pollock: A member of the cod family, pollock offers a similar mild flavor and flaky texture but is often a more budget-friendly option. It fries exceptionally well, making it a great substitute when cod isn’t available.
- Plaice: This flatfish has delicate fillets and a subtle, sweet flavor. Because it’s so light, plaice cooks up with an incredibly crispy coating, making it a lovely choice for a more refined taste.
- Tilapia: Known for its very mild flavor and wide availability, tilapia is an easy-to-cook fish that holds its shape well during frying. This makes it an approachable and reliable option for any home cook.
- Halibut: If you’re looking for a more premium option, halibut is a superb choice. It has firm, thick, white flesh with a richer, sweeter flavor. Keep in mind that it is typically pricier than the other fish on this list.
Ultimately, the best fish for your recipe is any white, flaky variety that is fresh. When in doubt, don’t hesitate to ask your fishmonger for their recommendation. They can guide you to the best catch of the day. Enjoy discovering the perfect fish for your next homemade meal!
What sauce goes with fish and chips?
The right sauce is essential for the perfect plate of homemade fish and chips. These classic accompaniments add extra layers of flavor and texture, elevating every bite. Choosing your favorite dip is part of the fun!
Classic Tartar Sauce
Tartar sauce is a timeless partner for crispy fish. It’s wonderfully creamy and tangy.
- Flavor Profile: With its bright, zesty flavor, this sauce provides a perfect contrast to rich, fried fish.
- Key Ingredients: Most recipes start with a mayonnaise base, then add chopped capers, gherkins (or pickles), fresh dill, and a squeeze of lemon juice.
- Why It Works: The acidity from the lemon and pickles cuts through the richness of the fried fish, creating a balanced and satisfying taste.
- Quick Tip: You can find excellent ready-made tartar sauce at your local grocery store. For a homemade touch, simply mix good-quality mayonnaise with finely chopped cornichons, capers, and a bit of fresh parsley.
Mushy Peas
A beloved British tradition, mushy peas are a surprisingly delicious addition to fish and chips.
- What They Are: These are simply dried marrowfat peas that have been soaked and then gently mashed, resulting in a distinctive, earthy flavor and a vibrant green color.
- Flavor Profile: Mushy peas offer a comforting, slightly sweet taste and a creamy consistency, providing a welcome textural contrast.
- Why It Works: Their soft texture and sweet notes beautifully complement the crispy fish and salty chips, making for a comforting and authentic pairing.
- Finding Them: You can often find canned mushy peas in the international aisle of larger supermarkets. Just heat them gently before serving.
Curry Sauce
Curry sauce is a hugely popular choice, especially in UK chippies. It brings a delightful warmth to your meal.
- Flavor Profile: Typically mild and savory, this golden-colored sauce gets its comforting depth from a blend of gentle spices.
- Growing Popularity: Its popularity has soared in recent years, becoming a top pick for fish and chips. Many consider it a modern classic [2].
- Why It Works: The warm, aromatic spices pair perfectly with the crispy batter and fluffy chips for a truly satisfying combination.
- Quick Tip: You can buy ready-made chip shop curry sauce mixes or jars. Simply follow the package directions to heat it up for an easy option.
Malt Vinegar and Salt
For the purists, nothing beats a generous splash of malt vinegar and a sprinkle of salt. This is the most traditional way to enjoy fish and chips.
- Simplicity is Key: This classic pairing highlights the natural flavors of the fish and chips without any fuss or fancy preparation.
- Flavor Profile: The sharp tang of malt vinegar cuts through the richness of the fried food, while a sprinkle of salt enhances all the flavors.
- How to Use: Simply sprinkle salt liberally over your hot fish and chips, then drizzle malt vinegar to your liking.
- The Authentic Experience: Many believe this is the only way to savor authentic British fish and chips. It’s a simple yet perfect pairing.
Tips from Our Kitchen for Recipe Success
Keep the Batter Cold
For truly crispy fish, this tip is a game-changer. When cold batter hits hot oil, it creates a powerful steam reaction that causes the batter to puff up. The result is an incredibly light and crunchy coating.
- Chill your ingredients: Use very cold water, or even ice water, when mixing your batter.
- Mix just before frying: Prepare your batter right before you dip the fish and keep it in the fridge until ready to use. This simple step helps you achieve that perfect, airy coating for your homemade fish and chips.
Get the Oil Temperature Right
The right oil temperature is vital for successful frying, as it’s the key to preventing greasy fish and chips. If the oil is too cool, your food will absorb too much of it. If it’s too hot, the outside will burn before the inside cooks through.
- Use a thermometer: A thermometer is your best friend for stress-free frying. For the perfect golden chips, aim for around 325-350°F (160-175°C) for the first fry.
- Maintain consistent heat: For your fish, keep the oil at about 350°F (175°C). Maintaining a consistent temperature ensures even cooking and delivers that wonderful crispness to every piece [3].
- Adjust as needed: The temperature will drop slightly when you add food, so be prepared to increase the heat briefly to bring it back up.
Don’t Overcrowd the Pan
Overcrowding the pan is a common mistake that dramatically lowers the oil’s temperature. When the oil cools down too much, your food steams instead of fries, resulting in a soggy, oily finish.
- Fry in small batches: Give your fish and chips plenty of space in the pan. This allows each piece to cook evenly while helping to maintain the ideal oil temperature.
- Be patient: While frying in batches takes a little longer, the superior texture and crispiness are absolutely worth the extra time.
Drain Excess Oil Properly
Don’t let your hard work go to waste with a greasy finish. Draining your fish and chips correctly is the final step to ensuring they stay perfectly crispy and delicious.
- Use a wire rack: Instead of placing fried food on paper towels, set a wire rack over a baking sheet. Then, arrange your freshly fried fish and chips on top of the rack.
- Allow air circulation: This setup allows air to circulate completely around the food, letting excess oil drip away. As a result, the coating stays wonderfully crisp and the bottom won’t turn soggy.
Recipe Variations: How to Adapt Your Fish and Chips
How to Make Fish and Chips Without Beer
Craving crispy fish and chips but want to skip the beer? No problem. This simple variation on our classic batter recipe is perfect for anyone who avoids alcohol or just wants an easy alternative. You’ll still get a wonderfully light and crunchy coating.
The secret lies in using a carbonated liquid. The carbonation creates tiny air bubbles in the batter that expand when fried, resulting in the same airy, crispy texture you get from a traditional beer batter.
Simple Beer-Free Batter Swaps:
- Sparkling Water: This is our top recommendation. Use it chilled for the best results. It provides excellent fizz.
- Club Soda: Another great option. It offers similar carbonation to sparkling water.
- Lemon-Lime Soda: For a subtle hint of sweetness and citrus, try this. Opt for a clear soda.
How to Adapt Your Batter:
Making the swap is incredibly easy. Simply replace the beer in our main recipe with an equal amount of your chosen carbonated beverage. For the best results, make sure your substitute is very cold. A cold liquid helps keep the batter thick and bubbly, leading to maximum crispiness.
Making Fish and Chips in an Air Fryer
For a quicker, less oily method, your air fryer is the perfect tool. It uses circulating hot air to give the fish and chips a satisfying crispness with a fraction of the oil used in deep-frying. This makes it a great option for a faster, healthier meal.
For Your Chips:
- Prepare Potatoes: Follow Step 1 of our main recipe for cutting and soaking the potatoes. This step is key for achieving crispy chips.
- Season: Pat the potatoes completely dry, then toss them with 1-2 teaspoons of oil until lightly coated.
- Air Fry Chips: Preheat your air fryer to 375°F (190°C). Arrange the chips in a single layer in the basket, making sure not to overcrowd it. Cook for 15-20 minutes, shaking the basket halfway through. For extra crispness, increase the temperature to 400°F (200°C) and cook for another 5-7 minutes.
For Your Fish:
A traditional wet batter doesn’t work well in an air fryer, as it can drip off the fish before it has a chance to set. Instead, we recommend using a simple breading method to ensure a perfectly crispy coating.
- Season Fish: Pat your fish fillets dry and season them with salt and pepper.
- Dredge: Create a three-station dredging line.
- First, plain flour.
- Second, beaten egg.
- Third, panko breadcrumbs. Panko gives a super crispy texture.
- Coat Fish: Dip each fillet first in flour, then egg, and finally in the panko. Press the breadcrumbs gently to ensure they adhere.
- Air Fry Fish: Lightly spray the coated fish with cooking oil and place it in the preheated air fryer. Cook at 380°F (195°C) for 10-15 minutes, flipping halfway through. The cooking time will vary depending on the thickness of your fillets. The fish is done when it’s flaky and the coating is golden brown.
This straightforward air fryer method is a stress-free way to enjoy this classic dish, making it a perfect beginner-friendly recipe.
Oven-Baked Fish and Chips for a Healthier Option
Oven-baking is the ideal choice for a significantly healthier version of fish and chips. This method uses very little oil but still produces delicious, crispy results, making it a wonderful way to enjoy a lighter, family-friendly meal.
For Your Chips:
The trick to wonderfully crispy oven-baked chips is high heat and proper preparation.
- Prepare Potatoes: Wash, peel, and cut your potatoes into even chip shapes. Soaking them in cold water for at least 30 minutes removes excess starch. Afterwards, pat them completely dry.
- Season and Toss: Preheat your oven to a hot 425°F (220°C) and line a large baking sheet with parchment paper. Toss the dried chips with 1-2 tablespoons of olive oil, salt, and pepper. You can also add a pinch of paprika for color.
- Bake Chips: Spread the chips in a single, even layer on the baking sheet, ensuring they are not overcrowded. Bake for 25-35 minutes, flipping them halfway through, until they are golden brown and tender on the inside.
For Your Fish:
Similar to the air fryer method, a breaded coating works best for oven-baked fish because it creates a reliably crispy crust without the need for deep-frying.
- Season Fish: Pat your fish fillets dry. Season them with salt, pepper, and a squeeze of lemon juice.
- Breading Station: Set up a dredging station with a plate of flour, a shallow dish of beaten egg, and a third plate of panko breadcrumbs. For extra flavor, mix herbs like parsley or dill into your panko.
- Coat Fish: Dip each fillet into the flour, then the egg, then the panko. Make sure it’s fully coated, pressing gently to help the breadcrumbs stick.
- Bake Fish: Place the coated fillets on a separate baking sheet lined with parchment paper and lightly spray them with olive oil to promote browning. Bake alongside your chips for 15-20 minutes, depending on thickness. The fish is done when the crust is golden and the inside is opaque and flaky.
This oven-baked method is a simple and approachable way to make a classic dish, proving you don’t need a deep fryer for fantastic fish and chips.
Frequently Asked Questions
What is the traditional British recipe for fish and chips?
Traditional British fish and chips is a comforting classic. The dish features fresh white fish, typically cod or haddock, which is dipped in a light, crispy batter and deep-fried until golden brown. The accompanying “chips” are thick-cut potatoes, often twice-fried for a fluffy interior and a perfectly crunchy exterior. Traditionally, the meal is served with a sprinkle of salt and a splash of malt vinegar. Popular sides include mushy peas, tartar sauce, or even a rich curry sauce [4]. Our easy-to-follow recipes embrace this tradition while providing simple dinner ideas for your family.
What is the secret to a crispy batter?
Achieving a perfectly crispy batter is simpler than you might think. For best results, follow these key tips:
- Keep it cold: Use very cold liquid, like ice water or beer, in your batter. This temperature difference helps create a super-crispy coating when the batter hits the hot oil.
- Leavening power: Many traditional batters use a leavening agent, such as baking powder or a carbonated liquid like beer or soda water. The bubbles trapped in the batter expand during frying, making it light and airy.
- Don’t overmix: Mix your batter just until the ingredients are combined; a few lumps are fine. Overmixing develops gluten, which can make the batter tough instead of crisp.
- Hot oil is key: Ensure the oil is at the right temperature (around 350-375°F or 175-190°C). If the oil is too cool, the batter will absorb it and become greasy. If it’s too hot, the batter will burn before the fish cooks through.
- Light coating: Aim for a relatively thin coating of batter on your fish. Too much batter can make the final result heavy and less crispy.
Following these beginner-friendly steps will help you master a wonderfully crispy batter every time.
Can you make fish and chips in the oven?
Yes, you can definitely make a delicious version of fish and chips in the oven. While it won’t have the exact same texture as its deep-fried counterpart, this method is a fantastic, healthier alternative that creates less mess. Here’s a simple guide to this approachable home-cooking technique:
- For the fish: Pat your fish fillets dry, brush them with a little oil, and then coat them in seasoned panko breadcrumbs for extra crunch. Bake on a parchment-lined baking sheet until cooked through and golden.
- For the chips: Cut your potatoes into thick fries and toss them with a little oil, salt, and pepper. Roast them on a separate baking sheet, flipping them halfway through, until they are tender inside and crispy outside.
This oven-baked method results in a satisfying, lower-calorie meal that’s perfect for busy families. To save even more time, you can prepare the potatoes and bread the fish ahead of time.
What is the history of fish and chips?
The rich history of fish and chips dates back to the mid-19th century in the United Kingdom, though its two main components developed separately. Fried fish was introduced by Jewish immigrants from Portugal and Spain, who brought their tradition of frying fish in oil [5]. Meanwhile, fried potatoes, or chips, gained popularity due to French culinary influence. Eventually, street vendors began selling the two foods together, creating an affordable and filling meal for working-class families. The dish quickly spread across the country and remains a beloved symbol of British cuisine today, often enjoyed as a comforting and simple dinner.
Sources
- https://www.fishwatch.gov/profiles/atlantic-cod
- https://www.theguardian.com/lifeandstyle/wordofmouth/2012/nov/29/fish-and-chips-curry-sauce
- https://www.seriouseats.com/the-best-way-to-fry-food
- https://www.historic-uk.com/CultureUK/Fish-Chips/
- https://www.nationalgeographic.com/culture/article/a-brief-history-of-fish-and-chips
Leave a Reply